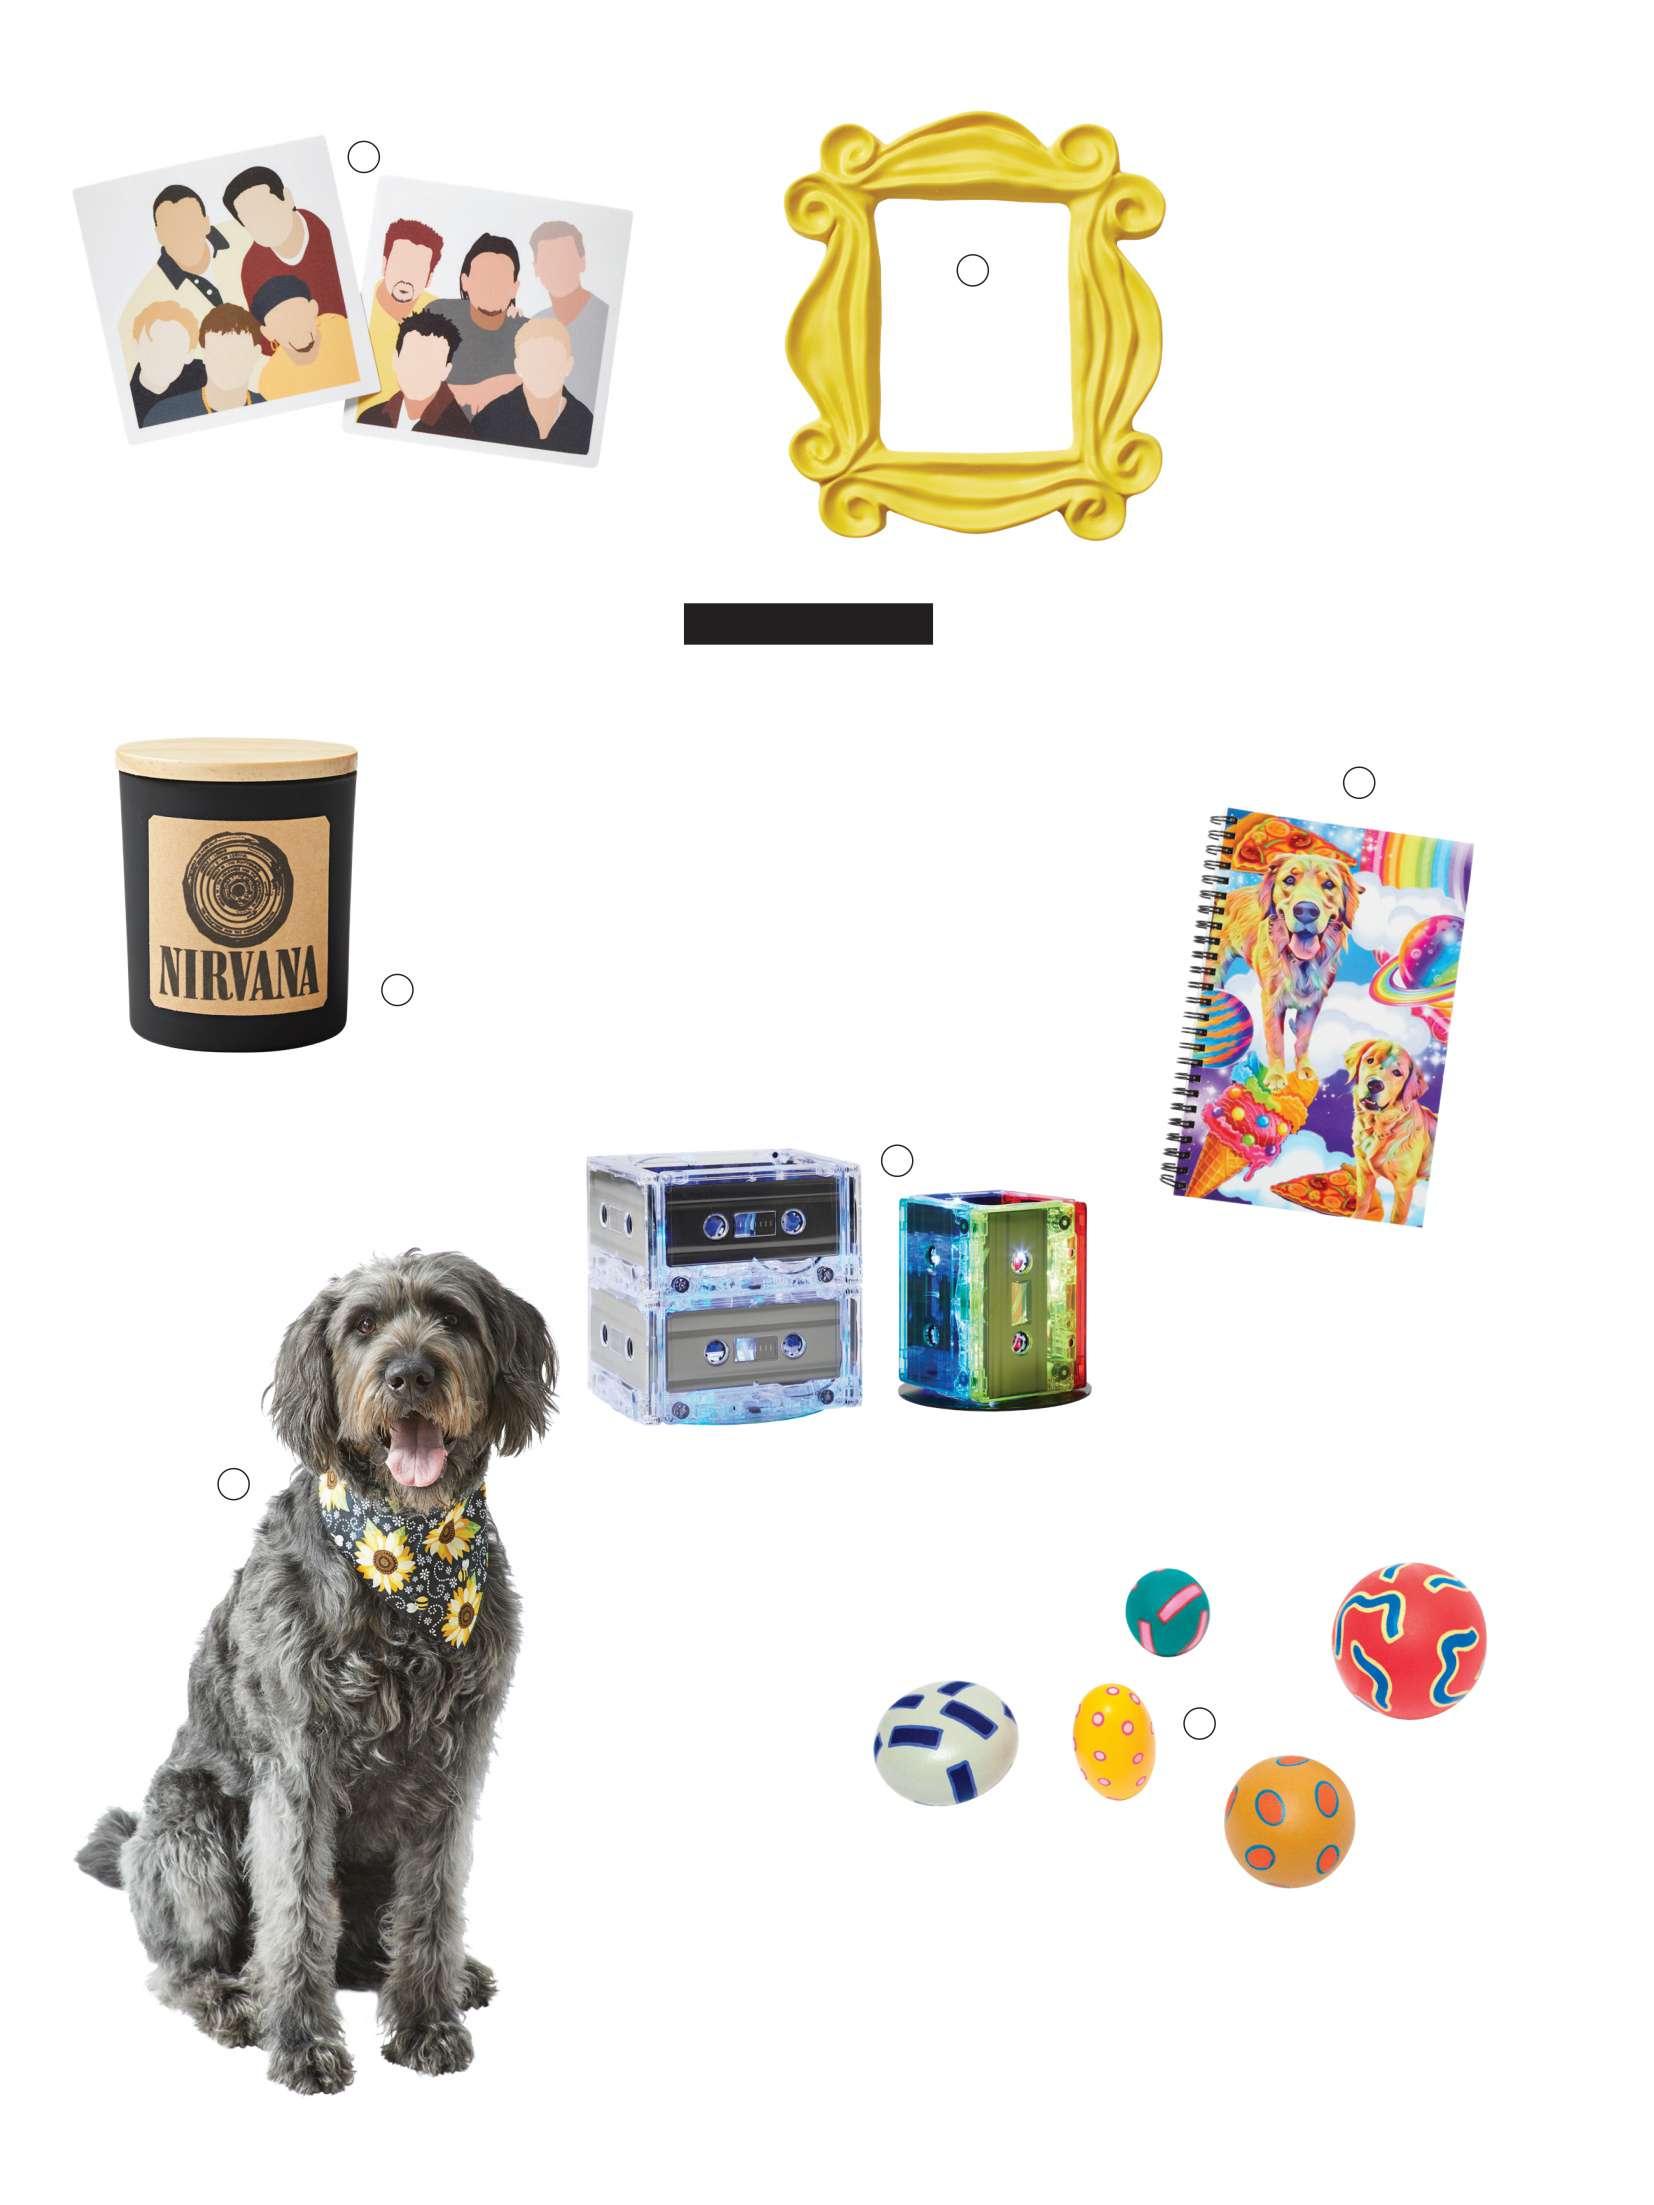
Gdgbvgnbvgh

Page 1

23 IDEAS

UNDER $20

TM

WEEKEND

PROJECTS! 29 STYLISH UPDATES YOU’LL ACTUALLY FINISH

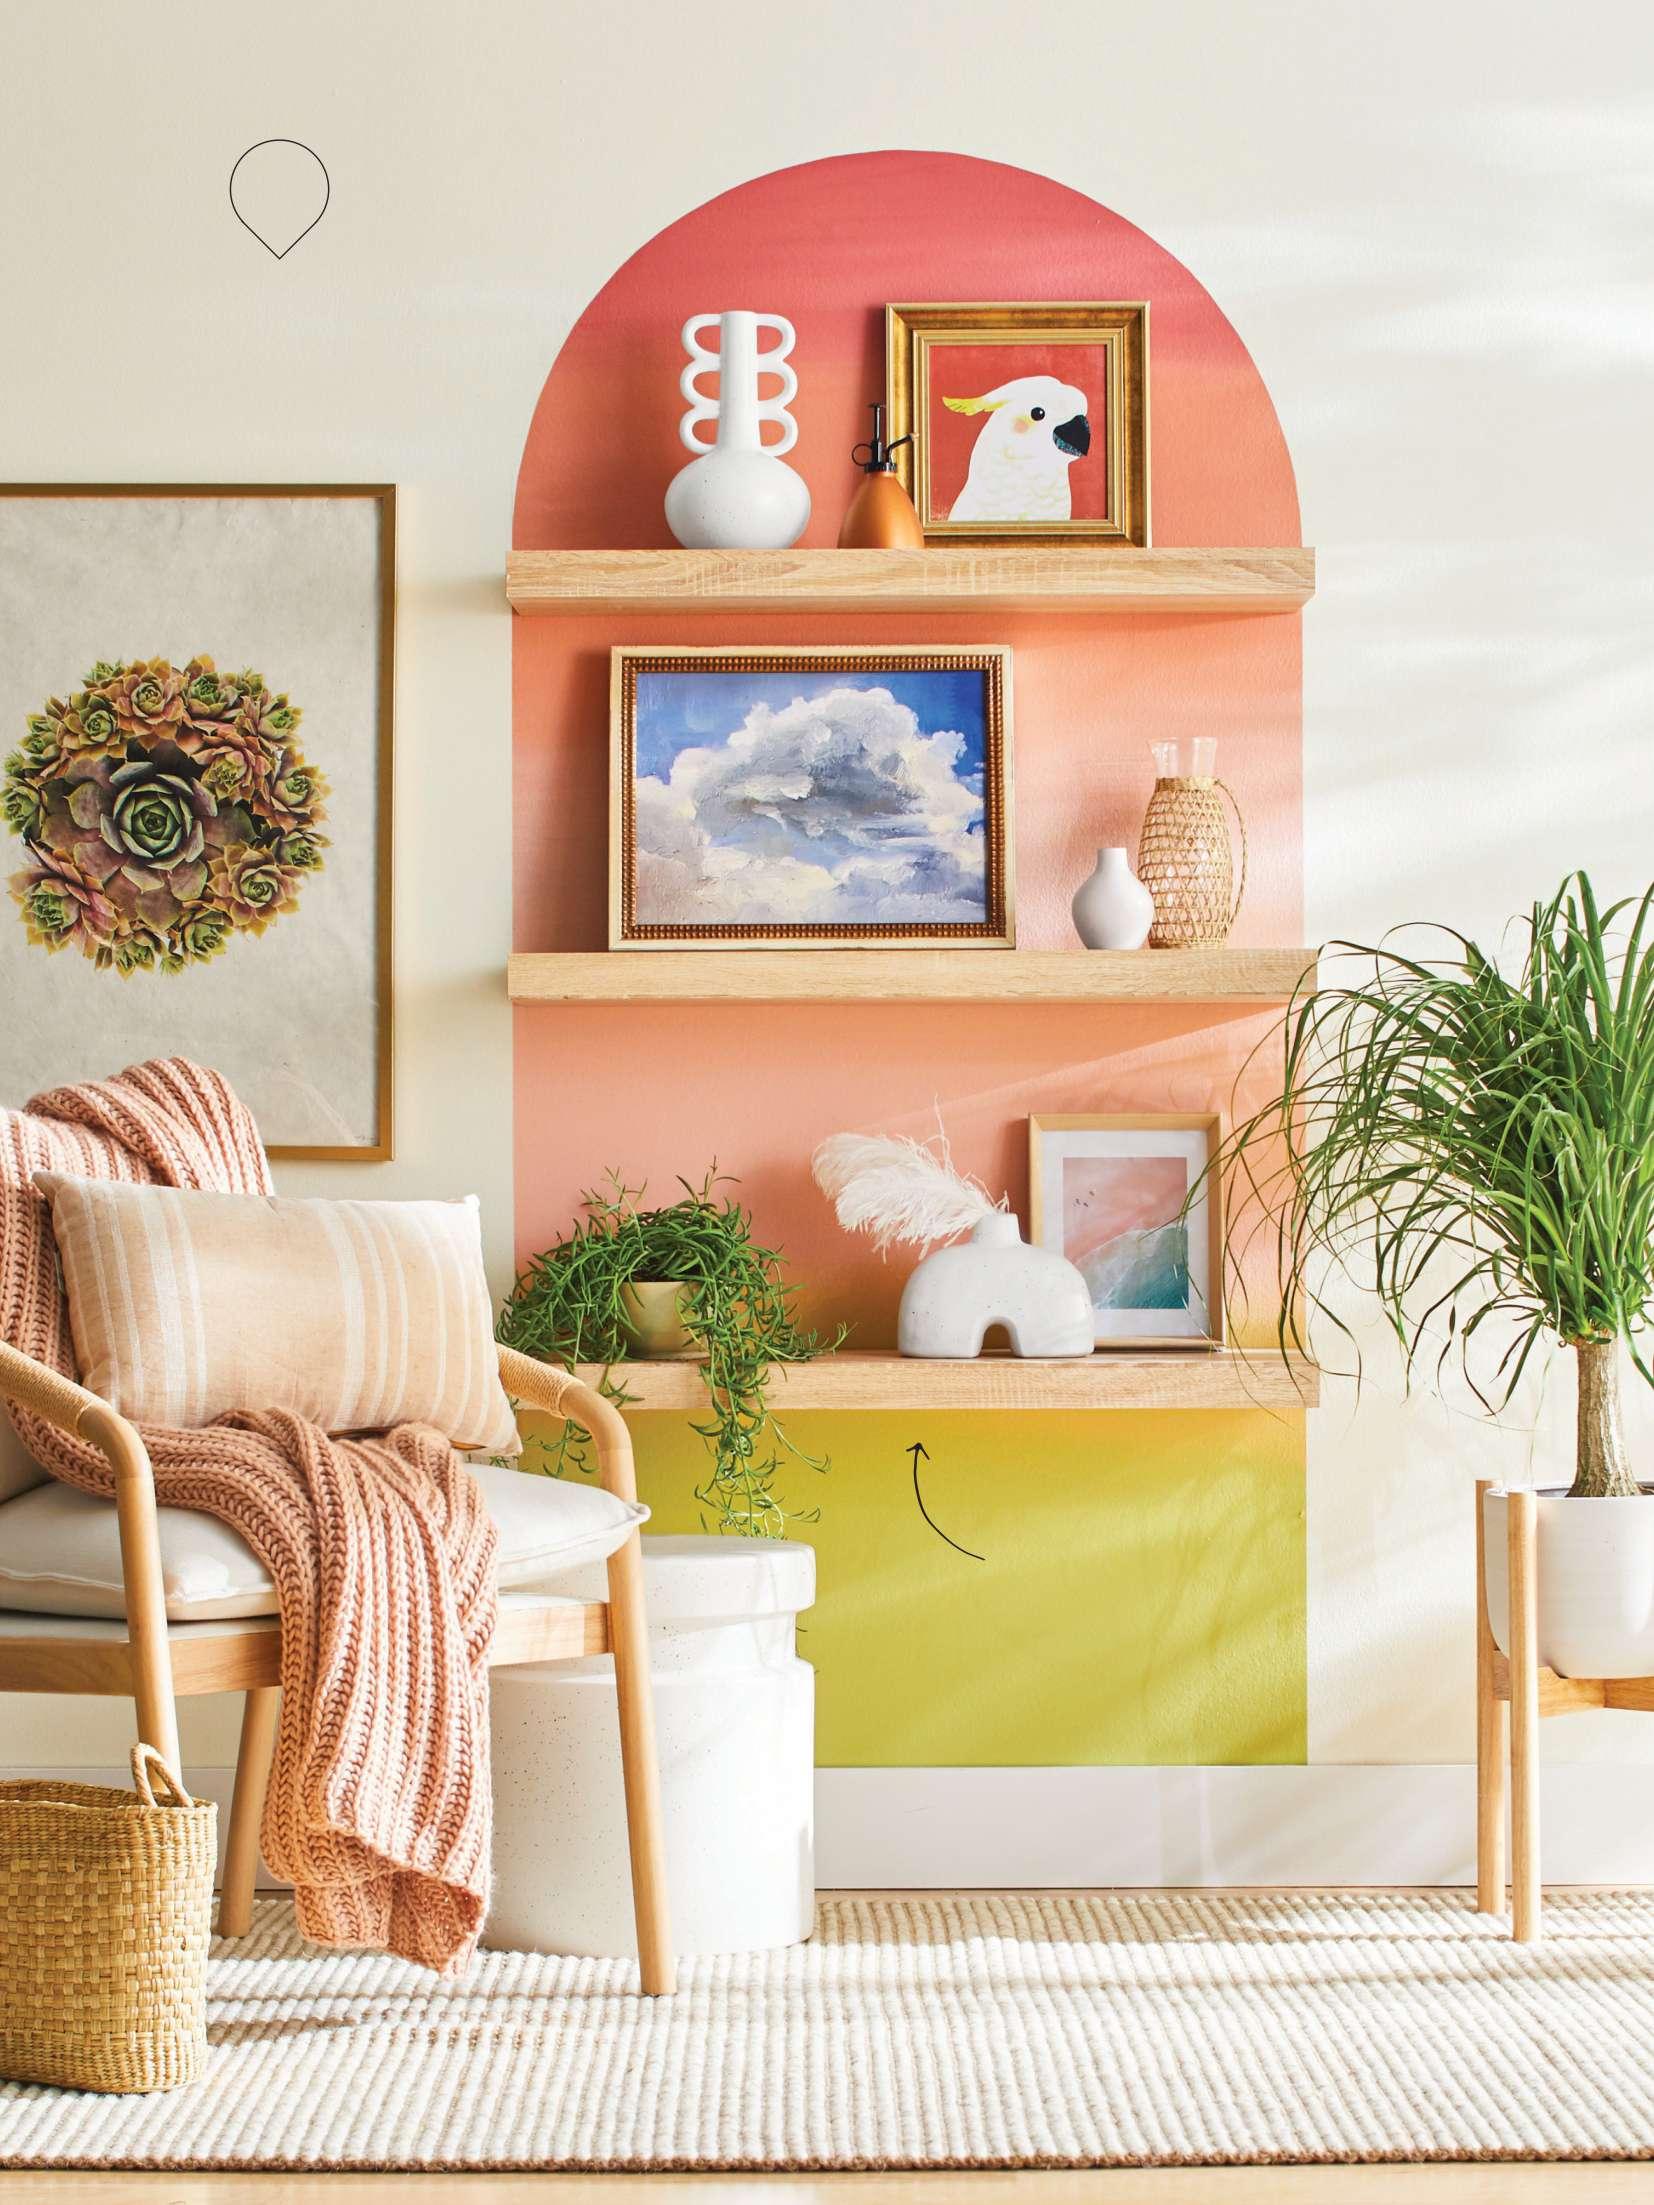
COMBINE PAINT + SHELVES FOR STORAGE AND DISPLAY

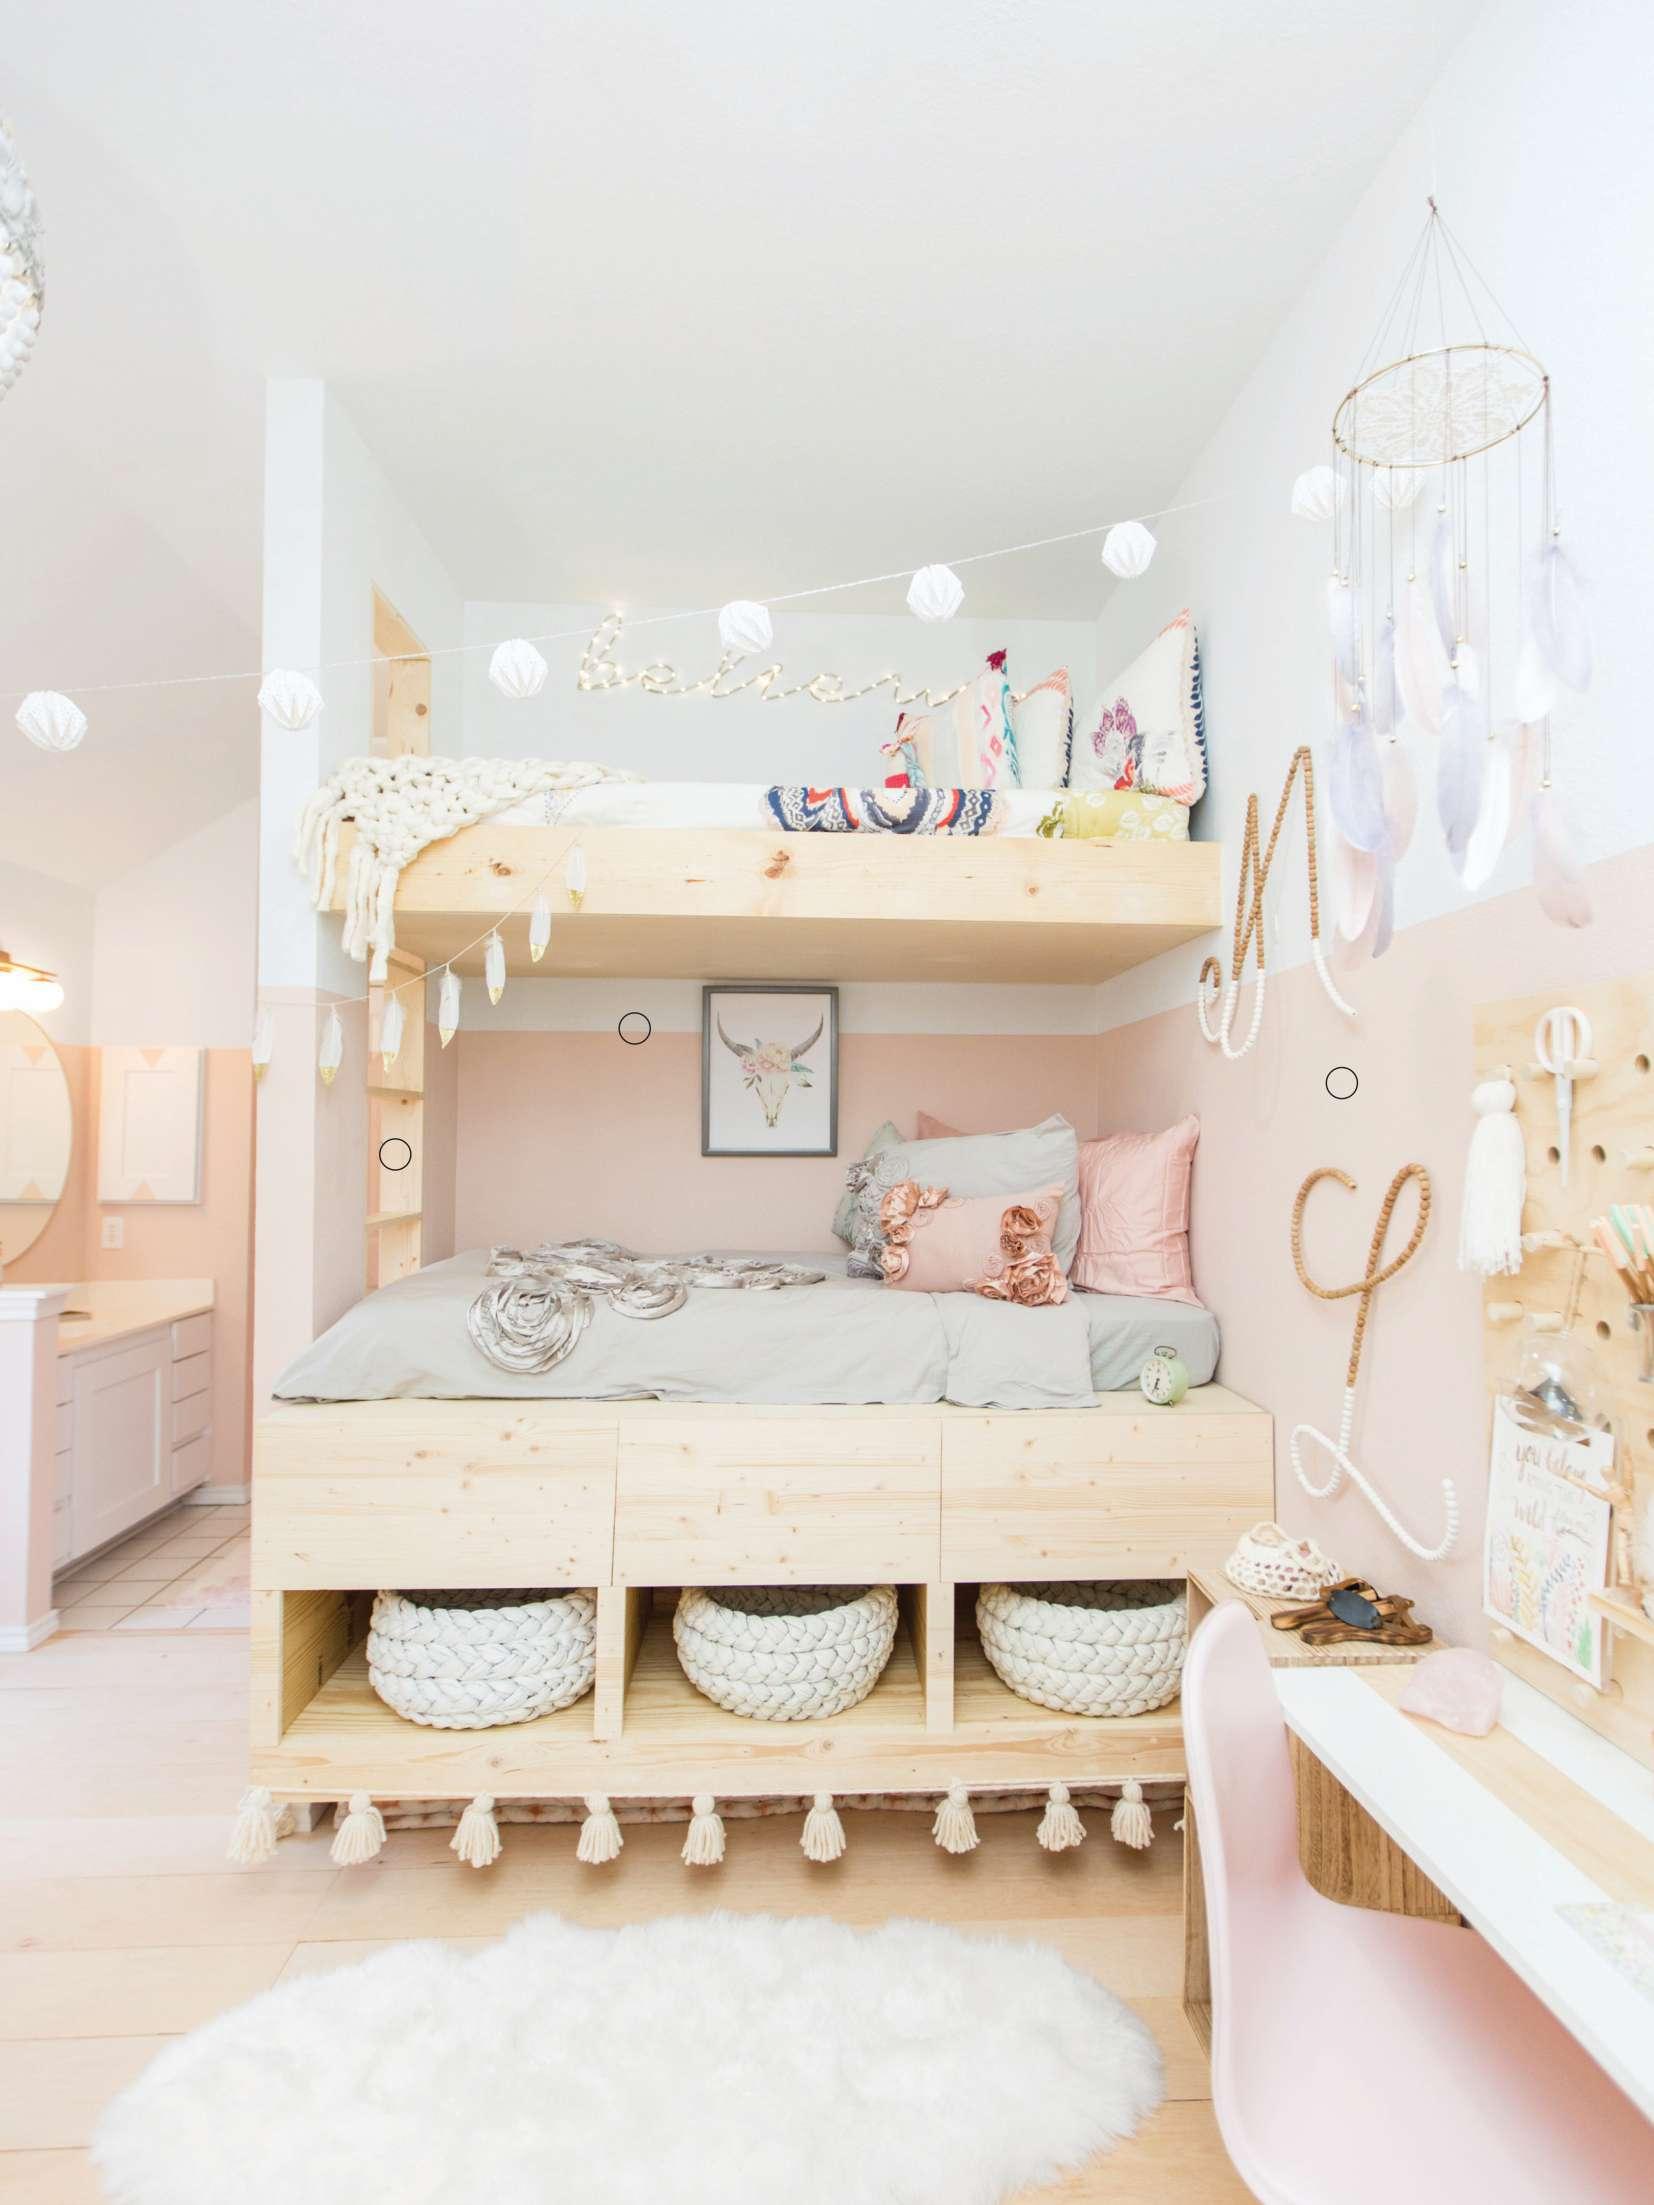
UPGRADE A ROOM WITH RECLAIMED WOOD BOOST CURB APPEAL WITH 4 EASY FACELIFTS

Fall 2021

VOL. 28/ISSUE 4

BHG.COM/DIYMAGAZINE


Lucy Blue 5001-5C

WORKS HARD TO PROTECT YOUR HARD WORK.

Valspar Reserve is the most durable, long-lasting, fade-resistant paint we make. Because you’ve put in enough hard work painting your walls. We’ll take it from here. It’s overly protective so you don’t have to be.


TM

.p 9 4 FEATURES 42

52

60

TOP SHELF Rethink shelving in a fun way with these inspiring setups for kids and adults that make the most of your wall space.

FALL 2021

68

RESCUE REDUX Kate Keesee’s 1,375-square-foot California home is heaven for lovers of furniture flips and cool salvaged decor. SWIRL PARTY Bring out the starch and paint, it’s time to make marble art

BHG.COM/DIYM A G A Z I N E

identity crisis with these five standout address options to boost curb appeal.

with your friends! Craft, an Austin workshop/studio, shows you how to swirl together.

76

BLISS BUILT IN One design-savvy mom + four kids = three bedrooms packed with adorable DIYs. Ginger Curtis teamed up with her husband and wove in their kids’ ideas to make their dream rooms come true. BY THE NUMBERS Your home will never have an

84

SHARING THE PASSION Blogger Anita Yokata combines a background in design, real estate, and therapy to give her home— and yours—a feel-good makeover.

94

IN FULL SWING Kick back in style on this strappy swing, and keep a book and beverage at hand with a matching side table.

DO IT YOURSELF Fall 2021 1


42

76

38

love your lunch bag again!

s ’ ’ it e k i l e 4 t 0 1 a . r p ! o s c e 0 9 d the ’

DEPARTMENTS 6

14

18

WHAT TO DO WITH  . .. Let’s get pouring! Cast your own concrete home decor with can-do accessories, including vases and a pendant light. COOL TOOLS Bring your inner carpenter to life with these hand and power woodworking tools that will simplify your projects. HANDY GIRL The leaves are starting to change and the days are cooler. Now’s the time to tackle fall to-dos with these tips and ticks.

2 DO IT YOURSELF Fall 2021

FALL 2021 22

ON OUR RADAR Harvest the best in projects, kits, products, and books.

28

ORDER IN THE HOUSE Keep your family’s entertaining gear at the ready by stashing everything in a console decked out with clever organizing ideas.

32

38

TRY IT Turn dried naturals into organic artwork that pays homage to autumn’s colors and textures. SEW EASY Pack your lunch—or just a snack—with panache when you make a set of foodie-friendly bags from your favorite fabrics.

104

TREND SITING Rock the best of the ’90s with these picks that will remind you how super fly Friends was—before you could stream it.

ALSO IN THIS ISSUE 3 EDITOR’S LETTER 5 BHG.COM 27 PROJECTS UNDER $20 102 RESOURCES ON OUR COVER PHOTOGRAPH CARSON DOWNING STYLING JENI WRIGHT


FROM THE EDITOR

PHOTOGRAPH CARSON DOWNING PORTRAIT JASON DONNELLY

Let’s hear it for bookshelves! The “shelfie” craze may date to 2014, but backgrounds that combine art, plants, and actual books have been a bright spot in this moment of Zoom meetings and video calls. Whatever your style, you’re sure to find a fresh, inexpensive way to showcase your collections and personality with a new bookshelf (see “Top Shelf,” page 42). Even better, each of these seven projects can be started and finished in less than a weekend. In fact, you can stack up the wood plank and acrylic cube bookshelf shown here in an hour. Autumn days are perfect for taking on projects to upgrade your home and yard. Gather grasses and florals to whip up instant organic art (“Fall on Display,” page 32). Follow influencer Kate Keesee’s tips to quickly create a reclaimed wood accent wall (“Rescue Redux,” page 52). Although our rock-solid concrete decorating ideas (“What to Do with Concrete, page 6) require at least 24 hours to cure, the molds and concrete mixes are ready to work with in minutes. Even this issue’s big carpentry project—a cozy outdoor swing (“In Full Swing,” page 94)—is designed to use limited tools and materials so you can build and begin enjoying it ASAP. Keep going and take on one more project this fall! We’re here to help you make the most of every moment.

Brian Kramer Editor, Do It Yourself ™ P.S.: Ready for Season 3 of the Furniture Flip Challenge? Head to builderschallenge.com/ffc to sign up for details about participating in the next challenge, which begins September 4, 2021.

DO IT YOURSELF Fall 2021 3


MEREDITH PREMIUM PUBLISHING Senior Vice President & Group Publisher SCOTT MORTIMER Vice President, Group Editorial Director STEPHEN ORR

Senior Editor BRIAN KRAMER Contributing Editor SAMANTHA S. THORPE Associate Art Director JESSICA ENO Assistant Art Director EMILY BUTTERWORTH Contributing Copy Editor NANCY DIETZ Proofreader MARTHA COLOFF LONG Administrative Assistant RENAE MABIE

HOME & GARDEN Executive Editor SAMANTHA HART Senior Editors BRIAN KRAMER, SALLY FINDER WEEPIE, KRISSA ROSSBUND, NICOLE DEAN TEUT Design Directors KIMBERLY MORGAN METZ, MICK SCHNEPF Associate Art Director JESSICA ENO Assistant Art Director EMILY BUTTERWORTH Senior Graphic Designer BRITTANY MUELLER Administrative Assistants RENAE MABIE, KATIE MORT, KIM O’BRIEN-WOLETT Photography Coordinator ALYSSA RICHARDSON Better Homes & Gardens Test Garden® Manager SANDRA GERDES FOOD Executive Editor SHELLI MCCONNELL Senior Content Manager JESSICA SAARI CHRISTENSEN Senior Editor LAUREN LASTOWKA Style & Design Director STEPHANIE HUNTER Associate Art Director RAE DANNEMAN Administrative Assistant COURTNEY BUSH Culinary Specialists SARAH BREKKE, JULI HALE, COLLEEN WEEDEN Food Styling Director GREG LUNA Food Stylists LAUREN MCANELLY, SAMMY MILA, KELSEY MOYLAN

EDITORIAL ADMINISTRATION Editorial Director JILL WAAGE Executive Creative Director MICHAEL D. BELKNAP Assistant Managing Editor JENNIFER SPEER RAMUNDT Copy Chief ANGELA K. RENKOSKI Senior Copy Editors ERIKA BJORKLUND, MARTHA COLOFF LONG Business Manager, Editorial CINDY SLOBASZEWSKI Lead Business Office Assistant GABRIELLE RENSLOW Director, Premedia Services AMY TINCHER-DURIK Director, Quality JOSEPH KOHLER Director, Meredith Food Studios ALLISON LOWERY Director, Meredith Test Kitchen LYNN BLANCHARD Director, Meredith Photo Studio REESE STRICKLAND Photo Studio Set Construction Manager DAVE DECARLO Studios Coordinator TERRI CHARTER Premedia Trafficking Supervisor ALEXANDER M. GRAY Color Quality Analyst TONY HUNT

CONTRIBUTING FIELD EDITORS Atlanta Lisa Mowry Baltimore Eileen Deymier Birmingham, AL Cathy Still McGowin Charleston, SC/Savannah Sandra L. Mohlmann Charlotte/San Diego Andrea Caughey Chatham, MA Karin Lidbeck-Brent Chicago Elaine Markoutsas Denver Mindy Pantiel, Elaine St. Louis Detroit/Toronto Khristi S. Zimmeth Danbury, CT Stacy Kunstel Los Angeles Darra Baker, Laura Hull, Robin Tucker Minneapolis/St. Paul Bonnie Broten, Heidi Pearson Nashville Anna Forkum New Orleans Kimberly Clarke, Margaret Zainey Roux New Paltz, NY Anna Molvik Newport, RI Lynda Sutton Portland, ME Susan Salomon Richmond, VA Paige Porter Fischer San Diego Karen Reinecke San Francisco Sarah Alba Seagrove, FL Eleanor Lynn Nesmith Seattle Linda Humphrey St. Louis Jessica Brinkert Holtam Washington, D.C. Jeanne Blackburn

FOR EDITORIAL QUESTIONS, EMAIL DOITYOURSELF@MEREDITH.COM OR WRITE US AT DO IT YOURSELF, MEREDITH PREMIUM PUBLISHING, MEREDITH CORP., 1716 LOCUST ST., DES MOINES, IA 50309-3023 To subscribe, go to BHG.com/MyAccount. For subscription help, email diycustserv@cdsfulfillment.com or call 800/247-0078. Subscriber Please Note: Our subscribers list is occasionally made available to carefully selected firms whose products may be of interest to you. If you prefer not to receive information from these companies by mail or by phone, please let us know. Send your request along with your mailing label to Magazine Customer Service, P.O. Box 37508, Boone, IA 50037-0508.

MEREDITH NATIONAL MEDIA GROUP President CATHERINE LEVENE President, Meredith Magazines DOUG OLSON President, Consumer Products TOM WITSCHI President, Meredith Digital ALYSIA BORSA EVP, Strategic & Business Development DAPHNE KWON EXECUTIVE VICE PRESIDENTS Chief Revenue Officer MICHAEL BROWNSTEIN Digital Sales MARLA NEWMAN Finance MICHAEL RIGGS Marketing & Integrated Communications NANCY WEBER SENIOR VICE PRESIDENTS Consumer Marketing STEVE CROWE Consumer Revenue ANDY WILSON Corporate Sales BRIAN KIGHTLINGER Foundry 360 MATT PETERSEN Product & Technology JUSTIN LAW Research Solutions BRITTA CLEVELAND Strategic Planning AMY THIND Strategic Sourcing, Newsstand, Production CHUCK HOWELL VICE PRESIDENTS Brand Licensing TOYE CODY, SONDRA NEWKIRK Business Planning & Analysis ROB SILVERSTONE Corporate Communications JILL DAVISON Finance CHRIS SUSIL Strategic Development KELSEY ANDERSEN Strategic Partnerships ALICIA CERVINI Vice President, Group Editorial Director STEPHEN ORR Chief Digital Content Officer AMANDA DAMERON Director, Editorial Operations & Finance GREG KAYKO

MEREDITH CORPORATION Chairman & Chief Executive Officer TOM HARTY | Chief Financial Officer JASON FRIEROTT | Chief Development Officer JOHN ZIESER President, Meredith Local Media Group PATRICK MCCREERY | Senior Vice President, Human Resources DINA NATHANSON Senior Vice President, Chief Communications Officer ERICA JENSEN Vice Chairman MELL MEREDITH FRAZIER For syndication or international licensing requests or reprint and reuse permission, email syndication@meredith.com. PRINTED IN THE USA

Vice President, Marketing JEREMY BILOON Director, Brand Marketing JEAN KENNEDY Brand Manager KATE RONCINSKE Associate Director, Brand Marketing BRYAN CHRISTIAN Senior Brand Manager KATHERINE BARNET Associate Brand Manager SAMANTHA LEBOFSKY FINANCIAL ADMINISTRATION Associate Business Director JENNA BATES Business Manager LISA CARLSON CIRCULATION Consumer Marketing Managers LAURA KROGH, ED LICHINSKY ADVERTISING & BUSINESS DEVELOPMENT Do It Yourself Project Supervisor BETHANY PETERSON bethany.peterson@meredith.com Account Executive BRIAN KOSSACK brian.kossack@meredith.com Sales Assistant ASHLEY JACOBS ashley.jacobs@meredith.com Home Senior Vice President & Group Publisher STEPHEN BOHLINGER stephen.bohlinger@meredith.com Brand Homes Director NICOLE HENDRICK nicole.hendrick@meredith.com Eastern Advertising Director BROOKE VLADYKA brooke.vladyka@meredith.com Advertising Sales Assistant CHERYL CORBIN cheryl.corbin@meredith.com Food & Holiday Senior Vice President & Group Publisher MARK JOSEPHSON mark.josephson@meredith.com Account Director MICHELLE BUTLER-MINGEY michelle.butler-mingey@meredith.com ADVERTISING OPERATIONS 1716 Locust St., Des Moines, IA 50309-3023 Associate Production Director PATRICK MCGOWAN Production Managers KYLE DIRKS, ASHLEY SCHAUBROECK, ANGELA SCHOPP DIRECT MEDIA Sales Director TYLER HUB tyler.hub@meredith.com


BHG.COM

EXTEND THE SEASON

Make the most of shorter days and cooler nights with ideas that will keep you lingering outdoors longer.

FALL POTS

GO FOR A STUNNING DISPLAY WITH THESE 31 AUTUMN CONTAINERS THAT PROMISE LASTING COLOR. BHG.COM/ FALLCONTAINERS

LIGHTEN UP

Follow these landscape lighting tips to enhance your home and make it safer. BHG.com/ LandscapeLights CREATE COZY VIBES

Try our best harvesttheme decor and recipes for toasty fall gatherings. BHG.com/HarvestParty DIY HAVEN

Sit back and relax! You can turn your deck or patio into a backyard oasis using privacy tricks. BHG.com/DeckPrivacy

BHG.COM/DIYM A G A Z I N E

DO IT YOURSELF Fall 2021 5


WHAT TO DO WITH

CONCRETE Mix up your decor by making these high-style, modern objects in no time—and on a dime! PROJECTS JODI HARRIS PHOTOGRAPHS NICOLAS GOURGUECHON WORDS PAMELA PORTER

CAST IN STONE Make your own

high-end accents, this photo, from a concrete mix. Countertop mixes will give a smooth, light texture as with the taller vases. Choose a regular mix for a rough-hewn look.


DO IT BETTER EASE THE REMOVAL OF CONCRETE

FROM FORMS BY COATING ANY SURFACE THE CONCRETE WILL TOUCH WITH NONSTICK COOKING SPRAY BEFORE FILLING WITH CONCRETE MIX. DRYING TIME WILL DEPEND ON THICKNESS AND TYPE OF MIX USED AS WELL AS THE ROOM’S TEMPERATURE AND HUMIDITY. WAIT AT LEAST 24 HOURS FOR FORM TO DRY.

TURN A PLASTIC BOTTLE INTO A CLEVER CONCRETE VASE. TRIM OFF THE BOTTLE’S TOP WITH A UTILITY KNIFE, SPRAY, THEN FILL WITH PACKAGED CONCRETE MIX. (TAP AWAY BUBBLES AS YOU GO.) INSERT A SPRAYED PLASTIC TEST TUBE. WHEN MIX IS DRY, USE A UTILITY KNIFE TO CAREFULLY REMOVE PLASTIC. SAND ROUGH EDGES, IF DESIRED.

COOL VESSEL To make an in-vogue bowl, start by combining packaged concrete mix like Quikrete and

water according to manufacturer’s instructions. Stir in black pigment powder (from earthpigments.com) to achieve the desired charcoal hue. Spray inside of a large plastic bowl with nonstick cooking spray and spoon mix into bowl, filling about three-quarters full and tapping to remove air bubbles as you go. Spray the outside of a smaller plastic bowl with nonstick cooking spray and press it into the center of the mix, pushing the concrete toward the rim of the large bowl. Weight the small bowl with rocks and let dry. Remove concrete from bowls; sand any rough edges, if desired.

BHG.COM/DIYM A G A Z I N E

DO IT YOURSELF Fall 2021 7


THE OPEN SIDE OF THE CARDBOARD LETTER FORM WILL PRODUCE THE ROUGH TEXTURE, SHOWN HERE. FOR A SMOOTH LOOK, TEAR THE BACK FROM THE LETTER FORM RATHER THAN THE FRONT BEFORE FILLING.

A

B

INITIAL THIS For this personalized accent, above, tear the front from

a three-dimensional cardboard papier-mâché craft letter. Combine packaged countertop concrete mix and water according to package instructions. Spoon mix into the letter form (A), tapping to remove air bubbles. Let dry. Remove paper by tearing it away from the concrete.

FOLIAGE FORM Bring the outdoors in with a colorful

cast leaf, above left. Select a real or imitation leaf with thick veining. Mix packaged concrete according to instructions. Place leaf facedown on a protected work surface and mold concrete 1/2 inch thick onto the back of the leaf to create the shape. Use a knife to smooth the edges. Let dry, then pull leaf off the concrete form (B). Paint the concrete leaf with crafts paints suitable for concrete, and finish with a clear spray sealer, if desired.

8 DO IT YOURSELF Fall 2021


USE A HEAT GUN TO SLIGHTLY MELT THE PLASTIC BOTTLE TO MAKE IT EASIER TO REMOVE FROM THE DRIED CEMENT— ESPECIALLY THE INTERIOR ONE.

HANG OF IT To craft a stone-look pendant, start by drilling a hole through the caps of a 2-liter and a 1-liter plastic

bottle. The holes should be the same size as the threaded tube found in DIY lighting kits or in a hardware store’s lighting section. Replace cap on larger bottle and cut the bottom off the bottle. To suspend the smaller bottle inside the larger one, fit the threaded tube through the unattached cap and secure with a nut on either side of the cap to hold in place before screwing the cap on the small bottle. Insert the small bottle into the larger one so the threaded tube fits through the hole in the other cap; secure at exterior with a nut so there are a few inches between the caps. Mix packaged countertop concrete mix and water according to instructions. Place bottles cap-side down in a vase or jar. Spoon mix between bottles, tapping to remove air bubbles. Let dry. Use a utility knife to remove plastic bottles. Through the opening, thread a pendant light fixture, following all installation, weight, and safety instructions. Call in a qualified electrician if you are inexperienced with electrical installation.


WE USED UNICORN SPIT GLAZE TO PAINT OUR PLANTER, BUT YOU CAN EXPERIMENT WITH CONCRETE STAINS, DYES, OR PIGMENTS. COAT PLANTER INTERIOR WITH WATERPROOF SEALANT TO HELP PROTECT THE PLANT AND ANY SURFACES THE PLANTER SITS ON FROM LEAKAGE.

ALL THE ANGLES Go for the geometric look for a tabletop planter, above. Construct a small and a large

hexagonal form. (We used open hexagon wall-display shapes in two sizes, securing a back piece to each.) Mix packaged concrete mix according to directions. Fill the large hex form with a 1-inch base layer of mix. Center the smaller hex on top of the base layer and weight it down. Scoop mix between the two hex shapes until full, tapping to remove air bubbles. Let dry. Remove concrete from forms, breaking or dismantling the forms as needed. Sand rough edges, if desired. Use concrete-suitable crafts paint to apply a wide stripe around the base of the planter; drill a drainage hole, if desired.

10 DO IT YOURSELF Fall 2021


INFUSE YOUR SPACE WITH A DELICATE SCENT BY ADDING ESSENTIAL OIL TO THE MELTED WAX BEFORE POURING YOUR CANDLE.

A

ON DISPLAY Invite these DIY

A

BHG.COM/DIYM A G A Z I N E

delights—a candle and trivet, left and above left—to dinner. To craft a concrete candleholder (A), follow instructions for the bowl, page 7; add pigment if you want a colorant. Hotglue the metal disk of a candle wick to the bottom center of your concrete bowl. Keep the wick elevated by placing a pencil across the top of the bowl and wrapping the wick around it. Melt wax shavings in a microwave in 30-second increments until liquid, then pour into the prepared bowl and let harden. Protect tabletop surfaces with a jumbo trivet. Mix packaged concrete mix according to instructions. Coat inside of 5-gallon bucket with nonstick cooking spray. Spoon packaged concrete mix into the bucket until it’s 2 inches thick, tapping to remove air bubbles. Let dry, then remove concrete from the bucket. Secure several self-adhesive felt pads to the underside of the trivet so it doesn’t scratch table surfaces.

DO IT YOURSELF Fall 2021 11


SUCCESS WITH CEMENT

When working with cement-based products, follow these tips. • Always wear eye protection, a face mask, and waterproof gloves. • Do not use a quick-setting packaged concrete mix. It will dry too fast. • Use disposable containers and stirrers, and protect your work surface. When mixing, add water gradually until desired consistency is reached. Properly mixed concrete should be a thick oatmeal consistency. • Plastic and cardboard forms release from cement better than wood, metal, or glass. • Drying time varies, but allow at least 24 hours before removing forms. Whether or not you add pigment, the surface color will continue to lighten as the concrete dries and cures.

TOP NOTCH Give a bedside table

an updated look, right and opposite. Remove the original top and build a frame to the same size using 2×4s and screws. Place the frame on a smooth surface such as melamine or acrylic. Mix packaged concrete according to instructions. Then add in fiber strengtheners or nylon fibers that help prevent cracking (sold through buddyrhodes.com) and dry powder pigments for desired color. Spoon mix into the frame, tapping to remove air bubbles. Press table base into the mix so it sinks in enough to be attached to the concrete when dry (A). Let dry, then remove the frame by unscrewing the wood. Sand the table edges and top smooth using a sanding pad and water.

12 DO IT YOURSELF Fall 2021

A

USE A TROWEL TO PAT DOWN ANY REMAINING BUBBLES AND SMOOTH THE TABLETOP SURFACE ONCE CEMENT MIX IS SPOONED IN.


HANGING OUT Craft a sweet planter, this

photo, from a heavily textured silicone swim cap stretched inside out over the edge of a plastic bucket. Combine packaged countertop concrete mix and water according to the instructions. Stir in dry pigment powder for desired color. Spoon mix into the silicone until three-quarters full, tapping to remove air bubbles. Press a smaller plastic bowl into the center until the mix rises to the rim; weight the bowl. Let dry. Remove the silicone from the bowl. Fill with dirt and plant, and display in a fun hanger.

FOR RESOURCES SEE PAGE 102.


Y H A N DY I D

P

DIY H A

COOL TOOLS

N

DY

N HA

K

DY PI C K

IC 2021

BUILD TO ORDER

PICK

DI

Y

Cutting-edge carpentry tools make any project a happier experience. WORDS LINDSEY M. ROBERTS

1. MILWAUKEE M18 FUEL 18-VOLT LITHIUM-ION BRUSHLESS CORDLESS COMPACT ROUTER Expect the power of corded 1.25 horsepower trim routers and 31,000 rpm, cutting up to 250 feet—that means all-day run time with fewer charger trips. Tool only. $200;

1

22

homedepot.com

3

3. RYOBI 18V ONE+ CORDLESS AIRSTRIKE 18-GAUGE BRAD NAILER Co-owner of the Builders Challenge, Adam Beasley of Lazy Guy DIY recommends Ryobi’s 18-gauge nailer as one of the best on the market. It drives nails from 5∕8 inches to 2 inches long.

2. FASTCAP BLUEDOG Make your workbench work harder with Fastcap Bluedog adjustable bench dogs. Install in pairs on your workbench using a 2½-inch hole saw and then dial to the desired height to hold projects in place. $16 per four

pack; fastcap.com

4

$129; homedepot.com

4. SILICONE PROJECT MAT Save the workbench: Dried glue peels right off this Rockler 15×30-inch mat. A 23×30-inch mat is also available for bigger benches.

$30; rockler.com

14 DO IT YOURSELF Fall 2021


5. BESSEY GEARKLAMPS The crank handle makes it easier to apply the bar clamp in tight spaces. The clamp is available in four sizes: 6, 12, 18, and 24 inches. Force can handle up to 450 pounds yet releases with a button. $20–$28;

rockler.com 5 7

6. PORTABLE DRILL GUIDE If you don’t have space for a full-size drill press, try a guide that can turn any drill into an accurate press. Rockler’s guide drills from 0 to 60 degrees using a protractor scale. Drill vise is optional.

6

$150; rockler.com

7. 3M PRO GRADE PRECISION SANDPAPER SHEETS Nonslip backing and mineral grits made with industrial adhesives won’t slip or slide, ensuring less fatigue to strip rust, paint, or varnish. Use on painted, wood, or metal surfaces. Comes in a range of grits. 4 sheets for $5 for 80 grit. homedepot.com

8

8. SIX-PIECE BENCH CHISEL SET This set from WoodRiver brings as much woodworking joy through the handles as it does in the use of the chisels. Beautiful hardwood handles hold hardened steel blades with ferrules. The set includes ¼-, 3∕8-, ½-, 5∕8-, ¾-, and 1-inch chisels. Honing is required before use.

9

$110; woodcraft.com

9. BLUE SMALL SQUARE WITH CENTER FINDER AND PINS Center marking hole allows larger pencils to make consistent center marks. It can also be used as a saddle square to transfer lines. $28; dfmtoolworks.com


10. SAW HEIGHT GAUGE The aluminum laser cut and anodized tool helps set the height of a table saw within 1/64-inch accuracy. $20; 10

dfmtoolworks.com

11

11. GORILLA WOOD GLUE ULTIMATE Gorilla’s most durable wood glue is waterproof, yet cleans up easily with water during application. It’s suitable for both outdoor and indoor use. $4; walmart.com 12

13

12. BORA ROUTER GUIDE Fit this router guide into Bora’s WTX and NGX Clamp Edge saw guide to guarantee straight dados and router cuts. (It works with other models as well.) The guide is easy to adjust for bit and board size.

$57; boratool.com

13. MITE-R-EXCELL II Add JessEm’s new miter gauge to a table saw to ensure accurate cuts—with nine miter detents and a spring-loaded indexing pin that allows for adjustments at 0, 15, 22.5, 30, and 45 degrees. $300; jessem.com

16 DO IT YOURSELF Fall 2021


14. KREG POCKET-HOLE JIG 720PRO This pocket-hole jig comes with on-board storage for accessories, a docking station for enhanced support for large pieces, clamp, project plan, and 160 screws. One-motion clamping adjusts to material thickness. $150; kregtool.com

14

15. DEWALT 7-INCH PREMIUM RAFTER SQUARE The extra-thick extruded aluminum body holds up to heavy-duty use of this speed square— strong enough for use as a saw guide. A large base helps provide a better grip on materials, and scribe line notches are ready for marking rip cuts. $13; acmetools.com

15

PULSE 62V ™

Powered by LiPRO ™ 62 VOLT Interchangeable Lithium-Ion Batteries

DRbatterytools.com Request your FREE Product Catalog! Toll Free: 877-201-8884


DIY HOME CARE

HANDY GIRL

Get ready for fall with spruce-up tips and savvy organizing steps you can tackle before colder weather arrives. WORDS KELLY ROBERSON ILLUSTRATIONS ANKE REGA

HEY, FELLOW DIYERS! Every Handy Girl I know is keen to pick up a shovel, saw, and more to keep her home and garden in tip-top shape. Follow these ideas to sharpen your fix-it skills and lessen your homeownership worries.

HELP PLANTINGS SURVIVE WINTER Trees, shrubs, and plants go through a lot, no matter where you live. If planted in the right Zone, they can cope with swings in temperature and moisture. (Find your area’s hardiness Zone at planthardiness.ars.usda.gov.) You can help them endure the worst that winter throws their way, including animals looking for a midwinter snack to get through the lean times. Here are a few tips: HARDWARE CLOTH: This wire mesh can deter burrowing rodents from nibbling on trunks when buried to a depth of about a foot around trees and shrubs. Discourage rabbits by wrapping it around plantings to a height of about 2 feet. You can also use hardware cloth to protect young trees and evergreens from sunscald, which can happen when temps rise on a sunny winter day. (Plastic tree guards and burlap also do the trick.)

FENCING: Install it as you would hardware cloth to deter small animals. If you struggle with deer munching in your yard, select 8-foot-high solid fencing. MULCH: A thick layer of mulch protects perennials from winter’s touch and helps trees and shrubs retain moisture over the dry months.


TO PRUNE OR NOT TO PRUNE? THAT IS THE QUESTION

ME, EVERY AUTUMN, STANDING IN FRONT OF THE FLOWERBEDS: “WAIT, AM I SUPPOSED TO CUT THAT BACK?” ALSO ME, EVERY AUTUMN AFTER A DUSTING OF SNOW, STANDING IN FRONT OF THE FLOWERBEDS: “NOW IT’S DEFINITELY TOO LATE TO CUT THAT BACK.” If there ever was proof that learning is a lifelong habit, my pruning conundrum is it. I’ve written numerous articles about nearly every DIY subject, but still can’t seem to figure out how to make the advice about pruning shrubs and trees stick in my mind. Will writing about it to the dear Handy Girl community help? Here’s hoping. • If you’re not sure … leave it to overwinter and prune in the spring. • If it flowers in the spring … prune it AFTER it’s done blooming (late summer). • If it flowers in the summer … prune it BEFORE it blooms the next season (late winter/early spring). • If it’s a shrub that has leaves but no flowers … prune AFTER it’s completely dormant (late winter/ early spring). • If it’s a shrub that’s evergreen … prune BEFORE it starts new growth (early spring). • If it’s a leafed tree … prune BEFORE it starts new growth (early spring) EXCEPT oaks, which should be pruned in winter.

Remember: Dead branches on any plant, shrub, or tree should be removed immediately to lessen the risk of disease or further damage.

ABOUT THOSE LEFTOVER PAINT CANS HANDY GIRLS, THIS IS THE YEAR: MY HUSBAND AND I HAVE FINALLY COMMITTED TO REALLY, REALLY CLEANING OUT OUR BASEMENT DIY ROOM. WE’RE BUILDING A NEW BENCH AND ADDING STORAGE, TOSSING BROKEN ITEMS, AND DONATING EXCESS TOOLS AND SUPPLIES. (I’LL NO LONGER ADMIT TO HAVING THREE T-SQUARES.)

BHG.COM/DIYM A G A Z I N E

The biggest win? Getting rid of old paint and stain cans, even those left over from previous owners of the house. If you have newish cans of paint or even an old jug that you forgot about, here’s what to do to clean up your DIY space. Latex paint and stain: If it’s a mostly full can in good shape, you might check about donating to a reuse facility in your area. Otherwise you can add cat litter to the can to soak up and dry the paint before tossing in the garbage, unless prohibited by your state or municipality. Oil-base paint and stain: Check with local hazardous waste disposal facilities for specific dump locations.

DO IT YOURSELF Fall 2021 19


When it comes to saws, the right one matters IT’S AN OLD ADAGE, BUT ONE YOU CAN LIVE BY: GET THE RIGHT TOOL FOR THE JOB AND YOUR LIFE WILL BE SO MUCH EASIER. SAWS ARE NO DIFFERENT. HOW THEY CUT AND THE BLADE THEY USE ISN’T JUST SOME HAPPY ACCIDENT, BUT AN INTENTIONAL DESIGN AND FUNCTION CHOICE. HERE’S HOW TO INVEST IN AND USE THE RIGHT ONE.

HANDSAW: A hefty handle and a long blade

CIRCULAR: Electric-powered with a spinning blade

Used for: Lots of general purpose jobs, such as cutting pieces of wood to fit together; reasonably priced and relatively flexible.

Used for: Cutting straight lines or angles on wood.

What to know: Fewer teeth per inch equals a quicker cut. But that’s not always good: Slow equals a smoother cut. Crosscut handsaws are great for cutting across wood grains, while a ripsaw is better for cutting along wood grains. Handy Girl extra: Ask a shop to resharpen these for you; it’s easy and quick for a shop, but not for you.

MITER SAW: Resembles a circular saw and usually used with a base Used for: Finish carpentry such as baseboards. What to know: If you’re finishing several rooms or building a big piece like several shelves in a closet, you might find a miter helpful and efficient. Handy Girl extra: These are fairly stationary but also simple to use.

20 DO IT YOURSELF Fall 2021

What to know: For a multipurpose version, opt for those with a combination blade to cut across or along the grain. Handy Girl extra: Get the right blade for the job; circular saws can be outfitted with ones to cut plywood, veneer, and more. Just be sure to buy the blade that will fit the center shaft on your saw.

HACKSAW: Resembles a handsaw Used for: Primarily metal but can also work on plastic or wood. What to know: Again, fit is everything; these are driven by the power of your hand, so make sure you like what you buy. Handy Girl extra: In a pinch, you can use this in place of a coping saw for a quick cut—just make sure the blade matches the material you’re cutting.

COPING: A small, thin, flexible blade Used for: Detail jobs such as cutting molding or cutting out around outlets, for example. What to know: Make sure the handle fits your hand so you don’t mind working the blade. Handy Girl extra: Skip trying to sharpen the blade when it’s dull; these are inexpensive and easy to replace.

JIGSAW: A cross between a circular saw and a handsaw Used for: Cutting precise curves or traced shapes in wood, thanks to a skinny blade. What to know: Teeth per inch matter; the more you have, the smoother your cut will be. Handy Girl extra: Need to make a long, straight cut? Don’t use the jigsaw; you’ll be disappointed.


FOUNDATION FEARS: WORRY OR NOT? EVER HAVE THAT MOMENT WHEN YOU NOTICE SOMETHING—SAY, DUST IN A CORNER—AND THEN ALL YOU CAN SEE IS DUST IN EVERY CORNER? Recently, I noticed a crack in our exterior foundation. And then I noticed another one. And another one. Do I need to worry? Should you? Here’s some help. DON’T WORRY if you see hairline exterior cracks. Homes settle and shift over time. DO WORRY if pieces of the foundation or bricks fall out of square. That may indicate a more serious problem. DON’T WORRY if you see teensy cracks on interior walls. Again, homes move, millimeter by millimeter and over time. DO WORRY if the cracks go from floor to ceiling, look zigzag, have wide gaps between sides, or appear at joints in walls. DON’T WORRY if a home’s floor has a gradual, almost imperceptible slope. DO WORRY if the slope is more than 2 inches in one room. DON’T WORRY if a beam shows its age. DO WORRY if a beam warps or bends. You could have damage from something like termites. Finally, WORRY (a lot) if there are overnight, major changes in the way your house works, such as a floor pulling away from a wall. Call an expert for help to fix big foundation issues.


STUFF WE LOVE

ON OUR RADAR

Everything will fall into place this season with our cornucopia of can-do picks. WORDS AMBER WAGNER PHOTOGRAPHS MARTY BALDWIN

1. Macramé coasters join the color-blocked trend. The kit includes everything you need to craft two posh protectors with a few simple knots. Instructions and video tutorial make these beauties a cinch to complete. Choose from seven colors. DIY Macrame Coaster Kit (set of two), $22; etsy.com/shop/tiedtocleveland


2. It’s time to play with clay. Crockd kits include tools, tutorials, and clay. “Clay Breakers” convo cards add a fun element to this cheeky kit. Air-dry your creation or use the site to find a local kiln for firing. $59 for regular kit, $70 for Pride Edition (in rainbow);

crockd.com 3. No messy gels or special fuels needed. This tabletop fireplace burns isopropyl alcohol. Just 5 ounces of fuel will give you 50 minutes of burn time. Perfect for roasting s’mores or adding cozy ambience. Flîkr Fire, $95;

2 3

4

5

6

flikrfireplace.com 4. Quiet your mind with a new approach to quilting. This book guides you through 20 modern projects combined with warm words of mindfulness. Learn basic quilting techniques as well as ways to mend, repair, and renew items for more sustainable crafting. Conscious Crafts: Quilting, $18;

quartoknows.com 5. Natural pigments color this incredible lime paint to leave your walls drenched in velvety smooth hues that give a space a tactile sensation. This zero-VOC finish absorbs CO₂ as it cures and resists mold and bacteria. $33 per quart;

jhwallpaints.com 6. High-viscosity acrylic paints have the intensity of paint with the movement of ink. Use like watercolors, paints, or dyes for a new twist on your artistic endeavors. The set includes three refillable markers and five colors. Golden Professional High Flow Acrylics Marker Set, $40; michaels.com or

goldenpaints.com

BHG.COM/DIYM A G A Z I N E

DO IT YOURSELF Fall 2021 23


7. An old-world material offers a new world of possibilities. Apply the mixture with a trowel then burnish to a shine. Venetian plaster can also be used on surfaces to texturize, age, or create a faux-stone look. Venetian Plaster, $28;

amyhowardhome.com

7 8

9

8. Ditch the dangerous, noisy chain saw for this simple no-emissions tool powered by you that can cut through 3-inch limbs in 20 seconds and go anywhere. The 92 bidirectional cutting teeth resist rust and reach where no bulky saw can go. Unbelievable Saw; $25; supremeprod.com

9. Go on an inspiring crochet journey with one amazing kid. Join Jonah Larson as he tells his story of love and connectedness tied in with the common thread of his favorite pastime. See yarn in a whole new light and try his favorite projects. Hello, Crotchet Friends!, $23;

jonahhands.com

10

10. The ultimate upcycler: A coat of Rust-Oleum’s Terra Cotta spray paint transforms trinkets to earthy treasures in a flash. American Accents Terra Cotta Spray Paint, $6;

rustoleum.com

24 DO IT YOURSELF Fall 2021


11. The Brewsy kit comes with everything you need to make your own wine or cider. Add sugar and your favorite juice and you’ll be sipping custom libations in just a week. Store your drink in a jug or add a bottling kit to your order. Brewsy Welcome Kit, $45;

getbrewsy.com 12. Stuck on plant propagation? This set of tubes boasts magnets that attach to sleek wall-mount bases. Checking on your plant babies is easy when they double as art! Magnetic Propagation Station Set, $72 for a set of three;

11 12

13

14

15

ironandsprout.com 13. No need to water these beauties. Craft your way through 128 pages of woolly wonders and fill your space with gorgeous blooms. Fun project ideas include wreaths, garlands, and more. Felt Flower Workshop, $25;

ctpub.com 14. Inspired by classic barn quilts, these wood art kits arrive complete with brushes, your choice of paint colors, and Baltic birch plywood shapes that you paint and glue into the frame. DIY Barn Quilt Painting Kit, $34; etsy.com/shop/

sweetloveadornments 15. This portable pump inflates tires, tubes, and toys. The digital display and preset auto shutoff mean perfect psi every time. The pump is compatible with other tools in the Power Share system. 20V Power Share Portable Air Pump Inflator, $99; worx.com


16. You can grow a garden, so why not other things? Follow the instructions to grow your own crystals, choose your favorite, and continue growing the crystal into your jewelry. This wearable project is sure to be a sparkling conversation starter. Crystal Necklace Kit—Gold, $89;

mine-shine.net

16 18 17

18

17. Finally, a better broom! Angled sides on this fine-bristle push broom capture more debris per stroke than traditional brooms. Better cleaning power with less effort makes this workhorse a winner. Rubbermaid Commercial Maximizer Push-to-Center Broom, $36; amazon.com

18. Stash, wash, and store your garden haul, all in one durable tote. BPA-free and dishwasher-safe, this tote is perfect for collecting veggies, berries, or cut flowers. Multiple colors are available. Garden Colander, $25;

gourmac.com

19

19. Take concrete from drab to fab with a real stone coating. SpreadRock combines antislip texture and visual appeal in seven durable colors. All-inone stone paste can be troweled on horizontal and vertical surfaces. SpreadRock, $40/gallon; daichcoatings.com

26 DO IT YOURSELF Fall 2021


PROJECTS UNDER $20

Get busy this fall. Find inspiration and how-to for thrifty DIY projects featured in this issue.

p. 8

Concrete vases and bowl 6 Concrete letter 8 Concrete planter 10 Concrete trivet 11 Concrete bowl candle 11 Hoop with dried grass artwork 33 Dried flowers and daylily weaving artwork 34 Branch with dried flowers/grasses artwork 36 Branch with dried flowers, grasses, and daylily braid artwork 37 Corner ledge 47 Coffee table/bench made from scrap wood 52 Sconce 52 Painted wall treatment 56 Wood and macramé wall hanging 57 Rake towel rack 57 Salvaged wood desk made from fencing 57 Painted desk chair 57 Pillows made from old rugs on outdoor sectional 58 Marbling artwork and cards 61, 67 Pom-pom garland 68 Tassel garland 70 Wall shelf/desk 71 Basket turned planter 90


ORDER IN THE HOUSE

FAMILY MEDIA HUB

Stay at the ready for impromptu game nights with this smartly stocked console. Make it play harder with handy products and simple hacks that keep things tidy. PROJECTS MOLLY REID SINNETT PHOTOGRAPHS JASON DONNELLY WORDS CHELSEA EVERS

SIDE ORGANIZER

Stick an acrylic bin to the inside of a console, above, to take advantage of unused space and make small items like decks of cards and dice easy to corral.

MULTIUSE STATION Turn an entry console,

opposite, into a family room problem solver with these easy solutions. Stow board games, large books, and a catchall bin or basket for workout equipment on lower shelves. Stock higher shelves with open baskets for more frequently accessed items like dog toys and game controllers. Upper drawers serve as a home for small game pieces, handheld games, and crafts supplies. Nolan Console, $699; westelm.com

28 DO IT YOURSELF Fall 2021

EASY ACCESS Leave this basket, above,

handwoven from rapidly renewable water hyacinth, open to grab and go or use its lid to conceal clutter. An interior metal frame reinforces the basket’s shape, standing strong even in a house full of kids and pets. Small Natural Twist Weave Basket, $25; westelm.com

HACK IT

BUY IT


STATEMENT MAKER Set the mood for a

raucous game night with this 2-foot-wide banner. Crafted from wool felt, it is stitched in Buffalo, New York—along with dozens of other maxim-adorned banners. Keep It Wild Championship Banner, $100; oxfordpennant.com


INSIDE STORY Add extra storage

to a packed console with a set of desktop office drawers, left. They’re an ideal keeper for activity books, art supplies, and haven’tread-this-issue-yet magazines. Even better, you can remove a drawer and take it to your work spot when you’re ready to focus on creating or reading. Bigso Linen Marten Paper Drawers, $25; containerstore.com

CLUTTER CONTROL Stackable

acrylic baskets, right, keep small video game equipment— including pint-size consoles like the Nintendo Switch and tiny game cartridges that are easy to lose—organized and easy to find. The baskets nestle neatly inside a drawer next to controllers and larger games. Like-it Bricks Bins, $5–$15; containerstore.com 30 DO IT YOURSELF Fall 2021


HANG OUT This sleek toilet

paper holder, left, makes a clever perch for headphones and gaming headsets. Made from zinc, it’s a hardy solution that will stand up to the demands of teen gamers. Allen + Roth Salem Oil Rubbed Bronze Wall Mount Single Post Toilet Paper Holder, $20; lowes.com

KEEP WITHIN REACH Make

cleanup a snap when you stow wipes, napkins, and alcohol swabs in an office-supply wall pocket where the kids hang out, left. Wipe off sticky game controllers, clean cheese puff dust off fingers, and polish touch screens with ease when everything is in reach.

POWER UP Use hook-and-loop tape

to affix a USB charging block, left, (or regular power strip) to the back of furniture to banish cord clutter forever—and charge tablets, phones, and gaming devices when not in use.

FOR RESOURCES SEE PAGE 102.


TRY IT

FALL ON DISPLAY Harvest materials from your backyard to craft organic artwork that celebrates the richness of the season.

PROJECTS KATIE LEPORTE PHOTOGRAPHS BRIE PASSANO WORDS SAMANTHA S. THORPE

WOVEN BEAUTIES

Capture autumn’s essence with simple weaving projects, this photo, that turn grasses, stalks, blooms, and more into unexpected decor that shows off nature’s textures and forms. See how-to tips, page 35.


WARM RAYS Welcome good spirits with a

dream catcher-inspired piece made from feather reed grass and a 20-inch metal hoop sold at crafts stores, this photo. Set 25–30 feather reed grass stems on a flat work surface. Thread one stem under and over another at a perpendicular angle to create an organic, crosslike shape. (See “Daylily Weaving,” page 35, for tips.) Tuck in an unexpected element, like a single stem of Chinese silver grass, for interest. Use thin twine to tie corners of the grass latticework in place and to attach the grasses to the hoop where they overlap. Trim grass stems to desired lengths. To hang the dream catcher, fold a 4-inch length of twine in half around the top of the hoop. Make a knot on the underside of the hoop with the twine, leaving two equal lengths. Hold the twine’s loose ends together and thread a wooden bead down to where the twine meets the hoop. Knot the bead in place. Make a knot where the twine’s ends meet and hang from a nail.

DO IT BETTER TAKE LONG CUTTINGS

GOLDEN ACCENTS LIKE THIS CRAFT HOOP PAIR WELL WITH NATURALS. THEY ADD A METALLIC SHIMMER THAT COMPLEMENTS THE SEASONAL VIBE WITHOUT STEALING THE SHOW.

BHG.COM/DIYM A G A Z I N E

WHEN HARVESTING PLANT MATERIAL TO GIVE YOURSELF MORE DESIGN OPTIONS. COMPLETE THE PROJECTS SOON AFTER GATHERING THE NATURAL MATERIALS WHILE THEY ARE STILL PLIABLE.

DO IT YOURSELF Fall 2021 33


DO IT BETTER NATURAL MATERIALS WILL

AIR-DRY OVER TIME TO FADED, RUSTIC HUES. TO EXTEND JUST-HARVESTED COLOR, APPLY A CLEAR, SPRAY-ON FLORAL OR FOLIAGE SEALANT SOLD AT CRAFTS STORES.


MAKE IT

A

B

C

D

E

F

DAYLILY WEAVING MATERIALS • Four long daylily flower stalks, dried • Twine • Hot-glue gun and glue sticks • Daylily leaves (We used 20 leaves.) • Hand pruner or sharp scissors • Floral/foliage spray preservative (if desired) • Heavy book • Cut flowers (We used allium, yarrow, and lavender.); ornamental grass cuttings or plumes (We used Amur silver grass.) Step 1 Create a frame shape using four dry daylily stalks. Cut the stalks to desired length (our frame is roughly 10×16 inches). Step 2 Overlap the corners and secure with twine (A), wrapping in an X pattern and knotting on the back (B). (TIP: Apply a dot of hot glue to hold the corners before you add the twine.) Set the frame aside until after you’ve created the weave. Step 3 Lay two long daylily leaves parallel to each other, about an inch or so apart (C). Thread another leaf under and over at a perpendicular angle to the two that are parallel (D). Thread a fourth leaf (E) in an alternating over-and-under pattern, creating an interlocking square from which you will work outward. Alternate under and over with the leaves, snugging them together to avoid gaps (F). Step 4 Weave the daylily leaves until you have enough to almost fill the frame. Position the weaving atop the frame with about an inch of space between the weave and the frame. The ends of the leaves should extend past the frame. Step 5 Tie the leaves together with twine around the frame (G). Use a hand pruner to clip excess leaves and twine. To preserve the color, spray on a clear floral protectant or foliage sealer. Step 6 Place a book on top of the woven portion for a couple of days to help it dry flat. Let dry. Step 7 Hang on the wall, and tuck small flowers, ornamental grass plumes, or seedpods into the pockets created by the weave, opposite.

BHG.COM/DIYM A G A Z I N E

G

TIE DAYLILY ENDS WITH TWINE AND CLIP OFF THE EXCESS ONCE YOU POSITION THE WEAVE IN THE CENTER OF THE FRAME.

DO IT YOURSELF Fall 2021 35


AUTUMN ARRANGEMENT String together a fall medley of purple baptisia, golden yarrow, rosy allium,

Chinese silver grass, and feather reed grass along a piece of driftwood, below. Arrange plant cuttings for textural and color interest along the branch. Once a pleasing mix is reached, secure with dots of hot glue then use short lengths of twine to tie each cutting to the branch. Trim twine ends and the top of the stems for a clean border. Knot chunky yarn around each end of driftwood and hang.

DO IT BETTER TIE TWO OR THREE

ORNAMENTAL GRASS STEMS TOGETHER TO CREATE SMALL BUNDLES. THIS WILL GIVE THE GRASSES MORE VISUAL WEIGHT AS THEY DANGLE FROM THE DRIFTWOOD.

CUT FEATHER REED GRASSES AND BAPTISIA STEMS LONG SO THEIR NATURAL CURVES CAN LEND A SENSE OF MOVEMENT. FOR RESOURCES SEE PAGE 102.

36 DO IT YOURSELF Fall 2021


TIERED GOODNESS Play up the

vertical with a wall hanging made of cascading Amur silver grasses, allium blossoms, bundles of pine needles, and a daylily-leaf braid anchor, this photo. Cut a piece of chunky cream yarn (ours is about 20 inches) and tie the ends to a piece of driftwood (ours is 16 inches). Hang the driftwood from a nail to simplify construction. Knot five 20-inch yarn lengths around the driftwood, spacing them about 3 inches apart. Tie thin twine around the end of allium stems, leaving tails to tie in place later. Assemble small bundles of pine needles and some of Amur silver grasses tied together with thin twine. Tie allium flowers, pine needles, and ornamental grass to the yarn, adjusting until pleased with the look. Craft the daylily braid anchor by tying interlocking knots from the leaves (see how-to, left). Trim interlocking leaves into a feather shape. Flatten braid by wrapping in a protective piece of paper, placing inside a heavy book, and pressing flat. Tie the braid to the yarn and trim off excess yarn and twine.

Create the braid by folding a long daylily leaf in half for the stalk. Make a 2-inch loop from another leaf, slide under the stalk, and pull leaf ends through loop, knotting around stalk. Repeat with other leaves, alternating direction.


SEW EASY

LUNCH BAG Go back to school and work in style with custom lunch and snack bags crafted by you from your favorite foodie fabrics. PROJECTS LACEY HOWARD & SONJA CARMON PHOTOGRAPHS MARTY BALDWIN & JACOB FOX WORDS LACEY HOWARD

WE USED DIRECTIONAL FABRICS—ONES THAT HAVE A DEFINITE TOP TO THEIR DESIGN. MAKE SURE YOUR FABRIC IS “UP” WHEN YOU STITCH IN STEP 2.


A

B

C

D

MAKE IT

LUNCH BAG MATERIALS • 2 pieces exterior fabric, 13 inches wide by 17½ tall for lunch-size bag (9 inches wide by 12½ tall for snack-size bag) • Food-safe PUL 13×34 inches for lunch-size bag (9×24 inches for snack-size bag) • Cardboard corner rectangle template 3×2½ inches for lunch-size bag (1½×1 inch for snack-size bag) • Iron • Pins • Sewing gauge or ruler • Sewing machine • Thread • Hook-and-loop tape for closure Step 1 Cut fabric, PUL (A), and cardboard corner template for size of desired bag.

E

Step 2 Stitch 1/2-inch seam allowance on one short end of fabric pieces, right sides together (B, this will be bottom of bag); open and press (C). Step 3 Fold stitched fabric at seam with wrong sides together and mark lower corners using the cardboard corner template, placing long side of rectangle against seam (D). Cut out rectangles at bottom corners of fabrics. Fold PUL in half, wrong sides together, to match fabric, with open short end at top. Repeat marking and cutting of lower corners (E). Note: Do not pin PUL! Simply fold in half, mark, and cut.

DO NOT PIN THE LINING. YOU WANT TO PUT AS FEW HOLES AS POSSIBLE IN THIS WATERPROOF FABRIC, SO USE CLIPS INSTEAD.

F

G

H

I

Step 4 Center each side of hook-and-loop tape (about 6 inches long) perpendicular to the top edge of right sides of fabric and stitch in place (F). Stitch as close to the outer edges of the tape as possible (G) so thread doesn’t catch in hooks of tape. Step 5 Fold fabric right sides together (the hook-andloop tape pieces will attach), pin, and stitch long sides of fabric together (H). Step 6 Fold each bottom corner of the lunch bag so that the bottom and side seams line up. Pin and stitch both corners (I) to create a square bottom. Step 7 Repeat stitching of long sides and corners for

Another version!

Check out a tie-closure bag with a fabric lining: BHG.com/LunchBag.

DO IT YOURSELF Fall 2021 39


the PUL liner. Instead of pins, use clips to hold fabric in place for stitching (J). Step 8 Insert cotton fabric inside PUL, aligning tops and side seams, with right sides together. Use pins to secure, carefully aligning pins with seams to avoid extra holes in the PUL (K). Step 9 Stitch around top edge of bag, leaving opening to turn bag right side out. Turn to place PUL inside cotton. Topstitch close to edge all the way around the top of the bag (L). Step 10 Create sides to the bag by measuring equidistant from the side seams at top and bottom of the bag. Clip in place and press (M). If desired, topstitch ¼-inch (N) on the pressed sides and bottom in squared-off U shape. Pivot at corners and repeat on other side.

DO IT BETTER OUR ROLL-TOP LUNCH AND

SNACK BAGS ARE LINED WITH FOOD-SAFE PUL (POLYURETHANE LAMINATE), WHICH IS A PLASTIC/ RUBBER FILM LAMINATED TO FABRIC IN A CHEMICAL HEAT PROCESS TO MAKE IT WATERPROOF.

J

M

FOR RESOURCES SEE PAGE 102.

40 DO IT YOURSELF Fall 2021

K

L

Be careful with the iron! The PUL will melt under direct heat. Always press with the cotton fabric against the iron’s surface.

N


NATURAL CHOICE SW 7011 SHERWIN-WILLIAMS.COM

PLAN YOUR SHELF PLACEMENT SO YOU CAN SCREW INTO WALL STUDS. IF THAT’S NOT POSSIBLE, USE HEAVY-DUTY DRYWALL ANCHORS RATED FOR THE PROPER WEIGHT.


TOP Step up your shelving game with these freestanding and hanging solutions that are creative, customizable, and anything but cookie-cutter. PROJECTS JENI WRIGHT PHOTOGRAPHS CARSON DOWNING WORDS MARIA V. CHARBONNEAUX

ON THE CURVE Create sky-high architectural

interest with floating shelves, left, and an ombré arch paint treatment, opposite. To make the arch, determine the placement for your top shelf; mark with a horizontal line that’s an inch wider than your shelf on either side. From the line’s ends, draw plumb lines to the baseboard. Insert a pushpin into the wall at the center of the horizontal line. Tie opposite ends of a string to the pushpin and a pencil—the distance between the two should be exactly half the distance of your horizontal line. Draw an arch that connects the vertical lines; mask off the outside edge with small bits of painters tape to match the curve. To create the gradient effect, paint four sections in coordinating hues. Once dry, apply a second coat to the bottom section: Add glaze to thin the paint, and then brush and blend the top half of the bottom section into the bottom half of the adjacent section where the color transitions. Repeat this process for each of the remaining colors and sections, gradually increasing the ratio of glaze to paint each time. Hang the floating shelves as directed using the provided brackets (A).

A

BHG.COM/DIYM A G A Z I N E

DO IT YOURSELF Fall 2021 43


ATTACH SHELF BRACKETS TO THE STUDS. CAMOUFLAGE BY PAINTING THEM THE SAME COLOR AS THE WALL OR PLACING A PIECE OF ART IN FRONT OF THEM.

RAINBOW BRIGHT No need to hunt for a pot of gold with this

affordable shelf, above. Inexpensive window wells ($15 each) are the magical ingredient for this rainbow-inspired project. Start by spraying two corrugated steel window wells (ours measure 37 inches wide and 12 inches deep) with bonding primer. Once dry, spray-paint stripes in four pastel hues on both sides, allowing colors to fade into one another. Seal with acrylic clear spray. Using a circular saw, cut a 1×16 pine board so it’s 13 inches wide and 67¾ inches long. Then cut a 1×10 into two 30-inch shelves. Sand and seal the shelves. Arrange one window well on the top of the long shelf and the other on the underside, making sure they’re evenly spaced. Secure them to the board using #10 ¾-inch wood screws and washers.

44 DO IT YOURSELF Fall 2021


TOUCH DOWN Hanging shelves attached

INNOCENCE SW 6302 SHERWIN-WILLIAMS.COM

TIE OVERHAND KNOTS AT THE ROPE ENDS AND BENEATH THE BOARDS, MAKING SURE THEY’RE LEVEL. TRIM AND FRAY ROPE ENDS TO CREATE TASSELS.

to a longer shelf add a gravitational pull and more display space, this photo. Prep your short boards by drilling 1-inch-diameter holes inset about 1½ inches from each corner. Determine the exact placement of the short shelves beneath the long one, and then mark and drill 1-inch holes into the larger board so they line up. Hang the shelves from 1-inch cotton rope.


TEAM UP Pair acrylic display boxes with 1-inch Baltic birch plywood to score big style

points, below. Stack a combo of 9¾×9¾-inch, 12×16-inch, and 4×4-inch display cubes on plywood shelves (ours are 12×60 inches) to create a customizable unit with varying shelf heights. Note: Because components aren’t secured to one another, this project is for homes without young children—or pets that may climb.

THESE DISPLAY CASES ARE LIDDED, SO PLACE YOUR DECORATIVE OBJECTS INSIDE AS YOU BUILD. BONUS– THEY’LL KEEP EVERYTHING DUST-FREE!

46 DO IT YOURSELF Fall 2021


IN YOUR CORNER This space-saving

floating corner shelf, left, tucks away easily. Cut an 8-foot Douglas fir 4×4 into the following: one 17-inch block, three 13¾-inch blocks, five 10¼-inch blocks, and six 7¼-inch blocks. Sand all surfaces; wipe away dust. Stand the longest block on end, and apply wood glue on two adjacent sides. Attach two of the 13¾-inch blocks, and then glue the third one in between them at the corner. Using a similar method, add the remaining blocks (A). Making sure all blocks are aligned, clamp in place as glue dries. Once dry, sand the sharp corners. Seal with varnish or acrylic sealer, if desired. Hang using metal French cleats secured to two adjacent sides of the shelf (B) and the wall, making sure they’re level. Use wall anchors if you can’t find a stud.

A

B


RICE GRAIN SW 6155 SHERWIN-WILLIAMS.COM


FOUND AT HOME IMPROVEMENT STORES, SOLID WOOD ROOF PANEL CLOSURE STRIPS FIT TOGETHER FOR STACKABLE BOXES.

BOX BUILDING 101 This playful shelving unit, left, starts

with simple wood box shelves in two sizes—ours measure 18×12×12 inches and 18×9×12, above. Purchase them or construct your own from ¾-inch medium-density fiberboard (MDF) like we did. Using a table saw, cut 18×12-inch panels for the tops and bottoms of all the boxes, 10½×12-inch side panels for the large boxes, and 7½×12-inch side panels for the small boxes. Assemble the boxes using butt joints—glue first, secure with brad nails, and clamp while glue dries. For added strength, add back panels, if desired. Pin-nail roof panel strips in place before filling all nail holes, sanding, and painting. Find detailed how-to for similar boxes: BHG.com/ModularBoxes

DO IT YOURSELF Fall 2021 49


BRING THE OUTDOORS IN

Grow the vertical storage space above a desk or a console table—no green thumb necessary, right. Here’s the trick: When turned upside down, a half-round window box planter becomes a divided filing shelf. To give it a more indoor-ready look, apply a coat of pretty paint. Lightly sand the planter to rough up the finish, and spray with a bonding primer. Once dry, spray two light, even coats of paint in your desired color. Screw it into the wall using wall anchors for stability. We like metal E-Z Ancor Drywall and Stud Anchors because they don’t require predrilling and can hold up to 50 pounds.

USE A REPURPOSED HALF-ROUND HANGING PLANTER FOR NOTEBOOKS, FILE FOLDERS, AND OTHER LIGHTWEIGHT ITEMS THAT CAN SUPPORT THEMSELVES AGAINST THE WALL AND THE PLANTER’S FRAME.

FOR RESOURCES SEE PAGE 102.


PLATFORM STYLE Give your room vintage vibes by turning a collection of reclaimed drawers, below,

into a groovy wall shelf. Curate drawers in various sizes, shapes, and colors. Flip the drawers upside down and align the bottoms to create a flat surface for the base row. (You may need to alter drawer depths.) Screw the drawers together. Outfit with heavy-duty D-rings to hang from the wall in studs.

IF YOUR DRAWERS ARE TOO DEEP, CUT THEM TO THE RIGHT SIZE AND FIT NEW BACKS FROM 1-INCH-THICK PLYWOOD.

SOFT APRICOT

SW 6352 SHERWIN-WILLIAMS.COM

BHG.COM/DIYM A G A Z I N E

DO IT YOURSELF Fall 2021 51


RESCUE REDUX Kate Keesee never passes a dumpster or curbside pile without taking a peek. Her thrifty transformations have turned her ’50s ranch into the epitome of California dreaming. WORDS SARAH EGGE PHOTOGRAPHS EDMUND BARR STYLIST KAREN REINECKE


THESE REVIVED PANELS HIDE AN AC UNIT.

THERE’S NOTHING LIKE DUMPSTER-DIVING IN THE RAIN. BUT FOR KATE KEESEE, A SOPPING-WET SCORE IS ALL PART OF THE FUN— AND A GREAT WAY TO FIND PROJECTS FOR HER CONSTANTLY evolving Orange County, California, home. This time, the loot was a vintage equipale chair—a hallmark of Southwest style—in sad shape. “It was like treasure!” Kate says with the gushing enthusiasm that has earned her more than 150K followers @katekeeseeoc on Instagram. They watch and learn as she spiffs up the chair, using oil to restore its wood base and then painting the stained leather. Yep, she painted the leather. “Paint is a miracle worker,” she says. “It’s the one thing I’m fearless about. I’ll paint any surface.” And she means it. Kate used paint to update a ceramic tile backsplash and a vinyl floor. She’s just as big a fan of wood stain, and often will mix the two to make over the pieces she scrounges, such as the curbside-rescue panel doors that hide an AC unit in her living room.

BHG.COM/DIYM A G A Z I N E

Thanks to this determination to recycle and reuse, her 1950s tract home has layers of personality. Everywhere you look, there’s a story: Boards from a neighbor’s old fence form a bedroom sliding door (“the handle is a piece of an old leather belt I had”), and a garden stake is now a slender sconce in the living room. “I’m happiest when I can take someone’s unwanted trash and turn it into something special,” she says. “I’d always rather use rescued materials than buy anything new.” PERFECT FINDS Kate calls her style

“California rustic” because she plays up regional motifs on bright neutral backdrops that highlight a mix of woods, textures, and patterns, opposite and above.

DO IT YOURSELF Fall 2021 53


MIXING OLD & NEW

Sometimes Kate has a vision for a project but not enough salvaged material to make it happen. For the accent wall in her kitchen, she worked with new weathered boards from Weaber Lumber, this photo. She and a carpenter friend laid out the pattern, then he did the cuts and nailed the boards in place. Kate painted it using a 3-inch angle brush to get into all the cracks. Air plants hang out on rusty wire garden fencing supported on finishing nails.

OCTAVIUS 0522 VISTAPAINT.COM

54 DO IT YOURSELF Fall 2021


KATE LOVES TO FIND NAME-BRAND IRONWARE AND POTTERY AT A FRACTION OF THE PRICE AT THE ORANGE COUNTY GOODWILL STORE.

MADE TO SIZE A friend called Kate about free salvaged

wood from an old bed truck. Her husband, Robert, pared one salvaged piece down with a circular saw to form a kitchen shelf, above. The shelf sits on L brackets hidden behind the new Weaber Lumber wall boards, which are attached to ½-inch-thick mounting strips.

DO IT BETTER TO UPDATE THEIR 1950S TILE

BACKSPLASH, KATE AND ROBERT APPLIED HOMAX TOUGH AS TILE FINISH, WHICH IS SELF-LEVELING AND HAS A 48-HOUR CURE TIME. “BE SURE YOU UP THE VENTILATION WHEN YOU’RE WORKING WITH TILE PAINT,” KATE SAYS. THEY WORE RESPIRATOR MASKS AND OPENED THE DOORS AND WINDOWS.

BHG.COM/DIYM A G A Z I N E

BARGAIN BEAUTY The redo of their 10×11-foot kitchen, above,

cost just $300. They painted the original pine cabinets and tile backsplash, found light fixtures at Goodwill, and chose stock laminate flooring from a home center. The “luxe” part of her luxe-rustic look comes from the rich tones in the paint colors, the patterned accent rug, the brass-and-glass pendants, and the copper mugs and cookware. All of these lend sophisticated textural elements and bits of sparkle and shine.


BEDROOM SYMMETRY

Inspired by the wall treatments of an Instagram friend, @liz_kamarul, Kate created a geometric focal point for the guest bedroom, this photo, out of two sample-size cans of paint. She used painters tape to get the straight edges crisp, but Robert has the steady hand needed to paint the curves. Kate hunts for linens, pillow covers, and towels at her favorite thrift stores, then launders them and hangs them outside in the sunshine for UV disinfectant.

56 DO IT YOURSELF Fall 2021

KATE AND ROBERT MADE A COMPASS OUT OF A NAIL, PIECE OF STRING, AND PENCIL TO DRAW THE SEMICIRCLE SHAPE.


FRESH TAKE Updating their only bath’s

1950s-era style, left, required Robert to use Homax Tough as Tile coating in white to refresh the ceramic tile tub surround and in black for the vinyl flooring. Kate designed the peg rail as a way to save her grandfather’s former rake.

FOR A QUICK CHANGE, KATE SPRAY-PAINTED A THRIFT STORE MIRROR FRAME BLACK.

DO IT BETTER

A SINGLE BRIGHT PAINT— COTTAGE WHITE BY BEHR— MAKES THE SMALL HOUSE FEEL LARGER BY AMPLIFYING THE SUNLIGHT. KATE CHOSE THE STOCK HUE BECAUSE SHE COULD GET A 5-GALLON CONTAINER IN AN EGGSHELL FINISH FOR $95, WHICH WAS ENOUGH TO COVER EVERY WALL IN THE HOUSE.

HOME WORK Kate borrowed a

corner of the living room in their 1,375-square-foot ranch for an office, right. She built the desk out of boards from a fence a neighbor was tearing down. The chair was a castoff Kate spiffed up with white paint. She tucked a small bucket into a rattan tote to create a textural vase and made the wall hanging from scrap wood and macramé cord.


FOR RESOURCES SEE PAGE 102.

“WHETHER IT’S A CURBSIDE RESCUE OR UNWANTED PIECE FROM SOMEONE ELSE, I FEEL LIKE THE PIECE SPEAKS TO ME, LIKE I HAVE A CONNECTION TO IT.” KATE KEESEE, HOMEOWNER

58 DO IT YOURSELF Fall 2021


DO IT BETTER STRING LIGHTS STRETCH

FROM EYEBOLTS ANCHORED IN THE HOUSE’S EAVE TO A UTILITY POLE IN THE FAR CORNER OF THE YARD. TO KEEP THEM FROM SAGGING, KATE TAUTLY TIED A 50-POUND NYLON ROPE TO EACH ANCHOR POINT, THEN ZIP-TIED EVERY BULB SOCKET TO THE ROPE.

ALFRESCO LIVING The outdoor sectional, above, was

framed out of new lumber, clad in salvaged wood, waxed with Briwax for a weathered look, and finished with a waterproof marine sealer. The patio screen, above right, is made of vintage fruit-drying racks. Kate, right, grew up in the house she constantly remodels and styles for her Instagram page. She started rehabbing neighbors’ curbside finds as a child.

Follow along on Instagram!

@katekeeseeoc


Take advantage of supplies you have on hand—or can pick up at the grocery store for about $10—to host a paper-marbling party. It’s a perfect project to do indoors or out, plus it’s kid-friendly. PRODUCER LAUREN RAMIREZ PHOTOGRAPHS BUFF STRICKLAND WORDS BETH ESLINGER


DO IT BETTER MAKE PICKING PAINT COLORS A

BREEZE BY BRUSHING SWATCHES ONTO CARDSTOCK OR BLANK RECIPE CARDS. LABEL THE BACK OF EACH CARD WITH THE PAINT NAME. HANG ROWS OF TWINE AND SUSPEND THE CARDS FROM SMALL CRAFTING CLOTHESPINS. BONUS, THE SWATCHES BECOME INSTANT DECOR FOR YOUR PARTY.

FUN BITES Pull out your favorite pedestal and other

pretty serving ware to put tiny appetizers on display, this photo. Toothpicks make small snacks easy to grab during a crafting break. For drink labels, use washi tape and mark names with a permanent pen.

BHG.COM/DIYM A G A Z I N E

DO IT YOURSELF Fall 2021 61


A CRAFTY BUSINESS

Based in Austin, Craft is an open studio for makers (madeatcraft.com). The Creative Ladies Night Troop, this photo, gathers monthly to make something new, including these marbling projects. The studio is a space for baby showers, sewing, and other girlfriend retreats. “We also collaborate with local artists to host workshops so they bring in new art forms,” says Eli Winkelman, Craft founder.


KEEP IT SIMPLE BY PICKING UP TREATS, SUCH AS MERINGUES, AT A BAKERY. ASSEMBLE MOZZARELLA BALLS TOPPED WITH TOMATO JAM AND BASIL, PEACHES TEAMED WITH PROSCIUTTO AND MINT, AND CAMEMBERT DOTTED WITH STRAWBERRY JAM.

WORK IT Founded by Eli Winkelman, above, Craft houses all

the supplies for party projects. “I remember walking through crafts stores thinking that I wanted to use everything without the burden of owning it all,” she says. The benefit of this party, however, is you can use up supplies you already own. EVERYDAY PAINTS Basic crafts paints, above, can

be used in this marbling technique. We recommend having six to eight colors in a mix of cool and warm hues. The paints are diluted with water, so they’re easy to mix and apply. Marbling inks are also available at crafts and art stores if you want to dig deeper into the technique.

BHG.COM/DIYM A G A Z I N E

DO IT YOURSELF Fall 2021 63


KITCHEN HELPERS

This affordable marbling technique uses crafts paints diluted with water— 2 tablespoons paint to 3 tablespoons water. Plastic party glasses, left, are the ideal size to prepare your colors.

USE ITEMS YOU HAVE ON HAND IN YOUR KITCHEN TO SPREAD THE DILUTED PAINT. SMALL SPOONS, DRINKING STRAWS, AND TOOTHPICKS ARE ALL PERFECT OPTIONS.

MAKE IT

MARBLED PAPER MATERIALS • Crafts paint • Disposable cups or glass jars • Two trays (we purchased a two-pack of disposable cake pans for $1) • Liquid starch (about $4 for 64 ounces in the laundry aisle) • Alum (about $1 in the spice aisle) • Tools for swirling paint • Cardstock, construction, or printer paper • Paper towels Step 1 Protect the work surface with newspaper or a drop cloth. Dilute 2 tablespoons of each paint

64 DO IT YOURSELF Fall 2021

color with 3 tablespoons water in cups or jars; stir to combine. Create the starch bath by mixing 4 cups liquid starch with 1 teaspoon alum in a tray larger than your paper. Fill second tray with water. Step 2 Apply diluted paint to the starch mixture, limiting the palette to two or three colors. Play with paint drops, combs, and swirls to create patterns. Drag a comb, bamboo skewer, or chopstick through the paint. Try multiple pulls in different directions. Step 3 Once you are pleased with the design, carefully place one

piece of paper on top of the painted starch to evenly coat the surface. Avoid submerging paper in the starch mixture so it doesn’t get waterlogged. Peel paper slowly off the surface and rinse in the tray of water. Lay flat to dry. Use a paper towel to mop up pooling water on the paper. Repeat with additional pieces of paper, creating patterns in the paint between applications, until the starch is murky (we could do four pulls). Pour used starch down the drain, running water for a minute after to avoid clogs.


PATTERN PLAY Lay paint over the

solution of liquid starch and alum one color at a time, this photo. Start with small drops and random patterns. Layer additional colors. You don’t need to cover the entire surface with paint. Manipulate the colors by swirling a straw or chopstick through the painted surface. Drip new paint inside other colors to form concentric circles. Tip: Go slowly to let the paint spread organically for the best effects.

STRAWS ARE A GREAT TOOL TO SLOWLY— AND RANDOMLY—DRIP PAINT ONTO THE STARCH SOLUTION.


DO IT BETTER ONCE THE PAPER IS DRY, IRON IT ON THE UNPAINTED SIDE TO GET A SMOOTH SURFACE. HANG THE FINISHED WORKS ON CLOTHESLINE TO CREATE A GALLERY OF YOUR GROUP’S WORK. USE THE FINISHED PROJECTS AS FRAMED ART, ORIGAMI, GIFT WRAP, OR GIFT TAGS.

AN IMPROVISED RAKE IS A GREAT WAY TO CREATE A FEATHERED EFFECT. MAKE ONE BY TAPING TOOTHPICKS ½ INCH APART ON A PIECE OF CARDBOARD.

66 DO IT YOURSELF Fall 2021

FREE TIME This technique is all about experimentation, so have

fun! “With marbling, the process is so fluid and unpredictable that no matter the experience level, the end result is beautifully unique,” says Heather Hale, teacher and Craft creative director. Her secret to success: confidence—jump in and try different techniques. “During a trial run, I had an ingredient off by 1 teaspoon and got a completely different result,” she says.


FOR RESOURCES SEE PAGE 102.


PURE JOY The two elder girls, Madison, 17, and Lilly, 16, share this frothy, fun room. 1 A new wall was key to fitting in bunk beds and trundle. 2. Parents Ginger and Eric Curtis

built the ladder to the top bunk right into it. “It was a small thing to do to get big gains,” Ginger says. 3 Painting the bottom portion of the walls dusty pink, and the ceiling and rest of the walls white created a crisp feel.

s ’ y l l i L + n Madiso Room

1 3 2


t l i u BLISS b IN

Three small bedrooms that needed to sleep five kids pushed their mom—and designer—to come up with 23+ ideas to pack wonder and function into itty-bitty spaces. WORDS SARAH HALVERSON PHOTOGRAPHS CONVEY STUDIOS AND NORMAN & YOUNG PHOTOGRAPHY

s i rt u C r e g n i meet G + her family

Follow along on Instagram!

BHG.COM/DIYM A G A Z I N E

@urbanologydesigns

GINGER CURTIS DIDN’T HAVE MUCH TO WORK WITH WHEN PUTTING TOGETHER BEDROOMS FOR HER FOUR CHILDREN STILL AT HOME. OH, THE DALLAS INTERIOR DESIGNER HAD CREATIVITY AND KNOW-HOW TO SPARE, BUT THE bedrooms presented plenty of challenges. They were small (less than 115 square feet apiece), they each had to include two beds, and the decor couldn’t veer too childish or trendy. And the most important must-do? Pleasing kids ranging in age from 7 to 17. “I started with the biggest challenges and looked for opportunities,” Ginger says. “There were hidden opportunities everywhere! I had to look at each room with a fresh set of eyes, and functionality had to drive a lot of the decisions.” She also needed to please Madison, 17; Lilly, 16; Avery, 10; and Asher, 7. She and her husband, Eric, carefully planned each room, sketching out where to put bunk beds, reading nooks, desks, and seating areas. Then they got to work. They custom-cut maple panels into wide-plank flooring, repainted doors, secured bed platforms to the wall, and crafted a giant chalkboard. “My husband and I are so busy, and doing projects gives us quality time together,” says Ginger, who owns the Dallas-area firm Urbanology Designs. “We call it ‘shoulder-to-shoulder time,’ and we have found that we work really well together.” Even the Curtis kiddos, got in on the fun. “It has presented amazing opportunities to pull our kids into projects and get one-on-one time with them. At the youngest of ages they were holding paintbrushes and electric sanders,” she says. The result is three rooms with dazzling details, efficient layouts, and familial pride. “Each one of the kids came to me at some point and said, ‘Mom, I love my room so much. Thank you!’” Ginger says. “That was such a treasure and a bonus on every level.”

DO IT YOURSELF Fall 2021 69


A LIGHT-AS-AIR CANOPY HANGS FROM THE CEILING TO ENVELOP THE READING NOOK. STRINGS OF HANDMADE PAPER CONES MAKE FOR A SHIMMERING BACKDROP

7

DO IT BETTER LILLY HAD ONE DESIGN

REQUEST: “I WANT PINK IN OUR BEDROOM.” GINGER TOOK THE REQUEST TO HEART BUT CHOSE A MUTED, DUSTY PINK FOR WALLS AND ACCENTS FOR A MORE SOPHISTICATED, LIVABLE SHADE.

8

70 DO IT YOURSELF Fall 2021


4

5

4 Tassels, pom-poms, and feather accents lend joyful touches. 5 The

6

slightest sliver of a desk—a wallmounted shelf backed by pegboard— snugs against the wall. 6 Squeezing in storage was a must to fit twice the amount of clothes, shoes, books, and gear in a shared bedroom. Deep drawers hold clothes, and baskets in built-in cubbies corral extra sheets, headphones, and more. 7 Madison’s major request was a lounge for reading. Two rectangular cushions are stacked on the floor and piled with pillows for cushy comfort. “We could sleep five people in that room!” Ginger says 8 Ginger and Eric couldn’t find a color or width of flooring they liked so they bought 4×8-foot sheets of maple plywood, ripped them into 8-inch-wide planks on the table saw, and installed them in all three kids’ rooms. “It’s one of my most favorite things,” Ginger says.


NOSTALGIC MODERN For 7-year-old Asher’s

room, Ginger stuck to a look that would last. 9. Two vintage twin-size beds are dressed with muted pillows, and soft, worn military blankets. 10 Ginger balanced the antiques with modern brass sconces for each bed.

Asher ’s Room

10

9

ROOM TO GROW Ginger Curtis makes it her mission to get longevity out of a room’s design. She shares her go-tos here, as well as in her book, Beauty By Design, available on Amazon.

AVOID WHAT’S NEW RIGHT NOW. Rather

than creating a room around a popularnow princess or character, consider which elements the child likes that could be made more sophisticated. “I’m trying to teach my kids the principles of sustainability and longevity,” Ginger says. DIG DEEPER. Say a kid wants a comic-

hero bedroom or adores dinosaurs, think about how to expand on that passion. For example, if dinosaurs are key, then work them into a science-theme room for a longer-lasting look. Or for that Spider-Man

fan in your fam, frame a vintage SpiderMan poster to make the room special and play shades of deep blue inspired by his famous suit. CONNECT WITH KIDS Ginger listened

to what her children wanted—a reading nook, pink walls—and founds ways to incorporate reasonable requests into the designs. “Rooms need to be personal for the kids, need to inspire them, and need to feel like home.” Ginger says.


GINGER BUILT A MASSIVE 8-FOOT CHALKBOARD WITH A SMART LESSON SCROLLED ACROSS IT TO ANCHOR ASHER’S ROOM.

11

12

11 When 21-year-

DO IT BETTER

LOOK TO MEANINGFUL ARTWORK TO HELP TIE A ROOM’S THEME TOGETHER. HERE THE TIMELESS FEEL WAS ENHANCED BY WATERCOLORS GINGER’S GRANDFATHER MADE. THEY HOLD PLACES OF HONOR THROUGHOUT THE ROOM.

BHG.COM/DIYM A G A Z I N E

old Tyler left for the Navy, Asher inherited his room but was heartbroken by his brother’s absence. To cheer him up, Ginger worked in references to the sea that Asher would love for years to come. 12 An oldfashioned accordion hanger behind the door catches jackets and hats. 13 Vintagestyle pennants with modern messages tie together the room’s motif. 14 Ginger designed this giant clipboard to hold a roll of art paper and encourage doodling.

13

14

DO IT YOURSELF Fall 2021 73


m oo R s ’ Avery 15 16

17

18

NATURAL CUES Designing small-space,

19

74 DO IT YOURSELF Fall 2021

shared rooms is not new to Ginger. When Asher bunked with Avery, Ginger chose a gender-neutral palette. She took cues from the live oak outside the window to make the upper-level bedroom feel like a cozy nest. 15 Filmy white curtains and a “valance” of pompoms frame the view. 16 As in the older girls’ bedroom, bunk beds made this room’s plan come together. Stacked beds free floor space for playing and create a little nook underneath the top bunk. 17 Black triangular decals from Urban Walls (uwdecals.com) make for an easy, playful wall treatment. 18 The bottom bed is a dynamo of versatility. Hoisted on casters, it can scoot anywhere. 19 Ginger snapped up these framed sayings (“love is all you need”) at a garage sale—brand new and never opened!—knowing it was a message she wanted to share with her children.


DO IT BETTER NEED TO MAKE A SPACE

21

WORK FOR A BOY AND GIRL? GO WITH A SOOTHING PALETTE OF WOOD TONES, WHITE, AND BLACK TEEMING WITH TEXTURE. EVEN THE TOYS AND FURNITURE ADHERE TO A SIMPLE COLOR SCHEME FOR A COZY, CALM FEEL.

20

21

22 21

20 A half-wall discreetly hides a sink on the other side.

On the side facing the room, a few oversize wood knobs hold bags and toys. 21 A winking storage bag, a velvety deer head, and a simple rocking horse bring in whimsical touches. 22 Neutral decorative elements, including white-and-blond furnishings, keep the room soothing. 23 This nook under the top bunk features an outline of a house crafted of black washi tape (which won’t peel the paint) and two shallow white ledges for display.

FOR RESOURCES SEE PAGE 102

23


by the

NUMBERS Update your home’s curb appeal with one of these house number projects. Try our ideas for every skill level and architectural style. PROJECTS JENI WRIGHT PHOTOGRAPHS MARTY BALDWIN WORDS BETH ESLINGER


ROUND ABOUT Have an

hour? That’s all it takes to make a stylish circular project, this photo and opposite. Mark the center line of an 18-inch wood round in pencil; apply painters tape along the line to mask the half to remain unpainted. Brush matte medium (found at crafts stores) along the tape’s edge. Prime half the round, then brush with two coats of exterior paint; remove tape. Fill any gaps with a fine paintbrush. When dry, seal the round with clear polyurethane. Attach numbers. Hang from a picture hanger or screw into siding.

DO IT BETTER

ADD DIMENSION AT THE FRONT DOOR BY STACKING YOUR HOUSE-NUMBER PROJECT OVER A NEW OR EXISTING MAILBOX. AIM FOR COLOR CONTRAST WITH YOUR PROJECT—THE BLUE HERE IS A COOL COMPLEMENT TO THE WARM COPPER.

BHG.COM/DIYM A G A Z I N E

DO IT YOURSELF Fall 2021 77


DIMENSIONAL DISPLAY Create a spatial look from cedar 4×4s and 3-D numbers (similar available at tableclothsfactory.com

or amazon.com), below. Cut two lengths of 4×4 to create legs equal to 12 inches plus the depth of your area’s frost line. For the crosspiece, cut a 4×4 to 44 inches. Apply wood glue to each leg and attach the crosspiece using pockethole screws and a jig. Paint desired color. Print your address so letters are 1½ inches tall. Transfer the address to the crosspiece using a pencil or carbon paper. Fill in letters with a black paint pen or permanent marker. Dig holes the depth of the frost line and insert the posts, making sure crosspiece is level. Fill holes and tamp dirt to secure. Paint dimensional house numbers with exterior spray paint in desired color then attach to the top with construction staples.

NO ROOM FOR A FREESTANDING BASE? INSTALL THESE NUMBERS ONTO THE SIDING. SPRAY-PAINT FOR A POP OF COLOR.

78 DO IT YOURSELF Fall 2021


DO IT BETTER TO INSTALL THIS SIGN,

ATTACH REBAR TO THE BACK OF THE STRUCTURE AND SINK INTO THE GROUND. FOR A DRAMATIC NIGHTTIME EFFECT, BACKLIGHT WITH A SPOTLIGHT.


IF YOU’RE NOT A FAN OF PAINTING FREEHAND, MAKE A STENCIL FROM CONTACT PAPER. TRACE NUMBERS ONTO THE PAPER AND CUT OUT WITH A CRAFTS KNIFE. APPLY TO THE DOOR AND PAINT.

DO IT BETTER

FRAME YOUR FRONT DOOR VIEW WITH PLANTERS IN VARYING HEIGHTS AND SIZES TO COMPLEMENT THE ASYMMETRICAL PAINTING. REPEAT PLANTS SUCH AS ORNAMENTAL GRASSES AND VARIEGATED COLEUS.

MAKE A STATEMENT Update the front door with a fresh coat of color and can’t-miss house numbers for

this no-tools project, above. Divide your door height by the number of numerals in your address. Add a few inches to this measurement so the numbers nestle for visual interest. Print out numbers to fill those measurements; you may need to tile and tape together. Cut out numbers, tape to your door, and trace. Paint inside the traced lines using several coats to create distinctive and lasting numbers.

80 DO IT YOURSELF Fall 2021


STREET SMARTS Set a

modern style with a cedar sign that also serves as a planter, this photo. The structure is clad in 1×3 and 1×4 cedar boards, which were stained to complement the home’s exterior (you could also paint the boards or leave them unfinished to weather naturally). Fill the planter with tall plants such as these snake plants, which can come inside during the winter, and trailing plants. For complete instructions, see page 82.


MAKE IT

CEDAR PLANTER WITH HOUSE NUMBER MATERIALS • 8-foot cedar 2×4s (need 9) • 8-foot cedar 1×3s (need 3) • 8-foot cedar 1×4s (need 5) • 8-foot cedar 1×6 • Circular saw • Wood glue • 2½-inch exterior wood screws and driver • Hammer and 1½-inch nails • Plastic planter box to fit in 12×26-inch opening, 12 inches deep • Coated plywood (to build concrete form) • Rigid foam insulation • E6000 adhesive • Quick-dry caulk • Concrete mix • Nonstick cooking spray • Trowel • Rebar • Concrete sealant • Concrete adhesive PLANTER FRAME Step 1 To build the front, butt two 37-inch 2×4s (A) to the top and bottom of two 27-inch 2×4s (B); screw together from the top down. Repeat for the back side. Step 2 To build the sides, butt two 11½-inch 2×4s (C) to two 27-inch 2×4s (B). Glue and screw together from the top down; repeat for second side. Step 3 Attach the four sections, with the front and back on the outside and making the sides flush. Screw together. Step 4 Center a 27-inch 2×4 (B) vertically on the back so narrow edges are flush with top board; glue and screw. Step 5 Center two additional 27-inch 2×4s (B) on either side of the previous board, placing these so long edge is flush against the inside edge of bottom and top boards. Glue and screw. Step 6 Add a 34-inch 2×4 (D) horizontal brace to the front, positioning it 193/4 inches off the ground. Glue and screw. Attach two 213/8-inch 2×4s (E), connecting them to the inside of the frame bottom and the horizontal brace. Space so they line up with the Bs on the back assembly. Step 7 Glue and screw two small pieces of scrap wood to the two (B) center boards that align with the (E) planter vertical supports; the tops should be 213/8 inches off the ground. Step 8 To create a shelf for the plastic planter, position the two 113/4-inch 1×3s (F) horizontally atop the E boards. Glue and screw, then connect to the scrap pieces on the B boards on the back assembly. Make sure the F boards are level. Step 9 Glue and screw two 34-inch 2×4s (D) at the top and bottom of the opening for the concrete number area, making them perpendicular to the bottom and the horizontal brace and flush with the inside edges to create a cavity for the concrete plaque.

82 DO IT YOURSELF Fall 2021

SOLID NUMBERS

Concrete reinforces the modern vibe on the planter, left. This project uses a white countertop mix to form the number plaque; additional colors are available online.

Step 10 Create a cap by gluing and nailing two 38¾-inch 1×4s (G) on either long side of the top—positioning for an overhang of 7/8 inches. Complete the top frame by gluing and nailing two 131/4-inch (H) 1×6s to the sides, with a matching overhang. Step 11 Clad the planter by alternating 1×4s and 1×3s (I, J and K, L), mitering the corners if desired. Use pin-nails and wood glue to secure.

CONCRETE NUMBERS PLAQUE Step 1 Build a shallow box from a material with a smooth surface to create the mold. We used a coated plywood for our box, which measured 181/8×34 inches to fit our planter. Step 2 Choose a font and print out house numbers—these are 10½ inches tall. Trace and cut numbers from 1-inch rigid foam insulation. Step 3 Place numbers backward on the back of the mold; glue with E6000. Step 4 Run a bead of quick-drying caulk around edges of the foam numbers. Smooth with your finger and a wet paper towel; allow to dry. Step 5 Mix concrete, following directions on the packaging. Step 6 Spray the inside of the mold and numbers with nonstick cooking spray. Step 7 Pour concrete into the mold so it’s 2½ inches thick; smooth with a trowel. Set three or four rebar rods into the concrete for strength. Let concrete dry. Step 8 Unscrew mold and flip project over to loosen the project; seal with a concrete sealant. Step 9 Secure plaque to the planter with concrete adhesive.


STURDY BASE The interior

frame features an elevated support for a plastic planter box, left, and also supports for the concrete inset. The project can be made with straight cuts.

H

G G

H

C B B

I

B

A

C

J F F

K B

D

L

D B E

B

B E

D A

CUT LIST KEY ILLUSTRATION CHRISTOPHER MILLS

INTERIOR BOX A B C D E F G H CLADDING I J K L

#

PART

MATERIAL

LENGTH

4 11 4 3 2 2 2 2

LONG SIDES SHORT SIDES, CENTER BOARDS SHORT TOP AND BOTTOM

2×4 CEDAR 2×4 CEDAR 2×4 CEDAR 2×4 CEDAR 2×4 CEDAR 1×3 CEDAR 1×4 CEDAR 1×6 CEDAR

37" 27" 11½" 34" 213/8" 11¾" 38¾" 131/4"

7 5 10

WIDE LONG SIDE SKINNY LONG SIDE WIDE SHORT SIDE SKINNY SHORT SIDE SCRAPS TO FINISH FRONT

1×4 1×3 1×4 1×3

38½" 38½" 18½" 18½"

8

FOR RESOURCES SEE PAGE 102.

HORIZONTAL BRACE PLANTER VERTICAL SUPPORTS PLANTER SHELF SUPPORTS FINISHING CAP LONG SIDES FINISH CAP SHORT SIDES

CEDAR CEDAR CEDAR CEDAR


MAKE A SPLASH

The Yokotas opted for inexpensive changes to give their kitchen big impact until they can do a major redo, this photo. They went with a wallpaper backsplash and refreshed the formerly dark granite countertops with a durable marble-look contact paper that hasn’t scratched or ripped even though it’s not waterproof.


SHARING the PASSION This California family took a team approach to making over their ’90s home. They focused on one project at a time and passed along the lessons they learned. WORDS NATALIE DAYTON PHOTOGRAPHS EDMUND BARR

WHEN IN DOUBT, TRY IT OUT . A   T LEAST THAT’S THE THINKING FOR ANITA AND TRAVIS YOKOTA WHEN IT COMES TO UPDATING THEIR IRVINE, CALIFORNIA, HOME. The Yokotas bought the

Follow along on Instagram!

@anitayokota

IT’S ALL IN THE FAMILY Anita and Travis Yokota, above, have

an all-hands-on-deck mentality when it comes to DIY. They taught their daughters (Rachel, 15; Emily, 12; Natalie, 7) how to use tools and listen to their input on projects.

BHG.COM/DIYM A G A Z I N E

Mediterranean-style home a little over 12 years ago, seeing beyond its builder-home sameness to all the untapped potential in its 2,100 square feet. “The three items on my must-have checklist were there: a kitchen window to look out into the backyard and watch the kids, a big oval tub in the master bath, and a kitchen island,” Anita says. “This home had all three, so even with the dated aesthetics, I knew we could make it our own.” And make it their own they did—despite their lack of DIY experience. “I’ve always been a crafter, and it just kind of grew from scrapbooking to making over small furniture pieces to bigger projects that Travis and I began to tackle,” she says. As the go-to adviser for friends when it came to paint colors and design advice, Anita finally took the leap and made a blog to record her DIY and design advice at anitayokota.com. From there, the home projects ramped up. Their first big undertaking was the accent wall in the backyard. “Our home is a cookie-cutter California home, and I was sick of looking out at the stucco walls, so we designed the zen, desertlike slatted wall for visual interest,” Anita says. “From there, we were hooked on all-things-home DIY.” Moving indoors, team Yokota started slow with paint, furniture, and wall treatments, then began dabbling with more skill-based projects like woodworking and tiling. The biggest project to date has been a Murphy bed. “For us, every project we do has meaning and has a purpose for our family,” Anita says. “It feels great knowing you can teach yourself to do something and then go out and actually do it.”

DO IT YOURSELF Fall 2021 85


DO IT BETTER

LOOK THROUGH A ROOM’S WINDOWS TO FIND COLOR AND TEXTURE CLUES FOR FURNISHINGS AND ACCESSORIES. IF YOU LIKE YOUR VIEW, OPT FOR MINIMAL TREATMENTS AND LET THE OUTDOORS DOUBLE AS ARTWORK.

86 DO IT YOURSELF Fall 2021


TRAVIS BUILT A SIMPLE OAK MANTEL (IT’S A BOX THAT SLIDES OVER A CLEAT ATTACHED TO THE WALL) AND ADDED A WHITEWASH STAIN TO COORDINATE WITH THE LIGHT COLORS IN THE LIVING ROOM.

NEUTRAL LIVING

Originally dark and dated, the living room’s renewal began with paint—and lots of it—to brighten the walls and ceiling, left. Neutral furnishings further open up the space. For the fireplace surround, Anita wanted to add pattern but stay within the room’s neutral palette. This was their first tiling project, and the learning curve included turning to YouTube for measuring and cutting tips. They hired an electrician to wire the sconces. The big mirror propped on the mantel and the glass coffee table reflect light and contribute more brightness.


FOR THE BEGINNER

Becoming a do-it-yourselfer can be overwhelming. Anita Yokota offers tips to help you get started— and stick with it! SET A BUDGET. “For us, a lot

of our DIYs came from not having the budget to purchase or hire out for a similar-looking item or project. We weighed cost against the work it would take us, and in most cases, it was more cost-effective to do it ourselves. Plus, it taught us a new skill and gave us a sense of pride and accomplishment being able to say, ‘I did that.’” DO RESEARCH. “Our main

outlet? YouTube! We had never tiled or done any woodworking before the projects in this house, so when in doubt, we watched tutorials to help teach and educate us on the proper techniques to build and create what we were working on.” DON’T SWEAT THE SMALL STUFF. “DIY is supposed to

be fun—and it is! So don’t get in your head and overthink a project. Do your homework and plan your project, but if something goes wrong, it’s OK! You can always fix it or ask for help. Just don’t let the fear of trying something new keep you from doing it.”

WORK FROM HOME A little reorganization goes a long way—cue the office

space, above, where Anita writes and edits her successful design website and DIY blog, anitayokota.com. “We originally had two IKEA desks, a toddler desk on the blank wall, a printer stand ...  it was so squished!” To outfit the space for the family’s needs, they hired California Closets to put in new cabinets. A gridded bulletin board displays design inspiration for upcoming projects.

88 DO IT YOURSELF Fall 2021


DO IT BETTER WEIGH THE PROS AND

CONS OF DIFFERENT WOOD SPECIES BEFORE DECIDING ON YOUR OUTDOOR ACCENT WALL. THE YOKOTAS CHOSE COST-SAVING PINE. CEDAR, REDWOOD, AND OAK, WHILE MORE EXPENSIVE, ARE MORE DURABLE. CONSIDER SEALING WOOD TO PROTECT IT.

EASY-TO-USE PLANT POCKETS ALLOW FOR DRAINAGE. WALLY PRO POCKETS, $40; WALLYGRO.COM


DO IT BETTER FOR THE LAUNDRY CABINET

DOORS, ANITA CUT SHEETS OF CANING AND PRESSED IT INTO THE RECESSED PANELS THEN USED CONTACT CEMENT TO HOLD THE CANING IN PLACE. PRO TIP: TO MAKE CANING PLIABLE AND EASIER TO WORK WITH, SOAK IN WARM WATER FOR ONE TO TWO HOURS.

CLEAN SPACES In the

bathroom and laundry room, the Yokotas found places to save and places to splurge. For the laundry, left, they went all in on a Delta faucet and sink but saved on handmade shelves and an IKEA cabinet. In the master bath, above, they wanted an oasis where they could relax and take in the Orange County sunshine, so they hired a contractor to create exactly what they envisioned. Black accents throughout offer a modern touch.

90 DO IT YOURSELF Fall 2021


GREEN WITH ENVY While

Anita leans toward neutrals when decorating, she was drawn to blue-green paint for a colorful accent in the master bedroom, this photo. Using it on the board-and-batten treatment (Travis and Anita’s first big interior project) made the bed wall a stunning focal point. “This was our first time cutting wood for a project, so it was a big deal for us! It got us going on our love for DIY projects,” she says.

UNDERSEAS SW 6214 SHERWIN-WILLIAMS.COM


NOW YOU SEE IT, NOW YOU DON’T The Yokotas knew they wanted to install a Murphy bed in their den so the space

could double as a guest room, but most were kind of blah. “We wanted something with architectural interest, not just a box in a room,” Anita says. So after getting the kit from Rockler, Anita drew her Scandi-inspired design and Travis built the box to hold the bed, painted the slats and the box, and let dry before then attaching the wood slats to the box using wood glue and a nail gun, this photo. A paint sprayer helped them create an even finish.

REFRIGERATOR PULLS ARE THE PERFECT SIZE OF HANDLES TO UNFOLD THE MURPHY BED. ANITA FOUND THESE GOLD-TONE BEAUTIES ON AMAZON.

DO IT BETTER WANT TO CREATE YOUR OWN

MURPHY BED LOOK? START WITH A BASIC HARDWARE KIT, THEN LET YOUR CREATIVITY GO! IF YOU’RE LOVING THE YOKOTAS’ STYLE, FIND THE FULL HOW-TO AT ANITAYOKOTA.COM.

FOR RESOURCES SEE PAGE 102. 92 DO IT YOURSELF Fall 2021


SCONCES AND ART SET INSIDE THE MURPHY BED BOX CREATE A WELCOMING EXPERIENCE WHEN GUESTS COME TO STAY.


Woven straps and wood pair up for a winning combination that leads to a breezy swing and matching side table. PROJECTS JENI WRIGHT PHOTOGRAPHS MARTY BALDWIN WORDS MARIA V. CHARBONNEAUX


HANGING AROUND Yes, you can build this swing! Start by constructing a frame from cedar 2×4s, 1×4s, and 1-inch

dowels, then weave polyester webbing to fashion the back and sides. Find tips on the following pages and see the step-by-step instructions on page 100.

Platform know-how! Find tips for building a freestanding deck: BHG.com/FreestandingDeck

BHG.COM/DIYM A G A Z I N E

DO IT YOURSELF Fall 2021 95


HANGING SMARTS

A solid plan for installing a swing is just as important as the build. Follow these tips:

WIRE ROPE CLIPS, ALSO CALLED CABLE CLAMPS, CINCH ROPE LOOPS SO THEY SNUGLY REST IN A HEAVY-DUTY S HOOK.

USE THE RIGHT ROPE Select

a heavy-duty rope that can withstand the elements and hold the weight of the swing plus two adults. PICK SMART HARDWARE

Attach the swing to the rope around the tree branch using wire rope clips and heavyduty S hooks, above right. TIE IT UP WELL Wrap the

rope several times around a sturdy tree branch, opposite, then secure it with a wire clip. Trim off any excess rope. To prevent fraying of synthetic rope, heat-seal the ends with a heat gun or torch. For natural fibers, add a plastic end cap and heat-seal in place. Depending on the height of your branch, you may need an extension ladder. HANG AT THE RIGHT HEIGHT

For the best experience, hang the swing 17 to 19 inches from the ground. To simplify the install, gain an extra pair of “hands” by propping the swing on a box while hanging it. Make sure the swing is level before securing rope ends. NO TREE? NO PROBLEM.

Hang your swing from ceiling joists under a porch roof or covered patio using eyebolts and S hooks with the appropriate weight capacities. Porch swing hanging kits, which include springs for more comfortable swinging, are another hardware option.

COMFORT COUNTS Focus on the seating details for a first-rate lounging

experience with a comfy seat cushion, above. Cut 2-inch-thick mildew-resistant foam, such as Nu-Foam, to desired size, then cut two panels from outdoor fabric that are 1½ inches inch wider and longer than foam (to allow for ½-inch seam allowances and ¼-inch flange). Machine-stitch the panels right sides together leaving a 6-inch opening. Clip corners and turn right side out. Slip foam through opening and stitch closed. Finish by topstitching around the perimeter to create a ¼-inch flange edge.


BHG.COM/DIYM A G A Z I N E

DO IT YOURSELF Fall 2021 97


AVAILABLE IN MANY COLORS AND WIDTHS, HEAVYWEIGHT POLYPROPYLENE WEBBING IS BEST FOR OUTDOOR PROJECTS. OURS IS FROM STRAPWORKS.COM.

STRAP SAVVY Follow these tricks

to ensure your woven swing looks like a pro job, above left and left. For a super taut finish, cut your straps longer than needed so you have plenty of material to hang on to as you firmly stretch and staple it in place, then cut the excess. To cut polypropylene webbing, use a handheld electric stencil cutter, above, which melts as it cuts so the ends don’t fray. If needed, protect your work surface with a metal baking sheet. Line up your staple gun neatly each time as your staples will be visible on the back. For full how-to instructions, see page 100.


DO IT BETTER IF YOU HAVE A POCKET-

HOLE JIG, YOU CAN USE IT TO CONSTRUCT THE FRAME OF THIS TABLETOP BY PLACING POCKET HOLES ON THE INNER FACE SIDES. YOU MIGHT NEED A RIGHT-ANGLE ATTACHMENT FOR YOUR DRILL TO HELP YOU REACH THE TIGHT CORNERS.

PERFECT MATCH Practice some of the skills you’ll use to build the swing by first constructing a matching side table, above.

Cut cedar 2×4s into six 18-inch lengths for the legs and the long sides of the tabletop and two 15-inch lengths for the short sides. Sand the cut ends and any imperfections using 120-grit sandpaper. Arrange the four tabletop sides on edge to make an 18-inch-square tabletop; glue and clamp them in place; secure with 2½-inch exterior screws driven through the long boards. Align the legs at each inside corner so they’re flush with the tabletop; glue, clamp, and secure them using two screws per leg. Fill all screw holes with wood filler; sand and wipe away dust. Prime and paint with exterior-rated products. Cut fourteen 34-inch lengths of webbing. Staple the ends of seven evenly spaced straps to the inside edge of the tabletop’s underside. Pull taut and secure on opposite side; trim excess. Staple remaining seven straps to the adjacent side, and weave them in an alternating pattern. Staple the straps on the opposite side, and trim excess.

BHG.COM/DIYM A G A Z I N E

DO IT YOURSELF Fall 2021 99


MAKE IT

OUTDOOR SWING MATERIALS • 8-foot cedar 2×4s (need 9) • 8-foot cedar 1×4s (need 3) • 36-inch-long 1-inch square dowel (need 4) • Tape measure • Miter saw • Orbital sander • 120-grit sandpaper • Wood glue • Wood clamps • Pocket-hole jig and drill with ¼-inch wood bit (We used Kreg.) • 2½-inch stainless-steel, coarse-thread pocket-hole screws • 11/2-inch exterior-rated wood screws • 2½-inch exterior-rated wood screws • Solid-wood pocket-hole plugs • Wood filler • Paintbrush • Exterior primer • Exterior paint • 2-inch heavy-duty polypropylene webbing (need 1,216 inches + selvage) • Stencil cutting tool • Heavy-duty stapler and staples • 3/8×3-inch lag screws • Hammer • Outdoor rope with load rating of 500 pounds or more • Hacksaw • Spade bit (slightly wider than rope) • Wire rope clips (sized for rope) Step 1 Referring to the Cut List, opposite, cut cedar 2×4s, 1×4s, and 1-inch square dowels using a miter saw. Sand all imperfections and rough edges. Step 2 To make the swing seat, gather two 44-inch seat frame sides (A), two 18-inch seat frame sides (C), two 18-inch seat braces (D), and five 1×4 seat slats (E). Referring to the diagram, opposite, and using the pocket-hole jig, drill two pocket holes on the face side at each end of all 18-inch boards. With pocket holes facing inward and boards on edge, glue, clamp, and screw the two short frame sides to the long ones using the 2½-inch stainless-steel, coarsethread screws to create a 44×21-inch seat frame. Evenly space the seat braces inside the frame; glue and screw them in place. Place the slats rough side down across the top of the seat frame so slats are evenly spaced and ends are flush; glue and screw in place with 1½-inch exterior wood screws.

Step 3 To make the swing back, gather two 19¾-inch back side supports (F), the 51-inch back top support (G), two 44-inch lower back supports (B), and two 113/8-inch back center supports (H). Drill two pocket holes at one end of each side support and at both ends of the lower back supports and center supports. Align the side supports perpendicular to the top support so they’re flush with the ends; glue, clamp, and screw in place. Glue, clamp, and screw one of the lower back supports to the side supports to complete the 51×23¼-inch swing back frame. Place the remaining lower back support 13/8 inches above the bottom one within the frame (see diagram, opposite); glue and screw in place. Measure and mark the center of the top support. Glue and screw the back center supports within the frame at ½ inch on either side of the center mark to complete the swing back frame. Step 4 To make the swing arm frames, gather four 113/8-inch arm frame supports (I) and four 21-inch arm frame supports (J). Arrange two short and two long supports to create a 21×143/8-inch frame; glue and clamp in place. Secure with 2½-inch exterior screws driven through the ends of the long supports into the short supports. Repeat to create a second arm. Step 5 To make the inner arm frames, gather four 177/8-inch inner arm frame supports (L) and four 93/8-inch inner arm frame supports (M). Arrange two short and two long supports to create a 177/8×113/8-inch inner arm frame. Secure with 1½-inch exterior screws driven through the ends of the long supports into the short supports. Repeat to create a second inner arm. Step 6 Now that each component is assembled, use wood glue and wood plugs to fill pocket holes. Fill any other screw holes and imperfections with wood putty. After glue and wood putty have dried, sand all screw holes. Prime and paint all components, including the seat platform supports (K), and let dry. Step 7 For the swing back, cut sixteen 30-inch lengths of webbing for the vertical woven pieces and ten 37-inch lengths for the horizontal woven pieces using a stencil cutter.

Starting with the vertical pieces, position the first strap about ¼ inch from the inside right-hand edge of the frame and staple it to the underside of the back top support. Repeat with seven more straps, each placed ¼ inch apart. Repeat the process for the left-hand side of swing using the remaining eight vertical straps. Once attached across the top, wrap each strap around the upper lower back support, pulling taut and stapling to the inside edge of the back of the board; trim excess. Evenly space five of the horizontal webbing strips on the righthand side, stapling them to the inside edge of the back side support. Weave them through the vertical webbing, and secure the ends by stapling them to the inside edge of the back center support and trimming the excess. Repeat process for the left-hand side of the swing back. Step 8 To assemble the swing, center and clamp the swing seat to the bottom board of the swing back. Drill ¼-inch pilot holes through the back of the seat back into the 18-inch seat braces. Screw 3-inch lag screws into the pilot holes. Align each arm frame with the swing back so they are flush with the edges of the seat; clamp in place. In the same fashion, drill pilot holes through the swing back at the top and bottom of each arm frame and secure with lag screws. Drill pilot holes and screw two lag screws from the inside of the seat into each bottom arm frame support. Step 9 For each arm, cut seven 30-inch lengths of webbing for the vertical woven pieces and four 39-inch lengths for the horizontal. Staple the ends of the vertical pieces to the outside top edge of the inner frame about ¼ inch apart. Wrap each strap all the way around the frame, securing the opposite end to the same edge as the first with staples. Trim the excess. Staple the horizontal straps to the outside right-hand edge of the inner frame, spacing them about ¼ inch apart. Weave them through the vertical webbing on one side, wrapping around the frame to weave them through on the other side also. Staple the ends in the same place where you began, and trim excess. Repeat process for other arm.


Step 10 Inset the woven arm frames within the outside arm frames, tapping lightly with a hammer as needed until centered. It should be a tight fit, making it unnecessary to screw or nail the inside frame in place.

supports to the underside of the swing using 2½-inch exterior screws.

holes of one platform support and tie overhand knots on the underside. Repeat for the other side. Attach wire rope clips at the top loops and hang using S hooks and appropriate hardware for your situation. (See page 96 for more info.)

Step 12 To hang, drill holes centered in each end of the seat platform supports using a spade bit that's slightly wider than the diameter of your heavyduty rope. Determine the rope length necessary for the location you’ve selected, and cut to size. (We used 12-foot lengths.) Working from the top, feed the rope ends through both

Step 11 Turn the swing upside down and position the two seat platform supports (K) centered left to right and inset about 1½ inches from the front and the back of the swing. Attach the platform

G H

H

F

J

F B J

B

I C

A E D

I

L M

A

C

K

I

K

J

ILLUSTRATION CHRISTOPHER MILLS

CUT LIST KEY

#

PART

MATERIAL

A,B C,D E F G H,I J K L M

4 4 5 2 1 6 4 2 4 4

SEAT FRAME SIDES, LOWER BACK SUPPORTS SEAT FRAME SIDES, SEAT BRACES SEAT SLATS BACK SIDE SUPPORTS BACK TOP SUPPORT BACK CENTER SUPPORTS, ARM FRAME SUPPORTS ARM FRAME SUPPORTS SEAT PLATFORM SUPPORTS HORIZONTAL INNER ARM FRAME SUPPORTS VERTICAL INNER ARM FRAME SUPPORTS

CEDAR 2×4 CEDAR 2×4 CEDAR 1×4 CEDAR 2×4 CEDAR 2×4 CEDAR 2×4 CEDAR 2×4 CEDAR 2×4 1-INCH SQUARE DOWEL 1-INCH SQUARE DOWEL

BHG.COM/DIYM A G A Z I N E

LENGTH 44 INCHES 18 INCHES 44 INCHES 193/4 INCHES 51 INCHES 113/8 INCHES 21 INCHES 571/2 INCHES 177/8 INCHES 93/8 INCHES

DO IT YOURSELF Fall 2021 101


RESOURCES

SHOPPING GUIDE

Here’s where to find building materials, furnishings, and accessories shown in Do It Yourself ™ magazine. We cannot guarantee the availability of items or services.

[P] Paint Color Because of the magazine printing process, paint colors depicted on our pages might vary slightly from manufacturers’ colors. Use paint color names or numbers, when provided, as a starting point. To get a color as it appears in the magazine, take the page to a paint retailer for matching.

[V] Product Line Varies Product selection frequently changes on retailer websites. Cannot guarantee availability.

ON THE COVER Wall paint Natural Choice SW 7011—The Sherwin-Williams Co.; 800/474-3794; sherwinwilliams.com [P]. Wood shelves, bird artwork, white side table, planter, wood frame on lower shelf, pillow, basket—Target Stores; 800/800-8800; target .com [V]. White vases—Crate & Barrel; crateandbarrel.com. Cloud artwork—Anthropologie; 800/309-2500; anthropologie .com. Succulent artwork— Tangletown Gardens; tangletowngardens.com. WHAT TO DO WITH: CONCRETE PAGES 6–13 PAGES 6–7 Packaged concrete mix— Quikrete; quikrete.com. Dry powder pigment in black—Earth Pigments; earthpigments.com. PAGES 8–9 Packaged countertop concrete mix for initials—Quikrete; quikrete .com. Packaged concrete mix for cast leaf—Quikrete; quikrete.com. Cardboard letters for forms— Jo-Ann Stores; joann.com. Nightstand, tropical leaf artwork— HomeGoods; 800/888-0776; homegoods.com. Lamp cord Single Socket Black Pendant Light Lamp Cord for Lanterns & Light Bulbs—Paper Lantern Store; paperlanternstore.com. Light

102 DO IT YOURSELF Fall 2021

bulb—Home Depot; homedepot.com. PAGE 10 Packaged concrete mix for planter—Quikrete; quikrete.com. Gel stain for planter—Unicorn Spit; unicornspit.com. Artwork above sofa—HomeGoods; 800/8880776; homegoods.com. Hexagon forms—Jo-Ann Stores; joann.com. PAGE 11 Packaged concrete mix for candle and trivet—Quikrete; quikrete.com. Cloth napkins, gold tableware—Cost Plus World Market; 877/967-5362; worldmarket.com. Red plastic nesting bowls—Dollar Tree; dollartree.com. PAGES 12–13 Packaged concrete mix for table top—Quikrete; quikrete.com. Packaged countertop concrete mix for planter—Quikrete; quikrete .com. Dry powder pigment—Earth Pigments; earthpigments.com. Bedding, lamp, wooden vase, artwork above bed—Target Stores; 800/800-8800; target.com [V]. Wood bead plant hanger, cat dish, area rug—Cost Plus World Market; 877/967-5362; worldmarket.com. Silicone swim cap for planter Sporti Latex Ornament Swim Cap in Yellow Ornament Daisy— SwimOutlet; swimoutlet.com. ORDER IN THE HOUSE: FAMILY MEDIA HUB PAGES 28–31 Console Nolan Entryway Console in dark walnut and antique bronze, small basket on floor Small Natural Twist Weave Basket—West Elm; 888/922-4119; westelm.com. Pennant Keep it Wild Championship Banner—Oxford Pennant; oxfordpennant.com. Wall shelf Umbra Levit White Tech Shelf, desktop drawers Bigso Linen Marten paper drawers, storage box Bigso Linen Marten Storage Boxes, bins in shelves water hyacinth, stackable acrylic baskets in drawer Umbra Like-It Brick Bins—The

Container Store; 888/266-8246; containerstore.com [V]. Remote organizer Plywood Remote Control Organizer Rack— Yamazaki; theyamazakihome.com. Mounted toilet paper holder Allen + Roth Salem Oil Rubbed Bronze Wall Mount Single Post Toilet Paper Holder—Lowe’s; 800/445-6937; lowes.com. Large floor basket Better Homes & Gardens Collection®—Walmart; walmart.com [V]. Indigo woven rug Threshold, lamp Knox Adjustable Shaded Table Lamp from Threshold, shower caddy mounted inside shelf Command, Nintendo Switch, canvas hanging organizer, games, books—Target Stores; 800/800-8800; target.com [V]. TRY IT: FALL ON DISPLAY PAGES 32–37 PAGE 32 Vases—West Elm; 888/922-4119; westelm.com. PAGE 33 Wall paint Special Gray SW 6277—The Sherwin-Williams Co.; 800/474-3794; sherwin-williams .com [P]. Large gold hoop Panacea Products 18-inch Metal Circular Hoop—Jo-Ann Stores; joann.com. PAGE 36 Wall paint Special Gray SW 6277—The Sherwin-Williams Co.; 800/474-3794; sherwin-williams .com [P]. PAGE 37 Wall paint Naive Peach SW 6631—The Sherwin-Williams Co.; 800/474-3794; sherwin-williams .com [P]. SEW EASY: LUNCH BAG PAGES 38–40 Fabric for lunch bags Blueberry by Jessica Scott, Pop Art Grapefruits by Alena Karabanova— Spoonflower; spoonflower.com.

TOP SHELF PAGES 42–51 PAGES 42–43 Wall paint Natural Choice SW 7011—The Sherwin-Williams Co.; 800/474-3794; sherwin-williams .com [P]. Wood shelves, bird artwork, white side table, planter, wood frame on lower shelf, pillow, basket—Target Stores; 800/800-8800; target.com [V]. White vases—Crate & Barrel; crateandbarrel.com. Cloud artwork—Anthropologie; 800/309-2500; anthropologie .com. Succulent artwork— Tangletown Gardens; tangletowngardens.com. PAGES 44—45 Wall paint Innocence SW 6302— The Sherwin-Williams Co.; 800/474-3794; sherwin-williams .com [P]. Rocking chair, large flower artwork, small picture frame, small flower artwork, candle, backpack on lower shelf, lumbar pillow, pouf, cloud light box on top shelf, bookend, books—Target Stores; 800/8008800; target.com [V]. Stuffed animals—Accents + Interiors; accentsdm.com. Rainbow pillow— Urban Outfitters; 800/282-2200; urbanoutfitters.com [V]. PAGE 46 Wall paint Pure White SW 5007—The Sherwin-Williams Co.; 800/474-3794; sherwin-williams.com [P]. Diver artwork, wood tray—At Home; athome.com. Floral artwork, chair—Target Stores; 800/8008800; target.com [V]. PAGE 47 Wall paint Pure White SW 5007— The Sherwin-Williams Co.; 800/474-3794; sherwin-williams .com [P]. White pot—Earl May Garden Centers; earlmay.com. Artwork with multicolor circles— Clementine Kids; clementinekids .com. Butterfly artwork—Urban Outfitters; 800/282-2200; urbanoutfitters.com [V]. Woman with botanicals artwork—Target


Stores; 800/800-8800; target .com [V]. Abstract artwork on upper left—At Home; athome .com. Paint by number artwork on upper right—Porch Light; porchlightiowa.com. PAGES 48–49 Wall paint Rice Grain SW 6155— The Sherwin-Williams Co.; 800/474-3794; sherwin-williams .com [P]. Artwork, speaker on green box, games, pillows— Target Stores; 800/800-8800; target.com [V]. Butterfly puzzle in round container—Porch Light; porchlightiowa.com. Baskets— The Container Store; 888/2668246; containerstore.com [V]. PAGE 50 Wall paint Techno Gray SW 6170—The Sherwin-Williams Co.; 800/474-3794; sherwin-williams.com [P]. File sorter, blue drawers Bigso Steel Blue Stockholm Paper Drawers— The Container Store; 888/2668246; containerstore.com [V]. White polka-dot vase—Crate & Barrel; crateandbarrel.com. PAGE 51 Wall paint Soft Apricot SW 6352 —The Sherwin-Williams Co.; 800/474-3794; sherwin-williams .com [P]. Lamp, hat—Target Stores; 800/800-8800; target .com [V]. Bird sculpture—Crate & Barrel; crateandbarrel.com. Rug—Dash & Albert, an Annie Selke company; 877/586-4771; annieselke.com. RESCUE REDUX PAGES 52–59 Follow Kate Keesee on Instagram @katekeeseeoc and on Pinterest, pinterest.com/katekeesee. PAGES 52–53 Dark pillow—San Junipero Textile Studio; shopsanjunipero.com. Multicolor pillow—Kazimah Carpets and Decor; kazimah .com. Area rug—Lorena Canals; lorenacanals.com. PAGE 54 Wall paint Octavius 0522—Vista Paint; vistapaint.com [P]. PAGE 55 Backsplash—Weaber Lumber; weaberlumber.com. Tile finish Homax Tough as Tile—Homax; homaxproducts.com. Chairs— Poly & Bark; polyandbark.com. PAGE 56 Wall paints for geometric focal point Lady Guinevere MQ1-13, Tribeca MQ1-40—Behr; behr .com [P]. Bedding—Holistic Habitat; holistichabitatclt.com. Framed cactus artwork—Down Shiloh Road; downshilohroad .com. Lighting—Poly & Bark;

polyandbark.com. PAGE 57 Tile finish for tub surround and flooring in bath Homax Tough as Tile—Homax; homaxproducts .com. Wall paint in home office Cottage White 13—Behr; behr.com [P]. Framed cactus artwork—Down Shiloh Road; downshilohroad.com. Hanging wood block—Holistic Habitat; holistichabitatclt.com. Blackand-white area rug—Rich Class Decor; richclassdecor.com. PAGES 58–59 Pillows made from rugs on wood sectional—Five Below; fivebelow .com. Rugs on wood sectional— Kazimah Carpets and Décor; kazimah.com. Wicker outdoor furniture—Best Choice Products; bestchoiceproducts.com. Plants, screen made from fruit drying racks, hanging candle lanterns— The Potting Shed by Carlisle; tpshomeandgarden.com. BLISS BUILT IN PAGES 68–75 Designer: Ginger Curtis, Urbanology Designs, 8300 Starnes Rd., North Richland Hills, TX 76182; 843/298-2929; ginger@urbanologydesigns .com; urbanologydesigns.com; Instagram @urbanologydesigns. BY THE NUMBERS PAGES 76–83 PAGE 78 Freestanding 3D Metal Wire Number—similar available, Amazon; amazon.com [V], or Tablecloths Factory; tableclothsfactory.com. PAGE 80 Exterior lights—Menards; menards.com. Tall black planter—Home Depot; homedepot.com. Outdoor rug, small black table—Target Stores; 800/800-8800; target.com [V]. SHARING THE PASSION PAGES 84–93 Follow Anita Yokota on Instagram @anitayokota and at anitayokota.com. PAGE 84 Wallpaper—Rebecca Atwood Designs; rebeccaatwood.com. Countertops faux marble contact paper, cabinetry hardware— Amazon; amazon.com [V]. Light fixture—Restoration Hardware; 800/762-1005; rh.com. Runner— vintage. PAGES 86–87 Fireplace hand-painted tiles Sanxenxo—Fireclay; fireclaytile .com. Upholstered chair—West

Elm; 888/922-4119; westelm .com. Couch, coffee table, lamp—Pottery Barn; 888/7795176; potterybarn.com. Black rattan chair—Eclectic Goods; eclecticgoods.com. Mirror, rugs, wall sconces—Rejuvenation; 888/401-1900; rejuvenation.com. PAGE 88 Cabinetry—California Closets; californiaclosets.com. Chairs— Lulu and Georgia; luluandgeorgia .com. Gold metal organizer— Urban Outfitters; 800/282-2200; urbanoutfitters.com [V]. Lamps— Target Stores; 800/800-8800; target.com [V]. Runner—Loloi Rugs; loloirugs.com. Skylight Sun Tunnel Skylight—Velux America; veluxusa.com. PAGE 89 Plant bags on fence Wally Pro Pocket—WallyGro; wallygro.com. Stain for pine fence SuperDeck Exterior Stain in Natural— The Sherwin-Williams Co.; 800/474-3794; sherwin-williams. com [P]. PAGE 90 Appliances—Samsung; samsung .com. Wallpaper—Rebecca Atwood; rebeccaatwood.com. White cabinet with DIY caning in doors—IKEA; ikea.com. Tub—Signature Hardware; signaturehardware.com. Vanity custom—similar available, Build with Ferguson; build.com. Shower fixtures—Delta Faucet Co.; deltafaucet. com. Bath mat, towels— Parachute Home; parachutehome.com. Black hanging light fixture—Target Stores; 800/800-8800; target .com [V]. Woven shades—The Shade Store; theshadestore.com. PAGE 91 Wall paint Underseas SW 6214—The SherwinWilliams Co.; 800/4743794; sherwin-williams .com [P]. Bed frame, side tables—West Elm; 888/922-4119; westelm. com. Bench—vintage. Bedding—Parachute Home; parachutehome. com. Sconces— Rejuvenation; 888/4011900; rejuvenation. com. Artwork—Minted; 888/828-6468; minted.com. Rug—Loloi Rugs; loloirugs.com. PAGES 92–93 Paint for bed slats Popular Gray SW 6071—

The Sherwin-Williams Co.; 800/474-3794; sherwin-williams. com [P]. Murphy bed kit— Rockler Companies; rockler. com. Handles for Murphy bed (refrigerator pulls)—Amazon; amazon.com [V]. Chairs, side table, area rug—Serena & Lily; serenaandlily.com. Bedding, throw—The Citizenry; the-citizenry.com. Pillows— Studio McGee; studio-mcgee .com. Sconces—Schoolhouse; schoolhouse.com. Artwork— Minted; 888/828-6468; minted .com. Ceiling fan—Hunter Fan Co.; hunterfan.com. IN FULL SWING PAGES 94–101 Polypropylene webbing for swing and side table— Strapworks; strapworks.com. Terra-cotta pots—Target Stores; 800/800-8800; target.com [V]. Baskets, rainbow pillow—Cost Plus World Market; 877/9675362; worldmarket.com. Pink pillow outdoor fabric, green cushion outdoor fabric—Jo-Ann Stores; joann.com. Lantern— HomeGoods; 800/888-0776; homegoods.com. Pink rug— Porch Light; porchlightiowa.com.


1

2. Let’s make Friends with a re-creation of Monica’s iconic peephole frame. Monica’s Peephole Frame, $30;

1. Perfect for your laptop, water bottle, or phone case, these cute boy-band stickers will have you singing, “Buy, Buy, Buy!” Boy Band Sticker, $4; alexandradesignga.etsy.com

cooltvprops.etsy.com TREND SITING

’90s LOVE 3

5

As if! Bring back the era of grunge music, underwear as outerwear, and TRL on MTV with home accessories that are totally booyah! WORDS TRISH RICHARDS PHOTOGRAPHS MARTY BALDWIN

3. This Nirvana-inspired candle comes in a variety of scents to get you into the “teen spirit.“ Nirvana

4

Candle, $30; pvcandles.com

5. Go super fly with a Lisa Frank-inspired notebook that features a funky custom portrait of your furry friend. Custom Pet Portrait Notebook, $35; 6

4. Just press play on this cool cassette tape light as a party centerpiece that will bring out the “We’re not worthy!” à la Wayne’s World. Cassette Tape

peaceoutaly.etsy.com

Lamp, $18; designsbydg.etsy.com

7

6. Like that supersize daisy that set off Blossom’s hat, this fido bling is a nod to ’90s love of oversize flowers. Sunflower Bandana, $9; dogcharms.etsy.com

7. Get it together with wall hooks in playful colors and patterns that will take you back to your Saved by the Bell days. Chiaozza Wall Hooks, $50 for five; store.moma.org

104 DO IT YOURSELF Fall 2021

Do It Yourself™ (ISSN 1075-1033), July (Fall) 2021, Volume 28, No. 4. Do It Yourself is published quarterly in January, April, July, and October by Meredith Corp., 1716 Locust St., Des Moines, IA 50309-3023. Periodicals postage paid at Des Moines, IA, and at additional mailing offices. SUBSCRIPTION PRICES: $19.97 per year in the U.S.; $23.97 (U.S. dollars) per year in Canada and overseas. POSTMASTER: Send all UAA to CFS. (See DMM 507.1.5.2). NON-POSTAL AND MILITARY FACILITIES: Send address corrections to Do It Yourself, P.O. Box 37508, Boone, IA 50037-0508. In Canada: Mailed under Publications Mail Sales Product Agreement No. 40069223. Canadian BN 12348 2887 RT. Your bank may provide updates to the card information we have on file. You may opt out of this service at any time. Better Homes & Gardens is a registered trademark in the United States, Canada, and Australia. Better Homes & Gardens marca registrada en México. © Meredith Corp. 2021. All rights reserved. Printed in the U.S.A.

2


®

Do it Right with DR ®

USA

ENGINEERED AND BUILT Assembled in the USA using domestic and foreign parts.

• • •

• CHIP big branche up to 5" thick • SHRED lighter ya and garden waste • REDUCE it all to a fraction of its original volume DRrototiller.com

DRchipper.com

Make Your Driveway Like NEW with a Power Grader!

Trim and M •

• •

DRpowergrader.com

DRtrimmer.com

GoDRpower.com


Turn static files into dynamic content formats.

Create a flipbook
Issuu converts static files into: digital portfolios, online yearbooks, online catalogs, digital photo albums and more. Sign up and create your flipbook.