
1 minute read
Bunnies or (Bears)


Before I began, I enlisted the help of my husband as he is the chainsaw master in our house. I showed him the finished product example from the DIY website momunleashed.com. He went outside and cut the pieces I needed.
Things I learned:
• Be specific in your instructions about how thick you want your wood pieces. You do not want them very thick as it will be harder to stand up and harder for the glue to hold.

• Make sure your pieces are cut as straight as can be. The glue will not hold very well with angled pieces of wood.
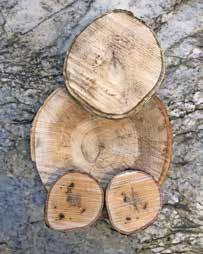
• Make sure you’re clear just how oblong you need the ear pieces to be. As you can see from my example, when they are not long enough, your project resembles a bear more than a bunny.
Step 1
I did not have any black twist ties for the whiskers, so I improvised and used a black Sharpie and just drew on my whiskers and eyes.
This was a super easy and fun DIY project. Even though mine did not turn out as the initially intended bunny, I was very pleased with the bear! D
Supplies
6 slices of wood:
1 large circle for the body
1 medium circle for the head
2 small circles for the feet
2 oblong circles for the ears
Black twist ties or pipe cleaners for whiskers
Wood glue
Hot-glue gun
Link to tutorial:
Instructions
Let wood try overnight before you start to assemble.
Start by gluing the head to the body, overlapping a little, with wood glue.
Glue the small circles on the body, overlapping a little.
Take the oblong ear pieces and glue them behind the medium circle of the head so they stick out like bunny ears.
Hot-glue black twist ties for whiskers https://momunleashed.com/2017/02/diy-rustic-wooden-bunny-step-step-tutorial.html


Step 2
Step 3


