5 minute read
Furnitures used/ designed


Advertisement


This is a serie of works during one quarter. The main idea of theses works are to exploring, and getting comfotable with tools in photoshop software. Most of these works were done with photoshop, and sometimes with illustrator and Indesign. Here are assignments description below :
1. Floor Plan | Materials-Textures
This week we will be rendering the floor plan INDES 265 Plan for Rendering pdf below, this time using materials and patterns as well as solid colors.
Learning Objective: Further your knowledge of Photoshop tools and techniques. Improve your floor plan rendering options and speed: floor plans are often the weakest part of interior design students’ presentations. Learn and practice skills that you will also use in perspective and other illustrations.
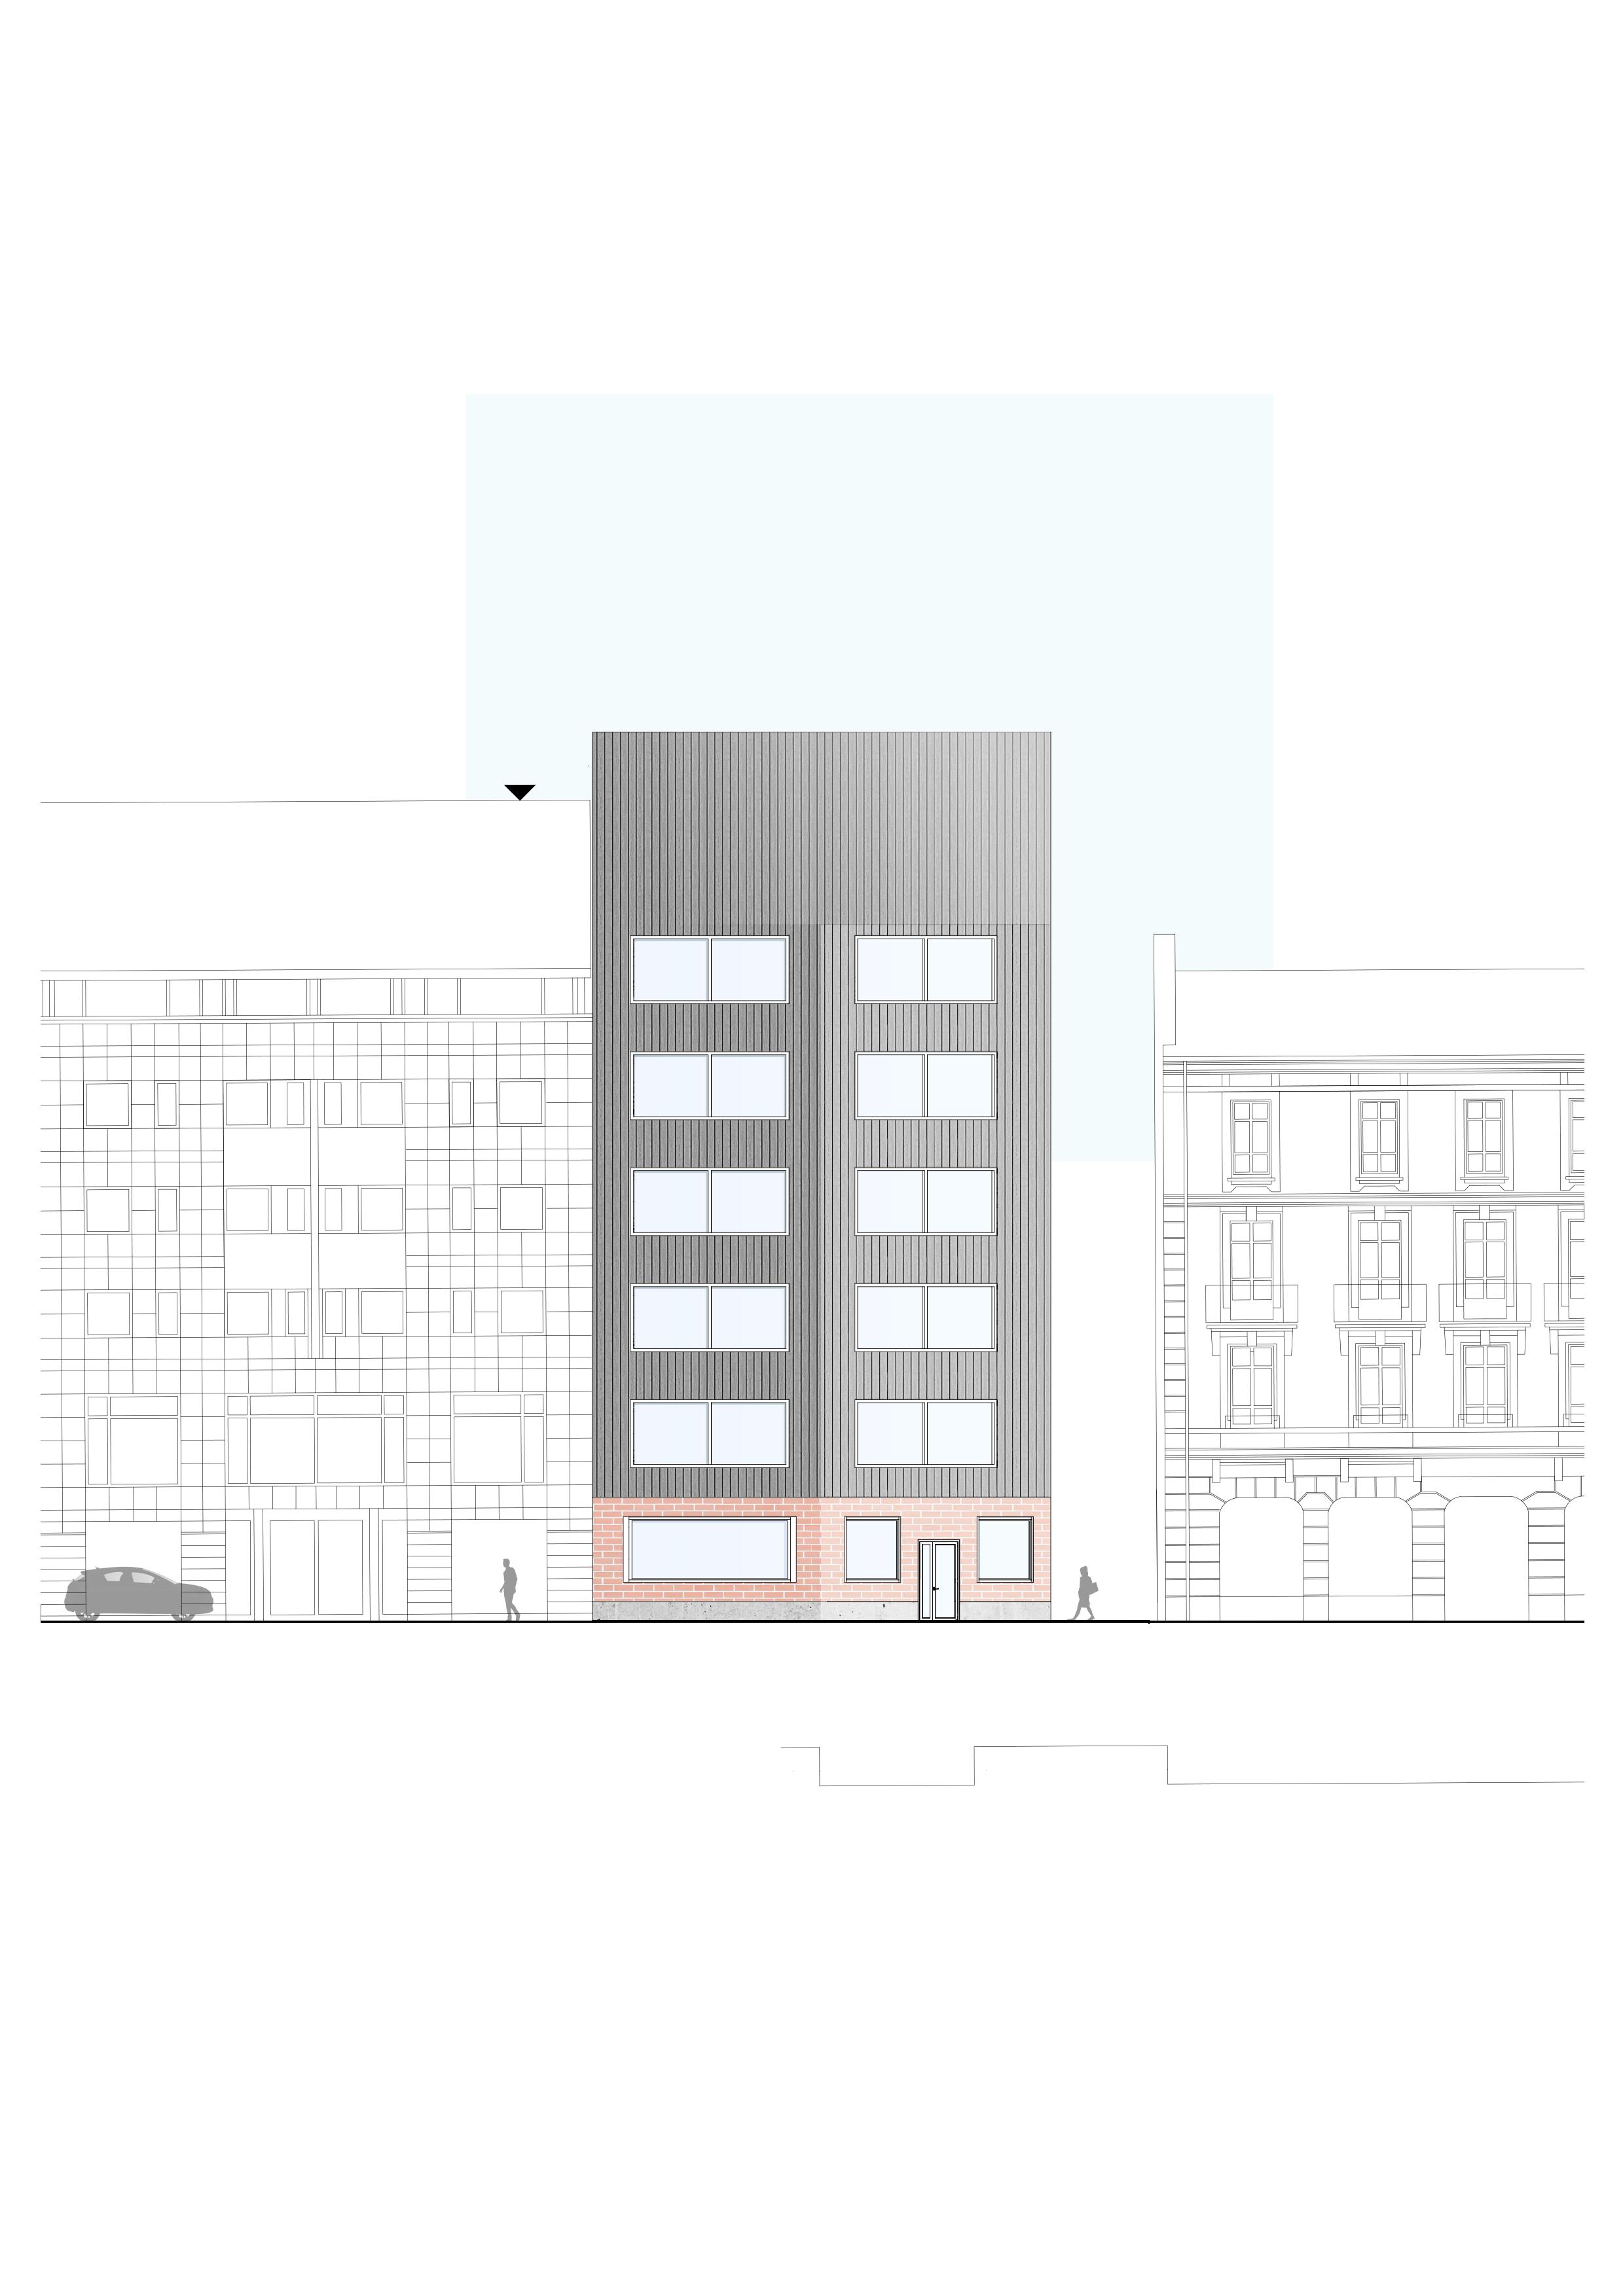
2. Elevation Rendering Assignment
In this assignment, we will continue to develop materials and textures placement as well as: Shade and Shadow effect
Lighting effects
Quick Glass effect
Create a Sillhouette of human a figure
We will be using many of the tools from the previous assignments and will be introduced to the following new tools:
Fill and Adjustment Layers
Blending Modes
Gradient Tool
Blur Filters
Eraser Tool
3. Photo Adjustments with Photoshop/Rendering and Placing People
You will often use photographs in your presentations, and you can use Photoshop to make them more dynamic. This assignment will use Adjustment Layers as masks to manipulate a photograph to prepare it for a presentation. We will also learn two techniques for preparing images of people to be placed into renderings, either photographs like in this assignment or into your Photoshop renderings of drawings like Sketchup, Revit, or even hand drawings.
4.
Rendering Light Two Part Assignment
First, watch this lecture video: This lecture covers a 5 layer lighting design approach.
Second, below you will find the demo video lecture for this assignment. It is taken from a recorded lecture by Alana Mackey, who teaches Lighting for Interiors. There is one issue that you should be aware of before you begin watching. In the lecture, she assumes that you know how to use photoshop and does not walk you through the process of actually creating the light effects. You have used all of the tools and techniques that she uses in the demo video and should pause and experiment until you get the effect you are looking for. There are two (2) assignments covered in this one video.
The first is a basic diagrammatic lighting rendering that you will place on a presentation board with examples that you find online (example below.) Please turn in this first part of the assignment in the 06a Module. The second is a photorealistic “post-production” rendering. This means that you will be taking an image that has been rendered with a plug-in like Enscape and adding lighting effects using photoshop. Please turn in the second assignment in the 06b Module.
5. Fusion Method
This illustration method combines the best features of SketchUp and Photoshop to create a highly effective, artistically expressive hybrid way of rendering your designs.
Objective: Create a hybrid interior illustration that relies on your artistic sensibilities and skills in rendering the light effects you envision, rather than illustrations that are generated for you by programs like Enscape and Podium. Develop intuitive and evocative design communication abilities that can adapt for use throughout the design process.
Objective: Create a hybrid interior illustration that relies on your artistic sensibilities and skills in rendering the light effects you envision, rather than illustrations that are generated for you by programs like Enscape and Podium. Develop intuitive and evocative design communication abilities that can adapt for use throughout the design process.
Instructions
Download the Fusion Method Instructions
6. Illustrator: Sketchup Export Orthographic Drawing Clean Up
Objective: To create clean, clear, scaled orthographic drawings with appropriate line weights using Sketchup and Adobe Illustrator.
The Assignment: I have created a series of short videos to walk you through the process of exporting AutoCAD DWG files from Sketchup and cleaning them up in Illustrator. I made the videos last year, so please ignore any references to the academic quarter.


Deliverables:
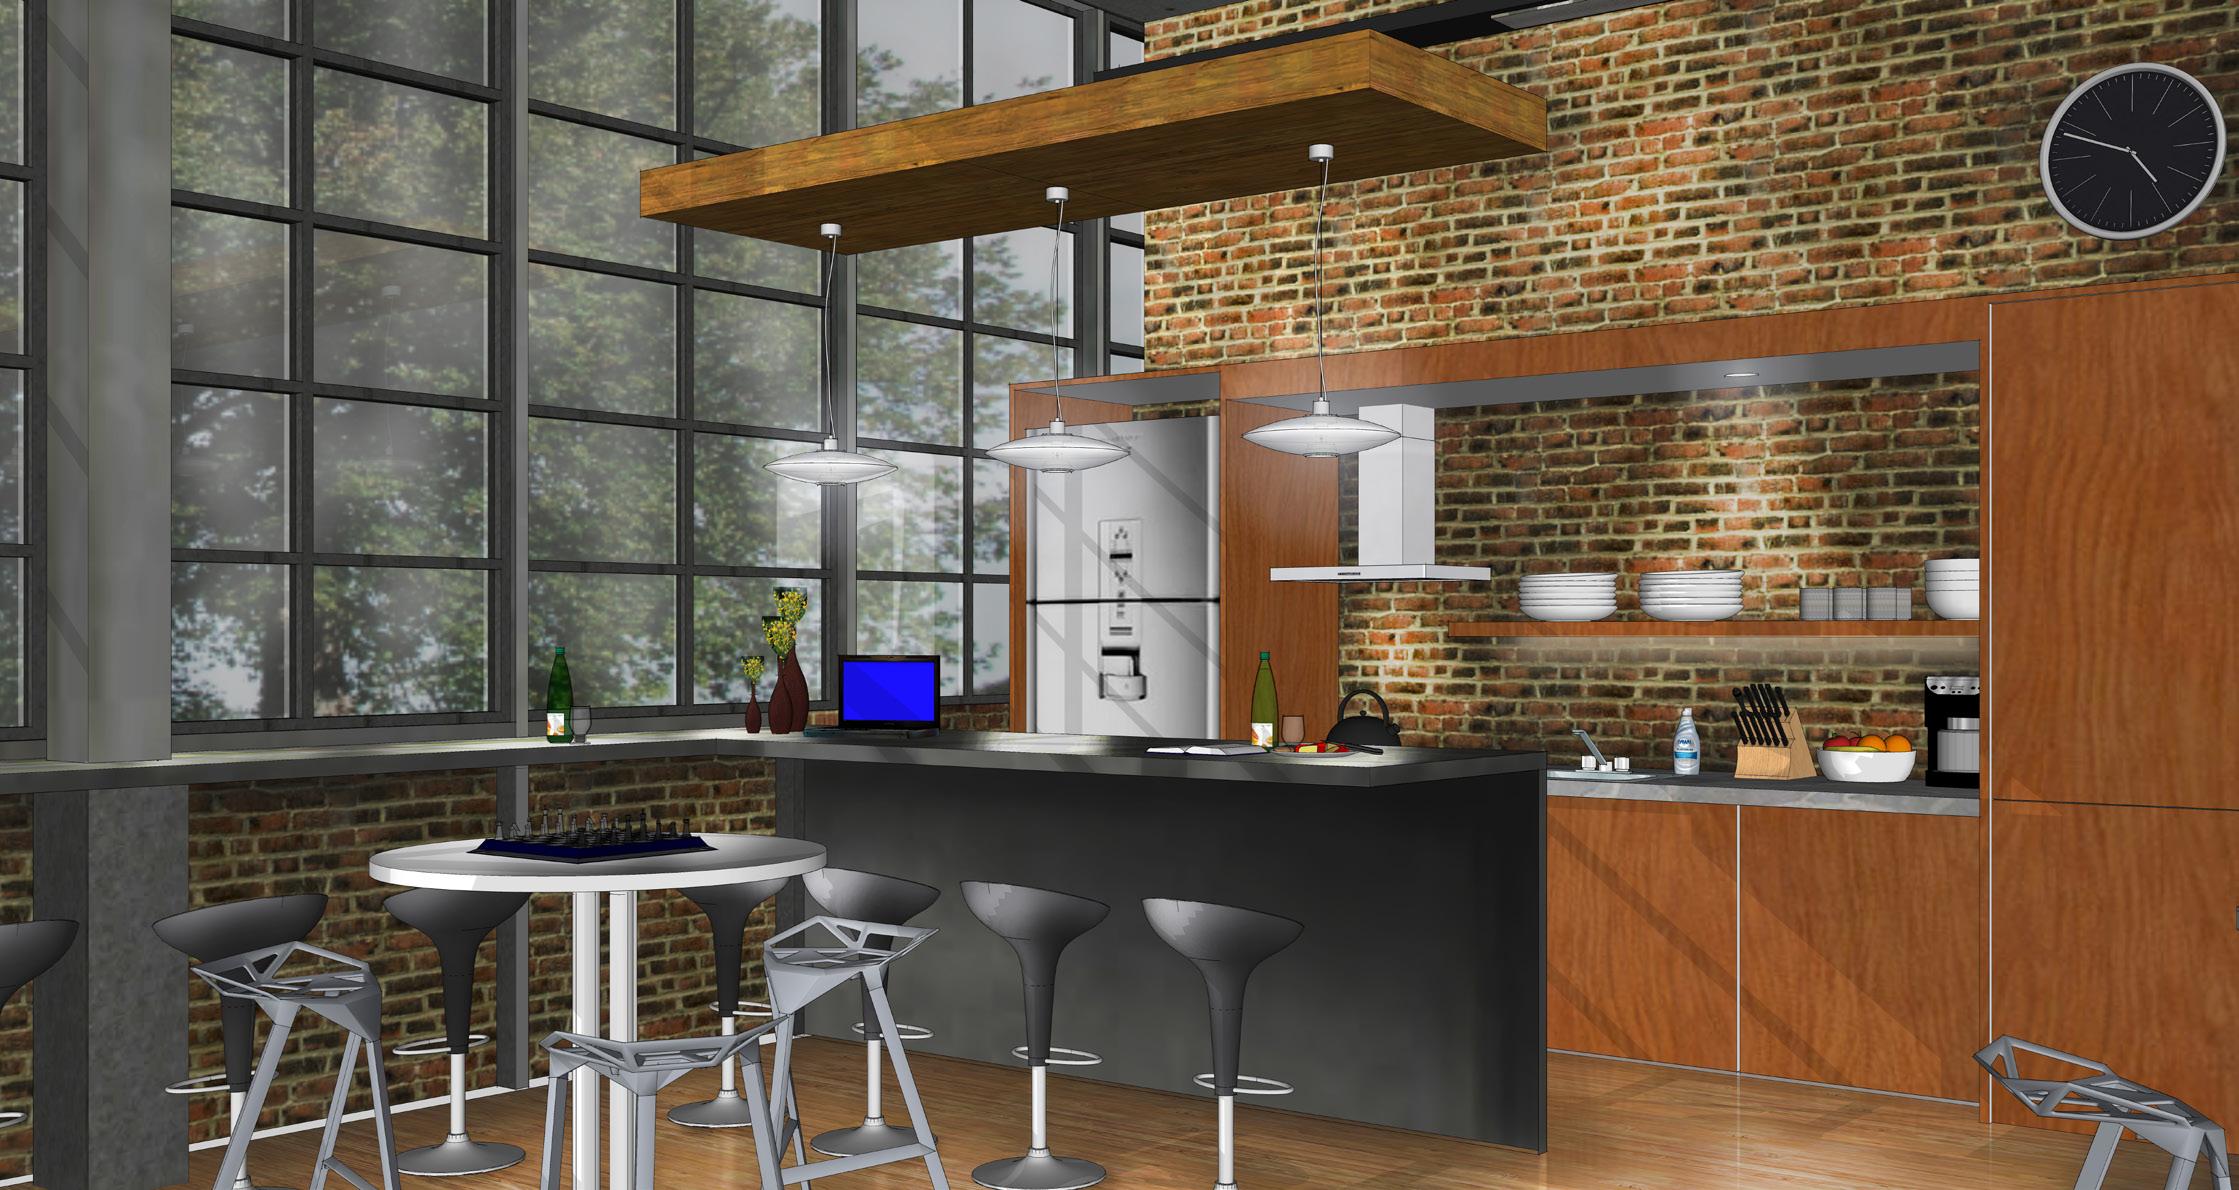
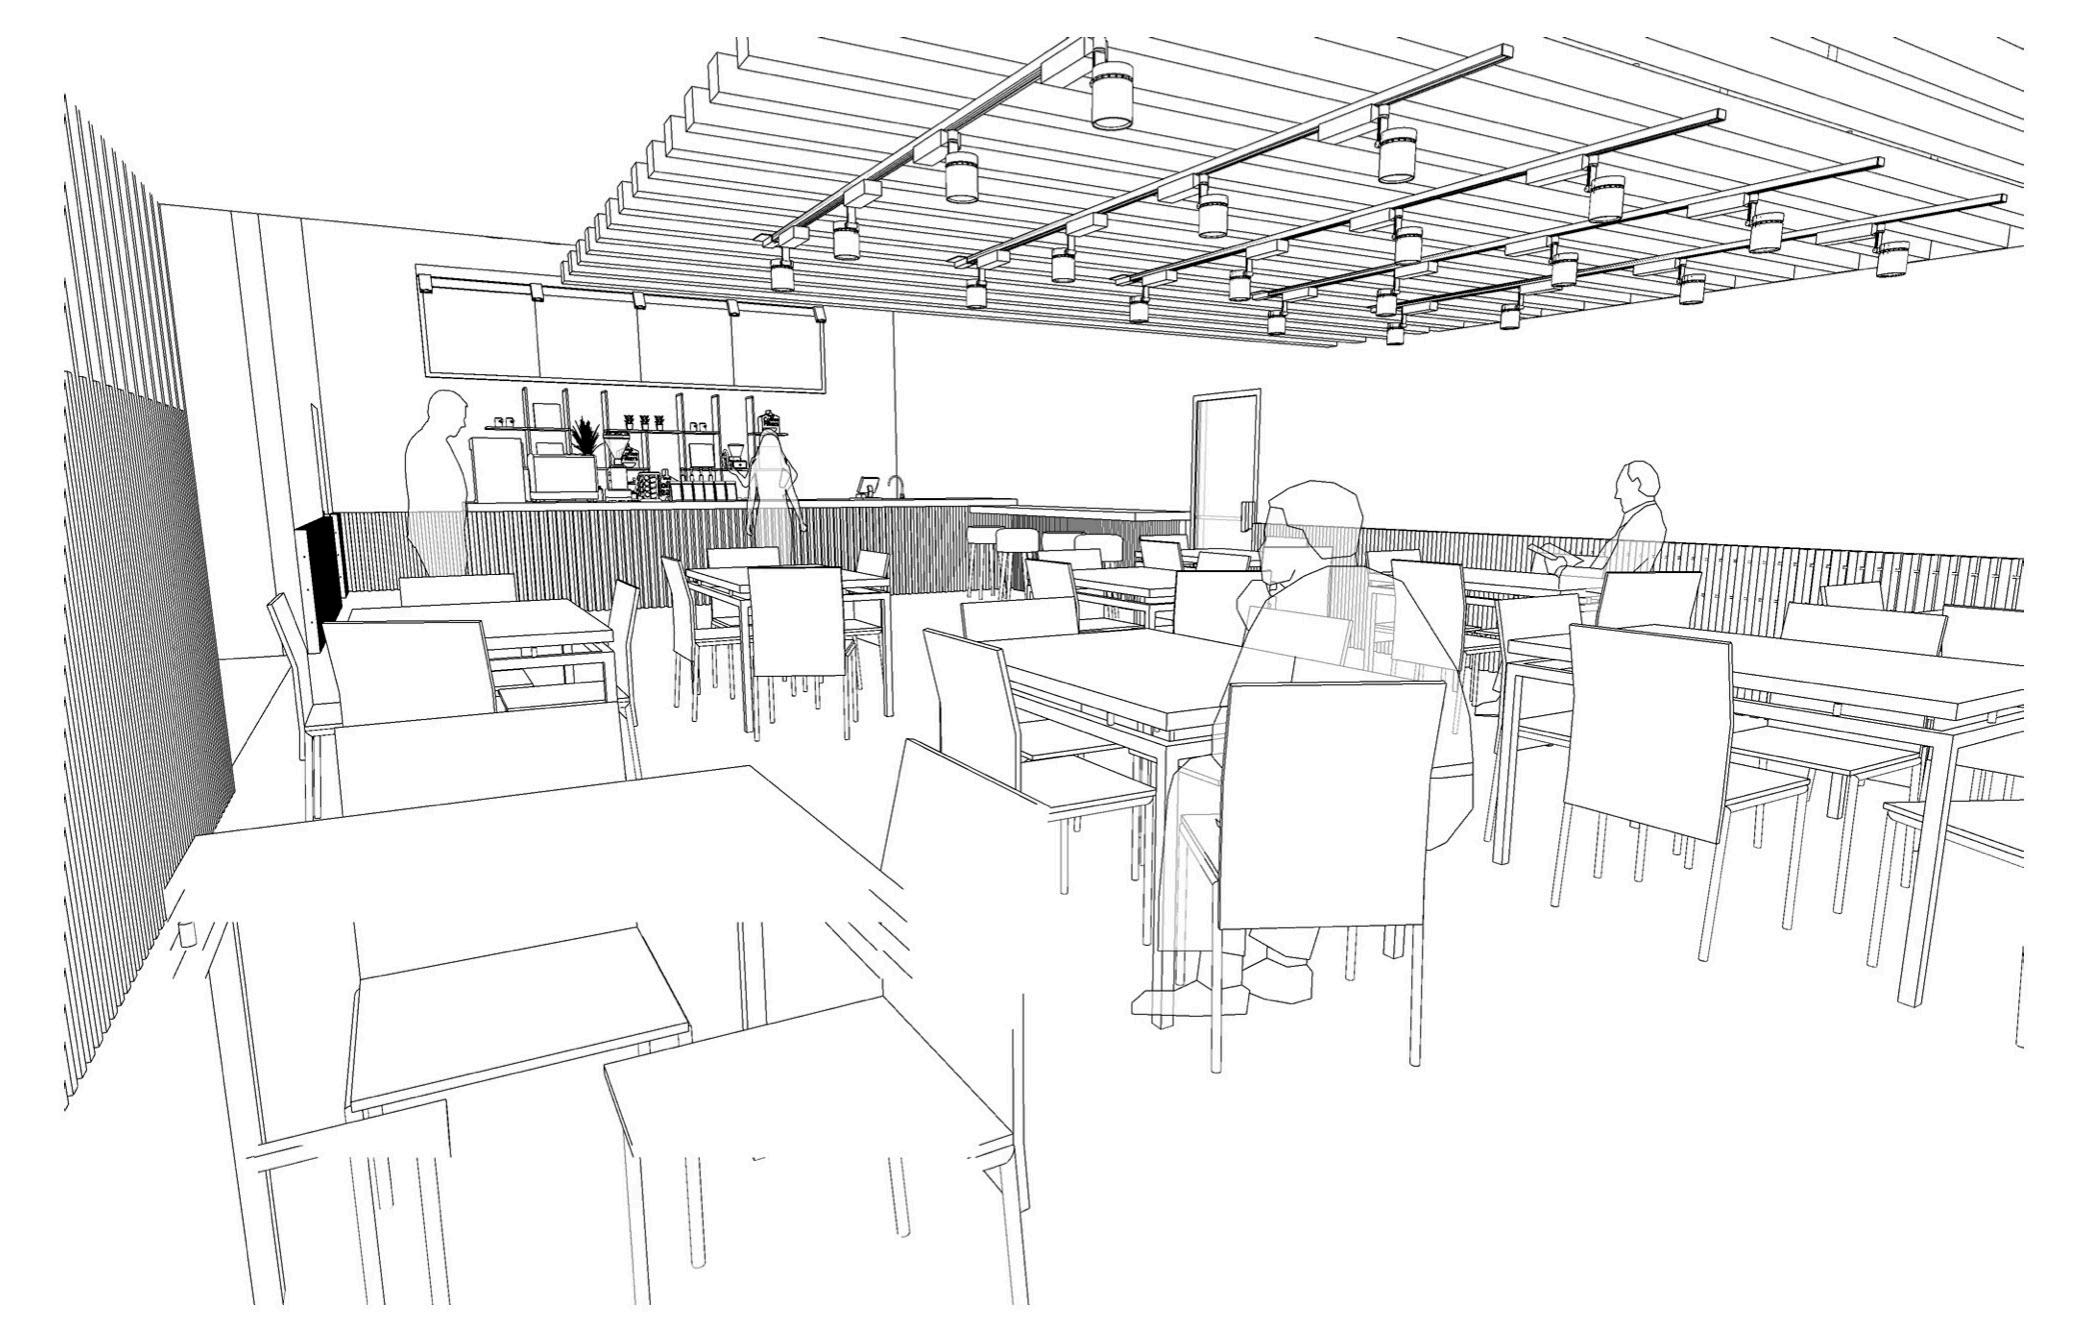
Coffee Shop: or more perspectives (drawn) showing your design intent. (Choose the views from your Sketch-up model, print them, and trace using your tools and lead holder).
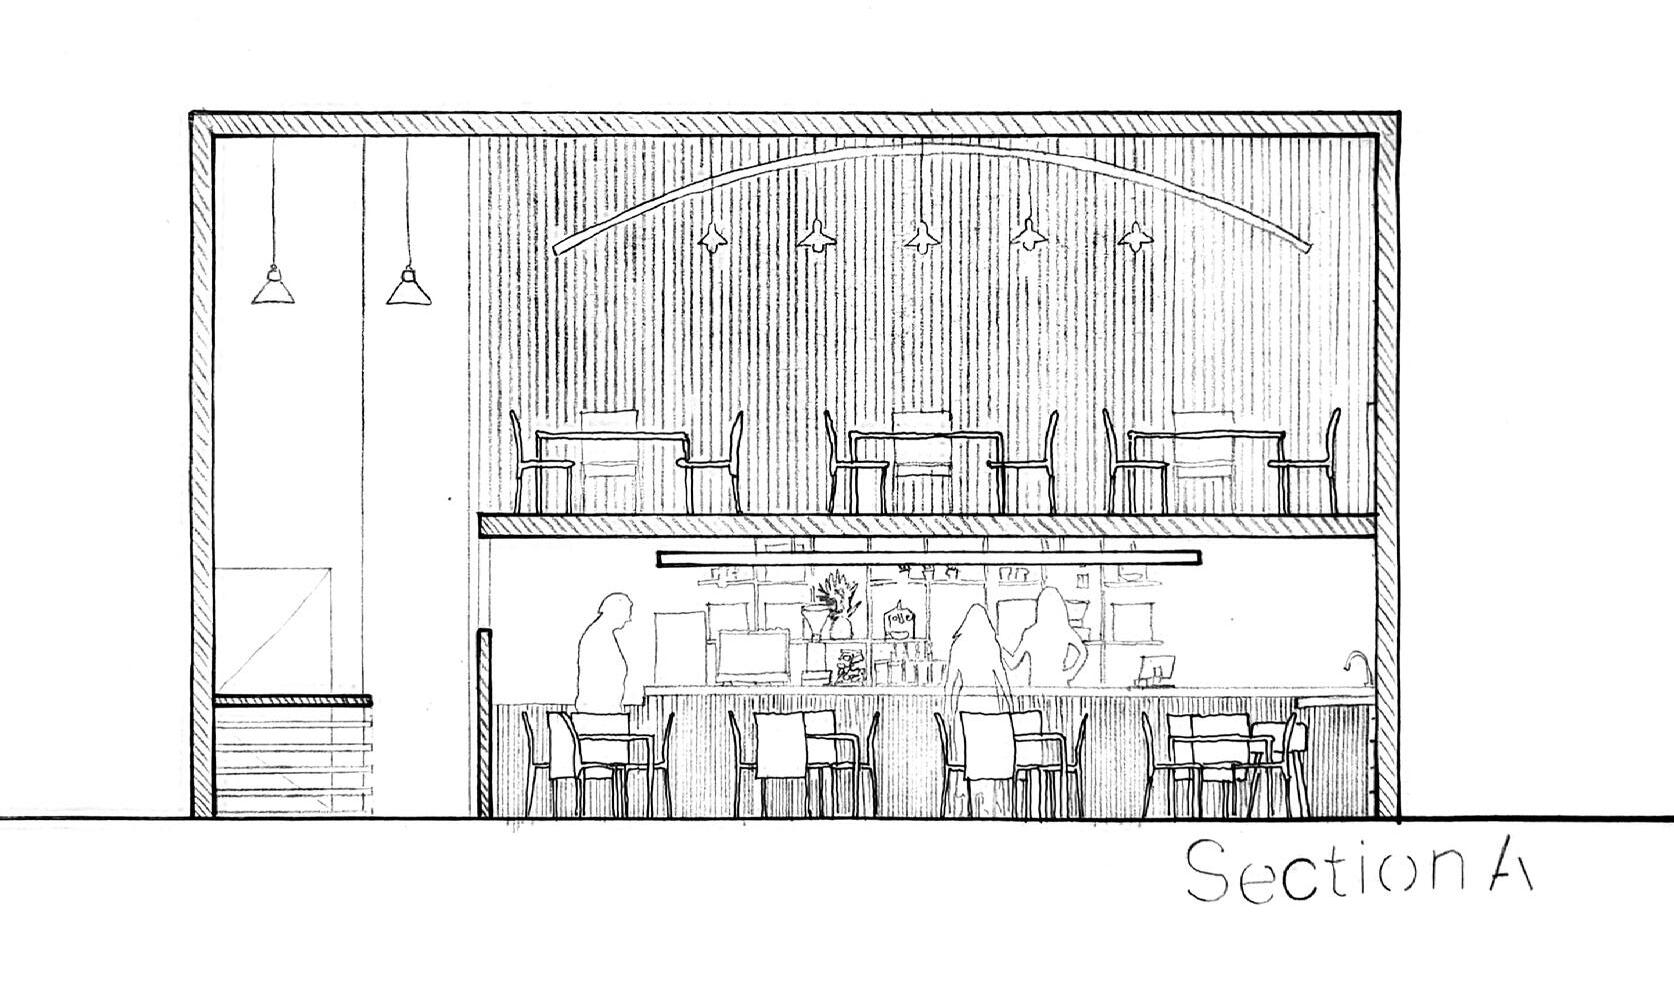
1) DRAWN Scaled floor plan + one section (1/4”=1’-0”) showing furniture along with all of your program requirements. By hand. Using drafting tools and lead holder trace floor plan and sections from your sketch up model. Remember Floor Plan and Sections are flat, not perspective views WITH APPROPRIATE LINE-WEIGHTS AND DIMENSIONS.


2) 3 or more perspectives (drawn) showing your design intent.
(Choose the views from your Sketch-up model, print them, and trace using your tools and lead holder).
3) Axon and enlarged plan (1/2” - 1’-0”) of your ADA bathroom + Accessible counter WITH DIMENSIONS.
4) 11X17 (pdf) with a brand name, inspirations, and concepts.
5) Optional, submit screen shots of your Sketchup model in PDF format. Include Color, Material, Finish Palette on the same previous 11 x 17” (pdf) board. Please photograph or scan your drawings and submit them in canvas in pdf format. Maximum 2000 Sq. Ft.
If you choose to use the provided site, just use one of the three buildings.
1) DRAWN Scaled floor plan + one section (1/4”=1’-0”) showing furniture along with all of your program requirements. By hand.
Using drafting tools and lead holder trace floor plan and sections from your sketch up model. Remember Floor Plan and Sections are flat, not perspective views WITH APPROPRIATE LINE-WEIGHTS AND DIMENSIONS.


4) 11X17 (pdf) with a brand name, inspirations, and concepts.

Coffee shop inspiration : Adiuvat Coffee Roaster Quinhon / A+H architect link: https://www.archdaily.com/945637/adiuvat-coffee-roaster-quinhon-a-plus-h-architect.

Concept:
I have design my coffee shop based on this coffee shop in Vietman. The reason I have chosen this coffee is because my idea of the coffee shop is to push people(customers) wherenever they are, they will alway have thie eyers on the store. Therfore, they will always want to buy something bu looking at the caffee direction. Focus eyes online on the store.
5) Optional, submit screen shots of your Sketchup model in PDF format. Include Color, Material, Finish Palette on the same previous 11 x 17” (pdf) board.


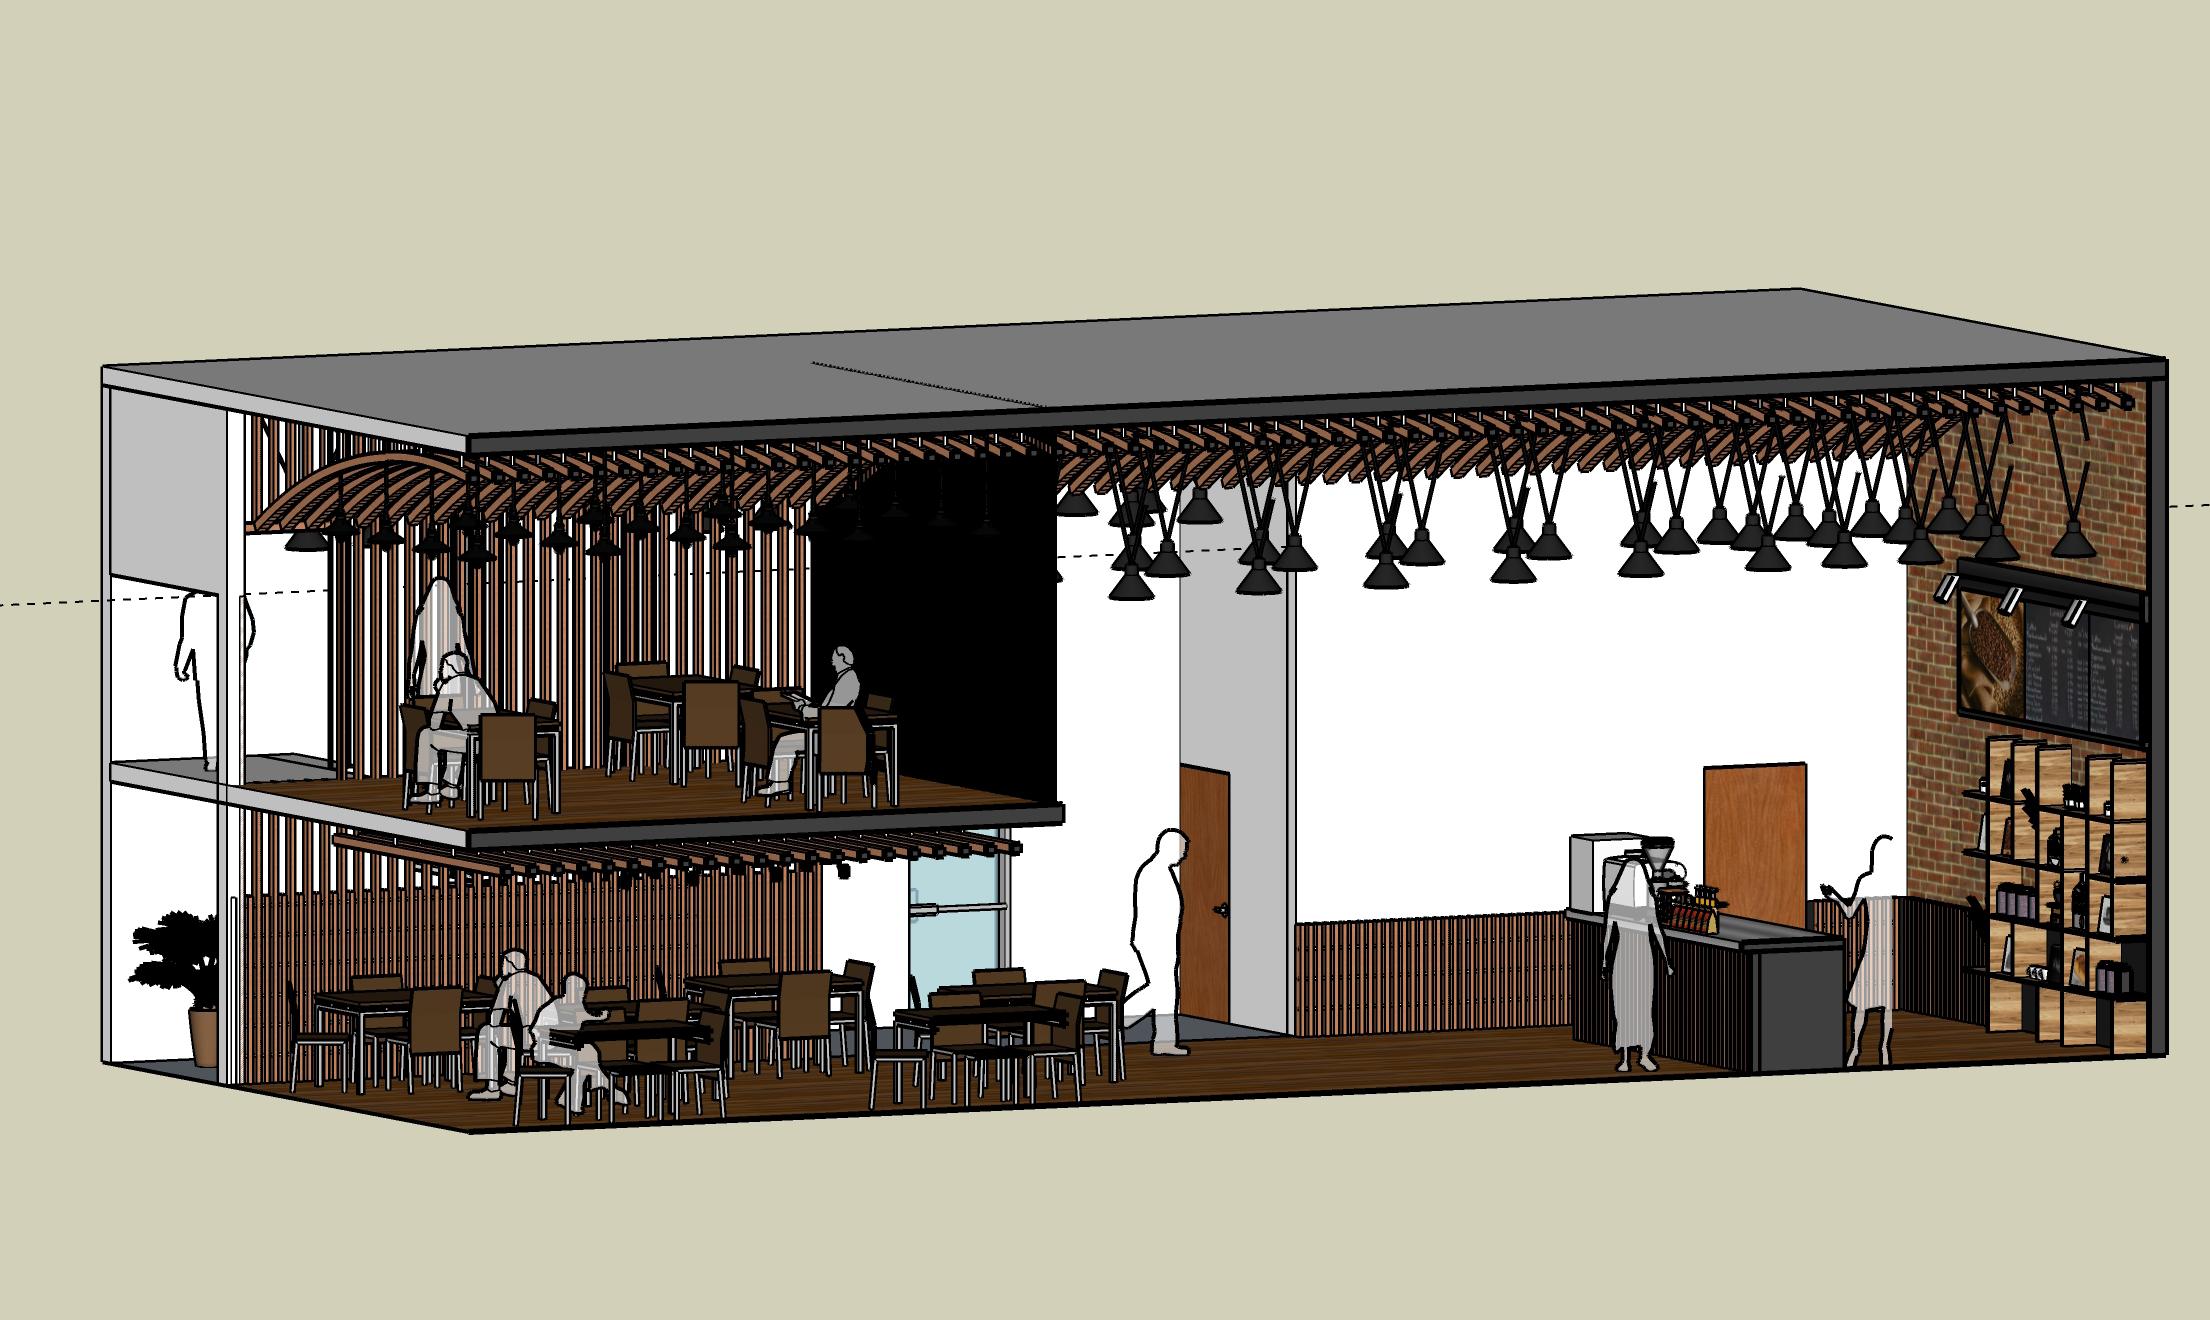

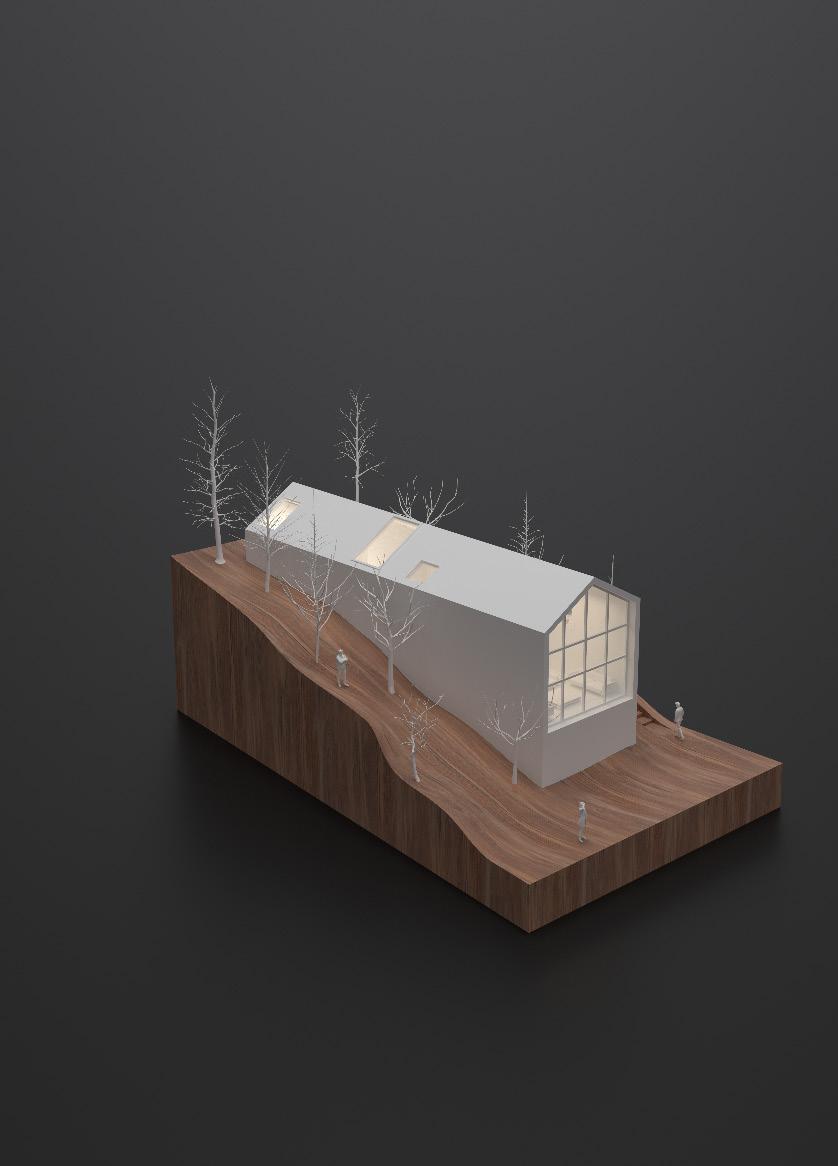
East Section Scale: 1/200
In a particular situation, located in a land sloping 15% from the top of a cliff of 17 m, which leaves an unmissable view of the sea and the center city of Tunis (East). The land is located in Gammarth in Tunis (capital of Tunisia), in a district of the bourgeois where one finds only individual villa.
I proposed a single tube perpendicular to the sea and partially implanted in the ground, facing the horizontal seasonally, to capture the attention of the sea and the city center.


- The first floor is only dedicated to relaxation and nighttime.
- The second floor is dedicated to daytime, activities.

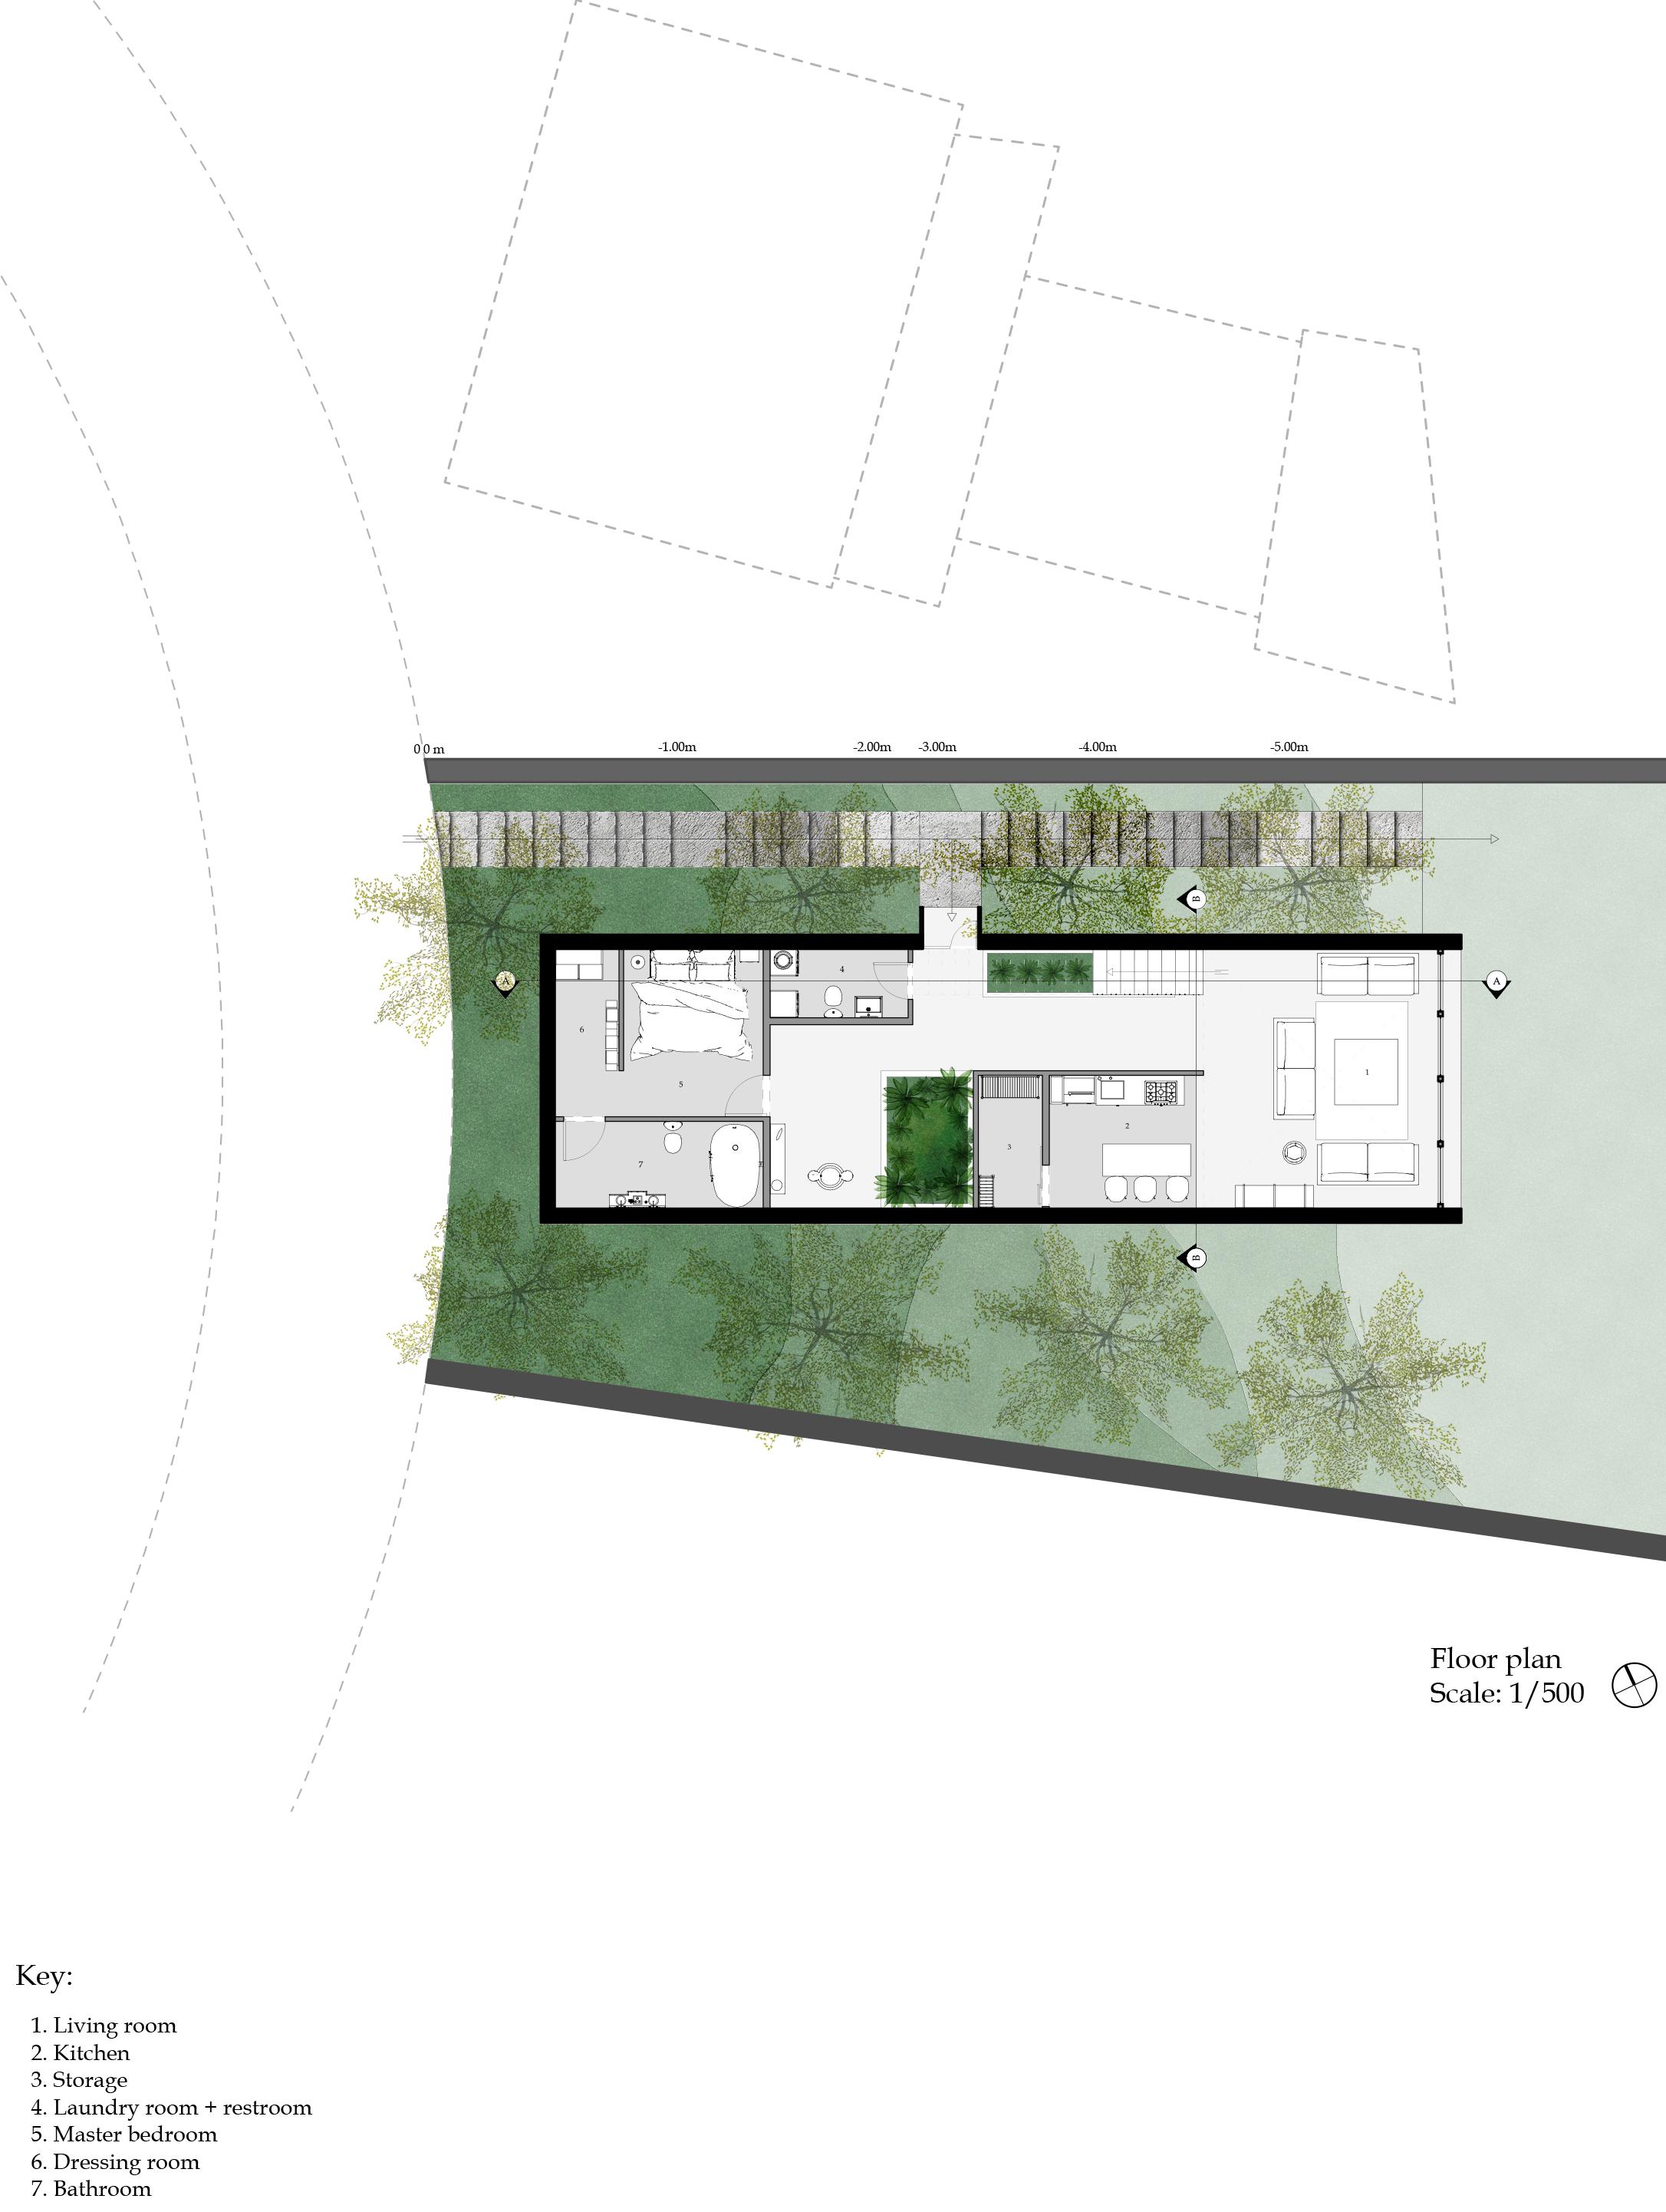


Based on the prototype of the Dom-Ino house in Le Corbusier, illustrated from 1914. The student had to distinguish the spatial structure and constructive structure, and organizer space with these many constraints. With a tolerance rancid to rearrange the stairs. “Between 2 slabs”it.

The domestic space contains in itself subessential sets for the life of a couple or from a family. In our case it is intended for a person, these subsets are: meet, share a meal and rest. From these three fundamental parts of spacewe could better deal with the organization of the house of man through the form, the size and position of each room or space, and also how they relate to each other.
With a territory already predefined by 3 tiles held by the existing constructive structure in posts which somehow define the spatial structure of the House A system which can be defined A, A and B of which B is the smaller unit.
In this project the most important piece of the house its rises to double height (come together) providing a strong relationship with the room to share a meal and rest upstairs. The smallest unit of the maisound is put aside (outside) in such a way that we regains the unity of the whole by extending the slabsuperior. The most important frame is the part center of the model, unlike two others in peripheries, one rises in half height (share a meal) and the other outside (terrace), with a horizontal distribution on the peripheries of the model.