








20, CA





Patent Pending*




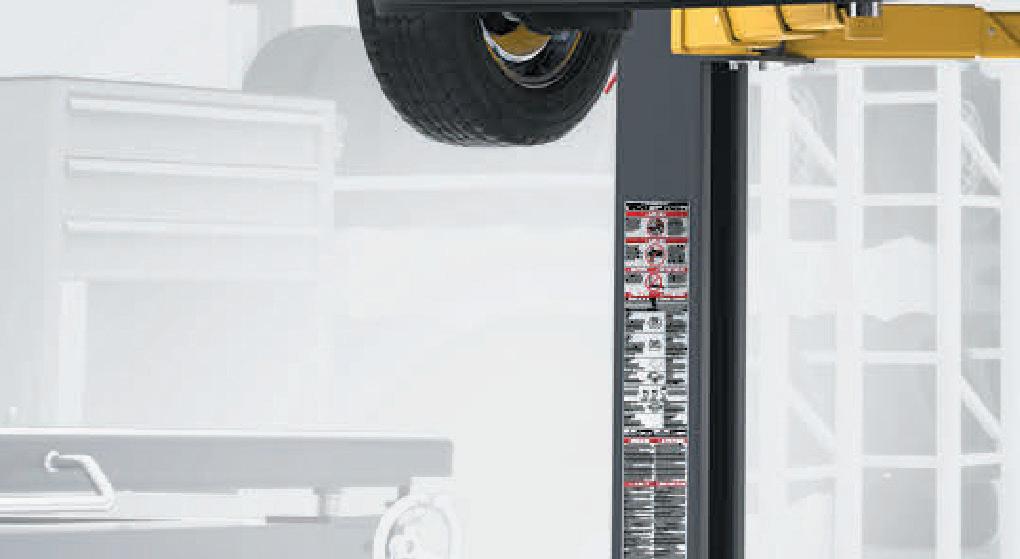
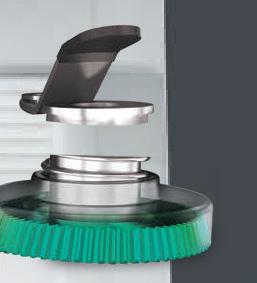
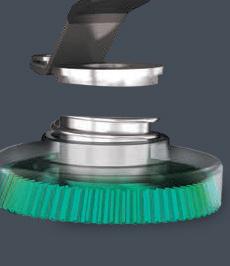
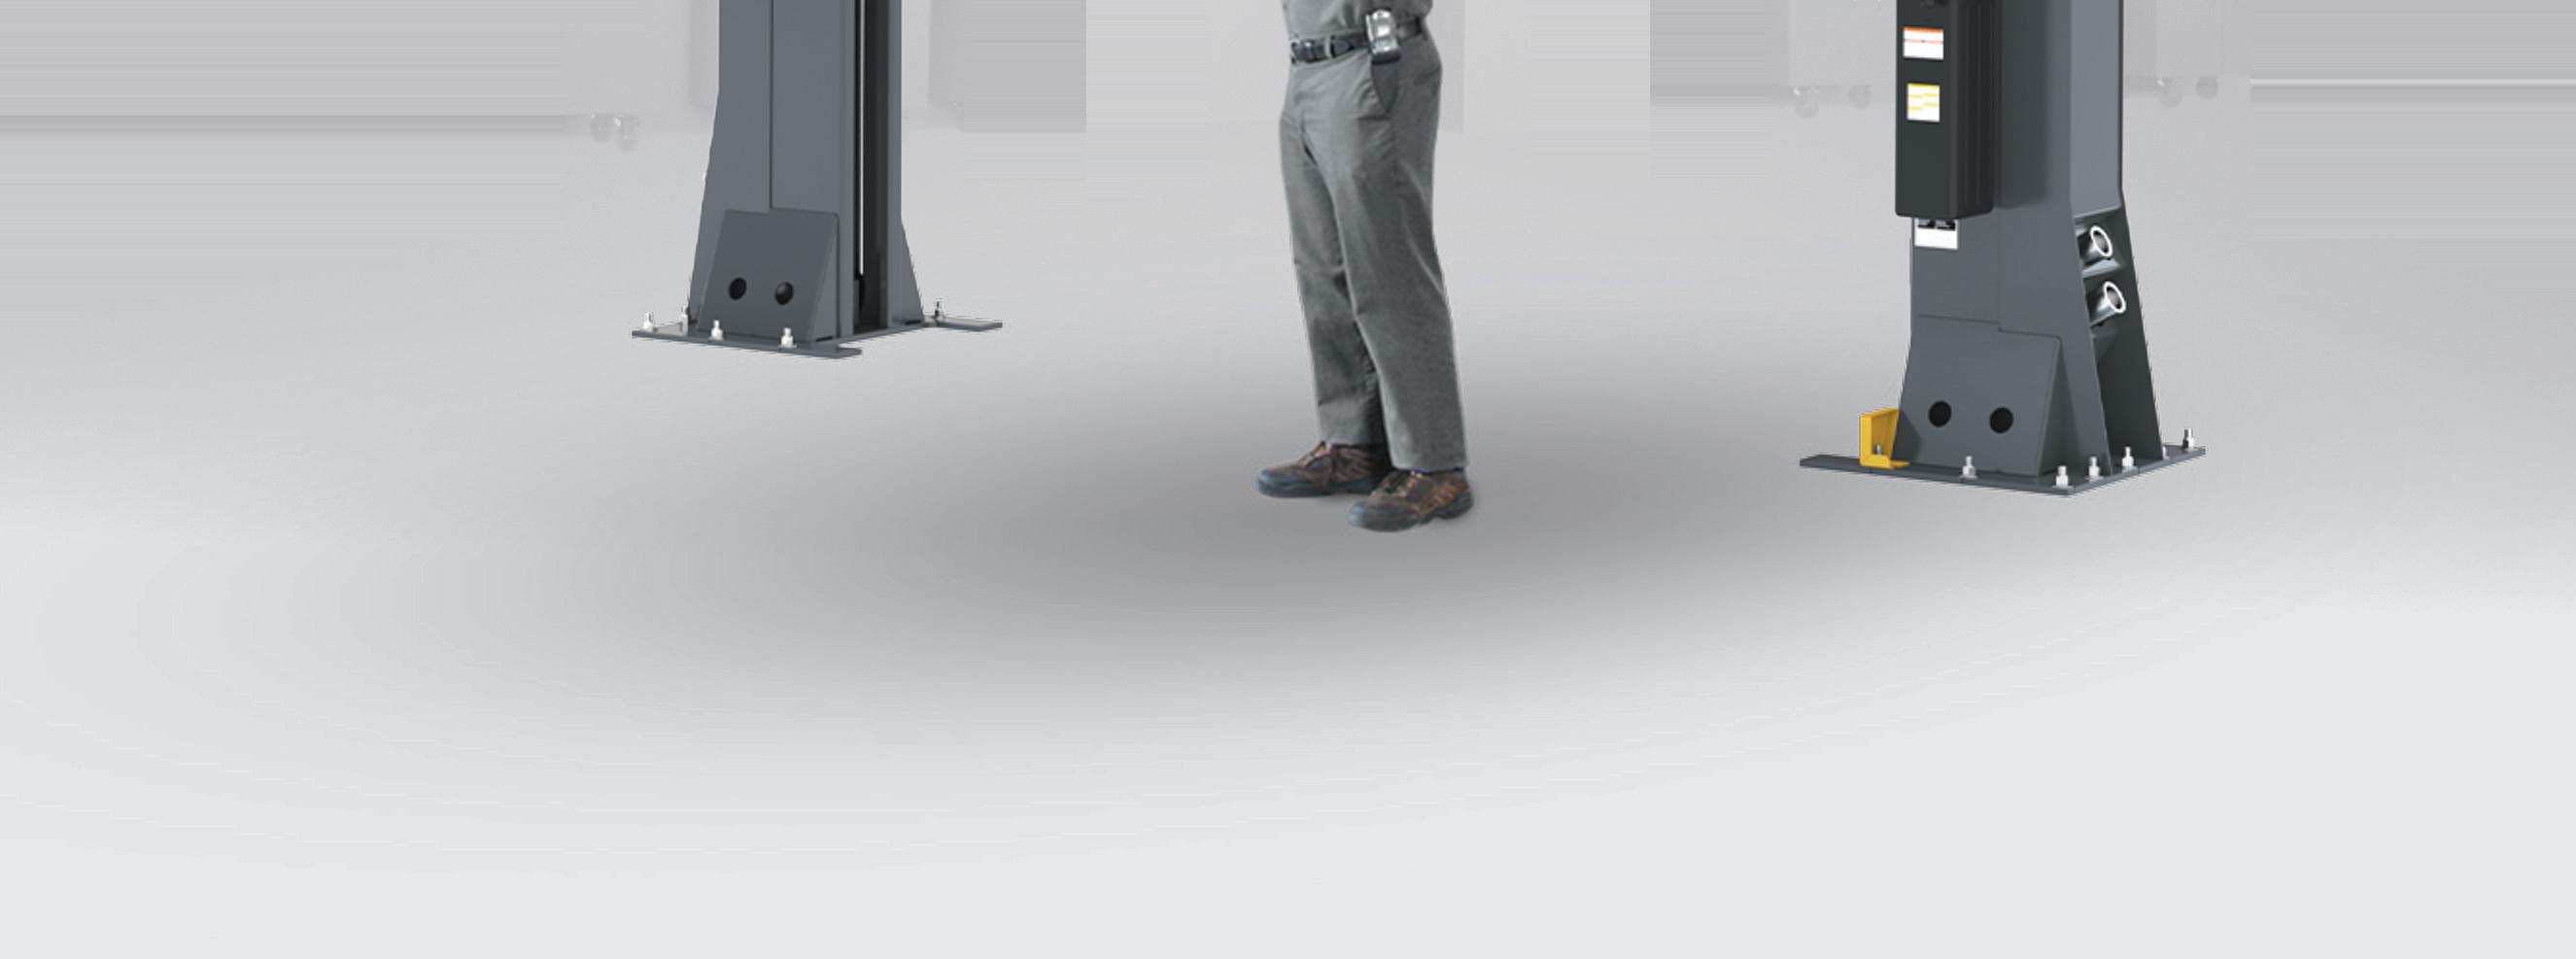
A versatile choice for mixed fleets, BendPak’s new 16AP and 20AP Series heavy-duty twopost lifts easily take on Class 1 through 5 vehicles, from passenger cars to commercial trucks and vans. They reach further, lift higher and deliver greater stability than other lifts, all while protecting technicians with unmatched safety systems and ergonomics. With fewer moving parts, they’re easier to maintain, less prone to wear, and more cost-effective to operate. Maximize your uptime and efficiency with BendPak’s heavy-duty lifts — delivering superior performance and unmatched value. To learn more or to shop now, visit bendpak. com or call us at 1-800-253-2363.


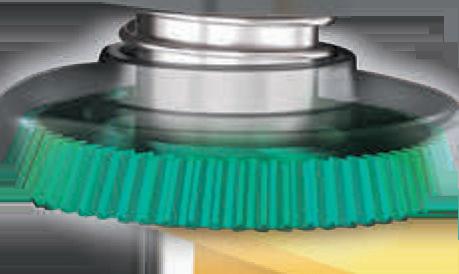


A.S.A.R.S. AUTOMATIC SWING ARM RESTRAINT SYSTEM FOR ADDED SAFETY. FOR BETTER ERGONOMICS










Professional Diagnostics
The next generation of scan tools with the most advanced OE level vehicle coverage supporting scanning, live data access and complete bi-directional functions.

Heavy Duty Diagnostics
Heavy duty solutions to help you get the repair done right and the vehicle back in operation.


in half the time.
Test, analyze and diagnose your vehicle electrical and mechanical systems. A




in the articles herein are not to be taken as official expressions of the publishers, unless so
nor do they so warrant any views or opinions by the authors of said articles.
Endeavor Business Media provides certain customer contact data (such as customers’ names, addresses, phone
and other opportunities that may be of interest to you. If you do not want Endeavor Business Media to make your
382-9187 or email MotorAge@omeda.com and a customer service representative will assist you in removing your
Motor Age does not verify any claims or other information appearing in any of the advertisements contained in the publication, and
in reliance of such content. While every precaution is taken to ensure the accuracy of the ad index, its correctness cannot
18 Steve Mancuso Named 2024 Best Young Tech
The ASE World Class Technician thrives on the variety and complicated puzzles he faces each day.
Joy Kopcha
26 Cylinder Head Inspection and Service
An overview to help you and your customer understand the work.
Mike Mavrigian
36 The Rise of ForwardFacing Cameras
As ADAS evolves, forward-facing cameras play an increasing role.
Jeff Taylor
45 The Spring Has Sprung Pinpointing the root cause fault can be the difference between a relatively inexpensive fix, and having the customer replace the vehicle unnecessarily.
Brandon Steckler
50 Without Hybrids, We May Not Have ADAS Many factors contribute to the implementation of ADAS.
Craig Van Batenburg
74 The Trainer #153 Cold Side Turbo Induction System Leak Detection
Brandon Steckler


We didn’t actually light 125 birthday candles, but we did gather some of the technical masterminds from Motor Age ’s past and present to talk shop. Editor Mike Mavrigian and Technical Editor Brandon Steckler were joined by two of their predecessors, Tony Molla and Pete Meier, to talk about what Motor Age has done for professional automotive technicians over the last 125 years. Endeavor Business Media Group Publisher Chris Messer hosted the conversation, and you can jump in, too. Tell us how you first encountered Motor Age . For most of these technicians who became editors, it was a learning tool they discovered early in their careers.
EDITORIAL
GROUP EDITORIAL DIRECTOR
Chris Jones / christopherj@endeavorb2b.com
EDITOR
Mike Mavrigian / mmavrigian@endeavorb2b.com
MANAGING EDITOR
Joy Kopcha / jkopcha@endeavorb2b.com
TECHNICAL AND MULTIMEDIA CONTENT DIRECTOR
Erik Screeden / escreeden@endeavorb2b.com
TECHNICAL EDITOR
Brandon Steckler / bsteckler@endeavorb2b.com
ASSOCIATE EDITOR
Madison Gehring / mgehring@endeavorb2b.com
CONTRIBUTING WRITERS
Jeff Taylor, Craig Van Batenburg
ART AND PRODUCTION
ART DIRECTOR
Rhonda Cousin
PRODUCTION MANAGER
Mariah Straub
AD SERVICES MANAGER
Melissa Meng
SALES
ASSOCIATE SALES DIRECTOR
Mattie Gorman-Greuel / mgorman@endeavorb2b.com
DIRECTOR OF BUSINESS DEVELOPMENT
Cortni Jones / cjones@endeavorb2b.com
ACCOUNT EXECUTIVES
Kyle Shaw / kshaw@endeavorb2b.com
Marianne Dyal / mdyal@endeavorb2b.com
Martha Severson / mseverson@endeavorb2b.com
Darrell Bruggink / dbruggink@endeavorb2b.com
Sean Thornton / sthornton@endeavorb2b.com
Diane Braden / dbraden@endeavorb2b.com
Lisa Mend / lmend@endeavorb2b.com
Chad Hjellming / chjellming@endeavorb2b.com

ENDEAVOR BUSINESS MEDIA, LLC
CEO
Chris Ferrell
PRESIDENT
June Griffin
COO
Patrick Rains
CRO
Paul Andrews
CHIEF DIGITAL OFFICER
Jacquie Niemiec
CHIEF ADMINISTRATIVE AND LEGAL OFFICER
Tracy Kane
EVP TRANSPORTATION
Kylie Hirko
BUSINESS STAFF
VP/GROUP PUBLISHER
Chris Messer
PUBLISHER
Andrew Johnson
BUSINESS DEVELOPMENT DIRECTOR, MOTOR AGE TRAINING
Michael Willins
CUSTOMER MARKETING MANAGER
Leslie Brown
AUDIENCE DEVELOPMENT MANAGER
Tracy Skallman
SALES COORDINATOR
Jillene Williams

Motor Age is partnering with TechForce Foundation to showcase young technicians and tell the stories of how they found the automotive industry, and what keeps them going. Beret DeWeese walked into Advance Auto Parts as a teenager in need of a job. Today, DeWeese is a technician and trainer at Wynne Ford in Hampton, Va. Find the stories on vehicleservicepros.com.
HOW TO REACH US
ENDEAVOR BUSINESS MEDIA LLC.
30 Burton Hills Blvd, Ste. 185, Nashville, TN 37215
Phone: 800-547-7377
CUSTOMER SERVICE
Subscription Customer Service 877-382-9187; 847-559-7598
MotorAge@omeda.com
PO Box 3257 Northbrook, IL 60065-3257
REPRINT SERVICES reprints@endeavorb2b.com
MEMBER OF:





Magazine’s legacy in training and technical information has been around longer than America’s modern automakers.
2024 REPRESENTS A MILESTONE OF 125 years for Motor Age magazine. The publication was introduced in 1899 to provide technical information to the fledgling automotive repair industry.
Over the years, the magazine was published by various publishing companies and was finally acquired by Endeavor Business Media in 2019.
In the “early” days, the vehicle brands were numerous. Some only lasted a few years, including companies such as C.R. Patterson & Sons, Durea Motor Wagon, Turgan-Foy, Detroit Automobile, Winton, Wavery Stan Hope, Stanley Buggy, Graut Brothers, Haynes Gasoline Buggy, Indiana Automobile Co., Robinson, Packard, and Whipples.









Some early vehicles were electric-powered (which finally phased out around 1935), or steam-powered, with gasoline-fueled engine power quickly taking a firm foothold. As time progressed, the domestic brands we’re familiar with today began producing vehicles on a larger scale, including Dodge (1900), Ford (1903), GM (1908), Chevrolet (1911), Lincoln (1917) and Chrysler (1925).
Motor Age made a commitment to keep abreast of the technology as it developed and changed, providing guidance to mechanics and technicians, just as it continues to do today, and will continue to do for the future. Under the stewardship of Endeavor, Motor Age is committed to keeping the industry abreast of current
and future technology for the benefit of its readers.
Here’s an interesting bit of history: Motor Age was the very first to develop an industry-wide training program, well prior to the start of NIASE (now ASE). The training program was voluntary. Each issue of the magazine would present technical skill questions. Readers would answer the questions on paper and mail them in. The papers would be graded, and readers would be notified if they passed or failed. The training program was the brainchild of John P. Kushnerick, a true visionary member of the Motor Age staff.



MIKE MAVRIGIAN MOTOR AGE // EDITOR mmavrigian@endeavorb2b.com





Since 1923, we’ve been making filters that meet the quality of workmanship from professionals like you. And, they’ve only gotten better.


PurolatorTECH Oil Filters
• Designed for Optimum Oil Flow
• Rugged Internal Construction
• 96.5% Dirt Removal Power™
Available for just about every passenger car and light truck on the road, PurolatorTECH™ Oil Filters offer reliable engine protection that meets or exceeds original factory performance.

PurolatorTECH Air Filters
• Enhanced Engine Airflow
• Multi-Fiber, High-Density Media
• Trap More Debris Than Economy Filters


PurolatorTECH Cabin Air Filters
• Optimize HVAC and Defroster Performance
• Available in Particulate or Carbon
• Meet or Exceed Manufacturer Requirements

A look back highlights the legacy of Motor Age, and also reveals how looking ahead has been its most important service.
BY TONY MOLLA



FOR FIVE GENERATIONS of automotive professionals, Motor Age magazine has been beside them on their journey to success. For many, it was the doorway to a career some hadn’t considered, including a 16-year-old kid who sat reading it while waiting for the next gas customer at a Sinclair station in Swarthmore, Penn. At the time, it was just a part-time job while in high school, and he had no idea that some 33 years later, he’d be the editor-in-chief of that very same magazine when it turned 100. If you haven’t guessed by now, that kid was me.
A quick Google search confirms that Motor Age, which debuted in 1899, is the oldest continuously-published trade magazine in the United States. In addition, it’s the third-oldest continuously published magazine in the U.S. (The oldest is Scientific American, first published in 1845 and the second-oldest is The Nation, which was launched in 1865.)
Motor Age chronicled the growth of


the automotive service industry from the beginning through two world wars, the Great Depression and the birth, life and eventual passing into history of several famous automobile manufacturers. The pages often predicted the future, as talented journalists covered the rise of 14 automotive manufacturers producing electric vehicles in 1909. This look ahead was and remains perhaps the most important service to the industry Motor Age provides. It also demonstrated the amazing ability of the independent repair community to adapt and change through such innovations as automatic transmissions, emission control systems and the evolution from purely mechanical systems to computerized engine controls — all in the space of one career.
Motor Age editors were there through the good, the bad and the ugly of automotive design and development. From the rolling works of art that parade on the green at Pebble Beach to the era of the muscle car in the ‘50s and ‘60s, Motor Age

kept mechanics up to speed on whatever rolled through the bay door. They even predicted and supported the evolution of mechanic into technician in the early ‘70s with something called the Certified Auto Repair Specialist (C.A.R.S) program that evolved into the Motor Age ASE Study Guides when ASE was born in 1972.
It was my honor and good fortune to have been on the staff of Motor Age through the 1980s and ‘90s where I had a front-row seat to the explosive growth of automotive technology which accelerated the evolution into the digital world we know today. I was there when the Motor Age website was created and the first online technician communities were born. (Anyone remember CompuServe?) And I remain in awe of how automotive professionals have risen to the challenge of keeping up with the changes by demonstrating a commitment to ongoing training and a dedication to excellence that is unrivaled in any other industry.
We’ve come a long way since September 12, 1899, when the first issue of Motor Age appeared with the tagline “A Weekly Journal of Modern Locomotion.” Though a bit dated, the language still fits the Motor Age mission of bringing the latest technical information to the hands of working technicians and shop owners tasked
with the service and repair of what has become a very advanced piece of automotive technology.
Few publications reach the century-and-a-quarter mark. Fewer still can claim to have been there at the birth of the industry they serve and become an iconic brand. But a magazine brand is not just a logo; it’s the value provided to their readers and that value lies in the skills of an ever-changing staff of automotive professionals, each a link in a chain stretching back to that first issue. Sir Isaac Newton said, “If I have seen further, it is by standing on the shoulders of giants.” The countless individuals whose talent, knowledge and insight have been alive in the pages of Motor Age over the years are among those giants of whom Sir Isaac speaks.
Although there have been many companies whose publishing portfolios included Motor Age over the years, all have appreciated the gravity of that stewardship and made sure the value being brought is of the highest quality and technical expertise. That legacy continues today.
Now a new generation is guiding Motor Age in the 21st Century and after meeting some of them and seeing how technology has expanded the channels for providing information beyond the printed page, I know our industry is in good hands.


Along the way, Motor Age has been there to help cope with rapidly-advancing automotive technology. Motor Age editors have been there to provide the roadmap, record the journey, and share the ride.
As one who has seen the future through others’ eyes, I offer hearty congratulations to the staff and current stewards of Motor Age on the 125th anniversary of the magazine. You are the next links in the chain and I’m sure I speak for many when I say “thank you” for the professionalism, insight, humor, compassion, knowledge, vision, and fierce dedication I’ve found in the pages of Motor Age over the years.
Next stop, 150!


TONY MOLLA is the former editorial director/ editor-in-chief of Motor Age. He was on the staff from 1986-1999 and his automotive career spans more than 40 years. Today, he is “relatively retired” and continues his service to the automotive industry as the Texas field manager for the ASE Education Foundation and the host of the Team ASE Podcast.

7249
BALL JOINT SERVICE KIT
• R&I press fit parts including ball joints, U-joints, truck brake anchor pins
• Hundreds of available adapters to build your kit
• Strongest C-frame available for years of trusted use

6530
BALL JOINT PRO KIT
• Includes 20+ adapters for more jobs and vehicle applications
• Specially hardened C-frame and forcing screw for years of reliable service

CA7149
CONNECTED ADAPTER STARTER KIT
• 7 connected cups & adapters hold securely to C-frame and drive screw
• 235+ vehicle models covered, from Honda Accord to Ford F-350s
• Backwards compatible with all OTC ball joint kits and adapters

CA6630
CONNECTED ADAPTER PROFESSIONAL KIT
• 25 connected cups & adapters hold securely to C-frame, making R&I easier
• 600+ vehicle models covered, including compact cars up to HD trucks
• Fully illustrated manual with adapter callouts, diagrams and instructions by vehicle model
• Backwards compatible with all OTC ball joint kits and adapters
If you have customers who operate trucks for snow plowing (residential and/or commercial), the truck may be outfitted with a brine/salt spreader. In addition to the truck being routinely exposed to ice-melting brine on the roadways, the use of a salt spreader exacerbates the issue of the truck’s exposure to salt and the rust issues this causes. A good example is a customer who uses a 2023 Ford F-350 who plows and de-ices parking lots and driveways of a number of area businesses. The truck was purchased new. After only one winter season, the frame, suspension and basically everything underhood (bolts, nuts, spark plugs, exhaust manifolds, etc.) had accumulated so much rust that service turned into an absolute nightmare. Even various harness connector pins/terminals were so difficult to disconnect that they almost seemed to be welded together.
Precautions to consider:
• Remove all spark plugs and reinstall with anti-seize applied to threads and seats.
• Apply dielectric grease to the inside of spark plug boots.
• Spray corrosion inhibitor/moisture displacement such as PB Blaster to all exposed bolt heads.
• Disconnect accessible harness connectors and apply dielectric grease to contacts.
• Power wash the chassis at every opportunity following a day/night of plowing.
• As time/opportunity permits, apply grease to the outside of all tie rod ends, steering joints, etc.
• Remove all wheels, clean the hub and wheel mating surfaces and apply high-temp anti-seize to the hubs to minimize difficulty of wheel removal in the future.
When servicing a vehicle equipped with alloy (aluminum) wheels, once the wheels have been installed and fasteners properly tightened to recommended torque value, it’s wise to re-check/re-torque the wheels after the vehicle has been driven for approximately 100 miles. Especially when dealing with brand new wheels, the
aluminum material may have been slightly compressed by the fasteners, effectively reducing the initially applied torque value. In addition, thermal fluctuations (heat cycling/ re: driving and brake applications) via heat and cooling may allow the aluminum to expand/contract, lowering the clamping load.
• Consider having the chassis “oil” sprayed at least once each year, prior to winter.
Road salt and brines are the most significant contributing factors to corrosion and rust damage on your vehicle’s undercarriage. When left untreated the rust will spread, causing extensive structural damage and costly repairs. Salt bonds to the surface and forms a film making it very difficult to remove and pre-treatments that are sprayed on the roads also include sticky additives which only complicate the removal process. As but one example, NHOU Salt Brine Eliminator, when properly applied, will remove up to 99% of salt and road brines from the undercarriage. Apply including the hard-to-reach cracks and crevices. It works to quickly loosen and break up any salt residue bond that has accumulated leaving the vehicle’s undercarriage free of salt and brine.
Loosen the fasteners and retorque to specified value. Always apply final tightening using a torque wrench. Avoid the use of power/ impact wrenches. While re-torquing may not be necessary in all cases, this check/re-torque verifies the clamping load and serves as an added safety precaution.
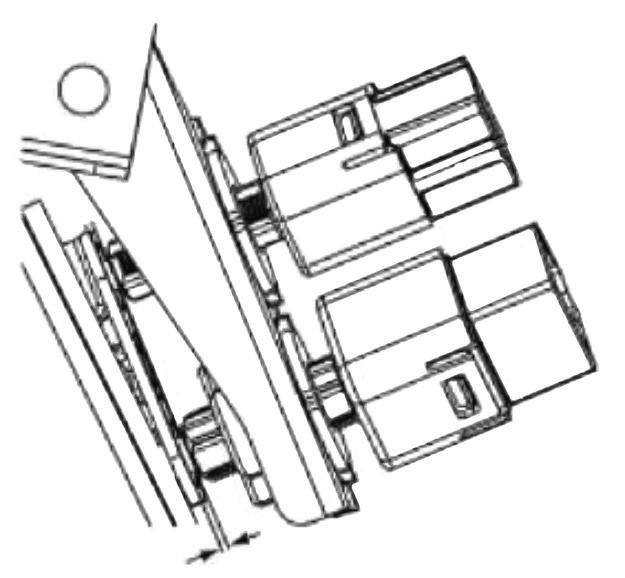
Nissan advises against the use of any silicone lubricant on brake light switches. Do not apply silicone-based lubes to or around the stop lamp switch or brake pedal position switch. This type of lubricant can be detrimental to the proper operation of the electrical contacts and could cause the brakes to operate unexpectedly.
It’s not uncommon for the engine oil dipstick to show a higher than normal level with today’s engines that feature direct fuel injection. Direct injection shoots high pressure fuel directly into the combustion chambers, where excess fuel can be forced/washed off of the cylinder wall by the piston rings, diluting the oil and increasing oil sump level. This is more common when vehicles are driven mostly on short trips. Consider advising customers who own vehicles that are equipped with direct injection of this concern, and recommend more frequent engine oil changes in order to minimize the risk of oil dilution.


If you’re chasing an EVAP fault on a Mitsubishi Eclipse Cross, inspect the connection between the main canister and vent tube. The connection may be misaligned, resulting in a small leak. Unbolt and remove the fitting and inspect the O-ring. If the O-ring is suspected as faulty, replace it. Reattach the fitting, making sure it is aligned with the canister as the bolt is tightened. Run a smoke test to confirm.


If you’re dealing with a 2017-2018 Chevy Silverado, a 2019 Silverado 2500/3500, a 2017-2018 GMC Sierra or 2019 Sierra 2500/3500 and you hear a clicking or tapping noise near the engine cooling fan area, the condition may be caused by the fan blades hitting one or more of the four shroud mounting tabs. If you find contact between the blades and the mounting tabs, replace the fan.
Chevy now offers an updated fan to correct the condition: P/N 84890705.


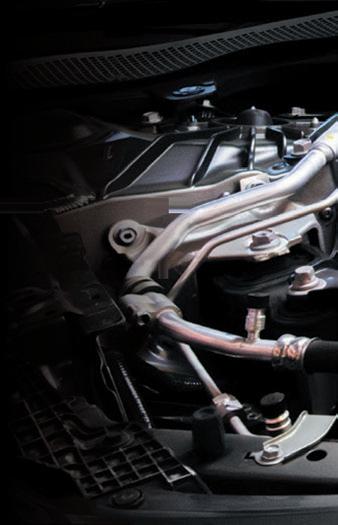
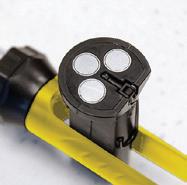



After replacing a DEF pump on a diesel engine, the pump may not build pressure. DTCs that may be set (for example, on GM vehicles), include P20E8 (reductant low pressure) and P249C (excessive time to enter closed loop/reducant injection control.)
If the new DEF pump won’t build pressure, check for leaks and loose connections. Perform a leak test three times. If no leaks are found, the problem may be that the DEF pump filter has dried out. Allow the vehicle to sit overnight with the new pump and DEF fluid, in order for the filter to re-saturate. In the morning, perform the leak test three times. The pump should now be able to build pressure.
2018 Ford Expedition, 2018-2019 F-Super Duty and E-Series vehicles built after July 9, 2018, and 2019 F-150/Transit vehicles built on or after Jan. 2, 2019, are filled with the new Motorcraft Yellow antifreeze/coolant. When servicing these vehicles, be sure to only use the yellow VC-13-G coolant. Do not mix different colors or types. Note that the yellow coolant may appear green in color due to the fluorescent dye.
Before installing new stainless steel brake pad slider clips into the caliper bracket, be sure to first clean the bracket’s clip pockets of all rust. Over time, the cast iron brackets tend to build corrosion behind the stainless steel clips, causing the clips to expand and place more pressure against the brake pad tabs. This results in restricted pad movement. The pads aren’t able to slide on the clips as they should. This requires more pedal pressure and/or brake pedal pumping to stop the vehicle, and the pads and rotors tend to get glazed because the pads can’t retract from the rotor disc as quickly as intended. Clean off any corrosion/rust from the caliper bracket clip pockets using a wire brush or mini sanding belt.
Clean to bare metal but don’t remove base metal. Before installing the clips, apply a thin film of dedicated brake caliper grease to the now-clean bracket surfaces, and apply the same grease to the exposed slider clip surfaces prior to pad installation. It’s a small, but important, detail.
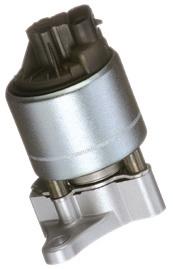
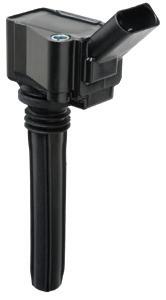

Delphi offers over 2,500 SKUs in our robust and ever-expanding Vehicle Electronics category. Our engineers are driven to ensure that our parts meet OE form, fit and function so you can install them with confidence.
From ABS Wheel Speed Sensors to EGR Valves, to Ignition Coils and MAF Sensors, Delphi’s Vehicle Electronics portfolio will help get you back on the road.
Contact your Delphi rep to learn more.




The ASE World Class Technician thrives on the variety and complicated puzzles he faces each day.
BY JOY KOPCHA




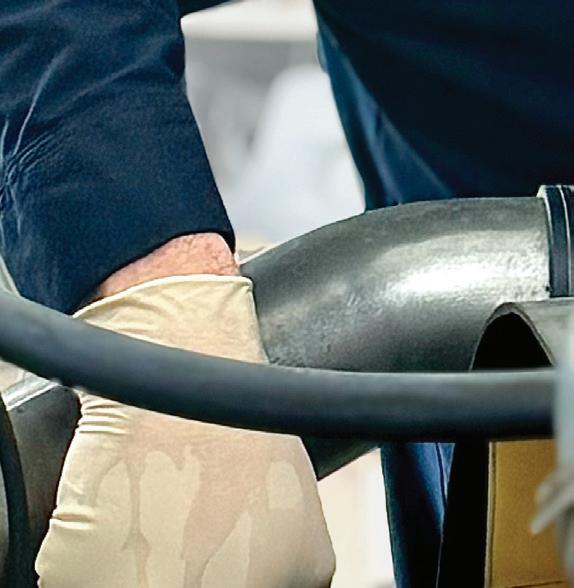



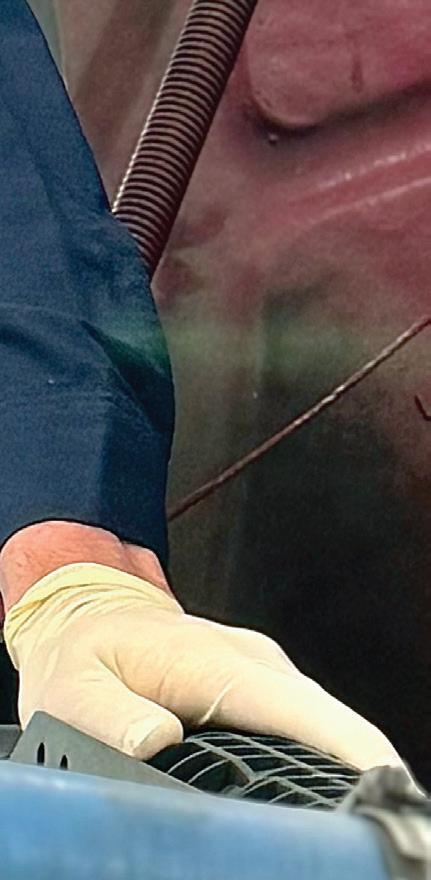
When Steve Mancuso was young, he was one of those kids who liked to disassemble things to see how they worked.
“I was always pretty mechanically inclined as a kid,” he says. He remembers going to yard sales and buying parts for his BMX bike and taking apart remote-controlled cars. And occasionally, his parents would find the television’s remote control in pieces.
“I would drive my parents crazy.”
At some point during high school an idea popped into Mancuso’s mind: “If I enjoy doing this, maybe I’ll make a career out of it.”
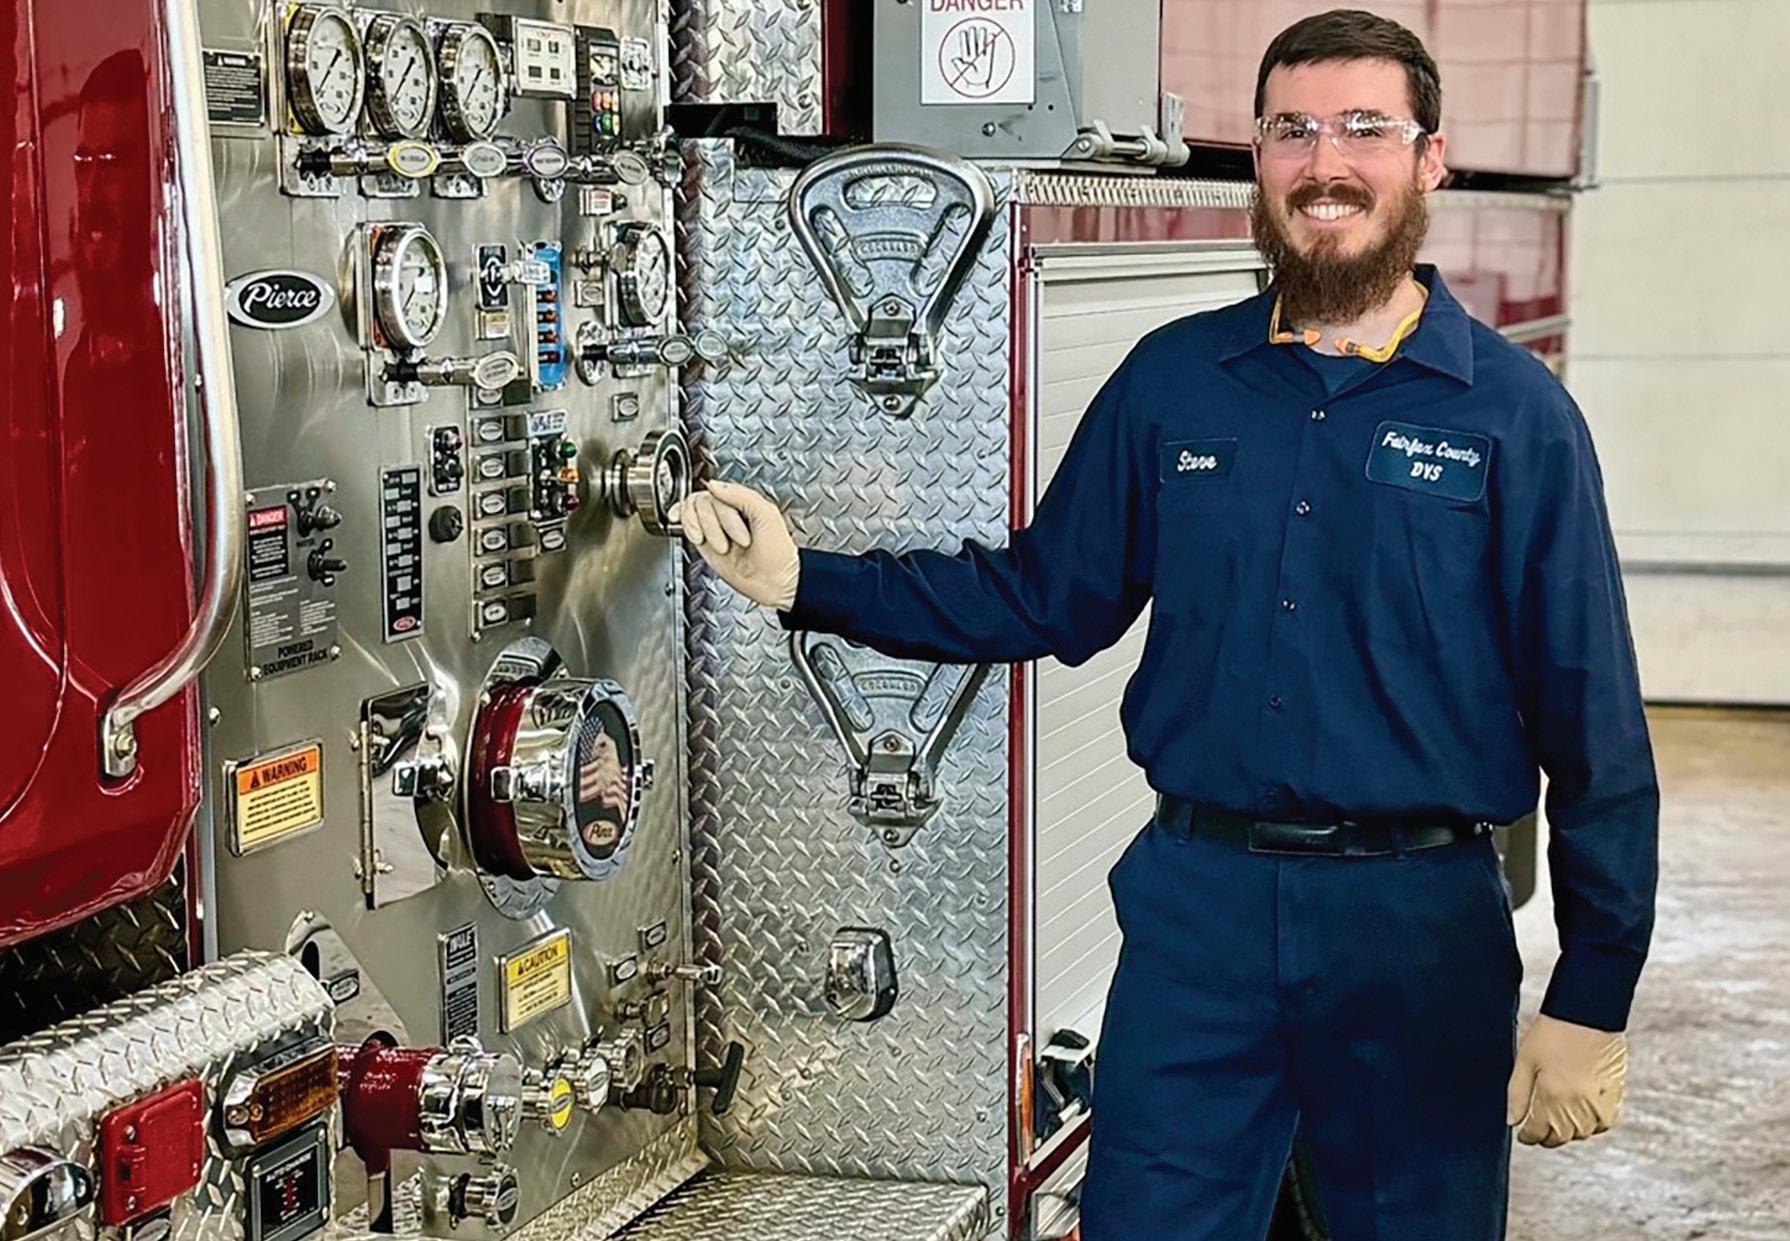
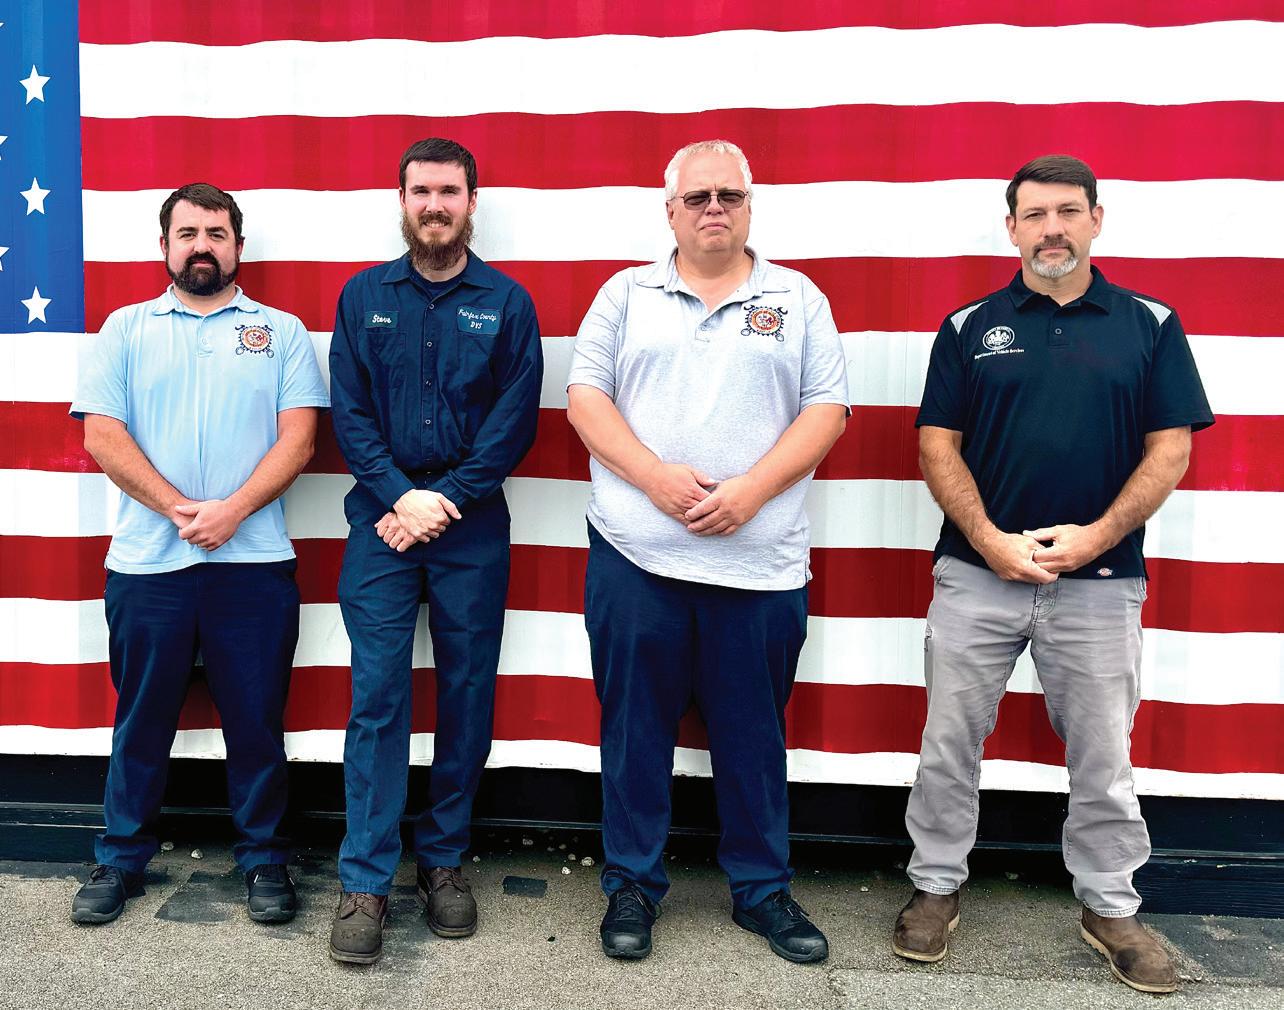
And Mancuso has done just that. The freshly minted 35-year-old has worked as a technician in a Ford dealership and for independent shops, but he’s found his professional groove since joining the Department of Vehicle Services for Fairfax County, Virginia, in 2018.
He achieved World Class Technician status in 2021 with the National Institute for Automotive Service Excellence (ASE) and has been promoted to Fairfax County’s highest level for technicians. He’s a go-to diagnostic technician who also serves as a trainer and mentor to his peers. And now he can add another achievement and exclusive patch to his sleeve: Motor Age’s 2024 Best Young Tech.
Feeding Off the Variety
Mancuso has had to find his own way into the field, because he says his high school didn’t have an automotive program. After earning his high school diploma he attended Universal Technical Institute in Exton, Pa., and completed his automo-
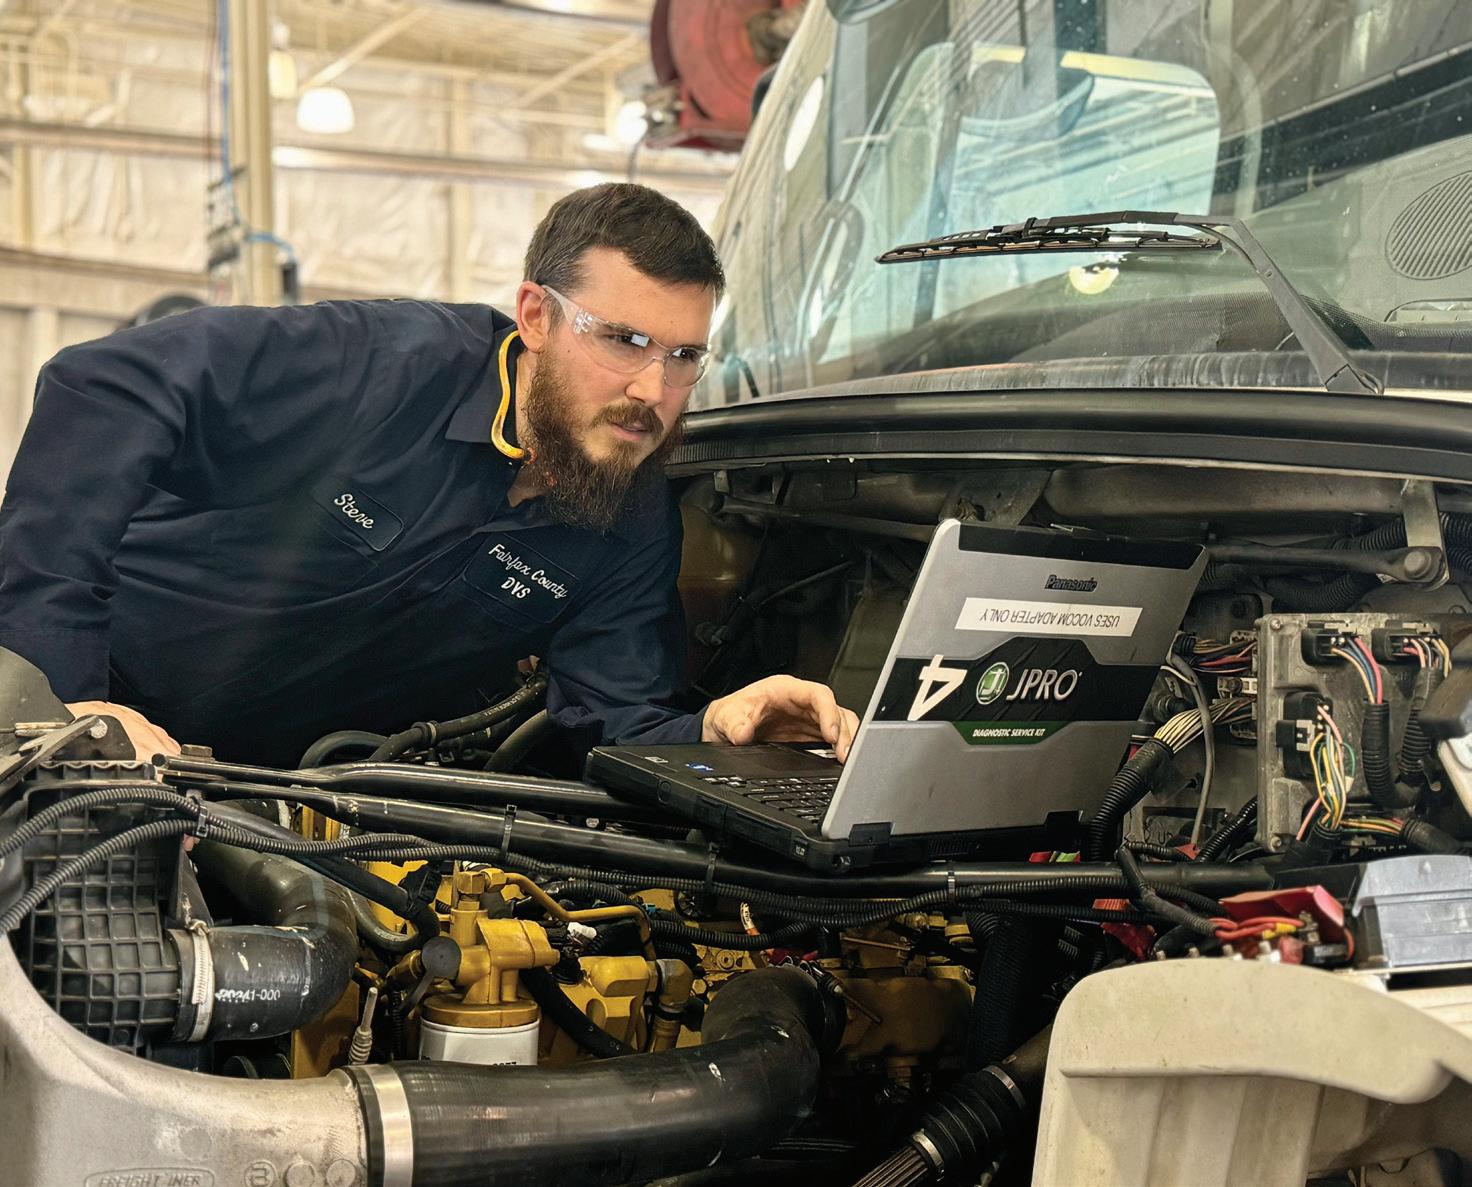
tive technology certificate with honors in 2009. His first job was as a helper at a Ford dealership, and he worked his way up to lead technician. That’s also where he started working on diesel engines. After some time with independent shops, he realized he was looking for something a little different.
He prefers variety, and found he really enjoyed worked on heavy-duty equipment. That led him to a municipality.
“When I started I wasn’t really sure what to expect,” he says. “It really varies. You don’t work on the same thing every
day. One day you could be working on a generator or a welder and the next day you’re working on a tractor trailer. It’s really varied work.”
The Department of Vehicle Services maintains and services more than 6,300 vehicles — everything from school buses and trash collection trucks to vacuum trucks for wastewater and stormwater and pickups for the park department.
“There’s just so many different vehicles that come through our shop — it’s crazy,” he says.
“I kind of like the fast pace of the dealSponsored by


ership world, but you’re just working on the same stuff every day. You can get really good at working on one thing, but (here), you’re working on 20 different things. To me, it’s a lot more interesting. It’s fun. It’s challenging and I really don’t have anything bad to say about it.”
Mancuso joined his department as a level one technician, and within three years had moved up two more notches to the department’s highest technical spot: vehicle and equipment technician 3.
In nominating Mancuso, Long “Teddy” Lai, fleet service and facility manager, said he “consistently performs at a high level. He is often seen diagnosing and repairing complex components in our fleet of trucks. He is always willing to take on tough assignments, help his team with difficult tasks, and strongly desires to exceed expectations.”
In the last year Mancuso has added safety trainer to his list of responsibilities. He’s developed and conducted training sessions on fall protection, uniform and personal protective equipment, lockout tagout and heat stress.
Mancuso says he’s also added technical training sessions to fill in gaps when the department’s budget has limited access to outside training resources. He says the training has been designed with new, young technicians in mind as they are getting to know the equipment that rolls into their service bays. Sessions have covered things like hydraulics, air brakes, and different electrical systems.
“It really helps the young guys get up to speed as far as what we work on dayto-day,” Mancuso says.
The in-house lessons complement what other vendors, including truck manufacturers, offer.
“Eaton, for example, makes transmissions, and the area representative will

come in and go over some of the more technical things with the transmission — how they operate, (common) problems and how to go about (fixing) those issues. And with the trash truck, you’ll have stuff that’s pretty complex with the body and all the hydraulics and all the electronics that have to work together and coexist,” he says.
“There was a need we saw, and we just put some stuff together in house (to) make our guys better and also safer.”
Mancuso is one of about 2,300 technicians to achieve World Class status from ASE since the program began in 1986. He earned his initial ASE certifications while a student at UTI, but then when he joined the Ford dealership, training there was centered on Ford’s technical credentials, so ASE certifications took a back seat.
“Once you get outside of (the dealership) box, the rest of the industry




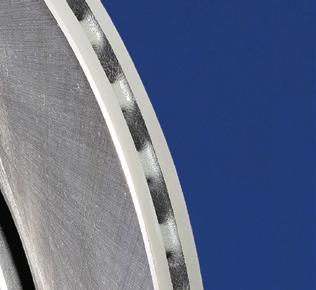


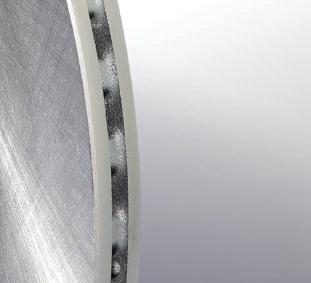

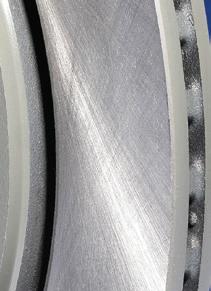


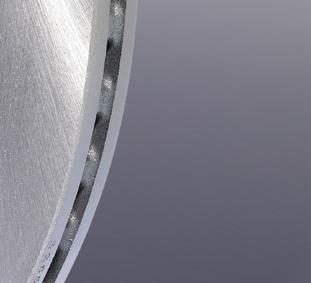


That’s what every set of Duralast brakes is. How does Duralast do it? Reverse engineering. It shows us every material and detail that went into the original so we can make our own version equal to or better than OE quality—without breaking the bank for your shop.

— everybody else — recognizes ASE,” Mancuso says.
He remembers a day when one of his coworkers at the county shop was talking about the World Class recognition. In a light bulb moment he thought, “I can probably do that.
“So I started taking the tests,” and as it turned out, others in the Department of Vehicle Services chose to do the same. Ultimately, four of them earned World Class status around the same time. (Mancuso completed his testing in 2020 and was named a World Class Tech in early 2021 when he was 31 years old.)
ASE hasn’t maintained official statistics of the ages of technicians when they achieve World Class status, but a spokeswoman estimated that most achieve the mark in their 30s and 40s.
Mancuso is well versed in the worries that surround a shortage of technicians and a general lack of young people entering the trade.
He doesn’t see a one-size-fitsall solution.
“There’s not just one problem in the industry with the technician shortage. I think it’s a few things.
“Some of it is, kids at high school really aren’t getting pushed to that because they’re not being exposed to the trades. And another thing is, when new guys are just coming in (to the industry,) it’s tough because you’re not getting paid a lot of money and you’ve got to buy a lot of tools.
“Also, the complexity of things nowadays, it really can be overwhelming. So if you’re not really committed to learning new things, buying tools and really buckling down, guys just move on and do something else.”
So if he could wave a magical wrench and fix this problem, what would Mancuso do?
“Bring back the vo-tech” and other hands-on training sessions in high schools. “I think that would definitely help.”
As for the technical side of things, Mancuso says there’s no simple fix. Vehicles are complex and he admits it’s just bound to be tough initially. “It can be discouraging.”
But that again is where he thinks exposure in high school is critical.
“With a lot of older guys retiring, they take that knowledge with them, and if there aren’t people to pick up their knowledge, it really leaves a big gap.”
Bridging that gap “isn’t simple, and (involves) a lot of moving parts,” he says.
He sees the gap in his own workplace, and after having the opportunity to participate in some panel interviews with job candidates, he also sees some of what is missing.



From micronized carnauba to the latest graphene and ceramic formulas, our full spectrum of BRIGHTLINE professional car appearance products has everything you need to make your customers’ cars – and your business – shine. So whether you run an automatic, self-serve or hand-wash and detail operation, make the smart choice with BRIGHTLINE.


“A lot of guys I feel like aren’t really passionate about being a mechanic. They just do it for the money. I don’t really think that helps the situation,” Mancuso says.
If he was tasked with recruiting, he says he’d stress the variety and the opportunity to constantly learn and try new things. “It’s not the same thing every day. If you enjoy learning new things and you’re not afraid to get dirty, it’s really fun — and you can learn how to work on your own stuff,” whether that’s a hot rod or vehicle for off-roading.
“The biggest thing is having passion. If you’re not passionate about doing something, it’s hard to do it.”
Playing Detective
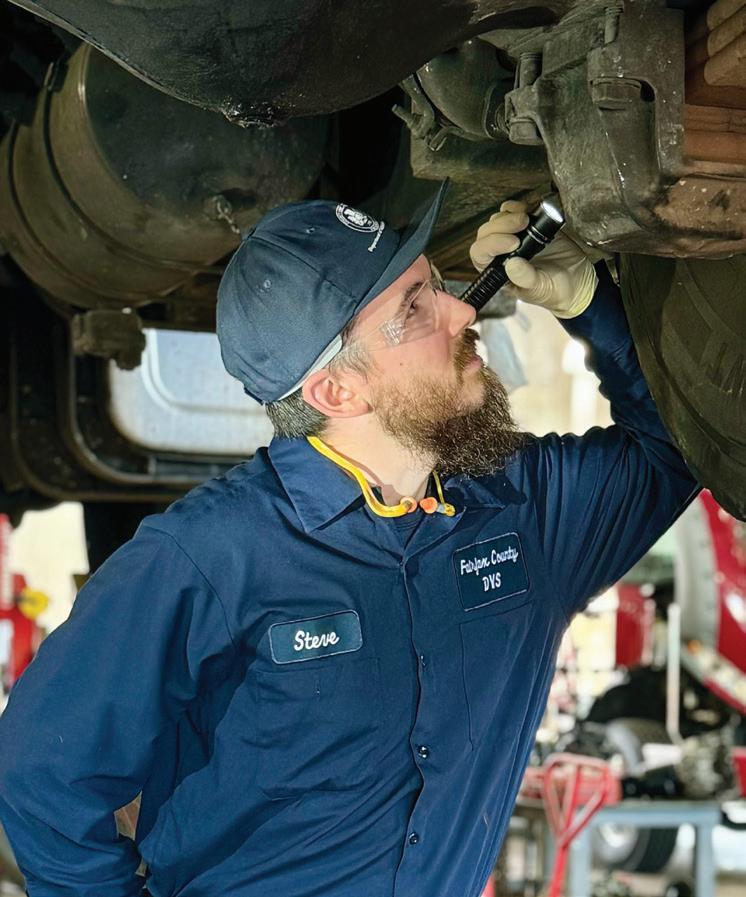
The passion is how Mancuso got hooked. Over time he’s advanced from doing typical maintenance and repair tasks to solving diagnostic mysteries.
“A lot of times what will happen is, I’ll start working on something and then somebody else will come to me for help. Then I’ll start working on their truck with them, helping them figure something out. I’ll never get my work done, but I’ll help somebody else finish theirs.”
He says that describes the majority of his workdays.
“To me, that’s the most fun — taking a bunch of pieces (of information) and then coming to something that you can
Steve Mancuso has amassed an impressive resume of trainings and certifications as a young technician, including:
• ASE World Class Technician
• ASE Master Certification in Automotive, Collision Repair, Truck Equipment, Transit Bus, School Bus, Medium-Heavy Truck, Military Tactical Wheeled Vehicle, Advanced Engine Performance Specialist L1, Electronic Diesel Engine Diagnosis Specialist L2, EV Technician, and Parts Specialist.
• Virginia State Vehicle Safety Inspector
• IMI International Level 3 certification in Electrical/Hybrid Vehicle System Repair and Replacement
• Tire Industry Association certified trainer
just figure out — you get the big picture,” he says. “You get to use your brain. It’s not just pulling out a drain plug and draining the oil. It’s challenging.”
Occasionally the diagnostic mysteries
are even more complex when they appear on a vehicle he hasn’t serviced previously.
“One day I’ll be working on something I’m familiar with and then the next day it’s something kind of alien to me.”
He remembers a truck that needed an engine harness. Someone else in the shop had put the harness on, but eventually the team realized the pins on the ECU connector were incorrect. He says it was a tedious yet satisfying project to reassemble that correctly.
It was like “playing detective and figure out what goes where.”
Sometimes that detective work is needed on more than just vehicles, but equipment in the shop. His boss Lai recalls Mancuso’s touch on a parts elevator that was built in 1988 — a year before Mancuso was born.
The elevator is used to lift heavy engine parts to an upper storage area in the shop’s parts department. Three vendors had all taken a turn at it, and the county had paid them a combined $5,000 only to end up with a still-broken elevator.
Mancuso happened to be in the office area when Lai and others were talking about what to do next. The elevator had been out of commission for more than a year. Mancuso asked, “Do you mind if I take a look?”
He got the OK and spent a few hours assessing the elevator. He even called in his brother, who is an electrician, for some assistance.
“There was some electrical work, like the building’s electric that I had to work through…and then there’s some hydraulics on the elevator that I had to figure out,” he says. “I spent a few hours on it and figured out what did what and eventually figured out the problem, and now it’s working again.” He admits the elevator “was completely out of my wheelhouse.”
Lai says Mancuso’s fix saved the county more than $300,000 — the cost to replace the elevator — which was thought to be the only solution.
He’s “always prepared to take on even
Steve Mancuso, winner of the 2024 Best Young Tech Award, will receive this prize pack from Motor Age and the contest’s sponsors:
• All expenses paid trip for two to the 2024 AAPEX/SEMA Show in Las Vegas, provided by Motor Age magazine.


• A complimentary ALLDATA subscription for 12 months, provided by Duralast Parts
• A $1,500 tool credit, provided by Nexpart
• ASE A-Series and T-Series study guides, provided by Motor Age Training
• Haynes Model V8 Engine, provided by TechForce Foundation
• Award plaque and uniform patch
the most challenging and dirtiest tasks in the facility without hesitation. It’s important to note that we maintain refuse loaders and compactors with highly sophisticated hydraulic systems. These trucks are difficult to maintain, and when you add waste and trash into the mix, the work becomes hazardous.”
Lai says Mancuso has built a reputation as a reliable and principled employee.
“He has demonstrated a consistent dedication to ensuring that tasks are executed with precision and correctness from their inception,” and has developed expertise in the maintenance and repair of tractors, trailers, and refuse trucks.
Just as important, Lai says Mancuso “places a high value on collaborative efforts and takes responsibility for his actions.”
He’s dependable and willing to help lower-level technicians, too. Lai says, “He is continuously relied upon to tackle
repairs, no matter the complexity or the availability of technical information.”
Mancuso says, “I like figuring it out. Solving problems is just fun for me.”
Someday, he says he might want to move up into management. But for now, he’s happy troubleshooting and fixing problems in a service bay.
“I think eventually I’ll probably move into management, but to be completely honest, my heart is really in the shop.”


BY MIKE MAVRIGIAN // Editor
WHILE YOUR SHOP likely does not include a machine shop and you may not be involved in engine rebuilding, this article provides an overview of what is typically involved in cylinder head repair/rebuilding. The goal of this article is to provide insight regarding what may be involved if, or when, you source cylinder head work
out to a local machine shop. The insight can help you (and your customer) better understand the work involved.
Cylinder head work, depending on the issue at hand, may be required due to a failed head gasket, worn or damaged valves and valve guides, cracks in the casting, etc.
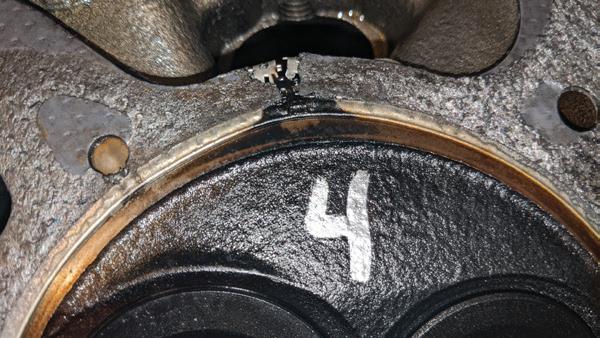
In cases where the engine overheats and/or leaks combustion, disassembly will often reveal a “failed” head gasket. The problem is incorrectly too often blamed on the gasket itself. When a head gasket fails or is “blown out,” the cause is far more likely to involve incorrect deck surface flatness

and/or machined finish. If the engine has experienced severe operating conditions (overheated due to lack of coolant, restricted radiator hose, plugged radiator, etc.), this can easily result in warpage of an aluminum cylinder head which prevents the gasket from sealing.
Other factors can involve a poor finish of the head deck that does not allow gasket sealing, and/or improper head installation where specified bolt torque/sequence tightening was not followed. In other words, don’t be quick to place the blame on the gasket. Rather, you can view the head gasket as a “fuse” that has failed due to other factors.
Whether the head gasket has failed or not, whenever a cylinder head has been


removed, always check for deck flatness before you consider re-installing the head.
A good head gasket seal requires a flat, clean gasket surface on both the cylinder head and engine block. Overheating, gasket failure, or careless handling can damage mating surfaces.
Inspect the head deck for flatness using a precision straightedge and feeler gauge. Do not rely on any “straight” piece of metal. Use only a machinist-grade precision straightedge that is purpose-made for flatness measuring.
Inspect the combustion deck and intake deck for flatness, using a precision machinist’s straightedge and feeler gauges. Measure decks from front to rear, on the
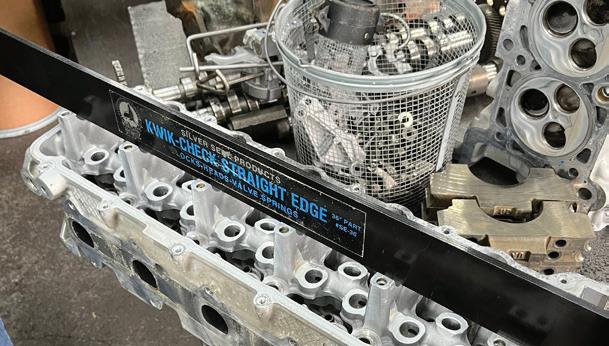

intake side of the combustion chambers. Then measure front to rear at the exhaust side of the chambers. Measure diagonally (corner to opposing corners, in an X pattern). Then measure from the intake side to the exhaust side in the center and at each end of the deck.
Perform the same checks on the cylinder head’s intake deck.
As a general rule, the maximum allowable warp from front to rear or diagonal paths on a cast iron head is 0.004” or less. For aluminum heads, front-to-rear or diagonal allowable warp is 0.002” or less. Maximum allowable warp from the exhaust side to the intake side is about 0.001”. Note that any sudden or isolated warp of 0.001” or
more along any 3” span is unacceptable. These tolerances are somewhat generic. Always refer to the engine maker’s specifications for allowable surface deviation. If a flatness inspection reveals that the deck is warped beyond acceptable limits, the cylinder head may be corrected or replaced, depending on the specific application. Corrections can involve resurfacing the deck to attain true flatness, heating the

head while fastened to a flatness fixture that replicates the engine block deck and allowing the head to cool, followed by a light resurfacing. If the head is to be resurfaced, always refer to the automaker’s tolerance limits in terms of how much material may be removed.
Overhead cam cylinder heads that warp along their length cause camshafts to bind in their support bearings. Upon

tear down, check for warpage through camshaft bearings. When a precision machinist’s bar straightedge will not go through camshaft bores or when bore diameters are “stepped” or have different diameters, you can use the camshaft by placing it onto the saddles and trying to “rock” the camshaft in the bore, using the cam as the “straightedge.”
Check also for damage caused by gasket


failure. For this purpose, it is a good idea to keep the original head gaskets on hand and check them for evidence of leakage. If leakage is apparent at the gasket, check the corresponding point on head and block surfaces. Depending upon the location of the leak, a “blown” head gasket sometimes permits combustion gases to burn or erode these surfaces. Be sure to find the cause to prevent repeat failures.

Corrosion damage around water circulation passages in aluminum cylinder heads is occasionally severe enough to prevent a head gasket seal. Sometimes corrosion damage extends across oil passages in the head and permits oil to enter the coolant and coolant to enter the oil. Be sure to check visually for corrosion because such problems are often the reason for removing the head. If severe,
resurfacing will not correct the condition. While a weld repair might be appropriate, the best option would be to simply replace the cylinder head.
Cylinder head gaskets rely on deck surface finish in order to properly seal combustion force and coolant. If resurfacing is required, chances are that your shop is not





equipped with the tools needed to accomplish this, requiring you to farm such work out to a local engine machine shop. The following information is intended to make you aware of the nature of this operation.
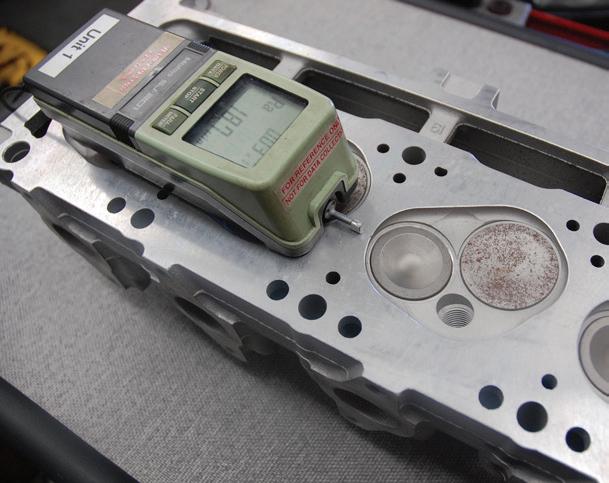
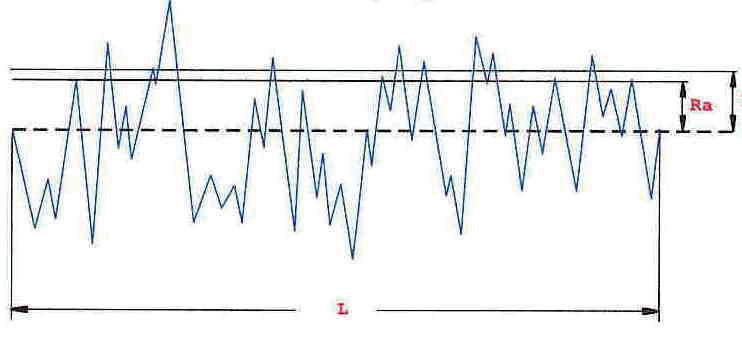
The head gasket deck surface of a cylinder head must provide a finish that is compatible with the intended type of head gasket. Surface finish requirements will vary, depending on the type of head gasket that is required — composite or multi-layer steel (MLS). Surface finish is typically rated in roughness average (RA). The RA specification represents the average across the surface of the peaks and valleys evident from surface machining.
The smaller the RA number, the finer the surface finish. While older engine designs that feature composite head gaskets may function with a surface finish in the 50-100 RA range, today’s MLS head gaskets employed with aluminum heads and/or blocks require a smoother finish to
compensate for the continuous expansion and contraction of aluminum as engine temperatures increase and decrease. The majority of today’s aluminum heads require an RA in the 30 range, but some OE specs for certain engines can require even finer finishes in the 20-30 RA range — or even finer. If the finish is not smooth enough, excess “bite” can occur at the gasket, preventing the head from moving during thermal expansion and contraction, which can easily lead to gasket damage and subsequent coolant, oil and/ or combustion leaks.
In order to actually measure the RA of a surface, a special tool called a profilometer may be used. This tool features a moving stylus that runs across the surface and displays the RA in a digital screen. If a profilometer is not at hand, resurfacing milling machine manufacturers provide a chart of recommended feed rates and cutting speeds in order to achieve a specific
RA finish. Again, this is something that the typical repair shop will be unable to do, but the purpose here is to provide information regarding what is involved.
While cylinder head resurfacing may be accomplished with either a wet grinding station or a dry milling machine, milling is preferred, since it’s faster, allows greater cutting depths per pass and does a superior job of achieving a fine surface finish. Wet grinding is usually limited to removing 0.005-0.001” per pass. Milling (with cutters lightly lubricated to prevent aluminum from building up on the cutters) allows one deep-cut pass to eliminate warpage, followed by one light dressing pass to achieve the desired RA. However, in order to achieve the desired fine RA finish for aluminum heads and MLS gaskets, light cuts per pass and lower feed rates are recommended. Again, the resurfacing machine maker will provide recommendations for traverse feed rate

and cutting speeds. Cutter inserts are typically carbide or cubic boron nitride (CBN) for cast iron heads and carbide or polycrystalline diamond (PCD) for aluminum heads. When milling aluminum heads for a fine RA finish, the rule of thumb is to increase the cutter rpm and slow down the feed rate (for example, a traverse feed rate of about 2-3” per minute).
Naturally, removing material from the cylinder head deck moves the combustion chambers closer to the pistons, with related

potential issues of pushrod length, valvetrain geometry, increased compression ratio, potential valve-to-piston clearance, potential misalignment of intake manifold ports, etc.
In general terms, resurfacing should be limited to no more than 0.010” of material removal. Again, always refer to the engine manufacturer’s recommendations before you consider resurfacing. Your local machine shop should be able to make the determination of whether to resurface or


IN ADDITION to checking the cylinder head for flatness and surface finish, the block deck may be checked in the same manner. Deck warpage and surface irregularities can also affect the head gasket’s ability to properly seal. If issues are found, the block deck can be resurfaced. However, it’s critical to note the engine maker’s specifications regarding deck resurfacing limits. In some cases, block replacement may be required.
to replace the head.
Keep in mind that these issues may be corrected by simply using a thicker head gasket. Various-thickness head gaskets are readily available for most popular engines, especially when dealing with MLS head gaskets, where thickness can be manipulated by the thickness or number of stainless steel support layers. Makers such as Fel-Pro, Mahle-Victor and Cometic offer a variety of head gasket thicknesses for various engine applications.





With that said, the reality is that, for repair shops that are not engine reconditioning specialists, quite often the practical solution to correct for deck warpage and/ or surface finish may be to simply replace the cylinder head with a new head, which obviously saves a great deal of time and allows getting the vehicle back into the customer’s hands in a shorter timeframe.
Check valve guide wear or “bell-mouthing” that occurs at each end of valve guides. The wear is greatest at the port end of the valve guide because of the extreme heat and deposits carried into the valve guide on the valve stem. Measure valve guide wear by taking measurements of the valve guide in the least worn part of the guide — the middle — and at the port end where it is most worn. The difference between the two measurements is the amount of wear.
Valve guide wear is extremely important in deciding upon what procedures to use in restoring specified valve stemto-guide clearance. Many manufacturers do not give specifications for valve guide diameter but instead give the valve stem diameter and the range of valve stem-to-guide clearance. The valve stem must first be measured and compared to specifications.
Valve guides can be checked more quickly using go-no-go methods. First adjust a micrometer to the valve stem diameter plus maximum valve stem-toguide clearance. Next, set a telescoping gauge to the micrometer setting and then check if it enters the valve guide. If it enters, the guide is worn beyond limits.
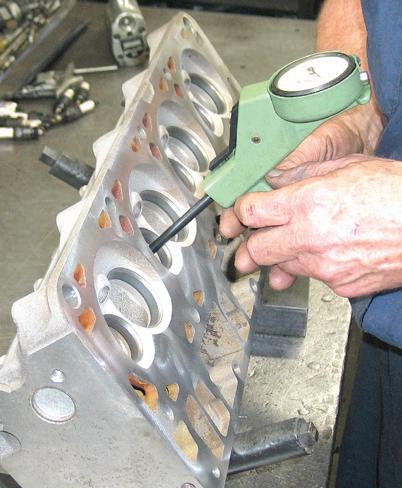
If it does not enter, clearance is within service limits.
Be aware that oversized valve stems are used to correct for wear in integral valve guides. Should this be the case, compare valve guide diameters to measured valve stem diameters to find the clearance or wear.
Measure valve stem diameter using a micrometer and record the dimensions. Use a small bore gauge to measure valve guide inside diameter and record this. Compare the readings to determine existing valve-to-guide clearance and compare this to specification.
It saves time to inspect valves before regrinding the faces. Set aside valves that show damage wear beyond service limits before cleaning if possible. Do not waste time refacing such valves.
Check the thickness of valve margins first. The thickness of the margin after grinding should be no less than 1/32” (.8mm) or half of the new thickness, whichever is greater. For passenger car engines, replace valves thinner than 1/32” or they will burn. For heavy-duty applications, replace valves that are thinner than onehalf of new thickness. If in doubt, check the manufacturer’s recommendations regarding minimum specifications.
Measure valve stem wear with a micrometer. Service limits allow .001” to .0015” (.03-.04mm) taper or variation in the diameter of the valve stem along its length. Keep in mind that manufacturers do specify stem diameters and that valve stems worn under minimum specified

diameters will not assemble within specified limits for clearance. Be sure to check specifications because some valve stems use a taper to compensate for uneven heat expansion along the stem.
Also inspect the heads of valves visually for damage such as warpage, burning, cupping, or pit marks. Keep in mind that valve burning follows a sequence beginning with unequal cooling, warpage, and then burning. Cupping occurs when the valve overheats all around the head. Look also for a necking down of the valve stem beneath the head that suggests stretching. Replace valves with such defects as they indicate exposure to extreme engine heat and the kinds of damage that cause failure. For some engines, it is safer to replace exhaust valves, not regrind them, during valve service because of the frequency of heat damage and the potential for failure. Measure used valve stems at three locations — at center of stem length, above center and below center. Any variations indicate wear.
Check for grooves worn in the faces of valve stems caused by defective “valve rotators.” A visible single wear mark/wear line indicates that the valve has not been rotating. Valve rotators cause valves to rotate each time they open and prevent warpage by maintaining uniform heat distribution around the valve head. Although rotators sometimes sit under valve springs, they most often serve as valve spring retainers. While rotators were common for many years in heavy-duty truck engines, they are now common in passenger car engines, especially for exhaust valves. Replace rotators when grooves appear in the faces






















NEVER ASSUME that head bolt holes in the block are in good condition. Make sure that the threads are clean and free of burrs/damage. A dedicated thread chaser is useful in cleaning and correcting any deviations in the threads. Never use a cutting tap, which would remove material and weaken the threads.
of the valve stems showing non-rotation.
Check keeper grooves for wear or damage. Worn keeper grooves prevent the keepers from properly locking to the valve stem. Sometimes the grooves wear so evenly that they appear as if they were made that way. If in doubt, compare worn parts to replacement parts and wear will be apparent.
The importance of maintaining correct guide clearance and carefully checking valves cannot be over emphasized. Considerable heat transfers through valves, valve seats, and guides into the cooling system, therefore, valve seats and guides not kept within service limits cause valves to overheat and fail.
Inspecting a cylinder head for cracks can be accomplished by pressure testing, or with a dye penetrant system.
Pressure testing requires blocking off water passages and pressurizing water jackets to three times cooling system pressure. To simplify testing, several manufacturers supply test plates to fit specific engine applications. These plates, with a rubber gasket, are clamped/bolted on to the face of the cylinder head using threaded rods, flat washers, and nuts. When submerged in the pressure tester tank, pressurized air is injected, with any leaks (cracks, pinholes/pits, etc.) evident by escaping air bubbles.
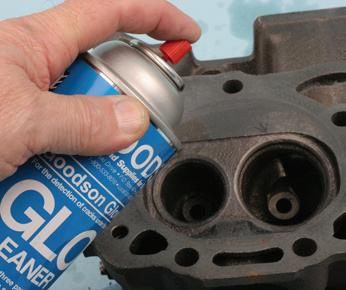
If a pressure tester is not available, a dye penetrant may be used, which is applicable to both iron or aluminum heads. The cylinder head casting must first be cleaned of excess oil/surface contaminants. Dye
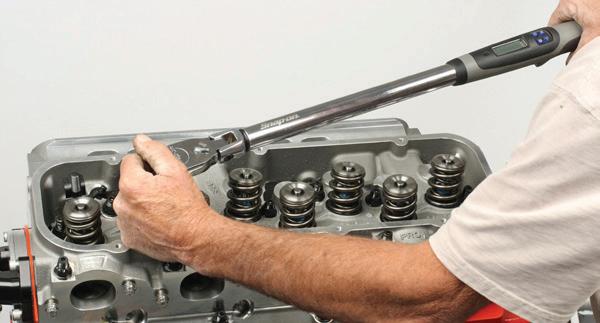
ALWAYS USE new head bolts, and strictly follow the specifications for bolt thread prep, torquing, torque-to-yield and tightening pattern. Improper bolt tightening can easily lead to head warpage and subsequent gasket failure.
checking involves spraying a cleaner to the suspected area, followed by spraying a penetrating dye, and then spraying a special developer. Using a black lint, the area is then inspected. Any cracks will be visible by a color (green, red, etc.). If a crack is found, depending on the location and severity, it may be possible to repair the crack. In most cases, it may be more practical to replace the head.
Installing a cylinder head requires attention to detail in order to achieve a proper gasket seal and to avoid comebacks. The block and head decks must be clean, flat, and provide the required surface finish. Always check all threaded female holes in the block deck for cleanliness and thread condition. Dirty or deformed threads will not allow proper torque value to be achieved. Never use a conventional cutting tap — use only a dedicated “chaser” tap. This type of tap is not designed to cut or weaken existing threads. Rather, a chaser tap cleans and re-forms the threads. Install the required locating dowels to the block deck. This accurately registers the gasket and head in position. Place the head gasket onto the block deck, paying close attention to gasket orientation to avoid blocking off critical oil or water passages. Some head gaskets are marked “front” to aid in positioning. Take your time when placing the gasket — check and re-check for orientation.
Unless specified by the automaker, never apply any sealant/glue to the gasket. While old-school copper gaskets may require a sealant, today’s composite or MLS
gaskets are designed to be installed dry.
Carefully place the head onto the block and gasket, registering to the locating dowels. Always use new head bolts, especially if the engine requires the use of torque-toyield bolts. Pay attention to bolt length, as lengths may differ among the set. Refer to the service manual for bolt locations where lengths vary.
Never install head bolts dry. Follow the manufacturer recommendations, which may include the application of oil, a specific thread lubricant, or a thread sealant in those cases where a bolt hole may be open to water or oil. Lubricant may also be required under the bolt head. Again, follow the service manual specs.
Hand install all bolts and washers. (Washers are always required for aluminum heads.) Tighten the bolts in stages, following specified tightening pattern and torque specs. Some engines (when using OEM bolts) require a torque-plus-angle procedure. Never use an impact wrench when installing head bolts!
Cylinder head inspection, repair and installation includes much more than we have space to discuss in this article (valve refacing, valve spring testing, overhead cam lifter buckets, etc.). Hopefully, this provides you with a rudimentary overview.

MIKE MAVRIGIAN has written thousands of automotive technical magazine articles involving a variety of specialties, from engine building to wheel alignment, and has authored more than a dozen books that crisscross the automotive spectrum. Mike operates Birchwood Automotive, an Ohio shop that builds custom engines and performs vintage vehicle restorations. The shop also features a professional photo studio to document projects and to create images for articles and books.














As ADAS evolves, forward-facing cameras play an increasing role.
BY JEFF TAYLOR
IN RECENT YEARS, the automotive industry has seen a significant transformation with the integration of advanced camera technologies. While rear-facing cameras have become a common feature to aid in reversing and parking, forward-facing cameras are now revolutionizing vehicle safety and functionality. These cameras, often referred to as dash cams, offer a plethora of benefits and have become a cornerstone in the development of Advanced Driver Assistance Systems (ADAS). These cameras enhance driving safety and convenience by providing real-time data that supports various functions such as adaptive cruise control, forward collision warning, and lane departure warnings. By continuously capturing high-resolution images and videos of the area in front of the vehicle, forward-facing cameras play a crucial role in making driving safer and more efficient.
A forward-facing camera system typically consists of two core components: the camera module and a processing unit. The camera module captures detailed images and videos, while the processing unit analyzes this visual data captured by the camera to identify objects, lane markings, pedestrians, and traffic signs. Additional sensors, such as radar (radio detection and ranging), or lidar (light detection and ranging), may work in conjunction with the forward-facing camera to enhance the accuracy and reliability of the system.
The forward-facing camera is usually mounted high in the center of the windshield near or integrated into the rearview mirror to provide a clear, unobstructed view of the road ahead. While most original equipment manufacturers (OEMs) use a single camera, some vehicles feature dual forward-facing cameras for enhanced functionality.
The real-time data captured by the camera is transmitted to the vehicle’s processing unit, which uses sophisticated algorithms and even artificial intelligence
to interpret the camera’s information. The vehicle shares this processed information from the camera, which includes object detection, lane detection, and traffic sign recognition, with other vehicle modules. This processed data supports various ADAS features, allowing the vehicle to respond appropriately to different driving conditions. Whether it’s maintaining a safe following distance, displaying road sign information on the dash, warning of potential collisions, or helping the driver stay within lane markings, forward-facing cameras are essential for modern vehicle safety and automation systems.
Initially, vehicle safety systems included technologies such as rain-sensing wipers, intelligent headlamp control, and lane departure warning systems. However, the advent of forward-facing cameras has expanded the scope of safety and convenience features in modern vehicles. These cameras now support a variety of advanced functions, including:
• Lane Keep Assist System (LKAS)
• Adaptive Cruise Control (ACC)
• Forward Collision Warning (FCW)
• Traffic Sign Recognition (TSR)
• Pedestrian Detection
• Obstacle Identification
• Night Vision Assistance
• Automatic Emergency Braking (AEB)
The incorporation of these functions has necessitated the advancement of lens and sensor technology tailored specifically for automotive applications. Most forward-facing cameras will also include their own dedicated defrosting systems to ensure the camera’s view is not obstructed by moisture on the windshield.
Forward-facing cameras often work in conjunction with radar or lidar systems to provide comprehensive safety features. In ACC systems, for example, the camera and long-range radar collaborate to detect and measure the distance to other

vehicles, ensuring safe following distances and automatic speed adjustments. Similarly, with AEB systems, the camera supplements radar data to enhance detection accuracy and reduce false alarms, leading to more precise vehicle intervention.
Beyond distance regulation, forward-facing cameras contribute to several other critical functions. They provide input to lane departure warning and lane-keeping systems, helping to prevent unintentional lane changes by issuing alerts and actively steering the vehicle back into its lane. These cameras can also recognize traffic signs, displaying relevant information on the instrument cluster and issuing warnings if speed limits are exceeded.
Forward-facing cameras are integral to automated high-beam lighting systems, which adjust the headlights based on the detection of other vehicles and ambient light levels. This ensures optimal visibility without blinding oncoming traffic, enhancing nighttime driving safety.
When removing, installing, or replacing a forward-facing camera, proper calibration is essential due to its high sensitivity. Calibration may also be required after events like airbag deployment or windshield replacement. Even altering the tire or wheel size may necessitate
the recalibration of the forward-facing camera system. We can categorize the calibration process into two main types: static and dynamic,. Together they ensure the camera is correctly oriented and functioning as intended.
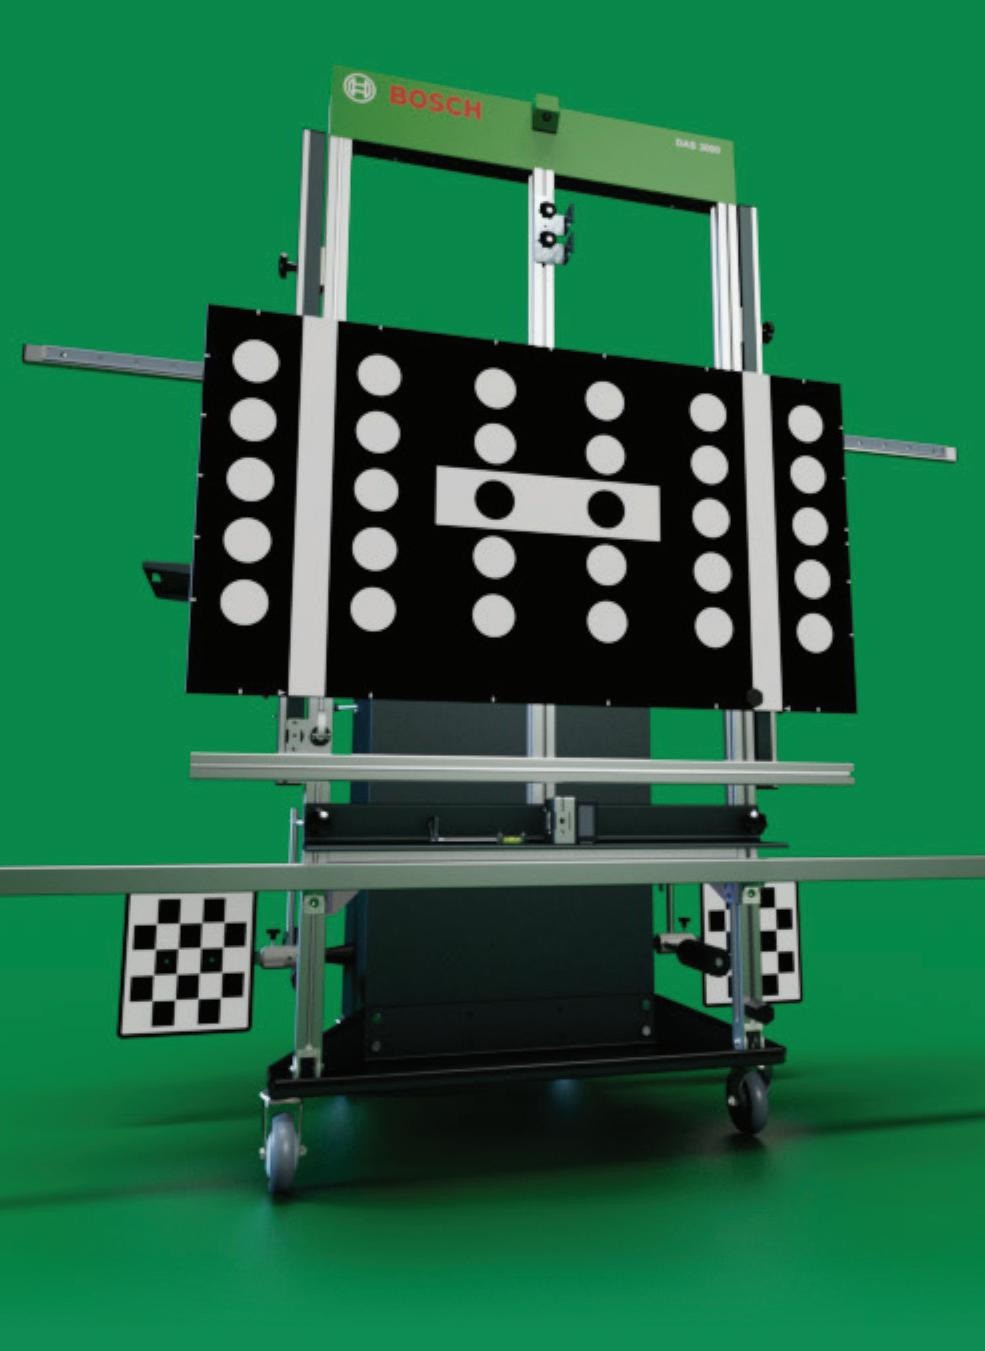
Static Calibration: Performed while the vehicle is stationary, this method may involve manually aligning the camera using bubble levels, angle/inclination meters, precise distance measurements, specialized camera targets and a fully capable scan tool. This procedure typically will require a large flat open area to perform the calibration.
Dynamic Calibration: Conducted while the vehicle is in motion, this method requires driving under specific conditions, such as maintaining a set speed on straight roads with clear lane markings. This process will involve a scan tool and may require two technicians for accuracy and safety. Weather conditions (rain, snow or fog), road curves, poorly defined lane markings, traffic or having to stop are just a few examples of issues that can impede or delay the completion of the dynamic calibration. The typical dynamic calibration drive time is under 10 minutes if conditions are optimal.
Diagnostics of all the forward-facing camera systems are going to involve the use of a scan tool. In some cases, a factory-level scan tool is going to be needed to diagnose and calibrate some systems. These forward-facing camera systems all generate DTCs, are heavily dependent on vehicle networks and often require complex alignment fixtures and measurements to ensure their safety and functionality. Many of these systems will have software updates to fix bugs and issues and checking for software updates should be part of the diagnostic process before digging deep into a DTC diagnostic. It’s crucial to refer to vehicle-specific service information for diagnostics and to determine the exact calibration requirements, as procedures can vary significantly between OEMs and vehicle models.
THE FORWARD-FACING camera’s communication/networking wiring schematic for a 2022 Ford Escape shows how intricately linked this system is to the operation of many other modules and systems
The Ford Lane Keeping System (LKS) encompasses two primary functions: lane keeping aid and lane keeping alert. The LKS detects and tracks road lane markings using the camera in the IPMA (Image Processing Module A), ensuring that the vehicle stays within its lane. The lane keeping alert function notifies the driver of any inadvertent drifting towards the outside of the lane through steering wheel vibrations and a visual alert in the IPC (Instrument Panel Cluster) message center. Conversely, the LKS will automatically provide steering torque to help the driver maintain the vehicle within the lane.
If the vehicle is equipped with Adaptive Cruise Control (ACC) other features are added to the system using the IPMA: traffic sign recognition, lane centering and stop-and-go cruise control. ACC enables the
vehicle to maintain a driver set distance between vehicles it approaches on the same path of travel. The Cruise Control Module (CCM) utilizes a radar beam to monitor the area in front of the vehicle and the IPMA and CCM share vital information on a dedicated private CAN network to enable the system. If the CCM’s radar beam is blocked by snow, ice, rain, or other debris the system will be disabled.
For the lane keeping alert and lane keeping aid to operate effectively, proper camera alignment is crucial. This calibration process is initiated using a capable scan tool and requires approximately 10 minutes of driving at speeds exceeding 40 mph (64 km/h) on a flat, straight road with clearly visible lane markings. It is important to avoid lane crossings, abrupt changes in vehicle speed, or excessive steering angle changes during the alignment process. During this calibration procedure

the IPC will display the message “FRONT CAMERA MALFUNCTION — SERVICE REQUIRED.” Once the system has properly aligned and calibrated itself, the IPC will remove this warning message.
The IPMA camera alignment procedure should be performed after a windshield replacement, if tire size is changed, suspension or alignment work is completed and after the deployment of the front airbag.
GM’s Front View Camera Module Learn If the windshield or the front view camera has been replaced, the vehicle’s suspension modified (raised/lowered) or the camera module software was updated, the camera module must be recalibrated. The calibration process typically takes between three to five minutes.
For the calibration to be successful, the vehicle must be operated under specific conditions with a clean clear windshield until completion. A two-lane road with clear lane markings, well-defined curbs and a speed limit of at least 37 mph (60 km/h) is best for the procedure. Start the camera module learn by installing a capable scan tool and access the diagnostics menu for the front view camera module. Select configuration/reset function, and then select the front view camera learn procedure and follow the instructions provided on the scan tool screen to complete the calibration while driving. Avoid changing lanes and maintain a speed between 35-56 mph (56-90 km/h) during the procedure.
After completing the calibration process, manually activate the Collision/
Detection Systems through the vehicle’s infotainment system if necessary. Set the Forward Collision System to “Alert and Brake” to finalize the calibration. The amber indicator will turn off upon successful completion, and the green ready-to-assist light will illuminate shortly thereafter, indicating that the system is operational. Heavy traffic, stop and go traffic, curvy roads, poorly marked lanes, Botts dots, weather conditions, and exceeding 56 mph (90km/h) can all affect the length of time needed for the module to calibrate or even prevent it from calibrating all together.
GM has issued several TSBs and PITs in reference to their Front View Camera and DTCs that the system can generate. DTC B1008 SYM4B can typically be set if the front windshield has been replaced and is not properly installed. The gap between the top of the windshield and roof should be 3.6 mm (±1 mm).
FCA incorporates their Forward-Facing Camera (FFC) into the Drivers Assist System Module (DASM). The DASM combines a radar unit for object detection and an integrated camera into a single unit mounted near the rearview mirror. If the windshield is replaced, DASM module replaced or moved, or the tire diameter is changed, the DASM vertical alignment procedure must be performed first, using a vertical inclinometer and a scan tool. After that procedure is performed, then the FFC is calibrated.
Before starting the FFC calibration, make sure all tires are properly inflated,
the vehicle is not loaded down, the windshield is clean, and the FFC’s view is unobstructed. Then, using your scan tool proceed to the ADAS calibration menu, DASM auto alignment procedure and follow the scan tool’s displayed instructions. The system will require the vehicle to be driven on a flat, straight road at a speed above 30 mph (48km/h) with clear lane markings, guard rails, utility poles, road signs and other common roadside objects. During the drive, maintain the required speed of 30 mph (dropping below 30 mph pauses the calibration) and avoid stopping to prevent restarting the process. FCA notes that weather conditions (snow, rain or fog), non-uniform pavement, or continuous shadows on the road can extend the alignment procedure. Typical calibration time is about seven minutes with ideal conditions. Once calibration reaches 100%, pull over safely and follow the prompts to complete the procedure by cycling the ignition. A final test drive on a road with clear lane markings will ensure the system operates correctly. Be cautious during this test, ensuring there is no oncoming traffic, and confirming that the vehicle maintains its lane as intended. Once verified, you can confidently return the vehicle to the customer knowing the system is working as designed.
To ensure that the forward-facing camera functions optimally, regular maintenance is essential. This includes keeping the windshield clean and free of obstructions like cracks or chips, which can impair the
camera’s view. Many vehicles are equipped with heating devices to remove condensation and ice from the camera’s field of view, preventing camera visibility issues.
In addition, repairs to the windshield near the camera’s field of view are often not recommended by OEMs to avoid compromising camera functionality. Using the correct windshield and following OEM procedures during installation are crucial for maintaining camera accuracy and performance.
In the rapidly evolving automotive industry, cars are increasingly becoming sophisticated computers on wheels. The integration of advanced technology in vehicles has reached a point where both software and hardware quickly become outdated. Automakers are addressing this challenge by introducing over-theair (OTA) update capabilities, allowing them to keep vehicles up to date without requiring physical service visits. Tesla pioneered this approach, and now many legacy automakers like Honda, Ford, GM, and Volkswagen have followed suit, although not without facing some initial challenges. OTA updates have transformed car ownership, making it more akin to owning a smartphone, where updates and improvements can be seamlessly delivered over the air.
OTA updates in vehicles function similarly to the updates we receive on our smartphones, pushing notifications for new software installations and bug fixes. However, the scope of these updates extends beyond simple software fixes. They can enhance vehicle performance, safety, and user experience, all through a wireless internet connection. This capability eliminates the need for many service center visits, saving time and effort for car owners. While many of these updates are offered free of charge, especially those related to safety, the growing reliance on OTA updates is also opening up new revenue
streams for automakers, with some updates and features being offered as paid upgrades. The automotive industry is increasingly adopting a subscription-based model, leveraging OTA updates to offer a range of services and features. HondaLink offers three different packages for example, ranging from $89 to $260 per year, depending on the services the customer wants to subscribe to.

There are two primary types of OTA updates: those for infotainment systems and those for vehicle performance and control. Infotainment updates enhance the user experience, addressing issues like laggy touchscreens and improving overall functionality. For instance, Volkswagen’s ID.4 has seen improvements in its infotainment performance through OTA updates. On the other hand, performance and control updates can significantly alter a vehicle’s capabilities, such as boosting acceleration or updating ADAS. However, these updates require robust security protocols to ensure safe implementation.
The benefits of OTA updates are evident in the improvements and fixes automakers have rolled out. Tesla, for example, offered an ‘acceleration boost’ for the Model Y, which reduced the 0-60 acceleration time, and it frequently updates its ‘full self-driving’ feature. GM’s Cadillac Escalade has received updates to its SuperCruise ADAS technology, while Ford’s BlueCruise handsfree driving technology has also seen OTA enhancements. These updates demonstrate how OTA capabilities can extend a vehicle’s lifespan and performance, ensuring it remains competitive without the need for physical modifications. However, it is important to note that only vehicles with the necessary electronic infrastructure can support OTA updates, making it impossible to retrofit older models with this capability.
While OTA updates offer advantages,
they also introduce potential security and privacy risks. Since these updates require a wireless internet connection, there is a risk of malware and data breaches. To mitigate these risks, it is advisable to accept OTA updates only when connected to a secure network, such as home Wi-Fi. As the automotive industry continues to embrace OTA technology, manufacturers are working to ensure robust security measures are in place. With manufacturers adopting OTA updates to provide a more customized and always changing driving experience, the future of automobile ownership is going to be more dynamic and involved. However, as these updates become more prevalent, the line between car ownership and tech product usage continues to blur.
There have been issues with OTA updates for certain 2021-2024 Buick, Cadillac, Chevy, and GMC vehicles. When a vehicle downloads a software update, the infotainment screen prompts the user to accept and install the update, provided the battery State of Charge (SOC) and Outside Ambient Temperature (OAT) requirements are met. Issues such as a no-crank condition due to a depleted battery, the radio remaining on after Retained Accessory Power (RAP) is canceled, and intermittent start-up messages indicating “Important Update … Download Resuming” have been reported. These problems












can leave the OTA update hanging in a pending state, preventing completion.
To address these issues, technicians are advised to reset the OTA update and clear the messages by charging the vehicle battery and ensuring the vehicle starts and runs properly. Technicians should verify the availability of an OTA system update in the Vehicle Settings, record the campaign number, and move the vehicle to a location with good cellular service. The vehicle must remain undisturbed for two hours with the battery SOC above 70% before confirming that no update messages are shown and there are no excessive parasitic battery draws.
The integration of forward-facing cameras in vehicles represents a significant leap forward in automotive safety and convenience. These cameras not only enhance

traditional functions like adaptive cruise control and automatic emergency braking but also support a wide range of advanced features, from lane-keeping assistance to traffic sign recognition. As technology continues to evolve, forward-facing cameras will play an increasingly vital role in
making driving safer and more efficient for everyone on the road. By understanding their functionality, calibration requirements, and maintenance needs, drivers and technicians can ensure these systems operate at their best, contributing to a safer driving experience for all.

JEFF TAYLOR is a seasoned professional at CARS Inc. in Oshawa with 40 years in the automotive industry. As a skilled technical writer and training developer, he holds licenses in both automotive and heavy-duty vehicle repair. Jeff excels in TAC support, technical training, troubleshooting, and shaping the future of automotive expertise.


www.aftermarket.schaeffler.us



Looking for battery performance under the toughest conditions? Install an FVP. Reliable, powerful – it’s the preferred battery of the NHRA. FVP. Reach for what works. POWER TO SPARE.




Expertly crafted shop management software, built for shop life. Gain visibility, boost efficiency, stay organized and impress customers.
Even more ways to connect with Shopmonkey this year at SEMA:


Visit us at booth #11861 in the North Hall at SEMA 2024!


On today’s engines, being able to pinpoint the root cause fault can be the difference between making a relatively inexpensive fix, and having the customer replace the vehicle unnecessarily.
BY BRANDON STECKLER // Technical Editor
ANOTHER EDITION OF “THE DATA DOESNT LIE,” A REGULAR FEATURE, WHERE I POSE A PUZZLING CASE STUDY.
SINCE THE LAUNCH of my first class “Pressure waveform acquisition and analysis from the inside out,” its popularity has gained a lot of traction. One of my students, Scott Jett (of Express Oil) in Ooltewah, Tenn., offered a very well documented case study that tells the story.
Scott was addressing a 2015 GMC Yukon with a misfire under all operating conditions. The engine seemed to crank over well and didn’t exhibit any audible clues to a loss of compression. From class Scott recalled the approach of working smarter and not harder. He used easy-toperform tests to guide him toward much more pinpointed tests he should invest in.
Scott began with a simple relative compression test. The test didn’t support a loss of cylinder charge capable of caus-


ing a misfire. With that, Scott moved on to analyze graphed data PIDs from the scan tool. The results of the data PID analysis virtually eliminated a misfire due to improper air/fuel ratio or lack of adequate and properly timed spark ignition.
With that, Scott performed the in-cylinder pressure transducer testing. This testing demonstrates a cylinder’s ability to pump, harness and squeeze its contents. Performing this test under different operating conditions will flush different faults to the surface and provide a diagnostic path to follow.
However, this running capture shows something very wrong with this cylinder (Figure 2). The low compression is apparent by the short amplitude of the compression towers. The fact that the towers appear to be leaning to the right indicates WELCOME


An accurate and efficient diagnosis is based around logical decisions. Understanding what a test result cannot tell you is just as important as understanding what it can. The relative compression test demonstrates the cylinder’s ability to harness and squeeze the contents within and compares that ability to those of the other cylinders of the engine. It cannot demonstrate the cylinder’s ability to breathe (pump air/ inhale, and exhale).

The cranking in-cylinder waveform indicates the cylinder seals just fine. It also shows how the piston moves air in and out of the combustion chamber via the intake and exhaust valve. No problem appears to be present in this cranking capture (Figure 1).


More than 100 years of supplying quality products.
A legacy of commitment to customers:
• Bosch offers extensive coverage on Domestic, European, and Asian applications.
• Engineering and quality experts actively develop and validate products for automotive aftermarket, heavy duty, and specialty applications.
• Bosch professionals provide best in class sales support, content, and cataloging.
• All Bosch starters and alternators are backed by Roadside Protect.











Our commitment to quality:
By remanufacturing starters and alternators to meet or exceed OE specifications, Bosch ensures the same high standards of durability and performance as new parts. Our rigorous testing and precision engineering guarantee the reliability you need on the road. Learn more about this high-quality remanufactured option at boschautoparts.com/rethinkreman.

the piston ascending builds compression at a rate that is significantly slower than the loss of pressure, as piston descends. This is a classic characteristic of a severe loss of cylinder charge — a leak. The one thing this capture doesn’t tell us is the location of the leak point within the cylinder.
A second lab scope trace was added to the capture. This was derived from a delta pressure transducer (one that reacts swiftly to changes in pressure). The approach is to analyze the capture where the

traces correlate with one another (Figure 3). What is apparent, and indicative of the fault, is the change in the delta pressure sensor trace that correlates with the opening of the suspect cylinder’s intake valve (derived from the in-cylinder trace).
With all the information in front of us, and the desired information not yet obtained, we are faced with deciding how to proceed. Here are some bullet points of what we

FIGURE 3: ADDING THE intake manifold delta-pressure trace to the capture pinpoints the location of the leak and the likely cause (the leak is only present during the duration of the intake valve being open).
know to be factual, and I will ask all of you, diligent readers, for your input on what they mean to you, collectively:
• Misfire under all operating conditions.
• Data PIDs point toward engine mechanical fault.
• In-cylinder testing shows no loss cranking, but significant loss with engine running.
• Change in intake pressure correlates with suspect cylinder’s intake valve duration.
Given this information, what would you do next?
1. Replace the piston/rings/recondition block.
2. Replace the intake valve spring.
3. Machine the cylinder head gasket surface.
4. Replace the exhaust valve spring.
A PLACE WHERE PEOPLE KNOW THE DIFFERENCE BETWEEN A CAMSHAFT & CRANKSHAFT.


BY BRANDON STECKLER // Technical Editor
WHAT WOULD YOU recommend doing next, given the data bullet points in last month’s challenge?
1. Replace the CKP sensor.
2. Inspect CKP reluctor with borescope.
3. Replace damaged crankshaft.
4. Update PCM software.
For those of you who chose answer No. 2, congratulations! The 1 Hz-anomaly yielded conclusive evidence that the fault was related to the crankshaft. The CKP sensor was removed, and a borescope inserted in its place.

The crankshaft was rotated until damage was seen on a section of the reluctor teeth. A stone made its way into the bell housing of the transmission and caused the damage.
Answer No. 1 is incorrect. Since the anomaly in the CKP sensor waveform occurred once per crankshaft rotation, it eliminates the sensor as the fault.
Answer No. 3 is incorrect, although some crankshafts have the CKP reluctor teeth machined into the crankshaft itself, this configuration has a bolt-on reluctor
that can be replaced. Replacing the crankshaft would not fix the issue.
Answer No. 4 in incorrect as well. Updatingthe PCM software can correct some issues that surface on vehicles.
However, the fault present on this vehicle is an input-issue and new or updated software will not allow the PCM to recognize the faulty input any better that the original software.
Be sure to read the next Motor Age issue for the answer to this month’s challenge and what was discovered!


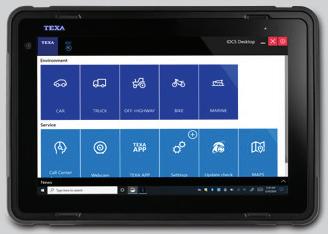






BY CRAIG VAN BATENBURG
ENGINEERS HAVE BEEN improving automotive and truck systems for a very long time. My grandfather, Ed Finacom, used a team of horses to haul back electric cars when the batteries went dead over 120 years ago. My father, Raymond Van Batenburg, modified a 1950s Ford to look cool and go faster when I was a kid in Utah. That was a long time ago and as more cars and trucks hit the road, some of the fun turned into traffic accidents and polluted air. In 1970 the Environmental Protection Agency (EPA) was created and then the National Highway Traffic Safety Administration (NHTSA) started up the same year. These regulatory bodies are still here and their missions are to make the roads safer and the air, land and water cleaner. We have come a long way in my lifetime and even further since my mother’s father, Ed, started his job fixing electric cars. In the last 100 years, we have experienced an incredible array of innovations. Advanced Driver Assistance Systems (ADAS) came out of the last few decades. ADAS was influenced by the decades before. Let me make the case that hybrids made the transition to ADAS possible.
The Toyota Prius started development in the late ‘80s. It was put on a fast track to go to market in Japan when Toyota was faced with Honda making them look technically inferior on the Indy Car and F1 race tracks. If the growth of Honda sales in Japan had continued, at some point in the future, the mighty Toyota would have become the No. 2 best-selling brand and Honda No. 1 in Japan. The proud Toyoda family would never let that happen. Once the Japanese
unspoken rule “never work for the competition” started to fade away, Toyota hired talent that they lacked from many OEMs and started a top secret project. That project eventually produced the Prius.
The first Prius was sold in Japan in December 1997 as a M/Y 1998 and it was a hit, but Toyota only made a right hand drive model. Toyota management asked the R & D team to convert the Prius to left drive and beat Honda to the punch as Toyota had already sold over 35,000 Prii (that’s plural for Prius) in Japan and the technology was working fine. Soon a problem was sent back to Toyota management from R & D. They couldn’t just move the steering wheel from right to left without re-designing a large part of the car. It would take more time than Toyota had, if they wanted to sell the first hybrid in the U.S. The car was eventually redesigned for the U.S. market. It was much quieter, faster and better appointed than the Japanese model.
My thanks to the late Stan Stephenson (former editor of Motor Age) as he was able to get me my first test drive in a Japanese version, right hand drive Prius, in the fall of 1999. The U.S. Prius was made available to the public in the summer of 2000 as a M/Y 2001, and was in limited supply. It became the iconic hybrid.
If you lived in California in 1997 you could apply to lease a pure electric Toyota RAV 4. Using Nickel Metal Hydride batteries and a Denso-designed heat pump, this heavy and slow EV (zero to 60 in 18 seconds) was also being designed by Toyota at the same time the Prius was just coming out. We have an old RAV4 EV at ACDC (my HEV-EV technician training company). The ‘90s were busy as OEMs were required to sell zero-emission vehicles in some states. It pushed the advancement of many ADAS components we see today.
In 1988, Koyo Seiko and NSK co-developed a column-mounted system 12-volt motor


Developed and approved by SKF for a better driving experience, lower consumption and maximum durability For technical support and insights, visit: https://vehicleaftermarket.skf.com/us/en or scan the QR code to know more about the
that assisted a manual rack and pinion system used on small cars sold in Japan. The first-ever electric power steering system (EPS) for mass-produced passenger cars appeared on the Suzuki Cervo in 1988. In 1993 the Acura NSX offered an A/T as an option and the added weight required a power steering system so Acura brought EPS to America.
Today, EPS is the norm in most new, light duty vehicles. The Ford F-150 and the Chevy Silverado half-ton pickup trucks have used a 12-volt electric power steering

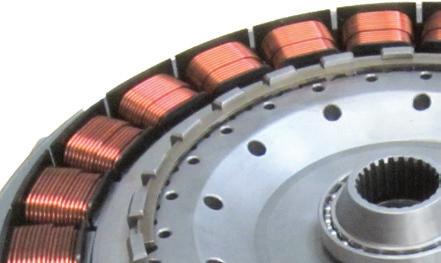




system for almost 15 years. Because hybrids need EPS so the ICE (internal combustion engine) can shut down at idle, this need drove the development of EPS.
The basic concept of regenerative, or recuperative braking, is to hold off using the conventional hydraulic brakes and let the drive wheels slow the HEV down using the high voltage drive motor(s) as a generator. Without modern computer controls, that would not have been possible. Imagine only having front brakes and trying to stop a car in all conditions. That would be very dangerous as the rear wheel brakes are needed to add stability. To have



a computer stop the vehicle with both a hydraulic system (think of a four-channel ABS) and one or more generators in the drive line, the Hybrid or EV would need the following data:
• Speed of each wheel
• Speed of the vehicle
• Stopping force requested
• Actual “G” force in real time
• Yaw rate
• Hydraulic pressure at each wheel


• Exact position of the brake pedal
• Brake fluid pressure in the master cylinder
• Pressure in the accumulator
• Vacuum in the brake booster (if equipped)
• How fast the driver pressed the brake pedal
• State-of-charge of the high voltage battery pack
• Other data may also be used


A smart dedicated computer system would stop the vehicle safer and faster than the average human.
Advanced Driver Assistance Systems (ADAS) technologies hold the potential to reduce traffic crashes and save thousands of lives each year. In 2022, 42,514 people died in motor vehicle crashes in the U.S. Many of these crashes were tied to human error.
A passive ADAS function merely informs the driver of an unsafe condition. The driver must take action to prevent that condition from resulting in an accident. Typical warning methods include sounds and flashing lights, and sometimes even physical feedback, for example, a steering wheel or seat that shakes or vibrates.
Common passive ADAS functions include:
• ABS or Anti-lock Braking Systems prevent the vehicle from skidding and allow turning when emergency braking is needed.
• ESC or Electronic Stability Control will assist the driver if they are losing control in an under or over-steering situation, usually when driving excessively fast.
• TCS or Traction Control System uses both ABS and ESC to assist the driver in maintaining adequate traction when negotiating turns, on hard acceleration or other times when the wheels are losing grip.
• A Back-up Camera provides the driver a view behind the car when parking and backing up, and some vehicles allow the camera to be activated while driving forward.
• LDW or Lane Departure Warning alerts the driver if the vehicle is not keeping within its lane.
• FCW or Forward Collision Warning tells the driver to brake in order to avoid a collision ahead.
• BSD or Blind Spot Detection warns
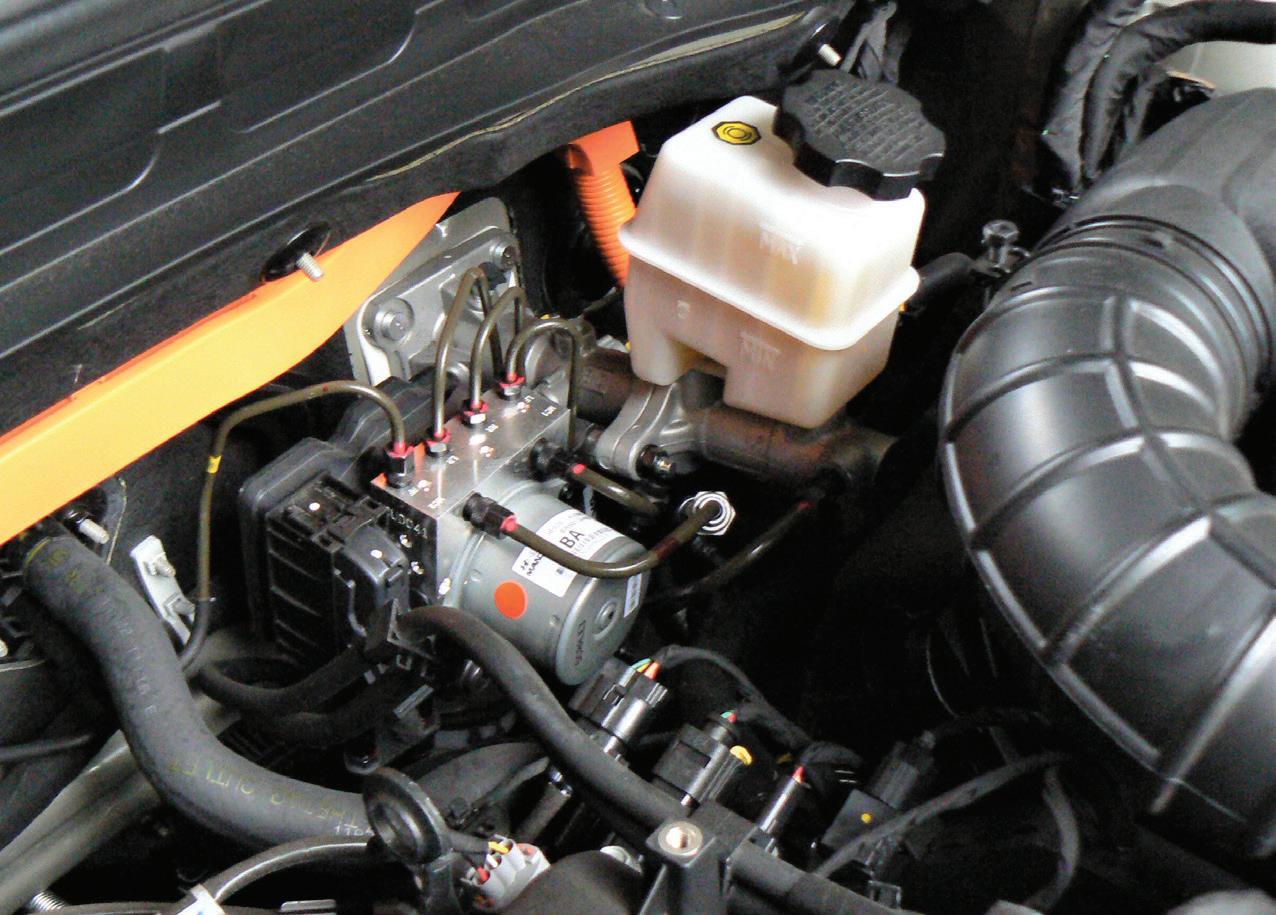
the driver that there is a vehicle in their blind spot.
• Parking Assistance will warn the driver when their front or rear bumpers are approaching an object at low speeds, i.e. when maneuvering into a parking space.
An active ADAS function will allow the vehicle to take direct action.
Examples of active ADAS functions include:
• Automatic Emergency Braking will stop or slow down the vehicle as required to avoid hitting a vehicle ahead — or another object, including pedestrians, animals, or anything in the lane of travel.
• Emergency Steering takes over the steering of the car to avoid striking an object in the lane of travel.
• Adaptive Cruise Control keeps a safe distance, when activated, from the vehicle ahead of you. It will adjust your speed to match that of the vehicle in front of you.




• Lane Keeping Assist (Sometimes called Lane Centering) will steer your car to stay centered in your lane.
• Traffic Jam Assist combines Adaptive Cruise Control and Lane Keeping Assist to provide semi-automated driving in dense traffic events, i.e., stop-and-go conditions due to lane closures, road construction, etc.
• Self-Parking will help those who never learned how to park a car maneuver into a parking spot.

The ultimate extension of ADAS technology is full autonomy, i.e., self-driving capability. (A common acronym is AV, for “Autonomous Vehicle.”)
If we imagine a future world where cars, trucks, motorcycles, mopeds, and buses are driving around without human operators in control, the challenges involved in creating such a broad system of automated driving technologies seem daunting.
If we can get there, here are some benefits:
• Far fewer accidents caused by driver error, meaning fewer human injuries and death, as well as fewer damaged or destroyed vehicles and property.
• Lower energy consumption due to ride-sharing, and possibly even fewer cars needed per capita.
• Self-managed traffic systems on busy roads, meaning fewer traffic jams.
• Less stress and road rage, leading to a more peaceful world.
EVs.
Consider this: It is 2044 and most cars are battery powered electric cars. The fuel cell was tried but the infrastructure was never built out so the few fuel cell cars from the 2020s are sitting behind a repair shop and the owner is still thinking about the cost for a new fuel cell membrane rebuild kit.
Hydrogen is expensive and although you can still buy it, the stations are getting

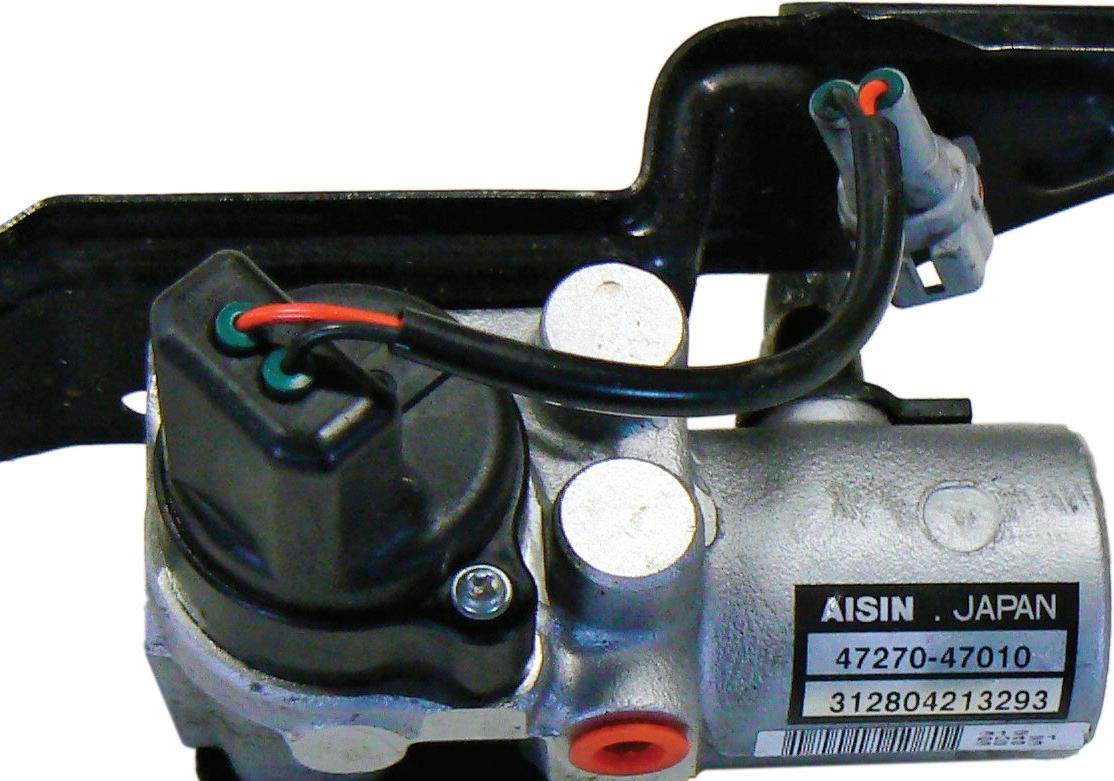

harder to find, just like gasoline. Diesels started to go out of favor in 2016 when Volkswagen brought attention to how dirty they can be and VW switched to all electric vehicles (EVs) in 2033.
Volvo had shocked everyone in 2017 with their announcement that they would stop spending any more research dollars on the internal combustion engine. In 2029 Volvo became a leader building pure EVs in China.
All major cities across America started switching their city vehicles to pure EVs by 2028. Recharge times were no longer an issue as the four-to-10 minute wait for a city car that had a 200 mile range or a 15 minute charge gaining you 500 miles of range was acceptable.
The high voltage battery packs are leased to the car owners by Exxon Mobile or some large energy producer that uses intermittent sources like wind and solar. The packs are repurposed, after their useful life in the car is over, to store electricity at wind and solar farms.
Body shops will have little work to do as traffic accidents are so rare. The work is mostly restoration for people yearning for the good old days when cars ran on gasoline and humans had to drive them.
As each advancement adds collectively to a more complex machine, it may feel like we are driving around in a laptop with a windshield and four wheels.
Did the Prius get us to ADAS? I say yes, but many cars came before the Prius.
The problems that so many vehicles have brought us also gave us mobility, the middle class, and jobs.
Technology, and your ability to fix these semi-automated systems, will get us to a better future. If you have mobility challenges, use a wheel chair, or need help walking, there is good news in all this. My late friend, Marylyn Keer, used a handicapped van for the last 20 years of her life. She made the best of it and drove the van herself as long as she could. If you are a new technician entering the workplace, keep up your studies, as we will need you to fix a broken world along with broken cars and trucks.

CRAIG VAN Batenburg is the CEO of ACDC, a hybrid and plug-in training company based in Worcester, Mass. ACDC has been offering high voltage classes since 2000, when the Honda Insight came to the USA. When EVs were introduced in 2011, ACDC added them to their classes. Reach Craig via email at Craig@ fixhybrid.com or call him at (508) 826-4546. Find ACDC at www.FIXHYBRID.com.







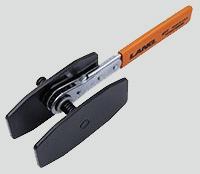


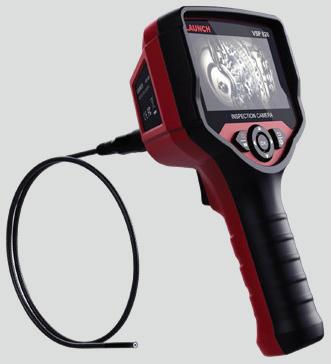






















The Matco Tools 1/2” Drive Air Impact Wrench, No. MT3779, delivers 1,700 ftlbs of breakaway torque and features a composite body weighing 4.6 lbs, reducing strain and user fatigue during prolonged use as well as allowing easier access to tight spaces. The impact wrench offers an easy-to-use forward and reverse push button with increased wear resistance and the tip valve trigger design provides ideal torque control and speed. Additionally, it has a large grease fitting and a heavy-duty anvil and delivers 1,250 bpm with 7,500 rpm. Available in blue, green, orange, and purple color options.


The PQ345 PicoBNC+ 1400V Differential Probe Kit from Pico Technology can handle signals ranging from EV batteries and inverters to 5V digital communications networks such as CAN. It connects seamlessly with PicoScope 4425A oscilloscopes with up to three probes usable at once. Designed for both high-voltage and low-voltage environments, it also offers smart probe interfacing for easy probe configuration, powered probes that don’t require batteries, and status lights and probe checking for instant identification of connected probes.


The 36” Dominator Pro Pry Bars, Nos. 14117GN and 141170R, from Mayhew Tools feature a hardened and tempered alloy steel shaft that runs from the cutting edge through the handle to deliver maximum durability and prying power. The capped end allows for striking without damaging the handle and serves as a shock absorber, reducing hand fatigue. Patented linear ribs around the neck ensure maximum transfer of torque, while the patented axial ribs assure a slip-free grip. The user’s hand naturally fits into the contour of the tri-lobular designed handle, and the rounded ends give additional comfort. A black oxide finish prevents corrosion and reinforces durability. The pry bars come in green or orange handles.




The TOPDON TopScan Moto offers comprehensive system diagnostics and maintenance functions for dirt bikes, cruisers, and touring and adventure motorcycles. It covers diagnostics for engine, ABS, smart key, and entertainment systems. It also features oil maintenance resets, service indicator adjustments, a multi-dimensional data display, automatic make and model recognition with auto VIN, and idle speed tweaks, and it can detect and clear fault codes across all systems. It’s currently available for MBW, Ducati, and Harley-Davidson brands with additional brands to be added as they’re developed.

DXS Impact Sockets from Ingersoll Rand replace the traditional square drive of other sockets with a spline-type interface for a tighter fit, more load-bearing surface, and easier access to tight spaces. The sockets are made from chrome molybdenum alloy steel, feature a ball nose retention pin for quick, tool-free installation and removal, and come with a lifetime limited warranty. The sockets are available both individually and in four sets: SAE, metric, standard, and deep.


The Autel MaxiSYS IA700 ADAS Calibration Frame System features a modular, compact design that can be quickly disassembled for transport or storage. It uses a robotic crossbar with six high-definition tracking cameras and includes advanced features such as wheel alignment prechecks, optical positioning, and unlevel floor compensation. The IA700 also includes the Guided ADAS application, which allows users to calibrate recently released vehicles that aren’t yet covered by Autel software.













The Bosch ADS and ADS X 5.19 Software Update expands coverage of 2024 vehicles, including DTC, data support, and bidirectional functions for multiple Toyota, Lexus, Kia, and other models. It introduces additional ADAS calibration capabilities for various makes and models and features 5,000 new special tests and system applications. It also allows ADS 525X and 625X users to unlock secure gateway-equipped Hyundai, Kia, and Genesis vehicles.


The S57 Programming Tool from Schrader TPMS Solutions is designed to simplify TPMS management. It can program sensors, including EZ-sensors and other programmable TPMS sensors. The S57 can also retrieve, read, and clear TPMS codes, as well as easily change placards. In addition to Bluetooth connectivity and a full-color touchscreen, this tool includes TPMS relearn procedures built into the unit itself. With five years of software updates and the ability to update the tool through Wi-Fi, it’s simple to keep the S57 up to date and running the most recent software.






The DHC BTW350 is a wireless battery and electrical system tester that conducts tests via Bluetooth connection to the DHC app on a smartphone or tablet, which then displays real-time results. The app-based interface is not limited by cable length, and it allows users to edit and save customer and shop information as well as share test results with customers through text or images. It supports 6V and 12V batteries and includes 12V and 24V system tests. It comes with a 12-month warranty.
Continental Cooling Fan Assemblies are exact replacements for the original fan in fit, form, and function, right down to the electronic module. They restore the original cooling performance and feature OE mounting locations and plug-and-play electrical connections for quick, easy installation, right out of the box.
Find the right part at: www.continentalaftermarket.com


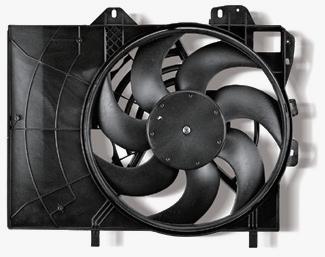








The Continental Active Grille Shutters are designed to be direct replacements for Chrysler, Ford, and Lincoln models, including the Chrysler 200 and Lincoln MKZ, as well as the Ford Focus, Escape, Mustang, Explorer, F-150, and Fusion. The grilles are identical in fit and function to the OE part, says the company, making them fast and easy to install. The grilles open when the engine needs cooling and close at highway speeds to improve aerodynamics.


The BendPak 12APX-192 is a lift designed to ease technicians’ workloads. With a height of 193” and a 12,000-lb lifting capacity, it offers increased space and power. Part of BendPak’s AP Series, the 12APX-192 is tailored for modern EVs, featuring advanced bi-metric arms for efficient lifting. With safety features like the automatic swing arm restraint system and innovative safety lock system, it ensures secure operation. Plus, its versatile design and Low-Pro arms make it ideal for a range of vehicles, providing precise, and safe lifting solutions.


Delivering up to 130% more nighttime vision compared to standard halogen bulbs, Philips NightGuide platinum premium upgrade headlight bulbs give drivers more time to react for safer driving.
Give your customers the advantage of NightGuide platinum.




The Duralast Wifi Borescope, No. 89-001, features a high-resolution, multiple-aspect camera (1920 x 1080, 1280 x 720, and 640 x 480) with adjustable LED lighting. It has an independent Wi-Fi signal that can connect to a phone or other device. Users can take high-resolution videos or pictures in areas like cylinder heads, gas tanks, and diesel injectors. The lens and cable are IP67 certified, dustproof, and waterproof in up to 3’ of water for up to 30 minutes. Its 58” cable is flexible yet rigid enough to give users access into hard-to-view areas. The compact camera is only 6mm in diameter, allowing user access to small areas. It has a mobile app for both Android (2.3 and up) and IOS (6.0 and up) devices.

The Lumileds Philips Flood Mini LED Worklight, No. X30FLMIX1, is a compact LED floodlight that provides a bright white light up to 500 lm. For handsfree use, the Flood Mini features a 360-degree hook and a tilting handle with soft-touch plastic to protect painted surfaces. The light is rated IP65/IKO8 for resistance to impacts, water, and dust and provides up to eight hours of use from a single charge. A USB-C charger and cable are included.
Kit includes restorer taps, dies, and files for chasing out damaged threads without undercutting good threads
Restorer taps and dies are highly tempered for strength and durability
Taps and dies are hex shaped for use with a socket or wrench
Tools are color-coded for quick visual identification


The In-Line Wire Stripper, No. 19150, from Tool Aid automatically adjusts to strip 8-30 AWG PVC insulated wire. Built-in cutters on the stripper can cut through 1030 AWG PVC insulated wire. The stripper includes a pressure adjustment slide for fine-tuning, and an adjustable strip length guide for quick, repeat stripping. The inline style allows use in tight and recessed areas.












Some 2020-2021 Lincoln Aviator hybrid vehicles may exhibit a brake pedal pulsation or vibration when the brakes are applied. The ABS may be activating without any indicators on the instrument panel. This may be due to the regenerative braking software in the ABS module. Reprogram the PCM to perform a coordinated flash on the PCM and ABS module using the latest software level. (Photo: Lincoln)
This bulletin applies to 2018-2020 Mazda6 vehicles equipped with SKYACTIV-G 2.5T engines produced before Dec. 27, 2019. Some customers may experience the check engine light on with DTC 222.9:00 stored in PCM memory. BARO sensor circuit high input.
This concern will most likely occur on vehicles that have aftermarket wax applied in the engine compartment. Aftermarket wax may adhere on the breather hole located at the bottom of the PCM, which may collect dust and result in a plugged filter. This breather hole is a filter for the air pressure sensor in the PCM. When the PCM gets hot, the internal air pressure may rise due to the plugged filter and result in the DTC.
programming according to instructions on MGSS.
P/N PART NOTE
PYH7-18-885A bracket
PYFL-18-881 ........ PCM ....... U.S. spec

To eliminate the concern, the shape of the PCM bracket has been modified to not cover the breather hole and eliminate a gap between it and the PCM that may promote the residual liquid wax. If the breather hole is plugged, it is impossible to clean the filter. Do not attempt to disassemble the PCM. Remove the PCM with brackets. Visually check if the clearance between the PCM and the lower bracket is narrow and/or the breather hole looks dirty. If not, there may be another cause for the concern.
If the breather hole is plugged, install a new PCM with a modified bracket. Perform PCM configuration and immobilizer system related part
PYFN-18-881.......PCM.......Mexico spec (Photo: Mitchell 1)
This bulletin applies to 2016-2017 Jeep Patriot/Compass vehicles built on or after June 20, 2016, and on or before March 31, 2017, and equipped with a 6-speed automatic transmission. The vehicle may exhibit an intermittent nocrank/no-start DTC P0705-00 (transmission range sensor A circuit..PRNDL input) and/or P0706-00 (transmission range sensor performance) may be stored in memory.

Scan for other issues and repair as needed before proceeding. If no other concerns are present, replace the TRS (transmission range sensor) with P/N 68273120AA. (Photo: Jeep)
Continental belts, hose, hydraulics, tensioners, and timing kits help ensure your customers’ cars and light trucks operate smoothly and reliably. Our precision-engineered parts are built to last and help extend the life of a vehicle without skipping a beat. Continental, your first choice for premium aftermarket products.
RUN STRONGER , LONGER


This bulletin applies to all Kia vehicles equipped with manual tilt steering columns. An oily substance may be noticed dripping onto the driver-side floor, especially in high ambient temperatures. This may be due to an excessive amount of grease applied to the steering column tilt adjustment area, which may become liquified and drip. Using a clean shop towel, remove the excess layer of grease from around the column pivot area, being sure to leave sufficient grease to allow for easy adjustment of the column tilt. (Photo: Mitchell 1)
Owners of 2019-2021 Cadillac XT4 vehicles equipped with a 2.0L gasoline turbo engine may comment on one or more of these conditions when driving in temperatures below zero degrees:
• Loss of power
• Hesitation on acceleration
• Stalling condition
• MIL illuminated
• DTCs P0299 and/or P2227 may be set.

This condition may be caused by ice accumulation in the charge air cooler (CAC), restricting airflow. A winter grille cover has been released to address this issue. After the technician initially installs the grille cover, the customer needs to be educated on the removal process after winter season ends and how the customer will reinstall the cover the following winter season. The winter grille cover is available as P/N 85513002. (Photo: Mitchell 1)
Some 2020-2022 Ford F-Super Duty vehicles may exhibit a condition where the engine will not turn off. Other various electrical issues may be present at times including a dead battery, a horn that stays on and no crank/no start. The ABS indicator may be on, with DTCs C0020 and U3003 in the ABS module. This may be the result of water/moisture intrusion into the BJB (battery junction box). This intrusion may be related to the BJB cover not
installed properly and/or broken cover tabs. Replace the cover if tabs/holddown fingers are damaged. Covers are available as P/N LC3Z-14A003-D. If water intrusion into the BJB is verified, replace the BJB with P/N 14A068. Refer to the parts catalog for specific VIN applications.
• Remove the battery and battery tray.
• Remove the BJB cover.
• Loosen the two BJB connector bolts and remove the battery power cable nut. Disconnect the battery power cable from the BJB.
• Release the BJB from the two locking tabs on each side of the BJB.
• Lift the BJB to allow access to both BJB connectors. Disconnect both connectors and remove the BJB.
• Remove the cover from the new BJB and connect both connectors to the BJB.
• Install the new BJB into both locking tabs.
• Attach the battery power cable and tighten the cable nut to 93 in-lb. Tighten the connector bolts to 48 in-lb.
• Install new fuses/relays as needed.
• Install the new cover making sure that the tabs/fingers are installed correctly.
Complete by installing the battery tray, a charged battery and cables.
BY BRANDON STECKLER // Technical Editor


A LOGICAL PROCESS OF SCAN TOOL ANALYSIS can easily point to a leak (or unmetered air) in an induction system. Although a layer of complexity is added when the vehicle configuration incorporates a turbo charged/pressurized induction system, preliminary scan tool data can still provide the stepping stone we look for to justify further investigation of a leak.


But now it’s time to find that leak. How do we approach it efficiently? Many of the pressurized induction system’s components are buried or at least not easily visible. With that, visual inspection can be very involved and can require extensive disassembly.
Implementing a smoke machine can aid in that process, however a pressurized induction system that leaks under boost pressure (upwards of 15 psi gauge pressure or more) may not reveal the leak with the same smoke machine we use on evaporative emissions system.


In this episode of The Trainer, Motor Age Technical Brandon Steckler implements the 43066 Digital Dual Smoke Machine from Mastercool to quickly and preliminarily locate the general area of a pressurized induction system leak. This gave him the justification and confidence for disassembly in order to pinpoint the source of the leak to a loose clamp at the turbo system intercooler. Stick with Brandon throughout this diagnosis to find out just how easy and efficient this job can be with the Mastercool 43066.
FOLLOW MOTOR AGE MAGAZINE ON YOUTUBE TO SEE NEW VIDEOS AS THEY ARE RELEASED.


