


We believe ALL stylists should be able to become experts at every hair type and that no one should ever hear “I don’t know how to do your hair.” With an estimated 65% of the U.S. population having curly, coily, or wavy hair, men and women are embracing their natural hair, and we know this will only continue to grow in the years to come.
This is why, at WELLA, we have decided to partner with five curl experts to co-design a comprehensive certification program that will to give you the tools and knowledge you need to take your Curl Craft to the next level and serve every guest walking through your doors.
With Curl Craft, you will deep dive into Curl Basics, Consultation, and Dos and Don’ts and acquire all the technical skills required to care, color, cut, and style all curls and coils.

CAROLE PROTAT Sr. Director, Brand Education, Artists & Events North America


Throughout the world, the understanding, cultural significance, and appreciation of curly/textured hair has varied greatly depending on region and era.
Click on the map above for more in-depth exploration of the history of curls in each region.


In many tribes throughout Africa, hair often communicated age, marital status, ethnic identity, religion, wealth, or rank in the community.
Curly hair is very rare in today’s Asian society and often looked down upon. However, there are many indigenous tribes throughout Southern Asia that have dark complexions and tight curly hair.


Throughout history, Europeans have embraced curly hairstyles.The ancient Greeks deemed curly hair to be beautiful.From the Renaissance to the Elizabethan eras, all the way to the 18th century, curly hair was always fashionable.
People from this region first migrated from Africa to Asia via the southern route through India. Their genes are directly related to Papuan people. Individuals in this region with curly hair inherit their hair from their Melanesian ancestry.


Slavery in North America required most slaves to shave their heads in order to remove identity. Eventually slavery was abolished but the push for assimilation into European beauty standards created a demand for straightening solutions such as relaxers and hot combs. In 1909 Garrett Augustus Morgan, a black American man, invented the first hair straightening prototype for women and men alike. He accidentally founded his straightening cream when he was trying to find a way to “ease friction of his sewing machines.” He then tested it on dog fur, and seeing the wonder it did to a dog’s curly fur, he tried it on his own head and achieved the same results. Thus the relaxer was created.
South and Central America are rich with cultural diversity and all ranges of curly hair.Unfortunately, until more recently, curly hair was seen as “pelo malo,” or bad hair (they even made a movie about it). Hair was often covered, straightened, or pulled back into a bun.There is a celebration among the Afro-Colombian community where, to remember the end of slavery, they have a contest for the most elaborate braided hairstyle.
1863 William Henry Perkins accidentally creates the first hair dye (Mauveine) while trying to find a cure for malaria.
Shears are invented in Italy. Two to three centuries later, they are fitted for fingers and thus scissors were invented.
Slavery in North America—most enslaved people have their heads shaved to remove identity.
Black and Creole women in some areas are forbidden from wearing their natural hair and begin wearing elaborate head wraps instead.
Relaxers and hot combs emerge, pushing for assimilation to European beauty standards.
1909 Garrett Augustus Morgan, a Black American inventor accidentally creates a hair relaxer prototype while trying to find a product to ease friction in his sewing machines. It is marketed to both women and men.
Homemade hair care product trailblazer Madam C.J. Walker produces a wildly successful line of products for Black women, becoming the first Black woman millionaire in America.
Short and sharp hairstyles reign supreme with the sculpted slick curls of the Eton Crop and Marcel Wave looks.
Short bobs and finger waves—styles seen as unfeminine and therefore bold/ rebellious—are made popular by stars like Josephine Baker.
1940s
Hollywood loves curls, with Marilyn Monroe and Dorothy Dandridge modeling the latest looks.
Hot rollers are on trend, the fast drying brush roller rises to popularity, and going to the salon weekly for a roller set is mandatory.
1930s
John Denman Dean invents the “Power Paddle Brush” in response to his sister’s need to detangle curly hair quickly and easily without damaging the curl pattern or scalp.
1950s
Joan and Lawrence Gelb introduce the first one-step hair dye product to lighten hair without bleach—the Miss Clairol Hair Color Bath—which is the signature product of the new company Clairol.
Wigs begin to gain massive popularity again, especially to achieve the iconic beehive hairstyle.
Black women take a stand against straight hair beauty standards, with icons like Nina Simone making it okay for women to take public pride in their natural curls, which are often then picked out into an afro. Still, natural hair products are very limited.
Chemist and hairdresser
Robert “Jheri” Redding’s permanent wave product— the Jheri Curl—is advertised as a safe, low-maintenance afro. Instead, the timeconsuming process is highly damaging to hair bonds and expensive to maintain.
Black Power movements encourage the wearing of naturally curly hair in big afros, and celebrities like Donna Summer and Diana Ross inspire an entire generation to wear big disco curls.
As Black and white people alike reject the neat and preppy norm of previous years, the market for cheap at-home styling tools and products—such as hairspray and hair combs—booms.
1972 Dark & Lovely is introduced as the first hair color product formulated specifically for African American women.
Whether crimped, straightened, relaxed, color blocked, bleached platinum, or styled with hot combs—everyone is doing something with their locks, usually with zero heat protectant. At-home styling products are all the rage, making adventurous style easily accessible.
The Victoria’s Secret soft wave and the rise of the Brazilian blowout mark the early 2000s, geared toward naturally curly hair for smoother and more manageable hair and strengthening. However, the use of excessive high heat and chemicals is the push some curly girls needed to say bye to chemicals for good.
Curls and textured hair are embraced and uplifted more than ever, with more curly hair products than ever, and a widespread, more nuanced understanding about what healthy, “good” hair really is.
Treatments and chemicals geared toward achieving Eurocentric beauty standards are rejected by a growing community of people embracing the natural movement and texture of their curly hair.
Between 2014-2017 relaxer sales plummet. More women start embracing their natural hair, and some opt for “the big chop.”
New technologies and groundbreaking R&D innovations by companies such as P&G lead to rapid growth in the hair color market, with emphasis on more techniques like ombré, balayage, block coloring, and chunky highlights.
The CROWN Act (“Creating a Respectful and Open World for Natural Hair”) is a law that prohibits race-based hair discrimination: the denial of unemployment and educational opportunities because of hair texture or protective hairstyles including braids, locs, twists, or bantu knots. It has been signed into law in many states to date.
LOOSE CURL
Circumference of sidewalk chalk
SPIRAL CURL
Circumference of permanent marker (i.e., Sharpie)
TIGHT CURL Corkscrew
LOOSE COIL
Circumference of pencil
SPIRAL COIL
Circumference of chopstick
TIGHT COIL
Circumference of crochet needle
LOOSE ZAG
Z-pattern
SPIRAL ZAG
Little to no curl definition
TIGHT ZAG
Full and soft
LOW POROSITY
Hair that does not easily allow moisture in or out.
HIGH POROSITY
NORMAL POROSITY
Hair that allows moisture in and retains it well.
Hair that easily allows moisture in and out, due to damage or gaps and large openings in the hair cuticle.
FINE: Feels like silk.
MEDIUM: Feels like thread.
COARSE: Feels like wire.
You never want your client to feel disrespected or stereotyped—be mindful of the words you use when discussing their hair, and avoid using language that is demeaning, or offensive or carries negative connotations.
Hair needs moisture to retain elasticity and avoid breakage. It should be soft, supple, and moist when doing any type of manipulation, such as detangling, styling, etc. While moisture is needed to help retain length and strength, it is possible to have too much. Moisturizing too much throughout the week or applying too much product and using moisturizing deep conditioner every wash day can lead to moisture overload, which in turn can cause breakage and split ends.
Our tresses are made up of 80% to 90% of the protein keratin, and protein treatments are necessary to prevent damage and maintain healthy hair structure. Processes like styling, perms, relaxers, hair dyeing, and manipulation all contribute to hair losing its strength, mostly from the cuticle. The weaker the cuticlestructure is around hair, the less protection it offers. While protein treatments help to reinforce cuticle strength, doing them too often can lead to protein overload, which can make hair stiff and dry.
Balancing protein and moisture is key. After doing a protein treatment, it is best to follow up with a moisturizing conditioner to help maintain normal balance. If the tresses are at the perfect balance already, consider using a conditioner that contains both protein and moisture.
Water and hair have a complicated relationship, and as anyone with natural curls knows, it can be tricky to navigate it. Understanding the basics is key to maintaining the healthy moisture that hair needs.
Water is at the core of healthy hair. A healthy strand of hair can maintain an appropriate amount of water, presenting a smooth, bouncy curl pattern.
Smooth, low porosity hair with a flat, sealed cuticle is the least affected by relative humidity or dew point. The cuticle maintains an appropriate amount of water in the cortex, not allowing moisture to flow in or out and resulting in healthy, shiny hair.
High porosity hair has difficulty maintaining proper moisture— whether naturally porous by genetics or damaged from chemicals, heat, or manipulation. When the cuticle is open, water moves freely in and out of the hair, creating dry, brittle hair when the air is dry and puffy, frizzy hair when the air is humid.
Water as steam can be a great refresher and styler. The steam softens the hair, allowing it to bend and change shape. This is a fantastic way to refresh and reshape curls flattened by a good night’s sleep or a ponytail.
Steam also works particularly well as a styler for curlies who have strands that are less porous since their hair will not absorb much moisture.
Avoid stripping hair of its natural oils with too much repeated wetting and shampooing.The natural oils that the scalp produces are necessary to keep moisture levels in the hair balanced and healthy, particularly if the hair is porous. Don’t strip away nature’s protective barrier with water and detergent.
Why are protein treatments essential? Put simply, our hair is protein. The protein called keratin makes up the majority of a hair strand, keeping it healthy, strong, and full of elasticity. When damage is caused by things like styling, maintenance, pollution, and coloring—to name a few—the keratin starts to break down.
A protein treatment is a product loaded with a protein that hair can easily absorb, helping to strengthen and repair the keratin.
There are many benefits of using a protein treatment on hair. It’s a great way to temporarily repair damaged hair by filling in the gaps on the hair cuticle, caused by styling or heat damage. They also help reduce breakage and make your hair smoother, stronger, and shinier.
One of the clear signs that hair may need a little protein help is the loss of elasticity. Try this little trick: take a small strand of the hair, and gently stretch it. If the strand doesn’t return to its natural state after being stretched—or worse, it snaps—chances are that a protein treatment is needed as soon as possible.
The hair is color treated. If hair has seen an excessive amount of hair color, chances are good that it could use a little more protein. Hair that has been colored is highly porous and even more susceptible to damage than natural hair. Protein treatments help strengthen color-treated hair and help maintain healthy and strong hair strands.
Breakage and shedding. While losing up to 100 strands a day is completely normal and no cause for worry, excessive shedding can be a sign that hair lacks protein. Particularly, if this hair isn’t from the root (doesn’t have a white bulb). This means that the hair breaks easily, and an increase in protein treatments is likely needed to help strengthen it.
The hair is limp and stringy. Dealing with hair that’s flat, limp or stringy is another sign that it may need some protein love. Protein will help revitalize the strands and make hair visibly less droopy.
High porosity. If hair is highly porous, it’s likely that there are gaps and tears in the strands that make it more vulnerable. Because this type of hair often absorbs too much water, tangles and frizz may be a common experience. A protein treatment will help porous hair get the nourishment it needs to seal those gaps. Not sure if hair is porous? An easy test is to place a strand of the hair in a shallow bowl of water. If the hair sinks, then it’s very porous.

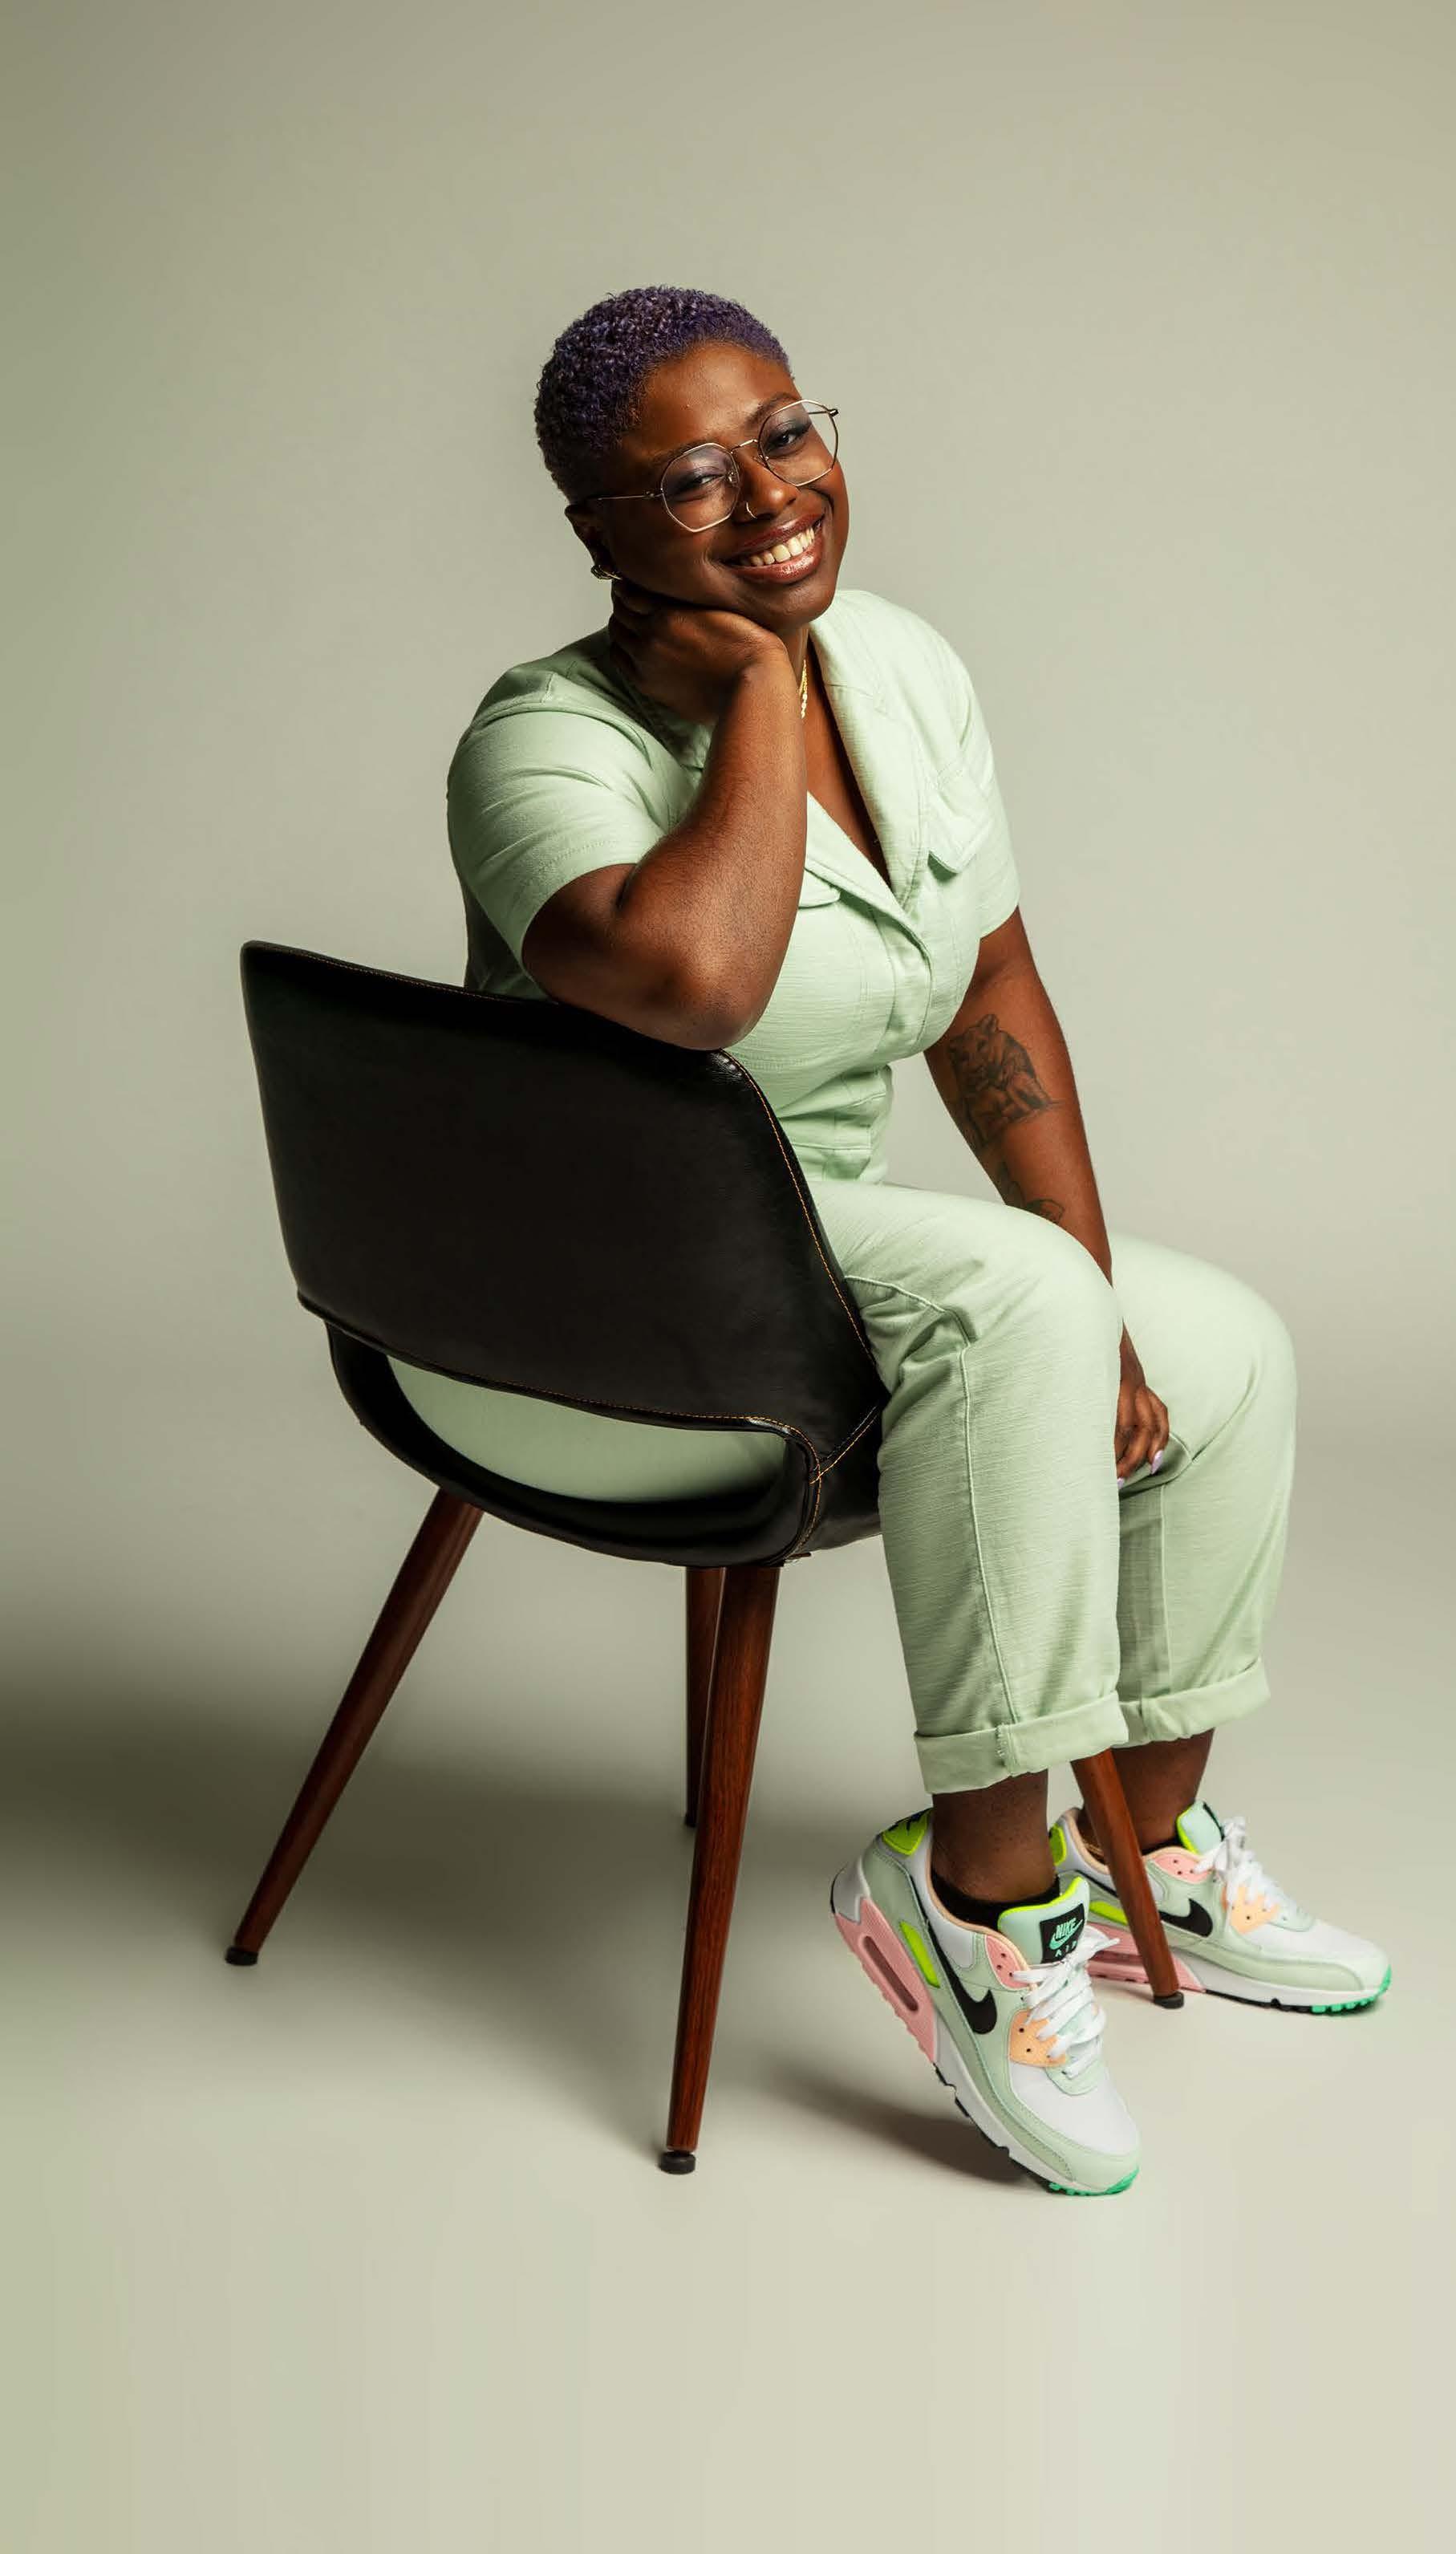


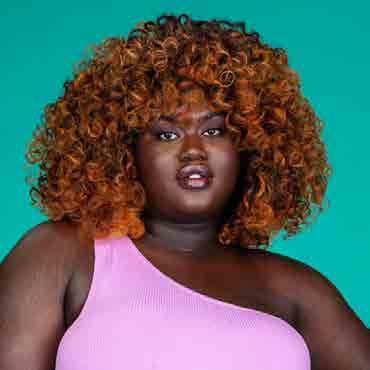
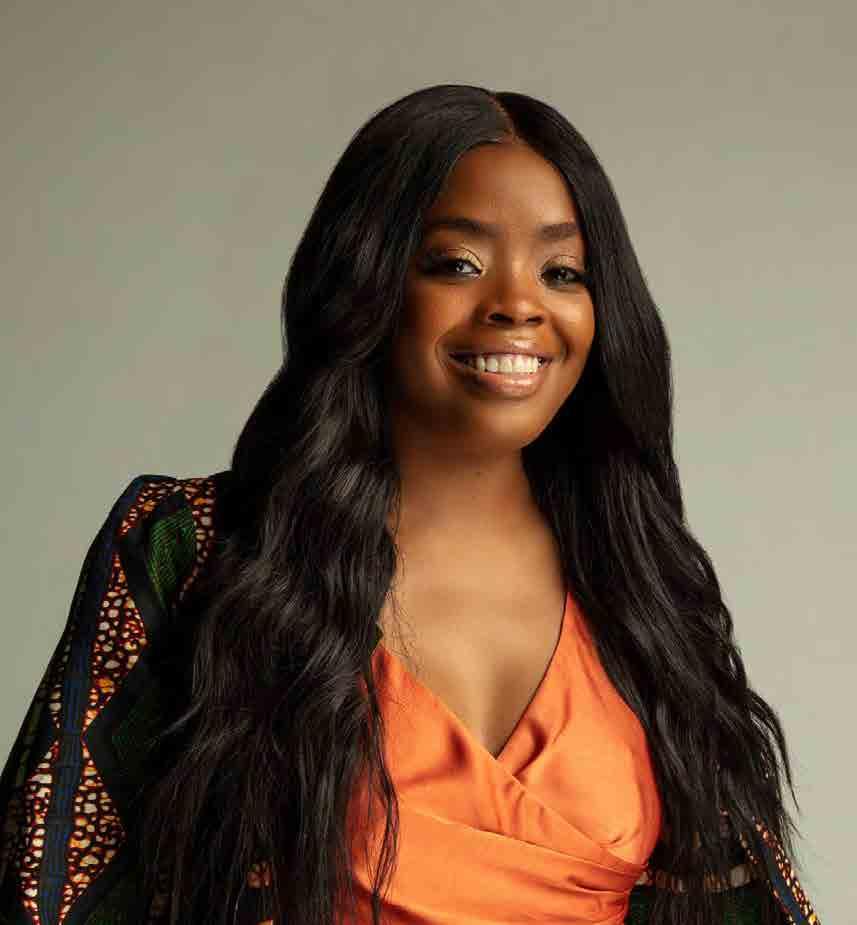
Care Pro Artist | @HuesByGabrielle


Gabrielle loves helping a client go from “hating their curls” to loving their hair, which mostly comes down to helping each client learn how to care for their curls.

Gabrielle’s salon, Frolanthropy, which opened in March 2021, is the culmination of her 8 years in the industry. A traditional salon setting where she, as owner, enjoys free range to be as creative as she likes while also helping people feel beautiful in their hair.
Among her career highlights are opening her own salon suite in 2016, features in two magazine spreads, becoming a trichologist, and working as a Wella Passionista, Curl Craft artist, and NIOXIN artist.
Her absolute favorite thing about working with curly hair is helping a client go from hating their curls to loving them. In her experience, this mostly comes down to helping each client learn how to care for their curls. Her advice to fellow stylists is to focus on your path and your journey. If you spend too much time analyzing someone else’s blessings, she says, you could miss out on your own.
She finds inspiration in seeing other women thrive and succeed as go-getters. She finds that anytime she feels there’s something she can’t do, she always finds another badass woman by her side, assuring her that she can. As an educator and stylist, she strives to be well rounded, building a reputation for taking a “boring” topic and turning it into something undeniably interesting and easy to understand. When it comes to her craft, she wants to be genuine above all else.
Evaluating clients’ hair should include identifying the hair’s quality in these five main categories:
Porosity refers to how well the hair absorbs and holds moisture and is affected by the cuticle, which determines how easily moisture and oils pass in and out of the hair. Porosity is mostly genetic, but it can also be affected by factors such as exposure, heat treatments, and chemical processing.
Hair density is the number of individual strands per square inch on the scalp. The average person has approximately 2,200 strands of hair per square inch on their head and sheds between 50 and 100 hairs per day.
This refers to the thickness or width of a single strand. Fine texture hair will feel like silk. Medium texture will feel like thread. Coarse texture will feel like wire.
This refers to how long a single strand of hair can stretch before it returns to its normal state. In order to find out what the elasticity of your client’s hair is, wet a strand of hair and stretch it as much as you can. If the hair retracts back to the original length, the elasticity is good, and you should be able to proceed with the service. If the hair does not retract after being stretched, there is a lack of elasticity from some damage and you should be cautious when moving forward with a service.
The classifications for wave pattern are straight, curly, coily, and zag. Unlike the other considerations, the hair pattern has no reference to hair health.

You should select a cleanser based on the condition the hair is in and the benefits you want (i.e., color saving, moisture/hydration, smoothing, strengthening, or volume).
If debris or buildup is present on the scalp, start with a clarifying shampoo.
If the end style goal is a smooth finish, start with a shampoo that has an anti-frizz/smoothing formula.
If the hair is dry or brittle, shampoos geared toward repair or hydration will be the best bet.
For tighter coils, the shampoo/conditioner combination should be moisture balancing.
Cleansing the hair regularly is important and sets the tone for how well your hair will style. You should wash at least once a week, and up to three times weekly if you exercise frequently.
Detangle before you cleanse, and avoid scrunching and rubbing the hair when shampooing.
Focus on cleansing the scalp and smoothing the hair as you go. This will keep the detangling process a breeze and keep your routine under an hour.


You should select a conditioner based on the condition your hair is in and the benefits you want (i.e., color saving, moisture/hydration, smoothing, strengthening, or volume).
After cleansing and before applying your conditioner, it’s best to emulsify the conditioner well in your hands and then apply it throughout the hair.
To avoid product waste, be careful not to have so much conditioner in the hair that there is a white cast. The conditioner should disappear into the hair, and once the hair has absorbed what it needs, everything else will be rinsed away.
Hair is typically fully conditioned in 3-5 minutes, so a conditioner with good slip is important for detangling with ease.


You should select treatments based on the condition the hair is in and the benefits you want (i.e., color saving, moisture/hydration, smoothing, strengthening, or volume).
Select a deep treatment based on the final style and benefits desired.
Avoid using a moisturizing deep treatment on the hair prior to a silk press or straight/smooth styling. When the hair is overloaded with water and moisture, it will be challenging to create a long-lasting, smooth finish. Wella Professionals Oil Reflections is ideal for smooth styles.
Follow manufacturer’s guidelines for each respective product. If a deep treatment is needed, misting or steaming is great to pair with a mask because of the combined heat and moisture.
Hair can be easily detangled when it is wet. However, hair is also at its most fragile when wet, so it is important to take your time.
To avoid breakage while detangling, start by using your fingers to gently pull apart any matting or knots before using a wide tooth comb or detangling brush.
Start from the ends of the hair in the nape area, and work your way up to the scalp and then eventually to the front hairline.
Avoid using a Denman brush when detangling. They should only be used in services where tension is needed, such as styling. Instead, opt for a sturdy wide tooth comb, a detangling brush, or brush with flex bristles.

The best regimen to retain moisture and length is to thoroughly cleanse and deep condition the hair at least once a week or every 2 weeks.
Every regimen should have the basics: cleanser, a deep conditioner, a leave-in conditioner, and generally two styling products.
For those who have scalp issues, specialty products incorporated into the regimen could also be helpful.
Business Tip! Bundle products with a service—especially any inventory overstock you may have. Bundle with services that are a bit more expensive, or bundle with services that don’t take much to do.


Don’t
Applying natural oils directly to the hair is beneficial
Applying natural oils to the scalp to alleviate conditions like dandruff or seborrheic dermatitis can result in greasier flakes. Additionally, yeast thrives in oily environments. Natural oils can be useful for scalp conditions where there are super thick scales that need help loosening, but an oil formulated with an emulsifier is a better option than pure oil. Because the particles are too large to penetrate, pure oil just sits on top of the hair shaft. Oils must be formulated with emulsifier and water to actually be beneficial on the hair—emulsifiers allow all the ingredients in the hair product to play well together.
Use oils that have been formulated with an emulsifier. Oils created by hair care brands and formulated with emulsifiers don’t weigh down the hair like pure natural oils do.
Don’t:
Coat the hair and scalp with pure oils for the purpose of moisture and/or hair growth.
Don’t
Shampooing is bad and drying to curls; I should only co-wash.
A clean, healthy scalp is essential to hair growth. You wouldn’t finish a workout, douse yourself with water, cover yourself in coconut lotion and feel clean—but that’s essentially what happens when you co-wash instead of shampooing. Using only a co-wash can create buildup on the scalp, which can lead to hair loss and a highly uncomfortable condition called folliculitis. The hair shaft will also suffer buildup, drying out the hair and leading to breakage, loss of curl definition, split ends, and unmanageable curls.
Shampoo hair at least once a week. This ensures that the scalp is clean and the hair is cleansed of any buildup from the use of heavy oils and butters.
Don’t:
Neglect curls and scalp for weeks at a time by not cleansing the scalp. Excessive buildup of dirt on the scalp can result in clogging of the scalp, which will lead to flakiness, excessively oily or crusty skin, hair loss, and scarring.

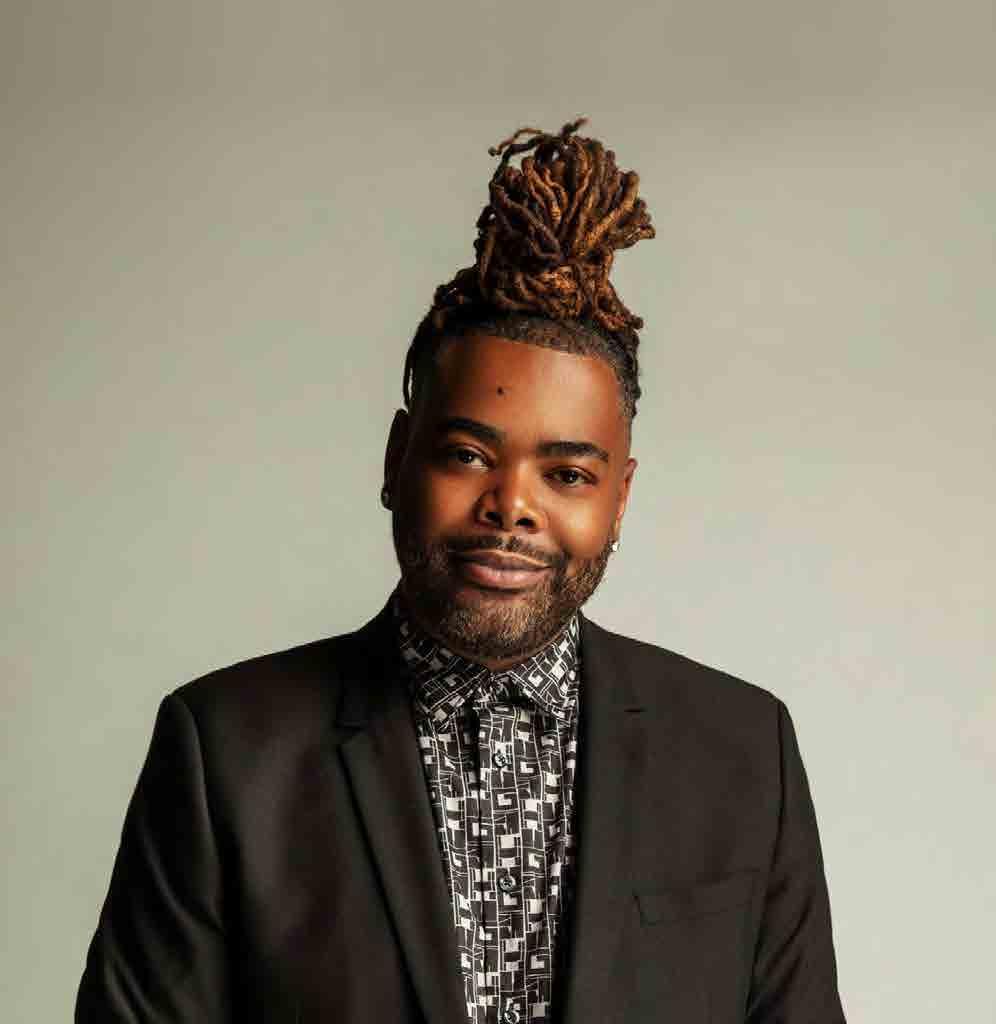
Color Pro Artist | @KolorKing
Oliver finds that curls thrive once their color is crafted and curated to perfection, and as a stylist he works to unlock the inner beauty and confidence in every curly client.

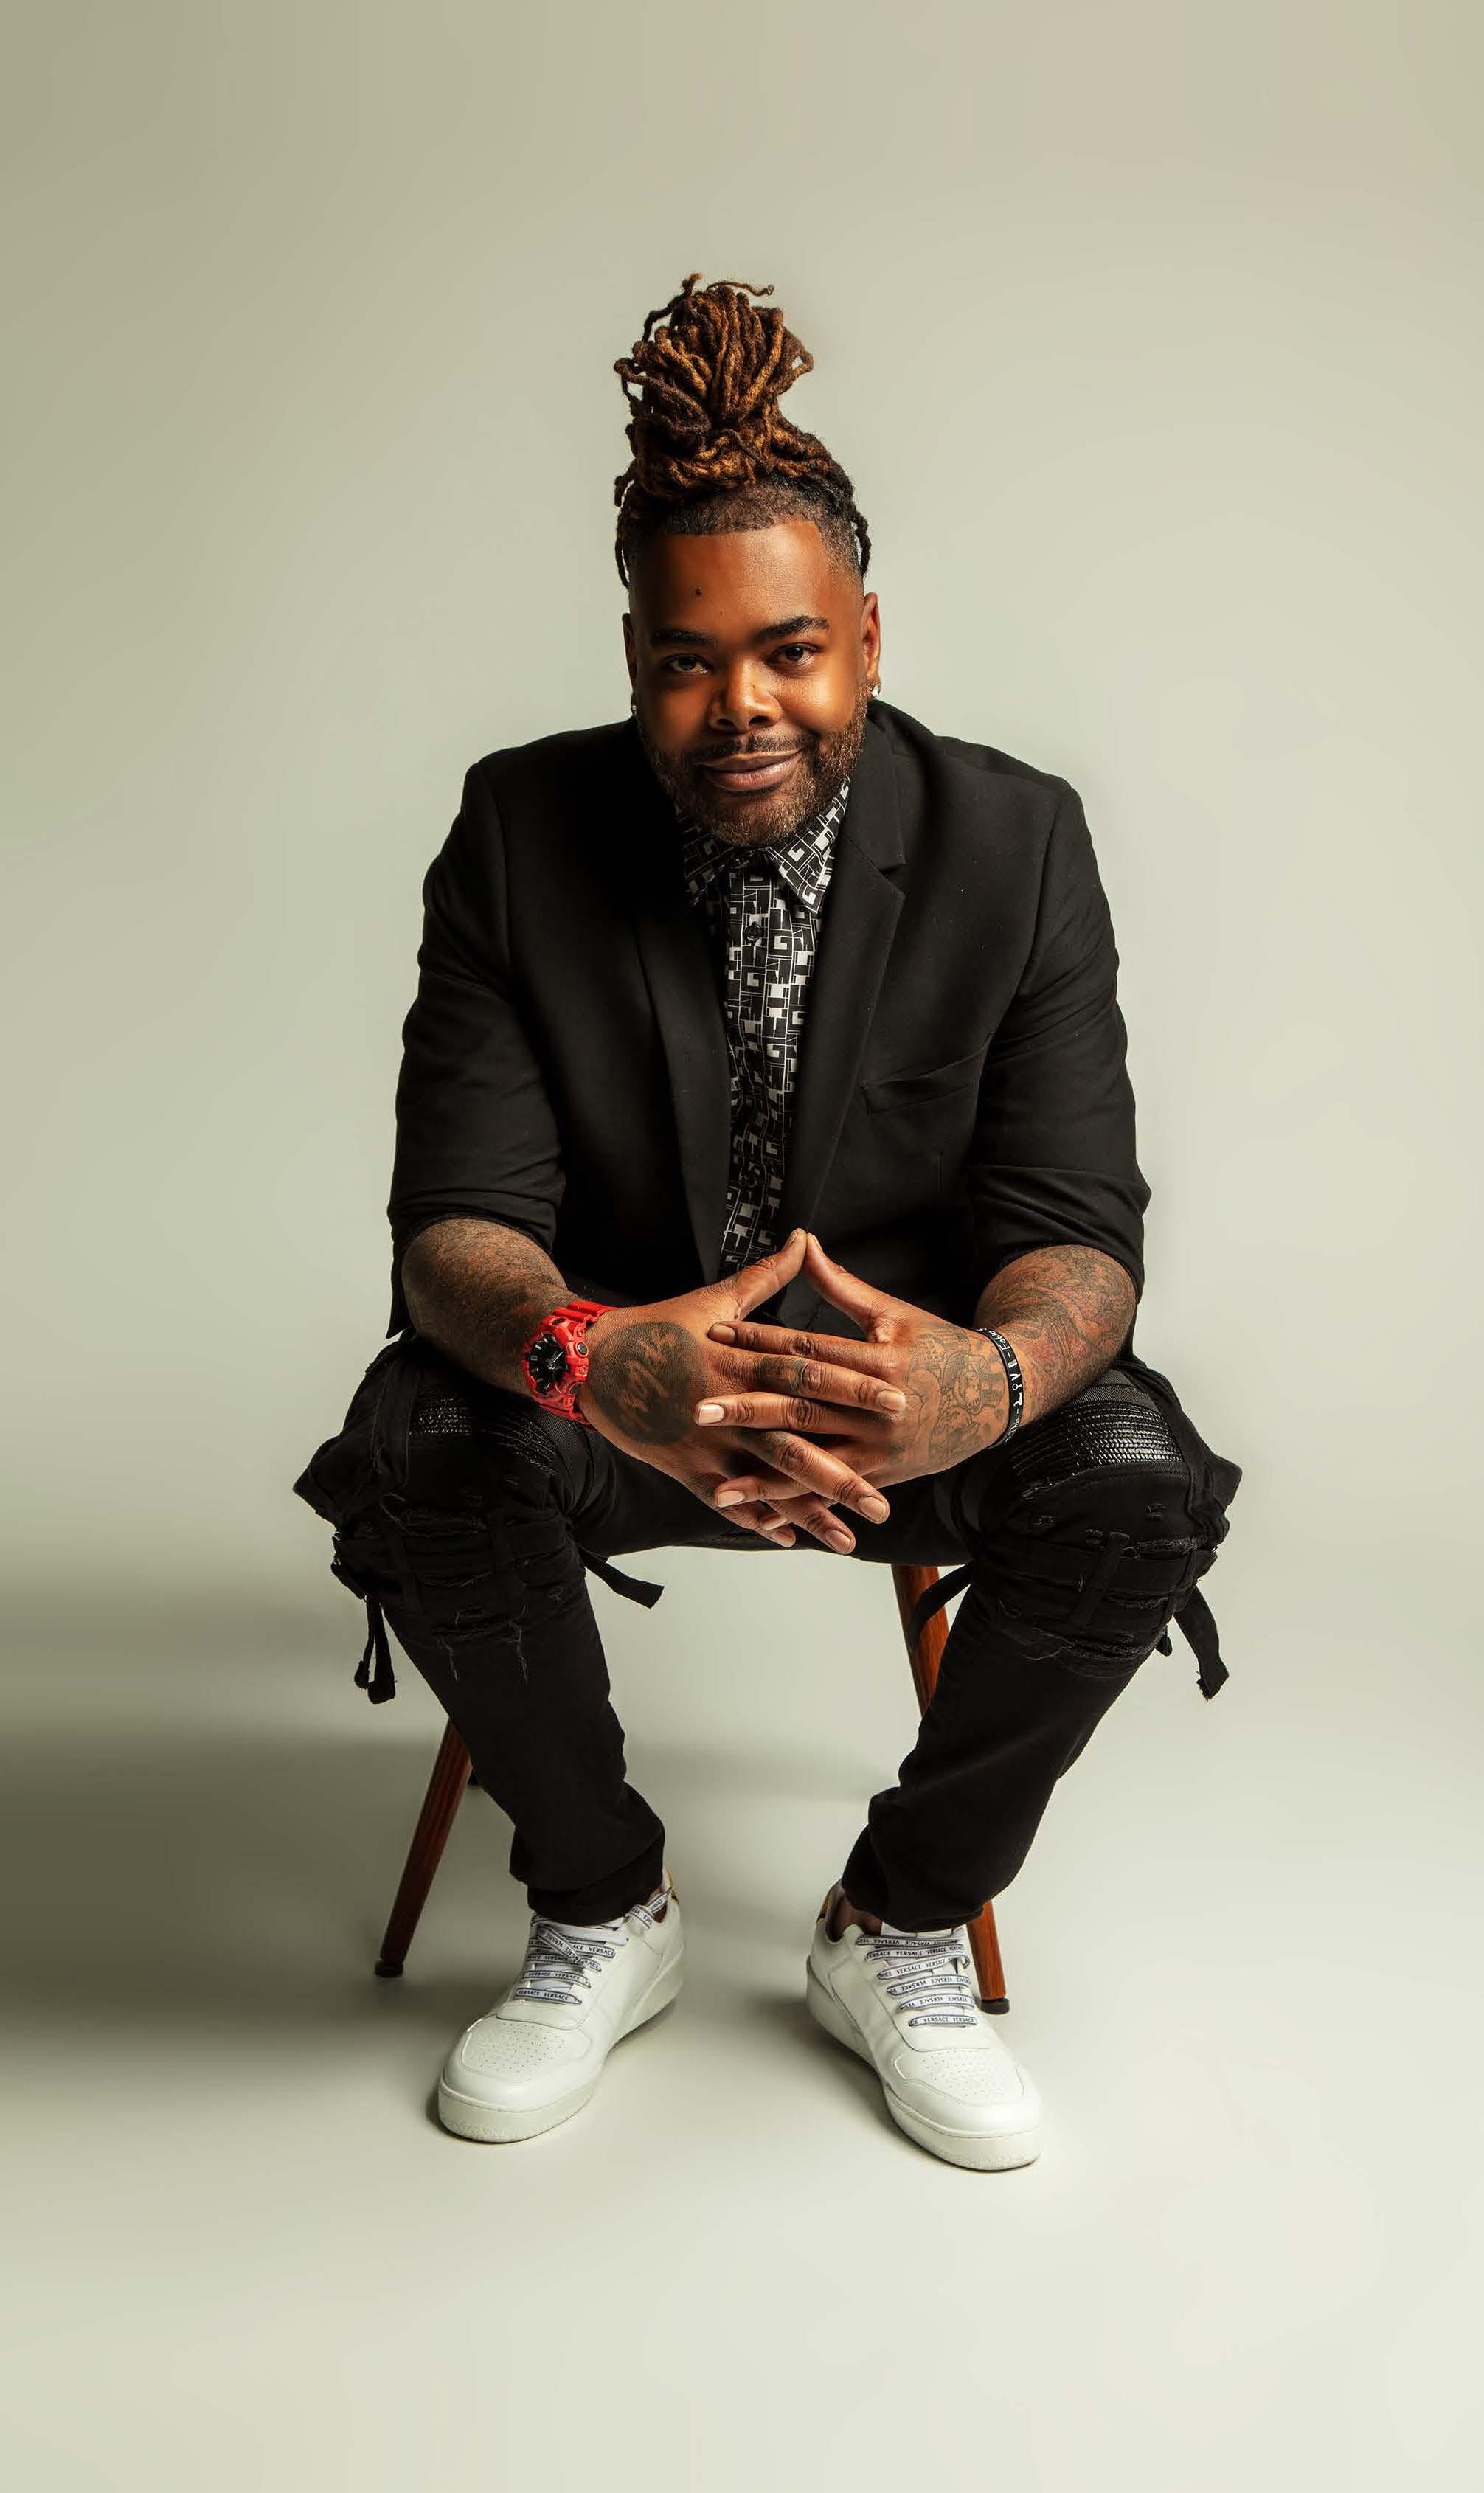

Oliver has officially been in the industry for 21 years, but as the son of a professional hair stylist he feels it’s been a lifelong pursuit. He currently has two salons, a barber shop, and twenty salon suites in Atlanta and has just expanded to Las Vegas with a traditional eight-chair salon. Career highlights include being a part of the Clairol and Wella Show teams for over 20 years, and he’s enjoyed numerous awards and features at trade shows and been featured as a guest educator many times.
He loves sharing his creative passion with other hair nerds, educating and inspiring people to take their artistry and business to the next level. He recognizes the importance as artists to give back to his art and craft and is thankful that he gets to do that every day.His favorite thing about working with textured hair is being able to enhance and show off the various curl personalities within every style. He finds that curls thrive once their color is crafted and curated to perfection, as a stylist he works to unlock the inner beauty and confidence in every curly client.
His advice to new stylists is to spend one to two years working and studying under a stylist or salon owner they look up to. “Give yourself the time and experience you need to not only be a great hair stylist, but also an amazing salon professional—which is about so much more than hair skills. You will be a much better stylist and business owner for it.” For inspiration he studies the greats: Sonya Dove, Dean Roybal, Stephen Moody, Anthony Cole, Omar Antonio, Marylle Koken, and Shirley Gordon, to name a few. He frequents trade shows and loves online education to keep his craft current and inspired.
He sums up his craft in one word: Premier. And he hopes to be known for being an outstanding salon owner, a resource for salon professionals around the world, a dynamic colorist, and a fearless educator. At the end of the day, he wants his legacy to make his family proud and to inspire others to always strive for greatness.In addition to styling, his passions include being a dad, traveling, shopping, fine dining, and five-star social settings with amazing views.
Whether adding subtle flair with a few well-placed highlights or going bolder to create a completely new signature look, hair color offers a chance to turn your client’s natural curls into a beautiful canvas for them to express who they are without saying a word.
However, if improperly done, coloring can be harmful to naturally curly textures. Not understanding proper hair color formulation and application can cause irreversible curl damage, unwanted dryness, and moisture imbalance. Use these tips to add new shades to any kind of curl without compromising the hair’s health.
Permanent, demi-permanent, temporary, or semi-permanent color—however you choose to color, you’ll want to begin with a few basics in mind:
If your client has dark hair, it will require pre-lightening. Depending on the texture of the hair, this process can take an hour or longer.
When determining desired hair color with your client, remember to always prioritize the integrity of the hair over the color. Only use bleach/lightener when necessary.
Identifying your client’s hair type based on curl type and texture (fine, medium, coarse) is vital for identifying developer strength and processing time, as well as determining the ideal products to use for their hair type.
If your client’s hair has been chemically straightened or they currently wear a relaxer, using lightener is not recommended.
Virgin (uncolored) dark hair is the easiest to lighten and doesn’t require bleach! You can achieve beautiful blondes using high lift permanent color.


STEP 1: Determine your client’s curl type and condition using our handy guide here.
STEP 2: Identify your client’s current hair color goals and the current status of their hair.
Ask open-ended questions that will help you determine your formula approach. For example:
· How do you feel about your grays?
· Is your hair too light? Too dark?
· Are you currently experiencing breakage, dryness, or shedding?
· Have you used any type of hair dye, box color, or henna in the past 4 years?
· Have you recently had a chemical relaxer or keratin treatment?
STEP 3: Keep in mind the desired end result and hair type when choosing color.
STEP 4: Be sure to correctly mix and apply hair color using one of our signature Curl Craft techniques.
STEP 5: Help your client maintain their new color with a tailored maintenance and styling regimen. Provide pairing suggestions of styling products that best match their color choice—think restaurant wine pairings but for curl color care.
When you know the lingo, discussing curl color is more efficient and more fun! And educating your clients gives them the language to collaborate with you and create color together.
From the French word balayer, which means “to sweep.” This refers to the color application, not the color itself. Balayage is a technique where hair color is painted onto the hair to create a graduated, more natural-looking highlight effect.
When a stylist applies an all-over base color at the roots in addition to the highlights. It is similar to a root smudge, but with a lighter color instead of a darker tone. This allows the overall color to appear lighter and change the way the skin tone and hair color are complemented and contrasted.
You create bands when you apply new color to previously colored hair, which has partly grown out. When you apply the new all-over color, its absorption is affected by the existing color, and the result is hair that may appear to have two different tones, or a visible band.
The line where the natural hair and chemically processed hair meet. The demarcation line is very important to try to eliminate when you are creating a new color.
A term that professional colorists use when the roots of the hair are noticeably—and unintentionally—warmer than the rest of the hair color. With hot roots, the hair color near the scalp is usually redder and can appear orange.
This is a process of changing a person’s hair color, using lightener or hair color to lift the level or brightness of hair strands.
This is the blending of one-color hue to another, usually moving tints and shades from light to dark. It has become a popular feature for hair coloring, nail art, and even baking, in addition to its uses in home decorating and graphic design.
Also known as “roots,” the new hair growth closest to the scalp is called regrowth. It is the natural hair color.
This describes the natural pigments that make up every natural hair color. When formulating hair color, you must take into consideration the underlying pigments and how they will affect the color process. Failing to take this into account can be disastrous for your final results.
Be ready to answer common questions your clients may have about coloring.
QUESTION:
Will coloring my hair damage my curls?
ANSWER:
When products are used correctly, there will be very little to no change in your natural curl pattern. When coloring natural hair, always use permanent color to achieve lighter tones before using bleach if possible. Normalize using bleach for removing unwanted color not just to make hair lighter. When hair is virgin—or no henna or artificial dye is present—permanent, semi-permanent, or demipermanent color should be your first choice.
QUESTION:
What’s the difference between semi-permanent, demi-permanent, and permanent color?
ANSWER:
Semi-permanent hair color does not contain peroxide so it can’t lift the hair—it can only make hair darker by depositing color. The color will be temporary, only lasting about eight to twelve shampoos. Semi-permanent will enhance the shine and condition of the hair since it doesn’t lift.
Demi-permanent hair colorcontains low amounts of peroxide and can lighten the hair slightly. Demi-permanent deposits the color between the cuticle and cortex, therefore making it last longer—anywhere from 12 to 24 washes. A much better option than semi-permanent for gray coverage, demi-permanent also adds shine and conditioning.
Permanent hair color, as the name suggests, does not wash out and will last until the colored strands grow out. Permanent hair color can lighten hair up to 4 levels. High lift permanent colors will give you up to 5 levels of lift and deposit selected tone. Permanent color will not remove previous color (permanent, semi/demi).
QUESTION:
Will the color cover my gray hair?
ANSWER:
Yes, hair color will cover your gray hair, depending on what formula and brand you use. If your hair is more than 50% gray, it is probably best to use permanent color. With permanent color, 20 volume developer should always be used for maximum gray coverage.
How often should I shampoo my hair after receiving a color service?
ANSWER:
After a color service, wait at least 24 hours before shampooing your hair (48 hours is preferable). Try to limit your washing to three times a week, especially if you have a more intense color like red.
How long do I have to wait before re-coloring my hair with a different color?
ANSWER:
This depends on the condition of your hair. If you have damaged hair, it is best to wait until your hair is in better condition or until the color grows out. If you don’t like the color of your hair, talk to your stylist about a color corrective service. For tinting back to natural color try our ammonia-free semipermanent color.
Don’t
Do:
Formulate with curl texture and integrity in mind first. Healthy color suggestions along with care and styling should be discussed during the consultation before any hair color is applied.
Don’t:
Apply lightener to your client’s scalp if they are prone to scalp sensitivity without applying a scalp protecting oil first. We recommend Wella Professionals Marula Oil Blend Scalp Primer.
Use liquid and gel colors! For better, fuller color on curls, using a liquid or gel color formula is ideal for ease of mixing, faster application, and optimum color coverage.
Don’t:
Use lightener unless you absolutely must remove previous hair color. Lightening or lifting and coloring hair in one sitting can cause irreversible damage by causing a looser curl pattern or loss of elasticity. When lightening curly hair, aim to go lighter gradually so you don’t disturb the curl pattern or drastically affect the health of the hair.
Semi-permanent color won’t work for curly hair. Normalize using semi-permanent color. Semipermanent color is great for curly hair because it’s less dehydrating on already dry hair. Semipermanent color coats the surface of curls and helps to smooth out the cuticle, leaving curls shiny, smooth, and nourished.
Curly hair needs moisture! Treat regularly to keep the hair from becoming dehydrated and brittle, condition with any NIOXIN, Sebastian, or Wella Professionals conditioners, masks or leave-ins, which are ideal for color-treated hair.
Do:
Coloring your client’s hair is only half the job— maintaining it is the other half. Use any NIOXIN, Sebastian Professional, Wella Professionals, or Clairol Professional color-protecting shampoos to preserve color and guard against fading and bleeding.


Sebastian Professional Whipped Crème
Wella Professionals Nutricurls Curlixir Balm

Clairol Professional Shimmer Lights Leave-in Treatment
Sebastian Professional Potion 9
Wella Professionals EIMI Perfect Me

Clairol Professional Shimmer Lights Leave-in Treatment
Coloring hair strips away the volume.
Oliver’s advice:
Permanent color (high lift included) will have a minimal effect on stripping away volume in the hair or the curl pattern when using 10, 20, 30, or 40 volume developer.
You can use any shampoo or conditioner on colored hair.
Oliver’s advice:
While negative results might not be noticeable after using a typical shampoo and conditioner once or twice, continued use for two weeks or longer may start to affect the hair. Instead, a color-safe shampoo and conditioner are recommended.
Lightening hair softens your curl pattern.
Oliver’s advice:
Using 10 and 20 volume developer with lightener offers a slower, controlled lift with minimum change to natural curl pattern. When using 30 or 40 volume, expect to see visible change in the curl texture and volume.
Coloring hair frequently will make it make it fall out.
Oliver’s advice:
Color requires maintenance and a commitment to be consistent with touch-ups and color refreshes. Curly color clients should commit to at least four appointments per year. To keep the hair current and well maintained, consider booking appointments once every season.


Cut & Style Pro Artist | @AkelasHairStudio

Akela has a special passion for working on curly hair because there’s so much versatility and she loves the joy of seeing the shape form immediately as she works with it.
Akela has been an industry professional for 10 years and a Wella Brand Educator for 4. She’s a member of the ghd styling team and was awarded the BEA Natural Texture Artist Artist of the Year in 2020 and Creative Artist of the Year in 2021. Having previously owned a salon in San Francisco, she relocated to Houston in 2020 where she manages a large salon and spa and is in final preparations for a soon-to-be-announced new venture!
She loves what she does, from working with clients and models to teaching in salons and schools—every day is different and that’s what makes it exciting! She has a special passion for working on curly hair in part because there’s so much versatility and because she loves the instant gratification of seeing the shape form immediately as she works with it. Her one piece of advice to fellow stylists: learn to work with ALL hair types, even if you have to seek out education yourself.
She finds inspiration everywhere—whether it’s walking down the street, people watching, being out in nature, or consuming movies and art. She loves to travel the world, cook, and watch beauty pageants. Even in her non-work interests she says she gets style inspiration: It’s everywhere as soon as you start looking for it!
In her experience, she’s found that natural hair is going to do what it’s going to do, and she’s learned to work with that rather than over-complicating it. When people overdo it they ruin the most beautiful aspects of natural hair, she feels, and she doesn’t want to be known for that. Above all, she wants her craft to be effortless and her signature simplicity.
Multi-purpose for all cutting techniques.
Used for bulk removal, softening ends, or blending short haircuts.
Razor
Ideal for finer hair or carving out a shape.
Used for creating strong lines, and shapes and tapering short haircuts.
Cutting with the curl pattern to remove length.
Straight edge cutting to create strong shape.
Method for removing bulk from the hair.
Scooping
C-shape curve to remove bulk or shape looser curls.
Curly clients are often apprehensive about cutting their hair. Many have a hard time retaining length since the hair tends to grow out instead of down.
And for some there may be a cultural component— they may have grown up being discouraged from ever cutting their hair. When consulting use words like “trim” and “shape” instead of “cut” or “haircut.”
During the consultation, consider and discuss the following with your client:
Face shape
Frequency of wearing curly hair
Maintenance level
Current routine
Use for detangling and cutting - Wide Tooth Comb, Standard Cutting Comb, Tail Comb, Pick
Used for detangling and defining curls - Denman, Paddle Brush, Edge Brush, Detangling Brush
Used to set and define uniform curls of various sizes - Rollers, Rods/Flexi Rods, Chopsticks, Pipe Cleaners, Duckbill Clips, Setting Clips
Hood Dryer
Air dry hair to set a style.
Diffuser
Attachment to dry curly hair with blow-dryer.
Pick Nozzle
Attachment to smooth hair with blow-dryer.
Flat Iron
Hot tool to smooth curly hair.
Great for deep conditioning treatments, especially in low porosity hair.
Hot comb to straighten hair, especially around the hairline.
Standard Comb
Comb coils and finger waves.
· Braid out, finger comb/coils, wash & go
· Twist out: Flat, 2-strand, 3-strand, Bantu knots.
· Diffusing: Faster method to dry curls. May cause curls to dry tighter and frizzier if touched too much.
· Blowout: Stretching and smoothing curls.
· Silk press: Hot tools used to completely straighten hair. May cause permanent damage to cuticle if not done properly or heat setting is too high.
#ProTip:
Check out the Protective Styles section of the book for even more details about styling without heat.
Sebastian Professional Whipped Crème
Wella Professionals Nutricurls Curlixir Balm

Sebastian Professional Shaper Fierce

Wella Professionals EIMI Stay Firm
Clairol Professional Shimmer Lights Leave-in Treatment
Sebastian Professional Microweb Fiber
Sebastian Professional Texturizer
Wella Professionals EIMI Nutricurls Curl Shaper
Sebastian Professional Twisted Foam
Professional Gel Forte

Wella Professionals EIMI Pearl Styler
Wella Professionals EIMI Nutricurls Soft Twirl Foam


Bodifying Foam
Myth
Don’t
Myth:
You have to straighten curly hair first in order to cut it correctly.
You cannot cut curly hair with a razor.
You always have to cut curly hair wet.
You always have to cut curly hair dry.
Cutting curly hair is really hard.
You shouldn’t use texturizing scissors on curly hair.
Do:
Use whatever tool that you want as long as you use it properly.
If your client wears their hair both curly and straight, shape it curly first, then straighten and refine.
Evaluate if there are multiple curl types throughout their hair.
Remove weight where needed, and refine the haircut after the shape has been put into place.
Always cut with, and not against, the curl.
Don’t
Don’t:
Don’t use too much tension. Cut the curls where they naturally want to lie.
Don’t be afraid to cut very short layers on top if your client wears their hair curly most of the time
Don’t ”texturize” curly hair—it’s already textured.
Don’t cut dirty hair.
Don’t focus so much on following a “system”; use your best judgment
You can’t change someone’s curl pattern; styling curly hair takes hours.
Curly hair clients always want their hair straightened when they come into the salon.
Really heavy products are the best way to control curly hair.
You should always send your curly clients home wet because air drying is best.
There are very limited number of hairstyles for curly hair.
Do:
Select products that support your client’s hair type and end goals.
Fully saturate your products, especially on highly porous areas. Always keep your client’s face shape in mind.
Make sure your client leaves with a finished, wearable style.
Educate your client on how to maintain their style at home.
Use heavier products to lay down the cuticle and hydrate the hair.
Use heat protection.
Do most of your smoothing during the blow-dry, with a Denman, paddle, or boar bristle round brush.
Only straighten your client’s hair if they specifically ask for it (many naturals are heat free)
Don’t weigh down fine, curly hair with heavy creams and gels.
Don’t send clients home with unstyled wet hair.
Don’t sit your client under the dryer for hours unless it is absolutely necessary.
Don’t mix multiple products together before applying because they may cause residue (layering is best).
Don’t use styling greases.
Don’t crank up the heat (heat trained = heat damaged).
Don’t use multiple passes with a flat iron. If the blow-dry is done properly you should only need one to two passes.


Wig & Protective Style Pro Artist | @HairLoveNYC

Safiya finds joy in bringing out the beauty in people, and she’s cherished her love of hair since she was a young girl.
In Safiya’s seven years in the beauty industry, she’s honed her goals down to three words—educate, eliminate, and elevate—and they inform how she runs her Brooklyn salon, Hair Love. She educates clients on the process of caring for their hair, eliminates the lies they were told about their natural hair, and elevates each client to love their true selves. She specializes in protective styling.
Her career achievements include owning her salon, Hair Love, braiding for the iconic Beyoncé in Disney’s “Black Is King,” serving as lead for the glam team on booking.com and the Addams Family project, being featured on the BET “Hair Show” as a celebrity hairstylist, styling hair for Princess Nokia on the front cover of Culture Magazine, working on Madonna’s Madame X tour with her team, and working as personal hair stylist for artist Ahamalik William.
Her favorite thing about being a professional artist is seeing the expression on clients’ faces when they say, “I love it!” She finds joy in bringing out the beauty in people, and she’s cherished her love of hair since she was a young girl. She especially loves working on curly and coily hair because it’s the most versatile type of hair, in her opinion. She loves hair that “has curve” and loves that she can style her clients curly one week and straight the next—the client enjoys having so many options, and it gives her more opportunities as a stylist to be creative.
Her advice to new talent is to trust the process—take your time perfecting your work, and be humble. Believe in yourself, continue to practice, and as her father would tell her, “Practice makes excellence!” She finds inspiration in every black artist she sees working hard and achieving their goals, especially when the obstacles are so many. “When I see a black person winning, I see room for me and many more who look like me; it gives me hope!”
As a curl expert, she wants to be known for her love of hair, and specifically for her expertise with sew-ins. Wigs, frontal sew-ins, closure sew-ins, and more—clients have many options to choose from, and as a stylist, she can help them make that choice. The important thing is to make sure the clients are happy and continue coming back.
“Love” is the word she uses to sum up her craft, which guides her interests outside of her career as well. Her passion in all pursuits is helping others. She loves seeing others grow and follow their dream, and loves being a part of another person’s seeing their dreams become a reality.
A protective hairstyle tucks the ends of the hair away, protecting them from exposure to damaging agents such as sun, heat, and constant manipulation. Protective styling benefits all types of hair textures, whether relaxed or natural.
The purpose and benefits of these hairstyles are to grow healthier, longer hair by retaining length and reducing split ends, knotting, and damage.
These styles take approximately 1.5 to 3 hours to complete and can last 1 to 4 weeks.
Two-Strand twists are one of the easiest protective styles for someone who has recently transitioned to natural hair— simply separate the hair into small sections, apply a leave-in conditioner and curling cream, and twist the hair from root to tip. Wrap the end of the strand around a finger for the perfect coiled ends. The twists can be worn overnight or up to a week before being unraveled for a twist-out style that can last another week!
Cornrows (or canerows) are a style of braids in which the hair is braided very close to the scalp, using an underhand upward motion to make a continuous raised row.
Flat twists look similar to cornrows but are easier to achieve. They’re a great protective style that can last up to a week, after which they can be undone to reveal a beautiful twist-out afro.
Bantu knots are sections of hair that are tightly twisted to form a coil (or “knot”).
This universally known hairstyle—in which the hair is drawn back and tied at the back of the head—is one of the simplest protective styling options.
These styles take from 4 to 8+ hours to complete and last anywhere from 4 to 12 weeks.
Sew-in wefts are a process where natural hair is braided down into cornrows, and a needle and thread are then used to sew down hair extensions onto the braids. With a sew-in, the natural hair is tucked away, so it requires very little upkeep.
A manufactured covering of natural or synthetic hair for the head. The natural hair would be braided down to the scalp and covered with a wig cap before the wig is installed.
Crochet is a unique braiding technique. The hair is braided down into cornrows, and then a crochet needle is used to weave the chosen synthetic/human hair through the braids.
The style is achieved by installing box braids, and then wrapping each braid with mainly “marley hair” or a soft curly texture depending on the look the client requested.
Knot box braids are created by adding synthetic hair—wrapped around the natural hair with a small knot to secure the braid.
Knotless box braids are created using a feed-in technique: braiding hair is added to a person’s natural hair in small pieces, resulting in a plait that lies flat and isn’t as heavy on the scalp.
Hairline Issues: Most hairline issues come from traction alopecia, which can be caused by braiding or incorrectly placing wig glue.
· Assess if the client can braid her edges for the look they’d like.
· Educate the client on how to maintain the approach taken for the look.
Dry or brittle hair condition: Why is the hair in this state? Get a history of your client’s hair processes, and educate the client on:
· Products or services needed to improve the hair quality.
· Time frame of how long they may need to keep a style before restyling.
· Importance of how often the client should come back in between services.
How to determine which approach to take with your clients’ hair.
· Is the client “transitioning” to natural hair?
· Does the client have hairline or scalp issues?
· Is this hairstyle something the client can afford and/or maintain?
· Does the client not want to deal with their hair or style their hair every day?
· Chemical Damage
· Traction Alopecia
· Dry or Brittle Hair
· Psoriasis
· Discuss the commitment that comes with maintaining the client’s desired style.
· For high-maintenance styles, the physical and financial cost can be a considerable adjustment compared to a client’s existing salon routine—be sure to discuss that change with your client so that it doesn’t come as a shock after it’s too late to make a styling decision.
How to determine which approach to take with your client’s hair.
Is the client transitioning from a chemical relaxer, thermal/heat tools, or damage from color/lightener?
What is the client’s preference for level of maintenance needed?
· NO MANIPULATION STYLES: Do not require daily attention. For example, box braids and weaves can take quite a bit of manipulation to install, but once installed, the natural hair is virtually out of sight.
· LOW-MANIPULATION STYLES: Usually easier to install but require some attention every day. For example, twists and buns don’t take much time to install, but they require a low amount of manipulation on a daily or weekly basis.
Does the client have hairline or scalp issues such as chemical or mechanical damage, traction alopecia, psoriasis, dry or brittle hair/ scalp, or other?
The client’s hair is in their natural texture.
The client is going through a process that requires their relaxed hair to grow out, leaving them with the natural roots (roots to midlengths) and relaxed hair (mid-lengths to ends combined).
Assess how to approach the client’s chemically or heat damaged hair with:
· Cutting the damaged ends.
· Allowing their hair to grow to its natural state while keeping
· the ends.
· Determining if the ends of the natural hair can be saved.
· Reminding the client of the expected time to reach their natural goal.
Transitioning from chemically relaxed hair to natural hair is an emotional process for most curly girls because they have had a relaxer for many years. Relaxers have become normalized in recent decades, and most of these clients have never worn their hair curly.
The client may arrive with a goal for their hairstyle or length and may want it quickly. However, it may be a longer process than they anticipated.
This is where the stylist has an opportunity to provide professional guidance to help their clients reach their hair goals.
it
GROWTH: Client may arrive with a goal for their hairstyle or length, and they typically want instant results.
OPT OUT: When told that it will take time for the process (multiple visits), client may opt out.
ASSIST: After learning about their hair condition and the commitment required, the client may or may not want your assistance.
LOVE: Clients want to love their hair immediately. They want to leave the salon with a transformation, but this may not be possible. This is where L.A.O.G. is the preference.
LOVE: Show the client love. It’s important to make the client feel beautiful, especially after the hair may have been damaged, resulting in loss of length.
ASSIST: Support the client with options to help them reach their hair goals, even if it’s not the look they had in mind.
OPT OUT: Let the client know it will be a process and all the options available to them. It may take time and trims may be necessary along the way.
GROWTH: Be professionally honest with the client. Give realistic timelines and expectations for their hair. Walk the client through the process. We are the partner to help them achieve their hair goals.
· The stylist should purchase the hair instead of the client. This ensures the right kind and right amount of hair. This will help overall speed and efficiency.
· Kanekalon hair is recommended for braiding, as it can be dipped into boiled water to seal the ends. If you opt for natural human hair, you can tie the ends to lock the braids in place. Kanekalon hair is the preference.
· The stylist should prep braiding hair before the client gets to the salon.
· Research the company to ensure you are getting 100%
· human hair.
· Wash the hair before using to avoid any irritation and or
· breakouts.
· Make sure the texture of the extensions matches the client’s · natural hair.
STEP 1: Hair must be shampooed thoroughly. Follow with a moisturizing treatment.
STEP 2: Section hair, detangle each section, and then blow-dry each section individually.
STEP 3: Trim if needed.
STEP 4: Section hair into 6-12 rows, and section each row into even parts.
STEP 5: Feed braiding hair into client’s natural hair, forming a plait.
STEP 6: Add finishing touches such as baby hairs, jewelry, etc.
STEP 7: If using Kanekalon hair, dip the ends in hot water using an electric pot. If you are braiding with natural hair, you can tie the ends of the braids or secure with tiny elastics. Kanekalon hair is the preference.
The hair can be either synthetic braiding hair or human braiding hair.
Hair Gel Detangle Brush
Section Rack
Used to hold the sectioned braiding hair.
It’s important to know the types of wigs available and to communicate these options to your clients as you help them choose the right wig for their styling needs.
Wigs made from human hair are long-lasting and easier to style than others, but they come with a higher price point.
Wigs made from synthetic hair tend to have shorter lifespans and can’t be subjected to thermal styling higher than 300°F. They tend to be less costly than human hair wigs.
It’s important to know the types of lace options available and to explain the differences to your client as you help them choose the right hairpiece..
High-definition lace is one of the newer lace types, available in light brown, medium brown, and dark brown. Because the lace is thinner and becomes completely undetectable when worn, it gives your client the most natural hairline. These hairpieces use the finest materials, with reinforced sewing lines and pleats to retain contour. Recommended for clients who want short-term use of a wig unit or who want the most translucent lace hairline.
Swiss lace is a more commonly used lace that comes in transparent, light brown, medium brown, and dark brown shades. Usually used for full-laced wigs, it offers medium-fine lace that can be tinted to any skin tone with lace tint. Recommended for clients who want long-lasting units.
This can depend on client input, as clips are usually a preference. Clips are usually used for full-laced wigs. While clips can create strong hold, they can also be slightly uncomfortable.
Wig manufacturers offer wigs in a variety of densities—ranging from light to thick—that are important to understand when helping your client choose a wig. When choosing the hair density of a wig, be sure to consider the length of hair.
For example, a short length and heavy density will look much less natural than a wig of the same length in light density.
The lowest level of wig hair density. The concentration of hair is quite low and only recommended for women who naturally have very fine or thin hair. This wig density is usually used for hairlines or to give an age-realistic look.
Constructed with light density near the hairline that gradually turns into medium density toward the crown—these wigs are light enough that your clients will feel they’re not wearing a wig at all.
The standard density of most wigs, these match the density found on an average human head. Most customers prefer to buy natural density wigs as they do not feel too thick or too thin and they replicate the look and fullness of natural-looking hair.
Offers a fuller and more voluminous look than lower densities. Heavy density wigs give a lot of bounce, movement, and style options and can be customized into curvy and wavy hairstyles.
An exceptionally heavy density, these wigs can have a peculiar look and are primarily used for full, high-volume, opulent styles (i.e., by artists or actors who need to perform). Their high density can make them slightly uncomfortable to wear.
The heaviest density of wig, these are only used by professional artists. They are hard on the head and might feel extremely uncomfortable, but they enable stage artists to create strong, distinctive styles.
Used to stitch the weave or wig to the client’s braids.
Adhesive
Used to join the lace to the client’s skin.
Used to part the client’s hair to braid down the foundation for the wig.
Used to lock in moisture before or after braiding the foundation.
Used if the client needs to add length or to secure the foundation.
Gives the illusion of scalp. This helps the wig to look realistic.
Works as an adhesive.
Ensure the thread matches the color of the root area of the wig, not the ends of the wig.
You do not need to take breaks between each protective style.
Braiding your hair tighter makes your style last longer.
You can use any size comb to detangle curly/coily hair.
All clients who choose protective styles have no edges (hairline).
All curly/coily hair is dry, unmanageable, and “intimidating.”
Protective styles always make your hair grow and right away.
The dirtier your hair, the more it grows.
You can’t wash your hair while it is protected.
Protective hairstyles make your hair smell.
Don’t
Do:
Take breaks between protective styling to avoid tangling, dryness, and breakage.
Moisturize regularly (especially for long-term protective styles).
Try an apple cider vinegar rinse, unless you or the client is allergic.
Use the LCO/LOC method (before and after).
· LOC stands for Liquid/Leave-in, Oil, Cream
Do a pretreatment.
Trim before styling.
Don’t:
Forget about the edges.
Allow product to build up.
Leave the style in too long.
Neglect the natural hair.
Sebastian Professional Gel Forte
Wella Professionals
EIMI Pearl Styler
Wella Professionals Marula Oil
Wella Professionals
EIMI Sculpt Force
Sebastian Professional Gel Forte
Sebastian Professional Twisted Foam
Wella Professionals EIMI Nutricurls Soft Twirl Foam
NIOXIN Bodifying Foam
Wella Professionals EIMI Nutricurls Curl Shaper


Scott


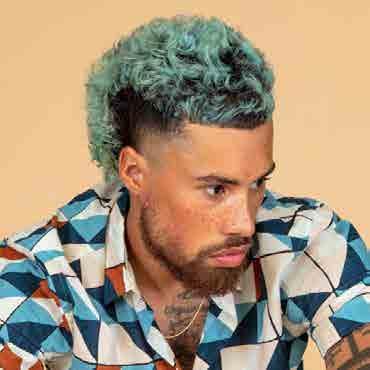
Barber Pro Artist | @HisGrooming

Jared’s favorite thing about working with curly hair is that it holds shape extremely well, and he loves that it’s naturally textured.

Jared has been in the industry for 20 years and a salon owner for 7—since the opening of HIS Grooming, a space he designed specifically for men. He began his career young and extremely determined, opening with just one other barber, eventually growing his team to five. Most recently he’s reimagined the space and now operates as a suite for just himself and his clients.
His career highlights include opening his own barbershop, cutting hair on the set of House of Cards, becoming a Wella Company Artist, and counting Congressman John Lewis among his clients along with other celebrities such as Chance the Rapper, NBA and NFL players, senators, and congressmen. Being a professional artist allows him to use his gift of creating while still having the ability to stay structured and organized. He loves the ability to pursue his passion every day while still having a 9–5 job.
His favorite thing about working with curly hair is that it holds shape extremely well, and he loves that it’s naturally textured. His advice to fellow stylists is to think long term, not just in the moment. He believes that every great artist is great for a time, but trends change and what’s hot gets cold. He encourages up-and-coming professionals to make financial, relationship, and work-related decisions for their 60-year-old selves, not just the 25-year-old one.
Jared sees the world as a gorgeous, continuously changing painting and finds that even what’s broken can be beautiful, which also inspires him. He wants his work to be known for order, and he wants his industry to know him for his voice, for saying things that are different, obvious, and truthful.
Barbers also performed minor surgeries and the common practice of bloodletting.
High-ranking men and women of Egypt had their heads shaved.
Interpretations of the barber pole are that red represents the blood, blue represents the veins, and white represents the bandages.
Beards and facial hair were seen as a status symbol. A well-groomed beard was a sign of high status.
White men had a very large influence over the barbering trade because they selected which enslaved people were allowed to learn barbering, a prestigious and highly coveted field.
The traditional barber became known as a “waiting man.” This person would travel with his master to make sure his boots were polished, his beard was shaved, his hair was cut, his clothes were clean, and he presented his best possible image.
The name was later changed to “Associated Master Barbers and Beauticians of America” and included traditional beauty salon owners.
Minnesota was the first state to set the standards for sanitation, minimum education, and licensing requirements for barbers in barbershops.
Today the NAB represents over 300,000 barbers and works toward maintaining professional policies and standards within the barbering industry.
NAB established September as National Barber’s Month.
OF A MERICAN BARBERSHO PS
Men often visited the neighborhood barbershop every two weeks to maintain a clean-cut appearance.


The rise of long hair trends from pop culture and hippie subculture led to more relaxed male grooming standards. Barbershop culture became less attractive to younger generations of men.
Men’s hair trends shift to a renewed focus on specialized beard grooming and getting a perfect fade line. Barbershops and men’s grooming lines proliferate to create what is now a $26 billion industry.

Comb choice is extremely important, because in curly hair every curl is unique in size and shape.
The tighter the curl the larger the comb teeth should be— a small tooth comb on a very tight curl is a painful experience.
Blades are your central place for length.
A #2 is measured from the blade to the guard.
Understanding what lengths are created by which numbers is less important as it pertains to the depth of the curl or wave.
EXAMPLE: 1 ½ with the grain is equal to a 3 ½ against the grain.
All outliners are not made equal. Only professional grade clippers and trimmers should be used by professionals and even recommended for client’s at-home use; however, advise clients to be very careful because of the precision and power.
Refer to the chart below for attachment and setting lengths.
Or
blade
closed clipper blade Open clipper blade
1 With closed clipper blade
1½ with closed clipper blade
2 with closed clipper blade
3 with closed clipper blade
4 with closed clipper blade
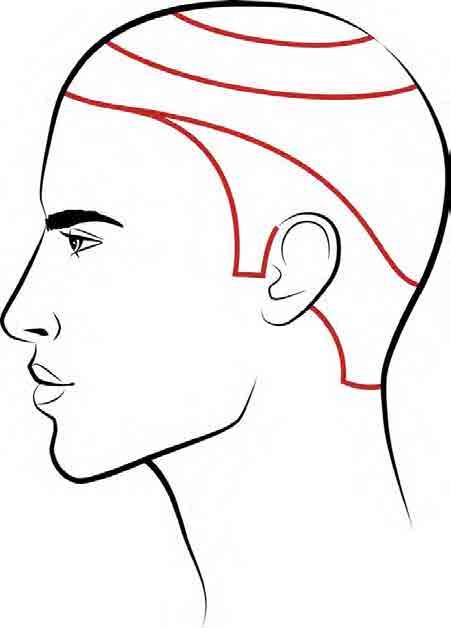
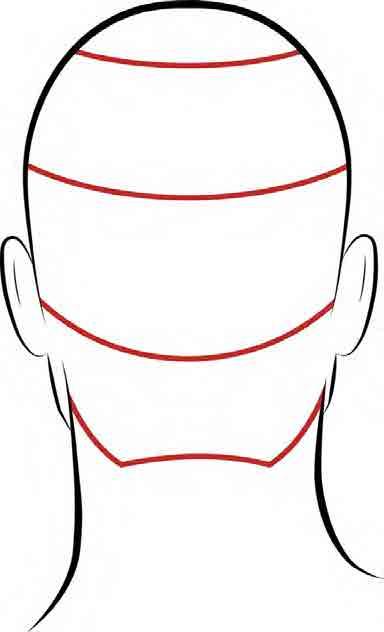
Easily considered the foundation of any haircut, this refers to the desired length placed in a specific zone, based on head shape and intended style. Correct and intended placement gives each haircut balance and shows a professional quality.
Within the zones placement of length and shape is important to the fit of an intended style (i.e., low fade, high fade, square shape, round shape, etc.).
A crucially important piece to every haircut. A combination and equal mix of lengths, dedicated to a specific zone or zones—the blend gives a haircut class and shows professional quality.
Blends typically occur within a zone or bridge two intended zones and are based on (but not restricted to) the natural head shape Blends, whether long or short, must create a seamless quality.
Depending on the style, hair type, and personality of the individual, hard or soft lines are used to frame a specific area of the haircut. When determining which edging to use, an in-depth consultation is paramount.
This refers to creating visible patterns within the exterior or interior of the haircut. Remember that certain hair types have natural texture while others do not.
Defined as the decrease in length, specifically in zone 1 (around the ear) and nape area.
A very important piece to haircutting, a distinct change in shades, going from dark to light.
Fades are typically created with a specifically placed design line within a specific zone to give the illusion of extreme lengths blending in a seamless fashion.
A very important piece to haircutting. It does not have a technical blend and could almost be described as multiple haircuts in one style. The blend is created visually and styled into shape. There are many different types of detached styles.
The consultation is paramount to understand each guest’s intended style.
When working with curly hair shapes, blow the hair out and execute the shape first, then add water and product to enhance the natural curl pattern (some curly hair can be cut and shaped while it’s wet).
When cutting and shaping curly hair it’s important to cut and simultaneously comb as curly hair tends to hide underneath itself. Comb with a minimum 3 to 5 pick size before moving to the next section.
It’s important to know first and foremost what cutting with, against, and across the grain produce. Cutting with the grain produces a cut that cuts the outermost layer and creates an exterior shape. It does not cut hair evenly—most waves are cut more frequently when cutting with the grain.
It’s recommended to cut waves against the grain every 6–8 weeks.
Creates an even surface by making the hair even in length to the hair directly next to it. The fastest way to remove texture under a certain length. Most fading is done against the grain.
Fades are typically created with a specifically placed design line within a specific zone to give the illusion of extreme lengths blending in a seamless fashion.
The best technique for creating shapes with a clipper and a comb, a shear and a comb, or freehand.
Cut and style hair in the way that it grows. This is something most clients don’t know, and many barbers don’t intentionally do this.
EXAMPLE: My hair grows in a circular pattern and needs to be brushed in the same direction for my waves to show. If it’s not cut that way it will become patchy and uneven.
Barber theory based.
Transition
Blending of cosmetology and barber theory.
Top Cosmetology theory based.
· Most men don’t cut their facial hair with a razor.
· Men with curly facial hair end up growing a beard, because
· when curly hair drops below the skin it creates razor bumps.
· The razor is used on the top line because the density is low.
· As the beard gets denser, the potential for razor bumps
· increases.
· Most men will only shave with a trimmer or an electric shaver.
· If a man is shaving with a razor, he most likely is shaving daily or every other day; any longer than that and the skin gets irritated and razor bumps occur.
· Don’t push hairlines back—it’s the most important part of the
· haircut, and it is the frame to the picture.
· The lower the hairline, the more central the face.
· The corners are very particular as they’re the first area to go back or recede—be careful not to overcut this area.
Sebastian Professional Shaper Fierce
Sebastian Professional Microweb Fiber
Sebastian Professional Texturizer

Wella Professionals EIMI Curl Shaper
Sebastian Professional Gel Forte
Wella Professionals EIMI Pearl Styler
Sebastian Professional Twisted Foam
Wella Professionals EIMI Soft Twirl Foam
NIOXIN Bodifying Foam
STEP 1: Bulk removal
STEP 2: Shaping & refining
STEP 3: Outline & finish
#ProTip:
Use product to help with sectioning or re-wetting.


Questions to ask your clients
· How much time can you put into your style?
· Have you researched and/or bought products and tools you’ll need to style it?
· How often do you want to return for a cut?
· Cowlick?
· Frizz?
· Curls?
· Hairline?
· Lies too flat?
· Sticks up too much?
· How do you want your hair to act? Stay put or move around? Soft or stiff? Do you want it to fall to the side or not?
· What to do you want your hair to look like? Stand up? Lie down? Lie back? Messy or neat? Flowy? Wavy? Straight? Would you like to see skin on the sides? Do you want to see shadow in the fade? Do you like hard corners or a rounder shape?
· What do you want your hair to say about you? Do you want to look like you care a lot to make your hair look perfect? Do you prefer to look like you accidentally look this good?
IF YOU’RE OVERBOOKED OR RUNNING LATE, ASK YOUR FRONT DESK STAFF TO HELP BY GREETING THE CLIENTS AND LETTING THEM KNOW YOU’LL BE WITH THEM SHORTLY. If you’re running behind by more than 30 minutes, offer to reschedule the appointment at a discounted rate, with the approval of a member of management; your client will appreciate your being respectful of their time. If in the event the client is running late, maintain your composure and kindly explain to them that depending on what time they arrived, you may have to alter the haircut services (i.e., only provide a trim or eliminate the shampoo/conditioner).
Whatever you choose to do, the client should in no way feel you are upset at them for being late. We service many professional people with important jobs. This needs to happen across the board (i.e., your “favorite” or long-term clients shouldn’t get special accommodations that another client wouldn’t receive).
YOUR CLIENT WANTS A GREAT HAIRCUT AND STYLE, SO BE PATIENT AND KIND WHEN DISCUSSING HOW TO ACHIEVE THAT. Explain everything: Assume your client has never heard of a fringe or an inverted cut and doesn’t know the difference. Be sure to ask your client if they have any questions about what you’ve recommended, and if they do, clarify it for them.
BE CLEAR ABOUT THE COSTS. As the barber, you shouldn’t assume the client tracked down detailed cost info—nor that they would have received that information when scheduling—so it’s important to be upfront about total cost of services. Sticker shock at the end of the service is uncomfortable for everyone.
HONESTY IS THE BEST POLICY. Be patient and listen. Offer a kind smile and a reassuring tone, but if you can’t give the client what they want, be sure to say so, explain why, and describe what you can do. Offer a positive alternative rather than a flat-out “no”— and never make the client feel insecure.
DON’T EXPECT A TIP FOR MEDIOCRE OR POOR SERVICE. It is not a given that a client will leave a gratuity; it’s something you as the barber must earn. Just as you wouldn’t tip a restaurant server who was lazy, rude, or inept, a client at the salon shouldn’t tip a stylist who does a poor or careless job. A good motto is “expect the cost of the service, but work for the tip.”
PUT AWAY YOUR CELL PHONE WHILE YOU’RE WORKING ON THE SALON FLOOR! Your clients should never have to compete with emails, text messages, or social media for your attention. When you’re on the salon floor, you’re on the job, and all of your attention should be focused on your clients, not on your cell phone. We can’t overstate this rule: put the phone away.
It’s tempting, especially when a client brings up such topics, to talk intimately about religion, money, romance, or even politics. Avoid these topics as much as possible, as well as any gossip about the shop. Whatever you do, be mindful not to put the client in the crossfire of your battle with a coworker or manager—that is the height of unprofessional behavior and is guaranteed to make your client uncomfortable. Treat others as you want to be treated.
There are many interesting conversations spawned on the barbershop floor. Remember, your client is bonded to you and will respond and feel most comfortable with you. Spend your time talking with him and if a conversation occurs that you’re interested in, ask your client what he thinks and make him a part of the conversation. Remember it’s not about you.
Remember, our clients are hard-working professionals with very demanding schedules; we sell them a professional and relaxing 50 or so minutes. In every service there is a point where the client reaches relaxation; don’t interrupt them with a side comment to a coworker or walk away from your chair (i.e., shampoo time, getting a shave, beard trim, when the client is laid back… all these moments are relaxation times that ought not be disturbed).
This is also not the time, under any circumstances, to take a smoke break. The towel is not on their face long enough for you to smoke, wash your hands, and return to the chair without a trail of smoke still following you. Not to mention how unpleasant it would be for a client to have their stylist’s smoky hands on their face after they’ve just smelled lavender oil for the past 2-3 minutes.
Each client is paying top dollar for your time and willing to tip you based on your service. Note that small infractions—like walking away from the chair, using profanity, talking about personal issues, and not being prepared for the service—are things that impede on what we sell and what they pay for. Remember to take a few minutes before each service to prepare your station, use the bathroom, and get a drink or whatever you need to do (within reason). These things are indispensable to your client and set you apart from other barbers and barbershops.
Be a part of our movement and our vision. We understand that our ideals and principles differ from most barbershop experiences and cause for a change in character and habit. Remember, what we are doing is for the betterment of this industry and it starts with one client one day at a time.
Myth:
Barbers don’t make hairstylist money.
Barbering isn’t that hard.
Barbering doesn’t have a place in the beauty hemisphere.
Men’s haircutting is easier.
Clippers are the best option.
Curly hair doesn’t pay that much; no need to learn it.
Men won’t go to the hair salon. Hair was not a noble trade.
Barbering was considered very low end; it started with slaves.
The industry was not always separated; Black people did all people’s hair (American).
Understand the importance of comb choice.
Find three to five guys who will let you cut their hair consistently all year.
Get feedback from a mentor on every cut.
Take pictures of every cut.
Familiarize yourself with blade theory.
Be proficient in shear over comb.
Spend time with barbers; there is a culture for this.
Understand the science.
Cut and style hair in the way that it grows.
Cut wet or dry for respective reasons.
Wash and blow-dry (most important).
Understand cutting (with the grain).
Don’t:
Think that all blades, guards, and guides are the same—there is a difference.
Think color isn’t important.


To prepare pre-colored hair, apply a cleansing rinse to the hair first.
For the root shadow, create a custom shade by mixing two or more shades of semi-permanent liquid color.
Apply a root shadow with semi-permanent color.
Mix your favorite lightener in a 1:1.5 to 1:2 ratio with the appropriate developer.
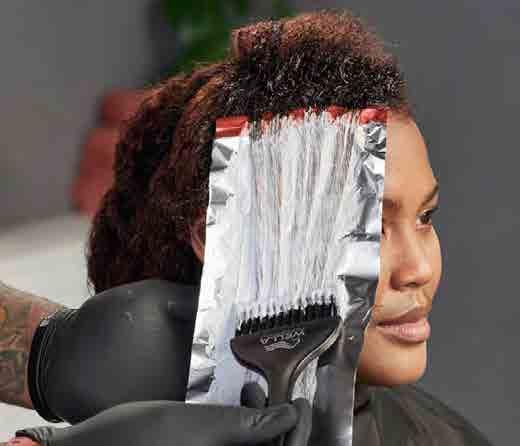
Start with a triangle at the front hairline. Weave the hair and apply selected lightener, alternating with your lowlight formula.
In the next section, take an inverted triangle, and continue with the same technique.
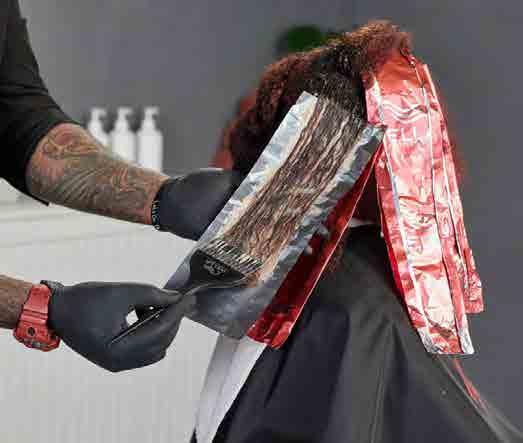
Continue to foil in this manner until all desired hair is covered.


Emulsify the hairline to remove any staining. Rinse the color out until the water runs clear.

Apply your preferred post-color treatment.
Rinse thoroughly.

Cleanse the hair thoroughly.

For longer lasting color, follow with a color-depositing mask for 10 minutes 1 3 5
Add the color depositing mask to your client’s retail regimen to maintain their color at home.
Wella Professionals Nutricurls Shampoo for Curls
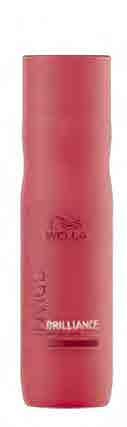
Wella Professionals INVIGO Brilliance Shampoo

Wella Professionals ColorMotion+ Treatment
Wella Professionals Service Color Post Treatment
Wella Professionals Fusion Shampoo

Sebastian Professional Twisted Cleanser
1
2 3
Layer a leave-in treatment with a medium hold gel, one section at a time.
Use a smoothing oil to seal in the shine.
Paddle brush with tension until hair is smooth and dry.
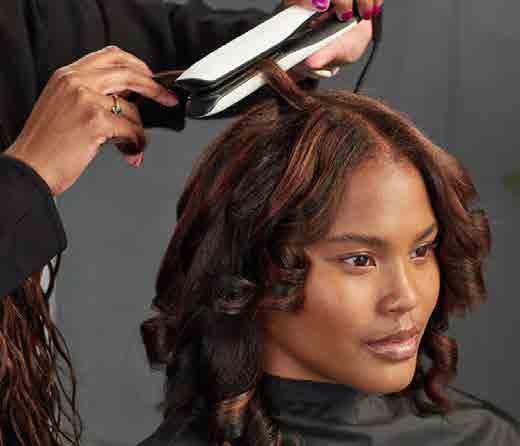
Mist dry hair with a thermal protection spray. Smooth root area and curl ends with a styler.

Sebastian Professional Potion 9
Wella Professionals EIMI Perfect Me
Sebastian Professional Texturizer

Wella Professionals EIMI Nutricurls Curl Shaper
Clairol Professional Shimmer Lights Leave-in Treatment
Sebastian Professional Dark Oil Wella Professionals Oil Reflections
Wella Professionals EIMI Cocktail Me
Sebastian Professional Trilliant
Wella Professionals EIMI Thermal Image

Clairol Professional Shimmer Lights Thermal Shine Spray


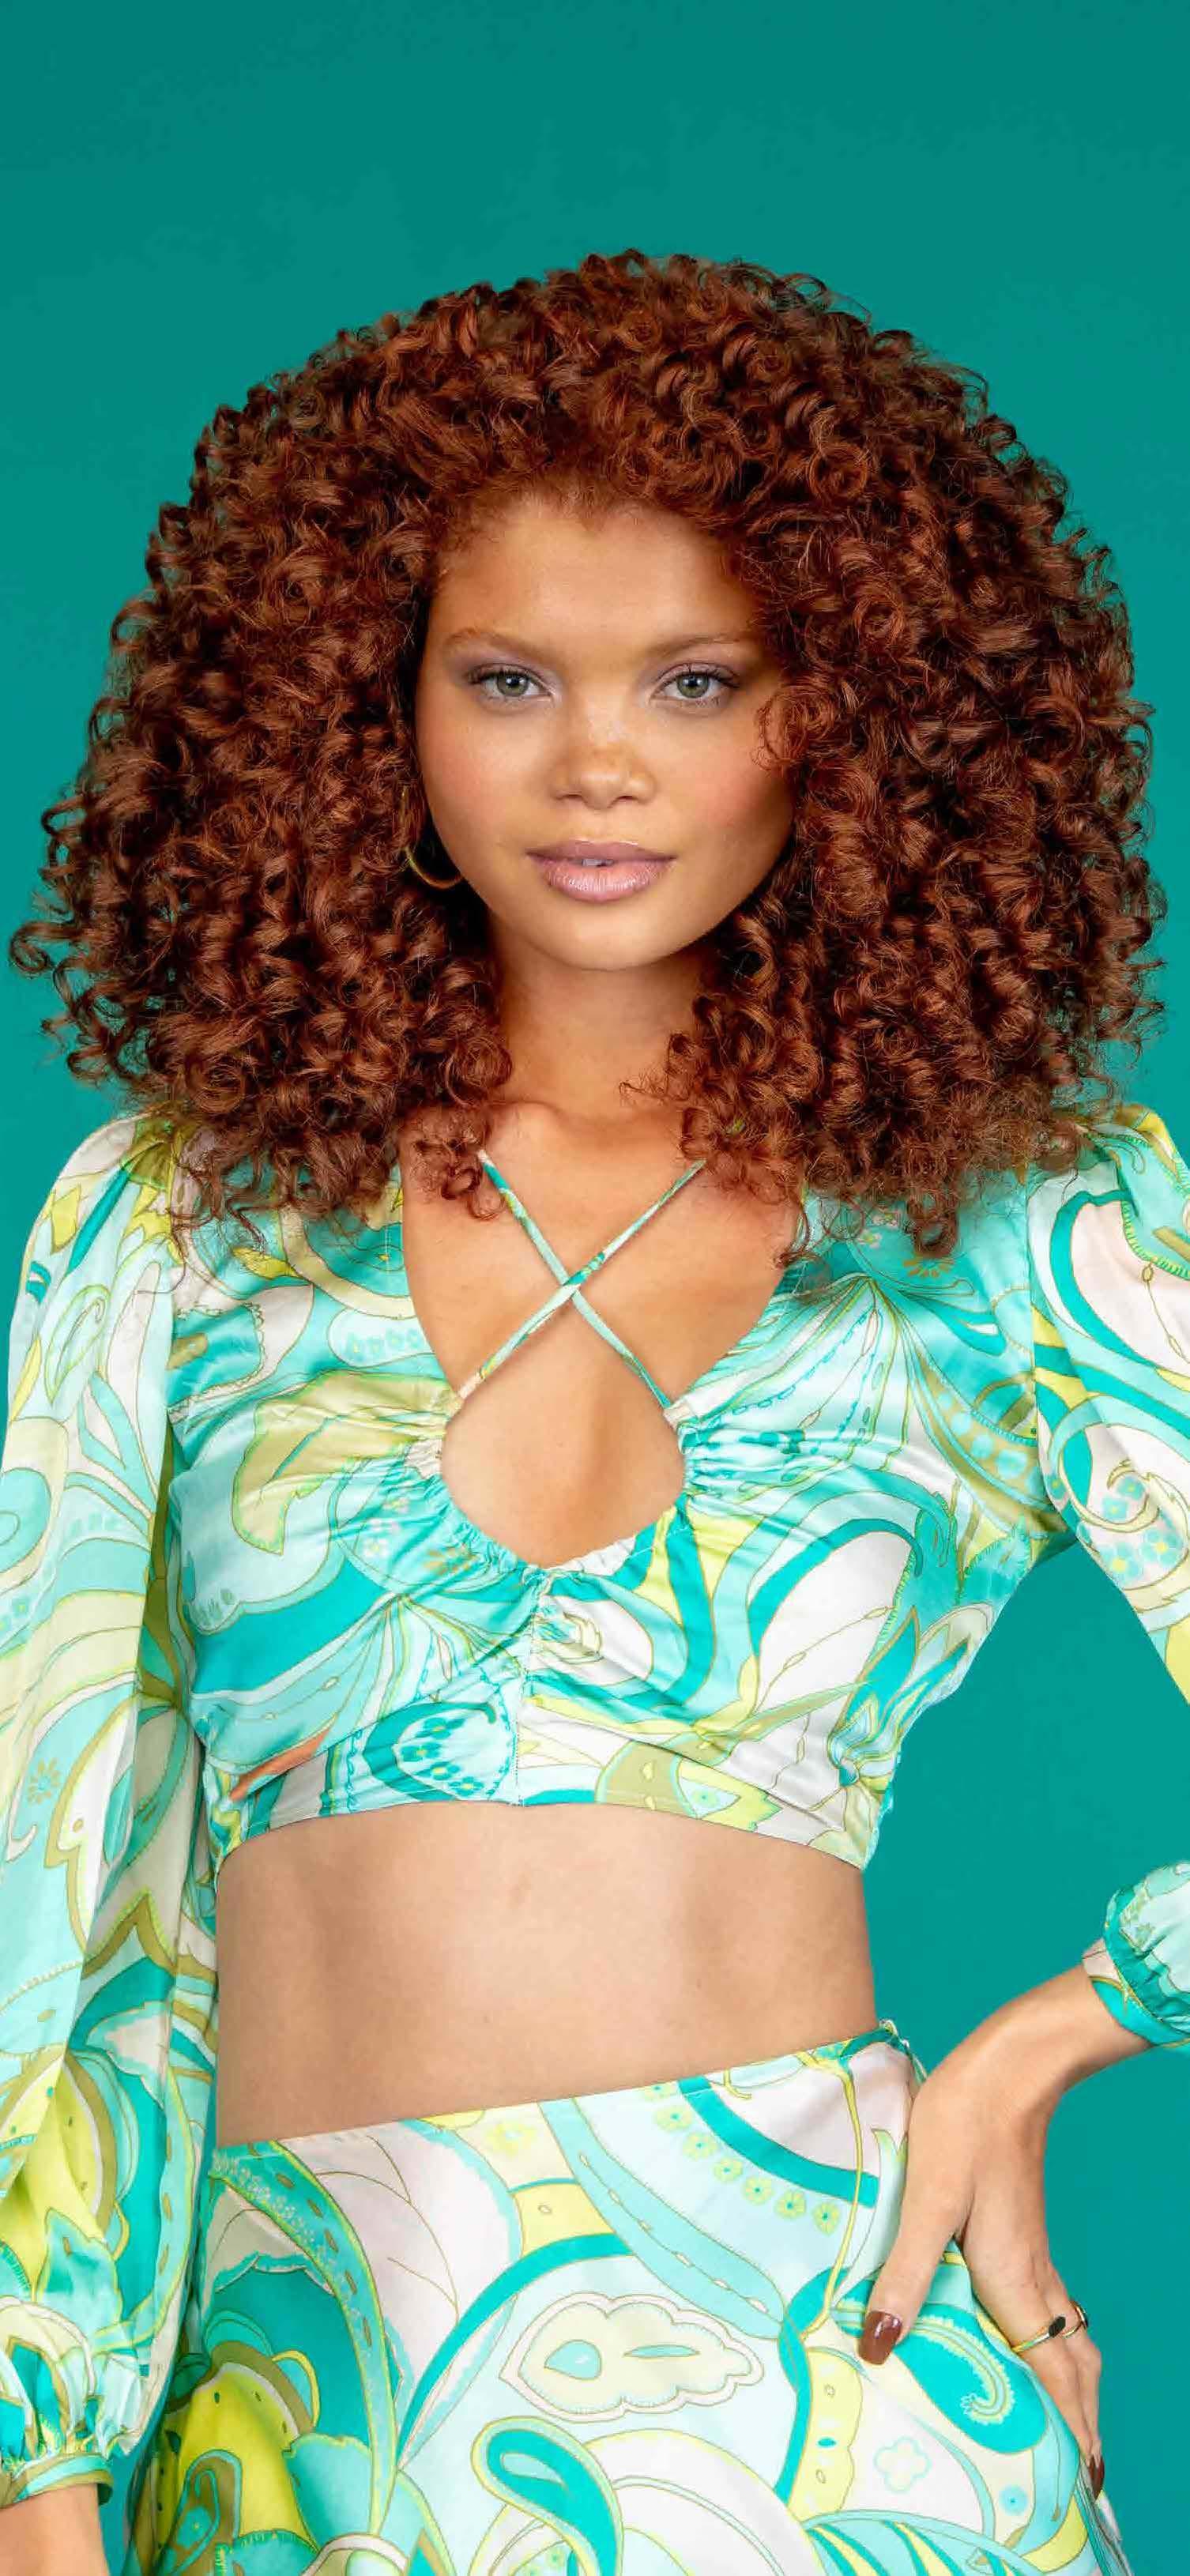
Gently brush dry hair to detangle.

1

2
Establish your guideline for the layers by pulling a 1-inch section from the top of the crown down to toward the ends. This will determine the shortest lengths.
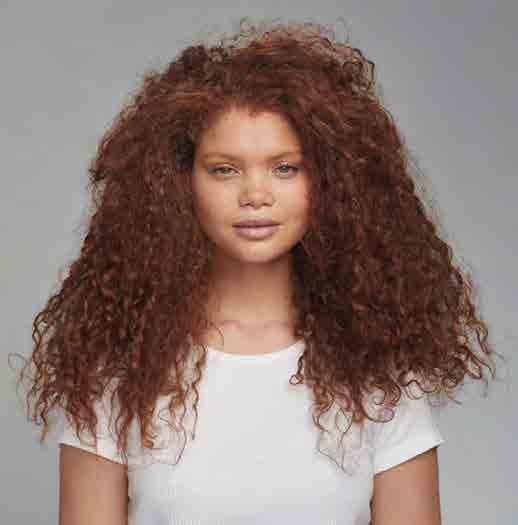
Freehand cut the perimeter to create a strong outline.
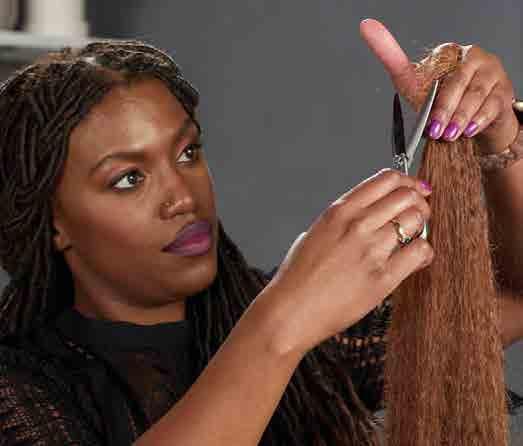
3
Use the initial guideline as reference for the shortest length and take vertical sections from the center back of the head. Continue taking vertical sections as you pivot around the head.
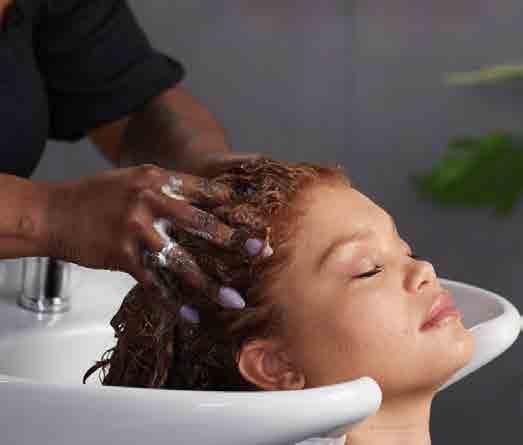
1
Cleanse the hair with a generous amount of shampoo. Cleanse twice if needed.
10-15 MINUTES

Apply a natural toning service to condition and color in one step. Apply the mask from roots to ends, and use a wide tooth comb to evenly distribute.
Process for 10-15 minutes. Rinse thoroughly, but do not shampoo. 3
Wella Professionals Nutricurls Shampoo for Curls
Wella Professionals INVIGO Brilliance Shampoo
Wella Professionals Fusion Shampoo

Wella Professionals Color Fresh Mask Copper lo
Sebastian Professional Twisted Cleanser
Mist a moisturizing spray from roots to ends.
Add a conditioning cream generously from roots to tip.
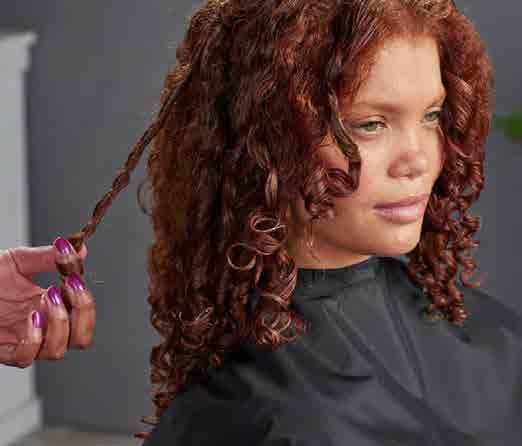
Take small to medium sections, and apply a strong holding gel to each strand. Gently twist the hair around your finger to create perfect ringlets.
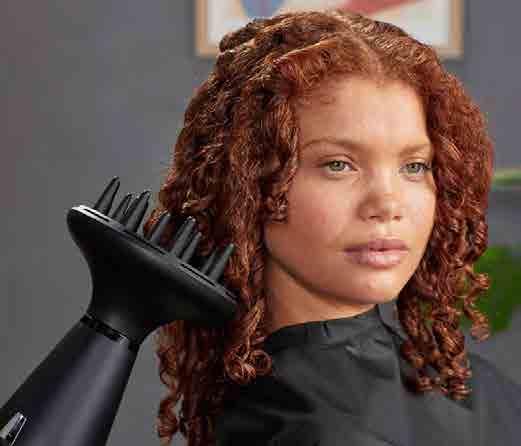
Blow-dry the hair with a diffuser attachment. Gently lift the curls as you dry, and capture the ends of the hair in the diffuser.
#ProTip:
After the hair is detangled, use a firm Denman brush to distribute the product.
#ProTip:
Once completely dry, have your client shake their hair before applying a shine spray.

Wella Professionals
INVIGO Brilliance a le BB Spray
Wella Professionals Nutricurls Milky Waves
Sebastian Professional Potion 9 Lite Spray
Sebastian Professional Whipped Crème
Sebastian Professional Trilliant
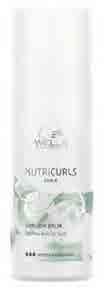
Wella Professionals Nutricurls Curlixir Balm
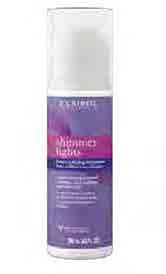
Clairol Professional Shimmer Lights Leave-in Treatment
Wella Professionals EIMI Thermal Image
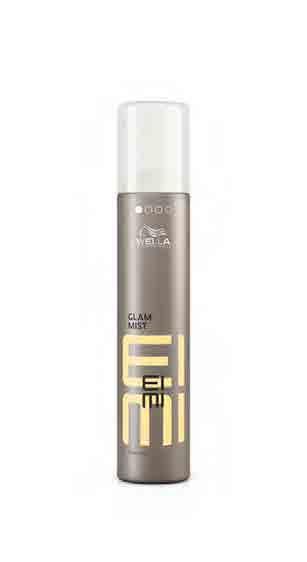
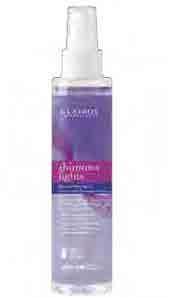
Wella Professionals EIMI Glam Mist
Clairol Professional Shimmer Lights Thermal Shine Spray
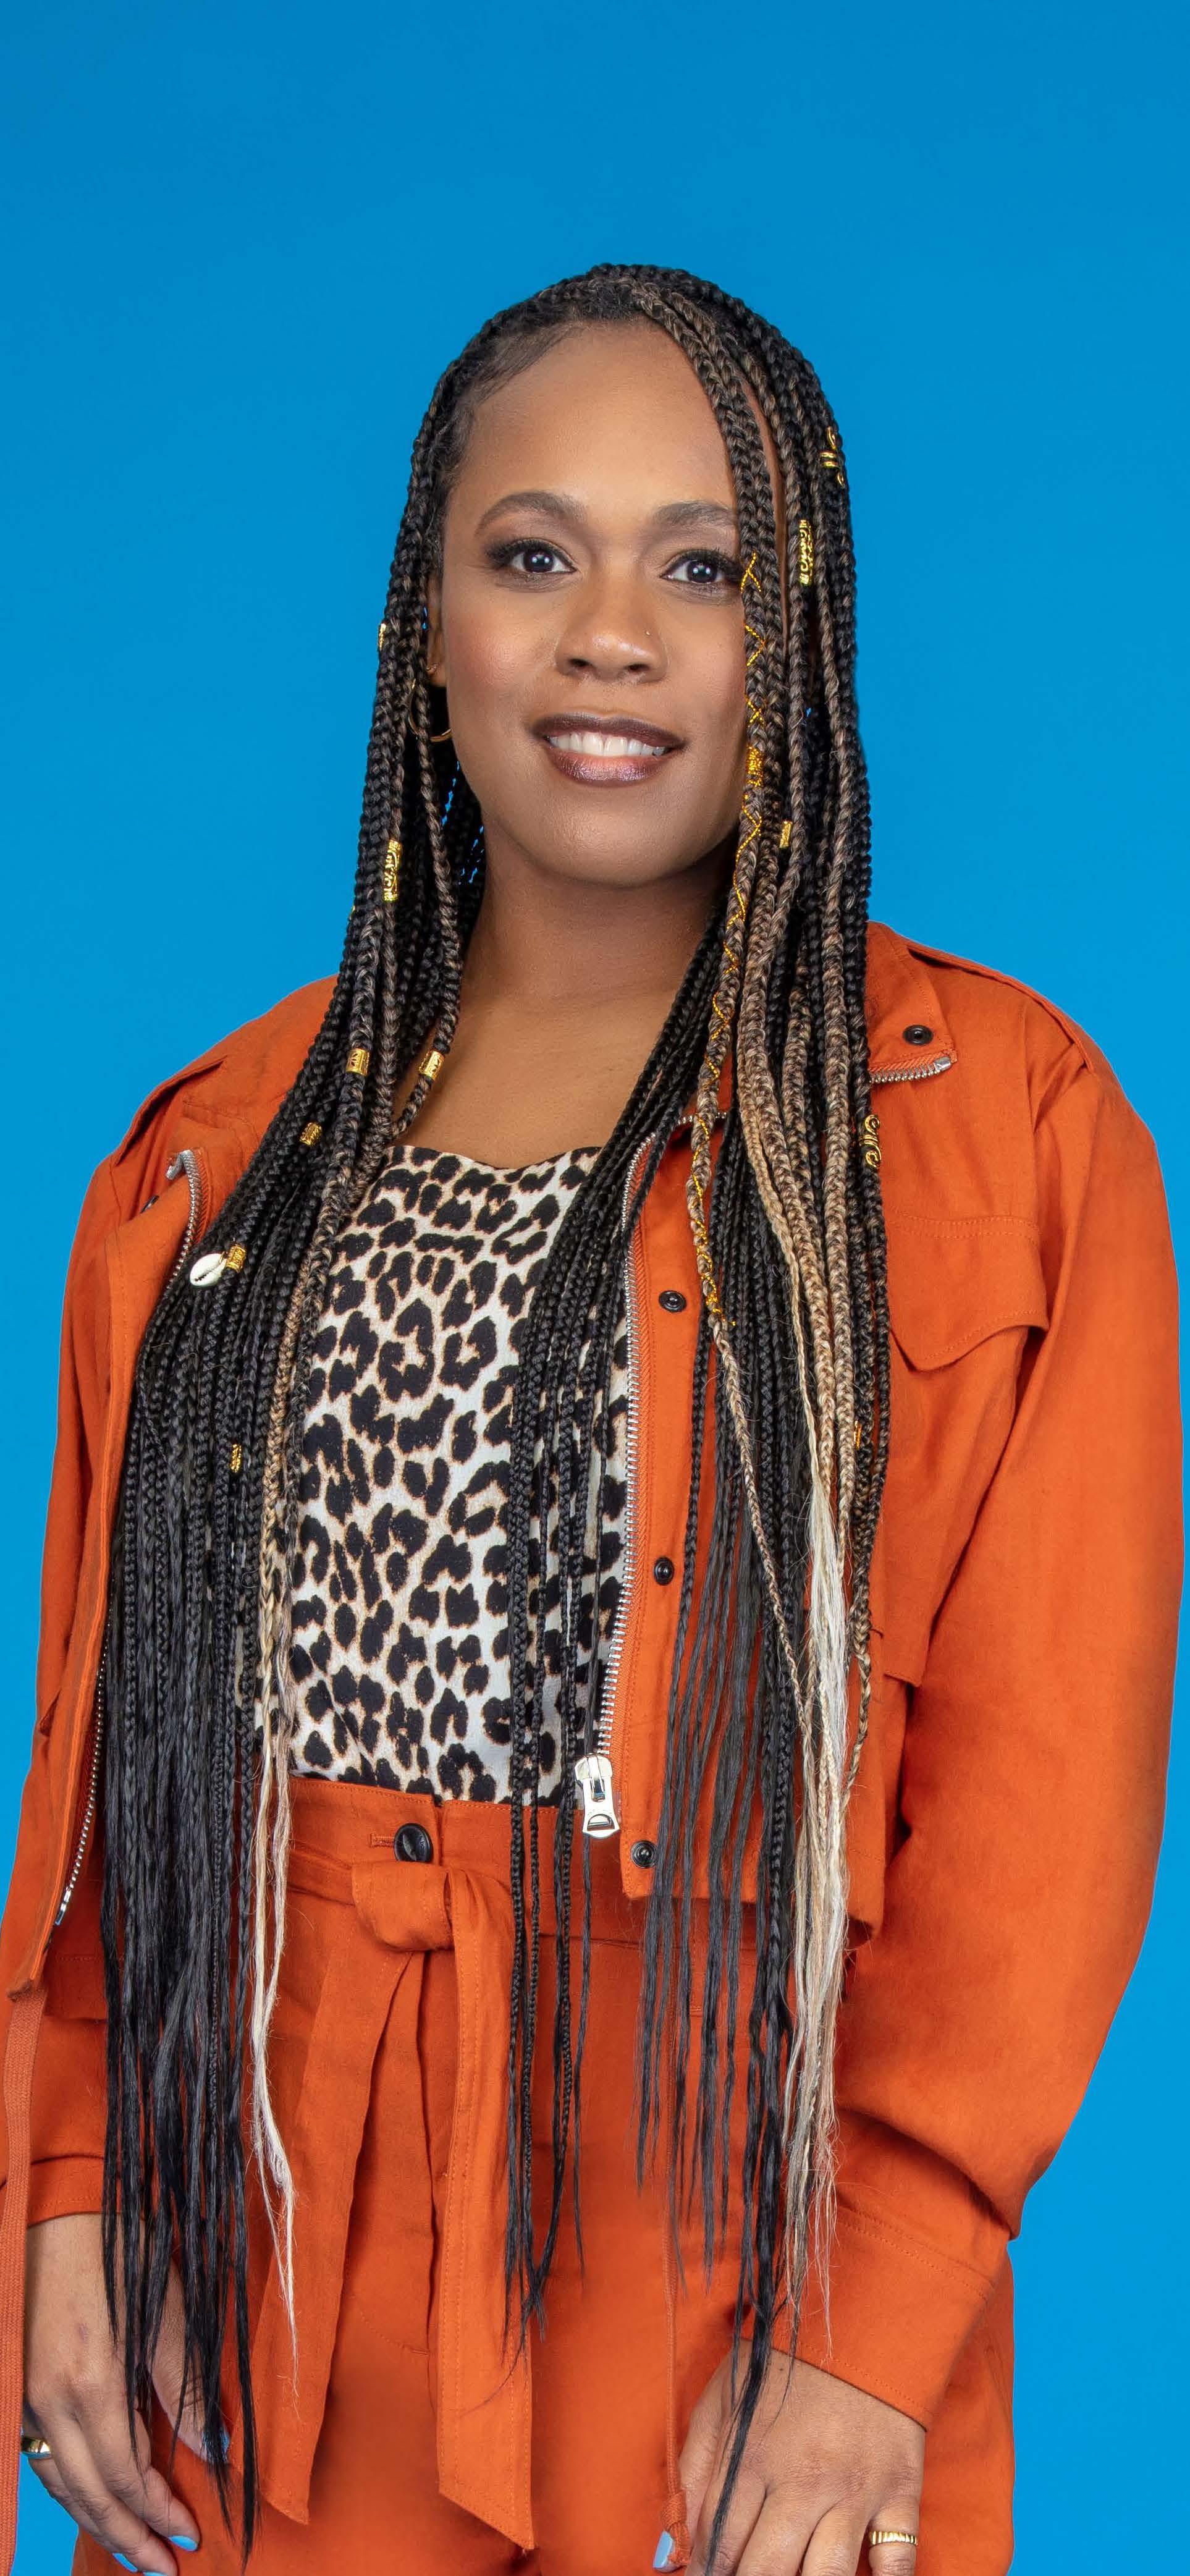


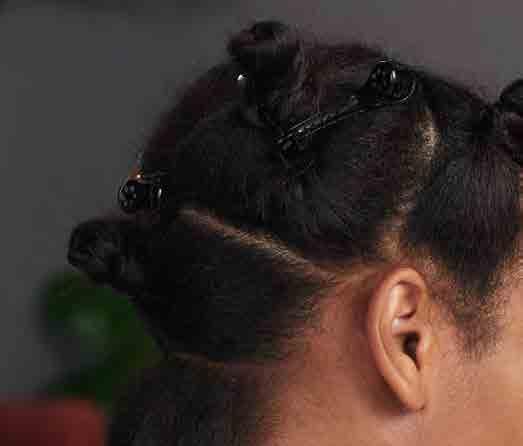
2
1
Create 3 major sections. Divide each into horizontal sub-sections.
Apply a small amount of hair gel to the root area.
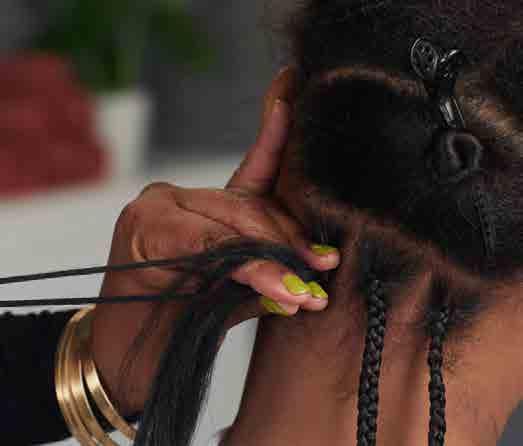
3
Add a small amount of hair to the first section of the braid.
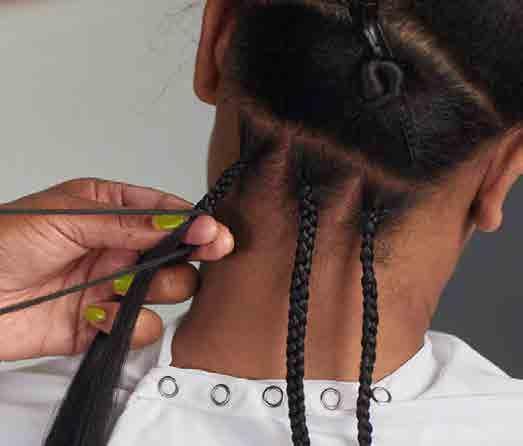

4
Add hair for the first couple of inches. Continue to add hair as needed through the braid.
Complete the braid to the end. 5
6
Apply a small amount of a strong hold gel to the hairline. Using a tiny brush, gently put the tiny hairs in place.
7 8
Apply a very generous amount of a medium hold foam to the root area and mid-lengths. Wrap the hairline area with a wrap and place under the dryer for 5-10 minutes
Dip the ends of the hair into boiled water.
#ProTip:
Take caution when handling hot water using an electric pot!
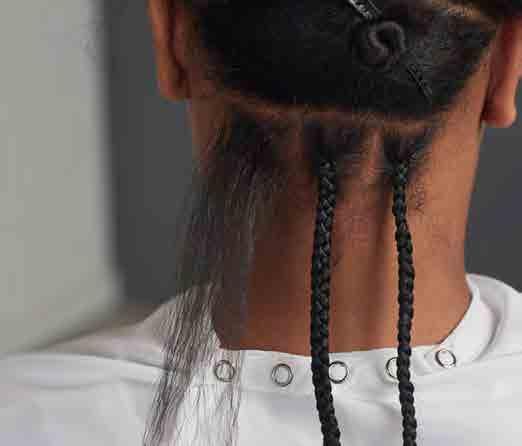
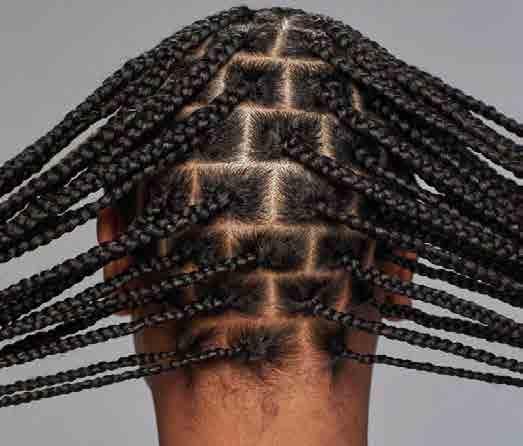
Sebastian Professional Gel Forte
Wella Professionals EIMI Pearl Styler
Wella Professionals EIMI Sculpt Force
Sebastian Professional Gel Forte
Sebastian Professional Twisted Foam

Wella Professionals EIMI Nutricurls Soft Twirl Foam NIOXIN Bodifying Foam
WIG & TWIST OUTS
Pre-lighten the
a
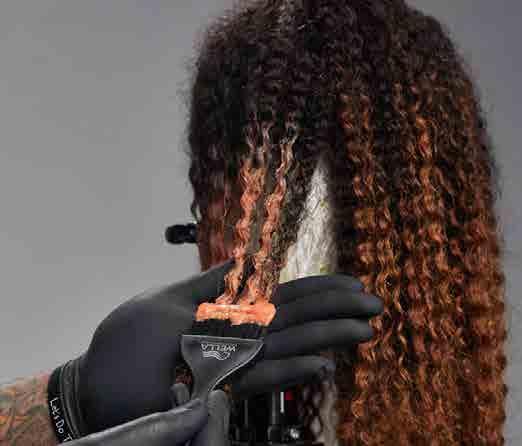


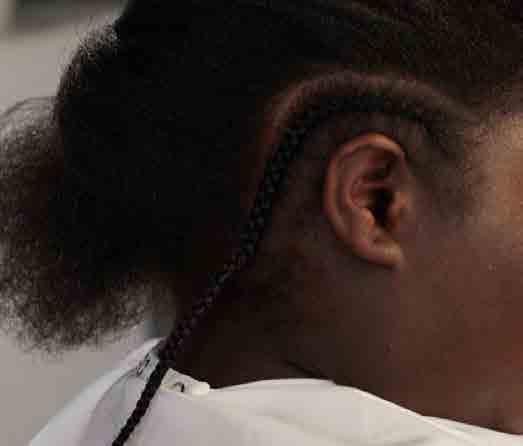
Begin by sectioning away a 1-inch C-shaped section around the ear.
Apply a small amount of hair gel to the root area. 2
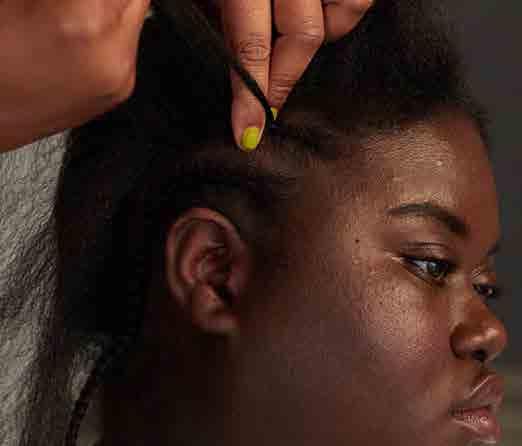
Feed hair into the braid to create stability. 3
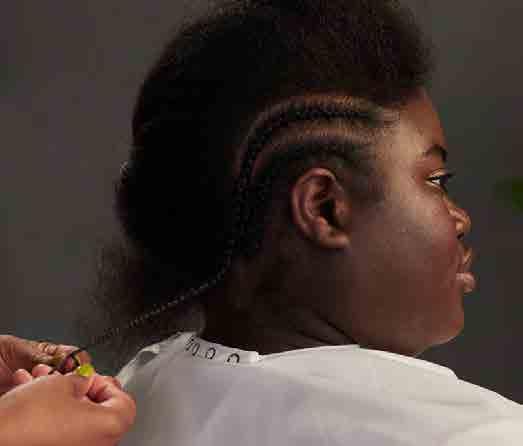
Continue taking even parallel sections until you reach the opposite side of the head.
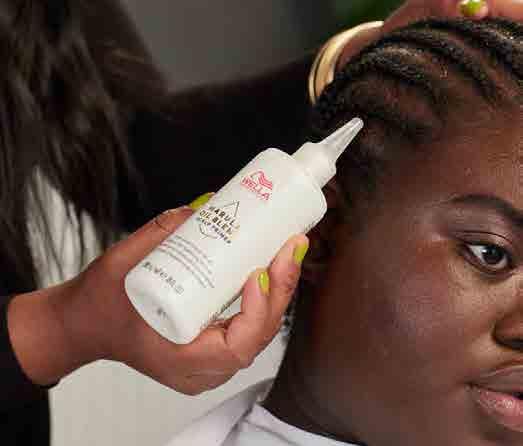
1
Prepare the scalp with a protective calming oil.
2
Apply a small amount of a superstrong holding gel to an edge styling tool, and apply to the hairline.
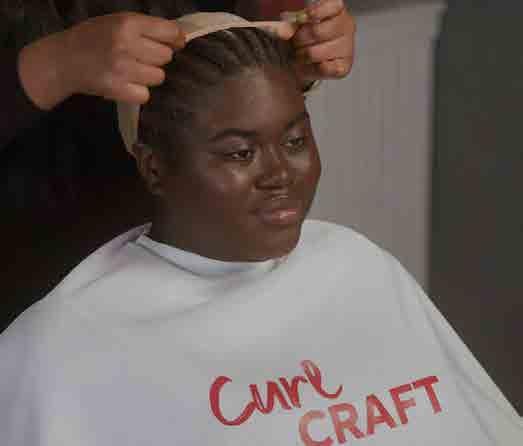
3
Starting at the nape, stretch the wig cap over the head and have the client hold the cap over their ears.

4
Cut small holes on either side and pull the ears through the holes.
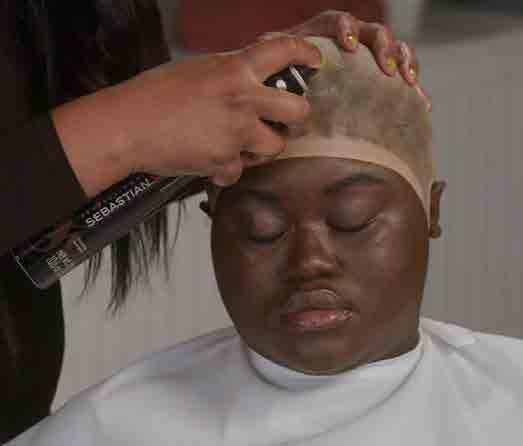
Using an extra strong hairspray, completely saturate the hairline and dry with low heat, or place the client under a hooded dryer until the hairspray is completely dry.

Where the cap meets the skin, use a dotting technique to apply a strong holding wig glue. Use the edge styling tool to gently spread the wig glue at the edge of the cap. Allow the glue to dry clear.
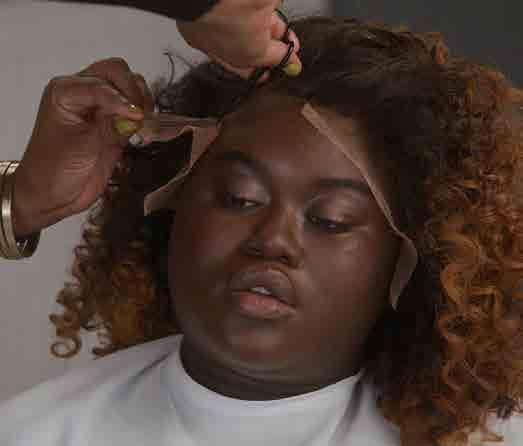
Once the wig is properly placed, use a silk wrap around the lace hairline. Place the client under the dryer. Remove excess lace with very small scissors.
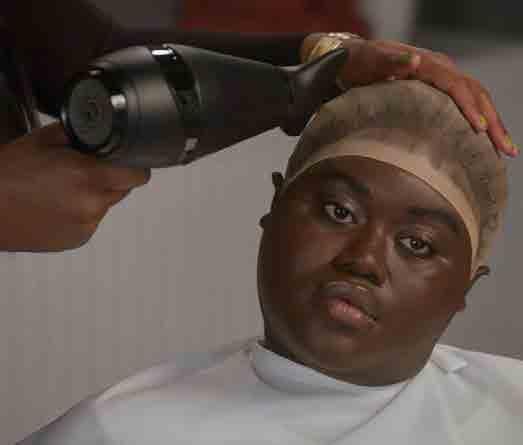
Once the hairspray is dry, cut the excess cap off.
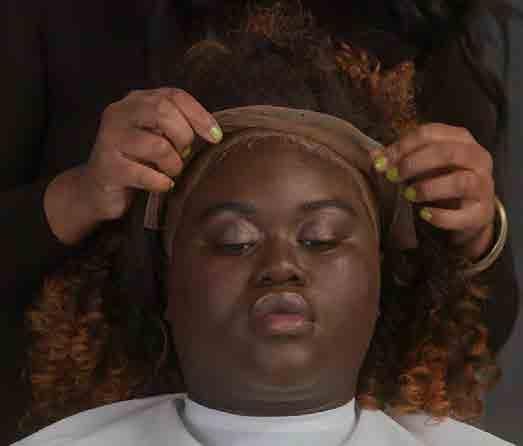
Install the wig starting at the nape and stretching it to the front.
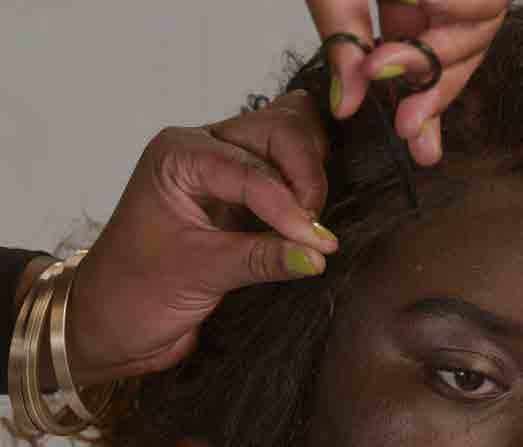
Trim and shape the hairline with very small scissors.
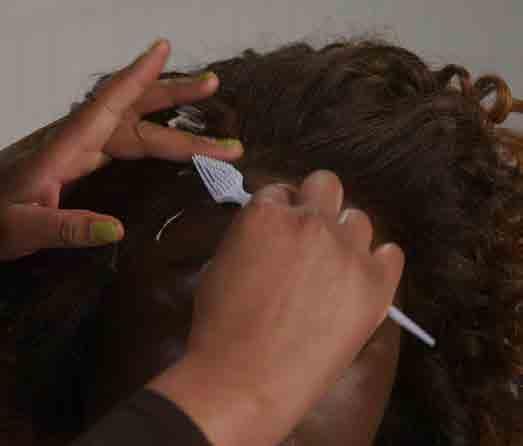
Lay the edges using a styling foam. Secure the edges with a silk wrap before finishing the style.


Akela D�ouglass
Cut & Style Pro Artist @AkelasHairStudio
1
2 4 5 3
Prepare the hair with a lightweight foam and leave-in spray. Set the hair with flexi rods.
Dry the hair under a hooded dryer until completely dry.
Gently remove the flexi rods.
Apply a small amount of your preferred oil, and begin to gently separate the curls.
Use a wide tooth comb to create fluffy, stretched curls.
Sebastian Professional Twisted Foam
Wella Professionals EIMI Nutricurls Soft Twirl Foam NIOXIN Bodifying Foam

Wella Professionals INVIGO Brilliance a le BB Spray
Sebastian Professional Dark Oil
Wella Professionals Nutricurls Milky Waves
Sebastian Professional Potion 9 Lite Spray
Wella Professionals Oil Reflections
Wella Professionals EIMI Cocktail Me
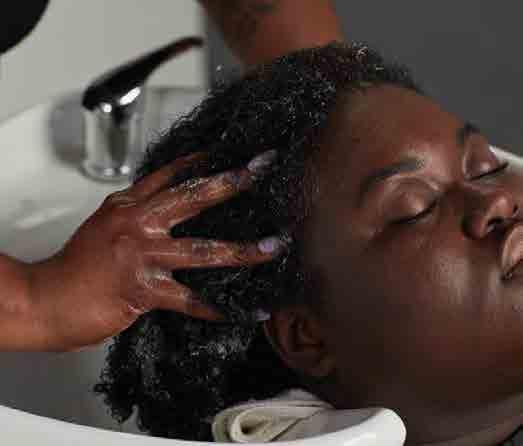
Cleanse the hair with a generous amount of shampoo. Cleanse twice if needed.
Rinse thoroughly.
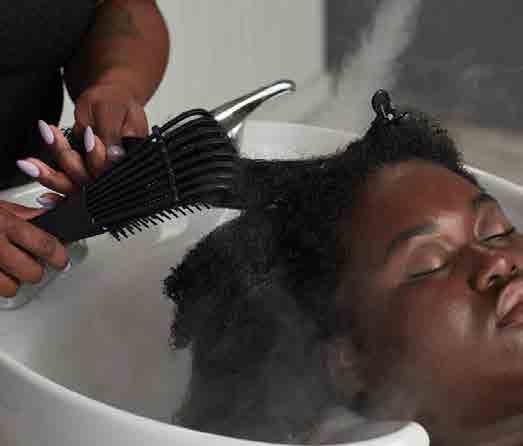
Using a mister, apply a mask and detangle with a detangling brush.

1
1A & 1B — Create a three-strand twist.
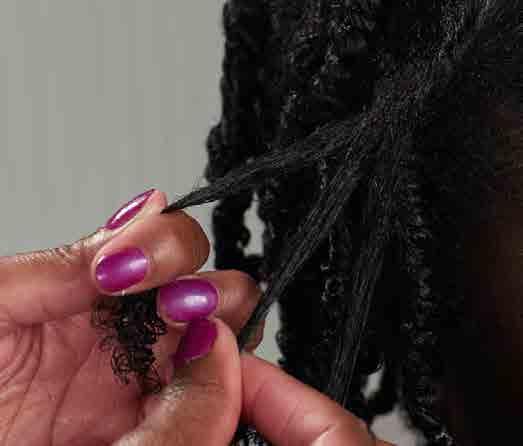
1A
2
3
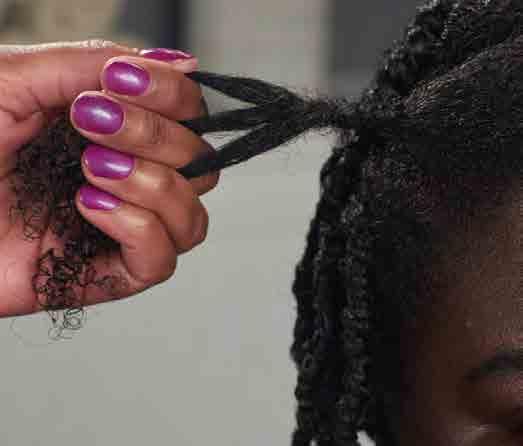
1B
Use a hooded dryer until the twists are completely dry. Gently untwist the hair and separate as desired.
#ProTip: Blow-dry the hair first to stretch out the curl before twisting.

TWIST OUTS AFTER
Sebastian Professional Twisted Foam
Wella Professionals EIMI Nutricurls Soft Twirl Foam NIOXIN Bodifying Foam
Wella Professionals INVIGO Brilliance a le BB Spray
Sebastian Professional Dark Oil
Wella Professionals Nutricurls Milky Waves
Sebastian Professional Potion 9 Lite Spray
Wella Professionals Oil Reflections
Wella Professionals EIMI Cocktail Me


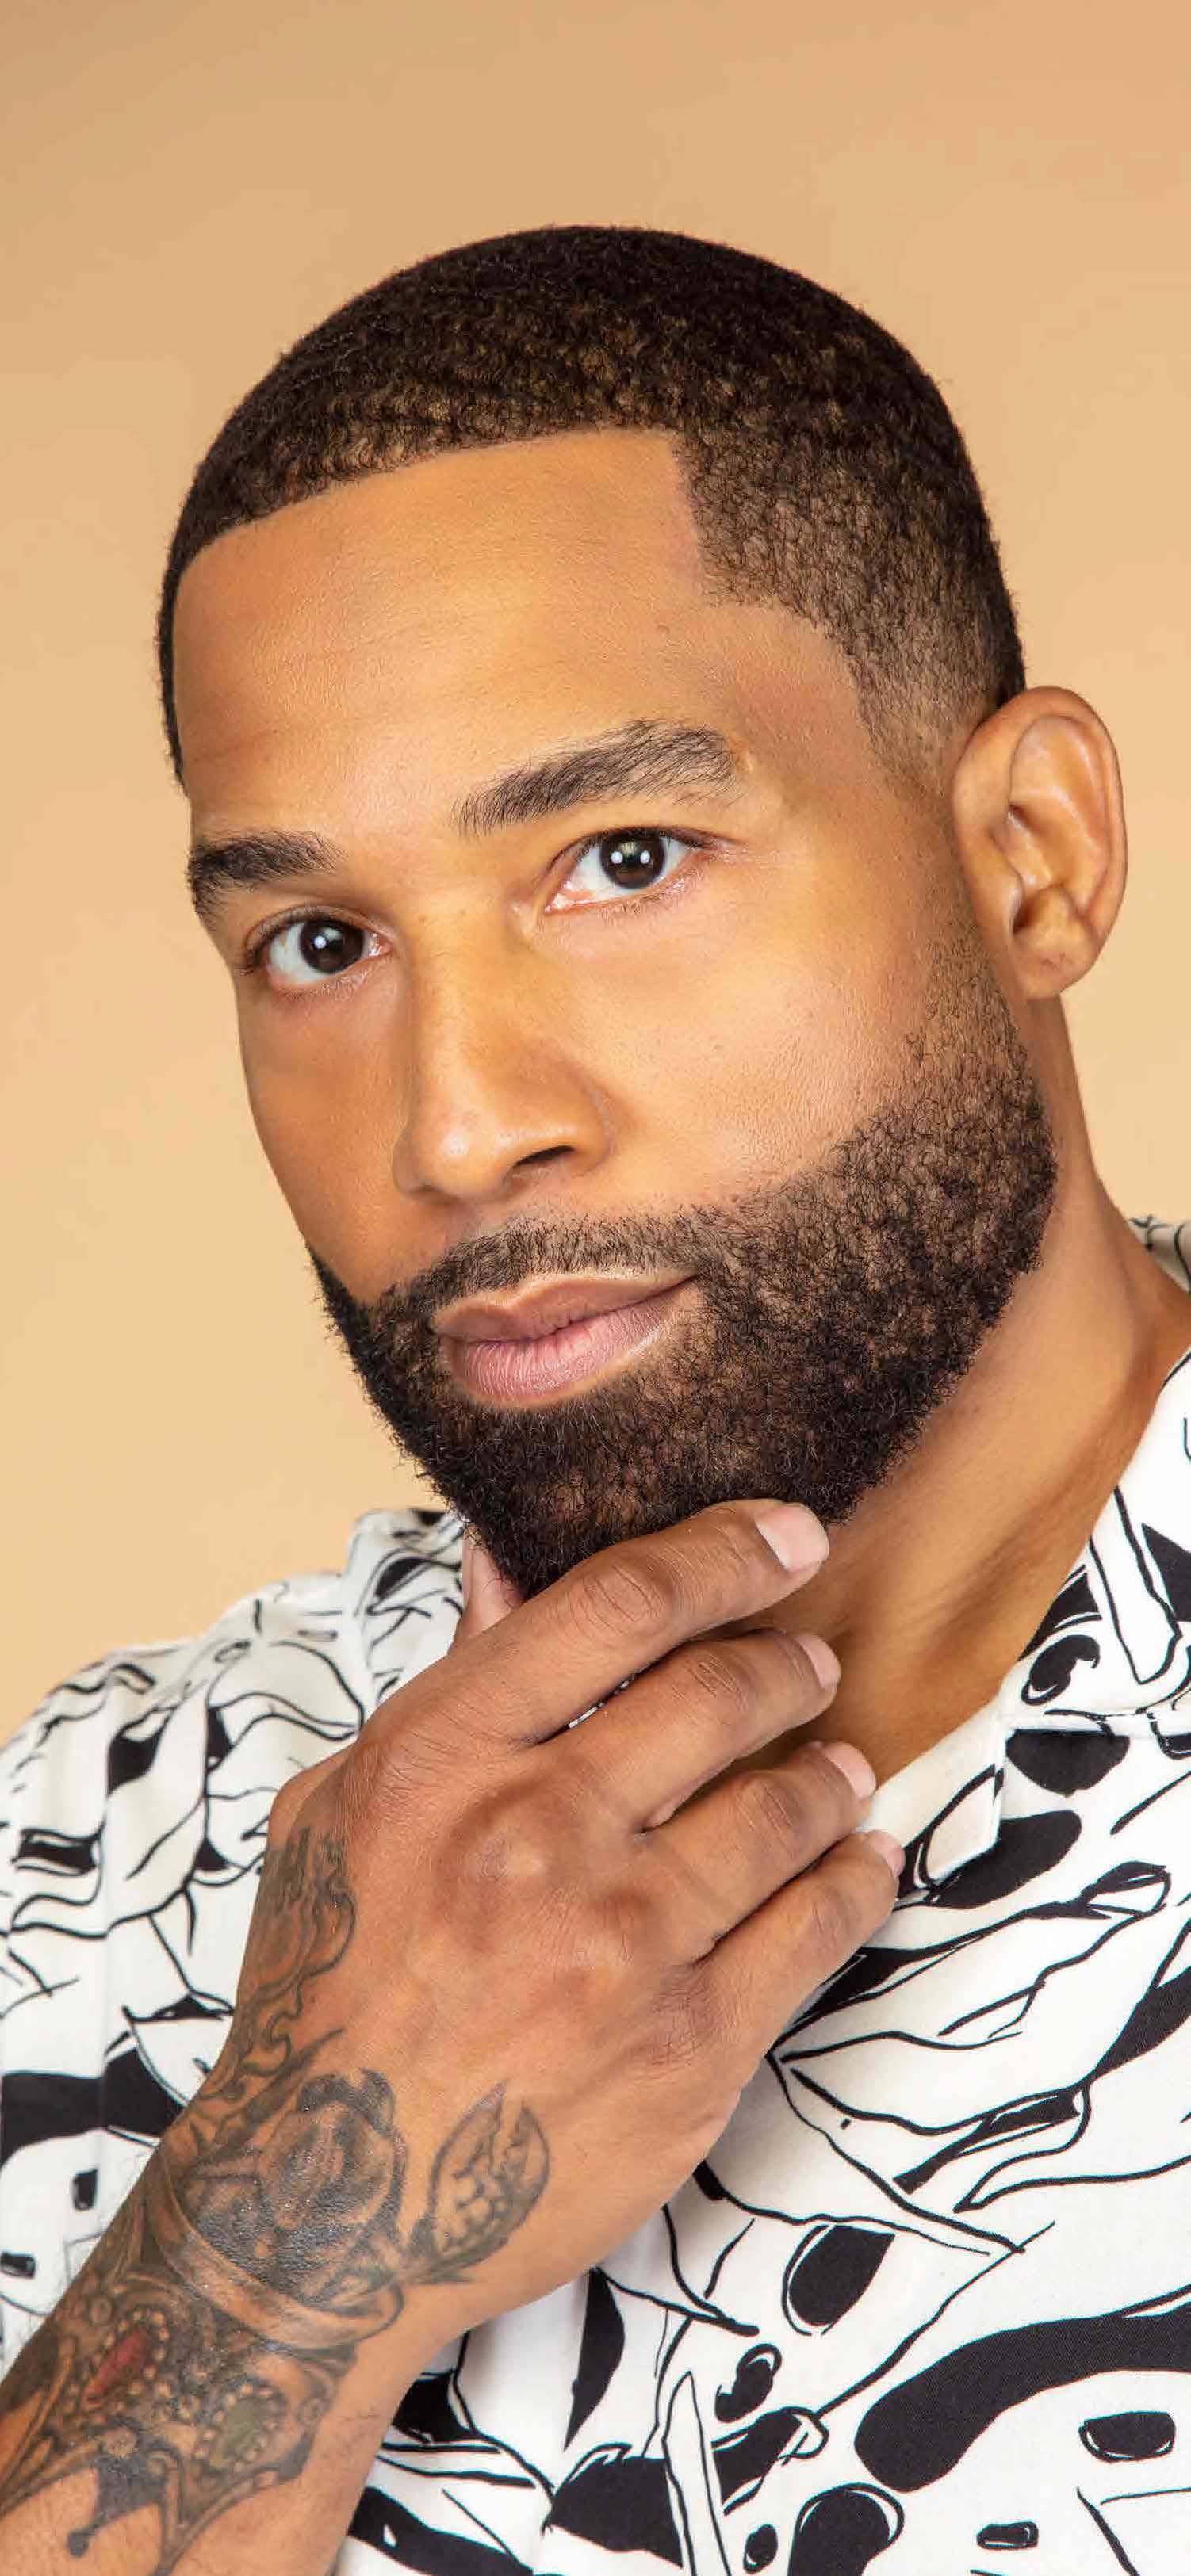
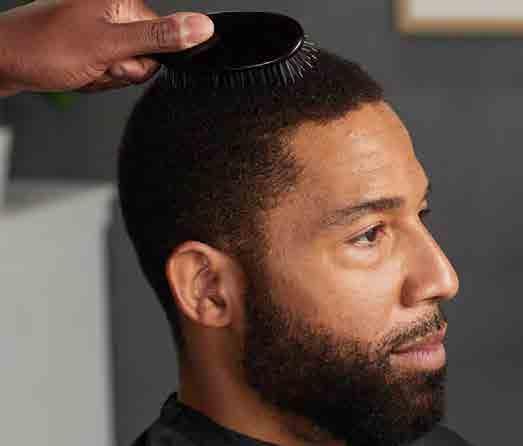
1
Mist the hair. Brush to find the growth pattern.
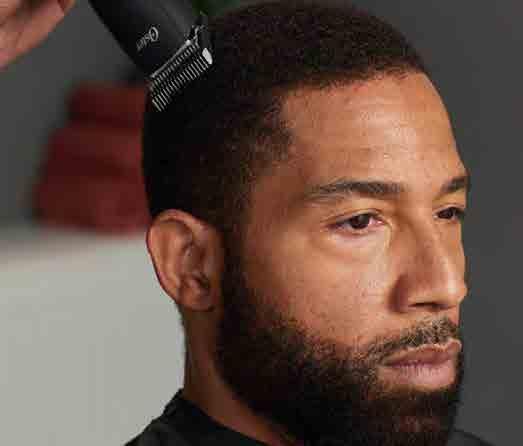
2
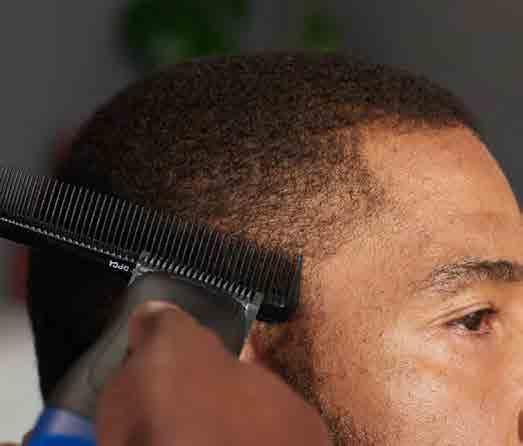
3
Establish desired length to determine which blade to use. Cut with the grain.
Taper with a clipper over comb technique.
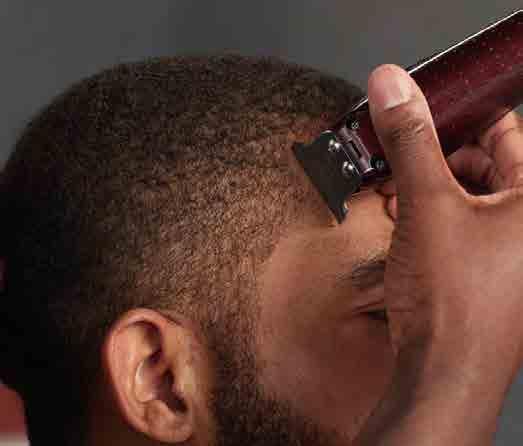
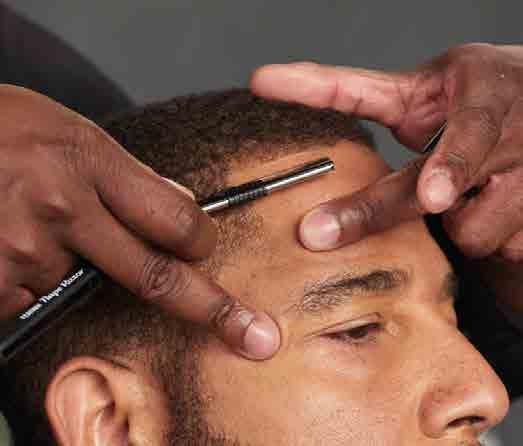
Fade at the temple and repeat technique at the nape.
Line up the edges with a straight razor.
#ProTip:
Add leave-in treatment to your water bottle before misting.

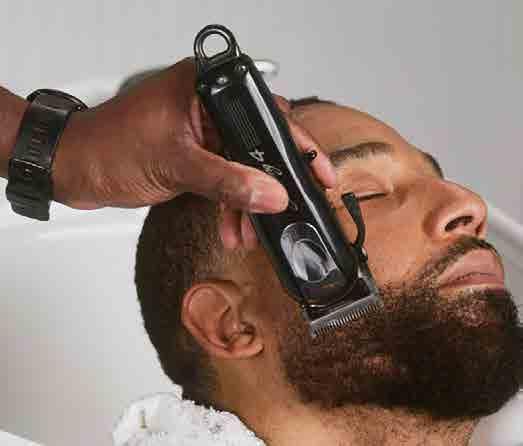
Comb to find the growth pattern. Establish desired length to determine which blade to use.
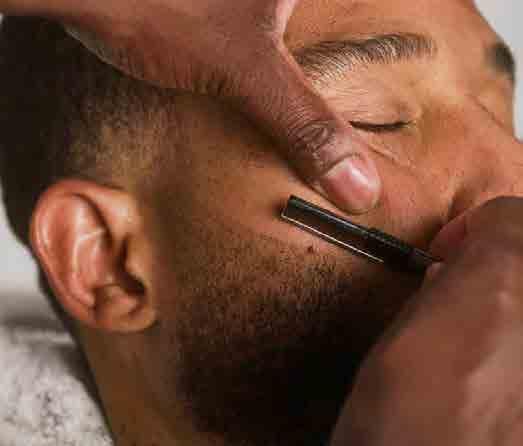
Line up the edges with a straight razor.


Taper with a clipper over comb technique and fade at the temple.
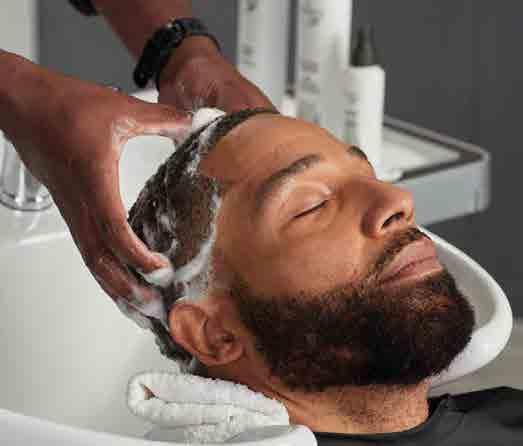
CARE: Cleanse and condition the hair. Repeat cleansing step if needed.
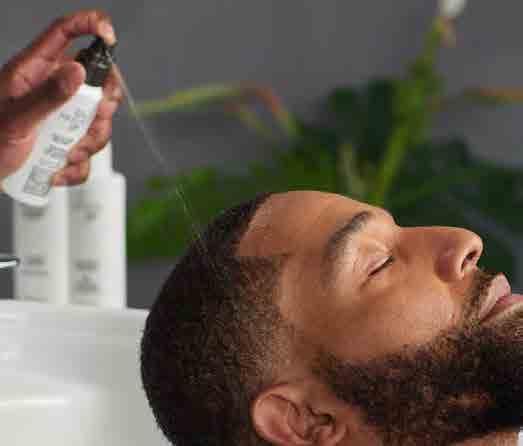
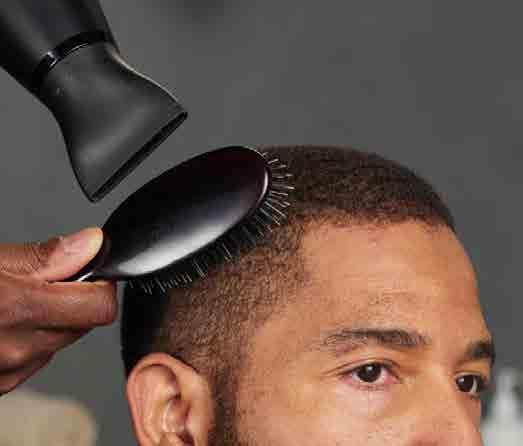
STYLE: To style the hair, apply a smooth pomade and brush the hair in the direction of the natural growth pattern.
TREAT: Apply a scalp treatment to maintain a healthy scalp environment and hair density.
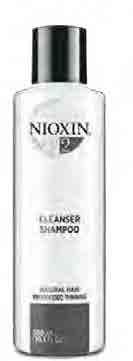
NIOXIN System 2 Cleanser
Wella Professionals Nutricurls Shampoo for Curls

NIOXIN System 2 Scalp Therapy Conditioner

NIOXIN System 2 Leave-In Treatment
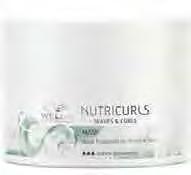
Wella Professionals Nutricurls Mask


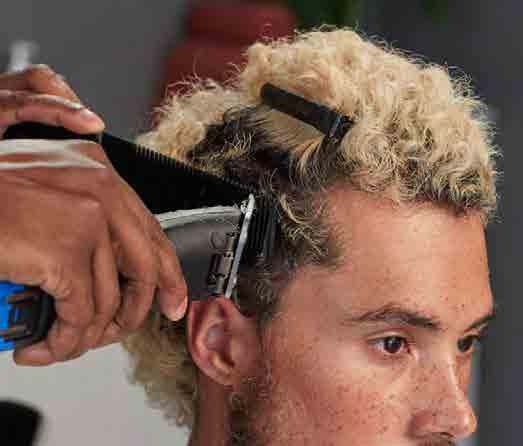
1
Remove he bulk with a clipper over comb technique.

3
Start fading the sides from the longest length to shortest, selecting blade sizes as needed.
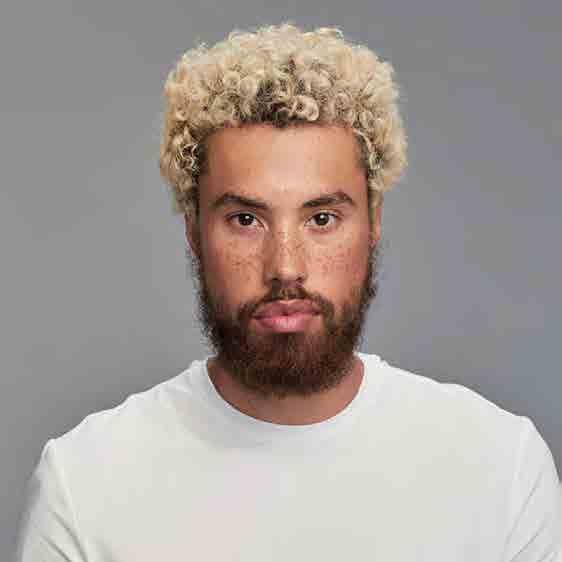
#ProTip: If further blending is needed, use a clipper over comb technique.
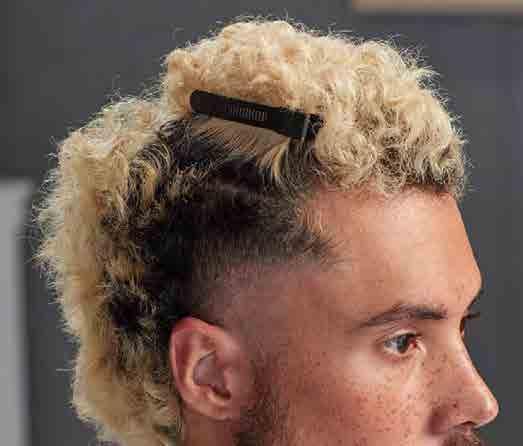
Section the hair into a wide mohawk section.

Taking horizontal sections below the parietal ridge, elevate the hair to 90˚ and point cut a square line.
Continue up the head taking horizontal sections until the hair no longer reaches. Repeat this technique on the other side.
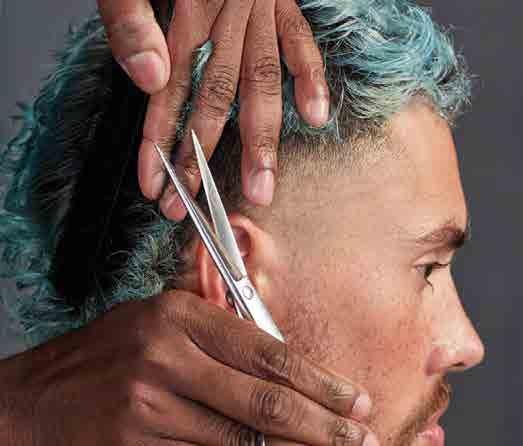
Move to the front hairline, and using 45˚ elevation, point cut the hairline to meet the guide on the side. Continue with parallel sections until the hair no longer reaches. 5
Line up the hairline and the sideburns with a trimmer, and then follow with a straight razor.
Pre-tone the hair.
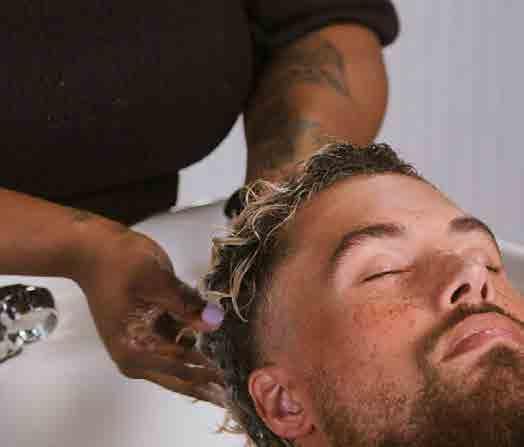
Cleanse hair thoroughly.
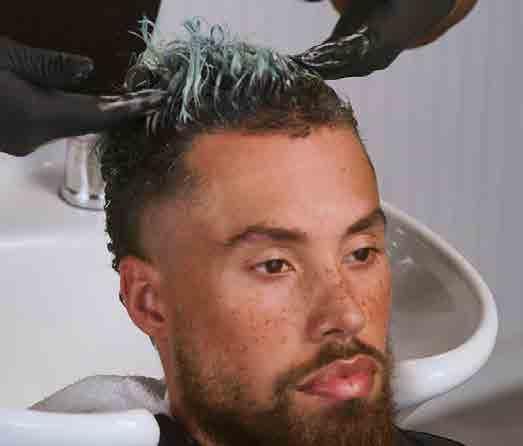
For vibrant, semipermanent effects, apply a color depositing mask for 10 minutes.
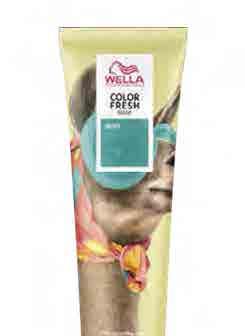

#ProTip:
Add the color depositing mask to your client’s retail regimen to maintain their color at home.


Professional Shimmer Lights Toner

Wella colorcharm Toners
Wella Professionals Nutricurls Shampoo for Curls
Wella Professionals INVIGO Brilliance Shampoo Wella Professionals Color Touch
Wella Professionals Koleston Perfect
Wella Professionals Illumina Color Wella Professionals Shinefinity
Wella Professionals Fusion Shampoo
WellaProfessionals Color Fresh Mask Mint
Sebastian Professional Twisted Cleanser
1
Mist the hair first.
2
Apply a small amount of a moisturizing leave-in treatment on damp hair, and allow your client’s hair to air dry.
#ProTip:
Mix a leave-in treatment in your water bottle before misting.
#ProTip:
For added texture, use a fiber cream.

Sebastian Professional Potion 9
Wella Professionals EIMI Perfect Me
Clairol Professional Shimmer Lights Leave-in Treatment
Sebastian Professional Whipped Crème
Wella Professionals Nutricurls Curlixir Balm
Sebastian Professional Microweb Fiber
Clairol Professional Shimmer Lights Leave-in Treatment
Hair services tailored to naturally curly clients are trending toward an all-time high! Along with that growth comes many opportunities for you to capitalize on this fast-growing market.
Every service naturally includes the potential to schedule follow-up service(s) as well as to sell through at-home care and styling products. Consistent clientele also opens the door for word-ofmouth referrals when your client’s friends and loved ones want to know where the work was done.
Asking your clients’ permission to share their styles on your social media platforms—and encouraging them to do so on their own—creates organic routes for you to build and promote visual campaigns that drive awareness and excitement about your business. It’s never been easier to promote your work, your business, and the most important aspect of your brand—you!
As a stylist, it’s vital that you educate clients on the importance of proper care. The best regimen to retain moisture and length is to thoroughly cleanse and deep condition the hair at least once a week or every 2 weeks. Every regimen should have a good cleanser, a deep conditioner, a leave-in conditioner, and styling products. (For those who have scalp issues, other products may need to be incorporated.)
Say, for example, a client comes to have he hair cleansed, conditioned, and a sew-in done. It’s smart business practice to educate this client on the importance of her hair/scalp being cleansed and conditioned even while it is braided under the sew-in. Encourage her to come and see you every 2 weeks for a shampoo, condition, and styling. This makes maintenance a breeze for he , creates an opportunity to keep her on a consistent appointment schedule (keeping your profit consistent as well , and builds trust.
If he can’t commit to an appointment every 1-2 weeks, the best alternative is a customized care regimen. Knowing he Big 5 (porosity, density, pattern, elasticity, diameter) will be helpful and will insure you’re successful in your retail picks.
A client may be apprehensive about spending extra money for at-home care, especially if they’ve just paid a premium price for color, cut, or extension services. Help them understand the value in the products. For the sew-in client mentioned above, explain that scalp care should be the foundation of her maintenance routine since the scalp will be the easiest for her to access when doing at-home maintenance. This regimen will also keep her scalp from becoming unbearably dry and itchy and will hydrate not just the scalp but the hair as well.
An ideal customized regimen for this client would be a NIOXIN Scalp Relief System Kit. Because it’s sold as a complete kit, the client may be more inclined to purchase it as the guesswork has been taken out of the process.
Consider that one in every three clients who buys color isn’t currently protecting her investment with color care, from any source. Salons have the best chance to convert this segment because there’s no better time to drive a color-care sale than at the time of service. And this provides the opportunity to grow the overall client ticket through color-related retail.
Bundling products with services is an optimal way to increase your profits and maximize the benefit of o e os l services—or services with few steps—for hesitant clients. This is especially helpful if you can bundle overstocked inventory.
Imagine, for example, your client comes in having only scheduled a silk press. However, you discover that their hair is seriously dehydrated, they haven’t had a trim or a good cut in a year, and the hair is webbing and extremely difficult to keep detangled. You know that just a silk press won’t cut it; they need three inches cut and their hair is in desperate need of hydration.
You can suggest a change of plan for your client— they will receive their service, a trim, an add-on salon treatment and take-home products, and an ontrend final style. They’ll feel as if they’ve received a little extra than what they paid for, while you jumped on the chance to upsell and were successful.
Don’t be afraid to introduce services and add-ons toincrease the average ticketand/or frequency of visits among your current color clients. For example, suggest adding a color glaze service for curls using Wella colorcharm Demi. This can be sold to clients by noting it’s low peroxide and adds moisture, shine, and beautiful new color for their curls safely.
Raising prices and charging what you know your time and expertise are worth can be scary. Especially when you’ve consistently charged the same low prices for years. Of course, your clients appreciate getting a deal, but if they’re long-term established patrons, it’s because they appreciate the work you do—and will understand that the value of that work increases. It’s important to set your prices and stick to them firmly.
Keep a physical copy of your rates, such as a printed menu, clearly visible at your station. This allows clients to consider your fees at the same time as considering services they might want, so there isn’t sticker shock after they’ve set their mind on a service or style.
Don’t be afraid to speak candidly about additional costs. Let a client know if a service will require more product and a higher fee, and explain to them why they might need additional products based on their amount of hair or its condition.
Add up the services, and provide them with a total estimate of what they may be spending before you begin. When possible, frame the conversation with the question, “How much are you willing to invest in your hair today?” When they give you a number—for example, “I don’t want to spend more than $300”— ask if this includes take-home products and adjust for that.
If they have an especially tight budget, try suggesting a service that accommodates them and still falls within the appointment time. Take the approach of, “Okay, so here’s what we can do today.” Clients will respect that you value your own professional services and appreciate that you’re considerate of their budget.
Every before and after comparison you fail to capture is a missed opportunity to show off your work on social networks. Tag your clients and encourage them to share the work to extend your reach into their networks as well. Capturing these beautiful transformations through Instagram, TikTok, YouTube, etc. is the primary way to promote your business. Remember that for clients with curly or textured hair, having a stylist they can depend on for results they love is something they will value highly and want to share.
Google’s search algorithm displays social media posts right alongside website and blog content results. Make sure that you are very specific when promoting your services in your posts. Use hashtags, mention the city and state, local neighborhood, or some other local reference that people would use when searching online for hair color services/salons in your area. For added impact, name your color services so that your clients will be able to easily promote your services. For example, you can create a menu for your color services: Curl Color Cocktails Clients can then post about their “Mai Tai Color Service,” “Cherry Bomb Red Service,” or “Blondie Highlighting Service.”
SIX KEYS TO PROMOTING YOUR BUSINESS & YOURSELF
It’s common for color clients to send you a photo they grabbed from Pinterest or an online magazine with a color and style they’d like you to replicate. Meet them where they’re at by creating your own look book of celebrity and style photos, and add it as a gallery page to your salon’s website. Creating visuals around your own work is the only way to grow at a rapid and consistent rate. You can also use Pinterest boards to create look books that clients can access before or during an appointment—and this would be a great place for you to post your own before and after pictures as well.
According to searchengineland.com, 88% of consumers trust online reviews as much as personal recommendations. Reviews give your clients the opportunity to say something wonderful about your salon and about your work. It’s a good bet that a lot of your clients would be willing to do this at every appointment, but they just don’t think of it. It’s your job to remind them. As clients check out, don’t end the conversation after, “How was your visit?” Follow up with “Please take a minute to check us out on Facebook and leave us a review if you loved your experience! Please use our hashtags #MySalonRocks.”
Email, text messaging, and social media make it possible for you to keep in contact with clients between appointments. Use these tools to prompt rebooking, ask clients to leave reviews about your hair color services online (if you didn’t at the appointment), notify clients about specials on hair color services and color-safe retail products for their curls, and check in with lapsed clients to make sure they were satisfied with their last service.
Last year, ThinkwithGoogle.com published an article noting that searches for gray and purple hair color were among the most popular searches on Google and that searches for rainbow hair color were up nearly 150%. Virtually all results were for doit-yourself articles and YouTube videos – showing that there is plenty of room for salons to get in the game when it comes to discovering and marketing to consumers’ “I want it now!” hair color trends. Social networks like Pinterest and Instagram can give you a peek at emerging new trends, as can online fashion and style magazines.
Follow trendsetters and influencers, post photos to your Pinterest or website look books, and search these social networks to find out which hair color trends are hot with consumers right now. Then build promotions to bring the clients who want these styles into the salon. Staying aware of current trends means you can market to and attract color clients in your surrounding areas with popular hair color services, as well (i.e., highlighting, singleprocess color, ombré/balayage, fashion shades).
This is a potentially sensitive subject. Should clients be charged more just because their hair is curly? Should you charge by the hour or à la carte? It is important to have a set pricing structure, clearly written out, and to stick to it.
If you desire to have more curly/coily clients, make sure your social media shows haircuts and styles for that hair type. How-to tutorials are also a great way to share your expertise and attract clients.
Nobody likes to be stared at while getting their hair done. Make sure your other stylists are also well versed in specific styling techniques so that they can communicate with curious non-curly clients.
Make sure to talk about all of the products that you are using on their hair, why you are using it, how much to use, and how to apply. Reference Gabrielle’s BIG 5 to help you know which products to recommend.
Create custom product packages with clear instructions to keep clients on a proper regimen.
Make sure that your retail marketing reflects curly/coily hair, and clearly indicate the products that are ideal for curly clients in your retail space.
It’s important to have ongoing discussions with curly barbershop clients so that you help them achieve a style they love. Suggest to your client that they find an image or a few images of the hairstyle that they like so you both have an end goal in mind and can monitor growth accordingly. Shoot for the target, and once you hit it, decide with the client if they want to stay there and maintain the style or go in a different direction.
For those clients who are invested in learning about their hair, make yourself their primary source of education. There are generally a few rules depending on the curl type. Typically, when it is short, lay it down, and if it’s long, let it curl. As the curl gets longer, to create that definition you’ll want to turn it into a twist or a cone, and past that point we’re looking at two-strand twist individual locs, etc.
The barbershop client with curly hair will likely have a scalp that is out of pH balance, maybe too dry or too oily. Usually this is an issue of lack of education, incorrect products, bad routines and regimen, etc. Adding on scalp treatments and steam treatments and using tools like a NIOXIN Nioscope set the stage for product sales. Additionally, giving your barbershop client a kit—for example, shampoo conditioner, curl mousse, and curl sponge—gives them all the tools needed to perform what you have done in the salon.
In terms of adding new services, it’s important to understand that curly hair has a shelf life. Clients complaining that their curl does not last 6 weeks should realize that between 2 and 4 weeks is the max, and if they prefer having longer time between services, you can introduce using all shears, which allows the curl to grow out more balanced—that is, using clippers tends to make the ends of the strands rigid.
When introducing the curly barbershop client to retail, begin with a shampoo and conditioning regimen. Many clients believe that with curly hair or waves you don’t want to rock the boat as if to say don’t shampoo and condition too often. Advice on finding a balance between the shampoo being too clarifying or too moisturizing should come directly from a knowledgeable stylist.
A shampoo/conditioning regimen that is moisturizing is key. Many clients have or have had scalp issues, so finding the perfect pH for them is important. If a client is too dry or feels as though shampoos and conditioners are too stripping, introduce them to a hair lotion, something that is different from a dressing but geared toward putting elasticity back into the hair.
Another great tip for selling to the barbershop client is identifying what their bathroom looks like. Encourage them and give them confidence so that their side of the shelf is not empty and has specific products only for their hair care regimen. Encourage these clients to own their regimen and take pride in the products they use.
Another way to increase sales is to recommend products from the barbershop that can be placed directly in the shower: creams, mousses, and products that can be applied to the hair when wet. It is wise to suggest your client keep the products in the shower so that their styling regimen does not increase. Barbershop clients often prefer a lowmaintenance style with a high-quality look, and this can be accomplished with a stylist who is well versed in product knowledge. It is important to walk clients through the process of using the products that you sell to them.
Source 1
https://naturallclub.com/blogs/the-naturall-club-blog/ the-history-of-curly-hair#:~:text=A%20Timeline%20of%20 Curly%20Hair,wigs%20were%20all%20the%20rave.&text=All%20 throughout%20the%201700s%2C%201800s,ever%20had%20 naturally%20curly%20hair
Source 2
https://www.hji.co.uk/curls/history-of-curly-hair/
Source 3
https://www.necessarybehavior.com/blogs/news/the-naturalhair-movement-history-stigma-and-successes
The Wella Eli te Certification is a comp rehensi ve p rog ram set up i n dif feren t tiers to ma ke you r learning journ ey digestible and achi evable. We of fer a variety of certification options in 9 c raft pillars at 3 l evels of expertise: I n s i d e r , S p e c i a l i s t and Expert.
To get mo re in formation and s tart collecting badges, visit ww w.wellaed.com, and b egin your j ourney to m as tery.

The I n s i d e r S eries is a collection of virtual seminars based on product knowledge and foundational expertise of our brands. The sessions are live through Zoom and guided by one of our professional experts to allow you to interact and ask questions. Once you have completed a n I n s i d e r S eries suite, you will ta ke a knowledge check to ensure you have acquired the tools to continue your journey to the Expert Series certification.


The Expert S eries i s a collect i on of seminars based on craft and technical expertis e. The sessions are either vi rtual or face -to -face, and you will be guided by our technica l education experts to perfect your craft in various h air and nail disciplines.Onceyouhave completed a S p e c i a l i s t S eries bundle, you will ta ke a knowledge check to ensure you have acquired the tools and expertise to continue your journey to the Master Seriescertification.
The E x p e r t S eries is a collect i on of seminars based on craft and technical master y. The sessions are face -to -face, and you will be guided by our highly technical and artisitc educatio n experts to perfect your craf t in various hair and naildisciplines.Onceyou have completed a E x p e r t Series y ou will ta ke a knowledge check to finalize yourcertificationandjoin the Elite Master Alumni commun ity and have access to custom programs andanannualalum ni retrea t.
COLOR INSIDER
Wella Professionals
Color & Lightener Virtual
Wella Professionals
Care & Styling Virtual
Instagram 101 Virtual
Clairol Professional Virtual *
BLONDING INSIDER
Wella Professionals Color & Lightener Virtual
Instagram 101 Virtual
Clairol Professional Virtual
Wella colorcharm Virtual *
Craft II WELLA COLOR SPECIALIST
Craft II
Craft III
BLONDING SPECIALIST
Wella Professionals Balayage Craft
Wella Professionals House of Tone
Wella Professionals Foiling Craft
Studio Platinum & Beyond
Wella colorcharm Lightening & Toning for Dark Hair *
Clairol Shimmer Lights Plex Lightening *
(PHASE I & II)
Revive
Elevate
WELLA ED
@WellaEducation
@WellaEd
@WellaEducation
@WellaEdu
@WellaEd
@WellaEducation
WELLA PROFESSIONALS
@WellaHairUSA
@WellaUSA
@WellaUSA
@WellaHair
@WellaHair
@WellaHairUSA
@WellaPro
WELLA COLORCHARM
@wellacolorcharm
@WellaColorCharm1
@wellacolorcharm
@WELLAcolorcharm
CLAIROL PROFESSIONAL @clairol_pro @clairolpro @clairolprofessional @clairol_pro
NIOXIN @Nioxin @NioxinUS @discovernioxin
SEBASTIAN PROFESSIONAL @sebastianPro_NorthAmerica
@SebastianPro @OfficialSebastianPro