


Refinishing today’s tri-coat and quad-coat paint demands meticulous application techniques.

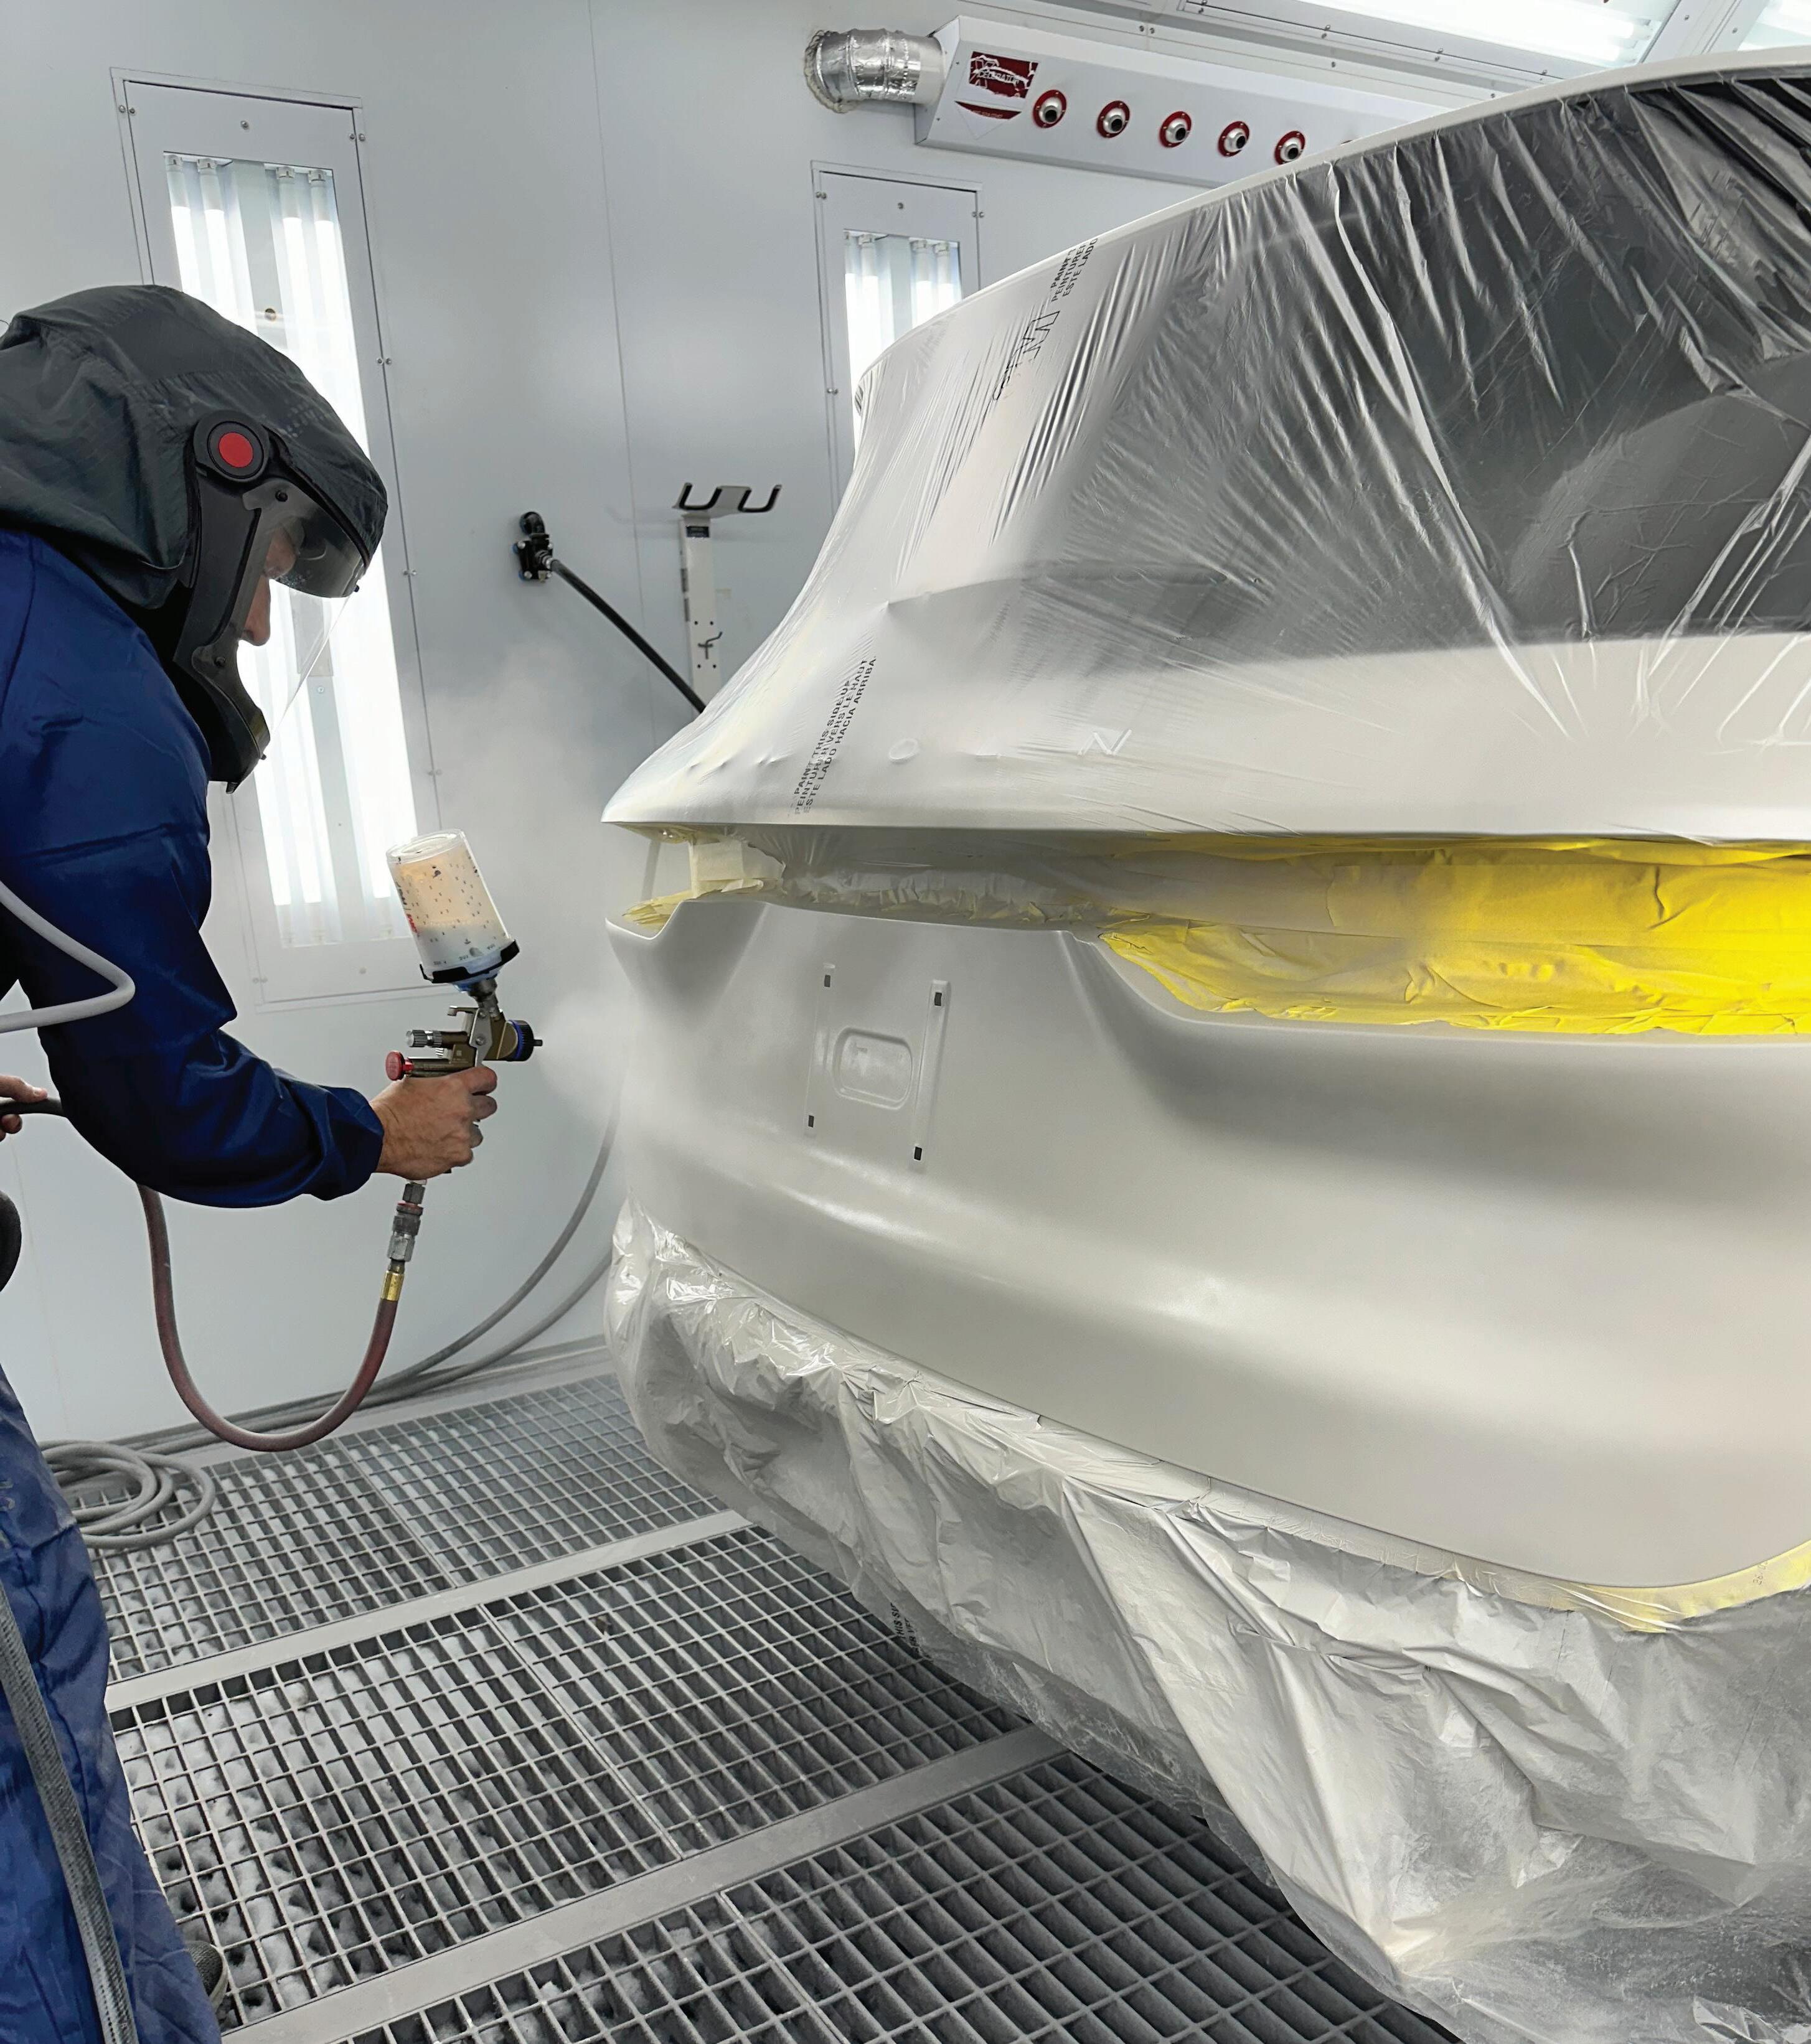




Refinishing today’s tri-coat and quad-coat paint demands meticulous application techniques.


Use these seven tips to determine how you manage scanning and ADAS calibration work.


EASING THE BURDEN OF RESEARCHING OEM REPAIR INFORMATION
Collision and service information can be confusing and a bit overwhelming. Here are some tips for successful navigation.

With a waterborne basecoat that’s easy to mix, match and apply and that uses the same coat flash application you’ve already perfected, Cromax® EZ makes an exceptional finish feel effortless. Discover how easy an outstanding finish can be.
axalta.us/ez


Use these seven tips to determine how you manage calibration and scanning work.
BY TIM SRAMCIKCollision and service information can be confusing and a bit overwhelming. Here are some tips for successful navigation.
BY KYLE MOTZKUSCOVERSTORY
Refinishing today’s tri-coat and quad-coat paint demands meticulous application techniques.
BY JEREMY WINTERSWith headlights costing as much as $6,000 each, a shop with the equipment and know-how to repair them can increase the profitability of the overall repair.
BY JOHN WILBURN




COLD WAR-ERA MISSILE TO BE REFURBISHED BY ILLINOIS AUTO BODY SHOP
TOTAL LOSS CONSULTING LAUNCHES NATIONWIDE
ALI LIFTING POINTS GUIDE COVERS 20 YEARS OF DATA IN PRINT OR ONLINE
TEXAS AUTO BODY TRADE SHOW COMING THIS JULY 34 PRODUCTS 35 AD INDEX
WWW . VEHICLESERVICEPROS . COM
Endeavor Business Media, LLC 30 Burton Hills Blvd, Ste. 185, Nashville, TN 37215 Phone: 800-547-7377
EDITORIAL STAFF
MATTHEW HUDSON
GROUP EDITORIAL DIRECTOR mhudson@endeavorb2b.com
JAY SICHT
EDITOR-IN-CHIEF jsicht@endeavorb2b.com
ABDULLA GAAFARELKHALIFA ASSOCIATE EDITOR agaafarelkhalifa@endeavorb2b.com
RHONDA COUSIN ART DIRECTOR
CONTRIBUTORS
KYLE MOTZKUS
TIM SRAMCIK
JOHN WILBURN
JEREMY WINTERS
ENDEAVOR BUSINESS MEDIA
CEO CHRIS FERRELL
PRESIDENT JUNE GRIFFIN
COO — PATRICK RAINS
CHIEF REVENUE OFFICER PAUL ANDREWS
CHIEF DIGITAL OFFICER JACQUIE NIEMIEC
CHIEF ADMINISTRATIVE AND LEGAL OFFICER TRACY KANE EVP, TRANSPORTATION KYLIE HIRKO
SALES STAFF
ANDREW JOHNSON ASSOCIATE PUBLISHER ajohnson@endeavorb2b.com
MATTIE GORMAN-GREUEL ASSOCIATE SALES DIRECTOR mgorman@endeavorb2b.com
CORTNI JONES DIRECTOR OF BUSINESS DEVELOPMENT cjones@endeavorb2b.com
Account Executives: DIANE BRADEN dbraden@endeavorb2b.com
MARIANNE DYAL mdyal@endeavorb2b.com
CHAD HJELLMING chjellming@endeavorb2b.com
LISA MEND lmend@endeavorb2b.com
MARTHA SEVERSON mseverson@endeavorb2b.com
KYLE SHAW kshaw@endeavorb2b.com
SEAN THORNTON sthornton@endeavorb2b.com

JAMES HWANG Inside Sales & Brand Manager, ASE Study Guides jhwang@endeavorb2b.com
BUSINESS STAFF
CHRIS MESSER
VP/MARKET LEADER
REPRINT SERVICES reprints@endeavorb2b.com.
MICHAEL WILLINS


VIDEO: BENDPAK OCTA-FLEX EV12DPS
TWO-POST LIFT: FIRST LOOK
In this video, BendPak introduces its Octa-Flex EV12DPS
Two-Post Lift, designed to handle both regular and electric vehicles (EVs). In addition to the typical four arms to lift the vehicle, the design incorporates auxiliary swing arms that can lift up to 2,500 lbs. and can be used to lower and raise a pickup cab or the battery pack on an EV.
SCAN THE QR CODE TO SEE A VIDEO DEMONSTRATION

BUSINESS DEVELOPMENT DIRECTOR, MOTOR AGE TRAINING
LESLIE BROWN
CUSTOMER MARKETING MANAGER
MARIAH STRAUB PRODUCTION MANAGER
JENNIFER GEORGE AD SERVICES MANAGER
TRACY SKALLMAN AUDIENCE DEVELOPMENT MANAGER
JILLENE WILLIAMS SALES COORDINATOR
CUSTOMER SERVICE
Subscription Customer Service 877-382-9187; 847-559-7598
ABRN@omeda.com PO Box 3257 Northbrook IL 60065-3257
ABRN is published 4 times yearly (March, June, October, December) by Endeavor Business Media, LLC. 30 Burton Hills Blvd, Ste. 185, Nashville, TN 37215. Customer service can be reached toll-free at 877-382-9187 or at ABRN@omeda.com for magazine subscription assistance or questions.
Printed in the USA. Copyright 2024 Endeavor Business Media, LLC. All rights reserved. No part of this publication may be reproduced or transmitted in any form or by any means, electronic or mechanical, including photocopies, recordings, or any information storage or retrieval system without permission from the publisher. Endeavor Business Media, LLC does not assume and hereby disclaims any liability to any person or company for any loss or damage caused by errors or omissions in the material herein, regardless of whether such errors result from negligence, accident, or any other cause whatsoever. The views and opinions in the articles herein are not to be taken as official expressions of the publishers, unless so stated. The publishers do not warrant either expressly or by implication, the factual accuracy of the articles herein, nor do they so warrant any views or opinions by the authors of said articles.
Endeavor Business Media provides certain customer contact data (such as customers’ names, addresses, phone numbers, and e-mail addresses) to third parties who wish to promote relevant products, services, and other opportunities that may be of interest to you. If you do not want Endeavor Business Media to make your contact information available to third parties for marketing purposes, simply call toll-free 877-382-9187 or email ABRN@omeda.com and a customer service representative will assist you in removing your name from Endeavor Business Media’s lists. ABRN does not verify any claims or other information appearing in any of the advertisements contained in the publication, and cannot take responsibility for any losses or other damages incurred by readers in reliance of such content. ABRN welcomes unsolicited articles manuscripts, photographs, illustrations and other materials but cannot be held responsible for their safekeeping or return.
A village in central Illinois has agreed to refurbish a retired ballistic missile that has long been stationed at a local air eld.
Last week, leaders in Rantoul agreed to hire a local dealership with a body shop, Crispin Auto Sales, to refurbish a rusting Minuteman II missile. This missile was originally installed at Chanute Air Force Base, which closed in 1993.
The missile now stands along U.S. Route 45 at what was once the West Gate of the Air Force base.
“It’s like our own Eiffel Tower,” Julio Crispin, owner of Crispin Auto Sales, told ABRN in a web call.
“They’re aiming for a glossy finish,” Crispin said. “You can’t really achieve that with residential or even commercial paint.” He explained that the material of the rocket is why his particular automotive services were requested.
To illustrate the amount of paint and finish he will need to restore the Cold War-era relic, he compared the surface area of the missile to that of six minivans.
As one could imagine, there aren’t any OEM procedures to follow for a missile
Total Loss Consulting has launched nationwide, assisting consumers in receiving the appropriate value for their totaled vehicles,. TLC aids consumers in receiving the actual cash value for their totaled vehicles. TLC will conduct a complimentary comprehensive market evaluation to deter-
that was almost used to start World War III. So, he will use PPG refinishing products because they are always readily available in his area and his staff is most familiar with them. Familiarity with tools and equipment will be key to completing such a unique project that isn’t vehicle related.
“There are priming products for aluminum and a lot of steel that needs to be treated,” he explained. “There’s a bit of rust that needs to be ground down and then we seal that.”
This project doesn’t just change what his employees would normally do, but it also changes contracts. Crispin can’t start until he finalizes his due diligence with his insurance.
“It’s such a peculiar thing,” he explained. “The insurance dynamics for my painters to be 52 feet in the air is not the traditional insurance I have for them.”
Because of how the missile is mounted, he can’t place it on its side so his painters can work from the ground. All the work must be done on location.
Crispin doesn’t just own a body shop and a dealership, he also runs a construction company, Rantoul Warehouse Group.

mine if a settlement offer represents fair market value. If the offer does not reflect the correct value, TLC will ensure that

Employees from there will also participate in the refurbishing of the missile.
“There’s steel, there’s concrete, and there’s a lot of different elements to this, so it definitely takes all hands-on deck for sure,” Crispin said.
The only thing he foresees subcontracting, as of April 16, is the signage on the missile.
According to local outlets, the project will cost $47,000 and Crispin anticipates completion in three months, or two months if weather permits.
The missile was one of many across the U.S., acting as a deterrent to imminent attacks, especially after the Cuban Missile Crisis in 1962, when thousands of other Minuteman missiles were installed across the country.
the consumer receives the appropriate compensation for their totaled vehicle.
Body shops can visit TLC’s body shop page, at totallossconsulting.com/bodyshop. aspx, to learn more and obtain free literature to distribute to their customers.
Owners of total loss vehicles can contact Total Loss Consulting directly via its website, totallossconsulting.com.
To help lift operators find the OEMrecommended lifting points for thousands of vehicles, the Automotive Lift Institute (ALI) is offering the 2024 edition of its popular Lifting Points Guide, Vehicle Lifting Points for Frame Engaging Lifts, for the first time as a digital product or a bundle of print and digital, according to a news release.
Both the print and digital versions have the same content covering model year 2000 to 2024 cars, SUVs, vans, light-duty trucks, and EVs sold in the U.S. and Canada.
“While many customers prefer the always-on access, easy magnification, and keyword search of the digital version, some still want a print copy, often because they don’t have connectivity in the shop,” said R.W. “Bob” O’Gorman, ALI president. “Offering a bundled solution lets
customers choose which format works best for them in any situation.”
One of the most important steps when using a frame-engaging car lift like a twopost lift is to position the lift adapters only at the OEM-recommended lifting points. Failing to follow this guidance and instead guessing where to position the adapters may result in the vehicle getting damaged or falling from the lift.
The ALI-sponsored Lifting Points Guide is updated annually to reflect the latest vehicles. Lifting points are showcased in more than 250 undercarriage images. Each purchase provides online access on up to three devices, with no third-party software required. Once a copy is purchased, customers can start using the digital version immediately. Customize the view with magnification, choose light or dark mode,

or go full screen. Find a vehicle quickly using the keyword search function and highlight or make notes as needed.
The industry safety standard for lift operation, inspection, and maintenance, ANSI/ALI ALOIM (current edition), requires shops to make lifting points information available to technicians. This




requirement is satisfied by providing technicians with access to ALI’s digital Vehicle Lifting Points for Frame Engaging Lifts. Anyone using a lift at home, at the track, or elsewhere should also protect themselves by using the Lifting Points Guide.
ALI’s Vehicle Lifting Points for Frame Engaging Lifts is available for purchase and immediate use at autolift.org/shop/. Other digital products available from ALI include the Lifting It Right lift safety training manual and online course.
ALI’s mission is to promote the safe design, construction, installation, service, inspection, and use of automotive lifts. In 1947, ALI developed the first Commercial Standard covering vehicle lifts published by the National Bureau of Standards. Today, ALI sponsors several national lift safety standards and offers third-party certification programs for automotive lifts and automotive lift inspectors.
Registration for the 2024 Texas Auto Body Trade Show is open.
The event is scheduled to take place at the Irving Convention Center, nestled within the lively Toyota Music Factory area.
This two-day event will commence on Friday, July 12. Educational sessions will run from 9:30 a.m. to 5:30 p.m., and the exhibit hall will be open from 1 p.m. to 8 p.m. The show will continue on Saturday, July 13, with educational sessions from 9 a.m. to 2:30 p.m., and the exhibit hall will be open from 10 a.m. to 6 p.m.
Attendees can anticipate new classes on legislation, workforce dynamics, and repair laws.
The event will also showcase Repairidy, a collision repair game show akin to Jeopardy, hosted by Erin Solis and Danny Gredinberg. Attendees are encouraged to

bring their A-game as they may be called up on stage.
Admission to the exhibit hall is complimentary, offering attendees the opportunity to network with top tool & equipment providers, paint suppliers, OEMs, and collision repair partners.
The exhibit hall will also host full-size equipment, demos, contests, car shows, celebrity autograph sessions, and more.
For additional information and to register, go to the Auto Body Association of Texas website at abat.us.







When you think about it, working in the collision repair industry comes down to making an ongoing series of difficult choices that will determine if you succeed and how. Your first hard choice is joining a business market as competitive as auto body repair, where profit margins can be razor thin. From there, you have to decide where you want to operate and with how many square feet of shop, what vehicles you want to repair, what your personnel makeup will be (techs, estimators, painters, managers, etc.), and what work you will and won’t perform. Following these are ongoing choices in tools and equipment, which only seem to grow yearly as vehicles become more sophisticated.
Ultimately, you end up creating a formula composed of space, people, market, and equipment that must regularly be
monitored and adjusted to keep the dollars rolling in. Your business really is one big calibration operation. Within this calibration is the need to figure out a way to provide required calibrating and scanning services.
Repair pre- and post-scans and module calibrations have challenged repairers for the past decade as shops have struggled with sending this work to dealers, where it may sit for days, or keeping it in-house and searching for ways to afford expensive equipment and repair subscriptions (for multiple vehicle brands and model lines). Added to these difficulties is the need to keep employees trained and available to perform these services.
Fortunately, a number of companies have come to the rescue with remote and mobile onsite services intended to help any shop perform scans and calibration on practically

every vehicle. But there’s a catch. Here, too, you’ll need to make choices of which services to offer in-house, how, and which of these companies to work with. Use these seven tips to help you make critical decisions that will keep your shop efficient and profitable.
1.Get started the right way.
Do you think you should add mobile services (where a tech comes to your shop) for scanning and calibration work or add remote services (remote on-line help)? Or maybe you should utilize both? Then again, maybe you could simply perform all this work by yourself by limiting the vehicles you repair to a select number of brands. There’s no one right answer or model that can be applied to every shop or even most shops.
This part of your scanning/calibration journey starts with getting some outside help – namely from companies who have experience in this area. Glen Dixon, senior director, North America Mobile Operations, and Don Smith, senior director of Remote Operations at Elitek Vehicle Services, an LKQ company, note that their company has sales reps and general managers in the field throughout the U.S. for just this reason – to help individual shops navigate through their options and find the scanning/calibration setup that works best for them.
Smith says the setup “depends on the shop’s needs and objectives.” If they want to keep calibration and its profits inhouse and use OEM-approved tools and information, remote services can work best. Dixon adds that remote services are a good entry point for some shops, but mobile has benefits, too, since it fills the gap created by tech shortages. “Remote is

great when a job isn’t difficult, but a mobile tech is better able to tackle related issues like broken wires and module replace ment ,” he says. “You have someone there who can get eyes and hands on a difficult service.”
other. Dixon adds, “They complement one another. It’s not an ‘either or’ choice. You can work with both.”
Bjerke, director of calibrations, R&D, and Implementations for asTech, says his company looks first at a shop’s work volume, specifically at repair orders per month, though he personally prefers to look at revenue.
tic – since that shows how complicated the calibrations can be and then calculate calibrations per repair order,” he says (Eu ropean models often require more calibration time). “We take a holistic look at a shop, what work it does and its processes. This isn’t a one-size-fits all idea. Ultimately, we aim to fit into what a shop does and not disrupt it.”
bration vendors offer other options that can help your business. For example, asTech offers in-shop help where they place one of their techs at your location to work full-time providing calibration/scanning services. Elitek’s mobile services can assist with full engine, transmission, and frame replacements, along with A/C services. Both companies also sell and lease equipment to make remote work more affordable. Additionally, Elitek offers a variety of subscription services and rates to increase accessibility while both companies also provide training to help shop employees stay up to date on equipment and calibration/scanning work.
As noted earlier, access to mobile services can help alleviate tech shortages since they bring in more help. Having someone else to do this work allows you to keep techs focused on repairs that are more profitable. Bringing in additional help this way benefits your bottom line by removing business costs of maintaining staff with expensive benefits such as healthcare, vacation, retirement, etc. It also frees shops up to place its own employees where they work best and most profitably.
Bjerke adds that investing in mobile assistance can eliminate worries over employee turnover. “You’re not constantly having to train estimators, blueprinters, and other employees who are just going to go elsewhere,” he says. “It’s less expensive and simpler to have a vendor take care of it for you.”


4.
Be prepared to make space. If you haven’t in a while, review some of the service instructions for performing calibrations. You’ll note that space is very important for calibrating a number of modules, since minimum measurements are established in those instructions. Bjerke says a number of shops struggle with this task of finding sufficient space for calibrations, since most of their work footage was already dedicated to bays, paint areas, storage, offices, and other purposes before calibration became necessary.
“This can’t be ignored if you’re going to do calibration work, so you won’t be doing it right,” he says. “If you don’t open up the space, your only real option is sending this work over to a dealer.” Again, this is where working with a calibration/scanning vendor can help. Make sure your vendor has someone on board who can assist you with ideas to find the necessary space. Note that this kind of change to your shop probably isn’t the big chore you may think it is. Dixon notes that shops can do this if they really want to keep this work in-house. From his experience, he says, “I’ve never seen it be a serious problem. When a car needs to ship, the shop almost always is able to find the space we need to complete the calibration work.”
5.
Make sure you’re supported.
Performing calibration work comes with some significant liability. Do it incorrectly and you could affect a vehicle’s safety and other systems, resulting in personal and property damage. Make sure your vendor can both do this work and will stand behind it. “We live in a litigious society, and you don’t want to open yourself up to that,” he says. Aside from legal protection, you’ll want to look at vendors who can offer multiple services to you regardless of your geographic location. This can be a challenge in remote parts of some states like Montana and Wyoming, but both asTech and Elitek say they cover most of the U.S. Finally, you should look at vendors who cover the vehicles you repair. Elitek says they cover virtually every brand or model from 2010 or newer, with the absence of some exotics

SCANNING/CALIBRATION service providers can assist with getting you the right tools and ensuring you’re prepared to repair most vehicles, which opens your business up to more revenue opportunities.
like Maserati and Lamborghini. The same goes for asTech, but not every vendor offers the same coverage.
6.
Address the details.
Elitek and asTech both note they want to partner with shops and are flexible when it comes to implementing their services. There also are steps you should take to be a better partner. Smith says shops needing mobile assistance should make sure mobile techs have direct access to a vehicle. “It shouldn’t be blocked in or have a dead battery that needs charging.” He also recommends shops invest in Wi-Fi strong enough to reach all bays so there aren’t any issues with connectivity.
Dixon says shops also should get vendors involved in the scanning and calibration processes as early as possible – especially during estimating and blueprinting. “This way, we can help identify any problem areas early on and even assist with repair planning and parts ordering,” he notes.
7.
You’ll need to keep evolving your setup. As your business changes, so will your scanning and calibrating needs. Business is always changing in the collision repair market. This is why you’ll want to continue working with vendors to readjust your calibration/scanning setup to maximize revenue and efficiency. Bjerke says asTech continually works with customers, reviewing repair orders and other information to ensure they’re getting the best possible help. Elitek does much of the same. Vendors like these are looking for long-term relationships where both sides benefit. You’ll want to work with someone who holds the same philosophy.
Scanning and calibration work looks to only become more challenging as automakers continue fine-tuning and adding technology. To survive, you’ll need to follow suit by evolving your operation, including your scanning/calibration setup. Ultimately, your goal is to create an ongoing formula that produces success in all parts of your work.

TIM SRAMCIK began writing for ABRN over 20 years ago. He has produced numerous news, technical and feature articles covering virtually every aspect of the collision repair market. In 2004 the American Society of Business Publication Editors recognized his work with two awards. Tim also has written extensively for Motor Age and Aftermarket Business.
SCAN TO READ MORE ARTICLES LIKE THIS ONLINE


COLLISION AND SERVICE INFORMATION CAN BE CONFUSING AND A BIT OVERWHELMING. HERE ARE SOME TIPS FOR SUCCESSFUL NAVIGATION.
BY KYLE MOTZKUS
“ S o, you say you want to learn how to read OEM repair procedures?” That’s a question I’ve found myself asking others at least once a day during the past two weeks. I remember sitting in Ranken Technical College (imagine one of those silly wavy TV transitions
into a daydream state). Sitting in a cramped upstairs room, I was oblivious to the world around me while barely navigating a program called ALLDATA. We had this worksheet in front of us that we were supposed to fill out to confirm we’d completed it. But let’s be honest here; 100 percent
of us cheated our way through that worksheet. We all thought we knew that the REAL education was downstairs working on the car. Boy, was I wrong in 2010. We spent approximately two class periods on using ALLDATA and properly navigating the system. I was left feeling nothing.
Fast forward to now, and I probably now spend more time doing research on the vehicles on the lot than I do anything else. On any given repair plan, I spend approximately three to five hours sifting through documentation, and I swear I still miss pertinent information. Every. Damn. Time. The unique part is that I am not using a third-party resource. Nope! I am going to the mothership itself, the OEM technical info website, which in my opinion is the best way to research the information needed to write the repair plan. The reason I bring this up is because day in and day out, I see the same sort of woes throughout the industry: “You have to follow OEM procedures.” I agree; you do, but it’s so confusing and kind of overwhelming for many collision repair centers nowadays.
So, that begs the question: Where do we even start with it all? I can tell you that I-CAR has some amazing places to at least alleviate some of the burden. So, I-CAR took the liberty of making some unique how-to videos for each of the manufacturers’ tech info sites. I-CAR realized that to stay relevant in today’s world, you must fuse social technologies with the everyday need to feed the brain.
Today’s internet is as complicated as the cars we are fixing, so just getting to the areas to find the tech info sites can be cumbersome. If you go to the I-CAR Repairability Technical Support (RTS) Portal (rts.i-car.com/oeminformation.html), a section on the left highlights “OEM INFORMATION.” Once you click that, it will bring up a

list of OEM logos. Once you click on the respective OEM logo, it will link to a bunch of other selections for that specific OEM. There are 37 different OEMs here. Some of them can be redundant or even be grouped together. This is where you can access the howto videos.
I had never seen this before. But before I wrote this article, I wanted to take a different spin and make sure I wasn’t reinventing the wheel, so to speak. On the righthand side, there are typically two videos listed. One video is a guide on how to purchase the subscription for that OEM’s tech info site. The other video is how to specifically navigate to find the collision information (remember this specifically). Now, this is helpful stuff because this is where using tech info sites may deter

most shops, as they require a subscription to access them. Most differ, from one to three days to a week. I know exactly what your thought is: “Well, I already pay for ALLDATA, why would I need to use the tech info sites?” I get it; ALLDATA is a fantastic program, but it isn’t up to date by the minute, and you can’t recommend changes or ask questions. You can, however, send in a library request if some information is missing. They or may not respond with what you’re asking. ALLDATA cannot interpret or make changes to OEM information, but they can through the tech info sites. Most OEMs will allow some sort of inquiry. That alone sells me on using the tech info site first.
So, you’ve used the I-CAR video on how to purchase the subscription, and now you’ve purchased your subscription. The fun finally begins! You watched the video and go right to where the collision data is…alas, our job is done. Wait... no, it isn’t. Simply viewing collision data isn’t researching the repair plan, now, is it? Of course it isn’t, and here is where I told you to, “Remember this specifically.” I spent some time watching all the videos. They did reference where to find the collision information, which is what you will need to look for sectioning procedures, welding information, general repair precautions and so much more. But we still need to access the service information side of the data, because that is where all your necessary remove-and-install info, one-timeuse parts, and safety inspections will generally be.
Now, I have done my fair share of research, so I can say, “just go ahead and cover me in makeup and call me an “expert.” No, seriously, I do have some tips and tricks for navigating some of these tricky websites. Because once we purchase this subscription, which may seem like that hard part,
you must still navigate them. I could write forever on this, so we will just stick to the common OEMs.
As discussed in the video, once you get into Tech Authority, you are golden. What’s super attractive about the tech info site for Stellantis brands is that you don’t need to search or bring up any different windows to bring over that table of contents. It already has one and allows you to view owner’s manual/build data for the vehicle per the VIN . You will want to make sure and navigate through service information, though. There are a lot of one time use parts that you can only find when reading the removal and installation portions of the material. Make sure to read up on steering column information, too. You might be surprised at what you will find. Different components such as airbags, ADAS and suspension also have pertinent information in the “Description and Operation” that can really help you when repair-planning.
OASIS, which is the portal for Ford’s tech info site. You can access full build sheet information on the vehicle, the owner’s manual and when going into “workshop” you can access all of the collision and service information. Most of your time will be spent in the body and frame” portion as that’s where most of your removals and installations will be. When checking for non-reusable retainers and parts, look for a trashcan icon in the photos. They will also inform you to discard the bolts. I highly recommend watching the navigation videos in the general information. They have a whole drop-down table of contents on how to use the tech info site properly. Pay extra special attention to the “Safety
and precautions.” A pertinent safety inspection is hidden within the safety warning drop down selection.
While it is easy to navigate, finding pertinent information like “What to do when you disconnect and reconnect the battery” may be a little harder to find. The search function can help you out a lot here. For example, memory that is “saved” to the vehicle with GM is called “Volatile Memory.” That’s stuff like up/down features on windows, clock radios, etc. The ADAS table document (which is Googlesearchable) and the Repairs Required after Inspections are where GM really shines, though. They don’t leave much for guesswork. Pay close attention to wording when reading through remove-and-install procedures, because they use phrases like, “discard bolt.” Also pay extra close attention to the steering column area. Many of the vehicles will require a “steering column accident damage inspection.” This is also another site where the table of contents is easy to access.
The video is a bit dated, but the site still operates the same. You are going to Service Express and will activate your subscription. The trick to Honda and Acura is finding the neat little drop-down menu that allows us to effectively navigate it. To do that, you can add in your VIN and narrow your search. To access the service info dropdown menu, I find it easier to search keywords like “front bumper.” Once you click on that, you are looking for a wrench icon. That is the service manual, and once you click that it will bring up that specific remove-and-install. It will also bring up a handy dandy menu on the left that breaks down all the service information. So, you can navigate


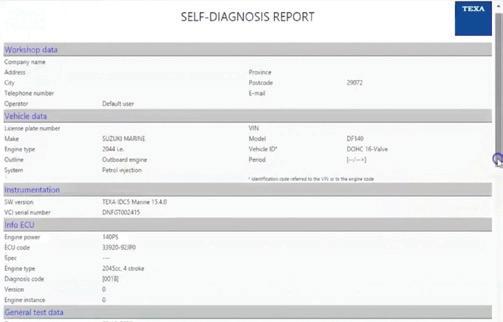


to your heart’s content and figure out where all your good stuff is. Don’t forget to read, though! You can find good information in basic precautions like, “prewashing vehicles” and “inspections required when an airbag has not deployed in a collision.”
The table of contents is there, but at the top of the screen you’ll need to click on Shop and then service information to access the service information. All three of these manufacturers run on the same platform. When looking in the service information to find safety inspections, you’ll need to access the restraint and the safety/precautions/ Look for a silly photo of a driver’s airbag (steering pad) being thrown down to the ground. If you scroll for a big make sure you are reading the info. That’s where you’ll find the RCM check and sensor checks.
ToPix operates much like Ford’s does. You are offered a table of contents per the VIN, owner’s manual and build data of the vehicle. Make sure you are reading the Hazard and Safety Information.
The I-CAR videos explain both the old-style service information and the ESM table of contents quite well. Just like a few of the others, you will need to access service information to find non-reusable parts. The neat thing about Nissan is they give you a “how-to” page and a legend explaining the diagrams. The diagrams are what show you which parts are nonreusable. Nissan’s safety information is very easy to find, even for steering columns. Once you navigate the table of contents for about five minutes you will get the hang of it.
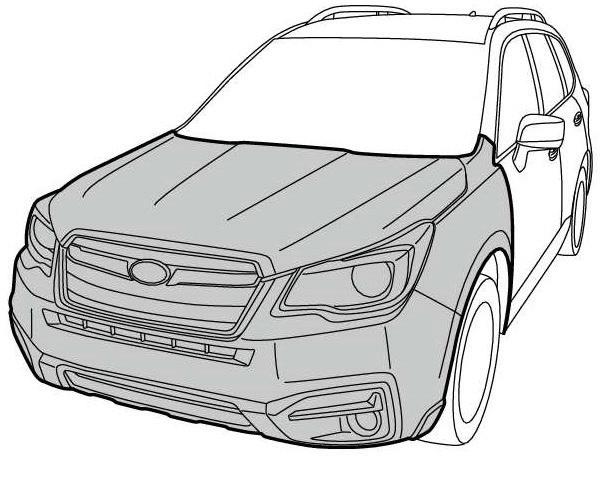

FRONT SUB SENSOR
If the section of vehicle as shown in the figure is damaged, check the following items and replace the damaged parts with new parts.
• Front sub sensor is cracked or deformed.
• Connector is scratched, cracked or deformed.
• Driver’s airbag module, knee airbag module or passenger’s airbag module has been activated.
FRONT DOOR IMPACT SENSOR, SATELLITE SAFING SENSOR, SIDE AIRBAG SENSOR AND CURTAIN AIRBAG SENSOR
If the section of vehicle as shown in the figure is damaged, check the following items and replace the damaged parts with new parts.
• Sensor is cracked or deformed.
• Mounting bracket is cracked or deformed.
• Connector is scratched, cracked or deformed.
• Side airbag module or curtain airbag module has been activated. (Operating side)
FOR THIS Subaru OEM information, you have to consider the type of collision first. The inspection criteria is different for each, and THEN you need to pay attention to the additional items to inspect, as they are not limited to one collision type.

CHECK STEERING SYSTEM
Check the following items, and if there is anything out of standard value, it is considered to be damaged. If so, replace it with a new part.
— Steering wheel
— Column assembly - Steering
— Universal joint assembly - Steering
— Steering gearbox
• Deflection of front and rear, upward and downward directions, and mounting condition to vehicle body of the column assembly - steering. (After a collision, absorbing part of the solumn assembly - steering may have been operated.)
Standard: Overall length L Tilt and telescopic column (measure while minimized)
819.7+1.5-1.5 mm (32.27+0.059-0.059 in)
THE STEERING column is the first component Subaru lists to inspect if the vehicle is involved in even a slight collision.


• Mounting conditions and deflection of front and rear, upward and downward directions of the steering wheel and column assemble - steering.
- Check the steering wheel deflection in axial and vertical directions.
Specification:
Axial deflection A (deflection of steering wheel)
Less than 6 mm (0.24 in)
Vertical deflection L (runout of steering wheel)
Less than 17 mm (0.68 in)
• Check for deflection and the swing load of the universal joint assemblysteering (Ref. to POWER ASSISTED SYSTEM (POWER STEERING)
> Universal Joint>INSPECTION.)
• Check the following items for the steering gearbox. (Ref. to POWER ASSISTED SYSTEM (POWER STEERING) > Election Power Steering Gearbox>INSPECTION.)
- Rack sliding resistance and deflection
- Input shaft play
- Rotation resistance of gearbox

THE STEERING wheel is the second component of the steering system Subaru directs the technician to inspect after even a minor collision.
Once you find the body repair information, the next daunting task is to find the Service Information. Much like the rest of the Asian manufacturers, there are a ton of non-reusable parts. To do so, you need to access your home screen from the top right corner. You will then be brought to a screen that shows all the current car models and years. Find the corresponding one and click on that to locate the service information area. Subaru’s tech info site (STIS) operates much like TIS. Pay close attention to hyperlinks and component guides. To find the safety inspections, you’ll need to head over to the restraint information.
The video is outdated. Once you create an account, Tesla’s service information is now absolutely free and the absolute easiest to navigate.
TIS is my favorite in terms of ease. It reminds me of an iPhone, as it’s userfriendly as can be. The only issue with TIS I can see is the abundance of hyperlinks which can take you down an
educational rabbit hole. Also, renewing a subscription can be a bit tricky. Once you get to the home screen on the top right, you will see Activate/renew subscription. You will have to clock that and follow the correct prompt; otherwise, it will lock you out of your account.
Remember that reading the information is just as important as documenting the information when repair planning.
VIDA is hands-down the worst one to get your subscription for. Once you finally download the app and manage to log in, before your subscription can be accessed (through the app obviously) you have to add that machine as the primary user. However, once you are in, Volvo’s service information is very easy to navigate. Just make sure you also purchase the
EPC with your subscription; it will help you when ordering parts.
I’ll be honest in saying that the European manufacturers leave nothing to be desired. They are a little finicky to get started, but that’s why I am here, to hopefully help alleviate that. When you finally purchase erWin for either VW or Audi, be mindful that the only way to fully view the procedures is to download and open them up with Adobe reader. Yes, I understand when you are staring at 300 pages of body repair information it may be overwhelming. It’s broken down for you, though, and you can isolate single pages or even text.
Overall, we as an industry need to realize that it’s not enough to simply access the body repair information, especially when repair-planning. There is no reason why technicians, managers, and repair planners shouldn’t all be in the know with service information. These cars nowadays take so much brain power and critical thinking. I hope these tips and tricks were of value to you and that you find yourself enjoying the research as much as I do. Remember that reading the information is just as important as documenting the information when repair planning. Thank you for giving me your time today!
KYLE MOTZKUS is the general manager at Hunter Auto Body in St. Louis, Mo. You can find him on social media by searching his name, or email him at Kyle@hunterautobodyinc.com.
SCAN TO READ MORE ARTICLES LIKE THIS ONLINE

Original fit and function
Seamless
Identical size and thickness


Recalibration ready
The use of OEM glass over alternatives is key to providing customer peace of mind. Same as the factory part, Original Ford Glass is designed to integrate with today’s advanced windshield safety systems, maintain structural integrity, and more.
Joining the Ford Certified Glass Network (FCGN) gets you access to not only the right parts but also exclusive Ford procedures, training, and support — helping you properly install and calibrate glass in any Ford vehicle you see.
Learn

AFTER THE GROUND COAT IS DRY, the mid-coat is applied to however many coats are needed to achieve a blendable match.


 BY JEREMY WINTERS
The world of auto refinishing has seen a rise in complex paint finishes in recent years, pushing the boundaries of aesthetics and demanding meticulous application techniques. Typical application methods taught in the past won’t cut it on many of today’s colors. We’ve all dealt with tri-coats in the booth for years now, but within the last five to 10 years we’ve seen the introduction of quad-coat paint jobs. Quad-stage jobs, with their captivating depth and shimmer, are a prime example of this evolution. But for body shops, refinishing these intricate layers requires a deep understanding of the process and precise execution.
Let’s dive into the world of tri-coat and quad-coat refinishing, exploring the materials, techniques, and considerations involved in achieving a flawless finish.
We all understand the basics of a typical base/clear paint job and all the tricks that go with matching and blending within our shop’s respective paint lines. Tri-coats and quad-coats elevate this process by adding additional layers for visual intrigue.
Tri-coat: This paint system incorporates three distinct layers: Base coat: This establishes the car’s foundation color. Mid-coat: This layer contains transparent pigments that create an iridescent effect, causing the color to shift and shimmer depending on the light. Clear coat: The final layer protects the underlying coats and provides a glossy finish. Quad-coat: Taking complexity a step further, quadcoats introduce a fourth layer: Tinted clear coat: This layer adds a subtle hint of color or translucency on top of the pearl coat, further enhancing the depth and visual play of the finish. Base clear, midcoat, clear- In some colors (for example, Mazda’s Machine Gray, 46G code), some paint manufacturers recommend applying the ground coat, followed by clear, prepping the fresh clear with a finer grit process, then application of the mid coat, and clearing again.
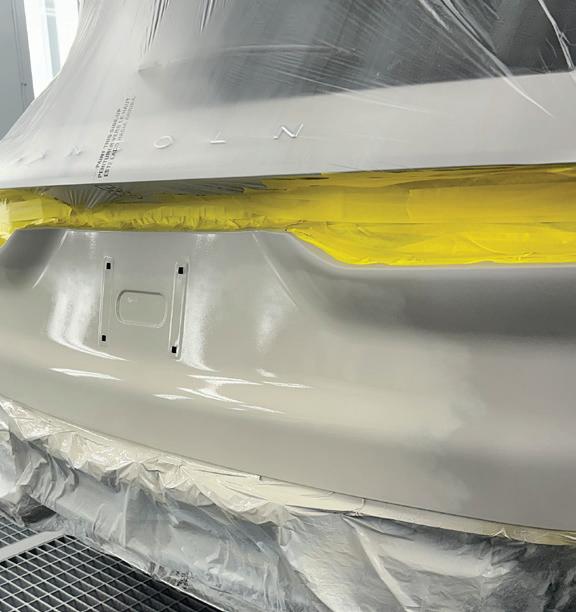
Refinishing a tri-coat or quad-coat paint job requires a skilled technician with a keen eye for detail. While a blendable match will get you moving through the booth, it’s just as important to understand that some of today’s specialty coatings require a different prep method. For preparation, I liken it to solvent vs water. They both have certain aspects that make the system work best. You wouldn’t prep a metallic blend area with 500 grit for water, would you?
This is one reason I am a huge advocate of going to classes by your paint manufacturer, especially those dealing in specialty coatings. I received my Master Certification at Axalta’s facility in Concord, North Carolina, in a class led by Bob Little. In those classes I took to get there, I wound up learning quite a bit about real-world application and not only the “what” to do but more importantly the “why” to do things a certain way. No one will be able to answer questions pertaining to your paint system better than the manufacturer.
NOTE: Owners/managers should invest in the paint shop and send painters to classes. The paint shop staff should be staying up on furthering their skills just as much as is the body side of the shop. We don’t repair vehicles like we did in the ‘90s, and we are not using the same coatings as then, either.
Let’s again reference Mazda’s Machine Gray, 46G. If you were painting in the collision repair field, you remember the headache that this color caused many of us when it hit the market (myself included). Several manufacturers started putting out documentation of the color and suggested tips. PPG came out with videos on their recommended blending techniques and walking through application of the color, and Axalta soon followed, as did the other manufacturers. With Axalta, for example, they wanted 46G sprayed as a quadstage. At the time, they wanted the black base coat shot, followed by clear. Then the entire surface was to be prepped with 1000-1200 grit sandpaper and a gold Scotch-Brite pad.
This was the first time I had ever come across this new procedure. It is what drove me to start asking questions and
THE GROUND COAT is applied and stepped out to help the transition between layers. Remember when applying water that the coating needs to be completely dehydrated before you are able to see that actual color. It will ALWAYS look wrong when initially applying, as shown in this photo, as you see such a color contrast between the wet base coat and the panel.

WITH THE panel blended and flashed, it is now ready for clearcoat.
diving deep into learning about the newer coatings. It turns out that it used a new metallic that was ground so much finer than what they had been using, they were seeing the sand scratches of normal blending techniques through the mid-coat layer when traditional prep techniques were employed. That’s something I would never have found out if I didn’t have a buddy that had just gone through a specialty coating class.
As with any multistage coating, understanding the matching process is half the battle. This is where having tools at your disposal really come into play. You can ask 10 different painters how they match these tri- and quad-stage colors, and you are going to get 10 different answers. But their most common solutions are to refer to previous sprayouts kept in a library, using color chips, and even a “camera” (spectrophotometer). When it comes to tri-coats, the ground coat matters. Most midcoat layers do not carry enough pigment to offset a ground coat that’s the wrong shade. And I believe I speak for ALL of us painters when we’ve put a bumper up to a car and seen how snow white it was compared to the body.
One trick that I have seen work many times for the ground coat is to use a camera, if available to your shop. Most of today’s color-mixing programs have individual settings for their respective spectrophotometers and can get you in the ballpark with two simple steps:
Lightly sand the surface to be read with 1500 and take your readings. This allows the camera to focus more on what the ground color should be. When uploading the readings into the computer, select the option to read the color as a solid. This forces the camera to focus just on the flat color shown by the previous sanding and to ignore the pearl. Obviously, a spray out is necessary for any verification of color, especially a camera reading. One thing to understand here is that many painters tend to rush this process of a sprayout. The card needs to be sprayed as it is a normal panel for a car and flashed the same way. Too many times, I’ve seen painters just piling on color coats, not giving the proper flash, and then following up with wax and grease remover. While the use of wax and grease remover can give a decent simulation, nothing replaces the appearance of a clearcoat. Not to mention, it also allows you the chance to catalog the sprayout among a library of other cards for future reference.
LABEL YOUR CARDS. Do not get lazy here; be sure to document what variant, reference number, number of coats, psi, whether you put a control coat or not, and even affix a printout of the formula used to the back of the card.
NOTE: From one painter to another, building a library


A SPRAYOUT is necessary for any verification of color. The card needs to be sprayed as it is a normal panel for a car and flashed the same way.
gives you a quick firsthand look at colors and eliminates the guesswork from your day-to-day duties. While it may seem like a lot of work up front, I promise you that a library will soon begin paying you back on tinted and camera shot formulas. At one point in my career, I had hundreds of cards in one paint line when I was still spraying solvent. Keep them clean, keep them organized, and keep things moving forward.
One last point to make is that it’s imperative to follow the recommended application and flash times. Some paint systems require use of an activator in the ground coat (especially in water systems) prior to applying the mid coat. When dealing in multi-layered refinishing, one of the most important steps is to ensure that the layers are dry prior to applying the next coat. While, yes, this sounds elementary to some, you would be surprised how many times I’ve seen tri-coats having to be redone due to improper flashing, which has resulted in overapplication of the product.
Take the time to learn how your paint manufacturer recommends certain colors are applied. It is also important to note that blending methods are different for some lines from solvent to water. If you’re making the switch from one to the other, it is important to work with your tech rep and get into classes to learn all the intricacies of each line.

Accudraft Paint Booths Content Creator JEREMY WINTERS spent 18 years daily in the paint booth doing collision and restoration work. He was the host of the popular BoothTalk podcast and has appeared alongside TV personalities Kevin Tetz and Ian Johnson on their respective shows helping out with bodywork and painting. He got his Bachelor’s degree in Business Administration with a concentration in marketing from Middle Georgia State University in Macon, Georgia. His goal is to help techs be the best versions of themselves they can be and to further education within the industry.
SCAN TO READ MORE ARTICLES LIKE THIS ONLINE




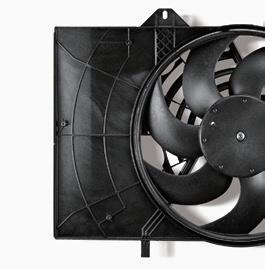


“We just replace it!” is a common refrain I hear when I’m in collision centers these days. “I don’t need more labor hours right now… I just need to move this backlog of work through the shop.” For good reason, especially since the pandemic, shop management has deemphasized the repair of damaged parts and accepted the higher cost of replacement parts as an expedient in response to the overall technician shortage and overwhelming workload.
However, there are recent signs that the backlog is receding and even that Gen Z workers are taking up the trades at a higher rate, so it may not be too long before the pendulum swings back to performing more repairs.
Regardless of the external factors, there will always be situations where it will be faster and more cost-effective to replace a damaged part rather than repair it. But to maximize shop gross profit, the repair planner needs to constantly evaluate the pros and cons of repairing a particular part versus just replacing it. To make this decision, the repair planner needs to know the capabilities of the shop’s technicians to make quality repairs on the wide variety of substrates from which today’s vehicles are made. From my own field of expertise in
plastic repair, I see many opportunities for shops to do more repairs on the plastic parts that comprise a large number of the non-structural components in the front of a vehicle. Bumper covers are the first things that spring to mind, but with the incorporation of more ADAS sensors in and around the bumpers, and with OEM restrictions on their repair becoming more prevalent, emphasis on the repair of bumper covers has diminished in favor of a focus on the repair of headlight tabs.
Headlights are one of the most important safety components on a vehicle, and with all the advancements and innovations being used in modern headlight design they are also one of the most expensive components to replace. Over the past couple of decades, the cost of replacement headlights has dramatically increased. Headlights on high-end vehicles are already reaching costs of $3,000-$6,000 each, prices that
A CLOSEUP of the nitrogen welder being used to repair a headlightmounting tab.

are sure to spread to more common vehicles as they begin using the same technology. A shop that has the equipment and know-how to repair broken tabs on such headlights can reduce the cost and increase the profitability of the overall repair.
As the training manager for a manufacturer of plastic repair products, I am often in collision repair shops doing demonstrations and training. Recently I was at a shop to do a nitrogen plastic welding demonstration, and the area they had me set up was near the parts check-in department. I heard a part hit the floor and a few minutes later the body shop manager walked up with a brand-new headlight in one hand and a broken tab in the other hand. The person checking in and inspecting parts accidentally dropped the headlight and broke a tab off. The headlight had been on backorder, and they had been waiting on it for two weeks. This headlight was the only thing preventing the car from being delivered. The manager requested that I do the demonstration on the headlight and said that if I could restore the headlight to like-new condition, with proper strength and appearance, that they would look kindly on the purchase of our equipment. A few hours later, I had my equipment
loaded in my van and the headlight was installed on the vehicle.
While this damage was caused in the shop, it’s not uncommon for headlights and other parts that are not in the direct impact zone, like airboxes and windshield washer reservoirs, to have minor damage. When this happens the part usually still functions as it should but has a few broken tabs or a cracked housing. Because headlights are a safety component, it is crucial to use the most effective repair method available to achieve a quality and safe repair. When it comes to the repair of meltable thermoplastic parts, like headlight tabs and housings, nitrogen plastic welding is the most effective method. Why? Because most headlight tabs are small and highly detailed. Fusion welding provides a strong repair even when the repair is confined to a small area, like


on mounting holes or tabs. By contrast, two-part adhesives require application over a large area to achieve adequate strength and are thus not well-suited to making repairs on small, detailed areas.
Most headlight housings are made of polypropylene (PP) blended with a talc filler. You can most easily identify the type of plastic by looking for the ID

BECAUSE MOST headlight tabs are small and highly detailed, nitrogen plastic welding is the most effective repair method.
symbols molded into the housing. You’ll often see a short list of ID symbols that also serve to identify the type of plastic used on the light’s other components, such as the lens (most commonly polycarbonate, or PC) and trim. Look for the symbol next to the word “HOUSING” or “HSG”. It will most often say “PP + T20”, or something similar. This means that the part is made primarily of polypropylene with 20% talc filler. There are certainly other components in the blend that are proprietary to the resin manufacturer, but this is what we need to know to choose the correct plastic welding rod to perform the repair.
Nitrogen plastic welding is a technique used to fuse plastic together.


The strength comes from using welding filler rods that match the plastic from which the part is made. The nitrogen fusion welding process uses hot nitrogen gas to melt the welding rod and the substrate, allowing the materials to fuse together creating the highest quality repair possible. Eliminating oxygen from the weld zone prevents the plastics from burning and becoming weak and brittle. Using nitrogen gas to melt and fuse plastic also minimizes fumes which results in a cleaner work environment. Professional-quality machines will allow the technician to adjust both temperature and gas flow; the very thin plastics used on headlight tabs may overheat and distort if the gas flow or temperature isn’t set correctly for the type and thickness of the plastic being repaired.
Welding small, detailed areas like headlight tabs requires a bit more finesse and a lighter touch from the technician than would be necessary on other parts, such as bumper covers. But with some training and practice, the skills are easily learned and can pay dividends on every vehicle that comes through the shop. The most time-consuming part of the repair is normally the cosmetic refinishing of the tab, especially if the damaged tab is visible by the customer when the hood is opened. In fact, the ability to restore the cosmetic appearance is most

often the deciding factor on whether to perform a repair or not. Headlight repair specialists often have small tools used by hobbyists to build plastic models to aid in the refinishing process.
Darwin didn’t say “only the strong survive.” He said “the one that’s most adaptable to change” will survive. If you want your shop to continue to thrive in a changing environment, dust off your hammers and dollies and get ready to do more repairs. The era of throwing parts at the car and expecting to be paid in full may soon be behind us.

JOHN WILBURN is the training manager for Polyvance. John has over 18 years of experience in bumper and plastic repairs. Polyvance is an I-CAR Sustaining Partner and provides several hands-on and virtual training courses on plastic repair and refinishing.
•Ergonomic Grip designed to reduce hand fatigue during
and provide comfort while maintaining
•Superior Surface Preparation specifically designed to excel in surface preparation tasks, paint defect removal, and imperfection leveling
•Durable and Long-Lasting high-quality materials and built to withstand the demands of professional use


Flip-up, stacking, or screw-in; low, medium, or tall; cradle or at –there are a plethora of lift adapter designs to choose from. How do you know which one is right for a particular job? Here are some tips to get you started.
1. There is no such thing as a universal lift adapter. Sadly, there isn’t an adapter out there that will work on every lift to safely pick up every vehicle. “Wait,” you may be thinking. “What about built-in ip-up adapters?” Nope, not even those. anks to the wide variety of vehicles on the road today, you just can’t count on one type of adapter to work equally well on a pickup truck, EV, and low-slung sports car – or even on the same type of vehicle from di erent manufacturers.
2. Follow manufacturer recommendations. You know when your mom would “recommend” that you clean your room? It wasn’t really a recommendation as much as it was an order. e same thing applies to OEM recommendations. Just as you should always place the adapters exactly where the OEM recommends, you should also follow any guidance they provide on what kind of adapters to use. Also consult your car lift manual for instructions on using lift adapters with your lift.


3. Certification matters. If you’re using an ALI-Certi ed Lift (and you should be), it was third-party tested and certi ed with speci c adapters. Swapping out the lift manufacturer’s approved adapters with some from another manufacturer puts your safety at risk. In fact, it voids your lift’s certi cation for as long as the unapproved adapters are installed.
4. Never make your own adapters. Ever. Don’t use wooden blocks or fabricate a homemade adapter. e vehicle may slide right o .
5. Know the basics. Screw lift pad assemblies are best suited for unibody vehicles and should not be used for trucks. Stacking auxiliary


adapters allow you to increase the height of the adapter to make better contact with the vehicle lifting points. Pay attention to height limits. Slotted pinch-weld pucks or pads fit on approved pinch weld jacking points. Cradle adapters are used to lift trucks, vans or other frame vehicles that require extra stability. Wider versions are available for heavier vehicles.
6. Don’t use a damaged or dirty adapter. If the rubber contact pad on an adapter is missing or damaged, replace it before use. Also never use an adapter that is covered with grease or oil that may make it slippery.


Our 10AP Series offers the convenience of wide or narrow installation wrapped up into one configurable package. This durable, safe, and reliable car lift features an expandable top beam and BI-METRIC™ arms to suit virtually every vehicle lifting requirement – symmetric or asymmetric. The 2-in-1 design gives operators the option of loading vehicles either symmetrically (centerline of vehicle at column) or asymmetrically (centerline of vehicle behind column). The simple, yet highly sophisticated design is sure to keep operating costs low and productivity high. Check out the full line of 10AP lift series at bendpak.com or call us at 1-800-253-2363


I
-CAR, the Inter-Industry Conference on Auto Collision Repair, was established in 1979 in response to the increasing complexity of modern vehicles and has since grown to provide educational programming and technical information for the collision repair industry.
Founded by industry representatives, including collision repair shops, insurance companies, equipment and material manufacturers, and educational institutions, the organization aims to ensure that collision repair technicians are equipped with the necessary skills and knowledge to handle the latest advancements in vehicle design and repair techniques.
As a leader in the industry, I-CAR is at the forefront of a collision revolution having established itself as the industry subject matter expert on Vehicle/Repair Technology and Educational Programming. Through I-CAR’s ongoing mission, the organization continues to seek ways to lessen the ongoing technician shortage by attracting new talent through CollisionCareers.com, a digital platform that shares educational resources and career guidance tools for potential and future collision technicians.

When it comes to training professional individuals to complete safe and quality repairs, and educating aspiring technicians, I-CAR sets the industry standard within the category. Ranging from their 300 online courses, and their renowned skills development and assessment programs, I-CAR is molding the future of the collision repair workforce.
To further I-CAR’s commitment to attracting talent, I-CAR will launch their Academy program, a comprehensive initiative designed to address the collision repair industry’s ongoing need
for skilled talent this summer, just in time for new graduates and career changers to take advantage of new opportunities in the collision repair industry.

I-CAR’s Academy program offers a unique solution that tackles both attracting and retaining entry-level technicians. A key aspect of this solution is the establishment of a clear and consistent career path for these new technicians. While there are many training programs available, I-CAR is the industry standard and is uniquely positioned to set this standard across the board.
The program provides a structured training curriculum to equip newcomers with the essential knowledge and skills required for various roles within the industry. This curriculum aligns with industry standards, provides essential tools for educators, team leaders and mentors, and offers recognition through badges for achieved competencies.
The Academy program will offer tools to educators, mentors and team leaders. Some resources that the curriculum includes are lesson plans and assessment tools, guidance and templates to support technicians’ development and improving talent recruitment, retention and development thorough culture-building and performance management.
For more information about I-CAR, its mission and upcoming initiatives, please visit www.i-car.com.


The I-CAR Academy curriculum is designed to prepare entry-level technicians for a promising career in collision repair. Combining an intuitive online experience with guided hands-on learning, I-CAR Academy empowers technicians with the skills they need to become productive members of a shop team.
Consistent entry-level education and recognition across schools and shops will enable smoother transitions to the workforce, helping to bolster industry onboarding and retention efforts.


3M PPS 2.0 Vented Cups are now part of the Full 3M PPS Family — The 3M PPS family of products has helped painters save time, reduce solvent use, and deliver consistent results for more than 20 years. From the world’s first linered cup system, the PPS family has grown to include a family of paint cups that meet painters’ everyday challenges. Instantly ready to use — 3M PPS 2.0 Vented Cups come with their valves pre-installed. They’re ready to start mixing right out of the box, delivering the excellent material flow you’d expect from a vented cup system.

The ADAS Radar 3-in-1 from Launch Tech USA offers a solution tailored for technicians and shops specializing in radar systems. It enables essential calibration capabilities without unnecessary complexity, ensuring efficient functionality in minimal spaces. Its user-friendly design facilitates quick setup and calibration, minimizing downtime and optimizing operational efficiency. The radar’s small targets enable convenient transport and on-site testing, while an optional travel-friendly protective case enhances on-site calibration.

FENDERBENDER.COM/33037226 SPONSORED
FENDERBENDER.COM/55036734
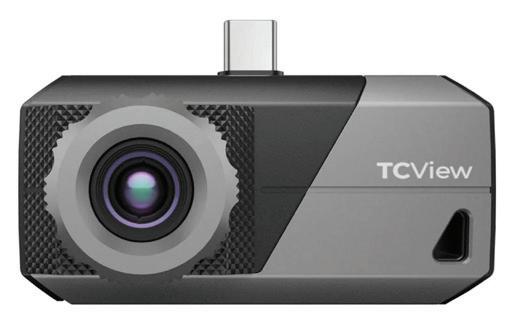
The TS001 Thermal Imager from TOPDON is a long-focus Android thermal imager with a 9mm lens. The TS001 has an infrared resolution of 256x192 and a 25Hz frame rate. The adjustable lens covers infrared imaging needs from 0.1m to 500m. Equipped with both measurement and observation modes, the TS001 provides accurate temperature readings and intuitive insights into heat distribution.
FENDERBENDER.COM/55036737


The revolutionary SATAjet X 5500 from SATA Spray Equipment achieves brilliant finishes regardless of the paint system being used. It is designed with synchronized air flow geometry inside the spray gun body and nozzle set, ensuring perfect material distribution, optimized atomization, and precise spray fan shapes. In addition, it is noticeably quieter due to the Whispering Nozzle™ and gives painters the feeling of a much softer and more comfortable coating process. Best of all, the X-nozzles considerably reduce paint waste.


Polyvance’s airless plastic welder set includes six different tips, offering versatility for various projects. Its airless design streamlines the process, eliminating the need for external air sources. The set, which comes in a labeled carrying case for easy organization and portability, is a compact solution for diverse plastic welding applications. It’s an essential tool for plastic repair work, allowing users to easily identify and order missing tips.

FENDERBENDER.COM/33035971 SPONSORED

Boost your body shop’s efficiency this summer with Vibac’s HONEYBADGER 209HB: Premium neon-yellow automotive masking tape. Designed for demanding applications, it offers exceptional adaptability, instant adhesion with strong holding power to prevent lifting/curling, leaves no residue, and is solvent/thinner resistant. Withstanding high temperatures and UV-rays for up to three days, it’s the ultimate solution for hot weather challenges. Keep your projects pristine and on schedule! Follow the link below for a free sample today!
FENDERBENDER.COM/55040114 SPONSORED

The Harbor Freight ICON Professional Adjustable Shop Seat with Tool Storage is an adjustable shop seat with a bottom tray that is designed to allow for a greater amount of tool and part storage. Users can change their position with the seat’s 360-degree swivel. The seat height adjusts from 17-1/2” to 21-1/2”. The 19” diameter tool storage base has two magnetic trays built in.
FENDERBENDER.COM/55036745
FENDERBENDER.COM/55036754

The AST-ID Refrigerant Identifier from INFICON is designed to verify that the refrigerant in a vehicle or cylinder meets the purity standard necessary for use or reuse. This portable tool reveals the presence of contaminants like hydrocarbons and oxygen, both of which can negatively impact the performance of an A/C system.
WWW.FENDERBENDER.COM/55036749
Experience unparalleled convenience with the BenchRack™ from Car-O-Liner, integrating drive-on functionality with a hydraulic lift and detachable ramps. Its tilt feature facilitates loading in confined spaces, making it the most versatile repair bench available. From minor cosmetic touch-ups to full-frame repairs, handle every collision-damaged vehicle efficiently. With four length options, BenchRack™ systems cater to a wide range of vehicles, including small cars, light trucks, vans, and SUVs, ensuring seamless repairs for any unibody or full-frame vehicle.

FENDERBENDER.COM/55038130 SPONSORED vans,


State-of-the-art paint systems and the latest application recommendations open up new possibilities, but also pose new challenges for professional painters. The SATAjet X 5500 featuring the new X-nozzle system defines a completely new application standard for the future.
Revolutionary: The X-nozzles are taking atomization to a whole new level
Noticeably quieter: reduced noise level in the relevant sound frequency ranges due to optimized flow geometry of the whispering nozzle
Individual: Matches any application requirement, such as specific characteristics of the paint system, climatic conditions and application method (application speed/ control)
Precise: Optimized material distribution for enhanced spraying uniformity and atomization with both spray fan shapes
Low maintenance: No air distribution ring required, which ensures a much easier and faster cleaning process
Efficient: The optimized atomization concept allows for considerable material savings
SATA USA Inc.
1 Sata Drive • PO Box 46 Spring Valley, MN 55975
Phone: 800-533-8016
E-mail: satajet@satausa.com www.satausa.com