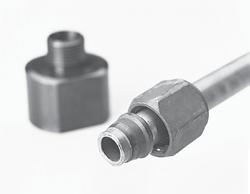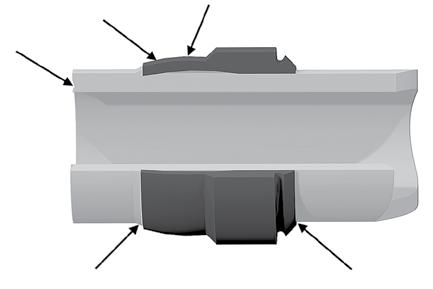
U
TABLE OF CONTENTS
S Assembly/Installation
Table of Contents
Assembly / Installation Parker Hannifin Corporation Tube Fittings Division Columbus, Ohio http://www.parker.com/tfd S2 Catalog 4300 PDF Section Updated October 2017
Port End Assembly S3 Parallel Thread Por ts S3 Adjustable Port End Assembly S4 Non-adjustable Port End Assembly .............................. S4 Tapered Thread Ports S6 Tapered Thread Port Assembly S7 Flange Ports S8 Troubleshooting Port End Connections S9 Tube End Assembly ........................................................... S12 Tube End Preparation S12 Seal-Lok O-Ring Face Seal Fittings and UPTC Assembly S13 Sleeve Attachment S13 Flanging S13 Brazing ..................................................................... S16 Final Installation S17 Seal-Lok Troubleshooting Guide S19 Triple-Lok 37° Flare Fittings S20 Flaring S20 Installation S21 Triple-Lok Troubleshooting Guide ............................... S22 Ferulok Flareless Bite Type Fittings S23 Ferrule Pre-set S23 Ferulok Troubleshooting Guide S25 24° Flareless Bite S26 Intru-Lok Flareless Bite Type Fittings.................................S27 Cutting, Deburring and Cleaning S27 Installation S27 Remake S27 Intru-Lok Troubleshooting Guide S27 EO Metric Bite Type Fittings .............................................. S28 Pre-set of Progressive Ring S28 Pre-set Using the Fitting Body or Hardened Pre-assembly Tool ................................. S28 Pre-set Inspection S29 Pre-set Using EO-Karrymat, Hydra-Tool or Hyferset................................................ S29 Installation S29 Steps for Proper Assembly of Support Sleeve (VH) .............................................. S30 EO Troubleshooting Guide ......................................... S31 EO-2 Metric Bite Type Fittings S32 Pre-set of the Retaining Ring S32 Pre-set Using the Fitting Body or Hardened Pre-assembly Tool S32 Pre-set Inspection S32 Pre-set Using EO-Karrymat, Hydra-Tool or Hyferset S32 Installation S33 Re-assembly with Replacement of Sealing Ring (DOZ) S33 EO-2 Troubleshooting Guide S33 24° Flareless Bite S34 Bulkhead Locknut Assembly..............................................S35 Pipe Swivel Assembly .......................................................S35 Routing and Clamping S36 Routing of Lines S36 Tube Clamping S37 Layout Data for Tube, Pipe and Hose Clamps Standard (Inch) and Series A (Metric)................ S37 Heavy Series (Inch) and Series C (Metric) S38 Twin Series (Inch) and Series B (Metric) S38 Tools for Tube Bending S39 Mandrel Bending Tools S39 Plumbing and Assembly Hints ........................................... S40
Port End Assembly
The three common types of port ends used in the United States with tube fittings, pipe fittings and hose fittings are:
1) Parallel thread
2) Tapered Thread
3) Flanges
Parallel Thread Ports
Unlike tapered threads, parallel thread ports do not require sealing by the threads. The seal is obtained by other means, typically an elastomeric seal. When assembled properly, parallel thread ports provide the best leak-free port connection available.
Parker tube fittings are available with several types of parallel thread port studs (ends):


• SAE straight threads (SAE J1926 / ISO 11926)
• ISO (ISO 6149)
• JIS (JIS B2351)
• BSPP flat face (ISO 1179)
• DIN Metric flat face (ISO 9974).
The SAE straight thread, ISO 6149 and JIS B2351 ports are all of similar design. The male end is fitted with an O-ring. On assembly, the O-ring is firmly sandwiched between the angular sealing surface of the female port, the male end undercut, and the shoulder or back-up washer of the male end. Sealing is thus made possible and maintained by the O-ring compression, which results from the sandwiching of the O-ring in the cavity as shown in Fig. S1. The straight threads do not offer sealing action; they provide the resistance (holding power) for service pressure. Port dimensions for SAE and ISO 6149 ports are given on pages T32 and T33 respectively. For JIS B2351 dimensions, please contact the Tube Fittings Division.
Port End Assembly
(ED) (see Fig. S2) and are recommended for higher pressures than the other types. Types “G” and “H” use an O-ring that is supported on the outside by a removable retaining ring (see Fig. S3). Type B (cutting face) is designed with a relatively sharp ridge of material that seals by coining the flat face of the female port (see Fig. S4). A fourth sealing method uses a bonded seal which consists of a metal ring with an elastomer bonded to the inside surface (often referred to as Dowty® seal) (see Fig. S5).

The SAE straight thread port is the same as MS 16142. It is also similar to, but dimensionally not the same as, MS 33649 and AND 10050, and thus not interchangeable with them. Therefore, it is not recommended to use fittings designed for SAE straight thread ports in MS 33649 and AND 10050 ports.
With the BSPP and metric flat face port ends, the sealing actually takes place on the top surface (spot face) of the port. Port dimensions can be found on pages T35 and T36 respectively. There are several sealing methods available for these ports. Port studs with type “E” sealing utilize Parker’s EOlastic seal

TABLE OF CONTENTS Catalog 4300 PDF Section Updated October 2017 Assembly / Installation Parker
Corporation
Fittings Division
Ohio http://www.parker.com/tfd S3 S
Hannifin
Tube
Columbus,
Fig. S1 – SAE / ISO / JIS B2351 Straight Thread Port O-Ring Upon Assembly
Fig. S2 – EOlastic Seal, Type E
Fig. S3 – O-Ring with Retaining Ring, Types G & H
Fig. S4 – Cutting Face, Type B
Fig. S5 – Bonded Seal
Counterbores and taps used to machine the various parallel thread ports can be found in section R.
For assembly purposes, there are two main categories of parallel port ends: adjustable and non-adjustable. Adjustable port ends are commonly found on shaped fittings to allow for proper orientation of the fitting. Besides the elastomeric seal, adjustable port ends are assembled with a locknut and a backup washer as shown in Fig. S6. Non-adjustable port ends are found on straight fittings.


6. To align the tube end of the fitting to accept incoming tube or hose assembly, unscrew the fitting by the required amount, but not more than one full turn.
7. Using two wrenches, hold fitting in desired position and tighten locknut to the proper torque value from the appropriate table located on pages S5 - S6.
8. Inspect to ensure that O-ring is not pinched and that washer is seated flat on face of por t.
Locknut Back-up Washer O-Ring
The general assembly procedure for all adjustable parallel thread port ends is the same. Likewise, the assembly procedure is the same for all non-adjustable parallel thread port ends.
Adjustable Port End Assembly
1. Inspect components to ensure that male and female port threads and sealing surfaces are free of burrs, nicks and scratches, or any foreign material.
2. If O-ring or seal is not pre-installed to fitting male port end, install proper size O-ring or seal, taking care not to damage it.
3. Lubricate O-ring with light coat of system fluid or a compatible lubricant to help the O-ring slide smoothly into the port and avoid damage.
4. Back off lock nut as far as possible. Make sure back-up washer is not loose and is pushed up as far as possible.
Non-adjustable Port End Assembly
1. Inspect components to ensure that male and female port threads and sealing surfaces are free of burrs, nicks, and scratches, or any foreign material.
2. If O-ring or seal is not pre-installed to fitting male port end, install proper size O-ring or seal, taking care not to damage it.
3. Lubricate O-ring with light coating of system fluid or a compatible lubricant to help the O-ring slide past the port entrance corner and avoid damaging it.
4. Screw fitting into port and tighten to proper torque from the appropriate table located on pages S5 - S6.
5. Screw fitting into port until the back-up washer or the retaining ring contacts face of the port. Light wrenching may be necessary. Over tightening may damage washer. (This potential damage was eliminated with Parker’s Robust Port)
Assembly / Installation Parker Hannifin Corporation Tube Fittings Division Columbus, Ohio http://www.parker.com/tfd S4 Catalog 4300 PDF Section Updated October 2017 TABLE OF CONTENTS
Completely Backed-Off Step 4 Step 5
Locknut
Step 6
Fig.S6 – Adjustable Port End Assembly
Steps 7 and 8
Tighten Locknut with Torque Wrench
Port End Assembly
Fig. S7 — Non-Adjustable Port End Assembly
SAE Straight Thread Port Assembly (SAE J1926)
Port End Assembly
Notes: Lubricate threads before assembly. Values in chart are for plated steel fittings in steel ports. For stainless steel fittings, use the upper limit of torque range. For brass and aluminum, decrease torque value by 35%.
BSPP (Thread G) Port Assembly (ISO 1179 / DIN 3852-2)
Note: Lubricate threads before assembly! Tightening torques are for steel fittings assembled in steel components. Values in chart are for steel fittings in steel ports. For stainless steel fittings, please use the upper limit of torque range. For brass (and other soft metals), decrease torque value by 35%.
Assembly / Installation Parker Hannifin Corporation Tube Fittings Division Columbus, Ohio http://www.parker.com/tfd S5 S Catalog 4300 PDF Section Updated October 2017 TABLE OF CONTENTS
Table S1 – SAE J1926 Straight Thread Port Assembly Torques SAE Dash Size Thread Size UN/UNF Assembly Torque (+10% -0) Non-Adjustables Adjustables Plugs Seal-Lok (Heavy Duty SAE J1926-2) Triple-Lok Ferulok Adapters (Light Duty SAE J1926-3) Seal-Lok (Heavy Duty SAE J1926-2) Triple-Lok Ferulok Adapters (Light Duty SAE J1926-3) Hollow HexHex Head HP5ON-S (Light Duty SAE J1926-3) P5ON-S (Light Duty SAE J1926-3) ft.lbs. (in. lbs) N-m ft.lbs. (in. lbs) N-m ft.lbs. (in. lbs) N-m ft.lbs. (in. lbs) N-m ft.lbs. (in. lbs) N-m ft.lbs. (in. lbs) N-m 25/16-24——(85)10——(60)7(60)7(85)10 33/8-24——(155)18——(100)11(100)11(155)18 47/16-20(310)35(260)29(180)20(180)20(180)20(260)29 51/2-20(360)41(280)32(360)41(250)28(250)28(280)32 69/16-18(420)47(350)40(420)47(350)40(350)40(350)40 83/4-16(720)81(620)70(720)81(620)70(620)70(620)70 107/8-1410013685115100136851158511585115 121 1/16-12135183135183135183135183135183135183 141 3/16-12175237175237175237175237175237175237 161 5/16-12200271200271200271200271200271200271 201 5/8-12250339250339250339250339250339250339 241 7/8-12305414305414305414305414305414305414 322 1/2-12375508375508375508375508375508375508
Table S2 – Assembly Torques for ISO 1179-1 / DIN 3852-2 Port Assembly Torque Nm +10% -0 Straight Male Stud Fittings Non-Return Valves RHV / RHZBanjo Fittings Plugs VSTI-ED Straight and Adjustable Fittings Series Tube O.D. BSPP Thread G Size Form A for Sealing Washer Form B with Cutting Face Form E with EDSealing Form E with EDSealing WH / TH SWVE Form E with EDSealing O-Ring with Retaining Ring and Bonded Washer 61/8 - 289181818181813 18 81/4 - 1935353535454030 35 101/4 - 1935353535454030 35 123/8 - 1945707050706560 70 L 151/2 - 146514090851209080 90 181/2 - 146514090851209080 90 223/4 - 1490180180140230125140 180 281 - 11150330310190320—200 310 351 1/4 - 11240540450360540—400 450 421 1/2 - 11290630540540700—450 540 61/4 - 19355540454540— 40 81/4 - 19355540454540— 40 103/8 - 19459080607065— 60 123/8 - 19459080607065— 60 S 141/2 - 146515011514512090— 90 161/2 - 146513011510012090— 90 203/4 - 1490270180145230125— 180 251 - 11150340310260320—— 310 301 1/4 - 11240540450360540—— 450 381 1/2 - 11290700540540700—— 540 Dimensions and pressures for reference only, subject to change.
Metric (ISO Thread M) Port Assembly (ISO 9974-1 / DIN 3852-1)
Port End Assembly
Note: Lubricate threads before assembly! Values in chart are for steel fittings in steel ports. For stainless steel fittings, please use the upper limit of torque range. For brass, aluminum (and other soft metals), decrease torque value by 35%. Table
Metric ISO Port Assembly (ISO 6149/DIN 3852-3)
Assembly Torque (+10% -0)3)
Tapered Thread Ports
Metric Thread M Size
ISO 6149-2 Stud Ends (S-Series) (Seal-Lok, EO & VSTI-OR Plugs)
ISO 6149-3 Stud Ends (L-Series) (Triple-Lok, EO, Ferulok & Pipe Adapters)
N.m.ft. lbs.N.m.ft. lbs.
M8x1107.58 6
M10x120151511
M12x1.535262518
M14x1.545333526
M16x1.555414030
M18x1.570524533
M20x1.54) 8059——
M22x1.5100746044
M27x217012510074
M30x21) 23517513095
M33x2310230160120
M38x22) 320235185135
M42x2330245210155
M48x2420310260190
M60x2500370315230
1) M30X2 will be added to ISO 6149 standards at next revision.
2) M38X2 is not covered in ISO 6149 standards.
3) These torques are for steel fittings, assembled lubricated, for brass (and other soft metals), decrease torque value by 35%.
4) For cartridge valves only.
Table S4 – ISO 6149 / DIN 3852-3 Port Assembly Torques
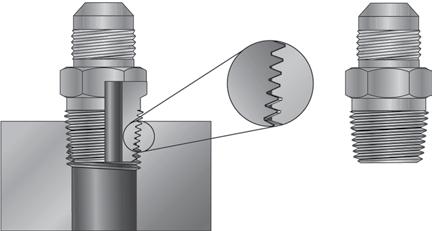
Tapered thread ports include NPTF, BSPT and metric taper. The tapered threads in these ports serve two functions: 1) to hold the fitting in place while under pressure and 2) to serve as the primary seal. The seal for NPTF threads is created by the metalto-metal contact between the mating roots and crests of the male and female threads. With all other tapered threads, there is not always a contact at the roots and crests, but the spiral gap there is small enough for a sealant to fill and provide a seal.
Dimensions and pressures for reference only, subject to change.

Assembly / Installation Parker Hannifin Corporation Tube Fittings Division Columbus, Ohio http://www.parker.com/tfd S6 Catalog 4300 PDF Section Updated October 2017 TABLE OF CONTENTS
Fig. S8 – Tapered Thread Port
Assembly Torques for ISO 9974-1 / DIN 3852-1 Port Series Tube O.D. Metric Thread M Size Assembly Torque Nm +10% -0 Straight Male Stud Fittings Non-Return Valves RHV / RHZBanjo Fittings Plugs VSTI-ED Straight and Adjustable Fittings Form A for Sealing Washer Form B with Cutting Face Form E with EDSealing Form E with EDSealing WH / TH SWVE Form E with EDSealing O-Ring with Retaining Ring 6 M 10 x 19 18181818181218 8 M 12 x 1.520 30252545352525 10 M 14 x 1.535 45453555503540 12 M 16 x 1.545 65555080605555 L 15 M 18 x 1.555 807070100806570 18 M 22 x 1.565 1401251251401209090 22 M 27 x 290 190180145320130135180 28 M 33 x 2150340310210360—225310 35 M 42 x 2240500450360540—360450 42 M 48 x 2290630540540700—360540 6 M 12 x 1.520 3535354535—35 8 M 14 x 1.535 5545455550—55 10 M 16 x 1.545 7070558060—70 12 M 18 x 1.555 110907010080—90 S 14 M 20 x 1.555 15012510012511080125 16 M 22 x 1.565 170135125135120—135 20 M 27 x 290 270180135320135—180 25 M 33 x 2150410310210360——310 30 M 42 x 2240540450360540——450 38 M 48 x 2290700540540700——540
S3 –
Port End Assembly
The variety of thread forms available under taper threads include:
NPT – American Standard Taper Pipe Thread (ANSI B1.20.1).
NPTF – Dryseal American Standard Taper Pipe Thread (SAE J476, ANSI B1.20.3).
BSPT or JIS “PT” – British Standard Pipe, Tapered (BS21, JIS B 0203, ISO 7), also known as “R” for male and “Rc” for female.
M-Keg – Metric taper threads (DIN 158).
The vast majority of Parker Tube Fittings Division’s standard pipe thread fittings are machined with the NPTF thread form. NPTF thread is also referred to as Dryseal Pipe Thread.
The full thread profile contact of NPTF threads is designed to give the tapered threads self-sealing ability without thread sealant. However, variations in condition of mating threads, fitting and port materials, assembly procedures and operating conditions make self-sealing highly improbable. Some type of thread sealant is, therefore, required to achieve proper seal and, in some cases, additional lubricity to prevent galling.
Types of Sealant/Lubricant
Sealant/Lubricants assist in sealing and provide lubrication during assembly, reducing the potential for galling. Pipe thread sealants are available in various forms such as dry pre-applied, tape, paste and anaerobic liquid.
Pre-applied sealants, such as “Vibraseal” (registered trade-mark of Loctite Corporation) and powdered PTFE are usually applied to connectors by the manufacturer. Connectors with some of these sealants may be remade a few times without needing additional sealant. Vibraseal may also help reduce loosening due to vibration.
PTFE tape, if not applied properly, can contribute to system contamination during assembly and installation. In addition, because of PTFE’s high lubricity, fittings can be more easily over tightened; and it does not offer much resistance to loosening due to vibration.
Paste sealants can also contribute to system contamination, if not applied properly. They are also messy to work with; and some types require a cure period after component installation, prior to system start up.
Anaerobic liquids are available from several manufacturers and perform sealing as well as thread locking functions. They are applied to the connectors by the user and require a cure period prior to system start up. Some are soluble in common hydraulic fluids and will not contaminate the system. For proper performance they need to be applied to clean and dry components, carefully following the manufacturer’s directions.
Tapered Thread Port Assembly
The proper method of assembling tapered threaded connectors is to assemble them finger tight and then wrench tighten further to the specified number of turns from finger tight (T.F.F.T.) given in Table S5. The following assembly procedure is recommended to minimize the risk of leakage and/or damage to components.
1. Inspect components to ensure that male and female port threads and sealing surfaces are free of burrs, nicks and scratches, or any foreign material.
2. Apply sealant/lubricant to male pipe threads if not pre-applied. For stainless steel fittings, the use of Parker Threadmate sealant/lubricant is strongly recommended. (Pre-applied dry sealants are preferred over other sealants). With any sealant, the first one to two threads should be left uncovered to avoid system contamination. If PTFE tape is used it should be wrapped 1-1/2 to 2 turns in clockwise direction when viewed from the pipe thread end. Caution: More than two turns of tape may cause distortion or cracking of the port.
3. Screw the connector into the port to the finger tight position.
4. Wrench tighten the connector to the appropriate T.F.F.T. values shown in Table S5, making sure that the tube end of a shaped connector is aligned to receive the incoming tube or hose assembly. Never back off (loosen) pipe threaded connectors to achieve alignment.
5. If leakage persists after following the above steps, check for damaged threads and total number of threads engaged. If threads on the fitting are badly nicked or galled, replace the fitting. If port threads are damaged, re-tap, if possible, or replace the component. If the port is cracked, replace the component. Normally, the total number of tapered threads engaged should be between 3-1/2 and 6. Any number outside of this range may indicate either under or over tightening of the joint or out of tolerance threads. If the joint is under tightened, tighten it further but no more than one full turn. If it is over tightened, check both threads, and replace the part which has out-of-tolerance threads.
As a general rule, pipe fittings with tapered threads should not be assembled to a specific torque because the torque required for a reliable joint varies with thread quality, port and fitting materials, sealant used, and other factors. Where many of these factors are well-controlled, such as particular jobs on an assembly floor, a torque range that produces the desired results may be determined by test and used in lieu of turns count for proper joint assembly.
Assembly / Installation Parker Hannifin Corporation Tube Fittings Division Columbus, Ohio http://www.parker.com/tfd S7 S Catalog 4300 PDF Section Updated October 2017 TABLE OF CONTENTS
Tapered Pipe Thread Size T.F.F.T. BSPTNPTF 1/8-281/8-272 - 3 1/4-191/4-182 - 3 3/8-193/8-182 - 3 1/2-141/2-142 - 3 3/4-143/4-142 - 3 1-111-11 1/21.5 - 2.5 1 1/4-111 1/4-11 1/21.5 - 2.5 1 1/2-111 1/2-11 1/21.5 - 2.5 2-112-11 1/21.5 - 2.5
Table S5 – Assembly Turns From Finger Tight (T.F.F.T) Values For Steel, Stainless Steel and Brass Pipe Fittings
Dimensions and pressures for reference only, subject to change.
Flange Ports
Large threaded port connections, such as SAE straight thread, require very high torque to assemble. This makes assembly very difficult, especially where wrench clearance is limited. Split flange connections solve this problem by dividing the hydraulic load among four bolts each requiring much less torque, smaller wrenches and smaller wrench clearance.
Port End Assembly
3. Position flange and clamp halves.
4. Place lock washers on bolts and insert through clamp halves.
5. Hand tighten bolts.
6. Torque bolts in diagonal sequence (see Fig. S10) in small increments to the appropriate torque level listed in Table S6 or S7 below.
There are two types of flange port connections:
• ISO 6162, Type 2
• SAE Code 61 4-bolt split flange
• SAE Code 62 4-bolt split flange
• ISO 6164
The 4-Bolt Split Flange consists of four main components:

• A body (flange head)
• An O-ring
• One “captive” or two “split” flange clamps
• Four bolts and washer
The four-bolt port is simply a circular opening (flow passage) surrounded by four tapped holes in a certain pattern for acceptance of the flange clamping bolts. The flat surface of the port compresses the O-ring contained in the groove in the flange head when the clamp bolts are torqued. In some instances, the groove is in the port and not in the flange head. The bolts, through the clamp halves, clamp down the flange head onto the flat surface of the port compressing and trapping the O-ring in the groove and leaving no gap for it to extrude under pressure. The hydraulic pressure is thus sealed by the compressed Oring as long as the bolts are tightened enough to maintain solid metal to metal contact between the flange head at the outside diameter of the O-ring and the top of the port.

Flange Port Assembly
The steps to properly assemble the flange port clamping bolts are:
1. Inspect components to ensure that male and female port threads and sealing surfaces are free of burrs, nicks and scratches, or any foreign material.
2. Lubricate the O-ring.
* Does not meet ISO 6162 specification. Table S6 – Code 61 Flange Recommended Bolt Torque
* Does not meet ISO 6162 specification.
Table S7 – Code 62 Flange Recommended Bolt Torque
Socket Screw Bolt Circle
Cap
* In general, variances of torque for soft metal ports/manifolds (ie: aluminum block - 66% of specified torque)
Assembly / Installation Parker Hannifin Corporation Tube Fittings Division Columbus, Ohio http://www.parker.com/tfd S8 Catalog 4300 PDF Section Updated October 2017 TABLE OF CONTENTS
to change.
Dimensions and pressures for reference only, subject
+10% -0 Torque ft. lbs. Metric Bolt (ISO 6162) +10% -0 Torque N-m 81/25/16-1817M824 123/43/8-1631M1050 1613/8-1631M1050 201-1/47/16-1452M1050 241-1/21/2-1377M1292 3221/2-1377M12*92 402-1/21/2-1377M1292 4835/8-11155M16210 563-1/25/8-11155M16210 6445/8-11155M16210 8055/8-11155M16210
Dash Size Flange Size Inch Bolt (J518)
Table S8 – Hydraulic Flange Recommended Bolt Torque
Screws Tightening Torques N-m LK35M610 LK40M610 LK55M825
(LK) Socket Head
Dash Size Flange Size Inch Bolt (J518) +10% -0 Torque ft. lbs. Metric Bolt (ISO 6162) +10% -0 Torque N-m 81/25/16-1817M824 123/43/8-1631M1050 1617/16-1452M1292 201-1/41/2-1377M14*130 241-1/25/8-11155M16210 3223/4-10265M20400
Fig. S10 – Flange Bolt Tightening Sequence
Bolts Flange Clamp Flange Head O-Ring Tapped Holes Washers
Fig. S9 – 4-Bolt Split Flange Components
Port End Assembly
Troubleshooting Port End Connections
Parallel (SAE, BSPP and metric) CONDITION
Washer is too loose (moves by its own weight or rocks too much on the undercut)
Fitting threads are distorted
Several scratches or nicks on the port face
Spot face of port is smaller than washer diameter
Port threads are distorted (yielded)
Leakage persists after locknut has been torqued
PROBABLE CAUSE(S)
• Washer damaged
RECOMMENDATION
• Replace fitting
Port End Assembly
Washer distorted, allowing opportunity for O-ring to extrude
• Over-torqued
• Mixed threads
• Port face contaminated (dirty)
• Improper port tool was used
• Wrong fitting selected for port
• Fitting over-torqued
• Damaged O-ring
• Damaged washer
• Improper assembly
• Exposed upper thread forced washer into port during assembly (over-torquing makes this more prevalent)
• Replace fitting and tighten to proper torque
• Determine correct thread type
• Reface the port
• Reface the port
• Select a proper fitting
• Replace component
• Replace O-ring with new quality O-ring (90 durometer) and reconnect fitting to proper torque
• Replace fitting
• Follow proper assembly procedure
• Replace fitting, using proper installation techniques for adjustable port ends
Assembly / Installation Parker Hannifin Corporation Tube Fittings Division Columbus, Ohio http://www.parker.com/tfd S10 Catalog 4300 PDF Section Updated October 2017 TABLE OF CONTENTS
Dimensions and pressures for reference only, subject to change.
Troubleshooting Port End Connections
Flange (i.e., ISO 6162 4-Bolt)
CONDITION
Missing or improper O-ring
O-ring pinched or extruded
Evidence of yielded or cracked flange head, tube or hose end
Components do not mate or gap is too large
PROBABLE CAUSE(S)
• Assembly/re-assembly oversight
• Improper tightening procedure
• Misaligned tube or hose connection
• Proprietary flange or pressure series matching problem
RECOMMENDATION
• Replace with proper O-ring and re-tighten connection using incremental alternating tightening procedure
• Replace O-ring and re-tighten connection using incremental alternating tightening procedure
• Re-bend or re-route hose/tube lines to eliminate misalignment
• Properly identify all components—most proprietary flanges use standard Code 61/62 bolt patterns and threads but are not usually interchangeable
Port has severe scratches or nicks in seal area
Clamp halves are bent
Bolts are bent
• Mishandling or abuse
• Over-pressurization or overtorque
• Bolts are too weak or overtorqued
• Resurface the port to remove scratches and nicks
• Replace clamp halves and tighten to proper torque
• Replace bolts with grade 5 or better; retighten to proper torque
Assembly / Installation Parker Hannifin Corporation Tube Fittings Division Columbus, Ohio http://www.parker.com/tfd S11 S Catalog 4300 PDF Section Updated October 2017 TABLE OF CONTENTS
Dimensions and pressures for reference only, subject to change.
Port End Assembly
Tube End Assembly
The assembly of the tube end consists of the following two steps:
1. Tube end preparation (cutting, deburring and cleaning)
2. Assembly and installation
Tube End Preparation
Tube end preparation is a very critical step to assure the integrity of a tube assembly. Failure to properly perform this function can result in leakage. The three steps in proper tube end preparation are: cutting, deburring and cleaning.

Cutting
Cut tube reasonably square (within +/- 1°) using a circular toothed cut-off saw (see Fig. S11), or a hacksaw with a fine tooth blade guided by a Tru-Cut Saw Guide (shown in Fig. S12) or other mitre-type saw guide.

Tube End Assembly
A tube cutter may be used with soft tube such as copper and aluminum. It is not recommended for steel and stainless steel tube because it creates a large burr on the I.D., which is difficult to remove and creates flow restriction. Furthermore, if the tube needs to be flared or flanged, the build up on the ID can compromise the sealing surface. For a steel or stainless steel tube application, Fig. S13 illustrates a proper cut and an improper cut (the improper cut was performed by a tube cutter).


Improper Cut
A square cut is essential to assure a leak-free connection. The following illustrations depict what will result from an uneven cut.
Assembly / Installation Parker Hannifin Corporation Tube Fittings Division Columbus, Ohio http://www.parker.com/tfd S12 Catalog 4300 PDF Section Updated October 2017 TABLE OF CONTENTS
Fig. S11 – Cut-off Saw on Parker’s TP432 or TP1025 Tube Preparation Center
Fig. S12– Parker’s Tru-Kut Sawing Vise used with hacksaw
Proper Cut
Fig. S13 – Samples of improper and proper cuts on steel tube
contact area
nut interference
Connection
bite may result from out-of-square tube cut
Connection
nut
contact area
Formed ORFS Connection
large of a gap impedes braze flow
Fig. S14– Results of Uneven Tube Cuts
Inadequate
Possible
Flare
Uneven
Flareless Bite Type
Possible
interference Inadequate
Mechanical
Too
Brazed ORFS Connection
Deburring
Lightly deburr the I.D. and O.D. of the tube end to remove burrs and sharp edges. Use the In-Ex deburring tool or power deburring tool (shown on page R22), or emery paper if using tube cutter (for soft tube) or hacksaw. Use front mounted deburring tools if using TP432 or TP1025 tube preparation center found on page R55.
Note: Point tube end downward during deburring to keep chips from entering the tube.
Cleaning
Remove metal chips from I.D. with a brush or compressed air. Wipe the I.D. and the O.D. of the deburred tube end with a clean rag. Debris present in the tube end can result in system contamination or can get embedded into the flange or flare, causing imperfections that are potential leak paths.
Seal-Lok O-Ring Face Seal Fittings
The proper assembly of the Seal-Lok fitting requires several steps, each important in guaranteeing a leak-free connection and a long service life:
1. Cutting, deburring and cleaning the tube
2. Sleeve Attachment
3. Inspection of sleeve attachment
4. Final installation
The first step of cutting, deburring and cleaning has been covered in a previous section (see page S12).
For recommended minimum and maximum tube wall thickness for Seal-Lok fittings, please refer to Table U3 and U4 on page U3.
Stainless seel lubricant is not necessary for assembly unless parts are washed or heated above 150°. The light wax coating will evaporate at that point.
Sleeve Attachment
Attaching the sleeve to the tube end is the next critical assembly step. This can be accomplished by two methods mechanically: (flanging) or brazing.
Flanging
The flanging method requires the use of an appropriate forming machine to create the flange or flat face on the tube end. Since the flat face of the flanged tube seals against the O-ring within the fitting groove, it is important that this surface be relatively smooth. Proper tube end preparation (cutting, deburring and cleaning) will help accomplish this goal
The Parker Parflange® machines utilize an orbital cold forming process to produce a flat, smooth, rigidly supported 90° sealing surface on the tube end.
Parker offers a bench mount model known as the Parflange 1025, shown in Fig. S17, as well as a more versatile, fully automated high speed models. For additional information on the Parflange machines and tooling, refer to section R of this catalog. For additional information on the fully automated models, please contact Parker Tube Fittings Division.


Assembly / Installation Parker Hannifin Corporation Tube Fittings Division Columbus, Ohio http://www.parker.com/tfd S13 S Catalog 4300 PDF Section Updated October 2017 TABLE OF CONTENTS
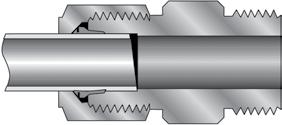
Fig. S15 – Seal-Lok Union cutaway with flanged and brazed assemblies
Braze Sleeve
O-ring
Nut
Parflange Sleeve
Fig. S16 – Parker’s exclusive orbital spindle motion produces a perfect flange every time
Fig. S17 – Parflange 1025 machine
Tube End / Seal-Lok Assembly
Flanging Steps:
1. Determine the extra cut-off length required for the Parflange process by referring to Tables S9 and S10. (Each table is only a guide. Variations in tube wall thickness and inconsistency in quality of tube cut-off may affect actual dimensions. User should verify actual extra tube cut-off length with one or two flanges prior to large scale flanging.)
2. Select the proper tooling for the tube size. The tube OD, wall thickness and material must be known for proper selection. Refer to Table R6 on page R24 for flanging capability by Parflange machine and availability of tooling
Seal-Lok Assembly
3. With the sleeve properly positioned within the die set, place the die set into the die holder of the machine.
4. Insert the tube through the die opening until it comes in contact with the tube stop. Do not forget to position the tube nut over the tube in the proper orientation, especially if the other tube end has already been flanged, or the tube has sharp bends.
5. Flange the tube as shown in Figure S17.
Note: For more information on Parflange procedures, machines, etc., Contact Parker Tube Fittings Division.
Assembly / Installation Parker Hannifin Corporation Tube Fittings Division Columbus, Ohio http://www.parker.com/tfd S14 Catalog 4300 PDF Section Updated October 2017 TABLE OF
CONTENTS
Fig. S18 – Extra cut-off length
Table S9 – Extra tube cut-off length guide for inch tube
Table S10 – Extra tube cut-off length guide for metric tube
Tube O.D. (in.) Tube Wall Thickness – Inch .028.035.049.065.083.095.109.120.134.156.188 1/43/1613/647/32 3/85/323/1613/6415/641/4 1/2 9/649/643/1613/649/3219/6419/64 5/8 11/643/1613/641/417/6417/64 3/4 11/643/167/327/321/417/649/32 1 3/163/1613/6415/641/419/64 1 1/4 11/643/1613/6415/641/419/6419/6421/64 1 1/2 13/6415/6415/641/417/6419/6423/643/8 Tube O.D. (in.) Metric Tube Outside Diameter – (mm) 6810121620253038 1.0 3/167/321/85/329/64 5.25.73.14.13.6 1.5 17/6415/6413/647/3211/64 6.75.95.15.44.2 2.0 13/6415/643/167/3215/6417/649/32 5.36.14.95.46.16.67.2 2.5 17/647/3215/641/419/64 6.75.56.16.47.6 3.0 15/6417/649/325/1619/64 5.86.77.27.97.7 3.5 17/6419/6421/64 6.97.58.5 4.0 9/325/1611/3211/32 7.28.08.68.7 5.0 11/32 3/8 8.8 9.4 Dimensions and pressures for reference only, subject to change.
Another consideration prior to flanging is the minimum straight length to the start of a 90° bend. Table S11 provides this information.
Seal-Lok Assembly
Notes:
* L is the minimum straight length to the start of tube bend.
** L1 is the minimum centerline dimension necessary for 90° bent tube to clear the frame of the Parflange machine. In bending of the tubes, use radius blocks which will ensure that L1 dimensions are met or exceeded.
Flange Inspection
The flange should be inspected for proper diameter and sealing surface quality. Table S12 provides the flange diameters for the different sizes. The sleeve can also be used as a quick gauge of the flange diameter. Visually compare the flange diameter to the tapered surface located at the front end of the sleeve (right behind the flange). The large diameter and small diameters at each end of this surface serve as the maximum and minimum flange diameter limits, respectively.
Assembly / Installation Parker Hannifin Corporation Tube Fittings Division Columbus, Ohio http://www.parker.com/tfd S15 S Catalog 4300 PDF Section Updated October 2017 TABLE OF CONTENTS
Table S11 – Minimum straight length to start of bend for 90° flanging
Fig. S19 – Minimum straight length to start of bend for 90° flanging
Table S12 – Flange dimensions
Flange Diameter
Fig. S20 — Flange diameter
Dimensions and pressures for reference only, subject to change. Tube O.D.Tube O.D.L* L1** Inch SizesMetric Sizes (in.)(mm)(in.)(mm) 1/4”61 5/16353 1/879 5/16”81 5/16353 5/3280 3/8”101 5/16403 3/1681 1/2” 121 3/8403 1/482 151 3/8403 5/1684 5/8” 161 1/2413 5/1684 181 5/8423 11/3285 3/4” 201 3/4503 3/886 221 7/8503 7/1687 251 7/8503 1/289 1” 281 7/8503 9/1690 301 7/8503 19/3291 1 1/4” 321 7/8503 5/892 352503 11/1694 1 1/2”382503 3/495 Inch Tube O.D. (in.) Metric Tube O.D. (mm) Flange Diameter (in.) 1/4 6 .478 / .502 3/8 10 .594 / .620 1/2 12 .719 / .745 5/814, 15, 16.875 / .923 3/418, 201.048 / 1.097 122, 251.298 / 1.347 1-1/428, 30, 321.549 / 1.597 1-1/2381.861 / 1.910
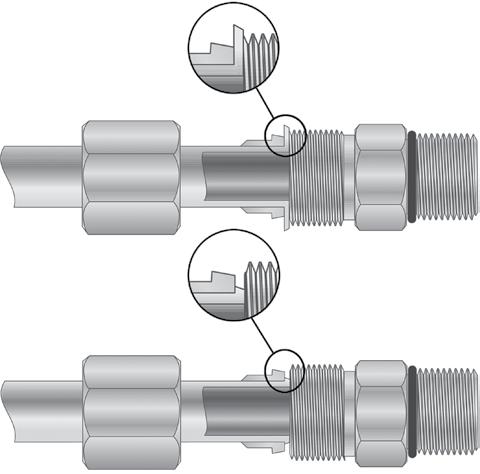
Over-flanging will result in tube nut interference, as well as thinning of the flange tube end. Under-flanging reduces the contact area for sealing against the O-ring in the fitting.
Seal-Lok Assembly
Advantages of Parflange process
There are numerous advantages to using the Parflange process over the braze or weld process:
• The Parflange process is several times faster than the brazing or welding methods. For instance, the 1025 model produce flanges at a rate of 9 to 12 times the speed of comparable induction brazing.
• The Parflange process does not require any special pre- or post-flange cleaning of the tube and sleeve.
• Unlike brazing, the Parflange process does not require any flux, braze alloy, post braze cleaner or rust inhibitor. An environmentally safe lubricant applied to the flanging pin is the only additive associated with the Parflange.
• The Parflange process is inherently safe. It does not require open flame or any form of heating. Additionally, there is no emission of hazardous fumes, as is typical with welding and brazing.
• The Parflange process uses only a fraction of the energy needed for welding or brazing.
• The Parflange process accommodates the use of plated components (i.e., tube and sleeve), thus eliminating the need to electroplate assemblies after fabrication.
• The Parflange process eliminates the potential for leaks at the braze or weld joint.
• The Parflange process produces a burnished sealing surface, typically much smoother than the 125 micro-inch requirement of SAE J1453.
Brazing
Brazing is the other method of attaching the sleeve to the tube end. This process can be accomplished by using a multi-flame torch, as shown in Fig. S22, or an induction brazing unit. (Note: multi-flame torches and induction brazing units are not available through Tube Fittings Division). During the heating process, the pre-formed braze ring or wire-fed filler material is melted between the tube O.D. and the sleeve I.D., creating a strong bond between the two.


Brazing Steps:
1. Determine the tube length allowance using Table S13.
Assembly / Installation Parker Hannifin Corporation Tube Fittings Division Columbus, Ohio http://www.parker.com/tfd S16 Catalog 4300 PDF Section Updated October 2017 TABLE OF CONTENTS
Overflanged assembly
Underflanged assembly
Fig. S21 – Overflanging and Underflanging
Fig. S22 – Multi-flame torch brazing
Fig. S23 – Tube length allowance
Table S13 – Tube length allowance
Nominal Tube O.D. A (in.) InchMetric 1/46 0.04 3/88, 10 0.04 1/212 0.04 5/814, 15, 16 0.06 3/418, 20 0.06 122, 25 0.06 1 1/428, 30, 32 0.06 1 1/235, 38 0.06 Dimensions and pressures for reference only, subject to change.
2. Cleaning the tube end: All oil and oxide build-up must be removed from the tube end for at least the length of the braze joint. Oil may be removed by using an oil-free solvent. Oxide build-up may be removed by pickling or by lightly sanding with an aluminum-free emery paper.
3. Fixturing the parts for brazing: Care should be taken so the braze fixture allows the sleeve to settle and bottom on the tube completely during heating. Since the Seal-Lok fitting sleeve is designed for a slip fit, this should happen easily. Short tubes can be brazed in the vertical position. On longer tubes, the joint may need to be in the horizontal position, requiring a slight nudge to seat the sleeve on the tube.
4. Applying flux: Apply proper flux to tube end (about 1½ sleeve lengths) and sleeve’s face and outside surface. Insert appropriate braze ring in the sleeve and place the sleeve on end of the tube. The flux helps protect the parts from oxidizing and promotes braze flow.
5. Heating the part: Apply heat uniformly to the joint by using a multi-flame torch as shown in Fig. S22 or with an induction braze unit. Proper brazing involves heating the assembly to brazing temperature and flowing the filler metal through the joint. Heat should be applied broadly and uniformly to the tube as well as the Seal-Lok sleeve. Keep in mind that thicker fitting and tubing sections take longer to heat. The entire assembly should heat to brazing temperature at about the same time. The braze alloy will always flow towards the area of higher temperature. The pre-formed braze ring has been placed inside the joint area—the last area to reach melting temperature. Therefore, when you see the braze material flow to the outside of the joint, you know the joint is complete. If the sleeve does not settle, a slight pressure will cause the sleeve to settle, completing the braze joint.
6. Cleaning the brazed joint: After stopping heat application, allow about 10 seconds for the braze alloy to solidify. Then, immerse the joint in hot water (approx. 140°F.). To make cleaning easier, add braze cleaner to the hot water. This sudden cooling cracks the braze flux residue, making it easier to remove. Any remaining residue can be removed by careful wire brushing, making sure not to scratch the sealing surface of the sleeve.
7. Corrosion protection after brazing: This is an extremely important step following brazing and even more so following the use of a braze cleaner. Braze cleaners available from Parker are used to facilitate the removal of residual flux after brazing, however are generally corrosive. The residue left on the surface by the cleaner, especially on the I.D. of the tube, can cause rusting in carbon steel tubes rather quickly, if it is not neutralized. Therefore, it is important to neutralize the cleaner residue after cleaning with a solution such as Bernite 1362 (mix 4 ounces of Bernite 136 with one gallon of water). If the brazed parts are not to be used soon after brazing, a coating of rust inhibitors such as WD-403 or SP3504 is recommended for the braze and heat affected area.
2 ) Products of Bernite Products, Inc. 84 New York, Westbury, NY 11500 (516) 338-4646.
3 ) A product of WD-40 Company, San Diego, CA 92220.
4 ) A product of CRC Chemicals, USA, Warminister, PA 18974 (215) 674-4300
Inspection of Brazing
Inspect the braze for a fillet all the way around the tube at the far end (small diameter) of the sleeve.
Caution: If there are gaps in the fillet, the joint may not be sound. In this case, rebrazing is recommended. Remove the sleeve and rebraze a new one in its place.
Fillet all the way around the tube
No braze alloy overrun on sealing surface
Inspect the sealing surface. There should be no braze alloy overrun or build-up on this surface. If there is build-up, remove it with emery paper, being careful not to scratch the seal surface. If this is not possible, remove the old sleeve and rebraze a new one in its place.
Final Installation
The following steps are required for final installation of the Seal-Lok fitting:
1. Ensure that the seal is properly installed in the groove of the face seal. Parker provides Seal-Lok fittings with pre-installed trap seals on the grove of the face seal. However, if the seal is being replaced, standard round O-Ring face seal O-rings can be found on page N4, in section N. Since Seal-Lok is machined with the Captive O-ring Groove (CORG), it is recommended that a CORG assembly tool be utilized, as shown in Fig. S25. To properly use the assembly tool, follow these steps
• Position the O-ring inside the CORG assembly tool against the pusher.
• Position the tool over the Seal-Lok tube end until the end is bottomed in the tool.

• Push the plunger of the tool until the O-ring is inserted and seated into the groove.

Assembly / Installation Parker Hannifin Corporation Tube Fittings Division Columbus, Ohio http://www.parker.com/tfd S17 S Catalog 4300 PDF Section Updated October 2017 TABLE OF CONTENTS
Fig. S25 – O-Ring installation using the CORG assembly tool
Fig. S24 – Brazed fitting
Seal-Lok Assembly
2. Place the tube assembly against the fitting body so that the flat face of the flange tube (or braze sleeve) comes in full contact with the O-ring. Thread the nut onto the fitting body by hand and tighten it to the recommended torque represented in Table S14. If torque wrenches are not available, an alternate method of assembly is the Flats From Wrench Resistance (F.F.W.R.) method. Wrench tighten the nut onto the fitting body until light wrench resistance is reached. Tighten further to the appropriate F.F.W.R. value.
Note: A second wrench may be required to prevent the fitting from moving during assembly.
Seal-Lok Assembly
Caution: The torque method of assembly is the preferred method of assembly for Seal-Lok fittings. It reduces the risk of human error during assembly that is more prevalent in the Flats From Wrench Resistance (F.F.W.R.) method. To ensure the most accurate assembly of the Seal-Lok fitting, it is strongly recommended that the torque method be utilized.
Assembly / Installation Parker Hannifin Corporation Tube Fittings Division Columbus, Ohio http://www.parker.com/tfd S18 Catalog 4300 PDF Section Updated October 2017 TABLE OF CONTENTS
Table S14 – Seal-Lok and UPTC assembly torque and F.F.W.R. For brass, aluminum (and other soft metals) decrease torque value by 35%, however F.F.W.R. is the same.
SAE Dash Size Tube Side Thread Size (UN/UNF) Tube Side Assembly Torque (+10% -0%) Flats from Wrench Resistance (F.F.W.R.) (in.)(mm) in.-lb.ft.-lb.N-m Tube Nuts Swivel & Hose Ends 1/46-49/16-1822018251/4 to 1/2 1/2 to 3/4 3/88, 10-611/16-1636030401/4 to 1/2 1/2 to 3/4 1/212-813/16-1648040551/4 to 1/2 1/2 to 3/4 5/814, 15, 16-101-14—60801/4 to 1/2 1/2 to 3/4 3/418, 20-121 3/16-12—851151/4 to 1/2 1/3 to 1/2 122, 25-161 7/16-12—1101501/4 to 1/2 1/3 to 1/2 1 1/428, 30, 32-201 11/16-12—1502051/4 to 1/2 1/3 to 1/2 1 1/235, 38-242-12—2303151/4 to 1/2 1/3 to 1/2 250-322 1/2-12—3755101/4 to 1/2 1/3 to 1/2
O.D.
Dimensions and pressures for reference only, subject to change.
Seal-Lok Assembly
Seal-Lok Troubleshooting Guide
O-Ring Face Seal
CONDITION
Immediate leakage when system is pressurized
Under-flanged assembly
PROBABLE CAUSE(S)
• Improper tightening of joint
RECOMMENDATION
• Check for O-ring damage and re-tighten connection to the recommended torque value
Over-flanged assembly
Flange out-of-round
• Undersized tube diameter resulting in tube slippage during flanging
• Die gripping surface is worn or dirty
• Sleeve is positioned incorrectly in die
• Tubing was not cut properly
• Tube was not properly supported during flanging
• Tubing is eccentric
• Verify that the O.D. is correct; if undersized, replace tube.
• Inspect die gripping surface; if clogged or excessively worn, clean or replace.
• Check for proper positioning of sleeve in die; if over-flanged, replace tubing
• Cut tubing within 90° ±1°
• Support tubing so that tube end is perpendicular to tube stop during flanging
• Replace with quality tubing
• Replace out-of-round flanges
Cracked flange
Scored, pitted flange
• Tubing too hard
• Improper deburring and cleaning of tube prior to flanging
• Flange pin not cleaned and lubricated properly
• Replace tubing using recommended quality tube
• Replace flange using proper deburring and cleaning recommendations
• Keep flanging pin clean and working surfaces well lubricated.
Leakage at braze joint
• Poor braze joint/improper joint clearance
• Mixing of sleeve and tube material
• Improper/inadequate flux, braze alloy overrun, or buildup on face
• Improper/inadequate braze temperature
• Flux and reheat the joint, remove and replace with new sleeve
• Always use steel sleeves with steel tubing and stainless sleeves with stainless tubing
• Apply flux liberally to sleeve and tube end prior to brazing. Use recommended flux, braze alloy and brazing temperature.
Leakage at face-seal end
• Misalignment or improper fit
• Damaged, pinched, improper, or missing O-ring
• Extruded O-ring
• Damaged fitting
• Braze overflow on sealing surface
• Align tube end and connecting fitting properly before tightening tube nut, holding the flat face of the mating fitting against O-ring while tightening
• Replace O-ring, properly installing it in the face seal groove
• Replace O-ring and check for proper alignment and pressure surges exceeding rated pressure of fitting; tighten the nut to recommended torque or replace fitting if threads or sealing surface is grossly damaged.
• Remove and replace sleeve which has braze overflow on its sealing surface.
Assembly / Installation Parker Hannifin Corporation Tube Fittings Division Columbus, Ohio http://www.parker.com/tfd S19 S Catalog 4300 PDF Section Updated October 2017 TABLE OF CONTENTS
Table S15 – Seal-Lok Troubleshooting guide
Dimensions and pressures for reference only, subject to change.
Triple-Lok Assembly
Triple-Lok 37° Flare Fittings
For leak-free performance, the Triple-Lok fitting requires the following steps:
1. Cutting, deburring and cleaning of the tube


2. Flaring
3. Flare inspection
4. Installation
Caution: Use only seamless or welded and drawn tube that is fully annealed for flaring and bending. (See page T14 for tube/fitting material compatibility information.)
Step 1 has been covered in a previous section (see page S12).
For the recommended minimum and maximum tube wall thickness for Triple-Lok fittings, please refer to Table U3 on page U3.
Flaring
Several flaring methods, ranging from simple hand flaring to hydraulic/electric power flaring, are available. Various tools for flaring are shown on pages R27 through R34. Power flaring is quicker and produces more accurate and consistent flares compared to hand flaring. Therefore, it is a preferred method of flaring. Hand flaring should be limited to places where power flaring tools are not readily available. The Parflange machines shown on page R23 also flare tube with an orbital flaring process and provide the best flare for stainless steel tube.
Prior to flaring, determine the tube length allowance using Table S16. This tube length allowance should be added to the cut tube length to allow for the “loss” of tube caused by flaring.
Flare Inspection
Inspect flare for dimensions and surface quality. Table S17 shows the proper flare dimensions. The sleeve can also be used for a quick check of the flare dimensions as shown in Fig. S29.
Stainless seel lubricant is not necessary for assembly unless parts are washed or heated above 150°. The light wax coating will evaporate at that point.
Flare tube end using one of the flaring tools and following its operating instructions. Fig. S26 shows flaring with Hydra-Tool.
Note: Be sure to insert a nut and a sleeve in proper sequence and orientation before flaring either end of a bent tube, or second end of a straight tube (see Fig. S27).
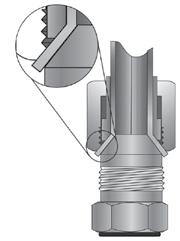
Underflaring (see Fig. S30) reduces contact area causing excessive nose collapse and leakage; or, in extreme cases, tube pull out under pressure.
Overflaring (see Fig. S30) causes tube nut thread interference, either preventing assembly altogether, or giving a false sense of joint tightness resulting in leakage.
Assembly / Installation Parker Hannifin Corporation Tube Fittings Division Columbus, Ohio http://www.parker.com/tfd S20 Catalog 4300 PDF Section Updated October 2017 TABLE OF CONTENTS
Fig. S28 – Nuts and sleeves assembled before flaring
Fig. S27 – Flaring with HydraTool
Fig. S29 – Comparing flare O.D. with sleeve seat and O.D.
Table S16 — Tube length allowance
Fig. S26 — Tube length allowance
Nominal Tube O.D. A InchMetric 1/8— 0.07 3/16— 0.08 1/46 0.09 5/168 0.08 3/810 0.08 1/212 0.12 5/814, 15, 16 0.13 3/418, 20 0.15 7/822 0.15 125 0.15 1 1/430, 32 0.20 1 1/238 0.18 242 0.28
Inch Tube O.D. (in.) Metric Tube O.D. (mm) 37° Flare Diameter ØA (in.) 1/46.340/.360 5/168.400/.430 3/810.460/.490 1/212.630/.660 5/815 & 16.760/.790 3/418 & 20.920/.950 1251.170/1.200 1 1/430 & 321.480/1.510 1 1/2 381.700/1.730
Table S17 — 37° Flare Dimensions
The flare must be reasonably square and concentric with the tube O.D.; and its surface must be smooth, free of rust, scratches, splits, weld beads, draw marks, embedded chips, burrs or dirt. If the flare does not meet the above requirements, cut it off, determine the probable cause from the troubleshooting guide shown in Table S20, take corrective action and re-flare.
Installation
Improper flaring or installation causes over half of the leakage with flared fittings. Thus, proper installation is critical for a trouble free operation.
Triple-Lok Assembly
joint tightness or clamping load. Therefore, it is recommended to use this method wherever possible, and especially where the plating combination of components is not known, and during maintenance and repair where the components may be oily. Use Table S18 as a guide for proper tightening method.
Condition Recommended Tightening Method
1. Plating of all comp- Either method is acceptable. onents is the same. Use Table S19.
2. Plating is mixed. Use FFWR method.
3. Plating of nut and Use FFWR method. sleeve or hose end is unknown.
4. Parts are oily. Use FFWR method.
5. Stainless or brass Use FFWR method. components.
Table S18 – Joint tightening method guide
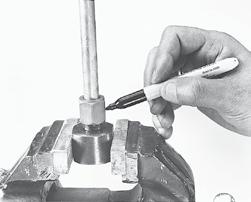
Parker also recommends that wherever possible, the step of marking the nut position relative to the body should be done. This step serves as a quick quality assurance check for joint tightening. To do this, at the initial wrench resistance position, make a longitudinal mark on one of the flats of the nut and continue it on to the body hex with a permanent type ink marker as shown in Fig. S32 Then, at the properly tightened position, mark the body hex opposite the previous mark on the nut hex.
Align the tube on the flare (nose) of the fitting body and tighten the nut using one of two methods described below.

1. Flats from Wrench Resistance (FFWR) or “Flats” method
2. Torque method
Note: Do not force an improperly bent tube into alignment (Fig. S31) or draw-in too short a tube using the nut. It puts undesirable strain on the joint leading, eventually, to leakage.
Flats Method
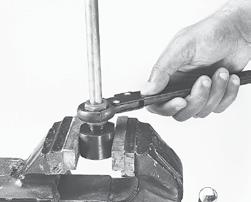
Tighten the nut lightly with a wrench (approximately 30 in.lb.), clamping the tube flare between the fitting nose and the sleeve. This is considered the Wrench Resistance (WR) position. Starting from this position, tighten the nut further by the number of flats from Table S18. A flat is referred to as one side of the hexagonal tube nut and equates to 1/6 of a turn.

This Flats method is more forgiving of the two. It circumvents the effects of differences in plating, lubrication, surface finishes, etc., that greatly influence the torque required to achieve proper
These marks serve two important functions:
1. The displaced marks serve as a quick quality assurance check that the joint has been tightened.
2. The second mark on the body serves as a proper tightening position after a joint has been loosened.
The flats method is slower than the torque method, but it has the two distinct advantages described earlier, namely, circumvention of plating differences and a quick visual check for proper joint tightening.
Torque Method
With proper tube flare alignment with the nose of the fitting, tighten the nut to appropriate torque value in Table S19. This method is fast and accurate when preset torque wrenches are used. Consistent component selection is recommended so that the effects of dissimilar plating is not an adverse factor in joint integrity. This makes it desirable for high production assembly lines. However, a joint assembled using the torque method can only be checked for proper tightening by torquing it again.
Note: This method should not be used if the type of plating on the fitting and mating parts (sleeve + nut or hose swivel) is not known. The torque method should not be used for lubricated or oily parts as improper clamping forces may result. Over-tightening and fitting damage may occur as a result.


Assembly / Installation Parker Hannifin Corporation Tube Fittings Division Columbus, Ohio http://www.parker.com/tfd S21 S Catalog 4300 PDF Section Updated October 2017 TABLE OF CONTENTS
Underflared assembly
Overflared assembly
Fig. S30 – Underflaring and overflaring
Fig. S31 – Improper bend and short tube
Fig. S32 – Make reference mark on nut and tube body
Notes:
Triple-Lok Assembly
1. Assembly Torque: Torque values are for unlubricated carbon steel components and properly lubricated stainless steel components. All stainless steel Triple-Lok tube nuts have an anti-seize lubricant to prevent galling during assembly.
2. FFWR: The Flats From Wrench Resistance or “Flats” method is recommended for steel, stainless steel and brass components.
3. Torque and FFWR: Torques and FFWR shown in the chart are for use with the tube materials, wall thickness, etc. recommended by Parker Hannifin Tube Fittings Division for use with Parker Triple-Lok fittings.
For brass and aluminum fittings, use approximately 65% of the torque values shown, unlubricated, however FFWR is same for all materials.
Triple-Lok Troubleshooting Guide CONDITION
37° Flare
Tube nut binds to tube flare
Tube nut cannot engage the fitting body
Flare is out-of-round (lopsided)
Nicks, scratches, pock marks on tube flare of fitting
PROBABLE CAUSE(S)
• Flare too large or tube wall too heavy
RECOMMENDATION
• Flare new tube end using proper flare diameters
Tube crack on flare
Tube nut bottoms out before seats are mated properly
Immediate leakage from tube nut
Tube nut continues to back off or loosen
Damaged fitting and/or nose collapse, flow reduction
• Tube cut at an angle
• Contaminants on tube ID or flaring cone/pin prior to flaring
• Worn/damaged flaring cone/pin
• Poor-quality tube
• Poor-quality welded tube; work-hardened tube; tube not annealed (too hard)
• Unintentional use of 45º flare tube nut, or tube sleeve was omitted
• Connection may not be tightened properly (if at all)
• Damaged Fitting
• Excessive vibration
• Improper assembly torque
• Frequent assembly and disassembly or over-tightening
• Re-cut tube, reasonably square, to 90º ± 1º and flare new tube end
• Flare new tube end using proper tube preparation techniques
• Assure that flare cone is clean
• Replace poor-quality tube
• Flare new tube end using appropriate tube (e.g.,fully annealed) and tube cutting methods
• Use appropriate 37° flare components (body, nut and sleeve)
• Check joint for appropriate FFWR or torque; retighten as appropriate
• Replace damaged fitting
• Re-route or clamp properly
• Assemble to appropriate torque
• Fitting should be replaced and tightened properly; avoid frequent assembly/disassembly
Assembly / Installation Parker Hannifin Corporation Tube Fittings Division Columbus, Ohio http://www.parker.com/tfd S22 Catalog 4300 PDF Section Updated October 2017 TABLE OF
CONTENTS
Table S20 — Triple-Lok Troubleshooting guide
Table S19 – Triple-Lok assembly torques and FFWR
Tube O.D. (in.) Thread Size Assembly Torque* (+10% -0) Tube Connection FFWR Swivel Nut or Hose Connection FFWR in. lb.ft. lb. 1/85/16-24 353— 3/163/8-24655— 1/47/16-20155132 1/2 2 5/161/2-20165142 2 3/89/16-18265222 1 1/2 1/23/4-16505422 1 1/2 5/87/8-14720601 1/2 1 1/2 3/41 1/16-121000841 1/2 1 1/4 7/81 3/16-1212001001 1/2 1 1/4 11 5/16-1214151181 1/2 1 1 1/41 5/8-1220151681 1 1 1/21 7/8-1223401951 1 22 1/2-1231802651 1 2 1/23-12——1 1 Dimensions and pressures for reference only, subject to change.
Ferulok Assembly
Ferulok Flareless Bite Type Fittings

Ferulok fitting assembly consists of the following steps:
1) Cutting, deburring and cleaning of the tube
2) Ferrule pre-set
3) Pre-set inspection
4) Final installation
Step 1 (cutting, deburring and cleaning of the tube) has been previously covered (see page S12).
For the recommended minimum and maximum tube wall thickness for Ferulok fittings, please refer to Table U3 on page U3.
Prior to pre-setting, determine the tube length allowance “A” using Table S21.
Step 1 – Lubricate thread and cone of Ferulset Tool (or fitting body).
Ferrule Pre-set
Prior to final installation, the Ferulok fitting requires a pre-setting operation that creates a bite by the ferrule into the outer surface of the tubing. Pre-setting can be accomplished by two different methods: hydraulically using a Hyferset Tool or a Hydra-Tool, or manually using a hardened Ferulset tool or the fitting body.


When using the Hyferset or Hydra-Tool method, the pressure build-up “bites” the ferrule into the tubing. When using the Ferulset or fitting body, thread the connection to finger tight and wrench an additional 1-3/4 turns. This will “bite” the ferrule into the tube.

Pre-setting using Ferulset Tool or Fitting Body
Ferulset pre-setting tools made from hardened steel are available for sizes 2 through 32. (See page R39.) They are recommended over the fitting body because they can be used repeatedly to perform the pre-set operation. The fitting body can be used only once for pre-setting and should be used during final installation with the pre-set tube line. The following steps are required for proper pre-set of the ferrule using the Ferulset tool or fitting body.
Step 7 – Hold tube steady against internal shoulder of Ferulset Tool or fitting body and tighten nut an additional 1-3/4 turns.

Step 2 – Slip nut and ferrule over deburred tube end. Be sure the long, straight end of the ferrule points toward tube end.
Step
nut and check for proper pre-set. Use the following inspection criteria.
Assembly / Installation Parker Hannifin Corporation Tube Fittings Division Columbus, Ohio http://www.parker.com/tfd S23 S Catalog 4300 PDF Section Updated October 2017 TABLE OF CONTENTS
Table S21 — Tube length allowance
Fig. S33 — Tube length allowance
Step 3 – Lubricate ferrule with system fluid or a compatible lubricant.
Step 4 – Bottom tube end firmly on internal shoulder of Ferulset Tool (or fitting body).
Step 5 – Manually screw nut onto Ferulset Tool or fitting body until finger tight.
Step 6 – Make reference mark on nut and tube.
8 – Loosen
Dimensions
Nominal Tube O.D. A 1/8 0.19 3/16 0.23 1/4 0.23 5/16 0.25 3/8 0.25 1/2 0.31 5/8 0.35 3/4 0.35 7/8 0.35 1 0.42 1 1/4 0.42 1 1/2 0.49 2 0.49
and pressures for reference only, subject to change.
Pre-setting with Hyferset Tool or Hydra-Tool
Pre-setting with hydraulic equipment (Hyferset or Hydra-Tool) is preferred for fittings larger than size 8 or large production quantities in any sizes.
For full instruction on the use of the Hyferset Tool (see Fig. S34), please refer to Bulletin 4393-B1, which is included with each shipment of the Hyferset Kit #611049C. For full instructions on the use of the Hydra-Tool, please refer to Bulletin 4392-B10.
Ferulok Assembly
4. There is a slight indentation around the end of the tube (E) that indicates the tube was bottomed in the tool or fitting during pre-setting.
5. Avoid rotating the ferrule. Steel ferrules should not be capable of moving back and forth along the tube beyond the bite area (a stainless steel ferrule will move more than steel because of it’s spring back characteristics).
Caution: Wrench torque should never be used as the gauge for reliable Ferulok pre-set and/or assembly. The reliability of the pre-set and assembly of bite type fittings is dependent on the ferrule traveling a prescribed distance into the tapered fitting throat in order to bite into the tube and effect a strong grip and seal.
Installation
Use one of the following installation procedures, depending on the tooling used earlier to pre-set the ferrule to the tubing.
Pre-Set Inspection
All Ferulok fitting presets must be disassembled and inspected for proper ferrule pre-set before final installation. The following detailed inspection procedures must be followed regardless of the method used to pre-set the ferrule to the tube. (Refer to Fig. S35 for the five inspection points discussed below).
1. A ridge of metal (A) has been raised above the tube surface

1. Fitting body, Hyferset, Hydra-Tool, or Ferulset used to pre-set ferrule – If the fitting body was used for presetting the ferrule, complete the final installation with the same fitting body. If one of the tools was used, select the compatible fitting body and lubricate* the threads. Tighten the nut until a sudden and noticeable wrench resistance is achieved. Then wrench an additional 1/6 to 1/4 turn to complete the final assembly.

2. Swivel nut assembly procedure (R6BU, C6BU and S6BU) – For final assembly of swivel nut, a 3/4 turn from finger tight is required for all sizes.
to a height of at least 50% of the thickness of the ferrule’s leading edge, completely around the tube.
2. While the leading edge of the ferrule may be coined flat (B) there is a slight bow to the balance of the pilot section (C).
3. The tail or back end of the ferrule is snug against the tube (D).
Assembly / Installation Parker Hannifin Corporation Tube Fittings Division Columbus, Ohio http://www.parker.com/tfd S24 Catalog 4300 PDF Section Updated October 2017 TABLE OF
CONTENTS
Fig. S34 – Hyferset tool
C B E A D
Fig. S35 – Ferulok preset inspection points
*No additional lubrication is required with stainless steel fittings as the nuts are pre-lubricated.
Ferulok Troubleshooting Guide
Problems with bite type hydraulic fittings are most often traced to faulty Pre-Set/Assembly procedure.
Problem / Probable Cause Remedy
Tube not Check for the indentation on the tube bottomed end or compare the length from the end of the tube to the front end of the ferrule of a known good assembly to that of the assembly in question. This assembly should be scrapped. (Fig. S36)
Shallow bite Inspect for turned up ridge of material. A failure to achieve this ridge can be traced either to the nut not being tightened enough or the tube not being bottomed against the stop which allowed the tube to travel forward with the ferrule. In some instances this assembly may be re-worked. (Fig. S37)
Over-set ferrule Too much pressure or more than 1 3/4 turns from finger tight were used to pre-set ferrule, or the nut was severely over-tightened in final assembly. This assembly should be scrapped.
(Fig. S38)
Ferrule cocked The ferrule may become cocked on on tube the tube when the tube end is not properly lined up with the body. Generally, this condition is caused by faulty tube bending. All bent tube assemblies should drop into the fitting body prior to make up. This assembly should be scrapped. (Fig. S39)
No bite If all of the prior checks have been made and the ferrule still shows no sign of biting the tube, it may be that the tube is too hard. This assembly should be scrapped. (Fig. S40)
Caution: Pre-set tools such as the Ferulset and Hyferset are preferred for pre-setting ferrules prior to final assembly. However, when an actual fitting body is used to pre-set the ferrule, that body should be connected only to the specific ferrule it was used to pre-set.
Assembly / Installation Parker Hannifin Corporation Tube Fittings Division Columbus, Ohio http://www.parker.com/tfd S25 S Catalog 4300 PDF Section Updated October 2017 TABLE OF CONTENTS
Fig. S36 – Tube not bottomed
Fig. S37 – Shallow bite
Fig. S38 – Over-set ferrule
Fig. S39 – Ferrule cocked on tube
Fig. S40 – No bite
Table S22 – Ferulok fitting troubleshooting guide
Dimensions and pressures for reference only, subject to change.
Ferulok Assembly
24° Flareless Bite
CONDITION
Immediate leakage when system is pressurized
Additional/excessive stress apparent on bite
Flexural stresses allow tube to“rock” back and forth
Poor ferrule/bite ring pre-set and/or tube collapse
PROBABLE CAUSE(S)
• Improper ferrule/bite ring orientation
RECOMMENDATION
• Reset ferrule to ensure that the leading edge of ferrule/bite ring is pointing towards end of tube and seat of the mating fitting
• Non-square tube cut; tube not being properly supported in seat of adapter
• Tube not fully supported in fitting’s body seat
• Tube may be too hard; or preset pressure or torque might be too high
• Tube is too thin
• Re-cut tube to 90° ± 1°
• Reset tube end. This time ensure that the tube is bottomed in the presetting tool or fitting body
• Use fully annealed tube max hardness RB 72 for steel, RB 90 for stainless steel
• Consult manufacturer's minimum tube wall thickness requirements; tube supports must be used with certain thinwalled steel or stainless-steel tube. Review preset requirements
Tube not bottoming out in fitting body
• Improper preset or wrong tool used for presetting
• In the presetting process, it is important to exert axial force on the tube to keep it fully bottomed in the tool. Check for indentation on end of the tube
Shallow bite of ferrule or cut ring into tube
• Worn preset tool
• Too low preset pressure or torque
• Tube too hard
• Tube not bottomed against stop initially in preset
• Replace preset tool
• Observe manufacturer’s recommendation for proper preset
• Ensure that tube is of correct hardness or material
• Hold tube against stop in preset
Tube pulls out of fitting in application and ferrule skives end of tube
• Improper preset
• Tube too hard
• Excessive internal pressure
• Excessive axial load on tube
• Inadequate make up
• Preset must be inspected for evidence of proper preset, such as raised ridge of metal in front of leading edge
• Ensure that tube is of proper hardness and material
• Ensure that internal pressure is within rating of fitting (tube might be of a higher rating)
• Avoid additional axial load than that caused by internal pressure
• Follow proper presetting and assembly procedures
Fitting nut is tight but leakage still occurs
• Overset ferrule
• Cracked tube
• Damaged components
• Excessive force used in presetting of ferrule can cause it not to spring back and effect a seal. Follow manufacturer’s recommendation for preset
• Check tube for circumferential crack due to fatigue
• Check components for damage such as nicks, scratches and cracks
Assembly / Installation Parker Hannifin Corporation Tube Fittings Division Columbus, Ohio http://www.parker.com/tfd S26 Catalog 4300 PDF Section Updated October 2017 TABLE OF CONTENTS Ferulok Assembly
Intru-Lok Flareless Bite Type Fittings
The steps to properly assemble the Intru-Lok fitting are:
1. Cutting, deburring and cleaning of the tube
2. Installation
Cutting, Deburring and Cleaning
Cut soft metal tube with tube cutter, circular toothed cut-off saw, or hacksaw with a fine tooth saw blade. A square cut can be attained with a hacksaw using Parker’s Tru-Kut Sawing Vise. With a Parker 226 In-Ex deburring tool (see page R22), lightly deburr the inside and outside corner of the tube end.
Plastic tube can be cut with a plastic tube cutter, Parker part number PTC-001 (available from the Parflex Division).
After cutting and deburring, remove loose burrs or dirt with a brush or compressed air.
Installation
Intru-Lok fittings are designed to permit tube entry and fitting make-up without removal of the nut and ferrule from the fitting body. The following steps are required for proper installation.
1. Insert the tube through the nut and ferrule until it bottoms on the seat within the fitting body
2. Tighten the nut to the finger tight position, then wrench tighten 1 1/4 turns. (For low pressure instrument air service, 1 turn from finger tight is sufficient. This will also allow for the maximum number of remakes.)
Note: When using the BIP knurled nut and TIP insert for plastic tube, tighten the nut an additional 1 turn from the finger tight position.
Remake
The nut should be wrenched down until a sudden resistance to wrench force is evident. From this point wrench the nut 1/6 turn more to cause the ferrule to spring into its seal against the tube and fitting body.
Intru-Lok Troubleshooting Guide
Problems associated with bite type fittings are most often traced to faulty Pre-Set/Assembly procedure.
Problem / Probable Cause Remedy
Tube not bottomed
On soft metal tubing, check for the indentation on the tube end. For plastic tubing or soft metal, compare the length from the end of the tube to the front end of the ferrule of a known good assembly to that of the assembly in question. This assembly should be scrapped.
Shallow bite Inspect for turned up ridge of material at the front of the ferrule. A failure to achieve this ridge can be traced either to the nut not being tightened enough or the tube not being bottomed against the stop which allowed the tube to travel forward with the ferrule. In some instances this assembly may be re-worked.
Over-set ferrule More than 1 1/4 turns from finger tight were used to pre-set ferrule, or the nut was severely over-tightened in final assembly. This assembly should be scrapped.
Ferrule cocked on The ferrule may become cocked on the tube the tube when the tube end is not properly lined up with the body. Generally this condition is caused by faulty tube bending. All bent tube assemblies should fit into the fitting body prior to make up. This assembly should be scrapped.
Assembly / Installation Parker Hannifin Corporation Tube Fittings Division Columbus, Ohio http://www.parker.com/tfd S27 S Catalog 4300 PDF Section Updated October 2017 TABLE OF CONTENTS
Table S23 – Intru-Lok troubleshooting guide
Intru-Lok Assembly
EO Metric Bite Type FIttings
The proper make-up and assembly of EO bite type fittings, as with other fittings, is critical to their proper functioning. Proper assembly consists of the following steps:
1. Cutting, deburring and cleaning of the tube
2. Pre-set of progressive ring
3. Pre-set inspection
4. Installation
Step 1 (cutting, deburring and cleaning of the tube) has been previously covered on pages S12-S13.
Pre-set of Progressive Ring
The EO fitting requires a pre-set operation that creates a bite by the progressive ring into the outer surface of the tube. There are two methods of achieving the pre-set:
• Manually with the fitting body or hardened pre-assembly tool (not recommended for stainless steel tube).
• Hydraulically with the EO-Karrymat, Hydra Tool or Hyferset
Pre-set Using the Fitting Body or Hardened Pre-assembly Tool
Pre-setting with the fitting body is only recommended for steel and copper tubes. For frequent pre-setting, stainless steel tube and hose standpipe fittings, a hardened pre-assembly tool (VOMO) is strongly recommended (see Fig. S41).
2. Slip nut and progressive ring over tube, assuring that they are in the proper orientation.
Steps for pre-set using the fitting body or the hardened pre-assembly tool.
1. Lubricate thread and cone of fitting body or hardened pre-assembly tool, as well as the progressive ring and nut threads.
3. Screw nut onto fitting body or hardened pre-assembly tool until finger-tight or light wrench resistance. Hold tube against the shoulder in the cone of the fitting body or hardened pre-assembly tool.
4. Mark nut and tube in the finger-tight or light wrench-resistant position.

Assembly / Installation Parker Hannifin Corporation Tube Fittings Division Columbus, Ohio http://www.parker.com/tfd S28 Catalog 4300 PDF Section Updated October 2017 TABLE OF CONTENTS
Correct Incorrect
EO Assembly
Fig. S41 – VOMO pre-assembly tool
5. Tighten nut 1½ turns if using the fitting body (1-1/2 turns if using the hardened pre-assembly tool). The tube must not turn with the nut. The stop edge in the progressive ring limits over tightening by sharply increasing the tightening torque.
Pre-set Inspection
To inspect the pre-set, remove the nut and tube from the fitting and check if a visible collar fills the space completely in front of first cutting edge. If not, tighten slightly more. It does not matter if ring can be rotated on tube end.
For full instruction on the use of these hydraulic tools, please refer to the Bulletins indicated below:
• EO-Karrymat – Bulletin 4044-T1/UK/DE/FR/T
• Hyferset - Bulletin 4393-B1
• Hydra-Tool – Bulletin 4392-B10
Installation
To install the pre-set tube assembly to the fitting body, wrenchtighten nut to wrench resistance (light wrenching). From this position, tighten nut another 1/12 turn or 1/2 flat (30°) of the nut. Another wrench must be used to prevent movement of the fitting body.
Pre-set Using EO-Karrymat, Hydra-Tool or Hyferset
When pre-setting EO fittings larger than sizes 18 mm, it is recommended that a hydraulic tool be used. The EO-Karrymat, Hydra-Tool or the Hyferset (shown in Fig. S42) are recommended for low to medium volume production.


Assembly with Support Sleeve (VH)
If the tube wall thickness is small relative to the tube O.D., this may lead to tube collapse. As a rule, the tube collapse (reduction in diameter) should not exceed 0.3 mm for tubes up to 16 mm O.D. and 0.4 mm for tubes from 18 mm O.D. and above.
When assembling thin walled tube, there is insufficient cross sectional rigidity where the progressive ring cuts. This will have a detrimental effect on the sealing efficiency. For this, internal support sleeves (VH) are available which are inserted in the tube to prevent tube collapse and also increase the cross-sectional rigidity.
Assembly / Installation Parker Hannifin Corporation Tube Fittings Division Columbus, Ohio http://www.parker.com/tfd S29 S Catalog 4300 PDF Section Updated October 2017 TABLE OF CONTENTS
Fig. S42 – Hyferset tool
EO Assembly
Fig. S43 – EO Karrymat
The shape of the tube supports allows them to be inserted easily in the tube. One end of the EO support sleeve is enlarged on its external diameter by a knurl. On insertion, this knurl forces itself into the interior wall of the tube and secures the sleeve against shifting or falling out during assembly and without widening the tube end.
Steps for Proper Assembly of Support Sleeve (VH)
Step 1 – Insert support sleeve up to knurl.
Step 2 – Drive knurled end of support into tube.
Support sleeve Cross-section of completed assembly
Steel tubes made of 37.4 or soft metal tubes can be checked in accordance with Figs. S45 and S46, respectively, to see if they require support sleeves; for plastic tubes, (support) sleeves are always necessary (see Page E15 for E type sleeves).
For stainless steel tubes of material 1.4571/1.4541, refer to Fig. S44 to determine the need for a support tube.
For thin-walled steel tube of material St.37.4 and stainless steel tubes of material 1.4571/1.4541.
Step 3 – Ensure that support sleeve is flush with tube end.
Step 4 – Pre-set progressive ring following one of the pre-setting methods covered earlier (page S29). The support sleeve prevents collapse of tube.
Fig. S45 — Recommended Tube Wall Thicknesses, Steel, SS Use of VH necessary
Use of VH is recommended especially in case of frequent loosening and with heavy-duty tubes (vibrations)
Fig. S46 — Recommended Tube Wall Thicknesses, Soft Metal Tubing
Use of VH necessary
Use of VH is recommended especially in case of frequent loosening and with heavy-duty tubes (vibrations)
Assembly / Installation Parker Hannifin Corporation Tube Fittings Division Columbus, Ohio http://www.parker.com/tfd S30 Catalog 4300 PDF Section Updated October 2017 TABLE OF CONTENTS
Fig. S44 — EO fitting completely assembled with support sleeve
EO Assembly
EO Troubleshooting Guide
Problems with bite type hydraulic fittings are most often traced to faulty pre-set/assembly procedure.
Problem Solution
Tube not bottomed Check for a visible mark on the tube end with EO fitting. (Fig. S47)
Shallow bite Inspect for turned up ridge of material (collar). A failure to achieve this ridge can be traced either to the nut not being tightened enough or the tube not being bottomed against the stop which allowed the tube to travel forward with the ferrule. In some instances this assembly may be re-worked. (Fig. S48)
Over-set ferrule Too much pressure or more than recommended turns from finger tight were used to pre-set ferrule, or the nut was severely over-tightened in final assembly. This assembly should be scrapped.
(Fig. S49)
Ferrule cocked The ferrule may become cocked on on tube the tube when the tube end is not properly lined up with the body. Generally, this condition is caused by faulty tube bending. All bent tube assemblies should drop into the fitting body prior to make up. This assembly should be scrapped.
(Fig. S50)
No bite If all of the prior checks have been made and the ferrule still shows no sign of biting the tube, it may be that the tube is too hard. This assembly should be scrapped. (Fig. S51)
Assembly / Installation Parker Hannifin Corporation Tube Fittings Division Columbus, Ohio http://www.parker.com/tfd S31 S Catalog 4300 PDF Section Updated October 2017 TABLE OF CONTENTS
Fig. S51 — No bite
Fig. S47 — Tube not bottomed Fig. S48 — Shallow bite
Fig. S49 — Over-set ferrule Fig. S50 — Ferrule cocked on tube
EO Assembly
Table S24 — EO Fitting troubleshooting guide
EO-2 Metric Bite Type Fittings
The steps for the proper assembly of the EO-2 fittings are similar to those of the EO fitting:
1. Cutting, deburring and cleaning of the tube
2. Pre-set of the retaining ring
3. Inspection of the pre-set
4. Installation
For step 1 (cutting, deburring and cleaning of the tube) please refer to page S12.
Pre-set of the Retaining Ring
The EO-2 functional nut consists of the nut, the sealing ring and the retaining ring. Unlike the EO fitting, the sealing and holding functions are performed by two separate components: the sealing ring and the retaining ring. The retaining ring must be pre-set to create the necessary bite on the tube O.D. The two methods to pre-set the retaining ring are:

• Manually with the fitting body or hardened pre-assembly tool (VOMO)
• Hydraulically with the EO-Karrymat, Hydra Tool or Hyferset
Pre-set Using the Fitting Body or Hardened Pre-Assembly Tool
1. Prepare the fitting or hardened pre-assembly tool by lubricating the threads of the following sizes: Steel Fittings: 20, 22, 25, 28 Lubrication is recommended for ease in assembly
Stainless Steel Fitting: For all sizes, lubrication is recommended for ease in assembly
High quality Niromont (liquid or paste) is recommended for lubrication of the fitting body threads.
It is strongly recommended that a hydraulic tool be used to preset EO-2 fittings in sizes 30S, 35L, 38S and 42L.
2. Insert tube into the EO-2 fitting body or hardened pre-assembled tool and press hard against the stop in the inner cone.


Note: A faulty assembly will result if the tube is not against the tube stop in the fitting body or hardened pre-assembly tool. To achieve the necessary assembling force, an additional wrench leverage may be necessary for tube O.D.’s 20mm and larger.
3. Turn nut until wrench resistance is felt. Tighten nut further
1 to 1-1/2 turns. As a recommended process control, mark the position of the nut relative to the fitting body.
Pre-set Inspection
Loosen the nut and check that the gap between the sealing ring and retaining ring is fully closed. A slight gap (up to 0.2mm) due to spring back is acceptable.
*Refer to Fig. S45 and S46 for required support sleeves.
Pre-set Using EO-Karrymat, Hyferset,
Hydra-Tool and EOMAT III
EO-Karrymat: Recommended for use with EO-2 fittings from 6mm through to 42mm.
Hyferset: Recommended for use with EO-2 fittings from 6mm through to 28mm.
Hydra-Tool: Recommended for use with EO-2 fittings from 6mm through to 42mm.
For instructions on operating one of these machines, refer to the following bulletins:
• EO-Karrymat – Bulletin 4044-T1/UK/DE/FR/IT
• Hyferset – Bulletin 4393-B1
• Hydra-Tool – Bulletin 4392-B10
Assembly / Installation Parker Hannifin Corporation Tube Fittings Division Columbus, Ohio http://www.parker.com/tfd S32 Catalog 4300 PDF Section Updated October 2017 TABLE OF CONTENTS
EO-2 Assembly
Installation
Connect tube and nut to fitting body. Holding the body rigid, tighten nut with a wrench until resistance is felt. Continue turning the nut approximately 1/6 to 1/4 turns (= 1 to 1-1/2 flats) to the same position as it was prior to disassembly.

If the assembled position was marked, reassemble until the marks match. To achieve the necessary assembling force, use an additional wrench leverage for tube O.D.’s 20 mm and larger.
EO-2 Troubleshooting Guide
Problems with bite type hydraulic fittings are most often traced to faulty pre-set/assembly procedure.

Problem/ Probable Cause Remedy
Tube not bottomed The tube end is not in firm contact with the fitting body at assembly. The tubing was not completely inserted into the throat of the fitting body until it bottomed out. Failure to bottom out the tubing against the tube stop of the fitting body during the presetting procedure will allow the tube to travel forward with the ferrule resulting in a shallow bite. This assembly should be scrapped.
Shallow bite
Caution: Improper tightening may reduce the seal reliability, pressure capability and the vibration resistance of the connection.
Re-Assembly with Replacement of Sealing Ring (DOZ)
1. After the nut has been loosened, the sealing ring can be pulled off the tube end. It must be checked for damage and replaced if necessary.

2. Push new sealing ring onto the tube, with metal inner cone facing the retaining ring.
3. Re-install using the installation procedures previously covered in this section.
After presetting, inspect to see that the gap between the bite ring and the sealing ring is closed. A failure to achieve a closed gap can be traced to the nut not being tightened enough. This assembly can be reworked by completing the assembly instructions as indicated in the catalog. Utilization of lubrication and wrench elongation may be necessary for larger sizes.
Damaged Seals Check sealing area for contamination such as chips, zinc particles or other dir t. Also check the inner cone of the fitting body and tubing for damage. Replace DOZ sealing ring if necessary.
Fatigue Crack Ensure proper assembly techniques at Bite are utilized. Utilize lubrication and wrench elongation for larger sizes. Check that the gap between the sealing ring and bite ring are closed.
Fatigue Crack at Check that the application does not Rear Shoulder of have excessive vibration. Utilize Bite Ring rigid clamping, tension piping or hose assemblies if relative movements are evident.
Distorted FM Utilize a split die nut back up plate Functional Nut at for presetting of 35L and 42L
Hydraulic Pre- functional nuts. Assembly
Assembly / Installation Parker Hannifin Corporation Tube Fittings Division Columbus, Ohio http://www.parker.com/tfd S33 S Catalog 4300 PDF Section Updated October 2017 TABLE OF CONTENTS
Step 1
Step 2
Table S25 — EO-2 troubleshooting guide
EO-2 Assembly
24° Flareless Bite
CONDITION
Immediate leakage when system is pressurized
Additional/excessive stress apparent on bite
Flexural stresses allow tube to“rock” back and forth
Poor ferrule/bite ring pre-set and/or tube collapse
PROBABLE CAUSE(S)
• Improper ferrule/bite ring orientation
RECOMMENDATION
• Reset ferrule to ensure that the leading edge of ferrule/bite ring is pointing towards end of tube and seat of the mating fitting
• Non-square tube cut; tube not being properly supported in seat of adapter
• Tube not fully supported in fitting’s body seat
• Tube may be too hard; or preset pressure or torque might be too high
• Tube is too thin
• Re-cut tube to 90° ± 1°
• Reset tube end. This time ensure that the tube is bottomed in the presetting tool or fitting body
• Use fully annealed tube max hardness RB 72 for steel, RB 90 for stainless steel
• Consult manufacturer's minimum tube wall thickness requirements; tube supports must be used with certain thinwalled steel or stainless-steel tube. Review preset requirements
Tube not bottoming out in fitting body
• Improper preset or wrong tool used for presetting
• In the presetting process, it is important to exert axial force on the tube to keep it fully bottomed in the tool. Check for indentation on end of the tube
Shallow bite of ferrule or cut ring into tube
• Worn preset tool
• Too low preset pressure or torque
• Tube too hard
• Tube not bottomed against stop initially in preset
• Replace preset tool
• Observe manufacturer’s recommendation for proper preset
• Ensure that tube is of correct hardness or material
• Hold tube against stop in preset
Tube pulls out of fitting in application and ferrule skives end of tube
• Improper preset
• Tube too hard
• Excessive internal pressure
• Excessive axial load on tube
• Inadequate make up
• Preset must be inspected for evidence of proper preset, such as raised ridge of metal in front of leading edge
• Ensure that tube is of proper hardness and material
• Ensure that internal pressure is within rating of fitting (tube might be of a higher rating)
• Avoid additional axial load than that caused by internal pressure
• Follow proper presetting and assembly procedures
Fitting nut is tight but leakage still occurs
• Overset ferrule
• Cracked tube
• Damaged components
• Excessive force used in presetting of ferrule can cause it not to spring back and effect a seal. Follow manufacturer’s recommendation for preset
• Check tube for circumferential crack due to fatigue
• Check components for damage such as nicks, scratches and cracks
Assembly / Installation Parker Hannifin Corporation Tube Fittings Division Columbus, Ohio http://www.parker.com/tfd S34 Catalog 4300 PDF Section Updated October 2017 TABLE OF CONTENTS EO-2 Assembly
Bulkhead Locknut Assembly
A bulkhead fitting allows one to connect tube or hose through a panel. This panel, often referred to as bulkhead, may be a structural element of the equipment, or an additional plate which is joined to the equipment, to facilitate convenient routing of hose and tube. Bulkhead fittings are also used as a transition point in a hydraulic system, such as connection of tube lines to hose lines or to a quick disconnect coupling.
The following steps are recommended for the proper assembly of the locknut for Triple-Lok, Ferulok and Seal-Lok bulkhead fittings.
1. Drill a pilot hole to dimension W + 0.015” (where W is shown in Tables S26 and S27).
2. Insert the bulkhead end of the fitting (without the locknut assembled) through the bulkhead opening and attach the locknut to the bulkhead end.
3. Finger tighten the locknut and wrench tighten further to the recommended torque shown in Table S28 for Seal-Lok fittings or Table S29 for Triple-Lok and Ferulok fittings.
Bulkhead Locknut Assembly
Seal-Lok Bulkhead Assembly
See page A8 for maximum bulkhead thickness. See page B8 for maximum bulkhead thickness.
Triple-Lok Straight Bulkhead
See page C6 for maximum bulkhead thickness.
Ferulok Straight Bulkhead
Pipe Swivel Assembly (NPSM)
4
9/16-180.561801520
6 WLNL 11/16-160.693002534
8 WLNL 13/16-160.81—5575
10
1-141.00—85115 12
* Recommended clearance hole is W + 0.015”
Table S26 – Torque for Seal-Lok Bulkhead Fittings
Unlike traditional pipe thread, these connections seal on the nose of the swivel end. The nose has a 60° inclusive angle that mates against a chamfer of the same angle on the male pipe thread end (also known as a 30˚ chamfer).
in male pipe thread end.
WLN 3/8-24 0.38 100—11
4 WLN 7/16-200.441551318
5 WLN 1/2-180.502502028
6 WLN 9/16-180.563002535
8 WLN 3/4-160.756005065
10 WLN 7/8-140.88 85115
12 WLN 1 1/16-121.06 135180
14 WLN 1 3/16-121.19 170230
16 WLN 1 5/16-121.31 200270
* Recommended clearance hole is W + 0.015”

Table S27 – Torque for Triple-Lok and Ferulok Bulkhead Fittings
NPSM Pipe swivels, also known as Parker 07 Adapters, must connect with a male NPT/NPTF pipe thread with a 30˚ machined seat per SAE J514.

Steps:
1. Finger tight
2. Wrench tighten to torque specs in Table (S28)
Dimensions and pressures for reference only, subject to change.
Assembly / Installation Parker Hannifin Corporation Tube Fittings Division Columbus, Ohio http://www.parker.com/tfd S35 S Catalog 4300 PDF Section Updated October 2017 TABLE OF CONTENTS
Fig. S52
FITTING PART # THREAD SIZE UN/UNF W* ASSEMBLY TORQUE +10% - 0 in.-lb.ft.-lb.N-m
TUBE
WLNL
WLNL
WLNL
WLNL
WLNL 1
20 WLNL 1
24 WLNL 2-122.00 270365 TUBE FITTING PART # THREAD SIZE UN/UNF W* ASSEMBLY TORQUE (+10 - 0) in.-lb. ft-lbN-m 3
1 3/16-121.19—135180 14
1 5/16-121.31—170230 16
7/16-121.44—200270
11/16-121.69—245330
20 WLN 1 5/8-121.63 245330 24 WLN 1 7/8-121.88 270365 32 WLN 2 1/2-122.50 310420
swivel
Fig. S52 - Illustration showing how
adapters seal on mating chamfer
NPSM Pipe Swivels
NPSM Size in. Steel Assembly TORQUE (+10% - 0% ) F.F.F.T. in.-lb.ft.-lb. 1/810691.0 - 1.5 1/4156131.0 - 1.5 3/8192161.0 - 1.5 1/2396331.0 - 1.5 3/4580482.0 - 2.5 11140952.0 - 2.5 1 1/414201182.0 - 2.5 1 1/228402372.0 - 2.5 237203102.0 - 2.5
Table
S28 – NPSM Pipe Swivel Torques
Routing and Clamping
Routing and Clamping
Most hydraulic, pneumatic and lubrication systems require some form of tube line fabrication and fitting installation for completion. Proper fabrication and installation are essential for the overall efficiency, leak free performance, and general appearance of any system.
The following factors should be considered early in the design process, after sizing the tube lines and selecting the appropriate style of fitting:
1. Proper routing of tube lines
2. Adequate tube line support (clamping)

Routing of Lines
Routing of lines is one of the most difficult, yet most significant of these system design considerations. Proper routing involves getting a connecting line from one point to another through the most logical path, while considering other factors as discussed below.
The most logical path is not always the direct path and should have the following characteristics:
• Avoid excessive strain on joint — A strained joint will eventually leak. A straight line tube assembly (with no bends) or a joint that is forced into position are common examples of strain applied to tube assemblies.
• Allow for expansion and contraction
— Use a “U” bend or a hose in long lines to allow for expansion and contraction due to pressure or temperature fluctuations.


• Allow for motion under load — Even some apparently rigid systems do move under load. Use an offset (“S”) bend.

• Get around obstructions without using excessive amount of 90° bends
— Pressure drop due to one 90° bend is greater than that due to two 45° bends.


• Keep tube lines away from components that require regular maintenance
• Leave fitting joints as accessible as possible — Inaccessible joints are more difficult to assemble and tighten properly, and more time consuming to service.
• Have a neat appearance and allow for easy trouble-shooting, maintenance and repair
The following illustrations provide several examples of typical routing situations. The graphics show the preferred and non-preferred path along with an explanation.
Non-preferred Routing Preferred Routing
Explanation
Avoid straight tube lines. There is no margin for error on a straight line, resulting in excess joint strain.
Straight tube lines do not allow for expansion and contraction due to pressure and temperature fluctuations.


Allow for expansion and contraction of lines by utilizing “U” bend.
Offset (“S”) bend allows for motion under load.
Avoid excessive pressure drop by getting around obstructions without using 90° bends. One 90° bend causes more pressure drop than two 45° bends.
Avoid creating an obstruction by routing lines around areas that require service. Leave adequate clearance for wrenches.
Route lines to allow for proper clamping. When done properly, several lines can typically be clamped together.
Route lines to allow for troubleshooting. Lines that cross and are not in logical order tend to be difficult to work with during maintenance.
Assembly / Installation Parker Hannifin Corporation Tube Fittings Division Columbus, Ohio http://www.parker.com/tfd S36 Catalog 4300 PDF Section Updated October 2017 TABLE OF CONTENTS
Tube Clamping
Tube line supports (clamps) serve two primary purposes in tube line systems; mounting and vibration dampening. Fatigue failure due to mechanical vibration accounts for the majority of tube line failures. Proper clamping of the tube also reduces system noise.
Use a clamping system such as Parker’s ParKlamp along with proper clamp spacing provided in Table S31.
For tube clamps to dampen vibration effectively, they need to be anchored to a rigid structure. Clamping several tubes together, without rigid structural anchoring, does not provide effective dampening.
A mountie can be used in lieu of clamps in certain product lines by anchoring a tee fitting to the equipment’s structure (see Fig. S53).
Layout Data for Tube, Pipe and Hose Clamps: Standard (Inch) and Series A (Metric)

Assembly / Installation Parker Hannifin Corporation Tube Fittings Division Columbus, Ohio http://www.parker.com/tfd S37 S Catalog 4300 PDF Section Updated October 2017 TABLE OF CONTENTS
Fig. S53 — Mountie cap used with Triple-Lok for anchoring tube lines
With Weld Plate Rail Mounting
Table S30 — ParKlamp Standard Series maximum tightening torque
Dimensions Routing and Clamping Tube O.D. A (in.) B (ft.) C (in.) (in.)(mm) 1/46 234 5/168 3/810 1/212 458 5/814 3/418 7/822 125 1-1/430 6712 1-1/238 250 Dimensions and pressures for reference only, subject to change. Group # Installation Dimensions MPNOR 1in.1 5/161 3/161 3/165/815/16 mm33303016.524.5 1ain.1 7/161 1/85/815/16 mm36291624.0 2in.1 11/161 7/163/41 1/16 mm423619.527.5 3in.21 1/213/161 1/8 mm503820.528.5 4in.2 3/81 3/415/161 1/4 mm60452432.0 5in.2 13/162 3/81 1/41 9/16 mm70613240.0 6in.3 1/22 11/161 7/161 3/4 mm88693644.0 Torque Bolt Thread in.-lbs.Nm 1/4 - 20 UNC708
Table S29 — ParKlamp Standard Series Installation
Table S31 — Recommended tube clamp spacing
Layout Data for Tube, Pipe and Hose Clamps: Heavy Series (Inch) and Series C (Metric)
Table S32 — ParKlamp Heavy Series installation dimensions
Table S33 — ParKlamp Heavy Series maximum tightening torque
Rail Mounting
Layout Data for Tube, Pipe and Hose Clamps: Twin Series (Inch) and Series B (Metric)
Rail
Assembly / Installation Parker Hannifin Corporation Tube Fittings Division Columbus, Ohio http://www.parker.com/tfd S38
4300 PDF Section Updated October 2017 TABLE OF CONTENTS
Catalog
With Weld Plate
Mounting
With Weld Plate
Twin Series maximum tightening torque
Table S35 — ParKlamp
dimensions
Table
S34 —
ParKlamp Twin Series installation
Dimensions and pressures
subject
change. Group # Installation Dimensions MNOPR H3 in.2 15/161 9/1615/162 5/161 1/2 mm7440245838 H4 in.3 1/22 3/161 1/42 7/81 13/16 mm8956327346 H5 in.4 1/162 11/161 1/23 7/162 1/16 mm10368388752 H6 in.5 7/83 7/82 1/84 5/82 5/8 mm150985411866 H7 in.7 1/85 1/162 3/4N/AN/A mm18012969N/AN/A Group # Bolt Thread Torque in-LbNm H3, H43/8 - 16 UNC10612 H53/8 - 16 UNC13315 H67/16 - 14 UNC26530 H75/8 - 11 UNC39845 Group # Installation Dimensions MNOR T1 in.13/1613/169/1613/16 mm20201521 T2 in.1 1/8111/1615/16 mm29261824 T3 in.1 7/161 7/1615/161 3/16 mm363723.529.5 T4 in.1 3/41 11/1611 1/4 mm45422632 T5 in.2 3/162 1/81 1/41 1/2 mm56543238 Group # Bolt Thread Torque in.-lbs. Nm T11/4 - 20 UNC455 T2 - T4 5/16 - 18 UNC10412 T55/16 - 18 UNC708
Routing and Clamping
for reference only,
to
Tools for Tube Bending
For smooth, wrinkle free tube bending without excessive flattening, there are a number of benders that can be selected. Consult the specific bender’s instruction bulletins for CLR (centerline radius), wall thickness, and tube material recommendations and limitations. For crank and hydraulic benders, utilize both the mandrel bending determination chart (Fig. S57) and the Parker Bender Capacity Guides on page R7.
1. Hand held lever type benders (see pages R4-R6). Individually sized for tube sizes 1/8” through 1” and 6mm through 25mm.
Tools for Tube Bending / Mandrel Bending
Mandrel Bending Tools
When bending thin wall tube it may be necessary to insert a mandrel into the tube to prevent excessive distortion, flattening or wrinkling. To determine whether mandrel bending is required, see the Mandrel Bending Requirements Chart and example below.
To accomplish such bending, a mandrel, mandrel rod, and a mandrel rod stop assembly are required. The rod stop assembly holds the end of the mandrel rod in proper alignment with the tube while the mandrel, which is threaded onto the other end of the mandrel rod, supports the tube on its I.D., thus preventing tube kinking or flattening during bending.

2. Manual crank, table mount or vise mount benders:

1) Model 412 (page R8). For bending 1/4” through 3/4” O.D. tube or 6mm through 20mm.
2) Model 424 (page R9). For bending 1/4” through 1 1/2” O.D. tube or 6mm through 38mm.
Example: Determine if it’s necessary to use mandrel for bending 3/4 x .049 steel tube through a 3” bend radius without excessive flattening.
Centerline Radius/Tube Outside Diameter = 3 / .75 = 4
Outside Diameter / Wall Thickness = .75/.049 = 15.3
Intersection of these two ratios on the graph falls within the area indicating that no mandrel is required. Note, however, that for the same tube O.D. at a smaller bend radius (e.g. 2”) or with a thinner wall thickness (e.g. .035”), a mandrel would be required for preventing excessive flattening.
If the tube wall is very thin, then a plug mandrel alone may not be adequate to prevent wrinkling. In such cases, special ball type mandrels and wiper shoes may be necessary (See Fig. S58 for illustrations of plug and ball type mandrels). As a rule of thumb, if the tube wall thickness is less than 7% of the tube O.D. then mandrel bending is recommended.
Assembly / Installation Parker Hannifin Corporation Tube Fittings Division Columbus, Ohio http://www.parker.com/tfd S39 S Catalog 4300 PDF Section Updated October 2017 TABLE OF CONTENTS
Fig. S54 — Hand held tube bender
Fig. S55 — Manual crank bender
3. Hydraulically powered bender Model 632 (page R12). For bending 3/8” through 2” O.D. tube or 10mm through 50mm.
Fig. S56 — Hydraulic bender with portable table for mandrel bending
0102030405060708090100110120130140150 1 Ratio of Outside Diameter (OD) WallThickness (TK) 2 3 4 5 6 7 8 9 10 11 12 13 14 Ratio of Centerline Radius (CL RAD) Outside Diameter (OD) TK CL RAD O.D. Not Practical Multiple Ball Mandrel One Ball Mandrel Plug Mandrel No Mandrel Mandrel Bending Requirements Chart 45 90 135 0 90 45 135
Fig. S57 — Mandrel bending requirements chart
Dimensions and
pressures for reference only, subject to change.
Plumbing and Assembly Hints
Even after choosing the appropriate type of fitting for your application, there are certain instances when a particular style has advantages over others.
1. Straight thread adjustable elbows and tees have several advantages over similar shaped fittings using tapered pipe threads:
Adjustable straight thread connections:
• Permit exact positioning
• Provide leak free joint
• Eliminate distortion and cracking of boss due to over-tightening
• Are easier to maintain
Plumbing and Assembly Hints
3. Use reducers/expanders and jump size fittings. There are some instances when it becomes necessary to connect tube lines of different sizes or tube lines to ports of different sizes. This can be accomplished by using either tube reducers, port expanders, port reducers, or jump size fittings. Achieving the reduction or enlargement is the main concern, but this should be accomplished by using the minimum number of connections (potential leak points and wrenching requirements) possible.
4. Use conversion fittings and adapters. There are instances when it becomes necessary to use conversion adapters for connecting a fitting to a por t with different style threads, for example, UNF thread fitting to a metric thread port. There are also some instances when it is necessary to connect tube ends or hose ends with different style terminations to one another or to a fitting. This can be achieved by using conversion fittings.
5. Use of other adapters and fittings for special applications are shown below.
2. Swivel nut fitting should be used with a straight connector to allow for connections in tight spaces, where an elbow or tee fitting cannot be fully rotated (see Fig. S60).
This same combination of fittings, shown in Fig. S60, can also be used to stack tube lines or provide clearance for ports that are relatively close and within the same plane (see Fig. S61).

Assembly / Installation Parker Hannifin Corporation Tube Fittings Division Columbus, Ohio http://www.parker.com/tfd S40 Catalog 4300 PDF Section Updated October 2017 TABLE OF CONTENTS
Fig. S63 — Metric sleeve adapts metric tube to standard Seal-Lok
Fig. S64 — Long elbow (CC5L) stacks above regular elbow (C5L)
One Ball Mandrel Plug Mandrel*
Multiple Ball Mandrel
Fig. S58 — Types of mandrels *Parker Tube Fittings Division offers only the plug mandrel.
Refer to Bulletin 4306-B5 for detailed bending instructions.
Fig. S59 — Top view of adjustable straight thread connection –allows for 360° positioning of fitting without losing its sealing capability
Fig. S60 — Swivel nut fitting used with straight connector in tight space
Fig. S61 — Swivel end fitting with straight connector provides clearance above regular elbow
Fig. S62 — F5OHAO for close coupling of components with two SAE Straight thread ports


