Tips & Tricks


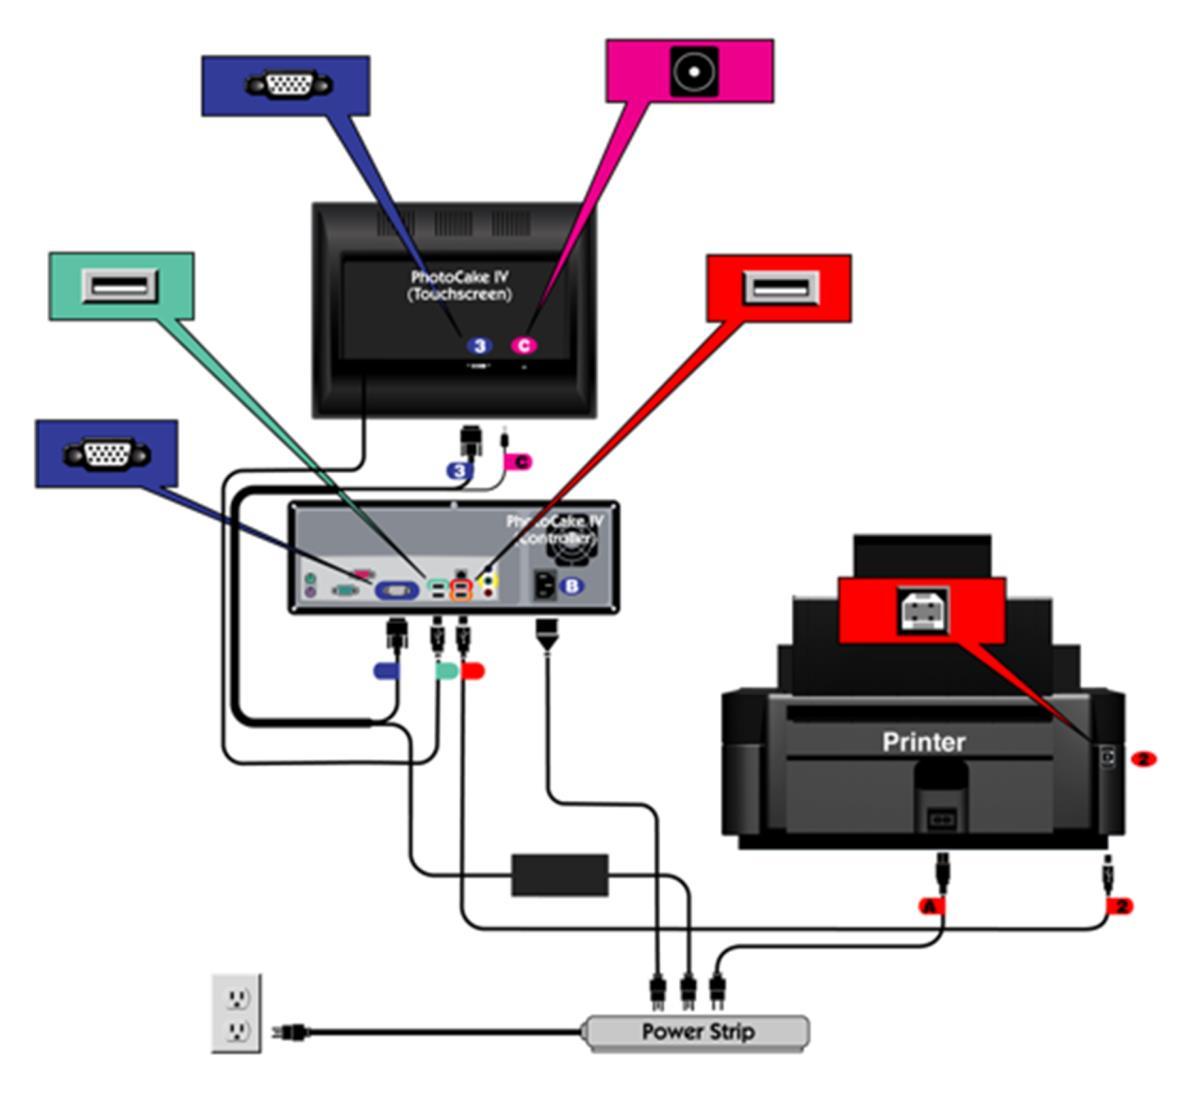
For your convenience, the monitor, controller, printer, and cables are all labeled.
• The Blue #3 VGA cable goes from the monitor (#3 side in monitor) to the blue port on the controller
• The Pink C plug goes into the back of the monitor
• The Green USB plug goes into the back of the controller
• The Red #2 USB cable goes from the printer (#2 side in printer) to the red port on the controller
• The Red A power cable goes from the printer (A side in printer) to the power strip
• The Blue B power cable goes from the controller (B side in controller) to the power strip
• Plug the power cable for the monitor into the power strip
Please note: Always plug all three power cables into the provided power strip. Do not plug anything else into the strip.

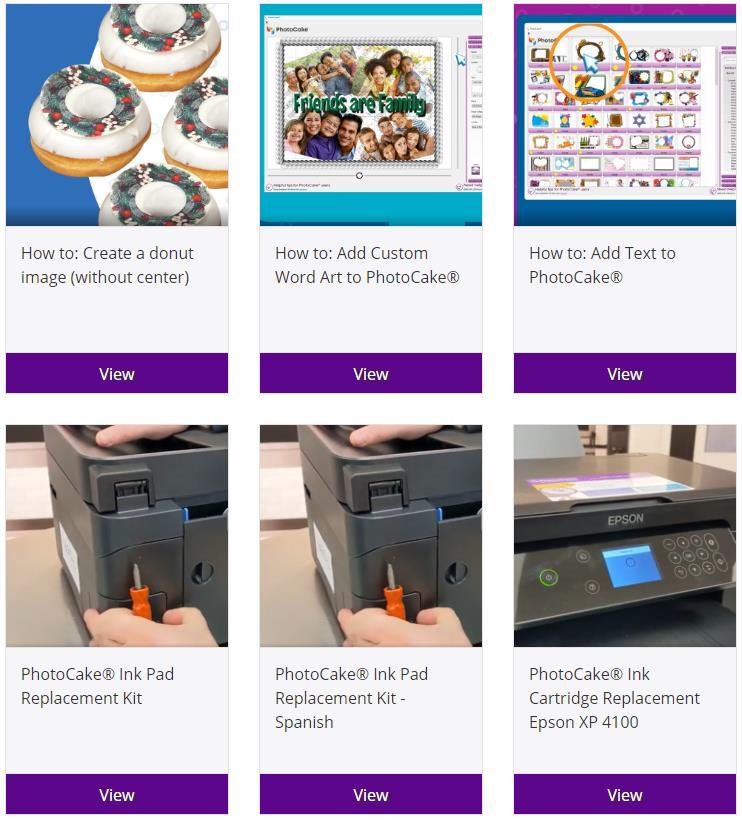
On DecoPac.com, we have many assets ready to help you to make the most of your PhotoCake system! A small selection of what’s available includes:
Videos
• Decorating assistance:
• How to create a donut image
• Using the NFL Match-Up Frame
• Creating custom sized media images
• Help videos:
• Basic printer maintenance
• Ink cartridge installation Publications
• PhotoCake Update information:
• List of new images and discontinued images
• Decorator Guides and The Magic of Cakes books
• Help documents:
• New printer setup steps
• Setting up a new PCIV system

This extended tray keeps your media from bending during the output process, eliminating potential issues like rubbing against the printhead. It’s necessary to install on every printer.
We have multiple versions of the output tray in stores, but they generally look the same.

Pull out the built-in output tray and lift the flap.
Attach the included enhanced output tray with the lifted flap going through the hole.


Proper upkeep for your printer is critical!
• Like all ink jet printers, clogs can happen during extended periods without printing. Doing a Color Test every day is suggested to keep clogs from building up.
• Prolonged exposure to air without ink cartridges in the printer or general disuse can cause clogs to happen.
• Ensure there are always cartridges in the printer.
• Store additional cartridges at room temperature, in a dry space, and out of direct sunlight.
• Edible ink has an expiration date. Please check the date on the packaging before installing new cartridges.
• Ink Cartridges: Treat them gently and do not shake them. This can introduce air bubbles that will cause printing issues.


This process should be added to your daily checklist. A properly running printer saves money through fewer calls to tech support and longer printer life.
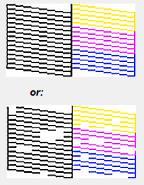
• Color Tests are ideal for identifying clogs or discolorations.
• Full process takes 20 seconds, uses very little ink, and requires a sheet of plain printer paper. Do not use edible paper.
• Automated Maintenance will prompt to run a color test each day.
• Daily printing helps to clear nozzles

Good color flow Clogged nozzles


• Never introduce unapproved liquids into the printer when attempting to clean. This includes isopropyl alcohol or other cleaning agents.
• Do not remove components from an Epson Printer. They can’t be effectively replaced, and a new printer will likely be needed.
• Maintenance steps should be performed through the PhotoCake application. Running these processes directly through the prompts on the printer can cause further complications because the drivers aren’t designed to work with edible ink.
• Deep Cleanings should be performed sparingly and with a PhotoCake Technical Support Representative on the phone.
• Our website has numerous resources that can assist you with your printer:
• Help Sheets and Instructions: DecoPac.com/publications/PhotoCake
• Video walkthroughs: DecoPac.com/videos/PhotoCake


• Very effective at forcing ink through a printhead experiencing clogging issues. Individual colors can be selected for a focused cleaning on just the problem area. We strongly recommend doing this to save ink.
• There is still a nozzle clog present if you see:
• Fine white lines going horizontally through the bands of color
• Fading from the beginning to the end of the bar
• Discoloration from other colors bleeding into the bar
• If the nozzle clog persists after a few Color Bars, continue to Print Head cleanings.


What you’ll need:
A few sheets of plain printer paper

• Will help alleviate distorted, faint, or streaked colors.
• PhotoCake is pre-programmed to print a Color Test after completing a Print Head Cleaning that a user begins.
• This process takes 3-4 minutes.
• Automated Print Head Cleanings happen periodically.
• Note: Color Tests do not print after the Automatic Print Head Cleanings
• This uses a larger amount of ink than a Color Bars and is considered a more aggressive attempt at resolving issues with a printer.

What you’ll need:
1 sheet of plain printer paper


Should only be done after the previous options didn’t work
Deep Cleaning
• We strongly suggest doing this step on the phone with Tech Support.
• The Deep Cleaning Process is the most aggressive method of removing a clog from a printer.
• A Cleaning Cartridge is required, which is like inks, but contains a clear fluid designed to break up the built-up ink that causes the clog.
• This is a multi-step process, so it can be very timeconsuming.

What you’ll need: PhotoCake Cleaning Cartridges
A few sheets of plain printer paper


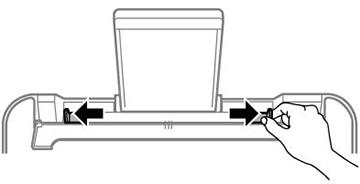
If the media is printing at a slant, rather than straight up and down, check your paper guide (image below).
The paper guide should be snug against the media, without squishing it. If you see the media bending, you have it too tight.


If you see black marks on the end of your prints, there are two things that are typically the cause:
1. The additional output tray (circled below) is missing or incorrectly installed. If you need a new tray, contact our Technical Support at 1-800DECOPAC.
2. If you leave the print on the tray too long, the rollers may grab the sheet. Remove your finished prints as soon as they are done.


If your printing is off from pre-cut circles, check:
1. The media type and item number on your package match what was chosen on the media selection screen (circled below).
2. The arrows on your media are pointing into the printer.


Ink Pad Replacement Kits
• All Epson printers contain a small internal ink pad tank that is filled with felt pads.
• These pads collect any “waste ink” the printer produces when self-cleaning.
• Eventually they soak up their maximum amount of ink and will need to be replaced.
• The process is simple and only takes a few minutes.
Ink Pad Replacement Guides
Models XP340, XP352, XP410, XP420, XP430, XP440, XP446, XP452, and XP2100
• PhotoCake Online instructions
• PhotoCake IV Version 8 software instructions*
• PhotoCake IV Version 9 software instructions*

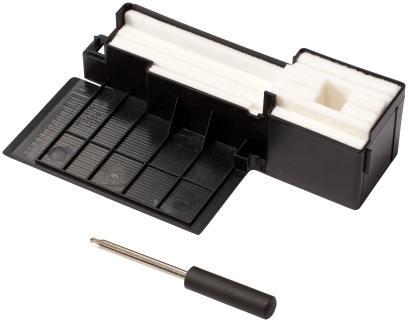
Models WF2830, WF2850, XP4100, and XP4105 (both E and U series)
• English text walkthrough video
• Spanish text walkthrough video
*If you don’t know which software was installed with your current update, start with the Version 8 instructions

• Colors are printing out too light : Perform a Color Test on plain white paper. This will show if one of the ink cartridges needs to be replaced. Contact DecoPac at 1800-644-1228 for further troubleshooting help, if necessary.

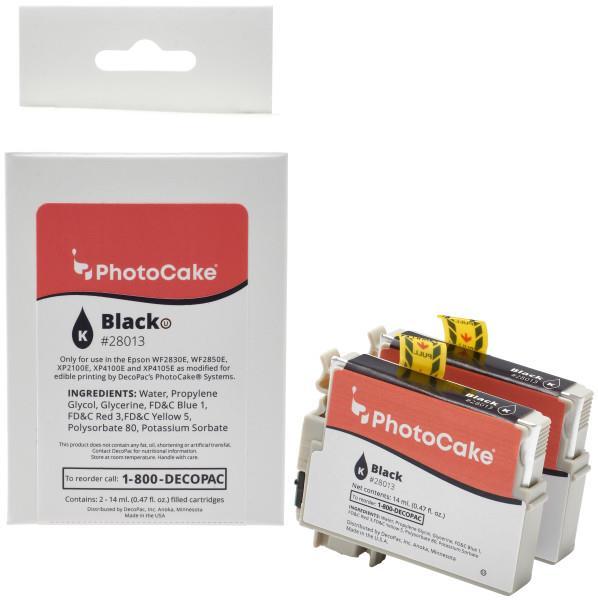
• Media won’t peel easily from backing sheet:
• Before printing, leave the media out of the package in normal room conditions for 5-15 (ideal time depends on humidity in the room, with longer wait times for higher humidity)
• Place a printed piece of media in a dry freezer for 10-15 seconds
• Use a blower-type hair dryer on the front and back sides of the of a printed piece of media

• Power sharing:
• PhotoCake IV: A 3-outlet surge protector is included with the system. It is required to use with the system; only plugging in the PhotoCake controller, monitor, and printer into it. No other equipment should be plugged in.
• PhotoCake Online: A surge protector is not included with the system, however, it is strongly recommended to use one to avoid electrical and/or power surge issues.
• Missing images: With every update, we both add and discontinue images. You can find the latest list of what has changed in our Image Guides on DecoPac.com/publications/PhotoCake.
• PCIV Customers can also locate a copy of this guide in their System. Simple go to ‘Documents’ → ‘Other Information’ tab to locate the ‘PhotoCake IV Image Guide’.


• Seasonal Printer Storage: If you store your PhotoCake printer for a long period of time, it is critical to follow these steps to keep excess ink from creating a clog over the winter.
• Storing Printer Prep:
1. Install PhotoCake Cleaning Cartridges into your printer
2. Select ‘Deep Clean’ and repeat until all the colored ink has been purged from the print head. Color bars should print to very faint colors or no colors at all.
3. Then, power off the printer with the cleaning cartridges still installed.
4. Store the printer in a temperature-controlled room.
• Unboxing Printer from Storage:
1. Set up printer. Power printer on.
2. Run a print head cleaning with the cleaning cartridges still installed.
3. Remove cleaning cartridges and install new PhotoCake Ink cartridges.
4. Run a print head cleaning with the regular ink cartridges installed.
Note: If your colors are not flowing, call Technical Support for assistance.


• Touch screen issues: If the touch screen isn’t as responsive as usual, you can recalibrate it. There are 2 ways to recalibrate:
• Screen is still responsive but needs fixing:
1. On the main screen select ‘Maintenance’.
2. Select ‘System Settings’ tab.
3. Select ‘Touch Screen Calibration’.
4. This will prompt the calibration process.
• Screen is completely unresponsive:
1. Power off the system.
2. Disconnect the Touch Screen green-labeled USB cable from the back of the controller.
3. Power on the system.
4. Wait until you get the ‘Required hardware not detected’ error message.
5. Reconnect the green-labeled USB cable to the back of the controller. It may take a few seconds for the calibration screen to appear.


Printer Firmware: Our printers are shipped with a specific version of firmware that will deliver excellent results. Changes to this firmware can cause problems that will result in long calls to Tech Support. To avoid this, follow these three easy bits of advice:
• Connect the printer using the provided printer cable, DO NOT connect through Wi-Fi.
• If you see a message on your printer asking if you want to update the firmware, select No.
• PhotoCake Online users need to ensure that automatic firmware updates are turned off on the computer. The steps to do that can be found below.


1. press the home button.
2. press the left or right arrow buttons to select Wi-Fi
Setup and press the OK button. You will see this screen:

3. press the up or down arrow buttons to select Disable Wi-Fi and press the OK button.
4. press the up or down arrow buttons to select Yes and press the OK button to disable Wi-Fi.


1. press the home button.
2. press the arrow buttons to select Setup and press the OK button.
3. press the arrow buttons to select Network Settings and press the OK button.
4. press the arrow buttons to select Wi-Fi Setup and press the OK button.
5. press the arrow buttons to select Disable Wi-Fi and press the OK button.
6. press the OK button to disable Wi-Fi.


1. press the home button, if necessary.
2. press the left or right arrow button to select Setup and press the OK button.
3. press the up or down arrow button to select Network Settings and press the OK button.

4. press the up or down arrow button to select Wi-Fi Setup and press the OK button.
5. press the up or down arrow button to select Disable Wi-Fi and press the OK button.
6. press the up or down arrow button to select Yes and press the OK button to disable Wi-Fi.


1. press the home button, if necessary.
2. Select the icon. You will see this screen:
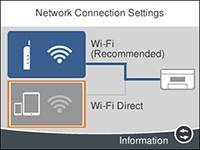
3. Select Wi-Fi (Recommended) 4. Select Change Settings 5. Select Others 6. Select Disable Wi-Fi 7. Select Start Setup to disable Wi-Fi.
8. When finished, press the home button to return 9. to the Home screen.


1.press the home button, if necessary.

2.Select the icon. You will see this screen:

3.Select Wi-Fi (Recommended).
4.Select Change Settings.
5.Select Others.
6.Select Disable Wi-Fi.
7.Select Start Setup to disable Wi-Fi.
8.When finished, press the home button to return to the Home screen.
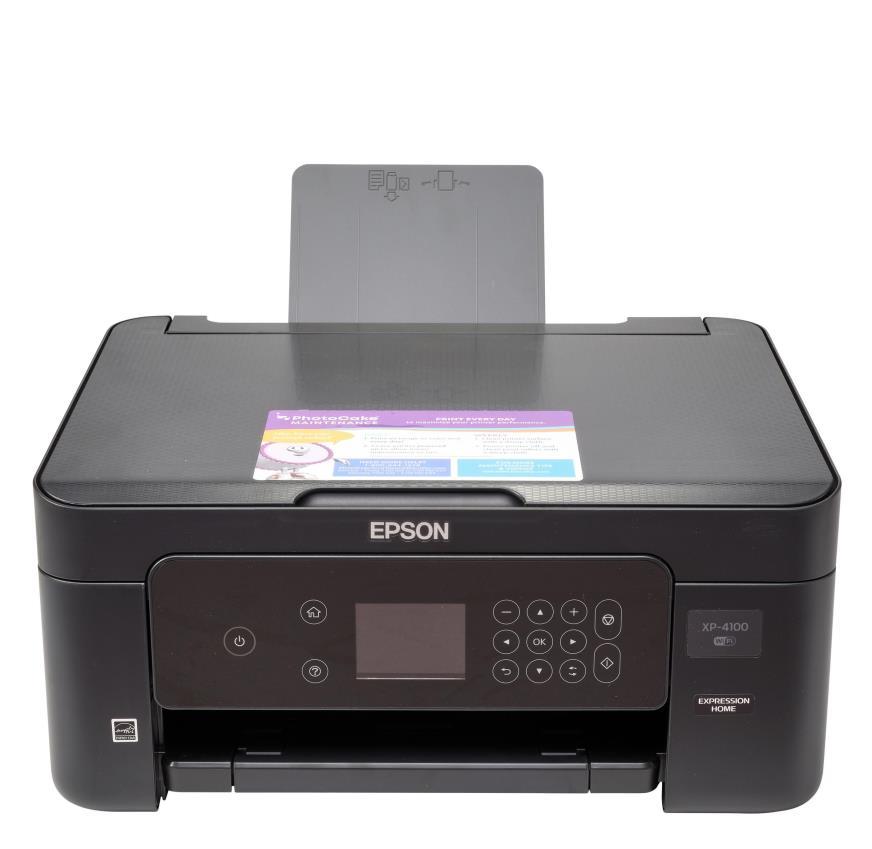

1. Press the Home button.

2. Navigate to Wi-Fi Setup using the left arrow button and press OK.
3. Select Network: Wi-Fi (Recommended) and press OK.
4. Confirm message and press OK.
5. Navigate to Others using the left arrow button press OK.
6. Navigate to Disable Wi-Fi using the left arrow button press OK.
7. Confirm message and press OK.
8. When finished, press the Home button to return to the home screen.


Locating Version, Serial numbers and PC Type
Localizando la Versión, Número de serie y tipo de Sistema

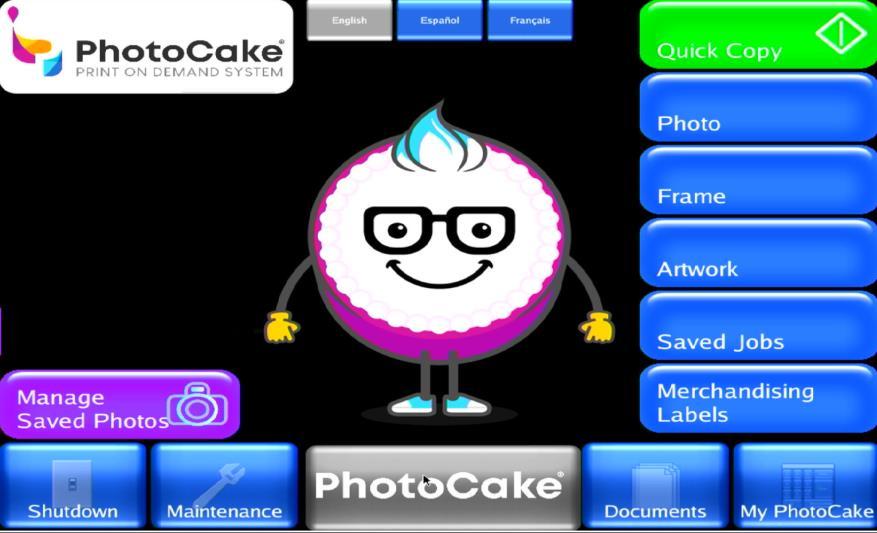
On the main screen , select the 'Photocake’ button. This screen will indicate what version and build you currently have installed.
En la pantalla principal, seleccione el botón ‘PhotoCake’. Ahí podrá ver cuál versión tiene actualmente instalada.


Localizando la versión - PCO
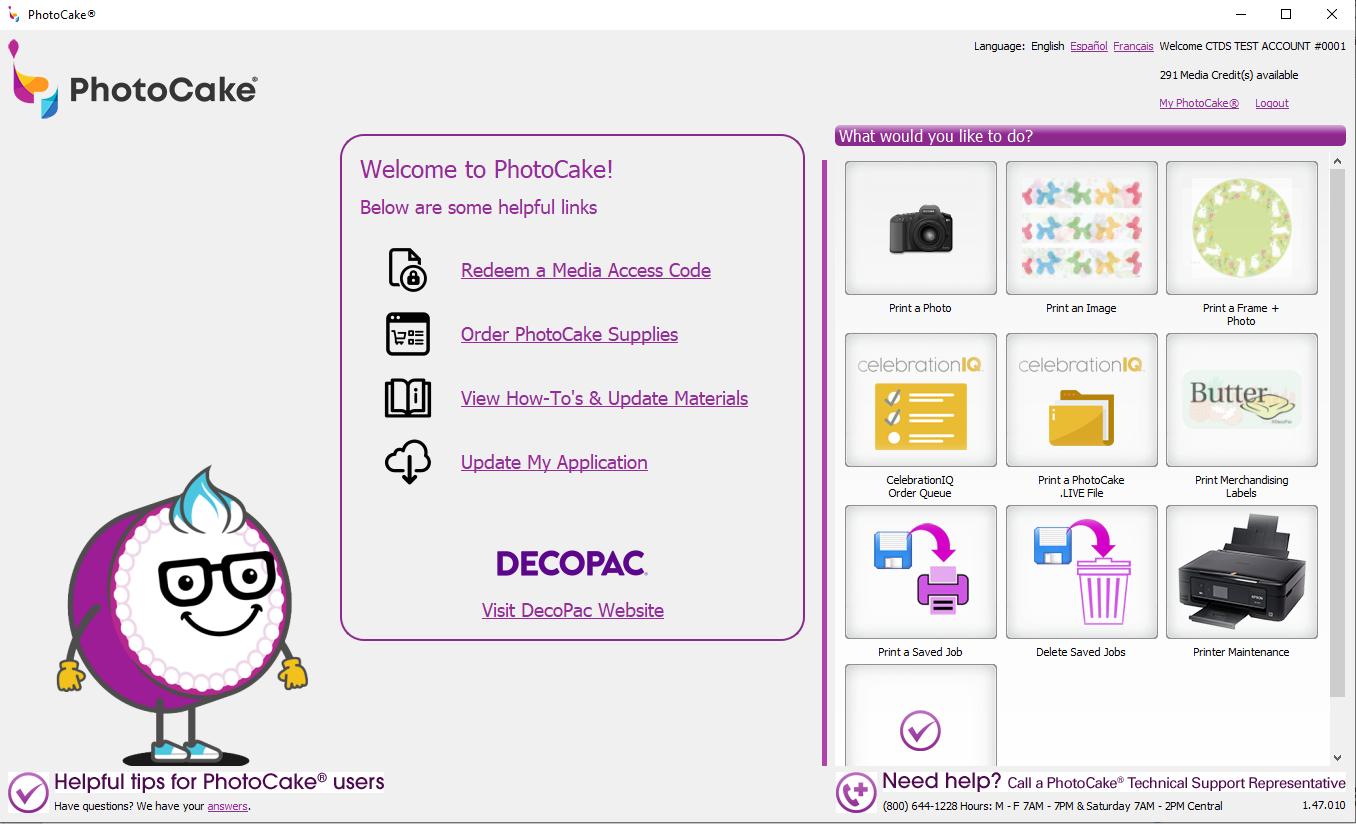
The version number is always located at the bottom side of the application and the login screen.
El número de la versión siempre está localizado en la parte inferior de la aplicación y la pantalla para iniciar sesión.


el
Open the lid of the Printer. Above where the ink carriage sits there is a white label with the serial number.
Abra la tapa de la Impresora. En el área sobre los cartuchos de tinta encontrará una etiqueta blanca con el número de serie.


On the back side of the Touch screen , there is a barcode label with the serial number.
En la parte posterior de la pantalla táctil encontrará una etiqueta con el número de serie.


On the right side of the Controller, there is a barcode label with the serial number on it.

En la parte derecha del Controlador encontrará una etiqueta con el número de serie.


¿Qué tipo de sistema tengo?
If the system that you have uses a Printer, Controller and a Touch screen, then your system type is PCIV.
Si el Sistema que tiene usa una Impresora, Pantalla táctil y un Controlador, su sistema es PCIV.
If the System that you use uses a Printer and a Windows computer, then your system Type is PCO.
Si el Sistema que tiene usa una Impresora y una computadora con Windows, su sistema es PCO.


Select, Maintenance
Select, Service Menu 3. Type in '99' on the keypad then select, enter. 4. Find in the list the row titled 'Motherboard' 5. Notate your Motherboard version Note: The below Motherboards are classified as Low


Select, PhotoCake
Locate Version
Notate the version
Note:
As of Update 45, all versions starting with '9' indicate the customer has a Low Memory Controller. These controllers are not eligible to upgrade to LIVE.


System Consists of:
• Customer sourced computer
• Printer/Scanner combo
Computer Specifications:
• Windows 8.1, Pro, or Enterprise; Windows 10 Home, Pro, or Enterprise; or Windows 11 Home, Pro, or Enterprise.
• Note: Windows Server operating systems, Chromebook, and Macintosh (Mac®) Computers not supported

• Intel® Core 2 Processor or AMD Athlon® 64 processor 2GHz or faster processor (or equivalent)
• 2 GB of RAM (Windows 8.1) 4GB or higher recommended (Windows 10 & Windows 11)
• 6.5 GB of available hard-disk space for installation
• Cannot install on removable flash storage devices
• 1024x768 display (1280x1024 recommended), 16-bit color, and 256MB of VRAM
• 2.0/3.0 USB Port Support (Minimum 2 ports)
https://www.decopac.com/photocake-online-technical-requirements
Internet:
• High-speed internet connection: broadband, DSL or T1
Whitelist:
• https://gateway.decopac.com/v1
• http://photocakeassets.blob.core.windows.net
• https://assets.decopac.com/
• https://api.photocake.com/
• FireFox
• Chrome
• Microsoft Edge

System Consists of:
• Controller
• 15” Touchscreen
• Printer/Scanner combo
• The PhotoCake® IV System should be operated in a clean, cool environment.
Power Source:
• All components use 115 VAC CO 60 Hz.
• It is required that the PhotoCake® IV System be placed on its own dedicated electrical power source to prevent other appliances from interfering with its operation.
• The system should be installed away from microwaves, refrigerators and ovens.
https://www.decopac.com/photocake-iv-technical-requirements

System Consists of:
• Controller
• 15” Touchscreen
• Printer/Scanner combo
• Internet connection device: Ethernet or Wi-Fi Adapter
Note: Hardware requirements are same as LIVE-Disconnected
Network minimum requirements:
• 3 Mbps of Download speed
• 1 Mbps of Upload speed
• 60 Ping or less
Whitelist:
• https://gateway.decopac.com/v1
• http://s3.amazonaws.com/photocake.decopac. com/resources
• https://assets.decopac.com/
• https://api.photocake.com/
• 98.178.229.137 TCP port 6000
Connection to Internet options:
https://www.decopac.com/photocake-live-technical-requirements 1 2
Ethernet:
• Cable connection to network switch
• DHCP Server
• DNS Server
• Route to internet
Wi-Fi:
• Wi-Fi Adapter
• Provided by DecoPac
• DHCP Server
• DNS Server
• Route to internet OR


System Consists of:
• Controller
• 15” Touchscreen or 14” Monitor
• Printer/Scanner combo
• Internet connection device: Internal or External Wi-Fi Adapter
Note: Hardware requirements are same as LIVE-Disconnected
1. Printer
o Printer should stay ON at all times to allow for printer maintenance to be ran. If the Printer is OFF, power the printer ON by pressing the power button. Make sure the printer power indicator is lit up green and the display is on.

DO NOT move forward until the Printer is ON.
2. Touchscreen
o The Touchscreen should have a red or orange power indicator light. This means the screen is on and in standby mode. If your screen does not have a red or orange light on, press the power button.
3. Controller
o press the power button on your Controller. The power indicator light should turn on and the system will commence booting up.

Error: Printer not recognized/detected
1. Review to ensure steps were followed from previous slide, if not, select the shutdown option on the home screen and follow the steps outlined.
2. Ensure the Printers green light and display are ON. If the display looks dimmed or off, select any button on the printer (Except for power button) to wake the printer back up. If the green light is not appearing, power the Printer on by holding the power button. Also, check that the power cord is secured to the printer and plugged into the power strip.
3. Check your printer connections. The USB cable should be secured in the Printer and in the red slot on the back of the Controller.
4. Verify build version. Select, the 'PhotoCake' button on the home screen, ensure you are running the latest build/version available. You will receive a message stating 'New version available' at the bottom of the menu, if not. If you are, the message will indicate 'You are on the latest version'
5. If the issue persists, contact technical support at 1-800-644-1228.
Error: User Timeout
1. The system will log the user out after 4hrs of inactivity. If you receive the timeout error, sign back in by selecting, 'My PhotoCake'.

Replacing the Printer – Locations that received a new printer

1. Power the system off by selecting 'shutdown' on the home menu.
2. Unplug the power and USB cable from the old Printer and set cords and Printer aside.
o Do not use any of the old cords on the new printer.
3. Unpack the new Printer.
4. Connect the new Printer’s power cable to the power strip and the Printer.
5. Connect the new Printer's USB cable to the Printer and red port on Controller.
6. Turn your Printer on – you should see a green light and display is on.
7. Initialize your Printer by following the on-screen instructions.
8. Once your Printer has been loaded with the inks and it is ready to go.
9. Power your system on.

1. Review to ensure steps were followed from previous slide, if not, select the shutdown option on the home screen and follow the steps outlined.
2. Ensure the Printers green light and display are ON. If the display looks dimmed or off, select any button on the printer (Except for power button) to wake the printer back up. If the green light is not appearing, power the Printer on by holding the power button. Also, check that the power cord is secured to the printer and plugged into the power strip.
3. Check your printer connections. The USB cable should be secured in the Printer and in the red slot on the back of the Controller.
4. Verify build version. Select, the 'PhotoCake' button on the home screen, ensure you are running the latest build/version available. You will receive a message stating 'New version available' at the bottom of the menu, if not. If you are, the message will indicate 'You are on the latest version'
5. If the issue persists, contact technical support at 1-800-644-1228.

Replacing the Controller – Locations that received a new Controller

1. Power the system off by selecting 'shutdown' on the home menu.
2. Unplug all the cables connected to the back of the Controller( VGA cable, USB cables, Power cable).
o Do not use the old power cord on the new Controller.
3. Unpack the new Controller.
4. Connect the new Controller’s power cable to the power strip and the Controller.
5. Connect all the cables to the new Controller (VGA cable, USB cables).
6. Turn your Printer on – you should see a green light and display is on.
7. The Touchscreen should have a red or orange power indicator light. This means the screen is on and in standby mode. If your screen does not have a red or orange light on, press the power button.
8. Press the power button on your Controller. The power indicator light should turn on and the system will commence booting up.

1. Review to ensure steps were followed from previous slide, if not, select the shutdown option on the home screen and follow the steps outlined.
2. Ensure the Printers green light and display are ON. If the display looks dimmed or off, select any button on the printer (Except for power button) to wake the printer back up. If the green light is not appearing, power the Printer on by holding the power button. Also, check that the power cord is secured to the printer and plugged into the power strip.
3. Check your printer connections. The USB cable should be secured in the Printer and in the red slot on the back of the Controller.
4. Verify build version. Select, the 'PhotoCake' button on the home screen, ensure you are running the latest build/version available. You will receive a message stating 'New version available' at the bottom of the menu, if not. If you are, the message will indicate 'You are on the latest version'
5. If the issue persists, contact technical support at 1-800-644-1228.


• Check the disc to ensure there are no major scratches or smudges.
• If there is, clean the disc with a X cloth prior to inserting into the Controller.
• If the scratch or smudge is unable to be removed, you can contact technical support to receive a replacement.
• This can sometimes cause slower speeds and/or failures mid update.
• Ensure there are no USB flash drives plugged into the Controller.
• Ensure the system is plugged directly into the DecoPac supplied power strip and not into an outlet.
• Ensure the system is not power sharing with other equipment.
• This can cause slower speeds and/or failures mid update.
• DO NOT shut down the system at any point during the installation.
• If the update fails at all during installation, please contact technical support.
• If you receive a GRUB error after fully installing, reattempt the installation.
• This sometimes takes 3 installs to bypass.
• If you receive any other odd behavior, please contact technical support
