


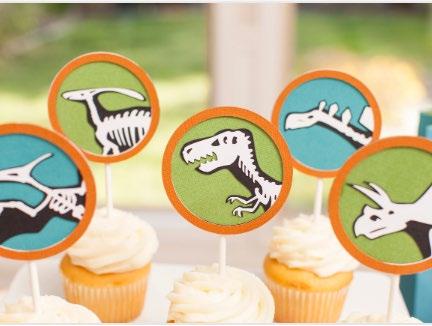
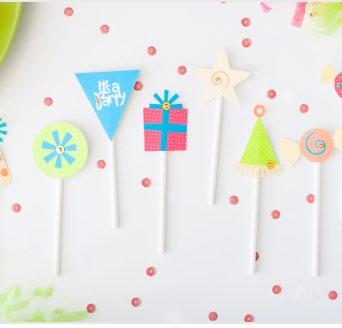
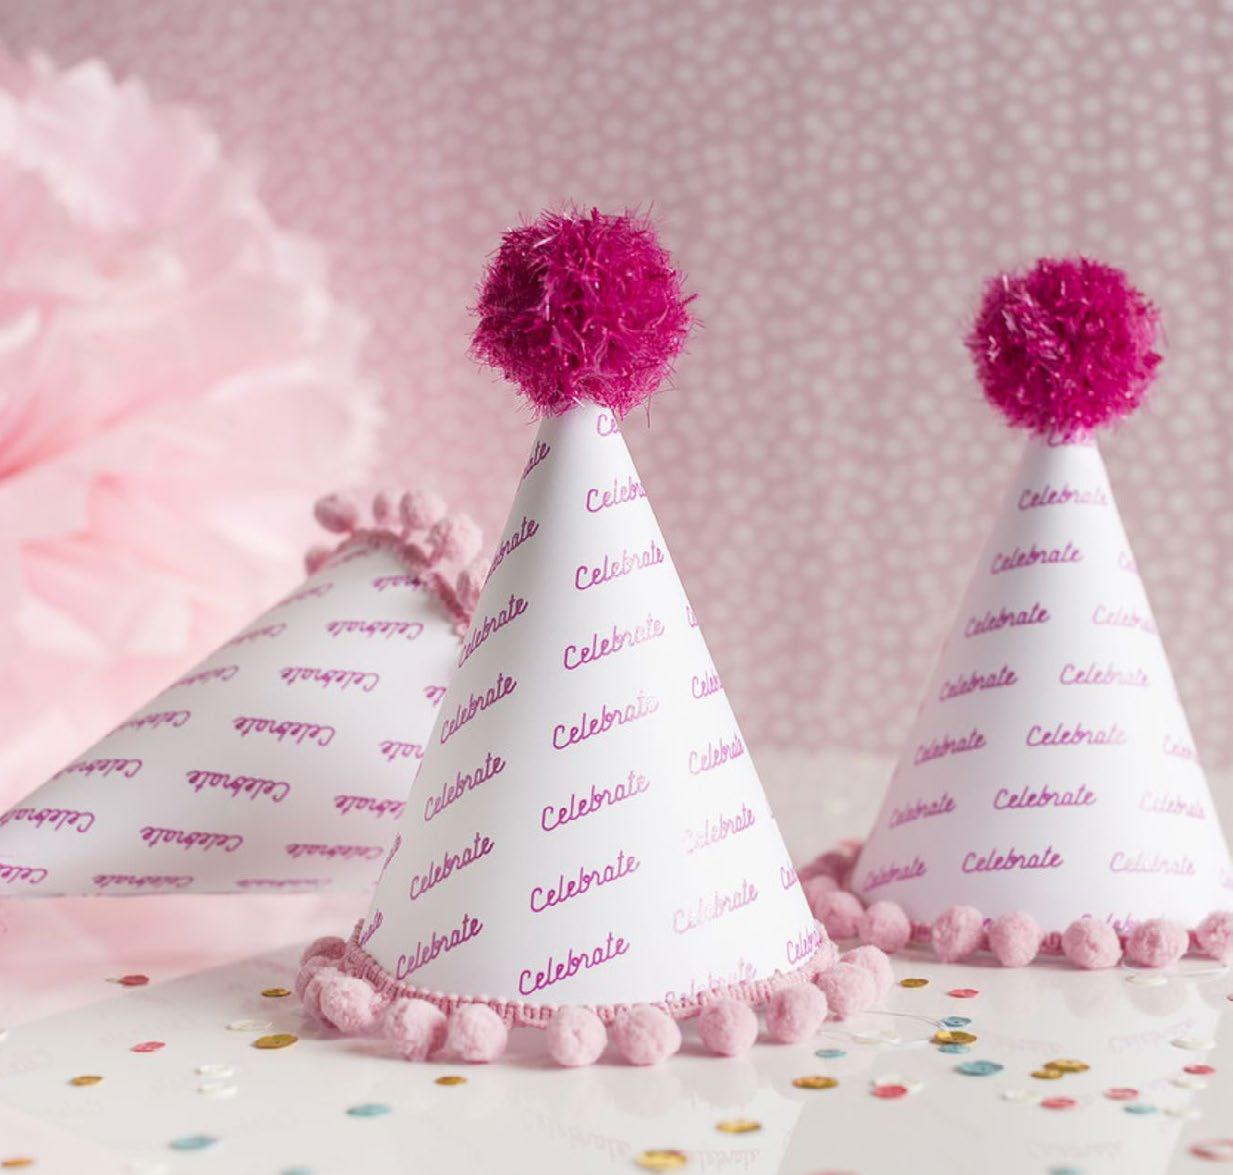
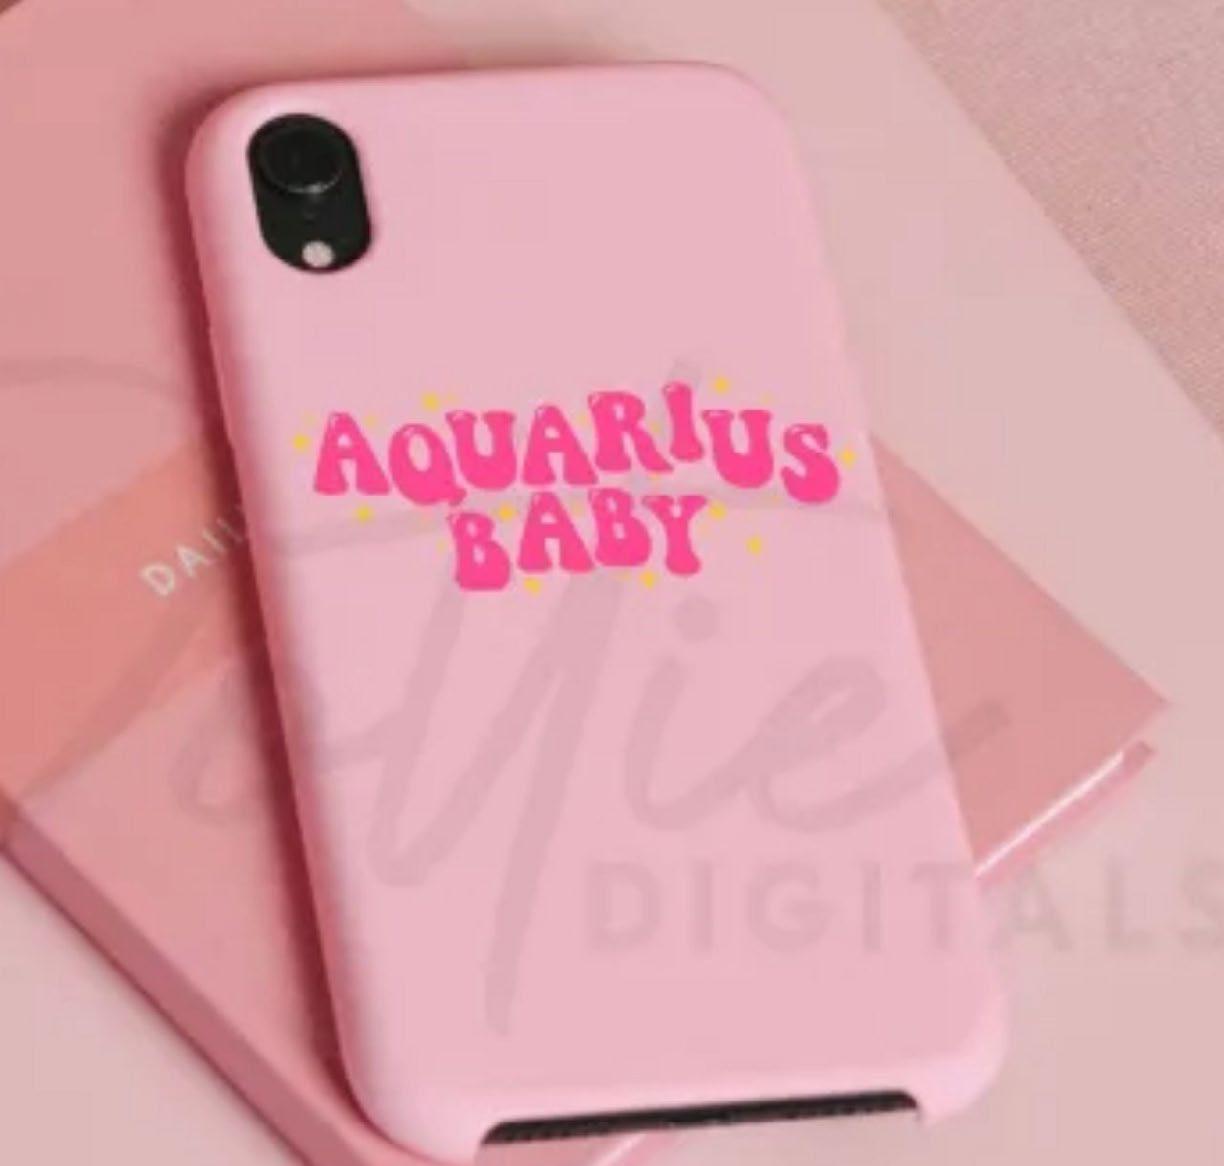
Every birthday deserves to be a birthYAY celebration, and Cricut is here to help you make it unforgettable! From crafting personalized party décor to creating custom gifts that bring smiles, Cricut gives you the tools to add your unique touch to every detail. Whether it’s a whimsical cake topper, fun party favors, or a thoughtful, handmade card, you can bring every birthday dream to life. With Cricut, it’s easy to turn every birthday into the perfect celebration of joy, creativity, and connection!
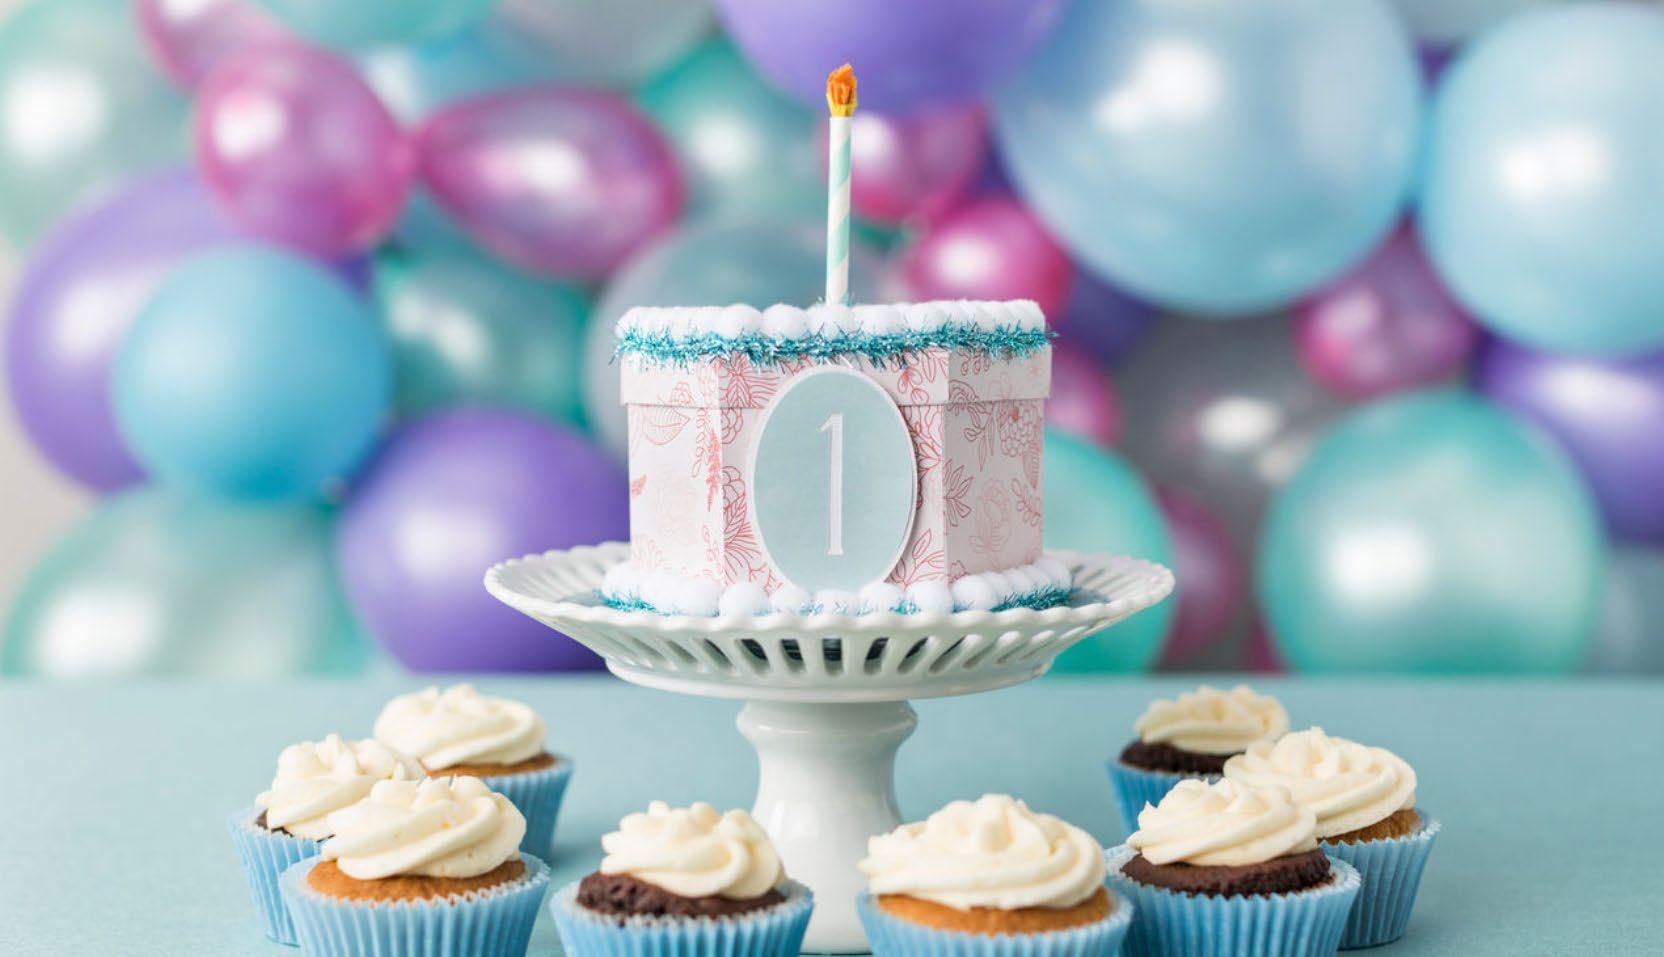
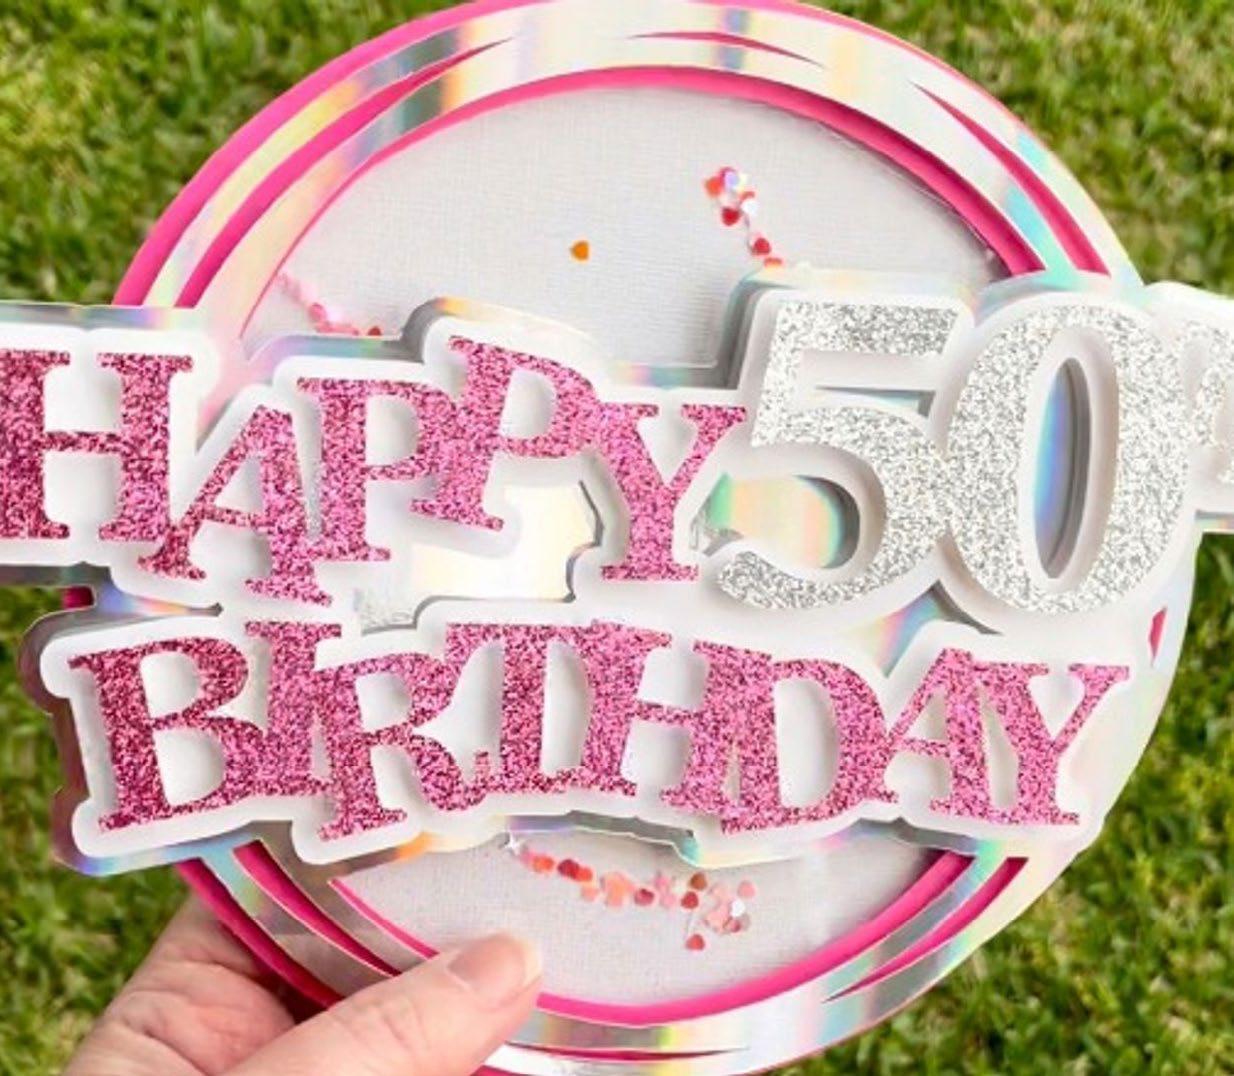
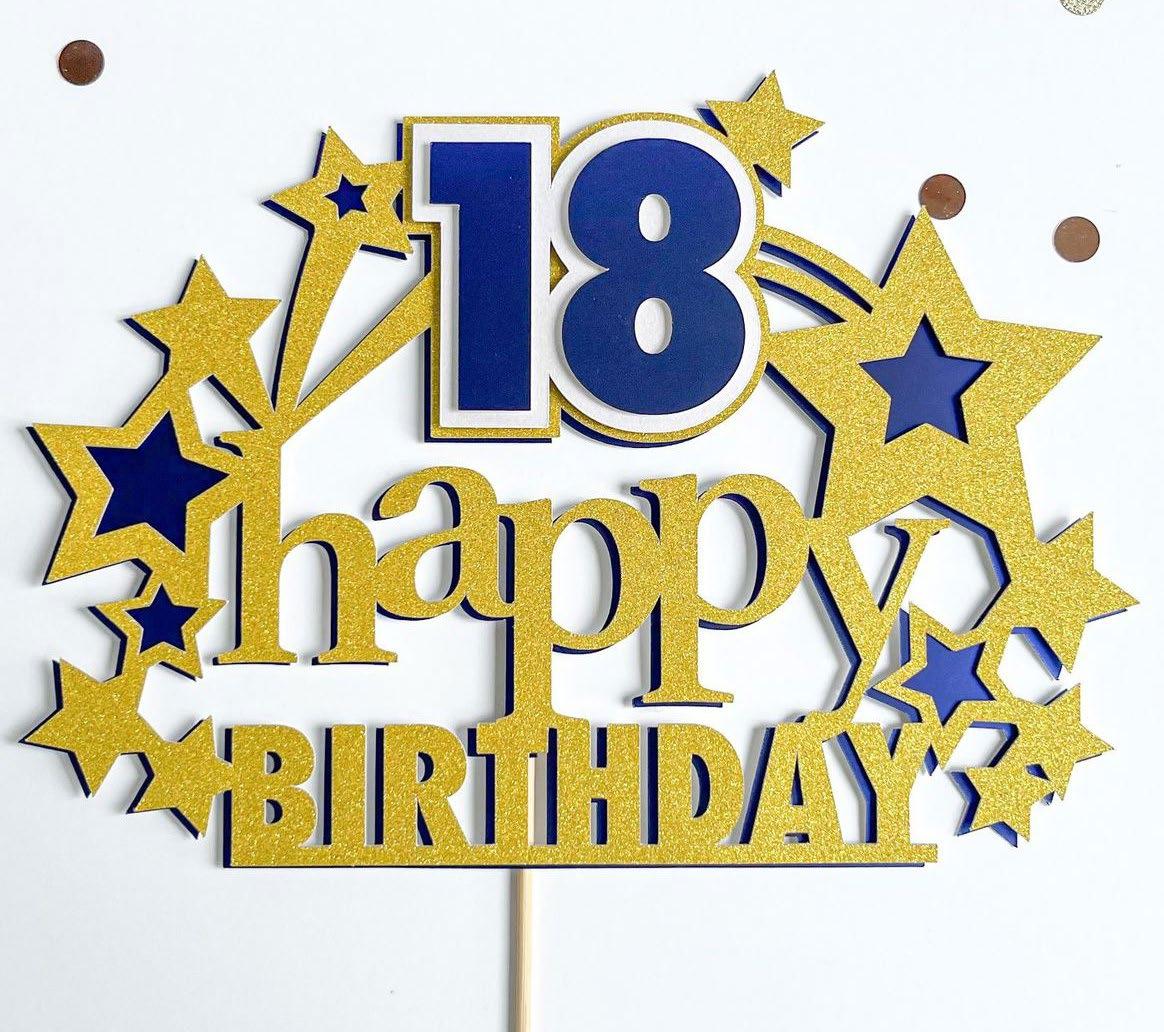
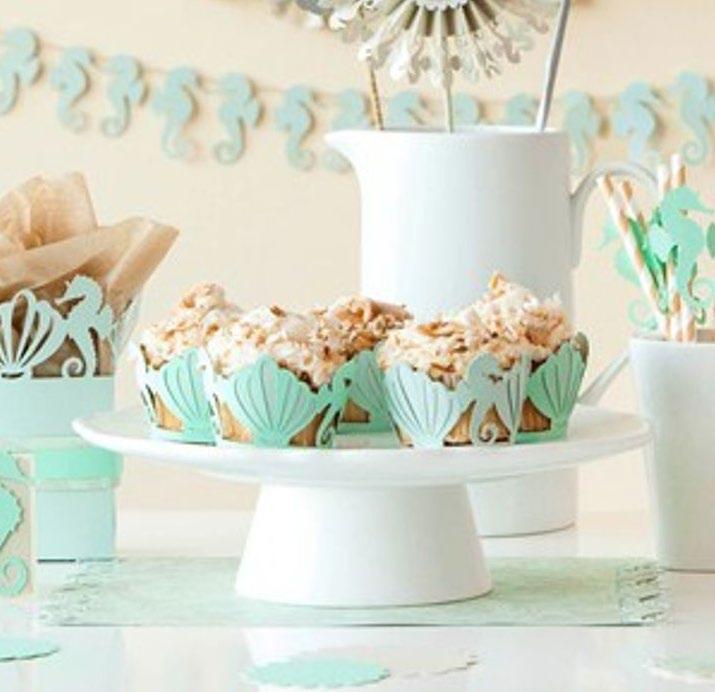
Milestone birthdays deserve extra-special celebrations, and Cricut makes it easy to create unforgettable moments at every age. From designing decorations for a magical first birthday to crafting elegant keepsakes for a 100th, Cricut helps you set the scene with personalized touches that reflect just how unique they are. With Cricut, every milestone becomes a masterpiece of love and creativity!

Materials to Cut
Patterned Cardstock
Solid Color Cardstock (2 Colors)
Everything Else
Cricut® LightGrip Machine Mat
Single Scoring Wheel, Double Scoring Wheel, or Scoring Stylus
Adhesive for Paper
Hot Glue Gun & Glue
Sticks
Pompoms
Glitter Ribbon
Paper Straw
Tissue Paper, Orange
Tissue Paper, Yellow
If you want to alter the project, select Customize, then use the tools in the edit panel to make changes before you cut.
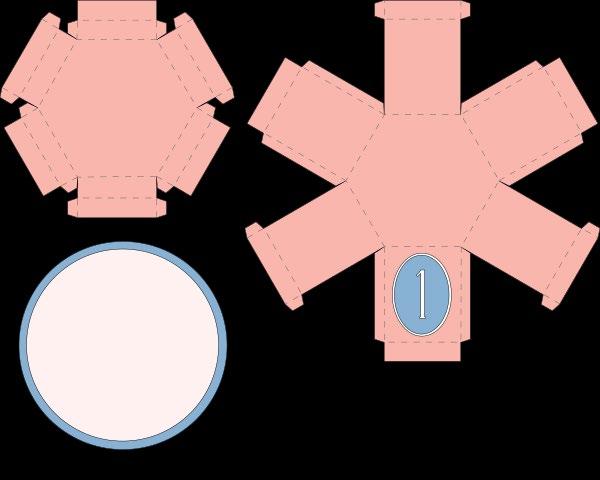
Cut
Follow the prompts in Design Space® to cut the images from cardstock.
Assemble
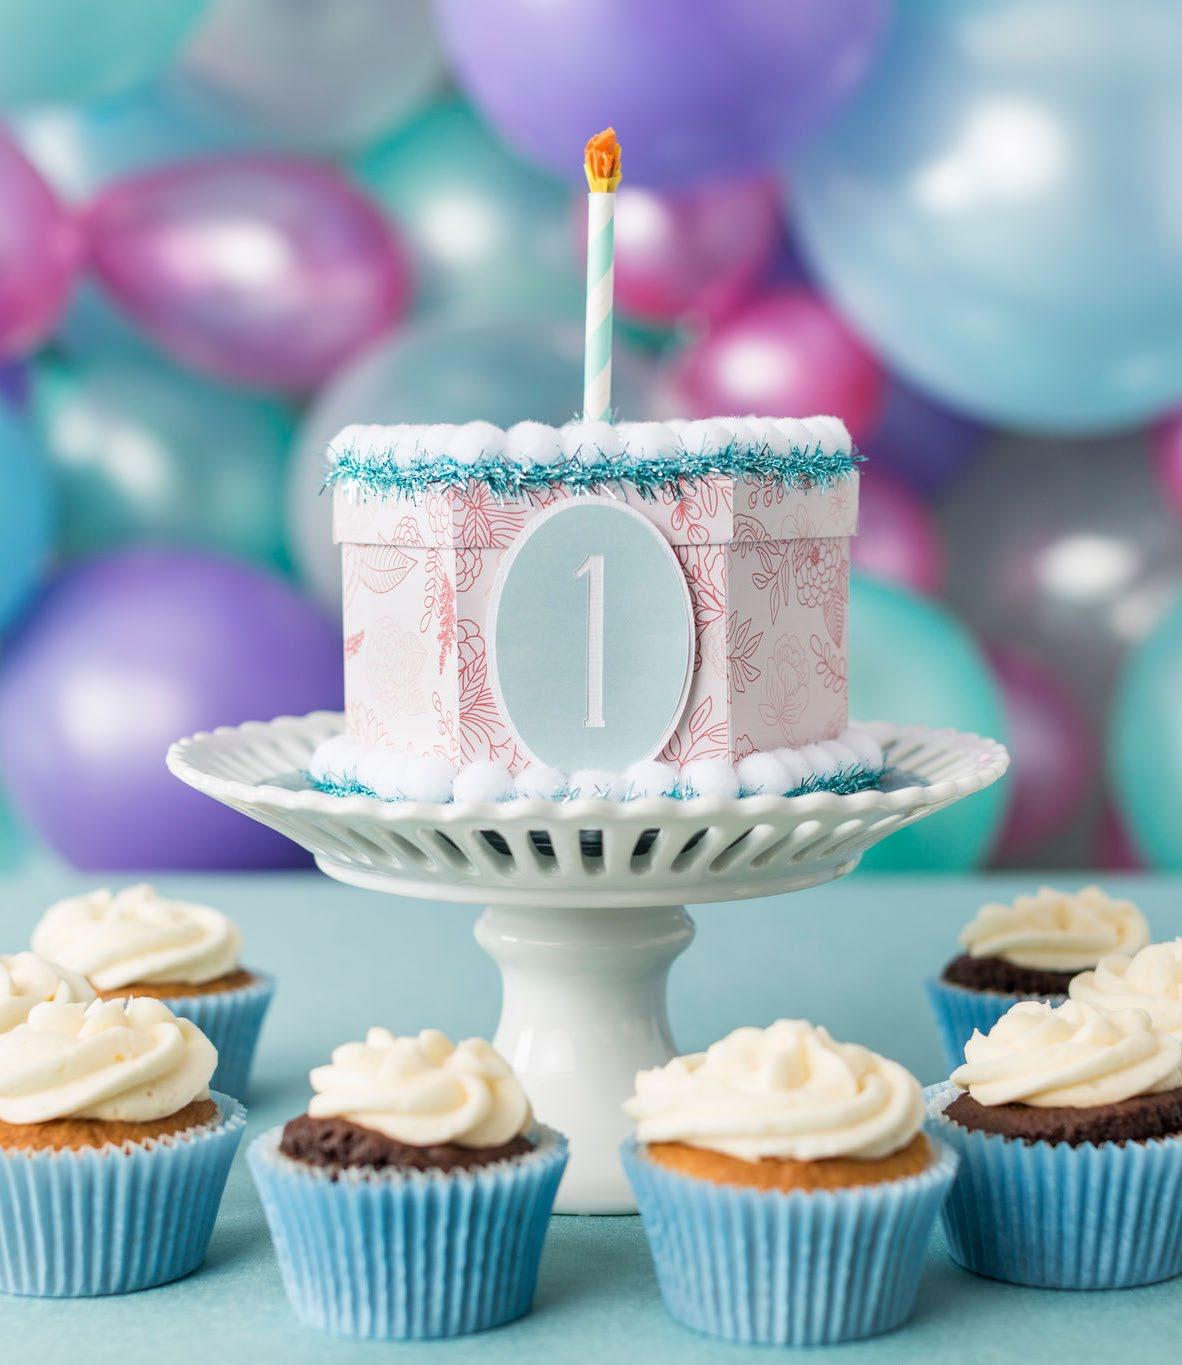
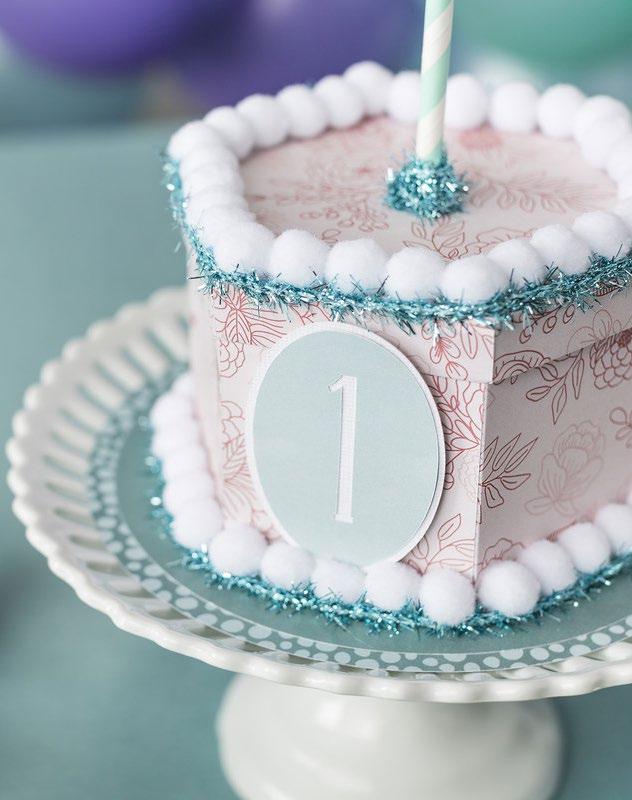
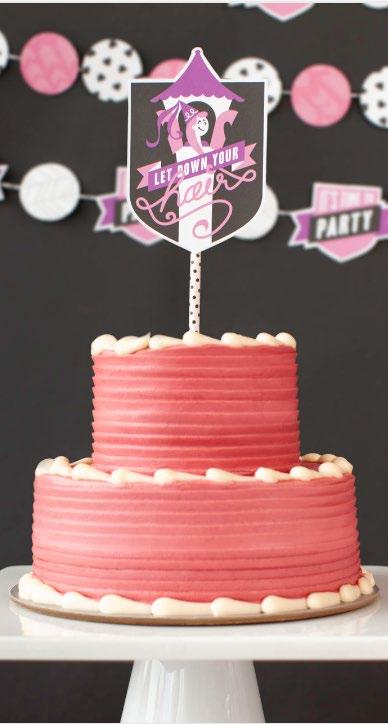
Fold along score lines and glue the box together.
Layer circles and glue together to create a “plate” for the cake.
Layer “1” cutout and oval, and glue together.
Glue box to top of “plate” and embellish with pompoms and glitter ribbon.
Glue star to lid of box and add tissue paper “flames” to straw to create a candle.
Materials to Cut
Everyday Iron-On™, White
Everyday Iron-On™, Gold OR
Smart Iron-On™, White
Smart Iron-On™, Gold
Everything Else
Cricut® StandardGrip Machine Mat (not necessary for Smart Iron-On™)
Cricut Heat Press
Cricut EasyPress™ Mat
Weeder
T-Shirt, Black
If you want to alter the project, select Customize, then use the tools in the edit panel to make changes before you cut.
When you’re ready, select Make It, and make sure you mirror your design.
Make sure your material is shiny side down on your cutting mat (or loaded into the machine directly when using Smart Iron-On™)
Follow prompts in Design Space®
Assemble
Use a weeder tool to remove unnecessary iron-on pieces, leaving design on the clear backer.
For Cricut EasyPress® 3 download the Cricut Heat™ app to get precise settings and step by step instructions. For all other Cricut Heat Press machines, get time and temperature settings and instructions on the Cricut Heat Guide.
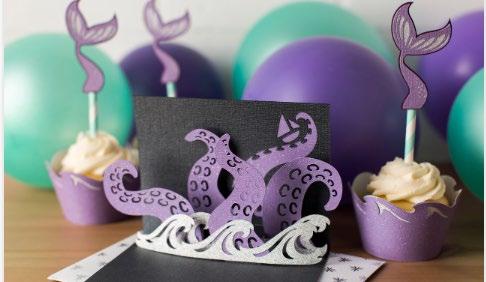
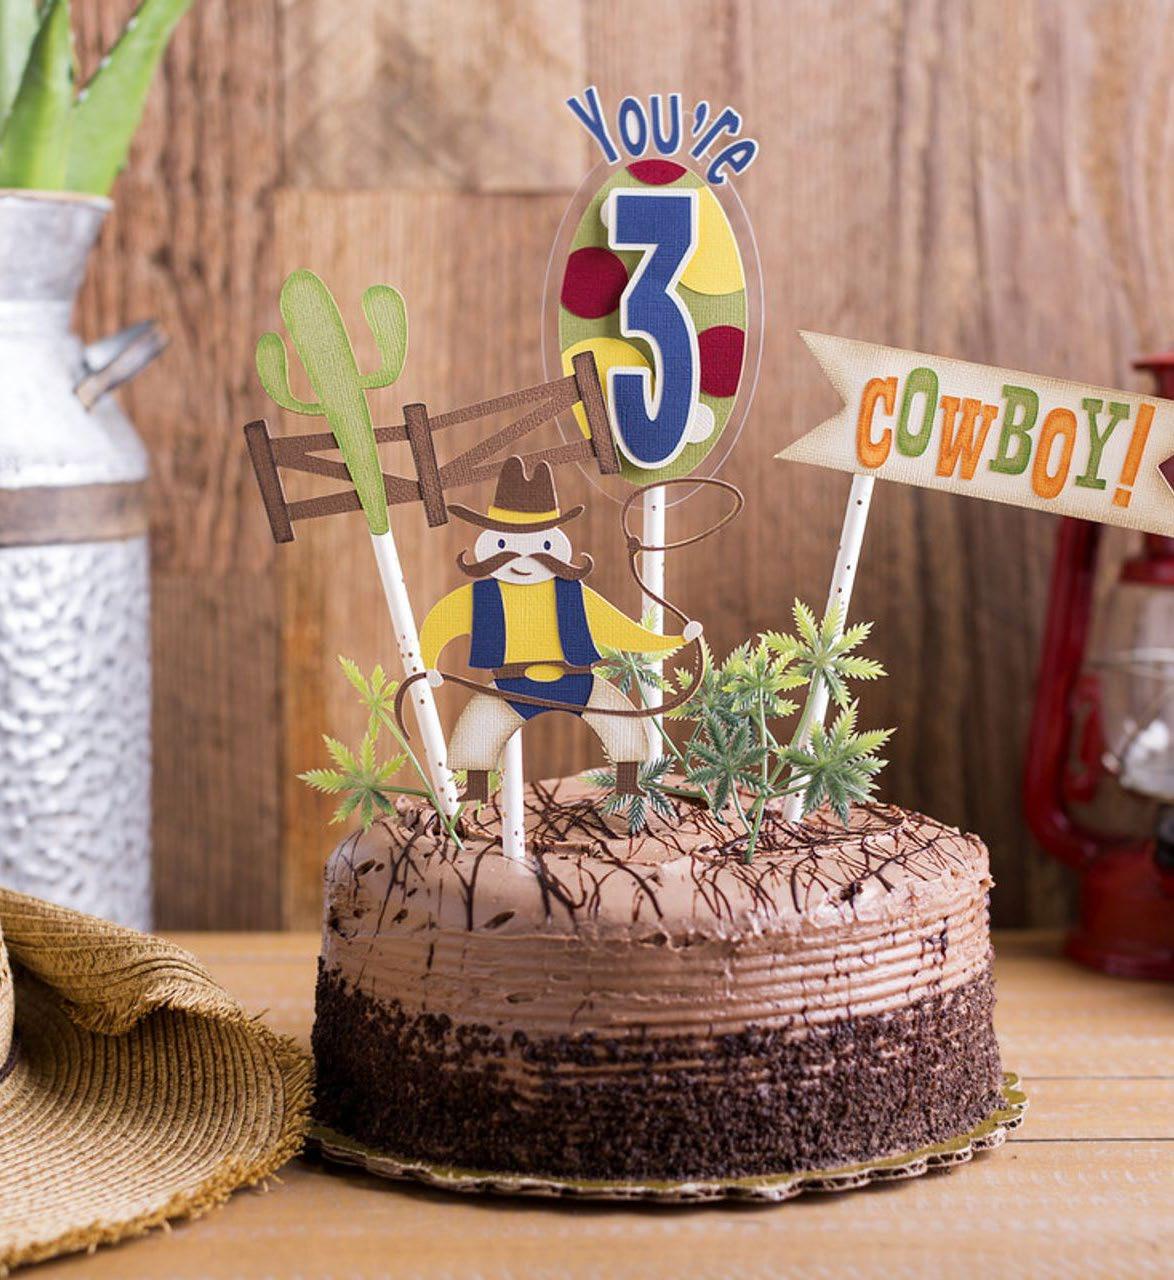
There’s nothing like the joy of celebrating the little hearts you hold closest, and Cricut helps you make their big day unforgettable. From crafting magical party décor that sets the scene to creating the perfect favors that make every guest smile, Cricut gives you the tools to bring their dream celebration to life. Because when it comes to the ones who mean the most, every detail deserves to be as special as they are!
Materials to Cut
Cardstock, Vanilla
Cardstock, Periwinkle
Cardstock, Yellow
Cardstock, Teal
Cardstock, Purple
Cardstock, Pink
Everything Else
Cricut® LightGrip
Machine Mat
Fine Point Blade
Adhesive for Paper
String
To alter the project, select Customize, then use the Edit panel to make changes.
To add text, use the text tool to add desired text. To fasten text to another layer, use Attach.
When you’re ready, select Make It. Then follow Design Space® prompts.
Assemble
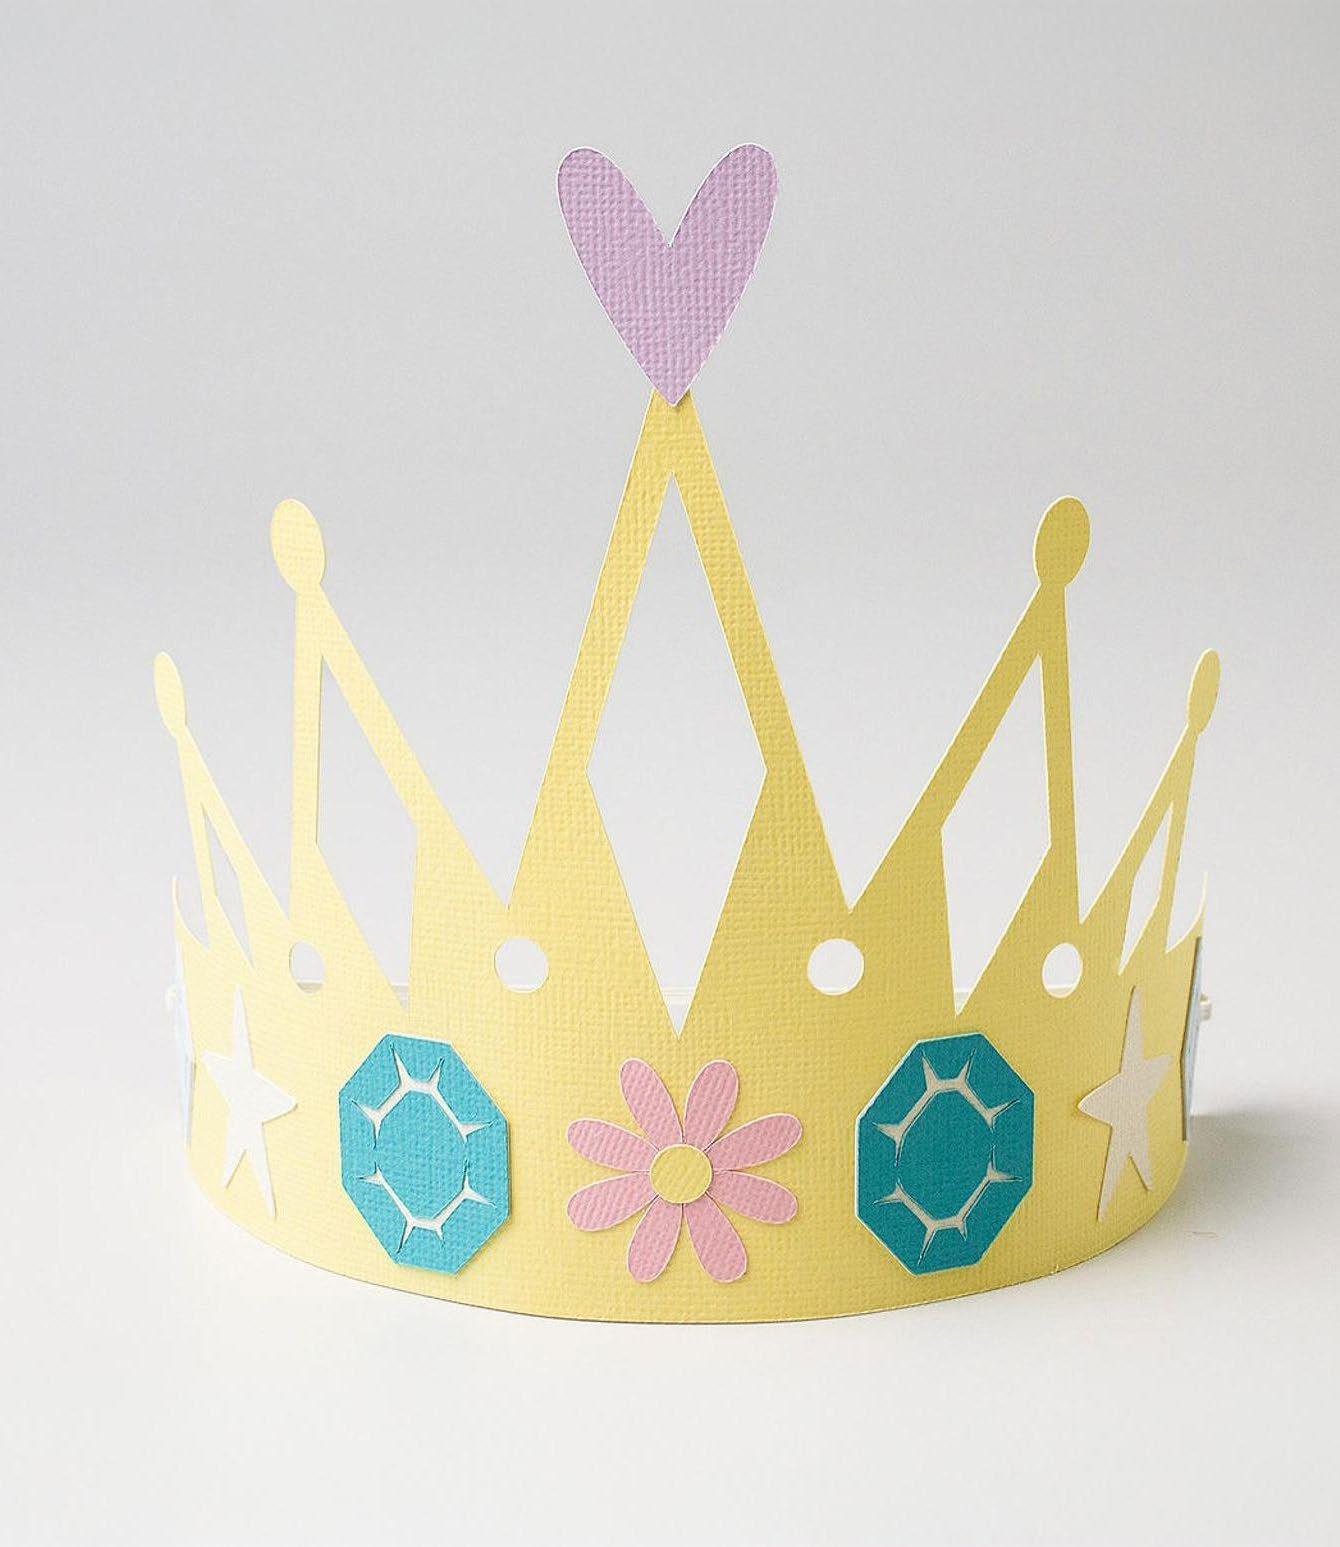
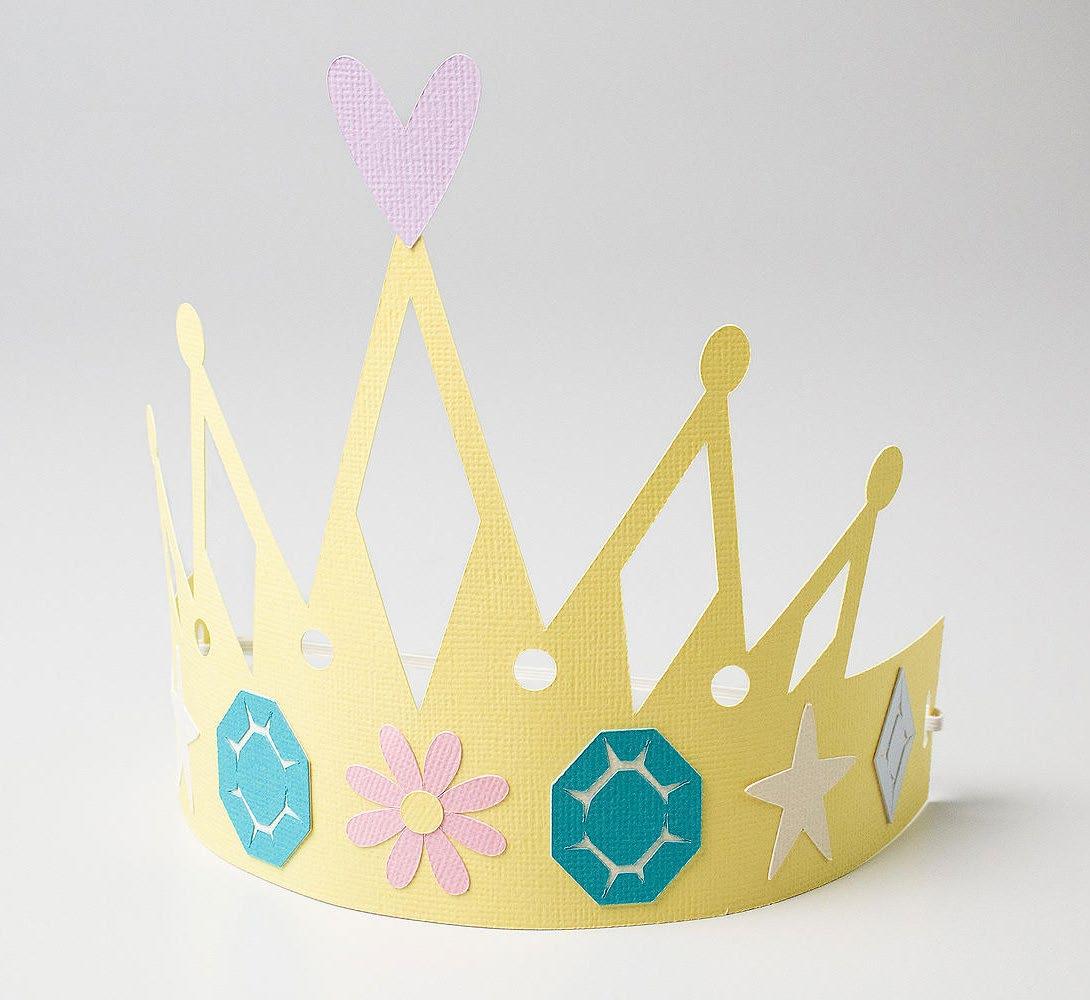
Gather all materials.
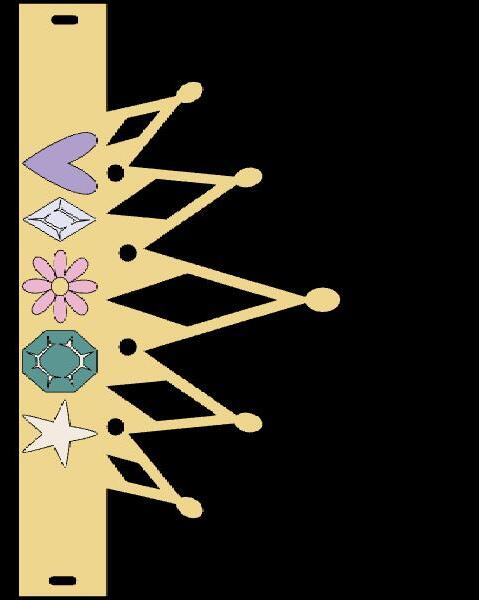
Assemble the crown elements that have multiple layers by gluing the detail piece onto the base.
Arrange the elements on the crown as desired, gluing in place.
Attach string/elastic into the holes on the edge of the crown and it is now ready for your Princess to wear and enjoy!
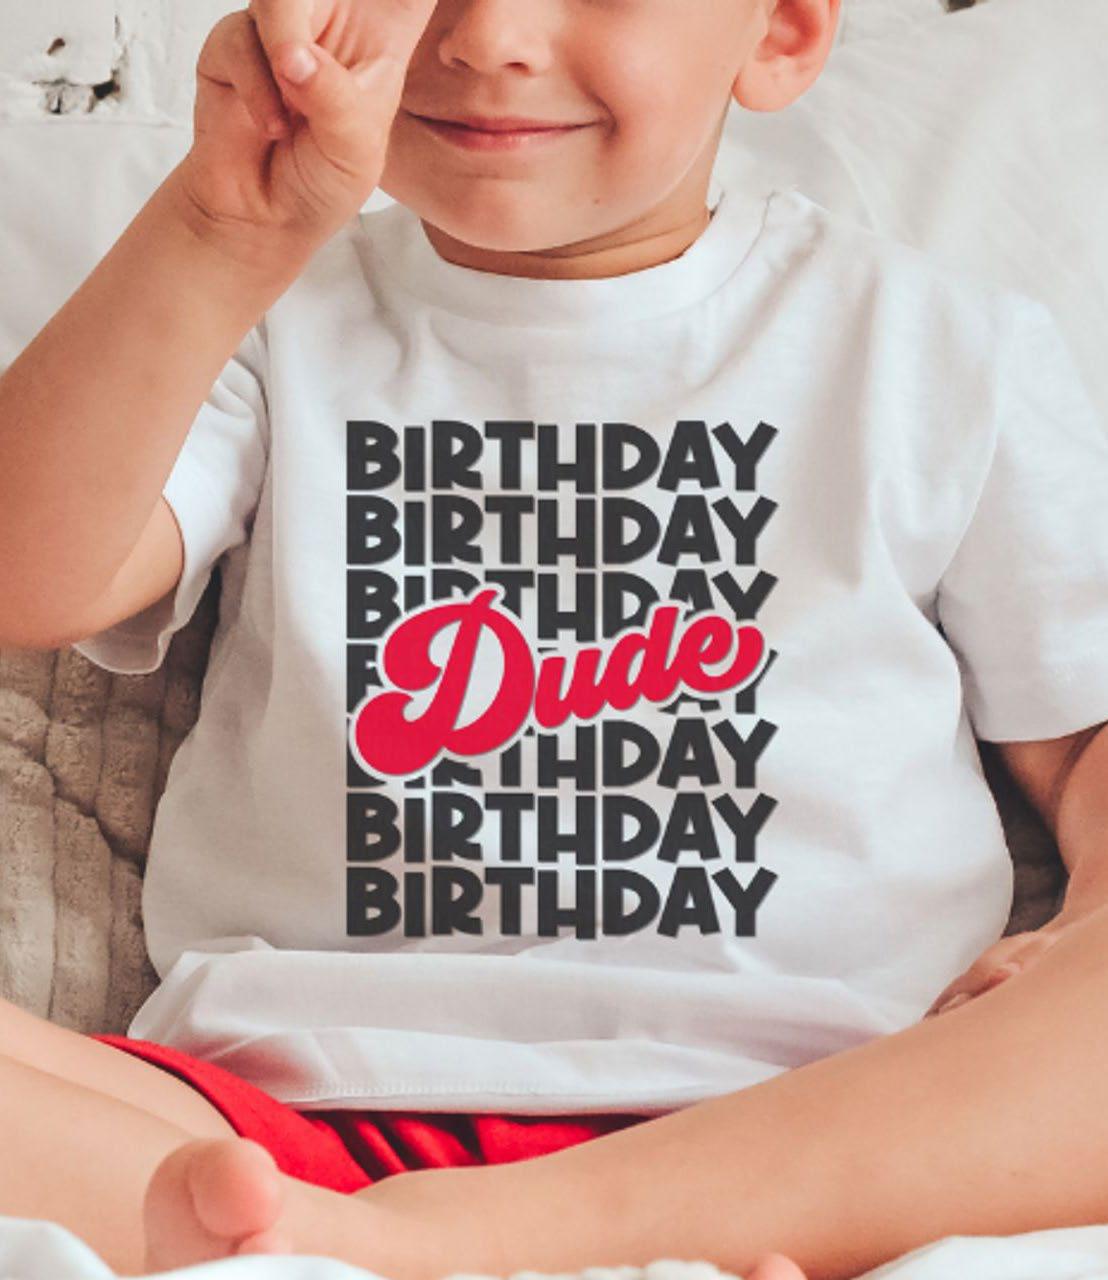
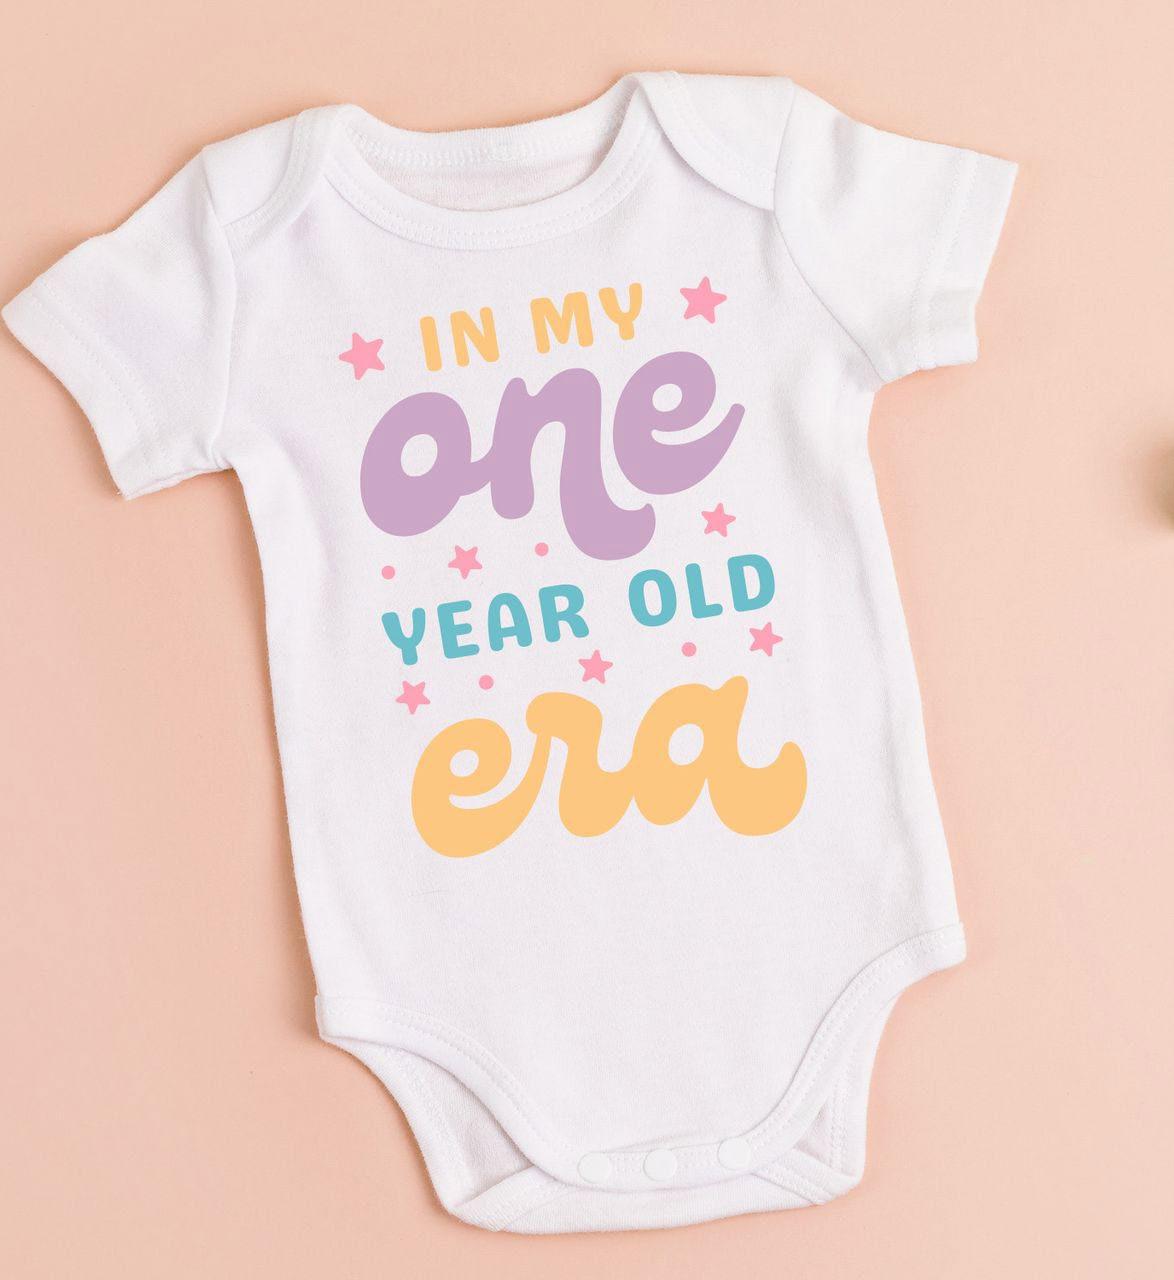
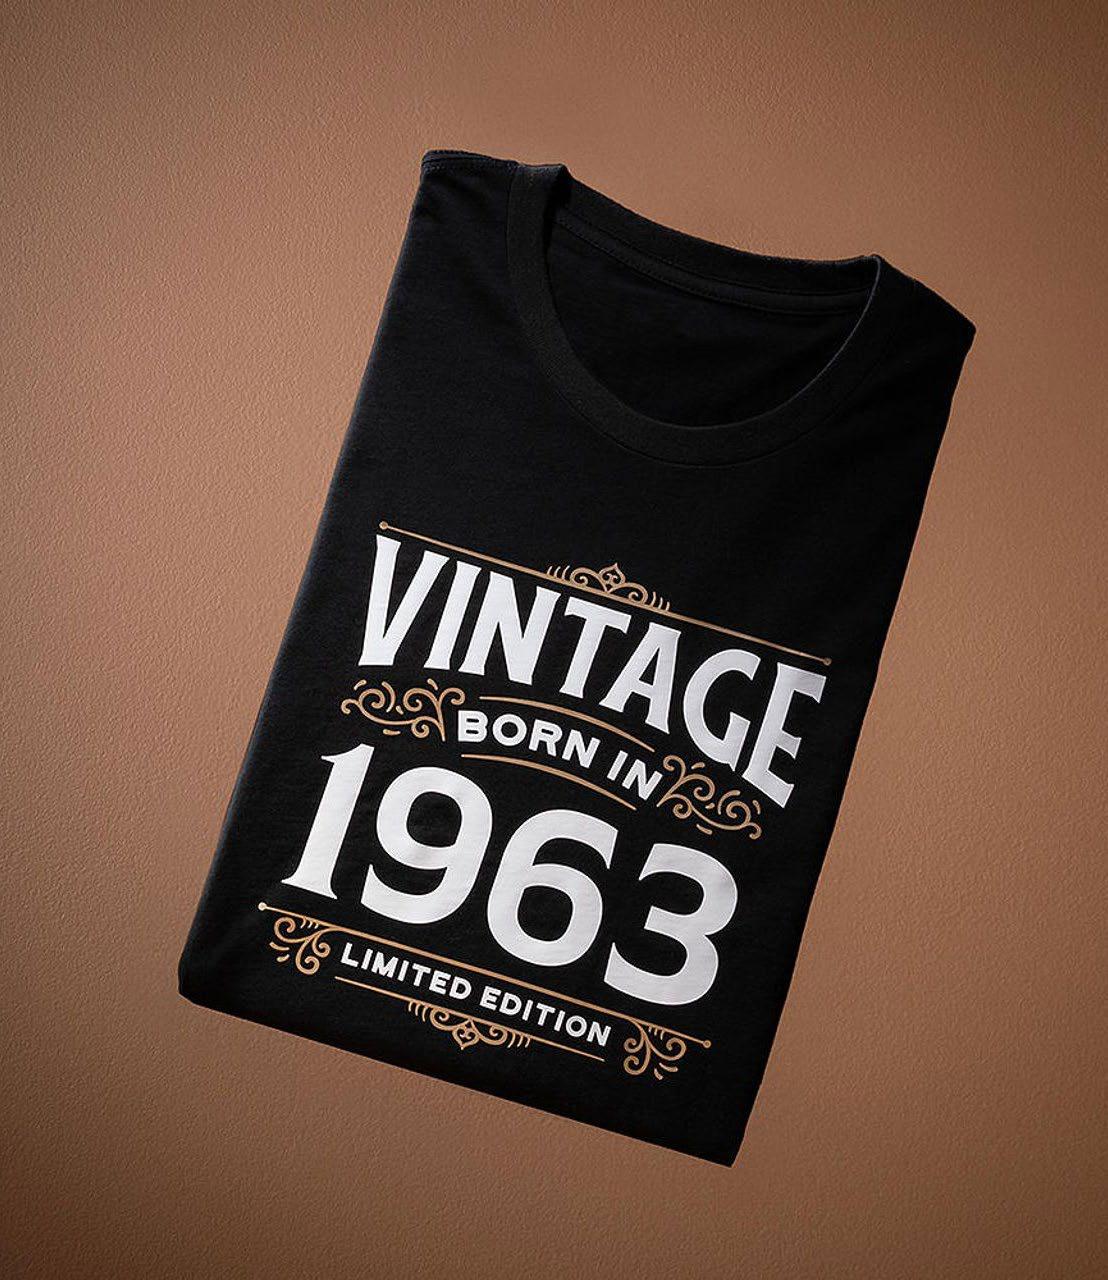
Materials to Cut
Everyday Iron-On™, Black
Everyday Iron-On™, Red OR
Smart Iron-On™, Black
Smart Iron-On™, Red
Everything Else
Cricut® StandardGrip Machine Mat (not necessary for Smart Iron-On™)
Cricut Heat Press
Cricut EasyPress™ Mat
Weeder
T-Shirt, White
If you want to alter the project, select Customize, then use the tools in the edit panel to make changes before you cut.
When you’re ready, select Make It, and make sure you mirror your design.
Make sure your material is shiny side down on your cutting mat (or loaded into the machine directly when using Smart Iron-On™)
Follow prompts in Design Space®
Assemble
Use a weeder tool to remove unnecessary iron-on pieces, leaving design on the clear backer.
For Cricut EasyPress® 3 download the Cricut Heat™ app to get precise settings and step by step instructions. For all other Cricut Heat Press machines, get time and temperature settings and instructions on the Cricut Heat Guide.

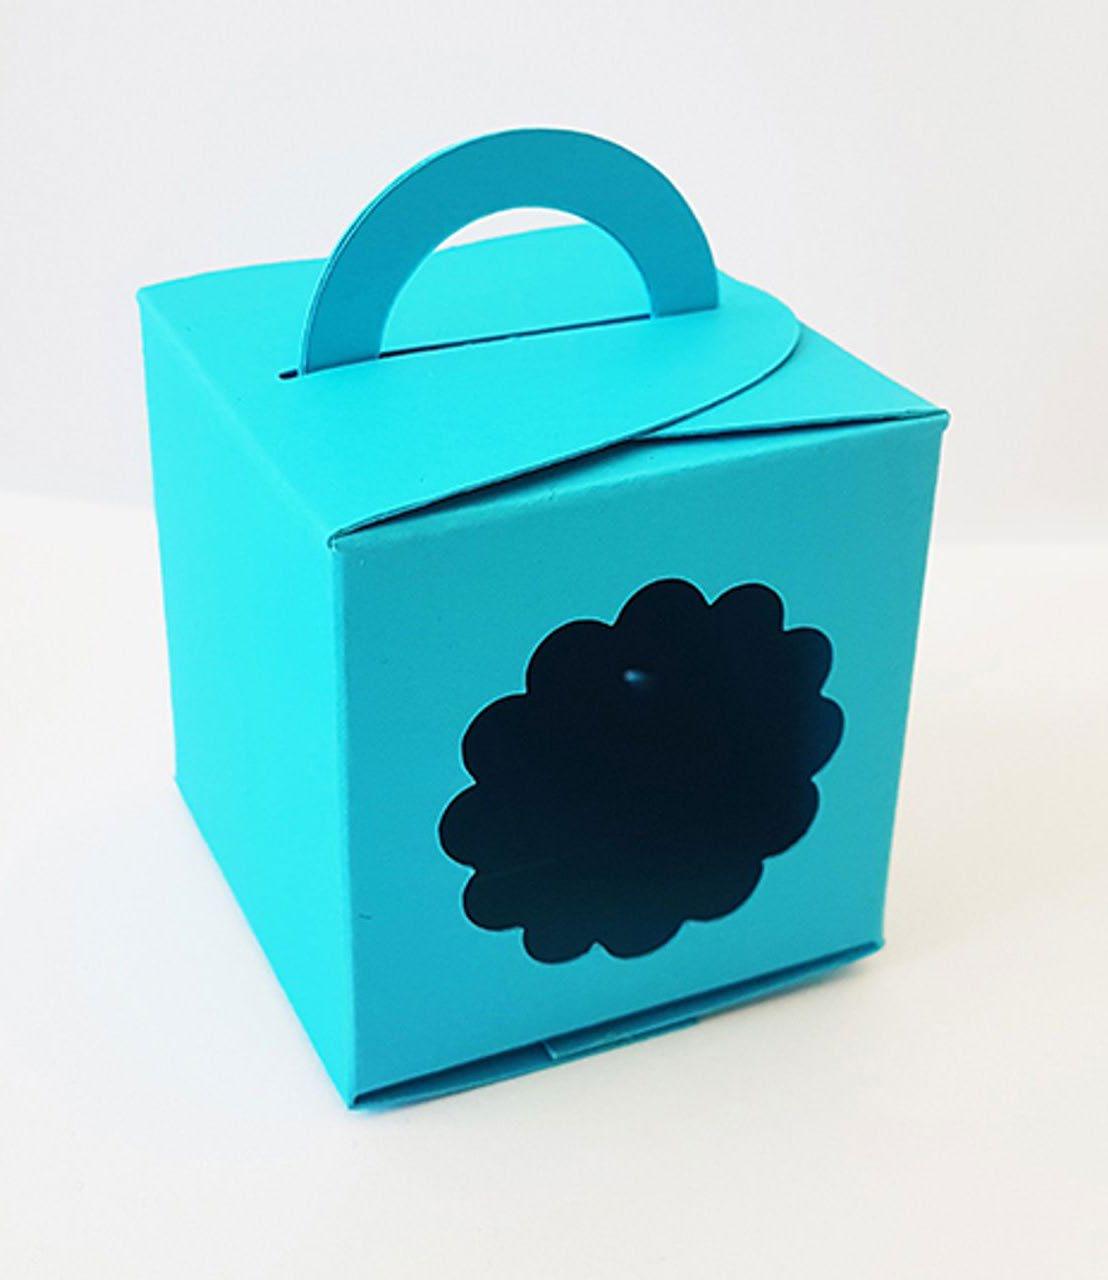
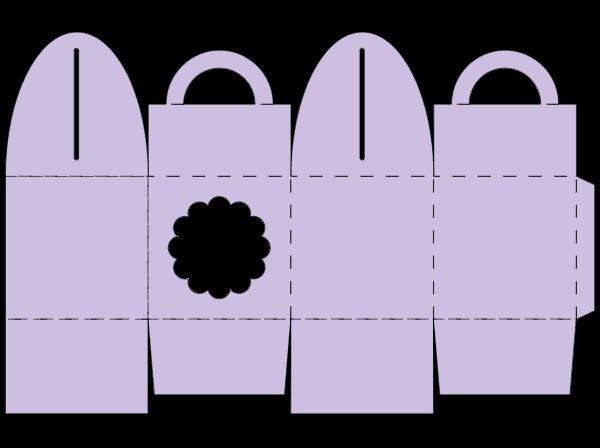
Materials to Cut
Cardstock, 100lb/150 gsm
Everything Else
Cricut® StandardGrip Machine Mat
Adhesive for cardstock
Single Scoring Wheel, Double Scoring Wheel, or Scoring Stylus
Acetate (Optional: can be manually cut and glued inside of box as “window” of the box)
To alter the project, select Customize, then use the Edit panel to make changes.
To add text, use the text tool to add desired text. To fasten text to another layer, use Attach.
When you’re ready, select Make It. Then follow Design Space® prompts.
Assemble
Fold along score lines
Glue Acetate sheet to cover window cutout (optional)
Glue the protruding flaps & fold together.
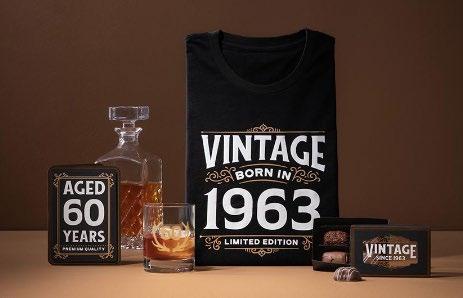
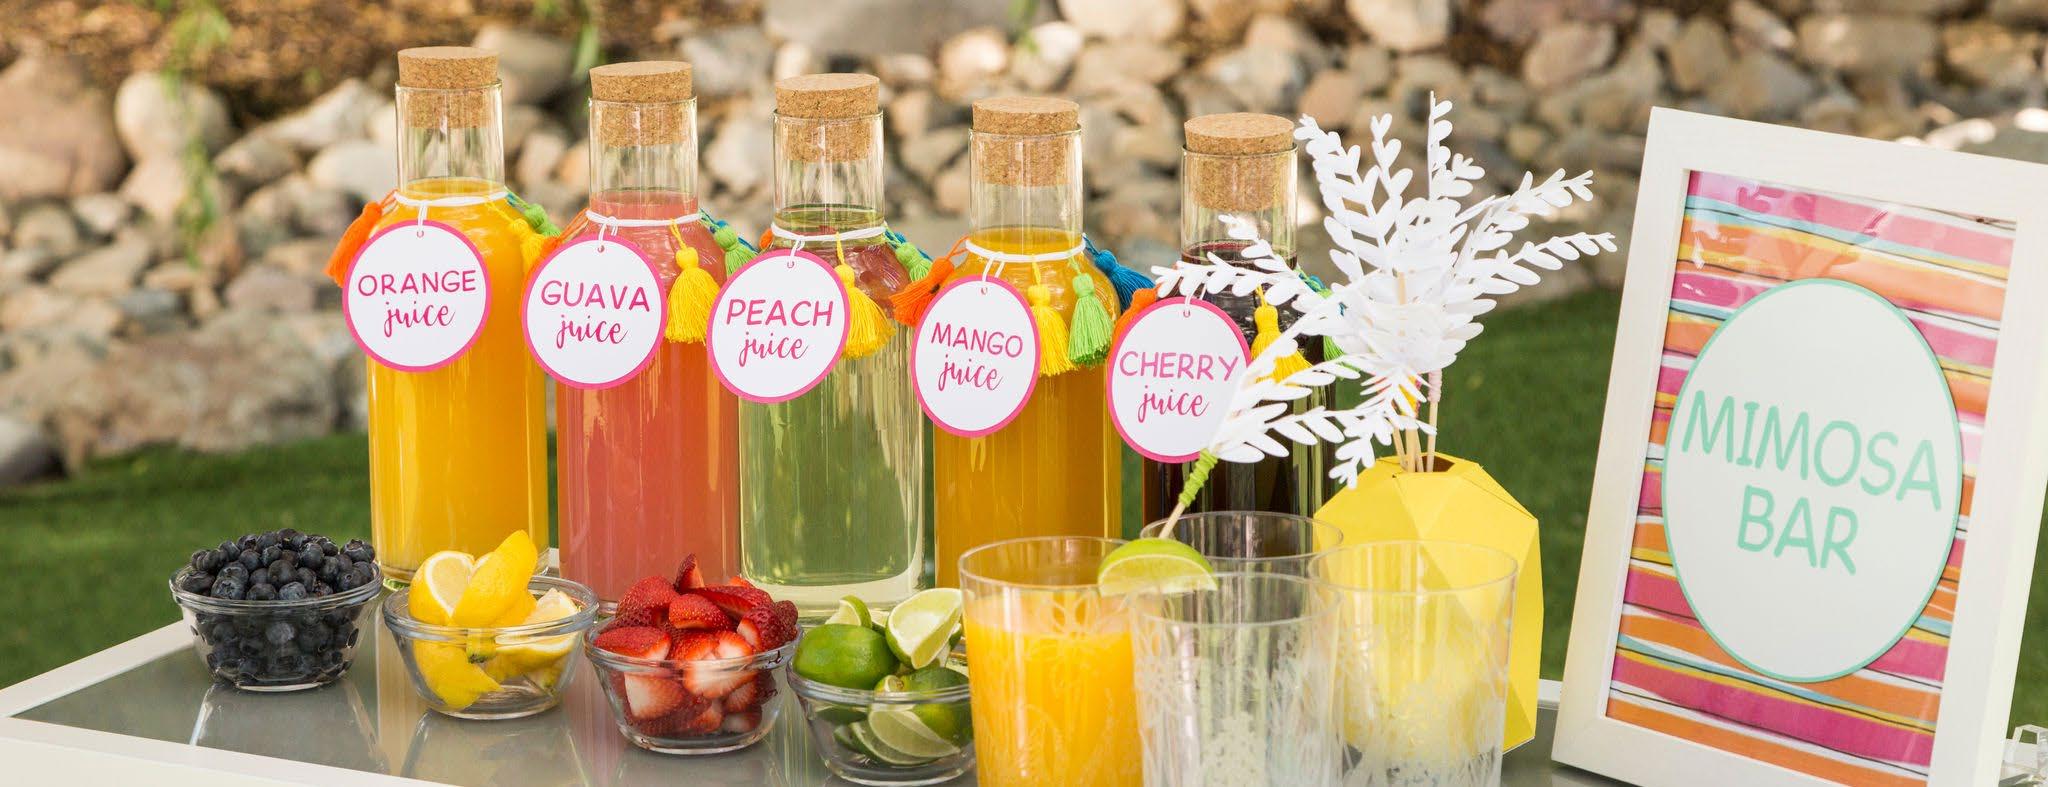
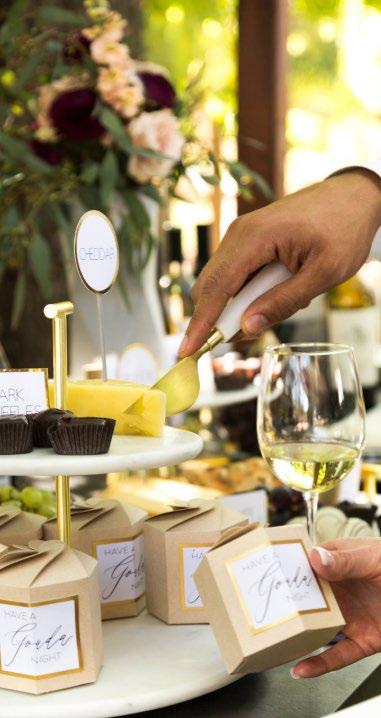
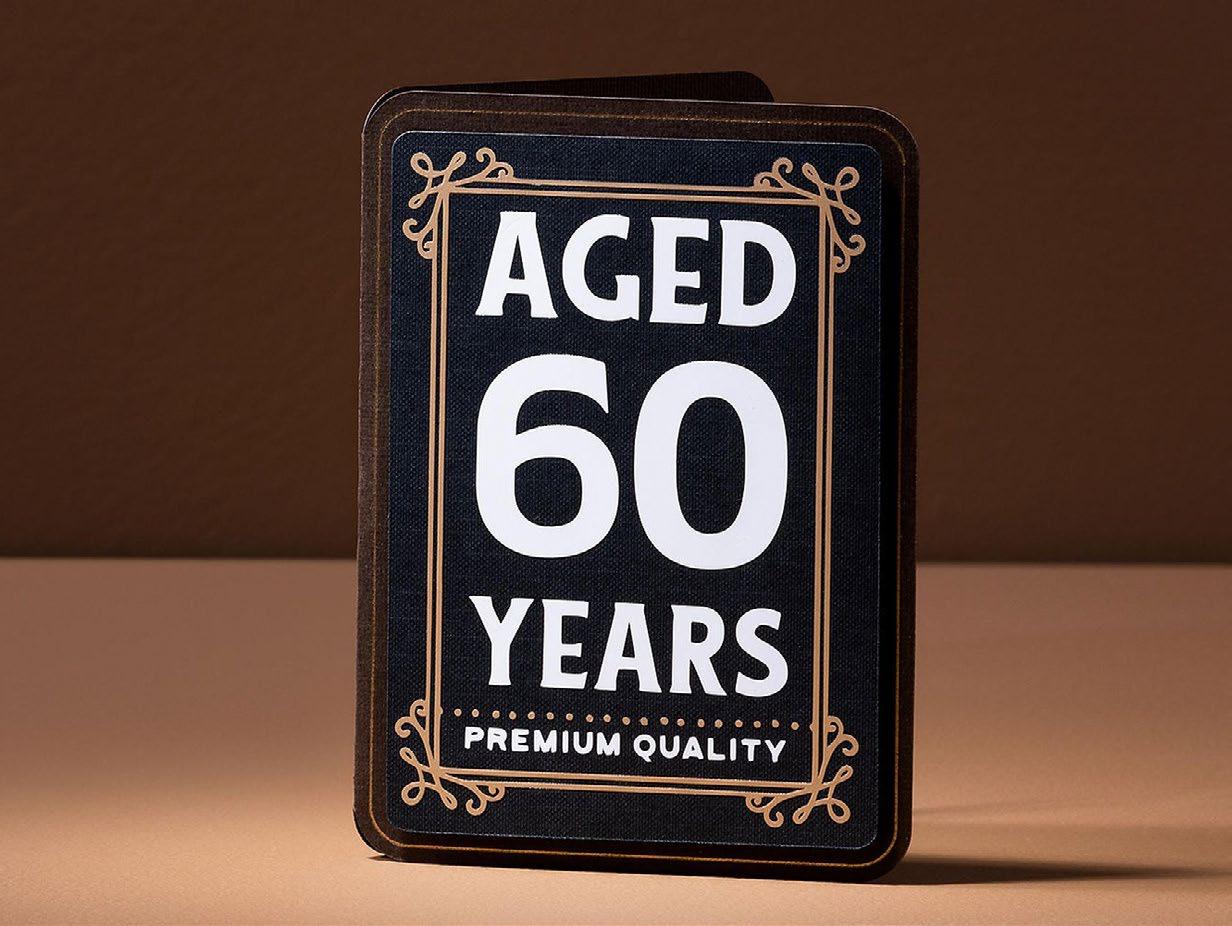
No matter what age you’re celebrating, Cricut makes it easy to honor everyone on their special day. From elegant decorations that set the scene for a sophisticated soirée, to fun personalized gifts that spark joy, Cricut helps you craft moments that feel as special as the person you’re celebrating. Create custom wine tags, party favors, and even meaningful keepsakes that turn memories into treasures. Because every year is worth celebrating, with your Cricut, you can make sure it’s done in style.
Materials to Cut
Cardstock, Black
Vinyl, Gold
Chipboard
Everything Else
Cricut® StandardGrip Machine Mat
Cricut® LightGrip Machine Mat
Single Scoring Wheel or Double Scoring Wheel (depending on material)
Hot Glue Gun and Glue Sticks
Adhesive Foam Dots
Weeder
Scraper
Transfer Tape
Confetti Spears
If you want to alter the project, select Customize, then use the tools in the Edit panel to make changes before you cut.
Follow the prompts in Design Space® to cut the images from the cardstock, vinyl and chipboard.
Insert your scoring tool when prompted.
Apply the cut materials in the same order it appears in the Layers panel in Design Space, starting from the bottom layer and working up.
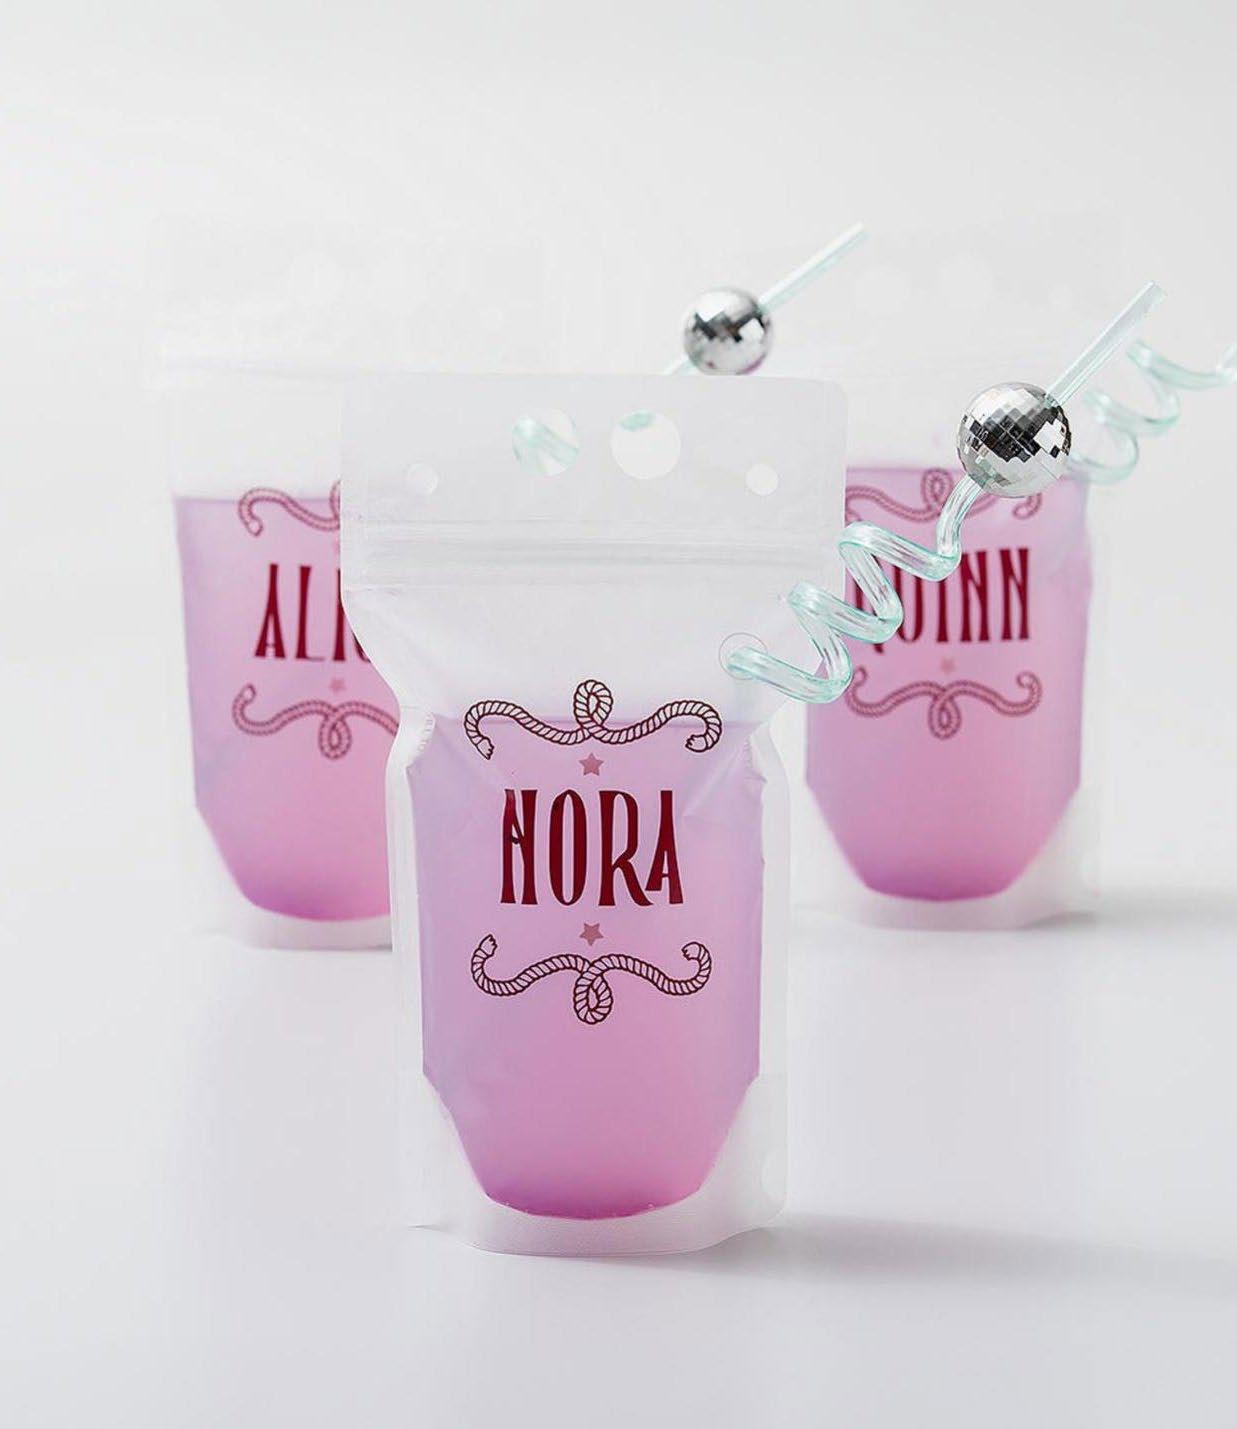
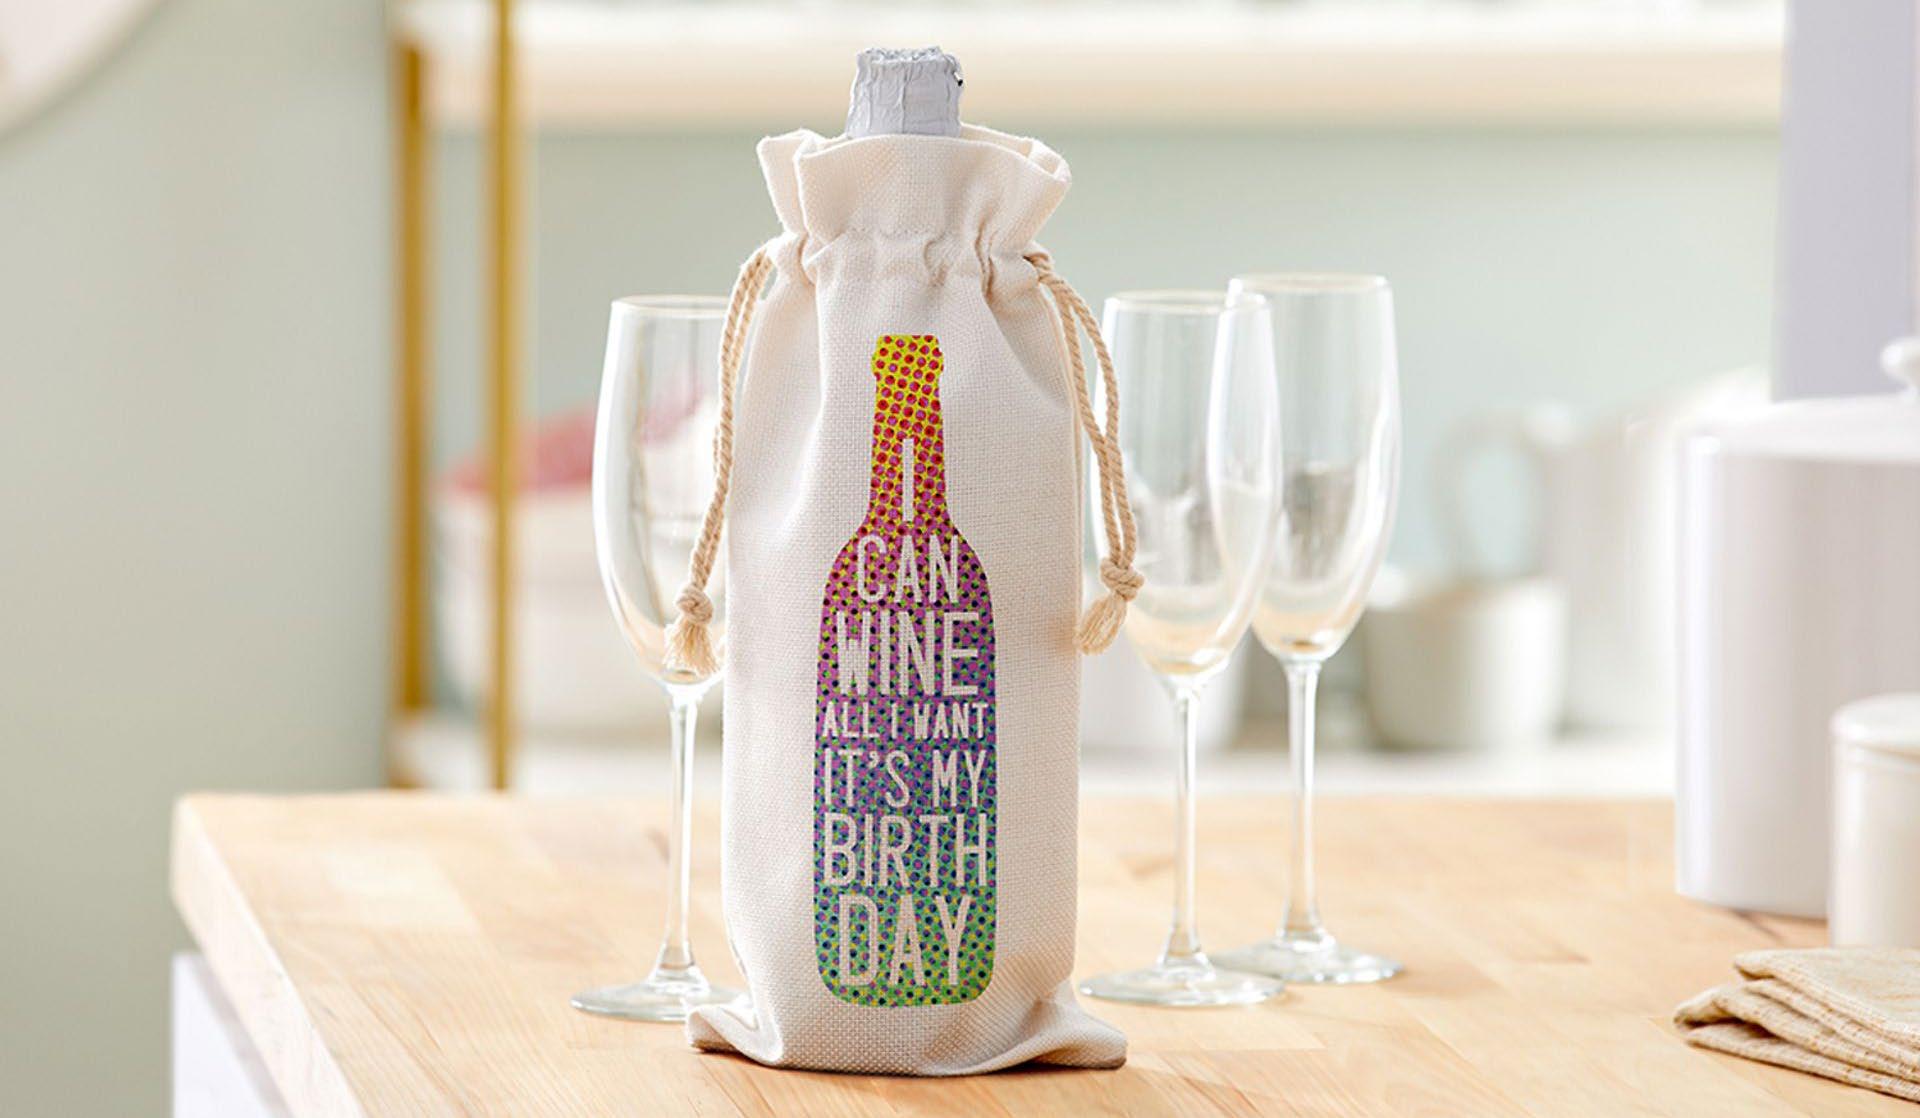
Materials to Cut
Smart Vinyl™, Pink
Premium Vinyl™, Light Pink
Everything Else
Cricut® StandardGrip
Machine Mat12 in x 12 in
Cricut® Transfer Tape
Weeder
Scraper
Drink Pouches
To alter the project, select Customize, then use the Edit panel to make changes.
To edit text, double-click the text you want to change, then update as needed. To fasten text to another layer, use Attach.
Cut
Follow Design Space® prompts to cut images from vinyl.
Assemble
Use a Weeder Tool to remove unneeded vinyl pieces. When weeding, start from inside and move outward.
Use Transfer Tape and a Scraper Tool to apply vinyl cuts to your project. Make sure the surface is clean and dry.
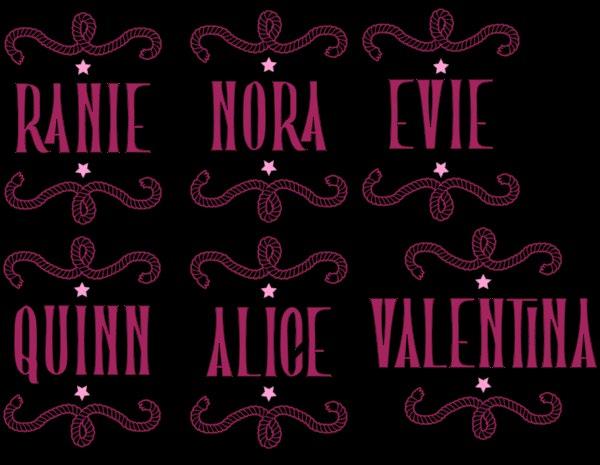

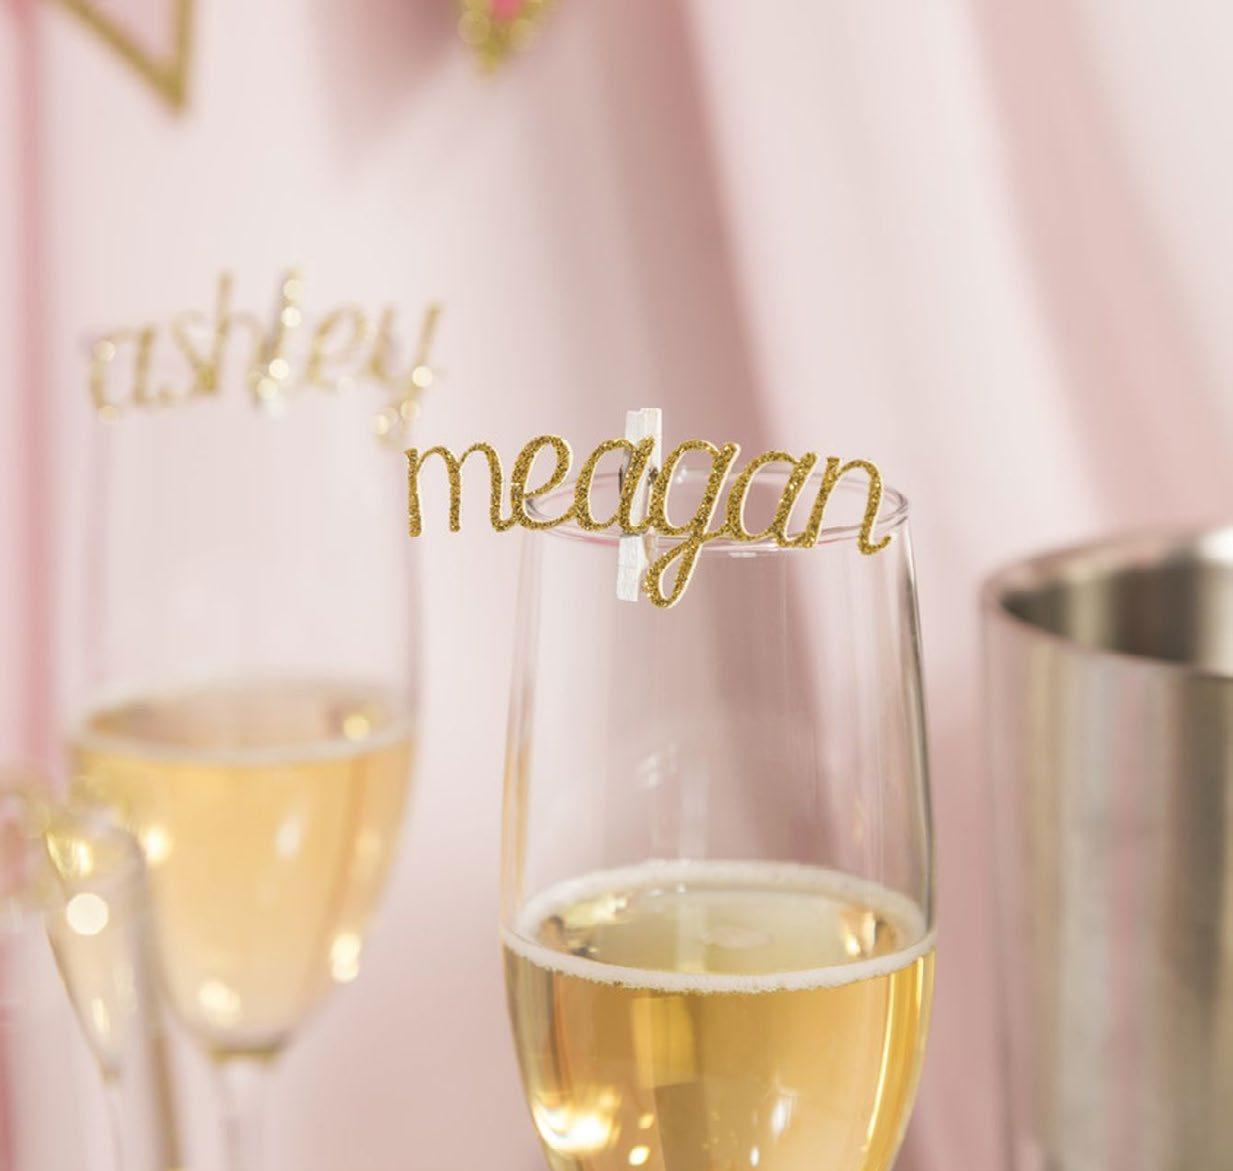
Materials to Cut
Glitter Cardstock in Gold
Everything Else
Cricut® StandardGrip
Machine Mat
Adhesive for Cardstock
Hot Glue Gun
Mini Clothespins
To alter the project, click “Customize,” then use the tools in the Edit panel to make changes before you cut.
Change each of the names to the names you want to use.
Use the advanced text tool to ungroup the names to letters if necessary: all letters must touch somewhere so each name can be welded into one complete piece.
When the names look as you want them to, select all the letters, then use the weld tool to turn them into one contiguous shape before moving on to the cut step.
Duplicate each name, and mirror, so there are two of each name: one normal, and one mirrored. This is to give the letters extra strength, and to make both sides glittery.
Follow the prompts in Design Space® to cut the images from the cardstock.
Use spray adhesive or glue to attach the front of the names to their backers
Use hot glue to attach the mini clothes pins to the back of the names, then attach to each of your guests’ glasses.
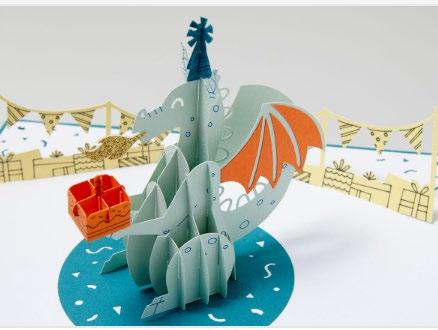
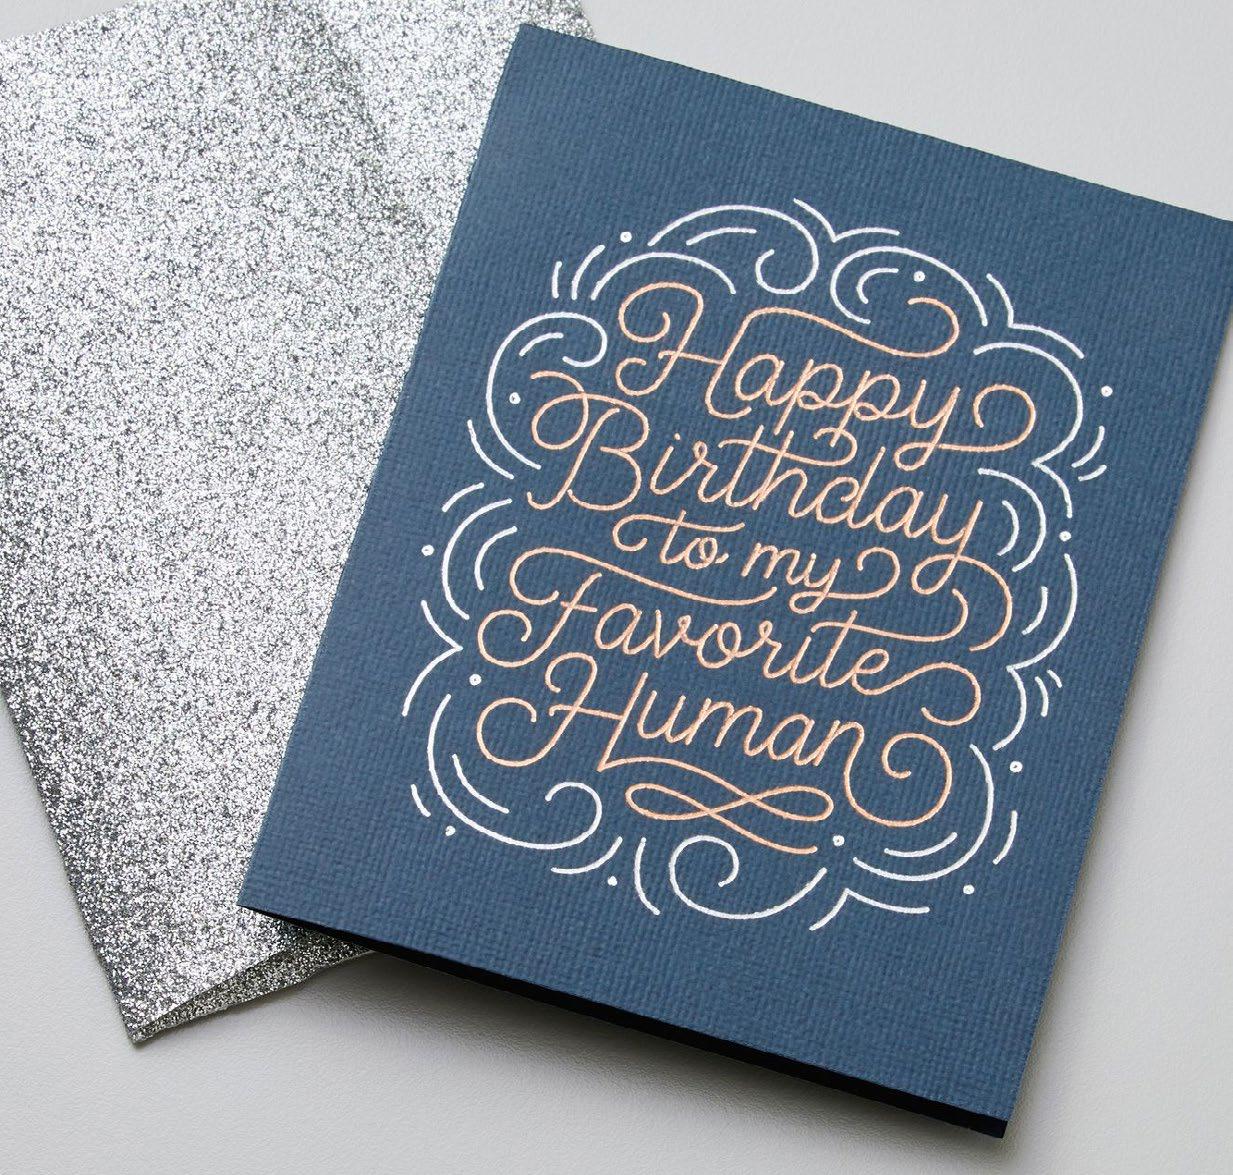
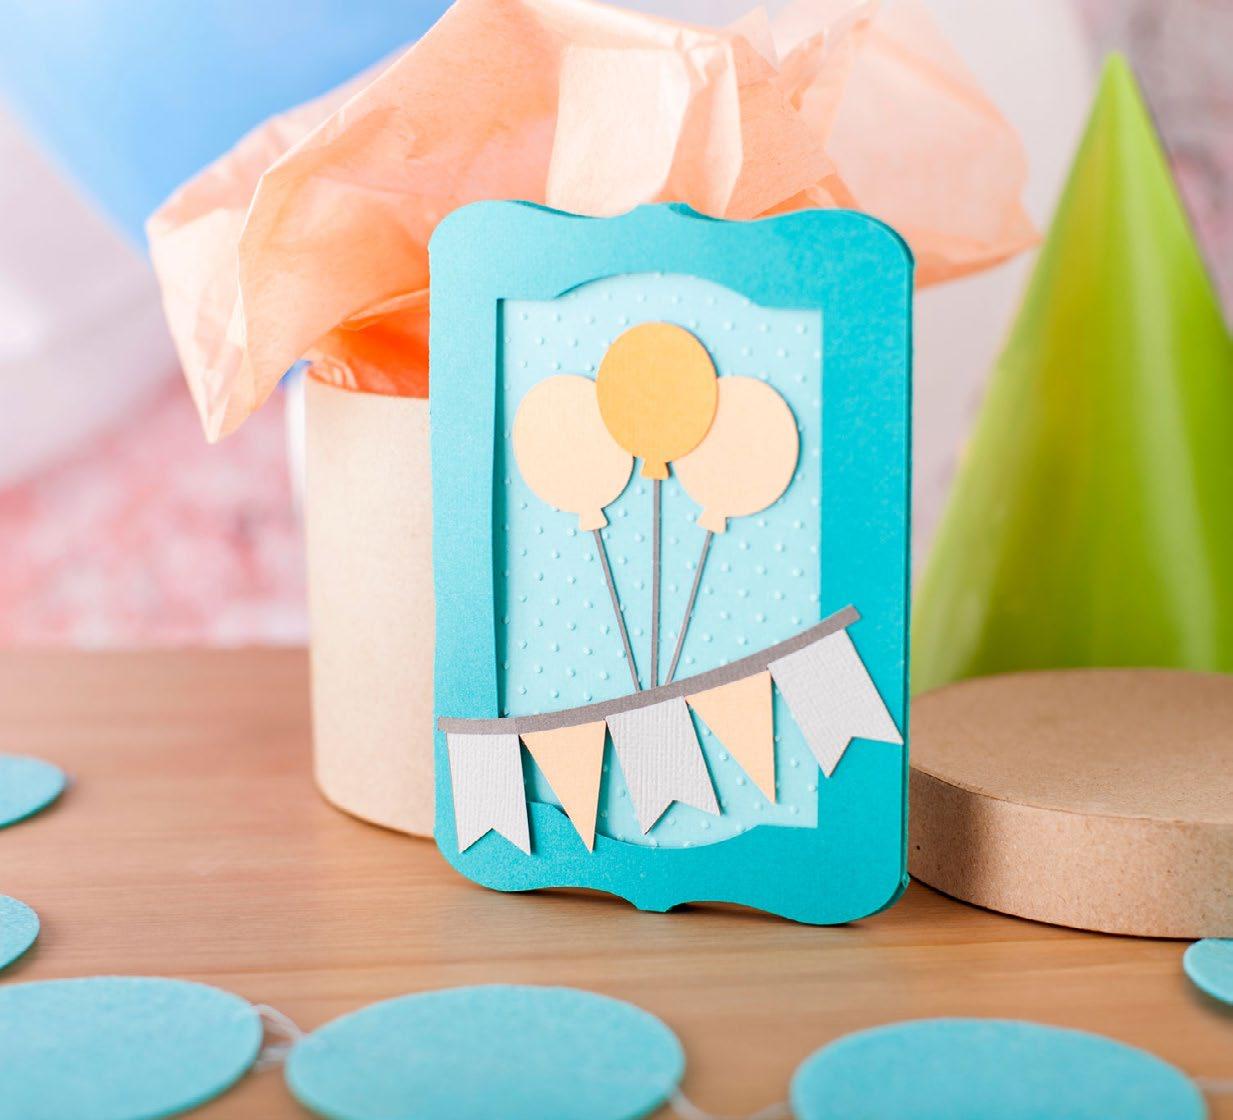
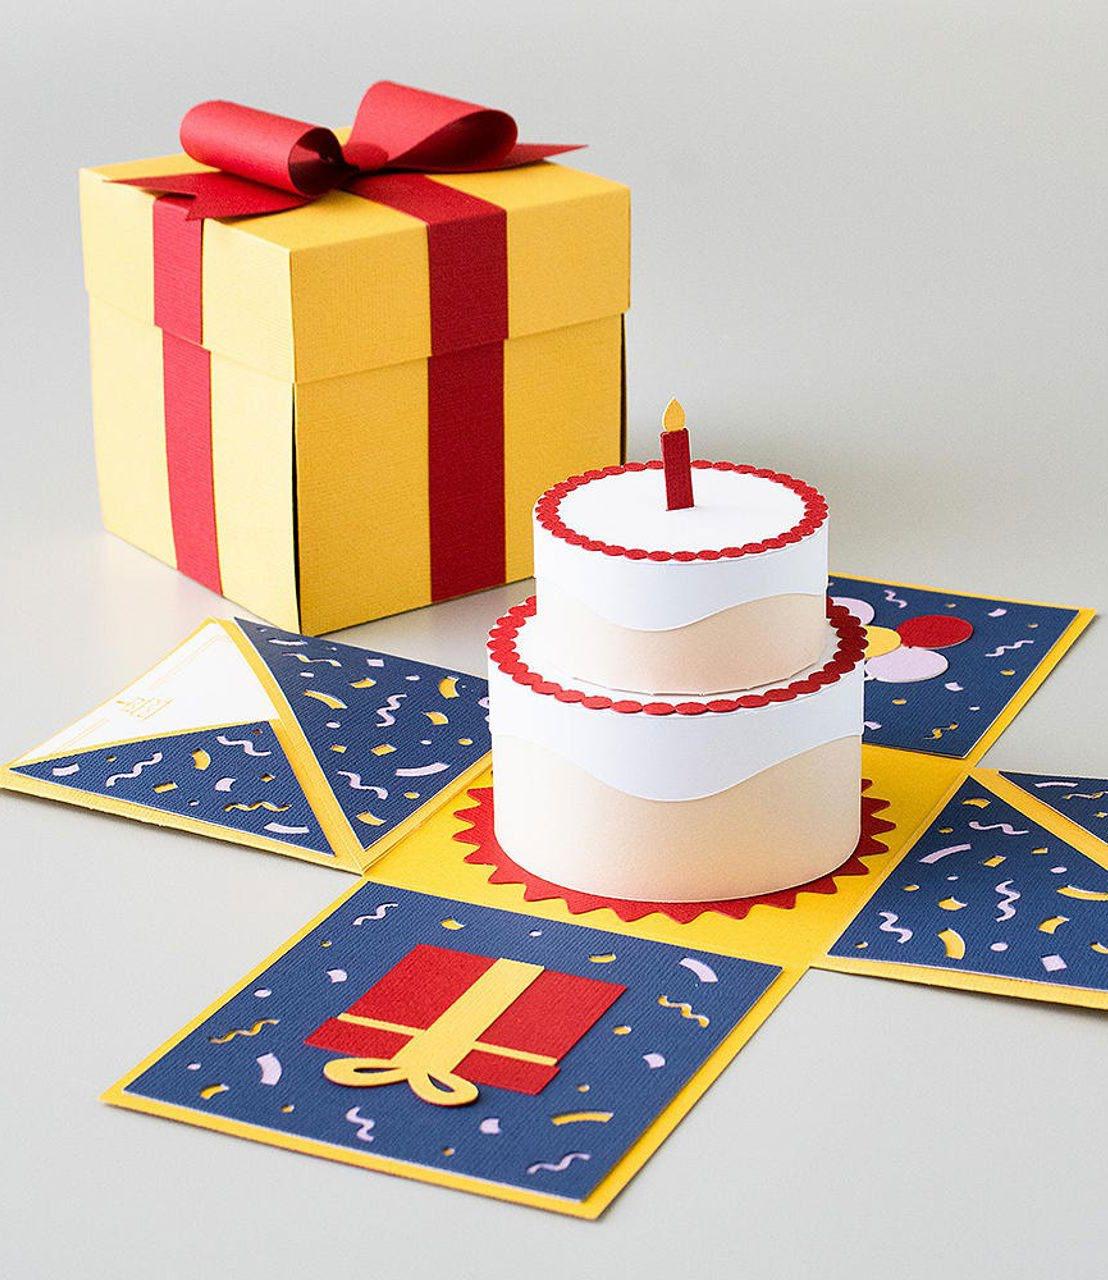
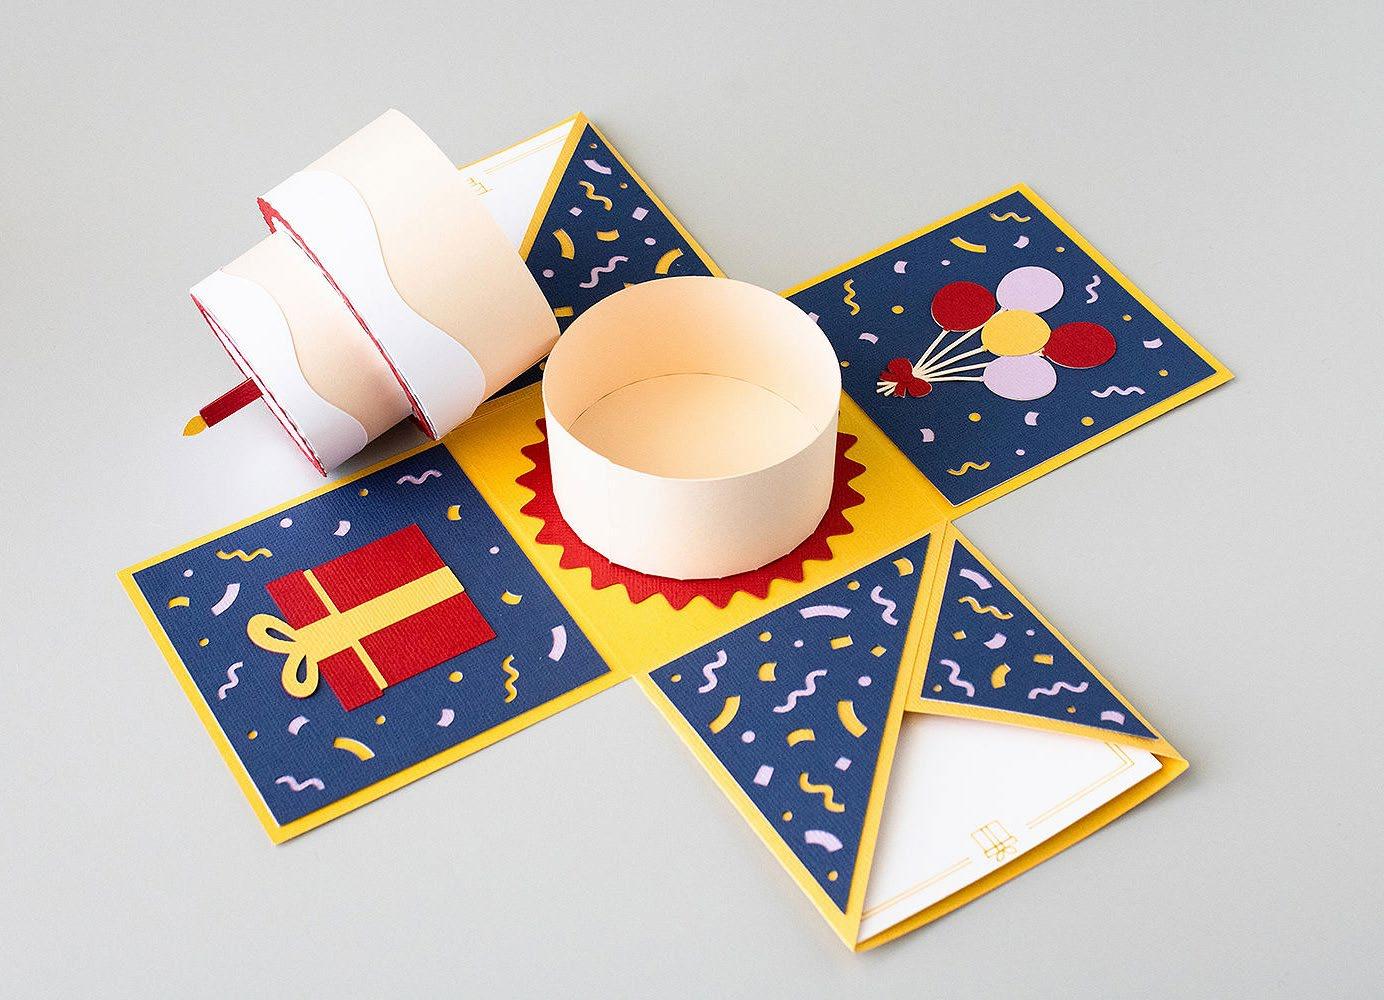
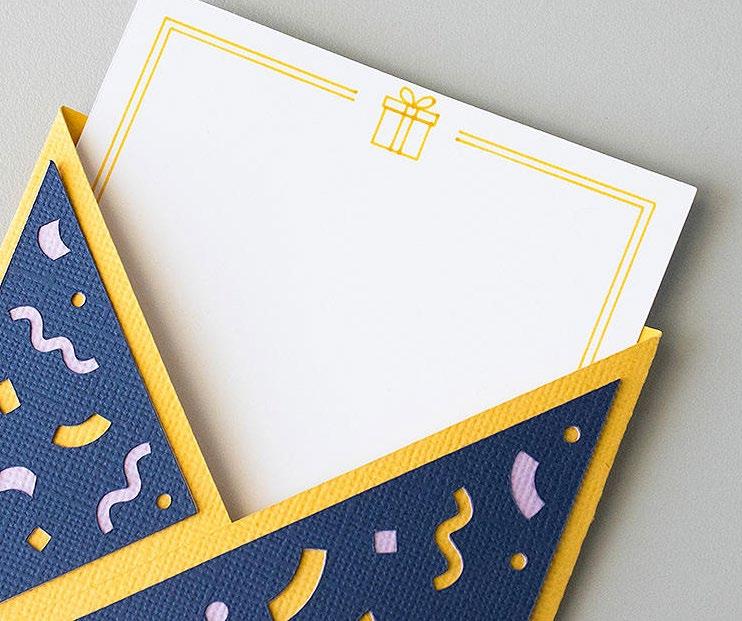
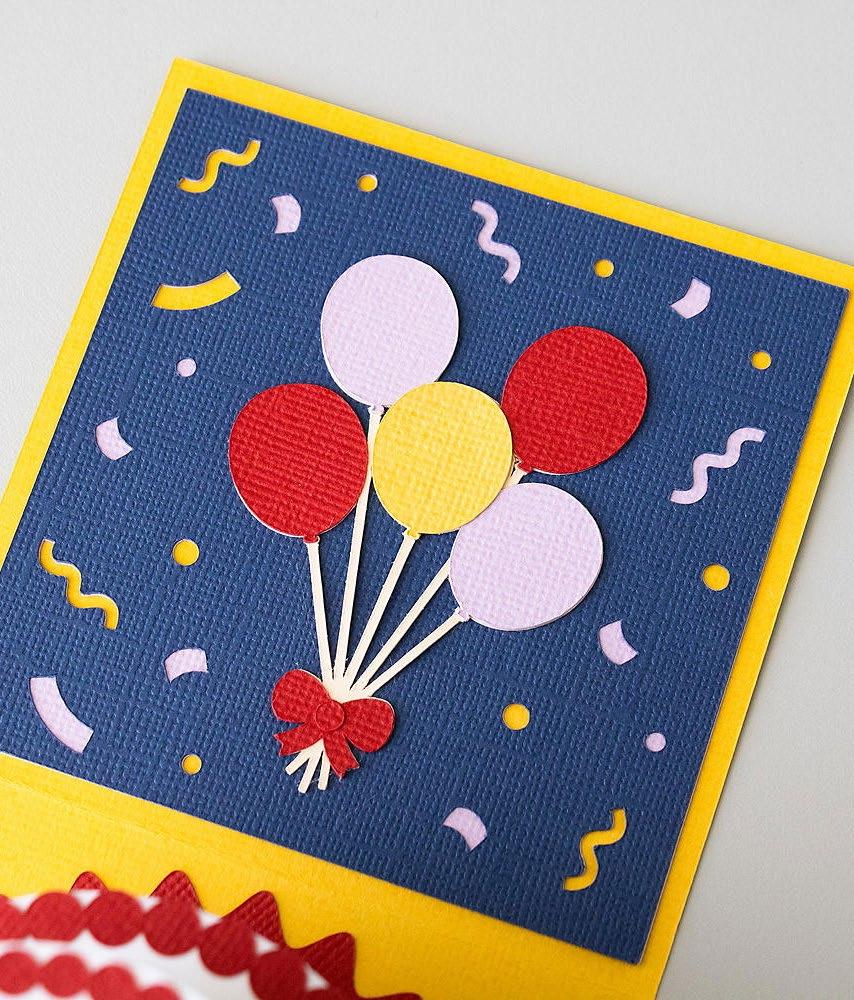
There’s nothing quite like a handmade card to show someone just how much they mean to you. With Cricut, you can create beautifully personalized cards that capture your unique style and their special personality. Make a batch of timeless designs to have on hand for every birthday, or craft a one-of-a-kind card on the spot that’s tailored to the recipient. However you choose to create, Cricut helps you turn every sentiment into something unforgettable!

Materials to Cut
Cardstock, White
Cardstock, Yellow
Cardstock, Teal
Cardstock, Mint
Cardstock, Raspberry (2)
Everything Else
Cricut® LightGrip Machine Mat
Single Scoring Wheel + QuickSwap Housing or Scoring Stylus
Fine Point Pen, Yellow
Fine Point Pen, Mint
Fine Point Pen, Raspberry
Fine Point Pen, Turquoise
Adhesive for Paper
If you want to alter the project, select Customize, then use the tools in the Edit panel to make changes before you cut.
Follow the prompts in Design Space® to cut the images
Insert your scoring tool and pens when prompted.
For assembly instructions and full project details, open the project in Cricut Design Space.


Materials to Cut
Cardstock, Yellow (2)
Cardstock, Cream
Cardstock, White
Cardstock, Lilac
Cardstock, Blue
Cardstock, Red
Everything Else
Cricut® LightGrip Machine Mat12 in x 12 in
Single Scoring Wheel + QuickSwap Housing or Scoring Stylus
Adhesive for Paper
Fine Point Pen, Orange Peel
To add text, use the text tool to add desired text. To fasten text to another layer, use Attach.
When you’re ready, select Make It. Then follow Design Space® prompts.
For assembly instructions and full project details, open the project in Cricut Design Space.
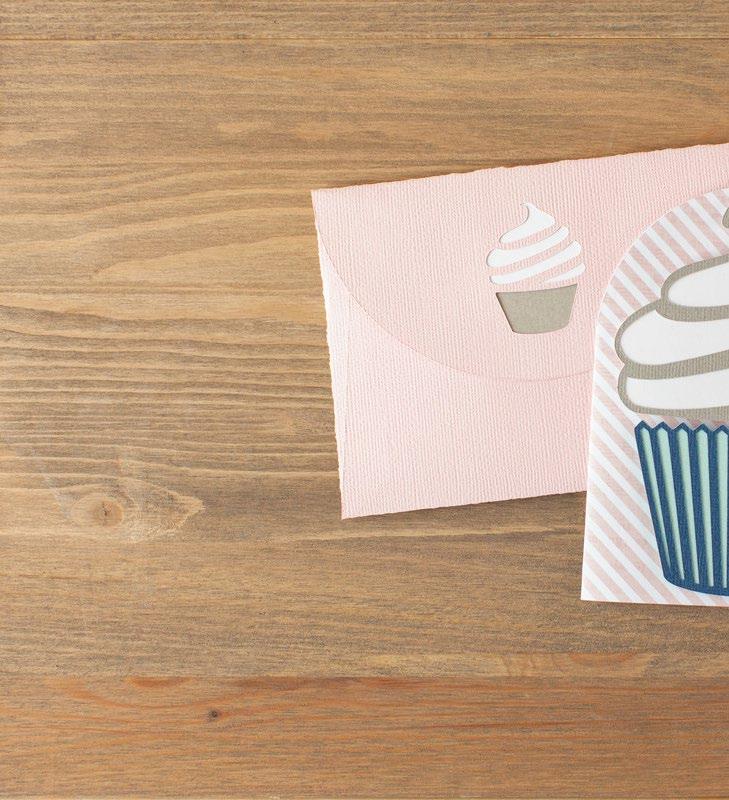
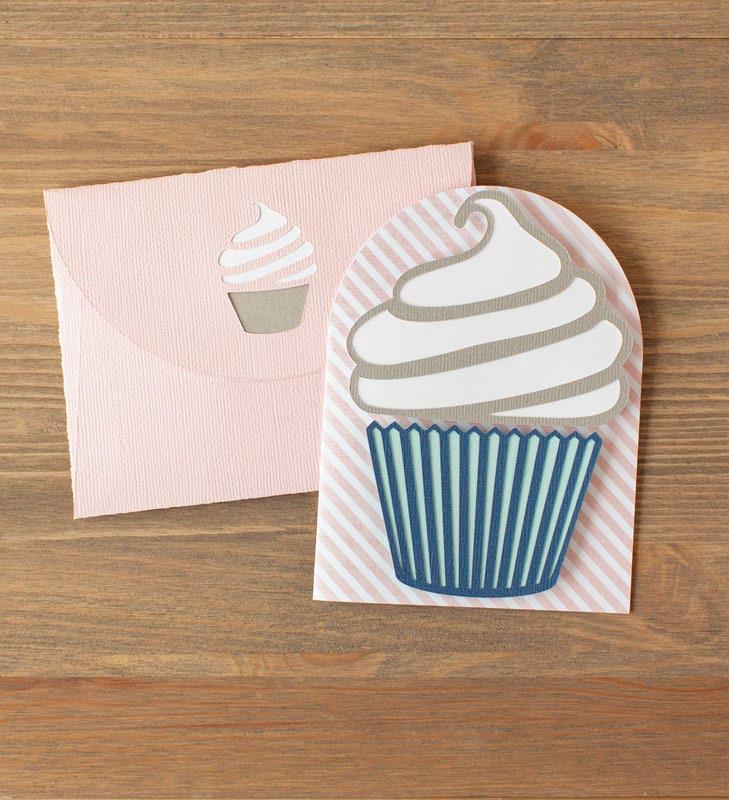
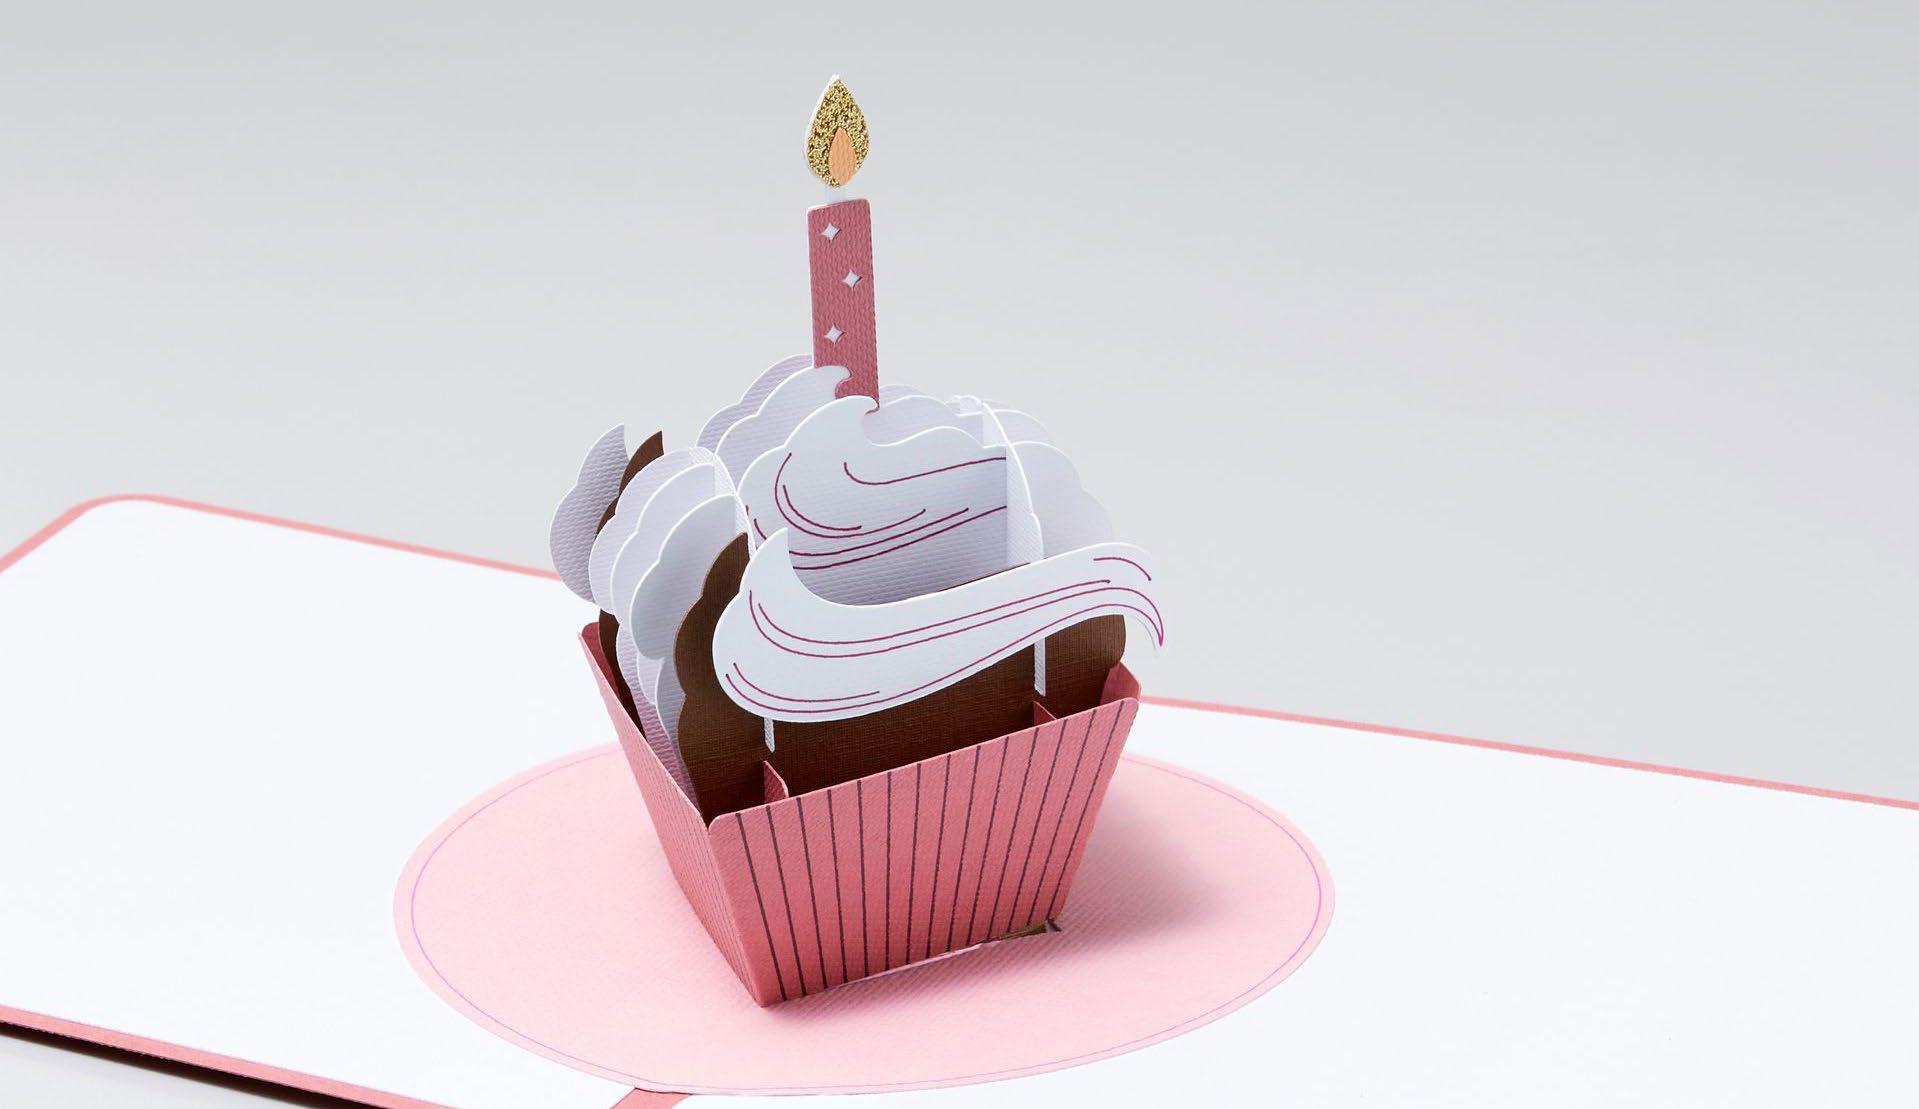
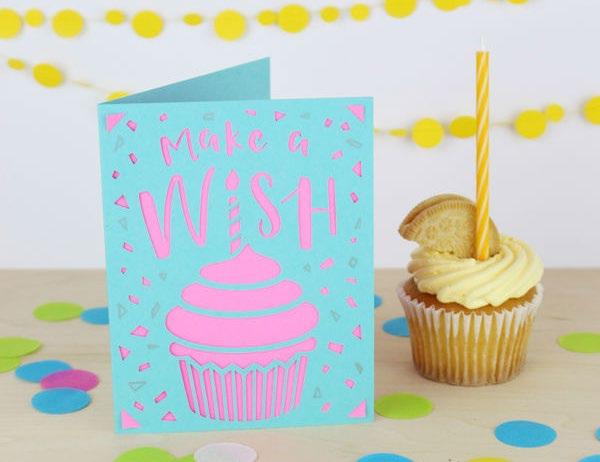
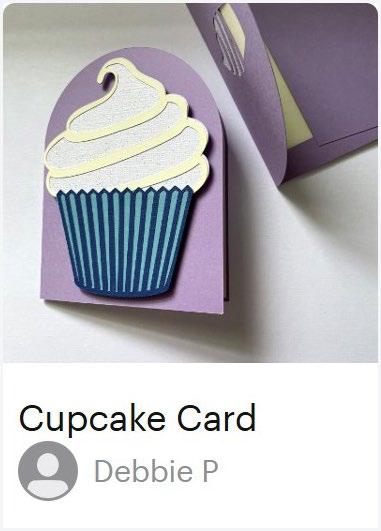
Materials to Cut
Cardstock, White
Pink and white striped card (1)
Light brown cardstock (1)
Dark blue cardstock (1)
Light blue cardstock (1)
Pink cardstock(1)
Everything Else
Cricut® StandardGrip Machine Mat
Scoring Stylus
Foam squares
Adhesive
If you want to alter the project, select Customize, then use the tools in the Edit panel to make changes before you cut.
Follow the prompts in Design Space® to cut the images
Insert your scoring tool and pens when prompted.
Glue the card insert to the inside of the card.
Glue the cupcake together and adhere to card with foam squares.
Fold on score line.
Glue cupcake background and liner in place.
Fold on score lines, glue in place.
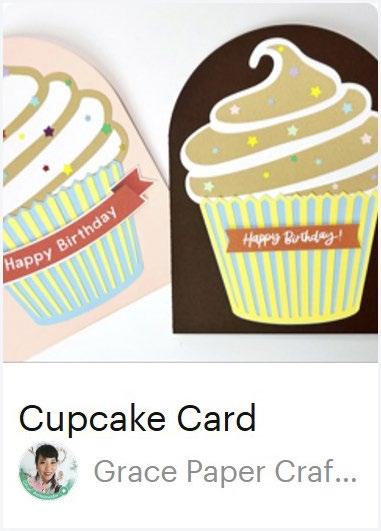
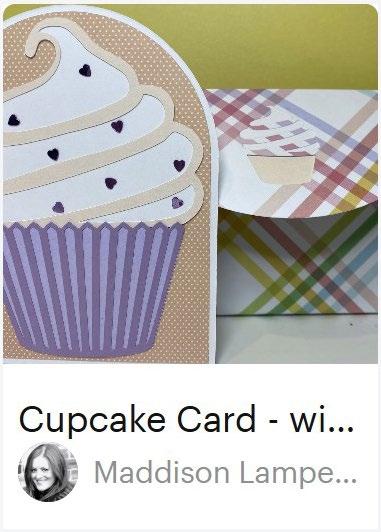
Inspired! See how others brought this card to
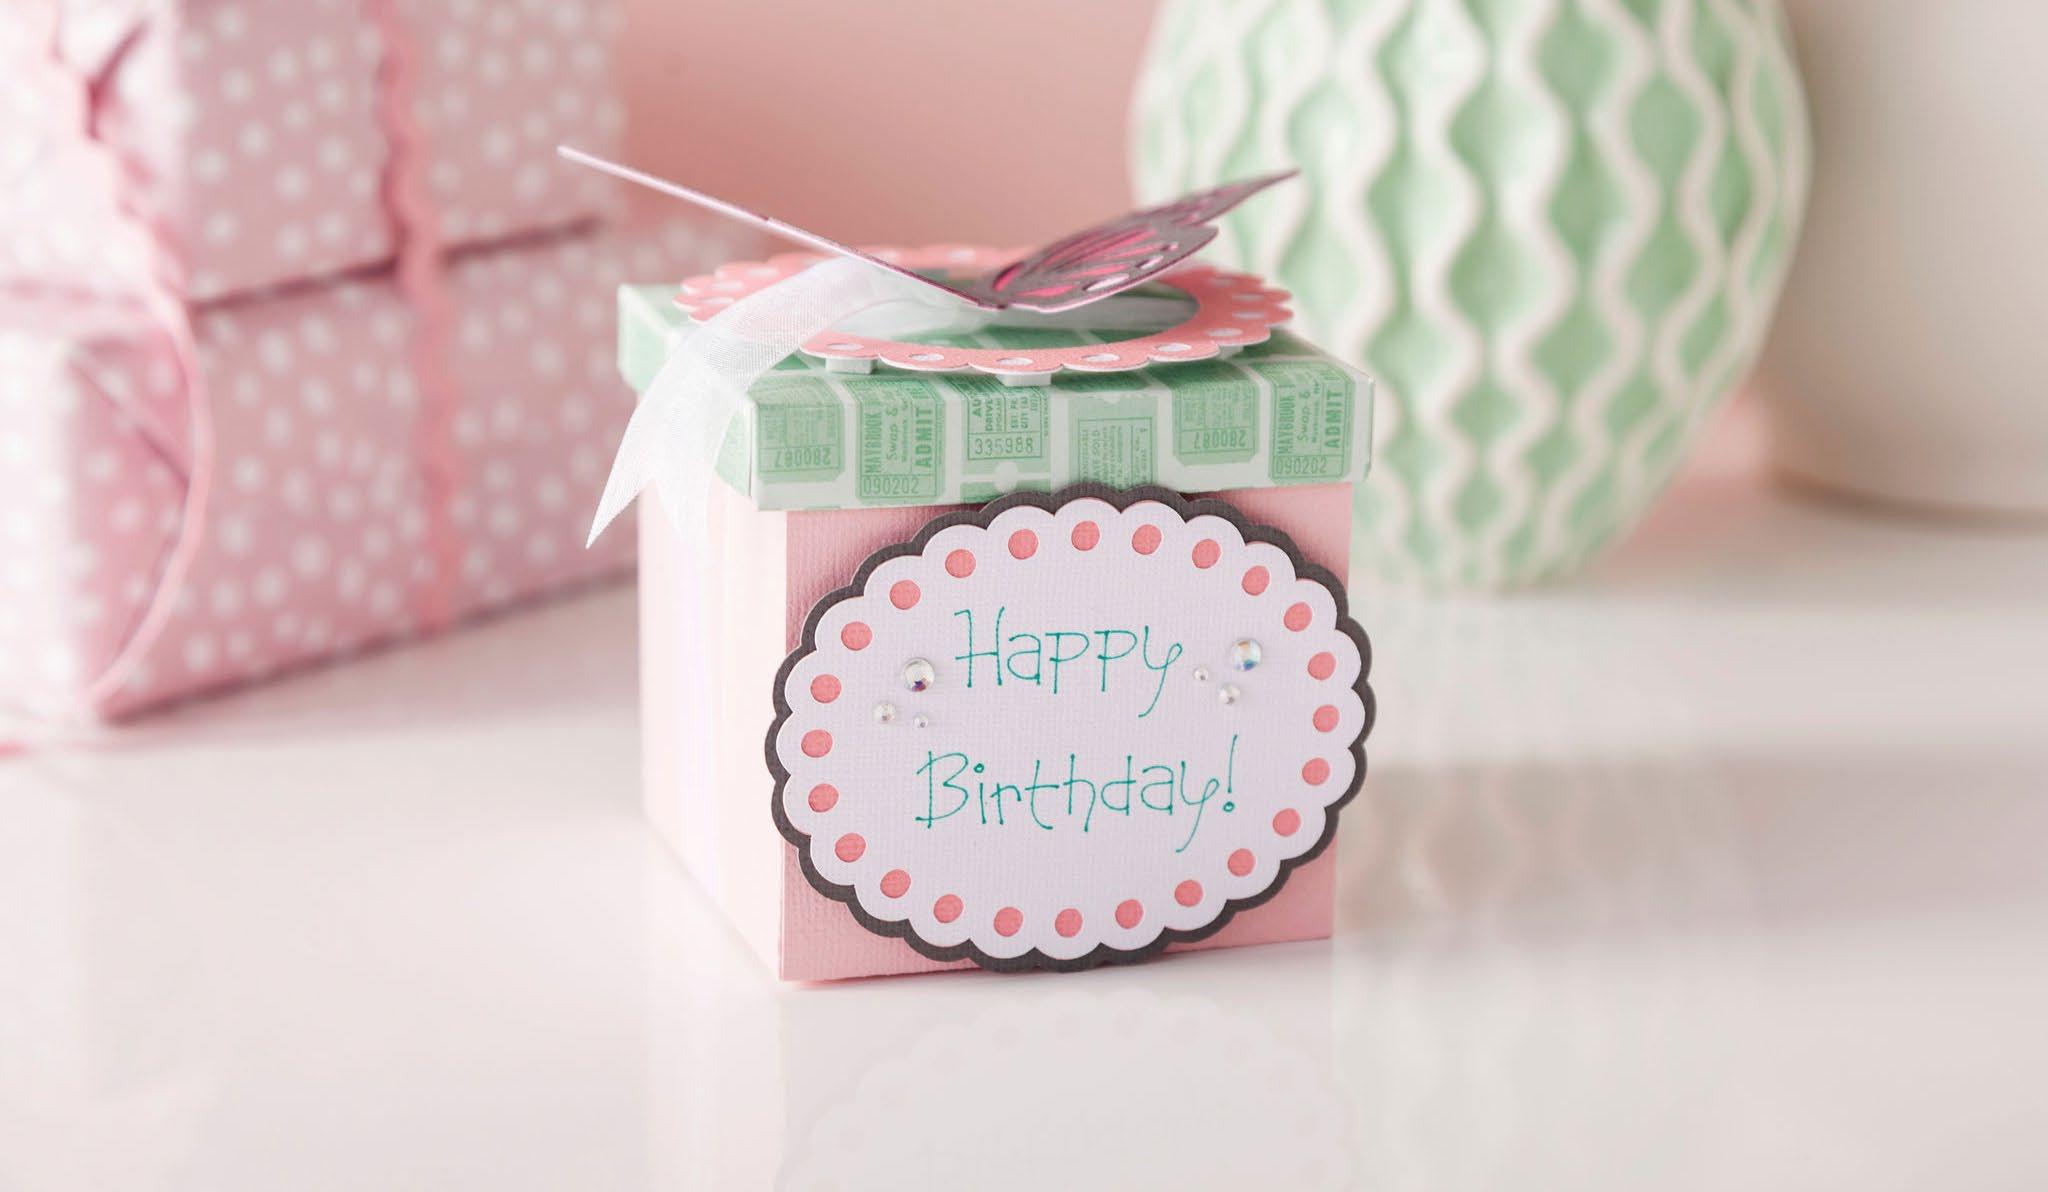
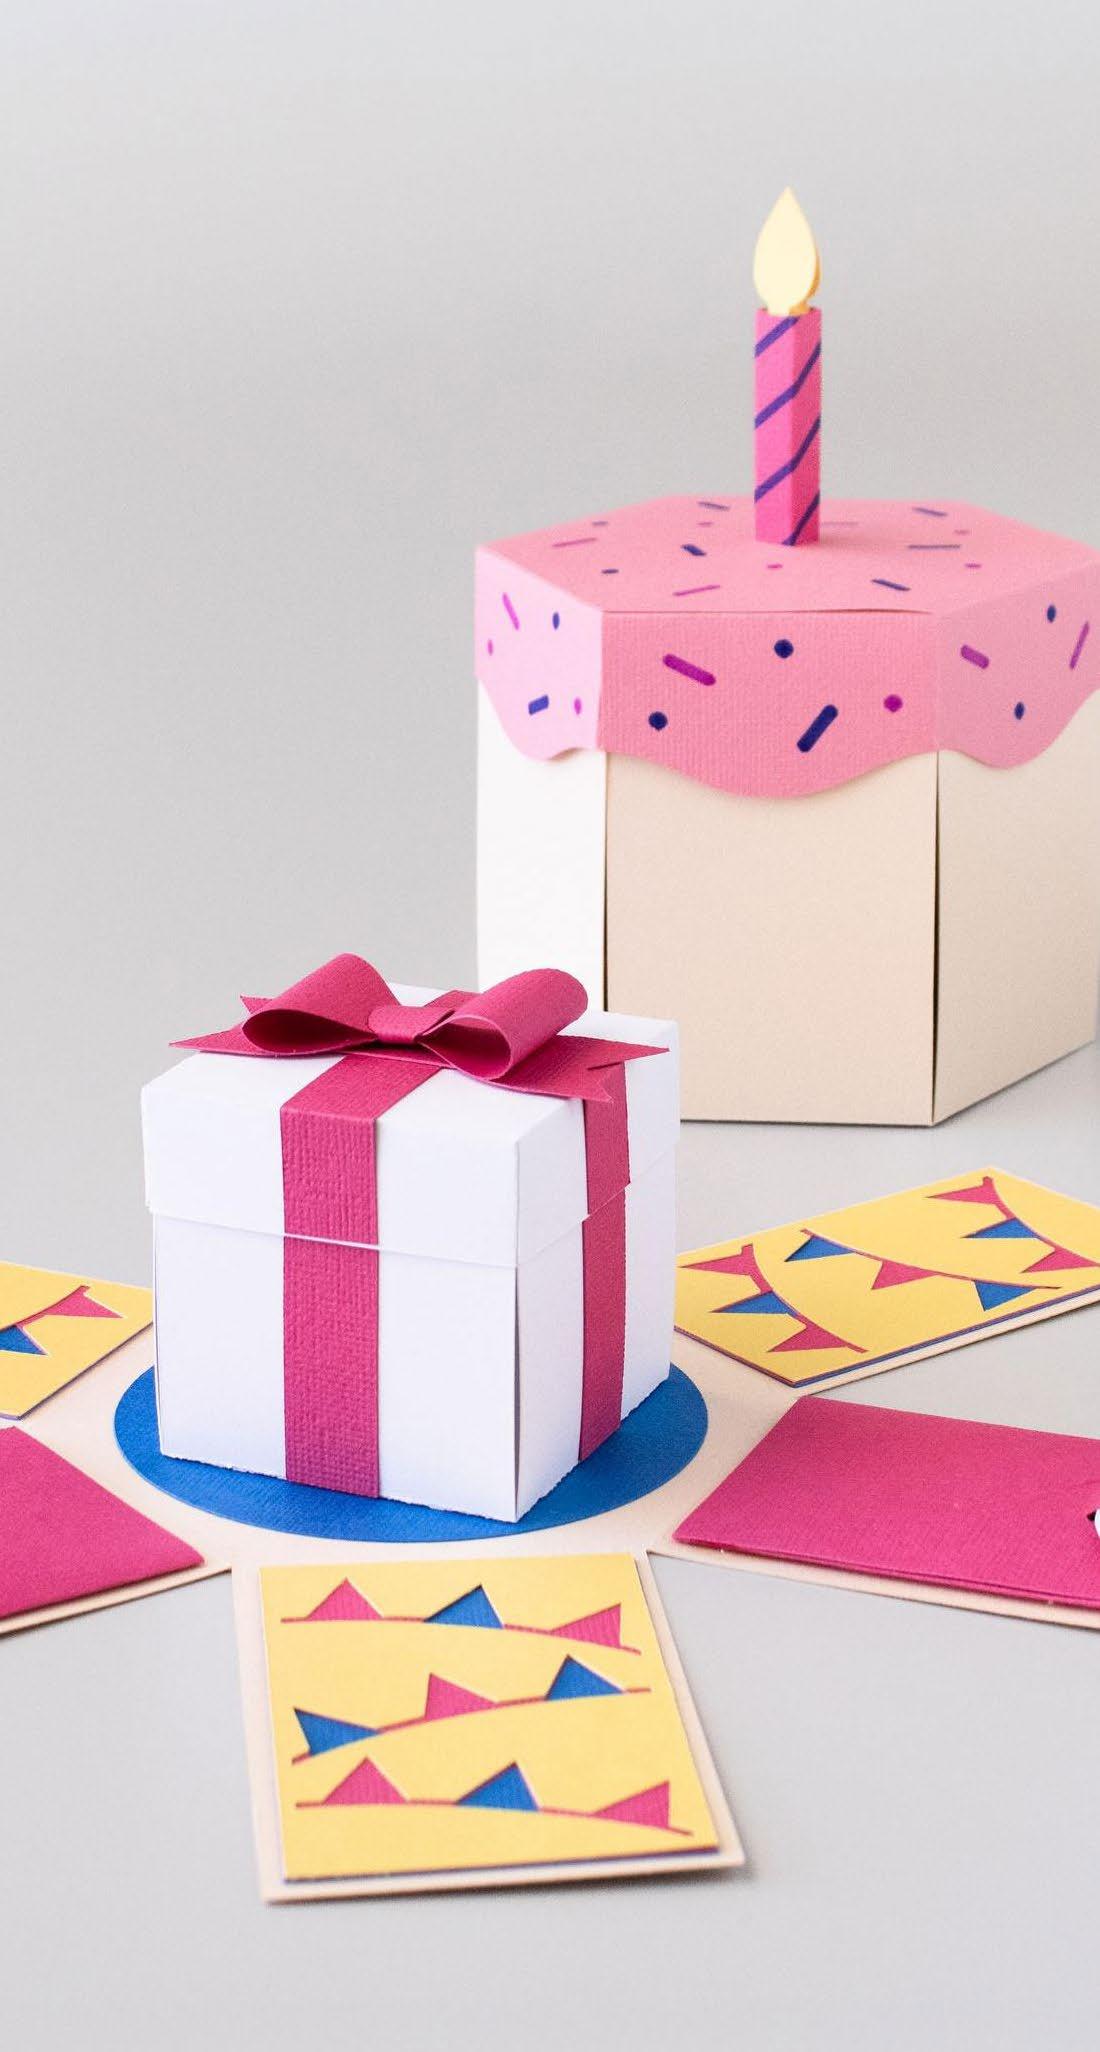
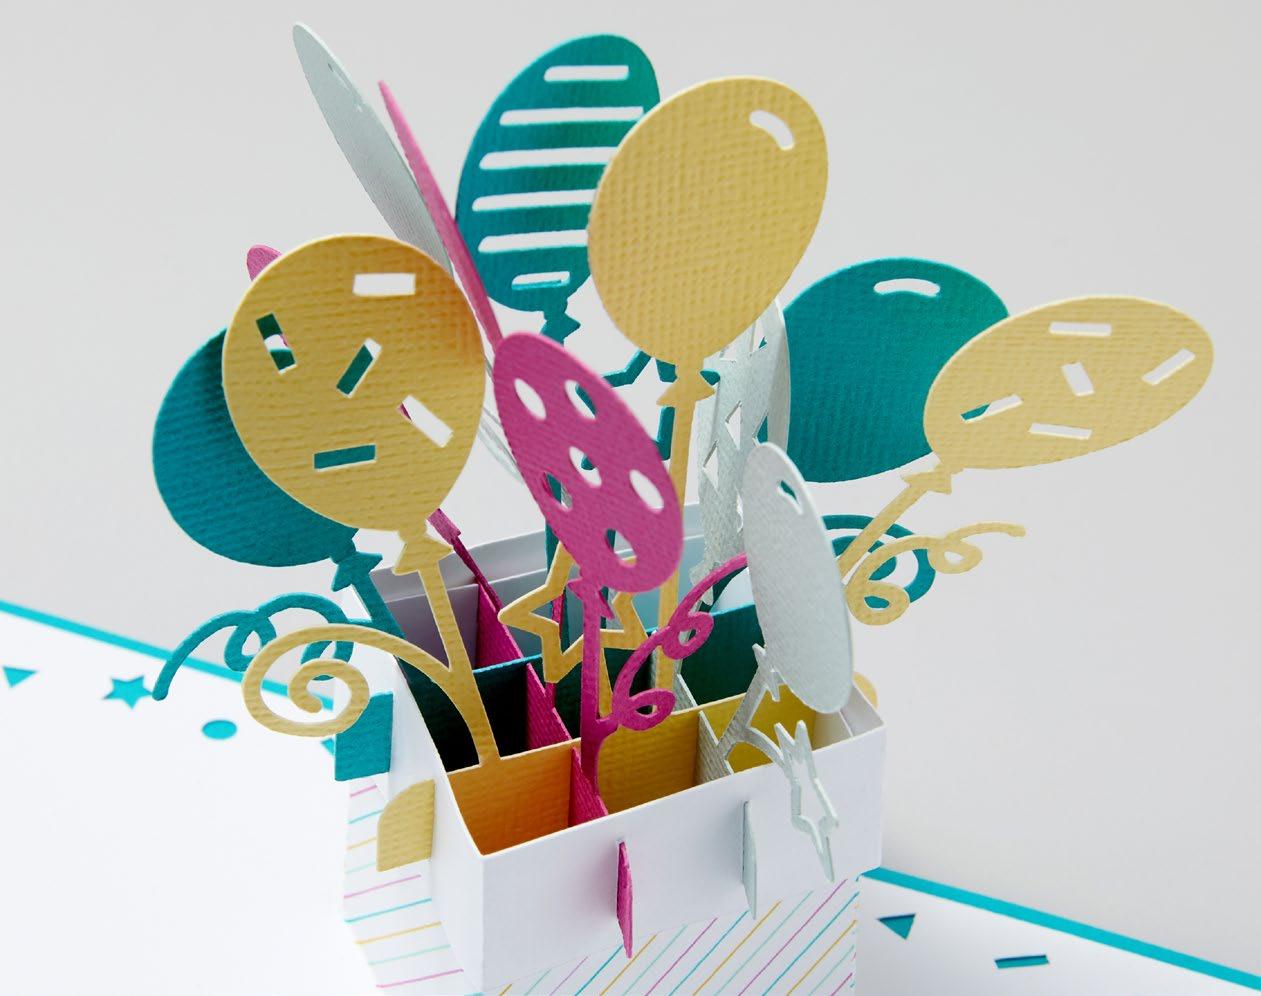
There’s nothing more meaningful than a gift made just for them, and Cricut makes it easy to create something truly unforgettable. From personalized keepsakes and thoughtful custom designs to unique gift tags and creative wrapping, Cricut helps you add a special touch to every detail. Whether it’s a heartfelt treasure or a fun surprise, you can craft gifts that are as unique as the person receiving them!

By: ByDerowen
Materials to Cut
Premium Vinyl™Permanent, Silver Or
Smart Vinyl™Permanent, Silver
Everything Else
Cricut® StandardGrip Machine Mat (Not necessary for Smart Vinyl™)
Cricut® Transfer Tape
If you want to alter the project, select Customize, then use the tools in the Edit panel to make changes before you cut.
Cut
Follow the prompts in Design Space® to cut the images
Assemble
Use Weeder to remove unneeded vinyl pieces. When weeding, start from the inside and move out.
Use Transfer Tape and a Scraper to apply vinyl design to your project. Make sure surface is clean and dry.

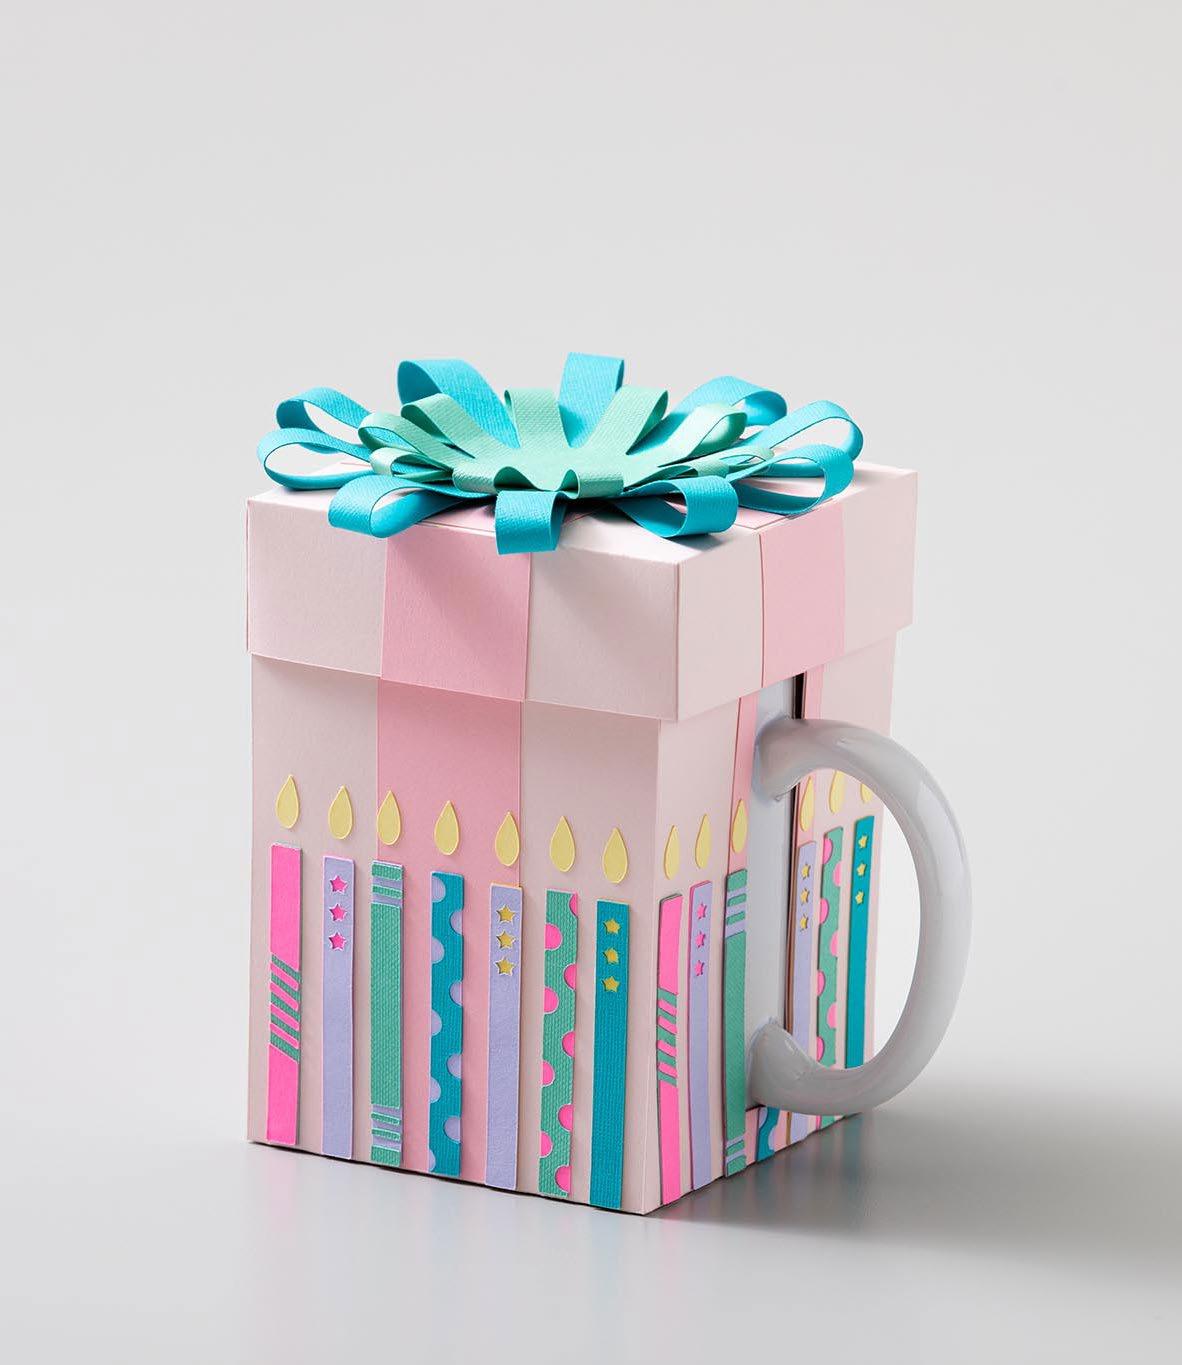
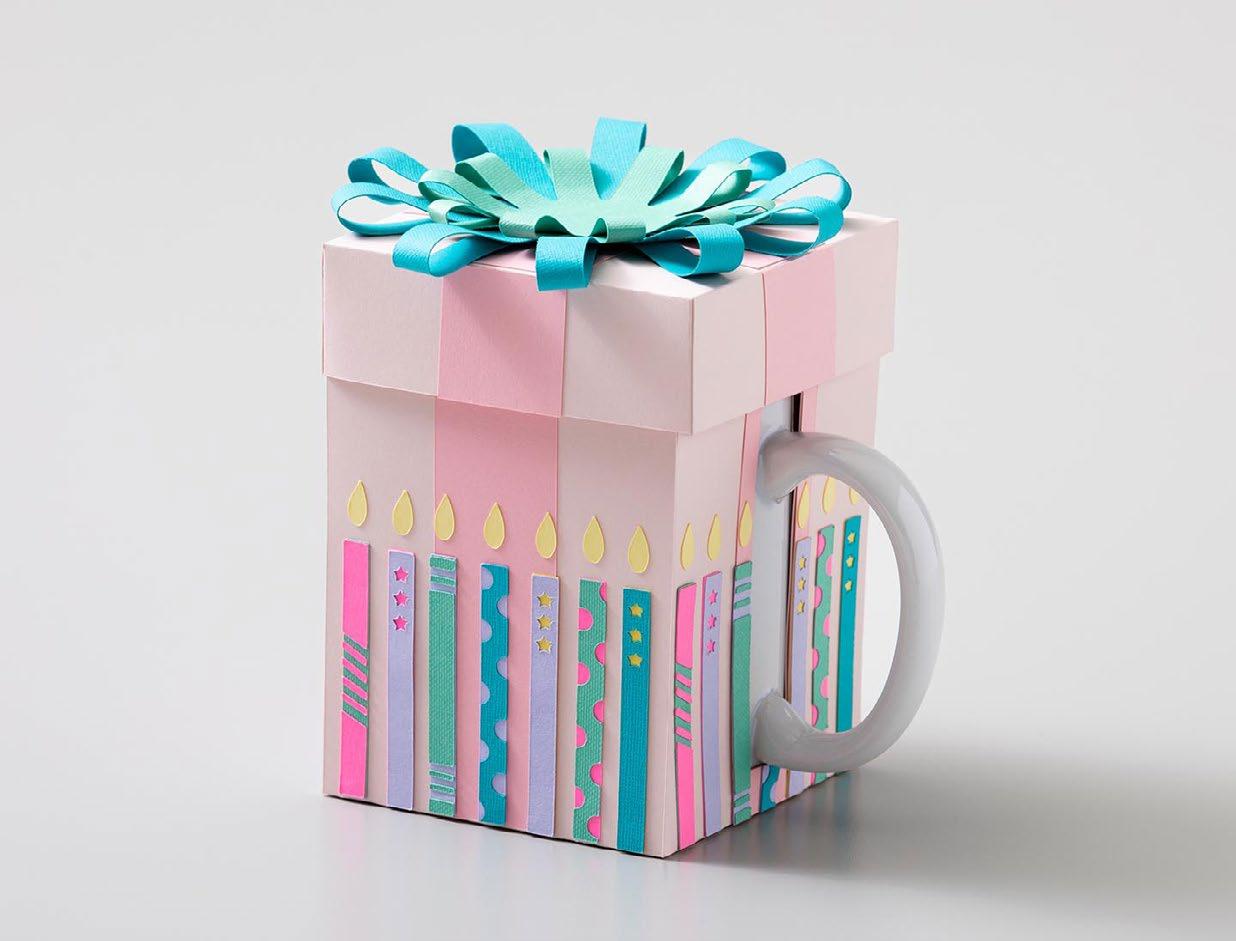
Materials to Cut
Cardstock, Bright Pink
Cardstock, Light Pink
Cardstock, Lavender
Cardstock, Yellow
Cardstock, Green
Cardstock, Blue
Cardstock, Pink
Everything Else
Cricut® LightGrip
Machine Mat12 in x 12 in
Single Scoring Wheel + QuickSwap Housing or Scoring Stylus
Adhesive for Paper
Mug
If you want to alter the project, select Customize, then use the tools in the Edit panel to make changes before you cut.
Follow the prompts in Design Space® to cut the images.
Gather all materials for the box.
Fold the box and the lid along the score lines and glue flaps to form the box.
Glue the darker pink “ribbon” pieces to the L-shaped box pieces.
Glue the two L-shaped pieces together, attaching the plain square to the square with the ribbon pieces on it, creating a + shape.
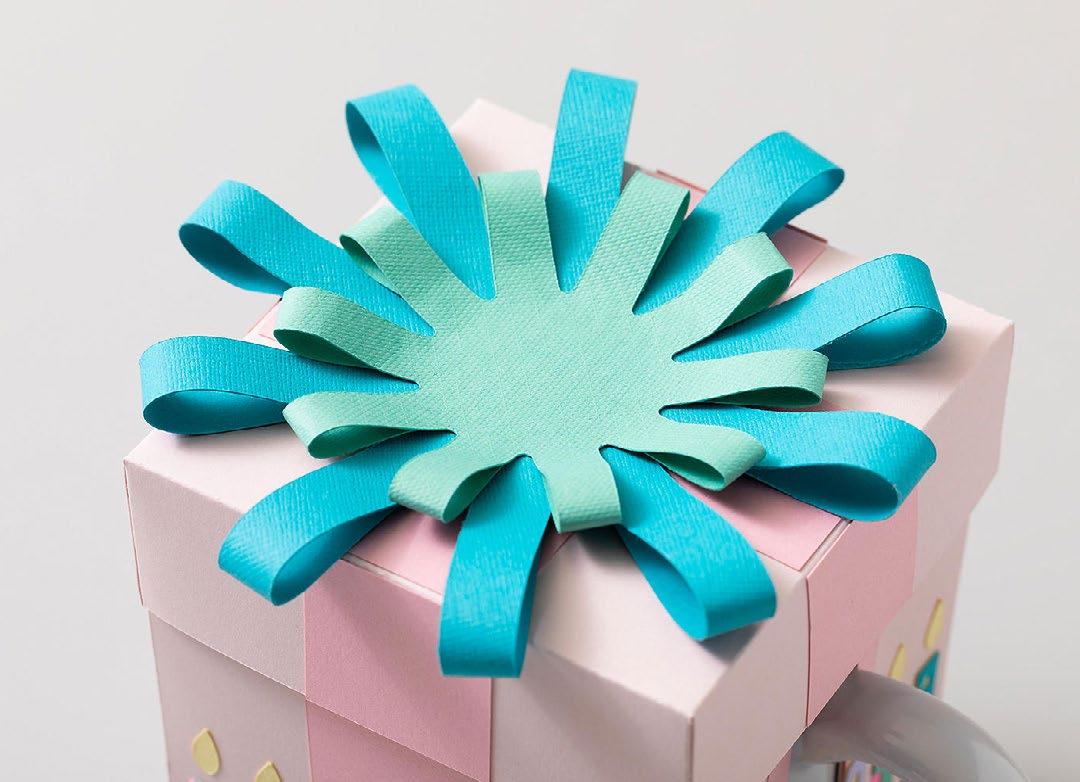
Gather all materials for the bows and candles.
To make the bows, glue the tips of the bow’s arms to the bottom centers of the bows.
Then glue the green bow on top of the blue bow.
Use glue to assemble each candlestick, using the photo as reference for color combinations.
For full project details, open in Cricut Design Space.


Materials to Cut
Cricut Insert Cards, Sensei Sampler
Everything Else
Cricut Card Mat
Cricut Glitter Gel Pens, 0.8 mm, Gold
Cricut Fine Point Pens, 0.4 mm, Black
Scraper
If you want to alter the project, select Customize, then use the tools in the Edit panel to make changes before you cut.
Insert your Cricut Pen when prompted.
Insert your Cricut Blade when prompted to cut the images from the card.
Assemble
Insert the coordinating card insert into the corner cuts one at a time until all corners are aligned and the insert lays flat inside the card.
Slide a gift card in through the opening in the front of the card.
It’s all about the party! Get ready to dive into trending party themes for 2025 that can be customized for any age.
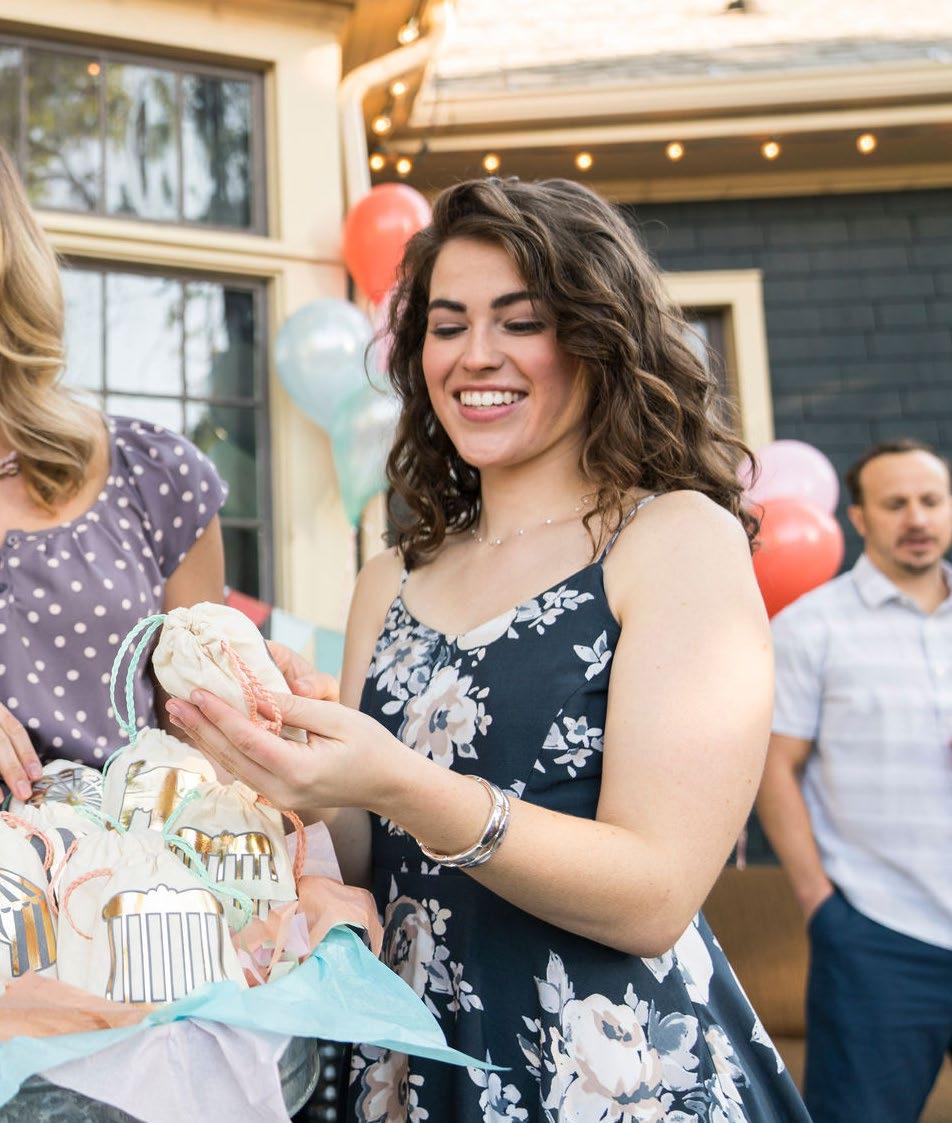
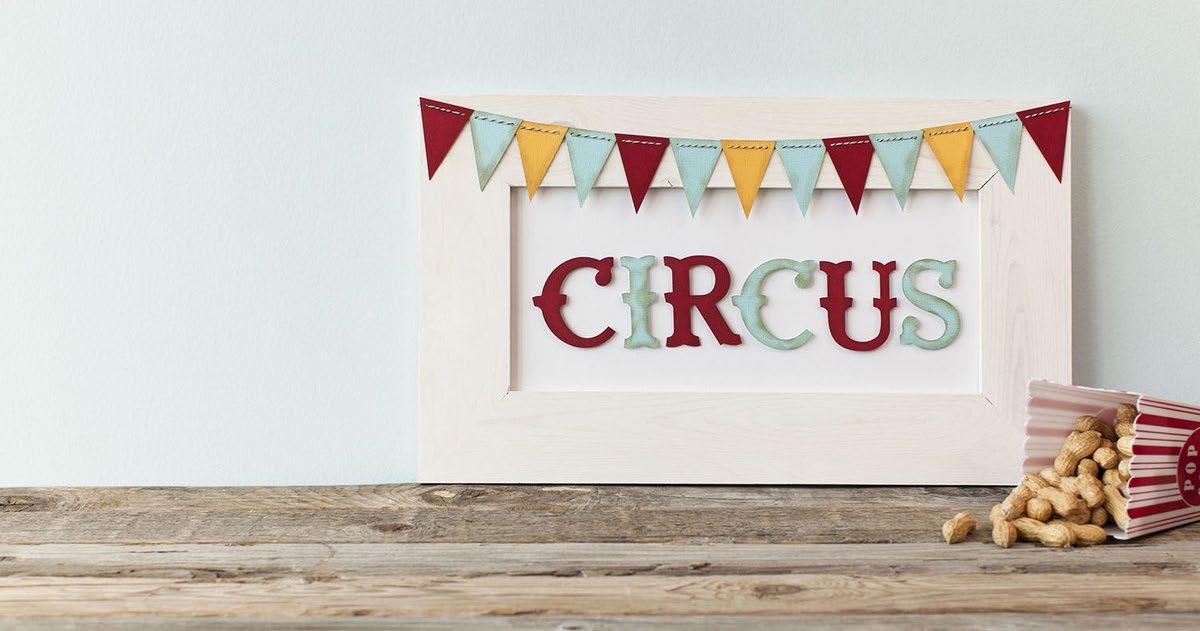
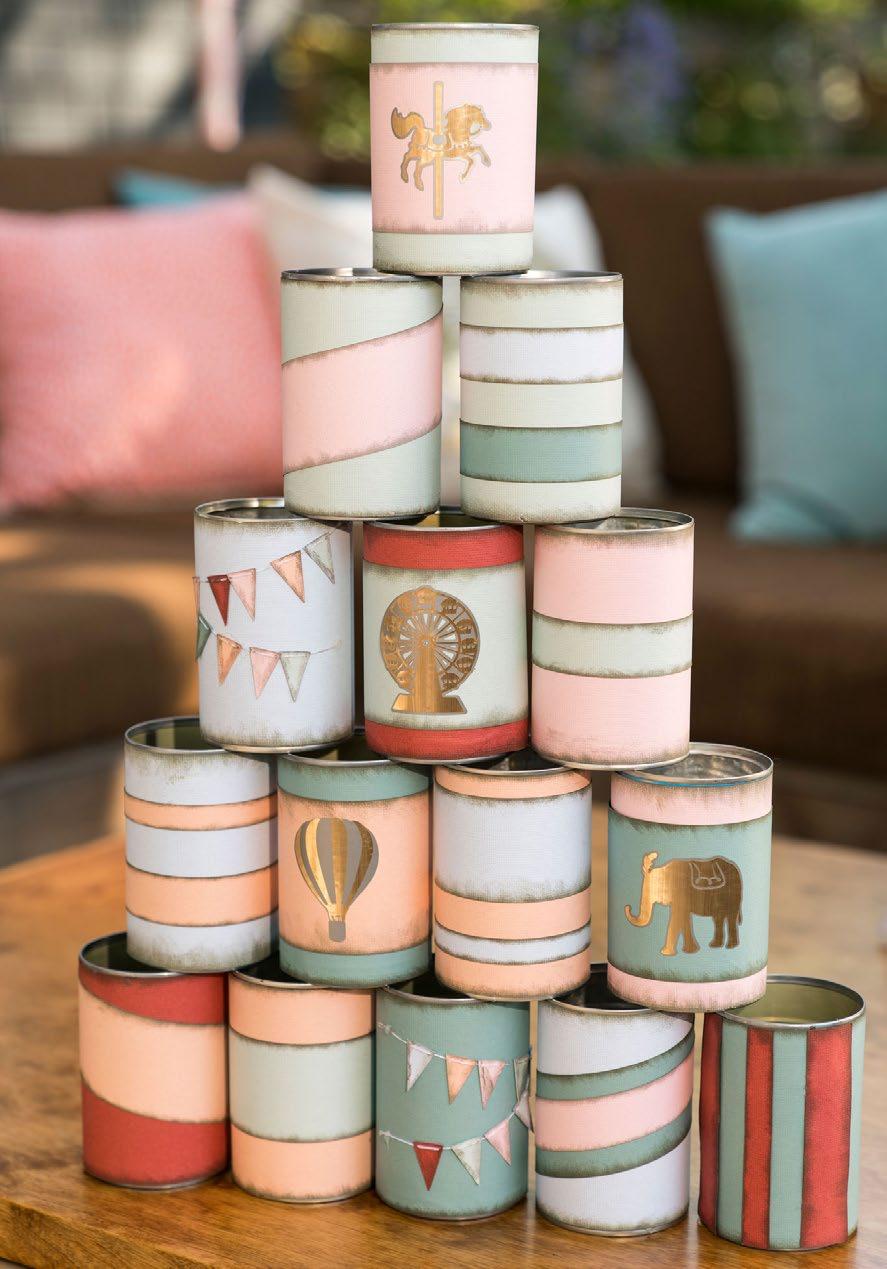
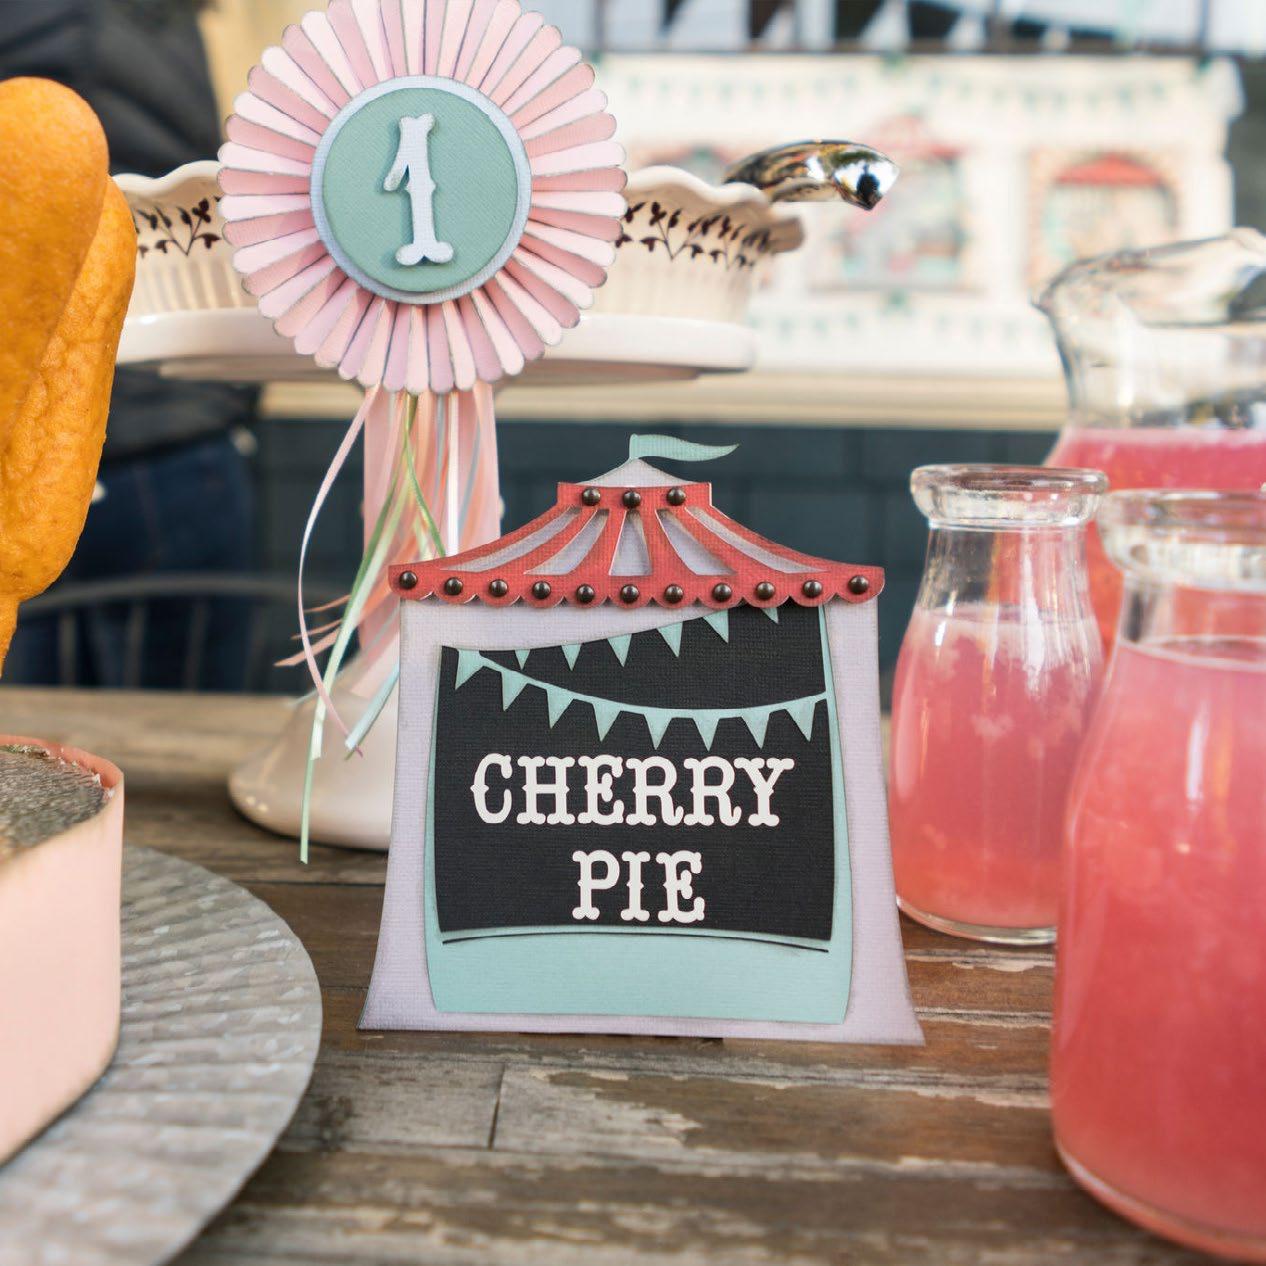
Step right up to the magic of the circus, where timeless retro tents, playful games, and whimsical animal motifs set the stage for unforgettable celebrations. Perfect for both kids and adults, this theme brings a touch of nostalgia and excitement to any party!
#E63946
#2A9D8F
#F4A261

#M505AA60A
CAP Artist: Graphigh Design

#M505C6747
CAP Artist: Tokocraft

#M505CCC39
CAP Artist: SVG Garage
Love the image? Easily find it in Design Space® by searching the image number.
Fonts


Carousel, Alphabet Soup STD Tilt, Country Life
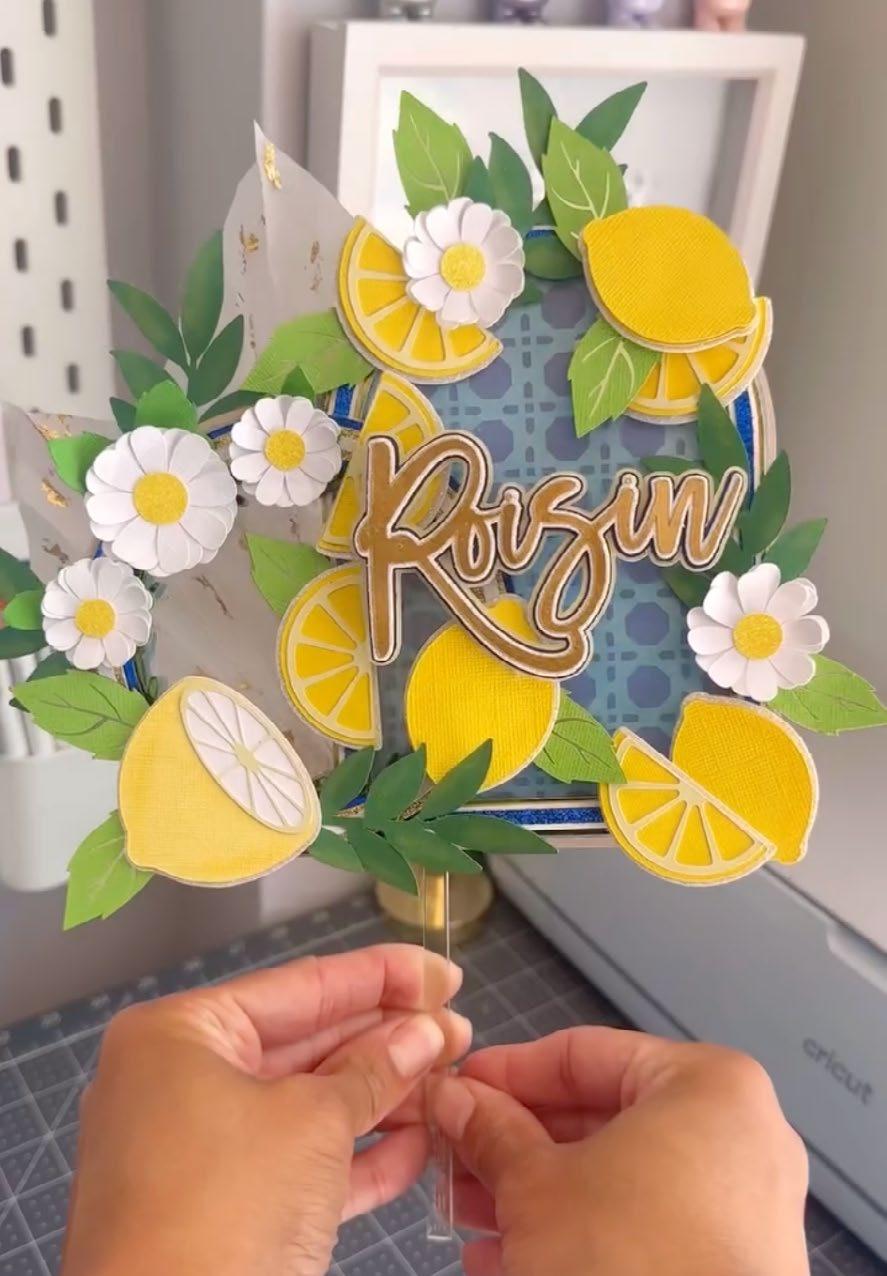
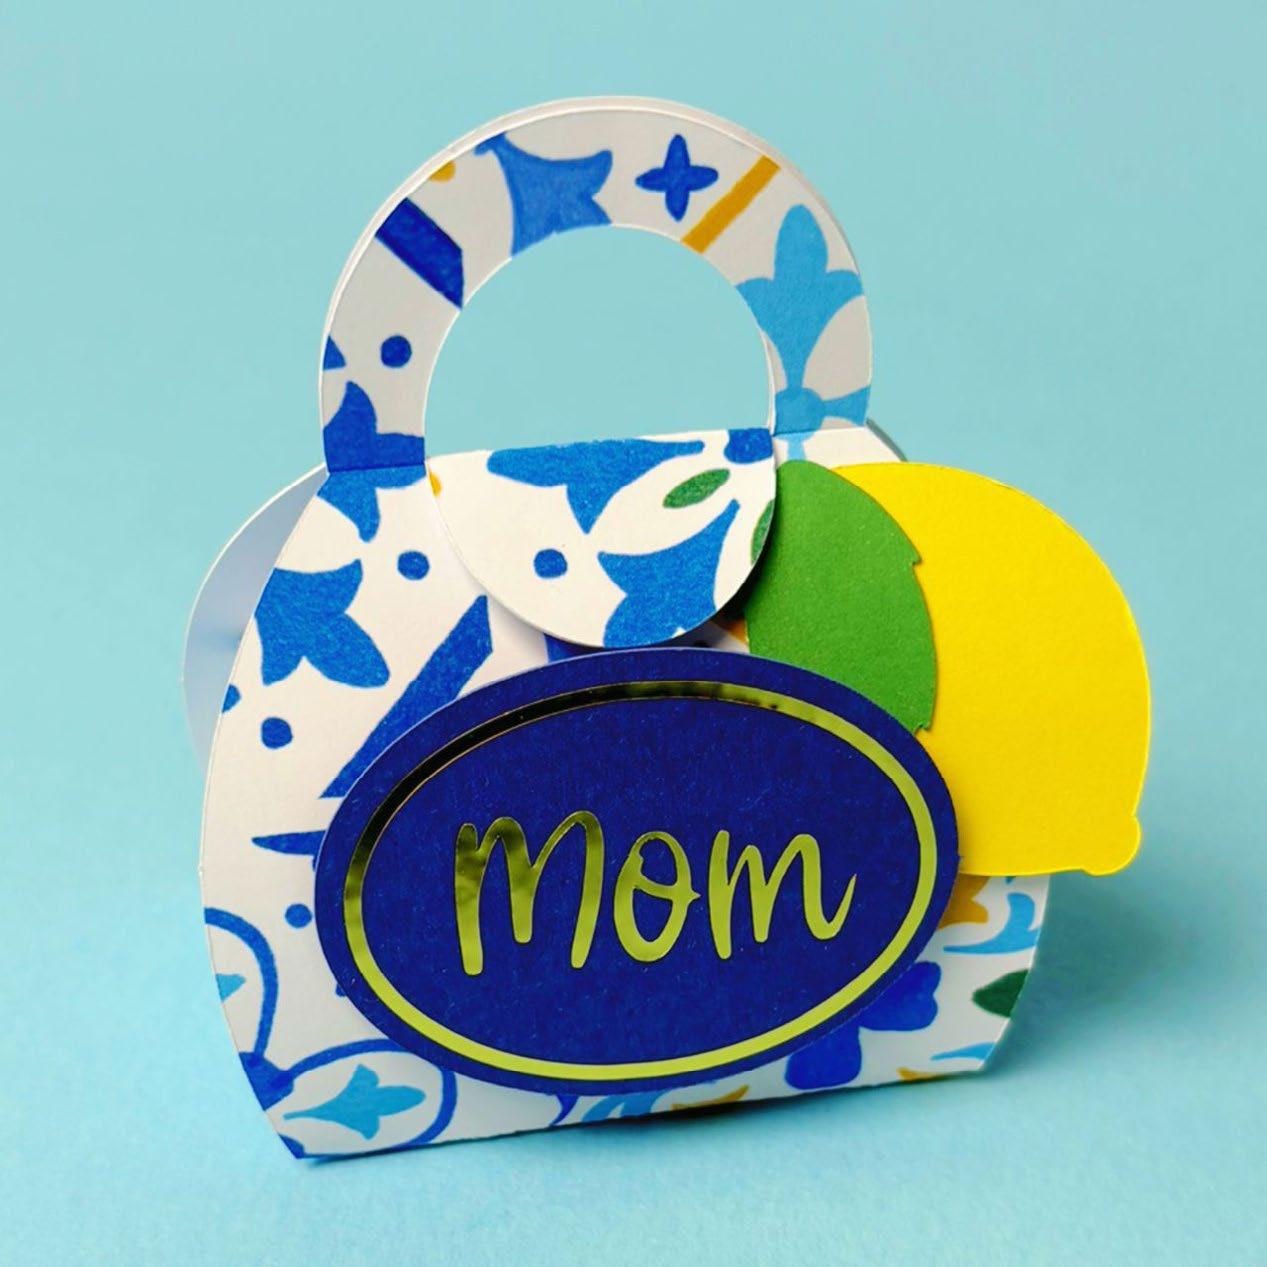
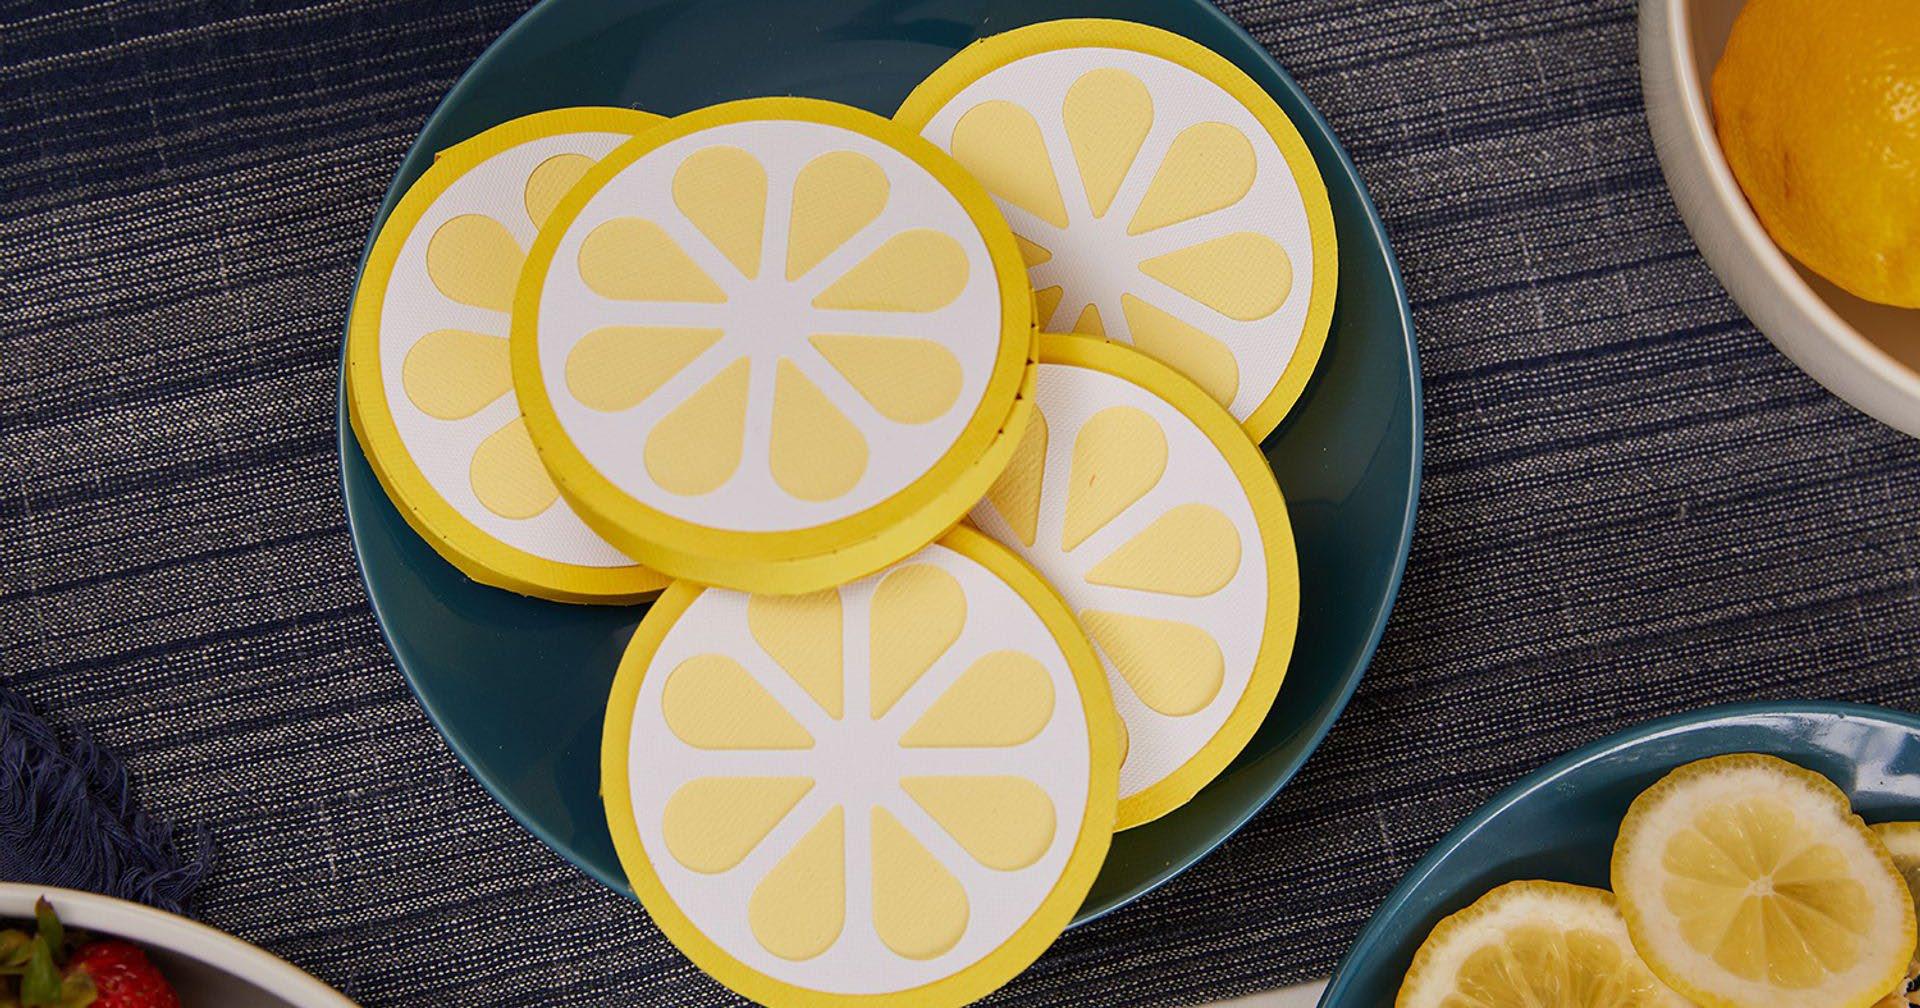
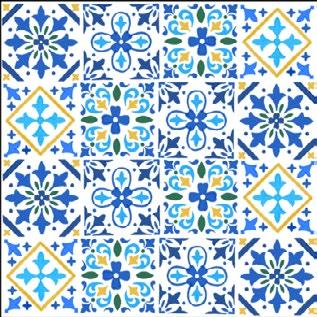
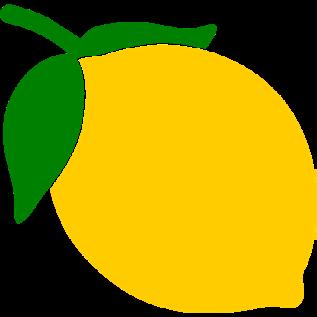
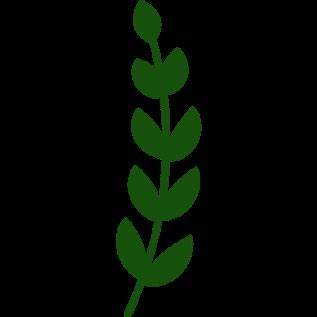
Dive into the neoclassical Mediterranean charm theme. Blue and white tones create a luxurious foundation, accented by sunny yellows, warm golds, and vibrant citrus motifs. With timeless floral accents, intricate tiles, and citrus fruits, this theme is perfect for people of any age.
#3A77B3
#F7F6F2
#F4A523
#FFE04C
#6A994E
#M505CA2B0
CAP Artist: Cat Madeira
#M478A97A0
CAP Artist: In Tune Digital Designs
#M4FF072A4
CAP Artist: Alex R
Love the image? Easily find it in Design Space® by searching the image number.
Fonts


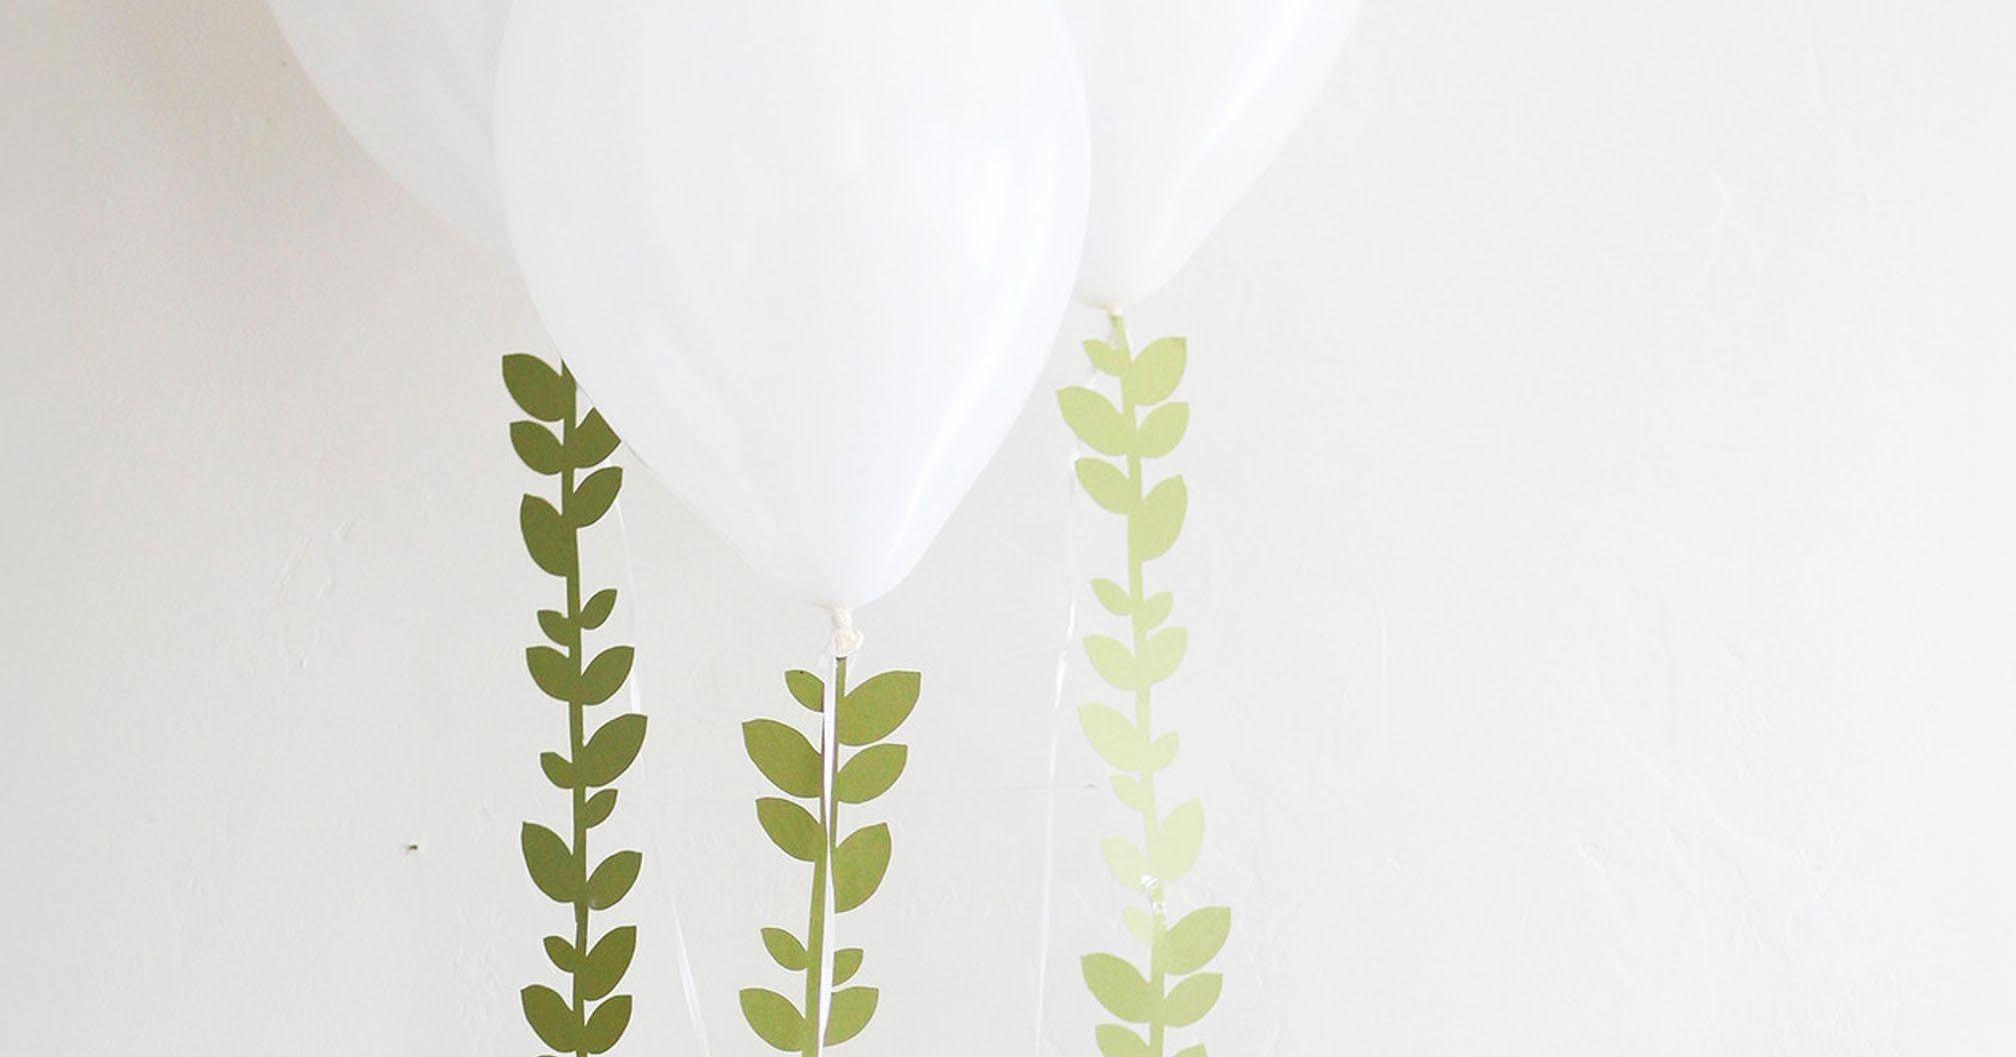
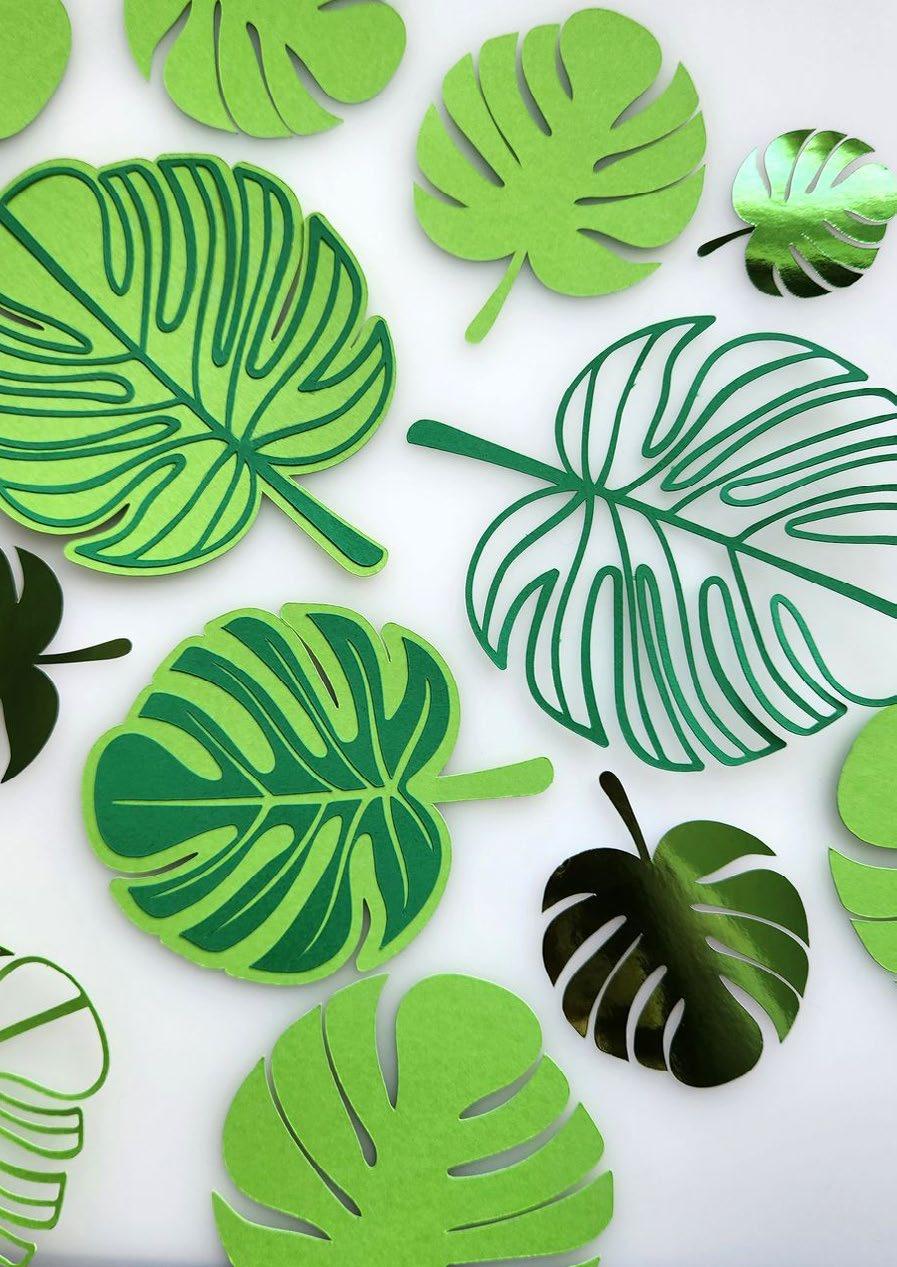
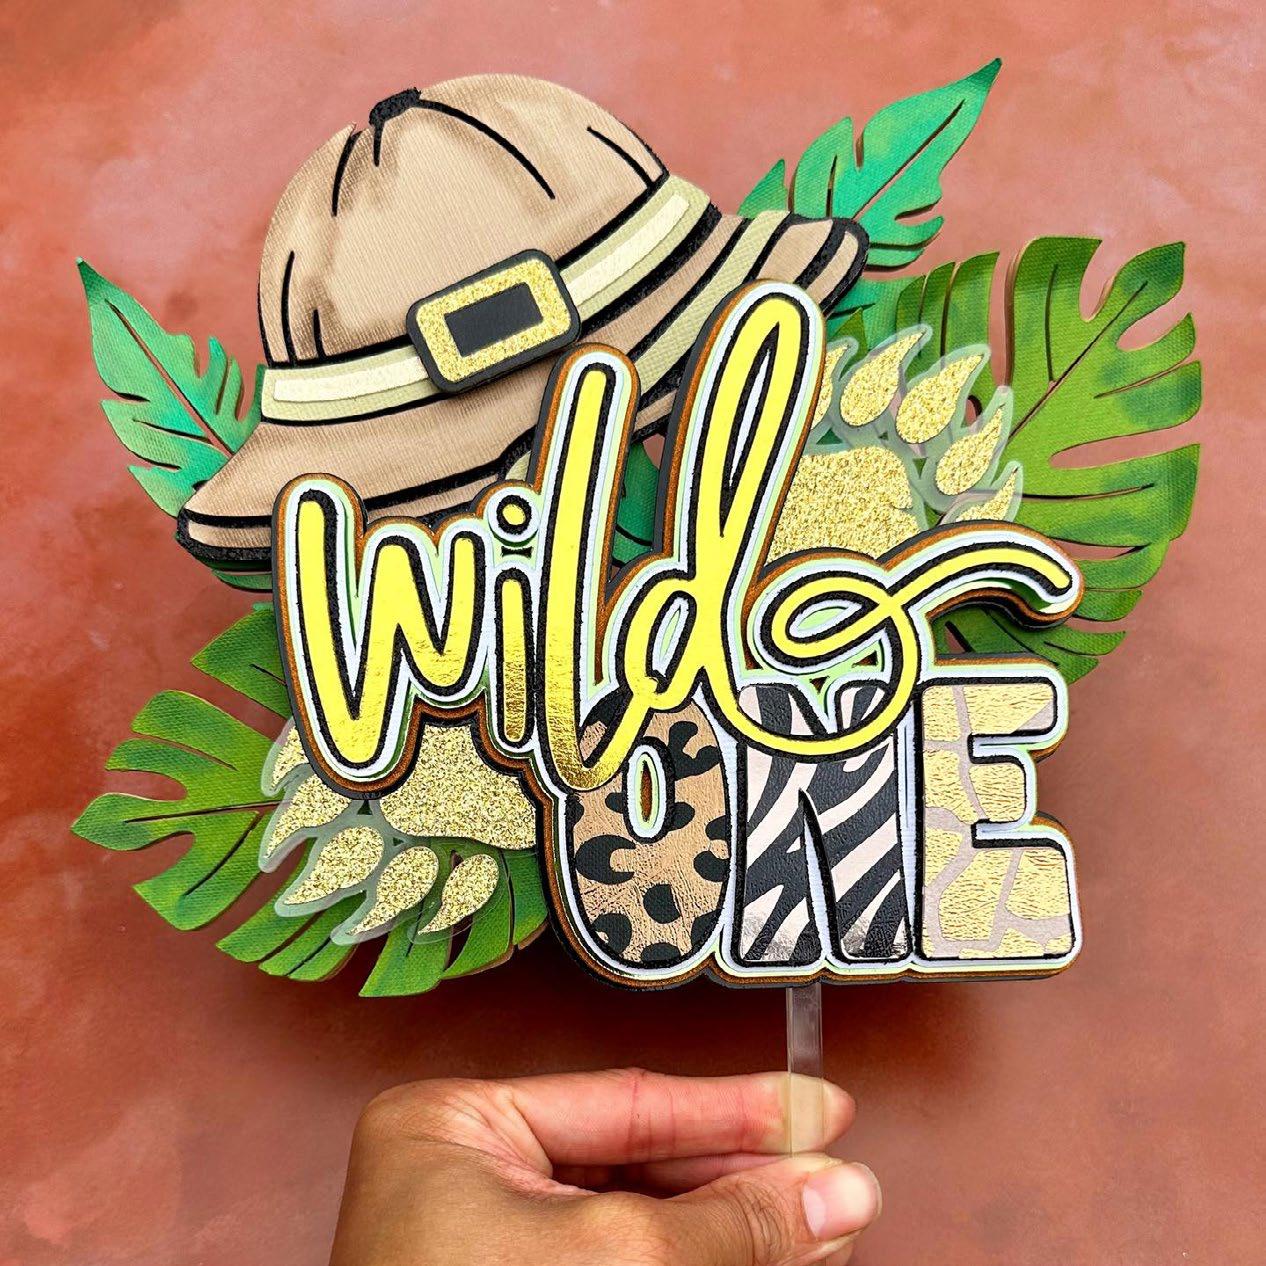
Immerse yourself in the untamed beauty of the jungle with bold plants, rich colors, and luxurious metallic accents. From from the perfect kids party to a sophisticated soirées using realistic animal prints and beautiful plants, this theme brings a refreshed and captivating vibe to every party setting.

#M40C83EEP
CAP Artist: JChewyDesigns

#M5059AE89
CAP Artist: EliArt Studio

#M3A831F0F
Love the image? Easily find it in Design Space® by searching the image number.
Fonts


Everyday Fonts - Something to Shout About, BFC Block Toys, Beef Cakes