Foundation
Handwriting Foundation Resource
Sue Peet
Handwriting Treasure House
Pack Resource Pack
Sue Peet
Handwriting Foundation Resource Pack Part 1
Sue Peet
Contents Part
Page Programme overview 5–6 Teacher notes 7–17 1 Spider alert! 18 2 Flowers in the garden 19 3 Blast-off! 20 4 Don’t look down! 21 5 Take a deep breath! 22 6 From outer space to Earth 23 7 Practising patterns 24 8 Practising patterns 25 9 Practising patterns 26 10 Hit the target! 27 11 Hit the target! 28 12 Follow the lines 29 13 Practising patterns 30 14 Practising patterns 31 15 Touch the stars! 32 16 Jump for It! 33 17 Bouncing balls 34 18 Kite-flying 35 19 Cloud cover 36 20 Practising patterns 37 21 Practising patterns 38 22 Practising patterns 39 23 Hit the target! 40 24 Shapes and patterns 41 25 Practising patterns 42 Page 26 Practising patterns 43 27 Follow the lines 44 28 Follow the lines 45 29 Join the lines 46 30 Join the lines 47 31 Join the lines 48 32 Monkey business 49 33 Practising patterns 50 34 Practising patterns 51 35 Practising patterns 52 36 Hit the target! 53 37 Practising patterns 54 38 Practising patterns 55 39 Join the lines 56 40 Join the lines 57 41 Hit the target! 58 42 Draw your own patterns 59 43 Draw your own patterns 60 44 Join the lines (letter-like shapes) 61 45 Join the lines (letter-like shapes) 62 46 Join the lines (letter-like shapes) 63 47 Join the lines (letter-like shapes) 64 48 Join the lines (letter-like shapes) 65 3
1
4
Part
Page 49 Practising patterns 67 50 Look out below! 68 51 Time for lunch 69 52 Practising patterns 70 53 Mice on the run! 71 54 Here comes the water! 72 55 One jump ahead 73 56 On the ball 74 57 Capital letters: A 75 58 Capital letters: B 76 59 Capital letters: C 77 60 Capital letters: D 78 61 Capital letters: E 79 62 Capital letters: F 80 63 Capital letters: G 81 64 Capital letters: H 82 65 Capital letters: I 83 66 Capital letters: J 84 67 Capital letters: K 85 68 Capital letters: L 86 69 Capital letters: M 87 70 Capital letters: N 88 71 Capital letters: O 89 72 Capital letters: P 90 73 Capital letters: Q 91 Page 74 Capital letters: R 92 75 Capital letters: S 93 76 Capital letters: T 94 77 Capital letters: U 95 78 Capital letters: V 96 79 Capital letters: W 97 80 Capital letters: X 98 81 Capital letters: Y 99 82 Capital letters: Z 100 83 Small letters: a, b, c 101 84 Small letters: d, e, f 102 85 Small letters: g, h, i 103 86 Small letters: j, k, l 104 87 Small letters: m, n, o 105 88 Small letters: p, q, r 106 89 Small letters: s, t, u 107 90 Small letters: v, w, x 108 91 Small letters: y, z 109 92 Add the missing letters (capitals) 110 93 Add the missing letters (small) 111 94 Numbers (0–4) 112 95 Numbers (5–9) 113 96 What’s missing? 114
Contents
2
Programme overview
Develop a comfortable and ef fi cient pencil grip Form letters correctly
Develop a comfortable and ef fi cient pencil grip Form letters correctly
ELG 4: Handle equipment and tools effectively, including pencils for writing
ELG 10: Use their phonic knowledge to write words in ways which match their spoken sounds. Write some irregular common words. Write simple sentences which can be read by themselves and others. Some words are spelt correctly and others are phonetically plausible
Sit correctly at a table, holding a pencil comfortably and correctly
Begin to form lower-case letters in the correct direction, starting and fi nishing in the:
Right place
Form capital letters
0–9
Form digits
Understand which letters belong to which handwriting ‘families’ (i.e. letters that are formed in similar ways) and to practise these
Form letters correctly and consistently
Form lower-case letters of the correct size relative to one another
Practise handwriting patterns and the joining of letters
Start using some of the diagonal and horizontal strokes needed to join letters
Understand which letters, when adjacent to one another, are best left unjoined
Write capital letters and digits of the correct size, orientation and relationship to one another and to lower case letters
Use spacing between words that re fl ects the size of the letters
Main Teaching Aims
To make controlled pencil movements
To join two points with a straight or curved line
To follow a given sequence of movements
To produce a comfortable pencil grip
To produce a controlled line that supports letter formation
To write upper case letters using the correct sequence of movements
To recognise lower case letters
To develop a comfortable and ef fi cient pencil grip for forming and linking letters
To recognise upper and lower case counterparts
To form lower case letters correctly in a script that will be easy to join
To reinforce the link between handwriting, spelling and the recognition of phonic patterns and letter strings
To practise correct letter orientation, formation and proportion
Practice in basic sight vocabulary
Reinforcement and practice using the four basic handwriting diagonal and horizontal joins
Linking handwriting to phonic and spelling knowledge and patterns
Conceptual awareness of space required for printing (for labels, notices etc.)
Pencil control
Hand-eye coordination Movements necessary to form letters
Age 4–5 Nursery/ Reception/P1 Foundation stage
Foundation Part 1
Pencil control
Letter-like movements
Age 4–5 Reception/P1
Foundation Part 2
Recognition of lower case letters linked to upper case letters
Upper case letters (alphabetical order)
Numbers 0–9
Precursive lower case letters, grouped according to movement
Recognition of lower case joins
Upper and lower case links
Age 5–6 Year 1/P2 (Term 1)
1 Part 1
Lower case letter formation and joins in a cursive style using common rime patterns
Main punctuation marks
Age 5–6 Year 1/P2 (Terms
1 Part 2
High-frequency word practice
Print in the environment
Letter joins through common spelling patterns and strings
Print for labels, notices etc.
School and classroom vocabulary
Beginnings of self-assessment
2 and 3)
Age 6–7 Year 2/P3
2
National Curriculum
Scotland Ireland Wales
Nursery objectives: Pick up small objects with fi nger and thumb and start to hold writing implements appropriately, using pincer grip
Key Stage 1 objective: use a legible style of handwriting
Demonstrate an understanding of the directionality of written print
Identify letter sounds through exploration of their shape using tactile letter forms and multi-sensory play activities
Reception objectives:
Hold writing instruments appropriately
Write from left to right
Discriminate between letters
Year 1 objective: form upperand lower-case letters that are usually clearly shaped and correctly orientated
Year 2 objective: form upperand lower-case letters accurately and with consistent size
First stage, Writing (Tools for writing): I can present my writing in a way that will make it legible and attractive for my reader (LIT 1-24a)
5
BookAge Main Content
EYFS / 2014 National Curriculum Cambridge International Primary Programme
Ensure consistency in the size and proportion of letters and the spacing of words
Practise joining letters in handwriting
Build up handwriting speed, fl uency and legibility
Use the diagonal and horizontal strokes that are needed to join letters and understand which letters, when adjacent to one another, are best left unjoined
Reinforcement and practice of cursive and printed style to ensure consistency in size and proportion of letters and the spacing between letters and words
Reinforcement and practice of print and cursive style
Copy writing Uses to which handwriting may be put
Use joined-up handwriting in all writing
Increase the legibility, consistency and quality of their handwriting (for example, by ensuring that the downstrokes of letters are parallel and equidistant; that lines of writing are spaced suf fi ciently so that the ascenders and descenders of letters do not touch)
Purposes and uses of handwriting and print
Reinforcement and practice of cursive and printed style to ensure consistency in size and proportion of letters and the spacing between letters and words
Purposes and uses of handwriting and print Consolidation and development of a style that is fast, fl uent and legible Presentation, layout and decoration of ‘ fi nished’ work
Practise fast, fl uent and legible handwriting styles for different purposes
Write legibly, fl uently and with increasing speed by: Choosing which shape of a letter to use when given choices and deciding whether or not to join speci fi c letters
Purposes and uses of handwriting and print Consolidation and development of a style that is fast, fl uent and legible
Presentation, layout and decoration of ‘ fi nished’ work
Use handwriting and IT effectively, making appropriate choices of presentation, to prepare writing for publication
Choosing the writing implement that is best suited for a task
Develop a personal handwriting style to write legibly, fl uently and with increasing speed, choosing the writing implement that is best suited for a task
Purposes and uses of handwriting and print Consolidation and development of a style that is fast, fl uent and legible Presentation, layout and decoration of ‘ fi nished’ work
High-frequency word practice
Development of spelling patterns
Copy writing Uses to which handwriting may be put
High-frequency word practice
Development of spelling patterns
Development of a personal style
Speed writing practice
Age 7–8 Year 3/P4
3
Age 8–9 Year 4/P5
4
Copy writing
Development of a personal style Speed writing practice
Age 9–10 Year 5/P6
5
Uses to which handwriting may be put
Copy writing
Development of a personal style
Speed writing practice
Uses to which handwriting may be put Links into ICT and fonts
6 Age 10–11 Year 6/P7
objective: produce legible handwriting and present work appropriately joining letters in some words
objective: produce handwriting which is clear and legible and may be cursive
objective: produce legible, cursive handwriting with increasing fl uency
objective: produce fl uent and legible handwriting
Wales
Year 3
Year 4
Year 5
Year 6
Ireland
National Curriculum
Scotland
Key Stage 2
objective: develop a swift and legible style of handwriting
Second stage, Writing (Tools for writing): I consider the impact that layout and presentation will have and can combine lettering, graphics and other features to engage my reader (LIT 2-24a)
6
BookAge Main Content Main Teaching Aims EYFS / 2014 National Curriculum Cambridge International Primary Programme
Teacher notes
General introduction
Treasure House Handwriting is a comprehensive programme designed to support teachers and children through the stages of learning a clear, fluent, legible and fast style of joined writing from the early stages to the top of the Primary phase. The programme provides copiable material that is intended for use through shared sessions, guided group tuition and individual practice.
The programme begins with patterns and movements, which will be necessary to improve hand-eye coordination, fine motor control and individual letter production.
Linked to the 2014 National Curriculum, the programme encourages a precursive and then a cursive style from the early stages of learning.
The programme aims to link the development of handwriting skills and style to the main patterns and rules of the English spelling system. As children practise the movements necessary to make the joins and patterns of the handwriting scheme, they are also reinforcing the patterns of the main onset, rime and spelling patterns.
By Book 2, children are provided with an opportunity to experiment with alternative letter shapes when forming their own personal handwriting style.
Books 3–6 introduce the notion of keeping a handwriting folder containing samples of material that will prove useful when presenting and setting out work for publication. The books include many uses to which both printing and joined handwriting skills may be put.
Books 3–6 also introduce the concept of two types of handwriting: one style may be used for ‘speed’ tasks, e.g. personal note-taking; the other, neater, style may be used for presentational work. Selfassessment sheets are included in Book 3 (pp.20 and 63) and Book 6 (p.20). Books 3–6 also link handwriting skills to the basic skills of layout and presentation on a computer keyboard.
The joining of letters in words: which style is most appropriate?
Teachers will always have views about the efficacy or attractiveness of specific letterforms.
It must be remembered that every adult will consider the formation that they use to be the most comfortable to them. However, this does not necessarily make it the most effective formation for children learning for the first time. Teachers must bear in mind the need to develop a handwriting style that is clear, fluent, legible and fast for children learning for the first time.
What about exceptions?
For children with dyspraxia or other handwriting difficulties, the teacher may need to look for SEND support. These children may already be receiving handwriting tuition as part of their support.
Children who move schools may well have already learned another handwriting style. If they enter school during the Infant stage, teachers may wish them to recap pages from the previous book, and this may be completed – with the cooperation of parents – as a homework activity. Children who move schools during the Junior stage may well have formed a personal handwriting style, which, although different, is clear, fluent and legible. It may be inappropriate to alter their handwriting style at this stage.
The notes on particular handwriting difficulties (see p.14 of the Teacher notes in Books F–2) may also provide useful information.
Letterforms in the programme
Treasure House Handwriting aims for the development of joined handwriting as soon as individual precursive letterforms have been mastered. This is in line with National Curriculum guidance. Specific letterforms have been selected to meet the following criteria:
● They should help children’s handwriting to be clear, fluent, legible and fast.
● Each individual lower case letter chosen begins from the main writing line.
● Each lower case letter is taught with both a leadin and a lead-out stroke. This is to help avoid confusion in young children about whether to
7
begin a letter at the top or the bottom. It has also proved to be beneficial for children with poor hand control and for dyslexic children.
● The joined lower case letters should, where possible, resemble closely their printed counterparts.
● Letters, such as ‘s’ should have the same form wherever they occur in a word, thus reducing the amount that children need to relearn.
● It is possible to join all lower case letters. One letter (‘f’) changes from the precursive to the cursive stage. While it is felt that the ‘f’ used in Book B will be familiar to young children learning to form the precursive letters, the cursive ‘f’ is used from Foundation Part 2 to encourage a more fluent hand.
● The pencil or pen should need to be lifted from the page as little as possible when linking lower case letters in words, thus reinforcing the patterning of joined movements within letter strings as an aid to memorising phonic and spelling patterns.
Precursive Upright (Foundation Part 2)
The following letter styles have been chosen to meet the preceding list of criteria:
Specific letter style options
The reasoning behind each cursive letter style option chosen for use in Treasure House Handwriting was discussed with several Literacy and SpLD (Dyslexic) practitioners who agreed with the choices.
Chosen because, looped from the back, it is easiest to link to all other letters, always joining the same way and thus more fluent.
Chosen because it joins in the same way whether it is at the beginning, in the middle or at the end of a word, thus making it fluent and meaning there is less for children to learn.
Chosen because it is more legible, most like the printed ‘v’ and less likely to be confused with the letter ‘u’.
Chosen because it is more legible, most like the printed ‘w’ and less likely to be confused with the letter ‘u’.
This is the only small letter that requires the pencil/pen to be lifted from the paper. This style was chosen because it will join and because it is most like its precursive counterpart.
Cursive Upright (Book 1)
Cursive Slanted (Books 2–6)
A curved ‘x’ can often be confused for the letters ‘sc’; this is particularly so for dyslexic and less able readers.
Chosen because it is more legible, most like the printed ‘y’ and doesn’t involve taking the pencil/pen off the paper.
Chosen because it will join and because it is most like its precursive counterpart.
As children move on to join letters in words, they will learn that many letters will join in different places, depending on the letter they are linked to. Treasure House Handwriting aims to support the development of strong links between the formation of patterns in handwriting and those involved in phonic and spelling knowledge.
8
Contents of the programme
Infant Stage
Foundation Part 1: Reception/P1
This book introduces the fine motor movements and pencil control that will be necessary for the formation of letters and patterns. It provides practice in moving from left to right, keeping within ‘tramlines’ and making the up-and-down and curved movements necessary for letter formation.
Foundation Part 2: Reception/P1
This book reinforces movements and patterns which will help children to make the movements they will need when learning to form letter shapes. For many children the movements from left to right and from top to bottom may not be intuitive, hence the instruction to ‘Start at the ✩.’
Practice is also provided in each of the movements for upper case letters. These have been placed early in the programme because many children will have learned at least some of these letters before they begin formal schooling, and so any inappropriate movements can be corrected early.


Book 1 Part 2: Year 1/P2 (Terms 2 and 3)
To provide extra practice in the transition from precursive to cursive letters, an extra section has been included at this stage. In this section, upper case letters and lower case letters are reinforced through some of the main rime patterns that will be used for spelling. In this way the development of a cursive hand is linked to the introduction of spelling patterns.

Book 2: Year 2/P3
This book continues the development of linking handwriting to spelling, introducing joins through the main onset groups and blends and the highfrequency words required to be learned and practised by the end of the Infant stage. Name Date
Book 1 Part 1: Year 1/P2 (Term 1)
Linked closely to the National Curriculum and Primary National Strategy, this book provides more intense teaching strategies and practice for the first term of formal tuition.
Since it is at this stage that children may learn incorrect or inappropriate movements, each individual letter shape and movement is taught with a lead-in and a lead-out stroke beginning from the writing line. The letters are grouped according to the main movements involved so that children gain extra reinforcement of the shapes and movements involved. By grouping letters according to their movement, it is also hoped to avoid the confusion that many children encounter between letters that may look very similar in print, e.g. ‘b’ and ‘d’, ‘p’ and ‘q’, ‘n’ and ‘h’.


9
Write
the
at the ✩✩✩✩ 12 742700_Bk_B_Main_[017-064].indd Sec1:28 4/4/11 13:09:52 60 27000_P067_0114.indd 78 24/02/16 2:20 PM
¶i Now practise
. Small
1
over
on the line here. Start at the ¶i ¶i ¶i ¶i ¶i ¶i ¶i ¶i 1 24/02/16 10:50 AM Name Date
â[t â[t â[t â[t â[t â[t â[t â[t â[t â[t t â[t Practise writing the letter join. Name Date
Remember to Look, Say, Cover, Write and Check! When you have nished, write each word three more times on another sheet of paper. Think about this! ¡[m ¡[n ¡[p
these letter joins by writing the words in the box. ¡[m]a[l[l ¡[°e[l[l ¡[m[i[¯e ¡[m]Š…e ¡[n]a[…e ¡[n]a[p ¡[n[iÁö ¡[n[i[p ¡[³e[l[l ¡[p[i[l[l ¡[p[i[n ¡[p[u[n Write all of the words that have the ¡[m letter join.
Capital letters
over each capital letter. Follow
movement order. Start
Name Date
writing the letter
letters
Write
each
Building words 20
Letter joins 5
Practise
Junior Stage
Book 3: Year 3/P4
This book reinforces the handwriting style already learned, through sentences, spelling patterns and simple tongue-twisters and rhymes. During this book, children are encouraged to attempt writing with their eyes closed to help fix the pattern of movements in the mind. (It may be helpful if teachers show children how to place their pencil or pen on the writing line before closing their eyes!)
Through this book, children are introduced to the idea of collating a handwriting folder. Some tasks will need to be completed on another sheet of paper. This book also contains ideas for exemplar material to be retained by children in their handwriting folder.

¡]a]d]d[¯e ¶h]Šb[b[¯e ¶m[i]d]d[¯e ¶›a[b[b[i[t ¶m[u]d]d[¯e ªd[ri[b[b[¯e
Book 4: Year 4/P5
At this stage, children are encouraged to examine different handwriting purposes and styles. This book also includes settings in which print letters may be appropriate both in upper case and lower case forms.
Links with common spelling rules and patterns and common high and medium-frequency vocabulary are continued. This book also introduces practice in writing at speed.

13

a range of curricula and everyday situations for presentation to others. By this stage, children will be developing at least three handwriting styles:
● A neat, ‘best’ form for presentational work that may be produced slowly and with care. This style may be part of a ‘school style’.
● A speedier and sometimes less neat form for, e.g. making personal notes or copying work to be presented later. It is perfectly reasonable that some children using this style may begin to ‘personalise’ their writing. They may begin to add loops or serifs, adopt alternative letterforms and link upper case letters to lower case letters – as many adults do. They may also experiment with a unique signature at the foot of their work. This personalisation should be encouraged as long as it fits the criteria of being clear, fluent, legible and fast.
● A clear, well-formed print style for labels, notices, captions etc. demonstrating judgement about style, size, and spatial awareness of the room available.
This book extends children’s mastery of the three forms of handwriting listed in the Book 5 entry on this page. Children are encouraged, through a variety of traditional calligraphy and modern presentational tasks, to develop a style that is personal and unique to themselves. (The relationship between hand-crafted and computer-aided design is extended.) Name
Each of the words and phrases in the box can be shortened by using an apostrophe. Write the shortened version of each as many times as you can on one line, making sure you put the apostrophe in the correct place.
about this!

If you remember that the apostrophe replaces the missing letter or letters, it should help you to put it in the correct place. If you forget, look back to page 28.
Book 5: Year 5/P6
Throughout this book, children explore different contexts in which a well-formed handwriting style plays an important part. They are asked to use both print and joined styles to transform material from


S¶t]or¬e¡ I ¶h]a[¹Ö ¡[t]a[Œ·e]d

S¶t[uÁö»›om¶t[«ei¶n¶·e]r±â[t
Book 6: Year 6/P7
ªa[m ¶wri[t[i[n]ü ¶t]‹ ªc]om[p[l]a[i[n ªa[b]ou[t ¶t[«e ¶¥e[h]a[vi]ou[r ªÆ ¶t[«e ¶Óou[n]ü ªc[h[i[l]d[ Ö[n ªa[n]d ¶·¨e[n]a]Îe[rã ¶i[n ¶m[þ ªa[ Ö]a.
Yâ¡[·e[›d]a[þ I ¶ºÖ[n[t ¶t]‹ ¶vi¡[i[t ªa[n â[l]§e[Œl[þ ¶±e[i]Ìh[b]ou[r ¶™h]‹
10
ªd]d ¶b[b Practise writing all of the words in the box in alphabetical order. Write
as
Date Double letters 20
each word as many times
you can on one line.
¶p]a]d]d[¯e ¶b[u[b[b[¯e »i]d]d[¯e ¶ŸŠb[b[¯e ¶ri[b[¥e]d ¡[t[u]d]§e]d
¶h[u]d]d[¯e »i[b[¥e]d ¶Ÿa]d]d[¯e Name Date Apostrophes
¶i[t
¡[«e ¶h]a¡
¶wi[l[l ¶wi[l[l ¶n]Št
¶n]Št
¶n]Št
¶n]Št
Label your folders
to
in
home. Here are
might label. 5 Think
about which
should have a capital letter at the beginning. Some of the writing is in speech. How will you show this?
about this!
Think
I ªa[m ¶«e ¶wi[l[l
¶i¡
I
ªd]‹
¡[h]a[l[l
ªd[i]d
¶Ÿou[l]d ¶n]Št Name Date
Design some eye-catching labels
use
your folders at school and at
some subject folders you
carefully
words
Think
through
write your own letter to a newspaper, complaining about something that annoys you. Writing a letter of complaint 20 Tª‹: T¶«e Eªd[i[t]or Dâ]a[r
Name Date Read
this letter of complaint and then
S¶i[r/Mªa]d]a[m, I
When should children begin Book F?
Before children begin work on Treasure House Handwriting, they need to:
● Be able to hold a pencil comfortably.
● Be able to make controlled marks on paper.
● Understand the basic conventions of English writing.
Some of the prerequisites for good handwriting are:
● To establish early learning goals for future letter formation and handwriting.
● To link sounds to letters, naming and sounding the letters of the alphabet.
● To know that print carries meaning and, in English, is read (and written) from left to right and top to bottom.
● To attempt writing for various purposes, using features of different forms such as lists, stories, instructions.
● To write their own names and other things such as labels and captions and begin to form simple sentences, sometimes using punctuation.
● To use a pencil and hold it effectively to form recognisable letters, most of which are correctly formed.
Source: Early Learning goals – Language and Literacy (DfEE)
The Foundation Stage in handwriting needs to provide:
● Opportunities for children to hear, use, see and read familiar words.
● Opportunities to link sounds to letters.
● Opportunities to see adults writing, and for children to write for themselves.
In the early stages of practice in handwriting, children have four main requirements:
● They need space to try out, on a grand scale, the movements and patterns that will become letter-like movements.
● They need to use, in play, the same kind of movements and patterns that they will need to hold a pencil, to make straight and curved movements, and to fulfil a pattern or sequence in the correct way across a page.
● They need to see models of writing and the purposes to which writing will be put and to attempt them for themselves.
● They need to be encouraged to ‘have a go’, confident that they will be praised for what is right rather than criticised for what is wrong.
Assessment
By the end of the Foundation Stage, children should be able to:
● Handle equipment and tools effectively, including pencils for writing (ELG 4, Moving and Handling)
● Use their phonic knowledge to write words in ways which match their spoken sounds. Write some irregular common words. Write simple sentences which can be read by themselves and others. Some words spelt correctly and others phonetically plausible (ELG 10, Writing)
Some children will also be able to:
● Hold paper in position and use their preferred hand for writing, using a correct pencil grip. Write on lines and control letter size. (Exceeding ELG 4, Moving and Handling)
● Spell phonically regular words of more than one syllable as well as many irregular but high frequency words. Use key features of narrative in their own writing (Exceeding ELG 10, Writing)
Source: The Early Years Foundation Stage Profile, 2016 Handbook
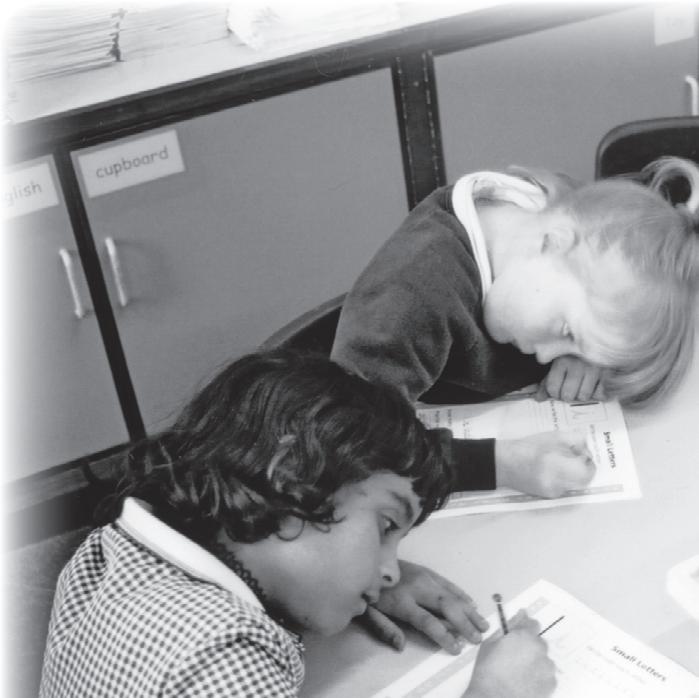
Making a mark
Many foundation settings now encourage children to make initial attempts at writing by completing a daily register. This may take the form of large sheets of sugar paper on which each child enters their own mark or signature as they enter the room. At some later point in the morning, when the children are gathered together, the teacher or adult helper points out the children’s marks to check that they are indeed present. No attempt is made during this activity to correct letter formation or spelling, the aim being for children to make a mark that they can recognise as theirs. Children learn to make and recognise their own individual mark and to recognise those of their friends.
As children progress towards writing their full names, their attempts are praised and encouraged. When a child has absorbed a new movement or shape well enough to incorporate it into their ‘signature’, this is noted and praised. As children progress, perhaps when they can sign their forename, they are encouraged to label their own books, pictures and writing in the same way.
Pre-handwriting play
Many of the activities readily available in any Foundation setting will provide preparation for good handwriting (for example, learning the
11
pincer movement necessary for holding a pencil by feeding fish in a fish tank-; source: DfEE Early Learning goals – Language and Literacy). The control necessary for building a pile of blocks or for driving a toy vehicle between and around obstacles can be developed so that large movements progress towards much finer and more controlled movements. P.E. and adventure activities can help to encourage balance and can be used to detect and strengthen the dominant hand for writing.
Musical activities can stimulate a sense of rhythm and pattern – necessary for letter formation and spelling. Household play activities such as ‘cooking’ or setting tables in a café all help in the manipulation and control of tools and implements.
What is important for handwriting is that teachers and teaching assistants are aware of what to look for and record, how to encourage beneficial skills and to detect and correct inappropriate habits. The following pages contain suggestions for how these play activities may be used to prepare children for the formation and linking of letters.
Which hand?
Many children at the Foundation Stage may not have firmly established the dominance of a writing hand. While many of us are ambidextrous to a certain extent, all of us have a dominant hand for writing; and because this is also linked to the cerebral hemispheres of the brain, it should be detected as early as possible. The practice of ‘forcing’ right-handed writing is now, thankfully, largely defunct, but play activities can be crucial in helping a child to reinforce the dominance that is natural to them.
Large movements, such as ball-play, can help teachers in detecting which hand is likely to be more dominant. One initial indicator is the foot that children use to a) kick a ball or b) make the first movement when climbing. The foot is less likely to have been influenced by outside factors such as parents or carers using a particular hand for feeding or cleaning teeth etc. For this reason, it is often a key indicator of the dominant side of the hemisphere. It is preferable, unless physical disabilities preclude it, for children to use the same side as their writing hand. A child with very strong dominance of one side will rely more on their right foot, hand and eye. A child with mixed dominance is more likely to suffer from at least mild learning difficulties in terms of handwriting. Likewise, crosslaterality, i.e. having a different dominant eye and hand, can cause difficulties in terms of pencil control and the orientation and spacing of letters.
While these conditions cannot always be avoided, they can at least be noted.
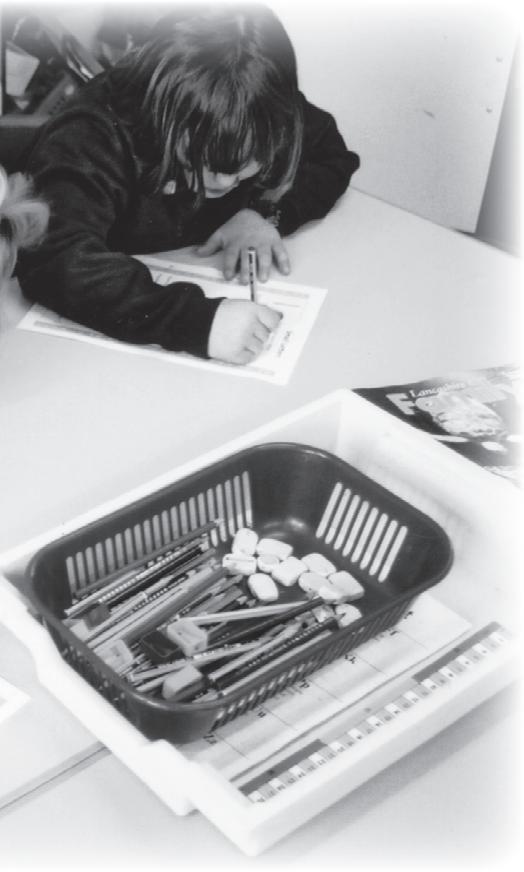
Activities to aid the development of handedness and pencil control
While many children may not yet be able to use one hand to catch a ball or a bean-bag, they are likely to use their dominant hand to throw it.
Foundation setting assistants can also be alerted to take notice of which hand a child uses, for example, to stir, or beat imaginary eggs when making a cake; to pick up coloured sticks or art straws; to balance blocks in a pile; to beat a drum and to feed fish.
It may be necessary to keep and maintain a record for some children over a period of time and across a full range of activities before a final decision about a dominant hand is reached. Parents may also be consulted to keep a similar record at home. This type of record may also be useful in detecting any dyspraxic difficulties, or clumsiness in fine motor movements, in order to provide more directed support.
Once it has been established which hand the child prefers to use, the use of it can be strengthened by offering toys, tools or implements towards that hand.
Threading large beads can help to strengthen hand-eye coordination. Weaving paper strips or art straws, or making collage pictures by gluing material or objects to paper, will also help.
Using a computer mouse and keyboard, particularly those adapted for use by young children, can also help in the development of hand-eye coordination and control of movements. It is even more helpful if the computer mouse can be sited for use by either hand.
Knowledge of upper case letters
Before they enter a Foundation setting, many children learn the rudiments of writing at home. When they do so they will often print their writing in upper case letters. This is particularly so when learning to write their name. It should also be borne in mind that because many upper case letters are formed from the joining of straight ‘stick’ shapes, they may be easier to learn at first than the more curvy lower case letters. In the environment of print around them, children will also see much evidence of printed upper case writing in road and street signs, advertisements, shops, packaging etc.
12
Rather than try to undo these early handwriting attempts, Treasure House Handwriting attempts to build on them by initial practice and reinforcement of upper case letters. This also allows the children to continue with their own unaided writing, using printed upper case letters if they wish, without feeling that they are in error.
It is important, however, that children extend their early knowledge by linking each upper case letter to its lower case equivalent. Name Date

It is helpful if children can also see upper case letters in posters and signs around the classroom, so that they become familiar with their use.
The sand tray
This is an ideal medium for training children in the ‘feeling’ of patterns in movement that is necessary for letter formation. Encourage children to use the first finger of their writing hand to create curved and straight tracks for cars or other vehicles. When children use sand tools, encourage them to ‘point their finger’ along the tool, making the tool work like their finger. This helps them to move away from the ‘fist’ grip that many young children will use to hold implements in the early stages.
Draw happy or sad faces, again using the first finger and vocalising all the features. (From the beginning. It is helpful if children make the round face using an anti-clockwise movement, which they will need later to form ‘c’, ‘o’, ‘a’, ‘d’, ‘g’ etc.)
“A round face … two eyes … a nose and a smi-l-ey mouth. Now draw two ears. This is a happy face”
“A l-o-n-g face … two eyes … a nose and a s-a-d mouth. Now draw two ears. This is a sad face.”
Later, when the teacher or teaching assistant feels they are ready, children can transfer their faces to paper for a more permanent attempt.
The painting area
At the Foundation Stage, paint easels and large sheets of sugar paper are much more useful resources than lined paper. Even better are whiteboards or Formica-topped tables, which can be wiped clean after use. Children can then be encouraged to make several attempts at patterns and letter shapes and formation without feeling that they have made mistakes.
The teacher or teaching assistant makes a particular pattern, using washable paint, for the child to replicate. As the adult makes the patterns, he/she vocalises each movement: “Up and then down.” In the first instance, the child replicates the pattern over or next to the adult’s pattern, vocalising in the same way. As the child gains confidence, the adult may move on to wipe clean their own model before the child attempts it, encouraging the child to hold the pattern and movement in their memory. The vocalisation then begins to act like a mnemonic.
Some children may progress very quickly from making these erasable patterns on a wipeable surface to making a more permanent pattern on sugar paper or art paper, which they then ‘sign’. If the patterns are made in a strong colour such as black or brown, children may then decorate their attempts as they will later decorate a capital letter.
As children move towards the formation of individual letters, these can also first be made in sand or paint using first the finger and then the tool, before attempts are made on paper.
To celebrate correct letter formation or patterning, children might use a glue pen to form the patterns or shape they have learned, covering their shape with glitter before it dries, to make a sparkly image of the letter or pattern that might then be displayed or included in a Record of Achievement. As children play in sand trays, in water or with paint, activities can be staged to provide more dextrous tasks. Children might take toy vehicles round an obstacle course, pour water from a large container to a small container through a funnel, or paint within given boundaries.
The writing environment
Although very few children may be ready to begin formal handwriting practice at the Foundation Stage, it is helpful for them to see writing in the classroom that demonstrates the style and formation of the letters they will use later. Teachers at the Foundation Stage often display the alphabet in both upper case and lower case forms and in
13
a B b C c D d E FfG H h
capital
are missing from this sheet. Can you write each one in its correct position next to a small letter?
742700_Bk_B_Main_[017-064].indd Sec1:60 4/4/11 13:10:00 27000_P067_0114.indd 110 24/02/16 2:20 PM
Add the missing letters Thirteen
letters
44
both a print and joined style. Far from confusing children, presenting both print and joined writing in the early stages reflects writing that they will see in the world around them. It is also important that children’s attempts, however incomplete, are displayed with the same pride of place as those of the adults.
Treasure House Handwriting displays both printed and joined writing side by side throughout the programme. Distinction is made by using a printed style for titles, captions and instructions, while joined writing is used as exemplar material for children to replicate.
It is not enough simply to display examples of writing around the classroom. Children need to be made aware of their purpose and the reasons for a particular style. It may be helpful, before such material is displayed, to carry out a ‘talk about’ session with the whole class or, more likely, with a small group.
Children might, for example, be asked if they recognise the ‘M’ used by a well-known burger chain or the ‘K’ used in the name of a leading cereal. Why do they think the ‘M’ is made to stand out? Why has the firm made it distinctive in appearance from other Ms?
Is it easy to spot the fast-food restaurant within a row of other shops? Having displayed examples of this, children might then be encouraged to spot Ms of their own in, for example, books, rhymes and environmental print. Focusing on the link between the style and purpose in this way, even at this early stage, helps children to link the shape of a letter to a particular object or purpose and then to its sound. One difficulty that many young children may have is the ability to understand the consistency of a letter shape with its specific orientation. If a teddy bear or a car is turned around or upside-down, it is still a teddy bear or a car. But if a ‘p’ is turned upsidedown it becomes a ‘b’, while an ‘m’ on its head is very similar to a ‘w’. For this reason, it is helpful for children to link letter shapes, both upper case and lower case, to particular objects or content words and then to their sounds. For example: “The letters ‘P’ and ‘p’ stand for Peter, panda and play and it says ‘p’.”
Children might make collage pictures of different examples of upper case and lower case letters with accompanying pictures of objects. Children might also talk through any signs and labels around the classroom, particularly if these take the form of instructions. For example: Why is there a sign saying, ‘Now wash your hands!’ above the wash basin? They might copy signs written by adults or attempt their own versions.
In the Foundation Stage, also, it is important that children begin to be aware of patterns in the world around them. These patterns will play a vital role in their later progress in phonics and spelling.

Patterns and patterning
Very often an adult, unsure of the spelling of a specific word, will write it several times. It may seem that this is in order to view the ‘look’ of the word; to ‘see’ if it looks right. There is, however, a second element in this trial. Through long experience, our writing hand and fingers also tell us that the sequence of letters ‘feels’ right. Experienced computer keyboard users, who are able not to look at the keyboard as they type, will often know that they have made an error, even before they see it on screen, because the sequence of movements ‘feels’ wrong. Some of the vital knowledge about the writing and spelling of words is held as much by the hands as by the eyes or the brain. We literally have the knowledge about patterns and sequences in words that we write regularly, at our fingertips.
Every teacher of Junior age children will, at some stage, have come across children who seem not to have developed this facility to ‘feel’ whether a word is correctly written or not. They may, incidentally, be the very same children who find it hard to detect a rhyme in words, or who, having spelled ‘cat’ correctly, cannot spell ‘catch’. Much of the foundation for this knowledge is laid down in the early years of learning, and it can be aided by activities that develop the concept of a pattern.
Vocalising the patterns of movement
Work on patterns may begin with reasonably large objects such as blocks or three-dimensional shapes. Children may begin by matching a given pattern, e.g. car, lorry, bus, car, lorry, bus; red block, green block, blue block, red block, green block, blue block. Physically moving items to make the patterns helps to involve the hands and
14
provides vital thinking time to work out the correct sequence.
As the teacher makes the patterns, it is helpful if they talk their way through it, e.g. ‘First I am putting a red block, then a green block, then a blue block.’ The children should be encouraged to sing along, joining in with the pattern. Vocalising the pattern in this way aids the memory and brings another sense into play.
Once children have grasped the concept of a repeated pattern, they might begin to make similar patterns on paper, initially with finger-paint and then with coloured crayons or pencils. Teachers or teaching assistants might make linked patterns in sand or on paper for children to go over, again first with the finger and then with a writing implement.
One of the first personal patterns children need to grasp is that which forms their own first name. By repeating their first name in different sizes and colours all over a piece of paper, children begin to grasp the idea of repeating the same thing over and over again. They also gain vital practice in writing their first name correctly.
Examples of patterns in wallpaper, material, hair ribbons etc. might be displayed in the writing area, so that children may trace over the patterns with their fingers before attempting to replicate some of the patterns in paint or crayon.
Foundation
Part 1
This book introduces some of the pencil control and movements that will be necessary for the formation of letters. Children are guided in left to right and top to bottom movements on the page and in the straight, diagonal and curved movements that will form letter shapes.
The pages are divided into groups that introduce, reinforce and practice the movements children will need to make when they come to form letters. Each group begins with illustrative pages that place the movements in the context of a picture before lifting the movement out for practice.
It is envisaged that the teacher or teaching assistant will demonstrate the movements for each group, possibly on a blackboard or whiteboard or on an enlarged copy of the work sheet. It is also envisaged that many children will need more than one attempt at movements, so selected pages may be attempted more than once.
The sequence of movements are introduced first through straight lines (from top to bottom and left to right), followed by diagonals and then curves. Once these have been established, patterns that involve the repetition of these movements are introduced. Children should be encouraged to try to complete as much of each pattern as they can without lifting their pencil from the paper.
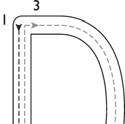
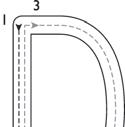
In the second half of Part 1, the patterns are combined to encourage children to move back over their own lines and to make loops. These movements are in preparation for the introduction of the linked lower case letters, later in Treasure House Handwriting. On these pages, children are also introduced to the idea of following numbers to form a sequence of movements in a specified order.
The final pages of Part 1 introduce the sequence of movements that will be necessary to form the upper case (capital) letters. Since many children at this stage will use upper case letters, even before they have really learned the alphabet, the ‘letters’ are introduced only as a series of movements that link to make a shape. Children who already know the alphabet may be encouraged to identify them if teachers wish, but this is not a requirement of Part 1, since these letters will be introduced again in Part 2.
Pages 18–23: Working with illustrations
One of the prerequisites for good handwriting is the ability to control pencil or pen marks within a given space. In these activities, children are asked to begin from a given starting point and keep their line steady. Teachers may wish to demonstrate this technique with a whole group before allowing them to practise independently.
These pages also allow teachers to introduce the idea of locating a starting point and following directional arrows.
15
✩ ✩
