
4 Door Styles - 17 Colors


4 Door Styles - 17 Colors
Every WeatherStrong® cabinet is crafted from our exclusive weather resistant system—engineered to handle sun, salt, storms, and heavy use without losing its strength or style. From the rugged cabinet core to the beautiful, low-maintenance doors, every detail is made to thrive outdoors and keep looking flawless year after year.

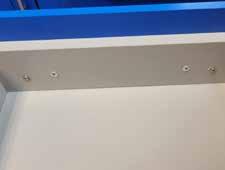
STURDY CONFIRMAT SCREW ASSEMBLY
To help ensure the assembly of strong cabinets, WeatherStrong® counterbores the cabinetry panels and uses stainless steel confirmat screws.
11. HDPE Doors & Drawers
Made from marine-grade High-Density Polyethylene, our doors and drawer fronts resist warping, fading, and cracking—even in harsh coastal or high-heat environments.
2. All‑Weatherboard® Cabinet Box
Our cabinet frames are constructed with ¾" thick All-Weatherboard® composite for unmatched durability, moisture resistance, and structural integrity.
3. Full Height Back Panels
We don’t do partial coverage. Every cabinet includes a ¾" thick All-Weatherboard® back panel that runs top to bottom for extra strength and stability.
4. Vented End Panels
Integrated oval cut-outs promote safe airflow and help prevent gas buildup—plus, optional inset mesh vent grills keep pests out.
5. Adjustable Support Legs
Factory-installed ‘Sure Level’ polymer legs support up to 330 lbs. For a sleeker look, upgrade to decorative stainless steel legs—perfect for uneven surfaces and high-end installs.
6. Stainless Steel Soft Close Hinges
Stainless steel, 6-way adjustable hinges ensure perfect door alignment and provide quiet, soft closing operation.
7. Stainless & Aluminum Handles
Choose from a curated selection of outdoor-rated handles in polished or brushed finishes—each one built to resist rust and elevate your design.
8. All‑Weatherboard® Adjustable Shelves
Just like the cabinet box, our ¾" thick composite shelves deliver strength, water resistance, and a flawless fit that lasts.
9. Heavy Duty Drawer Boxes
Made entirely from All-Weatherboard®, with full-extension stainless steel soft-close runners for smooth, quiet, everyday performance.


Outdoor living is where memories are made—sun-soaked cookouts, evening cocktails by the pool, family gatherings that spill onto the patio. WeatherStrong® was born on the Florida coast to make those moments effortless.
We’ve combined the rugged durability of outdoor-tested materials with the elevated finishes of indoor design. The result? Cabinets that look stunning and stay that way—through blazing summers, salty air, heavy rain, and even snow.
With WeatherStrong®, you’re not just building an outdoor kitchen. You’re creating a space that’s as stylish as it is strong—crafted to handle whatever life (and the weather) throws your way.
WEATHERPROOF DURABILITY
When you choose WeatherStrong®, you’re choosing cabinetry built from the ground up to conquer the outdoors. Our exclusive WeatherStrong Cabinet System is engineered to thrive in salt, sun, and storms—keeping its strength and style year after year—and every cabinet is backed by our Limited Lifetime Warranty.
• WeatherStrong® Cabinet System – our proven, weather resistant build never swells, fades, or cracks, no matter the climate
• Rust proof confidence – marine-grade hardware keeps every hinge and handle looking like new, even in coastal air
• Easy‑care performance – wipes clean in seconds, so your space stays as fresh as the day it was built
STYLE WITHOUT COMPROMISE
Only WeatherStrong® delivers finishes that combine rich texture, bold color, and lasting beauty—all engineered to thrive outdoors. Inspired by indoor design but built for the elements, every finish is part of our exclusive WeatherStrong Cabinet System, ensuring style and strength go hand in hand.
• Premium WeatherStrong® finishes – indoor-inspired elegance, perfected for outdoor living
• Texture & depth – more character than flat metal or stainless cabinetry
• Fade and chip resistant – keeps its look, season after season
It’s not a kit—it’s a kitchen. Semi-custom cabinetry that flexes to fit your space—made just for you in 10 days.
• Semi custom flexibility to fit any layout, large or small
• Tailored designs that work with your unique vision and space
• Faster turnaround—crafted to order and shipped in just 10 days
No sealing, staining, stress or metal headaches. Just durable materials made to stay clean.
• No sealing or refinishing—ever
• Stain and grime resistant surfaces stay clean with minimal effort
• Spend more time living, not maintaining your outdoor kitchen
Ships in just 10 business days—so your outdoor space gets done fast, and done right.
• Industry‑best lead times—no waiting weeks to start your project
• Made to order and shipped quickly without sacrificing quality
• Reliable delivery keeps your project on track from start to finish


• 5/8" thick flat panel door in a durable and color through High-Density Polyethylene (HDPE) finish
• Fully concealed stainless steel, sof t-close hinges
• Side-mounted, ball bearing, stainless steel, sof t-close drawer runners
• Decorative hardware required and sold separately. See page 42 for details.
• Lifetime Limited Warranty
• 5/8" thick flat panel door with an extended stile shaker-inspired routed center panel design in a durable and color through High-Density Polyethylene (HDPE) finish
• Fully concealed stainless steel, sof t-close hinges
• Side-mounted, ball bearing, stainless steel, sof t-close drawer runners
• Decorative hardware required and sold separately. See page 42 for details
• Lifetime Limited Warranty
• 5/8" thick flat panel door with an extended stile cottage-inspired routed center panel design in a durable and color through High-Density Polyethylene (HDPE) finish
• Fully concealed stainless steel, sof t-close hinges
• Side-mounted, ball bearing, stainless steel, sof t-close drawer runners
• Decorative hardware required and sold separately. See page 42 for details
• Lifetime Limited Warranty
• 5/8" thick flat panel door with an extended stile louver-inspired routed center panel design in a durable and color through High-Density Polyethylene (HDPE) finish
• Fully concealed stainless steel, sof t-close hinges
• Side-mounted, ball bearing, stainless steel, sof t-close drawer runners
• Decorative hardware required and sold separately. See page 42 for details
• Lifetime Limited Warranty
Images are computer generated and should not be used for true color representation or color matching. Please order a sample to view the actual color of the door in your space and light.


Customer Responsibility:
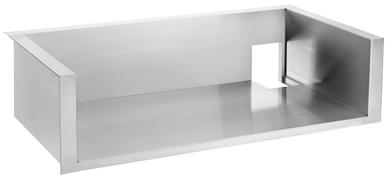
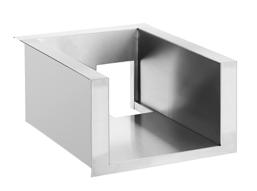
Grill, griddle, and side burner bases must be installed with the grill manufacturers specified insulation jacket to maintain warranty coverage.
When designing your kitchen you want to make sure each of your appliances are easily accessible.
To help in doing this it's important to think in zones.
• Hot Zone: This is the heart of the kitchen, where you will have heat admitting appliances.
• Dry Zone: This is a food preparation area. You will want an area of counter space that is near the Hot Zone.
• Wet Zone: Area with your sink that can be near your Dry zone. This zone should not infringe on your prep station
• Cold Zone: This will be your refrigerator or cold storage appliances. This zone should be kept away from the Hot Zone.


In addition to the three feet of prep space, you’ll need to consider the amount of "landing space" for each appliance in your outdoor kitchen to ensure it’s a safe distance from walkways and from other appliances. Our recommendations are:
• Grill or Pizza Oven: 24" of counter space on one side and 12" on the other
• Sink: 18" on each side
• Refrigerator: 15" of counter space above or around the fridge
• Side Burner/Cooktop: 12" on each side
Of course, these "buffer zones" can contribute to the 36" of uninterrupted prep space mentioned earlier. Just be sure to consider the practical side of getting everything to fit, such as whether you want under-the-counter appliances such as a mini refrigerator to be right at your legs where you’ll be doing the bulk of your prep work.


BASE CABINET CONTRUCTION
Base cabinet construction features a 30" high cabinet box, which must be mounted on 4½" high Sure Level adjustable polymer legs. Legs are installed on-site and are adjustable from 3 ¾" to 5¼" high. Optional stainless steel adjustable legs are available as an accessory. Optional snap-on matching toe kick panels are available 6" high x 96" long, for on-site modification and installation.
Our base cabinets feature a full-height ¾" thick enclosed All-Weatherboard® composite material back panel. Base cabinets can be installed as a freestanding island, or as a peninsula extending from a wall.
Features
• The face plate is modified in field to accept the respective insulating jacket used with the gas grill
• ¾" All-Weatherboard® composite material cabinet construction
• Includes Sure Level polymer legs, shipped loose for field installation and leveling. Upgraded stainless steel Sure Level legs are available
• Stainless steel handles are required and sold separately. See page 42 for details
• Grill base cabinet sides feature two vent cutouts, designed to promote air flow through the cabinetry, and to prevent any possible buildup from a propane or natural gas leak
PLEASE NOTE
All built-in grill heads require an insulating jacket. Please consult your grill manufacturer for the appropriate model.
GRILL BASE CABINET TIP
Grill base cabinets are manufactured with two full upper face plates that will need to be field modified to accept the insulating jacket used with the gas grill.
Under no circumstance should a grill be installed without the appropriate insulating jacket specified by the appliance manufacturer or warranty is voided.
DOUBLE DOOR GRILL BASE CABINET
Max Apron Width Cutout
GB36IB - 31.5
GB42IB - 37.5
GB48IB - 43.5
Max Apron Height Cutout plus Countertop Thickness
GB36IB - 11.5
GB42IB - 11.5
GB48IB - 11.5


Max Apron Width Cutout
GB60IB - 55.5
Max Apron Height Cutout plus Countertop Thickness
GB60IB - 11.5
The extended apron grill base is engineered for grills with insulating jackets that require a taller apron cut. Hybrid and Pellet grills are just a couple examples. The apron space on this grill is 18" in height and will need to be cut on the job site. Please consult your grill manufacture install instructions for the correct height required. Two drawers at the bottom allow for storage of grill pellets or other grilling accessories.
Max Apron Width Cutout
GBP48IB - 43.5
Max Apron Height Cutout plus Countertop Thickness
GBP48IB - 17.5


Kamado grill base cabinet requires the use of an outdoor counter surface on top of the base. This is where the grill will sit.Please consult the grill manufacture for surrounding clearance and installation of the grill.


Features
• The face plate is modified in field to accept the respective insulating jacket used with the side burner
• ¾" All-Weatherboard® composite material cabinet construction
• Includes Sure Level polymer legs, shipped loose for field installation and leveling. Upgraded stainless steel Sure Level legs are available
• Stainless steel handles are required and sold separately. See page 42 for details
• Side burner cabinet sides feature two vent cutouts, designed to promote air flow through the cabinetry, and to prevent any possible buildup from a propane or natural gas leak
PLEASE NOTE
All built-in side burners require an insulated jacket. Please consult your side burner manufacturer for the appropriate model.
Side burner base cabinets are manufactured with two full upper face plates that will need to be field modified to accept the respective insulating jacket used with the side burner. Under no circumstance should a side burner be installed without the appropriate insulating jacket specified by the manufacturer of the appliance.
Max Apron Width Cutout
SBB15 - 10.5
SBB18 - 13.5
SBB21 - 16.5
Max Apron Height Cutout plus Countertop Thickness
SBB15 - 11.5
SBB18 - 11.5
SBB21 - 11.5
DOUBLE DOOR SIDE BURNER BASE CABINET
Max Apron Width Cutout
SBB24 - 19.5
SBB30 - 25.5
Max Apron Height Cutout plus Countertop Thickness
SBB24 - 11.5
SBB30 - 11.5


Features
• ¾" All-Weatherboard® composite material cabinet construction
• Includes Sure Level polymer legs, shipped loose for field installation and leveling. Upgraded stainless steel Sure Level legs are available
• Stainless steel handles are required and sold separately. See page 42 for details.
•Full-height base cabinet sides feature two vent cutouts, designed to promote air flow through the cabinetry, and to prevent any possible buildup from a propane or natural gas leak
Features
• Two full-depth adjustable shelves
• Available in 18", 21", 24", and 27" depths
• Two full-depth adjustable shelves • Available in 18", 21", 24", and 27" depths
SINGLE DOOR BASE CABINET WITH 1 ADJUSTABLE SHELF AND 1 ROLL-OUT TRAY
Features
• Roll-out tray features stainless steel, soft-close, side-mounted, ball bearing drawer runners
• Roll-out tray is 6" high by 21¾" deep, and the sides and bottom panel are constructed of ¾" All-Weatherboard® composite material
• One full-depth adjustable shelf
• Available in 24" and 27" depth
• *27" deep base cabinets include the same 21¾" deep roll-out tray
• *27"deep base cabinets include the same 21¾" deep roll-out tray FULL-HEIGHT DOUBLE DOOR BASE CABINET WITH 1 ADJUSTABLE
• Roll-out tray features stainless steel, soft-close, side-mounted, ball bearing drawer runners
•Roll-out tray is 6 high by 21¾" deep, and the sides and bottom panel are constructed of ¾" All-Weatherboard® composite material
• One full-depth adjustable shelf
• Available in 24" and 27" depth
FULL-HEIGHT SINGLE DOOR BASE CABINET WITH 2 ROLL-OUT TRAYS
Features
• Roll-out trays feature stainless steel, soft-close, side-mounted, ball bearing drawer runners
• Roll-out trays are 6" high by 21¾" deep, and the sides and bottom panel are constructed of ¾" All-Weatherboard® composite material
• Available in 24" and 27" depth
• *27" deep base cabinets include the same 21¾" deep roll-out tray
Features
• Pull-out features stainless steel, soft-close, side-mounted, ball bearing drawer runners
• Includes weatherproof inset handle for easy grip
• Circular cut-out to support a standard 20 lb propane tank
• Available in 24" and 27" depth
• *27" deep base cabinets include the same 21¾" deep pull-out
Features
• Pull-out features stainless steel, soft-close, side-mounted, ball bearing drawer runners
• Includes weatherproof inset handle for easy grip
• Includes a removable plastic bin with a 35-quart capacity
• Available in 24" and 27" depth
• *27" deep base cabinets include the same 21¾" deep pull-out
Right or Left
Features
• ¾" All-Weatherboard® composite material cabinet construction
• Includes Sure Level polymer legs, shipped loose for field installation and leveling. Upgraded stainless steel Sure Level legs are available
• Stainless steel handles are required and sold separately. See page 42 for details.
• Blind base cabinet sides feature two vent cutouts, designed to promote airflow through the cabinetry, and to prevent any possible buildup from a propane or natural gas leak
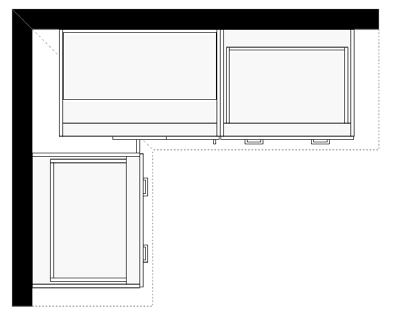
The Blind Base cabinet is 36" wide. It must be installed from 3" to 9" away from the adjacent wall. This allows the door full clearance and provides a flexible installation range. From the adjacent wall to the far edge of the cabinet, a minimum width of 39" to a maximum width of 45" is required.
Features
• Two adjustable shelves
• 3" filler, 3" & 9" overlay fillers included
• Door width is 12", door opening is 10½"
• Available in 18", 21", 24", and 27" depths


Features
• ¾" All-Weatherboard® composite material cabinet construction
• Includes Sure Level polymer legs, shipped loose for field installation and leveling. Upgraded stainless steel Sure Level legs are available
• Stainless steel handles are required and sold separately. See page 42 for details.
• Standard base cabinet sides feature two vent cutouts, designed to promote air flow through the cabinetry, and to prevent any possible buildup from a propane or natural gas leak
Features
• Drawer features stainless steel, soft-close, side-mounted, ball bearing drawer runners
• Drawer box is 4" high by 21¾" deep, and the sides and bottom panel are constructed of ¾" All-Weatherboard® composite material
• One full-depth adjustable shelf
• Available in 24" and 27" depth
• *27" deep base cabinets include the same 21¾" deep drawer box
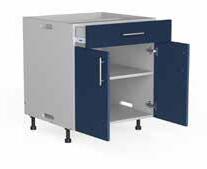
DOUBLE DOOR BASE CABINET WITH 1 DRAWER AND 1 ADJUSTABLE SHELF
Features
• Drawer features stainless steel, soft-close, side-mounted, ball bearing drawer runners
• Drawer box is 4" high by 21¾" deep, and the sides and bottom panel are constructed of ¾" All-Weatherboard® composite material
• One full-depth adjustable shelf
• Available in 24" and 27" depth
• *27" deep base cabinets include the same 21¾" deep drawer box
SINGLE DOOR BASE CABINET WITH 1 DRAWER, 1 ADJUSTABLE SHELF AND 1 ROLL-OUT TRAY
Features
• Drawer and roll-out tray feature stainless steel, soft-close, sidemounted, ball bearing drawer runners
• Drawer box is 4" high by 21¾" deep
• Roll-out tray is 6" high by 21¾" deep
• Drawer box and roll-out tray sides and bottom panel are constructed of ¾" All-Weatherboard® composite material
• One full-depth adjustable shelf
• Available in 24" and 27" depth
• *27" deep base cabinets include the same 21¾" deep drawer box and roll-out tray
DOUBLE DOOR BASE CABINET WITH 1 DRAWER, 1 ADJUSTABLE SHELF AND 1 ROLL-OUT TRAY
Features
• Drawer and roll-out tray feature stainless steel, soft-close, side-mounted, ball bearing drawer runners
• Drawer box is 4" high by 21¾" deep
• Roll-out tray is 6" high by 21¾" deep
• Drawer box and roll-out tray sides and bottom panel are constructed of ¾" All-Weatherboard® composite material
• One full-depth adjustable shelf
• Available in 24" and 27" depth
• *27" deep base cabinets include the same 21¾" deep drawer box and roll-out tray
DOOR BASE CABINET WITH 1 DRAWER AND 2 ROLL-OUT TRAYS
Features
• Drawer and roll-out trays feature stainless steel, soft-close, side-mounted, ball bearing drawer runners
• Drawer box is 4" high by 21¾" deep
• Roll-out trays are 6" high by 21¾" deep
• Drawer box and roll-out tray sides and bottom panel are constructed of ¾" All-Weatherboard® composite material
• Available in 24" and 27" depth
• *27" deep base cabinets include the same 21¾" deep drawer box and roll-out tray
Features
• ¾" All-Weatherboard® composite material cabinet construction
• Includes Sure Level polymer legs, shipped loose for field installation and leveling. Upgraded stainless steel Sure Level legs are available
• Stainless steel handles are required and sold separately. See page 42 for details
• Top drawer front is 6" high
• The middle and bottom drawer front is 12" high for three drawer base cabinets
• The bottom three drawer fronts are 8" high for four drawer base cabinets
• Drawer base cabinet sides feature two vent cutouts, designed to promote air flow through the cabinetry, and to prevent any possible buildup from a propane or natural gas leak
3 DRAWER BASE CABINET
Features
• Drawers feature stainless steel, soft-close, side-mounted, ball bearing drawer runners
• Top drawer box is 4" high by 21¾" deep
• Middle and bottom drawer box is 7⅞" high by 21¾" deep
• Drawer box sides and bottom panel are constructed of ¾" All-Weatherboard® composite material
• Available in 24" and 27" depth
• *27" deep base cabinets include the same 21¾" deep drawer boxes
Features
• Drawers feature stainless steel, soft-close, side-mounted, ball bearing drawer runners
• Top drawer box is 4" high by 21¾" deep
• Middle and bottom drawer box is 7⅞" high by 21¾" deep
• Drawer box sides and bottom panel are constructed of ¾" All-Weatherboard® composite material
• Available in 24" and 27" depth
• *27" deep base cabinets include the
Features
• Drawers feature stainless steel, soft-close, side-mounted, ball bearing drawer runners
• Top drawer box is 4" high by 21¾" deep
• Bottom three drawer boxes are 6" high by 21¾" deep
• Drawer box sides and bottom panel are constructed of ¾" All-Weatherboard® composite material
• Available in 24" and 27" depth
• *27" deep base cabinets include the same 21¾" deep drawer boxes
Features
• ¾" All-Weatherboard® composite material cabinet construction
• Includes Sure Level polymer legs, shipped loose for field installation and leveling. Upgraded stainless steel Sure Level legs are available
• Stainless steel handles are required and sold separately. See page 42 for details.
•Sink base cabinet sides feature two vent cutouts, designed to promote airflow through the cabinetry, and to prevent any possible buildup from a propane or natural gas leak SINK BASE CABINET CODING
DOUBLE DOOR SINK BASE CABINET WITH FALSE DRAWER FRONT
• False drawer front to accommodate sink
• No adjustable shelf
• Available in 18", 21", 24", and 27" depths
Features
• ¾" All-Weatherboard® composite material cabinet construction
• Stainless steel handles are required and sold separately. See page 42 for details
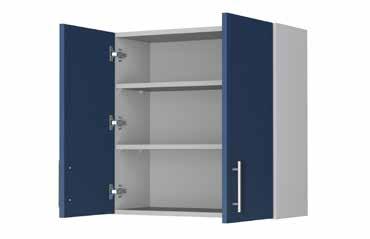
If the sides of the wall cabinet are exposed, make sure to order Wall End Panels to cover the exposed sides. Do not place bridge cabinets over a heat emitting appliance, even if there is a range hood. The heat could damage the front of the cabinet.
Wall cabinets can provide excellent additional storage.
It is important to space plan when using wall cabinets to ensure there is proper distance from your heat emitting appliance and the start of your wall cabinet run.
If you have an area where you need a narrow storage, you can use a wall cabinet. Simply order an extra set of legs or have the installer build a platform under and cover with toe kick material. Much like you would do in an indoor kitchen.
As the cabinets are full overlay frameless, fillers must be used if the cabinet is going against a side wall.


Features
• No adjustable shelves
• Available in 9", 12", and 15" depths
30" HIGH DOUBLE DOOR WALL CABINET WITH 2 ADJUSTABLE SHELVES
Features
• Three full-depth adjustable shelves
• Available in 9", 12", and 15" depths
Features
• Three full-depth adjustable shelves
• Available in 9", 12", and 15" depths
Features
• Three full-depth adjustable shelves
• Available in 9", 12", and 15" depths
Features
• Three full-depth adjustable shelves
• Available in 9", 12", and 15" depths
Features
• ¾" All-Weatherboard® composite material cabinet construction
• Stainless steel handles are required and sold separately. See page 42 for details
BLIND WALL CABINET CODING
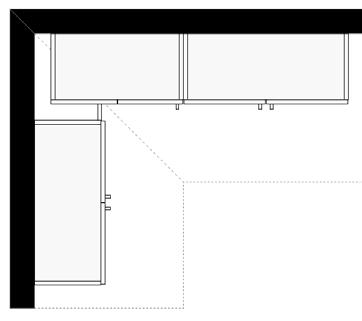
The Blind Wall cabinet is 24" wide. It must be installed from 3" to 9" away from the adjacent wall. This allows the door full clearance and provides a flexible installation range. From the adjacent wall to the far edge of the cabinet, a minimum width of 27" to a maximum width of 33" is required.
BLIND WALL CABINET WITH 2 ADJUSTABLE SHELVES AND FILLERS
• 30" High include two adjustable shelves
• 36" and 42" High include three adjustable shelves
• 3" filler, 3" & 9" overlay fillers included
• Door width is 12", door opening is 10½"
• Available in 9", 12", and 15" depths


or Left
Features
• ¾" All-Weatherboard® composite material cabinet construction
• Stainless steel handles are required and sold separately. See page 42 for details
84" HIGH UTILITY CABINET WITH 4 ADJUSTABLE SHELVES
Features
• Four full-depth adjustable shelves
• Available in 18", 21", and 24" depths
84" HIGH UTILITY CABINET WITH 1 ADJUSTABLE SHELF AND 4 ROLL-OUT TRAYS
Features
• One full-depth adjustable shelf
• Roll-out trays feature stainless steel, soft-close, side-mounted, ball bearing drawer runners
• Roll-out trays are 6" high by 21¾" deep
• Roll-out tray sides and bottom panel are constructed of ¾" All Weatherboard® composite material
• Available in 24" depth only
CABINET CODING
90" OR 96" HIGH UTILITY CABINET WITH 5 ADJUSTABLE SHELVES
Features
• Five full-depth adjustable shelves
• Available in 18", 21", and 24" depths
90" OR 96" HIGH UTILITY CABINET WITH 2 ADJUSTABLE SHELVES AND 4 ROLL-OUT TRAYS
Features
• Two full-depth adjustable shelves
• Roll-out trays feature stainless steel, soft-close, side-mounted, ball bearing drawer runners
• Roll-out trays are 6" high by 21¾" deep
• Roll-out tray sides and bottom panel are constructed of ¾" All Weatherboard® composite material
• Available in 24" depth only
Features
• Panels are designed to be flush with the door. Field trimmable to desired depth
• Use to cover cabinet sides that are exposed to sunlight and other weather elements
• This end panel should be used when the cabinetry is installed against a wall and should be installed flush to the All-Weatherboard® cabinet back
Features
• Panels are designed to be flush with the door. Field trimmable to desired depth
• Use to cover cabinet sides that are exposed to sunlight and other weather elements
• This end panel should be used when the cabinetry is free standing and should be installed flush with the additional Island End Panel used to cover the All-Weatherboard® cabinet back
• Vent cutouts are designed to promote air flow through the cabinetry, and to prevent any possible buildup from a propane or natural gas leak
• Black vent hole covers are available and sold separately. See page 39 for details
Features
• Panels are designed to be flush with the door. Field trimmable to desired depth
• Use to cover cabinet sides that are exposed to sunlight and other weather elements
• This end panel should be used when the cabinetry is installed against a wall and should be installed flush to the All-Weatherboard® cabinet back
Features
• Panels are designed to be flush with the door. Field trimmable to desired depth
• Use to cover cabinet sides that are exposed to sunlight and other weather elements
• This end panel should be used when the cabinetry is free standing, and a Bar Riser Kit is needed. It should be installed flush with the additional Island End Panel used to cover the All-Weatherboard® Bar Riser Kit
Features
• Panels are designed to be flush with the door. Field trimmable to desired depth
• Use to cover cabinet sides that are exposed to sunlight and other weather elements
• Ships in two separate panels and are used to cover the sides of Utility Cabinets
• This end panel should be used when the cabinetry is installed against a wall and should be installed flush to the All-Weatherboard® cabinet back
Features
• Field trimmable to desired width and height
• Use to cover cabinet backs that are exposed to sunlight and other weather elements
• This end panel should be used when the cabinetry is free standing and should be installed flush to the All-Weatherboard® cabinet sides. Additional Base End Panels (vented or non-vented) should be used to cover the exposed cabinet sides
• *IPL4848 measures 48" W x 47½" H
Features
• Available in all finishes
• Will need to be cut to fit on the job site
• Toe kick clips will need to be added to allow attachment to the legs when needed
Features
• 3/4" All-Weatherboard® composite material construction, 4-sides and bottom panel
• Soft-close, side-mounted, ball bearing stainless steel runners and screws
• ROT12 fits 12" wide cabinet, etc.
• Field installed
ROT12-FG
ROT15-FG
ROT18-FG
ROT21-FG
ROT24-FG
ROT27-FG
ROT30-FG
ROT33-FG
ROT36-FG
Features
• Available in all finishes
Features
• Available in all finishes
PLEASE NOTE
6"x 96" filler can also be modified on site to be used as a matching toe kick once cabinets are installed on legs
Features
• 3/4" All-Weatherboard® composite material cabinet construction
• 4" deep by 36" high
• Requires BTP for field installation to match the cabinet doors
Features
• Available in all finishes
• Requires stainless steel installation screws, sold separately
Features
• Square Head Bit included
• Used for joining cabinets together and for installing Matching Panels and Corbels
• Required for installation
• Screws sold separately
• Please see page 56 for installation guide
Features
• Designed to fit vent cutouts for a decorative finish
• Promotes the release of excess LP and NG gas the could build-up within the cabinetry
• Includes grill vents to keep pests out of the cabinetry
Features
• Includes 4 316 stainless steel legs, 4 mounting plates, and 316 stainless steel screws
• Height adjustment from 4" to 5 7⁄16"
• Each leg rated for 2,000 lb static load
Features
• Durable U-Shaped clip for attaching toe kick to stainless steel legs
• Includes Clip and screw
• Available in Single pack or pack of four
• See install guide on page 53 for installation instructions
Features
• Includes 4 adjustable legs
• 4 mounting plates, 4 toe kick clips and #316 stainless steel screws
• Height adjustment: Short stem: 3 ¾"- 5 ¼"
• Each leg rated for 330 lb static load
SS-LEGS-4PK
PLS-TK-CLIP-1PK
PLS-TK-CLIP-4PK
WS-PLASTIC-LEGS
OUTDOOR HDPE BAR HEIGHT STOOL
Features
• Full HDPE construction
• Designed to support 350 lbs.
• Marine-grade stainless steel hardware
• Ships assembled
Available Colors


OUTDOOR HDPE COUNTER HEIGHT STOOL
Features
• Full HDPE construction
• Designed to support 350 lbs.
• Marine-grade stainless steel hardware
• Ships assembled
Available Colors


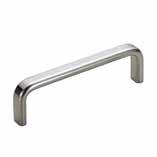
CONTOURED POLISHED C-PULL HANDLE - MARINE GRADE STAINLESS STEEL
Features
• #316 Stainless steel handle with screws
• 4¼" overall length
• 315/16" center to center
EURO BAR PULL HANDLE - MARINE GRADE STAINLESS STEEL
Features
• 316 Stainless steel handle with screws
• 79/32" overall length
• 51/32" center to center
DH-00171
DH-21021

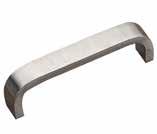
WIDE BRUSHED C-PULL HANDLE - MARINE GRADE STAINLESS STEEL
Features
• 316 Stainless steel handle with screws
• 41/16" overall length
• 3¾" center to center
PROFESSIONAL BAR PULL HANDLE - MARINE GRADE STAINLESS STEEL
Features
• 316 Stainless steel handle with screws
• 8 ¾" overall length
• 7½" center to center
PLEASE NOTE
Make sure to check the width of your drawer front. The handle fits drawer fronts of 18" wide or more. **Fits all Miami drawer fronts**

DH-45170
DH-92170
Plastic Leveling Leg Assembly
Simple assembly is required for each leveling leg.
Plastic Leveling Leg Assembly
Simple assembly is required for each leveling leg. For easier handling and to avoid damage remove doors and drawers from the cabinet. Then, using two or more people, place the cabinet upside down on a protected surface.
1
Simple assembly is required for each leveling leg.
Simple assembly is required for each leveling leg. For easier handling and to avoid damage remove doors and drawers from the cabinet. Then, using two or more people, place the cabinet upside down on a protected surface.
For easier handling and to avoid damage remove doors and drawers from the cabinet. Then, using two or more people, place the cabinet upside down on a protected surface.
For easier handling and to avoid damage remove doors and drawers from the cabinet. Then, using two or more people, place the cabinet upside down on a protected surface.
Place the two front leg brackets 3½" from the front edge with the support plate overlapping the end panel ush to the edge.
1. Place the two front leg brackets 3½" from the front edge with the support plate overlapping the end panel flush to the edge.
1
Place the two front leg brackets 3½" from the front edge with the support plate overlapping the end panel ush to the edge.
Place the two back leg brackets ush with back and side panels 2
1 Place the two back leg brackets ush with back and side panels 2
Place the two front leg brackets 3½" from the front edge with the support plate overlapping the end panel ush to the edge.
2
2. Place the two back leg brackets flush 2 with back and side panels.
Place the two back leg brackets ush with back and side panels
Flush to edge Flush
Flush to edge
Flush to edge
Flush
3½ in
3½ in
3½ in
3
Use a #2 Phillips bit to attach the legs using the supplied stainless steel screws. DO NOT OVERTIGHTEN!
3 4
3. Use a #2 Phillips bit to attach the legs using the supplied stainless steel screws. DO NOT OVERTIGHTEN!
Use a #2 Phillips bit to attach the legs using the supplied stainless steel screws. DO NOT OVERTIGHTEN!
4
Adjust the leveling legs up or down to bring the cabinet to a level plumb position.
Adjust the leveling legs up or down to bring the cabinet to a level plumb position.
4. Adjust the leveling legs up or down to bring the cabinet to a level plumb position.
3 4
Use a #2 Phillips bit to attach the legs using the supplied stainless steel screws. DO NOT OVERTIGHTEN!
Adjust the leveling legs up or down to bring the cabinet to a level plumb position.
1 2 3
Lay the trimmed toe kick panel in front of the cabinet against the leveling legs. Mark the location of each leg on the back of the panel. Clips are not needed on all leg locations, but enough for a secure hold.
1 2 3
Lay the trimmed toe kick panel in front of the cabinet against the leveling legs. Mark the location of each leg on the back of the panel. Clips are not needed on all leg locations, but enough for a secure hold.
1. Lay the trimmed toe kick panel in front of the cabinet against the leveling legs. Mark the location of each leg on the back of the panel. Clips are not needed on all leg locations, but enough for a secure hold.
Center the clip in the middle of the toe kick panel, secure with the supplied attachment screws.
2. Center the clip in the middle of the toe kick panel, secure with the supplied attachment screws.
Center the clip in the middle of the toe kick panel, secure with the supplied attachment screws.
If applying toe kick around corners, adjacent panels will clip to the same corner leg. Be sure to stagger the clip heights so they overlay properly.
If applying toe kick around corners, adjacent panels will clip to the same corner leg. Be sure to stagger the clip heights so they overlay properly.
Align the toe kick panel and push the clips onto the legs.
3. Align the toe kick panel and push the clips onto the legs.
Align the toe kick panel and push the clips onto the legs.
Steel Leveling Leg Assembly
Stainless Steel Leveling Leg Assembly
Simple assembly is required for each leveling leg.
Simple assembly is required for each leveling leg.
Simple assembly is required for each leveling leg. For easier handling and to avoid damage remove doors and drawers from the cabinet. Then, using two or more people, place the cabinet upside down on a protected surface.
For easier handling and to avoid damage remove doors and drawers from the cabinet. Then, using two or more people, place the cabinet upside down on a protected surface.
For easier handling and to avoid damage remove doors and drawers from the cabinet. Then, using two or more people, place the cabinet upside down on a protected surface.
Simple assembly is required for each leveling leg. For easier handling and to avoid damage remove doors and drawers from the cabinet. Then, using two or more people, place the cabinet upside down on a protected surface.
1
1
Place the two front leg brackets 31/2" from the front edge with the support plate overlapping the end panel flush to the edge.
Place the two front leg brackets 31/2" from the front edge with the support plate overlapping the end panel flush to the edge.
1. Place the two front leg brackets 3½" from the front edge with the support plate overlapping the end panel flush to the edge.
1
Place the two front leg brackets 31/2" from the front edge with the support plate overlapping the end panel flush to the edge.
Place the two back leg brackets flush with back and side panels 2 31/2 in Flush to edge
Flush to edge
Place the two back leg brackets flush with back and side panels 2 31/2 in Flush to edge
31/2 in
2. Place the two back leg brackets flush 2 with back and side panels
Place the two back leg brackets flush with back and side panels 2
Flush
Flush
Flush
3
3. Use a #2 Phillips bit to attach the legs using the supplied stainless steel screws. DO NOT OVERTIGHTEN!
Use a #2 Phillips bit to attach the legs using the supplied stainless steel screws. DO NOT OVERTIGHTEN!
Use a #2 Phillips bit to attach the legs using the supplied stainless steel screws. DO NOT OVERTIGHTEN!
Use a #2 Phillips bit to attach the legs using the supplied stainless steel screws. DO NOT OVERTIGHTEN!
4
3 4
3 4
Adjust the leveling legs up or down to bring the cabinet to a level plumb position.
Adjust the leveling legs up or down to bring the cabinet to a level plumb position.
4. Adjust the leveling legs up or down to bring the cabinet to a level plumb position.
Adjust the leveling legs up or down to bring the cabinet to a level plumb position.
1
Lay the trimmed toe kick panel in front of the cabinet against the leveling legs. Mark the location of each leg on the back of the toe kick panel. Clips are not needed on all leg locations, but enough for a secure hold.
Lay the trimmed toe kick panel in front of the cabinet against the leveling legs. Mark the location of each leg on the back of the panel. Clips are not needed on all leg locations, but enough for a secure hold.
1. Lay the trimmed toe kick panel in front of the cabinet against the leveling legs. Mark the location of each leg on the back of the toe kick panel. Clips are not needed on all leg locations, but enough for a secure hold.
2. Center the clip in the middle of the toe kick panel, secure with the supplied attachment screws.
Center the clip in the middle of the toe kick panel, secure with the supplied attachment screws.
Center the clips half way up the height of the toe kick panel, screw into place. Then screw the clip directly onto the toe kick panel.
2 3
2 3
If applying toe kick around corners, adjacent panels will clip to the same corner leg. Be sure to stagger the clip heights so they overlay properly.
If applying toe kick around corners, adjacent panels will clip to the same corner leg. Be sure to stagger the clip heights so they overlay properly.
3. Align the toe kick panel and push the clips onto the legs.
Align the toe kick panel and push the clips onto the legs.
Align the panel and push the clips onto the legs.
• Level
• Plastic Shims (for leveling if necessary)
• Drill
• Tapcon® 3/16" x 2¾" Stainless Steel Screws
• ¼" Stainless Steel Washers
• Tapcon® 3/16" Drill Bit (drill pilot holes in concretetypically provided with screws)
• 3/16" Wood Drill Bit (drill pilot holes in cabinet backs or installation rails)
• 1/8" Wood Drill Bit (drill pilot holes in cabinet sides to join them together)
• Phillips Head Screwdriver
• Clamps (with rubber pads)
• Saw (circular or table) – to trim matching end panels and toe kick fillers
• Carpenter’s Square
• Tape Measure
• Extension Cord
• Step Ladder (at least 6’ if installing wall cabinets)
Leveling the cabinets is the most important part of installation, to ensure doors align properly and countertop sets evenly. They are to be level and square. Make sure your leveling legs are installed and adjusted. Review separate leveling leg instructions.
Be sure to level your cabinets in all three directions:
1. Front to Back 2. Vertically
3. Horizontally
Check your new cabinetry against your design plan to ensure that you have all required cabinets, moldings, fillers, and accessories to complete the installation.
To avoid injury, explosion, or shock, make sure that all water supplies, gas supplies, and pertinent circuit breakers are shut off. Double check electrical using circuit tester to confirm power is off. If you are uncertain that utilities have been properly shut off, consult your utility company or service professional.
CAUTION:
It is essential that you use the recommended screws for your cabinetry installation. Under no circumstances should you use nails or drywall screws as they do not have the strength or holding power to ensure that cabinets stay on the wall. Failure to use specified screws will render warranty null and void.
Installation detailed in this manual is for concrete block construction only. Attachment to any other wall types will require locating the wood or steel studs behind the wall. Consult with your local home center, hardware store or installation specialist for recommended fasteners.
2
3
1
Prior to installation you will find it easier to handle the cabinet with the doors and drawers removed.
Hinges can be removed from the hinge plate by simply pressing in the release button on the end of the hinge, and pulling away from the cabinet. They are re-attached by hooking the hinge to the plate and snapping the pressure release into place.
Pull the drawer out until it stops. Each drawer runner has a small plastic release tab. One tab will point up and the other will point down. Holding the drawer box on each side, push the tabs in the opposite direction from which they’re pointing and carefully pull the drawer box out. Carefully push the runners back into the cabinet.
1. Each Wall Cabinet requires 4 wall anchors (2 top, 2 bottom).
2. Screws should be placed in each corner approximately 2" from the end panels.
3. Pre-drill the pilot holes before you place the cabinet against the wall with a standard 3/16" drill bit.
4. Then put the cabinet in place. In each corner use the 3/16" Tapcon® bit through the pilot holes to create starter holes into the concrete block, for the Tapcon® anchors.
5. Remove the cabinet to complete drilling the pilot holes into the concrete block. When complete, place the cabinet against the wall.
6. Once you confirm the cabinet is level and square, use Tapcon® 410 Stainless Steel 3/16" x 2¾" fasteners, with a ¼" stainless steel washer to secure the cabinet to the wall.
As you install your Base and Wall cabinets, you should fasten the cabinets together along the front edge. This will help reduce gaps between cabinets and maintain alignment
1. To secure cabinets together, a 1¼" stainless steel screw is used. (Model #WSSS1.25-Screw Kit)
Pre-drill a 1/8" pilot hole in one end panel. Try to locate the joining screws where they will not be visible, above the drawer runner or behind the hinge plate.
2. Use clamps to hold cabinet panel in alignment. Insert the screw through the pilot hole into the second cabinet end panel – be careful not to countersink the head.
1 2
Door Alignment
1. WeatherStrong® Cabinets feature a 6-way adjustable hinge that will allow you to adjust and align all the doors after installation
2. The center screw will adjust the door from side to side.
3. The top and bottom screws in the hinge plate will allow adjustment up and down
4. The back screw will adjust the door in and out.
5. Please Note: These are soft-close hinges and will close slower at first.
To Reinstall the Drawers
1. Extend both drawer runners all the way out of the cabinet box
2. Carefully reengage the metal drawer box profiles on both sides
3. Once both profiles are engaged about 1" carefully push the drawer all the way into the cabinet.
1 2 3
If your design includes a Bar Riser Kit (BRK), the information below will help you to install it. We recommend installing the cabinet legs after you have attached the bar riser to the base cabinet.
1. Lay out the cabinets that make up your kitchen and locate where the bar riser kits are going to be placed.
2. Note: Some BRK’s may overlap two cabinets, so follow your floorplan carefully.
3. Attach the BRK to the base cabinet(s) by lining up the bottom of the bar riser with the bottom of the cabinet.
4. Attach the bar riser using 1¼" stainless steel screws (WSSS1.25-ScrewKit) by screwing from the inside of the cabinet through the rear hanging rails.
5. Once the BRK is attached, you can install the adjustable legs and level the cabinet/riser.
Bar Riser Kits
• ¾" All-Weatherboard® composite material cabinet construction
• 4" deep by 36" high
• Requires BTP for field installation to match the cabinet doors
Bar Risers are 4" deep by 36" high and are available in 3" width increments from 12" to 48". When securely attached to the back of a 34½" high base cabinet, the top of the riser will be approximately 40½" from the floor. These field installed kits feature a fullheight ¾" thick enclosed All-Weatherboard® composite material back panel and can only be paired with the Island Back base cabinets. These kits will turn almost any base cabinet into a two-level bar.
Please Note: Exposed cabinet sides and backs MUST be covered by a matching end/island panel.
D
W
H
Grill Bases and Side Burner Cabinets have a few extra steps that make up the proper installation.
First and foremost, if you are installing a drop-in grill or side burner in your cabinets, you MUST first install an insulated jacket before inserting the heat admitting appliance. This protects your cabinets from the extreme heat and protects your limited lifetime warranty.
Please Note: You must purchase the insulated jacket from the manufacturer of the gas/heat appliance. Please follow the manufacturer’s instructions on how to properly support your appliance and insulated jacket inside the cabinet.
1. Your grill base or side burner cabinet comes with two panels in the upper, apron part of the cabinet.
2. Mark the required cut-out necessary to install the insulated jacket and the gas appliance. Refer to the specification and installation guides supplied by the appliance manufacturer, or use a template if provided. Remember to account for the countertop thickness.
3. Carefully cut out the required space on the cabinet apron and decorative overlay panel.
4. Place the insulated jacket into the cutout to ensure a proper fit.
5. Fabricate a support brace, inside the cabinet, based on the appliance manufacturer’s recommendation.
6. We recommend hiring a licensed professional to install the gas appliances and the insulated jacket.
Grill Double Door Base
• The face plate is modified in field to accept the respective insulated jacket used with the gas grill
• ¾" All-Weatherboard® composite material cabinet construction
• Fully integrated back panel
• Includes Sure Level polymer legs, shipped loose for field installation and leveling. Upgraded stainless steel Sure Level legs are available
• Available in all door styles and finishes
• Stainless steel handles sold separately see page 42 for details
Please Note: All built-in grill heads require an insulated jacket. Please consult your grill manufacturer for the appropriate model.
All Base Cabinets have precut vent cutouts in the cabinet sides. These provide airflow through the cabinetry and enable any excess gas to vent out the end of the run. Matching Base End Panels are available with decorative vent grills see page 36.
Matching End Panels and Island Back Panels are used to cover any exposed cabinet sides or backs. These panels are manufactured from the same HDPE material as the cabinet doors and drawer fronts.
Matching End Panels are oversized and will not match the exact measurements of your cabinets. This allows them to be trimmed to follow the pitch of the floor of your outdoor space, which is often sloped. Trimming HDPE will not leave a raw edge as the material color is through and through.
Matching Panels should be trimmed to fit after the cabinets are permanently set and leveled.
Panel Installation:
1. Refer to your floorplan or cabinet layout to determine which panels go in which location.
2. Measure each panel location from front to back and top to bottom. Use these measurements to mark your panel.
3. Once the panel is marked, use a table saw or circular saw to trim the panel to size.
4. Use C-clamps or Quick-Grips to hold the panel in place during installation.
a. Screws (WSSS1.25-Screw kit) can be used to secure the panels to the cabinets.
b. If using Screws make sure to drill pilot holes into the cabinet before placing the permanent screw.
Hardware is the final step of your cabinet installation. This is done after the drawers are back in place and the doors have been replaced and adjusted to be square.
Placement of your hardware is per your choice and a template can be purchased from your local hardware store.
Install:
5. Attach the panel by screwing the panel from inside the cabinet box.
Please Note: Panels that will cover the side of a cabinet with a Bar Riser Kit attached will need to have the profile of the side of the cabinet combination cut out.
1. Mark your doors/drawer fronts with a pencil or small marker where the screw holes will go.
2. Make sure to carefully measure where these holes will be drilled to ensure proper placement.
3. Drill the screw holes using the 3/16" drill bit.
4. Attach the hardware using the screws provided in the hardware bag, from the inside of the door/drawer out into the piece of hardware.
After your cabinets have been installed, wipe down all exteriors with a damp cloth to remove dust.
Clean Up: Wash WeatherStrong® with water and a soft cloth or sponge. A mild dishwashing liquid can be used if needed. For tougher to clean spots, wash with Simply Green All-Purpose Household Cleaner. A soft bristle brush may be used if needed.
Everyday Care
Salt Water Environments: Oceanfront environments with salt air and sea spray will require regular maintenance and cleaning to prevent rust from forming on the handles, hinges and drawer runners. Clean stainless steel surfaces several times a month to keep the chemical reaction, from the salt, from gaining a foothold on the hardware. With regular cleaning, your cabinets will look like new for many years. To achieve maximum corrosion and stain resistance, the surface of the stainless steel must be kept clean.
Never use abrasive cleaners, scouring pads or powdered cleansers.
Hardware Care
Use mild soap and warm water to clean door, drawer knobs and pulls. Thoroughly dry hardware surfaces after cleaning. Do not use silver or brass polish.
Grill and side burner cabinets are manufactured with two full upper face plates that will need to be field modified to accept the respective insulated jacket used with the gas grill or side burner.
The second matching panel will be shipped loose for ease of modification and installation. It can be attached with stainless steel screws or a suitable construction grade adhesive. Under no circumstance should a grill or side burner be installed without the appropriate insulated jacket specified by the manufacturer of the appliance.
Heat Appliances
Free-standing grills with adequate space from direct heat are recommended or grills with insulated jacket specified by the grill manufacturer can be installed in WeatherStrong® cabinets.
Insulated jackets are required for heat admitting appliances being installed in WeatherStrong®.
Light Exposure
Cabinet sides and backs that will be exposed to direct sunlight and other weather elements must be covered by a matching end panel in coordinating High-Density Polyethylene (HDPE). Failure to install these protective panels will void the cabinet warranty.
DRAWER REMOVAL
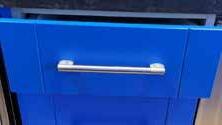

Step 1
Fully open drawer and remove contents.

Step 2
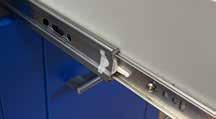
With drawer fully extended, locate slide release tab on left side and push up to release.

Step 4
To re-install, align drawer slides and gently push drawer closed. Locking tabs do not need to be pressed.
Step 5
Open and close drawer several times to ensure proper alignment.
Step 3
Locate release tab on right side and push down to release. Pull drawer forward to remove.
Step 1
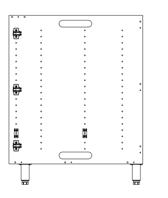
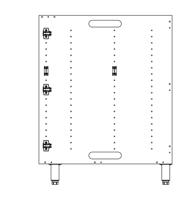
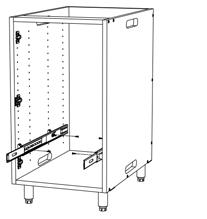
Install two spacers on each end panel just above the lower hinge. Use two Euro screws per spacer. If applicable, repeat step 1 to install an additional upper roll-out tray above the middle hinge.
Step 2
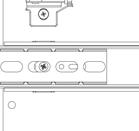
Remove drawer runner from packaging and extend the runners. While pressing down on the white tab pull smaller runner Member (A) apart from larger runner Member (B).

Step 3
Attach the larger runner Member (B) to the spacers using two Euro screws per runner. Attach the smaller runner Member (A) to the sides of the roll-out tray using two Euro screws. To access the attachment holes, you will need to extend the runner mechanism.

Step 4
Carefully slide the roll-out tray into the larger runner Members (B) by inserting the smaller Members (A) into the plastic guides at the front of the larger Members. You should hear a ‘click’ when fully inserted.




Height
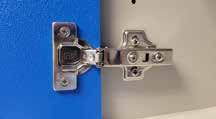
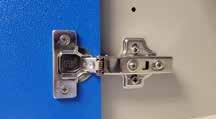
Loosen two screws and adjust door to desired position. Re-tighten all screws.
Using a Phillips screwdriver, rotate front screw to move the door to the desired position.
Using a Phillips screwdriver, rotate back screw to move the door to the desired position.
Adjustable shelves are supported by sturdy, clear polymer shelf rests.
Height
For vertical door adjustment loosen center screw on each hinge. Set door at desired height. Re-tighten each screw.
Rotate front screw for horizontal door adjustment
If additional adjustment is required, loosen screws and twist drawer front for proper alignment. Tighten screws securely.
Depth
Rotate back screw for front to back door adjustment
Thank you for your purchase. We aim to deliver exceptional quality and personalized service. To view our warranty and registration policy on your mobile phone scan the QR Code using your camera application. (For Android devices, use Google Lens)
WEATHERSTRONG® OUTDOOR CABINETRY WARRANTY

JUPITER WARRANTY
