
Just as the natural world transforms around us each season, our bodies and minds also ebb and flow with the cycles of the year. By aligning ourselves with nature’s rhythms and incorporating seasonal herbs into our daily lives, we can tap into the profound wisdom of seasonal herbalism and experience a harmonious connection with nature.
The following pages contain a collection of carefully curated herbal recipes intended to support your health and wellness throughout each season of the year.
During the vibrancy of spring, explore herbal oils, ointments, and washes that soothe and protect the skin as you venture outdoors once more. In the radiant heat of summer, indulge in refreshing herbal infusions and cooling muscle oils to help you beat the heat and promote vitality. As autumn paints the world in shades of muted colors, uncover recipes for immune-boosting herbal syrups and warming herbal broths to help you transition from one season to the next with grace and resilience. And when winter’s chill descends, cozy up with recipes for soothing herbal balms, respiratory steams, and infused honeys that fortify the body’s defenses and offer you solace during the cold months.
Whether you are an experienced herbalist or a curious newcomer to the wild and wonderful world of herbs, these herbal recipes will inspire and empower you on your journey to becoming a seasonal herbalist. Each recipe combines the wisdom of traditional herbalism with a touch of creativity, inviting you to embark on your own herbal adventures and forge a deeper connection with the power of plants and the seasons that guide us all.
But first—a couple of things before you head off to the kitchen to begin making your seasonal preparations.
The herbal recipes that follow generally call for dry plant material unless fresh plant material is specifically mentioned. However, if you want to use fresh plant material instead of dried, you will need to dou ble the volume measurement (not weight) of the herb called for in the recipe to account for the extra water content in the fresh plant material. For example, if a recipe calls for 2 tablespoons (4 grams) peppermint (Mentha x piperita) leaf, and you want to use fresh peppermint, you will need to use 4 tablespoons, which should still come to approxi mately 4 grams of weight instead.
Most of the recipes in this book can be easily doubled or tripled to create larger batches or cut in half to create smaller batches depend ing on your preferences and use of the recipe. I recommend you make the recipe as written the first time. If you find yourself running out of it quickly, make a note to double the recipe the next time you make it. If you find yourself not using it before reaching its expiration date, make a note to reduce the recipe.

So, let us set off on this transformative journey as we embrace the magic of the seasons and unlock the secrets of nature’s herbal bounty. Welcome to the realm of seasonal herbal recipes for the home apoth ecary, where wellness and nourishment await at every turn.
Spring is one of my favorite seasons, both as an herbalist and a gardener. After the long, cold days of winter, the first sign of green plants emerging from the warming soil sets my heart aflutter and beckons me outdoors to explore the land for more signs of new life. As I dig my fingers in the thawing soil and breathe in its scent, I begin to plan the gardens and harvests to come. The potential of the season fills me with anticipation and hope in such a way that I’m caught off guard by it every year.
In spring, plenty of herbs are available for harvest. Bitter roots are accessible when the soil is soft enough to dig. The bark from trees and shrubs is ready to harvest when the sap starts running again. Leaves and tender aboveground plant parts are ready to gather all season long. Spring buds and flowers are free for the taking as soon as they make their appearance too!
Depending on your location and climate, some common herbs you might find during the spring season include:
• Aerial and aboveground parts: chickweed (Stellaria media), cleavers (Galium aparine), ground ivy (Glechoma hederacea), nettle (Urtica dioica), purple dead nettle (Lamium purpureum)
• Bark: birch (Betula spp.), crampbark (Viburnum opulus), oak (Quercus spp.), sassafras (Sassafras albidum), wild cherry (Prunus serotina), willow (Salix spp.), witch hazel (Hamamelis virginiana)
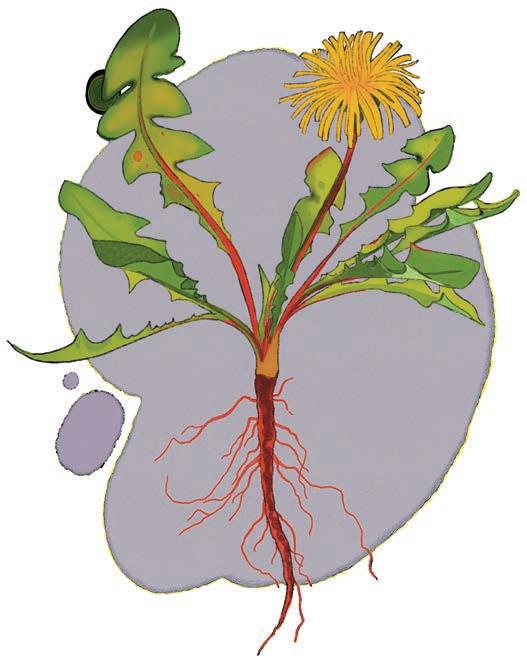
• Buds and flowers: coltsfoot (Tussilago farfara), dandelion (Taraxacum officinale), forsythia (Forsythia suspensa), poplar (Populus spp.), rose (Rosa spp.), violet (Viola odorata)
• Leaves: comfrey (Symphytum officinale), dandelion (Taraxacum officinale), mullein (Verbascum thapsus), plantain (Plantago spp.), yarrow (Achillea millefolium), violet (Viola spp.)
• Roots: burdock (Arctium lappa), dandelion (Taraxacum officinale), yellow dock (Rumex crispus)
Just as nature awakes from its winter slumber, we, too, must slowly emerge from a quiet, restful state as our energy levels rise gradually throughout the spring season. We can use this ever-increasing energy to help guide us to make healthy choices that benefit our wellness. One such choice is transitioning our diet away from the hardy foods of winter toward the lighter foods of spring, which may look like eating more wild edible greens as soon as they become available, either gently cooked or eaten raw. This is also the perfect time to introduce bitter flavors from roots and leaves into our diet, which help support the liver and digestive systems and set the body up to break down and absorb important nutrients. It’s also important to make sure we’re getting plenty of healthy fats and staying hydrated with mineral-rich fluids as increasing temperatures and activity levels throughout the season can lead to dry tissues.
As we transition from winter to spring, we also find that ailments and seasonal conditions begin to shift away from those common in winter toward those more common in spring. Plants and trees begin to bloom, insects buzz about, and the weather grows steadily warmer. Depending on location, there might be a lot of humidity in the air due to increased rainfall. We often spend more time outdoors, and it’s not uncommon to find ourselves dealing with a variety of respiratory issues, skin irritations, digestive upsets, and other troubles associated with the seasonal adjustments of spring.
Here, you will find botanical recipes that can come to your aid when potential ailments and seasonal conditions come your way during the spring season.
Give the body a gentle (and tasty) wake-up with liver-supportive herbs and circulatory stimulating spices that will encourage healthy energy flow and metabolic function—the perfect daily sipper to help you transition from winter to spring.
YIELD: 2 CUPS (480 ML)
Ingredients
2 cups (480 mL) water
2-3 tbsp (14–21 g) Spring
Reset Chai tea blend (below)
1 cup (240 mL) milk
Raw honey, to taste (optional)
Spring Reset
Chai Tea Blend:
2 parts dandelion (Taraxacum officinale root
1 part chicory (Cichorium intybus) root
1 part cinnamon (Cinnamomum verum bark
½ part clove (Syzygium aromaticum) bud
½ part cardamom Elettaria cardamomum) pods, crushed
½ part black pepper (Piper nigrum) seeds
½ part ginger (Zingiber officinale
1 Start by blending your Spring Reset Chai tea blend together. Measure out each herb individually and combine them in a large mixing bowl, stirring the herbs well to fully blend them together. Transfer this tea blend to a labeled glass storage container. Cap and store for future use.
2 Place 2–3 tbsp (14-21 g) of Spring Reset Chai tea blend in a small saucepan. Pour 2 cups (480 mL) of water over the plant material, stirring the mixture well to fully saturate the herbs with water, and place a lid on the saucepan. Allow this mixture to sit for 12–24 hours, giving the harder plant parts time to soften, if desired.
3 When you are ready to make the tea, place the saucepan on the stove, remove the lid, and bring the mixture to a boil over medium-high heat. When the water comes to a boil, immediately reduce the heat to bring the mixture to a simmer. Add 1 cup (240 mL) milk and hold the mixture at a simmer until the liquid has reduced to 2 cups (480 mL).
4 Once the liquid has reduced to 2 cups (480 mL), carefully strain the mixture through a fine-mesh sieve (lined with a few layers of cheesecloth to remove any plant material, if you wish). Press the herbs with the back of a spoon (or gather the edges of the cheesecloth to create a bundle and squeeze) to extract as much liquid as possible. Reserve the liquid in a clean, heat-proof mug or glass canning jar and compost the used plant material. Sweeten with raw honey, if desired.
Drink up to 2 cups (480 mL) a day, hot or cold.
Store tea blend in a cool, dark location. Use within 12 months before making a fresh batch.
From pollinating trees and blooming flowers to mowing grass and harvesting hay—spring allergy season can feel never-ending for those who suffer from seasonal allergies. Thankfully, you can access the inflammation-modulating and histamine-calming properties of fresh nettle through this refreshing herbal infusion all throughout the season.
YIELD: 4 CUPS (960 ML)
Ingredients
4 cups (960 mL) water
2 cups (28 g) fresh nettle (Urtica dioica) tops
2 tbsp (4 g) peppermint (Mentha x piperita) leaf for flavor (optional)
Local raw honey, to taste (optional)
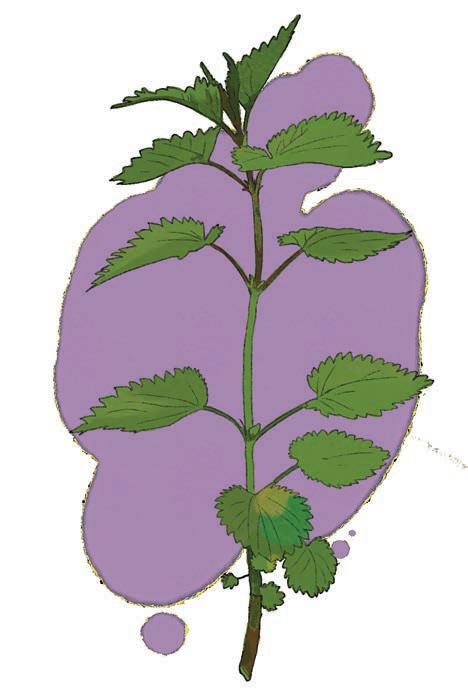
1 Wearing protective gloves, cut the top 4–6 inches from each nettle plant. This will encourage the plant to produce more leaves, ensuring plenty of nettles all season. Carefully rinse the nettle leaves under cool running water to wash away debris, and thoroughly shake them to remove excess water.
2 When you are ready to make your infusion, bring 4 cups (960 mL) of water to a boil in a kettle or a small saucepan over medium-high heat. As soon as the water comes to a boil, remove it from the heat.
3 While the water is coming to a boil, roughly chop the nettle wearing protective gloves. Weigh out 28 g of nettle (approximately 2 cups) on a kitchen scale, and transfer the leaves to a clean glass canning jar. Feel free to add 2 tbsp (4 g) peppermint, or another flavorful herb, to adjust the flavor to your preference. It can also help improve the flavor to serve it over ice.
4 Pour 4 cups (960 mL) of boiled water over the ingredients, cap, and set aside to infuse up to 4 hours (or overnight for a long-steep infusion).
5 When time is up, carefully strain the mixture through a fine-mesh sieve (lined with a few layers of cheesecloth to remove any plant material, if you wish). Press the herbs with the back of a spoon (or gather the edges of the cheesecloth to create a bundle and squeeze) to extract as much liquid as possible. Reserve the liquid in a clean glass storage container and compost the used plant material.
6 Sweeten with local raw honey, if desired. Cap and store for future use.
To support allergies, fresh nettle is best, as the drying process reduces the plant constituents that lend themselves to easing inflammation and the histamine response. Nettle can be grown from seed, foraged in the wild, or even purchased from local farmer’s markets. If fresh nettle isn’t available to you, or you aren’t a fan of herbal infusions, freeze-dried nettle capsules also contain all the beneficial phytochemicals you need. These are best taken 2–4 weeks before allergy season begins and throughout the season for maximum results.
Substitute fresh goldenrod (Solidago spp.) aerial parts in place of the nettle in the autumn for an equally helpful infusion for autumn allergies!
Drink 4 cups (960 mL) of nettle infusion, hot or cold, daily throughout allergy season.
Store the prepared infusion in the refrigerator for no more than 24 hours before making a fresh batch.
• While it’s best to use freshly harvested nettle right away, you can wrap them in a damp towel and store them in the refrigerator for 24–48 hours.
• Reserve the used nettle leaf from your infusion to include in an upcoming recipe (freeze them if you don’t plan to use them in a day or so) or compost them to amend your soil (adding nutrients to the soil).
• If you don’t want to make this infusion on a daily basis, feel free to triple or quadruple the batch and freeze the extra liquid, thawing it the night before you need it.
This must-have herbal sinus rinse is a great way to gently cleanse nasal and sinus passages of irritants and debris while moisturizing dry tissues and helping you to breathe a bit easier this spring.
YIELD: 4 CUPS (960 ML)
Ingredients
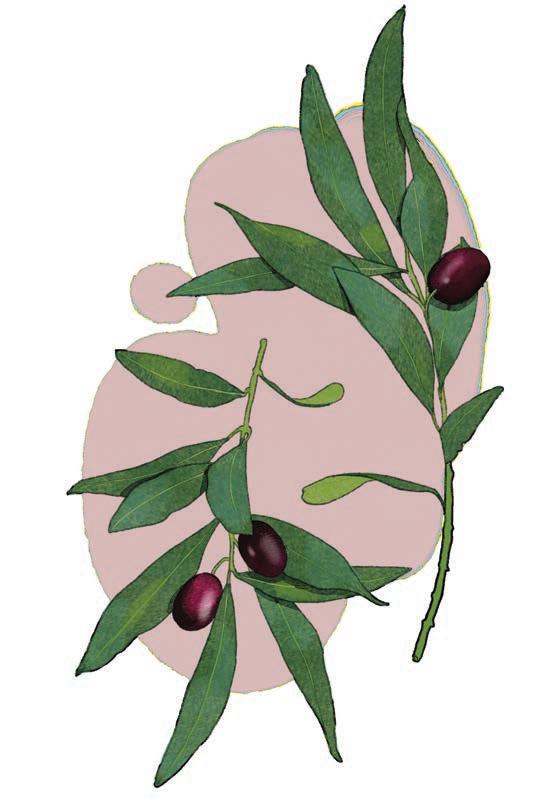
¼ cup (16 g) olive (
3 tbsp (10 g) eucalyptus ( globulus) leaf
2 tbsp (3 g) violet ( leaf
1 tbsp (2 g) plantain ( spp.) leaf
1 tbsp (1 g) rose (Rosa petal
1 tbsp (18 g) baking soda
4 cups (960 mL) water
1 Bring 4 cups (960 mL) of water to a boil in a kettle or a small saucepan over medium-high heat. As soon as the water comes to a boil, remove it from the heat.
2 While the water is coming to a boil, combine herbs and baking soda together in a quart-sized glass canning jar.
3 Pour 4 cups (960 mL) of boiled water over the ingredients, cap, and set aside to infuse for 20 minutes or up to 4 hours (or overnight for a long-steep infusion).
4 When time is up, carefully strain the mixture through a fine-mesh sieve lined with an unbleached coffee filter to remove any fine particles (you don’t want bits of herbs in your sinus cavities!). Press the herbs with the back of a spoon (or gather the edges of the coffee filter to create a bundle and gently squeeze) to extract as much liquid as possible. Reserve the liquid in a clean glass storage container and compost the used plant material. Cap and store for future use.
Add 1 cup (240 mL) of warm liquid to a neti pot or nasal irrigation bottle. Use as directed to rinse the nasal and sinus passages 3–4 times a day.
Store extras in the refrigerator for no more than 24 hours before making a fresh batch.
• You can reuse strained herbs 1–2 more times before composting them (just add more baking soda for each repeated infusion). While subsequent infusions will be slightly weaker than the first, they will still extract plant constituents that remain in the plant material and will be beneficial to the sinus tissues.
Show your lungs some love with this tasty syrup that is not only toning to the tissues—providing strength and support for proper function—but also eases inflammation, thins thick mucus, and soothes irritation all at the same time. Whether you have prevention or recovery in mind, this syrup will come to your aid.
YIELD: 4 CUPS (960 ML)
Ingredients
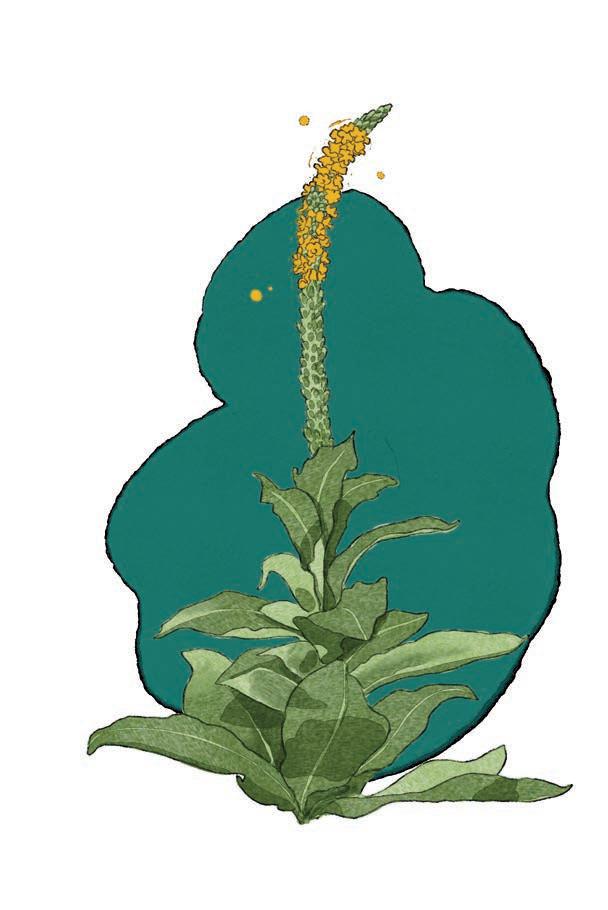
6 tbsp (8 g) mullein (
6 tbsp (12 g) plantain (
6 tbsp (5 g) goldenrod ( aerial parts
4 tbsp (8 g) tulsi ( tenuiflorum) aerial parts
2 tbsp (16 g) elecampane (Inula helenium
2 tbsp (10 g) astragalus (Astragalus mongholicus
2 tbsp (4 g) peppermint (Mentha x piperita
4 cups (960 mL) water
2 cups (480 mL) raw honey
1 Measure all herbs, except for peppermint, and combine them together in a small saucepan. Pour 4 cups (960 mL) of water over the plant material, stirring the mixture well to fully saturate the herbs with water, and place a lid on the saucepan. Allow this mixture to sit for 12–24 hours, giving the harder plant parts time to soften, if desired.
2 When you are ready to make the syrup, place the saucepan on the stove, remove the lid, and bring the mixture to a boil over medium-high heat. When the water comes to a boil, immediately reduce the heat to bring the mixture to a simmer and hold it there until the water level has reduced by half—to 2 cups (480 mL)—to create a decoction.
3 Once the water level has reduced to 2 cups (480 mL), remove the saucepan from the heat and add the peppermint leaf to the mixture, being sure to submerge it into the hot liquid. Immediately cover the saucepan with a lid, and allow the mixture to steep for 20 minutes.
4 When time is up, carefully strain the decoction through a fine-mesh sieve (lined with a few layers of cheesecloth to remove any plant material, if you wish). Press the herbs with the back of a spoon (or gather the edges of the cheesecloth to create a bundle and squeeze) to extract as much liquid as possible. Reserve the decocted liquid in a clean glass measuring cup, adding more water, if needed, to bring the total volume of liquid up to 2 cups (480 mL), and compost the used plant material.
5 Allow the liquid to cool slightly before adding 2 cups (480 mL) of raw honey. Stir well to combine and transfer to a labeled glass storage container. Cap and store for future use.
Use 1 tbsp (15 mL) of syrup 3 times a day for 4–6 weeks. Take straight off the spoon, mix with some seltzer water, or add to a smoothie or yogurt bowl.
Store syrup in the refrigerator. Use within 3–4 weeks before making a fresh batch.
Deter pesky bugs (and their bites) with the help of aromatic botanicals! Simply spritz this bug-repellent spray onto your clothes as often as needed to stay bugfree as you head outdoors this spring.
YIELD: ½ CUP (120 ML)
Ingredients
½ cup (120 mL) yarrow (Achillea millefolium) hydrosol
2 tsp (10 mL) of thick aloe (Aloe vera) gel
25 drops of lavender ( angustifolia) essential oil
15 drops of geranium (Pelargonium graveolens essential oil
8 drops of patchouli (Pogostemom cablin essential oil
1 Measure and combine all ingredients in a bowl to create a 2% dilution, which is the suggested dilution for use in products that cover a larger surface area of the body.
2 Blend the mixture using an immersion blender or personal blender until all ingredients are well incorporated.
3 Transfer the mixture to a labeled glass bottle and cap with a spray top. Store for future use.
Shake well before using to ensure ingredients are combined. Lightly spritz the mixture over clothes before heading outdoors, doing your best to avoid the skin. Reapply as often as needed to keep bugs at bay.
Store in a cool, dark location. Use within one month before making a fresh batch.
• Add these essential oils to ½ cup (120 mL) of a carrier oil of your choice to create a bug-deterring body oil that you can apply to your skin.
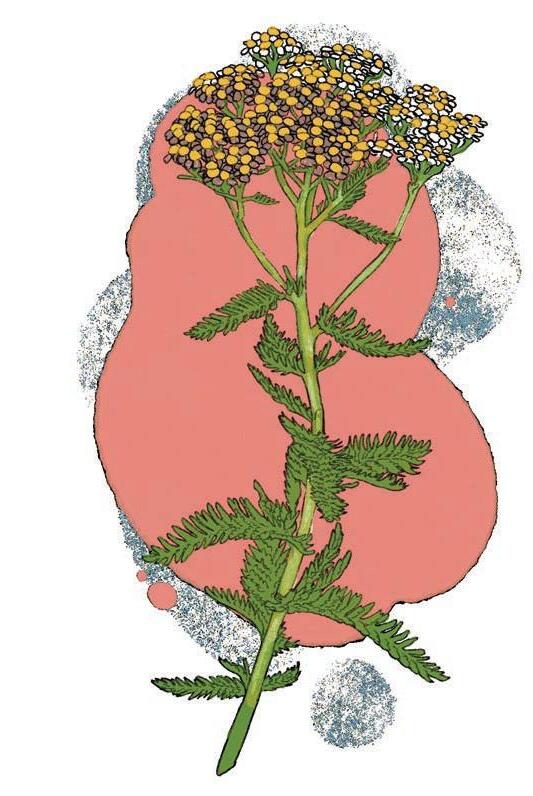
Yarrow is a must-have herb in any herbal garden because of its wide array of uses. Grow it from seed, purchase it at a local nursery (be sure you’re getting an organic heirloom variety instead of a hybrid for best results), or harvest it from the wild after proper identification (as it has some poisonous look-alikes!).
Yarrow’s beneficial properties are primarily attributed to its volatile oil content, which is also responsible for its strong aroma.
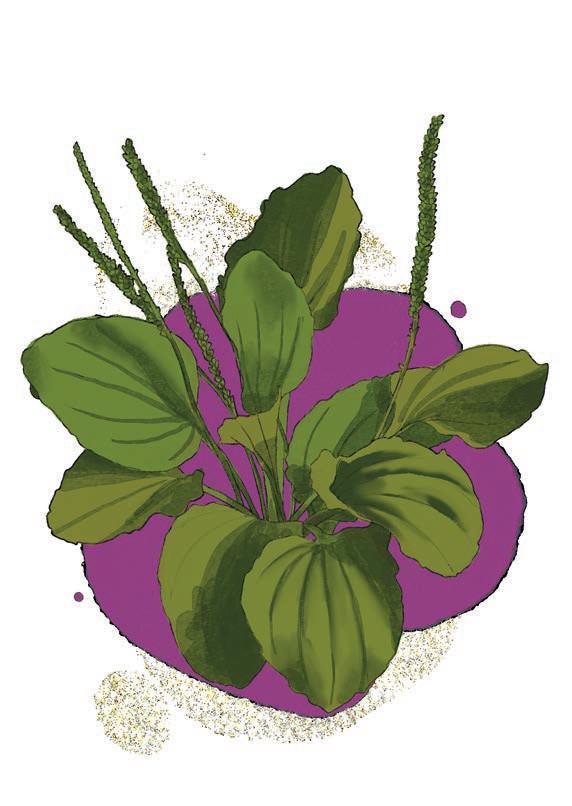
Just as we come out of our time of winter rest, so do the insects. The pain from bees, wasps, and other insect stings can be, well, quite painful. Thankfully, there is an herb that grows far and wide all over the world and is known for its usefulness in easing the uncomfortable symptoms of these types of stings. Plantain leaf is an herb that not only helps to ease pain and swelling but soothes tissues and stimulates quicker cell regeneration as well.
Ingredients
2–3 fresh plantain (Plantago spp.) leaves, chopped
1–2 tbsp (15–30 mL) cool water
Directions
1 Place fresh plantain leaf in a personal blender and add 1 tbsp (15 mL) of water. Blend until the herb becomes a pulp, adding more water, if needed.
2 Strain the mixture through a fine-mesh sieve, reserving the pulp and liquid separately.
Usage
Place a small amount of plantain pulp directly on the sting site (after carefully removing the stinger if stung by a honey bee) and cover it with a clean bandage. Leave this poultice on for 2–3 hours. Apply more of the reserved pulp if pain and swelling are still present and rebandage. Drink the reserved liquid from step 2 to further ease inflammation and slow histamine release in the body. Feel free to drink the liquid straight, dilute it in a small amount of water, or mix it into a smoothie.
Reserve extra pulp in a clean glass container in the refrigerator and use it within 24 hours before making a fresh batch.

If you are stung outdoors and don’t have access to a blender, you can simply wipe a couple of fresh plantain leaves clean of dirt and debris on your shirt (or rinse them in a nearby clean water source), pop them into your mouth, chew away, spit the pulp out, and put the chewed leaves directly on your sting. This is called a “spit poultice,” and it’s a traditional way to make a poultice when you don’t have the convenience of electricity!
Itchy bug bites (and rashes) are the worst. Thankfully, we have some great herbal allies that can come to our aid when itchy things ail us. This herb-infused oil is a simple way to ease the itch and soothe minor swelling and irritation that often accompany bug bites.
YIELD: ¼–½ CUP (60–120 ML)
Ingredients
¼-½ cup (60-120 mL) olive oil
1 tbsp (6 g) clove (Syzygium aromaticum) bud
1 tbsp (2 g) plantain (Plantago spp.) leaf
1 tbsp (1 g) calendula (Calendula officinalis flower
2 tsp (1 g) violet (Viola odorata) leaf
60-120 drops of peppermint (Mentha piperita) essential oil (or lavender (Lavandula angustifolia) essential oil for children <6 years old)
1 Measure all ingredients and follow the steps for the quick or slow herb-infused oil method on pages 32–34.
2 When your oil is finished, place a fine-mesh sieve (lined with a few layers of cheesecloth to remove plant material, if you wish) over a clean, dry glass container and carefully pour the mixture through it. Press the herbs with the back of a spoon (or gather the edges of the cheesecloth to create a bundle and gently squeeze) to extract as much liquid as possible. You can double strain the decanted liquid once more through a fine-mesh sieve lined with an unbleached coffee filter to further remove fine particles if you wish and compost the used plant material.
3 Use a glass measuring cup or graduated cylinder to measure the amount of herb-infused oil you have. If needed, add more olive oil to bring the total volume of oil back up to the amount you started with: ¼–½ cup (60–120 mL).
4 Add 60 drops of essential oil for every ¼ cup (60 mL) of herb-infused oil to create a 5% dilution, which is the suggested dilution for use on small surface areas of the body during acute issues.
5 Mix well with a spoon. Transfer the finished oil to labeled glass roller bottles and allow it to cool completely. Once cool, cap and store for future use.
Roll a small amount of oil directly onto itchy bug bites or rashes as often as needed. Discontinue use if irritation occurs.
Store in a cool, dark location. Use within 12 months before making a fresh batch.
Clove contains a compound called eugenol, which is primarily responsible for its temporary numbing effect on the skin. When applied to the skin, eugenol interacts with nerve endings, blocking the transmission of pain signals to the brain. This is why clove oil or other clove-based products are often used topically to ease pain. However, it's essential to use clove oil or products containing clove with caution, as excessive application can lead to skin irritation or other adverse reactions.
As the days warm, a variety of eye irritants can be problematic for us as we open the windows to let the fresh spring air in and begin to spend more time outdoors. Whether you have an irritant in your eye or the eye is red, painful, and swollen, this herbal eyewash can help rinse and soothe the delicate tissues of the eye thanks to the bacterial-sup pressing, inflammation-modulating, and emollient properties of the botanicals in this blend.
YIELD: 8 FL OZ (240 ML)
Ingredients
1 cup (240 mL) water
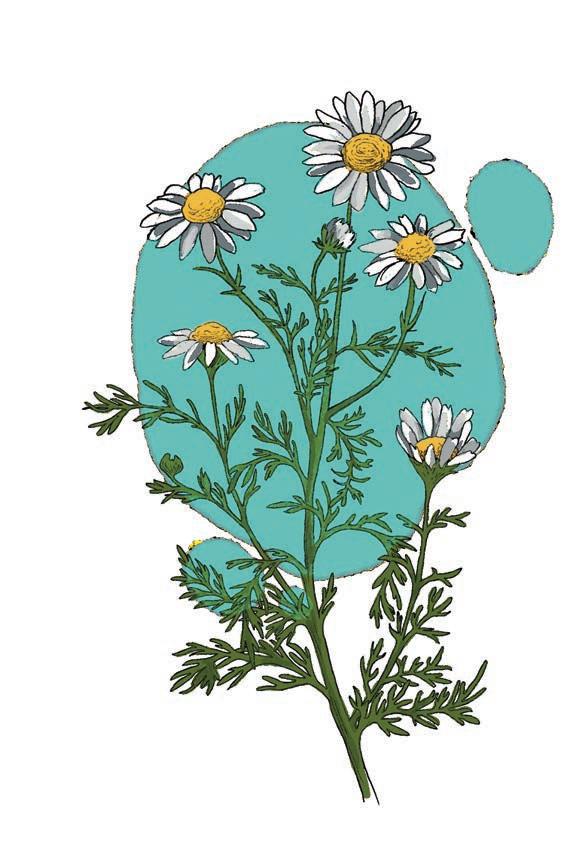
3 tbsp (5 g) chamomile (Matricaria chamomilla flower
3 tbsp (3 g) calendula (Calendula officinalis flower
2 tbsp (4 g) yarrow (Achillea millefolium aerial parts
2 tbsp (3 g) violet (Viola spp.) leaf
½ tsp (4 g) sea salt
1 Bring 1 cup (240 mL) of water to a boil in a kettle or a small saucepan over medium-high heat. As soon as the water comes to a boil, remove it from the heat.
2 While the water is coming to a boil, combine herbs and salt together in a pint-sized glass canning jar.
3 Pour 1 cup (240 mL) of boiled water over the ingredients, cap, and set the jar aside to infuse for 20 minutes or up to 4 hours (or overnight for a long-steep infusion).
4 When time is up, carefully strain the mixture through a fine-mesh sieve lined with an unbleached coffee filter to remove any fine particles (you don’t want bits of herbs in your eyes!). Press the herbs with the back of a spoon (or gather the edges of the coffee filter to create a bundle and gently squeeze) to extract as much liquid as possible. Reserve the liquid in a clean glass storage container and compost the used plant material. Cap and store for future use.
To use as an eye wash, fill an eye wash cup half full with warm herbal eye wash. Holding your head over a sink, bring the cup up to your eye and hold it firmly to avoid leaks. Tilt your head back so that the liquid covers your eye. Blink a few times, moving the eyeball back and forth so the liquid covers the entire surface. Tilt your head back down and remove the eye cup. Rinse and dry the cup for storage, and gently dry the eye. Repeat 3–4 times a day.
To use as an eye compress, soak a clean cloth in the warm herbal eye wash and press out just enough liquid that it’s not dripping from the cloth. Fold the wet cloth into a square and place it over the eye. Hold it firmly to the eye for 10 minutes. Repeat with a clean cloth 3–4 times a day.
Store in a labeled jar in the refrigerator for no more than 24 hours before making a fresh batch.
• Feel free to double or triple the recipe if it will be used for several days. Freeze leftovers in ice cube trays and thaw them as needed, warming the liquid to a comfortable temperature before using.
Spring has a way of drawing us outdoors, whether it’s to pick the first wildflowers that bloom, go for a hike in the warming temperatures, or dig in the dirt to get a head start on the year’s garden. This all-purpose herbal ointment is infused with herbs that deter microbes and stimulate tissue regeneration and will come in handy for minor cuts, scrapes, and abrasions that may come your way during your outdoor adventures.
YIELD: ½–1 CUP (120–240 ML)
Ingredients
½–1 cup (120-240 mL) olive oil
1 cup (14 g) calendula (Calendula officinalis) flower
¼ cup (7 g) lavender (Lavandula spp.) flower bud
¼ cup (5 g) yarrow (Achillea millefolium) aerial parts
2 tbsp (4 g) comfrey (Symphytum officinale) leaf
3–6 tbsp (21–42 g) beeswax, grated or pastille
60–120 drops of lavender (Lavandula angustifolia) essential oil (optional)
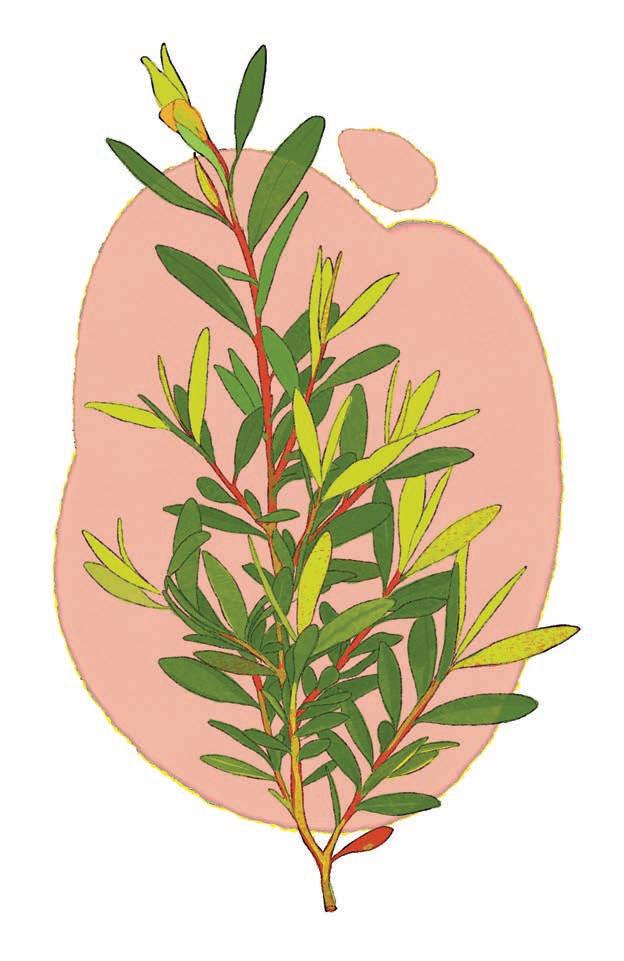
60–120 drops of tea tree (Melaleuca alternifolia) essential oil (optional)
1 Measure all ingredients and follow the steps for the quick or slow herb-infused oil method on pages 32–34.
2 When your oil is finished, place a fine-mesh sieve (lined with a few layers of cheesecloth to remove plant material, if you wish) over a clean, dry glass container and carefully pour the mixture through it. Press the herbs with the back of a spoon (or gather the edges of the cheesecloth to create a bundle and gently squeeze) to extract as much liquid as possible. You can double strain the decanted liquid once more through a fine-mesh sieve lined with an unbleached coffee filter to further remove fine particles if you wish and compost the used plant material.
3 When you are ready to make the ointment, use a glass measuring cup or graduated cylinder to measure the amount of herb-infused oil you have. If needed, add more olive oil to bring the total volume of oil back up to the amount you started with: ½–1 cup (120–240 mL).
4 Measure out 3 tbsp (21 g) of beeswax for every ½ cup (120 mL) of herb-infused oil you have. Place the beeswax into a clean saucepan, and heat it over medium-low heat until it has melted.
5 Turn the heat to low and pour the herb-infused oil into the saucepan alongside the melted beeswax. Carefully mix the two together until they’re thoroughly combined.
6 Test the consistency of the ointment by dipping a spoon in the mixture and letting it cool for a few minutes before touching it to get a feel for the final consistency. The goal is for the texture to be soft and easy to press. If the mixture is too hard, add a bit more oil. If the mixture is too soft, add another 1 tbsp (7 g) of beeswax. Be sure to go slow and make small adjustments, testing after each addition and repeating until you get the ointment to the desired consistency.
7 Remove the saucepan from the heat and carefully transfer the mixture to a labeled tin or glass storage container.
8 If using, add 60 drops of each essential oil for every ½ cup (120 mL) of herb-infused oil to create a 5% dilution, which is the suggested dilution for use on small surface areas of the body during acute injury. Stir the mixture with a toothpick and allow it to cool completely. Once cool, cap and store for future use.
With a clean finger, scoop a small amount of ointment out of the storage container. Apply directly to minor wounds and abrasions as often as needed.
Store in a cool, dark location. Use within 12 months before making a fresh batch.
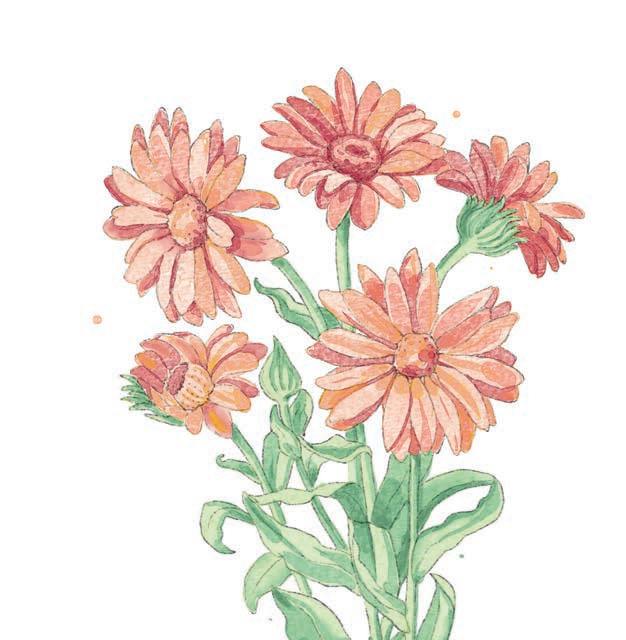
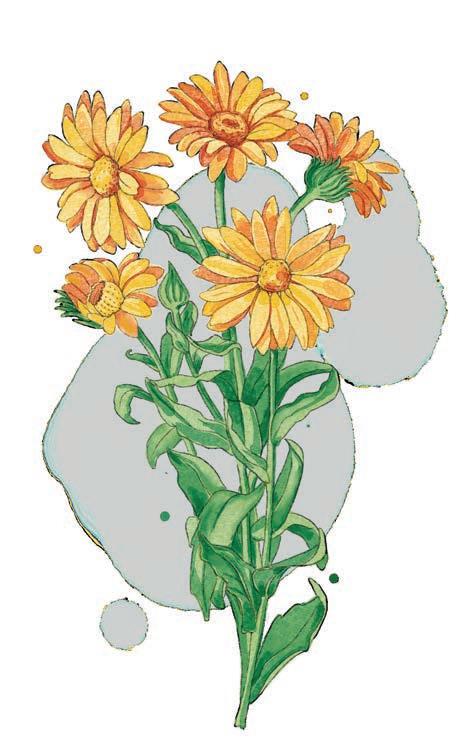
Calendula is one of the easiest herbs to grow! Sow seeds in a container or directly in the ground, cover them with a small amount of dirt, water well, and sit back and watch beautiful yellow-orange blooms appear in a couple of months. Calendula flowers should be picked as soon as they’re in full bloom, stimulating the growth of more flowers and giving you a long harvest period. Calendula can be used fresh or dried for future use. Don’t forget to let some of the flowers go to seed so you can collect the seeds and replant them the following year.
Breezy spring days and temperature fluctuations, along with spring allergies and viral ailments, can sometimes lead to uncomfortable earaches. Thankfully, there are some tried-and-true herbal combinations that can quickly be infused in oil and used inside the ear canal to help ease pain and swelling and deter microbes.
YIELD: ¼–½ CUP (60–120 ML)
Ingredients
¼-½ cup (60-120 mL) olive oil
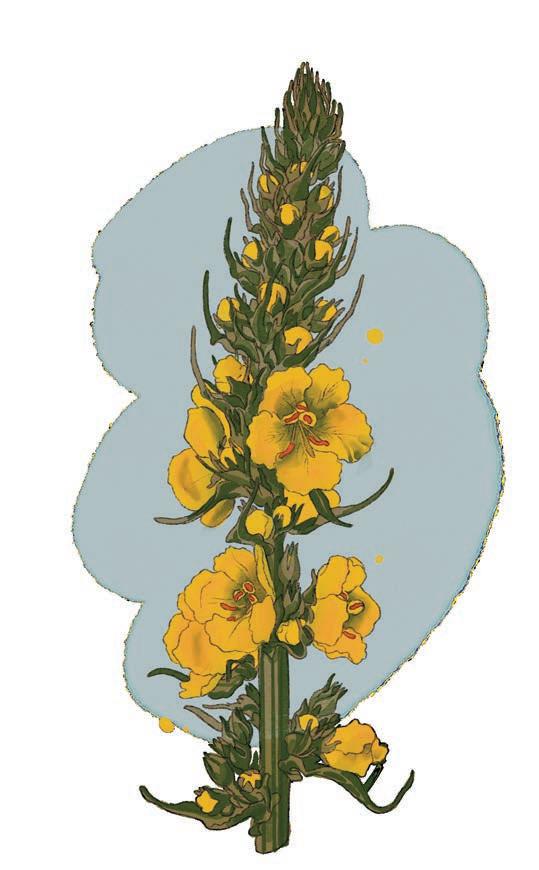
1 tbsp (1 g) mullein (Verbascum thapsus) flower
1 tbsp (2 g) bee balm (Monarda fistulosa) aerial parts
2 (12 g) garlic (Allium sativum cloves, minced
1 Measure all ingredients and follow the steps for the quick herb-infused oil method on pages 32–33.
2 When your oil is finished, place a fine-mesh sieve (lined with a few layers of cheesecloth to remove plant material, if you wish) over a clean, dry glass container and carefully pour the mixture through it. Press the herbs with the back of a spoon (or gather the edges of the cheesecloth to create a bundle and gently squeeze) to extract as much liquid as possible. You can double strain the decanted liquid once more through a fine-mesh sieve lined with an unbleached coffee filter to further remove fine particles if you wish and compost the used plant material.
3 Transfer the finished oil to a clean, labeled glass storage container and set aside to cool. Once cool, cap with a dropper top and store for future use.
Warm the oil by placing the bottle in a cup of hot water for 10–15 minutes. Apply 2–3 drops of oil into the canal of the affected ear, keeping the ear tilted upward for 5–10 minutes so the oil doesn’t run back out. Repeat 2–3 times a day. You can also massage a small amount of this oil into the skin around the ear and down the neck, gently massaging to encourage lymphatic drainage and oil absorption.
Store in a cool, dark location. Use within 12 months before making a fresh batch.
Garlic contains several phytochemicals, including allicin and other sulfur compounds, that contribute to its antiviral and antibacterial action. These make it an effective herbal ally against a wide spectrum of bacteria, including many strains of antibiotic-resistant bacteria.
Essential oils not only smell nice, but they’re also useful resources to have on hand during an earache. They help relax tension, ease inflammation, and calm the nerves, and they can discourage microbial growth as well.
YIELD: ¼ CUP (60 ML)
Ingredients
¼ cup (60 mL) olive oil
16–24 drops of tea tree (Melaleuca alternifolia) essential oil
12–20 drops of basil (Ocimum basilicum) essential oil
8–16 drops of lavender (Lavandula angustifolia) essential oil
Directions
1 Combine olive oil (or another herb-infused oil of your choice) and essential oils together to create a 3–5% dilution, which is the suggested dilution for use on small surface areas of the body during acute issues.
2 Transfer the finished oil to a clean, labeled glass storage container and cap. Shake well to thoroughly mix the oils together and store for future use.
Usage
Apply a small amount of oil to the skin around the ear and down the neck, gently massaging to encourage lymphatic drainage and oil absorption. Reapply 3–4 times a day. For external use only!
Store in a cool, dark location. Use within 12 months before making a fresh batch.
Tip
• This oil can also discourage microbial growth and inflammation in other areas of the skin. It makes a great preparation to rub on cleaned cuts, scrapes, and scratches.
With the arrival of spring, you will likely find yourself spending more time outdoors. Black drawing salve is a traditional Amish preparation that has stood the test of time thanks to its effectiveness in drawing impurities from the skin’s surface, such as splinters, thorns, small gravel, and dirt. It’s also commonly used on venomous insect bites and boils to help slow venom spread and draw toxins and impurities out of the skin.
Ingredients
2 tbsp (14 g) beeswax, grated or pastille
3 tbsp (45 mL) olive oil
1 tbsp (15 mL) castor oil
2 tbsp (24 g) activated charcoal
2 tbsp (20 g) bentonite clay
1 tbsp (2 g) plantain (Plantago spp.) leaf, powdered
1 tbsp (15 mL) raw honey
¼ tsp (1 mL) vitamin E oil (optional)
28 drops of lavender (Lavandula angustifolia essential oil (optional)
8 drops of tea tree ( alternifolia) essential oil (optional)
1 Measure out 2 tbsp (14 g) of beeswax. Place it into a clean saucepan and heat it over medium-low heat until it has melted.
2 Turn the heat to low and add the olive and castor oils to the saucepan alongside the melted beeswax. Carefully mix them together until they’re thoroughly combined.
3 Remove the saucepan from heat and add the charcoal, clay, and plantain powders. Mix the powders into the oils before adding the raw honey and vitamin E oil, if using. Stir the mixture once more to incorporate all the ingredients together. Feel free to add extra clay or charcoal if you’d like a thicker consistency.
4 If using, add the essential oils to the mixture to create a 3% dilution, which is the suggested dilution for use on small surface areas of the body.
5 Transfer the mixture to a labeled glass storage container or tin and allow it to cool completely. Once cool, cap and store for future use.
Apply a small amount of clay to the affected area. Cover with a bandage and replace every 12 hours as needed.
Store in a cool, dark location. Use within 12 months before making a fresh batch.
• You can create your own plantain leaf powder by placing 2–3 tbsp of dried plantain leaf in a coffee grinder and grinding it into a powder. Sift the powder through a fine-mesh sieve, reserving the fine powder and composting the larger particles. This creates quite a bit of dust, so be sure to do this in a well-ventilated area or wear a face mask.
The negative electrical charge of clay attracts the positive electrical charge of metal, binding the metal molecules to the clay and, depending on the type of clay, can sometimes render the clay less absorbent. For this reason, it is important to use non-reactive supplies, such as glass, enamel, or wood, when working with pure clay to ensure it is most effective.
If you find yourself with a dry, scratchy throat come spring, brought on by the cool, dry outdoor air, seasonal allergies, or an unexpected virus, this herbal throat spray is one of the best ways to soothe the painful tissues of the throat while combating microbes. Not only that, but it tastes great too!
YIELD: ½ CUP (120 ML)
Ingredients
2 tbsp (30 mL) raw honey
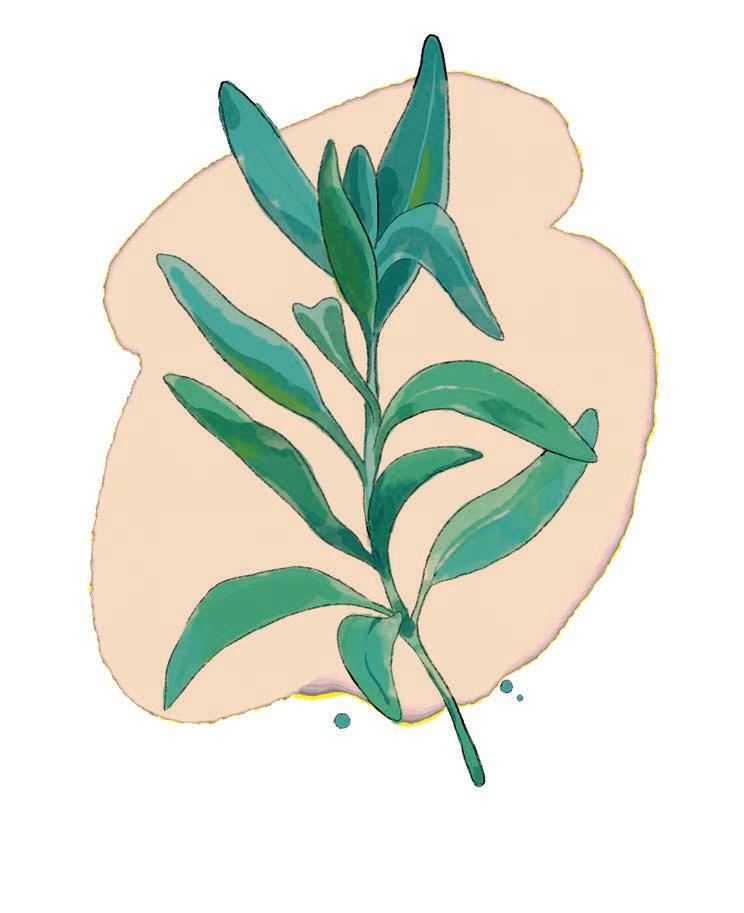
2 tbsp (30 mL) sage (Salvia officinalis) leaf tincture
2 tbsp (30 mL) licorice (Glycyrrhiza glabra) root tincture
2 tbsp (30 mL) echinacea (Echinacea angustifolia, E. purpurea) root tincture**
3–5 drops of eucalyptus (Eucalyptus globulus) essential oil (optional)
** cultivated source
Directions
1 Measure and combine all ingredients in a labeled glass bottle and cap with a spray top.
2 Shake well to combine and store for future use.
Usage
Shake well before each use. Use 2–3 sprays in the mouth, swishing the liquid around for several seconds before swallowing it slowly so it comes into as much contact with the tissues at the back of the throat as possible. Repeat as often as needed.
Store in a cool, dark location. Use within 2 years before making a fresh batch.
• If you have high blood pressure or kidney disease, skip the licorice root tincture and use fennel (Foeniculum vulgare) seed tincture instead.
If you’re a seasonal eater, it’s likely that you are shifting away from the heavier, richer fare of winter and toward the lighter, fresher fare of spring. This transition can sometimes be a challenge for the digestive system as it has to get used to a larger amount of fiber and raw foods once more. This transition can sometimes lead to slow digestion, bloating, gas, and even cramping. Thankfully, there are some herbs that can help support digestion and ease uncomfortable symptoms during this transition period—bitters! Bitter herbs stimulate gastric secretions and support digestion (among many other things). Plus, bitters infuse for less time than most tinctures since bitter principles are extracted from the plant material more quickly than other plant constituents.
YIELD: VARIES
Ingredients
3 parts dandelion (Taraxacum officinale) root tincture
2 parts chamomile (Matricaria chamomilla) flower tincture
2 parts cinnamon (Cinnamomum spp.) bark tincture
1 part yarrow (Achillea millefolium) aerial parts tincture
1 part orange (Citrus spp.) peel tincture
½ part fennel (Foeniculum vulgare) seed tincture
Directions
1 Make individual tinctures following directions on pages 35–38.
2 When you are ready to create the tincture blend, begin by choosing the measurement you’d like to use for your part.
3 Measure out each tincture individually before combining them in a clean, labeled glass storage container. Cap and store for future use.
Usage
Take ¼ tsp (1 mL) directly in the mouth 15–30 minutes before meals. Swish bitters over the tongue to taste the bitterness and stimulate salivation.

Store in a cool, dark location. Use within 3–5 years before making a fresh batch.
• To make non-alcoholic spring digestive bitters, simply substitute raw apple cider vinegar for the alcohol when making each tincture. Use within 3 years.
• You can also use your bitters in your botanical cocktail and mocktail recipes.
• Place digestive bitters in a small, labeled spray bottle and keep it in your purse so you can take it with you on the go!
Spring is the ideal time to show the lymphatic system some love, especially after a long winter with less-than-average movement and a diet filled with heavy, seasonal foods. Come spring, there are some fresh green herbs that help to get the water pathways of the lymphatic system moving, which help to cleanse and refresh the body’s tissues so they function better and give you renewed energy.
Ingredients
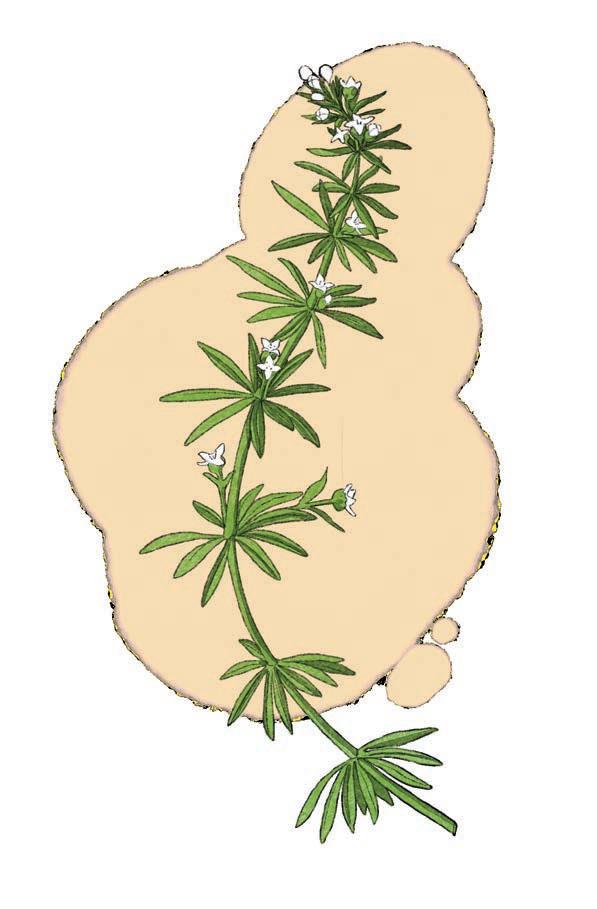
1 part fresh cleavers (Galium aparine aboveground parts
1 part fresh chickweed (Stellaria media) aboveground parts
1 part fresh violet (Viola spp.) leaf
Water (optional)
70% ABV (or higher) alcohol of your choice
1 Wearing protective gloves, collect the aboveground parts of fresh cleavers and chickweed, as well as violet leaf. Rinse the plants under cool running water to wash away debris, and thoroughly shake them to remove excess water.
2 Roughly chop the plant material before measuring each herb using your chosen part. Then, place the measured plant material in a large bowl.
3 To make a succus, you have two options.
a First, you can process the fresh herbs with a juicer, reserving the juice in a clean glass storage container and composting the plant pulp.
b If you don’t have access to a juicer, you can combine the fresh plant material and a small amount of water in a high-speed blender and blend until a slurry forms, gradually adding more plant material (and additional water, if needed) until the mixture is well blended. Once the mixture is blended, strain it through a fine-mesh sieve lined with a few layers of cheesecloth to remove as much pulp as possible. Bundle the cheesecloth and squeeze as much liquid as possible from the plant material. Reserve the liquid in a clean glass storage container, and compost the used herbs.
4 Measure the amount of reserved liquid in a glass measuring cup or graduated cylinder and add an equal amount of 70% ABV (or higher) alcohol to preserve the liquid. For example, if you have 2 cups (480 mL) of liquid, you will need to add 2 cups (480 mL) of alcohol.
5 Transfer the mixture to a labeled glass storage container. Cap and store for future use.
Use 1–3 tsp (5–15 mL) 3 times a day. Drink it straight from the spoon, mix it into a smoothie, or add it to an herbal infusion.
Store in a cool, dark location. Use within 3 years before making a fresh batch.
• Want to go alcohol-free? Skip the high-proof alcohol and use food-grade vegetable glycerin instead. The shelf-life will decrease to 1 year before a fresh batch is needed. You’ll want to aim for a 2:3 ratio of liquid to glycerin. For example, if you have 2 cups (480 mL) of liquid, you will need to add 3 cups (720 mL) of glycerin.
• Skip the alcohol and glycerin and freeze the succus in ice cube trays to enjoy later. The shelf-life will decrease to 6 months before a fresh batch is needed.
Cleavers, chickweed, and violet all grow in similar habitats in spring—moist, shady spots—so if you see one plant, look around, as the others are likely growing nearby. These plants like to stay cool, and cleavers and chickweed are best used fresh for maximum potency.

Meagan Visser is a registered nurse turned herbalist who lives with her husband and four sons in the beautiful southern Appalachian mountains. As a Staff Herbalist and Lead Herbalist Educator at Herbal Academy, Meagan brings a wealth of knowledge to her contributions, blending her medical background with timeless herbal wisdom. She is also the founder of Growing Up Herbal, a platform dedicated to natural living for families. When she’s not teaching or crafting herbal preparations, Meagan enjoys homeschooling her children, gathering with friends and family, and spending time in her gardens, where she finds inspiration in the beauty of nature.
Good ideas ripen with time. From seed to harvest, Cider Mill Press brings fine reading, information, and entertainment together between the covers of its creatively crafted books. Our Cider Mill bears fruit twice a year, publishing a new crop of titles each spring and fall.
“Where Good Books Are Ready for Press”
cidermillpress.com