
Diabetic Shoes – Georgia
This document outlines the diabetic shoe process for Village Podiatry Centers in Georgia. This is state specific so steps will vary for other states.
Measuring Patients
Prior to measuring patient and placing shoe order, physician must first mention that they recommend use of diabetic shoes in their most recent visit note
1. Measure the patient’s foot length and width using a brannock device (preferably Anodyne brand)

NOTE: Measurement of patient can be conducted during any regular visit or at a separate appointment specifically designated for measurement
2. Obtain an impression of patient’s foot using a crush box if provider states that patient needs custom inserts - otherwise, only use measurements from step one
3. Provide patient with Anodyne catalog and allow them to select shoe of their choice
NOTE: Inform patients that slippers/sandals will never be covered by insurance
4. Document patient’s shoe of choice, color, length, width, physician that treats patient for diabetes, and the last time patient saw said physician
NOTE: Obtain a back-up choice from patient for instances where first choice is back-ordered
5. Enter shoe/patient information onto Anodyne order form
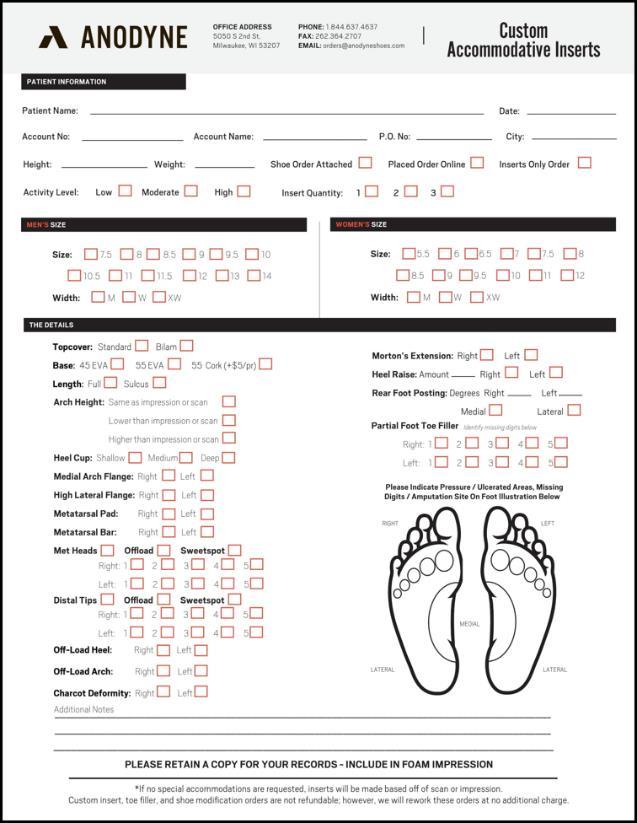
NOTE: A custom order form needs to be attached to all custom orders
6. Scan and save completed form(s) into patient’s chart

Inputting Orders
Orders are to be inputted after patient has left measuring appointment
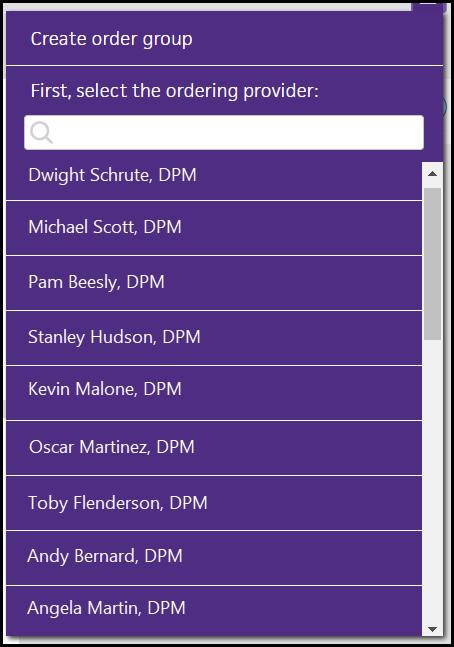
1. Enter patient’s chart
2. Click on the patient action menu


3. Select Create Order Group

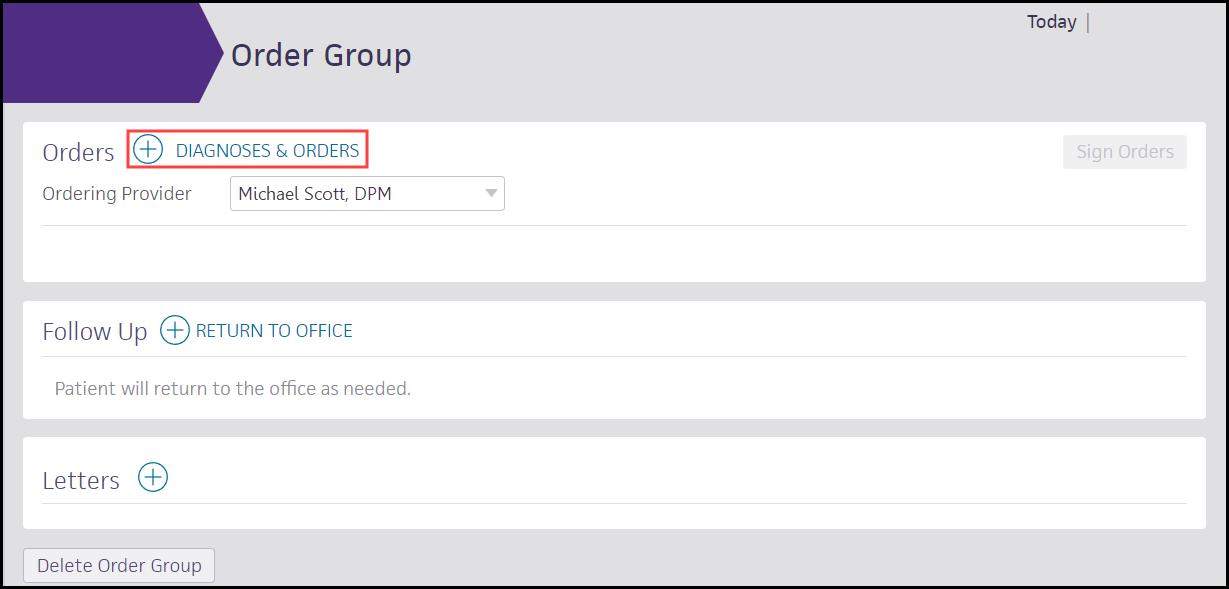
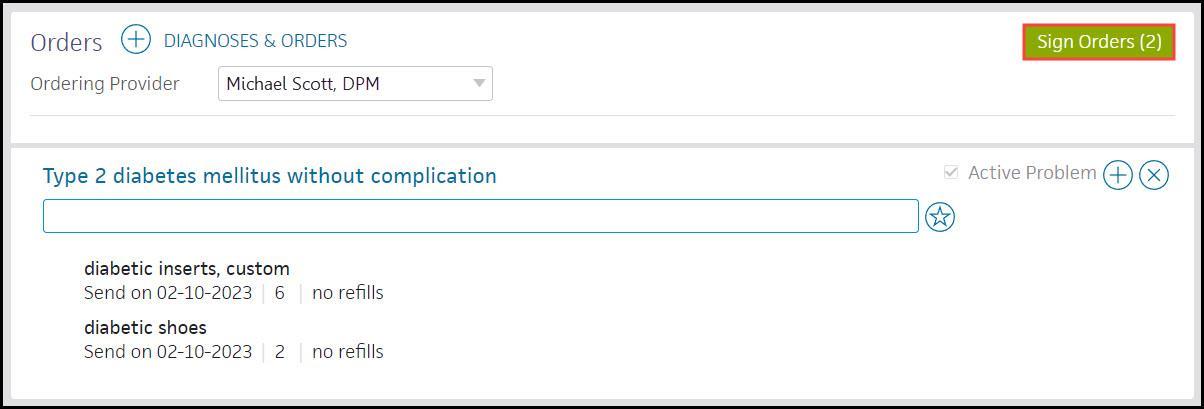
7. Select EHI_Diabetic Shoes Custom (2) for custom orders or EHI_Diabetic Shoes Heat (2) for normal orders

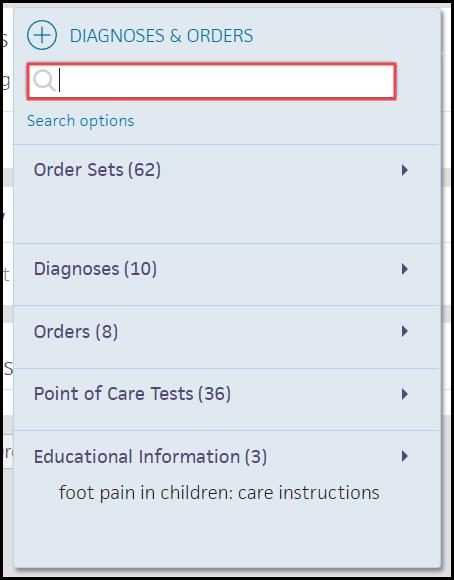
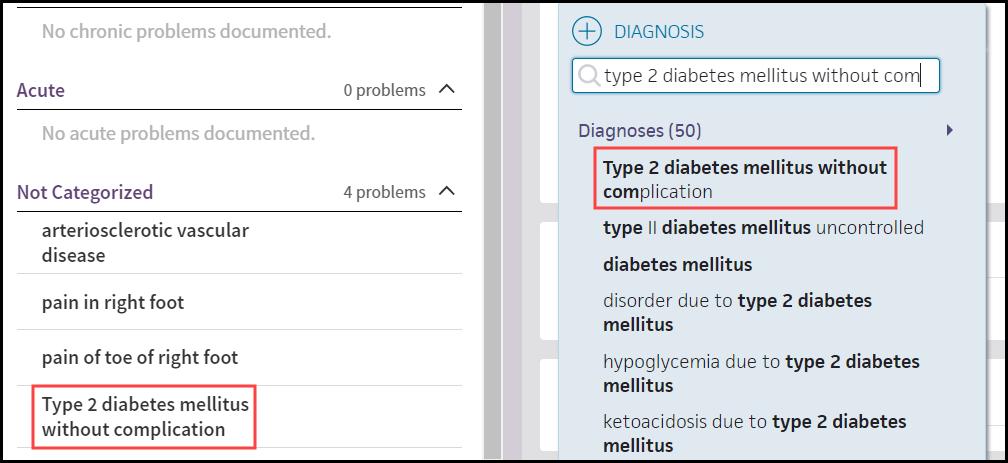
8. Click + DIAGNOSIS to add a diabetic diagnosis
NOTE: Select diagnosis from Not Categorized list under Active Problems. Do not add a new diagnosis that was not entered by physician. Must be a diabetic diagnosis

9. Click diabetic shoes to expand
10. Enter shoe information into selected fields


A. Enter primary care physician and date last seen in Note to facility field
B. Enter shoe color and width in Internal Note field
C. Enter shoe size in Size field
D. Enter model number in Quantity field
11. Click diabetic shoes to minimize
12. Click Sign Orders

NOTE: The Sign Orders button will only appear green if provider has approved sign-off privileges for user. The button will look be grayed out and unable to click otherwise.

Closing Diabetic Inserts
1. Click diabetic inserts once order is signed
2. Click VIEW MORE at bottom of order group
3. Click VIEW DOCUMENT

4. Click view actions


5. Click Submission Completed drop-down menu


6. Select By Phone option

7. Click Save
NOTE: This then closes the order for the inserts. Closing out this portion of the order is necessary for the diabetic shoe team to avoid having multiple documents for one patient
8. Click x to leave order
Closing Diabetic Shoes
1. Click diabetic shoes
2. Click VIEW MORE at bottom of order group


3. Click VIEW DOCUMENT
4. Click view actions


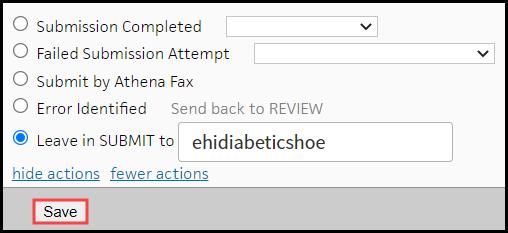
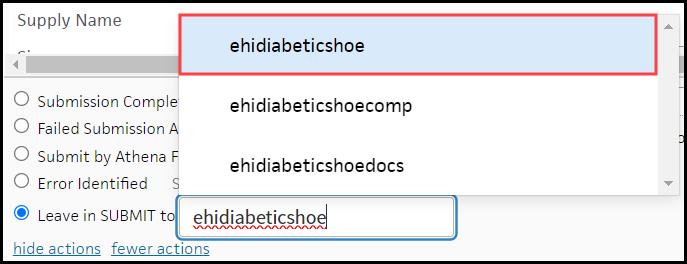
5. Click more actions
6. Click Leave in SUBMIT to search bar and type ehidiabeticshoe
NOTE: This routes the order to the diabetic shoe department where letter from PCP is obtained, shoes and inserts are manually order, etc. Office must then wait until shoe order arrives. It is important to look at the shoe order periodically to assure that proper documentation from diabetic shoe department is complete.
Scheduling Shoe Dispensing

Once shoe order has arrived to clinic and diabetic shoe department confirms that shoes are okay to be dispensed, staff is able to schedule dispensing appointment with patient. Patient cannot have shoes dispensed if diabetic shoe department has not received signed forms from patient’s primary care physician/endocrinologist.

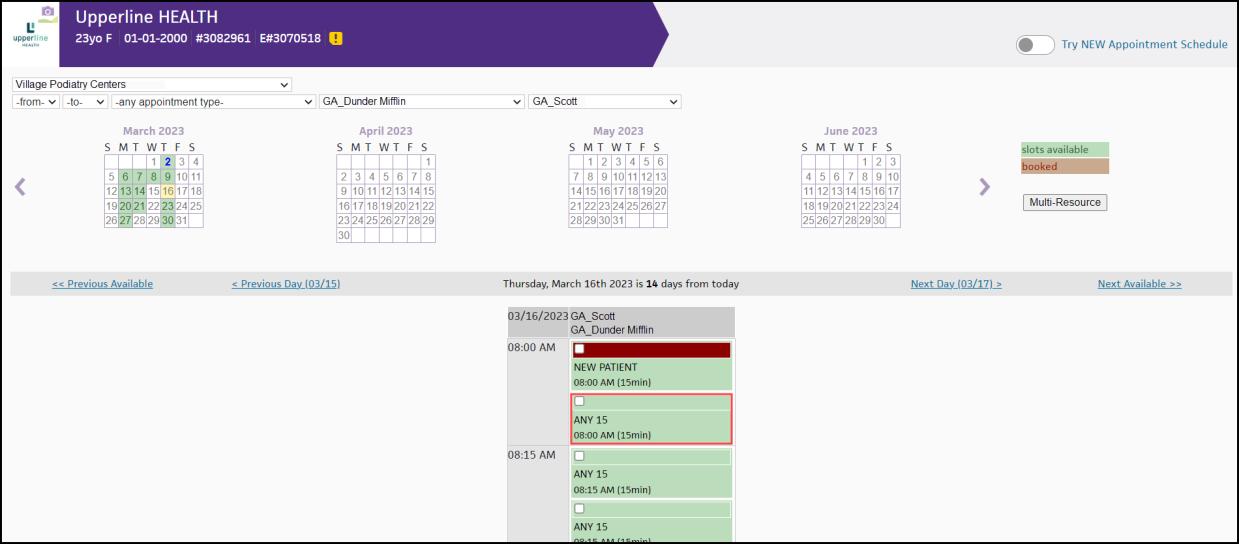
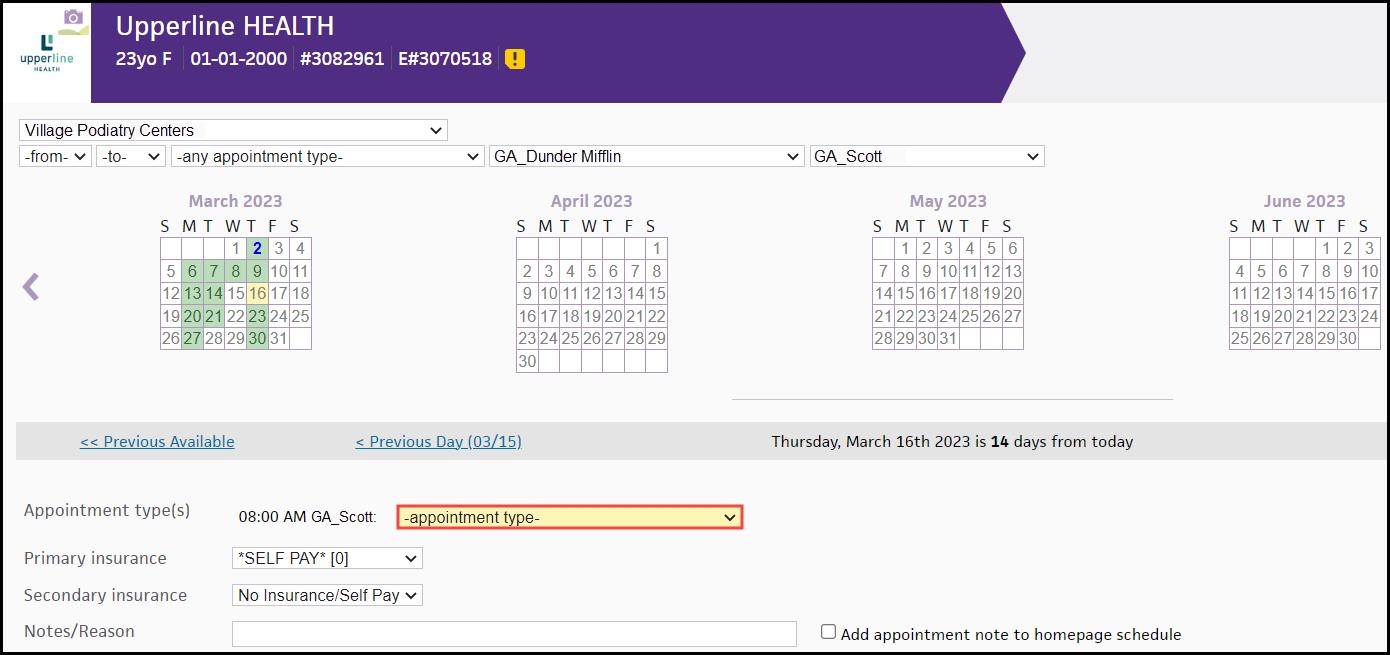
5. Select DME (15 min)

6. Type diabetic shoe dispensing in Notes/Reason, enable Add appointment note to homepage schedule radio dial, and click Schedule Appointment(s)

Dispensing Shoes
Shoes are to be dispensed at patient’s DME appointment as scheduled above once patient is checked-in and marked Ready for Staff. Assure patient is content with shoes and explain warranty and return policy. Patient has thirty days to return shoes if shoes are unsatisfactory. Patient may not return shoes if worn outdoors at any point. Patient is recommended to wear their new shoes one hour indoors day one, two hours day two, three hours day three, four hours day four, and five hours day five to break-in shoes properly.
Printing Warranty

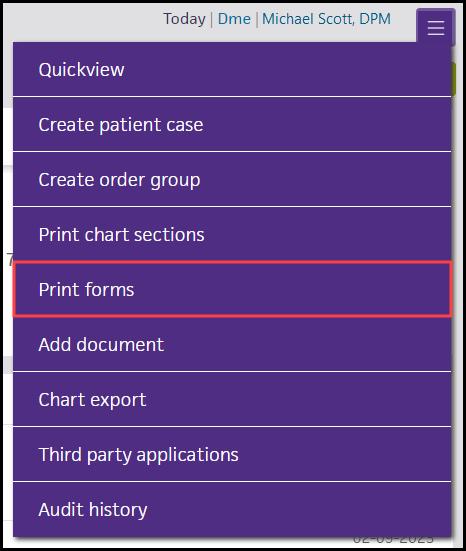
1. Click the patient action menu (“hamburger”) from patient’s chart

4. Print warranty and have patient sign
5. Make a copy for patient and scan warranty into patient’s chart\

Documenting Visit
1. Click Go to Intake after patient is checked-in and marked Ready for Staff

2. Complete each tab of Intake

3. Click drop-down menu next to Done with Intake


4. Click Done with Intake, go to Exam
5. Click PE section within Exam
6. Click + next to Procedure Documentation
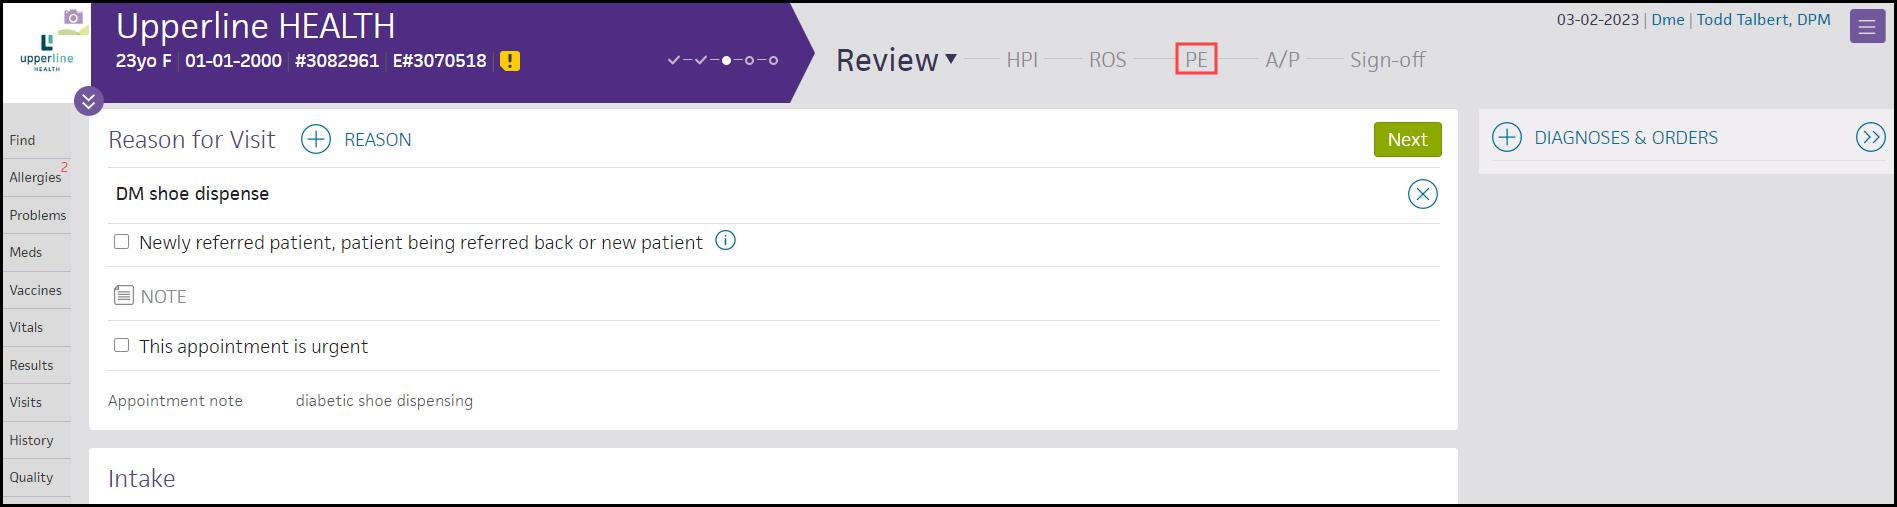

7. Select Diabetic Shoe Dispensing


8. Click the blank within template
9. Select type of inserts dispensed


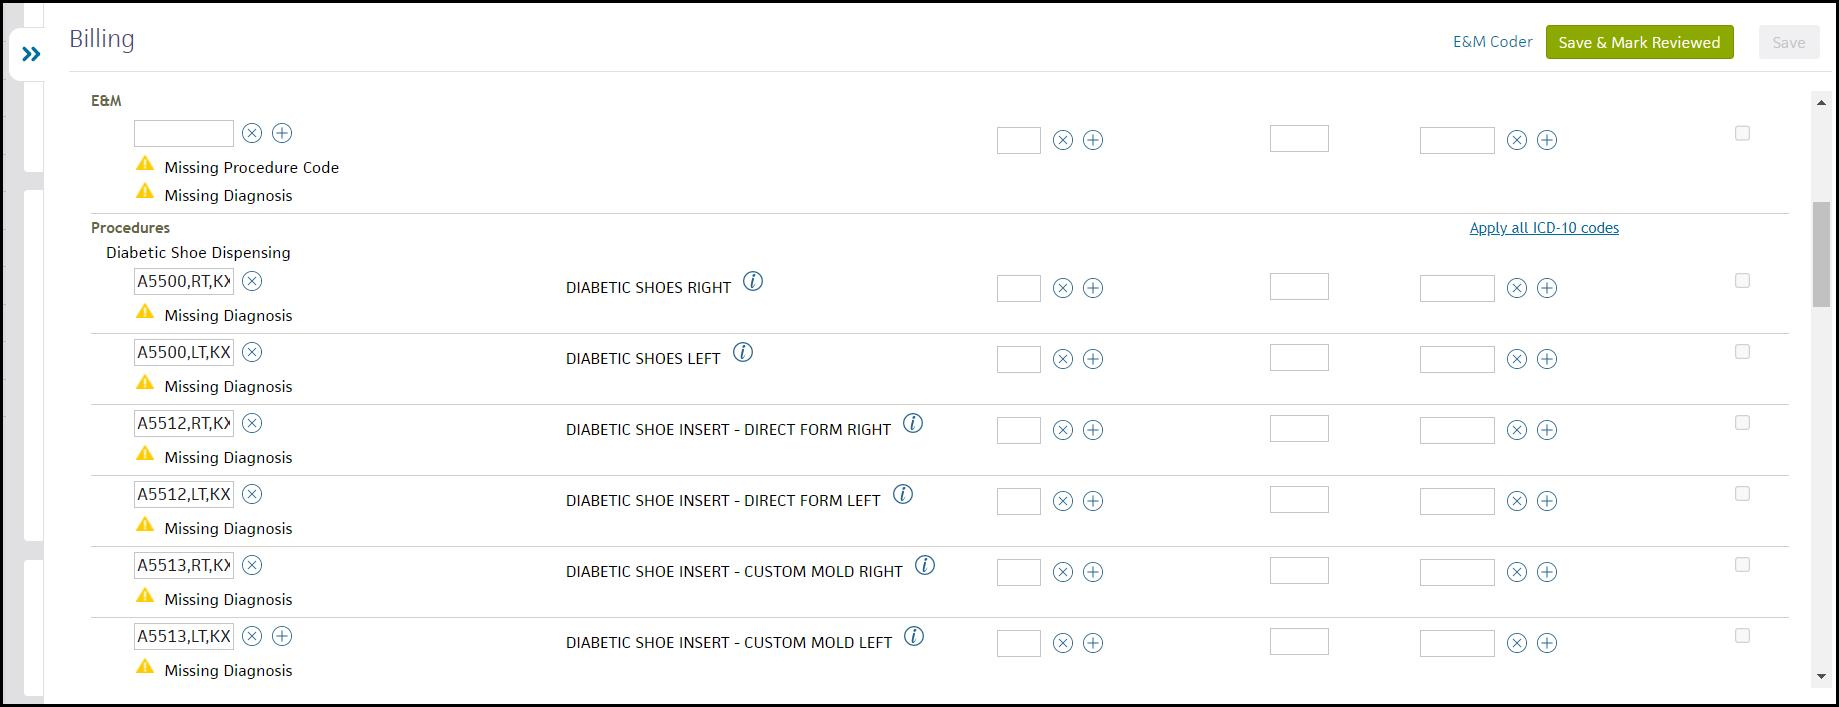
13. Delete inserts that were not dispensed to patient
NOTE: If custom inserts were dispensed, delete direct form (prefab) inserts. If direct form inserts were dispensed, delete custom inserts


14. Click on ICD-10 Codes and add diagnosis for each Procedure

NOTE: Add two diagnoses from patient’s chart for each procedure. Ensure that right shoe/insert has a right foot diagnosis
15. Click Save & Mark Reviewed
16. Click drop-down menu next to Done
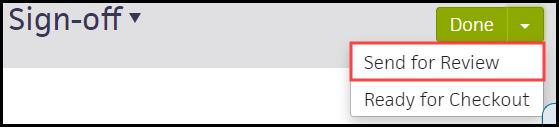

17. Select Send for Review
NOTE: Selecting this will send encounter to physician to sign and close note