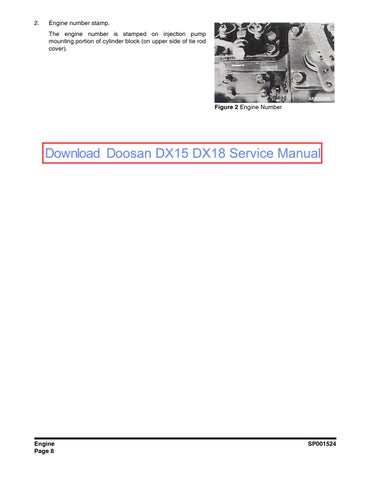
2.Engine number stamp.
The engine number is stamped on injection pump mounting portion of cylinder block (on upper side of tie rod cover).

Figure 2 Engine Number
2.Engine number stamp.
The engine number is stamped on injection pump mounting portion of cylinder block (on upper side of tie rod cover).
Longitudinal Section (L3C)
1.Small and lightweight engine.
The new series are 10 - 20% smaller in weight and 1520% smaller in contour volume than the same class of engines of competitors
2.Low noise and economical fuel consumption.
Low noise and economical fuel consumption are attained by the well designed cylinder block construction (having curved side faces), the rearranged combustion chambers, and the small sized fuel Injection system.
3.Easy starting.
The engine can be started instantly only by keeping the starter switch key in the ON position for about 6 seconds to allow automatic feeding of current to the glow plugs, eliminating the necessity of setting the key to the HEAT position. (For engines with the automatic glow plug system.)
The new governor mechanism also contributes to easy engine start, because it increases fuel injection and delays injection timing for easy engine start without necessity of moving the throttle lever to the "full throttle" position.
4.Multipurpose engine.
The L series engine can be equipped with various kinds of optional devices.
•Key off stop system (Fuel cutoff valve).
•Torque spring.
•Manual stop lever.


L2 Series Performance Curves
9
Model Item L2AL2CL2EL3AL3CL3E
Engine Type4-cycle, Water Cooled, Vertical, Diesel Firing Order1-21-3-2
Compression Ratio23:1
General
Combustion ChamberSwirl Chamber
Number of Cylinders23
BorexStroke
Cylinders
Performance
Displacement
Maximum Power
Maximum Torque
Specific Fuel Consumption
See the engine performance curves.
List Ability In every direction (to lower limit of oil level) 25° continuous 30° in a short time (within 30 min.)
Fuel System
Lubrication System
Cooling System
Accessories
Injection PumpBosch NC type
NozzleThrottle type
FuelJIS No. 2 or No. 3 Diesel Fuel
Lubricating MethodForced Lubrication Oil FiltrationPaper Element Filter (Full-flow Type)
Oil Capacity
Upper Limit/Lower Limit (Excluding 0.5 liters (0.13 U.S. gal.) for oil filter)
2.4/1.4 liters (0.63/0.37 U.S. gal.)
3.0/1.5 liters (0.79 - 0.40 U.S. gal.)
3.6/1.8 liters (0.95 - 0.48 U.S. gal.) or 4.8/3.0liters (1.3 - 0.79 U.S. gal.)
Cooling MethodForced water circulation with pressurized radiator.
Coolant Capacity (Except Radiator and Hose) 1.20 liters (0.32 U.S. gal.) 1.80 liters (0.48 U.S. gal.)
Alternator12 V @ 15 A or 12 V @ 40 A
Starting Motor12 V @ 1.2 kW or 12 V @ 0.6 kW
Battery45 Ah or more60 Ah or more
1.Checking and correcting the engine oil level.
A.Place the engine horizontally.
B.Check the oil level with oil level dipstick. If the oil level has fallen to the lower limit, add oil up to the upper limit.
C.Check the oil level before (everyday) operation of the engine.
Whenever oil is added, check the oil level again after waiting for about 1 minute.
When adding oil, use only the same engine oil used in the engine.
When checking the oil level in an engine which has been long out of use, run the engine for several minutes, shut down engine, and check the oil level after a while.
2.Oil change intervals.
A.Change oil after first 50 hours of operation (on new engine) and every 100 hours operation thereafter.
B.Replace oil filter after first 50 hours of operation (on a new engine) and every 200 hours of operation thereafter.
3.Engine oil to be used.
A.Engine oil must conform to the API classification and viscosity number specified in the following table.
Figure 11 Checking Oil Level
Class CC or Better
(Class CD for 3000 or higher speed specification engine.)

Figure 12 Checking Oil Level
Above 20°C (68°F)
5° - 20°C (41° - 68°F)
Below 5°C (41°F)
All seasons
30
4.When replacing oil filter, use only original equipment filter.
5.Changing oil.
A.To change oil, first warm up engine and remove drain plug to let oil completely drain.
B.Install drain plug and fill oil pan with fresh engine oil through oil fill cap.
NOTE: Oil pan drain plug tightening torque: 5.06.0kg•m (36 - 43ftlb).
NOTE: For oil capacity (Upper limit/Lower limit) see “Engine Specifications” on page1-16.
6.Replacing oil filter.
A.Remove oil filter with a filter wrench or similar device.
B.Thoroughly clean filter mounting surface of filter bracket. Install new filter with O-ring coated with engine oil and tighten securely by hand.
NOTE: Tightening torque 1.0- 1.3 kg•m (7 - 10ftlb)
Be careful not to twist O-ring.
C.Run engine for several minutes and make sure that no oil leaks.
D.After stopping engine, check oil level. If necessary, add oil.
Retightening Cylinder Head Bolts
1.When retightening cylinder head bolts, draw out coolant, loosen bolts slightly, and then tighten bolts to specified torque in numerical order shown in Figure 15.
NOTE: Tightening torque:
M10 bolt 7.5 - 8.5 kg•m (54 - 61ftlb).
M8 bolt 2.0- 3.0kg•m (14 - 21ftlb).


14 Oil Filter Wrench
Figure 15 Cylinder Head Bolt Tightening Sequence (L2)