The Home of Fresh Air

MVHR & Quiet-Vent Radial Ductwork Installation Manual
Contents
1.1 - Installation of MVHR Unit (Refer to MVHR owners manual)
1.2 - Installation of MVHR Controls (Refer to MVHR owners manual)
1.3 - Installation of Condensation Drain (Refer to owners manual)
1.4 - Installation of Distribution Boxes (Refer to Plan)
1.5 - Installation of PVC Rigid Ductwork to MVHR Unit
1.6 - Installation of External Vents to MVHR Unit
1.7 - Installation of Radial Pipe into Distribution Box
1.8 - Installation of Radial Pipe
1.9 - Installation of Radial Pipe to Plenums
1.10 - Installation of Plenums to Ceiling or Wall
1.11 - Installation of Air Valves
1.12 - Optional Heaters and Coolers
1.13 - Optional Fire Control
1.14 - Commissioning

Notes on This Guide
This guide features the use of our premier kit with flexible pipe connectors,additional silencer and pro air valves.
Not all radial pipe is the same and various specification and colours are available, the illustrated Quiet-Vent premium pipe is widely regarded as the best available with excellent strength, ease of use and with an antistatic, antibacterial lining.
Contact Us! - Website: www.bpcventilation.com - Tel: 028 2827 5150 - Email: technical@bpcventilation.com 2
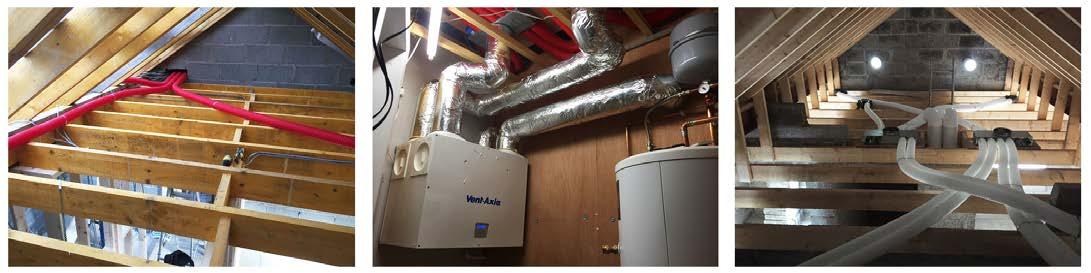
Installing your Heat Recovery System
BPC Ventilation will Provide the Following:
Floor Plan *On bespoke systems

Includes approximate locations of extract and supply points. You may have to alter the design to suit specific requirements of the building that are not noted on the submitted plans.
List of all Supplied Ducting
Please ensure to check each delivery before you sign the docket for damage or for missing items. If there is any issue we will resolve as soon as possible but please note we can not be liable if you do not report any issue within 3 days of delivery.
Technical Support
You will find most common issues on our website under technical guides or please email our technical team on technical@bpcventilation.com and one of our team will get back to you as soon as possible.
Installation Manual
Specific manufacturers installation manuals are supplied with the Heat Recovery unit that you have purchased. These are also available in the knowledge centre of our website.
Air Flow Rates *On bespoke systems
For all the air valves to help commission the system.
Calculated Ducting Amount
The amount of ducting provided is calculated from the received plans, if more ducting is required this would be at an additional cost.
Safety
• Always wear appropriate personal protective equipment.
• Always wear a protective face mask when using duct insulation.
• It is recommended to use walking boards when working in a loft void.
• If the loft is fully insulated when work is being carried out, it is recommended to provide adequate air throughout the installation process.
• Electrical connections should be made by a qualified electrician.
Contact Us! - Website: www.bpcventilation.com - Tel: 028 2827 5150 - Email: technical@bpcventilation.com 3
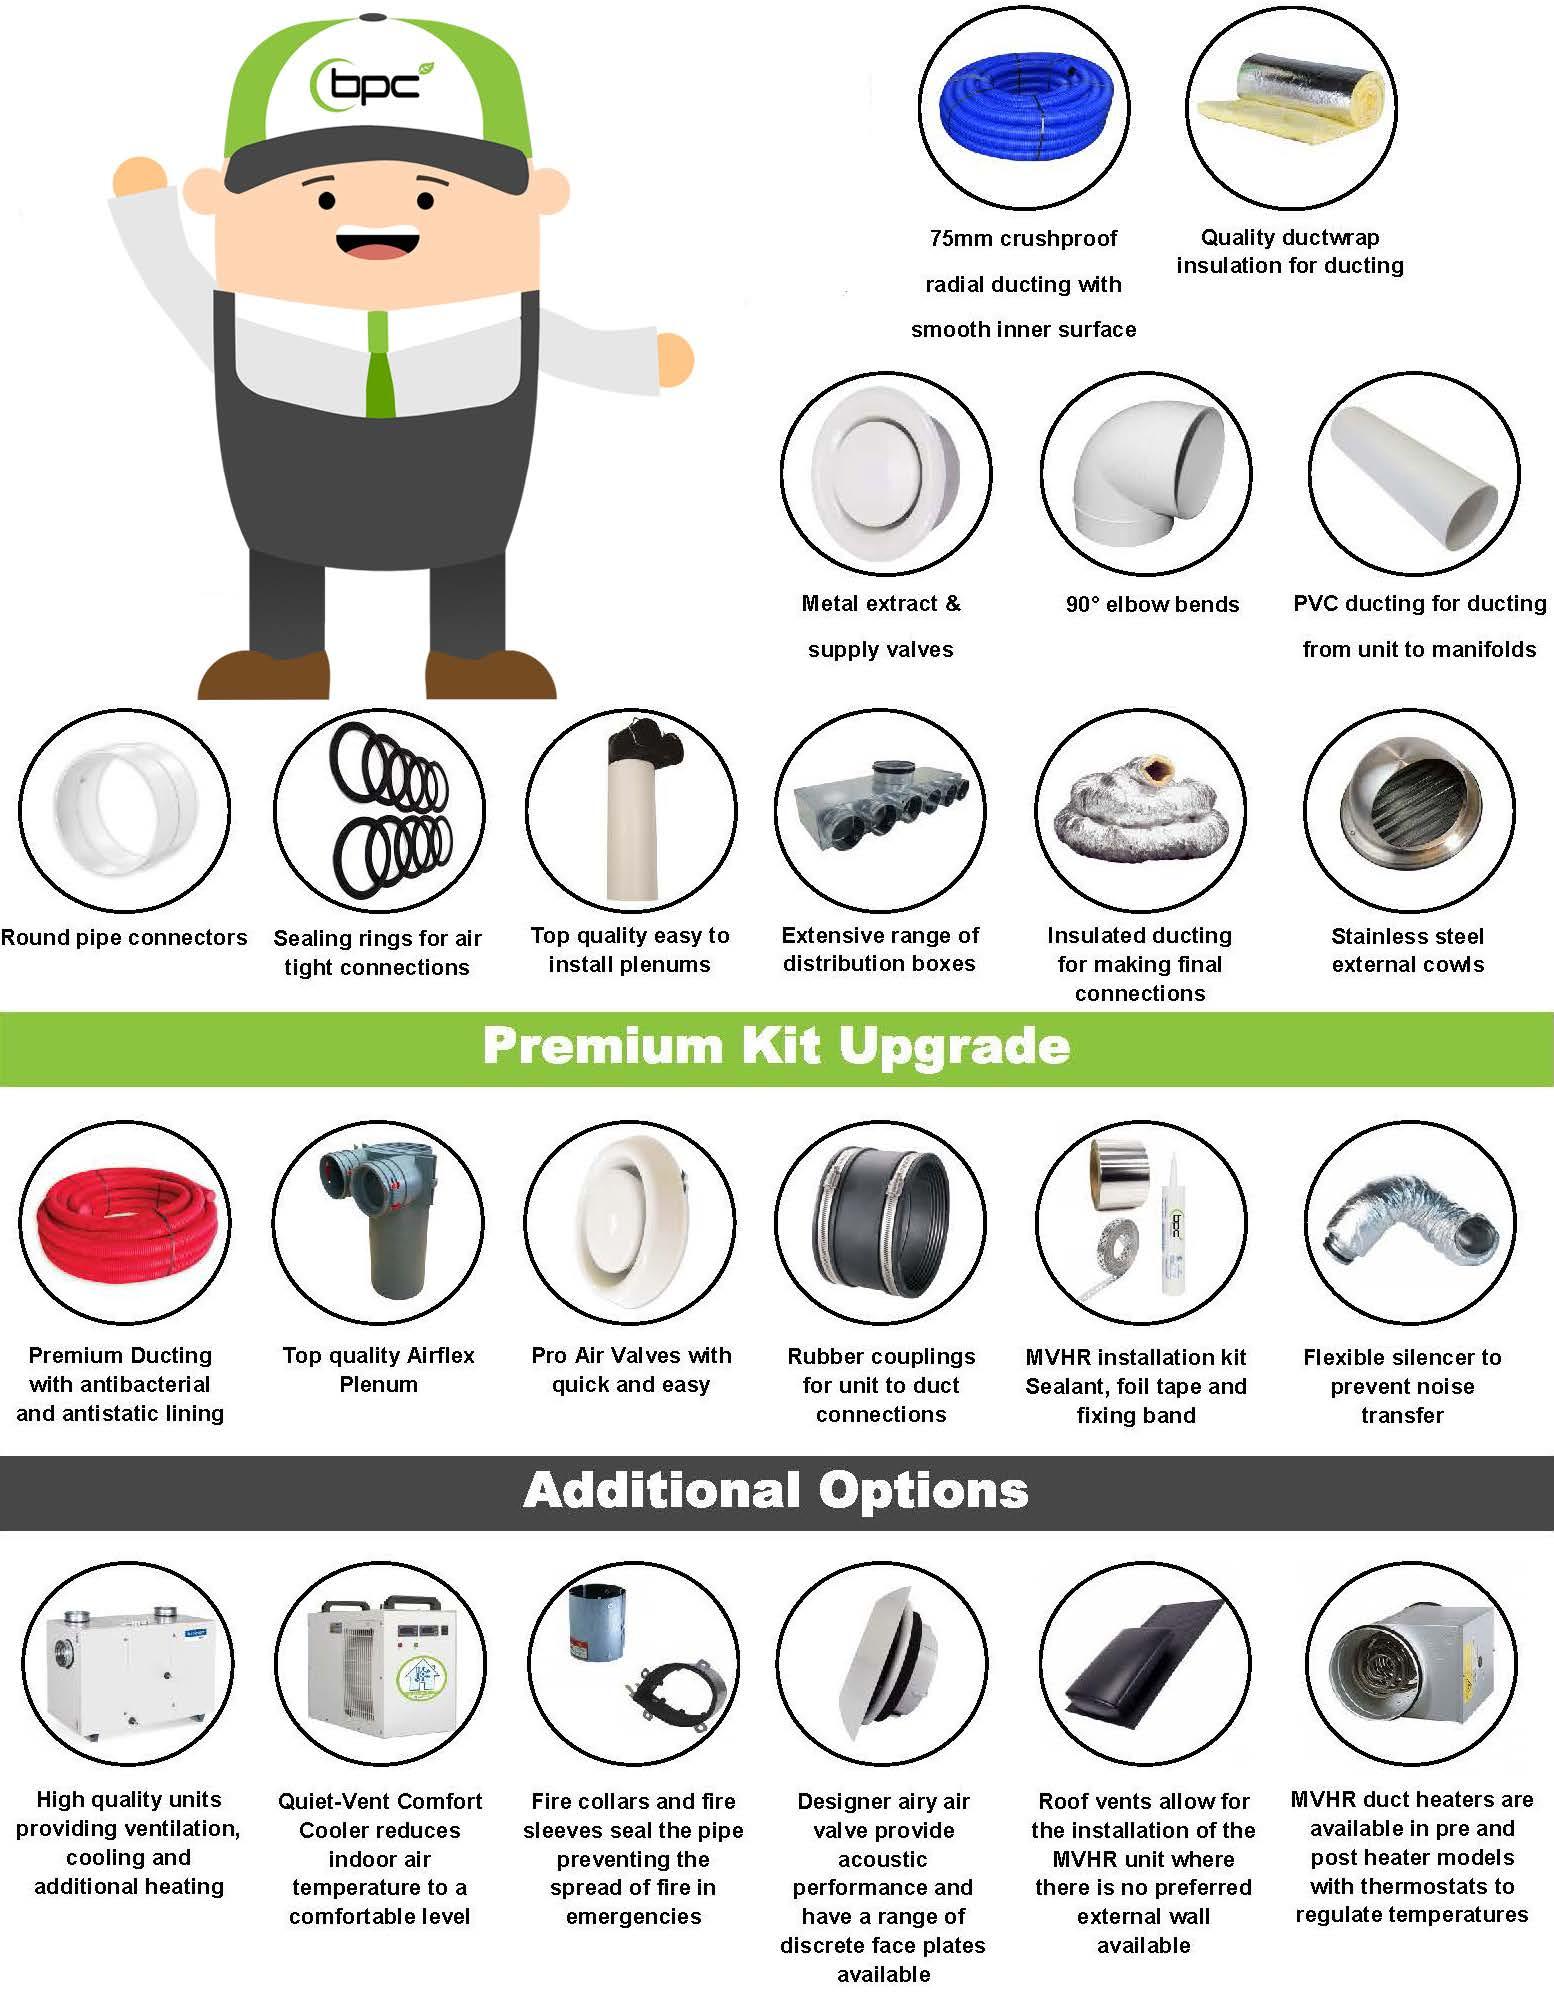
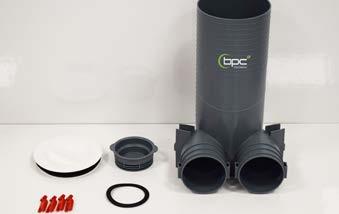
Radial Ducting Kit Contents There are various options of ducting kits available, this guide features the use of our premier kit. Contact Us! - Website: www.bpcventilation.com - Tel: 028 2827 5150 - Email: technical@bpcventilation.com 4 Quiet-Vent standard ducting kits are the perfect ducting solution for MVHR systems, check out our additional options and upgrades to get even more out of your system.
Quiet-Vent
1.1
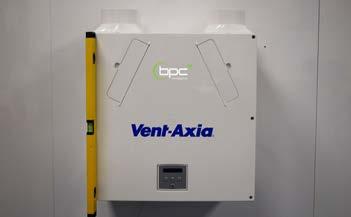
Installation of MVHR Unit (Refer to MVHR owners manual)
Securely fasten and level the fixing bracket (allow for drain area below the unit).
1.2
Installation of MVHR controls (Refer to MVHR owners manual)
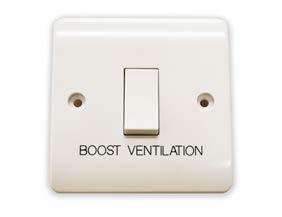
We recommend you install boost switches outside the bathrooms, 2 gang switches are also available that incorporate the light switch.
1.3
If available, we recommend the installation of the MVHR controller be positioned in the kitchen/utility room or plant room.
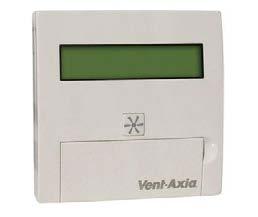
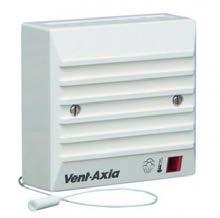
Some units require additional room sensors to detect moisture or Co2.

Installation of Condensation Drain (Refer to owners manual)
Install a condensation drain to the unit with a waterless trap.
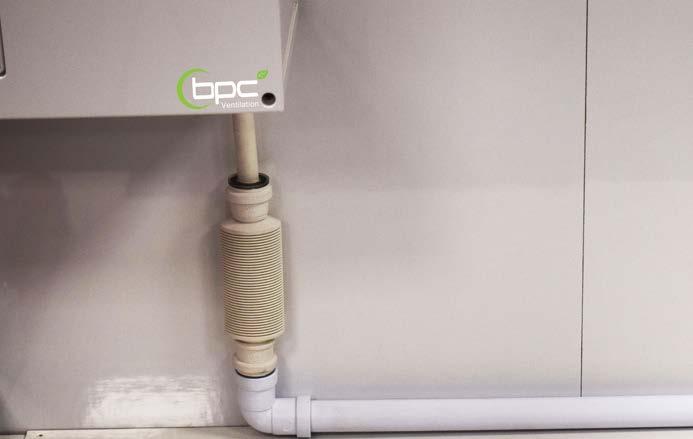
It is recommended that this is connected to a 32mm waste pipe (within 1m of the unit) going into an internal drain.
If an internal drain is not possible insure pipe has sufficient fall and is protected from freezing.
The waterless trap and condensation drain is available as an additional accessory to our kits.
Position unit onto bracket. Ensure unit has small fall to drain.
Contact Us! - Website: www.bpcventilation.com - Tel: 028 2827 5150 - Email: technical@bpcventilation.com 5
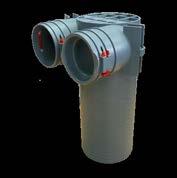
1.4
Installation of Distribution Boxes (Refer to plan)
There are various sizes and shapes of distribution boxes available for installation on walls, floors and ceilings but all have similar installation.
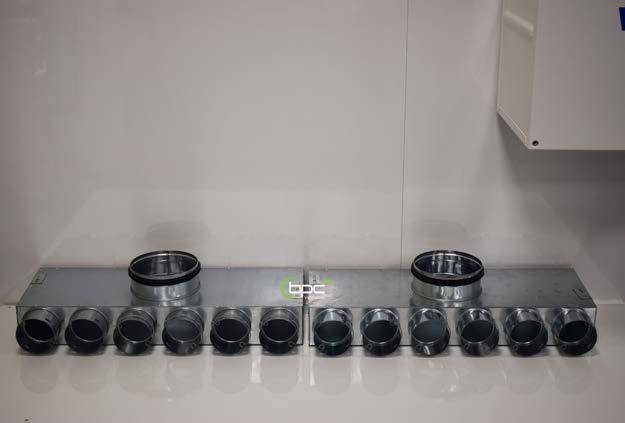
Install box by fastening with screws via provided brackets connected to boxes.
(Bracket may need turned around on box).
Refer to your plan or material list to confirm type.
6 point top entry box for floor or ceiling installation, 150mm spigot can be reduced to 125mm with provided reducer.
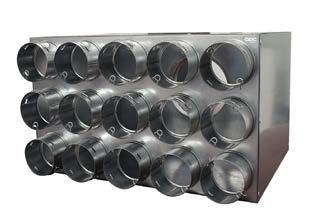
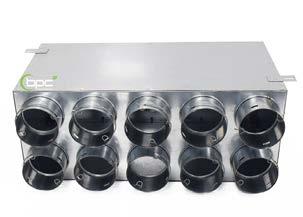

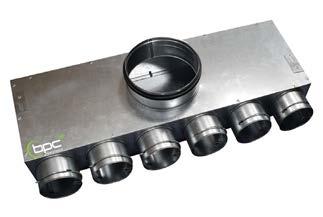
10 point top entry box for floor or ceiling installation, 150mm spigot can be reduced to 125mm with provided reducer, also available with 180mm spigot on request.
10 point rear entry box for floor or wall installation, 150mm spigot can be reduced to 125mm with provided reducer.
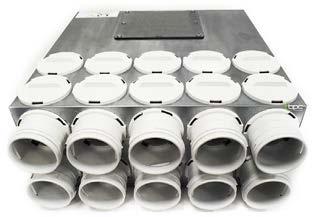
15 point rear entry box for floor or wall installation, 150mm spigot.
Insulated 10 or 15 point rear entry box for floor or wall installation, 150/180mm spigot can be reduced with provided reducer.
Contact Us! - Website: www.bpcventilation.com - Tel: 028 2827 5150 - Email: technical@bpcventilation.com 6
Installation of Rigid Ductwork to MVHR Unit
PVC ducting is normally supplied due to ease of use and strength but an alternative solution would be to install thermal EPP (foam).
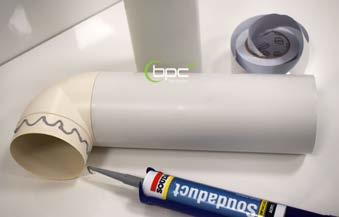
Spiral metal ducting is required on pipework above 150mm diameter.
PVC and thermal pipe is easy to cut with a fine-toothed handsaw.
Connect flexible pipe connectors to the spigots of the unit and secure with provided jubilee clips or cable ties.
Ensure that the flexible connectors are not crushed or heavily deformed.
Alternatively, a small length of flexible ducting could also be used.
Dry fit the pipework so lengths can be cut to size.
Install glue to male fitting with duct sealant or PVC glue.
Tape with silver foil tape (do not use duct tape).
Insulate external pipes and pipes above insulation in cold areas with foil faced insulation.
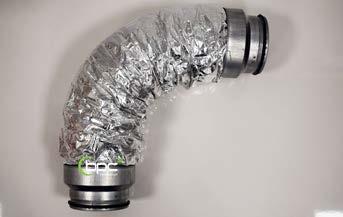


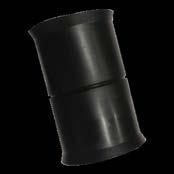
Install semi flexible silencers between the unit and distribution boxes, these can be also be used to align the pipework but ensure that they are safe from possible damage.


1.5
Contact Us! - Website: www.bpcventilation.com - Tel: 028 2827 5150 - Email: technical@bpcventilation.com 7
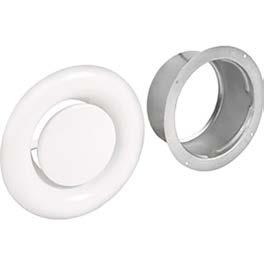
Installation of External Vents to MVHR Unit
Wall Vents
• There should be a small fall to the external wall vents, the vents are required to be installed at a minimum of 1.5 meters apart to prevent air contamination.
• All external pipework to the MVHR unit should be insulated and final connections by a flexible pipe connector.
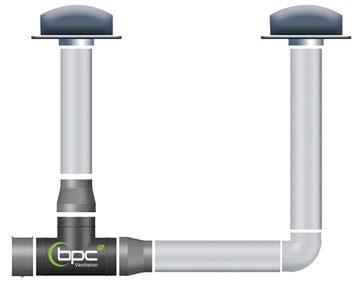
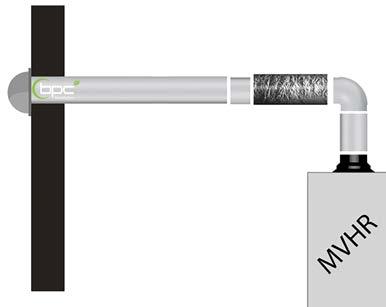
• Ductwork from the unit should be kept to a minimum and preferably not exceed 5 meters.

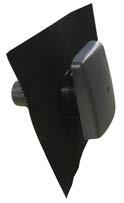
The most popular provided Stainless Steel cowls come with a mesh. Please carefully remove the mesh if the cowls do not have easy access for cleaning.

Please note that the Stainless Steel cowls are not suitable for areas of sea salt and PVC louvred vents should be fitted.
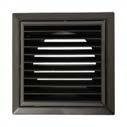
Optional PVC louvred vents can be used on walls or soffits but are more susceptible for rain or wind noise to enter the system.
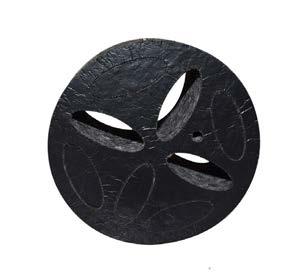
Roof Vents
• We provide MVHR roof vents suitable for slate and tiled roofs.
• It is important that the airflow is not restricted.
• MVHR units using ductwork up to 150mm diameter require a roof vent with an airflow of 20,000mm2 and have a rain cowl to prevent water or snow being brought in. (Standard vents are designed for normal extraction only, not air input to an MVHR).
• Do not use flush mounted roof vents without a cowl as unit warranty will be void.

• We recommend the installation of an in-line drain with waterless trap be fitted to the air extract roof vent to prevent water damage to the unit.
• In addition, roof vents must be installed at a higher level than the MVHR unit or condensation will form in the pipework.
Flat roof vents are widely available but due care has to be taken to ensure the airflow capacity is not restricted and are suitable for air supply.
On larger units requiring over 20,000m2 you can use a commercial stack or alternatively double up and install two roof vents per pipe.
A short section of Insulated flexible ducting will be required to install roof vents and ensure that it is pulled tight and is not crushed. This also should be supported to prevent deformation over time.
1.6
Contact Us! - Website: www.bpcventilation.com - Tel: 028 2827 5150 - Email: technical@bpcventilation.com 8
Installation of Radial Pipe into Distribution Box
Remove pipe retaining clip from Distribution Box (if fitted).
Insert pipe fully into distribution box and refit retaining clip ensuring the clip is between groove of pipe.
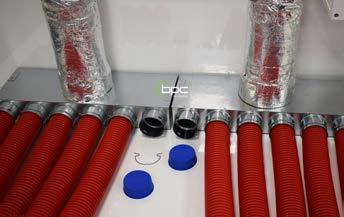
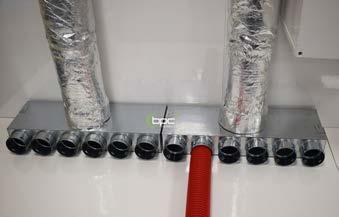
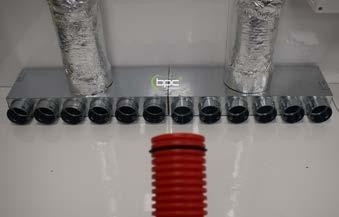
Any unused ports on the distribution box need sealed by first removing the pipe retaining clip.

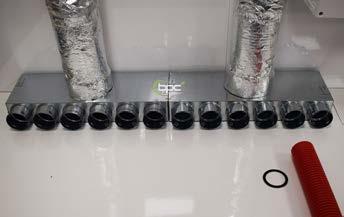
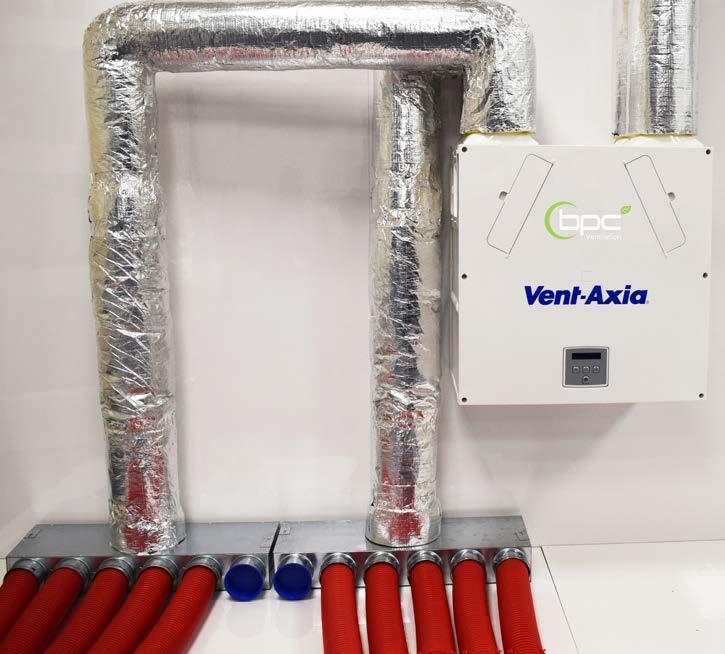
Insert the blue sealing caps as far as possible into distribution box. Unit and distribution boxes completed.
The Radial pipe is easy to cut with either a fine toothed-handsaw or Stanley knife, we can also supply a professional radial pipe cutter if preferred.
1.7
Insert sealing ring on second grove on Radial pipe.
Contact Us! - Website: www.bpcventilation.com - Tel: 028 2827 5150 - Email: technical@bpcventilation.com 9
Installation of Radial Pipe
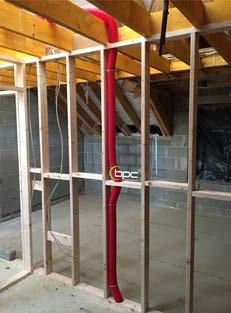
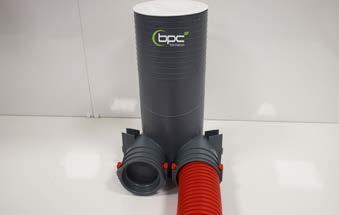
The radial pipe is supplied in coils of 50m long lengths. (75/90mm sizes), colours may vary.
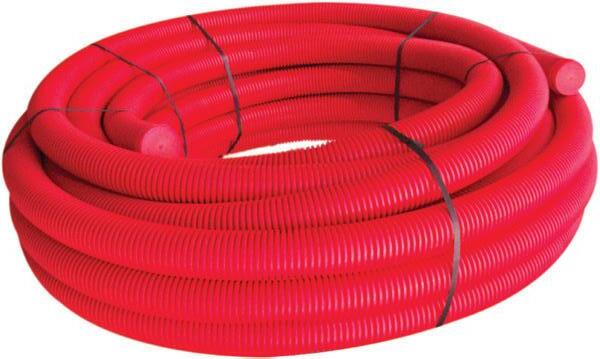
The pipe is crushproof and can be buried in concrete or walked over without damage.
All joins and connections require sealing with sealing rings.
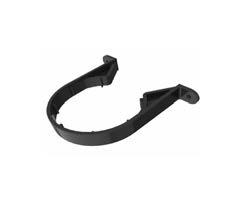
We recommend that you support radial pipe with pipe clips or fixing band every 1 meter.
The pipe can be joined if required with available connectors. The pipe can be bent two to four times its radius and tight 90-degree bends are available if required.
It is recommended that if there is any radial pipe installed in a cold area it is insulated over with loft insulated or foil faced insulation.

The air capacity is maximum 36m3h/r per pipe, and it is quite normal to have two or more pipes going to some rooms.
All connecting plenums have two or three outlets for radial pipe (unused outlets are to be sealed closed).
It is recommended to keep lengths of radial to below 15m long, if longer distance is required our technical team can help.
Note: Not all radial pipe is the same and Various specification and colours are available, the illustrated Quiet-Vent red pipe is regarded as the best available with excellent strength, ease of use and antistatic, antibacterial lining.
Radial pipe going through timber stud wall (recommended to use a minimum of 100mm wide timber).
1.8
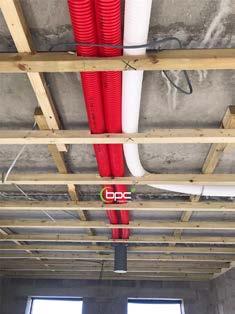
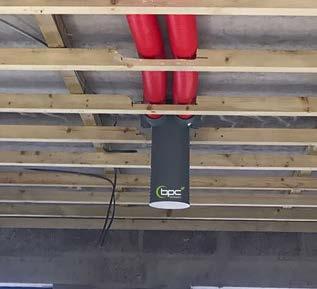
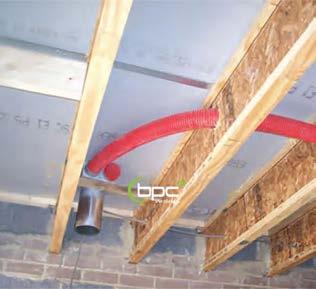
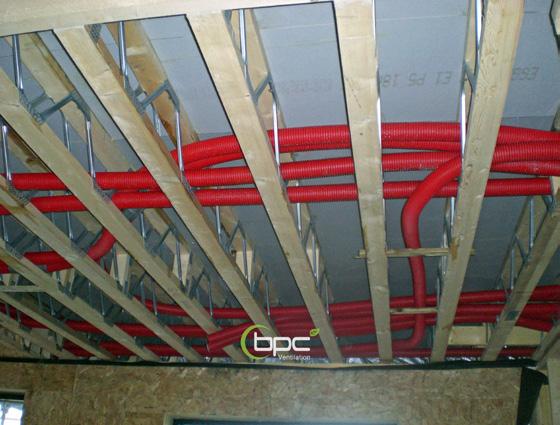
Radial duct installed through metal web joists.
Radial pipe on concrete ceiling, allow for a 100mm crevice void.
Optional radial pipe clip to connect pipe to ceiling.
Radial pipe connector for joining 2 x radial pipe.
Contact Us! - Website: www.bpcventilation.com - Tel: 028 2827 5150 - Email: technical@bpcventilation.com 10
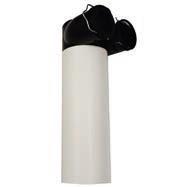
Radial tight 90-degree bends.
Quiet-Vent Red Radial Ducting.
Installation of Radial Pipe to Plenums
If only inserting one pipe, please seal plenum with provided blanking cap.
Insert sealing ring onto cap. Push cap into plenum and secure with retaining clips.
During installation, the radial system needs to be kept airtight to prevent condensation and dirt entering the system. Install end caps or tape both the plenums and external vents (distribution boxes if not connected).

1.9
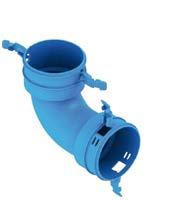
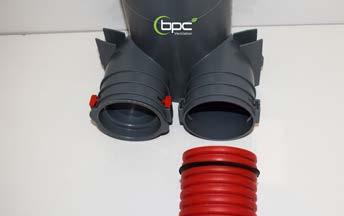
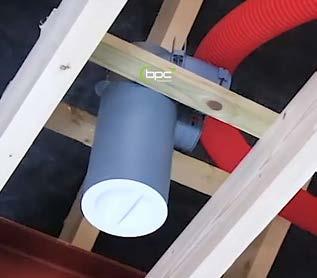
90-degree plenums that can be installed to walls and ceilings.
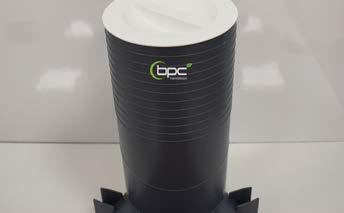
Floor plenum that can be fitted to floors and used with a floor grille.
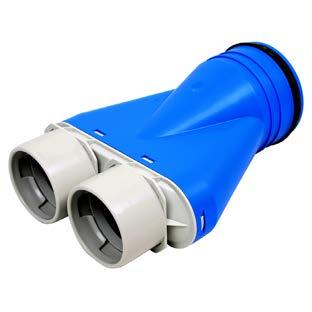
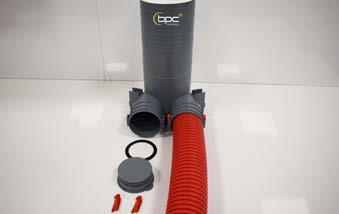
Straight plenum that can be used for wall grilles or converting 125 pipe to 2 x 75mm pipes.
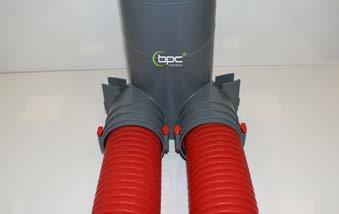
Pro Plenum Kit. Insert sealing ring in second grove on radial pipe. Insert one or two pipes into plenum and fit the retaining clips.
Contact Us! - Website: www.bpcventilation.com - Tel: 028 2827 5150 - Email: technical@bpcventilation.com 11
Installation example shows Quiet-Vent Premium Plenum
Installation of Plenums to Ceiling or Wall
When installing on top of wooden joists you should install a baton on top of the joists and fix plenum with screws.
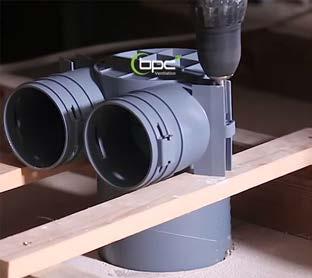
When installing between joists, place bridging above plenum below the floor and fix plenum with screws.
When installing on concrete ceiling fix plenum with screws onto concrete.
We recommend that during construction you do not cut plenums to length. Fit a sealing cap or seal opening with tape.
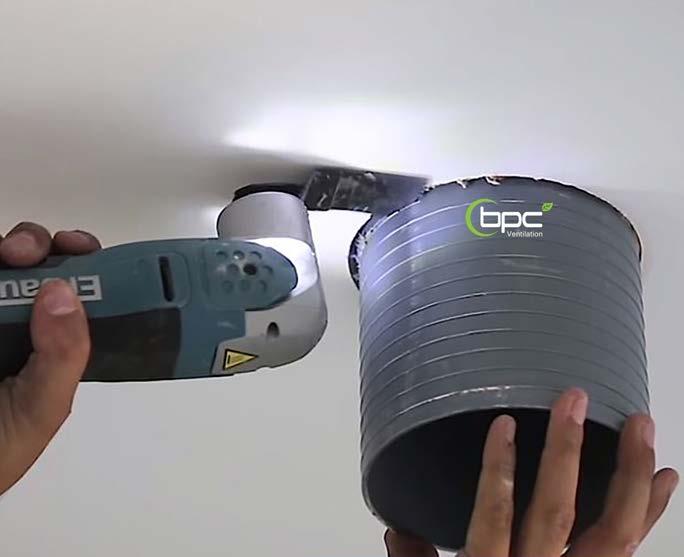
It is important that the system is kept air tight until ready for operation or condensation and dirt will accumulate inside the ductwork.
After plasterboard and plastering has been completed, trim the plenum down flush with the finished ceiling.
1.10
Contact Us! - Website: www.bpcventilation.com - Tel: 028 2827 5150 - Email: technical@bpcventilation.com 12
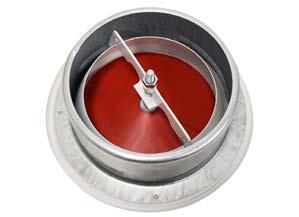
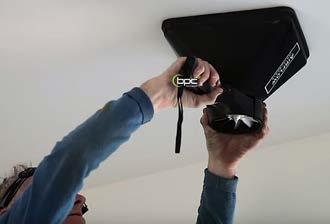
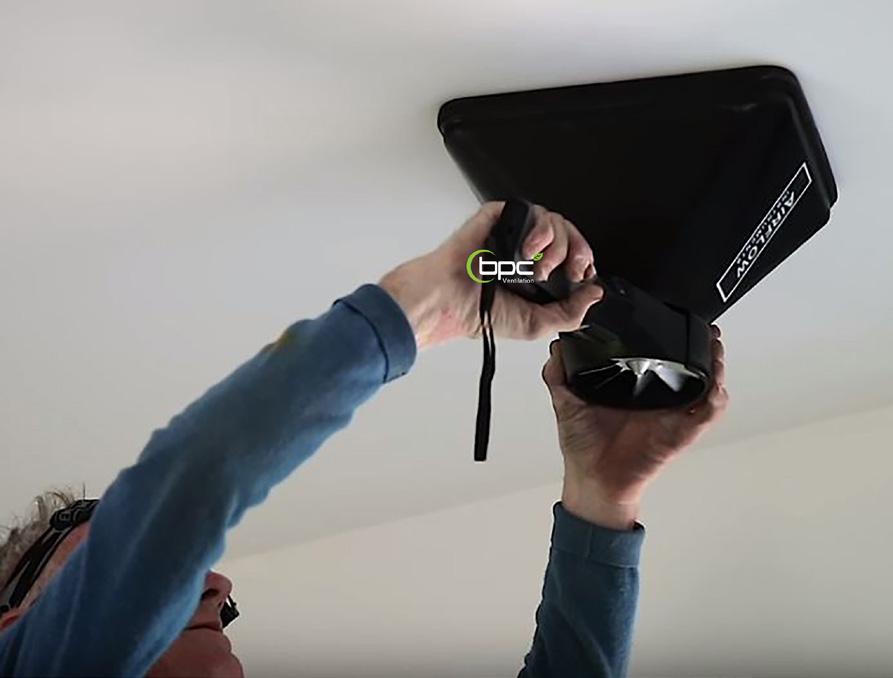
Installation of Air Valves
How to Install Air Valves

There are various types of air valves and the most popular are the Pro model that simply push into the plenum.
The air supply valves that are angled internally for air supply.
The air extract valves have a variable bevel for extracting air.
The airflow is adjusted by screwing the air valve in or out to reach the desired airflow rate. (See balancing and commissioning).
After the airflow is set, tighten the attached nut with a 10mm spanner to secure setting.
Metal Air Valves
Optional Metal Air valves normally have a frame that you install into the plenum or pipe first, then fasten the air valve to the frame with a half turn clockwise.
The valve is adjusted by screwing the valve in or out and then locking with provided nuts.
Designer Air Valves
Optional designer air valves can be used for both air supply and extract and can be installed flush to the wall or ceiling.
To install the designer valve, you will require a mounting frame and a airflow regulator installed in the pipe or plenum. (Available through BPC).

Foam Flow Control Dampers
Optional foam dampers can be used either with or without an air valve to provide improved attenuation and air control.
Insert the foam damper inside the pipe or plenum before the air valve or designer valve and remove the inserts until the desired airflow is achieved.
1.11
Contact Us! - Website: www.bpcventilation.com - Tel: 028 2827 5150 - Email: technical@bpcventilation.com 13
1.12
Optional Heaters and Coolers
There are a number of solutions that can provide additional heat or cooling to further improve the efficiency and personal comfort of your ventilation system.
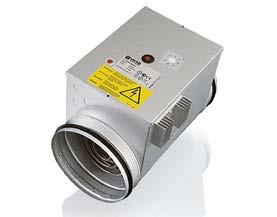
Electric duct heaters can be installed as pre-heaters for frost control or post heaters to supply warm air to rooms.
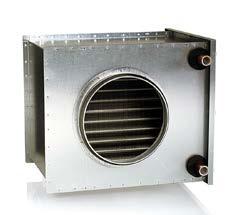
Water batteries are used to either heat or cool the air by using water supplied from your heating or A/C system.
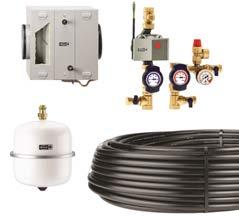
1.13
A MVHR geothermal system is a pipe installed below ground and connected to your MVHR that will supply free heating or cooling of approx. 10 degrees all year.
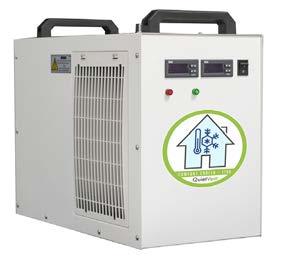
Quiet-Vent Comfort Cooler
The Cool-Vent Comfort Cooler unit will lower the air temperature of the air supply during very warm days to a comfortable temperature. The unit can also be retrofitted to any type of MVHR system with the use of a cooler water battery.
Optional Fire Control
On some builds you may require or personally prefer to have a fire strategy and you can install the following solutions.
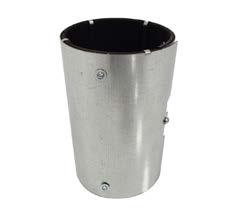
Fire collars are suitable for PVC pipe going through concrete walls.


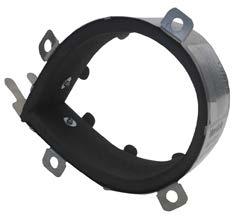
Fire sleeves are suitable for PVC pipe going through concrete and timber partitions.
Fire Rated Air Valves
Fire rated air valves are the most popular method to contain fire on MVHR systems and works with an integral intumescent material that rapidly expands to seal off the air valve and reinstate the fire resistance rating of the ceiling.
Fire Dampers are suitable for PVC and Metal pipe going through concrete walls and floors.
Contact Us! - Website: www.bpcventilation.com - Tel: 028 2827 5150 - Email: technical@bpcventilation.com 14
Commissioning
Balancing and Commissioning
Before commissioning a system it is important that there is a sufficient gap below all doors to allow for air circulation and we recommend a gap of between 8mm to 10mm.
To obtain a quiet and efficient MVHR system the system must be balanced to achieve the recommend air change rates in each room.
On all bespoke in-house designed systems, we will supply you the required air flow rates on the final design as part of our installation pack.
To commission a ventilation system an airflow meter (Anemometer) is required to allow you to measure the air velocity in metres per hour (M3h/r) or Litres per second (L/s) at each inlet or extract point as required for Building Regulations Part F.

We can help by supplying you details of a local technician to commission the system or provide details of a company that hires the air meters.
To Commission System:
1.Adjust all air-valves by closing them then opening them by 2 full turns and set unit speed.
2. Start at the furthest extract valve and check the air flow volumes at all of the outlets and note the air volume to each room, whilst doing this make sure that the direction of flow is correct.
3.If the measured air flow is above or below the requirement set out on the provided flow rates adjust each air valve by rotating the central cone on its screw thread to increase or decrease the size of the air opening.
4.Replace the cover and re-measure the air volume. Repeat this process until the correct flow rate is achieved.

5.Once all the extract rates are achieved, repeat the process for the supply valves.
6.When all inlets and outlets are measured it may be found that the total for extract or supply maybe greater or lesser than required in which case the speed of the fans must be adjusted at the air handling unit. (See MVHR manual on how to adjust).
Note: As any adjustments of individual air valves will affect the flow rates of all other valves on the duct system it will usually be necessary to re-balance the system three or more times before the correct readings are achieved in every room.
1.14
Contact Us! - Website: www.bpcventilation.com - Tel: 028 2827 5150 - Email: technical@bpcventilation.com 15
MVHR Unit selection
Please read before you purchase a MVHR unit
To provide a quiet and efficient system It is important that the correct MVHR unit is chosen

Please use our Online selection software or contact us for confirmation but as a basic guide you can check the unit performance by the following
• Calculate the required airflow by either size of area
• UK and Ireland (m2 floor are multiply x 0.3)
• Scotland M3 x 0.5 (0.5 air changes per hour)
• On small properties calculate by totaling the all extraction rates to each room of Kit 13 ls , Bat 8 ls, Wc 6 ls
• The unit should only run at between 30% to 70% of the total output and never full capacity
75mm Radial Duct Runs
Please read before you install radial ducting
•Airflow rates to each room of a house will vary depending on size and location
•It is important that the correct number of pipe runs are installed to each area to insure that the air-flow can be achieved

•If you send us a set of plans we can provide the number of required pipes and location of the air valves for you
•If you are retrofitting the system it may not be possible to have a detailed plan
• If you have vaulted rooms or large areas of glazing you may require additional ventilation
As a basic guide we recommend that you follow the below guide when installing 75mm radial pipes
Pipe length below 14 Meters
Air Extract
•Shower rooms 2 x pipes to single air valve
•Kitchen x 2 pipes to single air valve
• Utility x 2 pipes to single air valve
•w/c x 1 pipe to single air valve
Air Supply
•Dinning Room x 2 pipes to single air valve

•Any Room (0to 20m2) x 1 pipe to single air valve
•Any Room (21to 40m2) x 2 pipe to single air valve
Pipe length Above 15 Meters to 20 meters
Air Extract
•Shower rooms 2 x pipes to single air valve
•Kitchen x 3 pipes to one or two air valves
• Utility x 2 pipes to single air valve
•w/c x 2 pipe to single air valve
Air Supply
•Dinning Room x 3 pipes to one or two air valves
•Any Room (0to20m2) x 2 pipe to single air valve
•Any Room (21to40m2) x 4 pipe to two air valve
Please contact our technical team with any pipes above 20 meters
Air valve location
When instaling the air valve position it is important that the air flow does not cause the preception of a draft
"It is not the amount of airflow and not the air tempature being supplied but it is the movement of air over our body when we are at rest could give the perseption of a cold draft " Do
• Install the air vale in the furthest corner from the door to allow for the best air circulation
• Install approx 300mm from any corner or wall
• Install kitchen extract above sink area not the cooker
• Install extract valve in areas of solar heat gain
• Install extract valves as high as possible
• Install supply valves near stoves or fires (not extract)
• If the bed location is not known position at window
Do Not
• Do not install above beds or seating areas
• Do not install where built in furniture could be fitted at a later date
• Do not install directilly above shower head (install just outside shower area)

• Do not install were you will not be able to adjust or clean the air valve
• You do not normally need to install supply valves in hallways
• Do not extract from an area containing a stove unless there is a higher air supply rate (possitive pressure)
We are Here To Help!
If you have an issue installing the MVHR system, please contact our technical team by email or telephone that can help you.
Most information can also be found on our website.
Don’t worry if you need some extra items to complete your install.
We have thousands of ventilation parts in our distribution centre that are available for express delivery.
If you do require the MVHR system installed or commissioned, we have a large network of fully trained installers throughout the UK and Ireland that can help.


UK Office T: 028 2827 5150 E: sales@bpcventilation.com www.bpcventilation.com Dublin Office T: +353 1526 7452 E: info@bpcventilation.ie www.bpcventilation.ie
