PORTFOLIO
PORTFOLIO
journey has already begun.
HI!
My name is TSAO CHIH-CHIA. I am keening to creating GAME ART! Here we will go on a tour with some of my work which I hope you will like it. ray26443546@gmail.com.tw
Keelung City 205 , Taiwan (R.O.C.)
2018-2022
Major in Media Design
Tatung University. Taipei, Taiwan
2013-NOW
Major in 3D GAME ART
Teesside University. Middlesbrough, UK
2018-2021
Board Game Shop staff
2011-2022
Moaideas Game Design Intern
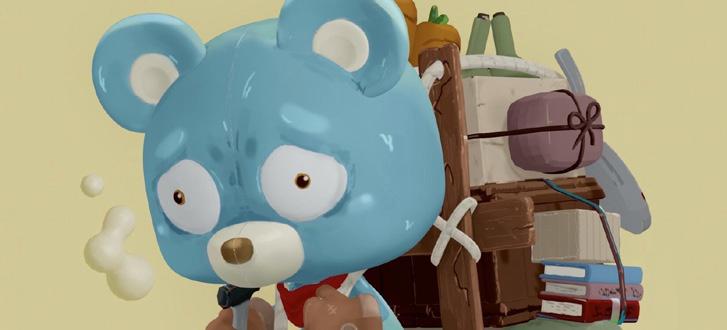
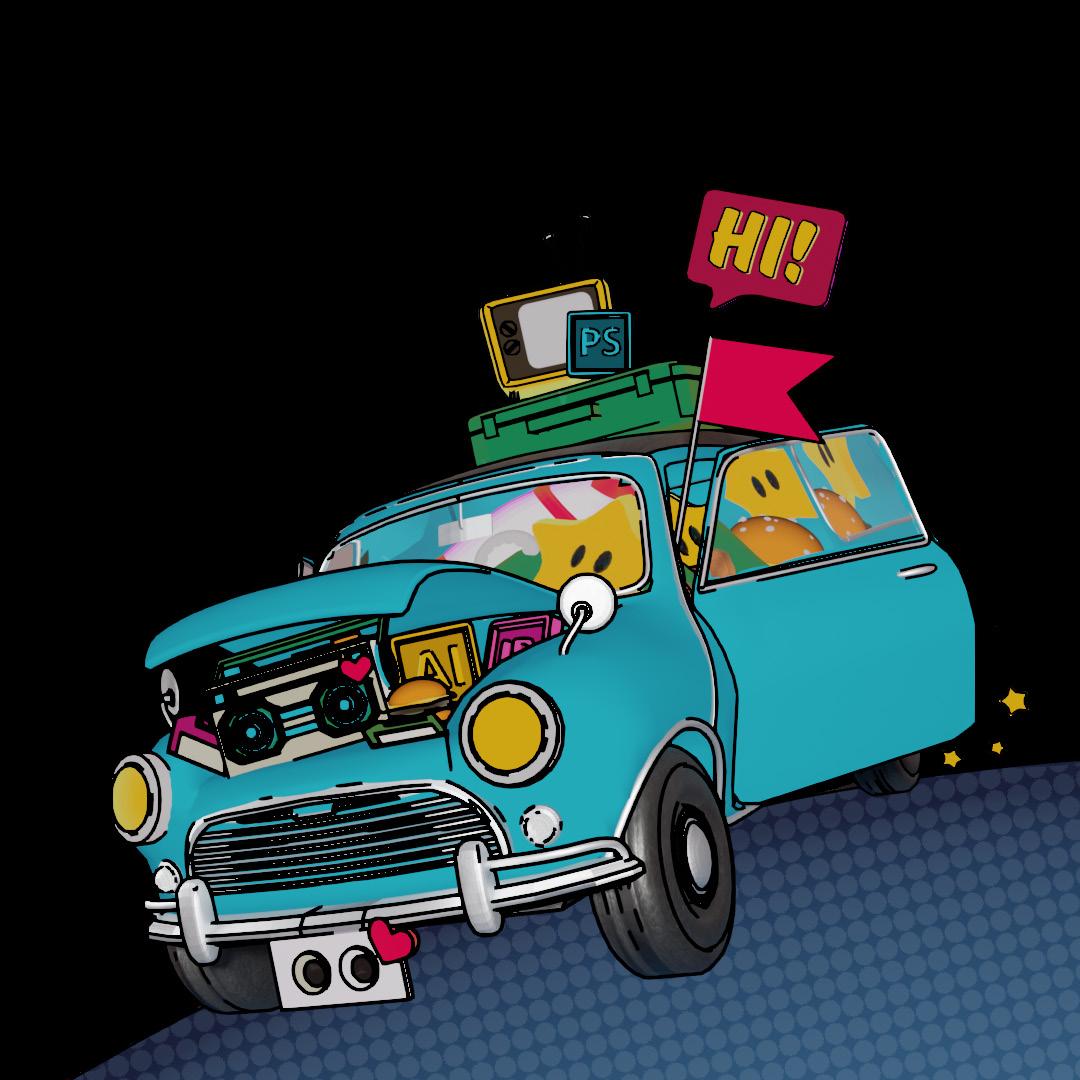
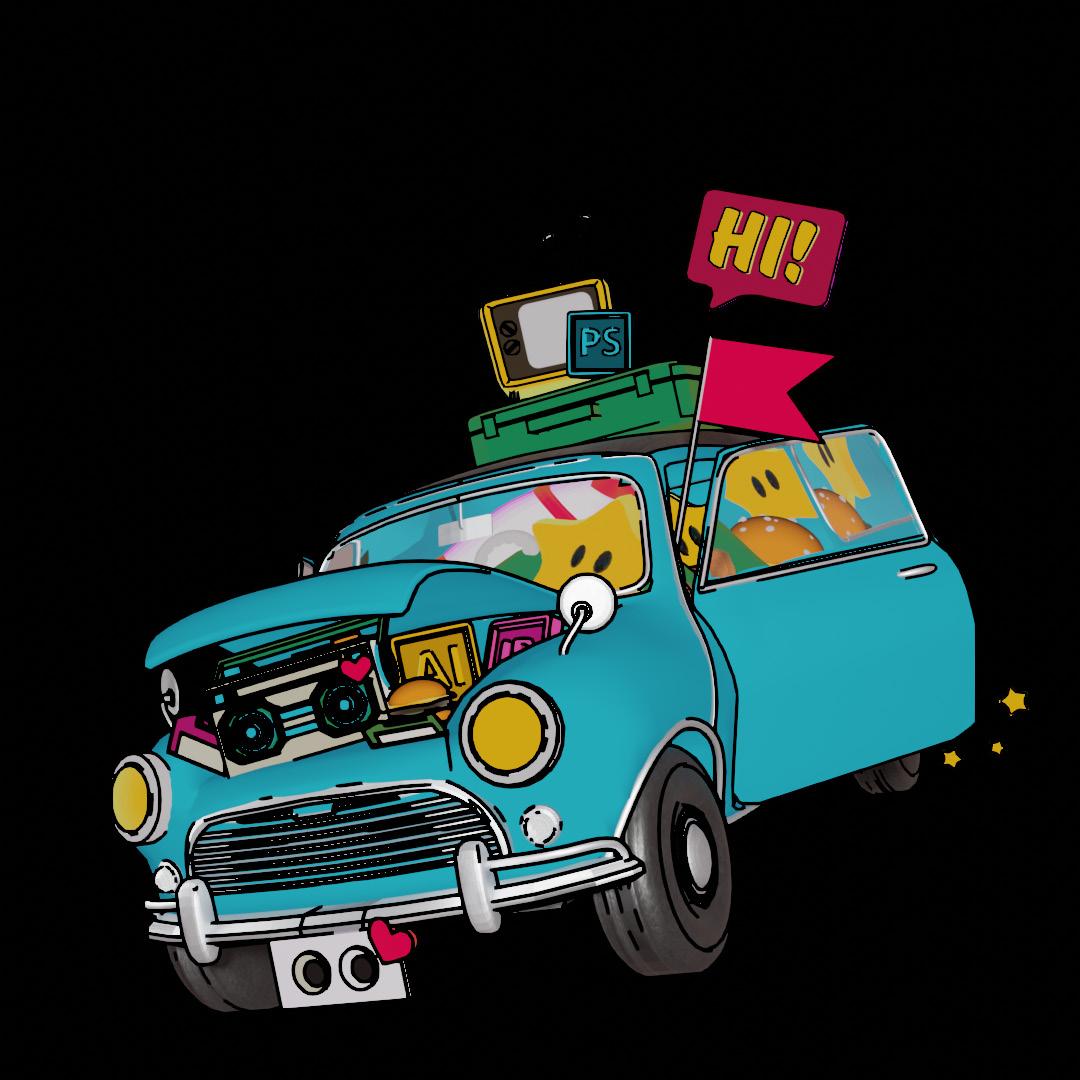
The cover is made up of different objects, including a car, tv, star, briefcase, and so on... My life is just like this car that carries everything I love to start my journey. And the name of this portfolio is "ING". I use blender to build whole the cover and try different shaders in the software. The vivid color and lively appearance want to present my personality and expectation for the future.
GAME PROJECT

BOARD GAME
ENGINE5/ MARMOSET

Games? Movies? or...?
SCENE DESIGN
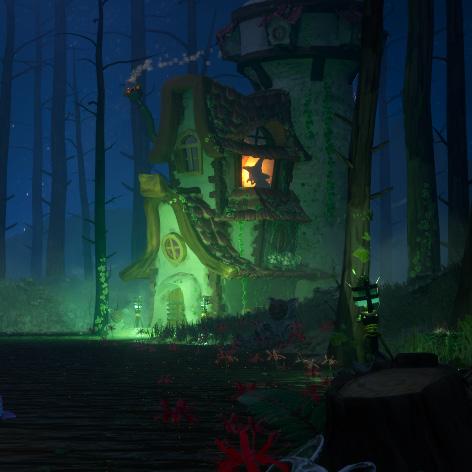
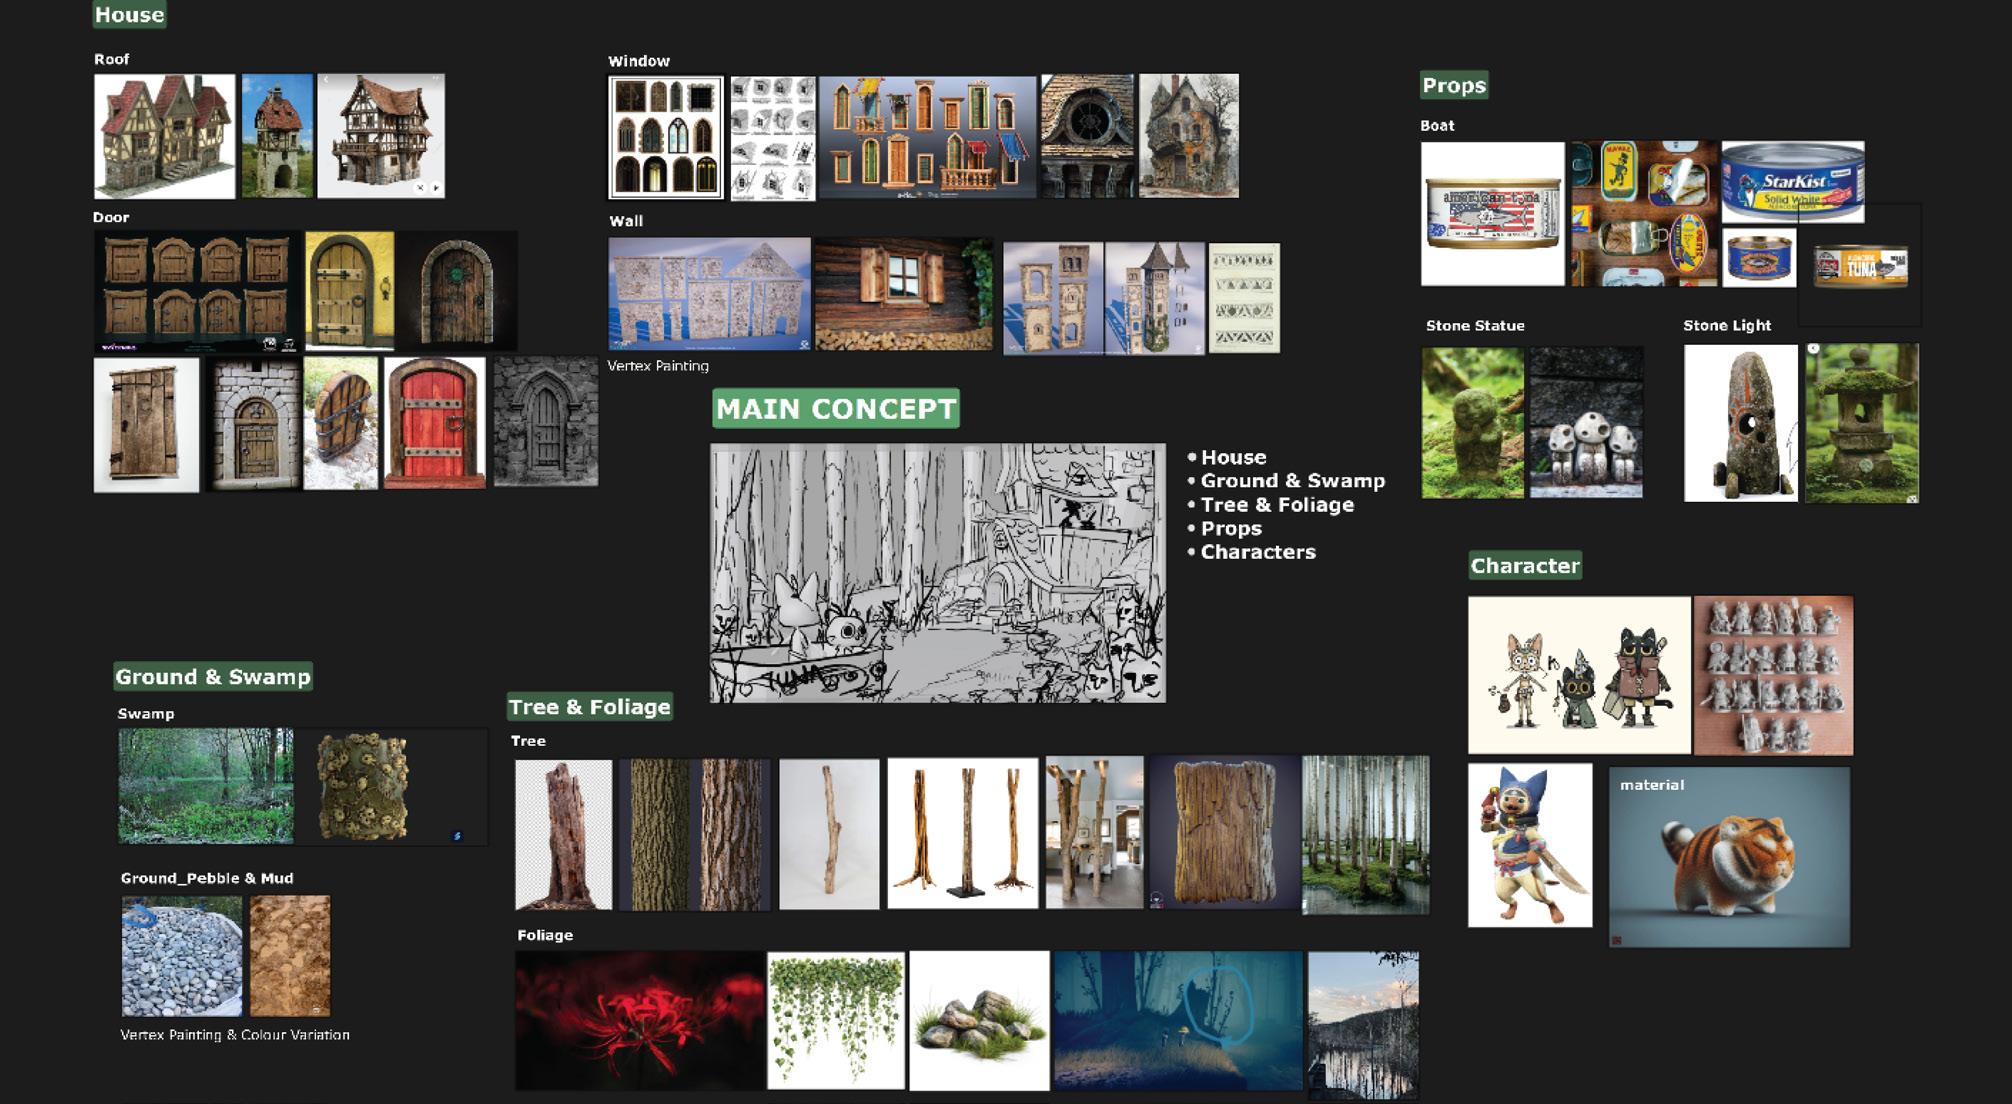
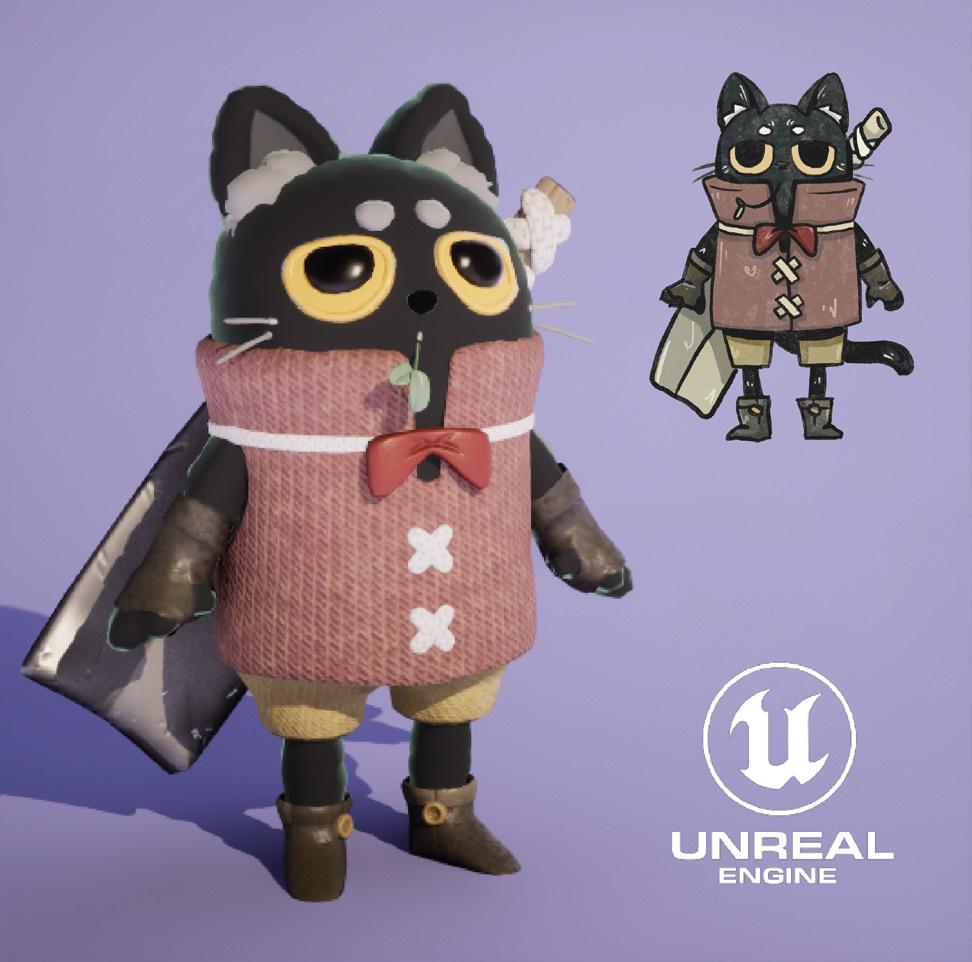
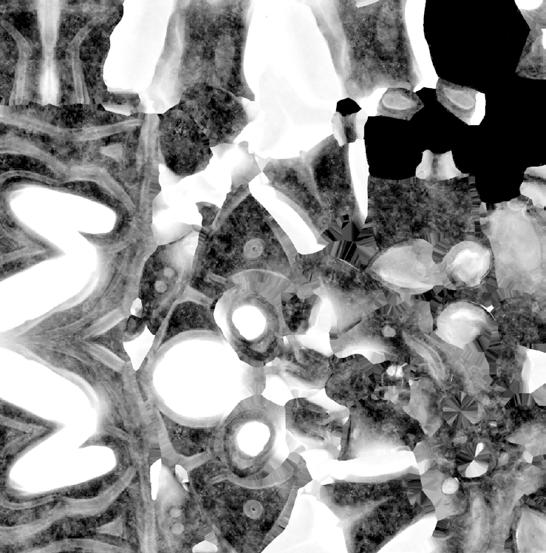
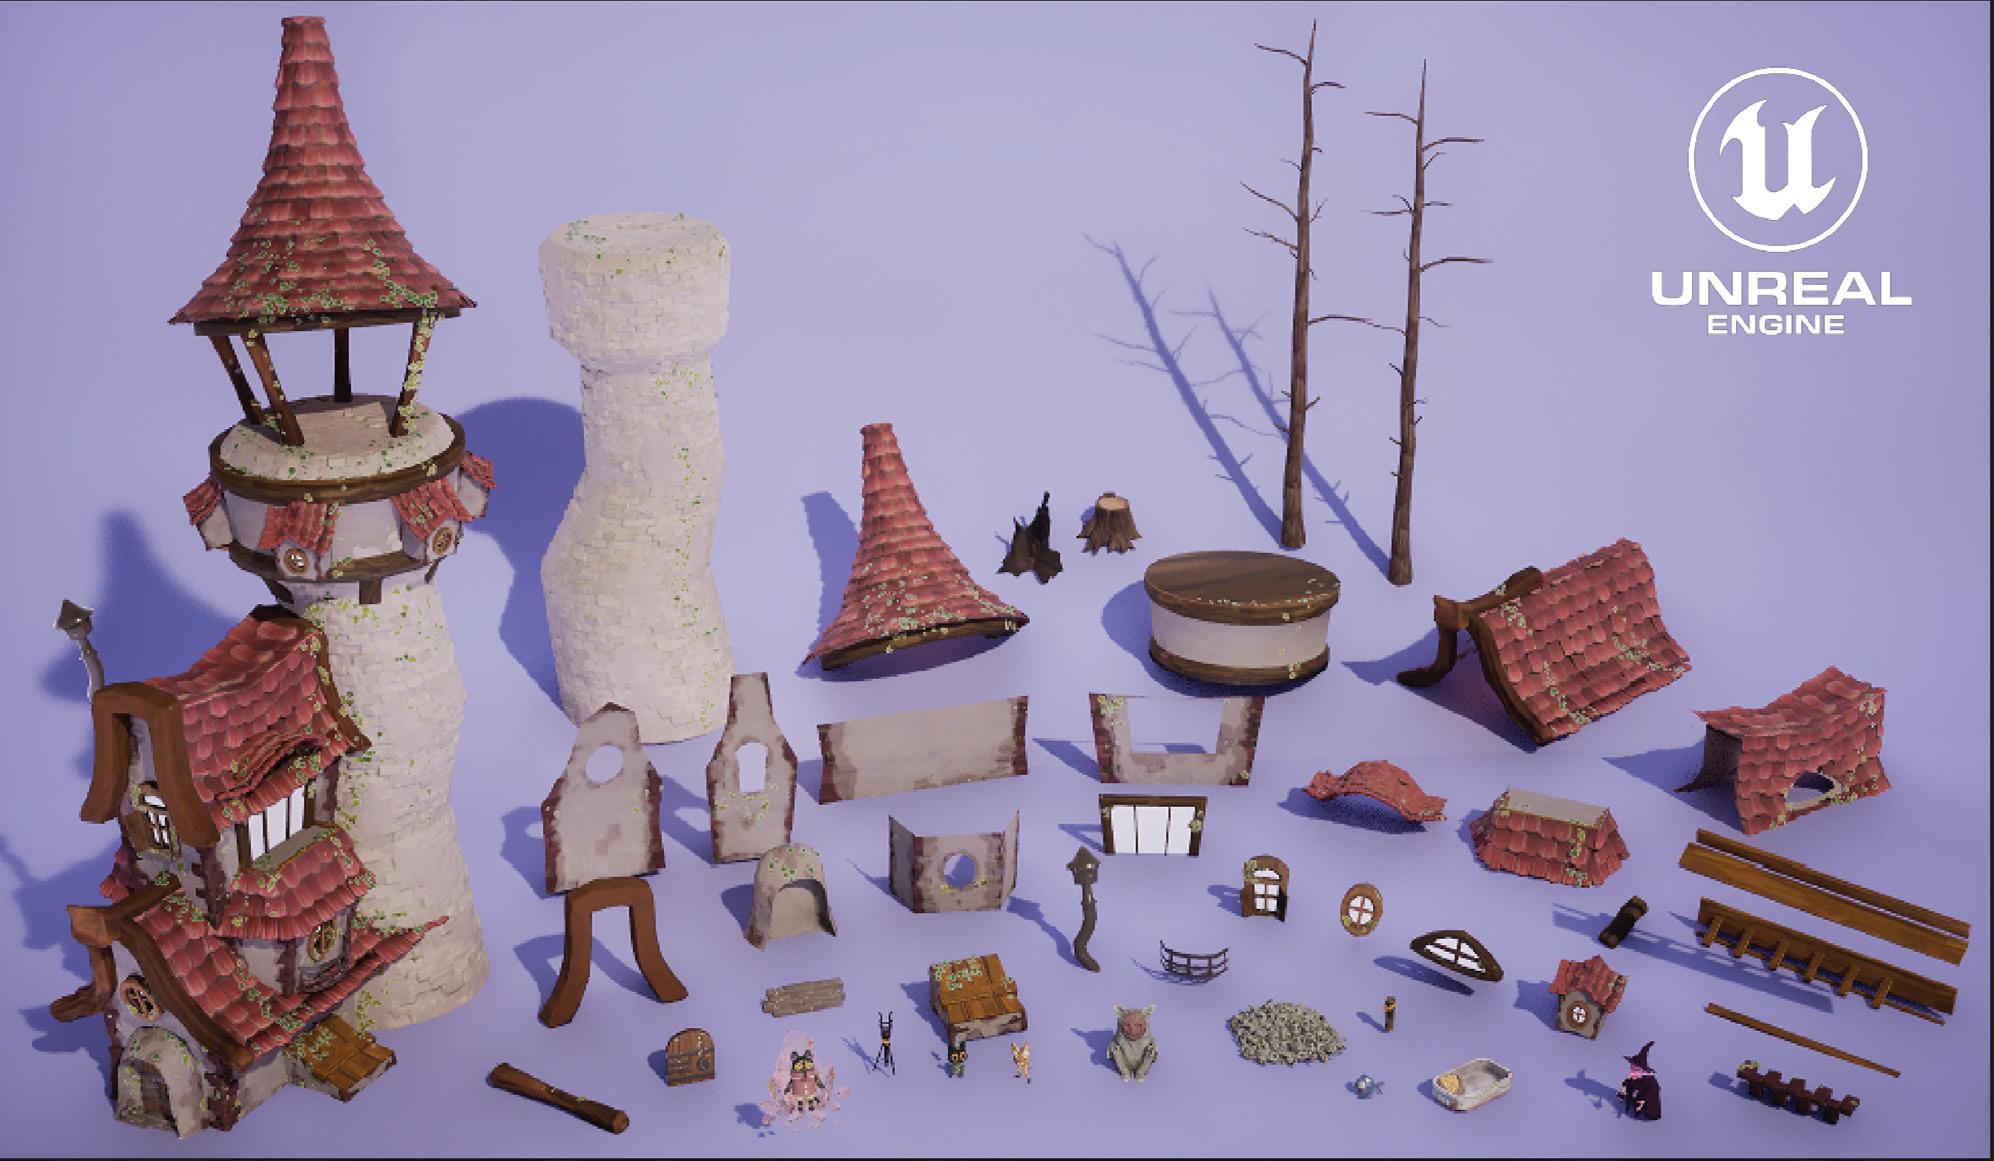
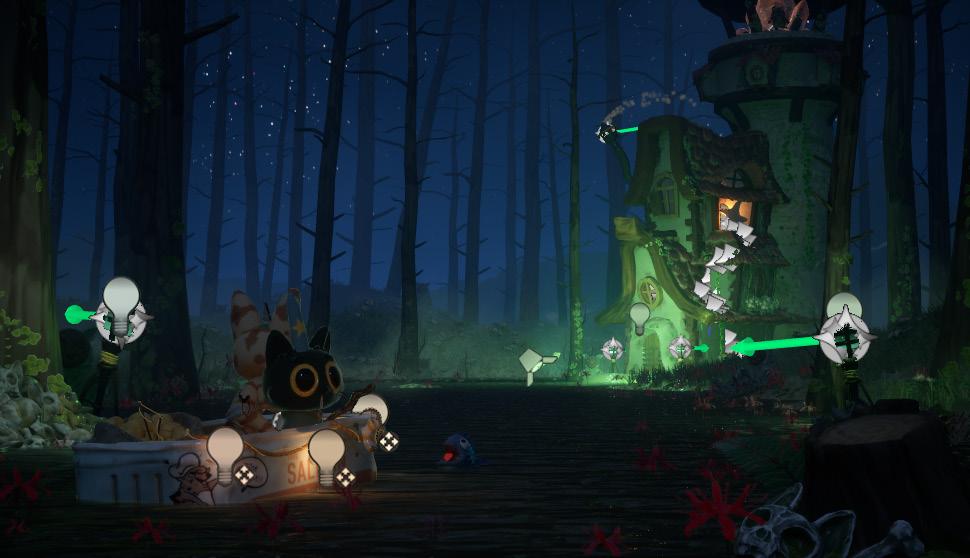
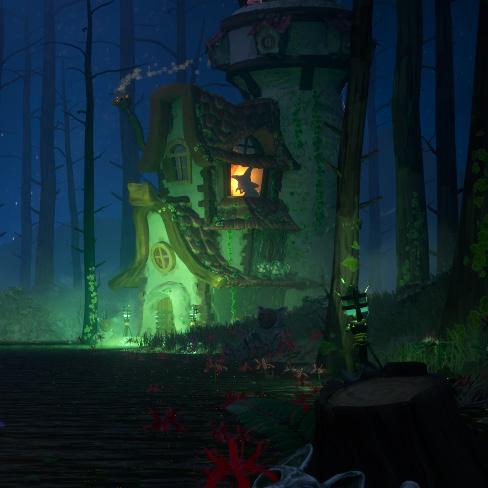
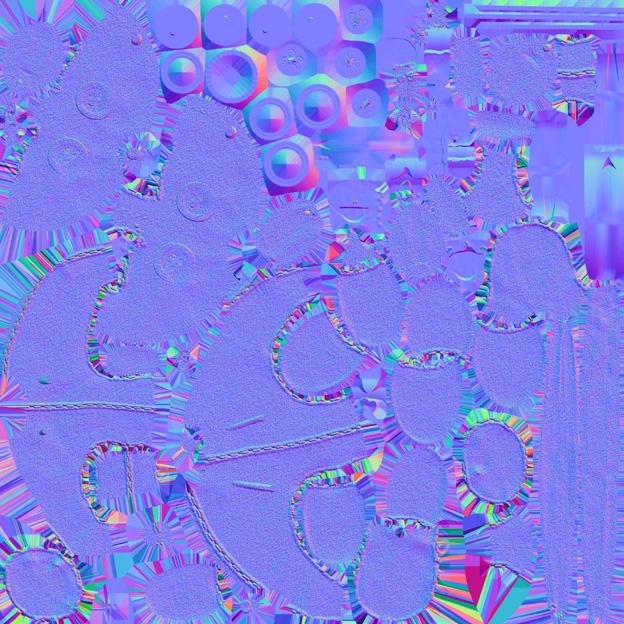
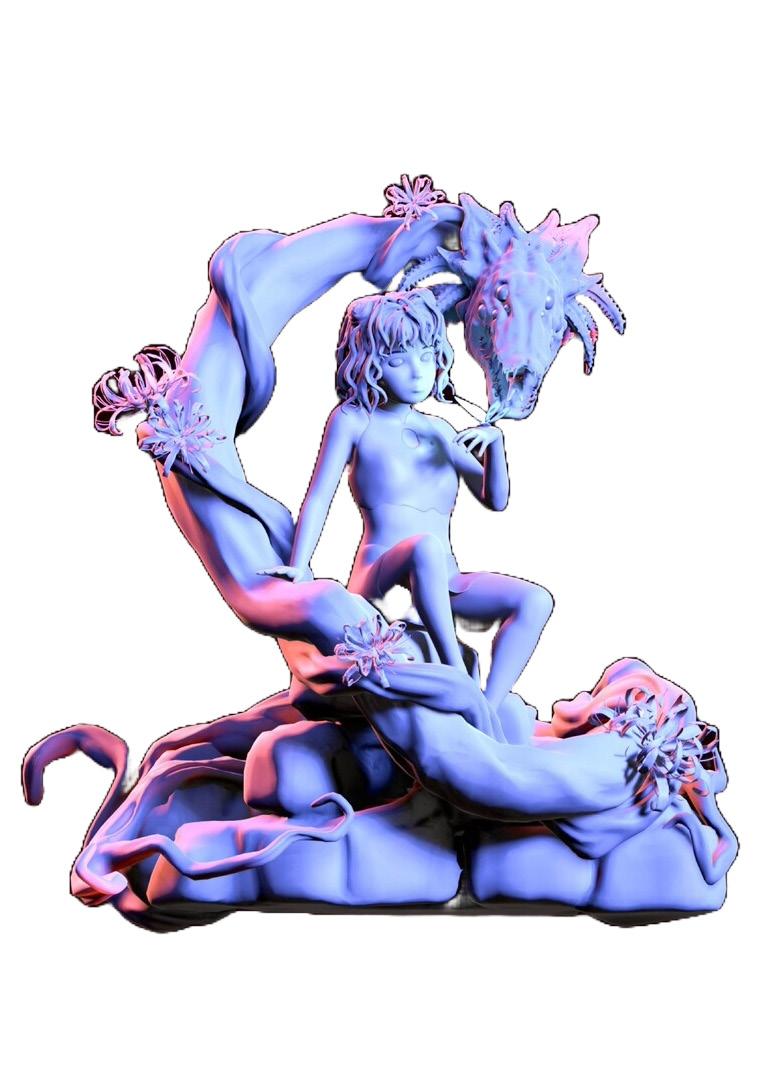
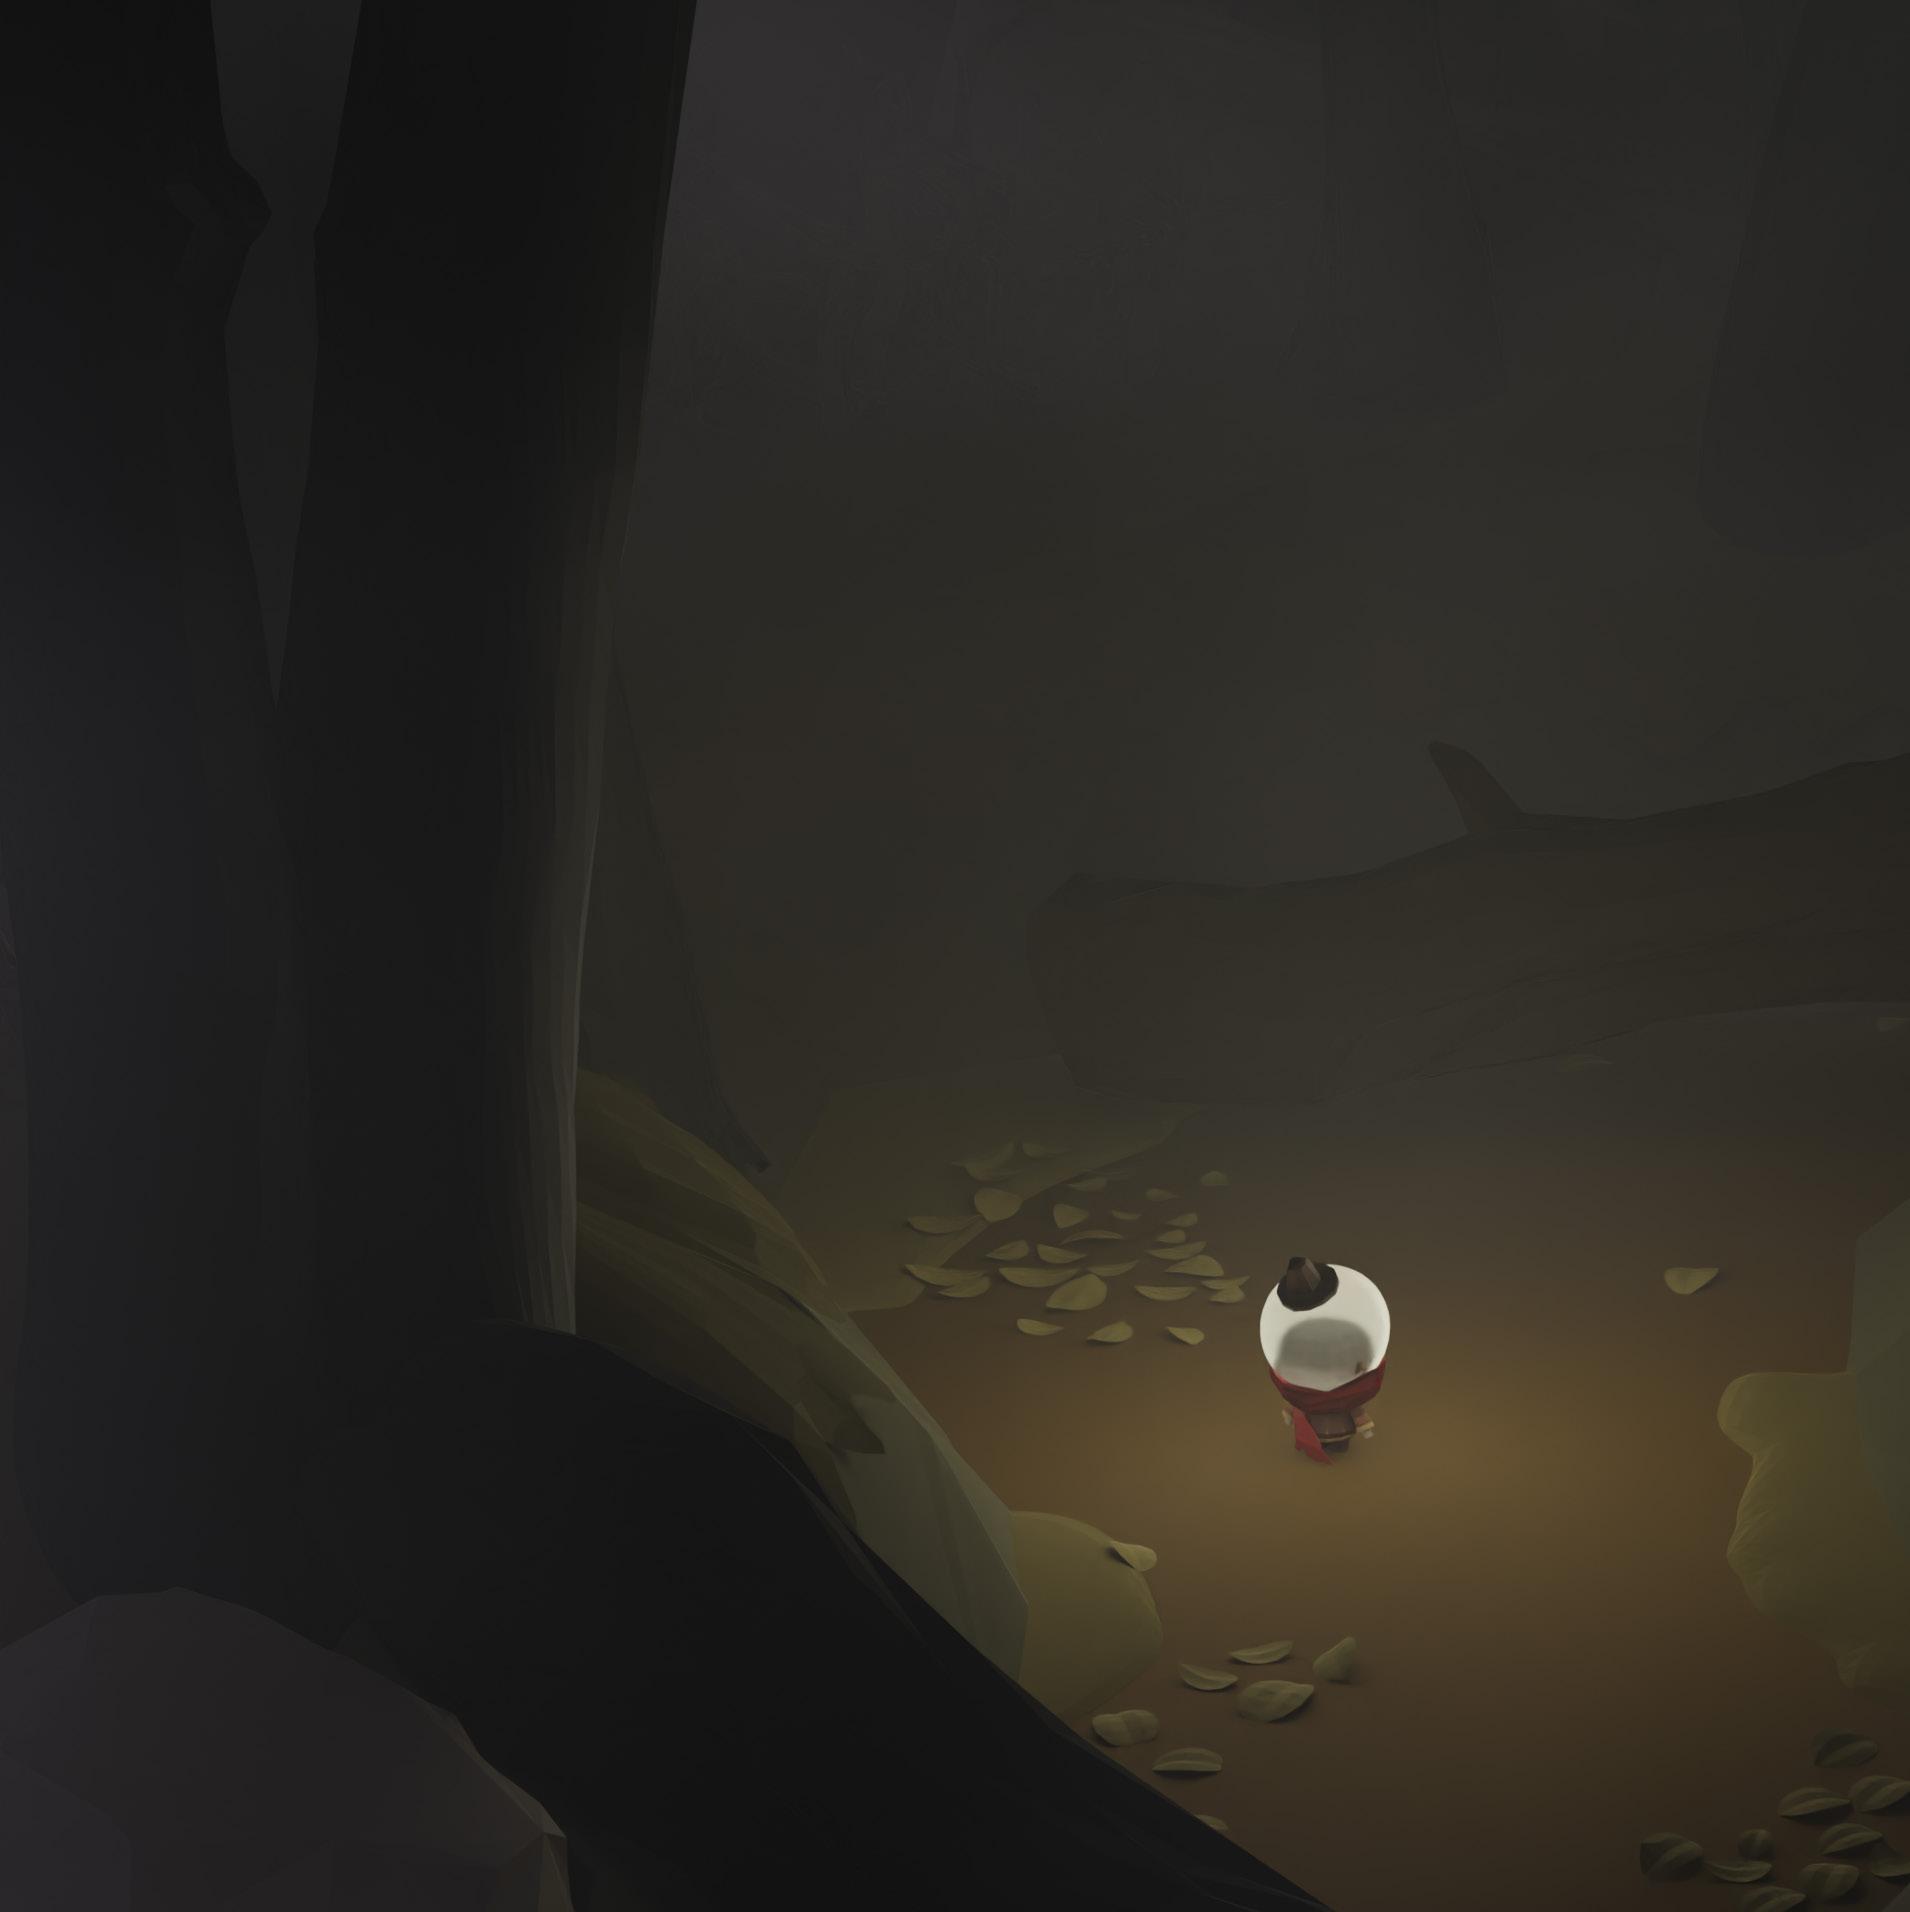
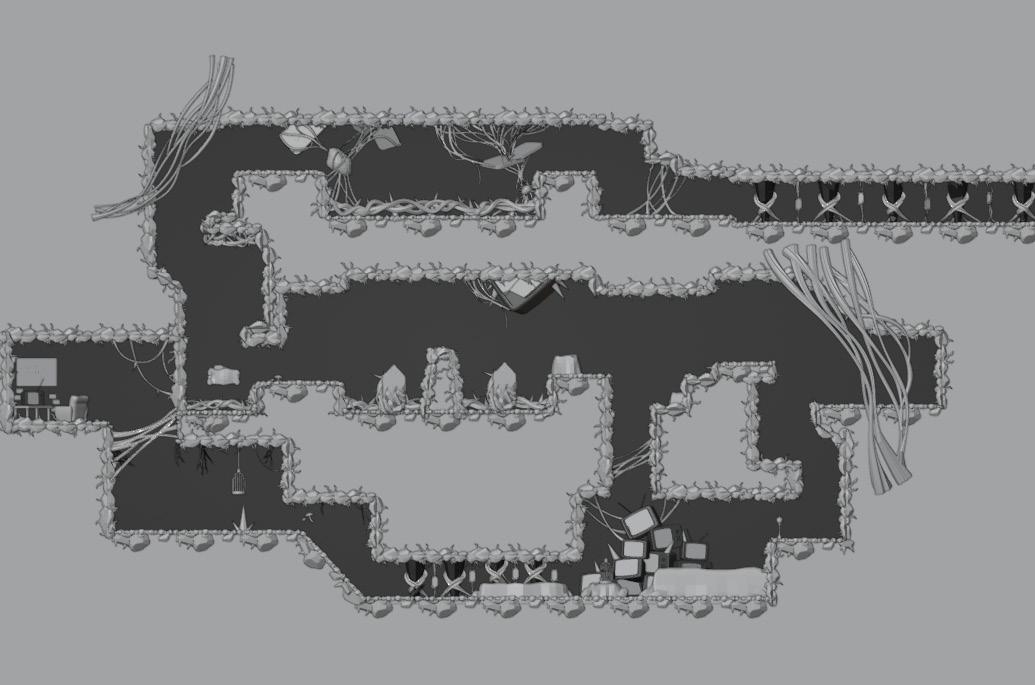
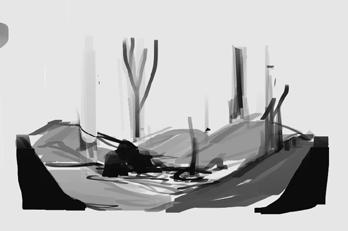
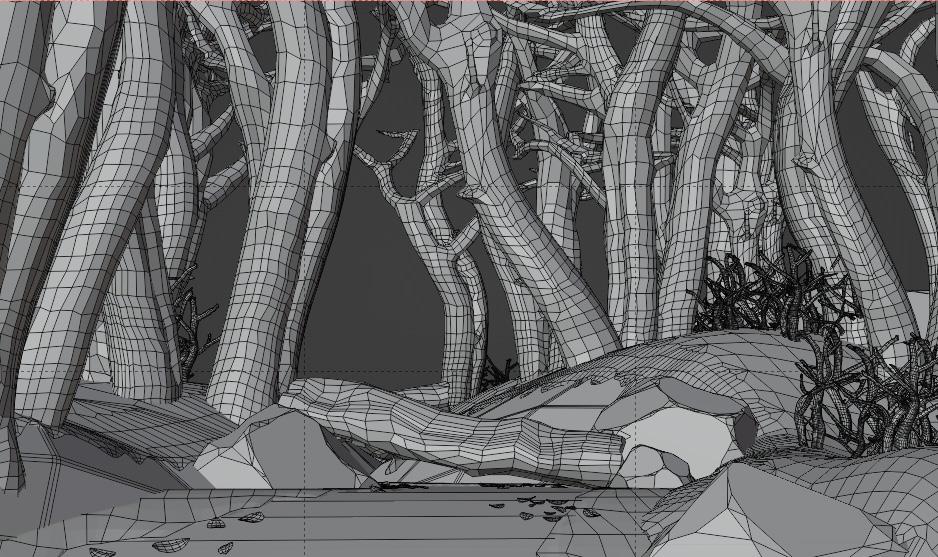
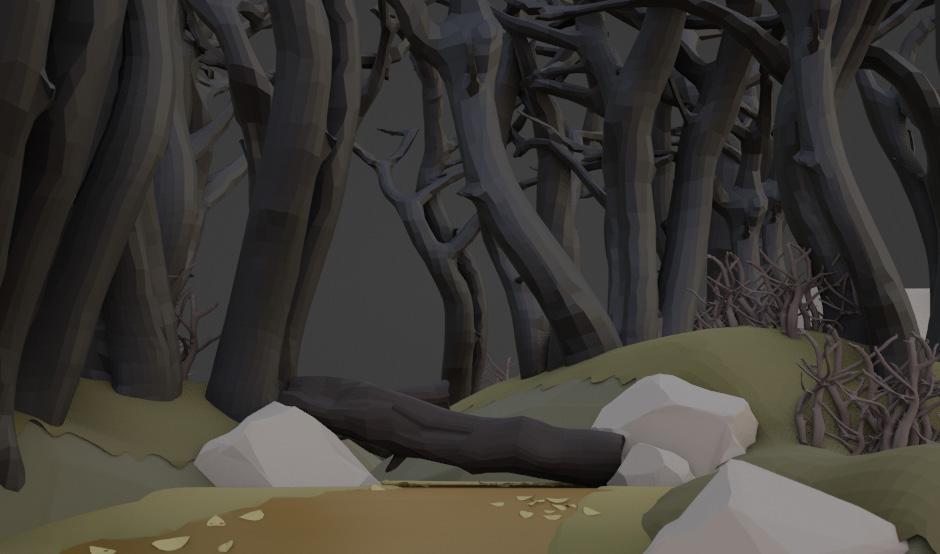
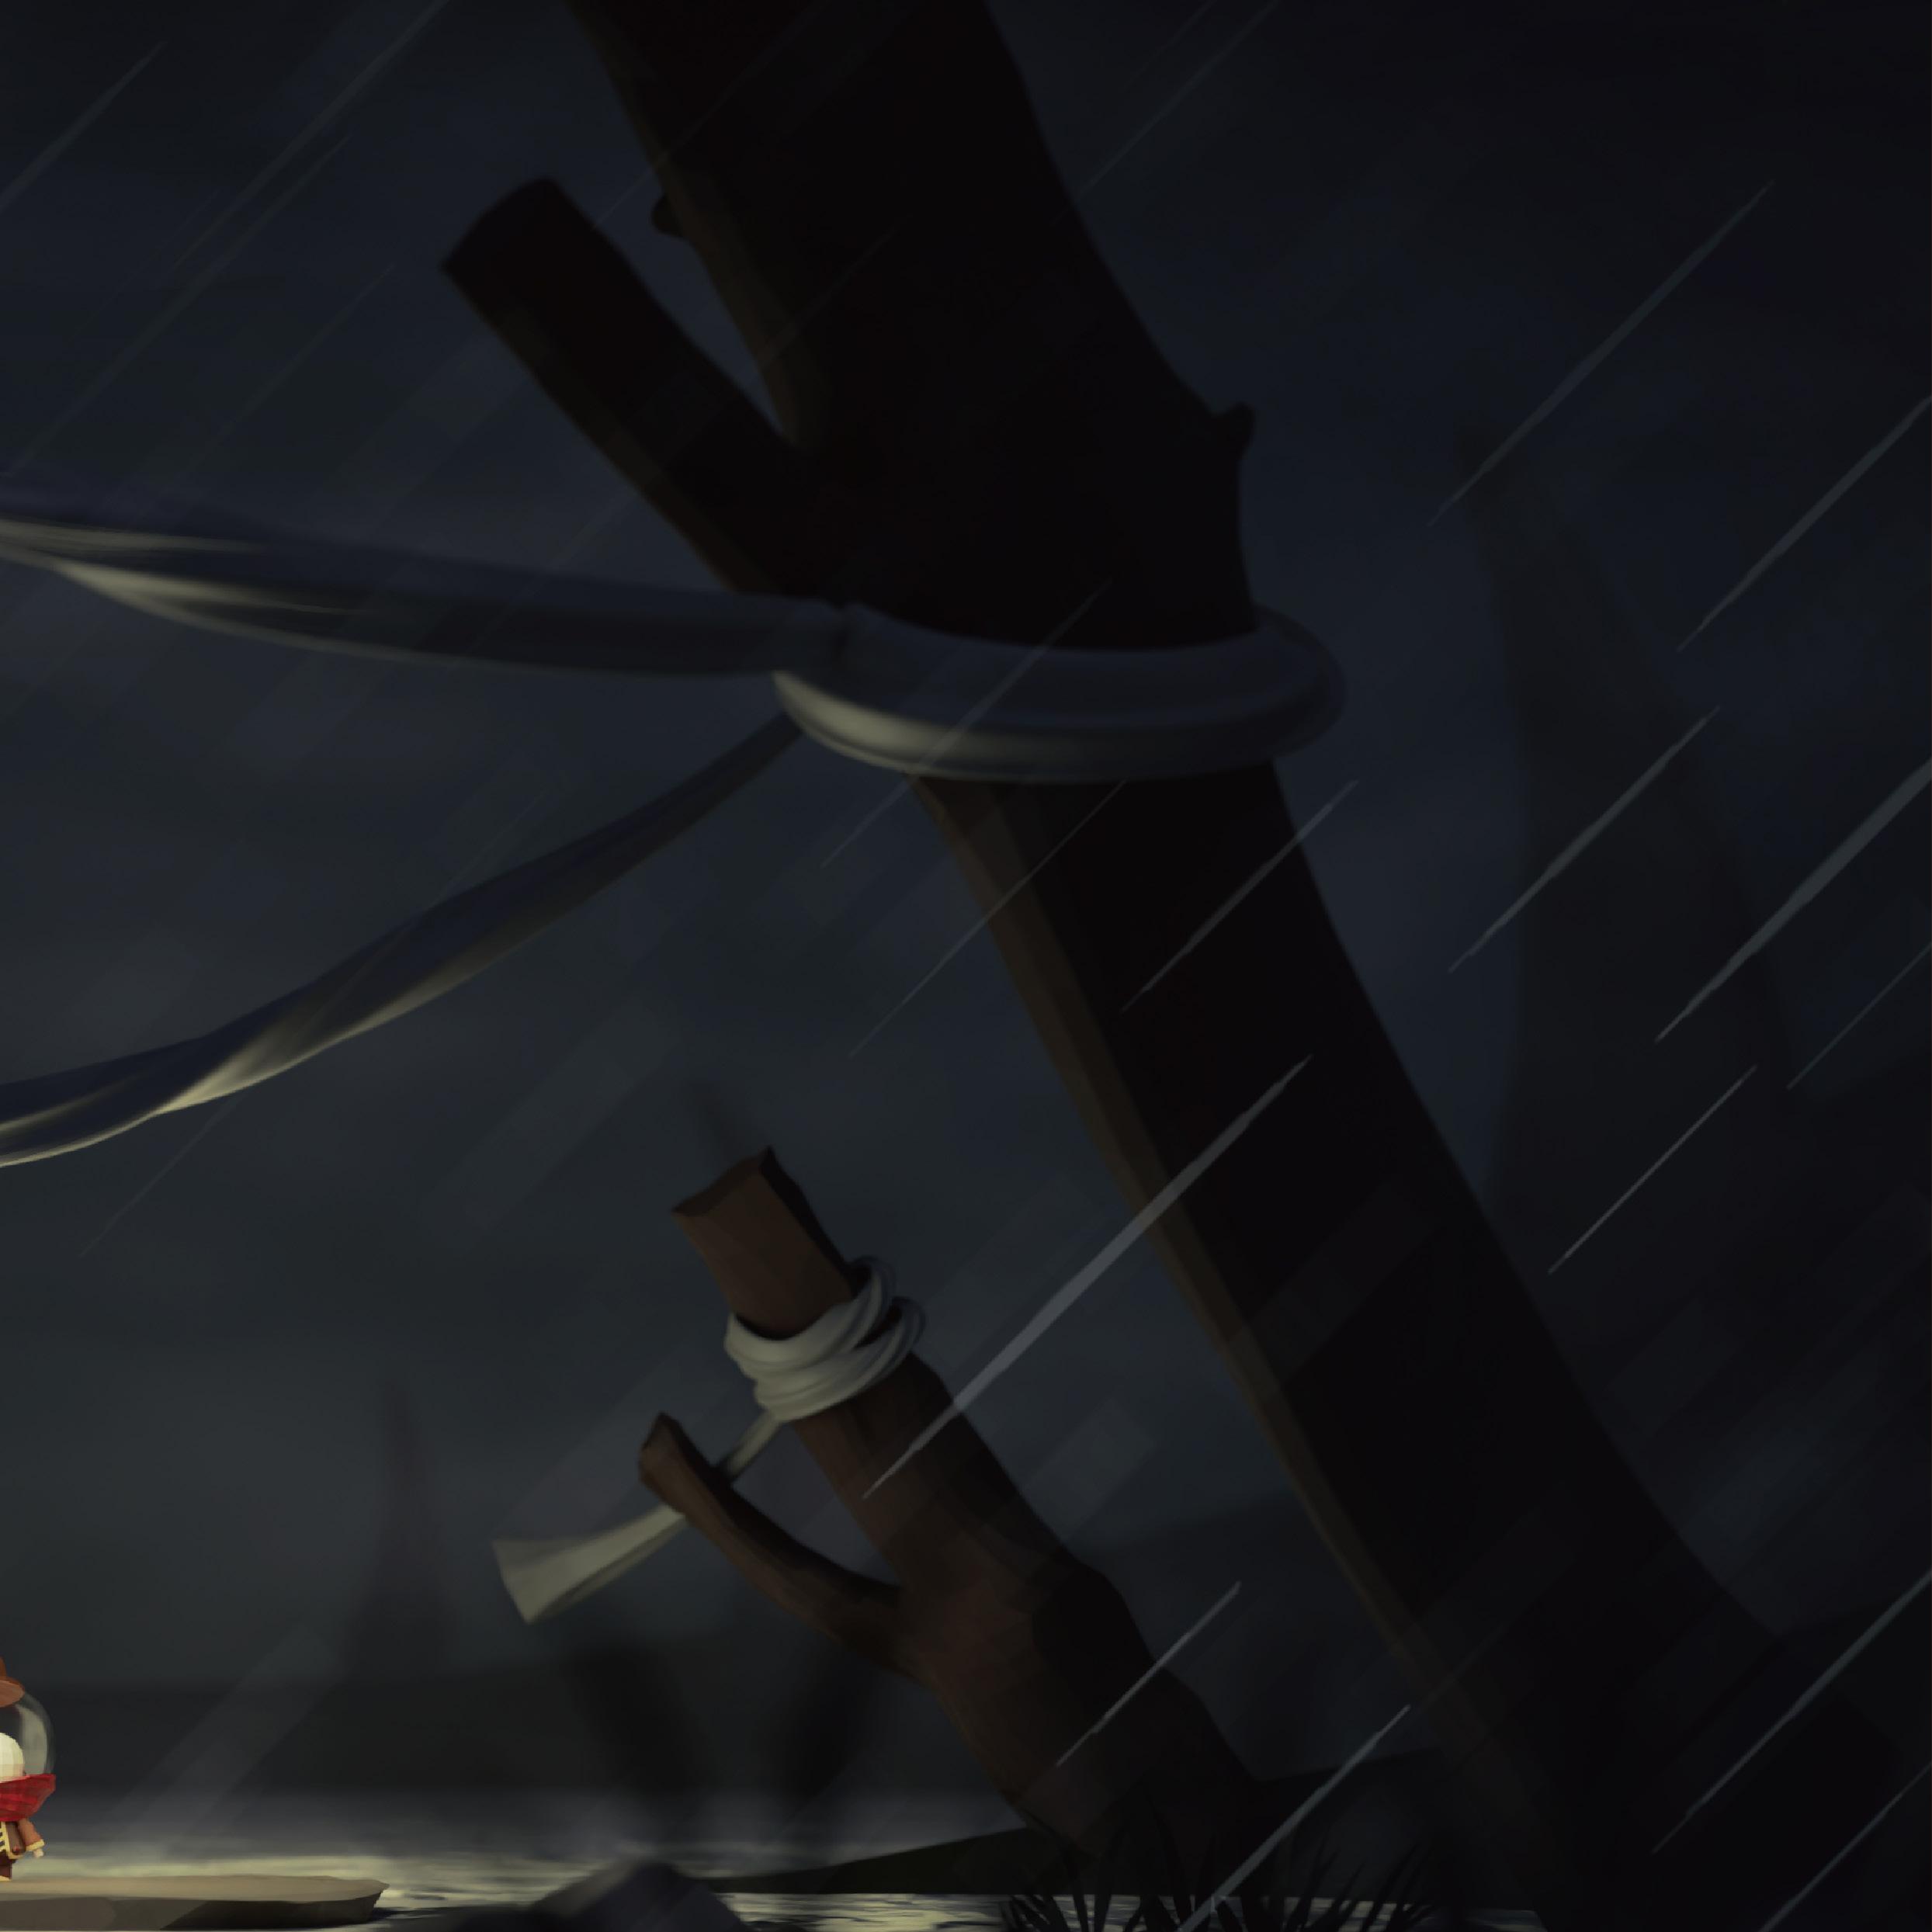
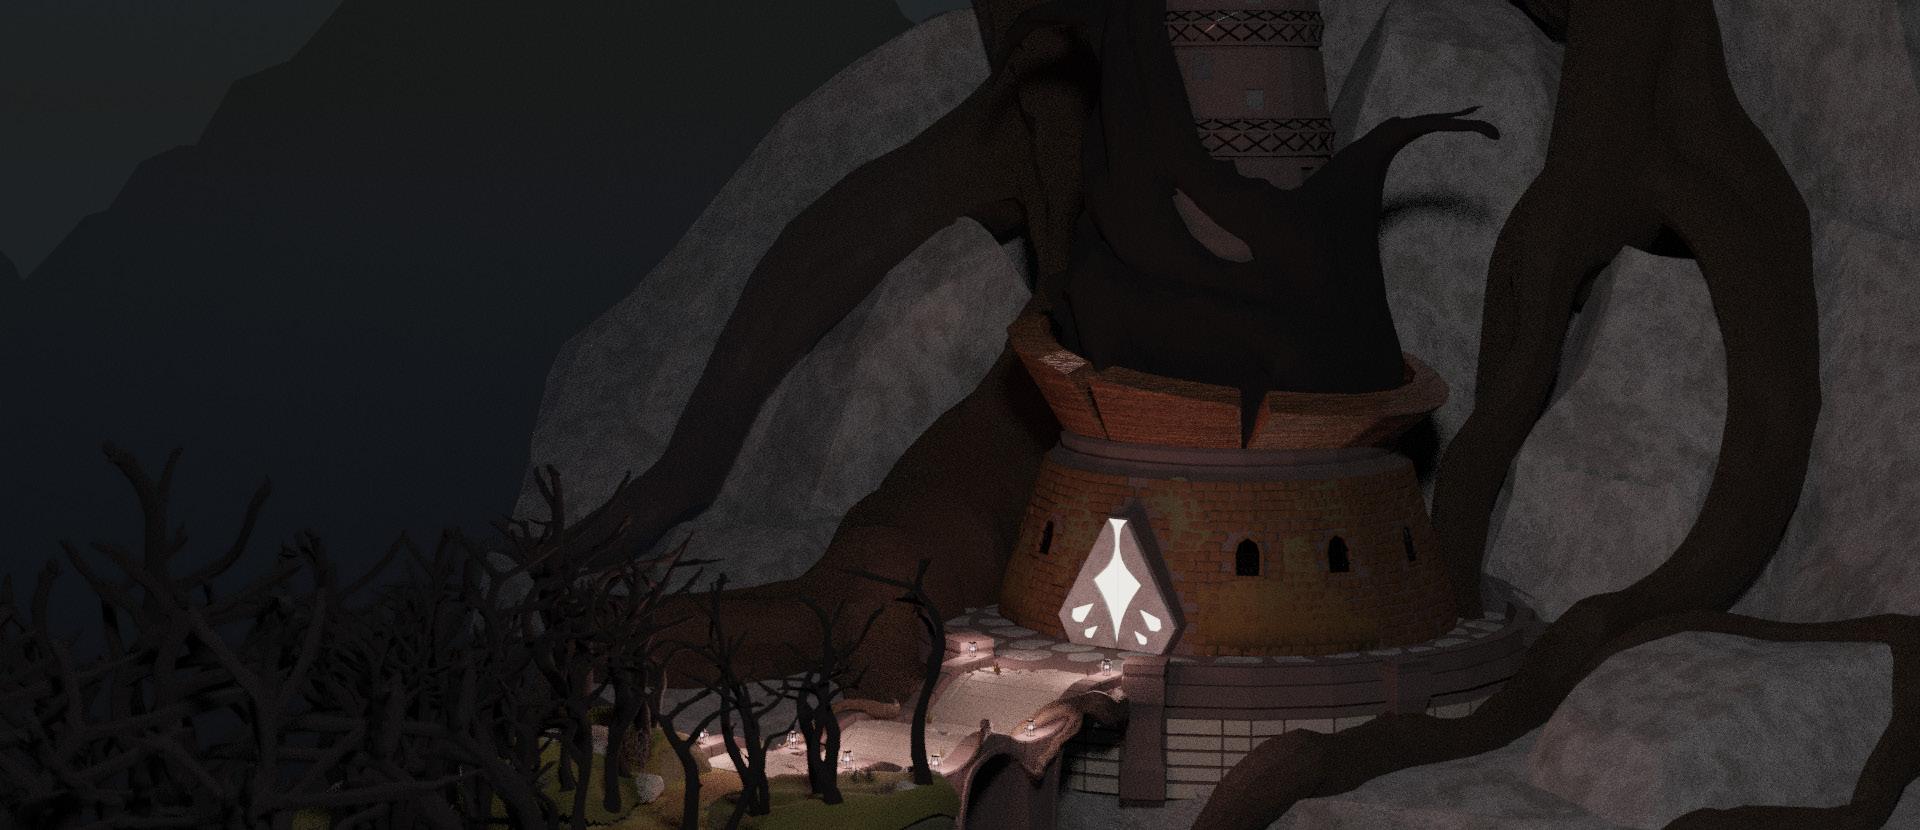
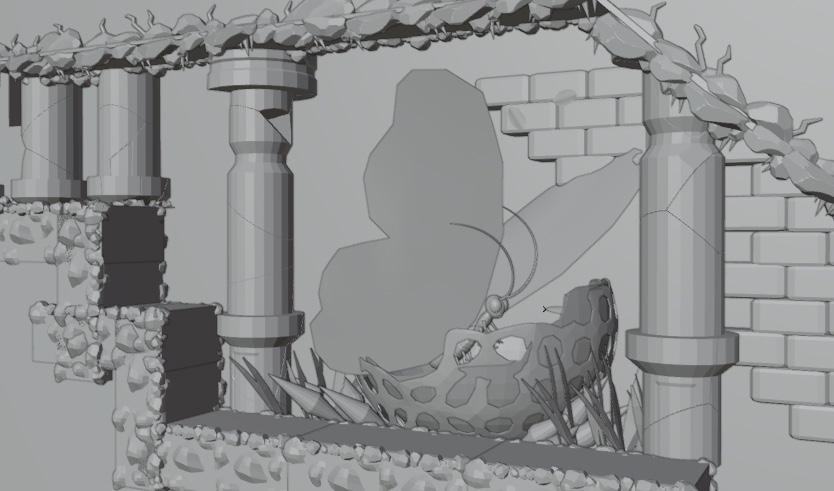
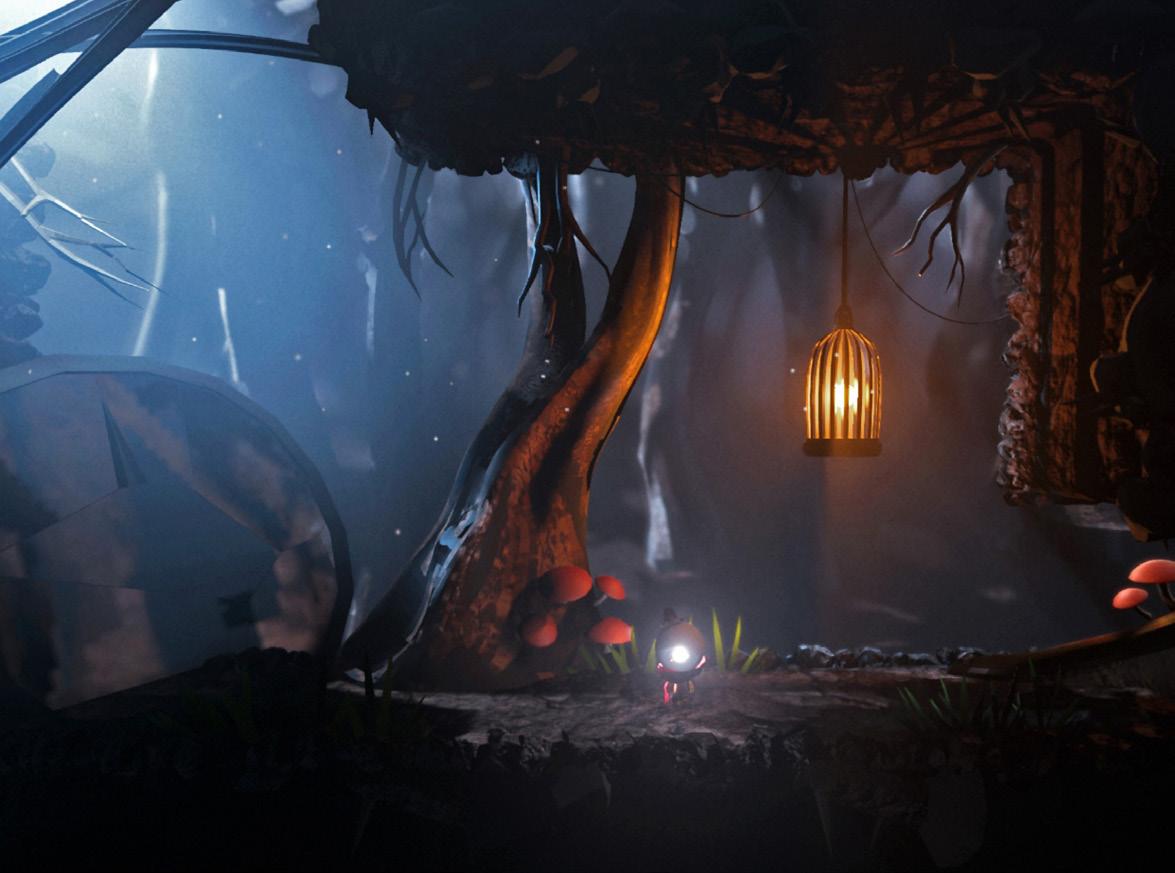
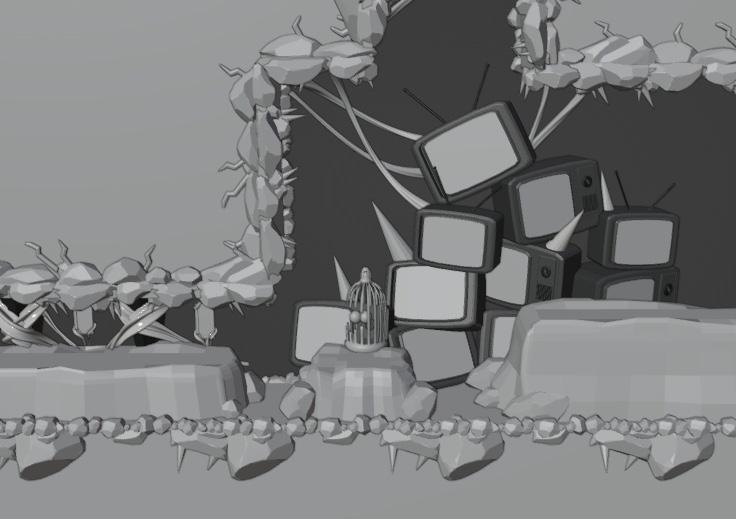
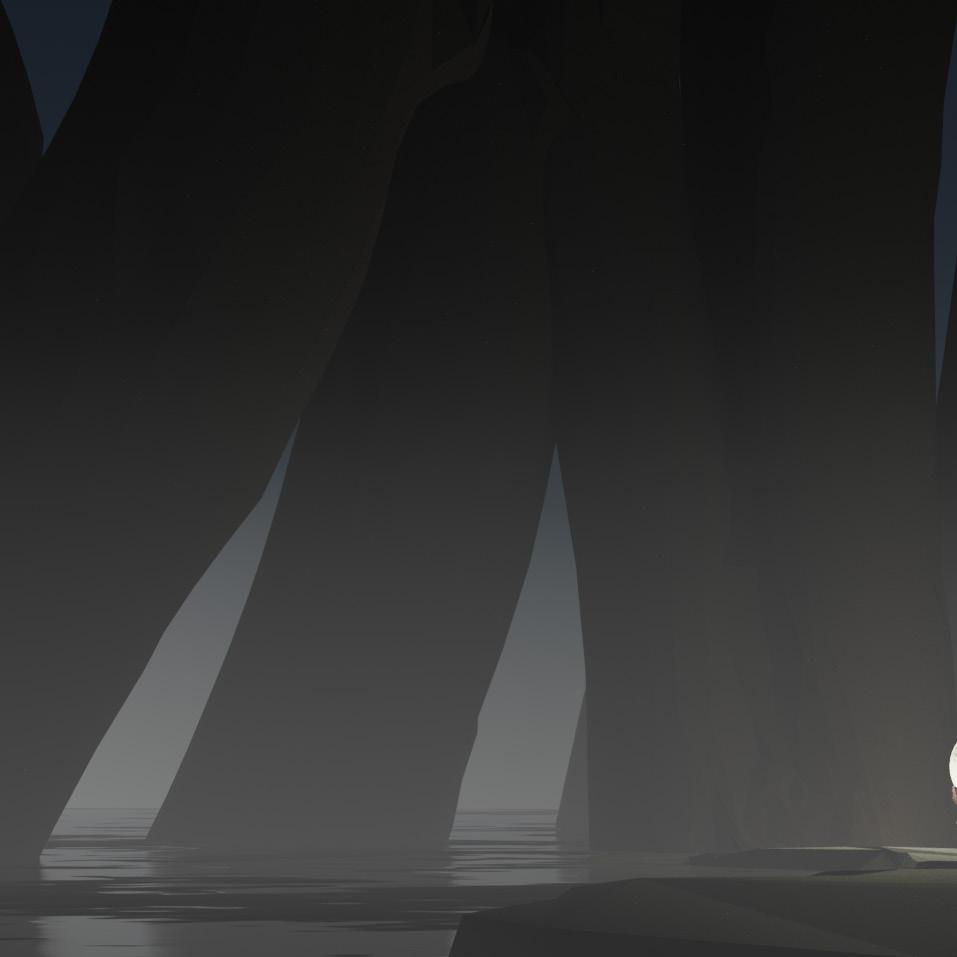
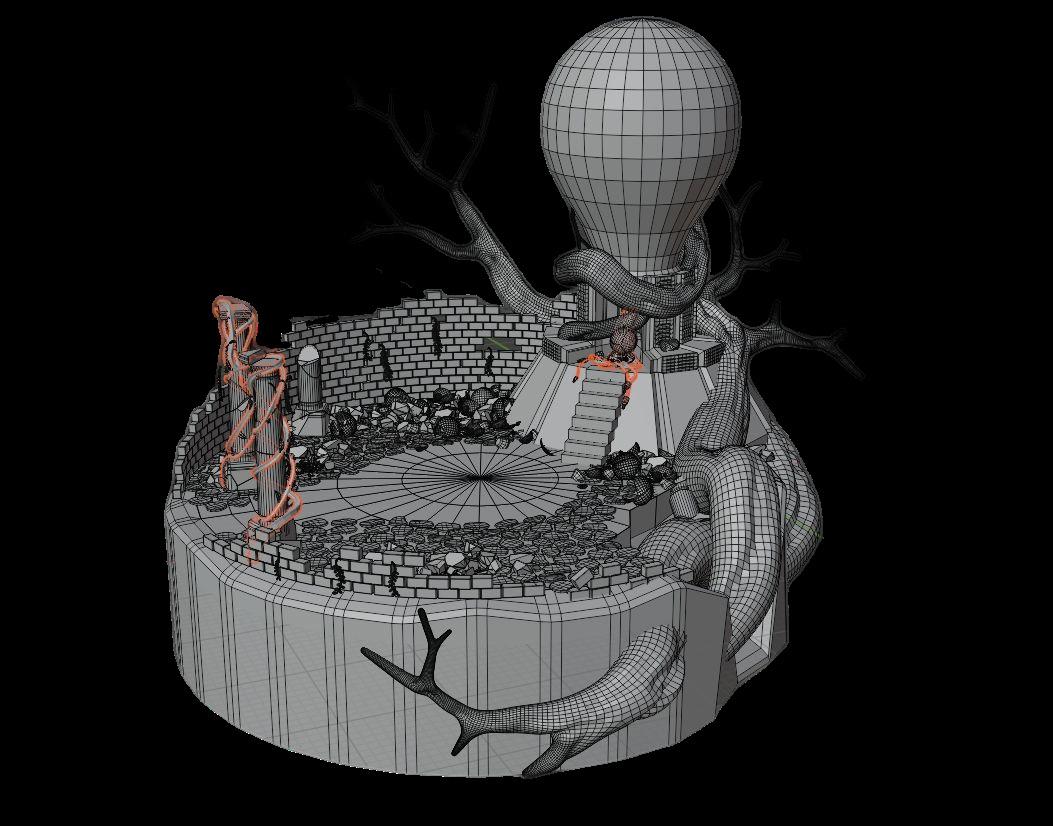
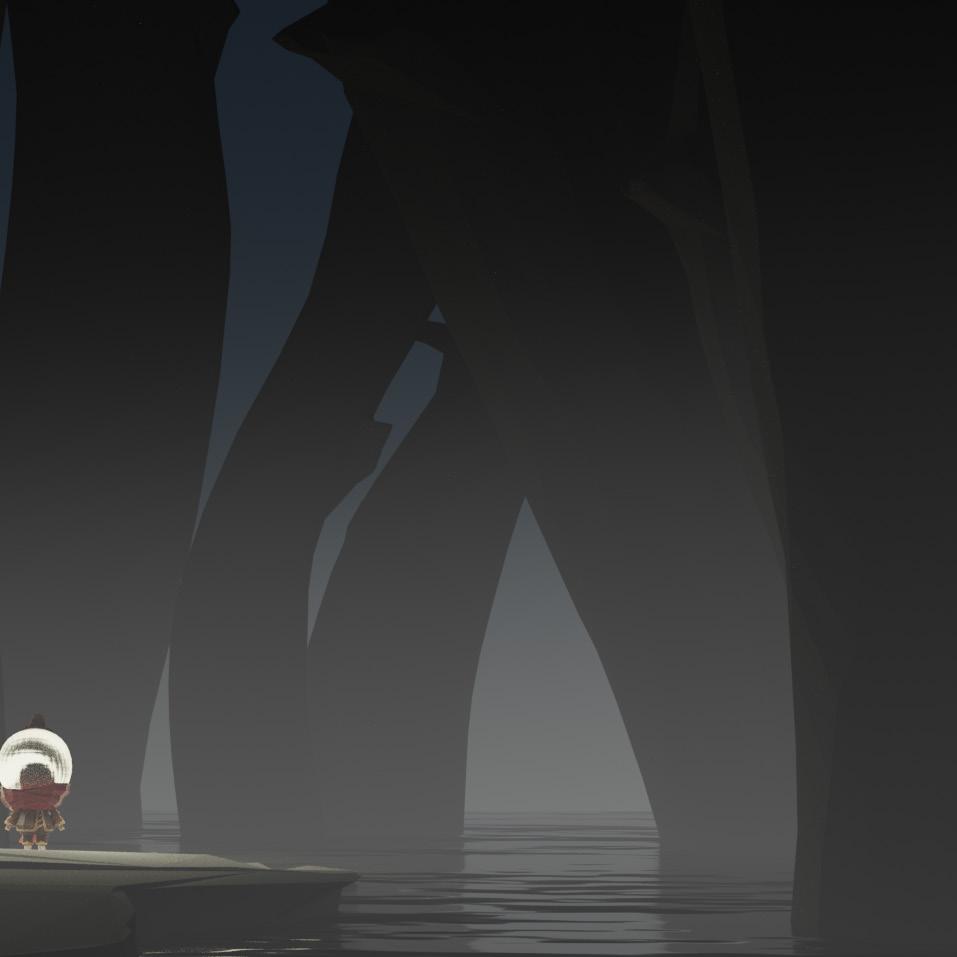
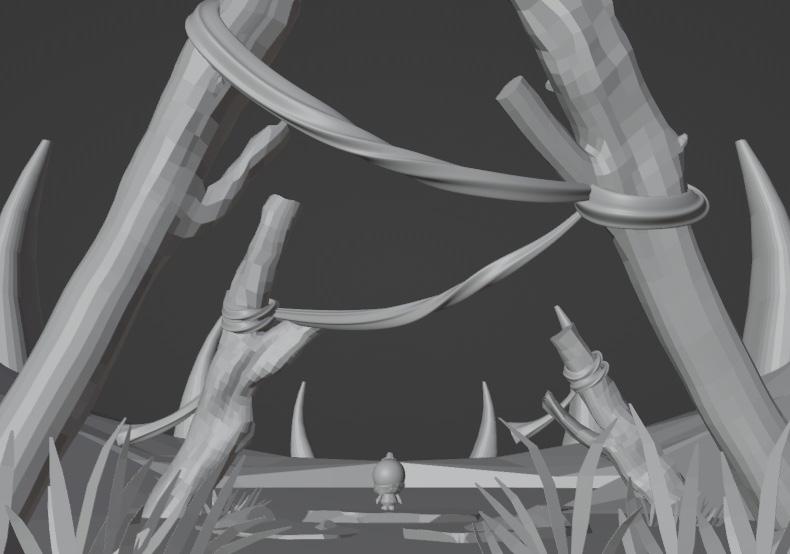
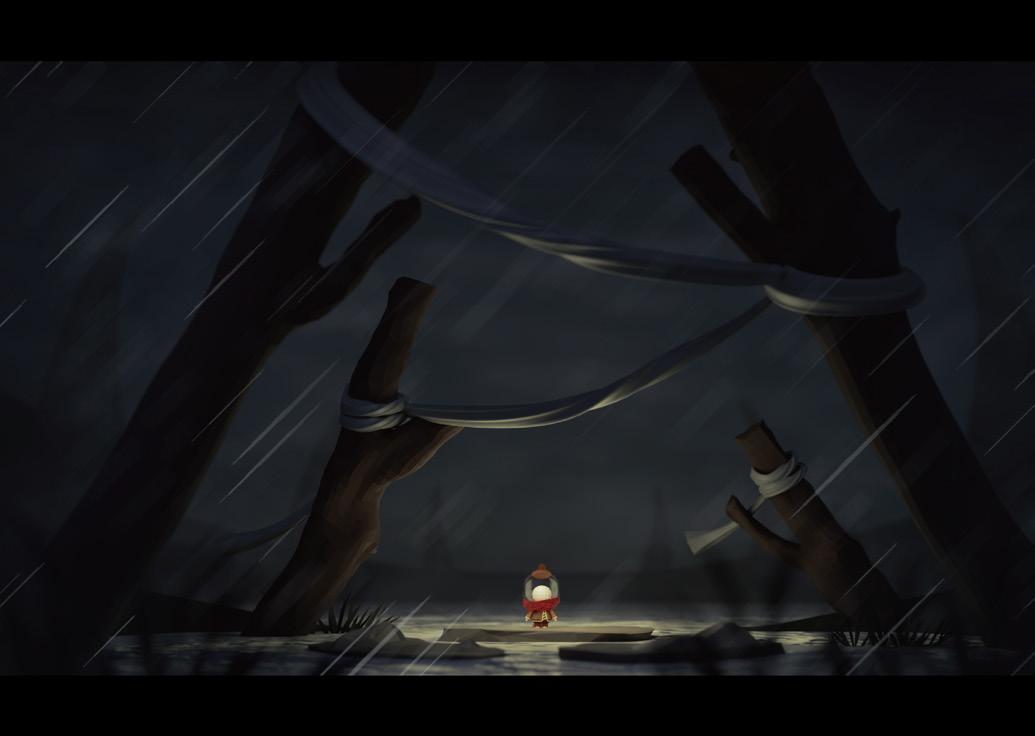
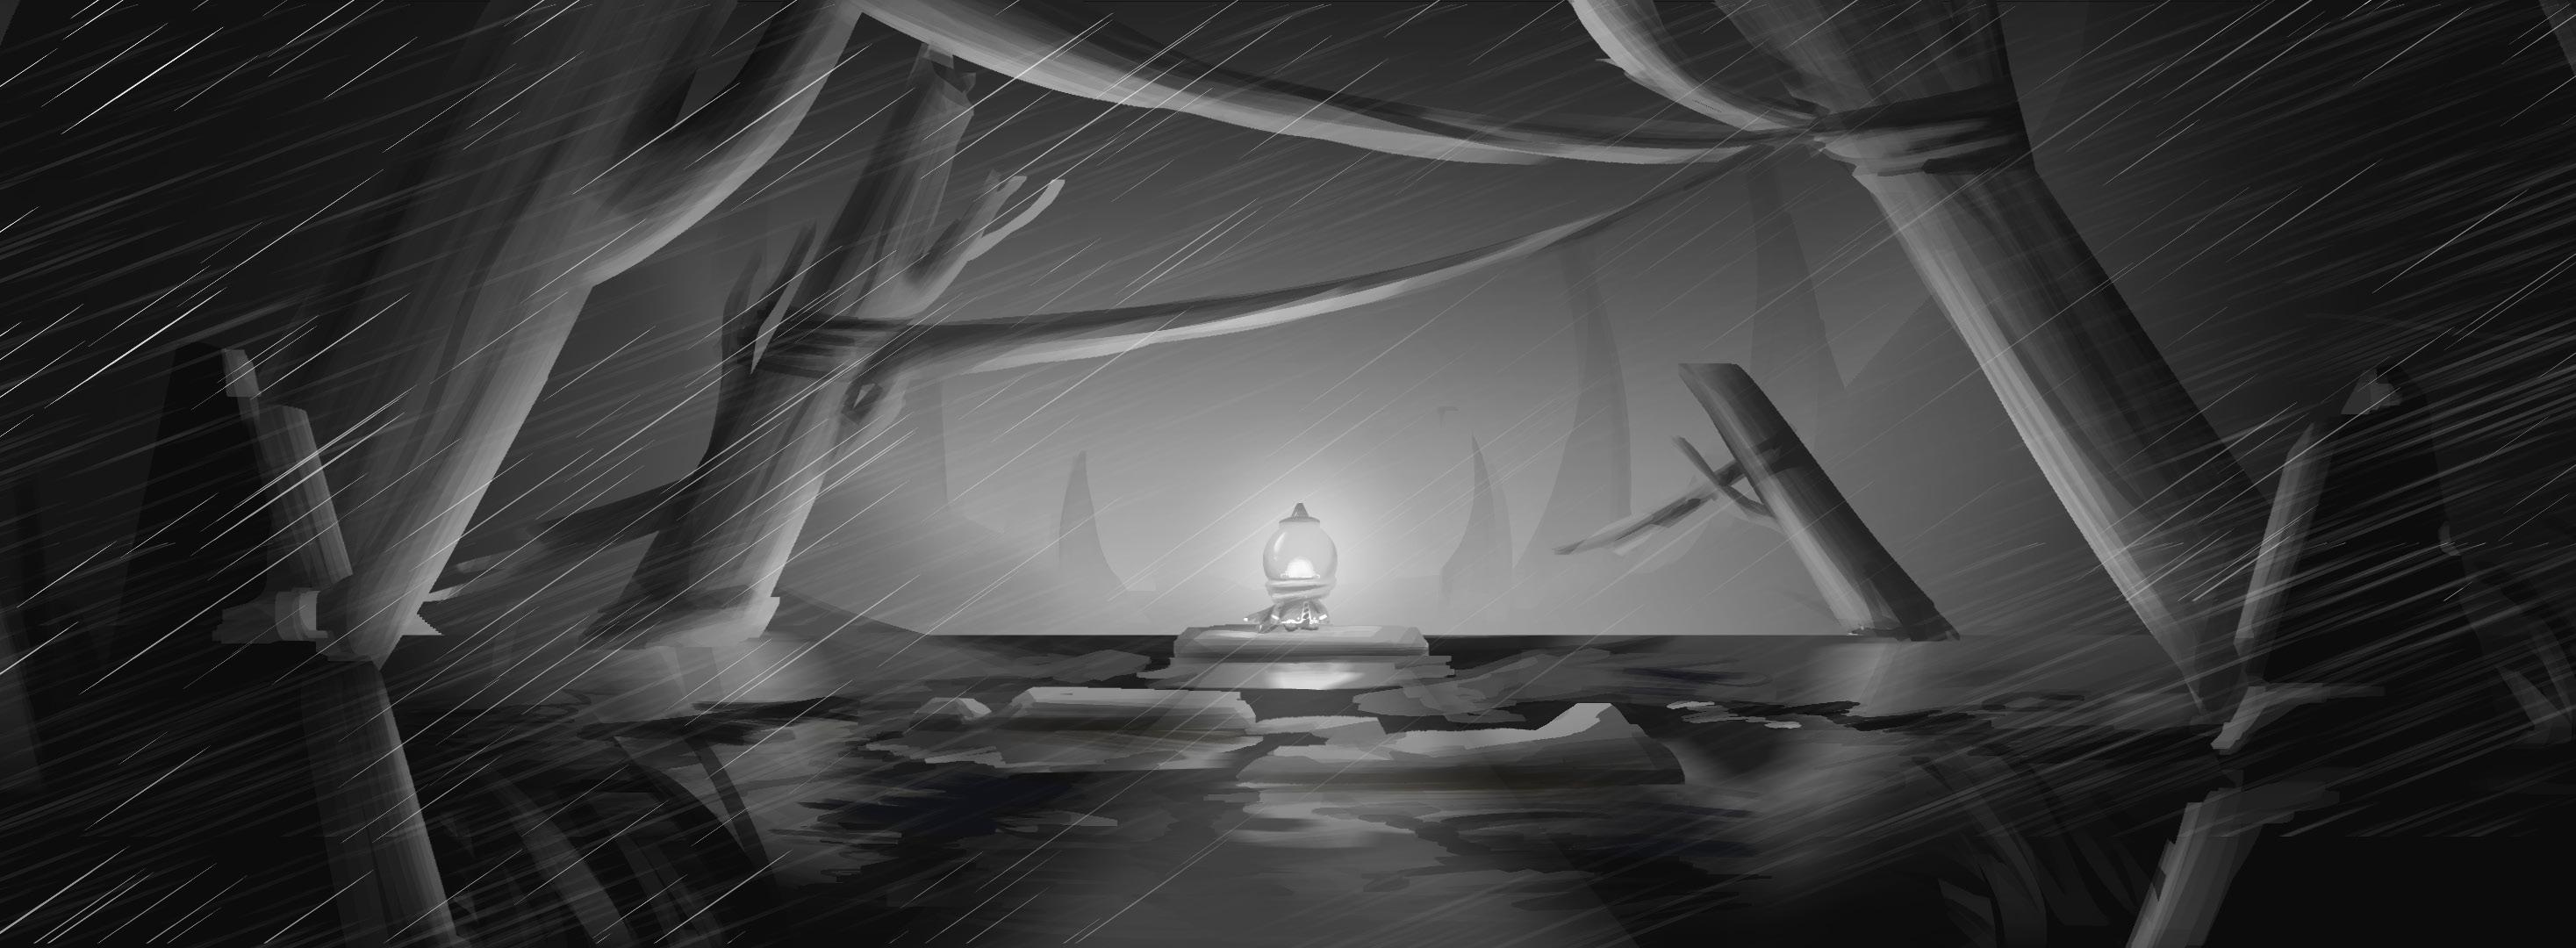
"Cats in the Misty Swamp" is a deeply personal 3D scene inspired by my own travel experiences and the bond I share with my cats.
The story follows three cats—two black cats and a spotted cat—who embark on a perilous journey through a mist-laden swamp to rescue one of their own, imprisoned by an evil sorceress. The swamp is adorned with vibrant red spider lilies and scattered with skulls, creating a hauntingly beautiful yet ominous environment. This setting draws inspiration from a memorable trip to Australia, where I encountered desolate, gnarled trees rising from a fog-covered lake, leaving a lasting impression on me.
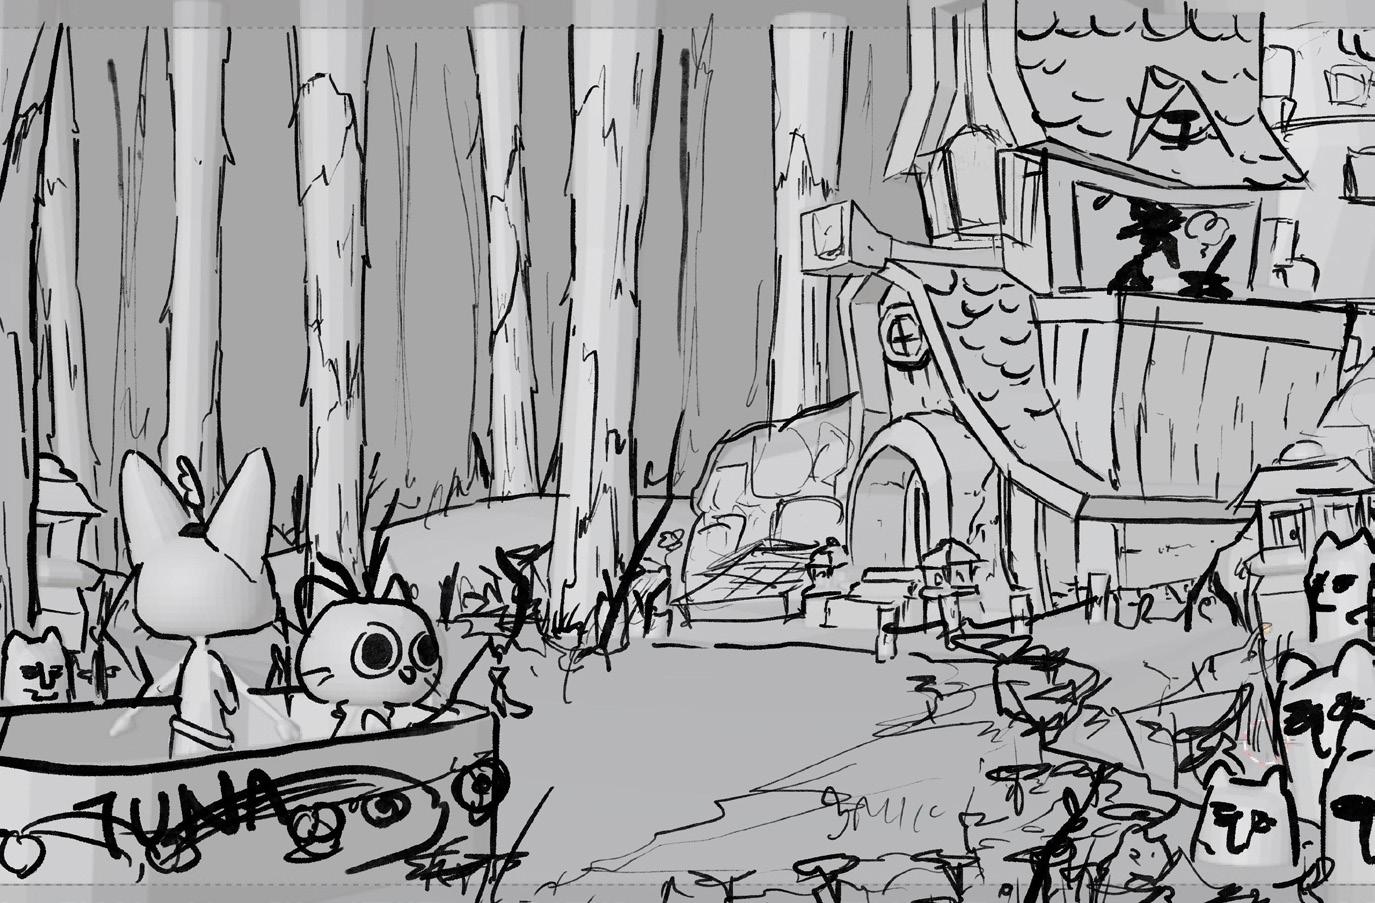
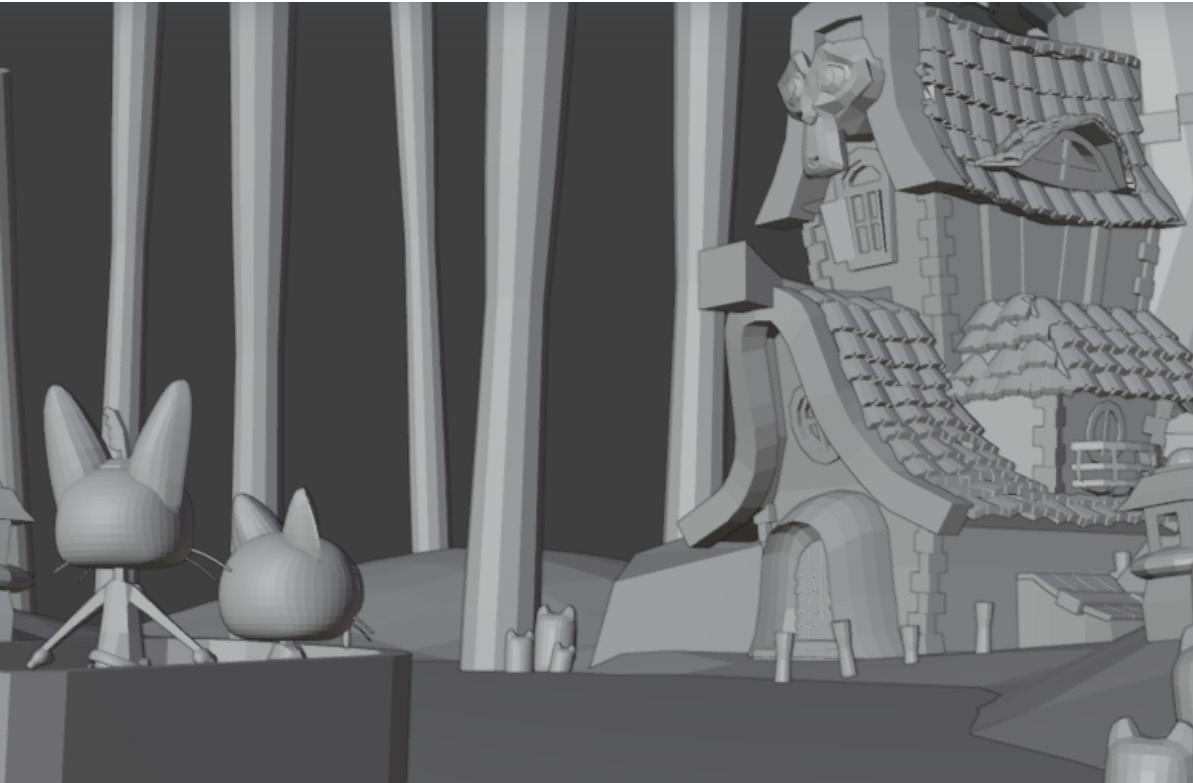
Concept to BlockOut
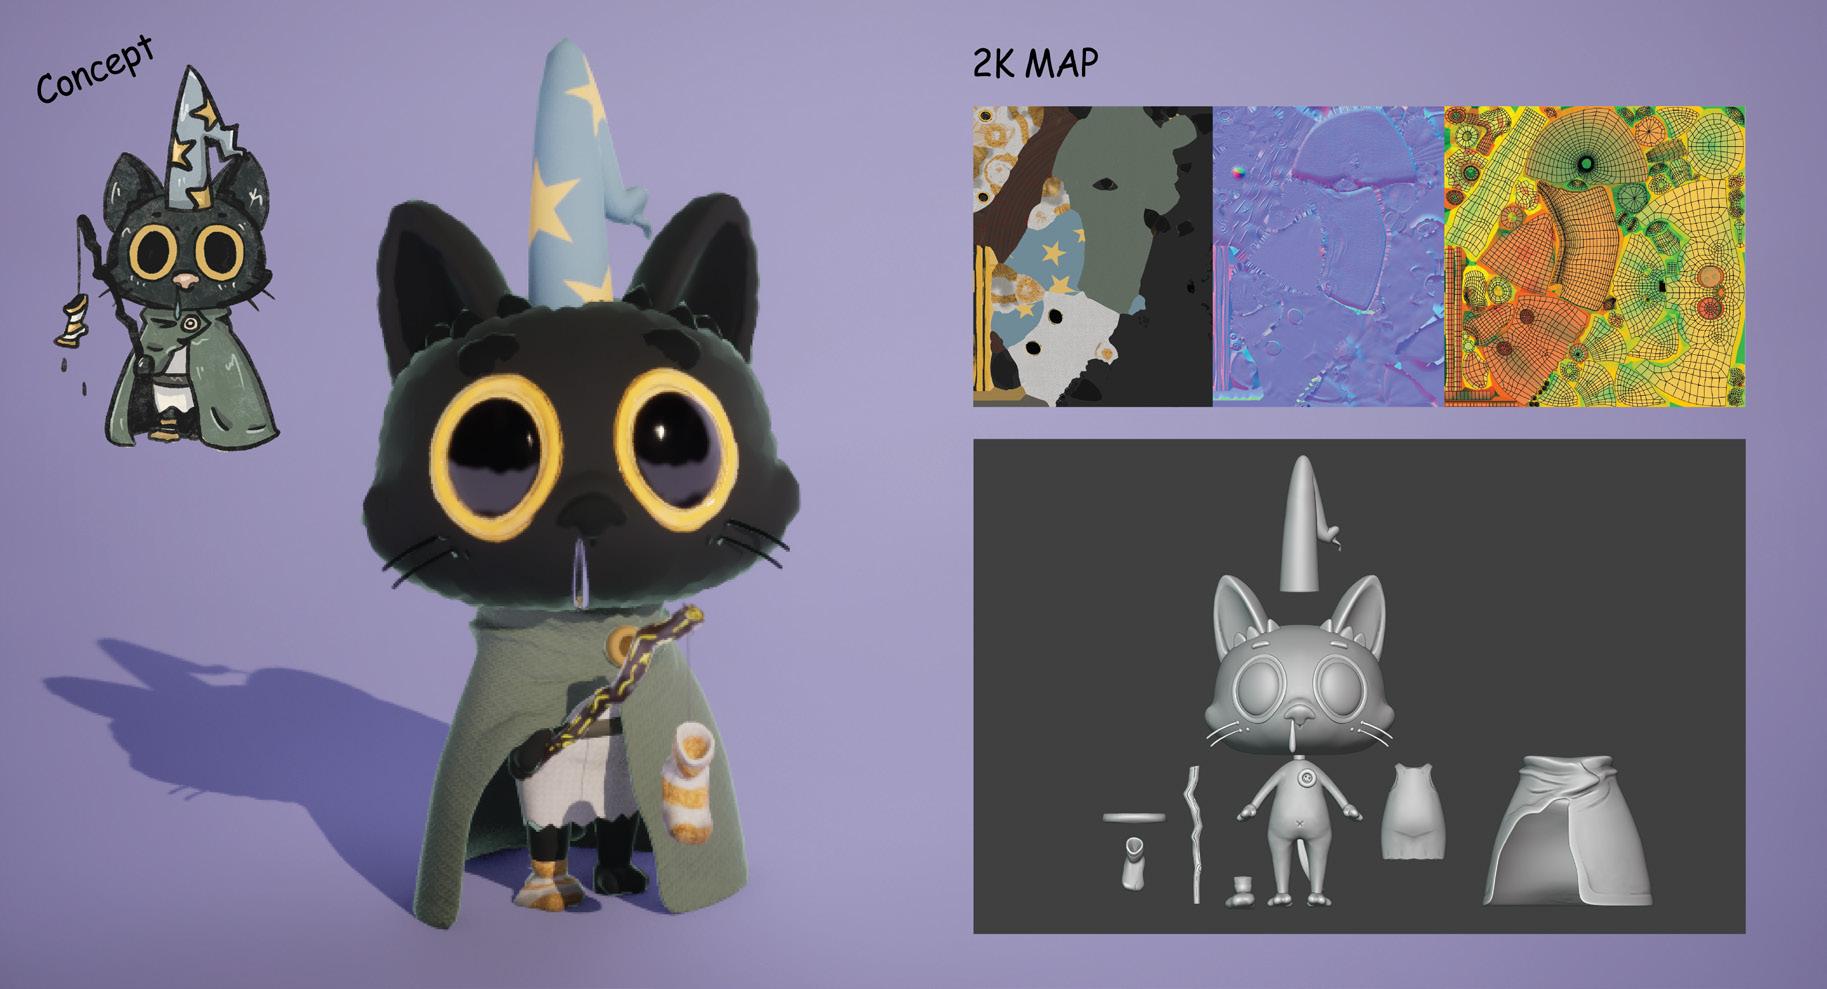
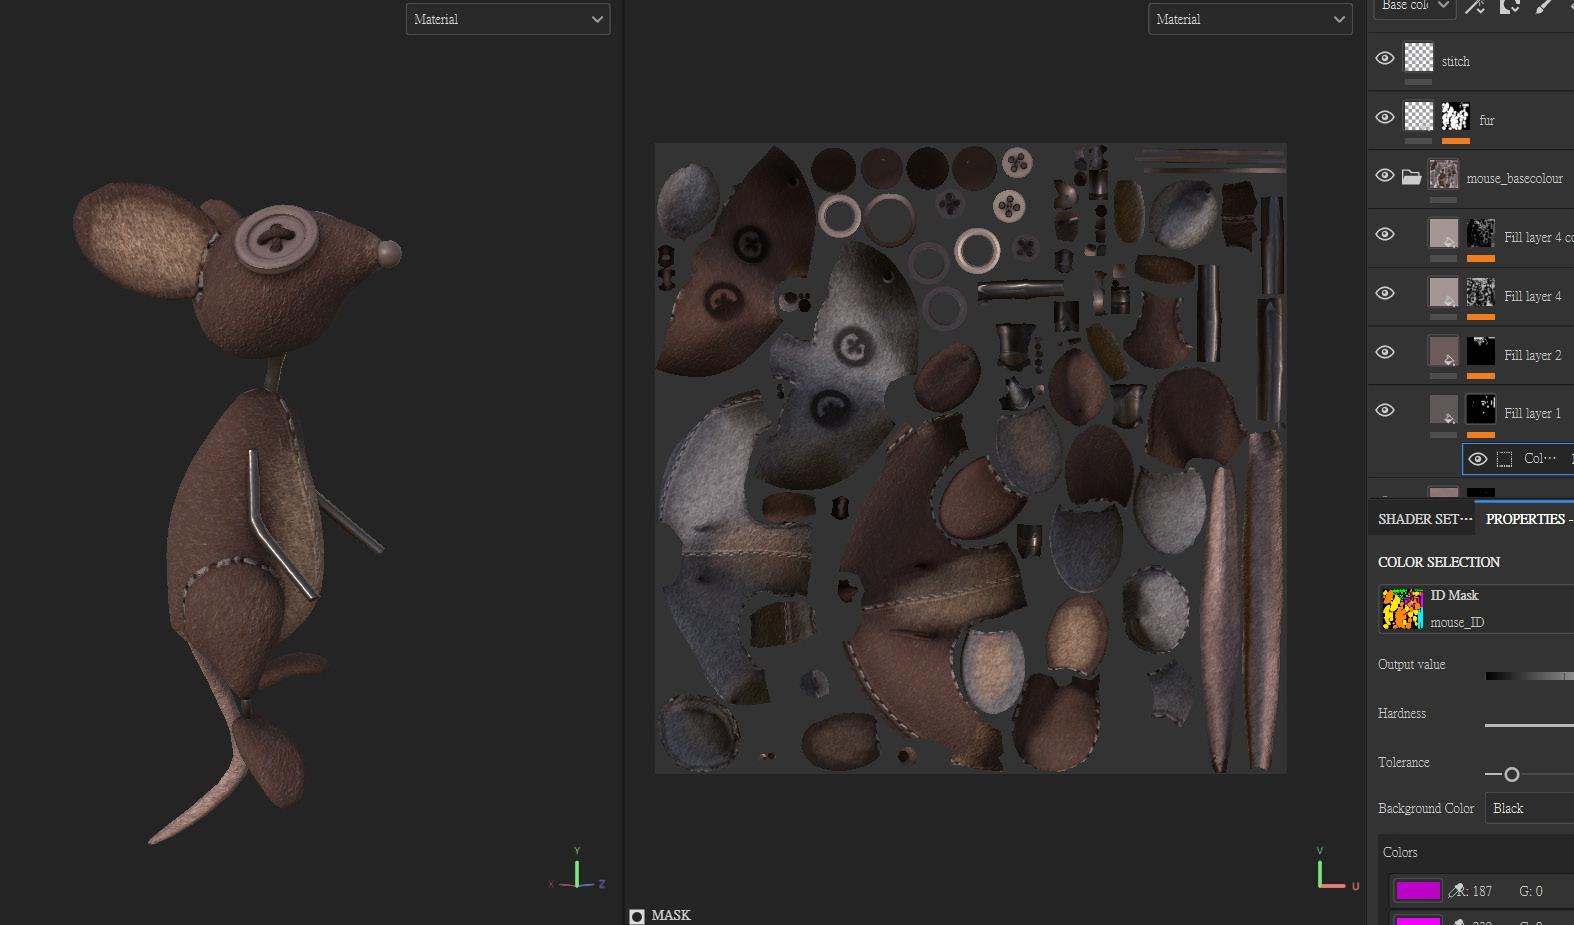
Firstly, I designed the character based on their own unique characteristics, drawing inspiration from specific traits and personality elements. I began by modeling the base mesh in Blender . Once the foundation was in place, I exported the model into ZBrush to sculpt the finer details, carefully capturing subtle features that give the character its individuality.
After that, I performed retopology to create a clean, optimized topology suitable for deformation during animation. This step ensured that the model would animate smoothly without unnecessary geometry. Then baked the high-resolution sculpt’s detail on maps.
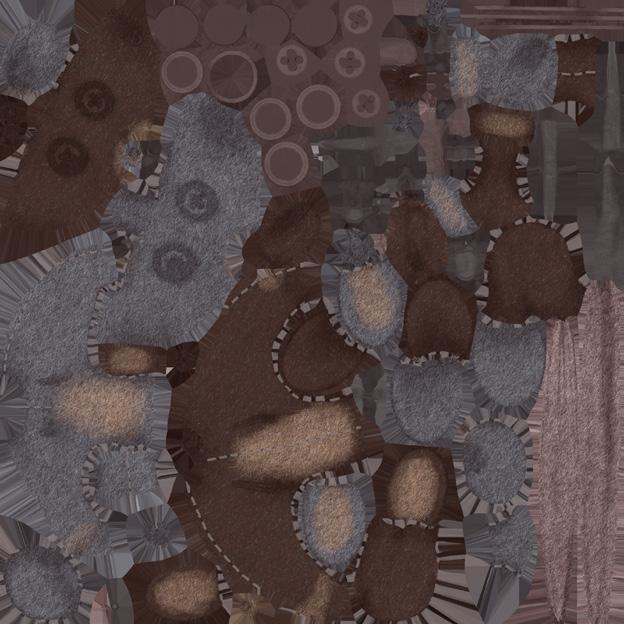
For the texturing phase, I used Substance Painter to fine-tune the surface materials, adding color variation, wear, and texture depth to bring the character to life. This process allowed me to combine artistic vision with technical precision.
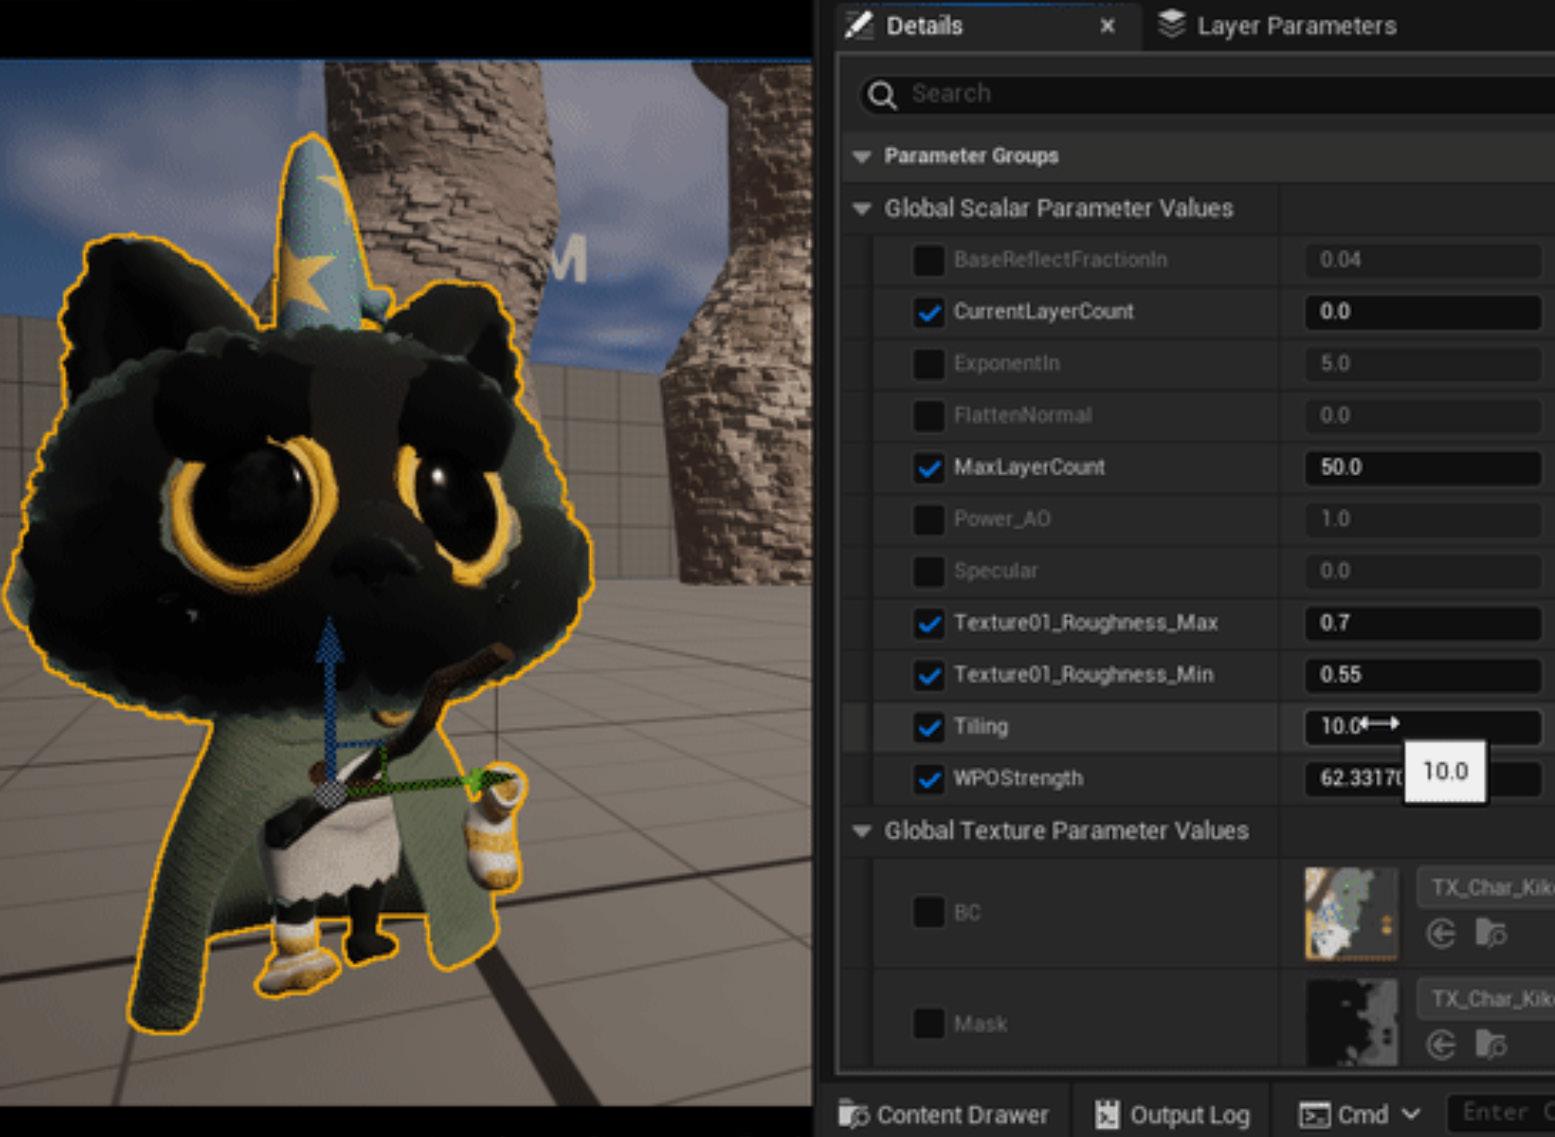
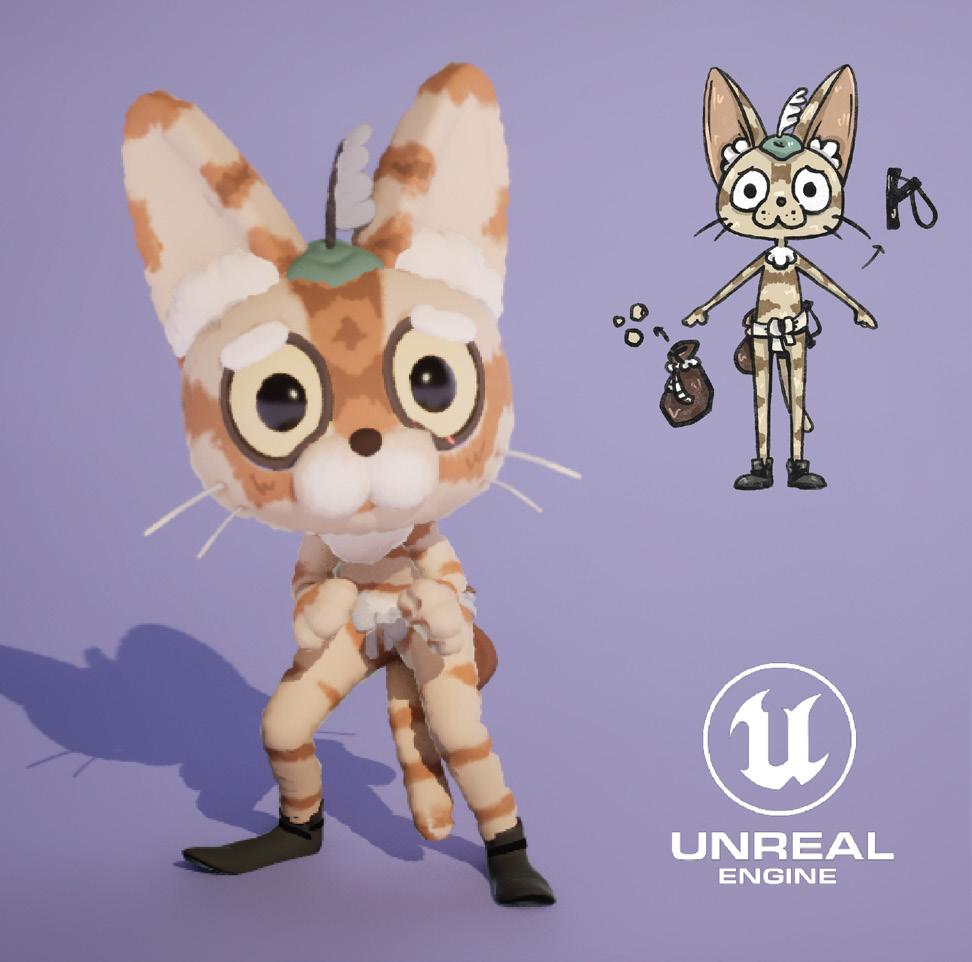
I used a custom shader by using Unreal Engine's Blueprint system. To prevent fur from intersecting with clothing, I created a mask that selectively hides fur in areas where it shouldn't appear. This way ensures that the fur only grows in appropriate regions, maintaining visual integrity.
I also used adjustable parameters for gravity and noise within the shader. By adjusting these values, I achieved a stylized look where the fur edges clump together, resembling tufts rather than individual strands. This method enhances the overall aesthetic, aligning with the desired stylized visual style.

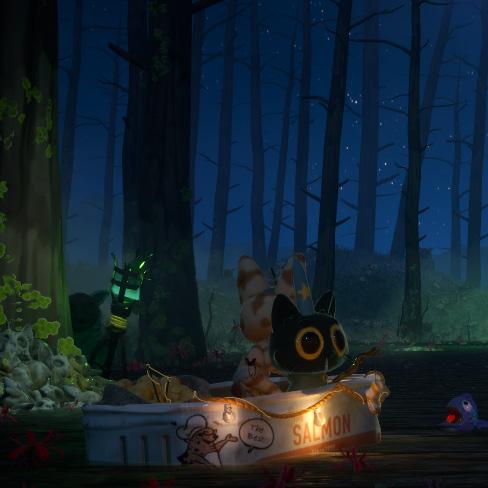
For the hero asset, I designed a whimsical junk tin boat inspired by a salmon can, aiming for a humorous and cartoonish aesthetic. The boat features a charming American-style character painted on the can's surface, adding personality and flair. Adding to the playful design, the boat is illuminated by three lightbulbs, powered by a potato—a nod to UK culture and a touch of quirky humor.
The asset was created using a 2K texture map in Substance Painter , ensuring detailed and vibrant visuals. This approach not only enhances the boat's character but also contributes to the overall stylized and humorous tone of the project.
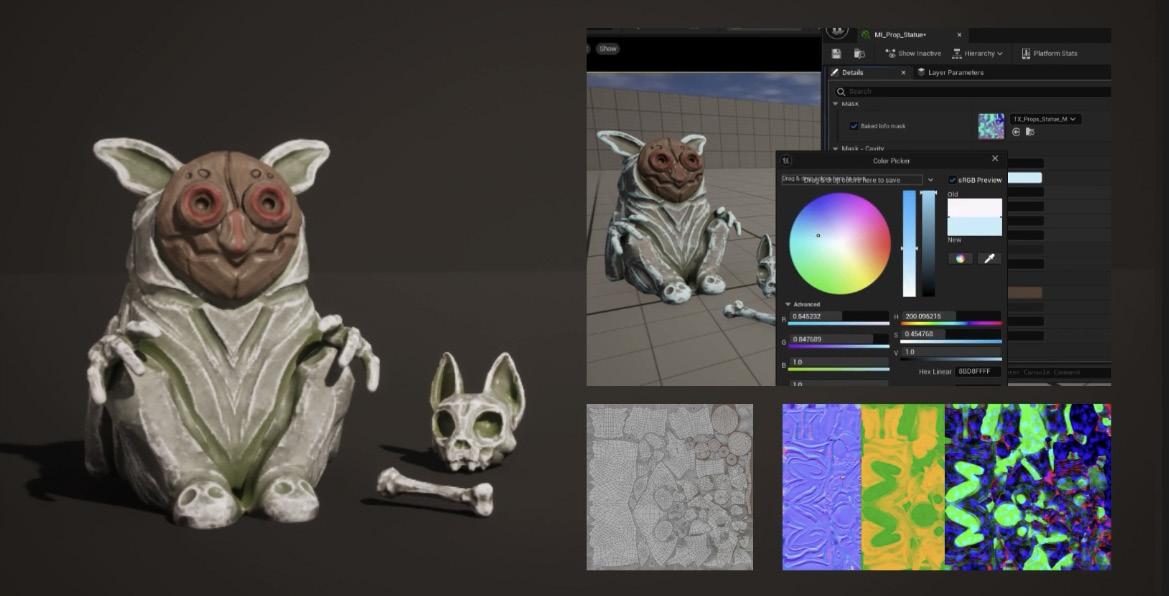
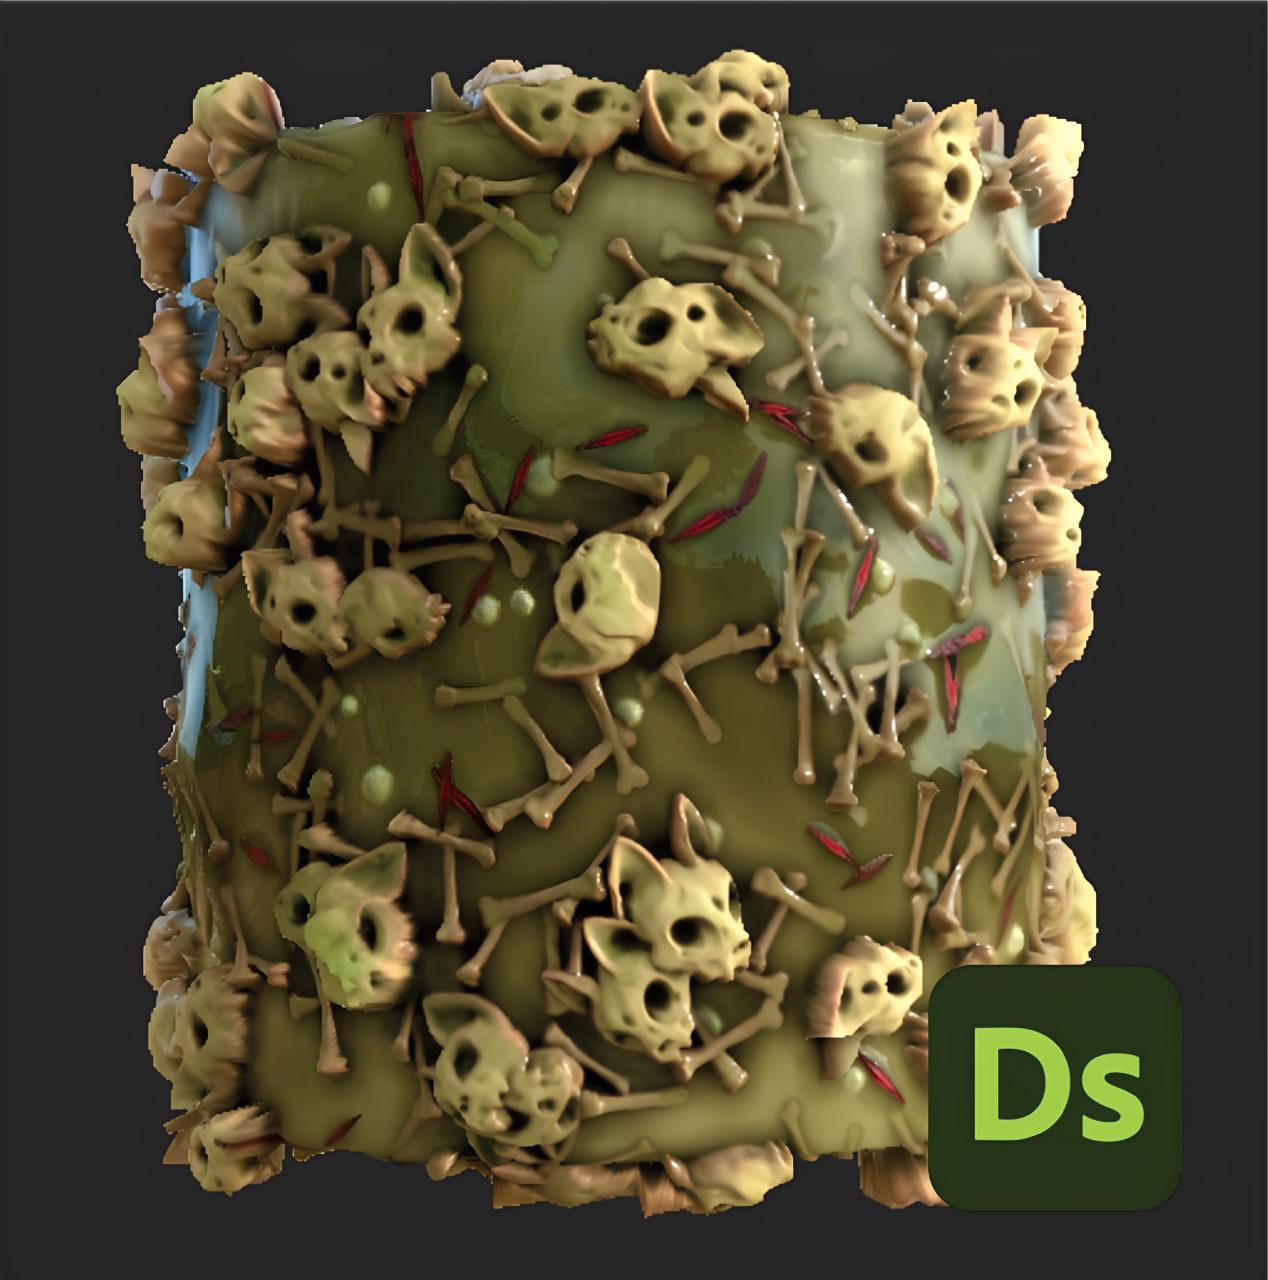
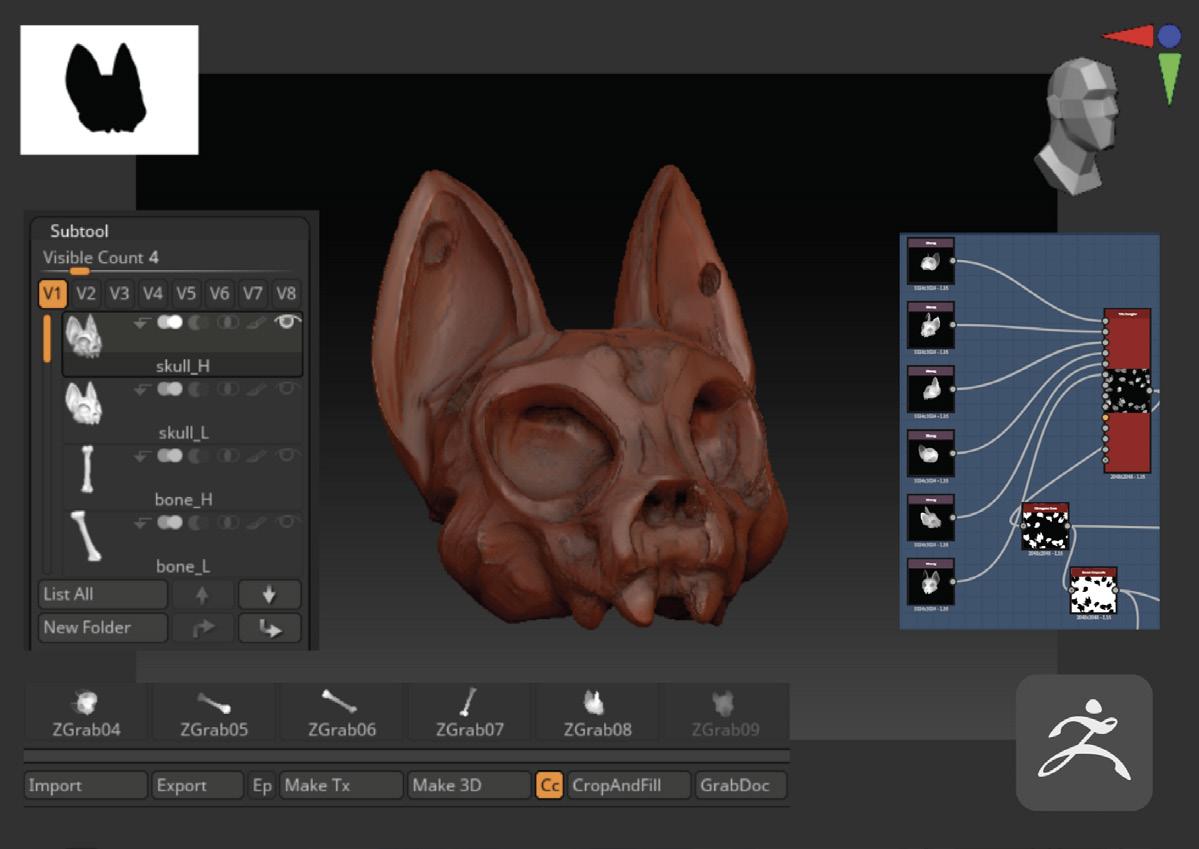
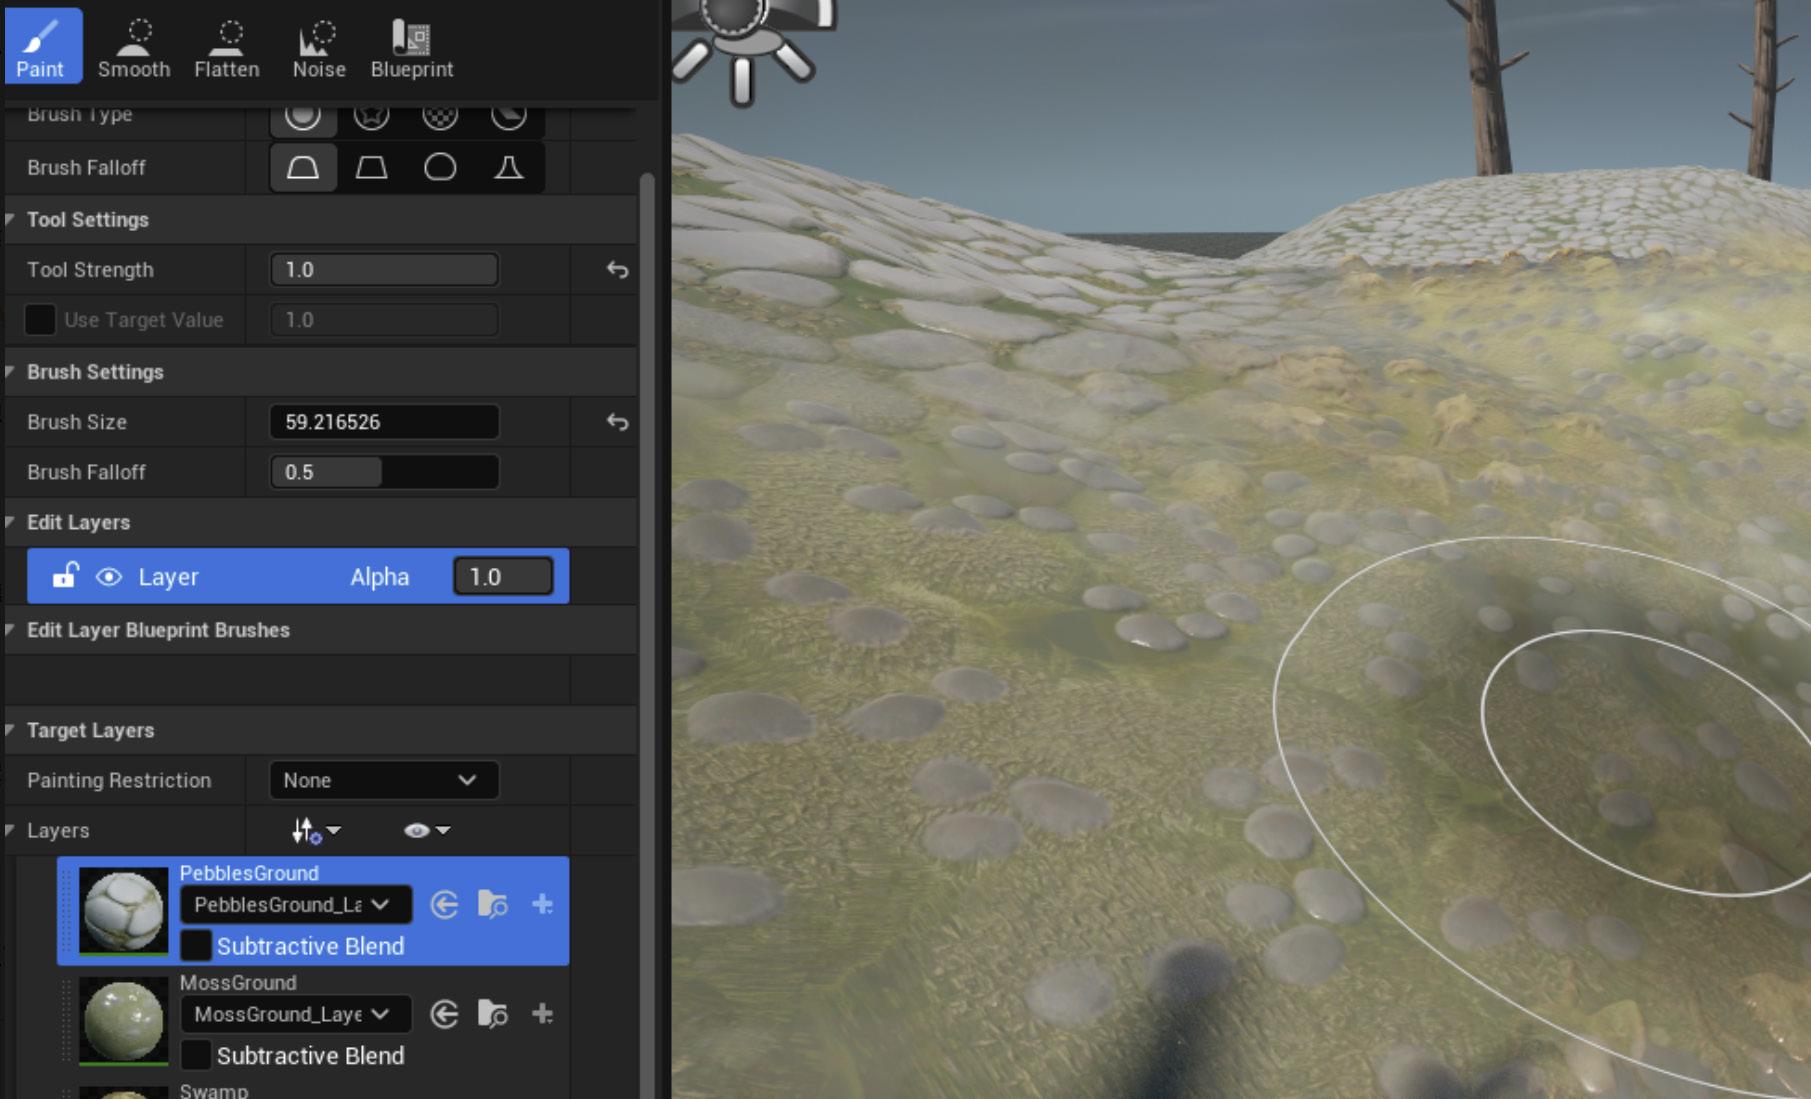
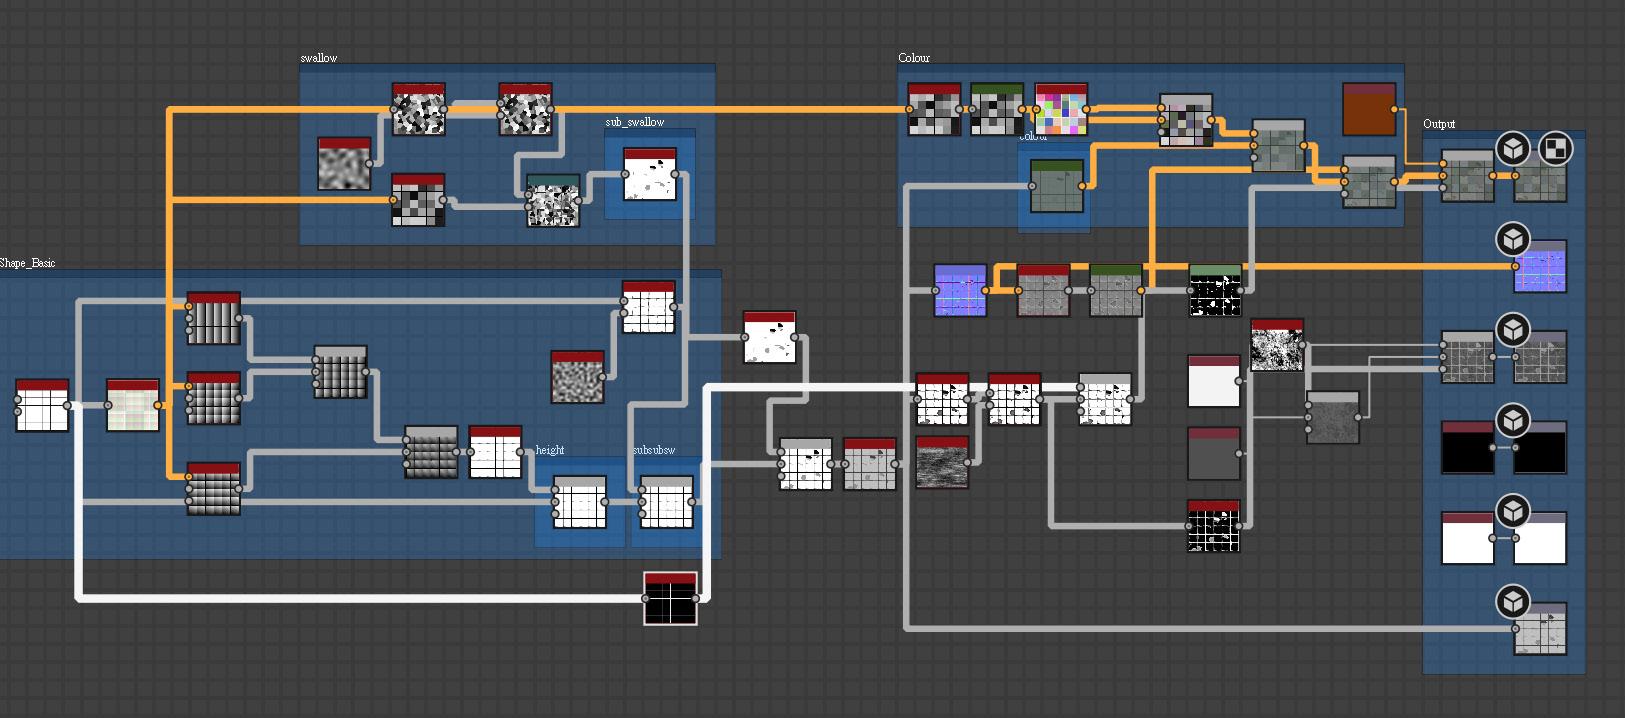
For the statue and skull asset, which I plan to duplicate multiple times in the scene, I used a multi-channel masking technique in Substance Painter to efficiently manage various environmental details. This approach allows for greater flexibility and control over the asset's appearance in UE5.
RGB CHANNEL
R for Cavity, G for Moss, B for Dust.
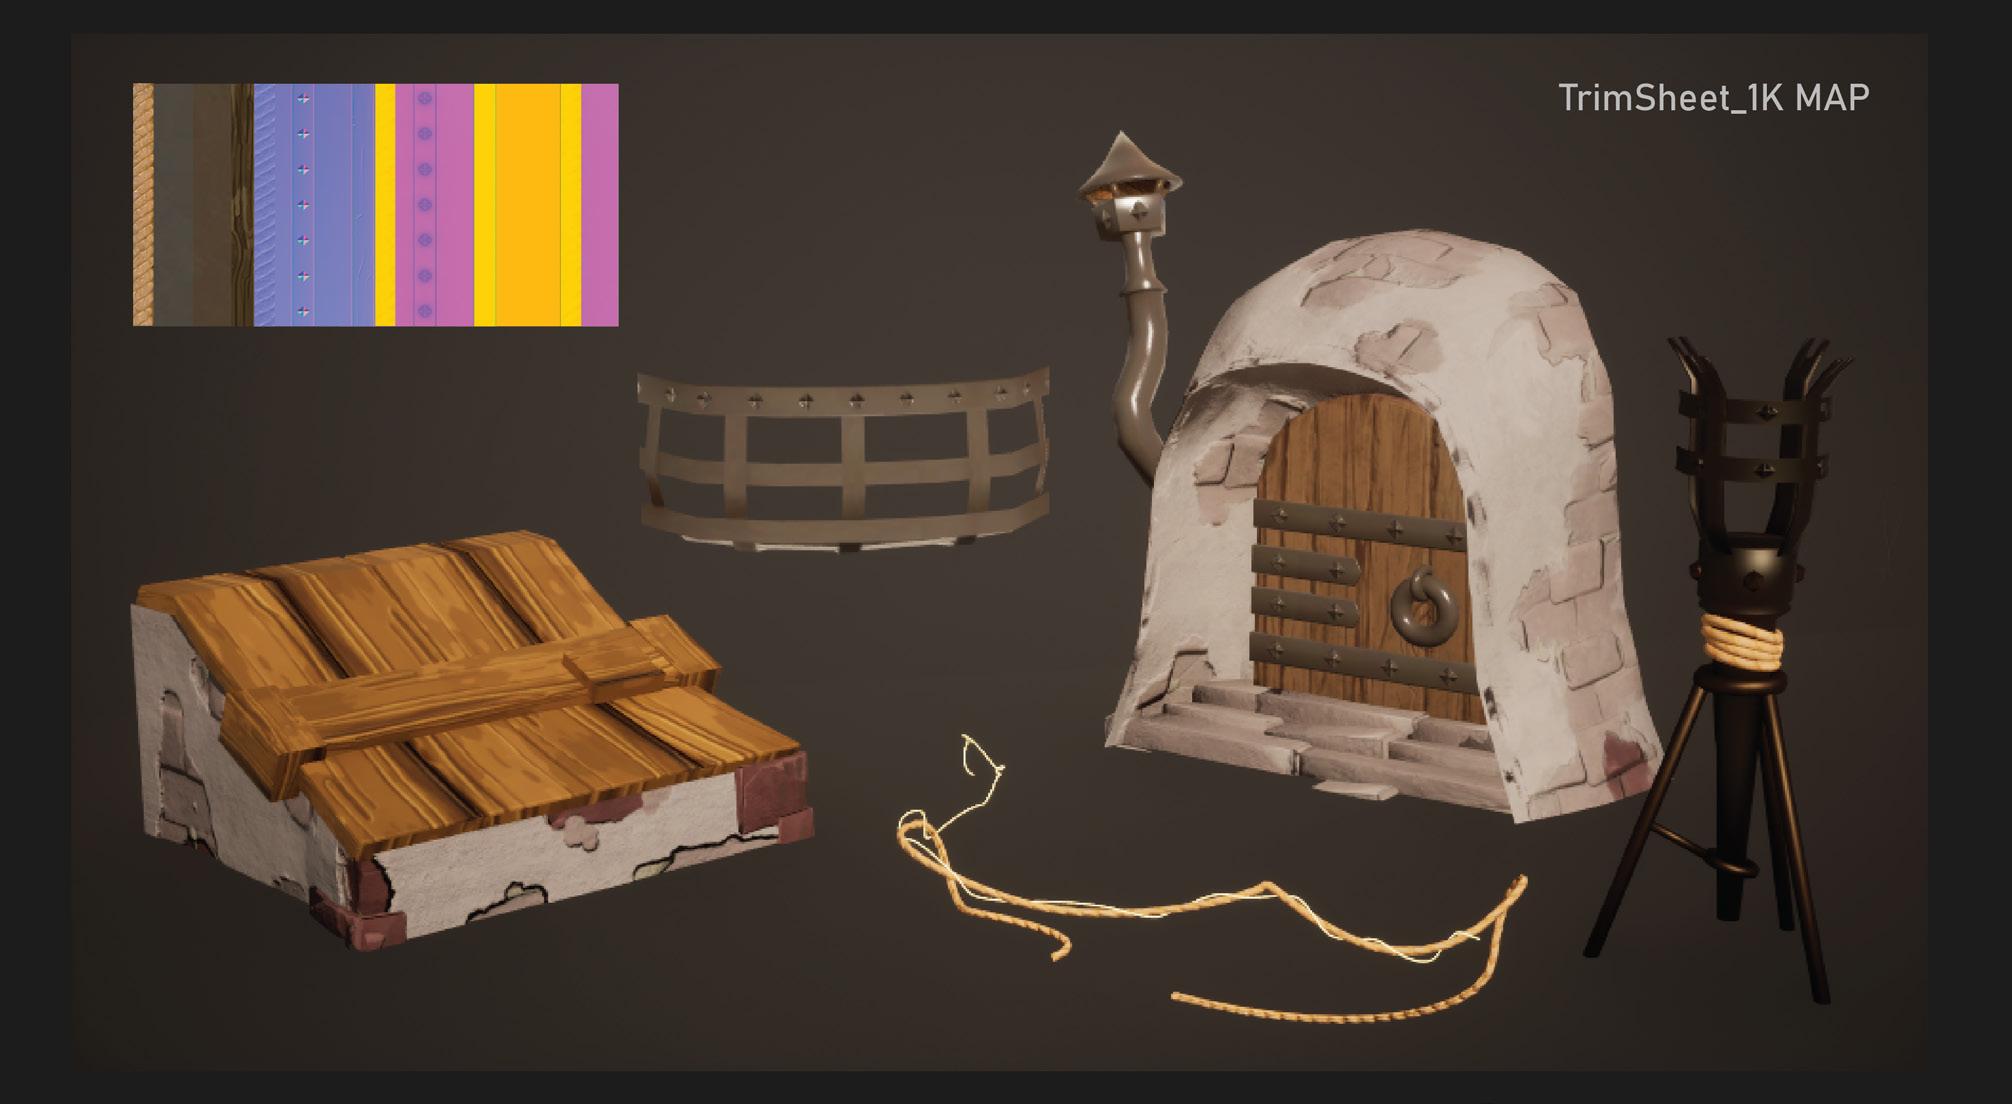
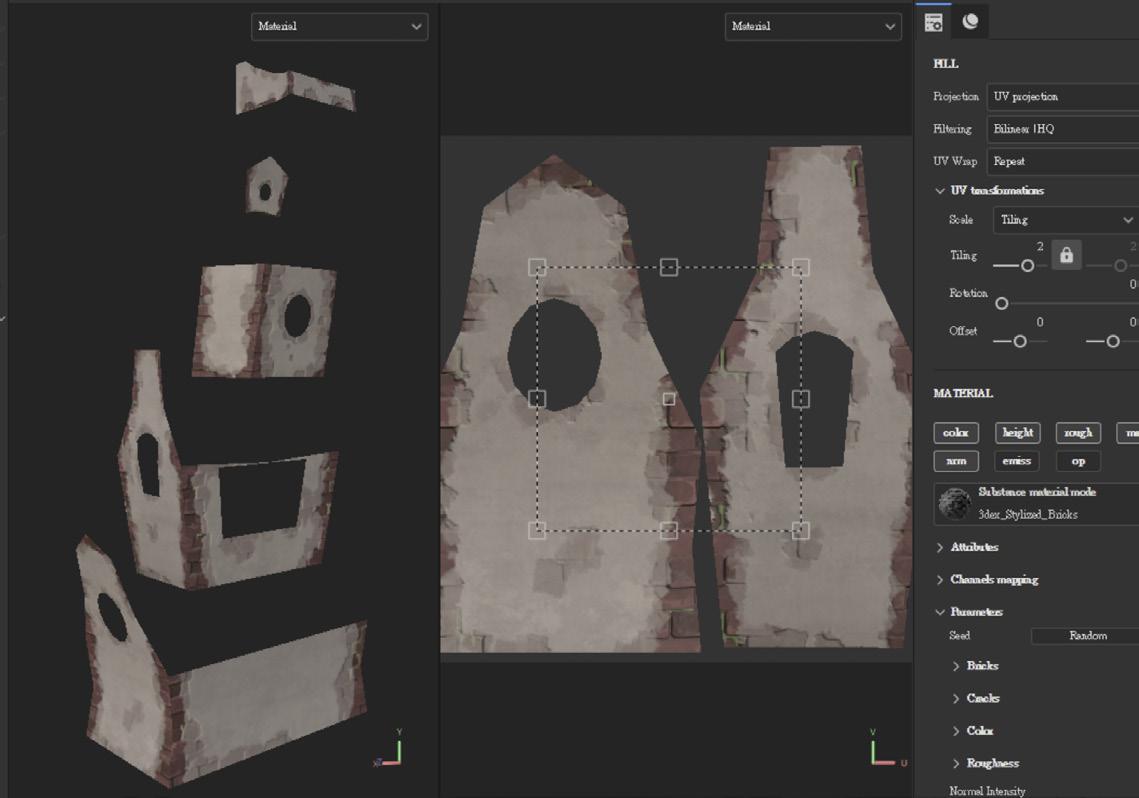
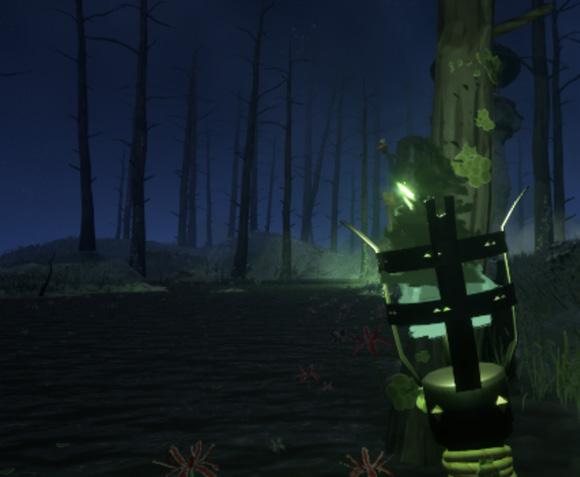
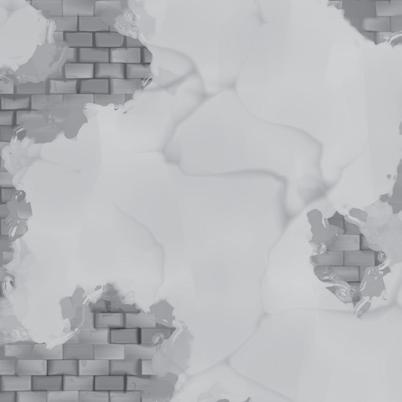
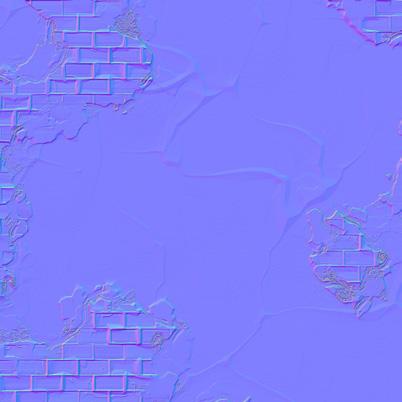
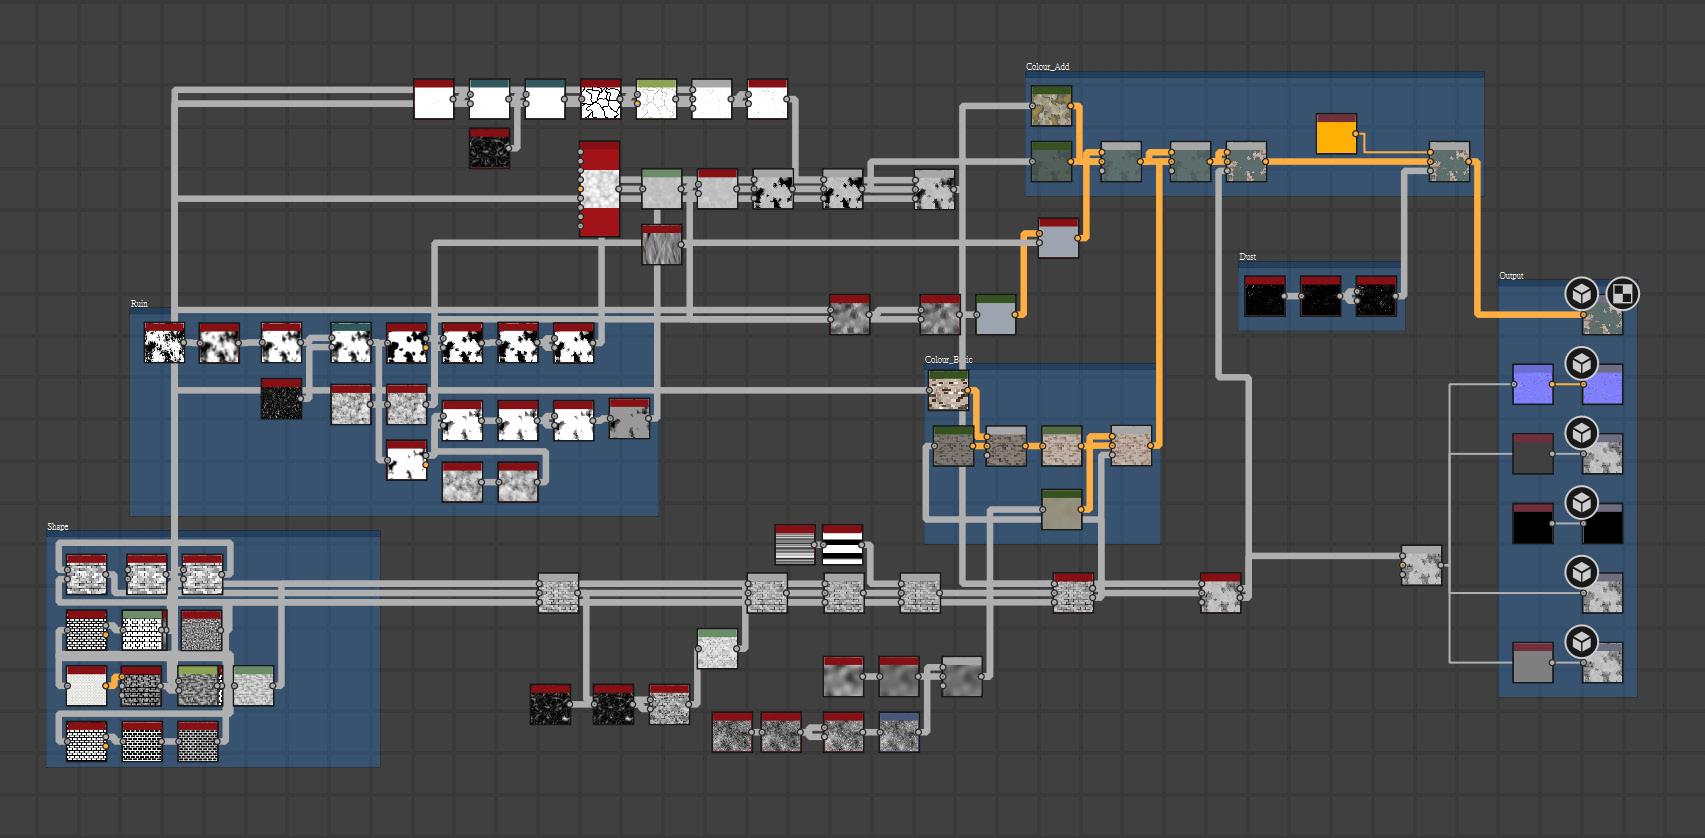
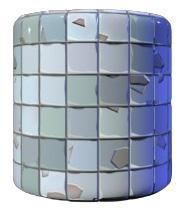
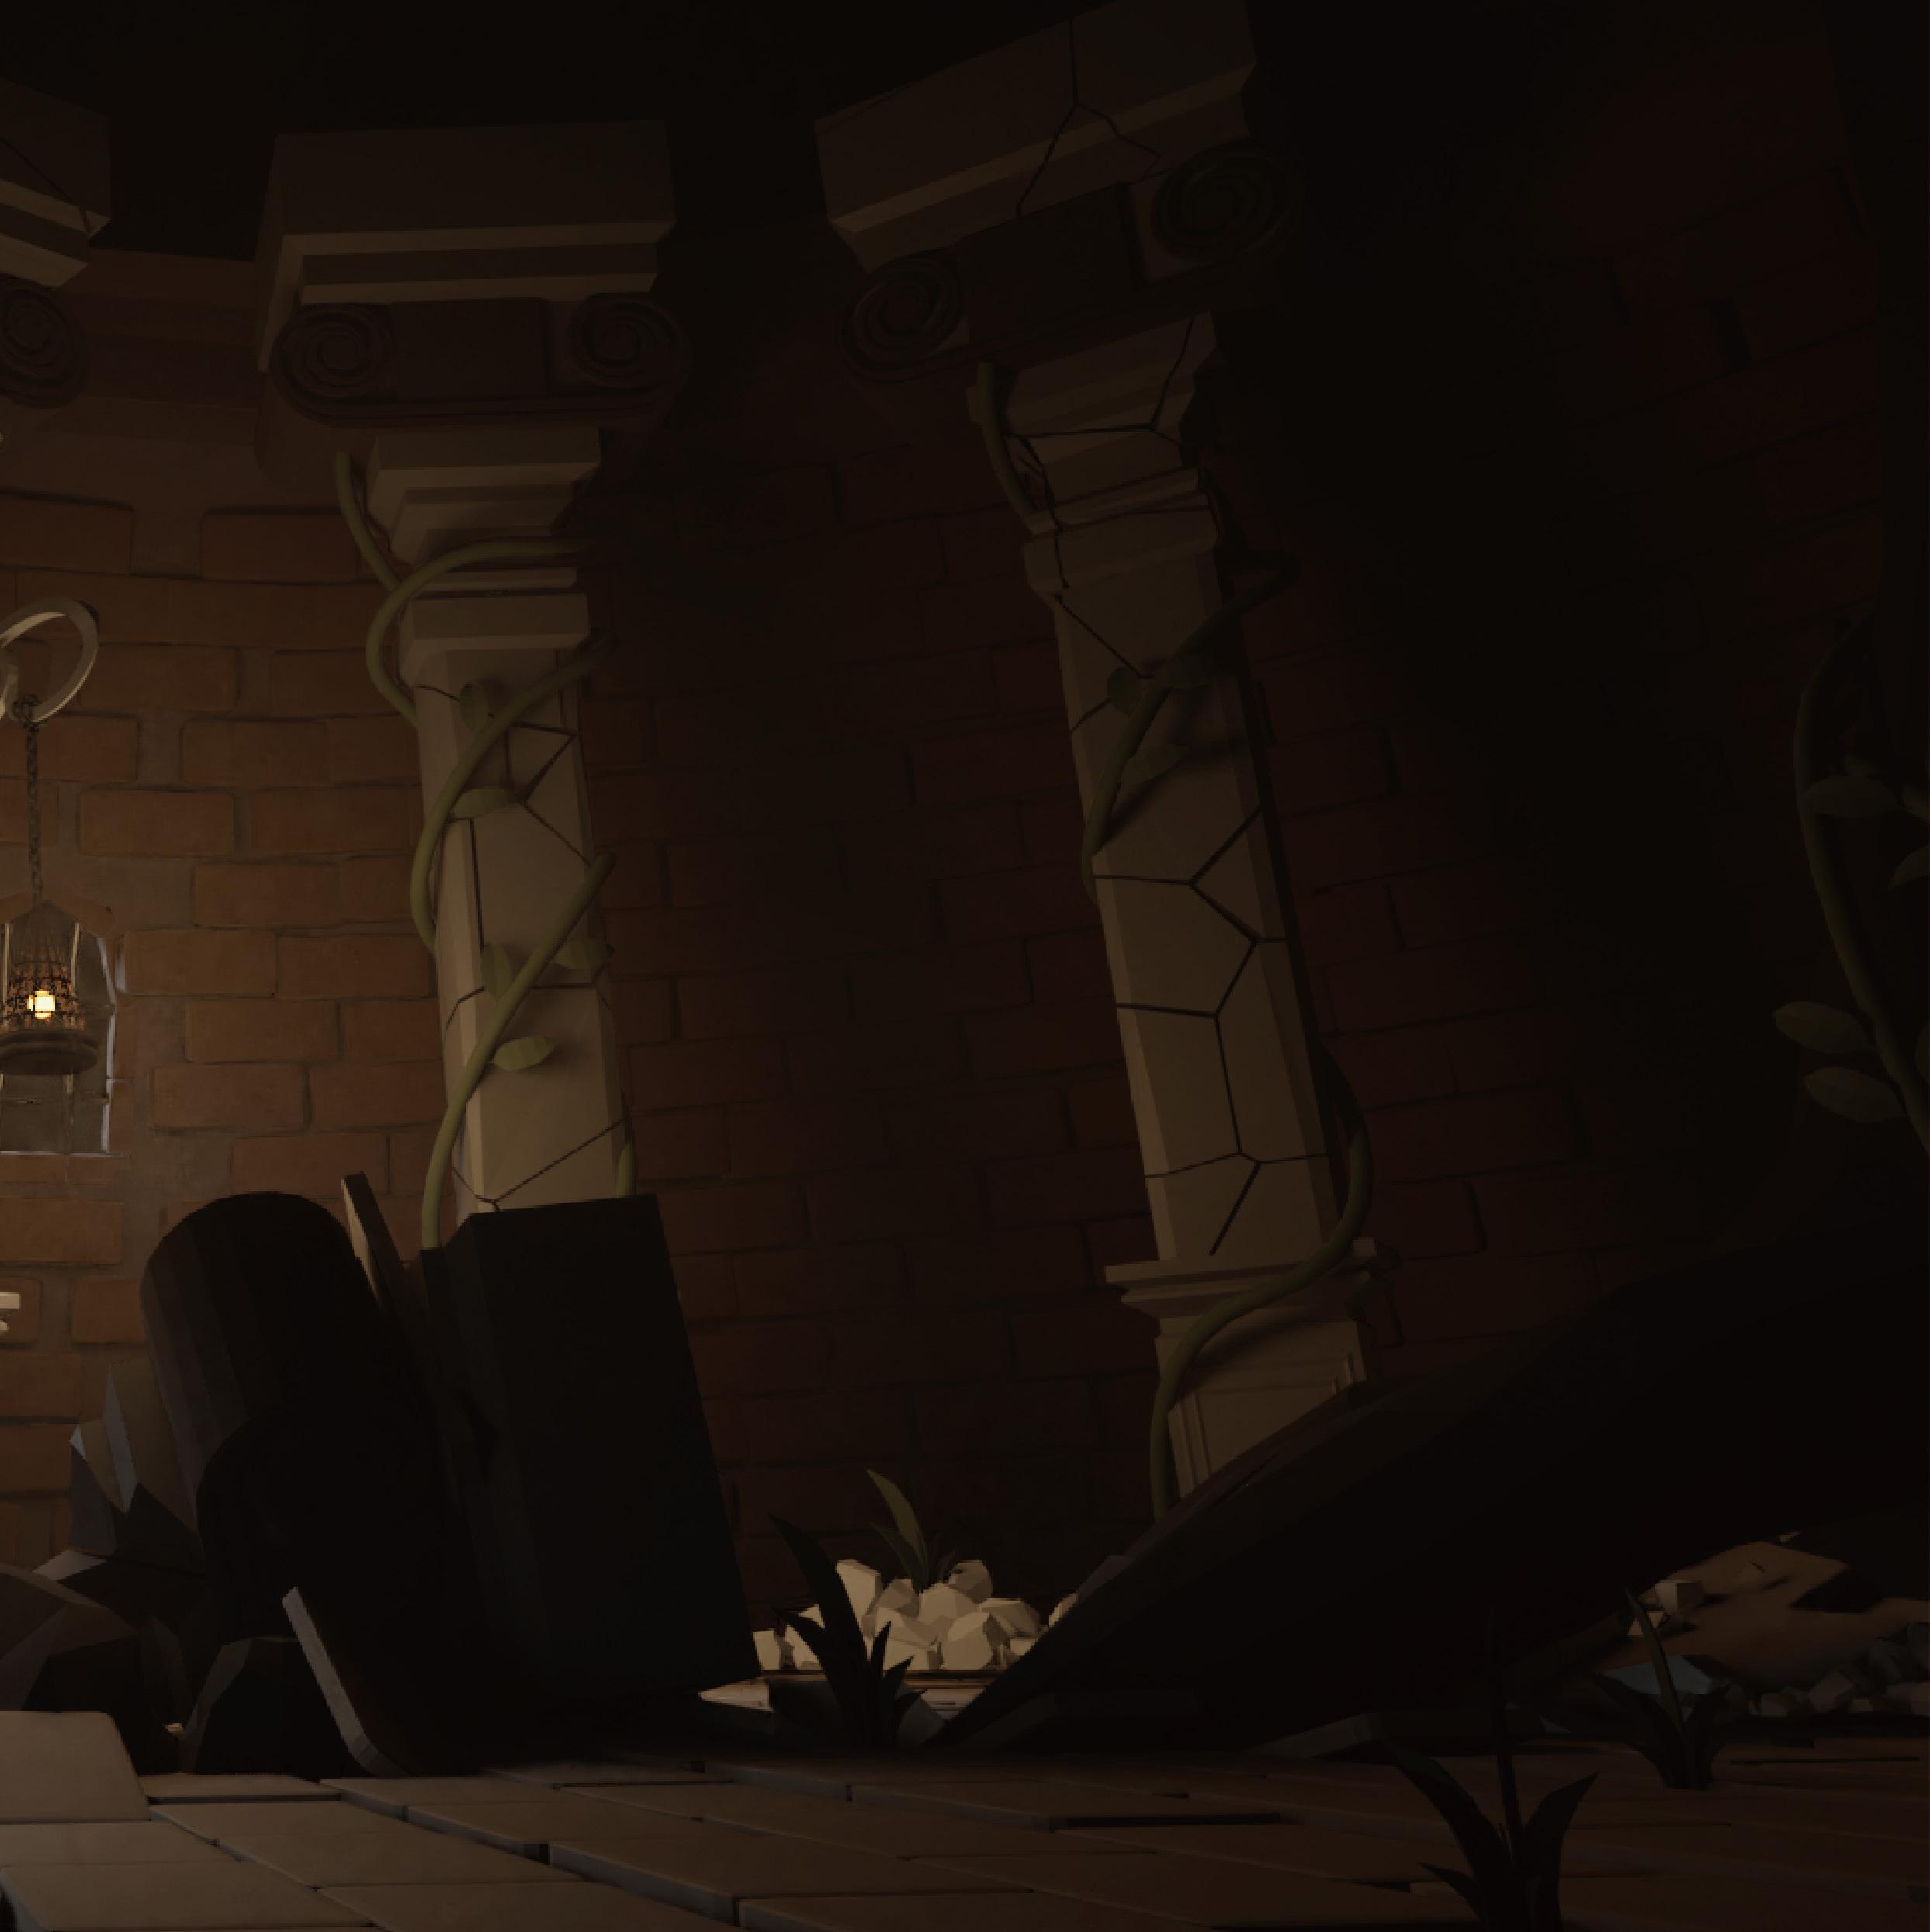
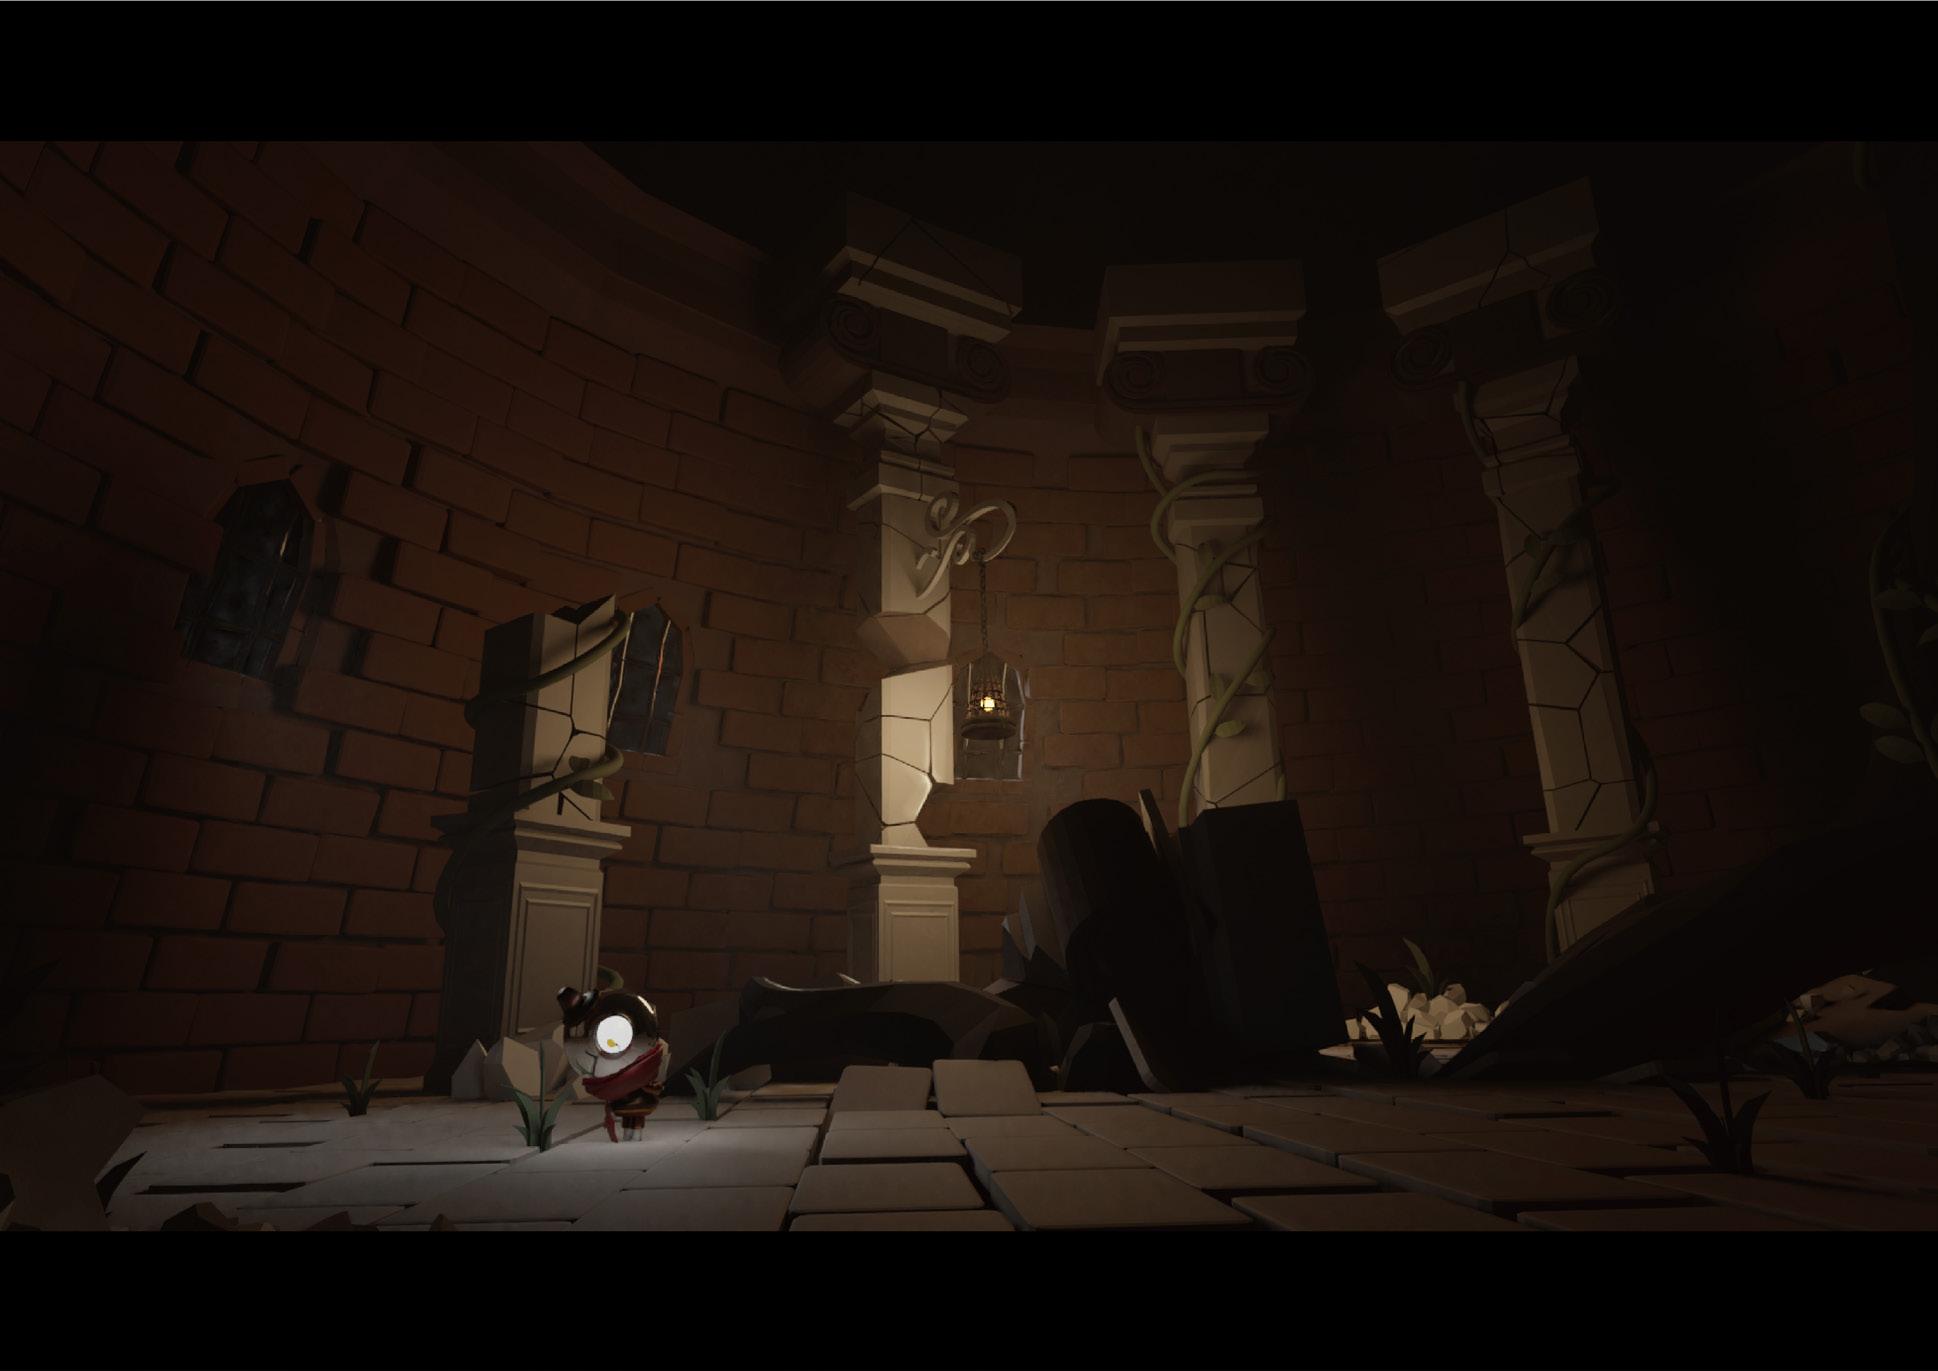
To keep things efficient and make sure all the assets looked like they belonged in the same world—things like cabinets, doors, baskets, torches, and ropes—I went with a trim sheet workflow. Instead of making a completely new texture for each object, I built one texture sheet packed with reusable patterns and details. This way, I could map different parts of the sheet onto different models, giving them a consistent style while saving a lot of time and memory.
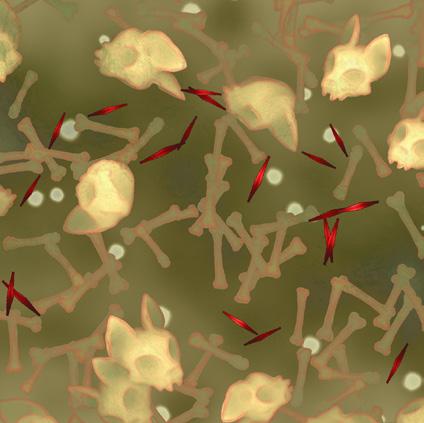
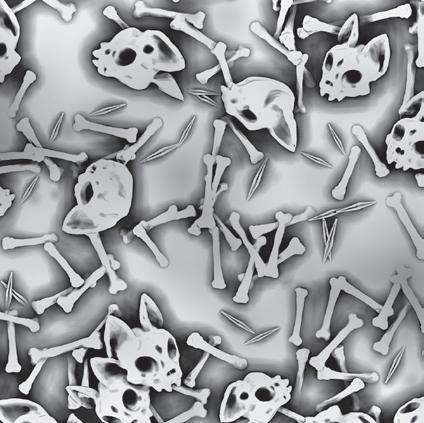
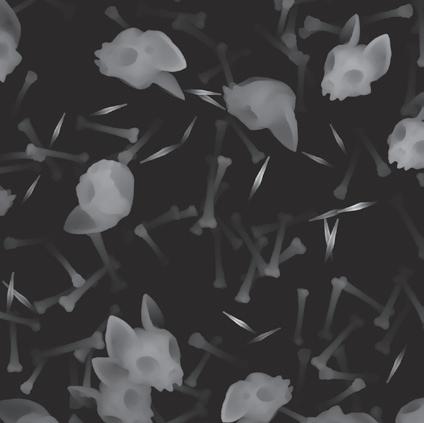
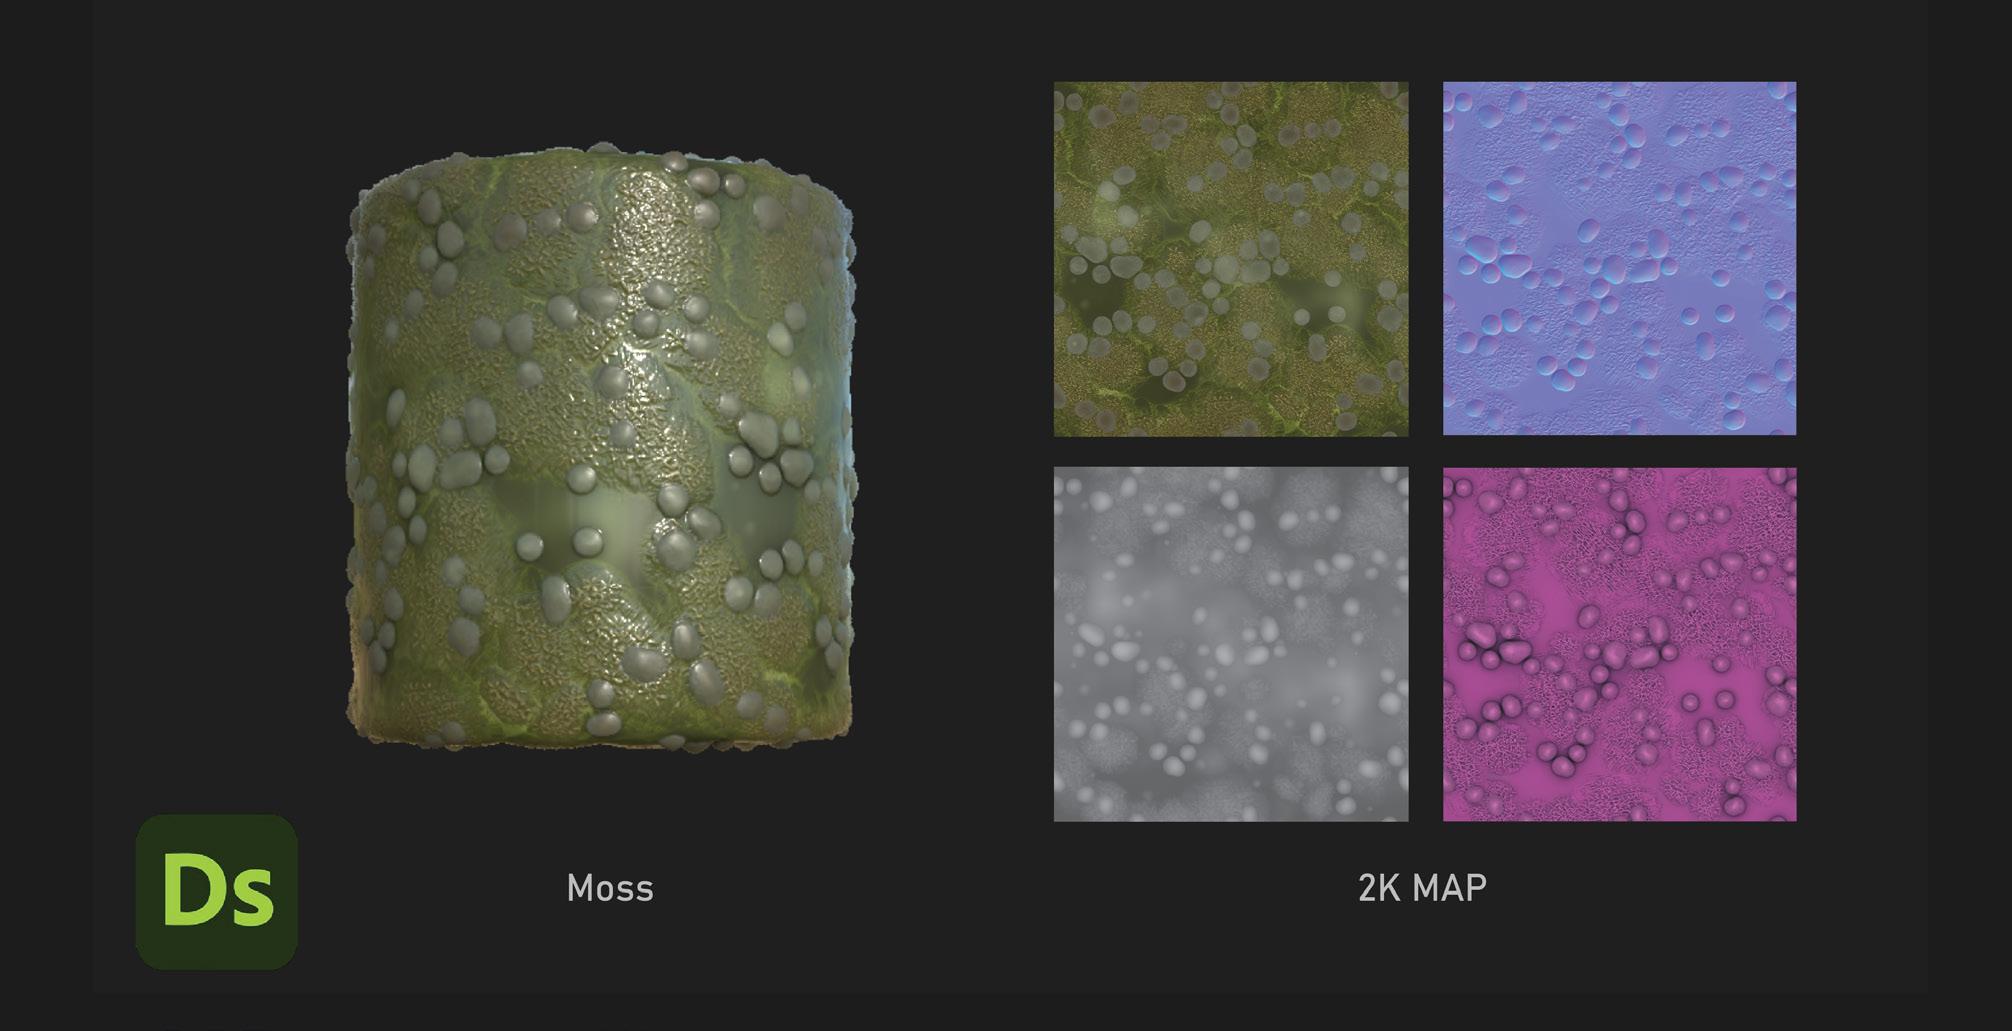
For the swamp landscape material, I aimed to create a stylized and eerie atmosphere by incorporating skull motifs. I sculpted the skulls in ZBrush and used the Alpha GrabDoc feature to capture grayscale depth information, which I then applied as a height map in Substance Painter to add intricate details to the texture.
To enhance the visual contrast and break up the dominant green tones of the swamp, I added red flowers into the design. This not only added a pop of color but also emphasized the stylized nature of the environment.
The combination of the skulls and red flowers created a unique and visually striking swamp texture that contributed to the overall atmosphere of the scene.

Trimsheet & Substance Designer
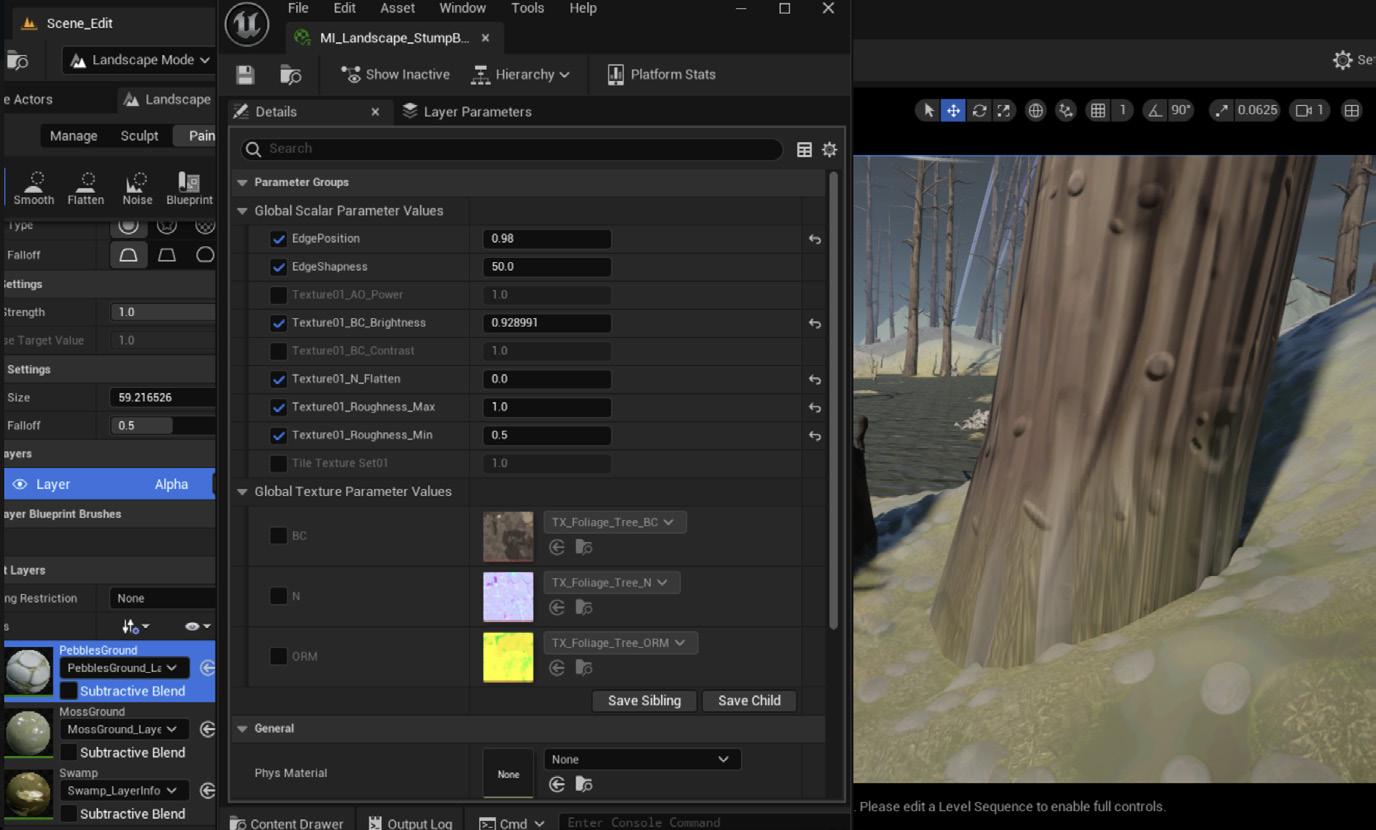
In UE5 , I utilized the Landscape Layer Blend node with the LB_HeightBlend mode. This way considers the displacement data from each texture, ensuring that materials blend based on the terrain's actual surface features. For instance, sand naturally accumulates in crevices before covering elevated areas, creating a more believable landscape. Additionally, I adjusted the contrast of the height blend to achieve a more pronounced transition between textures.
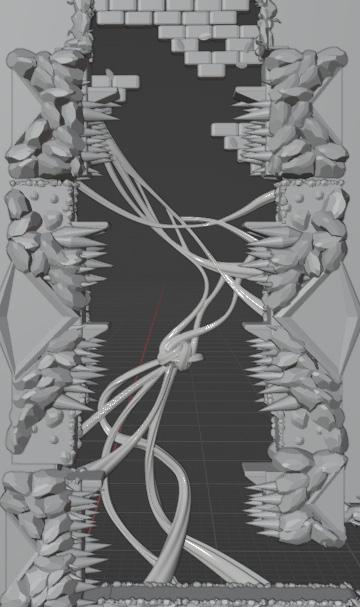
To achieve a natural integration between trees and the surrounding ground in my swamp forest environment, I utilized RVT again. This technique allowed for seamless blending of materials, ensuring that tree bases transitioned smoothly into the terrain without harsh lines or noticeable seams.

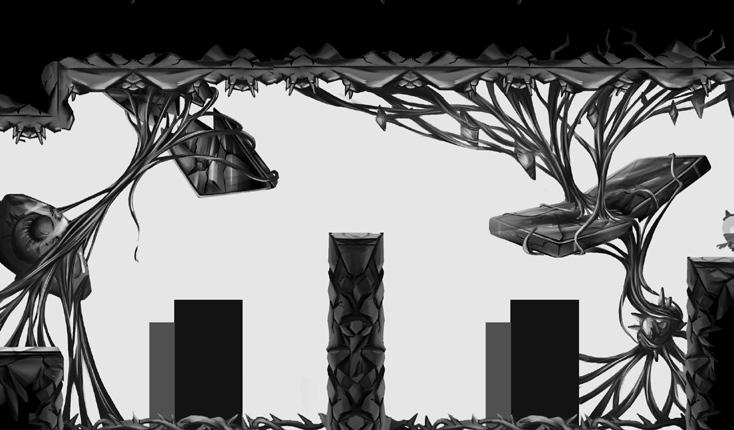
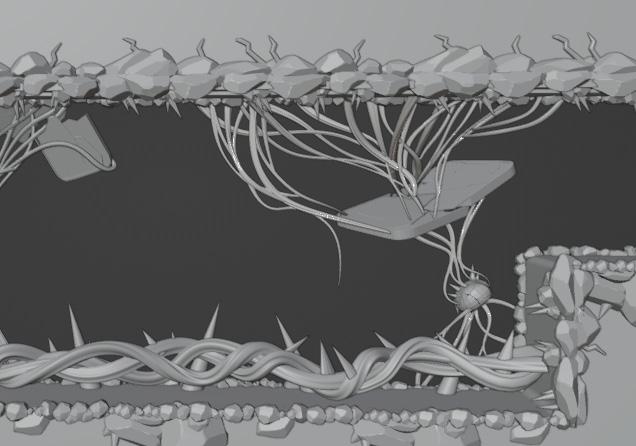
Modular Assets
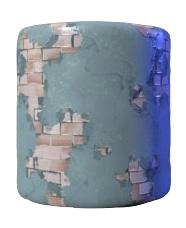
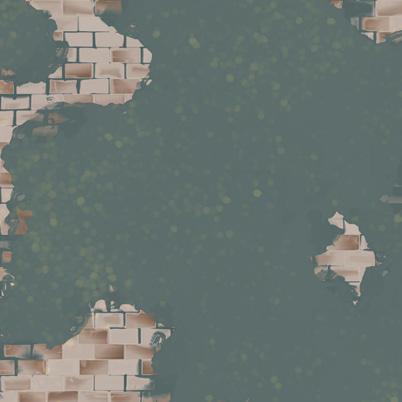
For the wall asset, I employed a straightforward approach by modeling the base mesh and texturing it using Substance Painter. This method allowed for efficient creation while maintaining a focus on detail and realism.
Upon importing the textured wall into UE, I enhanced its visual complexity by in using decals and painting foliage directly onto the surface. The use of decals enabled the addition of subtle details such as dirt, stains, and wear marks, contributing to the wall's aged and weathered appearance.
To further enrich the environment, I utilized UE's foliage painting tools to add various plant life growing on the wall. This technique not only added organic elements to the scene but also emphasized the passage of time and the encroachment of nature on the manmade structure.
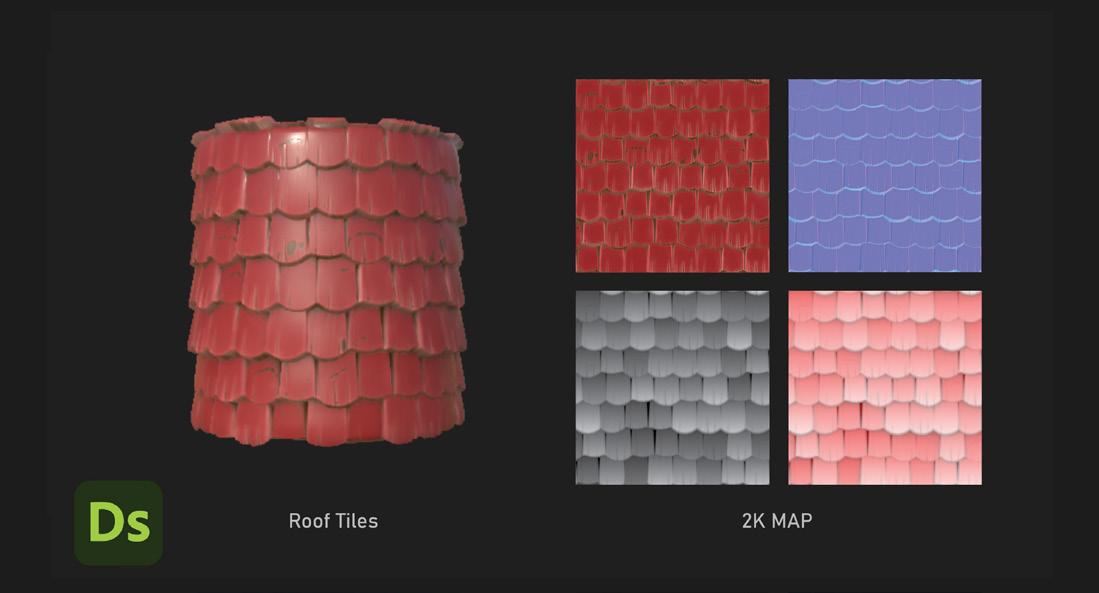
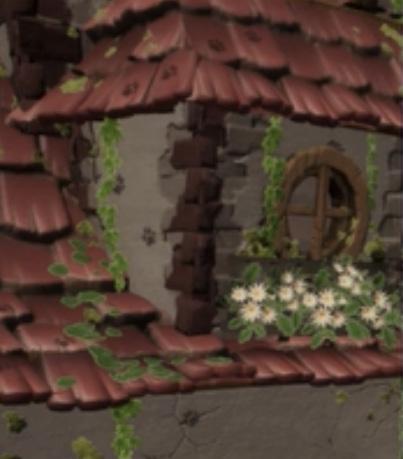
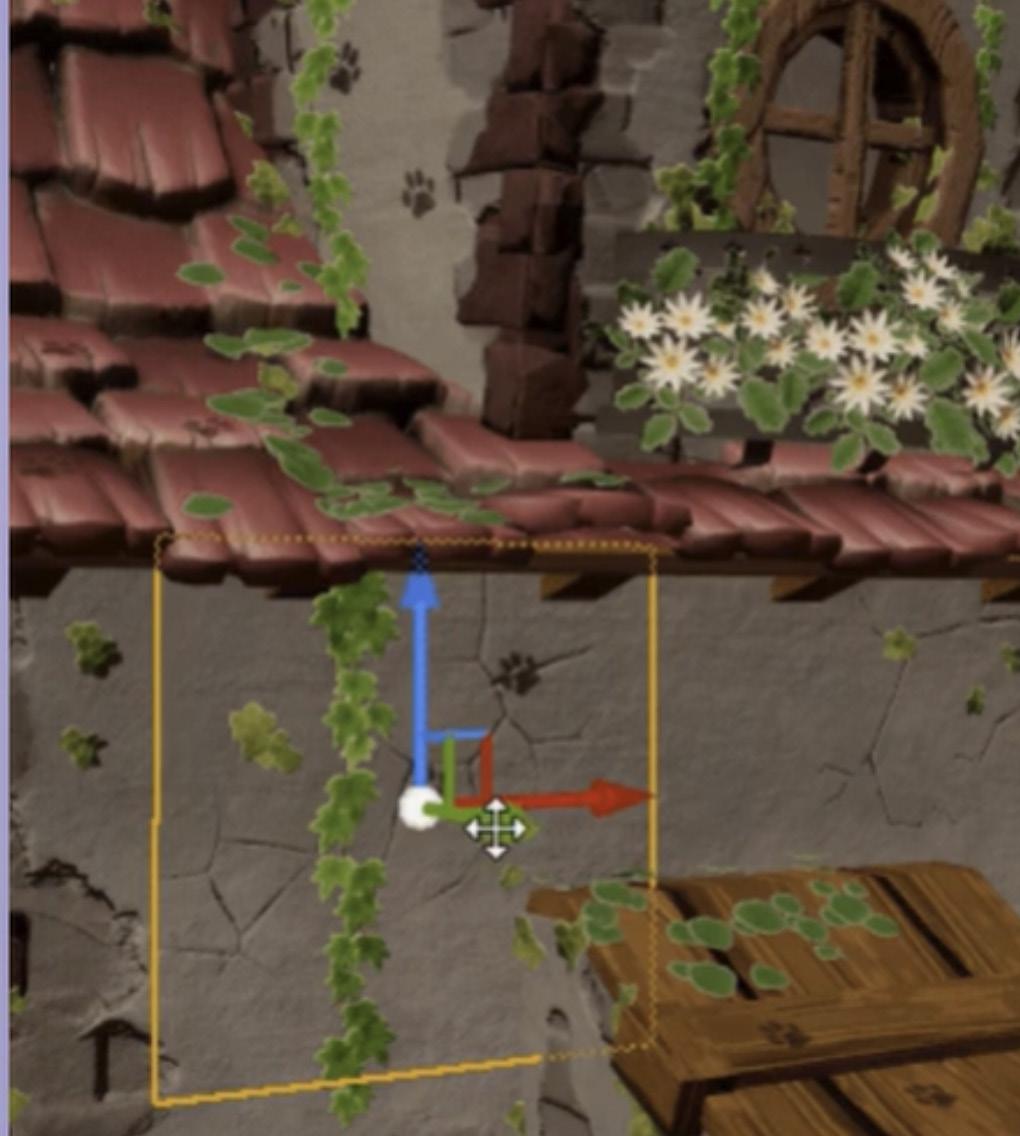
To implement the roof in UE5, I imported a single plane mesh and applied the tile texture. Utilizing UE5's displacement tools, I manipulated the mesh's height to match the contours of the roof, creating a realistic, uneven surface.

Foliage &Water
Foliage
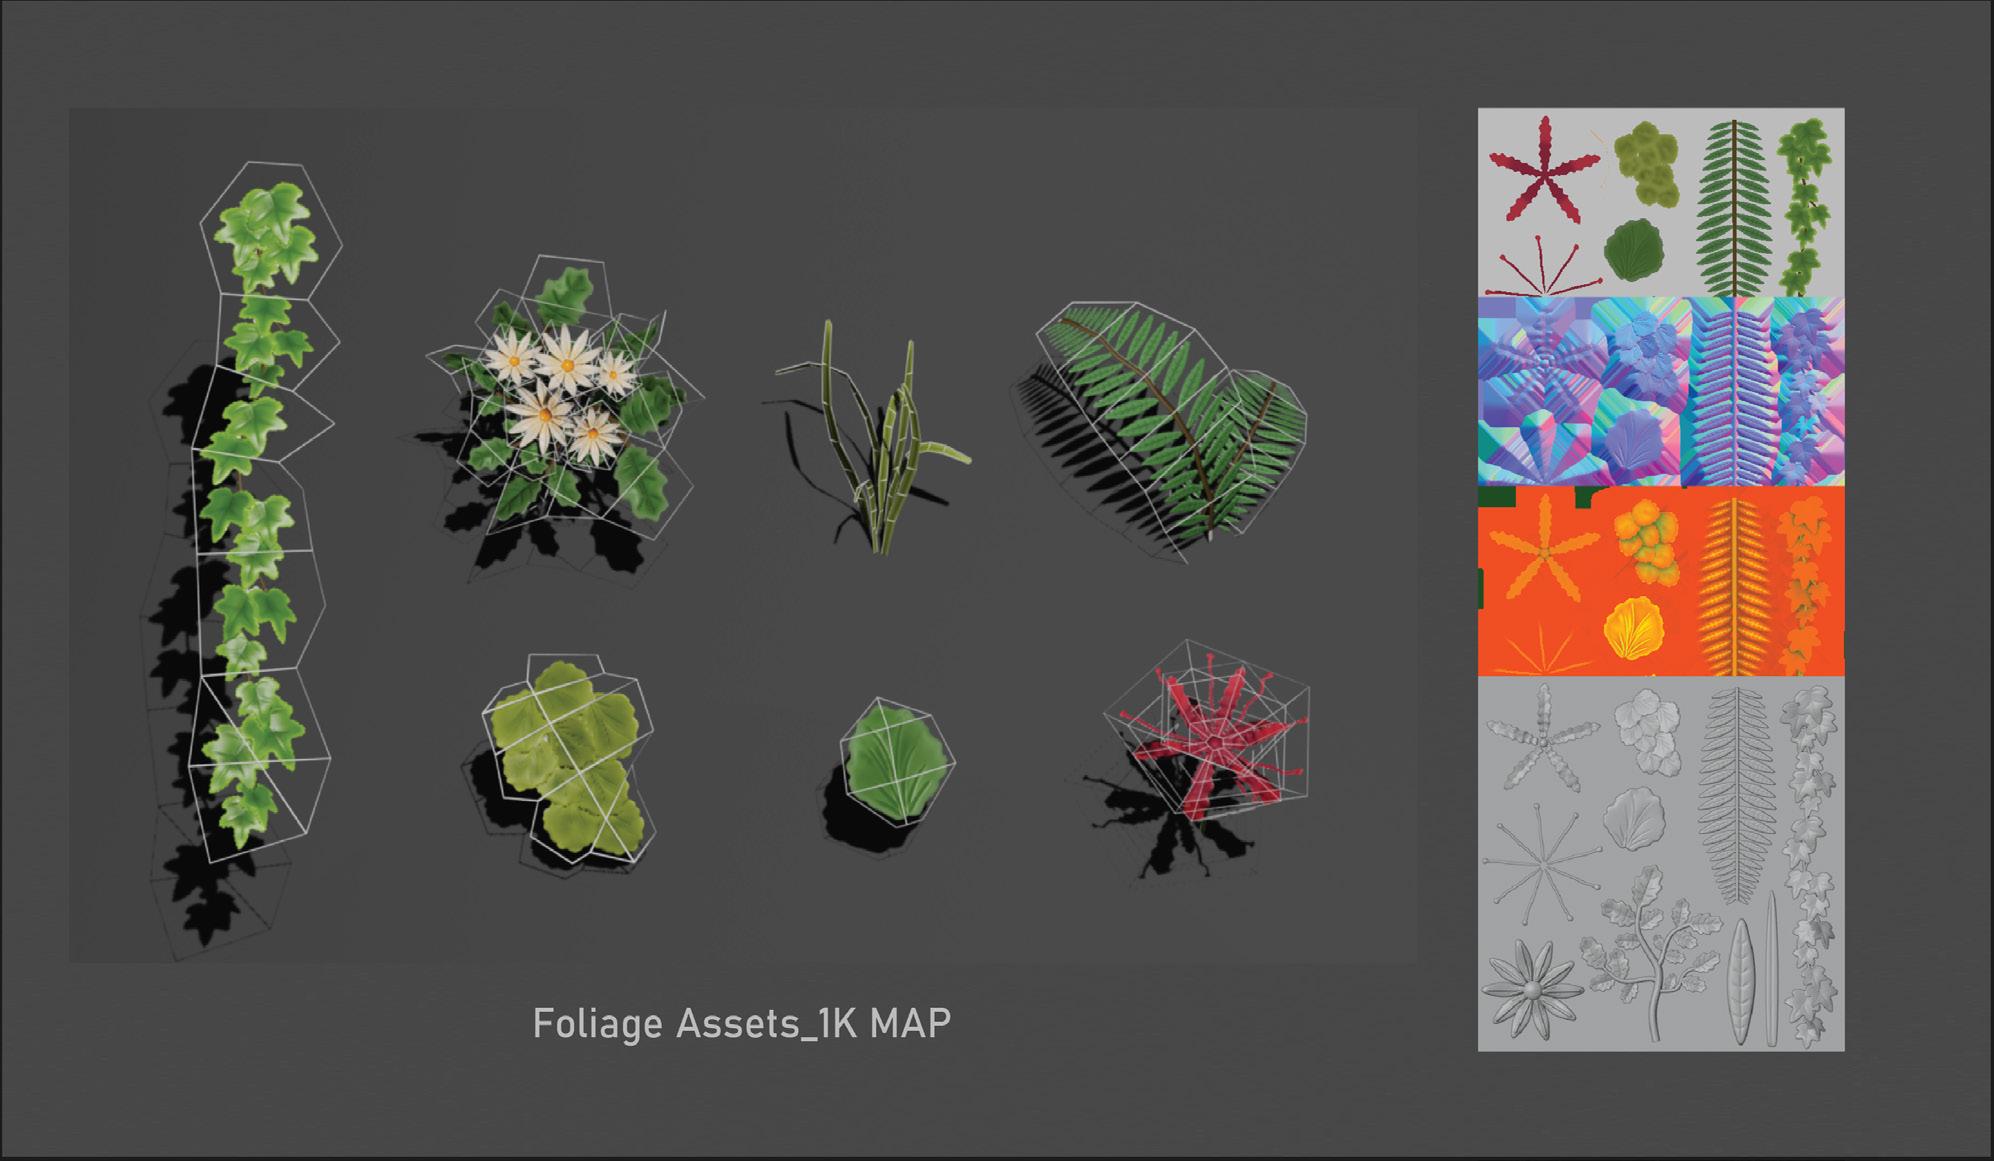
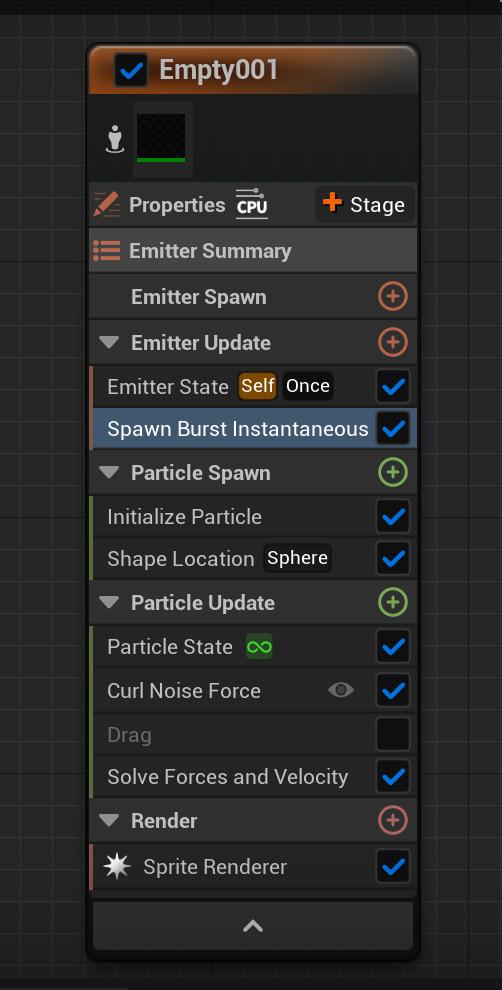
After completing the basic landscape, I began creating various types of foliage, including vines, white flowers, red flowers, small leaves, and grass. To achieve a stylized yet optimized result, I used single planes with high-to-low poly baking techniques. The textures were created in Substance Painter , where I also generated opacity masks to define the shapes of the foliage and achieve soft silhouettes. Once the texture work was completed, I used Blender to model and arrange the foliage cards, adjusting shapes to match the visual style.
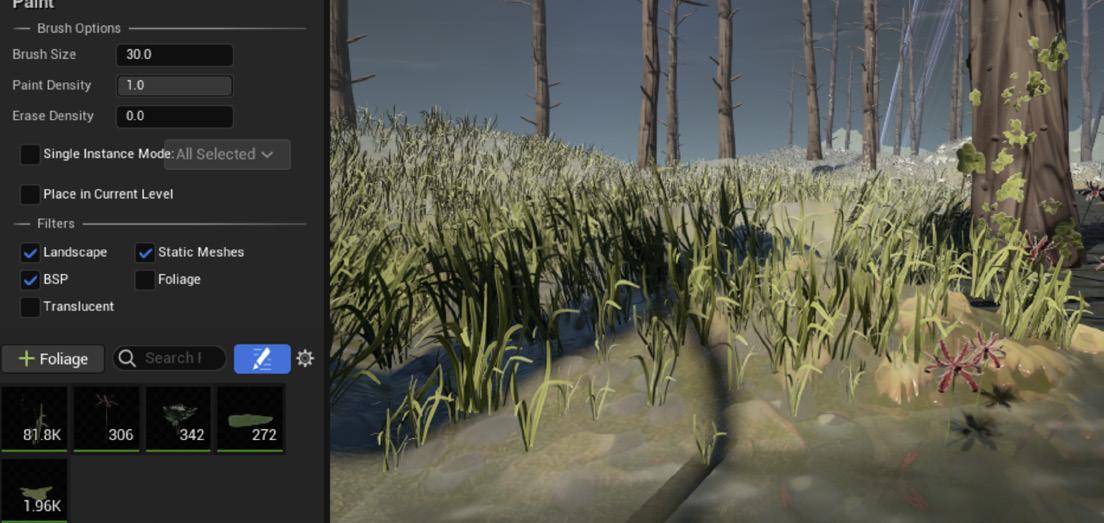
After completing the foliage assets, I used the SimpleGrassWind node in the material setup to add subtle wind animation, making the plants feel more vivid and dynamic.
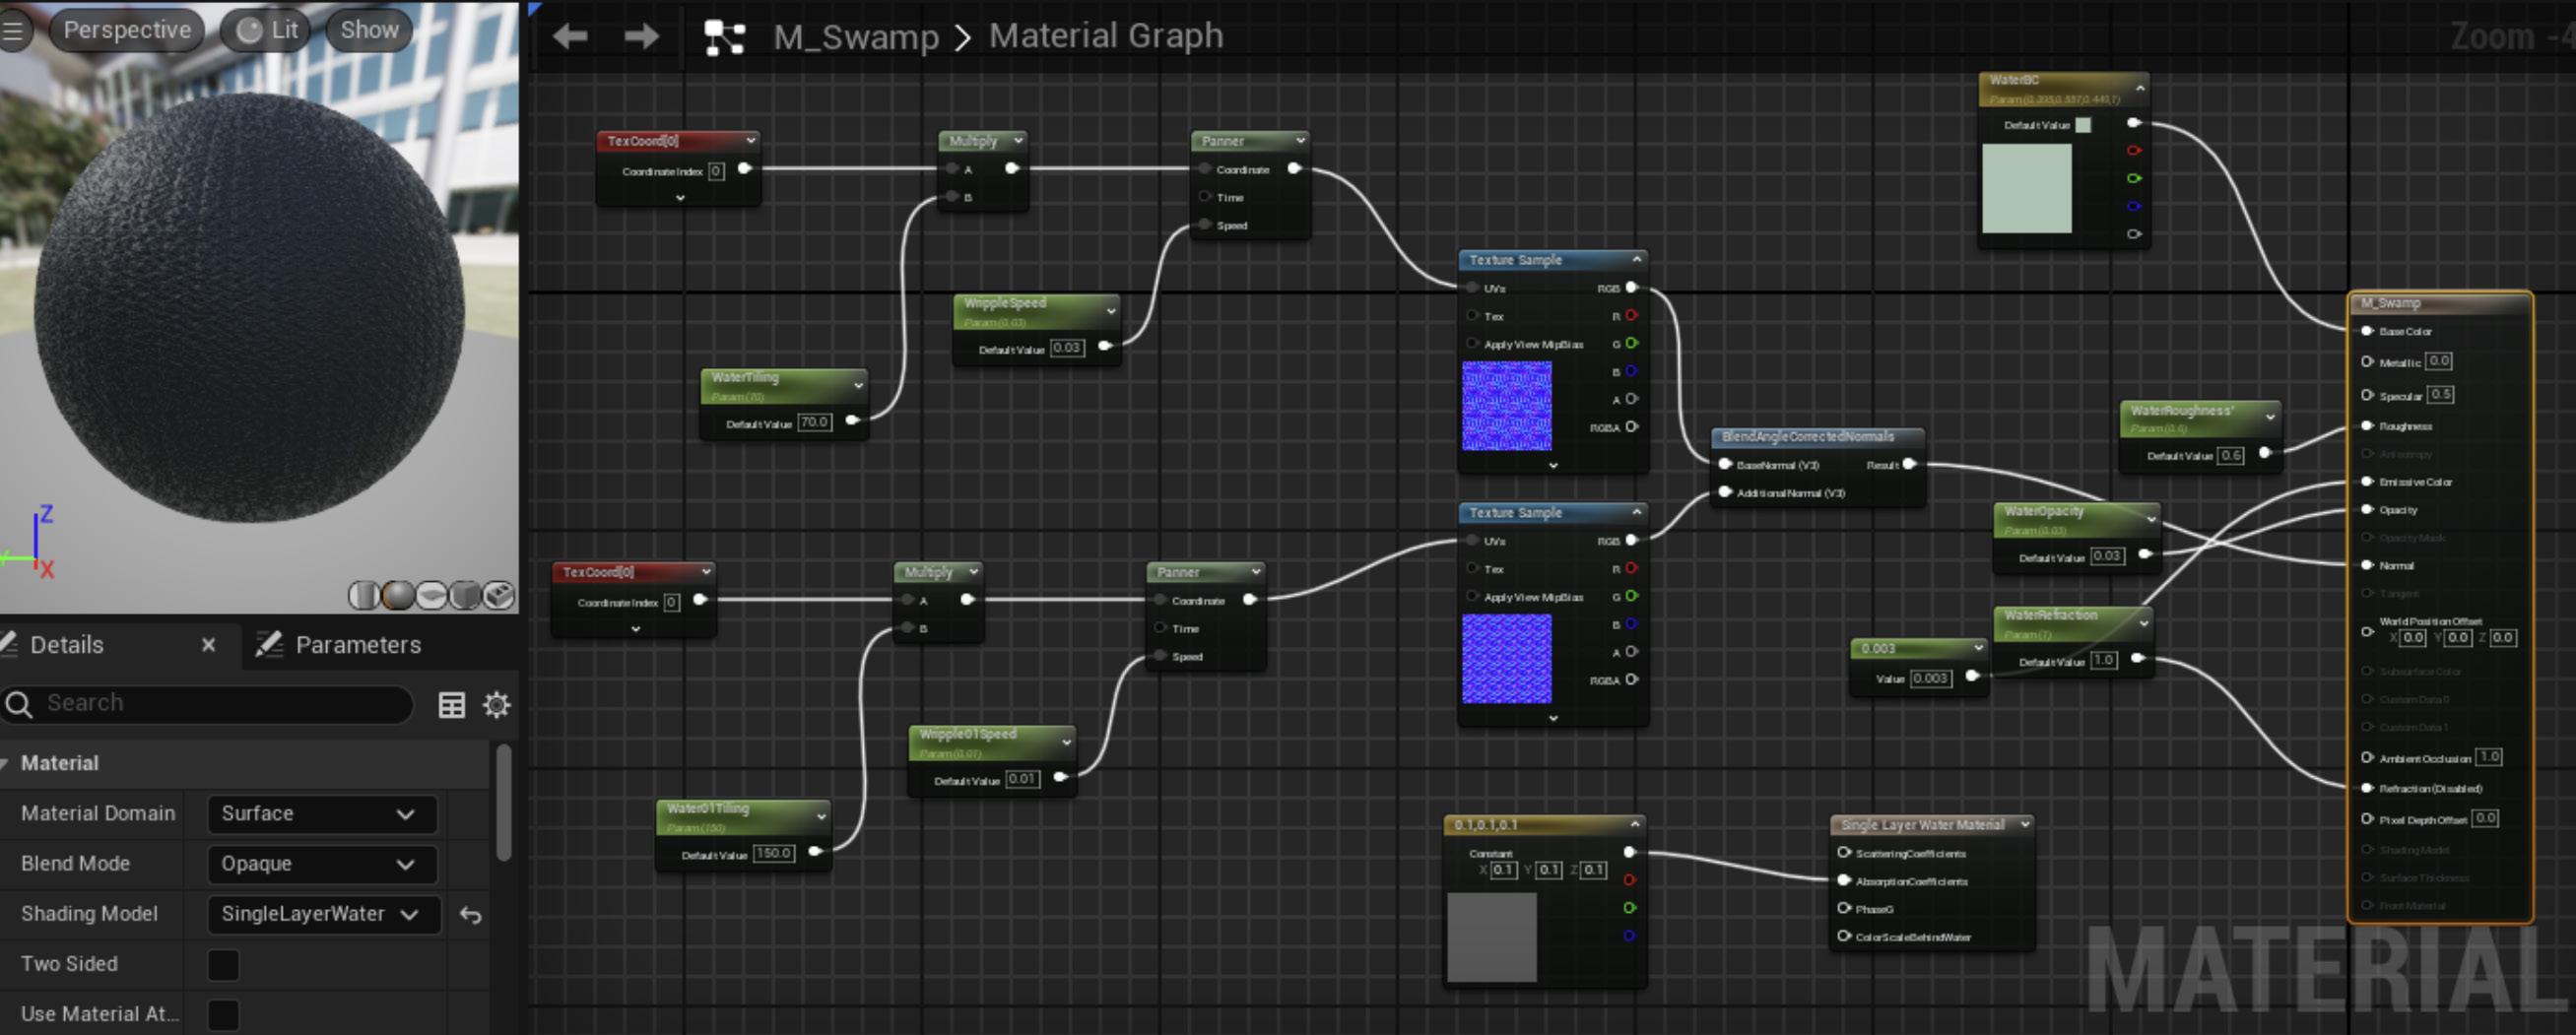
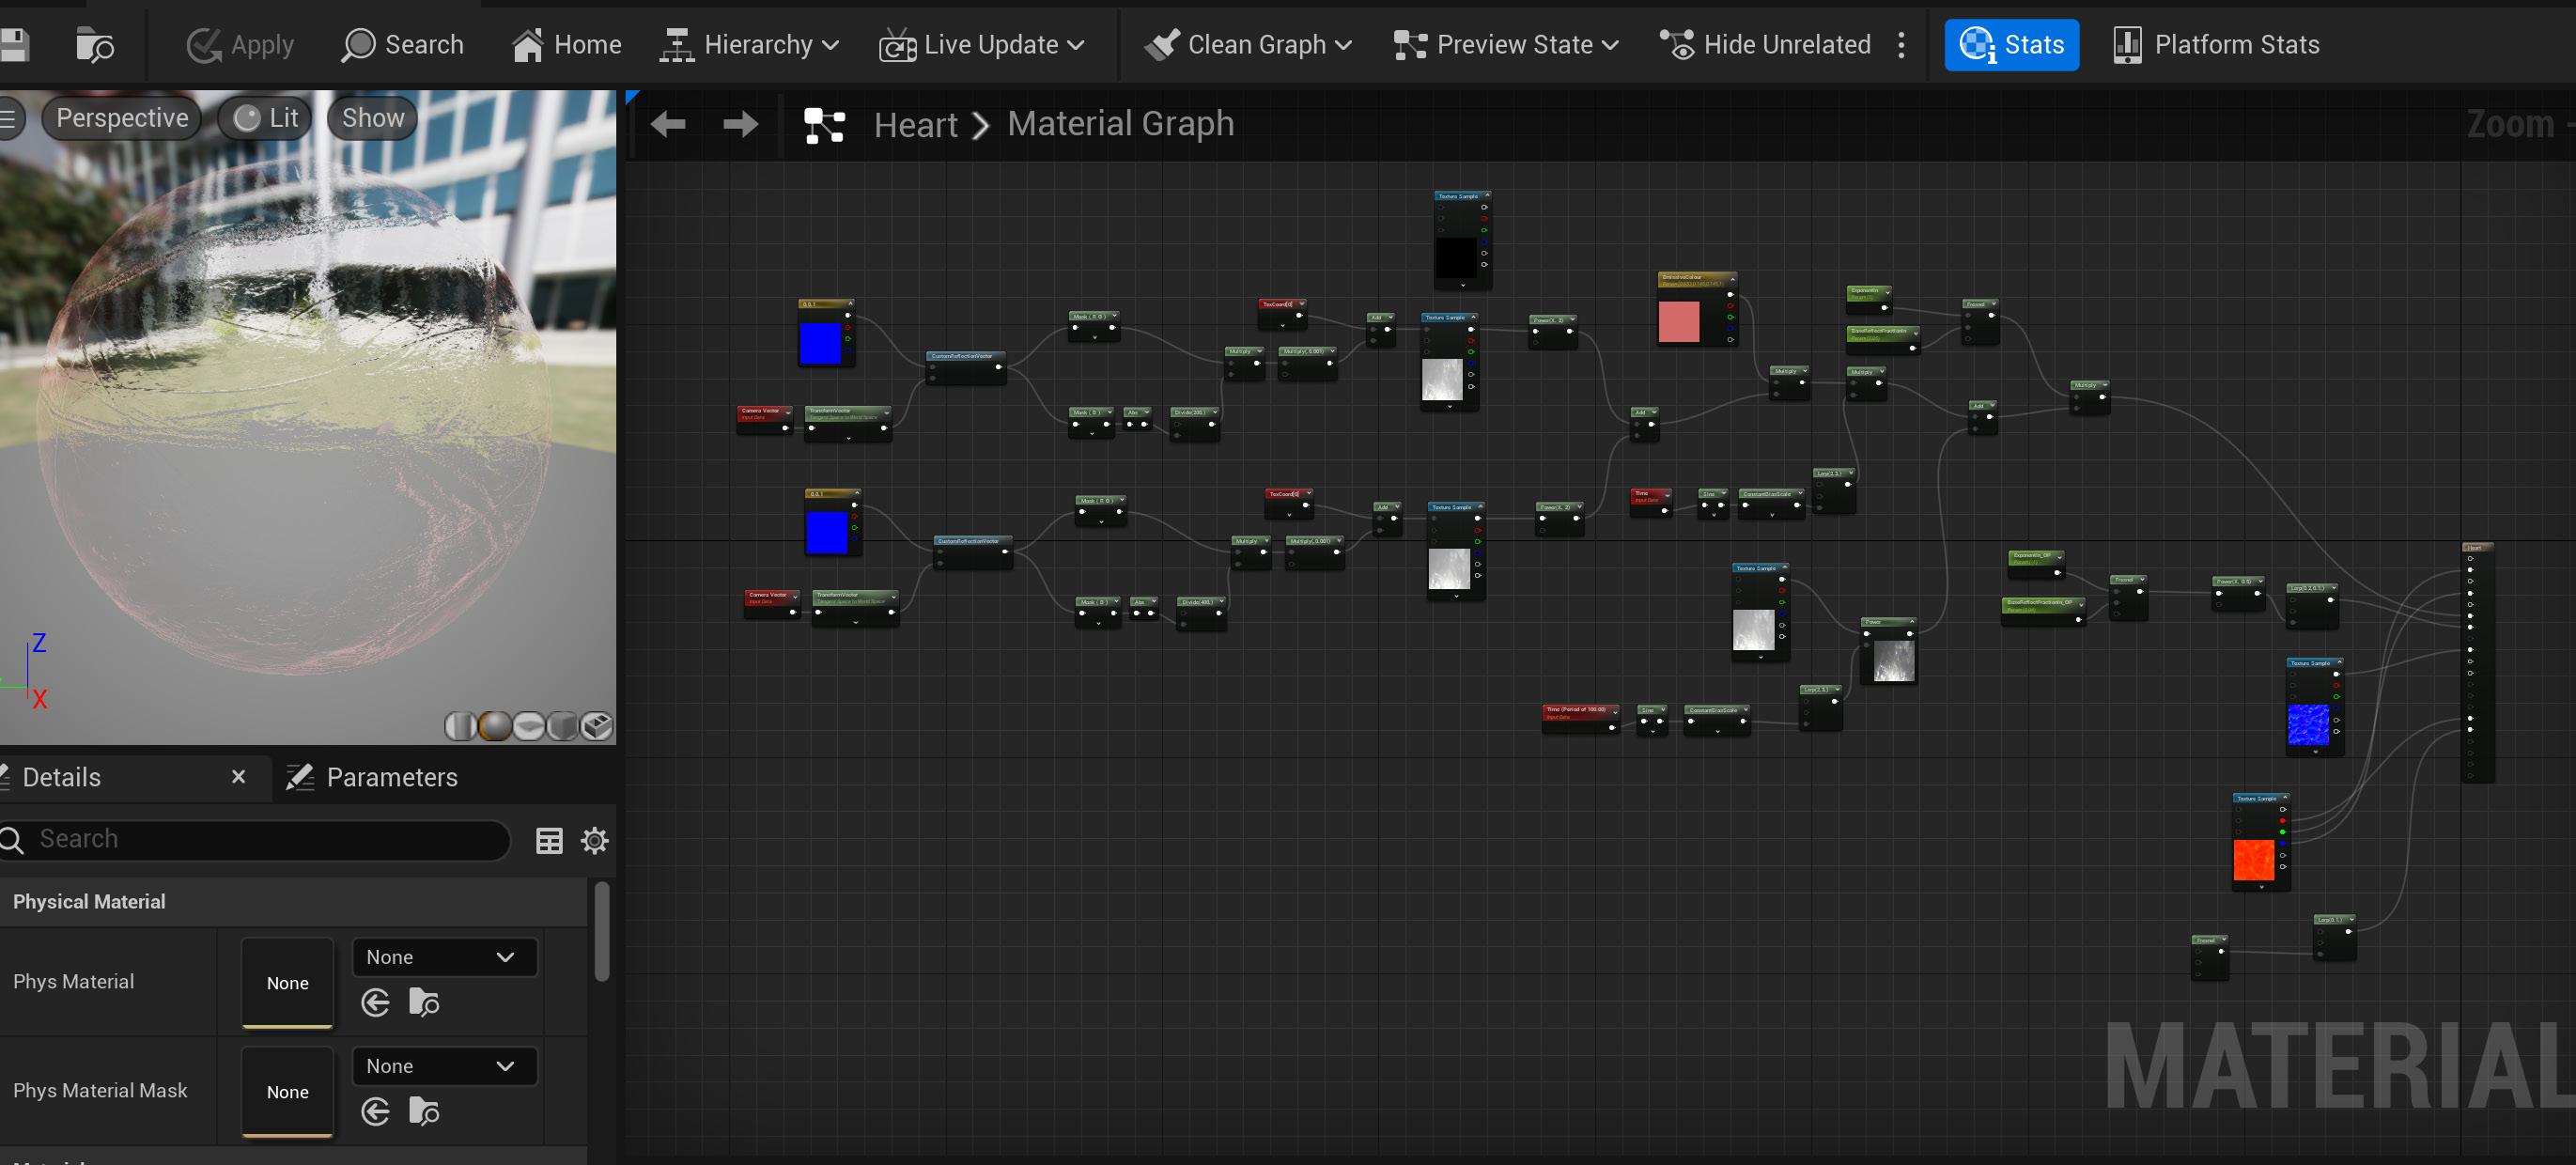
For the water, I developed a custom shader that enables real-time control over reflection intensity and water speed. This shader utilizes Unreal Engine's Single Layer Water Shading Model , allowing for realistic light scattering and absorption effects. By adjusting parameters such as scattering coefficients and phase functions, I was able to fine-tune the water's appearance to match the desired atmosphere of the swamp forest. Additionally, I implemented a panner node to simulate water movement, creating subtle ripples and enhancing the overall realism of the scene.

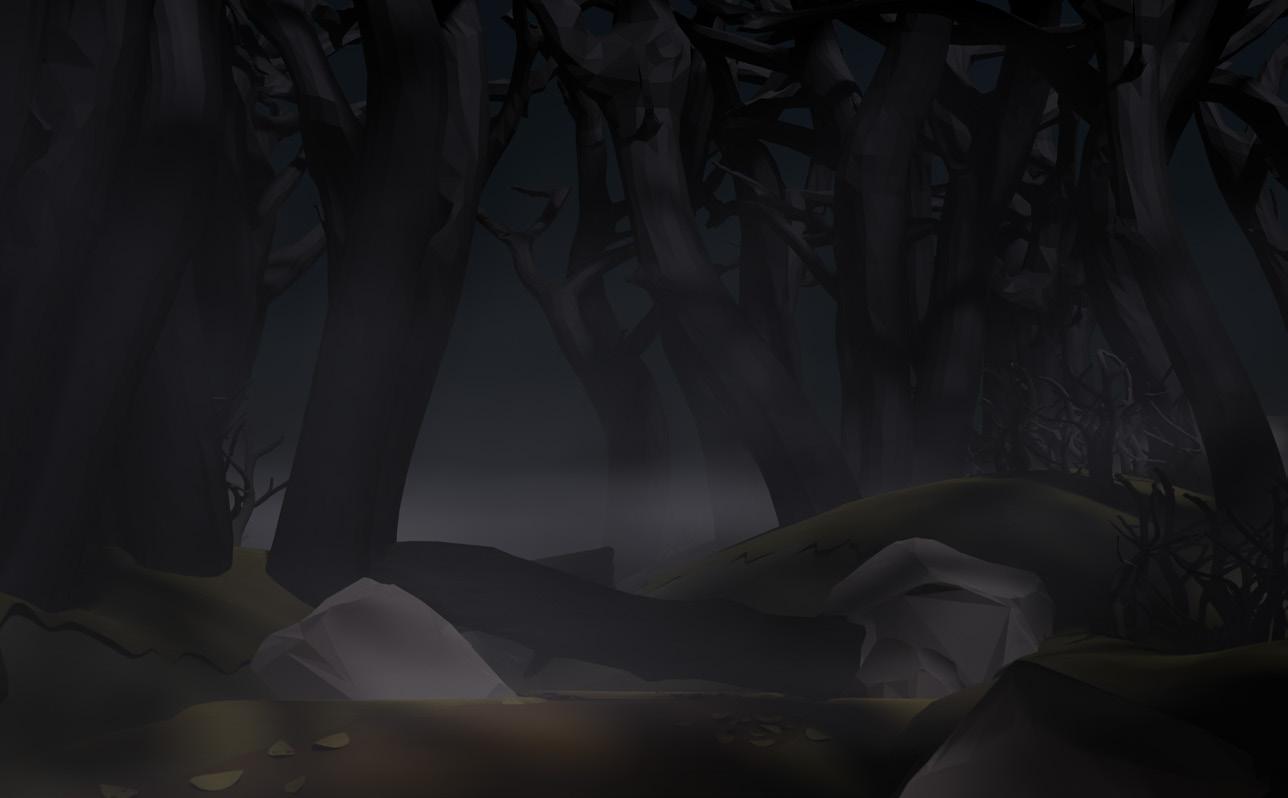
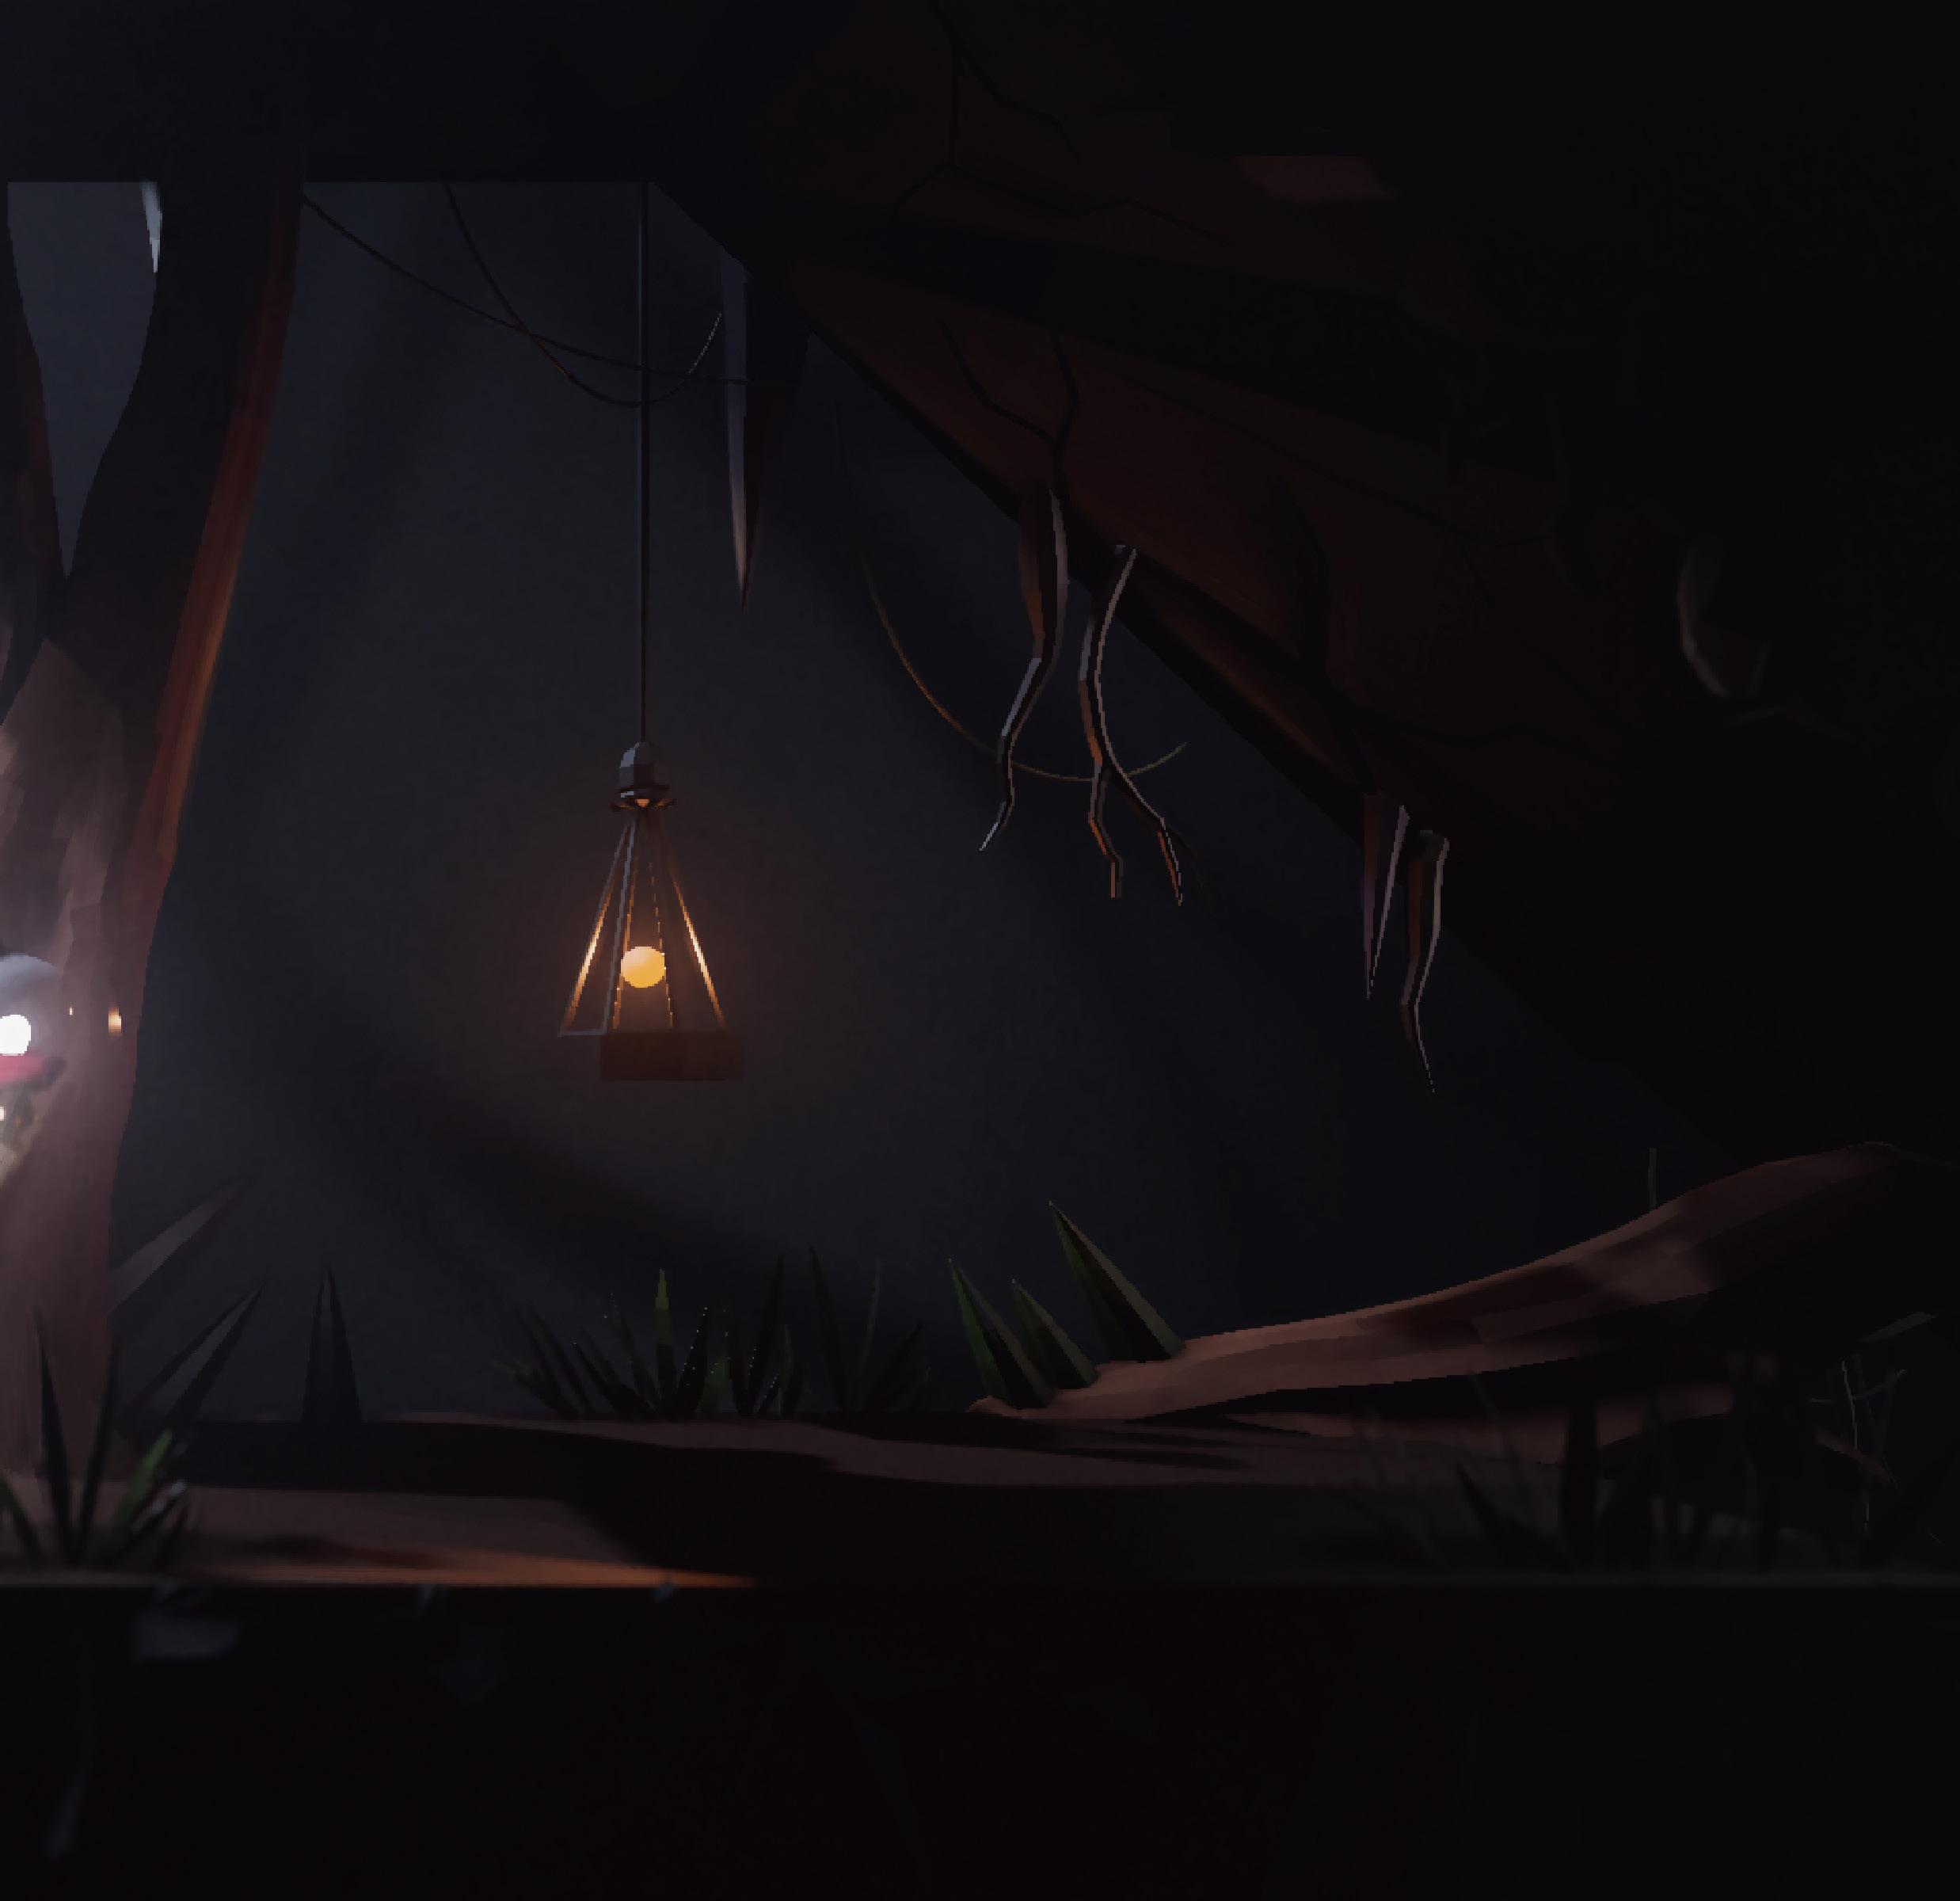
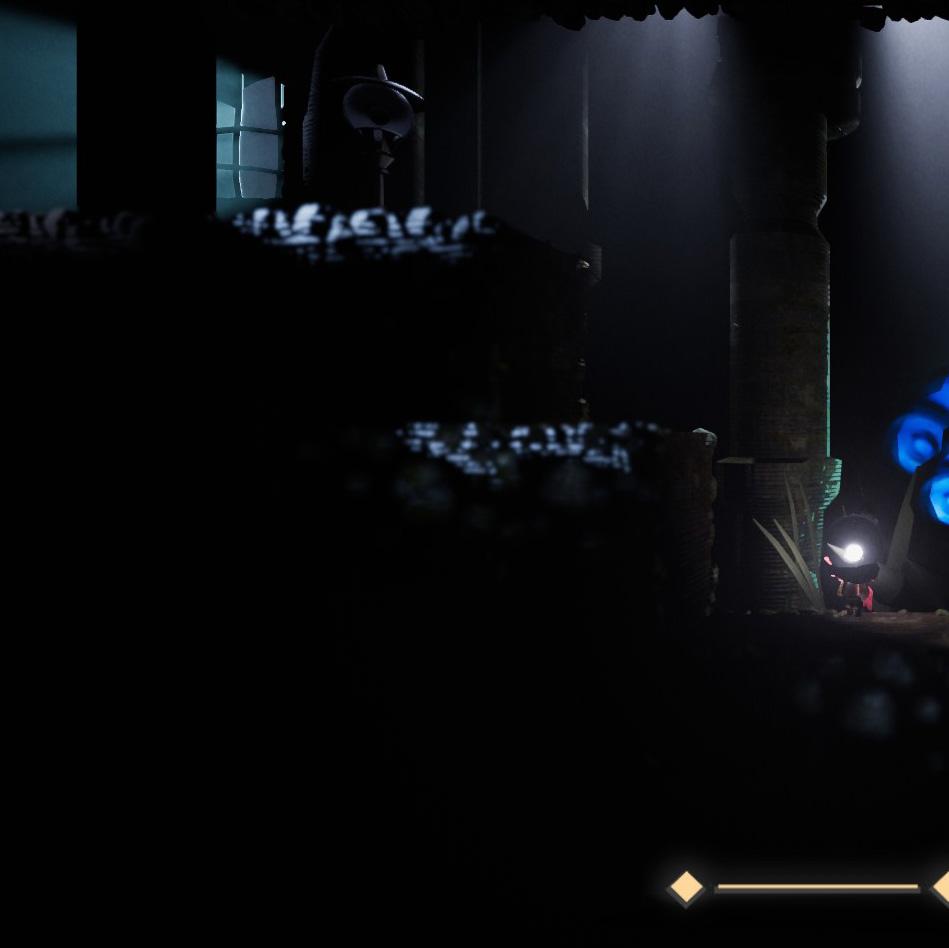
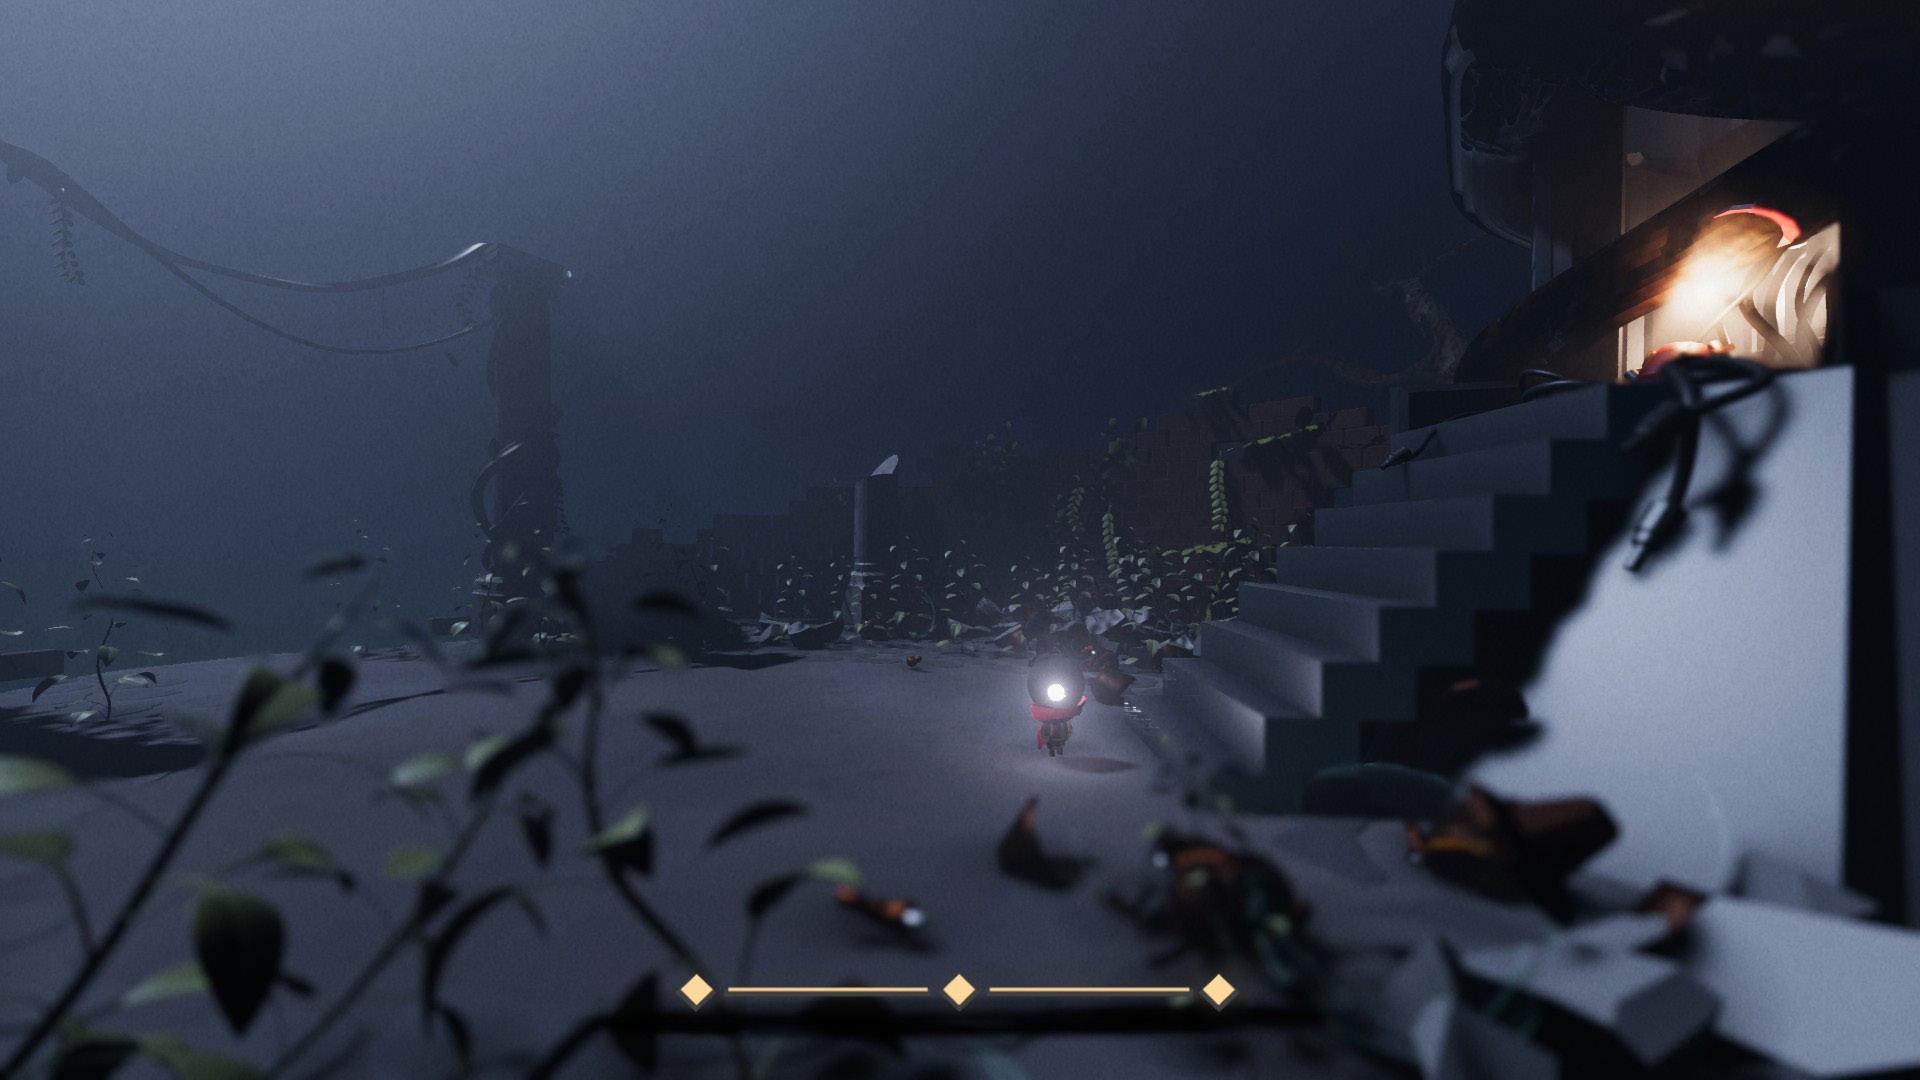
About Lighting
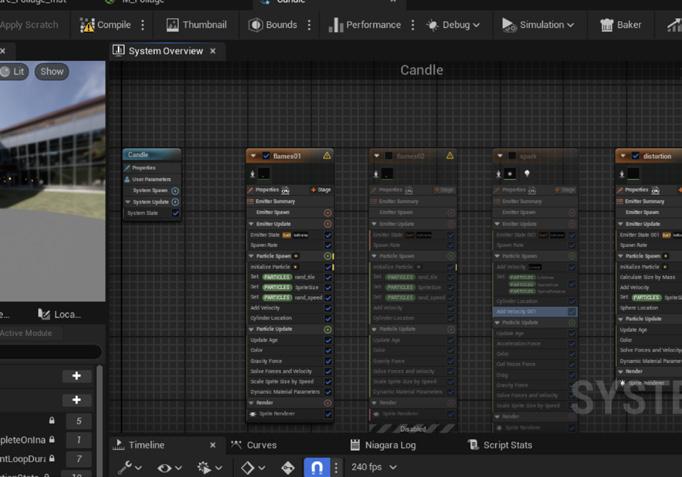
For the lighting setup, I experimented with numerous point lights, using green-colored lighting to evoke a dramatic, otherworldly feeling. I was personally drawn to this unusual lighting choice.
I established a clear focal point, so I decided to make one of my buildings the central focus. To achieve this, I used a spotlight to direct attention towards it, ensuring that the light intensity was varied across the scene to create depth.
Additionally, I included a witch silhouette in the building's window to add a sense of story and intrigue, hoping to evoke a feeling of mystery for those who observe it. As I mentioned earlier, when I reduced the light, many details were lost. To address this, I created a day version of the scene, which provided a clearer view of the finer details and helped balance the atmosphere with readability.
I purchased this effect from the Unreal Engine Marketplace, but I still spent quite some time learning how to adjust the values inside the Blueprint.

Games? Movies? or...?
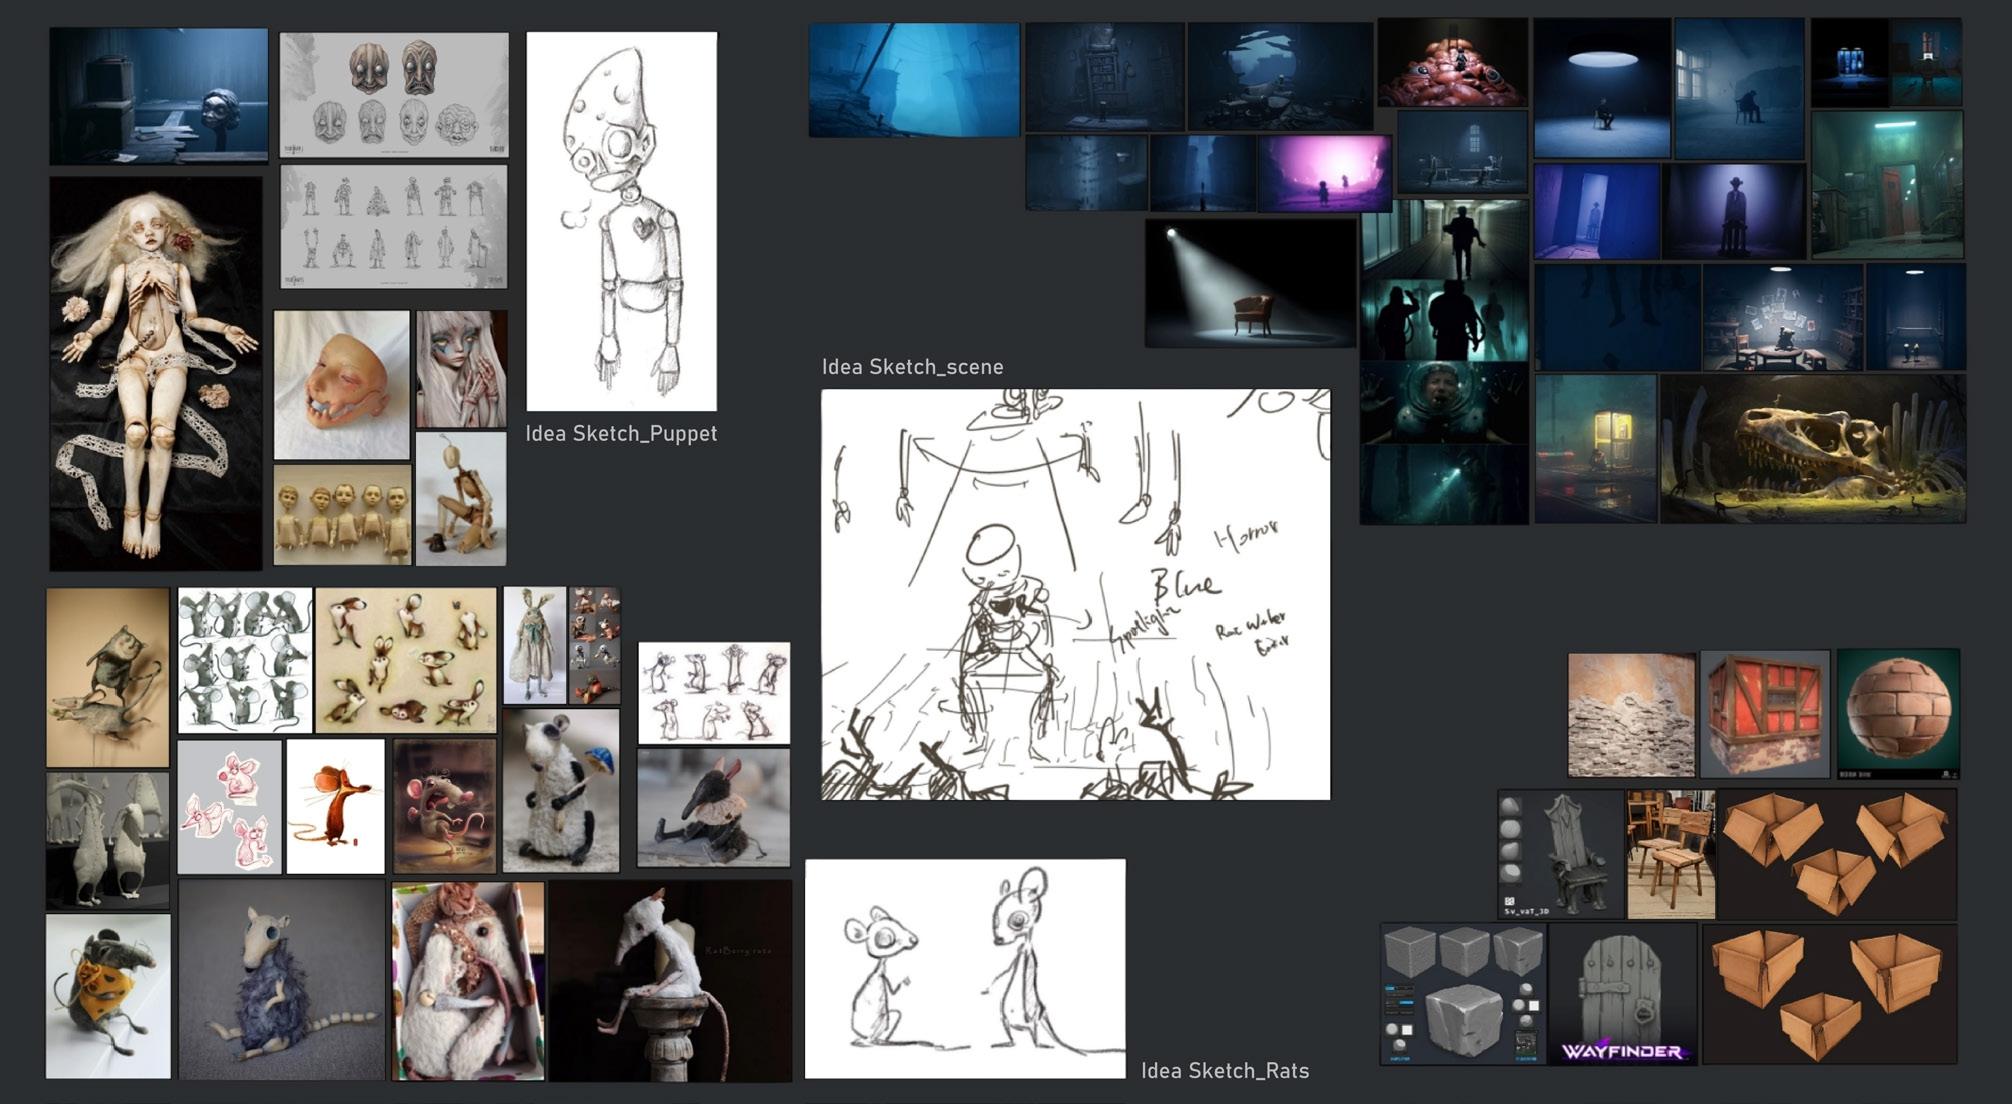
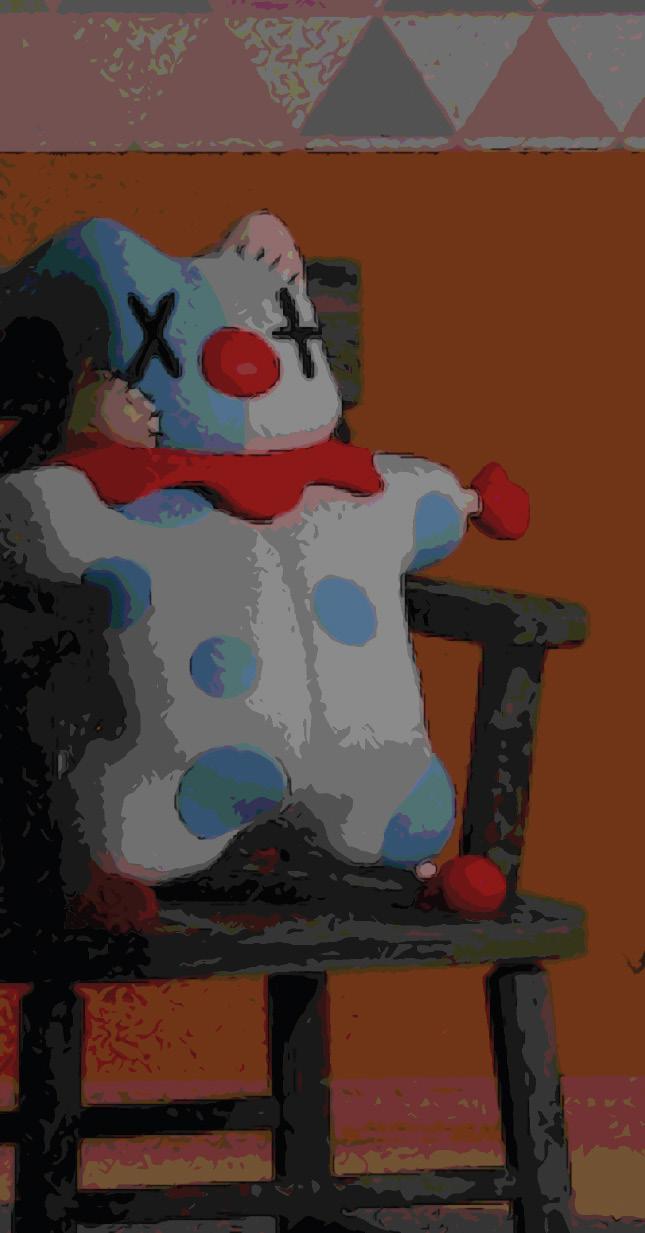
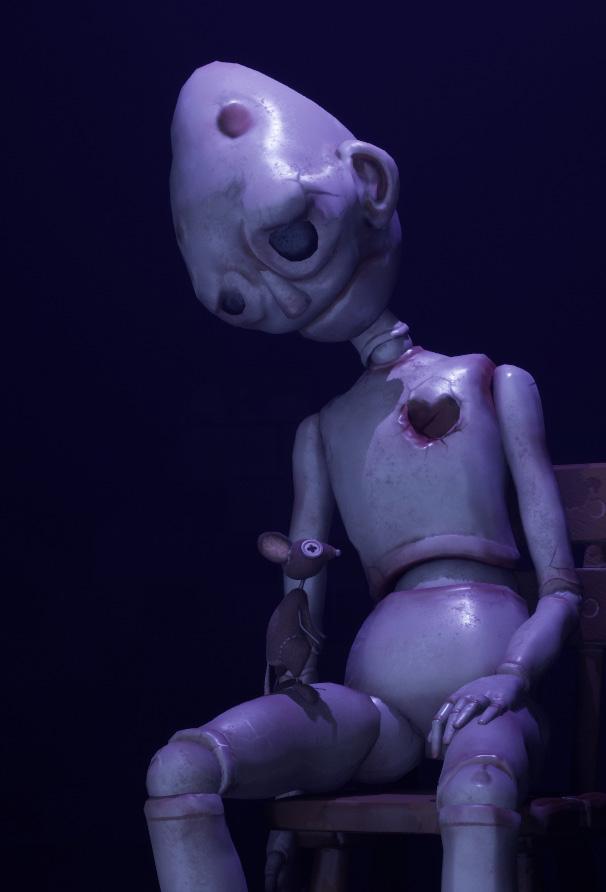
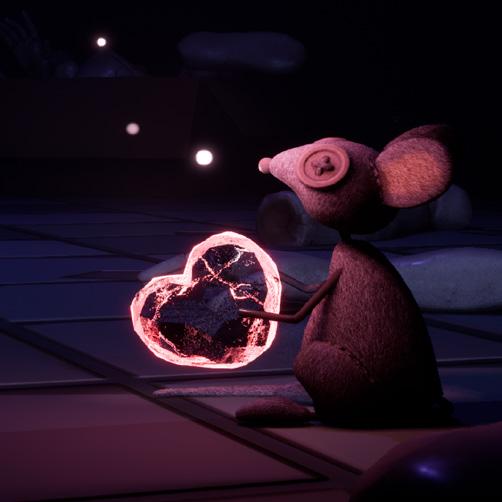
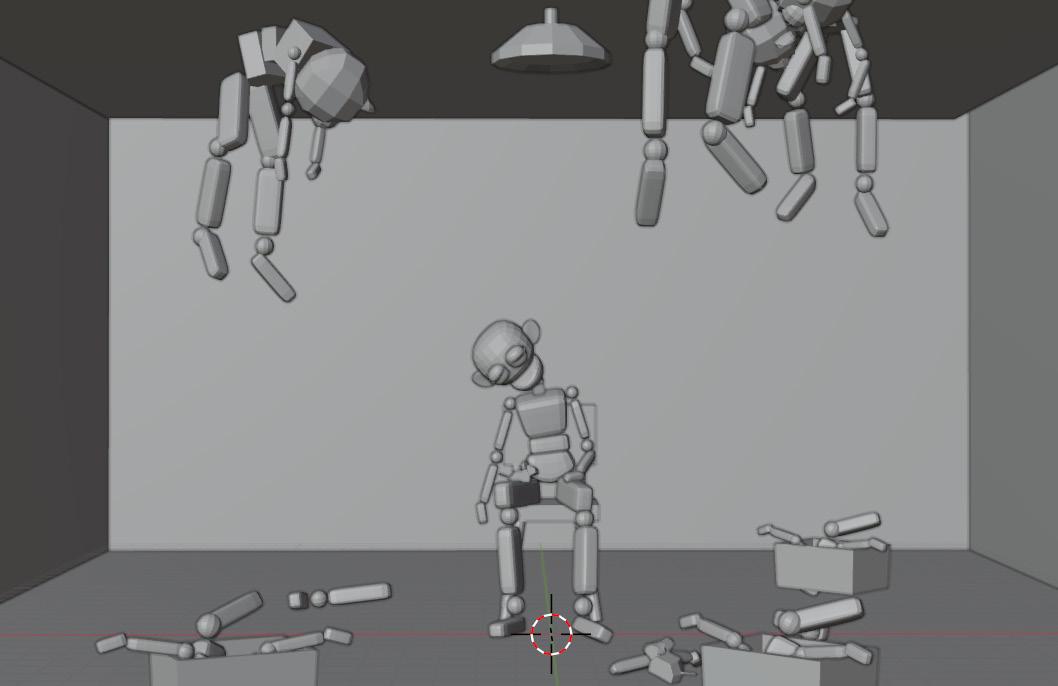
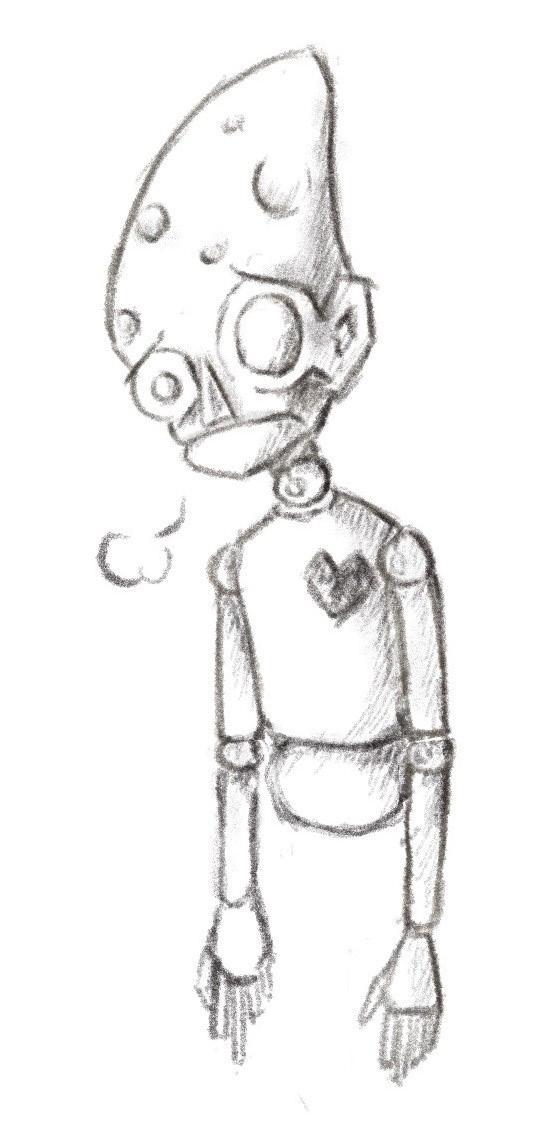
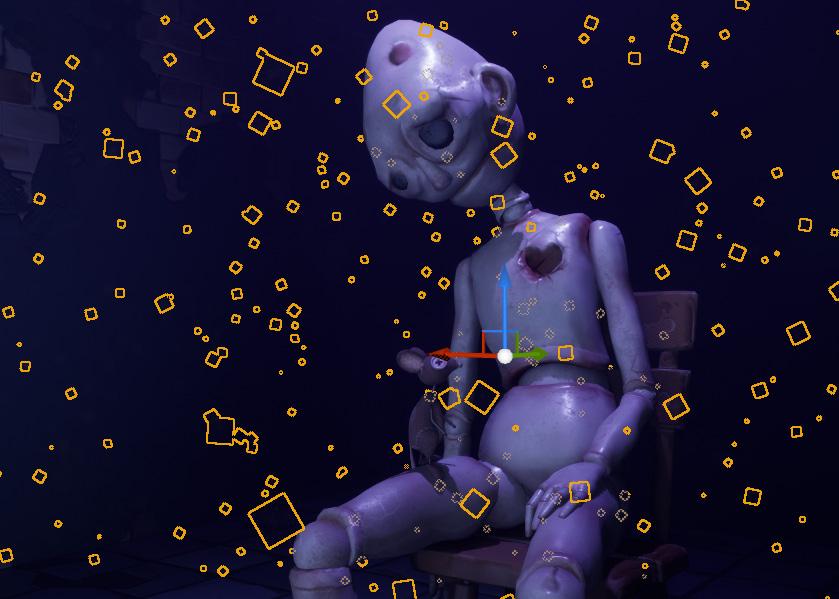
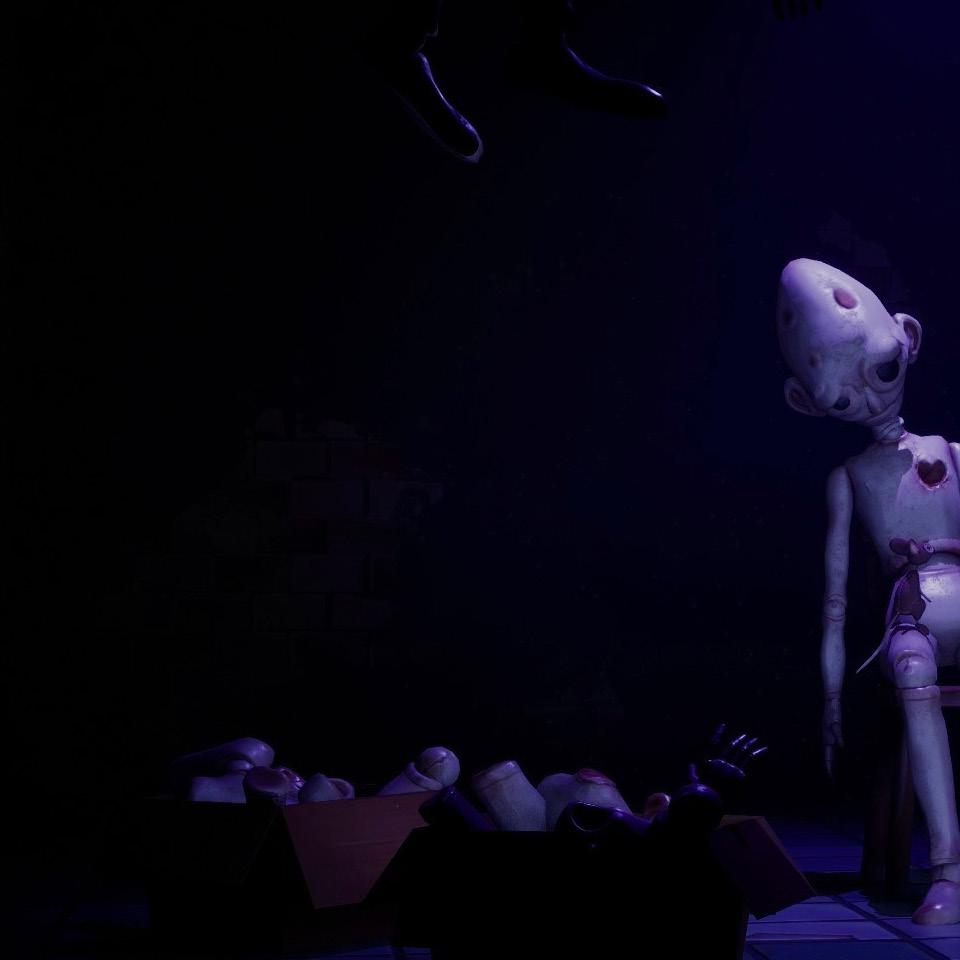
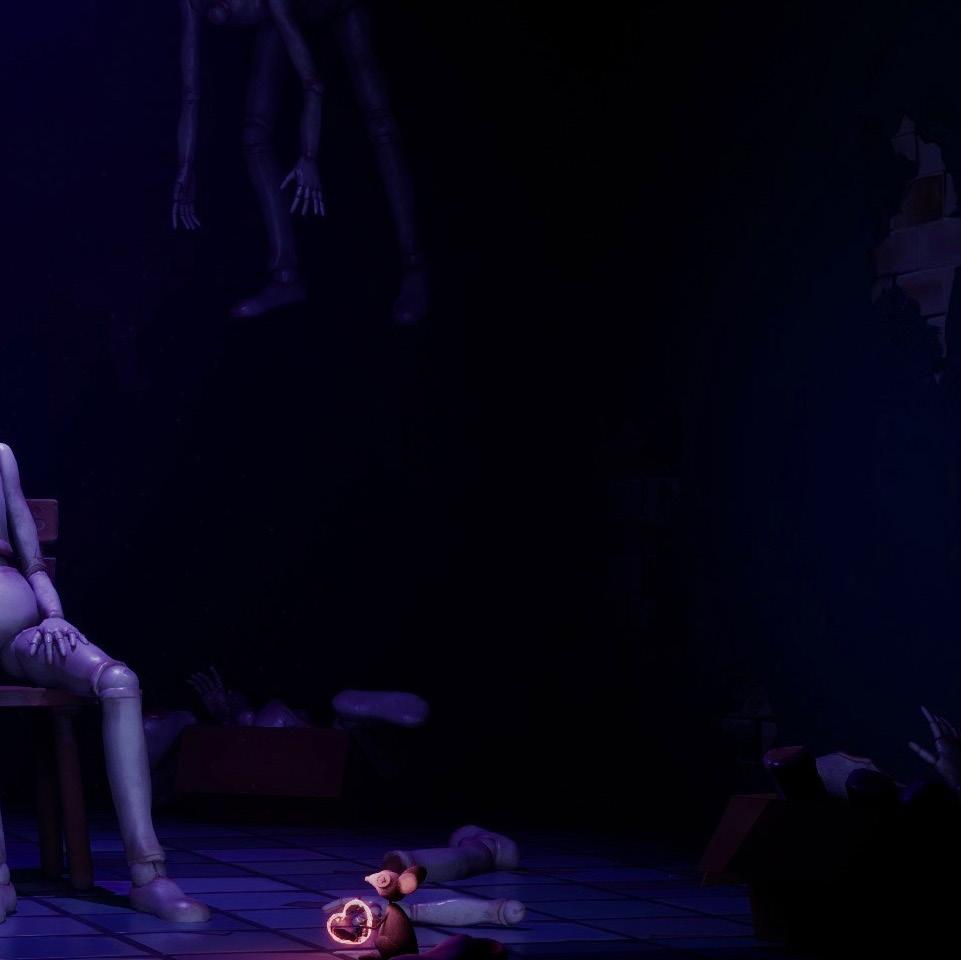
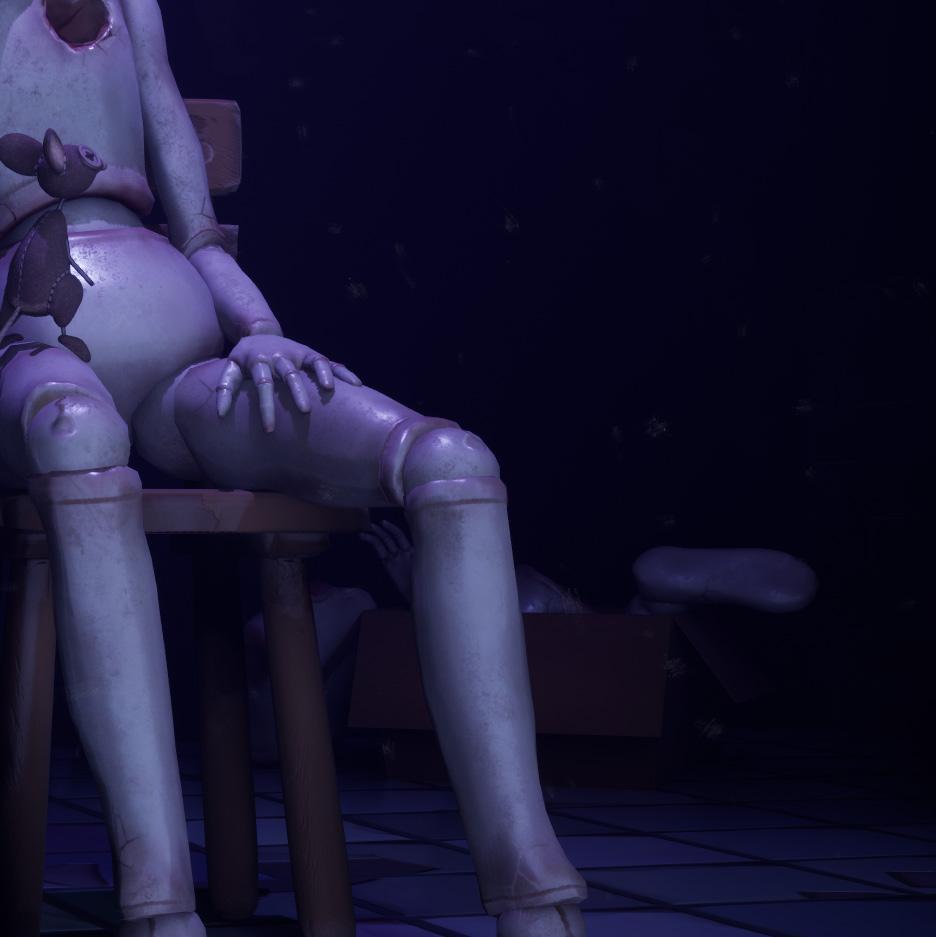
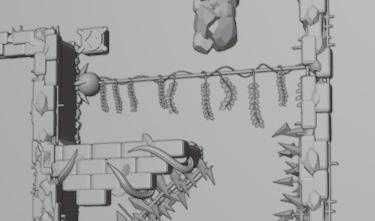
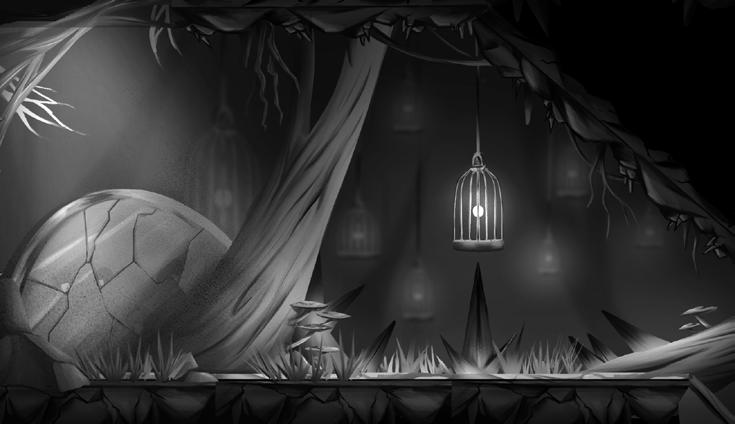
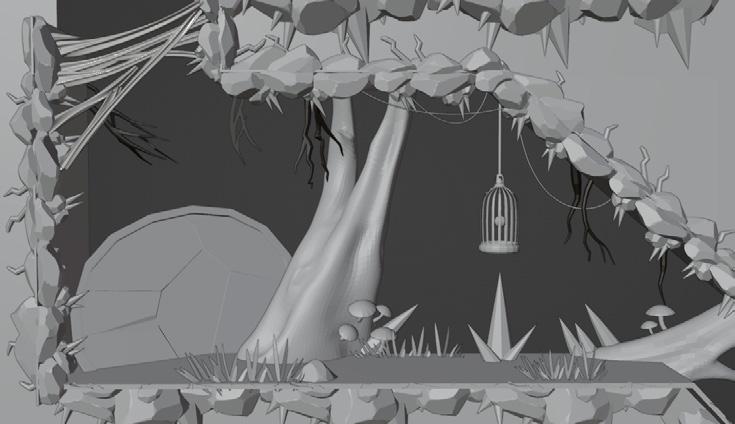
My idea is inspired by one of the famous games called The Little Nightmares, so I took a lot of gameplay photoshoots and did more research on this kind of style. After doing this work, I quickly sketch my ideas by procreate. The character is a puppet that sits on the center of a chair. There is a spotlight over its head. Several body parts are separated around, and the ceiling also hangs the bodies on the top.
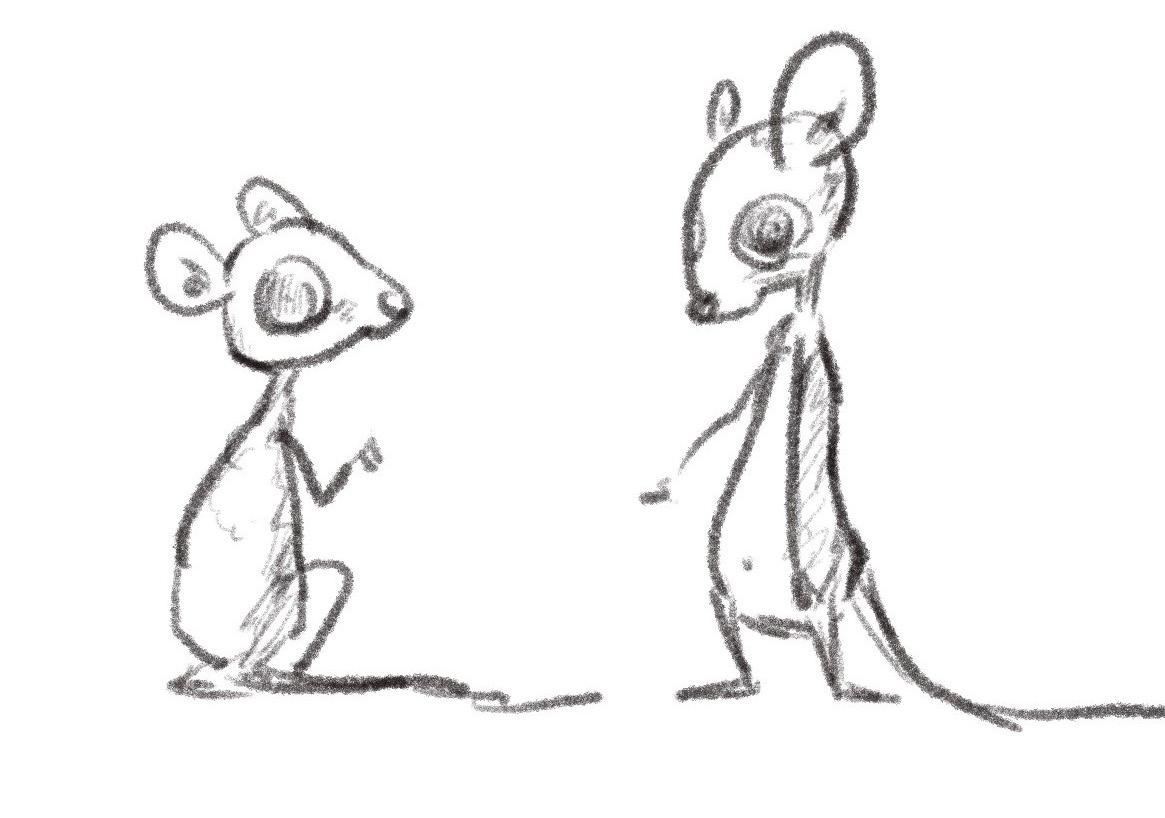
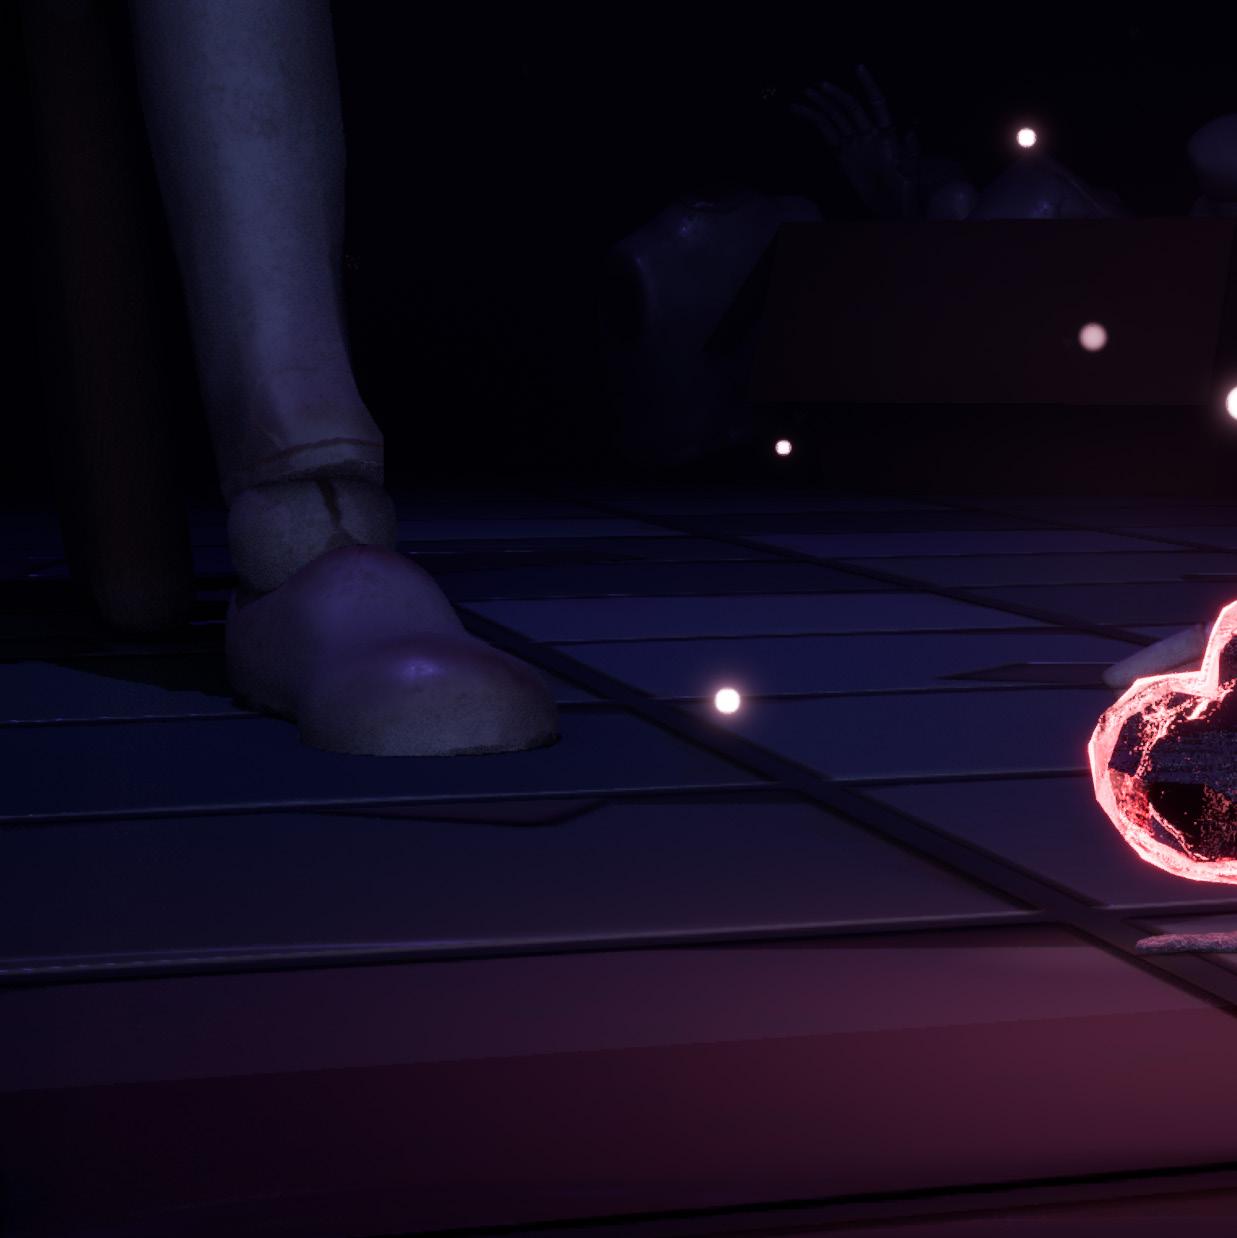
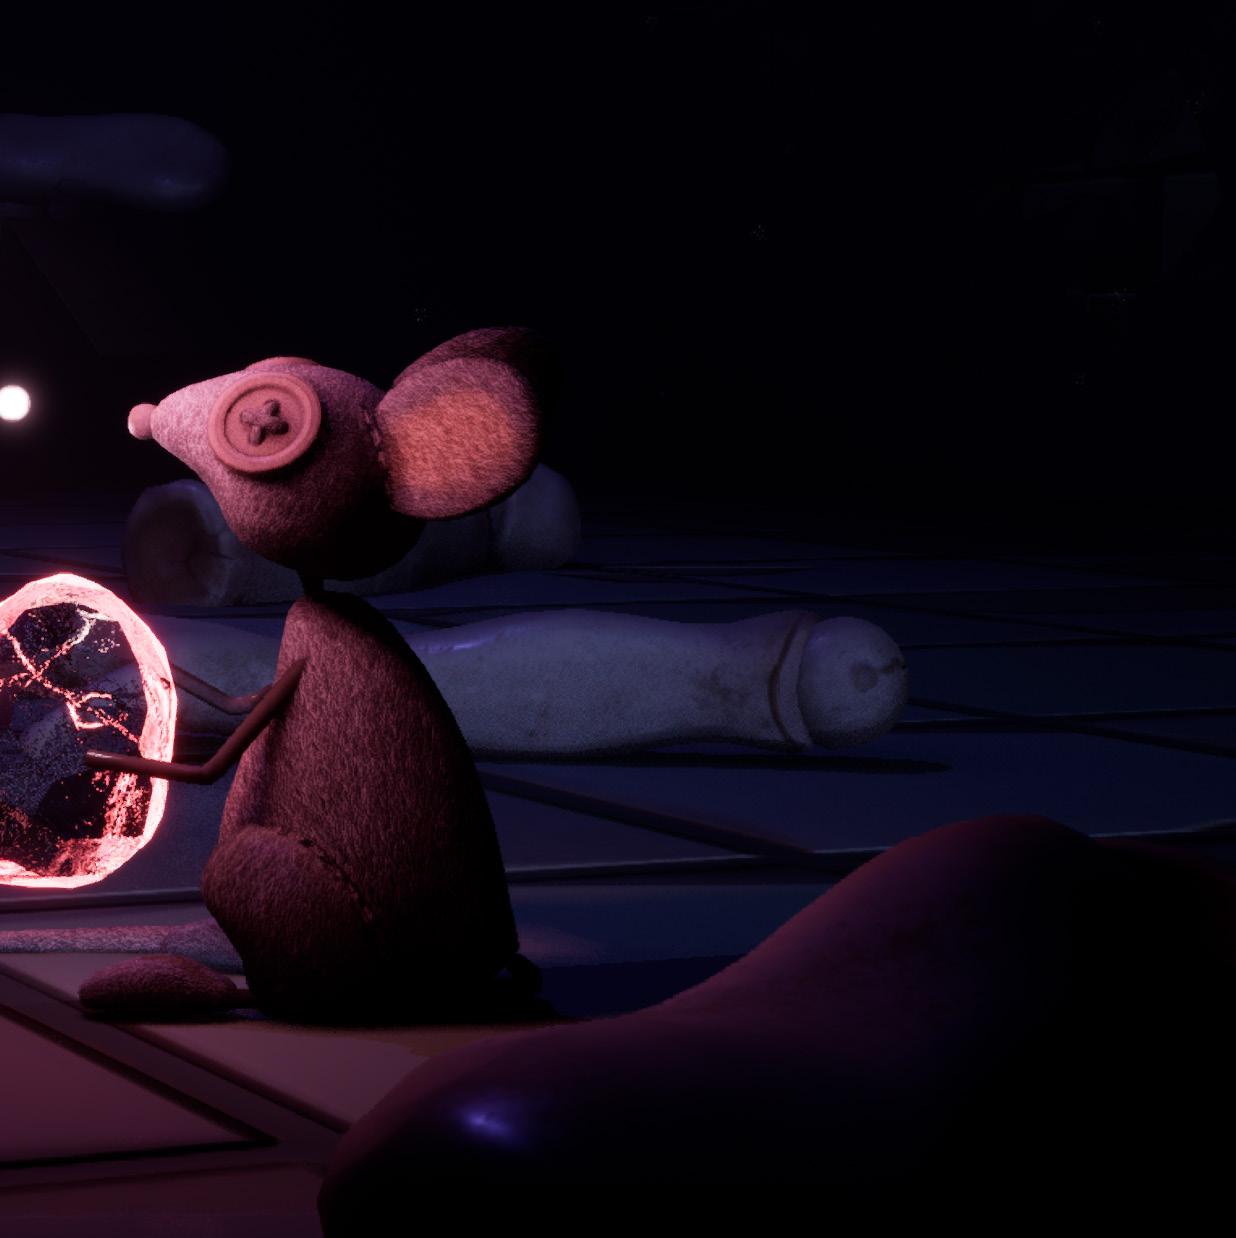
I want to let people feel lonely and cold. Because this doll was forgotten by its master, I dug a hole in the puppet’s chest. It means that it lost its heart. And there are two rats in the scene. One is on its leg and the other one is on the floor. One of the rats found the doll’s heart. they are trying to put the heart bake in the right place.
PUPPET DESIGN
Using Blender to do simple block out. With these ideals set, I began blocking out and putting into Unreal Engine.
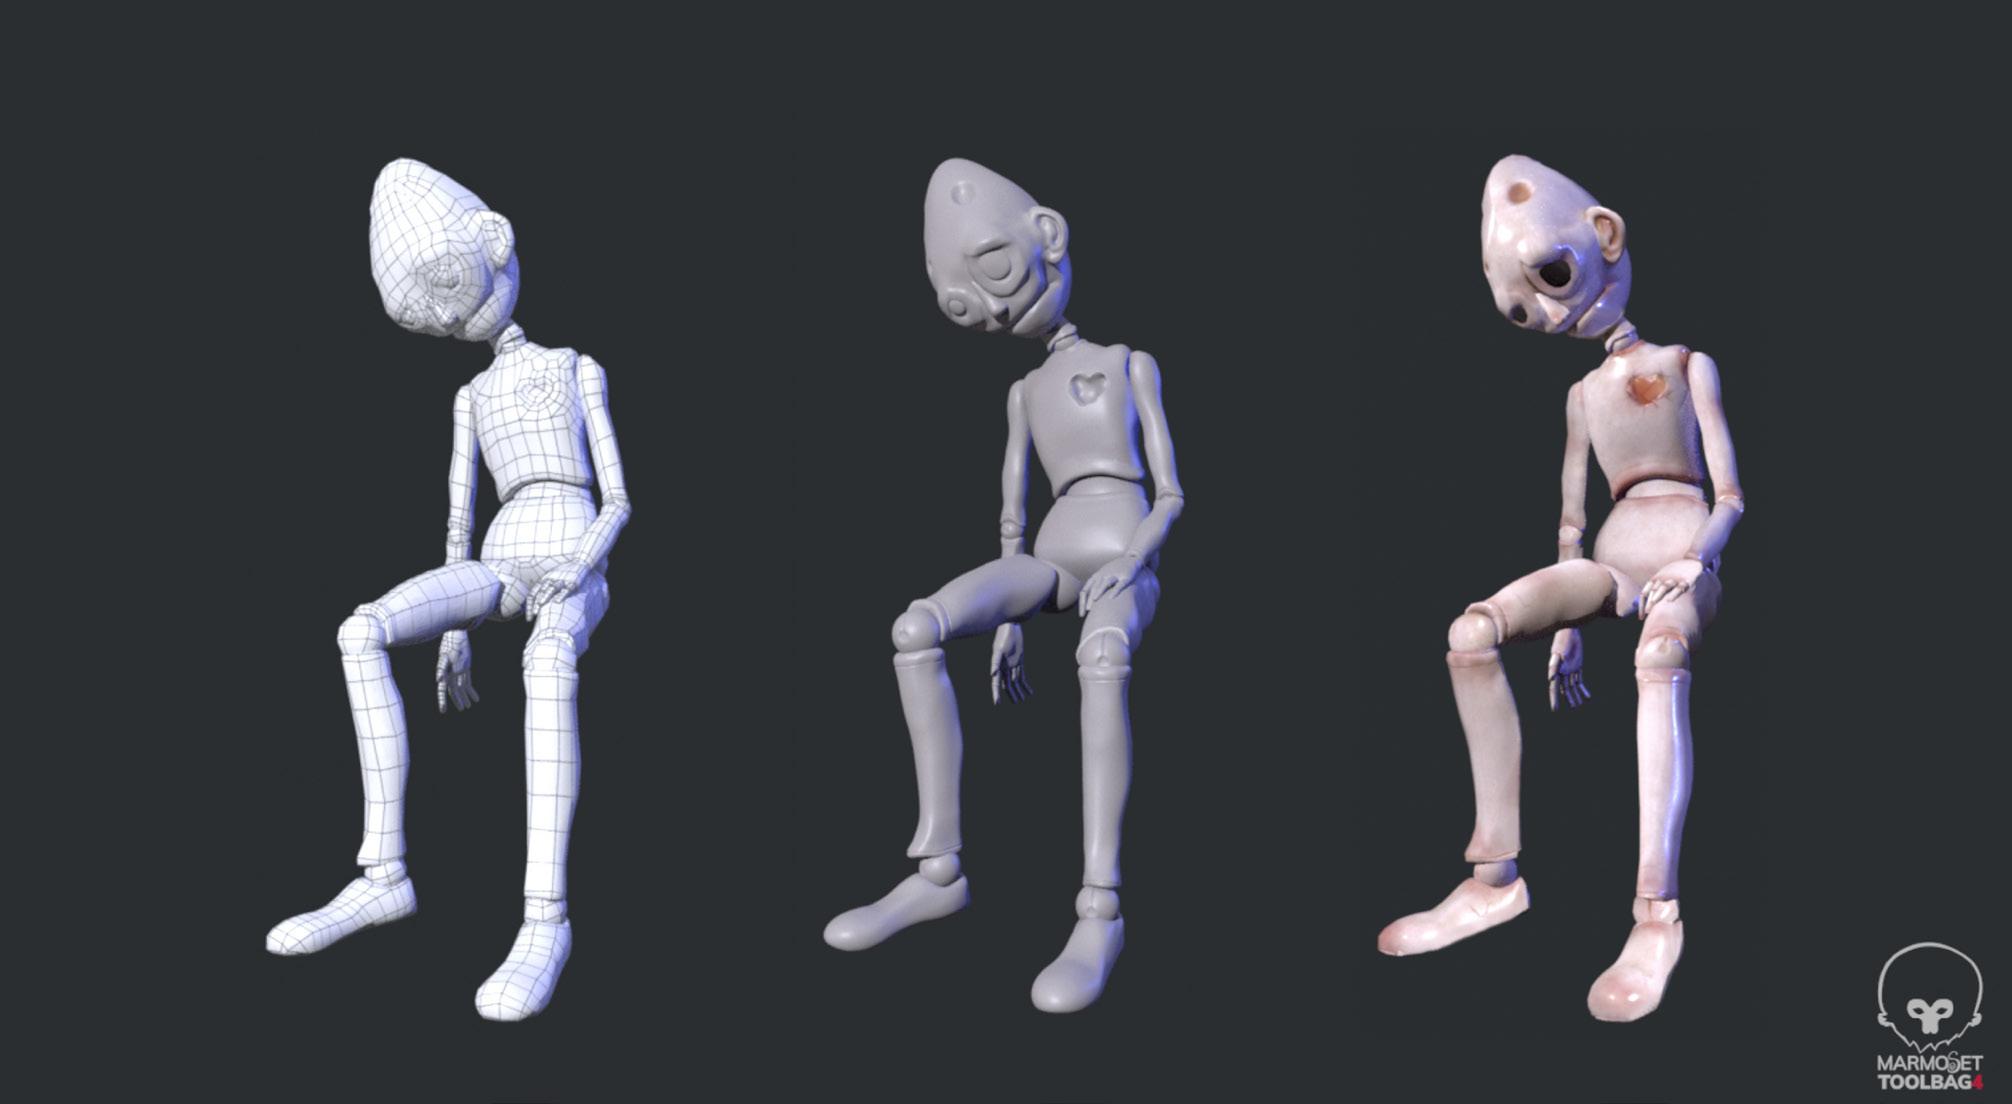
The puppet, abandoned by its master, sits alone in the room. Its silent presence echoes a sense of loneliness and coldness. The skin is made of ceramic because It looks funner than the rough material when the light spots on the doll. The smooth skin can reflect the light and also make a doll more obvious than others.
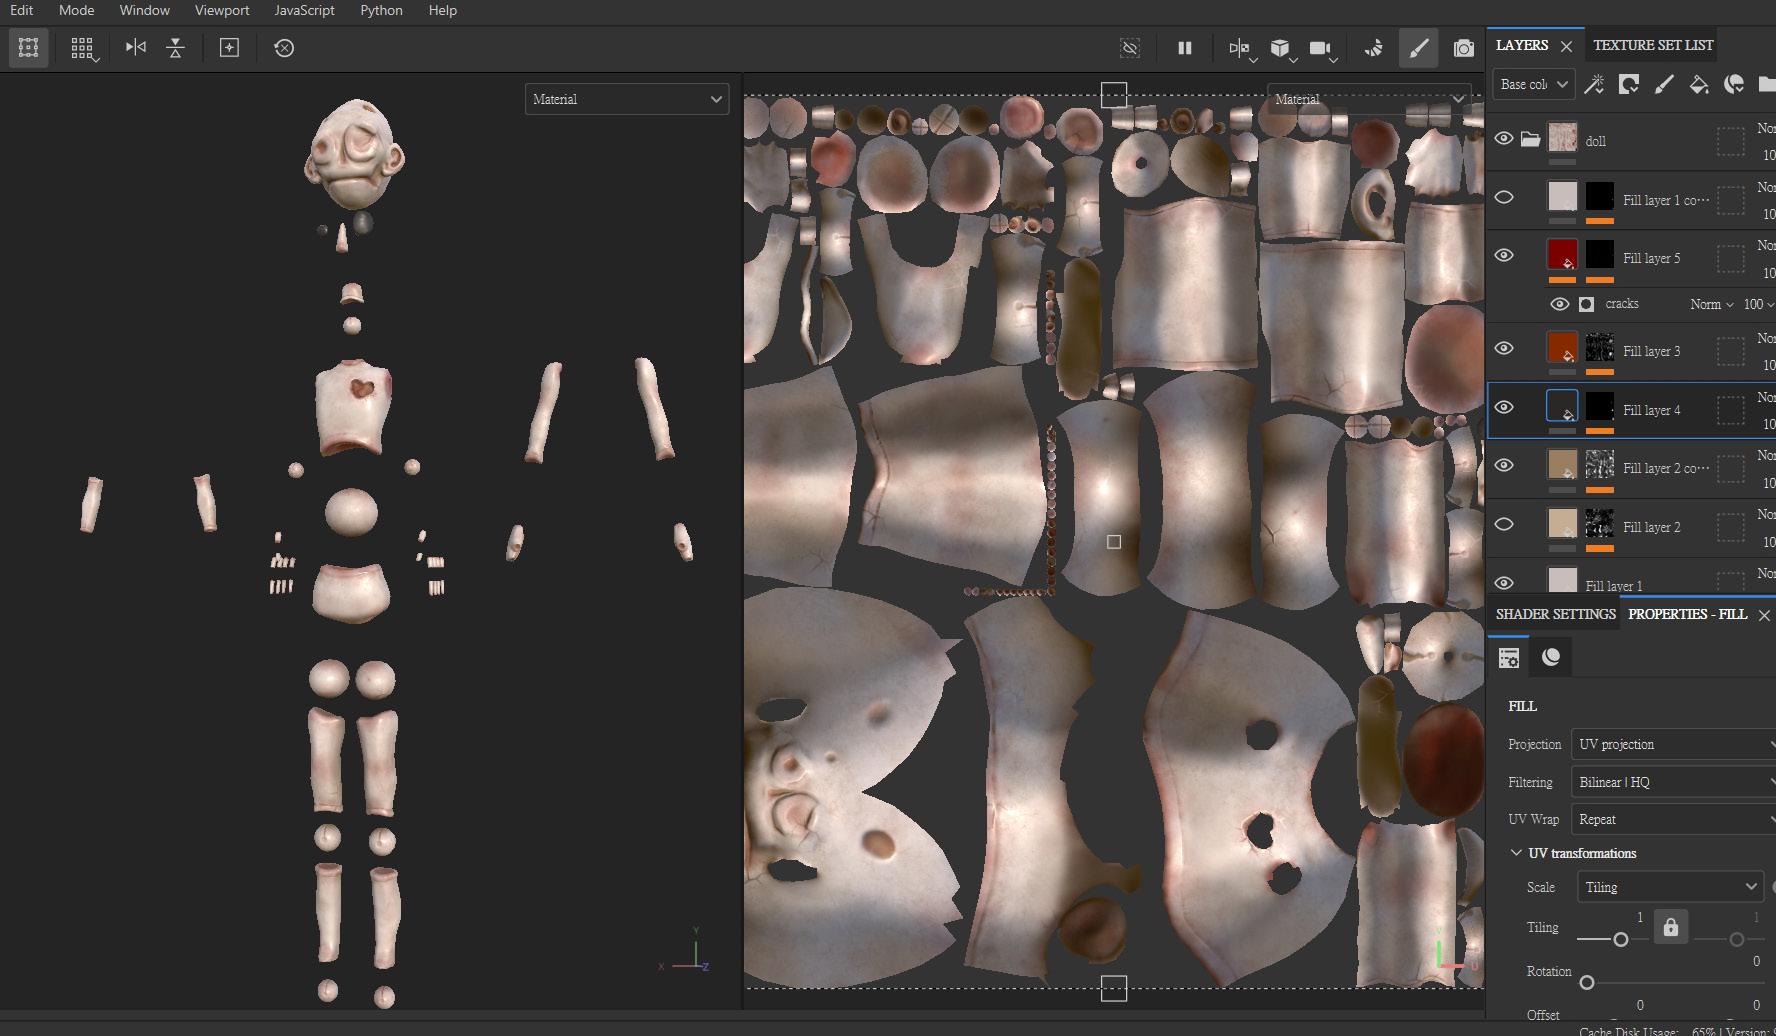
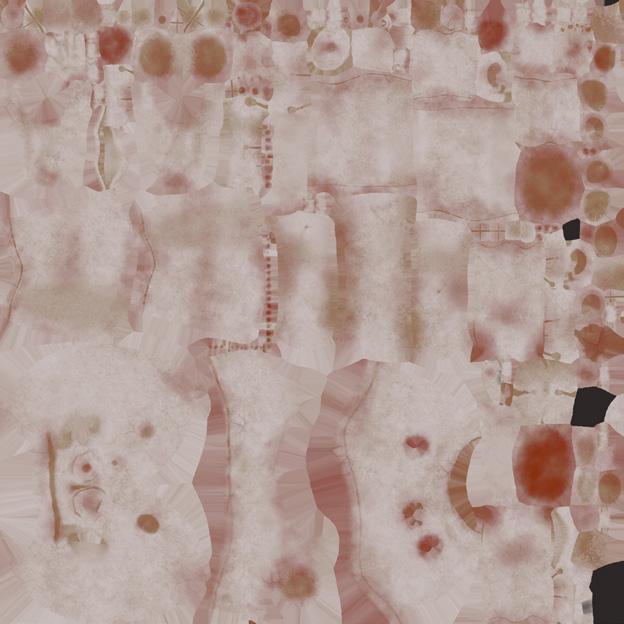
Using Blender to make a simple shape then put it into Zbrush to carve the details. As for its skin, I used Substance Painter to create it.
The individual showing was rendered in the Marmoset Toolbag .

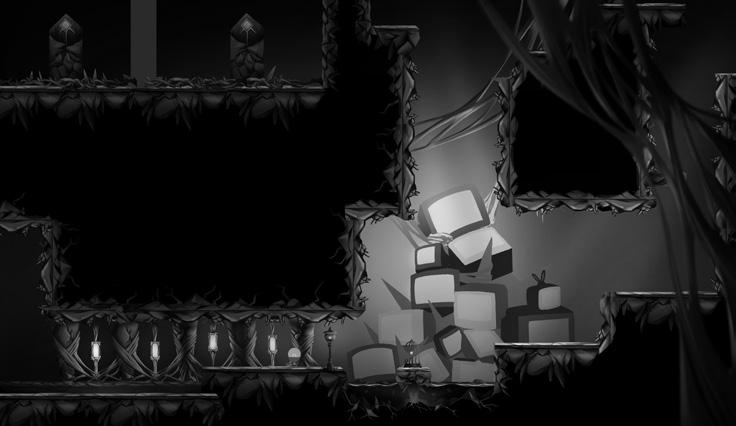
Rat's Process
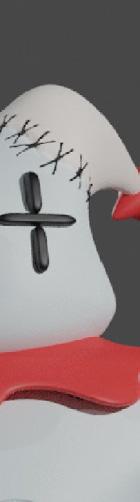
The felting texture shows the contrast to the puppet. Both of them are dolls but made of different materials. Rats are not the main character however they are also important. I really like their buttons eyes and the stitch on the skin.
Using Blender to make a simple shape then put it into Zbrush to carve the details. As for its skin, I used Substance Painter to create it.
The individual showing was rendered in the Marmoset Toolbag.
The wall is very rough and mottled. Because the whole scene is full of dust and mess both of them are broken.
Made in Substance Designer
The wall and floor were both created in Substance Designer, The floor is smooth and reflected. It is the tile's texture, using a little bit blue to give people a cold feeling
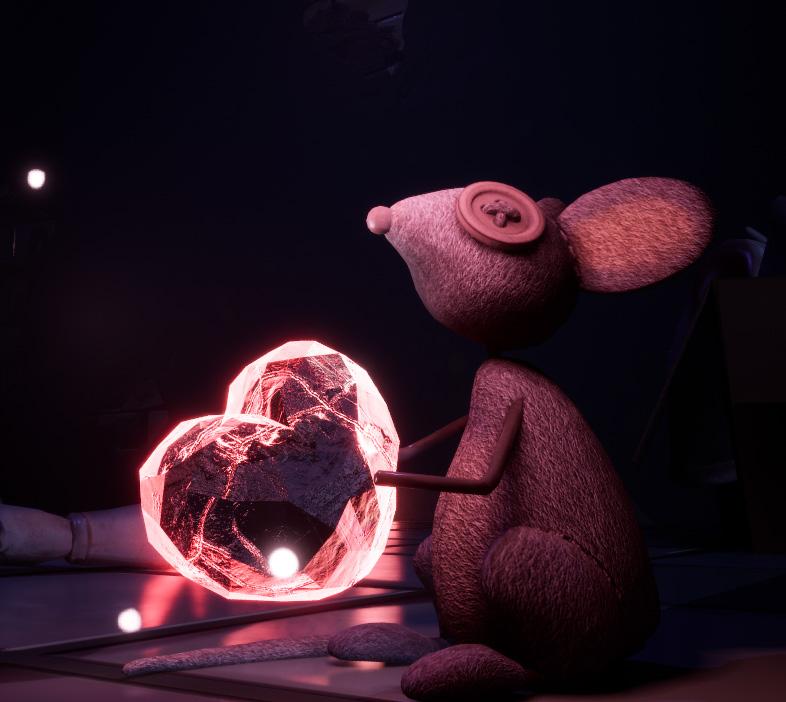
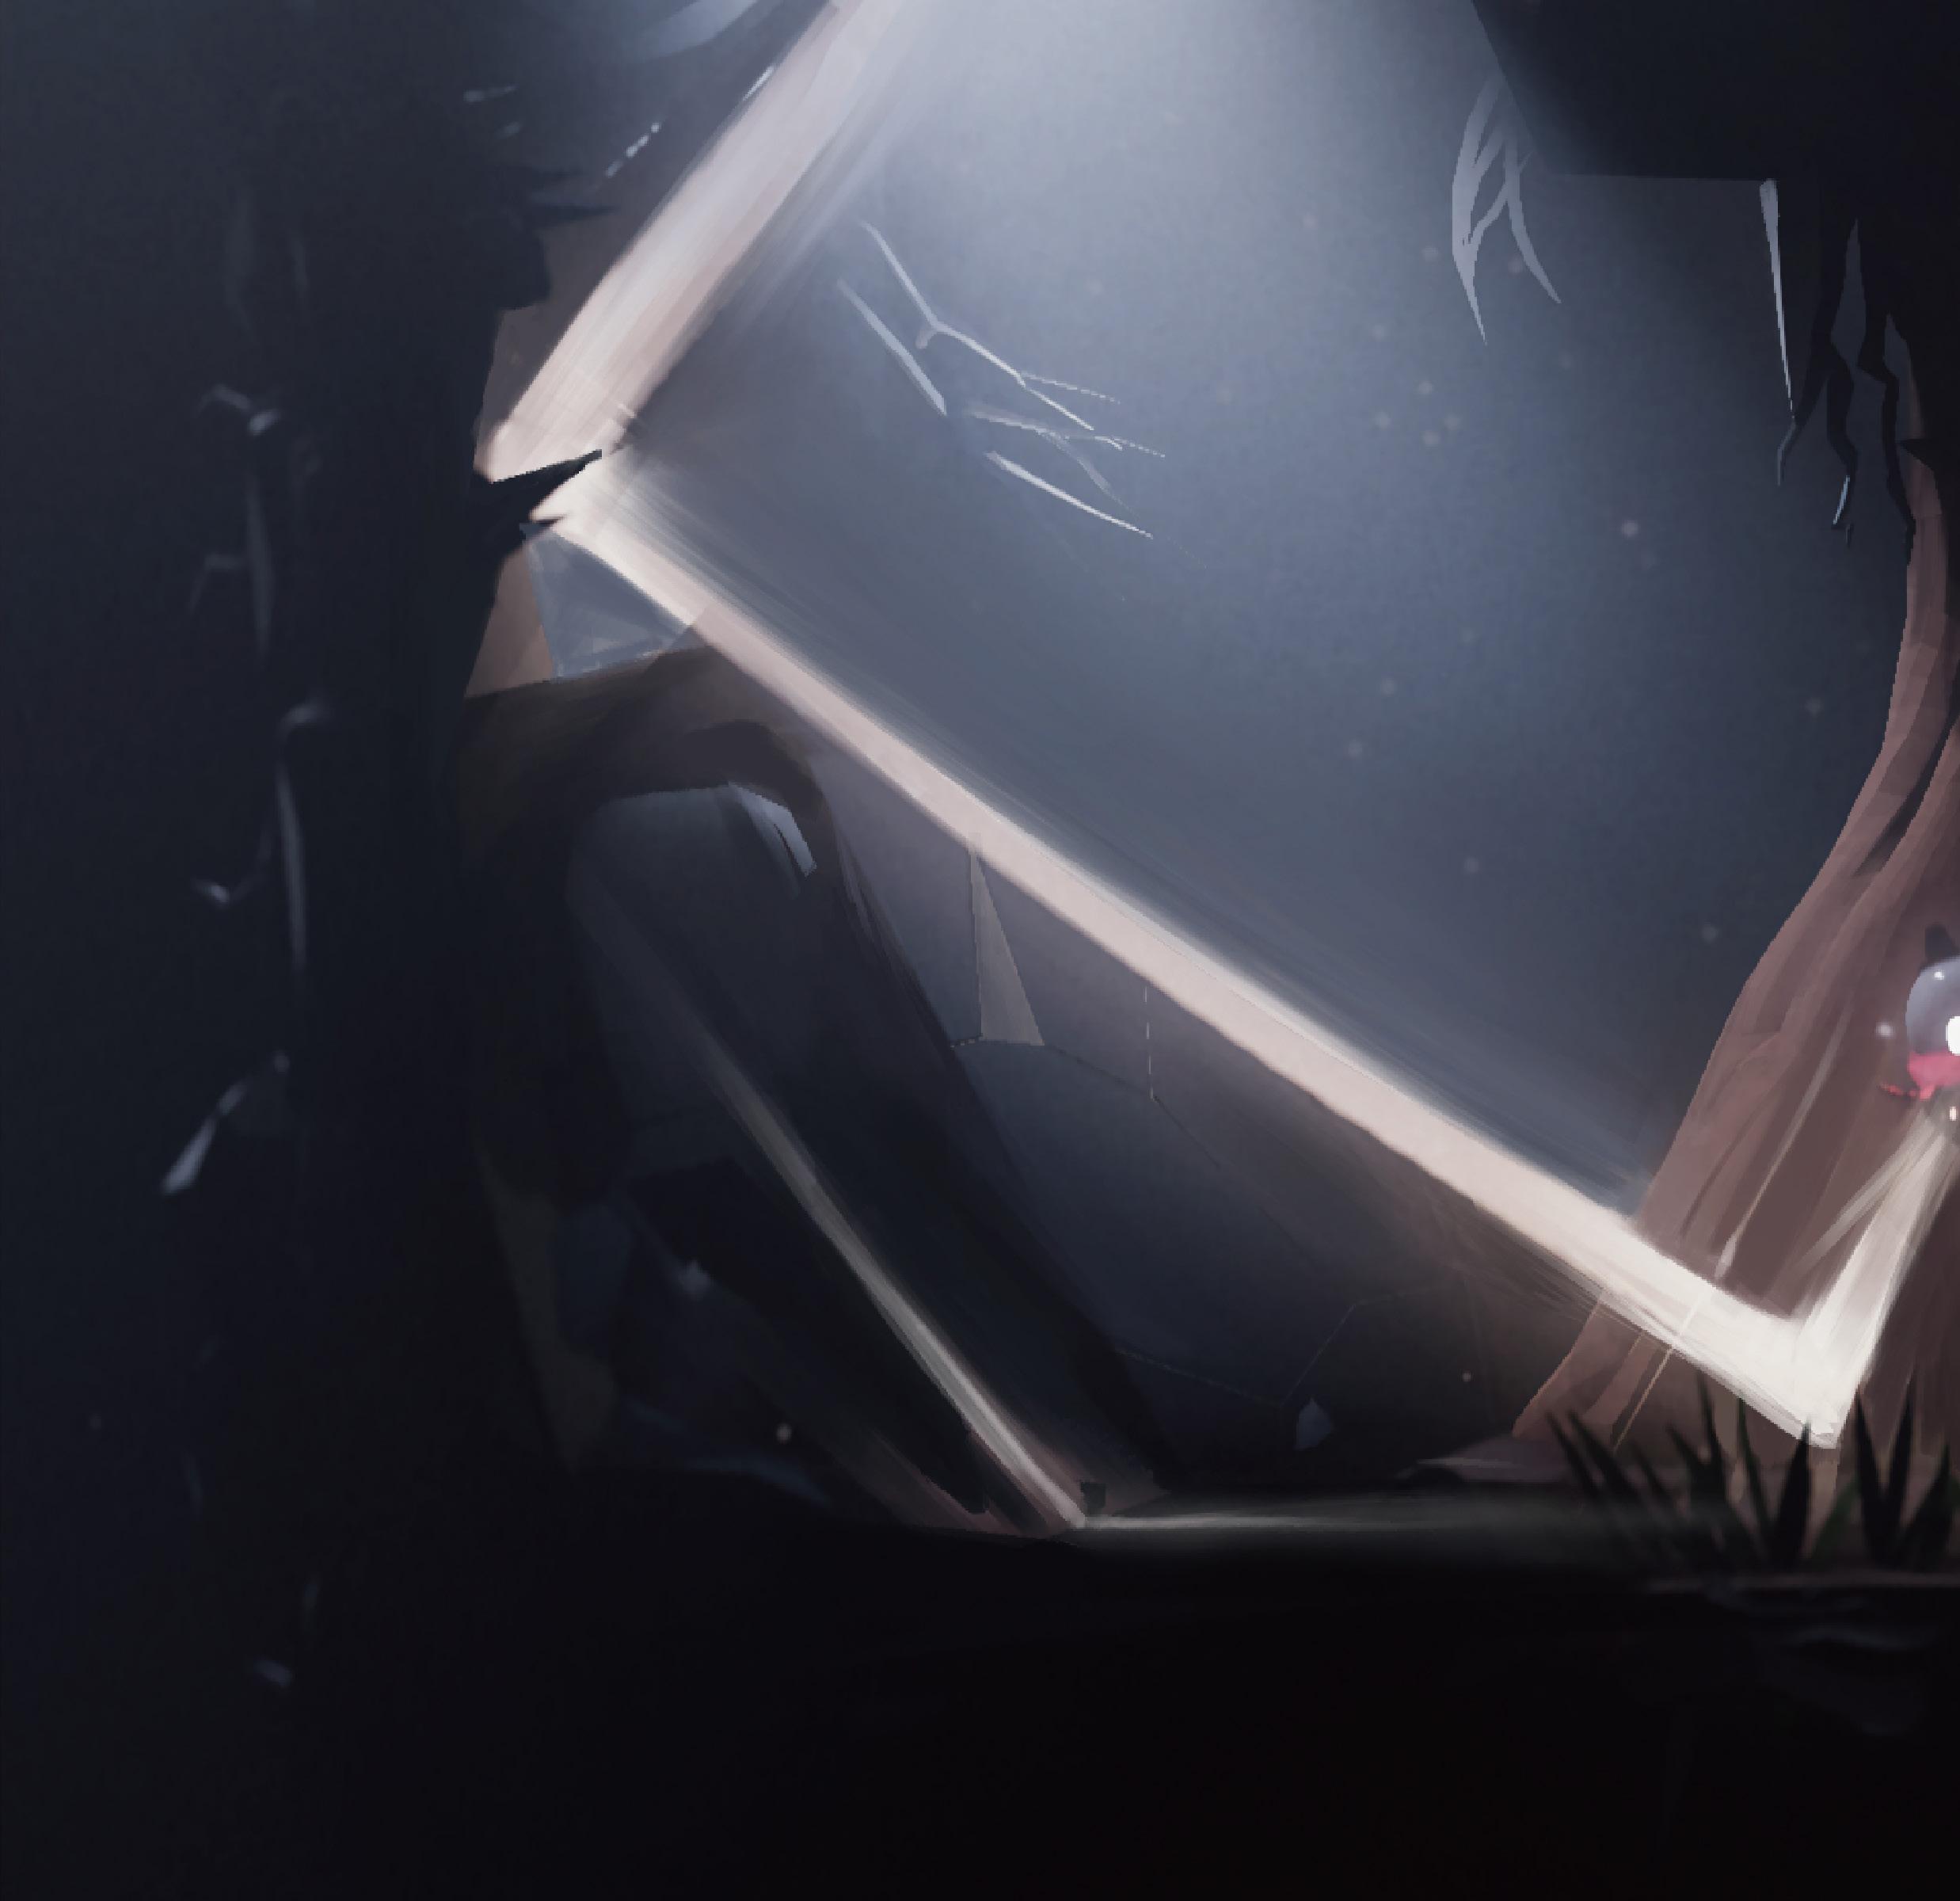
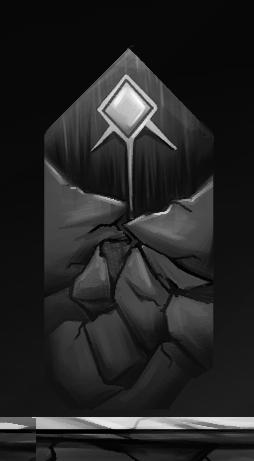
The crystal texture was made in Unreal Engine 5 . By using broken texture, It shows a really nice fragile feeling, and also the sparkle emission highlights its presence. Moreover, the crystal material adds a sense of fantasy to the entire scene by contrasting with the mouse and the floor.
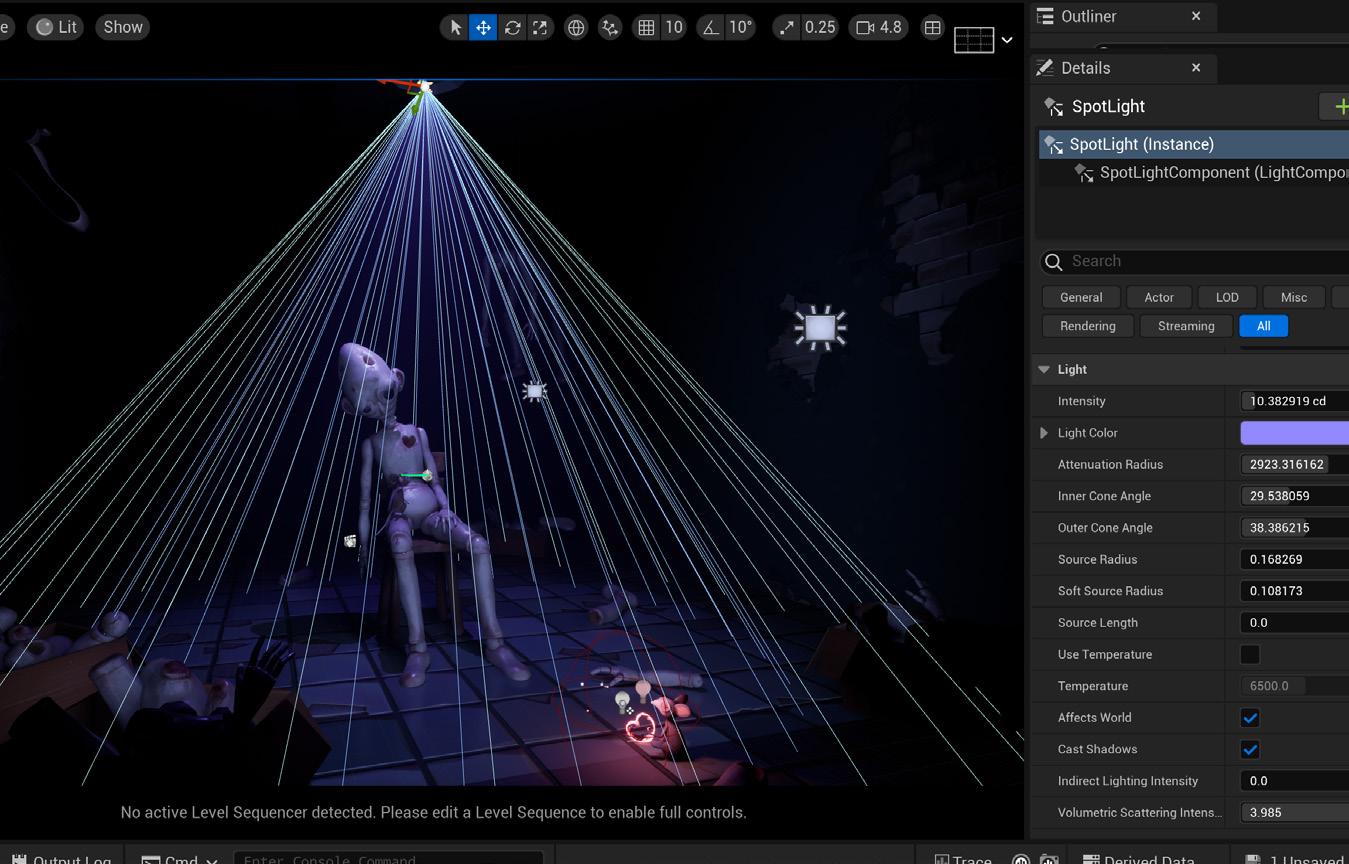
In order to make the whole scene dramatic, there is a spotlight above the puppet. This light could emphasize the main character. The second strongest light is point light which is located at the broken heart.
Apart from these, two supplementary lights have been incorporated to enhance the overall brightness of the scene.

Games? Movies? or...?
Ideas & Design
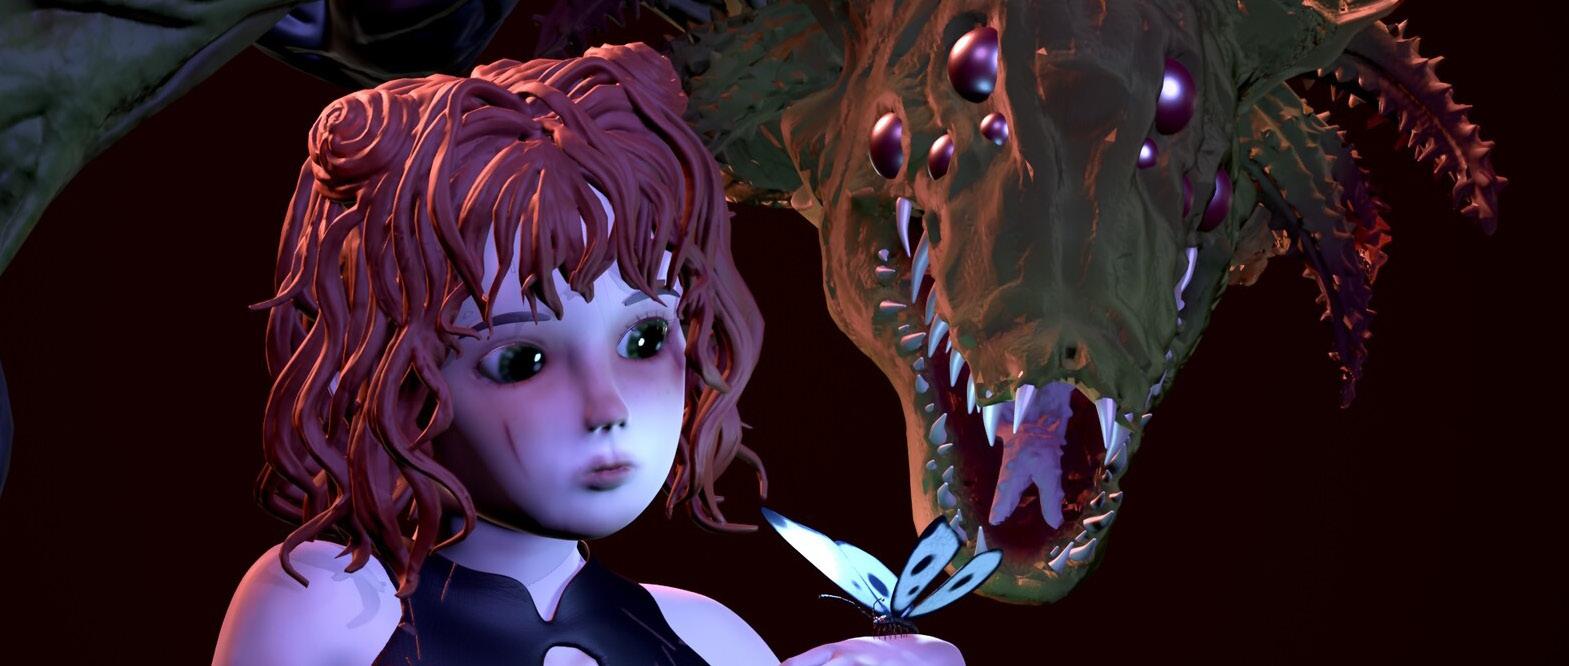
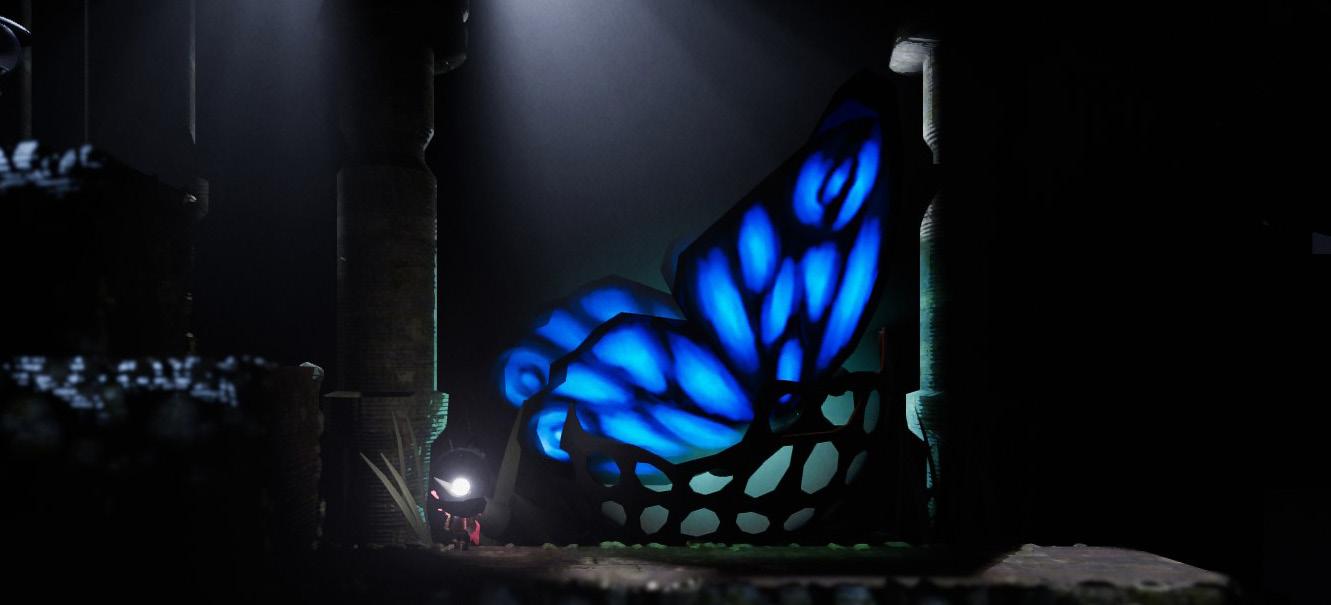
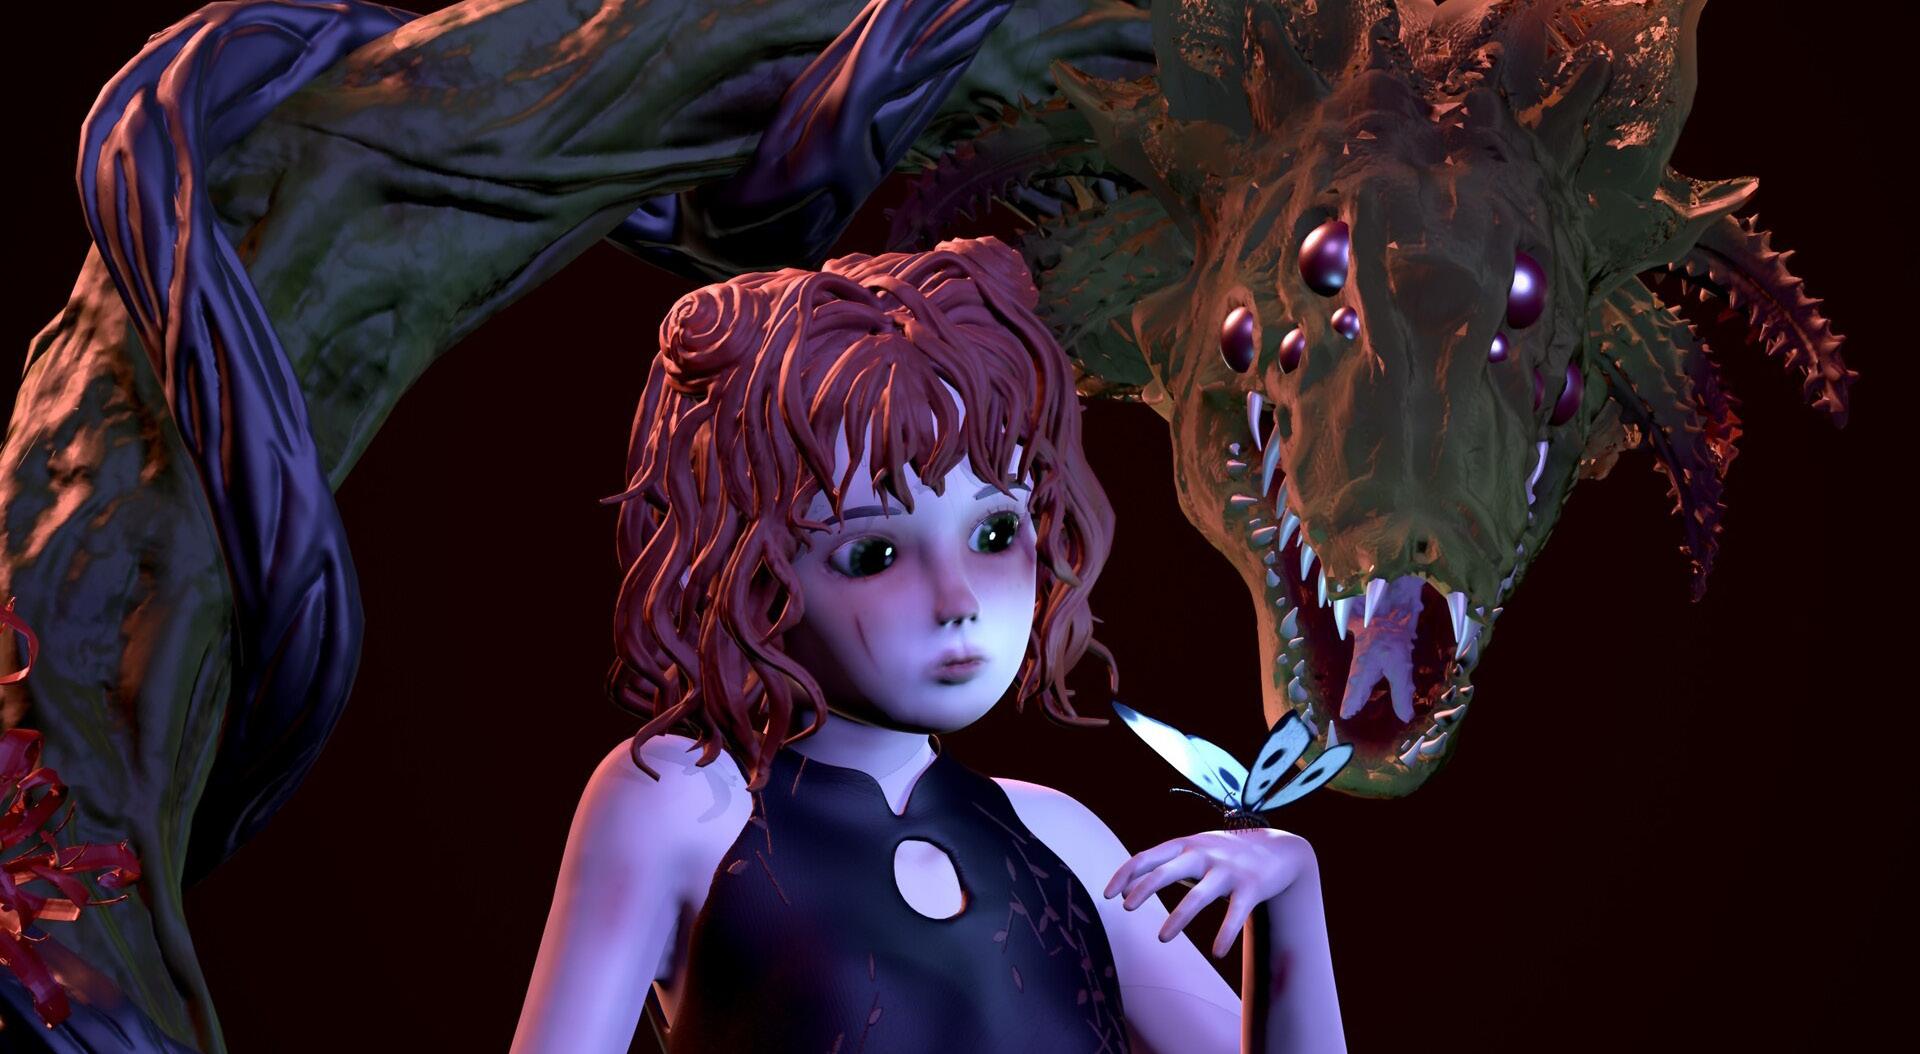
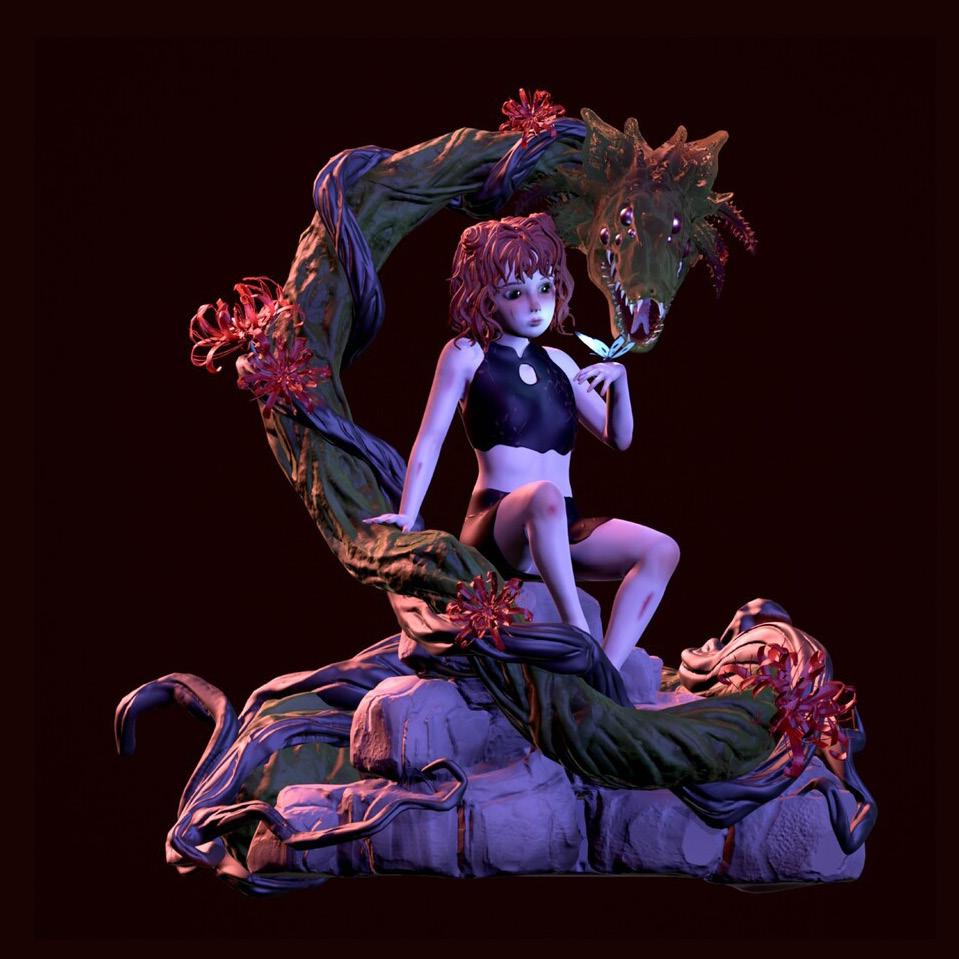
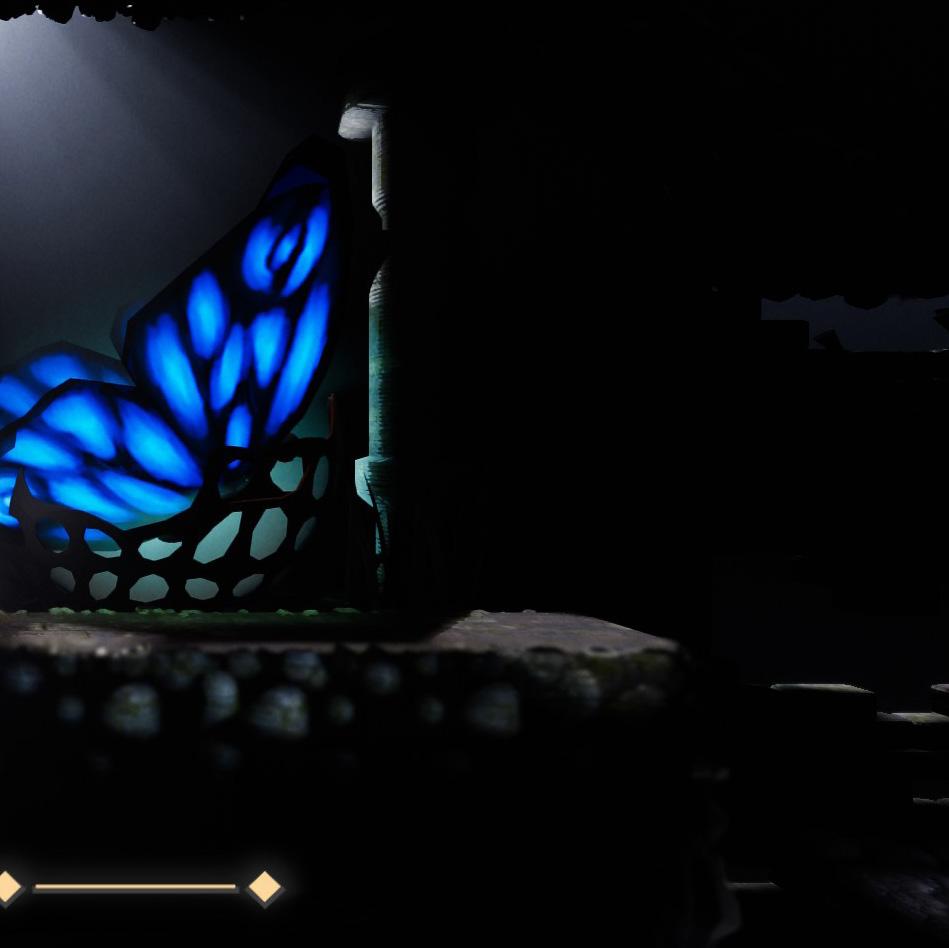
After searching various images online, I captured IVY distinctive features, such as her red hair and the green plant monster. I intend to incorporate Chinese elements into the design, so I decided to change the plant aspect to Higanbana (Spider Lily), and for the costume, I'm thinking of transforming it into a Qipao.
In my imagination, young Ivy lives in the forest, and due to her mischievous personality, she has many wounds on her body.
To make the scene more eye-catching, the lighting is intense and dramatic. The butterflies are designed to emit light, and Ivy has a curious and playful expression as she looks at them.
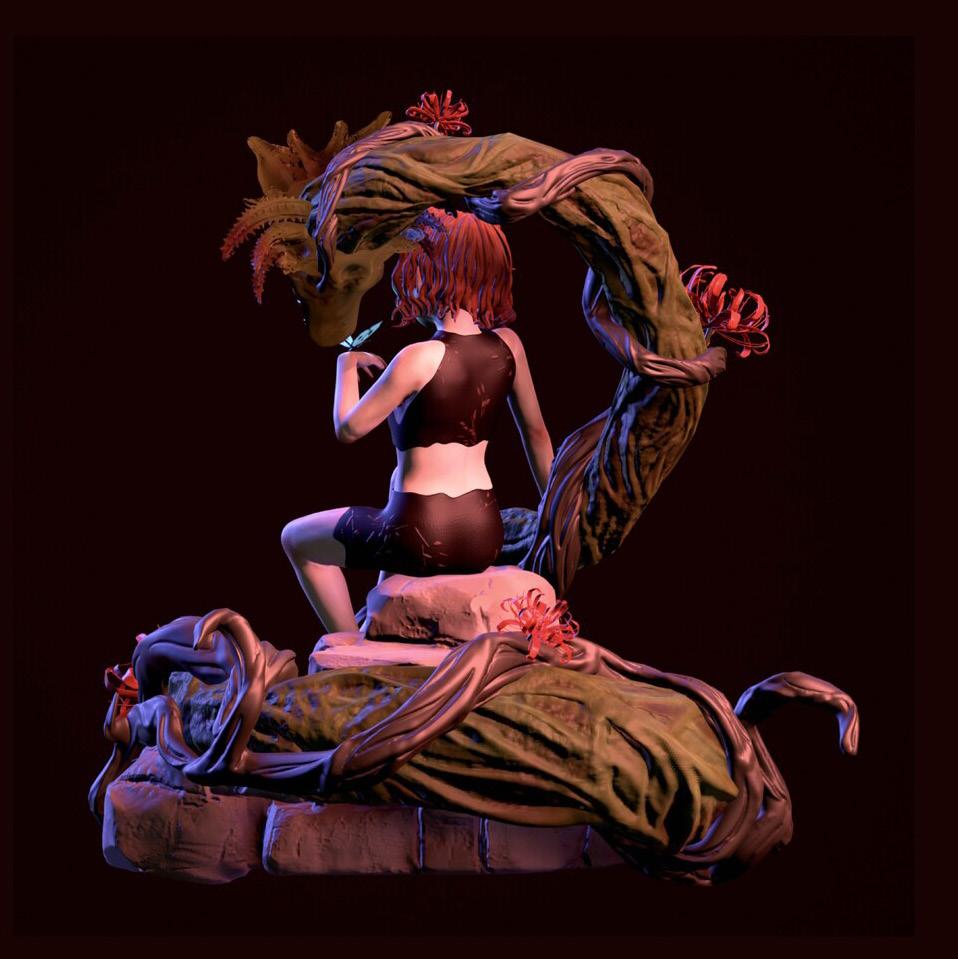
Before and After

Use Blender to make the basic shape then put it into Zbrush to carve the details. After that, In order to reduce Engine loading, use baking from high poly to low poly. Then use Marmoset Toolbag to render the result.
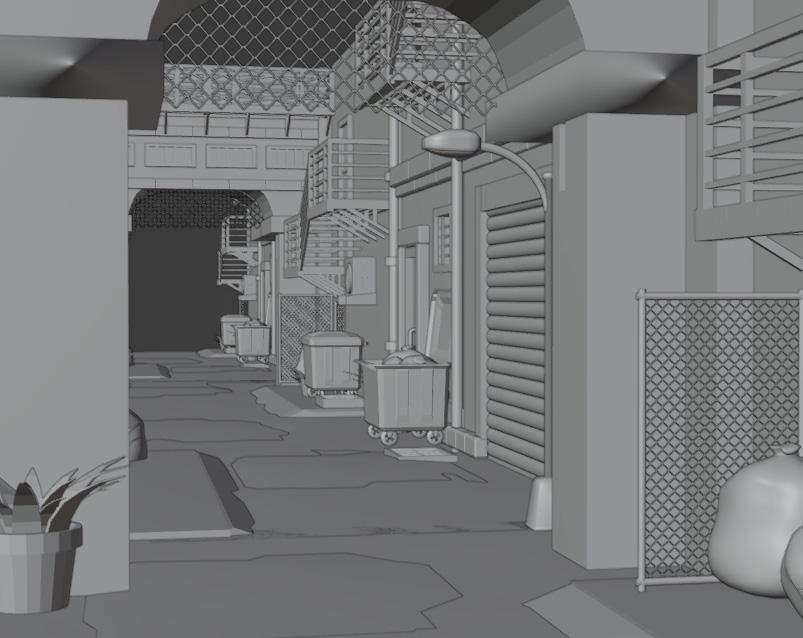
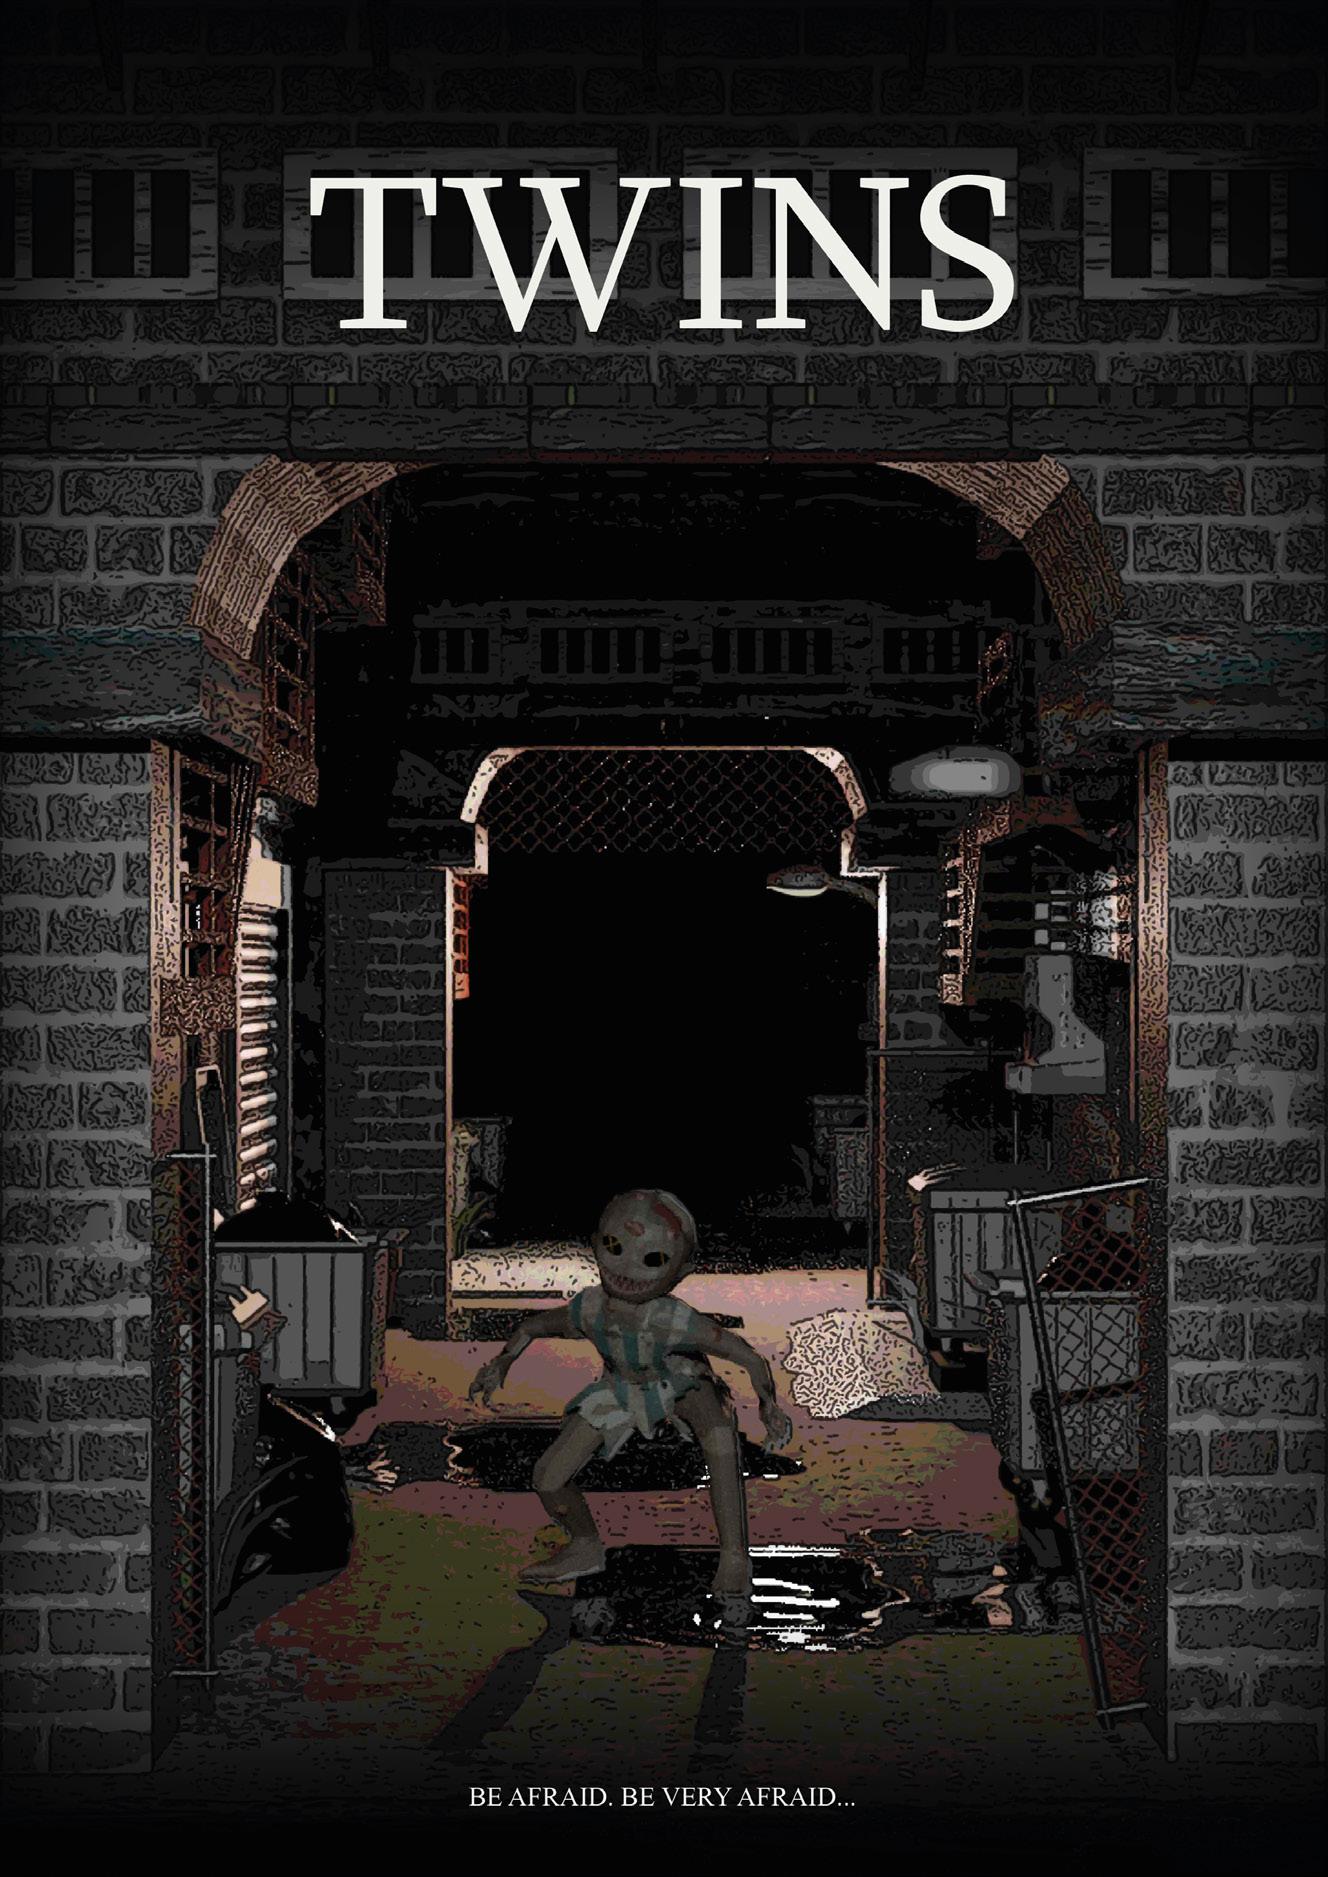
SCENE DESIGN
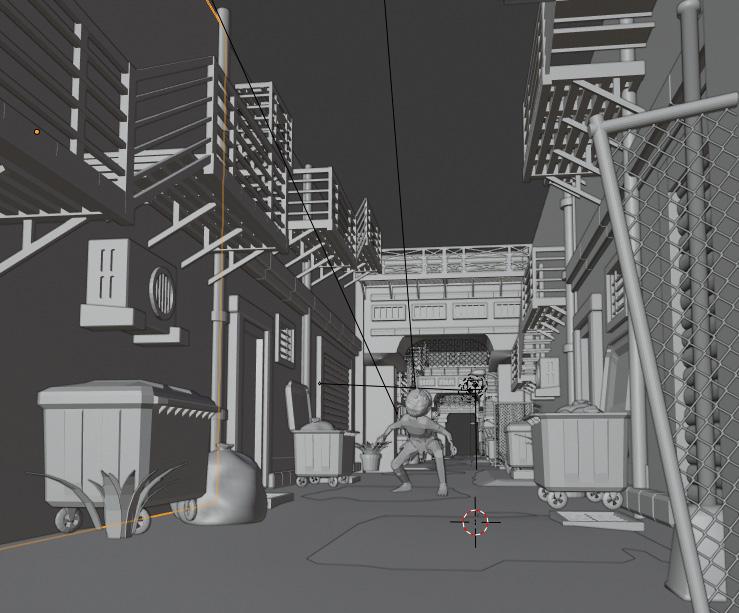
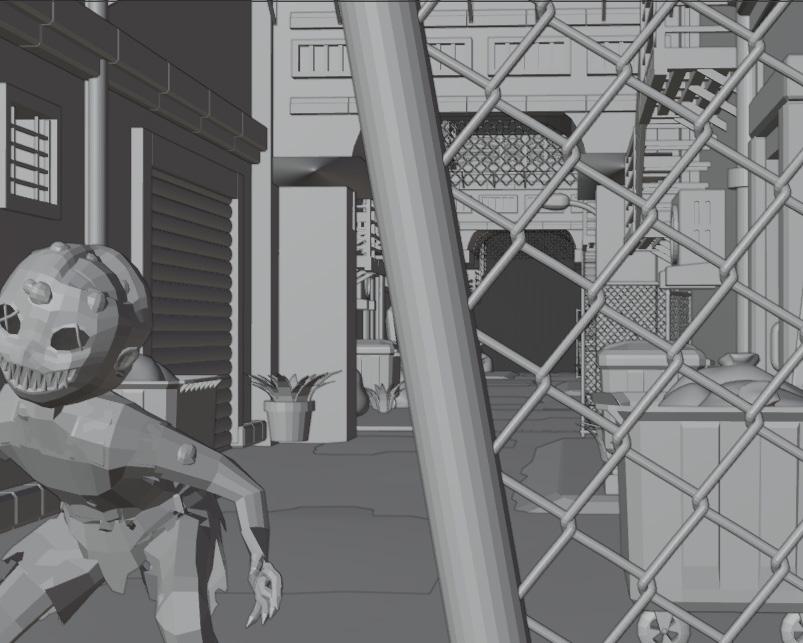
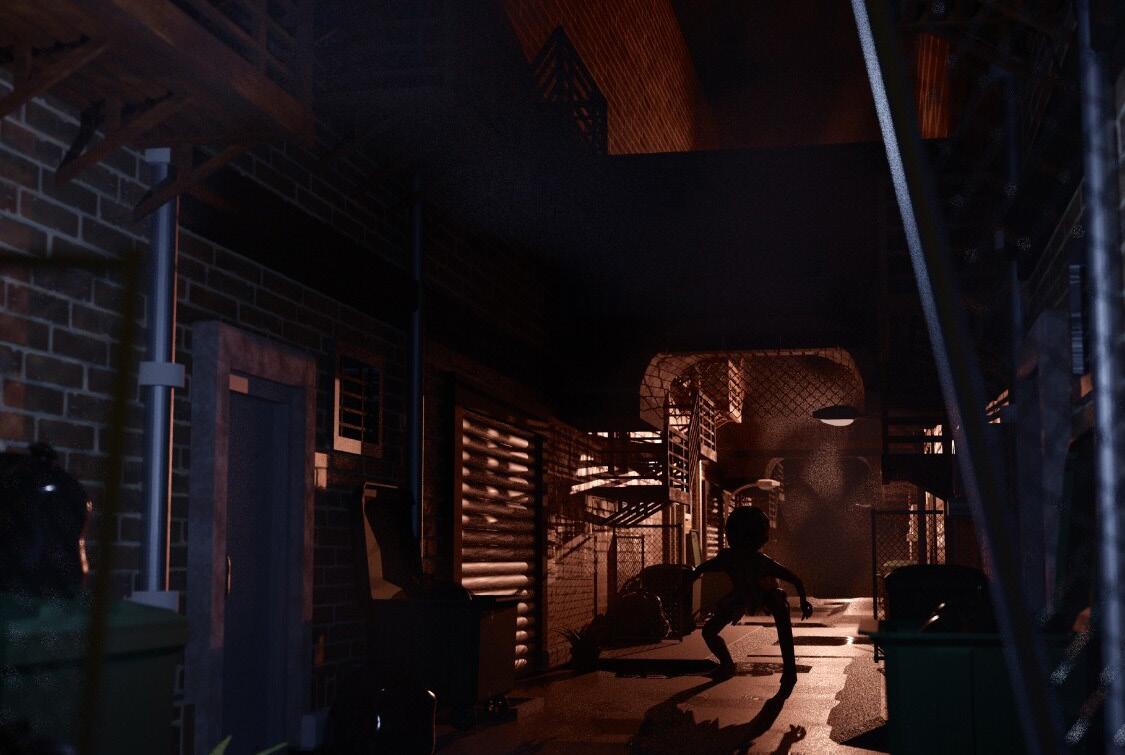
Using blender to build the scene, learning how to use light to change atmosphere in the screen. It is quite fun to create simple objects to assemble the whole alley. Successfully give people a sense of horrifying feeling.
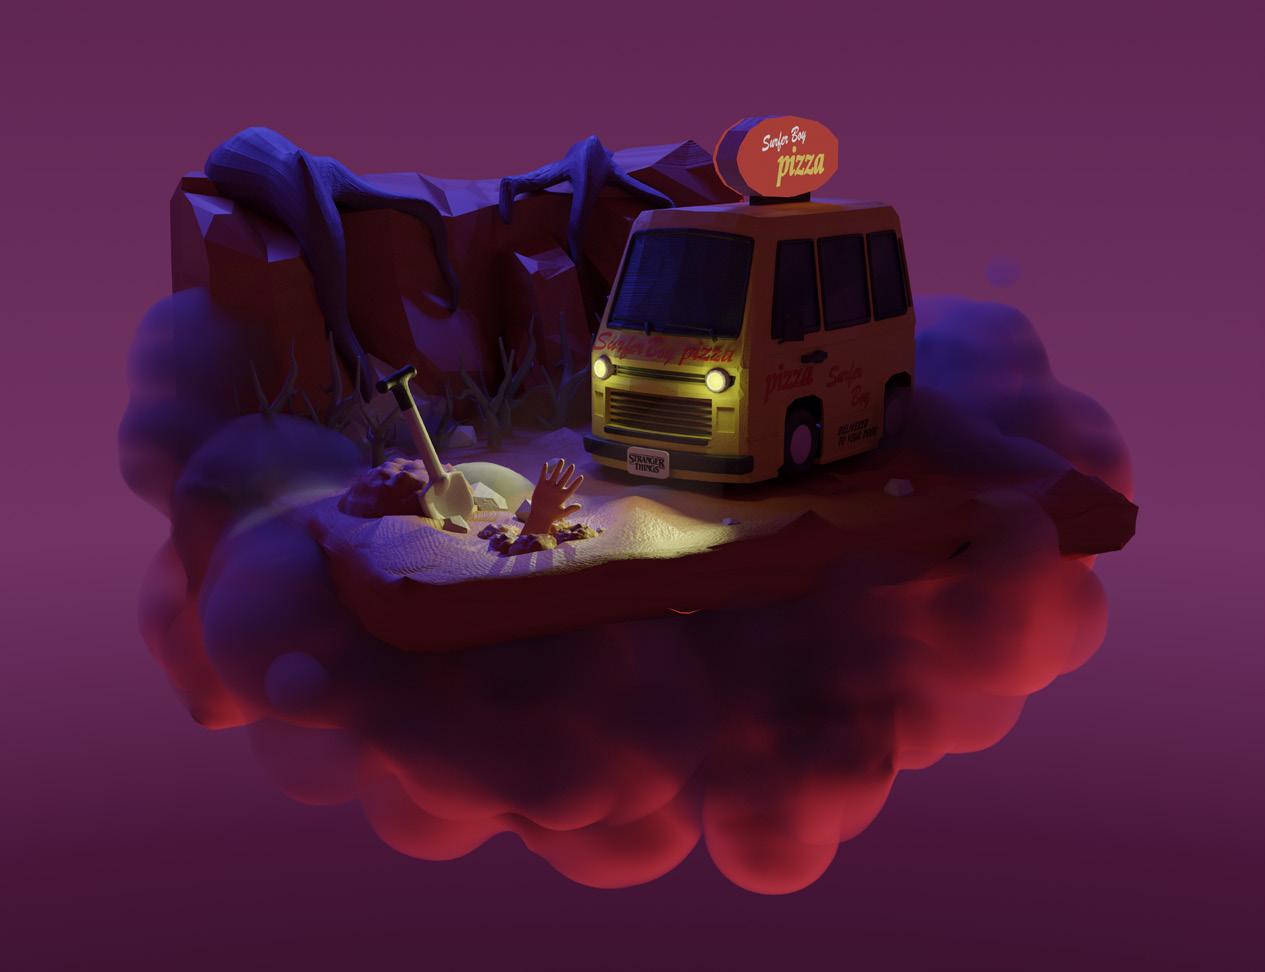

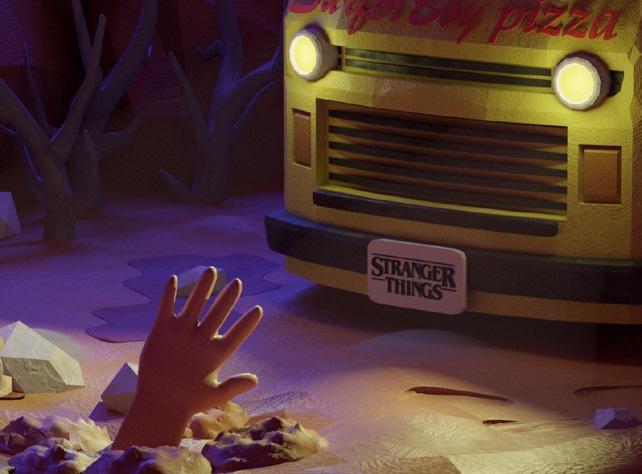
This is an idea inspired by Stranger Things 4, showcasing a stylish pizza car crafted from clay material.
Additionally, the classic lighting sets a mysterious atmosphere.
Some Props
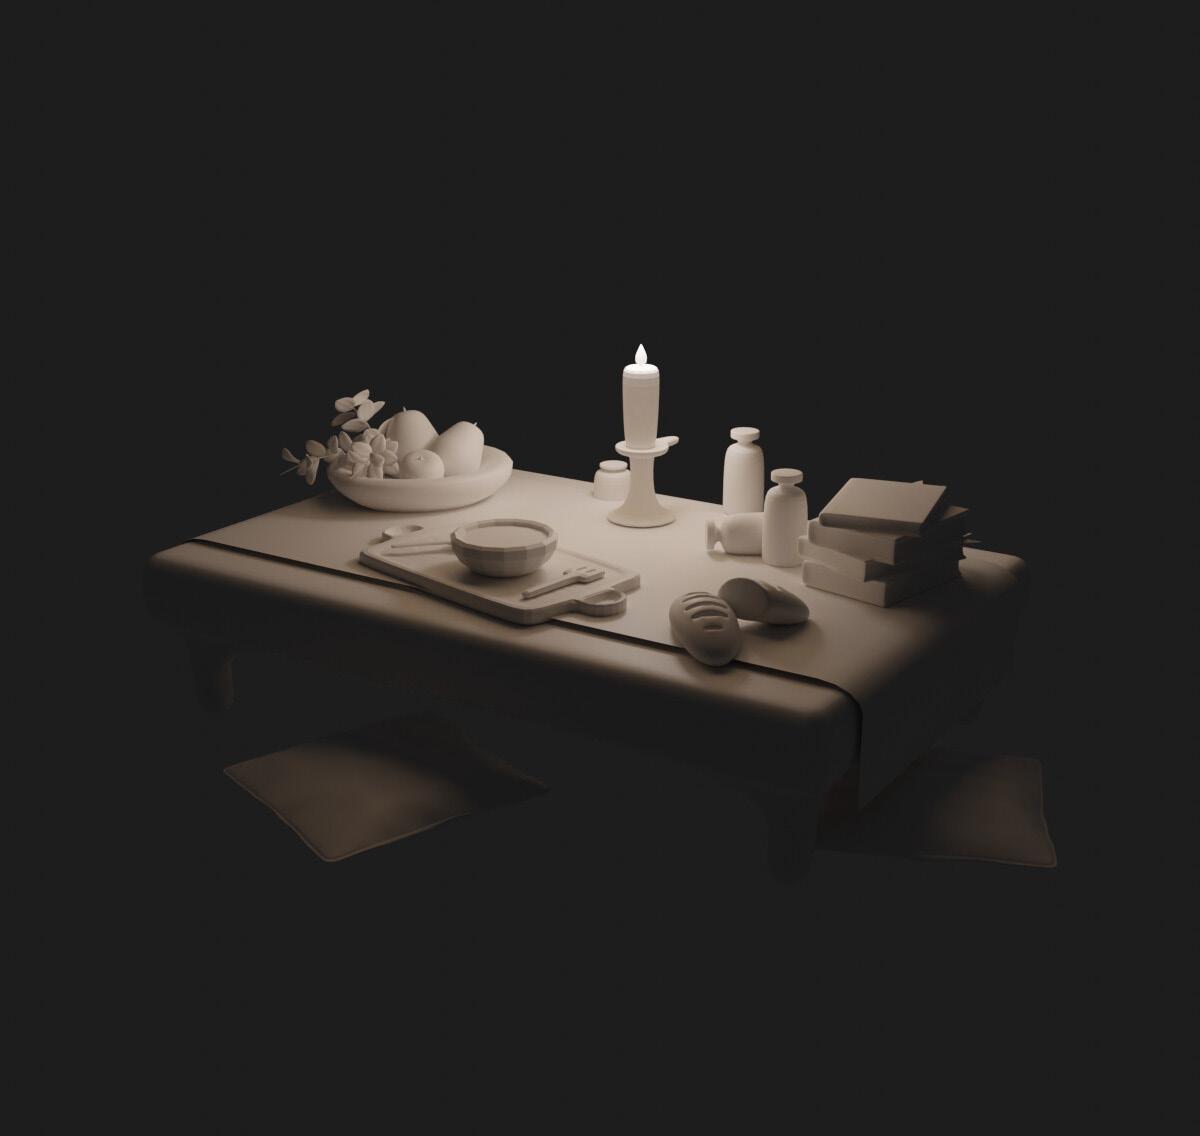
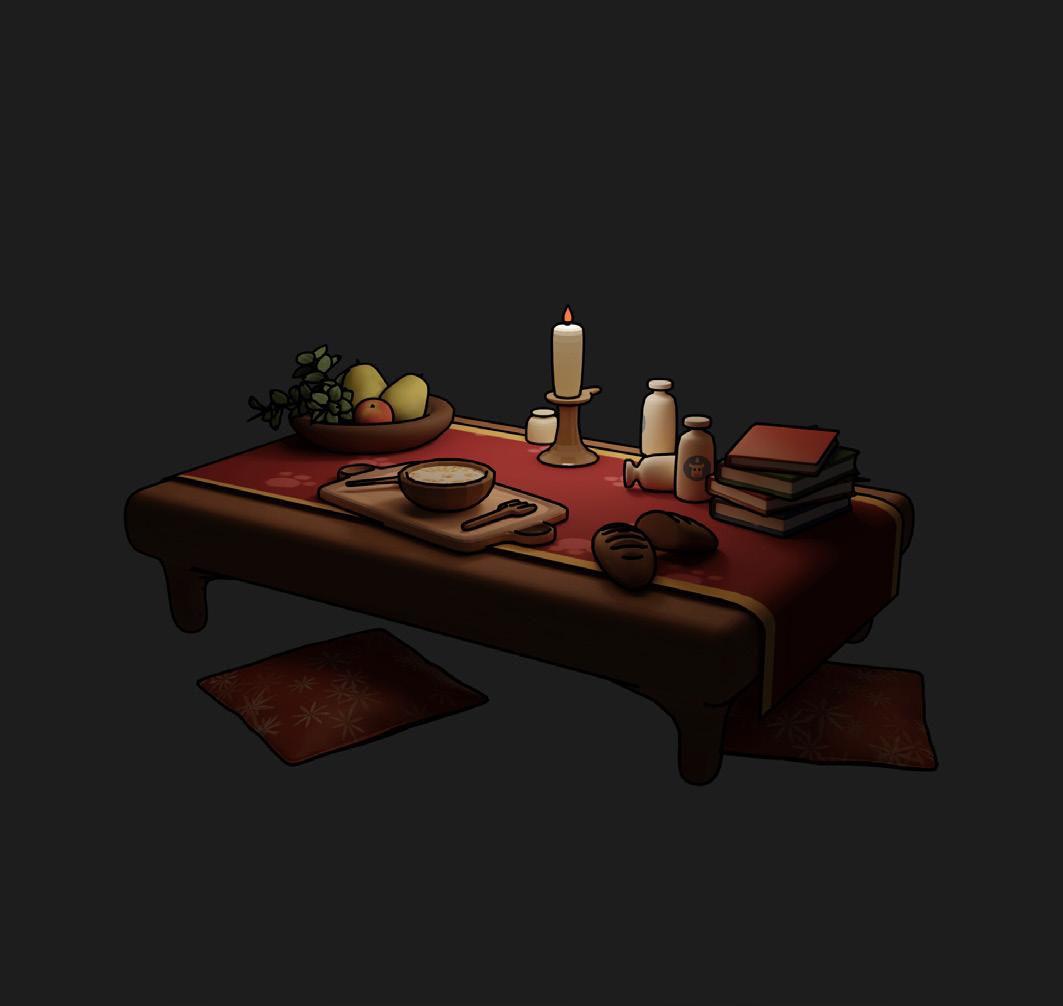
This work was entirely created within Blender , serving as a sole exercise in stylized objects. Simple textures, complemented by point lighting, evoke a classical ambiance, adding warmth to this meal. Finally, the integration of a comic book-style thick outline further blends the overall aesthetic.
Blue Bear
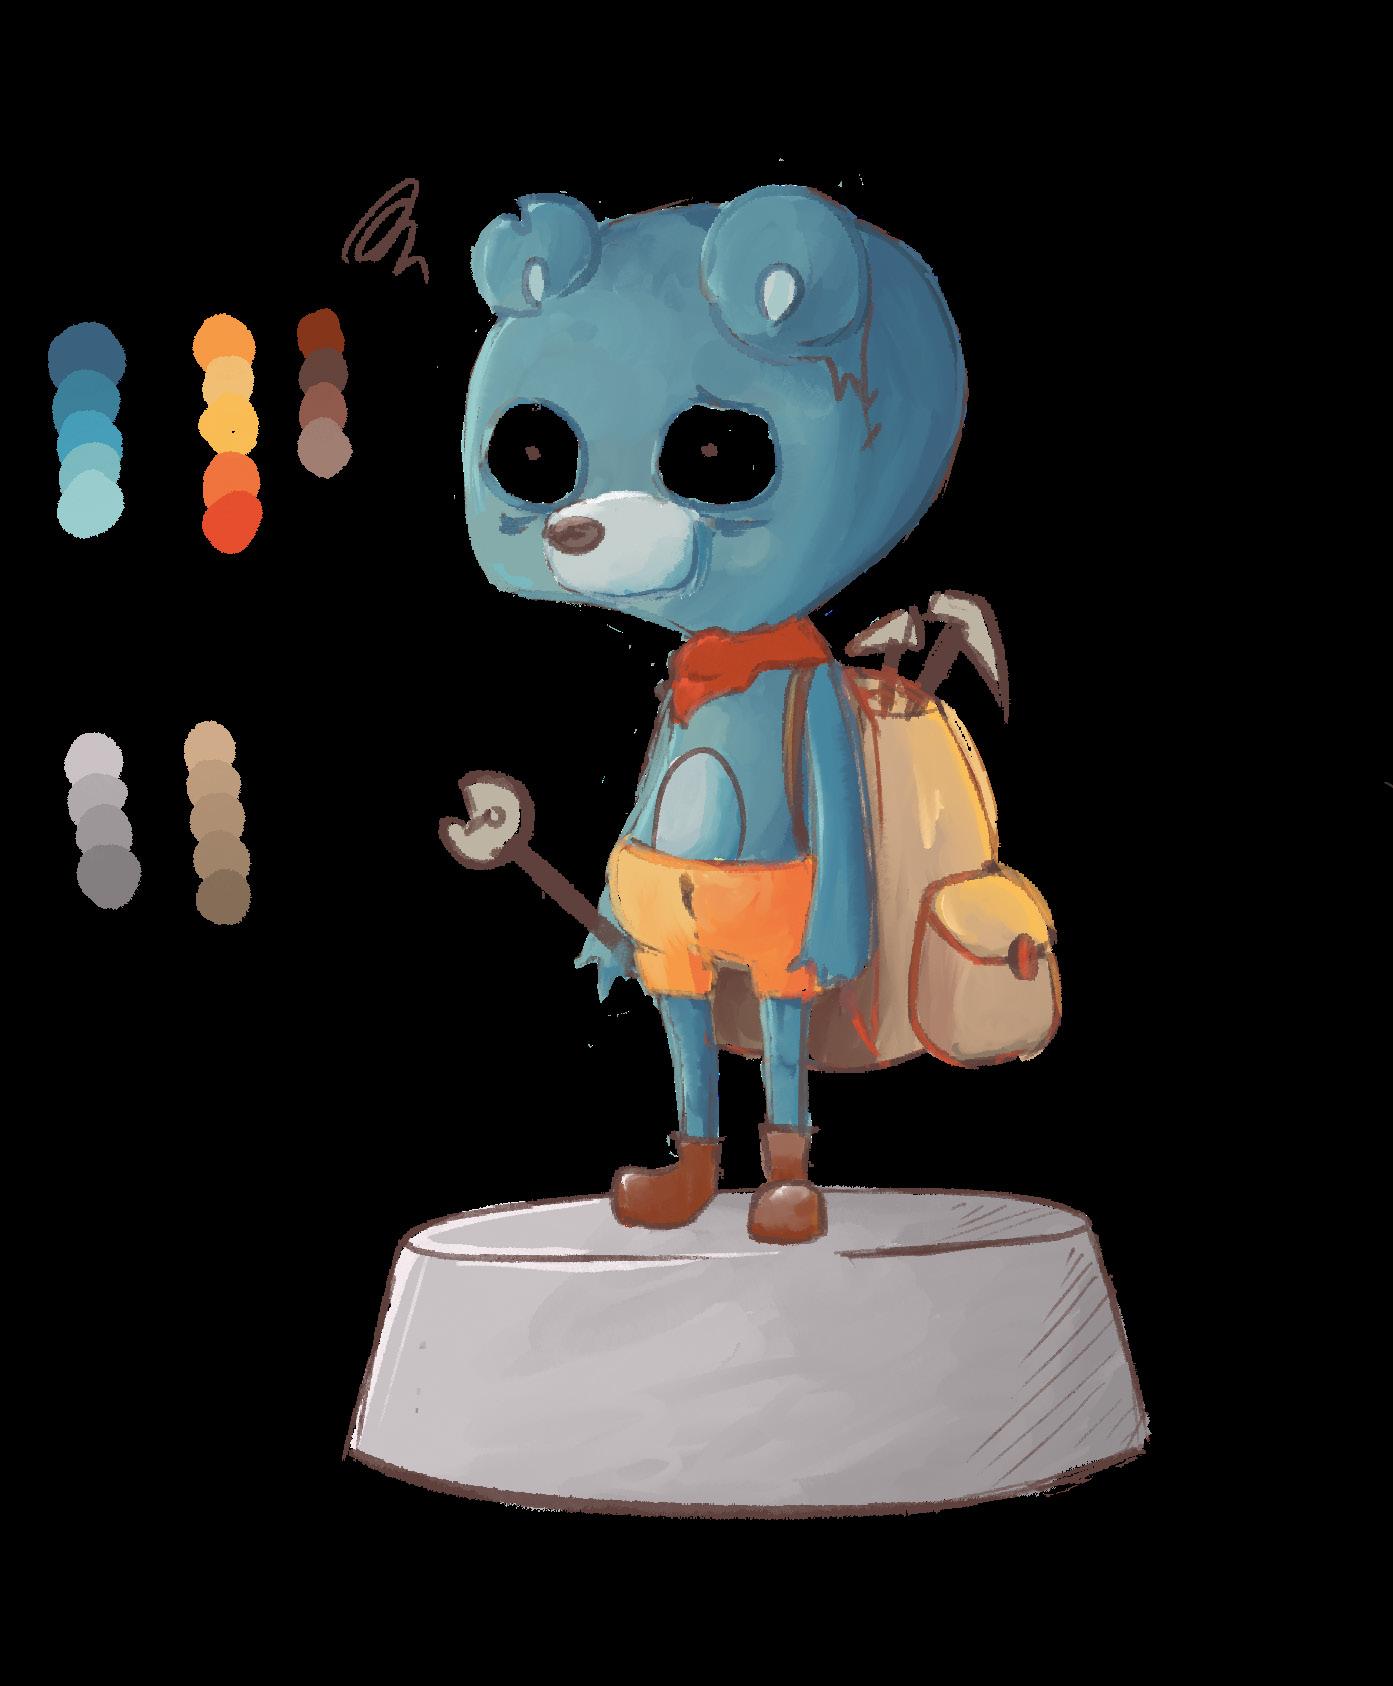
● MASCOT DESIGN
C75 M35 Y30 K10
R60 G125 B155
#3c8099
C5 M30 Y60 K0
R240 G190 B115
#f0bf74
C0 M80 Y85 K0
R230 G75 B45
#e64e2
C30 M60 Y60 K30
R145 G90 B75
#905a4b
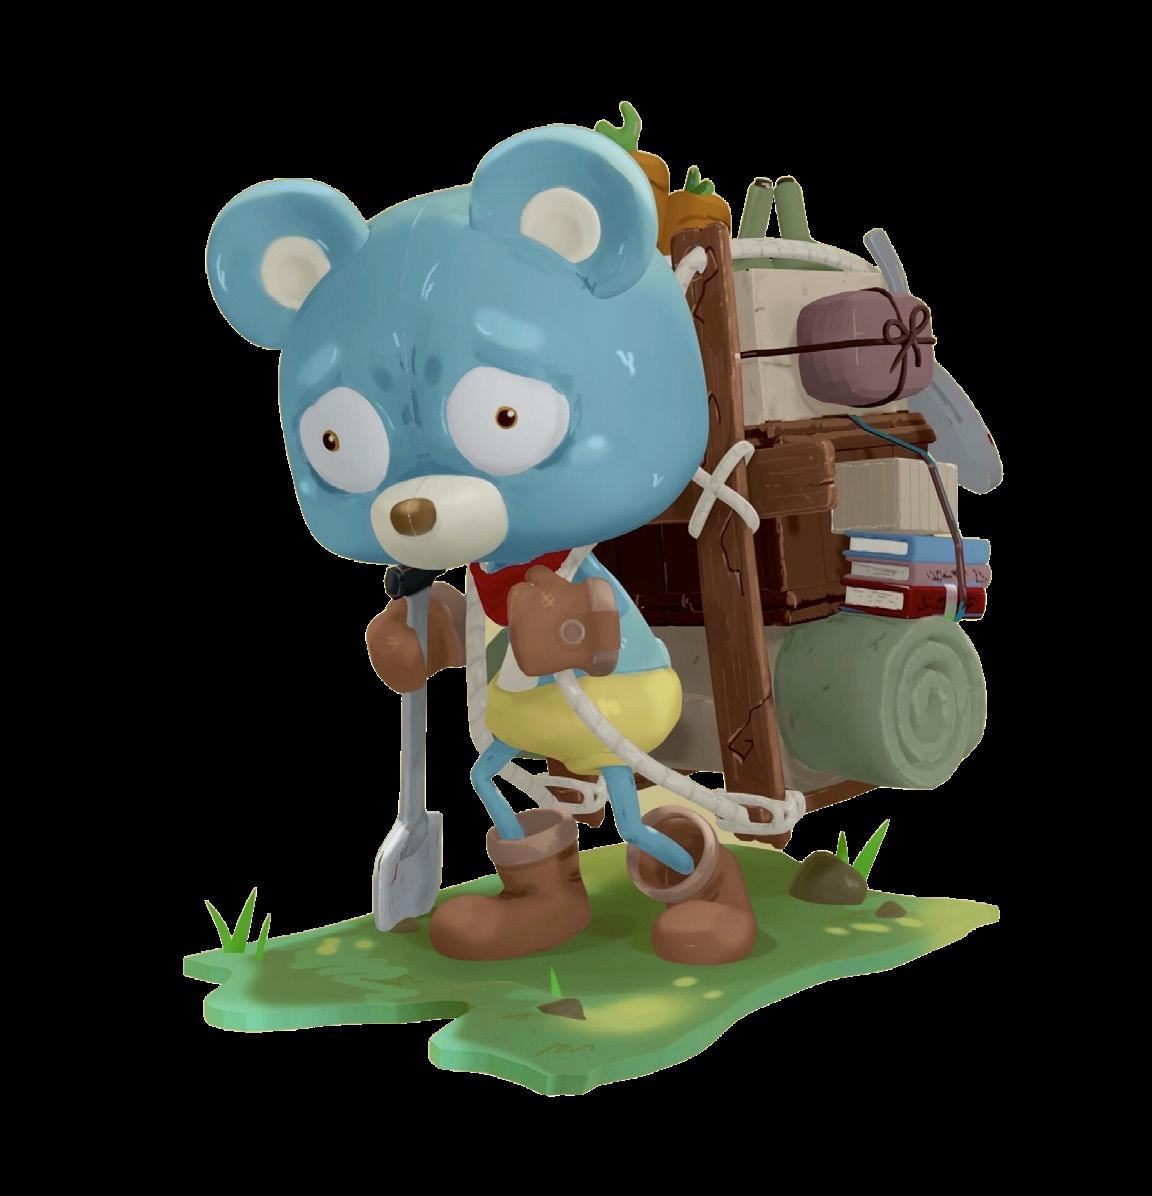

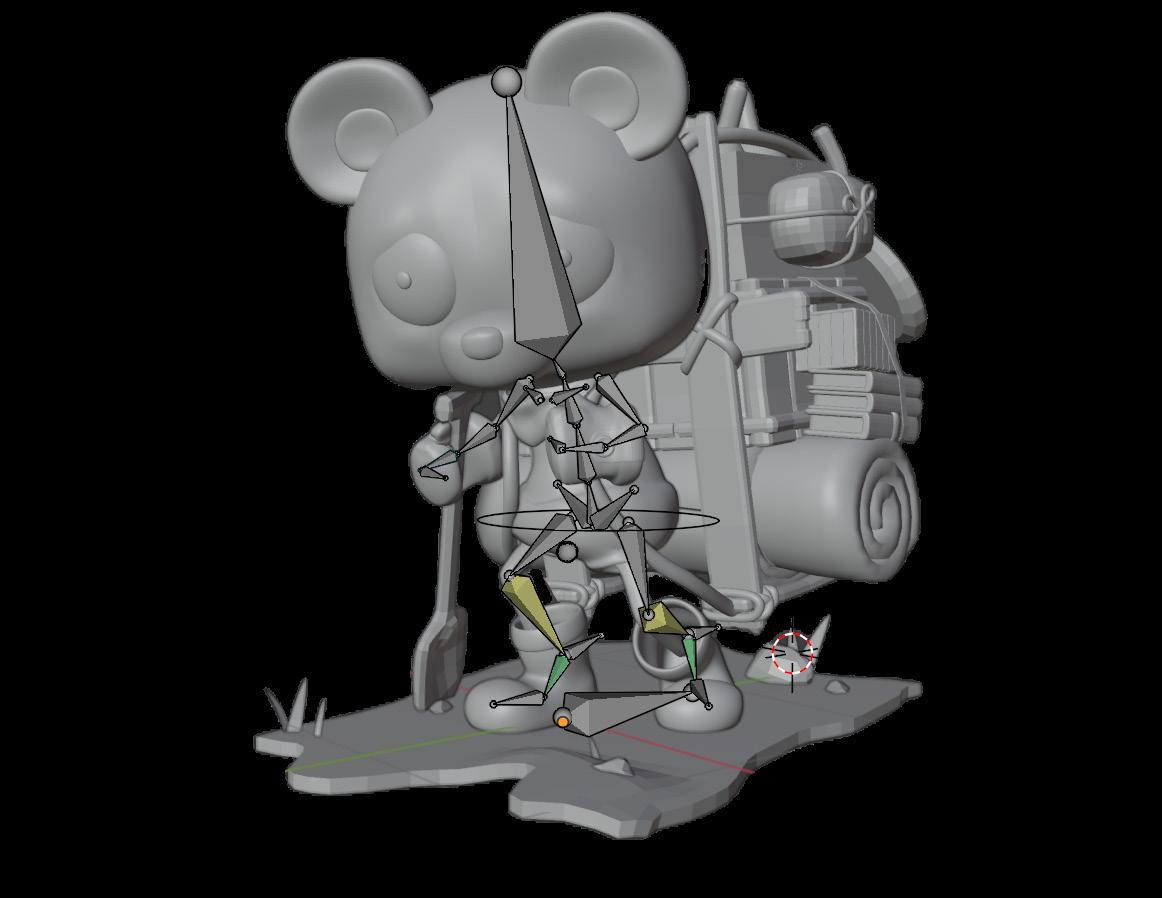
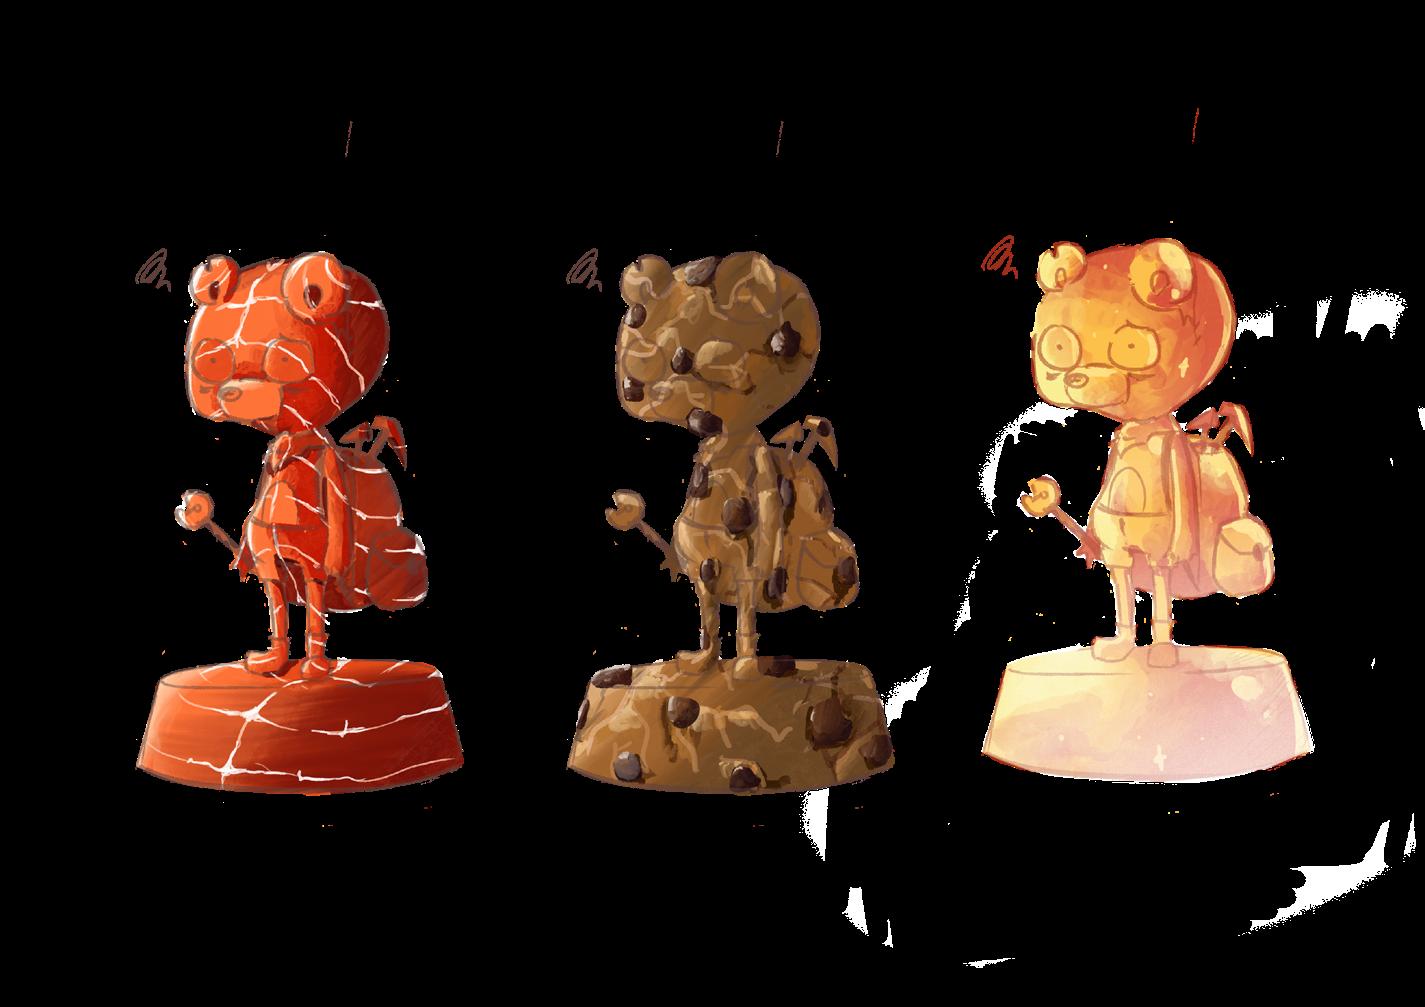
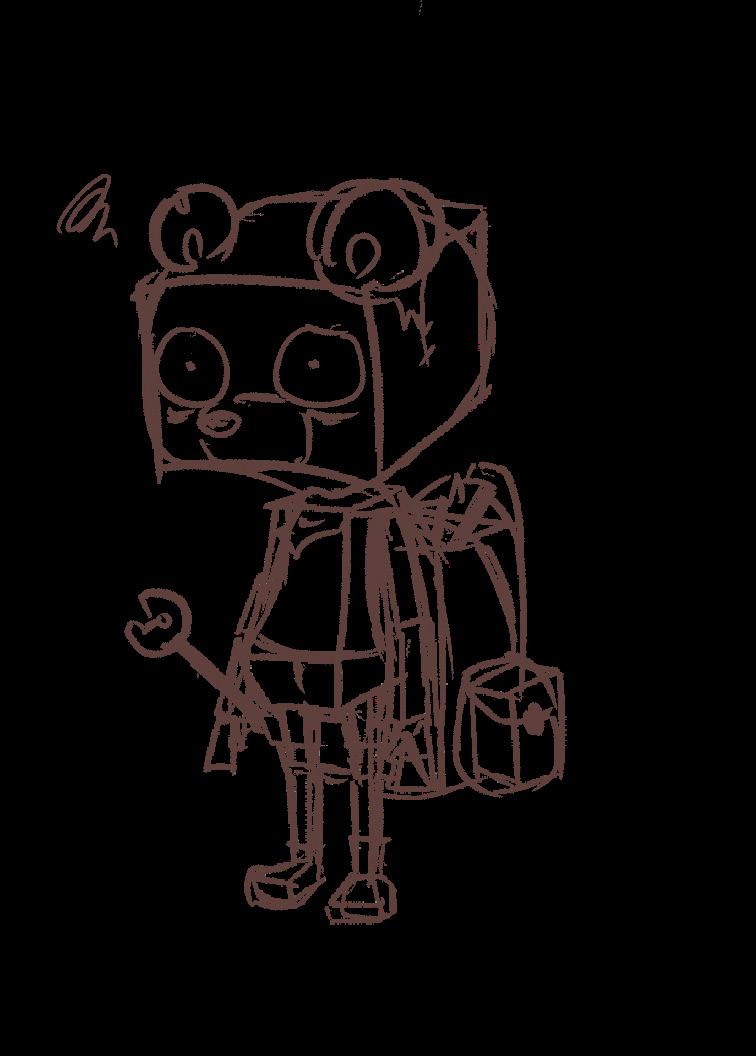
The whole character was made in Blender , including the texture. The texture was drawn in engine. After making T-POSE, I started to rig the bear with the skeleton. In order to make a pose.

In order to improve the painting skill, trying different materials to draw on the bear. The first one is salmon, vivid colour and soft surface are quite hard to depict. Then the second one is chocolate biscuit, the main goal is to draw a crispy appearance. The final one is honey, want to present the crystal and sparkle outside.
COMPETITION:
2022 Young Pin Design Award
2022 Vision Get Wild
2022 KT Digital Game
Planner : All members
Concept Art : Huang, Zui - Wei
Level Design : Huang, Po - Hsiung
3D Scene : Tsao, Chih - Chia
Graphic Design : Luo, Zhi - Han
Program : Chien, Anke
Keep on going never give up.
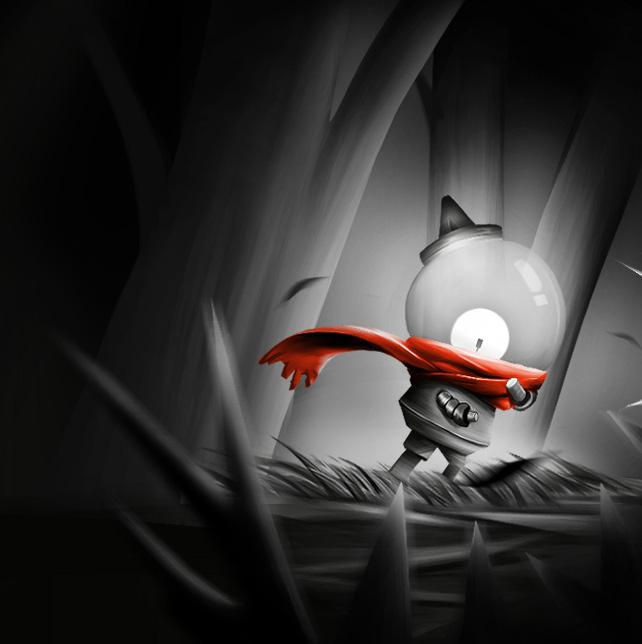
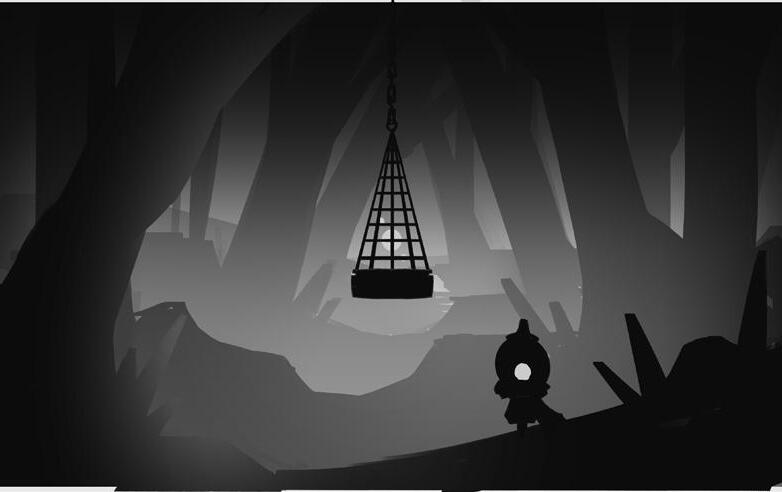
LIGHT is a platformer with a twist, using the reflection of light as the primary way to traverse the terrain.
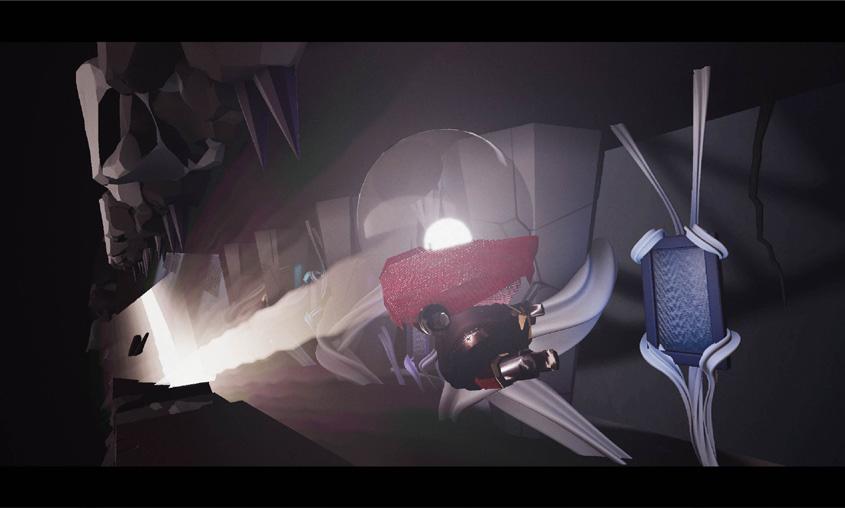
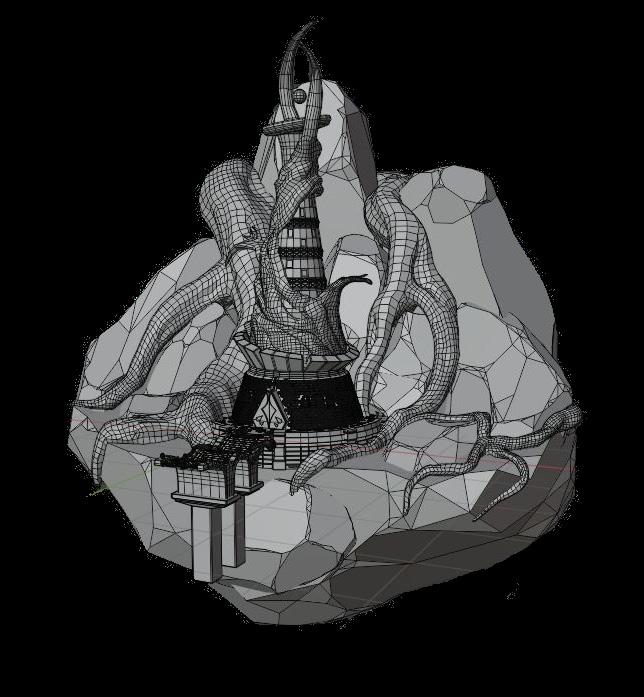
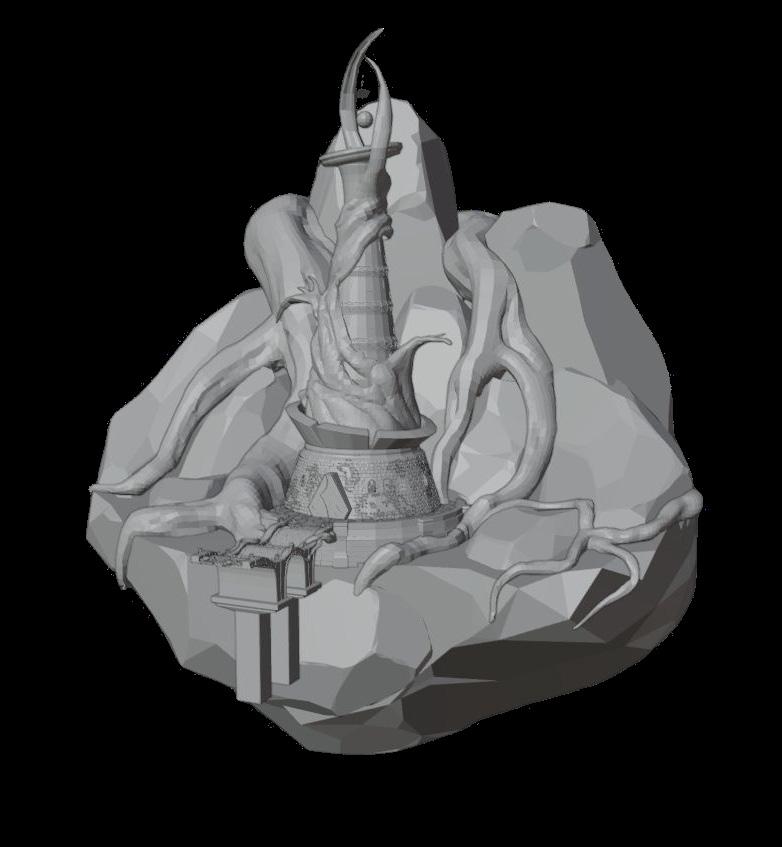
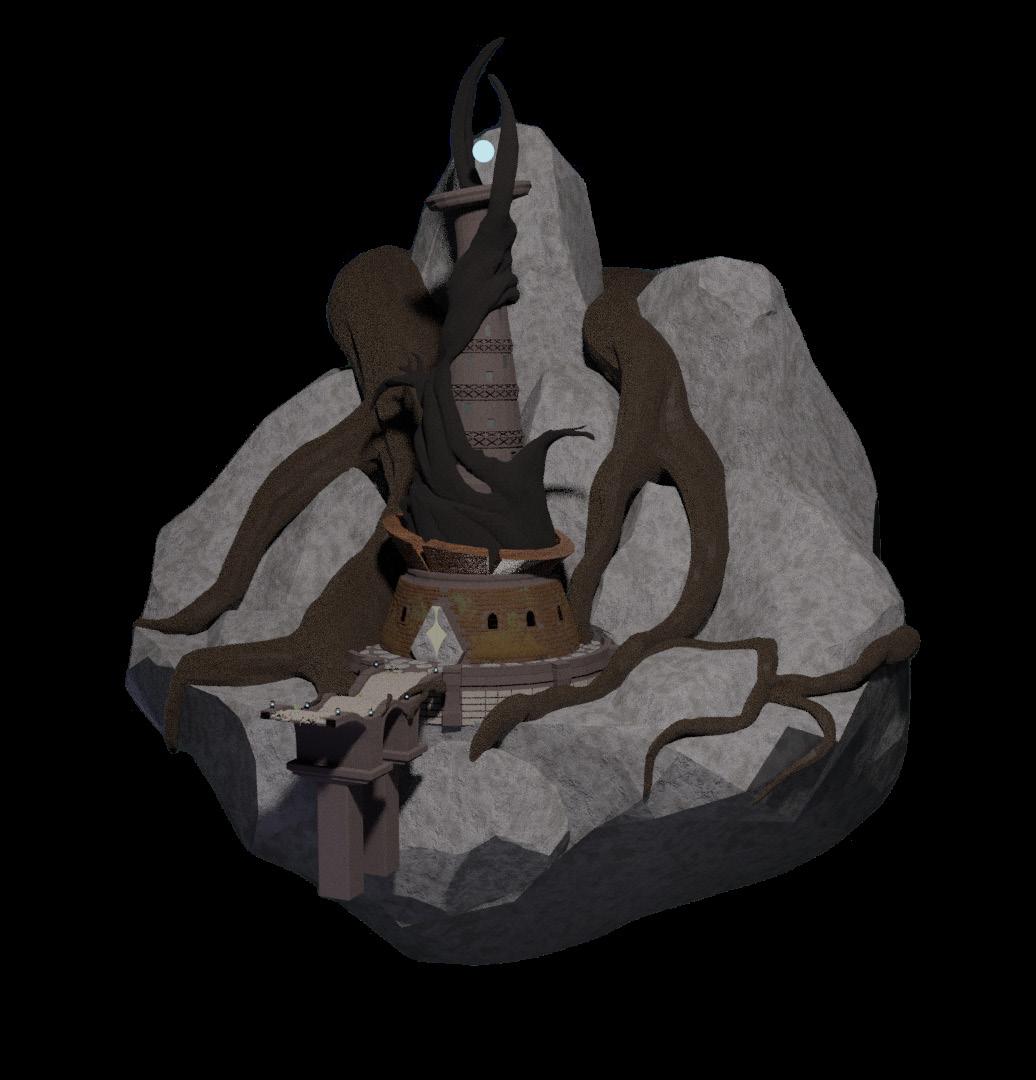
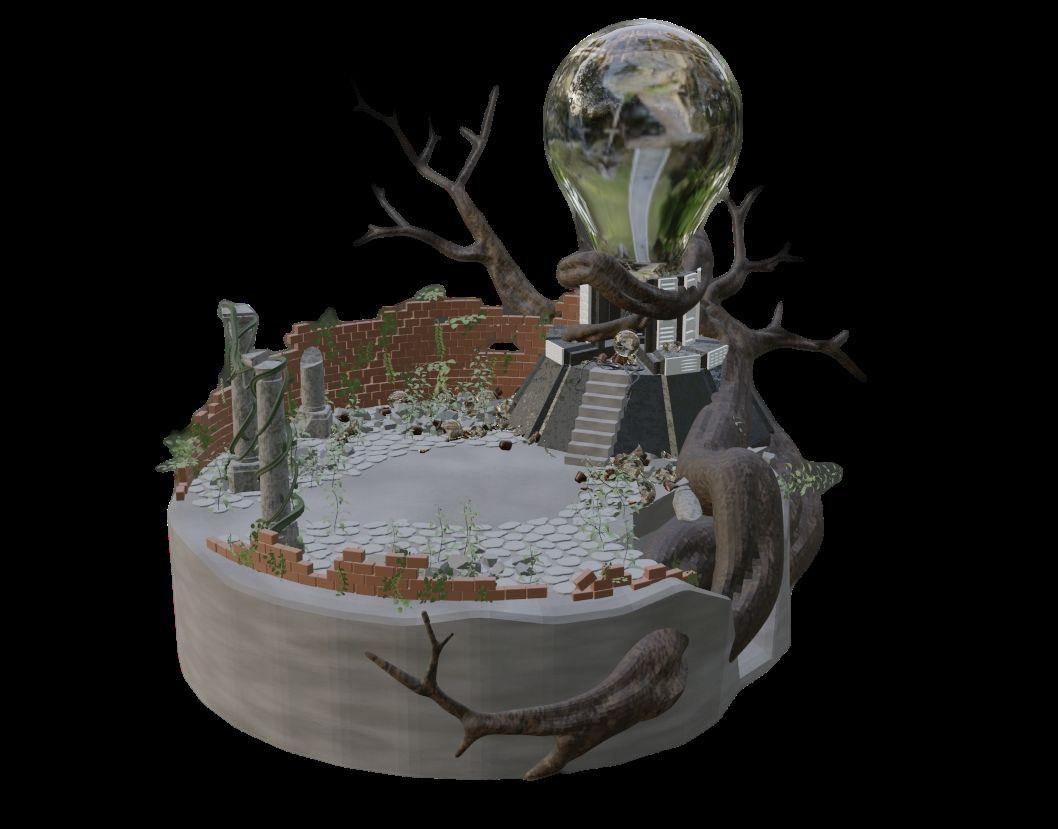
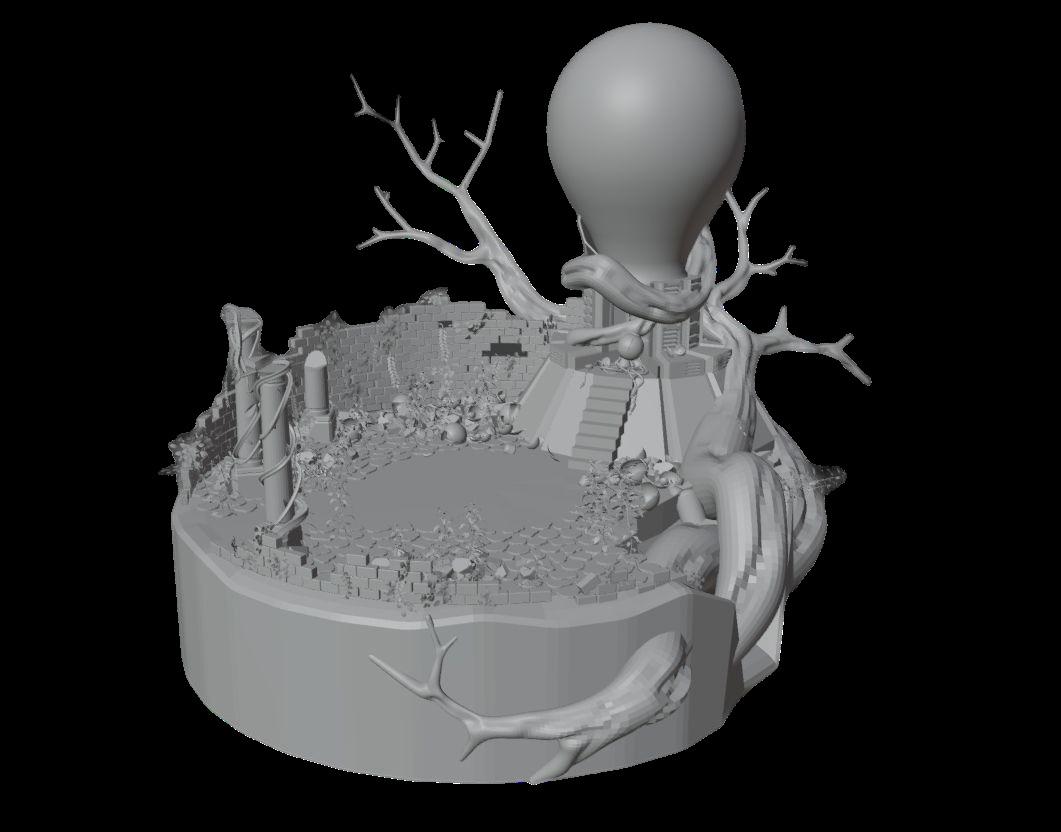
INNER LEVEL ● CONCEPT ART-TOWER ● 3D RENDER
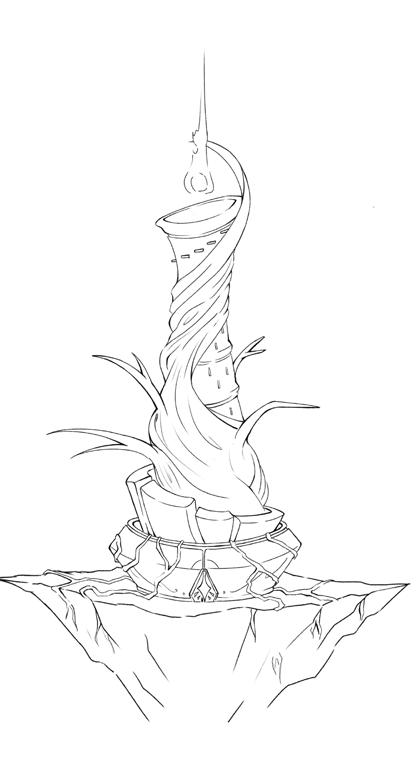
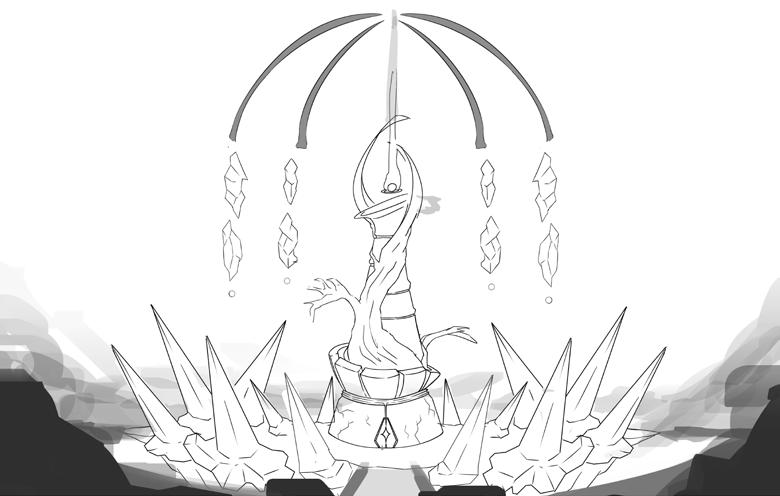
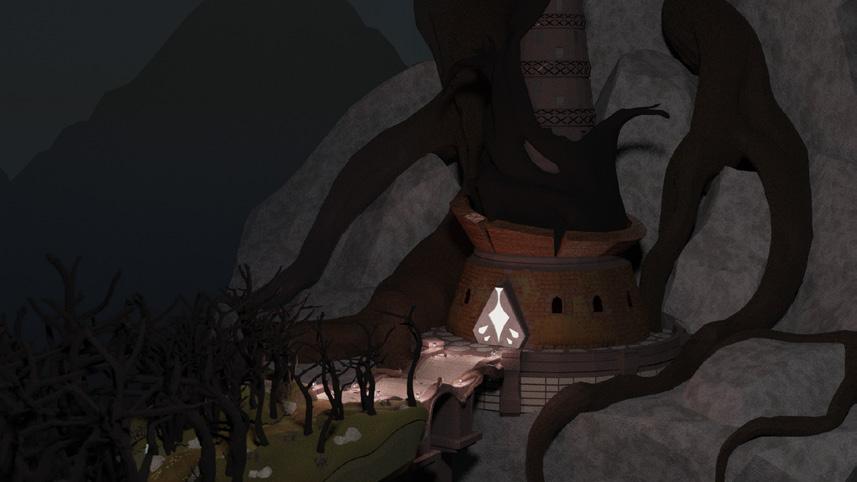
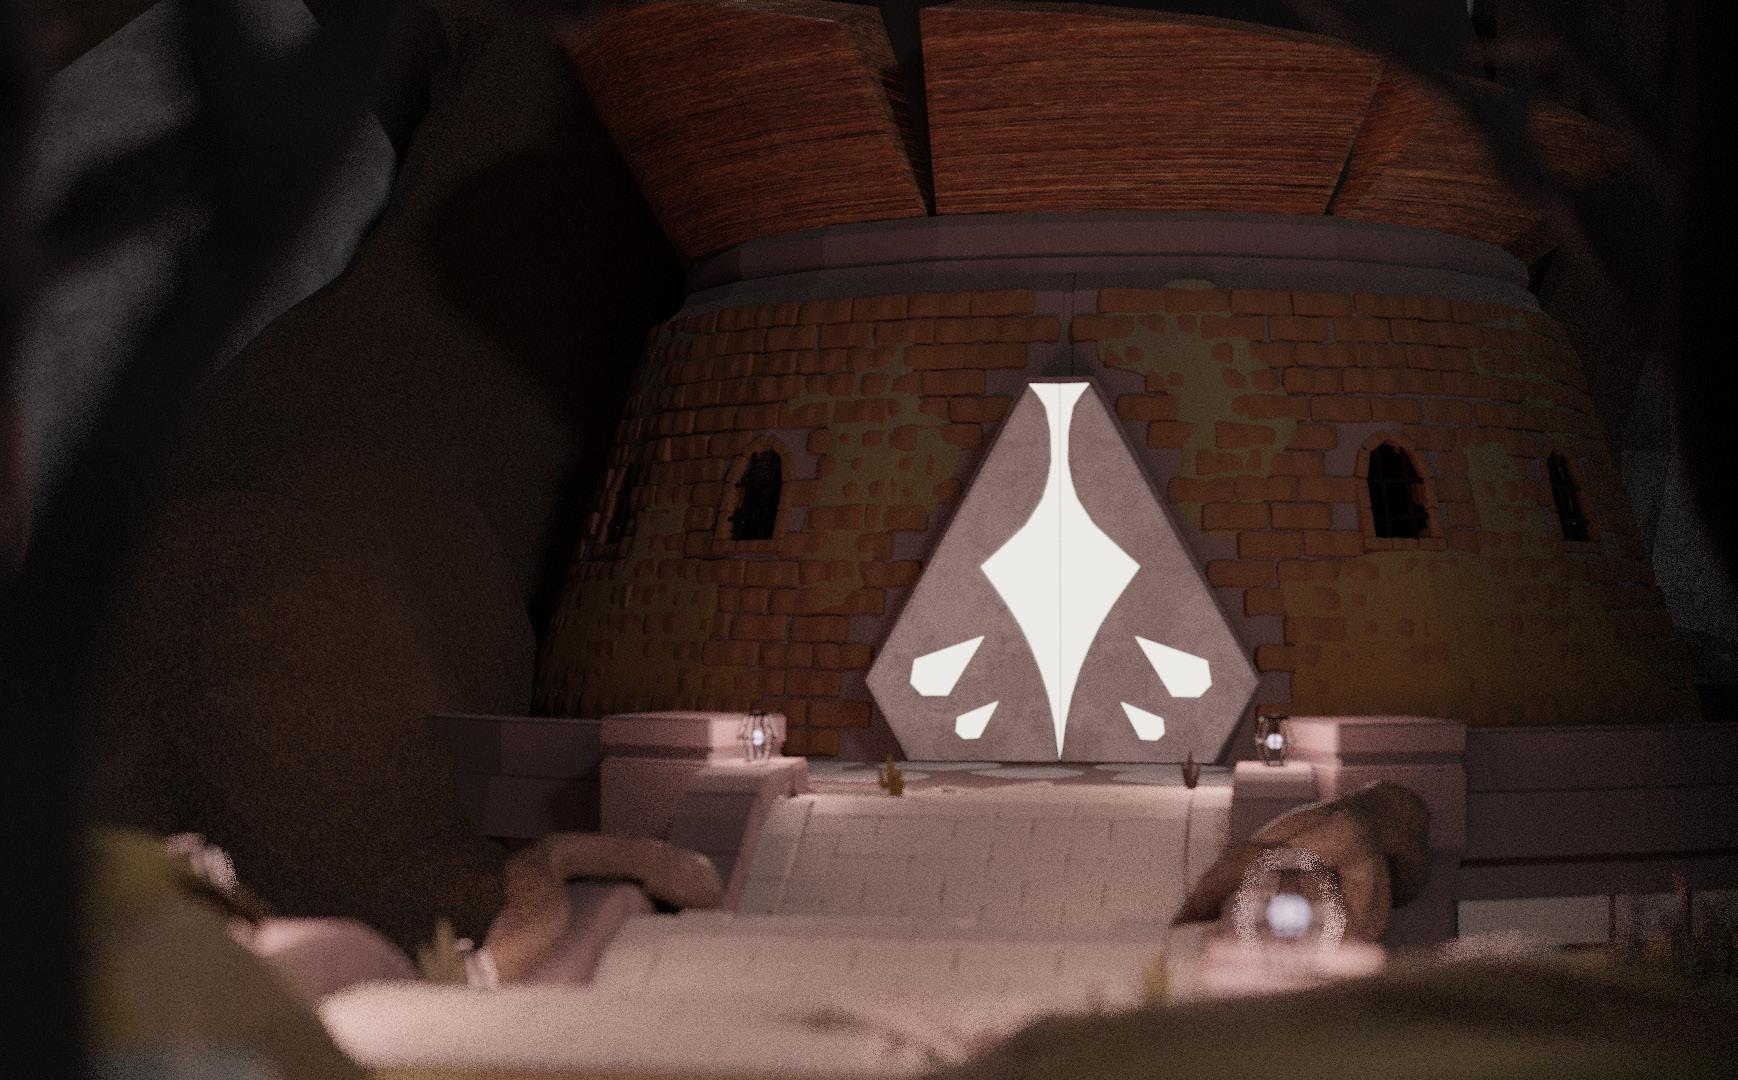
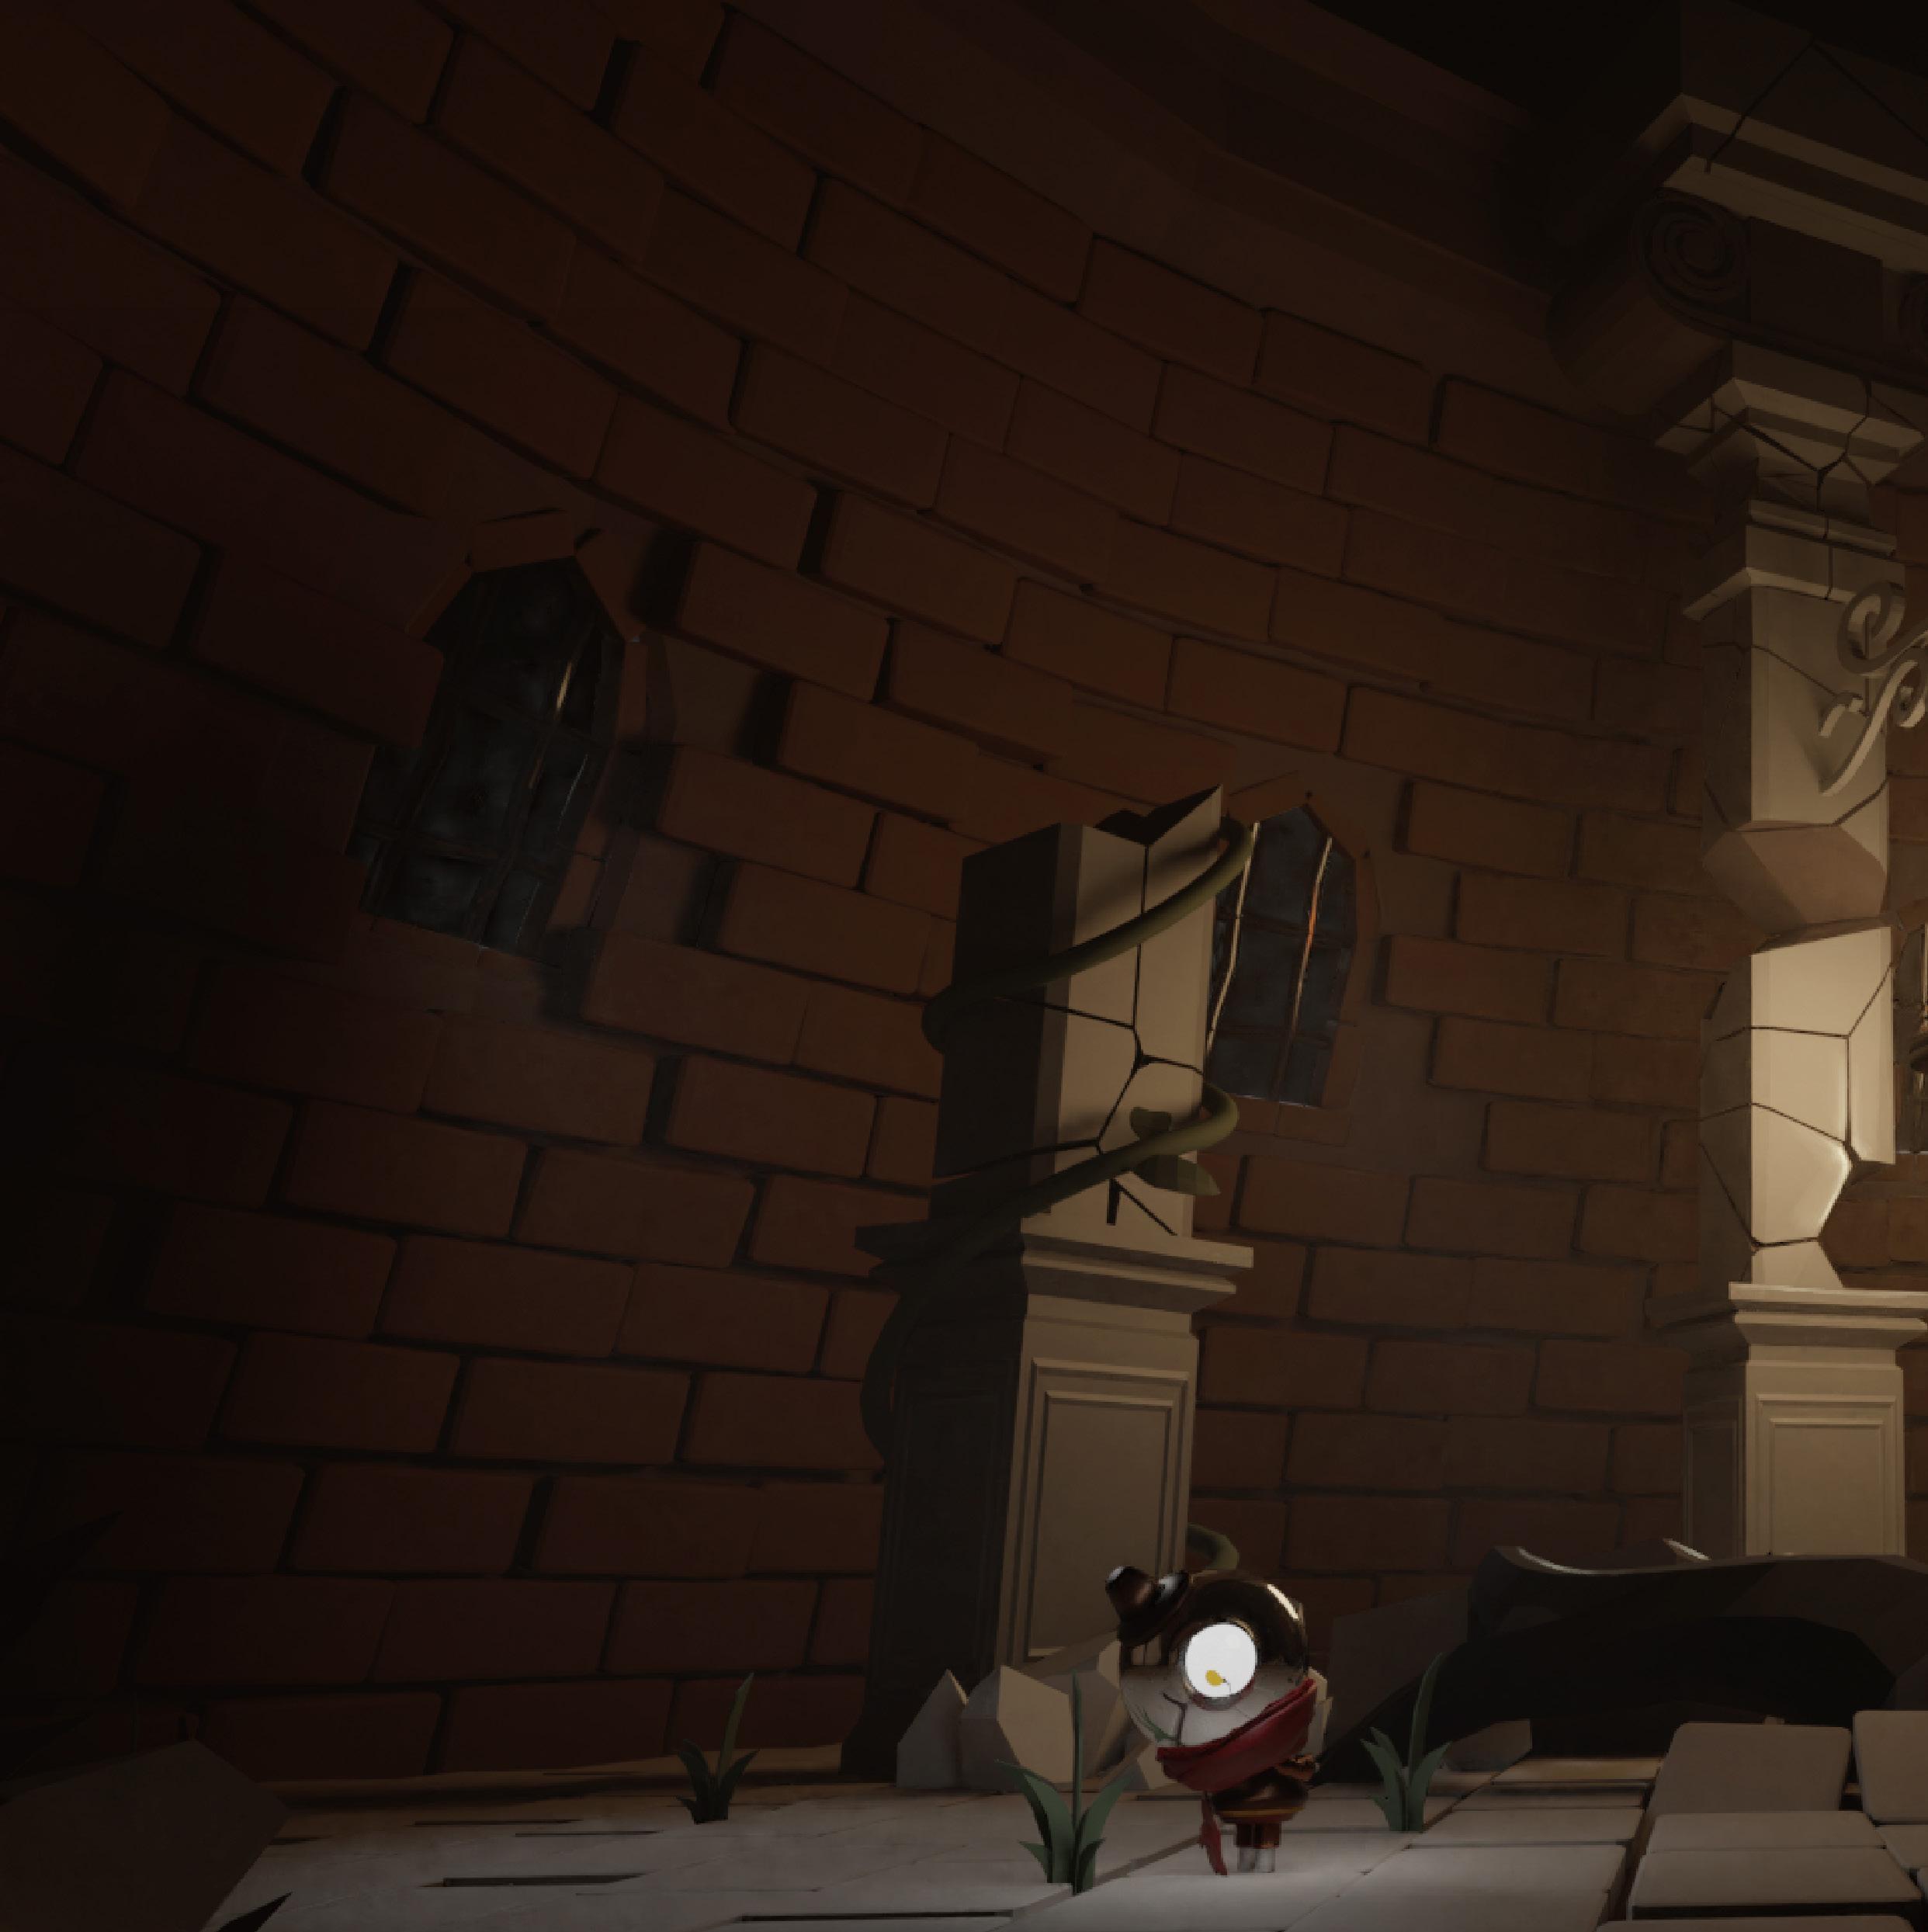
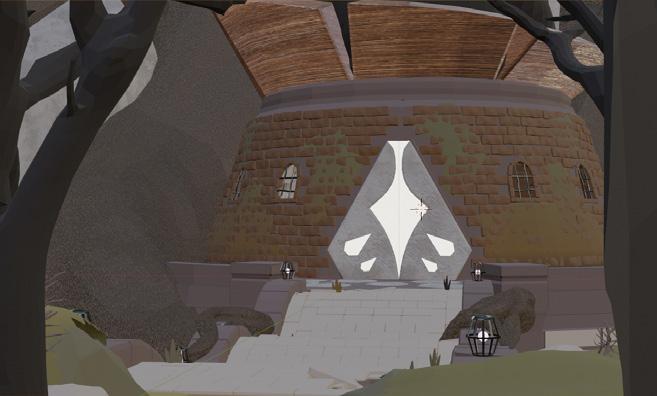
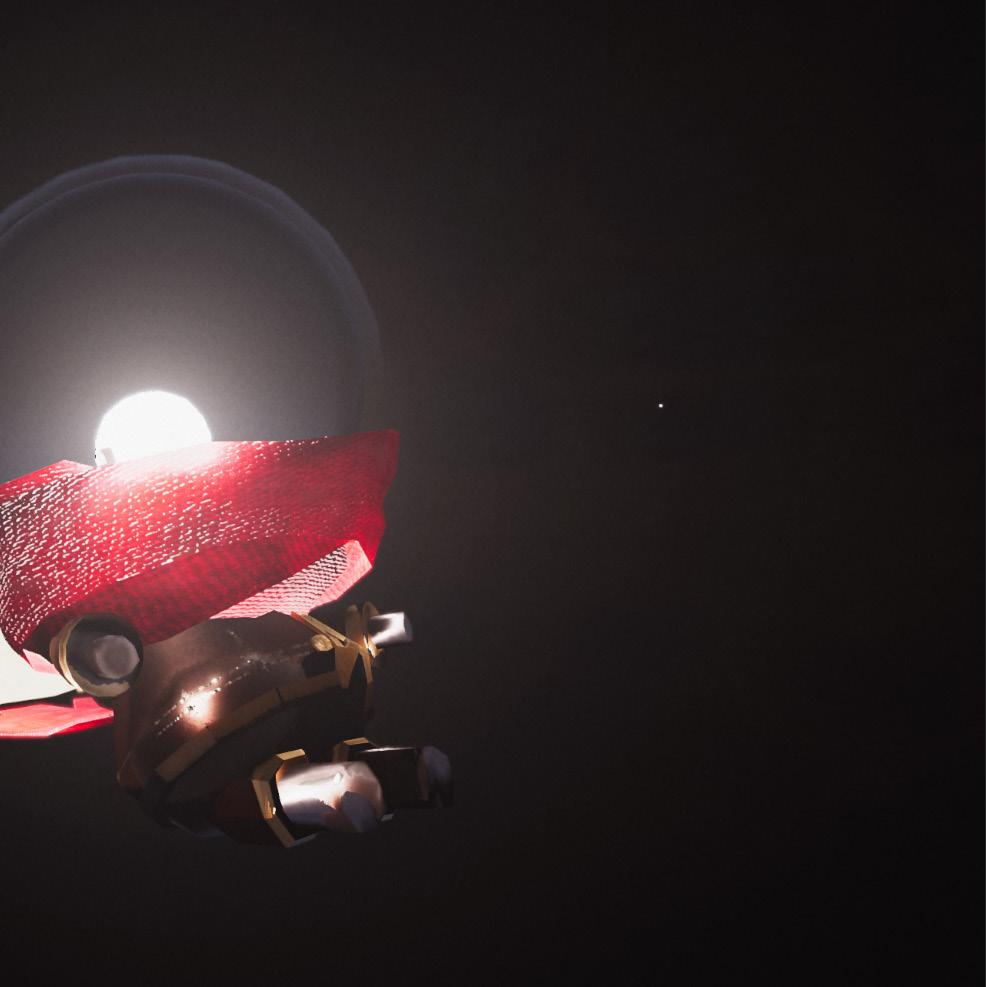
The main story background is that A robot named ‘E-10’, who is cornered by monsters that dwell within the cursed woods of old, stumbles upon a menacing tower, where it decides to use its power of light to create its own path.
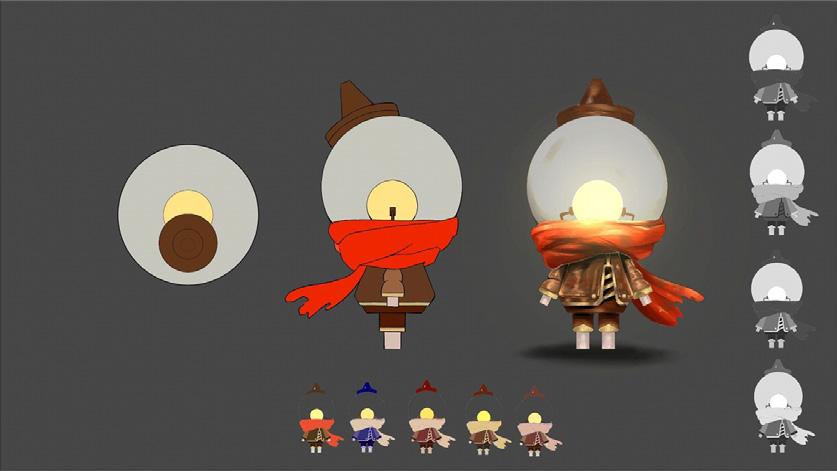
● CHARACTER DESIGN
MAIN CHARACTER
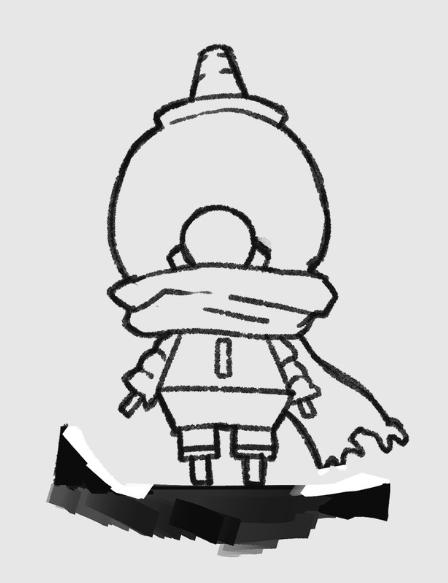
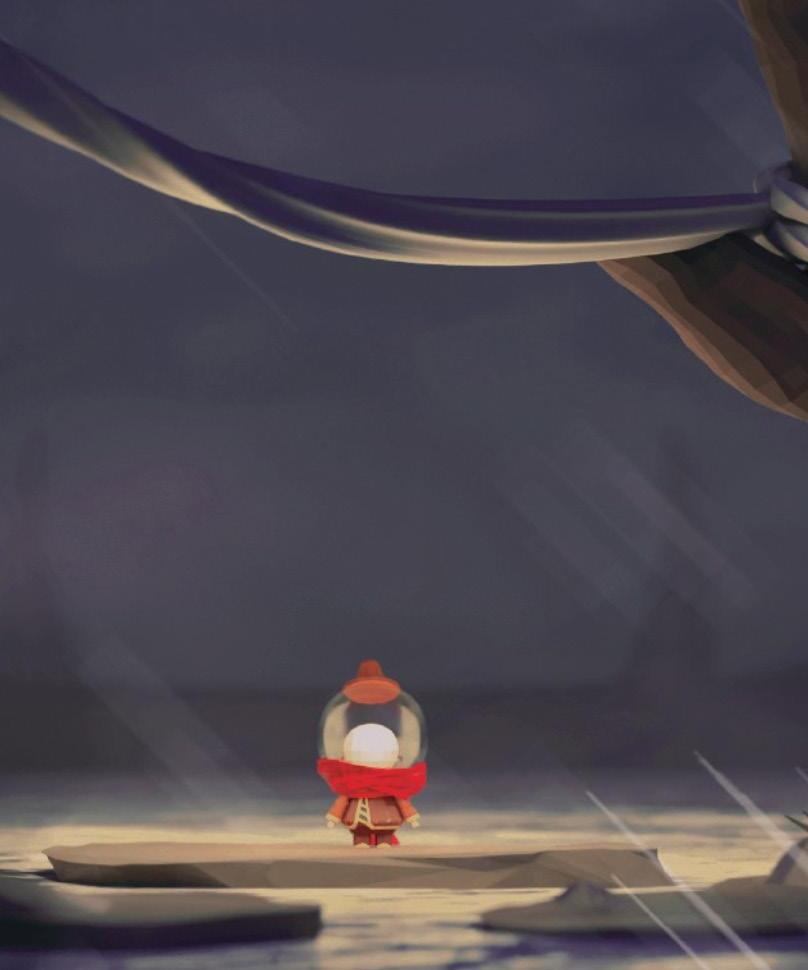
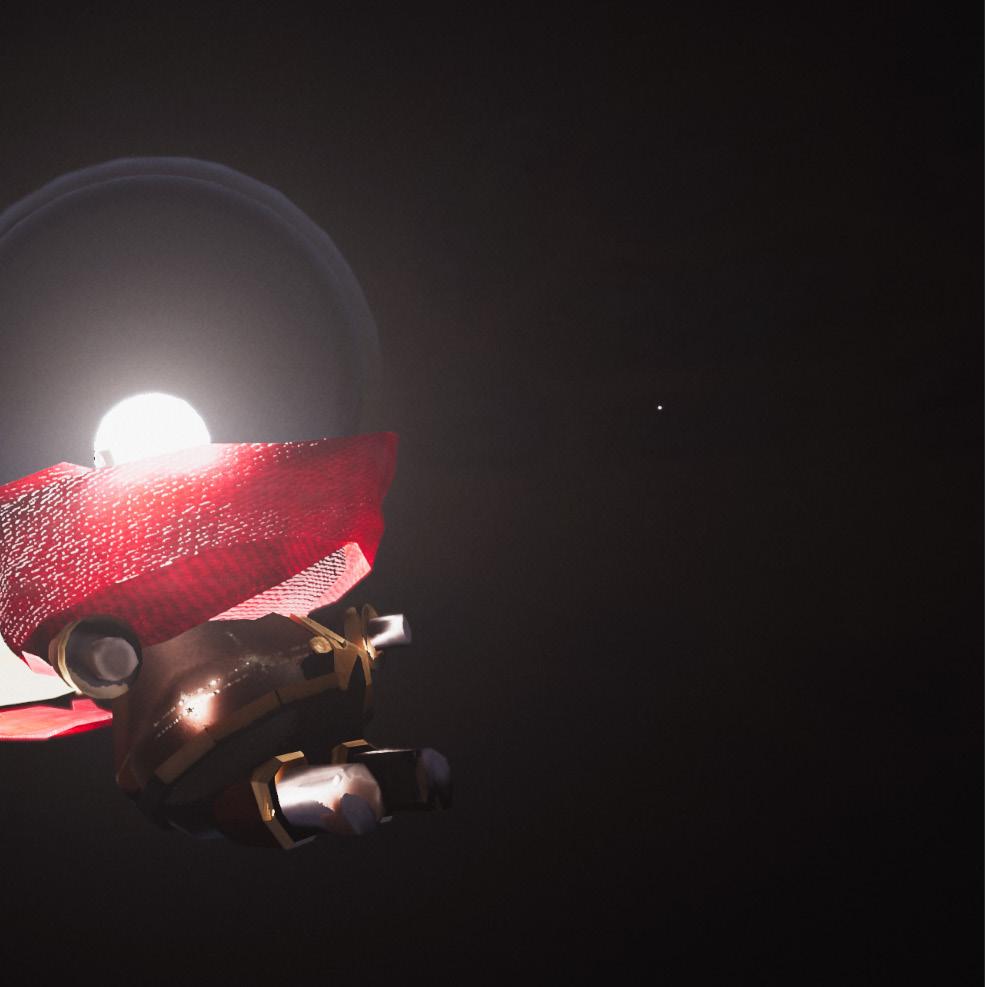
E-10 is a robot. Using a light bulb as a basic outline to create the character. It has its own cap and a scarf to display it is an adventurer.
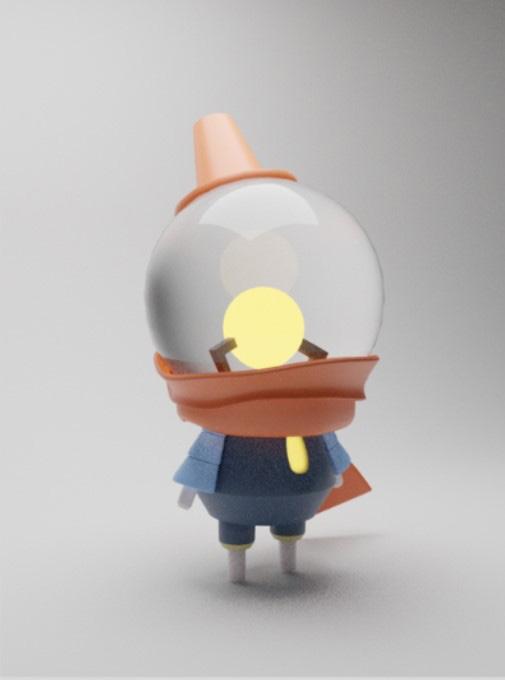
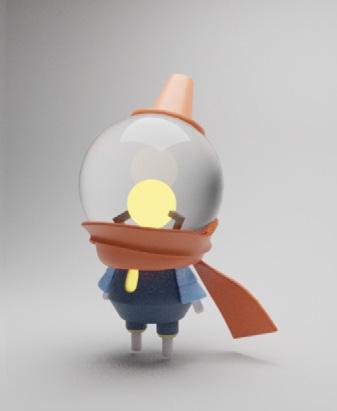

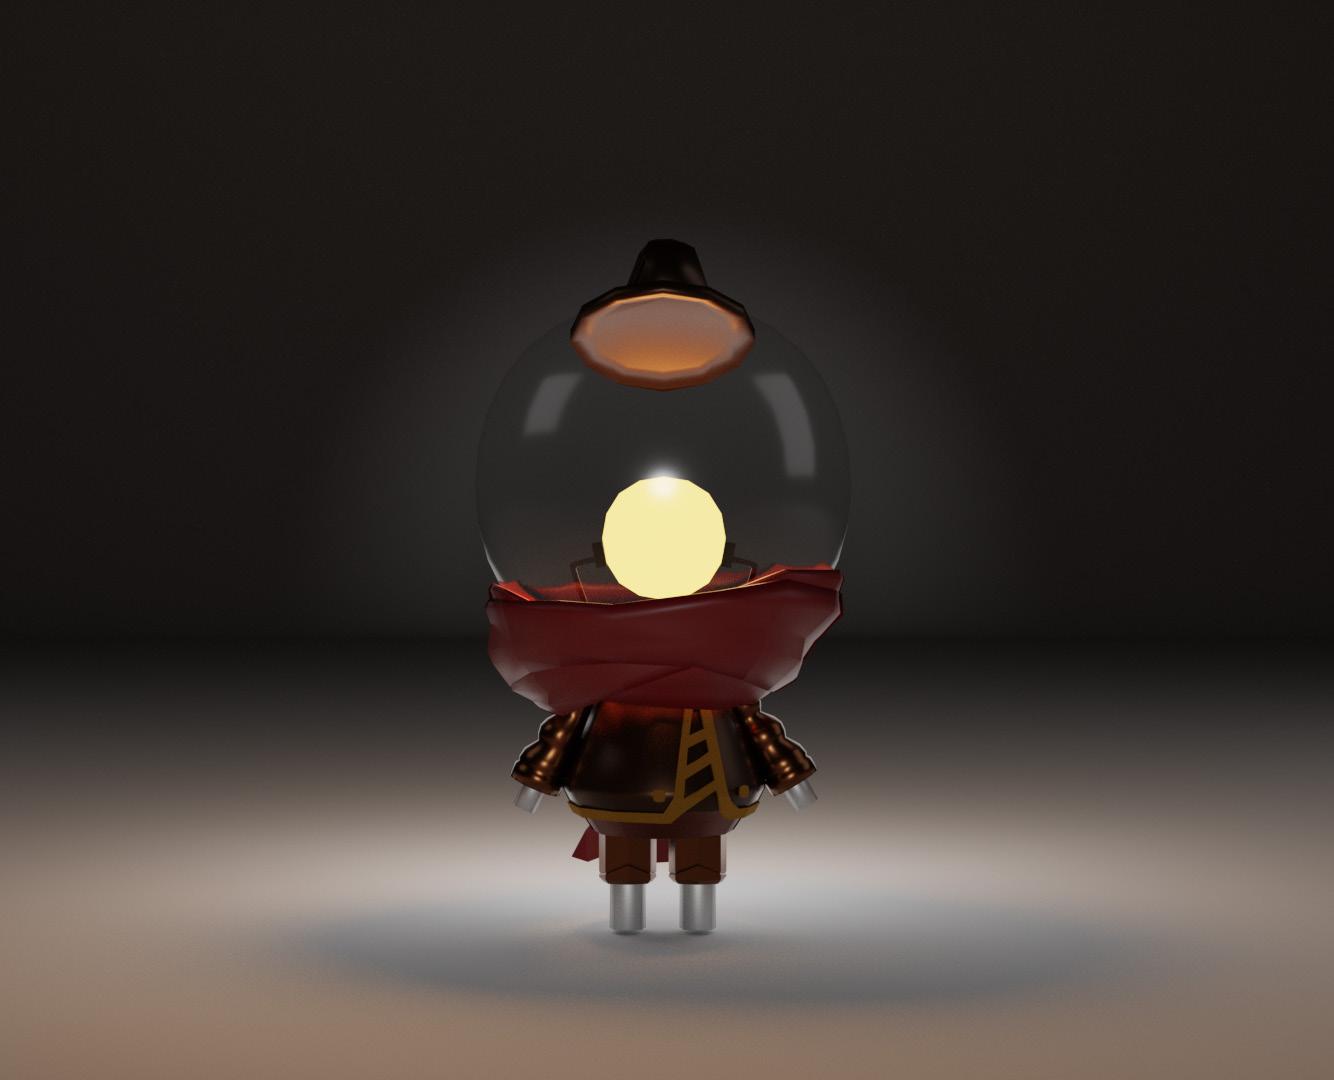
● 3D MODELING ● 3D RENDER
● LAYOUT
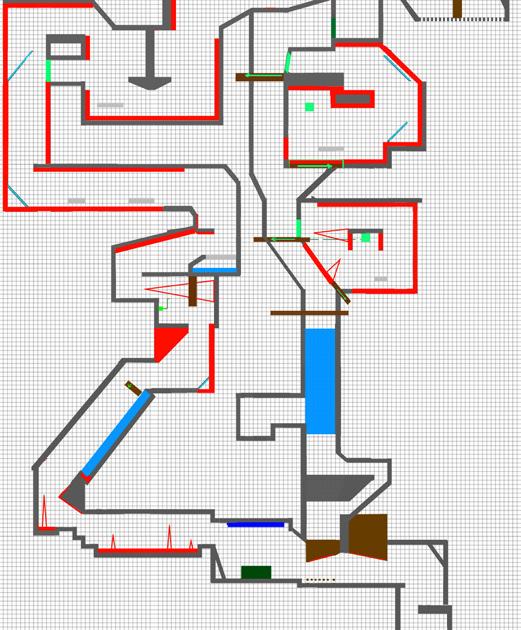
LEVEL DESIGN
LIGHT is a platformer game. Before starting design. We refer to a number of related games such as "Jump King", "Celeste", and so on.
Want to get players a taste of hardcore experience.
●
Using blender to build the whole levels is a heavy bundle to the computer, so just need to take care of the faces and the materials.
Concept Art & 3D Scene
● CONCEPT ART

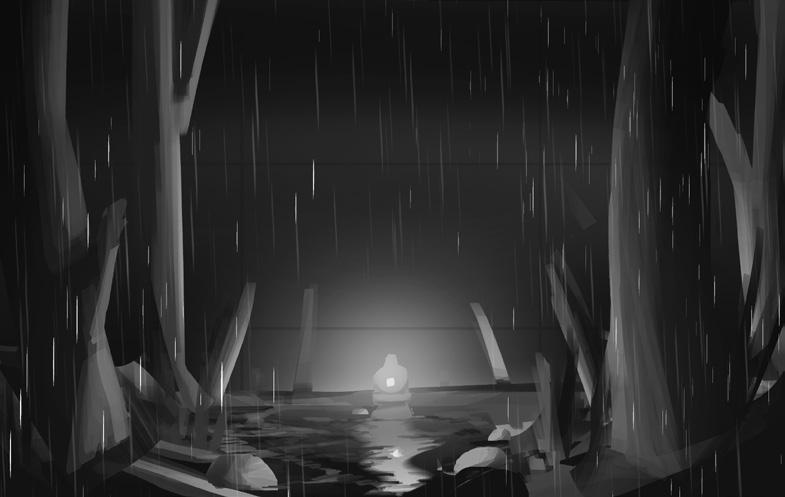
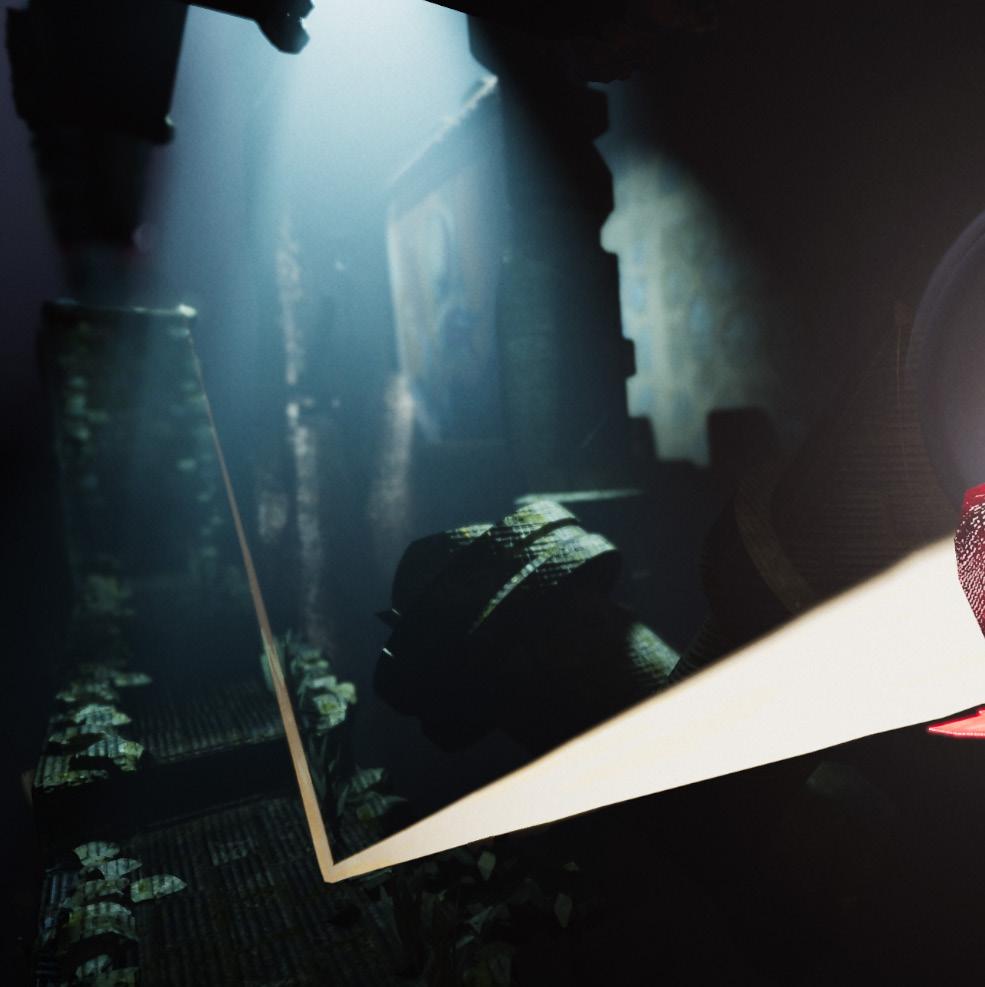
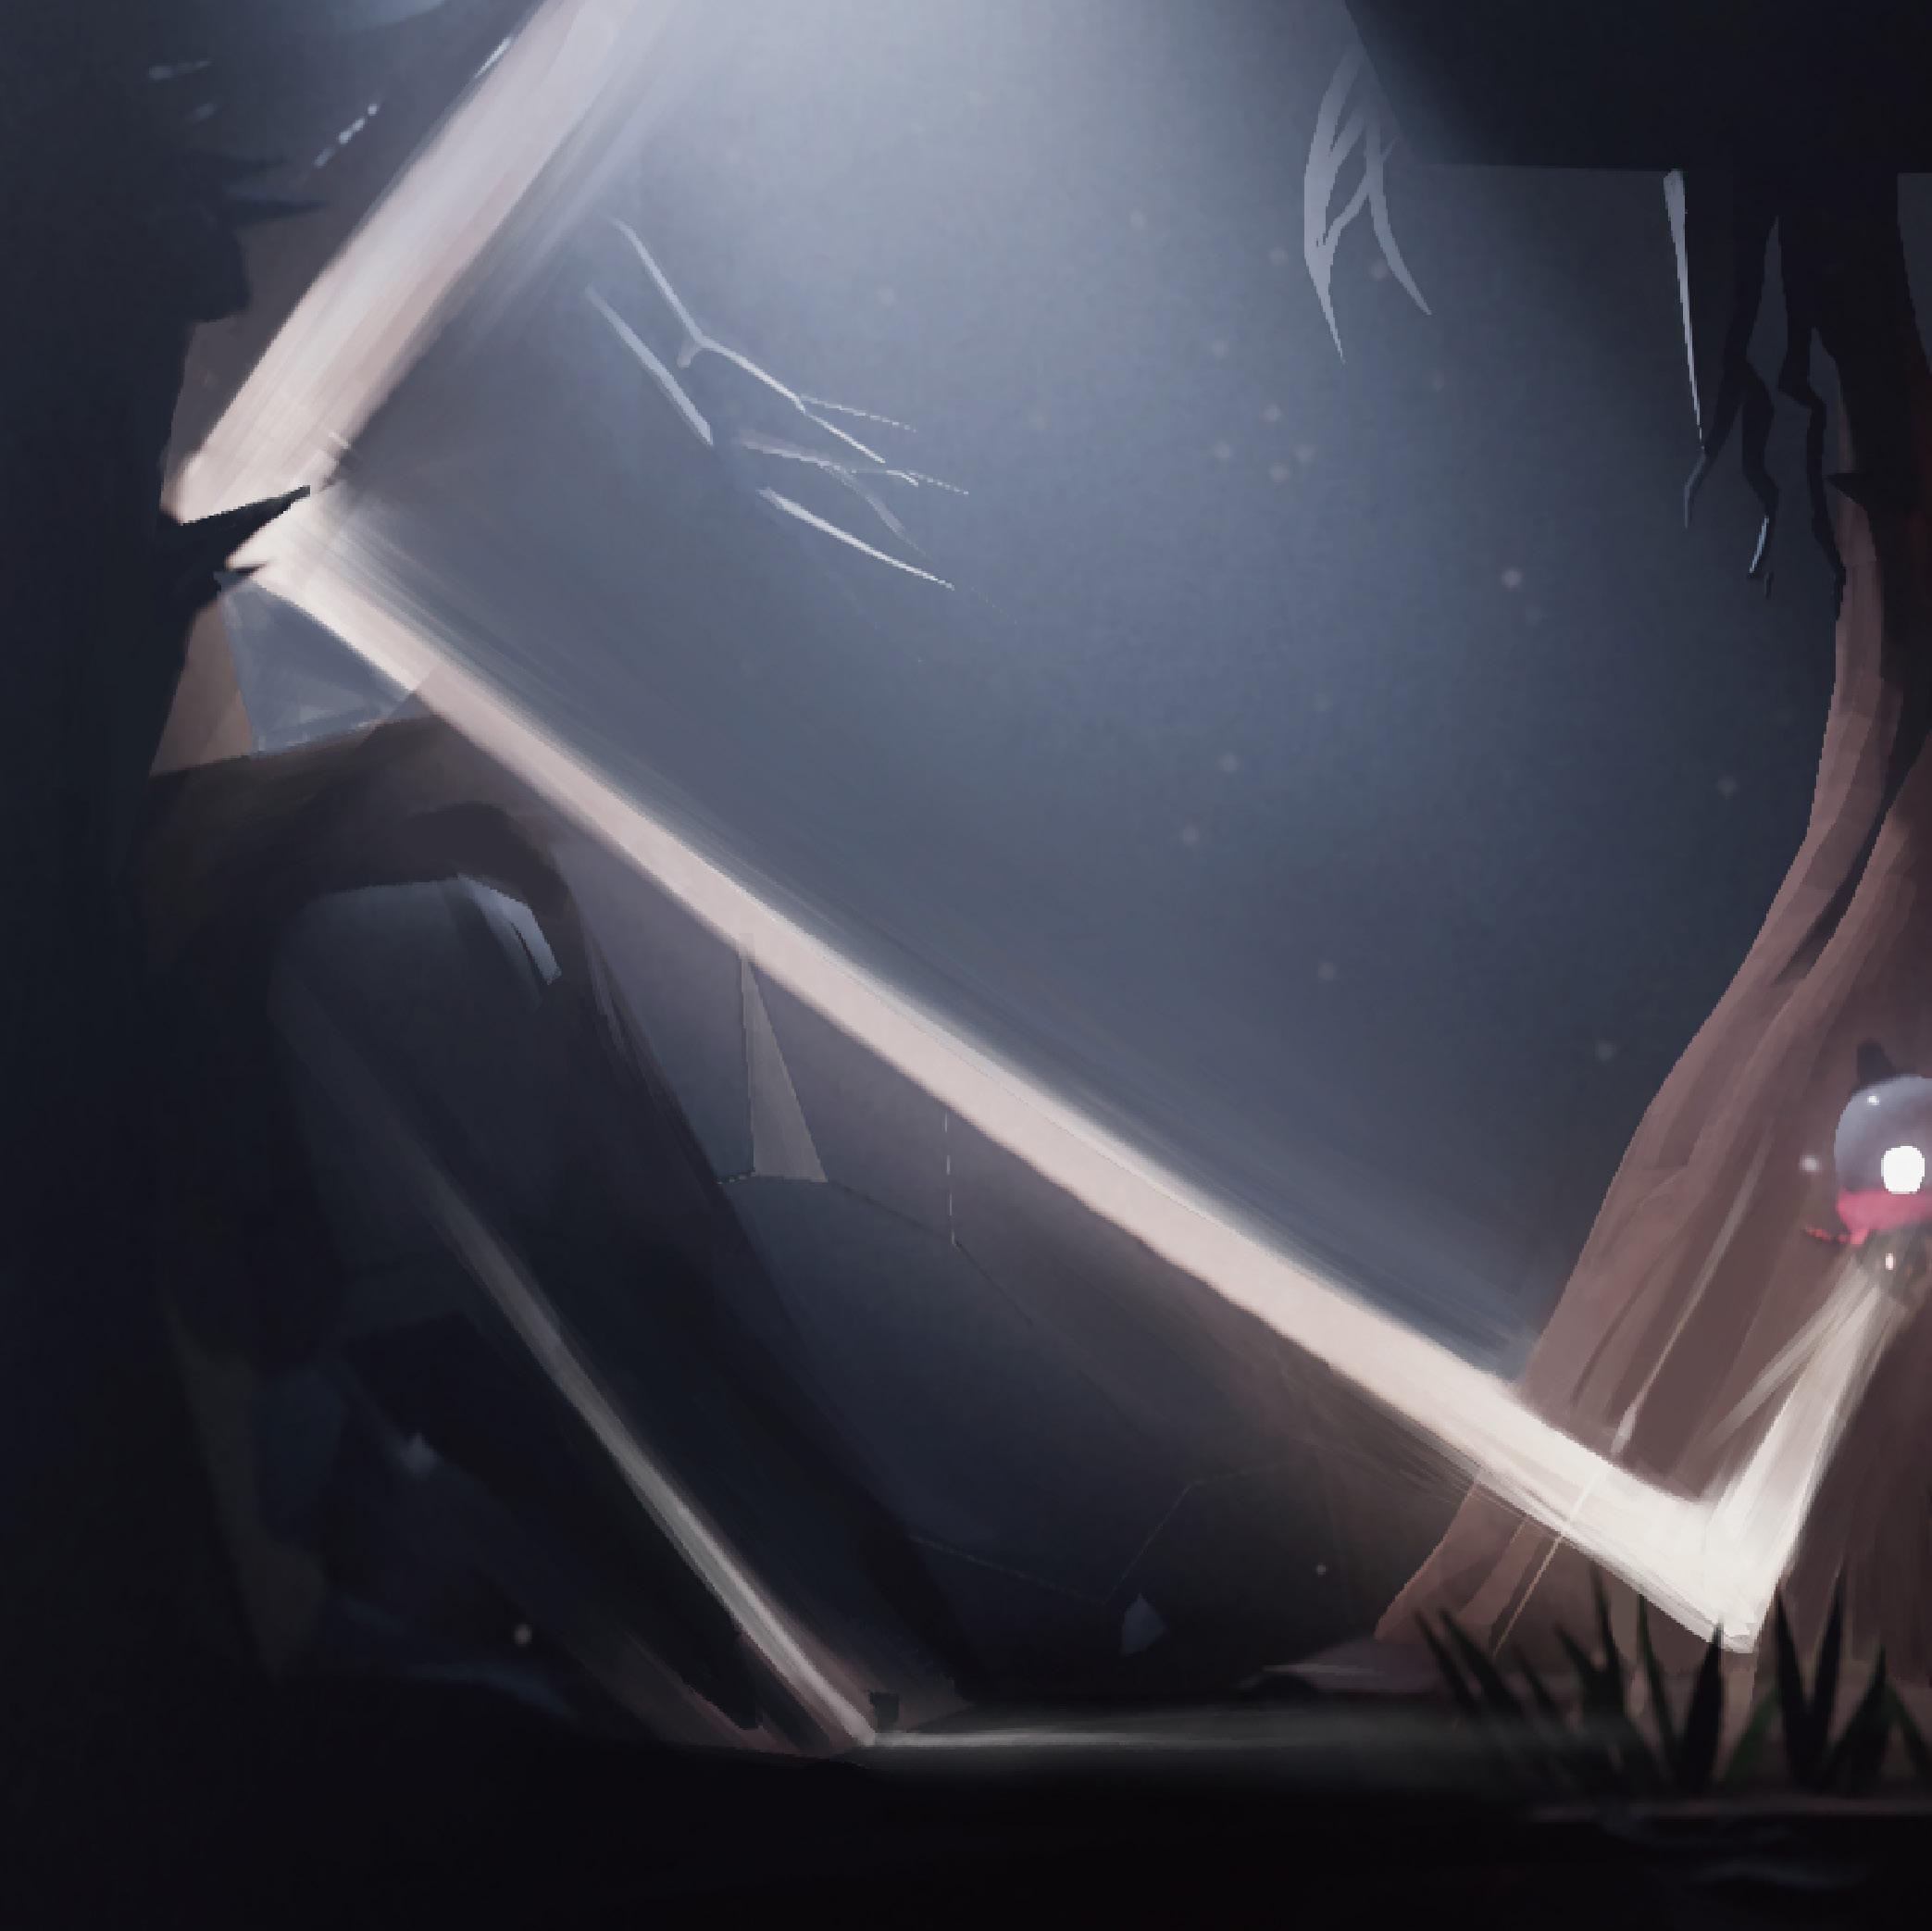
In the beginning, E-10 wakes up in the middle of the lake. It does not know where it is, trying to figure out what happened here and why the forest is so gloomy. In order to find the truth, it walks into the dark forest.
● 3D MODELING
Scattered leaves and full of mist, trying to let players feel the forest is creepy.
Concept Art & 3D Scene
Use blender to create the materials then bake them in order to import in Unity.
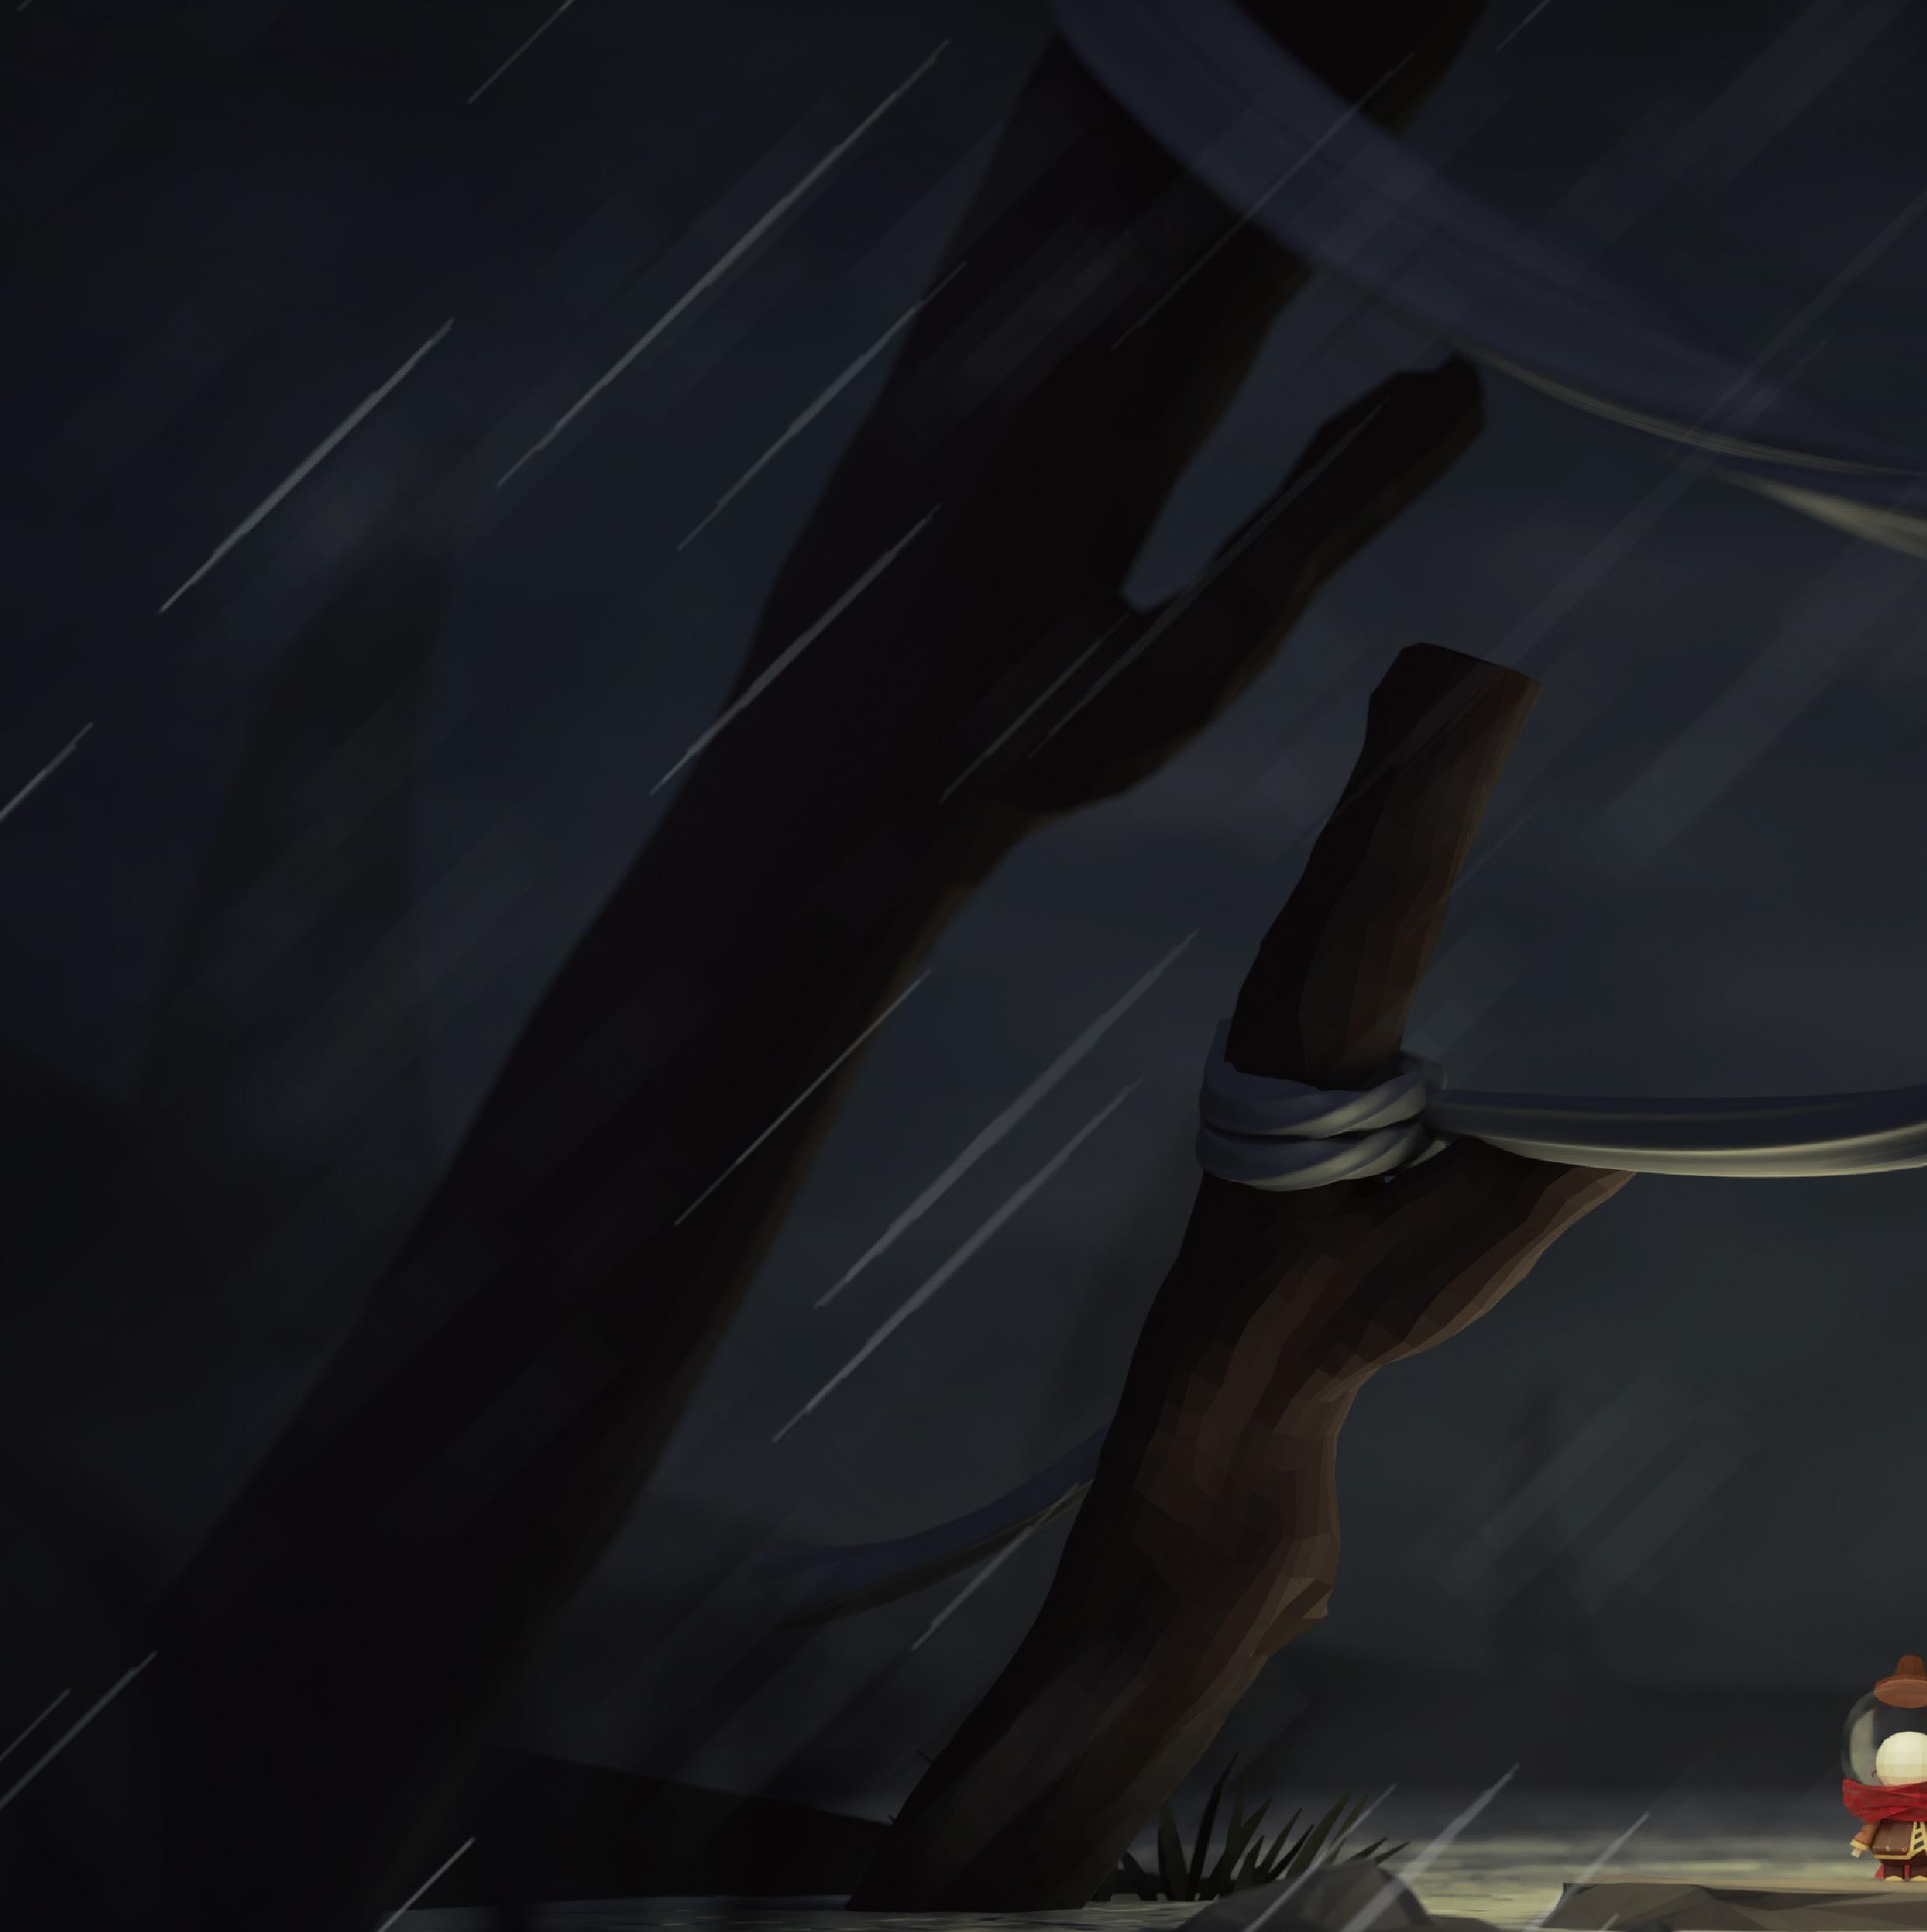
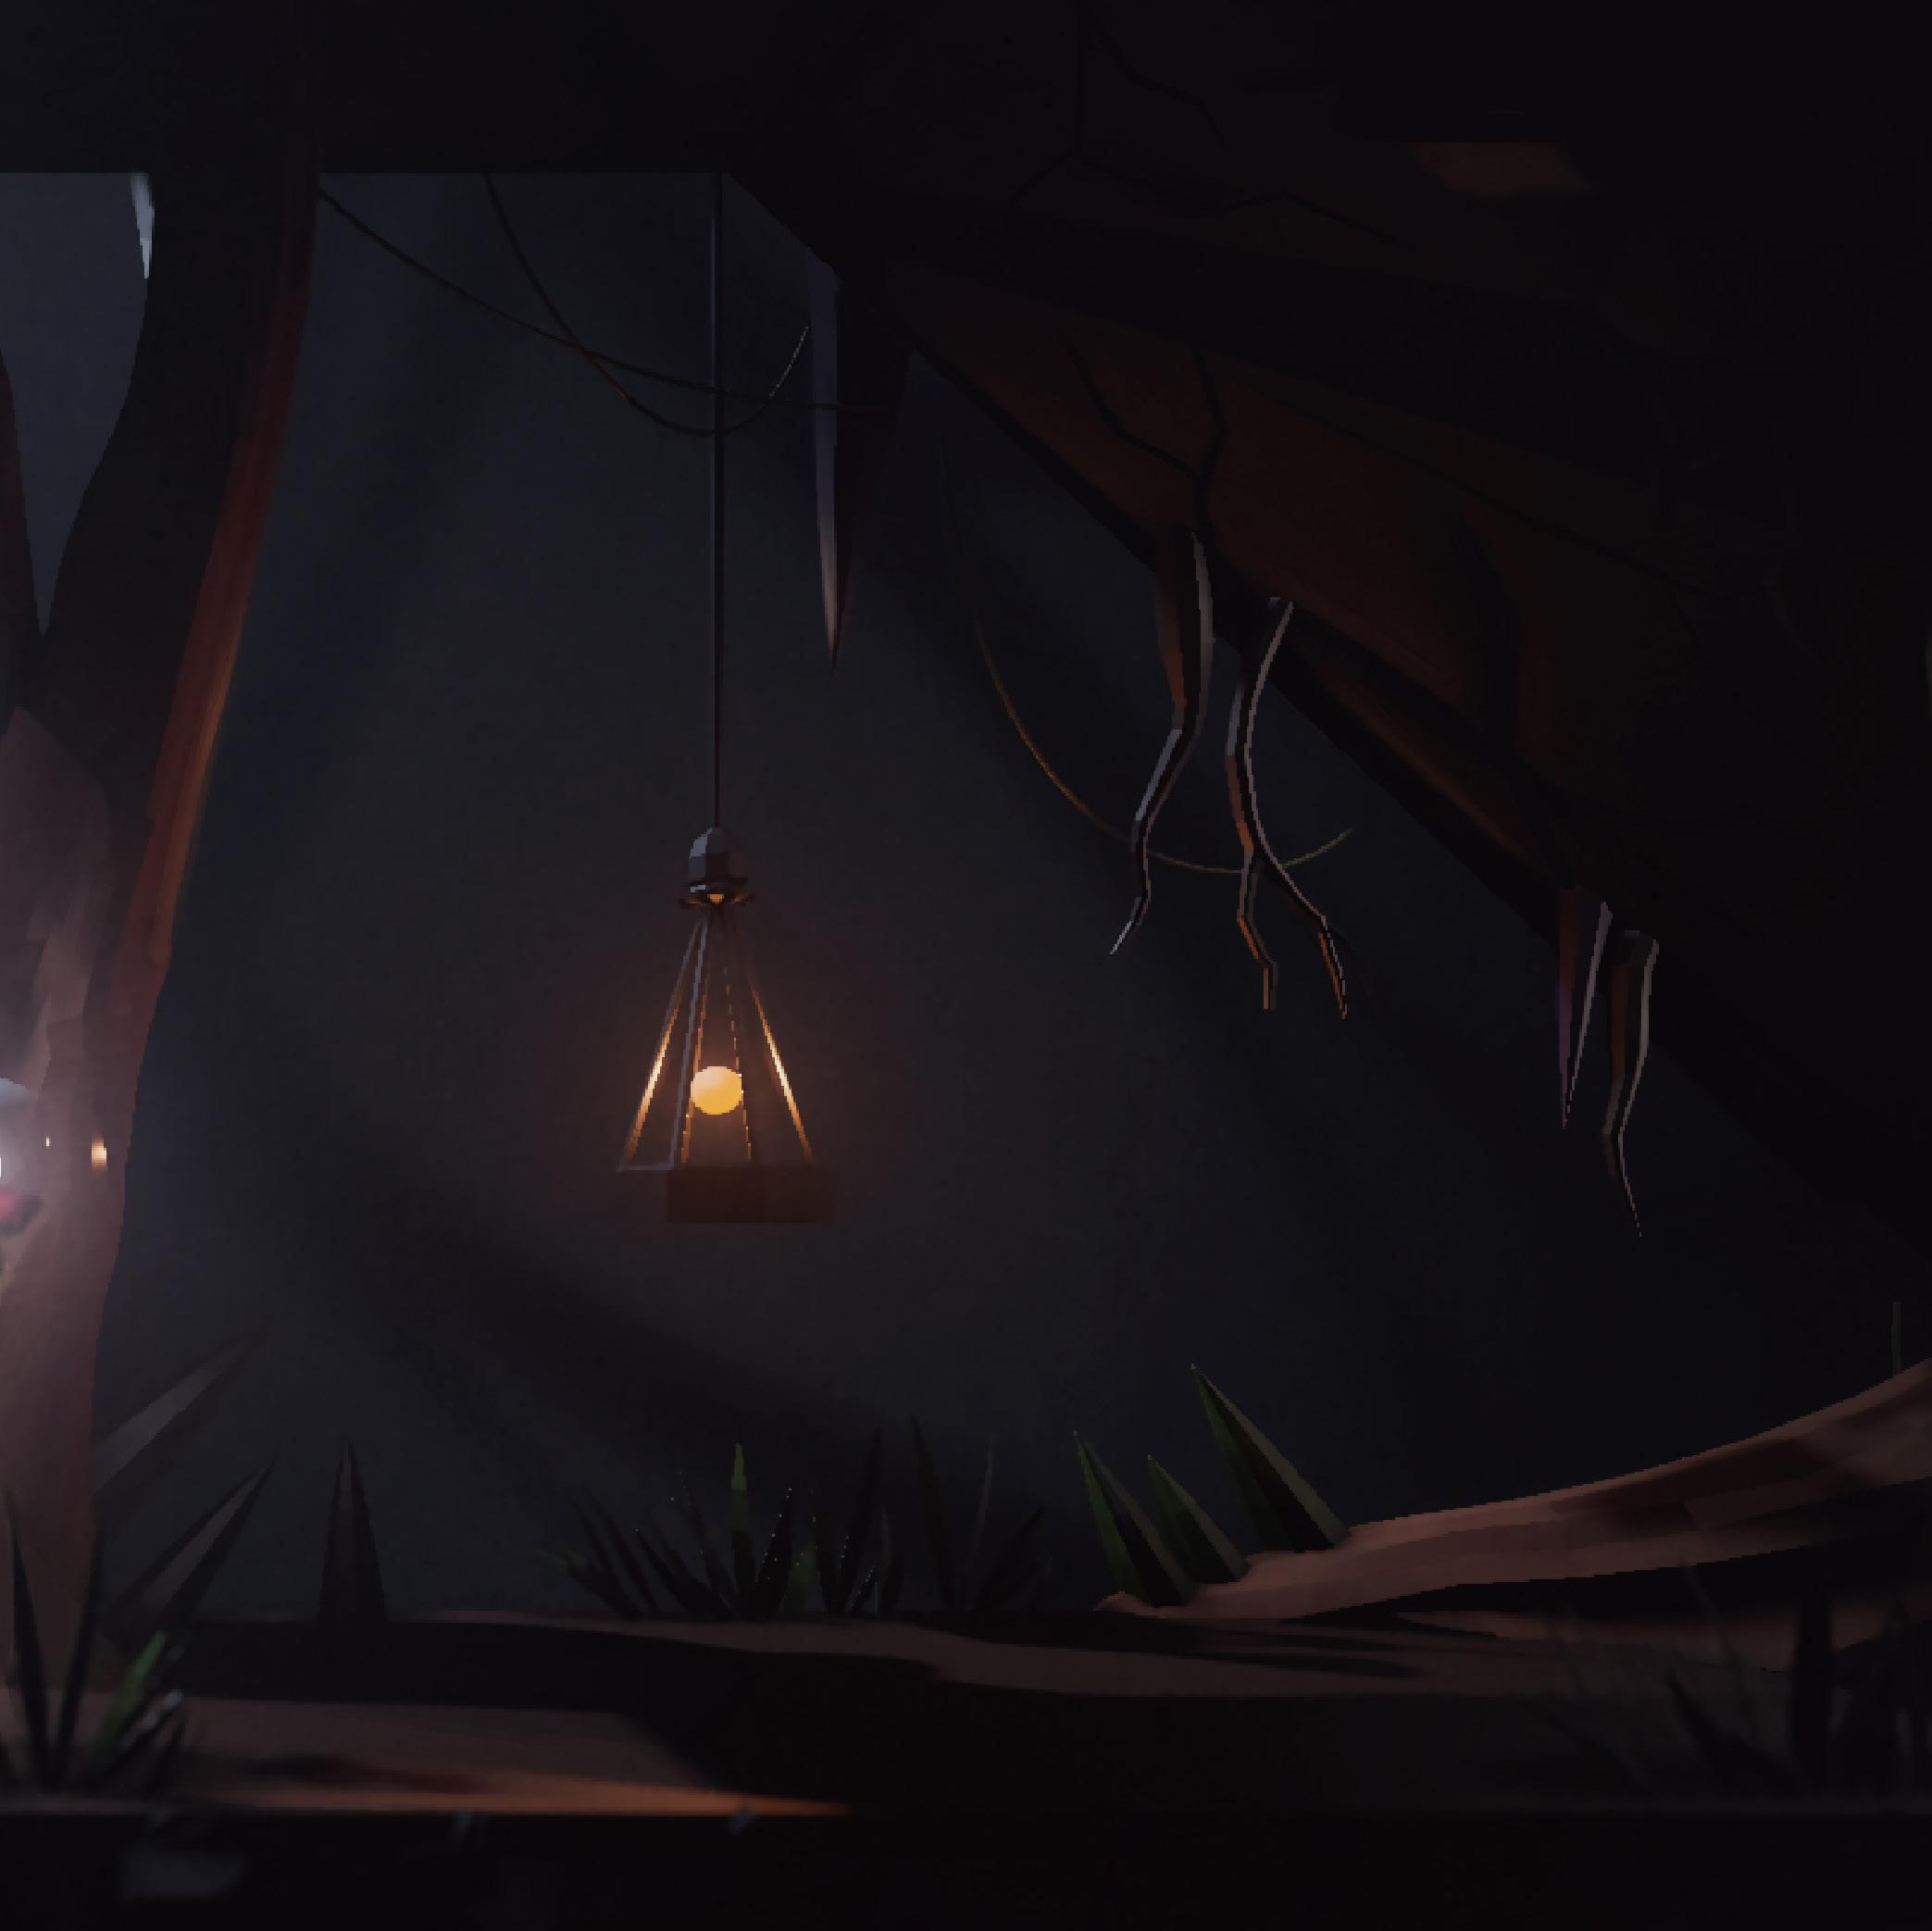
Light use simple and dark colour to express the weird atmosphere in the game scene. Material
Concept Art & 3D Scene

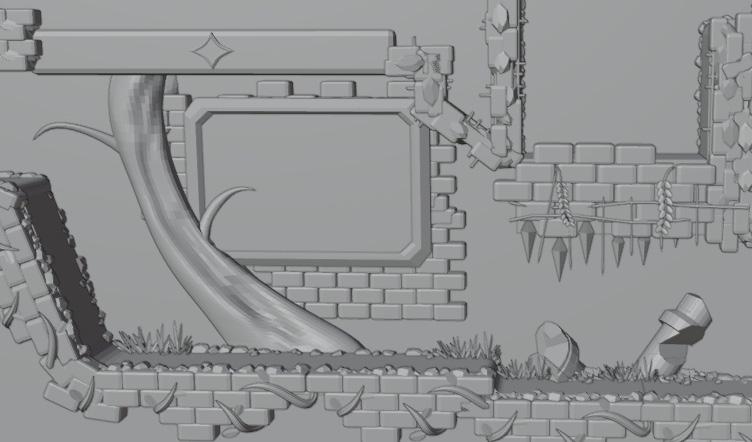
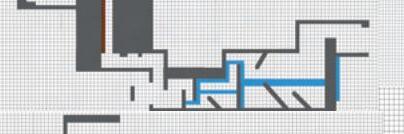
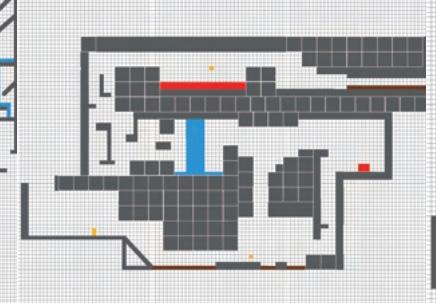
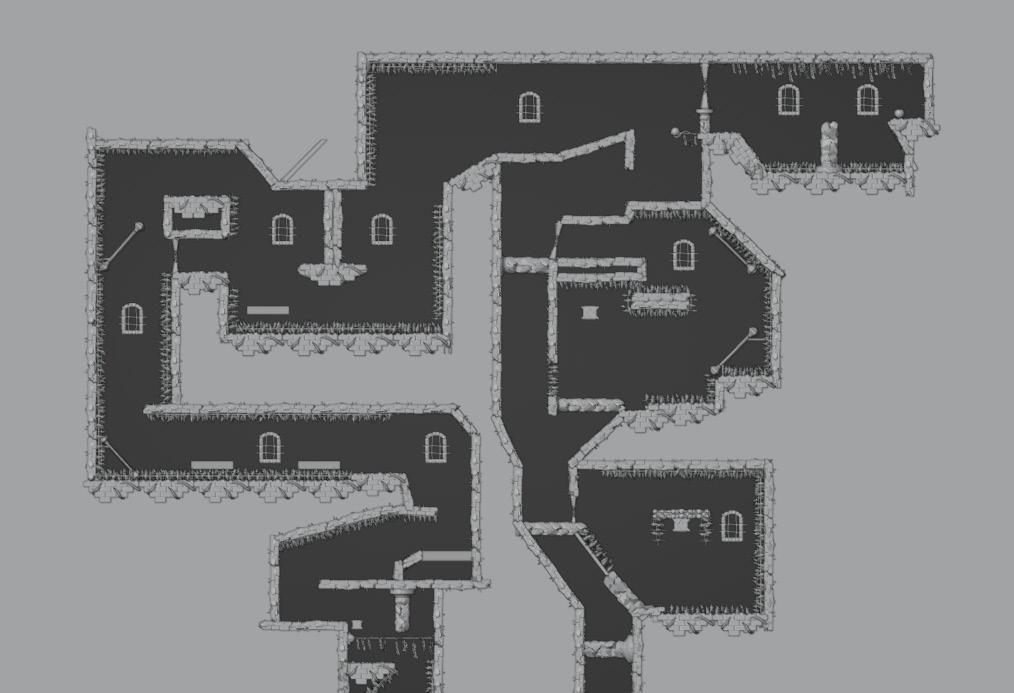
The levels are made up of tiles and can be easier to modify.

● GAME SCREEN
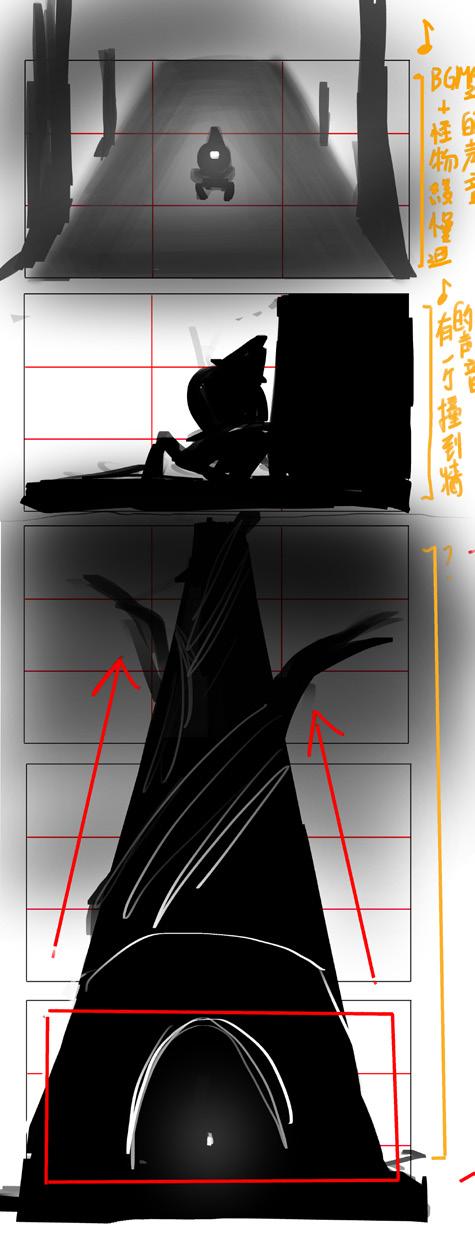
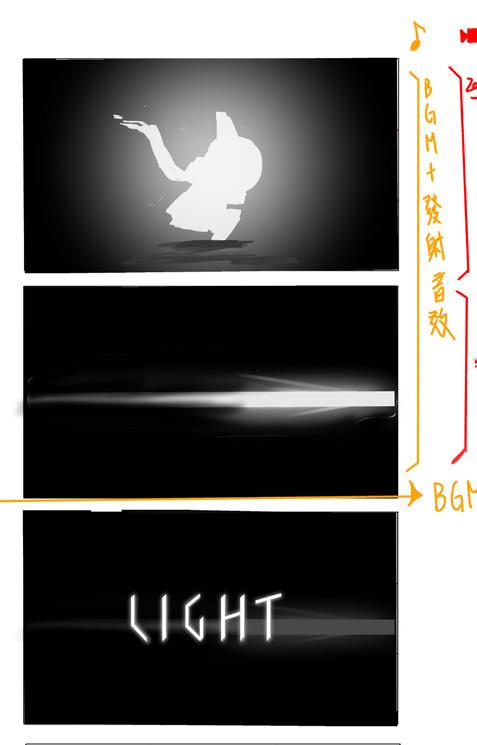
Finally, E-10 climb to the top of the tower. It sudden knows what happened to here. Also using the blender to Put Random plants on top of the tower can easily fill up the scene. Then send into the unity, let camera set depth of field.
URL : https://youtu.be/YauivwLxkKY

TAKE A LOOK
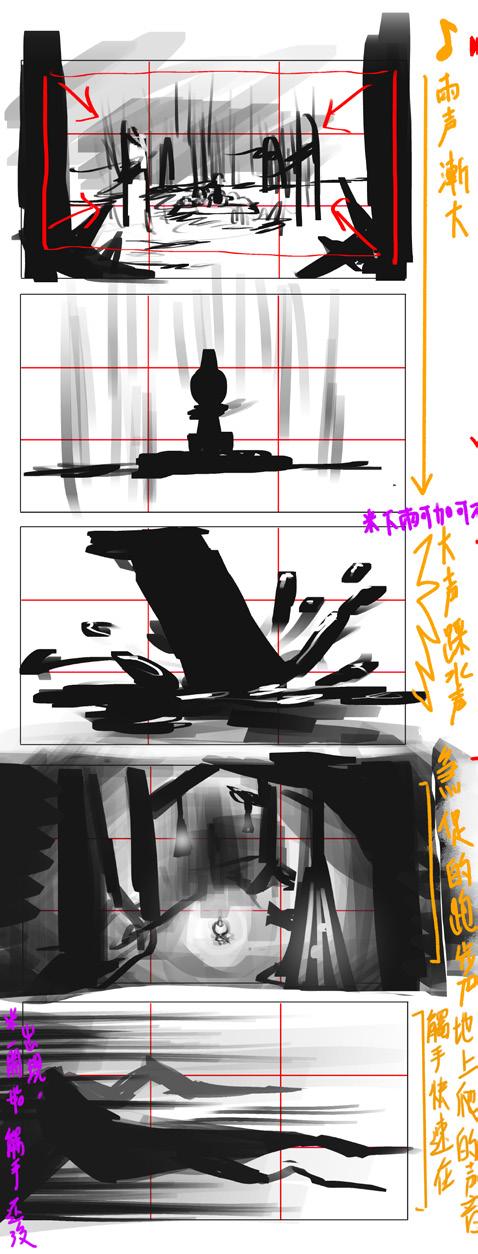
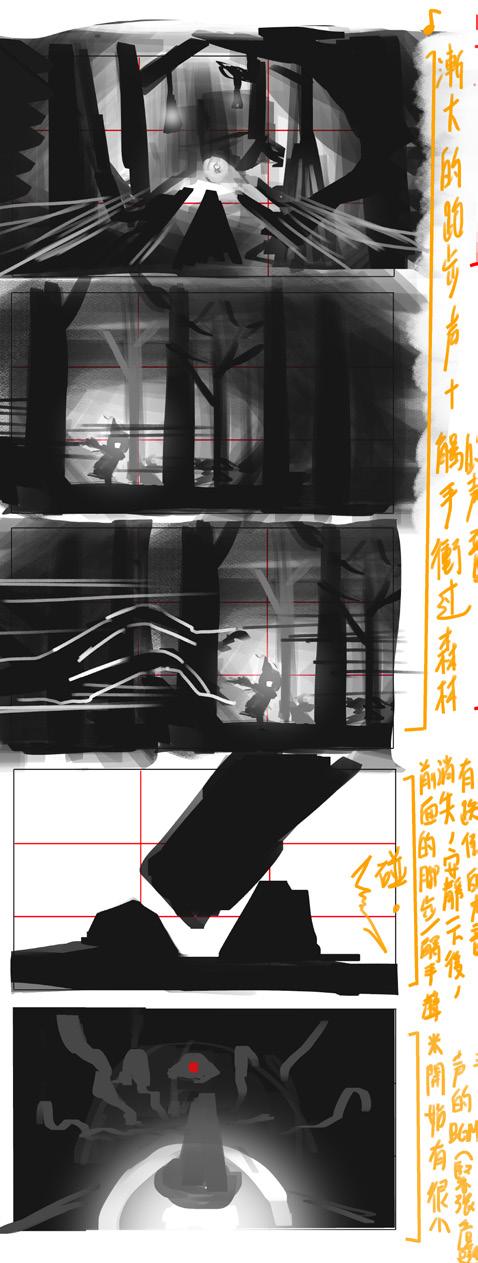
STORYBOARD
It is about 80 seconds to show the players roughly the story and gameplay. Our promotional video wants to give people suppressed feeling, so the entire clips are full of the dark screen and hurried background music. In the beginning, slowly zoom in then suddenly use a recording voice to cut off. After that, a creature keeps tracing E-10, forcing it to run into the forest, finally, it meets the tower. At the end of the video, using its power to lead to our name. If you are interested, please scan the QR code to take a look.
● 3D MODELING
● Render in blender & AE
● Concept Art

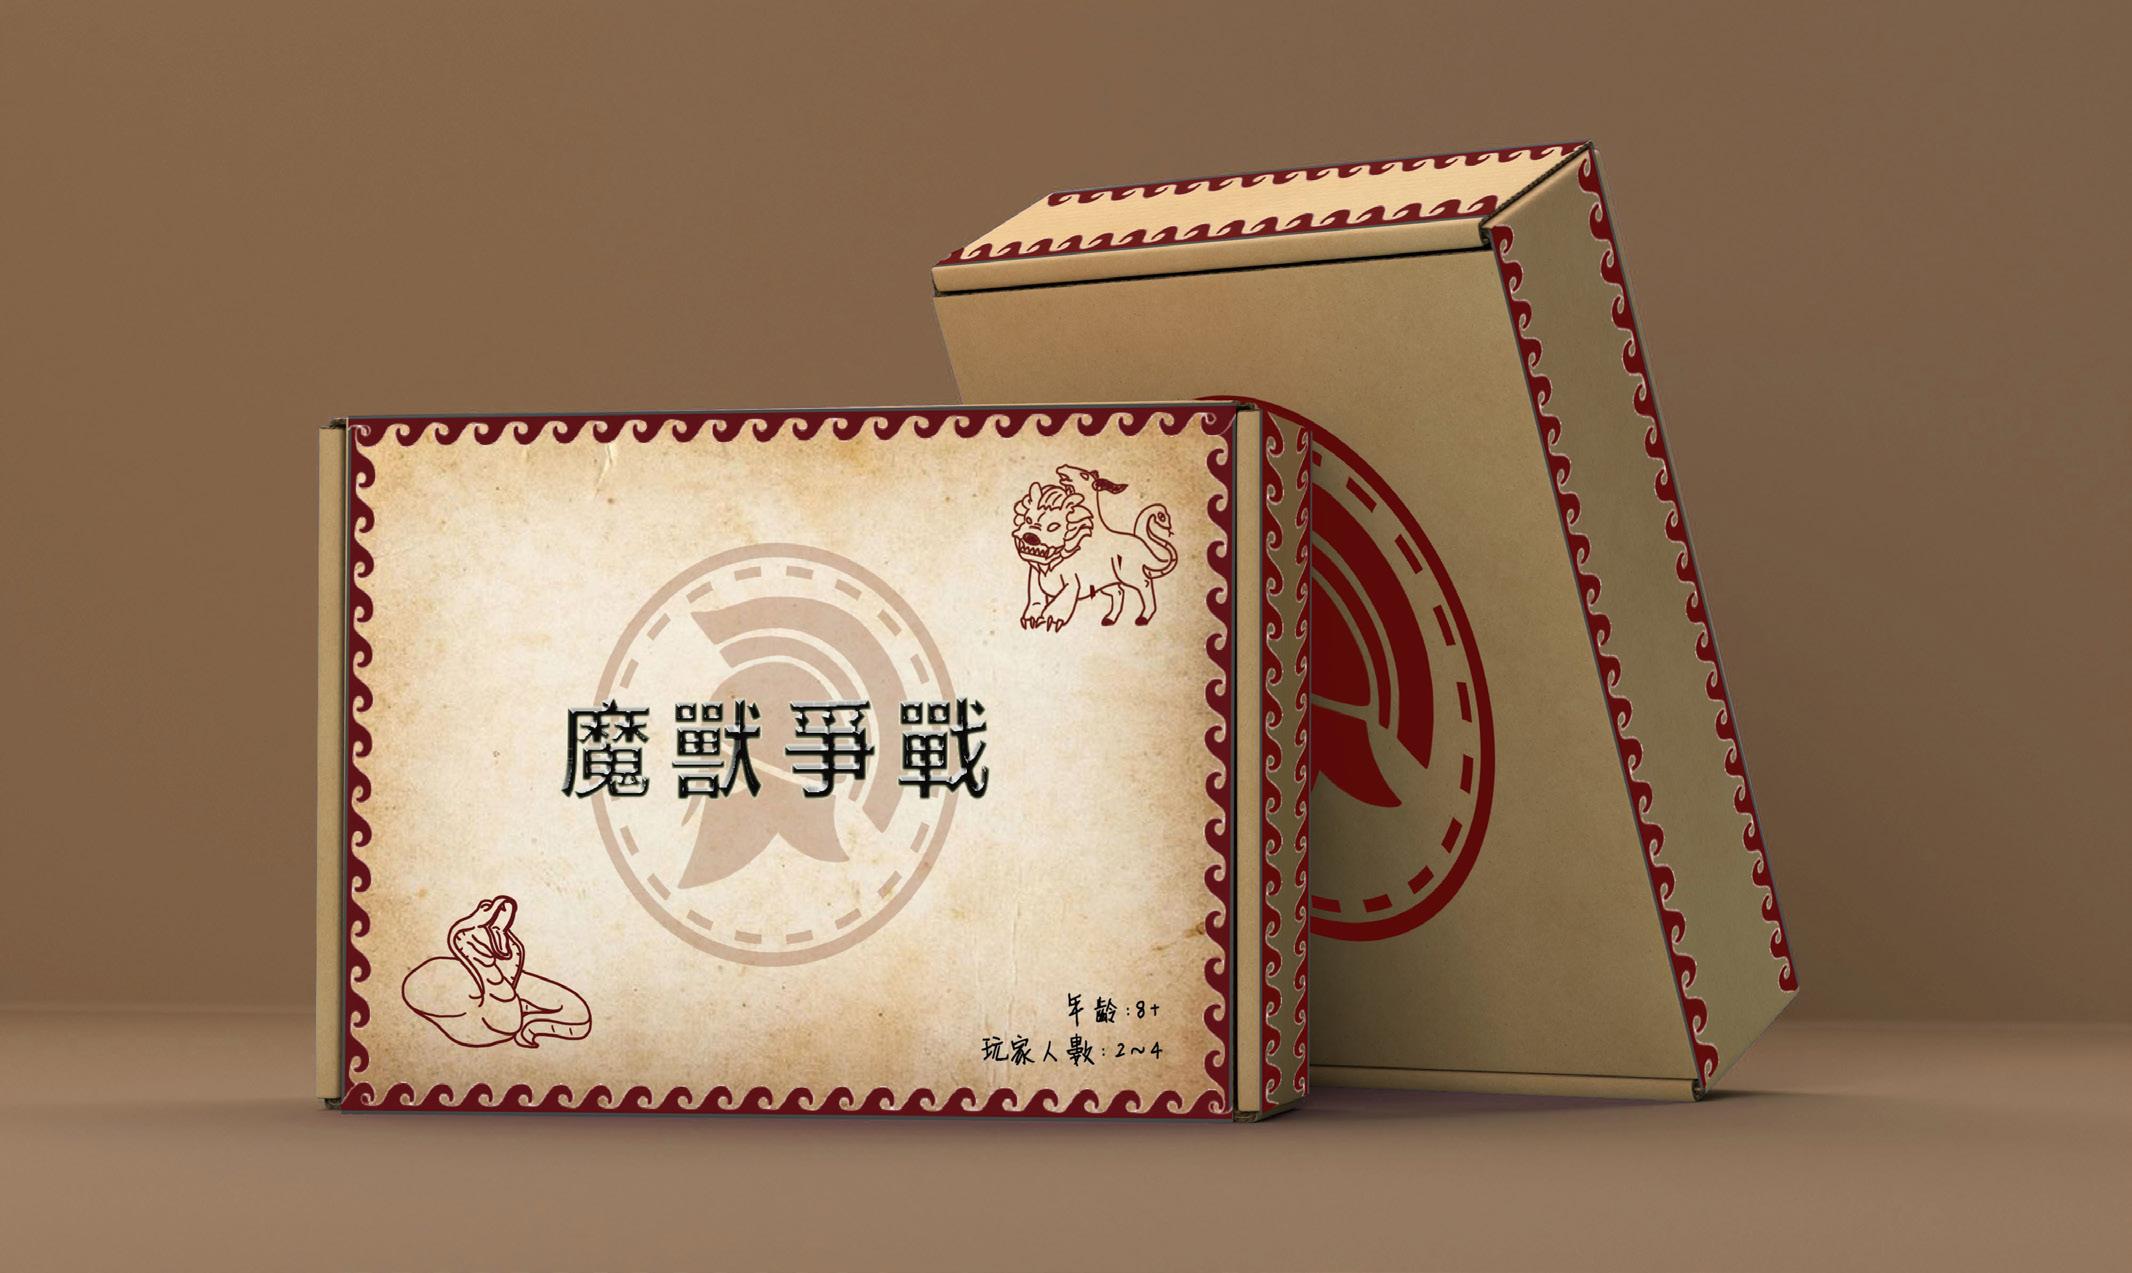
AGE : 8+
PLAYERS : 2~4
TIME : 40mins
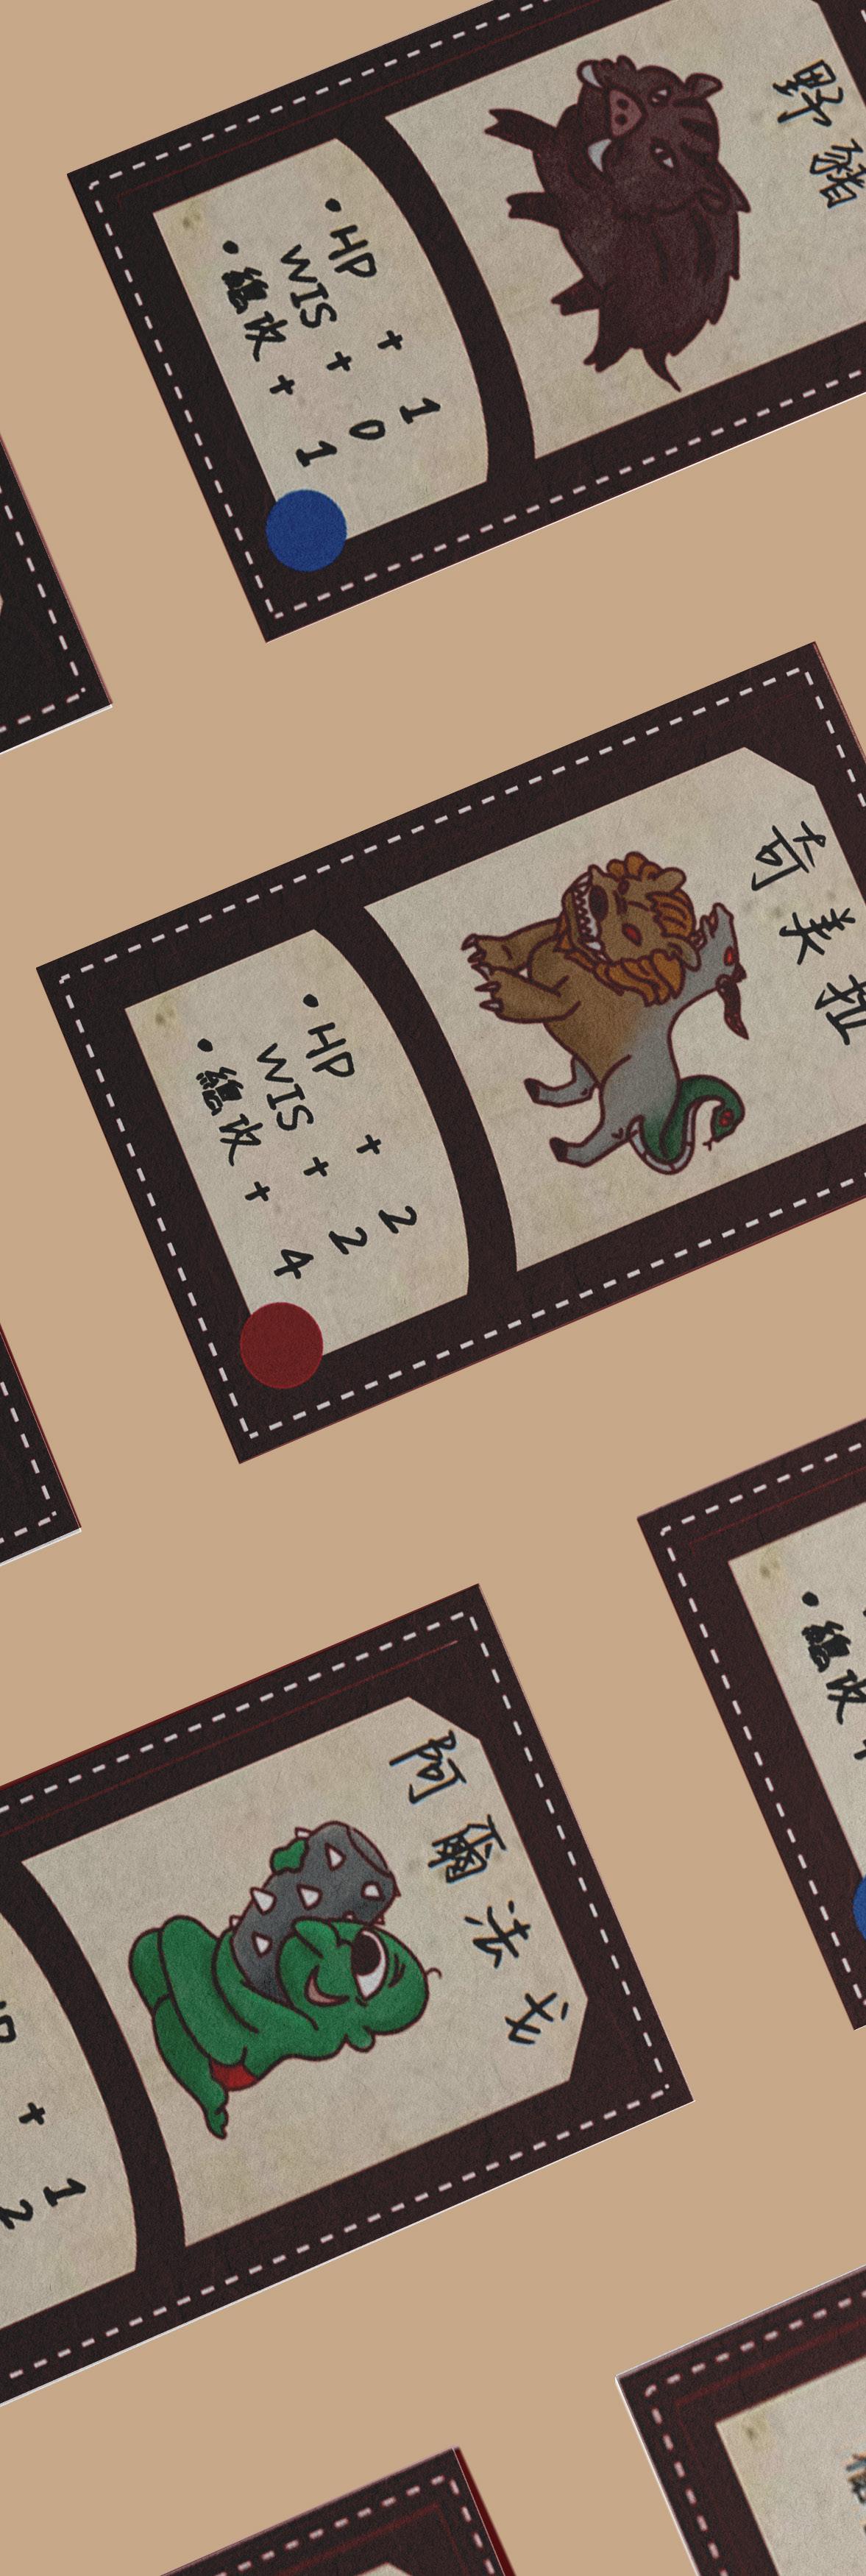
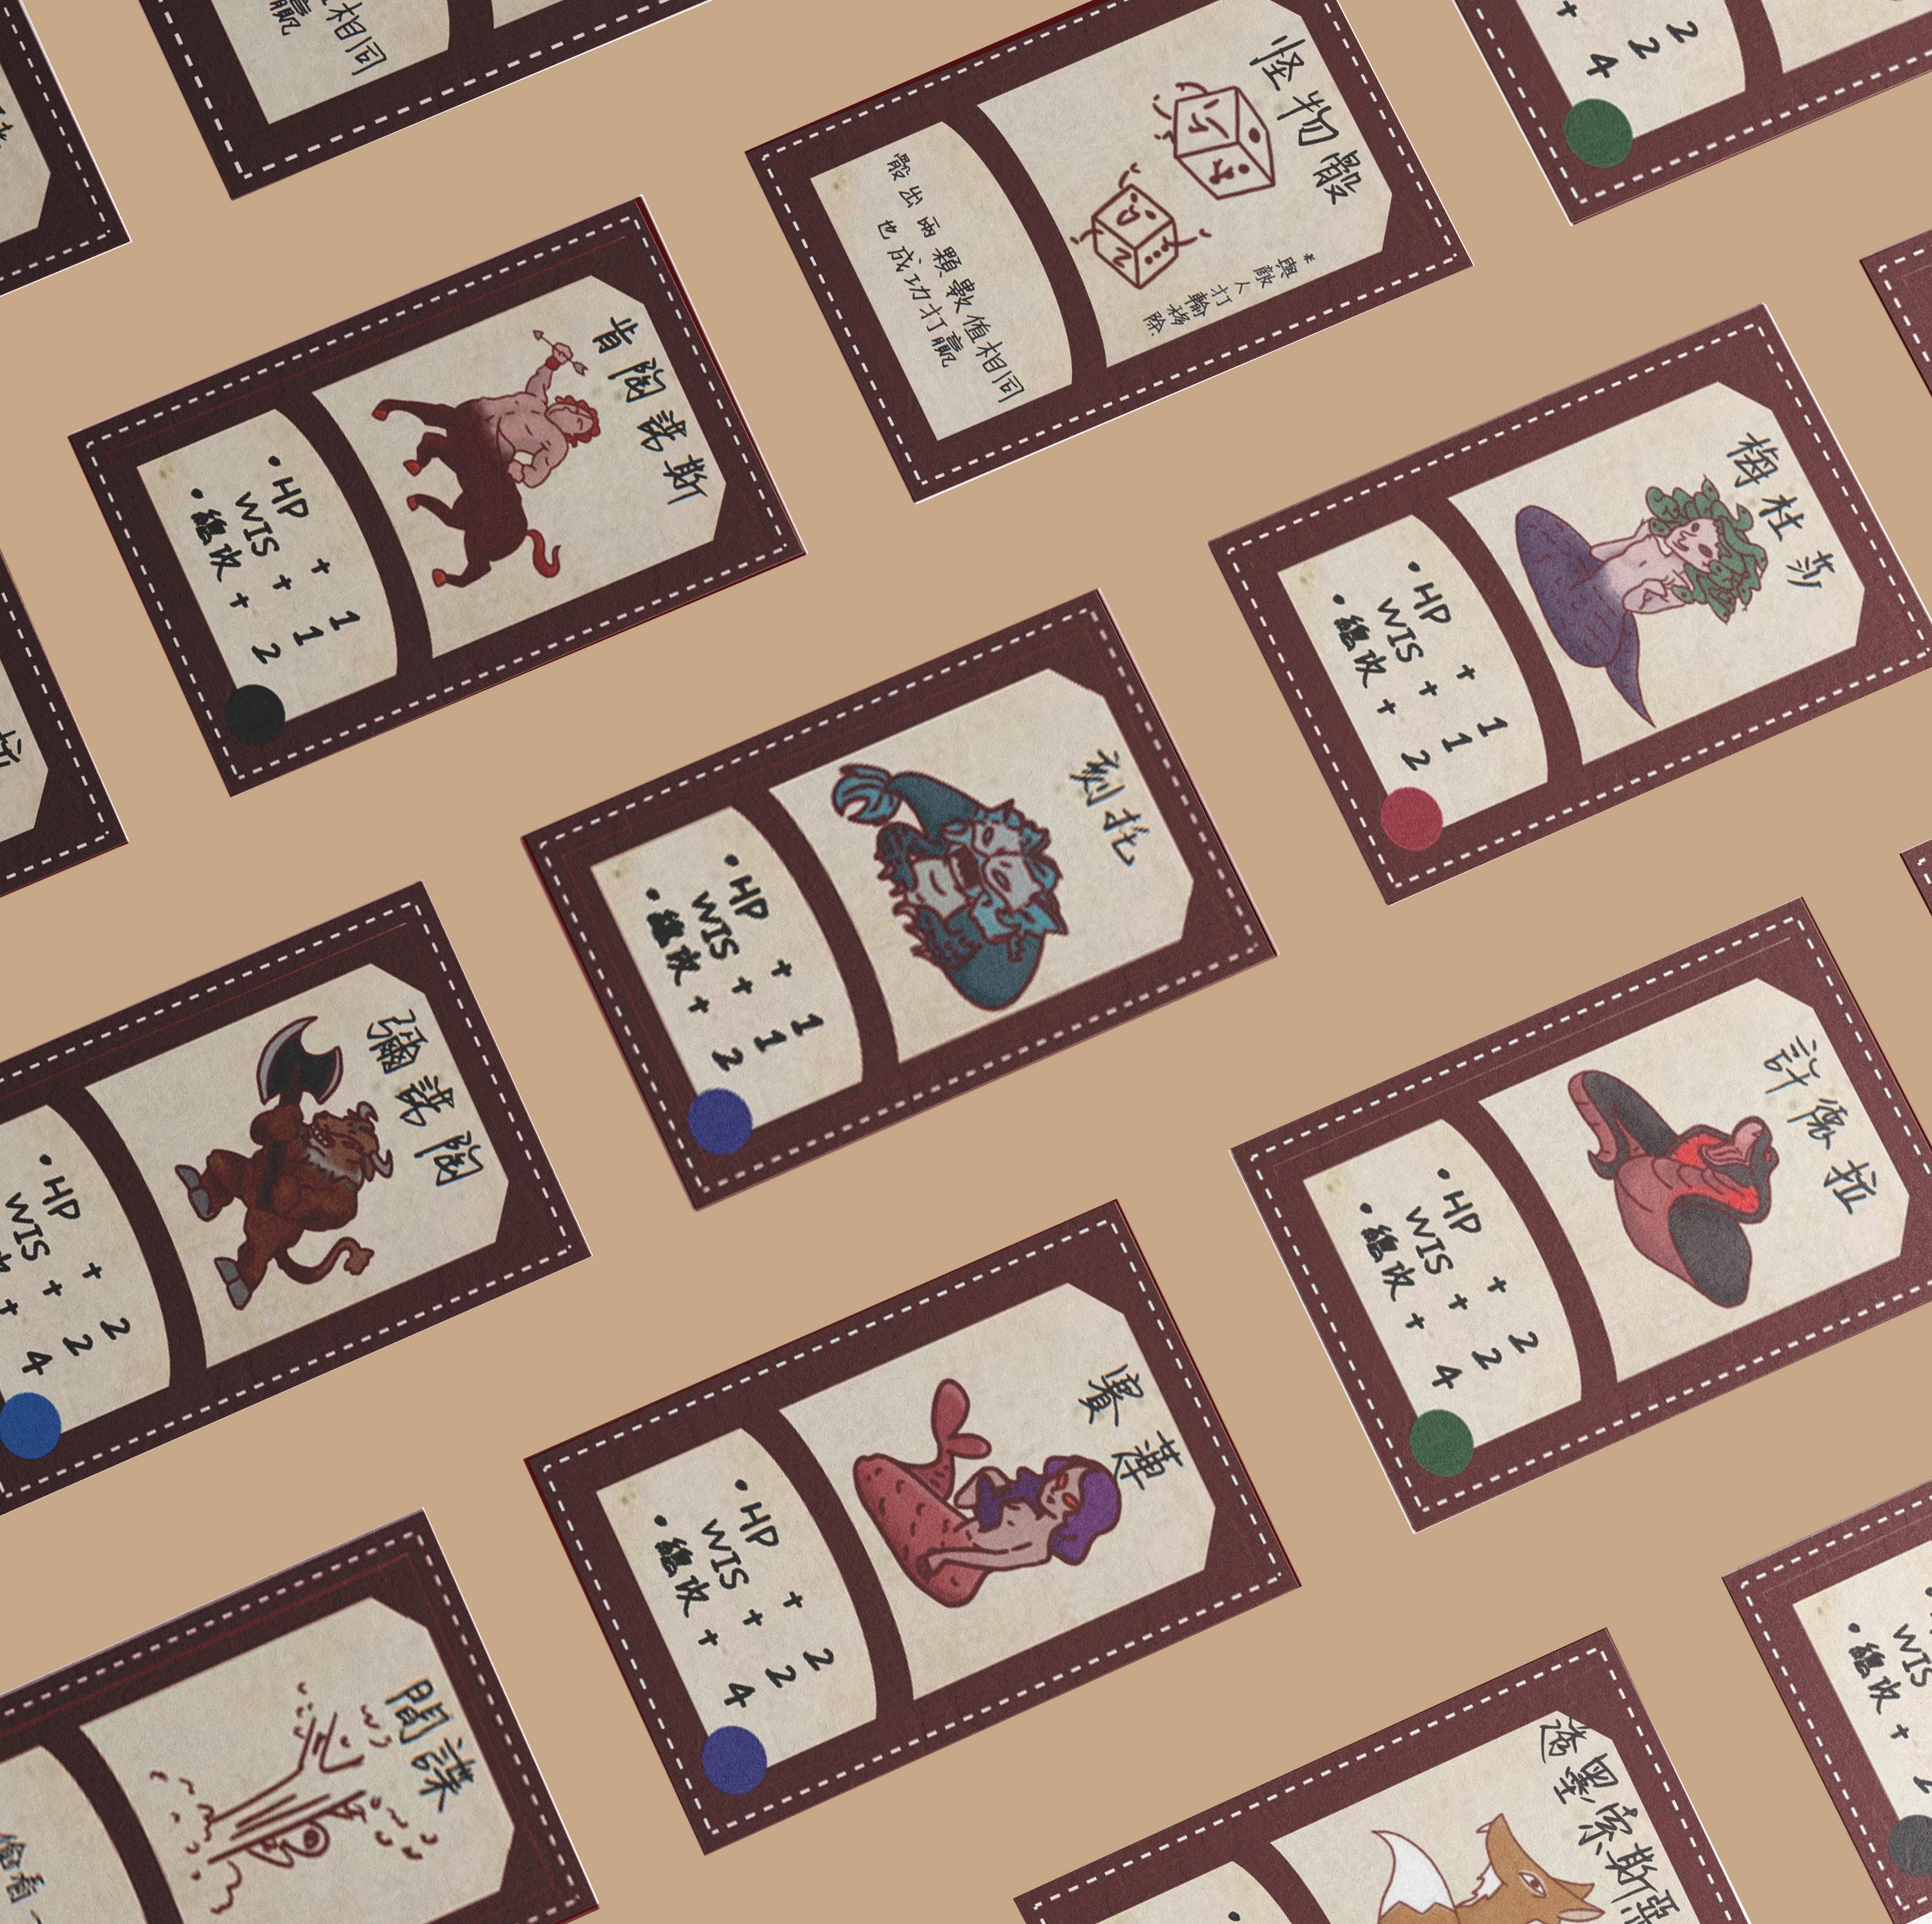
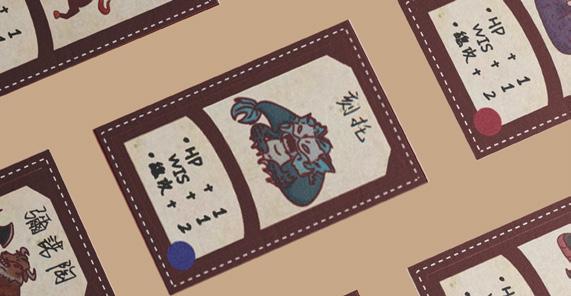
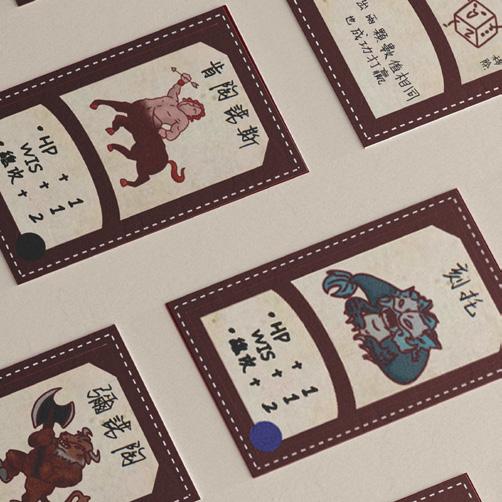
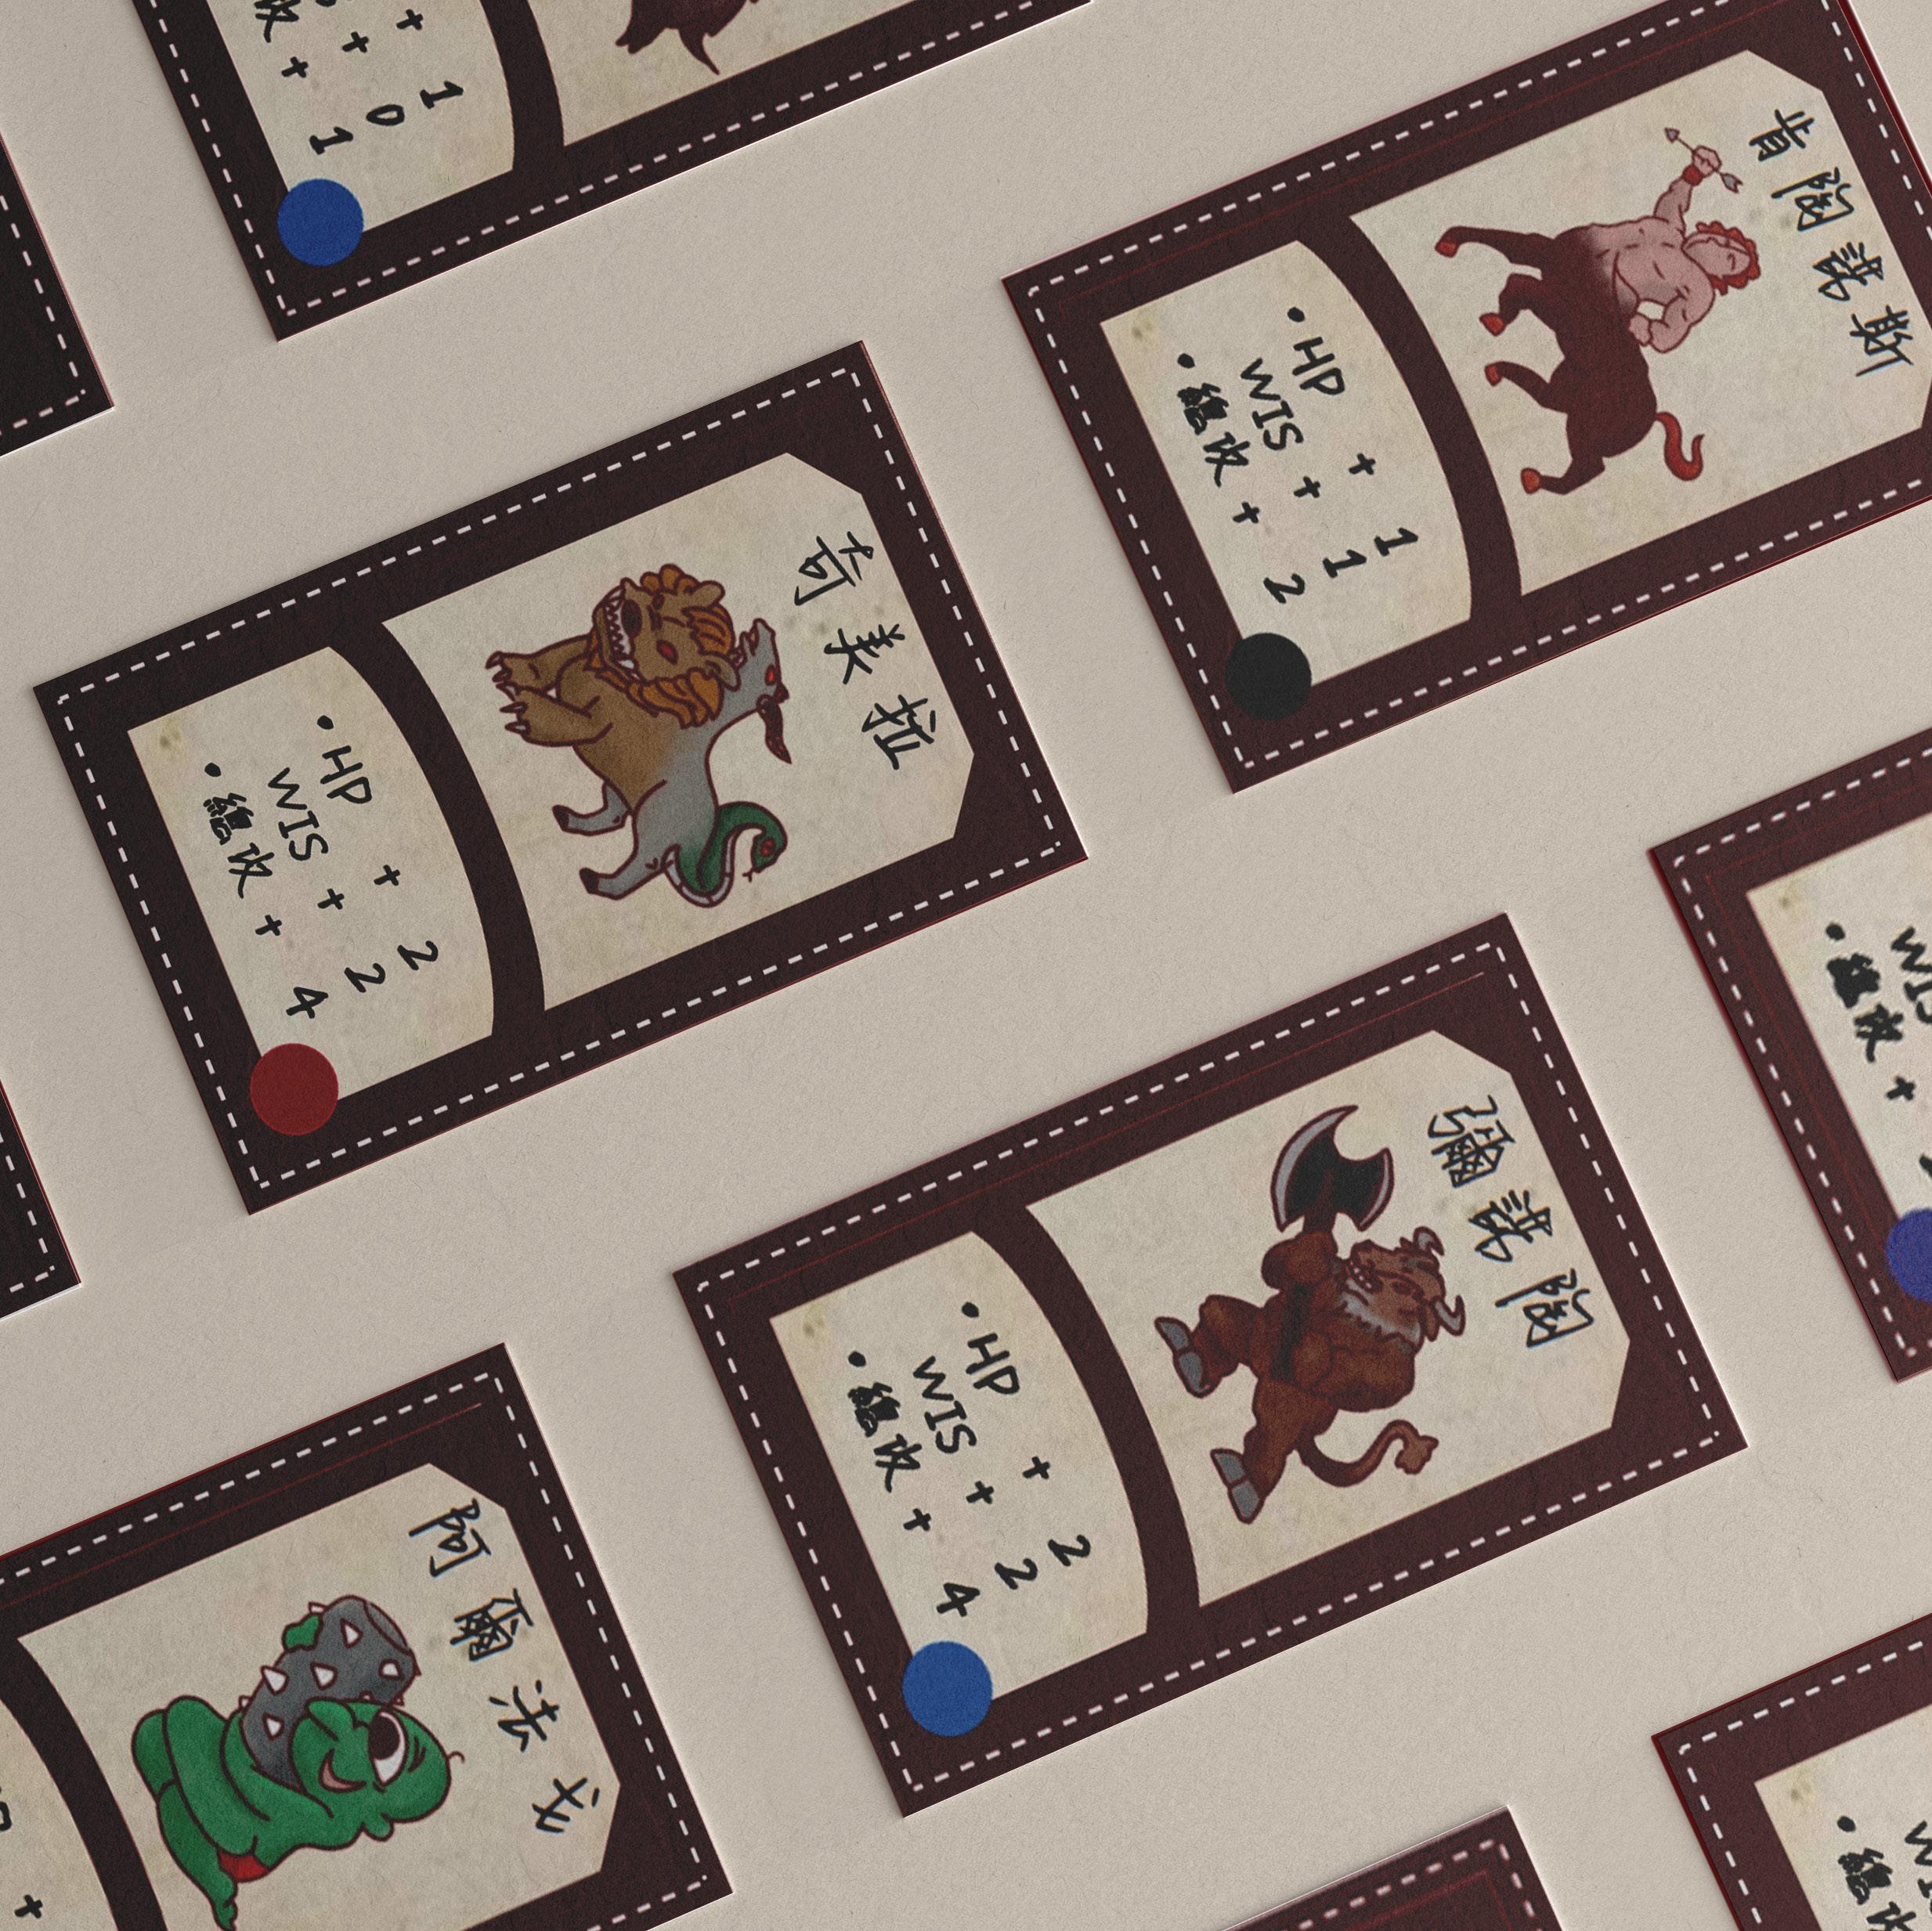
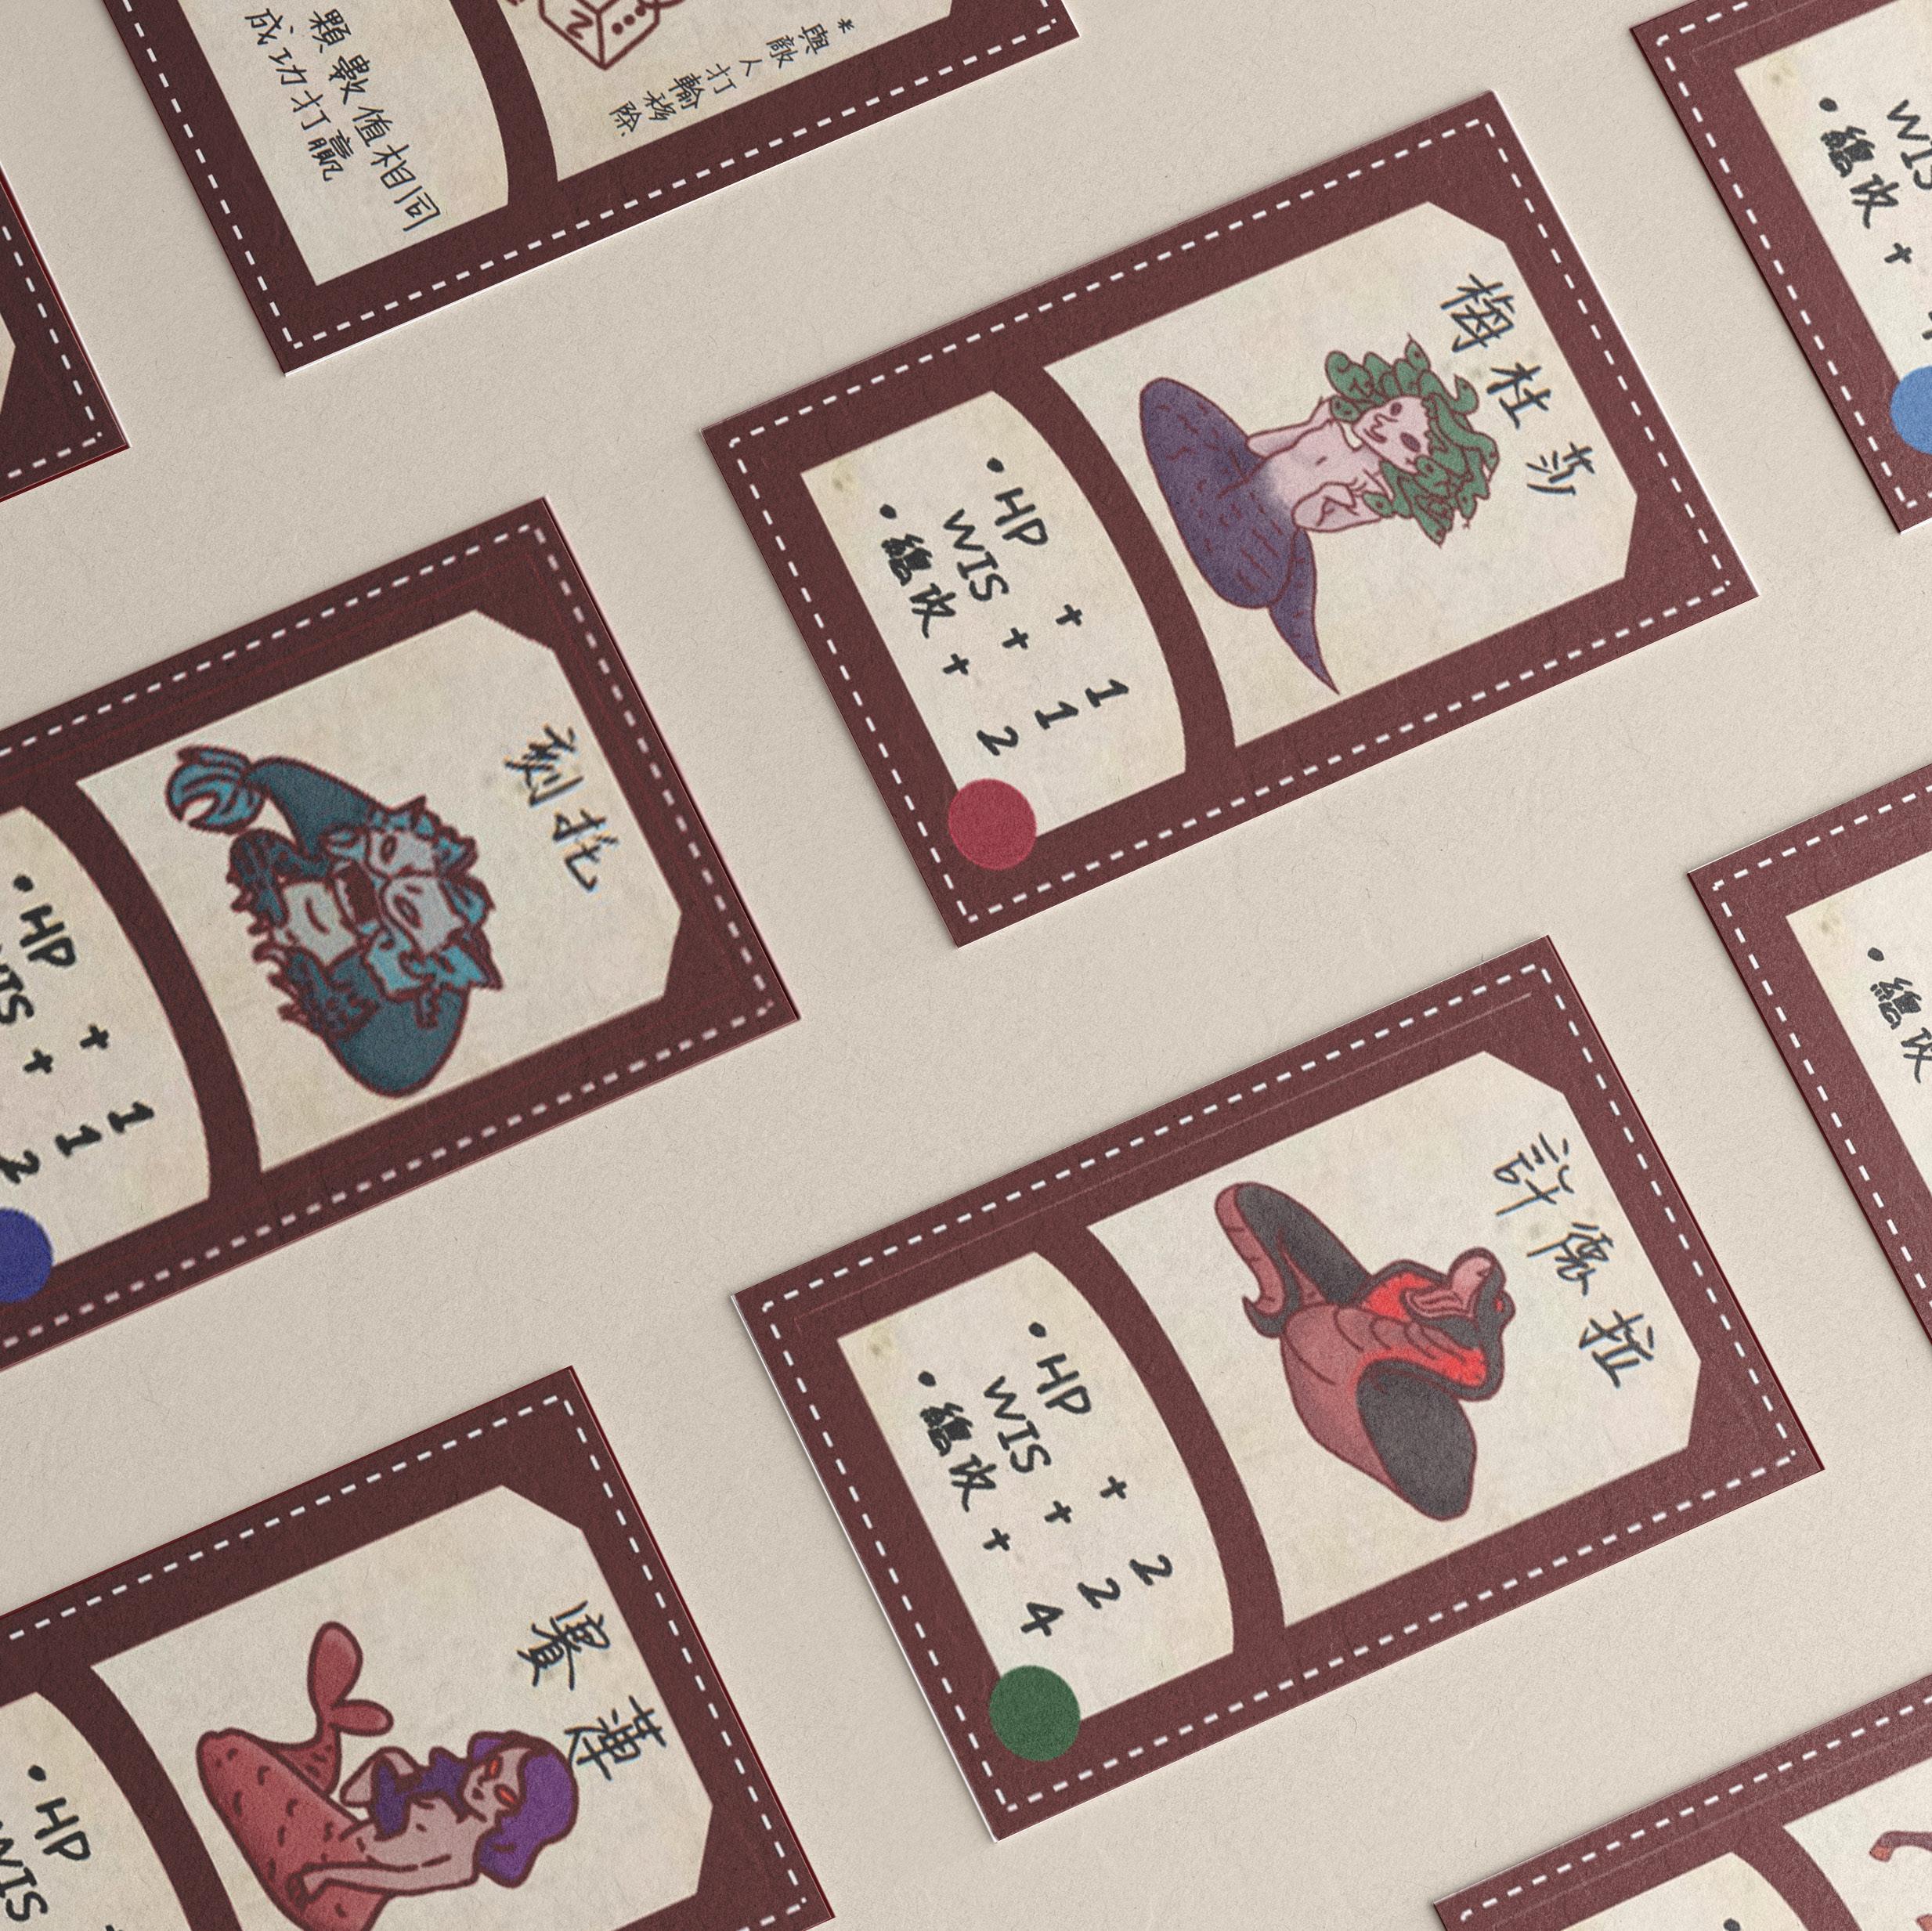
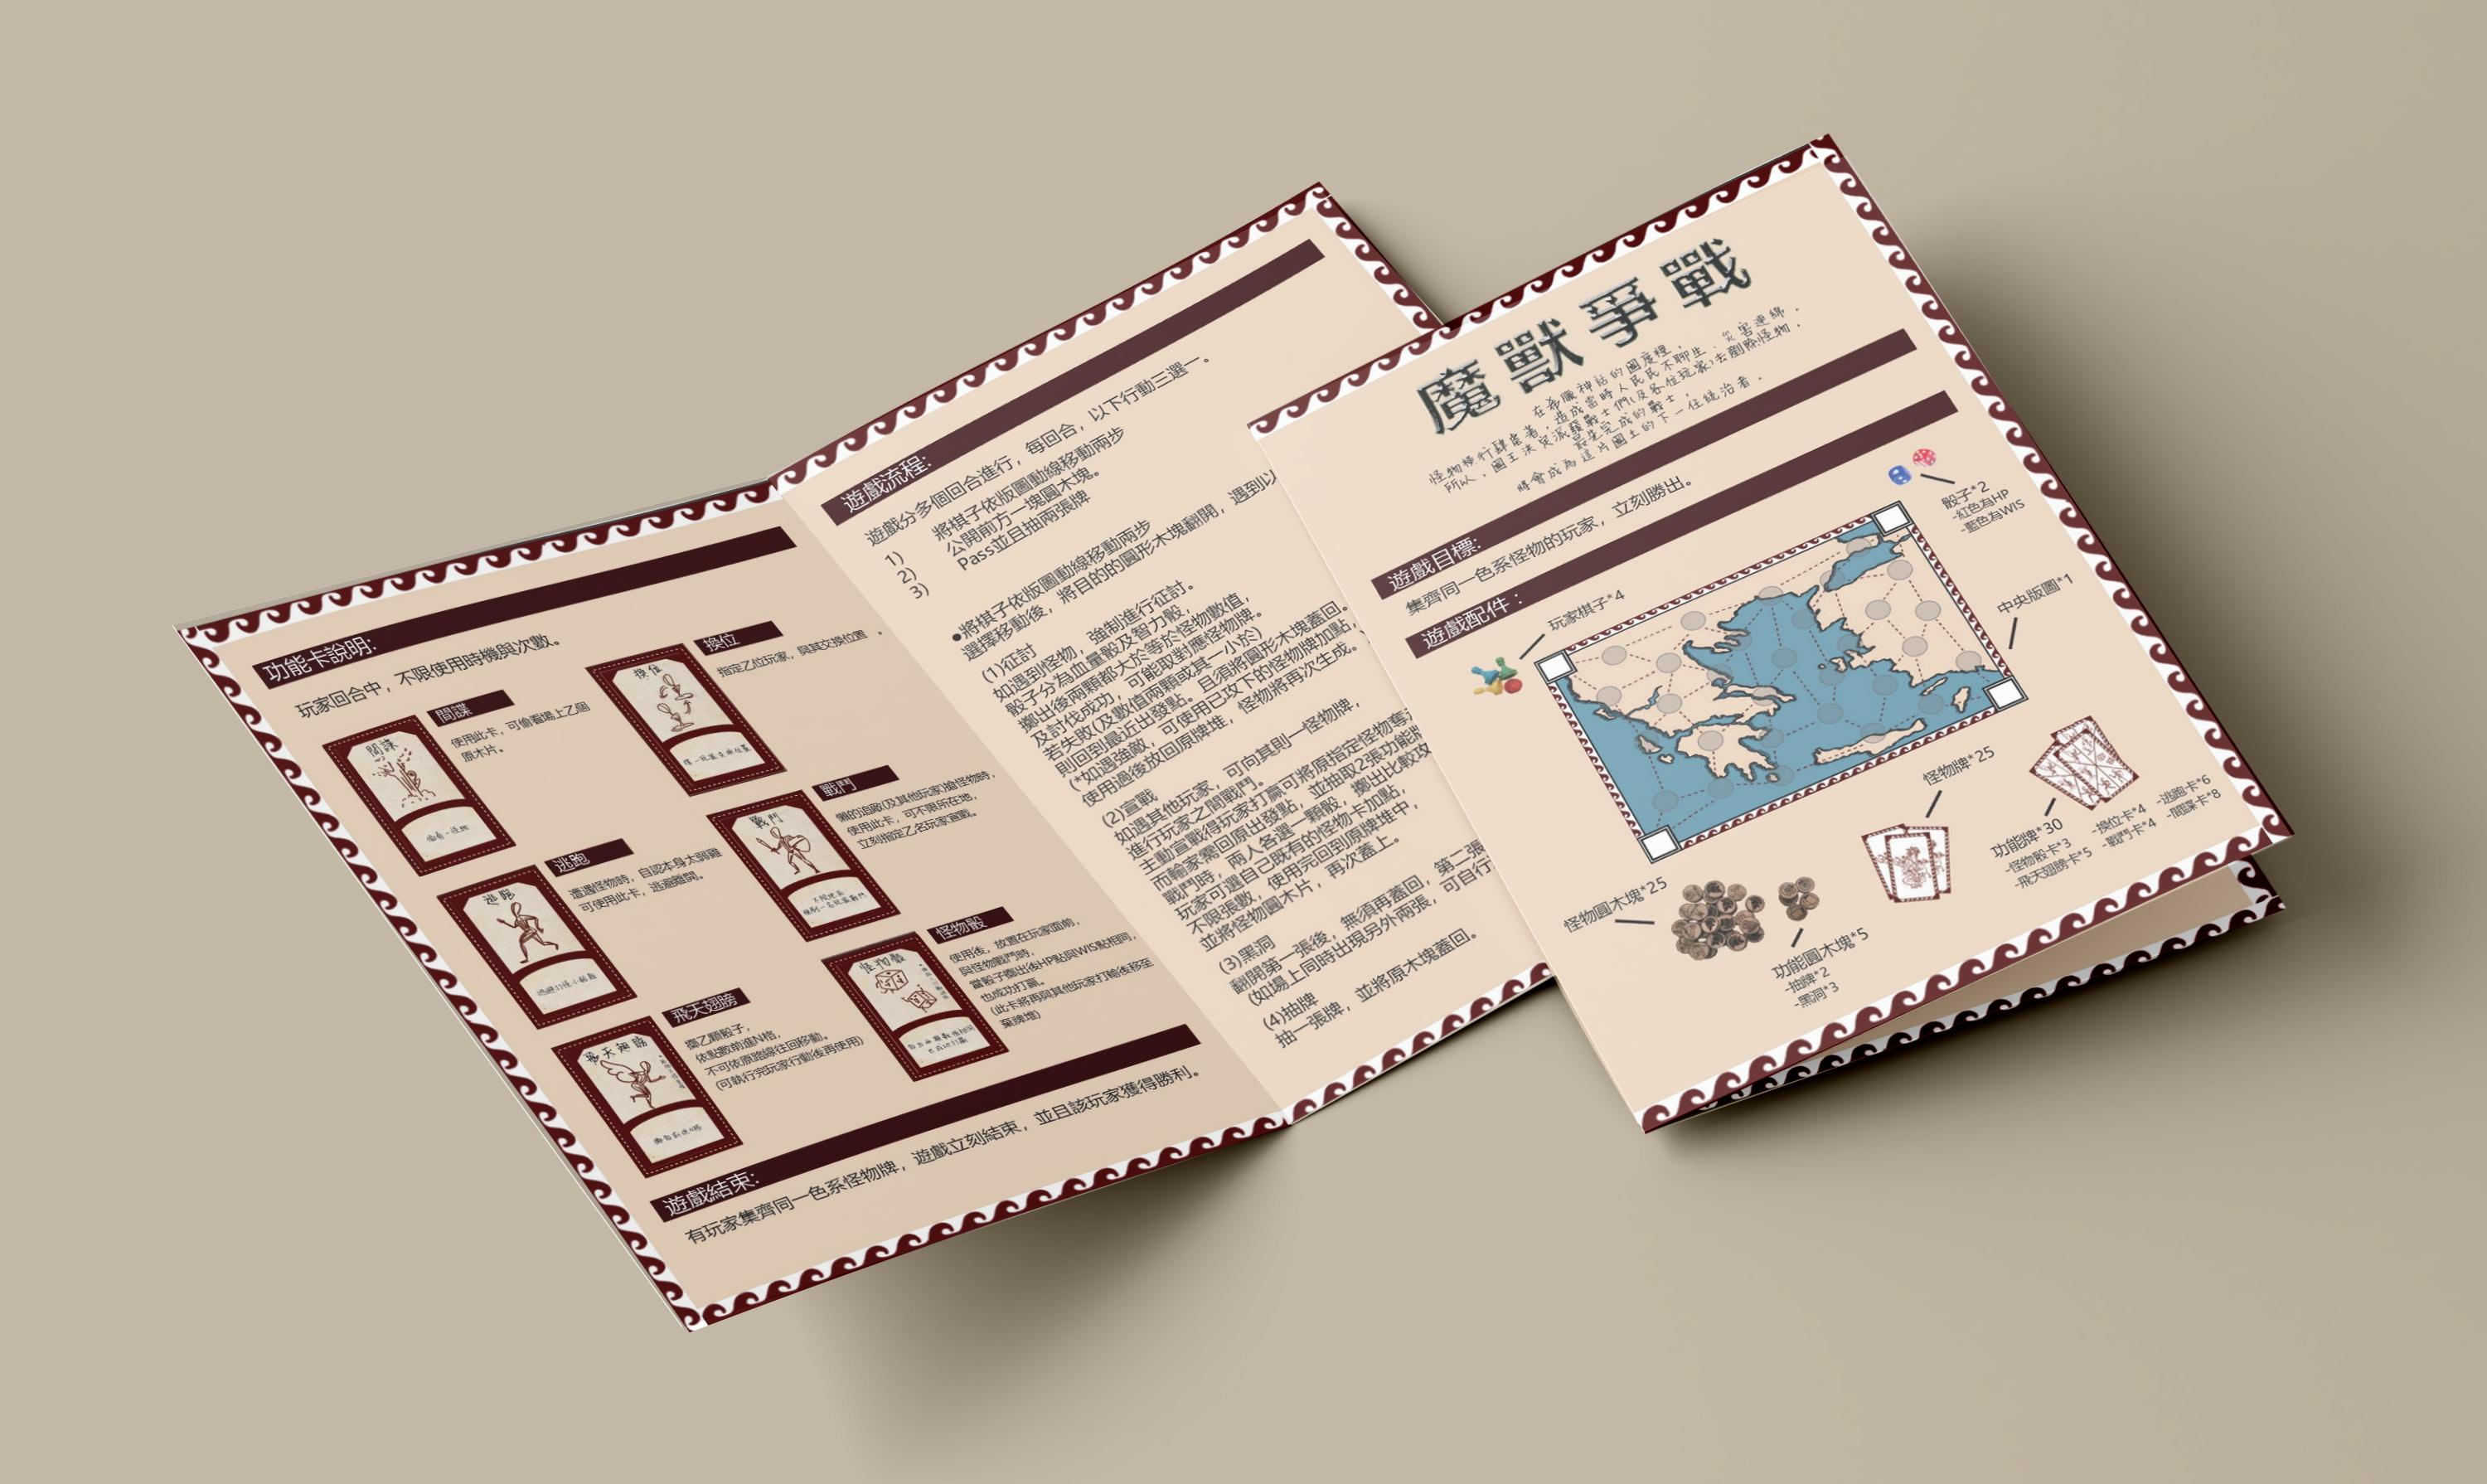
This game's category is for families, mainly using dice and cards to conquer the monsters. It is easy to learn how to play, but a lit bit difficult to memory the site where the creatures hide. But this is the most interesting point!
As for the art of this game, using simple colors to depict the monsters, want to give the players a traditional feeling.
Dice Rolling
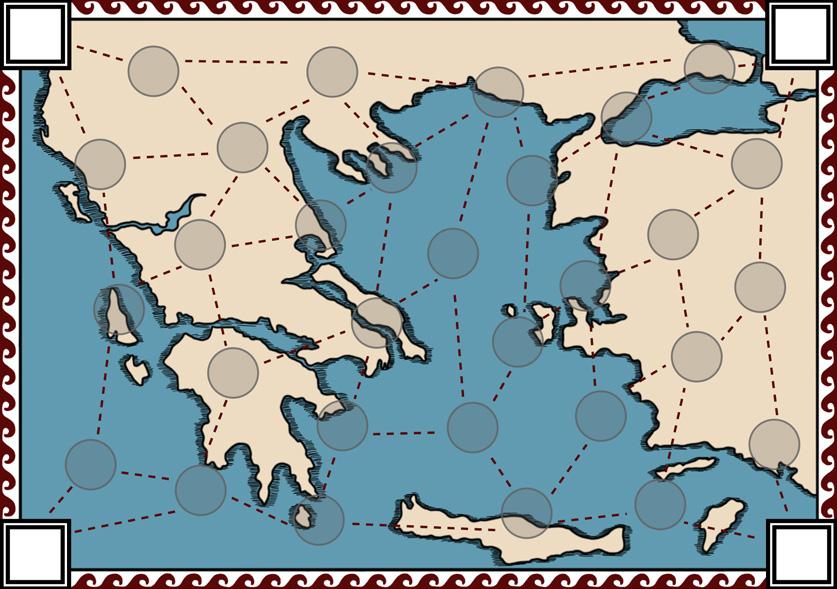
Point to Point Monement
Memory
Set Collection
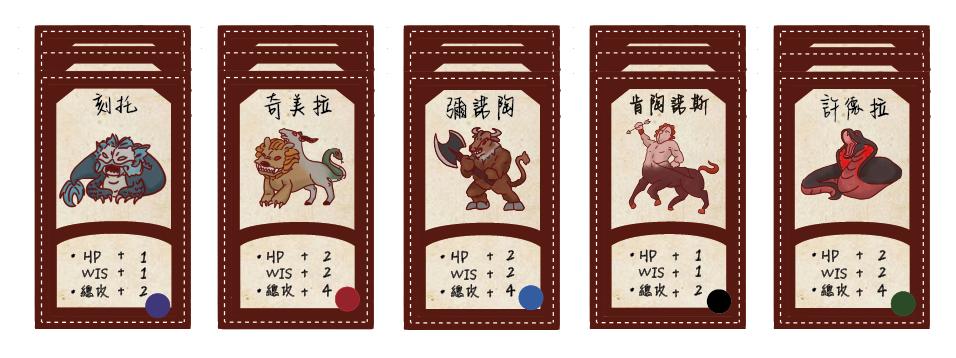
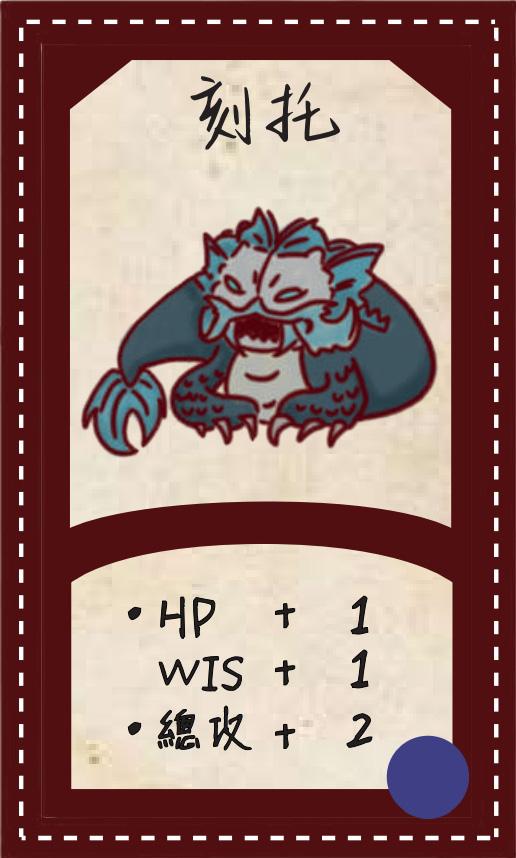
The game is mainly for people to play with families. So cute monsters can attract children and simple UI can easily let them read them. Also, I use different colours to categorize the type of the creatures, at the bottom of the right-hand side.