


Welcome to the BPL Zine Box Handbook! We are so excited for you to use the zines and tools we have curated for you.
The BPL Zine Box is an Incubator project designed by Emma Karin Eriksson, Young Adult Librarian at Windsor Terrace, in collaboration with Monica Johnson & Jan Descartes of Booklyn, Inc a Sunset Park-based arts nonprofit organization that promotes artists’ books and zines as art and research material, and distributes their artwork and archives within the academic market. Booklyn’s Education Program presents free and low-cost book-, print-, zine-making workshops for adults, and afterschool and day camp programs for kids Zines After School & Zine Camp.
This box was designed to support branch staff who want to host zine programs but don’t have the materials or training to start on their own. The BPL Zine Box is a physical item that can be checked out by staff on their branch card.
This handbook was designed to support you as you dream up zine programs for your branch. It is meant to complement the in-person trainings offered by BPL and Booklyn or to stand on its own. If you were not able to attend those trainings, or did and need reminders, this handbook has all of the information needed to learn and review the process of zine-making.
Use it to jumpstart or refresh your knowledge on zines, zine-making, and get programming ideas. This handbook was designed with the library worker as an educator in mind. We will walk through zine-making processes and give tips on how to teach the materials to others. You can read it cover to cover or skip to the sections you need.
A zine is a self-made publication that is typically created, copied, and distributed by the zine maker (also known as a zinester!).
Zines are typically created in small editions and have a limited distribution. Meaning, a zine may only have 100 copies made and only be distributed throughout the town or state in which it was created.
When we try to define a zine we use the word “typically” a lot. This is because the definition of zines is as flexible as a zine itself! The beauty of a zine is that there are few shoulds and shouldn’ts when it comes to making them.
Zines are self-published and generally created by individuals or small groups/organizations, which allows them to be accessible to the general public, without the gatekeeping of publishers, editors, and advertisers. This is in contrast to a mainstream published book, a magazine, or a journal that may be available at a bookstore.
Because there aren't the same gatekeeping challenges in zine culture, zines offer a space for many voices to be heard- voices that may often be silenced, edited, or oppressed by mainstream culture. Zines offer space to share thoughts, experiences, and knowledge about race, gender, feminism, identity, political ideologies, animal rights, and body politics.
Zines are often made from low-cost, accessible, and readily available materials. Such as printer paper, pencils, markers, magazines, stamps, and found materials.
“What is a Zine? (Pronounced like magazine without the maga) A zine is an independently created publication. The contents are anything you want them to be like; personal experiences and stories, political ideologies, music related writing, gardening tips, travel stories, comics, photography, or anything you like. Zines can be put together by one person or a group of people and they are usually photocopied.”
- Alex Wrekk, Stolen Sharpie Revolution
Checking out a Zine Box is simple:
Sign into the catalog using your branch card.
1. Search “BPL Zine Box” or “BZB” to pull up all the materials available. 2. Select the collections you would like to be included in your Zine Box. 3. That’s it!
4.
You can check out two zine collections at a time and three items of workshop supplies. If you require more workshop supply pouches, please reach out to Emma at eeriksson@bklynlibrary.org or on Slack.
Each box will be different depending on the collections and supplies requested by the staff member. However, each box will always contain the following:
A copy of this handbook and example zines
A print card and it’s password
A supply of pencils and stickers to be given away to patrons
Staff can have the Box checked out for six weeks and are allowed to renew the check out twice for a total of 12 weeks. If you need materials longer please contact Emma.
The Box must be returned in a black interchange bin wrapped in the original padding. Please use green ties on each side to securely close the bin. Please affix a label to the top with the following information:
When did zines start? Well, it depends on who you ask. Because the definition of a zine is flexible, you can bend it to fit any time period. Some people consider going as far back as 1776 when Thomas Paine published the pamphlet, Common Sense. The beginning of modern zine culture dates back to the 1930s and 1940s with the rise of science fiction fanzines. Fanzines marked the beginning of “zines” as a medium, and of zine culture as well.
Pace University discusses the differences between pamphlets and zines as the means of production. Early 18th- and 19th-century pamphlets ranged from topics including religion, the state, racism, sexism and more. Though these pamphlets were self-published, they were not physically self-published by the hand of the creator because there was no means of DIY personal publishing. Pamphlets would need to be printed at a professional print shop, hired by the author. Early zines differed from pamphlets in that they were self-published by the creator. The first fanzine, The Comet, was published on a mimeograph, which was a predecessor of the photocopier machine. With the use of the mimeograph, and later the photocopier machine, the zine (and zinester!) was born.
If you can believe it, there was a time when sci-fi was not mainstream. There were a few sci-fi books, movies, radio programs, and magazines, People who loved sci-fi wanted more media to consume so they decided to create their own. They made zines that included their own sci-fi stories, reviews, artwork, and opinions. These zines were not sold in stores; you had to know someone who had one or get on a mailing list to receive them. Zines continued to be made throughout the ‘40s, ’50s, and ‘60s, with content including sci-fi fanzines, music, politics, changing culture, and literature.
We often start our workshops asking people if they can imagine a time when sci-fi wasn’t popular; and tell them how in the 1930's that was true! So a group of people who loved sci-fi created their own zines to share their stories and artwork and to find others who loved sci-fi too.
By the 1970s, photocopiers had become more available to the mainstream than ever before. There were an explosion of Fanzines from different subcultures like Punk, who created music and culture zines to share information on new bands, record reviews, and share tips on living outside of the mainstream. In the 1990s, the Riot Grrrl movement connected DIY culture with third-wave feminism. Riot Grrrl bands such as Bikini Kill, Heavens to Betsy, and Bratmobile took part in a culture that challenged gatekeeping and celebrated rewriting the heteronormative narrative from a cis-male-dominated hegemony. This culture included zines that celebrated sharing personal narratives, challenged the patriarchy and white supremacy, and pooled information about surviving in structures designed to oppress.
The 2000s still see vibrant zine communities, including in academia. In the mid-2000s, academics started to publish literature about zines and recognize the genre for its incredible cultural significance. As personal printers and the world wide web became even more accessible, zinesters could print their work more easily and share it more widely online, at bookshops or by tabling at zinefests and other events. Platforming marginalized or voices that may be silenced by the mainstream cultural structures now becomes even more accessible. The zine world is steadily becoming more inclusive, such as with the POC Zine Project, which was founded in 2015. Now, in the 2020s, zines are still going strong. We see more digital zines, zines as school projects, and even more zines in libraries.
Many parts of zine culture are unique. The most important being the idea of doing-it-yourself, sharing your work, and building community. You can encourage engaging in zine culture at your workshops by allowing participants to make or share whatever they want—or, equally important, by telling them it is okay to not make anything or to not share if they don’t want to. Zines are about giving people agency and that is the most important thing we want patrons to walk away with.
Zinester: A person who makes zines
Master flat: The pieces of paper you have drawn/written or glued your images/text onto
Copy flat: A copy of the master flat that you used to make copies from (so the master flat doesn't get damaged)
Dummy: A mock-up; a physical representation of a book
Sheet: A single piece of paper
Pages: The sections of a folded piece of paper
Folio: One sheet folded 1 time to create 2 sections (creating 4 pages)
Quarto: One sheet folded 2 times to create 4 sections (creating 8 pages when folds are cut)
Editions: The number of zine multiples produced
Pagination: The sequence of numbers assigned to pages in a printed work, zine pages must be laid out in a specific order on sheets of paper to ensure they are printed in the correct order when assembled
Collating: When printing more than one copy of a multi-page document, pages are printed in the correct order from the first page to the last page, before the next copy is printed
Lengthwise/Long side/Hot dog fold: All these terms mean the same thing: folding a piece of paper in half on the longest edge
Widthwise/Short side/Hamburger fold: All these terms mean the same thing: folding a piece of paper in half on the shortest edge
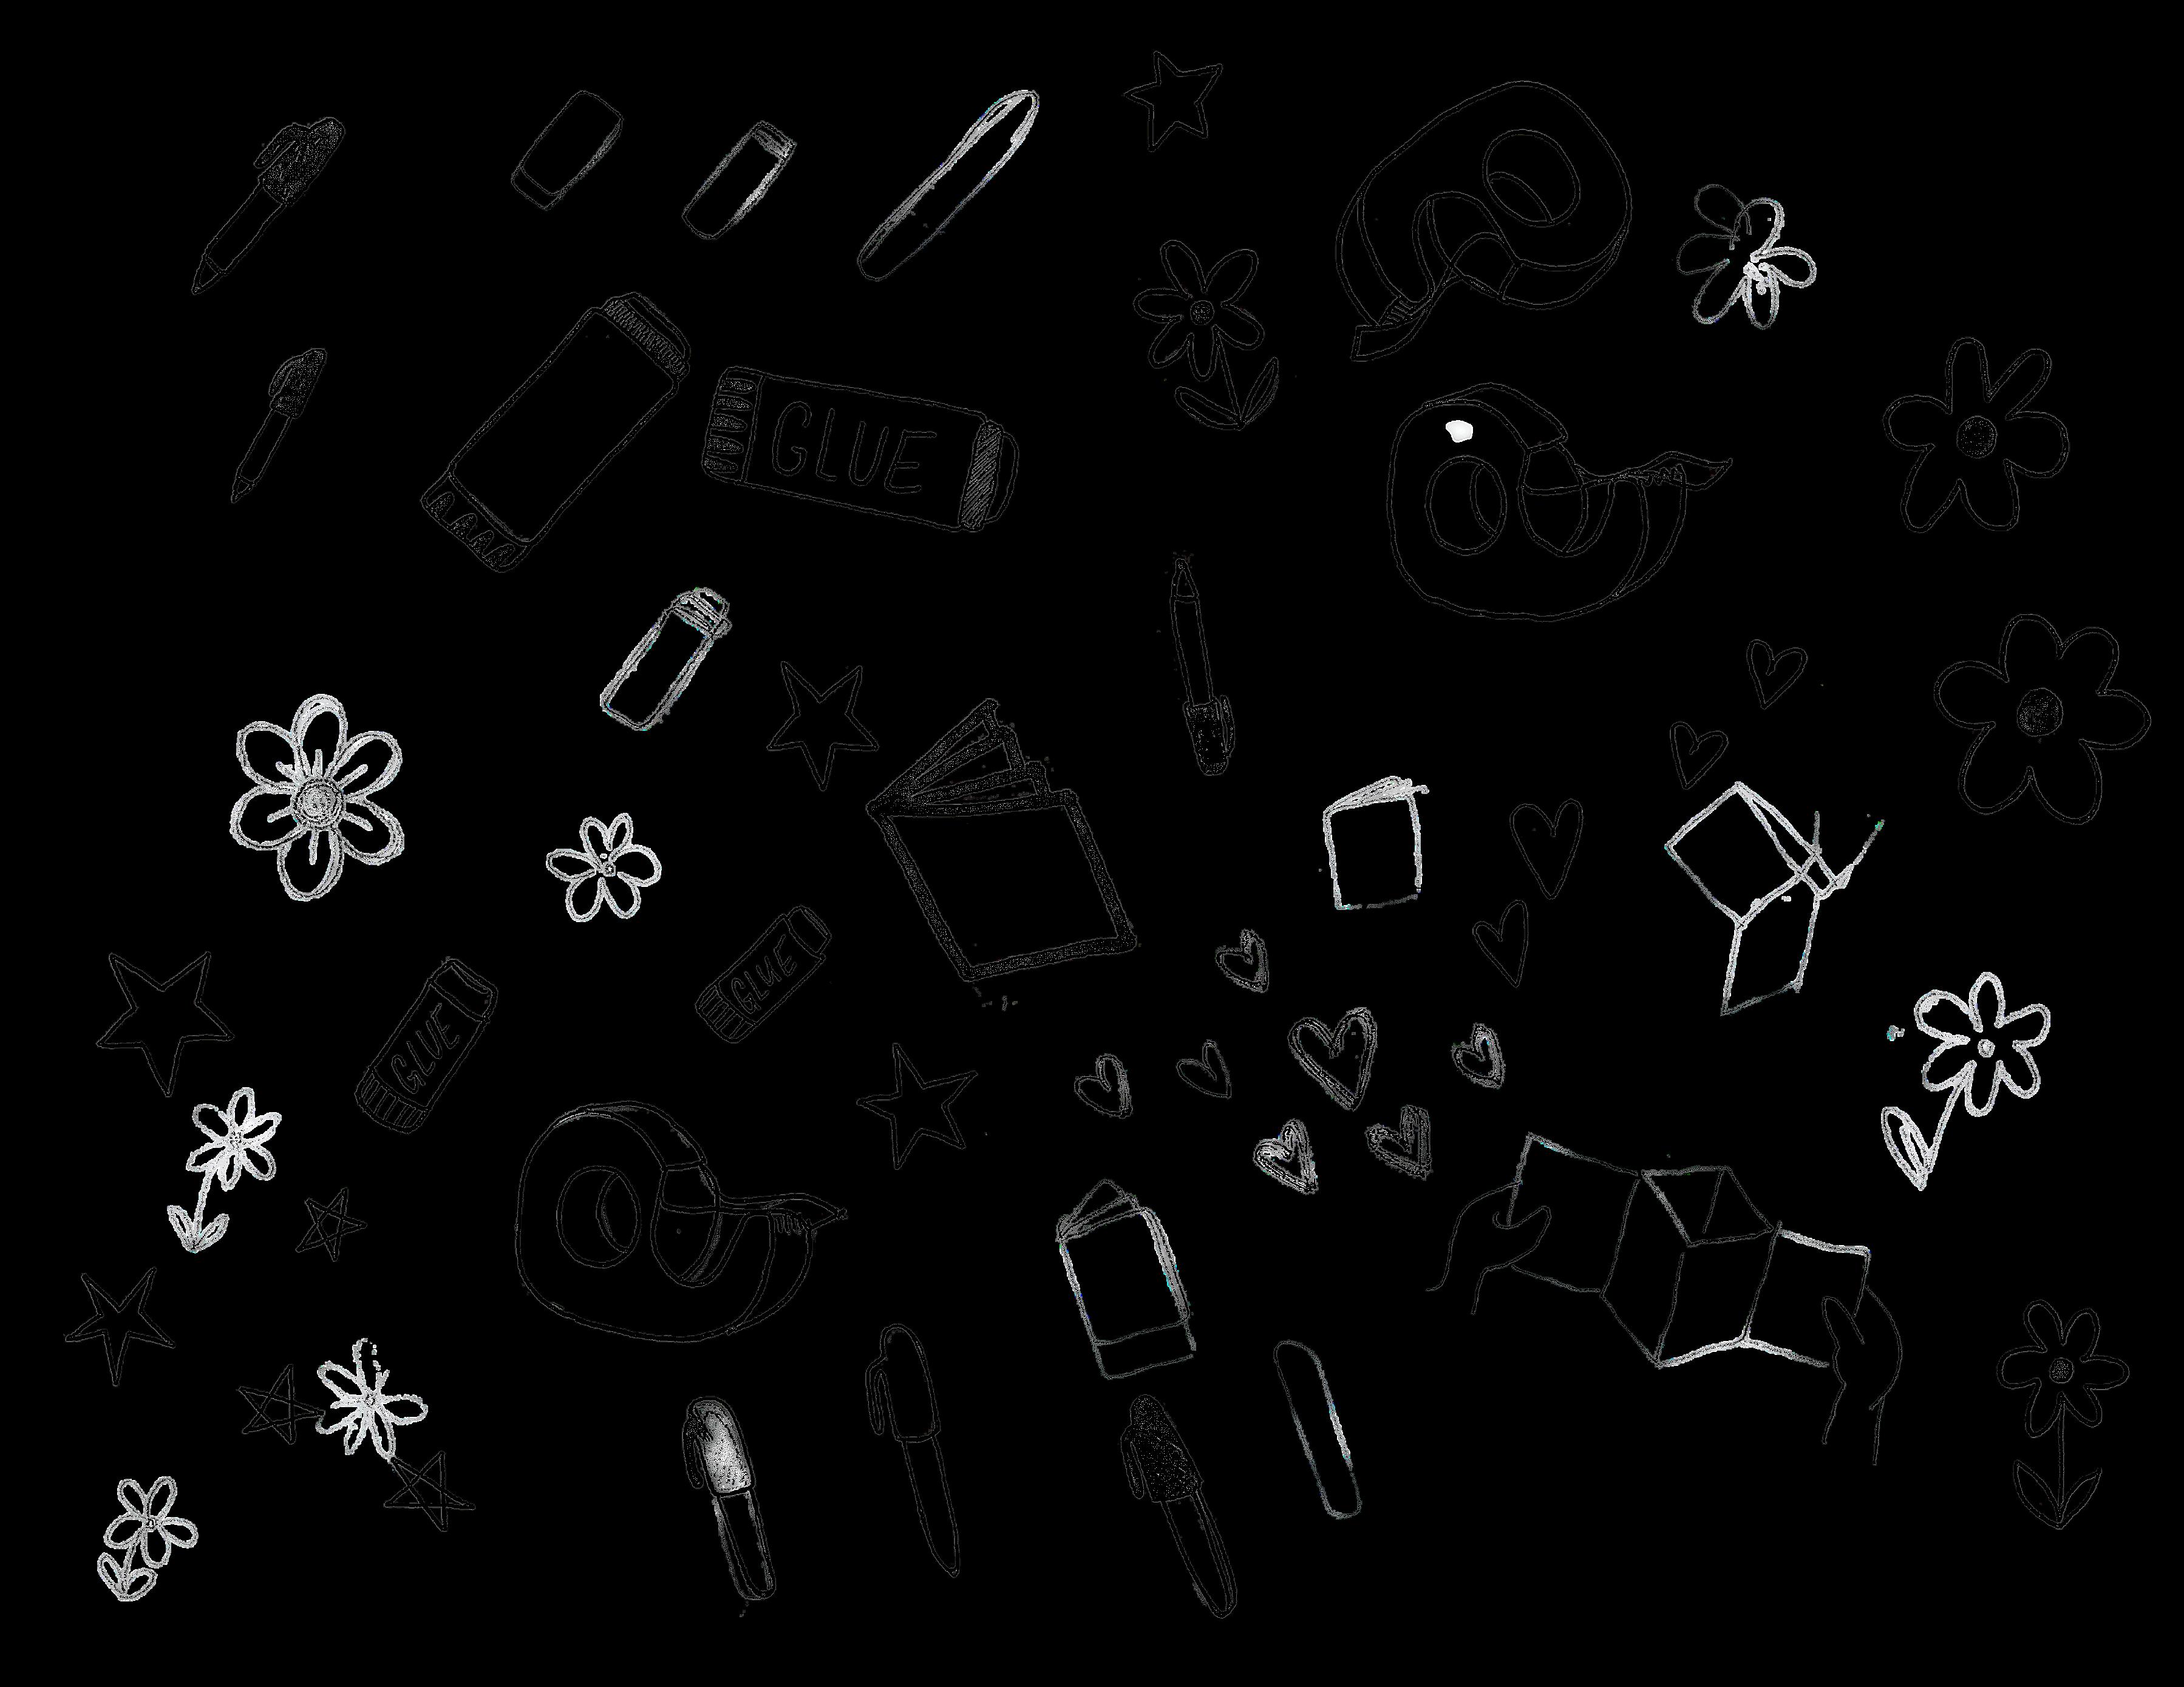
All you need to make a zine is paper, content (drawings, text, etc.), and an adhesive (glue or tape). Once the zine is finished and copied, the zinester will need a method of binding (staples, thread, etc.).
Paper: 8.5 x 11 inch paper known as Standard or Letter-size is typically the best to use as it works with most printers, scanners, and photocopiers, but any size paper works. The bigger the paper the bigger the zine can be. It is best practice to use white paper when making a zine and then print onto colored paper. But if zines are being made and not copied or they are able to be copied in color use whatever color paper you like!
Writing or Drawing Materials: Pencils with erasers, ink pens, and markers. Paper Mate Flair Pens are a favorite! Sharpies are good in a pinch, but we find they can bleed, are stinky, and get messy. It is also a good idea to remove any yellow-colored drawing materials as they rarely show up when photocopied.
Adhesives: Glue sticks and glue pens work well for the whole range of ages of zine-makers. Double-sided tape and scotch tape (in a loop behind the item) also work well. Liquid glues and Mod Podge can be messy; we find they wrinkle papers. There is also a tool called a “tape runner” often used by scrapbookers which allows you to lay down a strip of double-sided adhesive without getting your fingers messy. Tape runners can be requested as part of your BPL Zine Box.
Collaging Supplies: Collage materials can be anything that can be glued down: old magazines, pages from books, newspapers, wrapping paper, fliers, ads, stickers, stamps, washi tape, maps, glitter, old office supplies, beads, fabric, lace, bric-a-brac the list goes on and on. You can add on 3D materials like leaves, flowers, puffy stickers, gems, shells, or other found objects. Emma has even created a zine using trash she found on the sidewalk!
Bone Folders: These are not absolutely necessary but can be really useful when working with younger kids, older adults, or people who may have difficulty with fine motor skills. Bone folders are most commonly round on one end and slightly pointed on another. Any edge of the bone folder can be used to help make and sharpen creases and folds. Use the edge of the pointed part to score folds along a ruler’s edge for a super-crispy and exact fold. If you don’t have a bone folder you can use: a popsicle stick or the edge of a spoon.
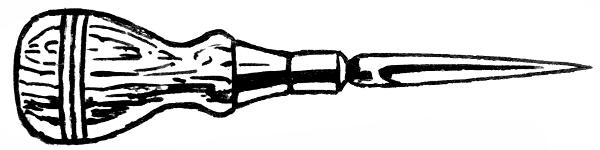
Awl: An awl is a pointed tool used to punch holes. In zine-making, it is commonly used to create holes for binding stitches like the pamphlet stitch A safety pin or the pointed end of a compass can work to create
The size of a zine is dependent on the size of the paper used and the desired outcome. Most zines are created from 8.5 x 11 paper as it is the most readily available and easiest to make copies of. How the paper is folded can also determine the size and shape of your zine.
Standard/Letter = 8.5 x 11 in Legal = 8.5 x 14 in Tabloid = 11 x 17 in
Half Letter Size: Created by folding a Standard/Letter size sheet of paper in half widthwise
Quarter Size: Created using a Standard/Letter sheet of paper cut in half either lengthwise or widthwise and then those sections are folded in half widthwise
Long Zine: Created by folding a Standard/Letter sheet of paper in half lengthwise
One-Sheet zine or Mini zine: Can be made from any size sheet of paper. Typically Standard/Letter is used, Tabloid and Legal size can be good for younger zinemakers who might want more room to draw or write
Full Size - Created by folding a Tabloid sheet of paper in half widthwise
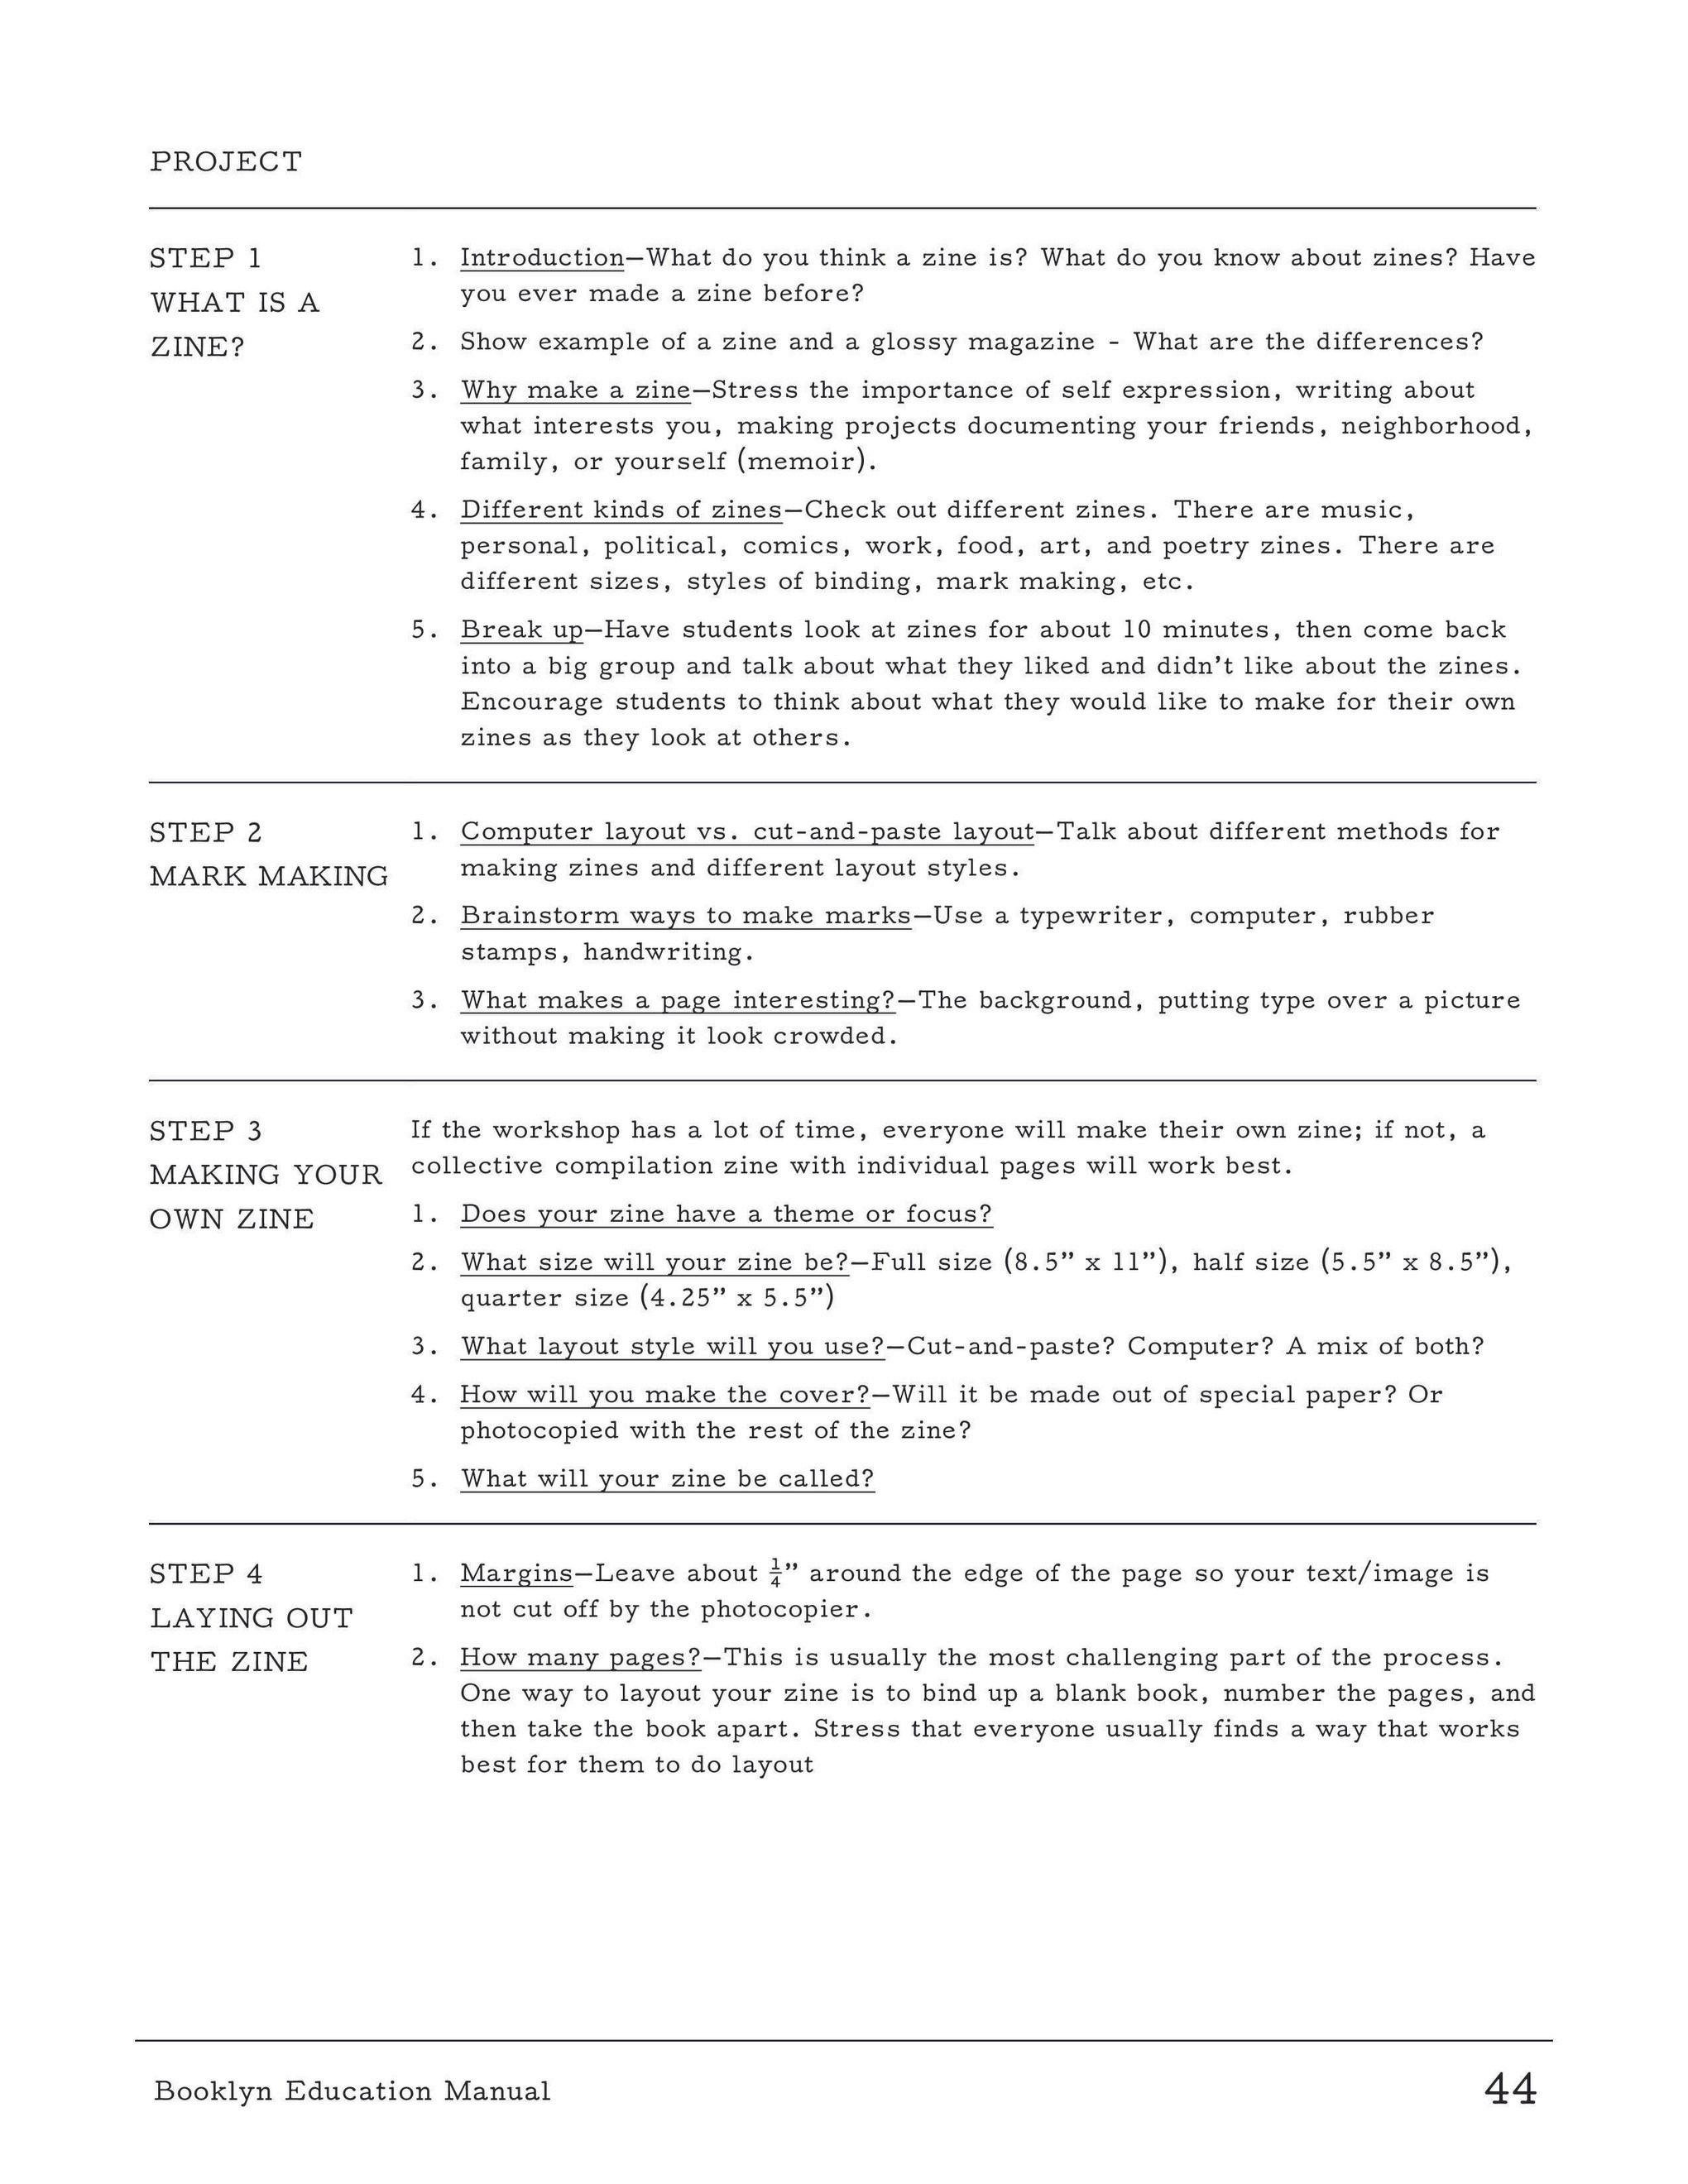
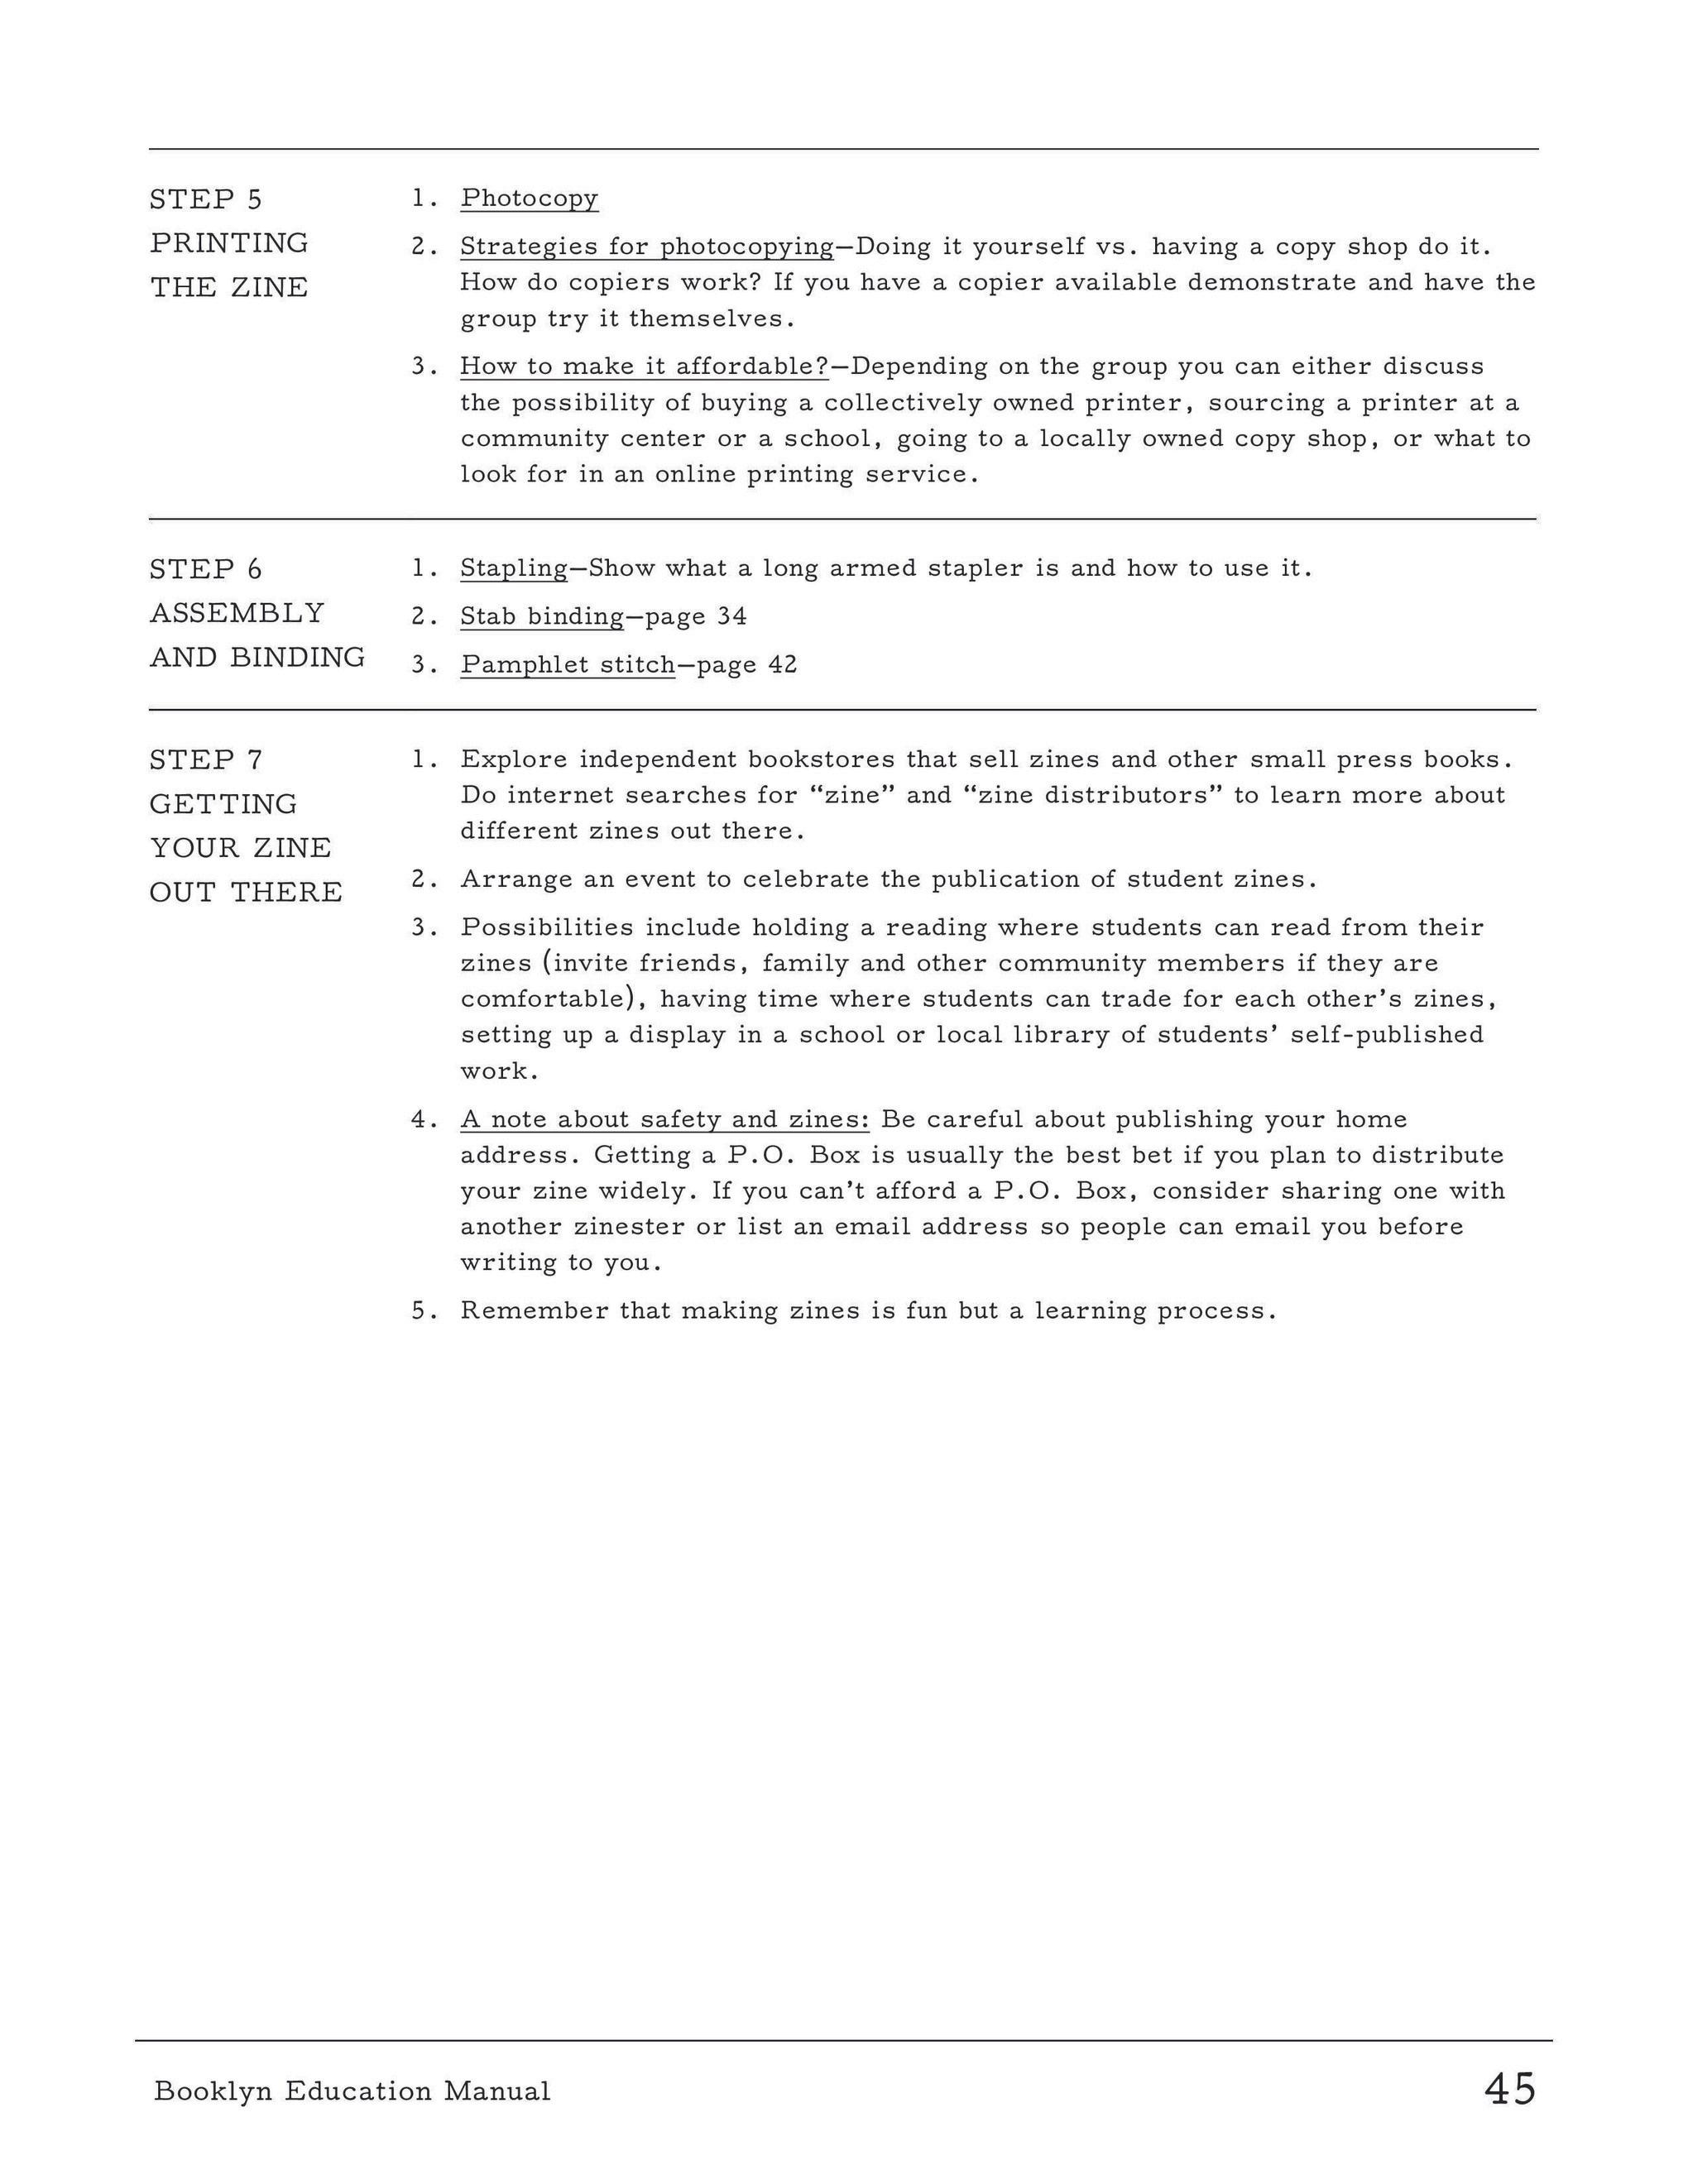
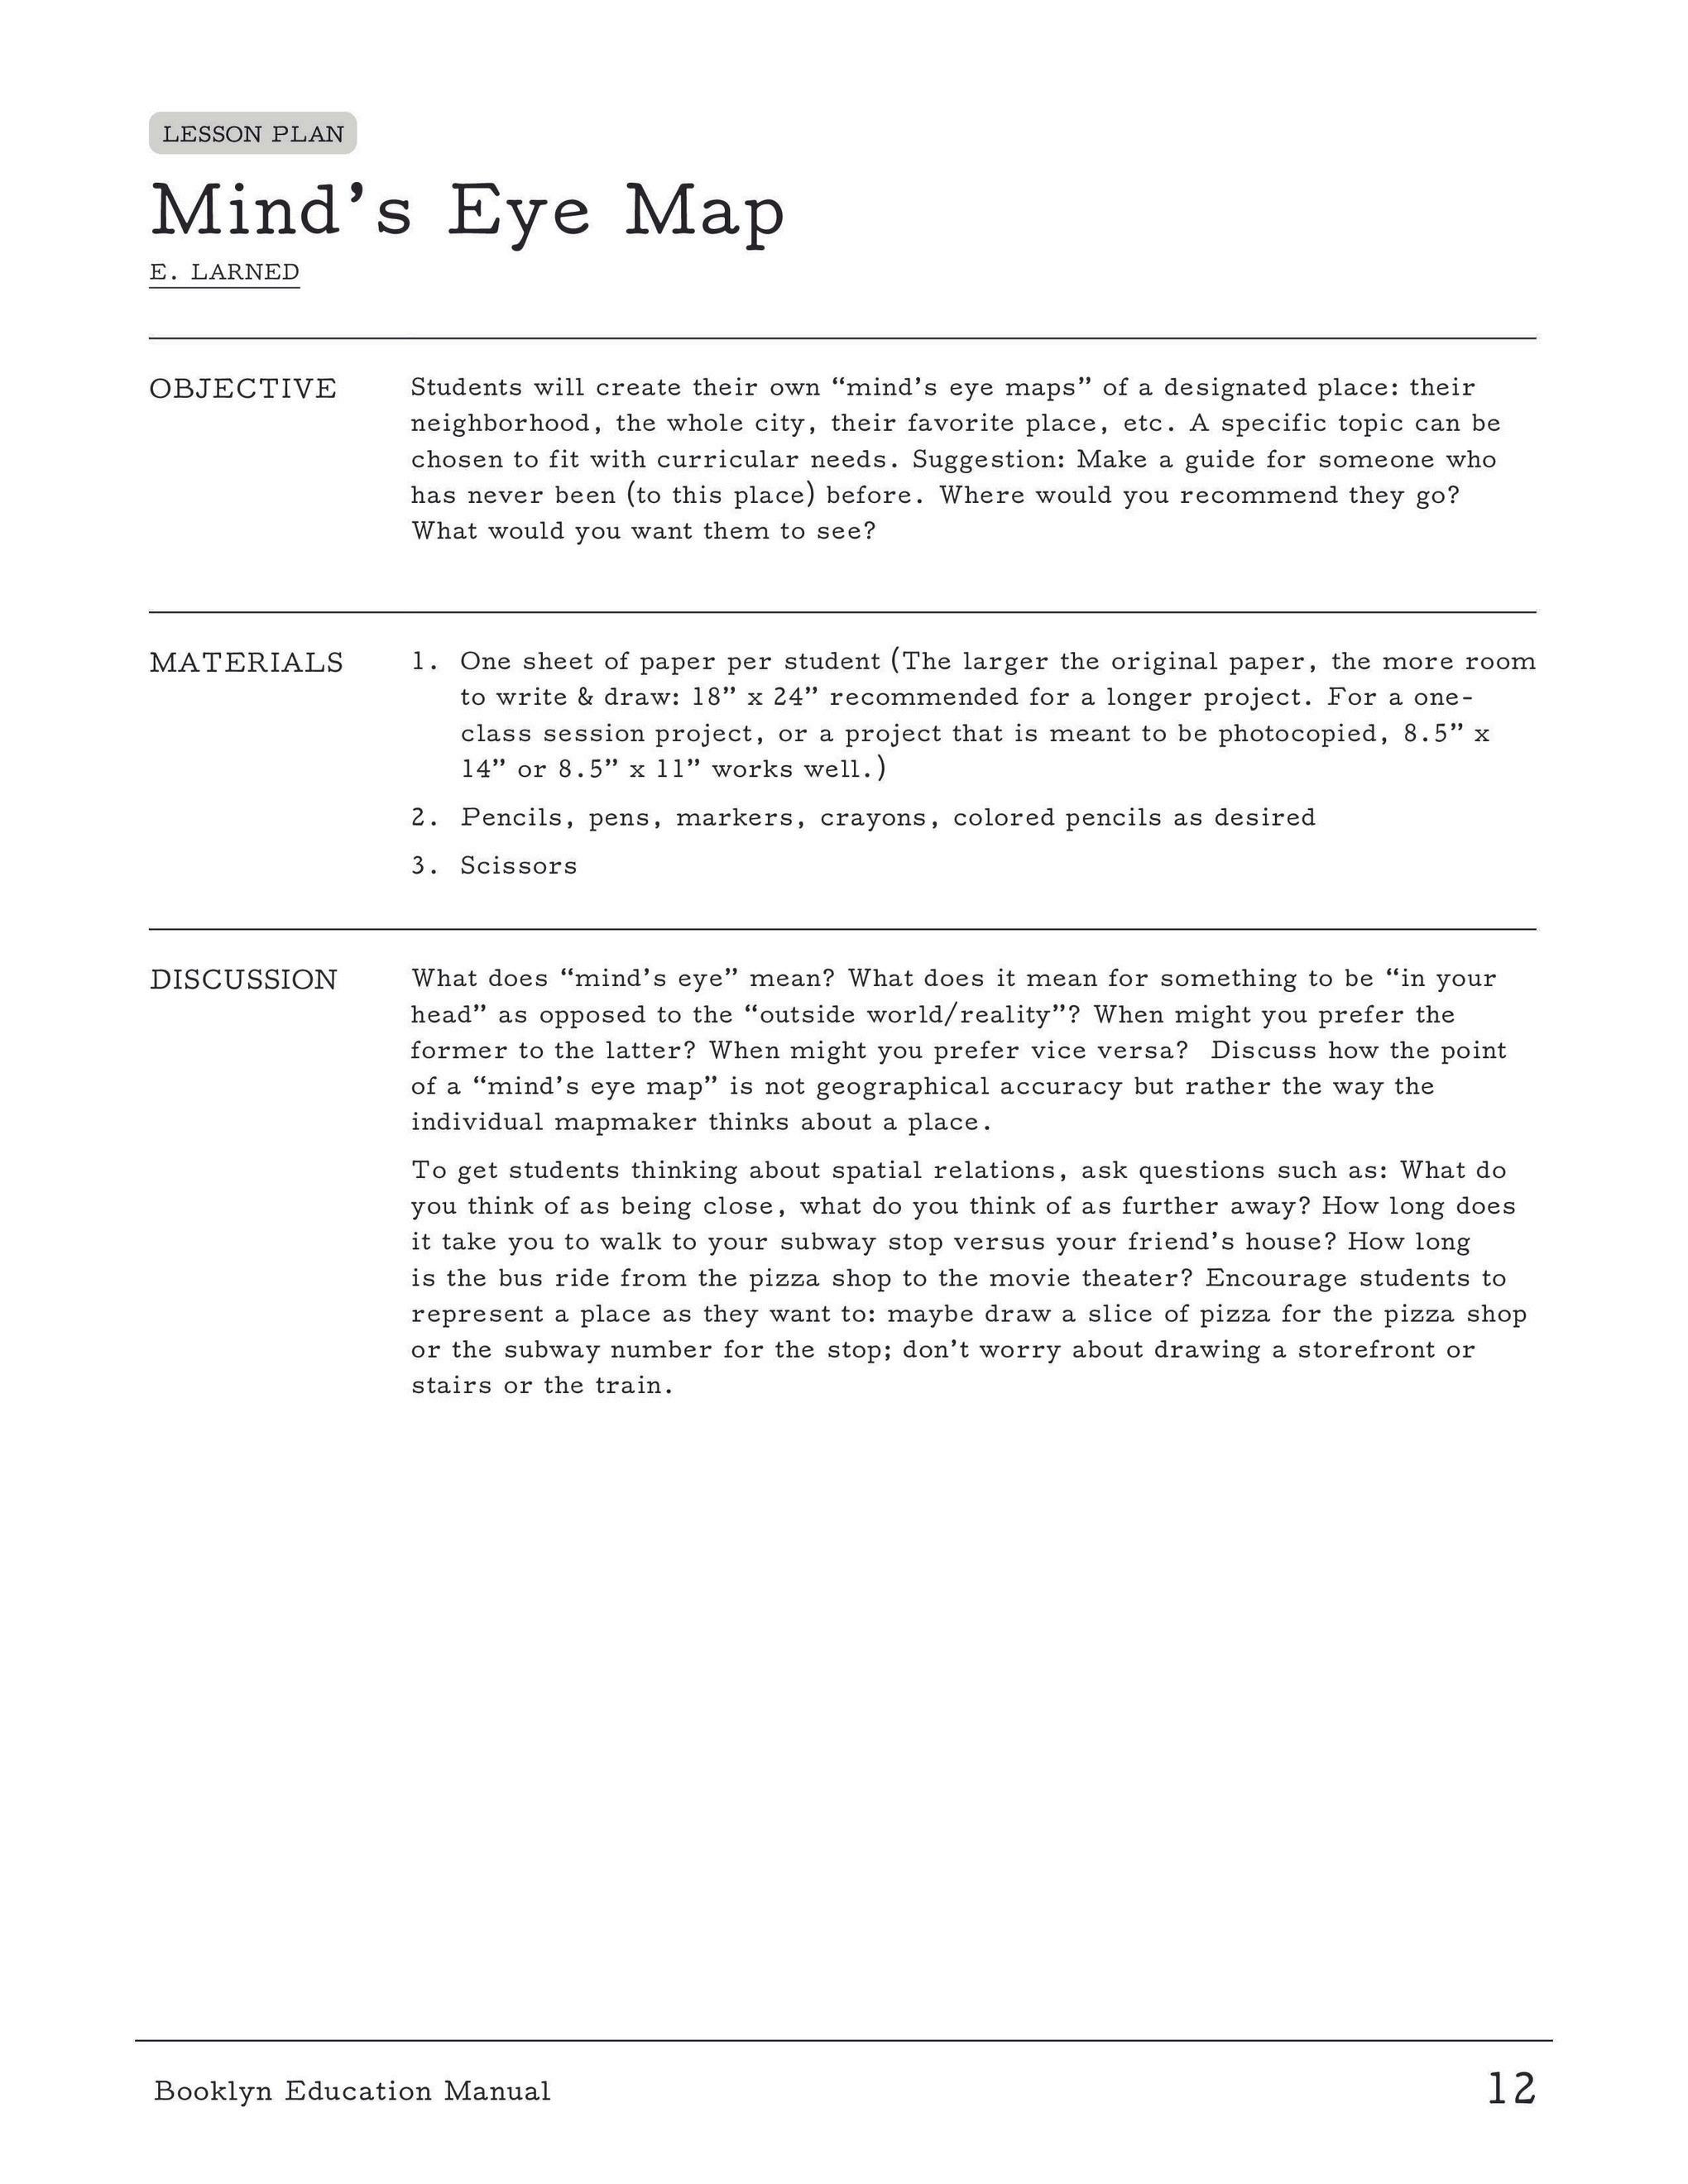
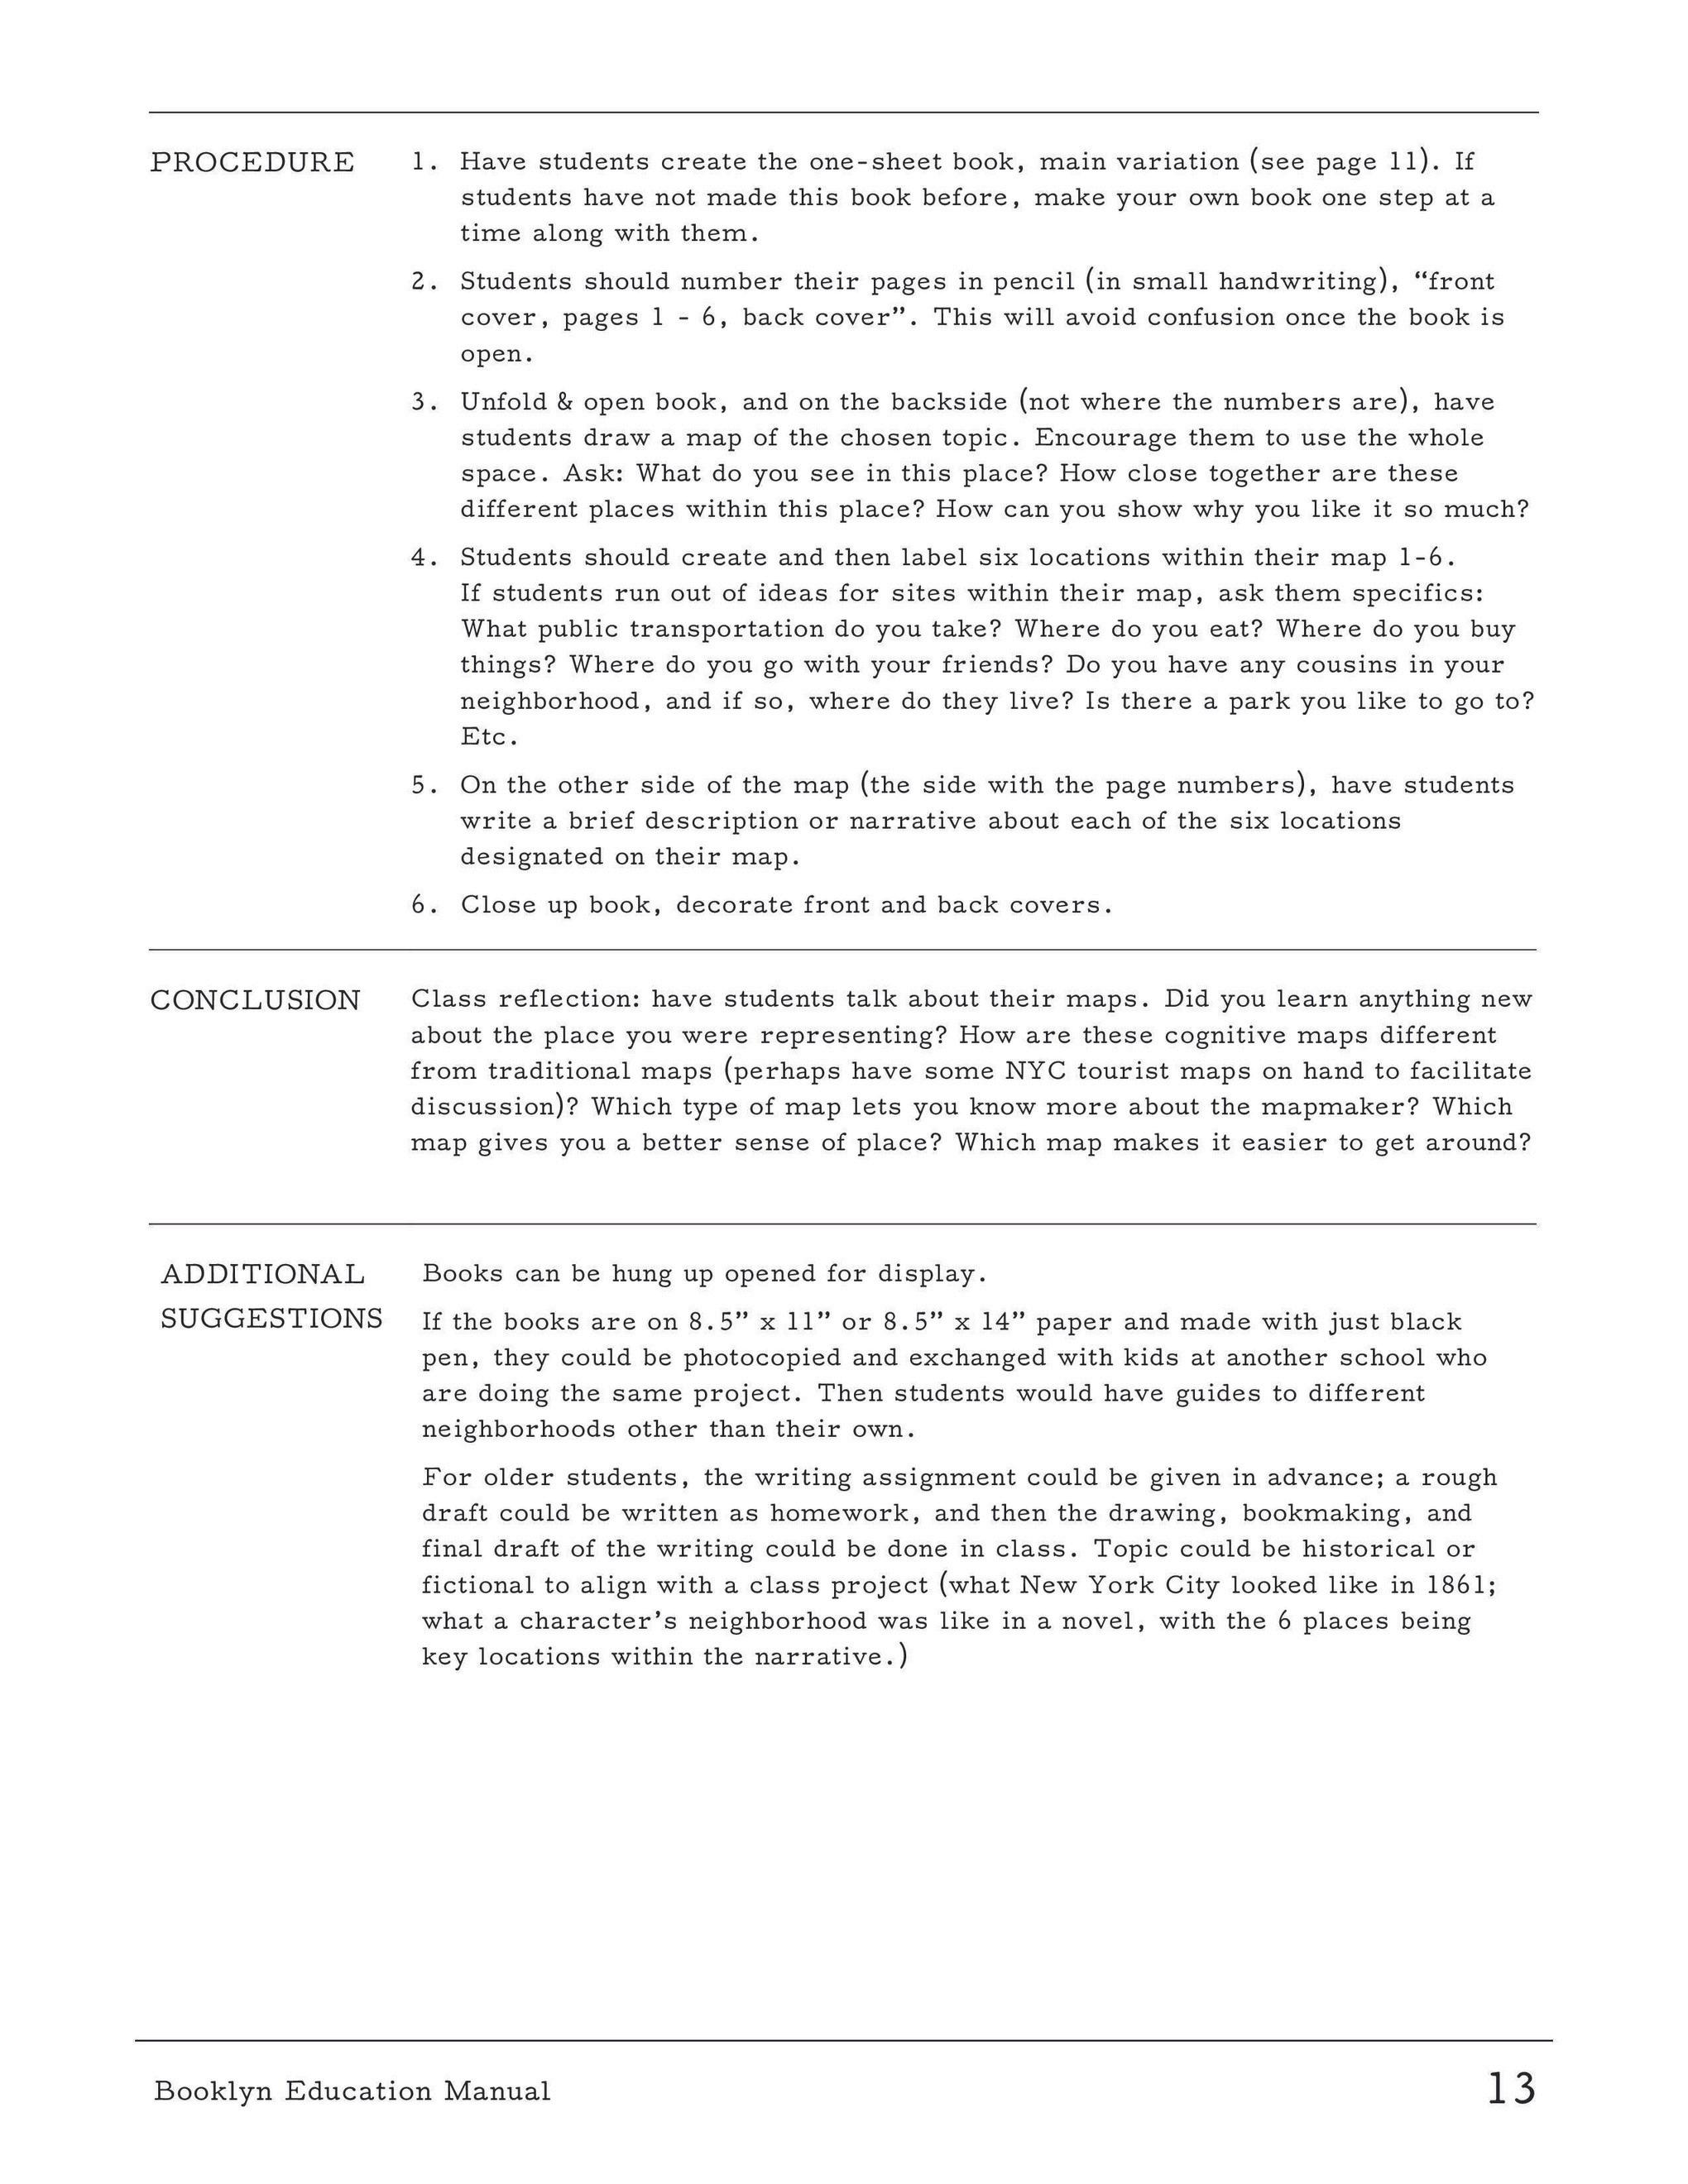
In this chapter, you will find written guides for creating common zine sizes and styles. You will find select pages from the Booklyn Education Manual and other drawings to help you visualize the steps. If you need more support check the BPL Zine Box Wiki Page for helpful videos or reach out to Emma Karin at eeriksson@bklynlibrary.org.
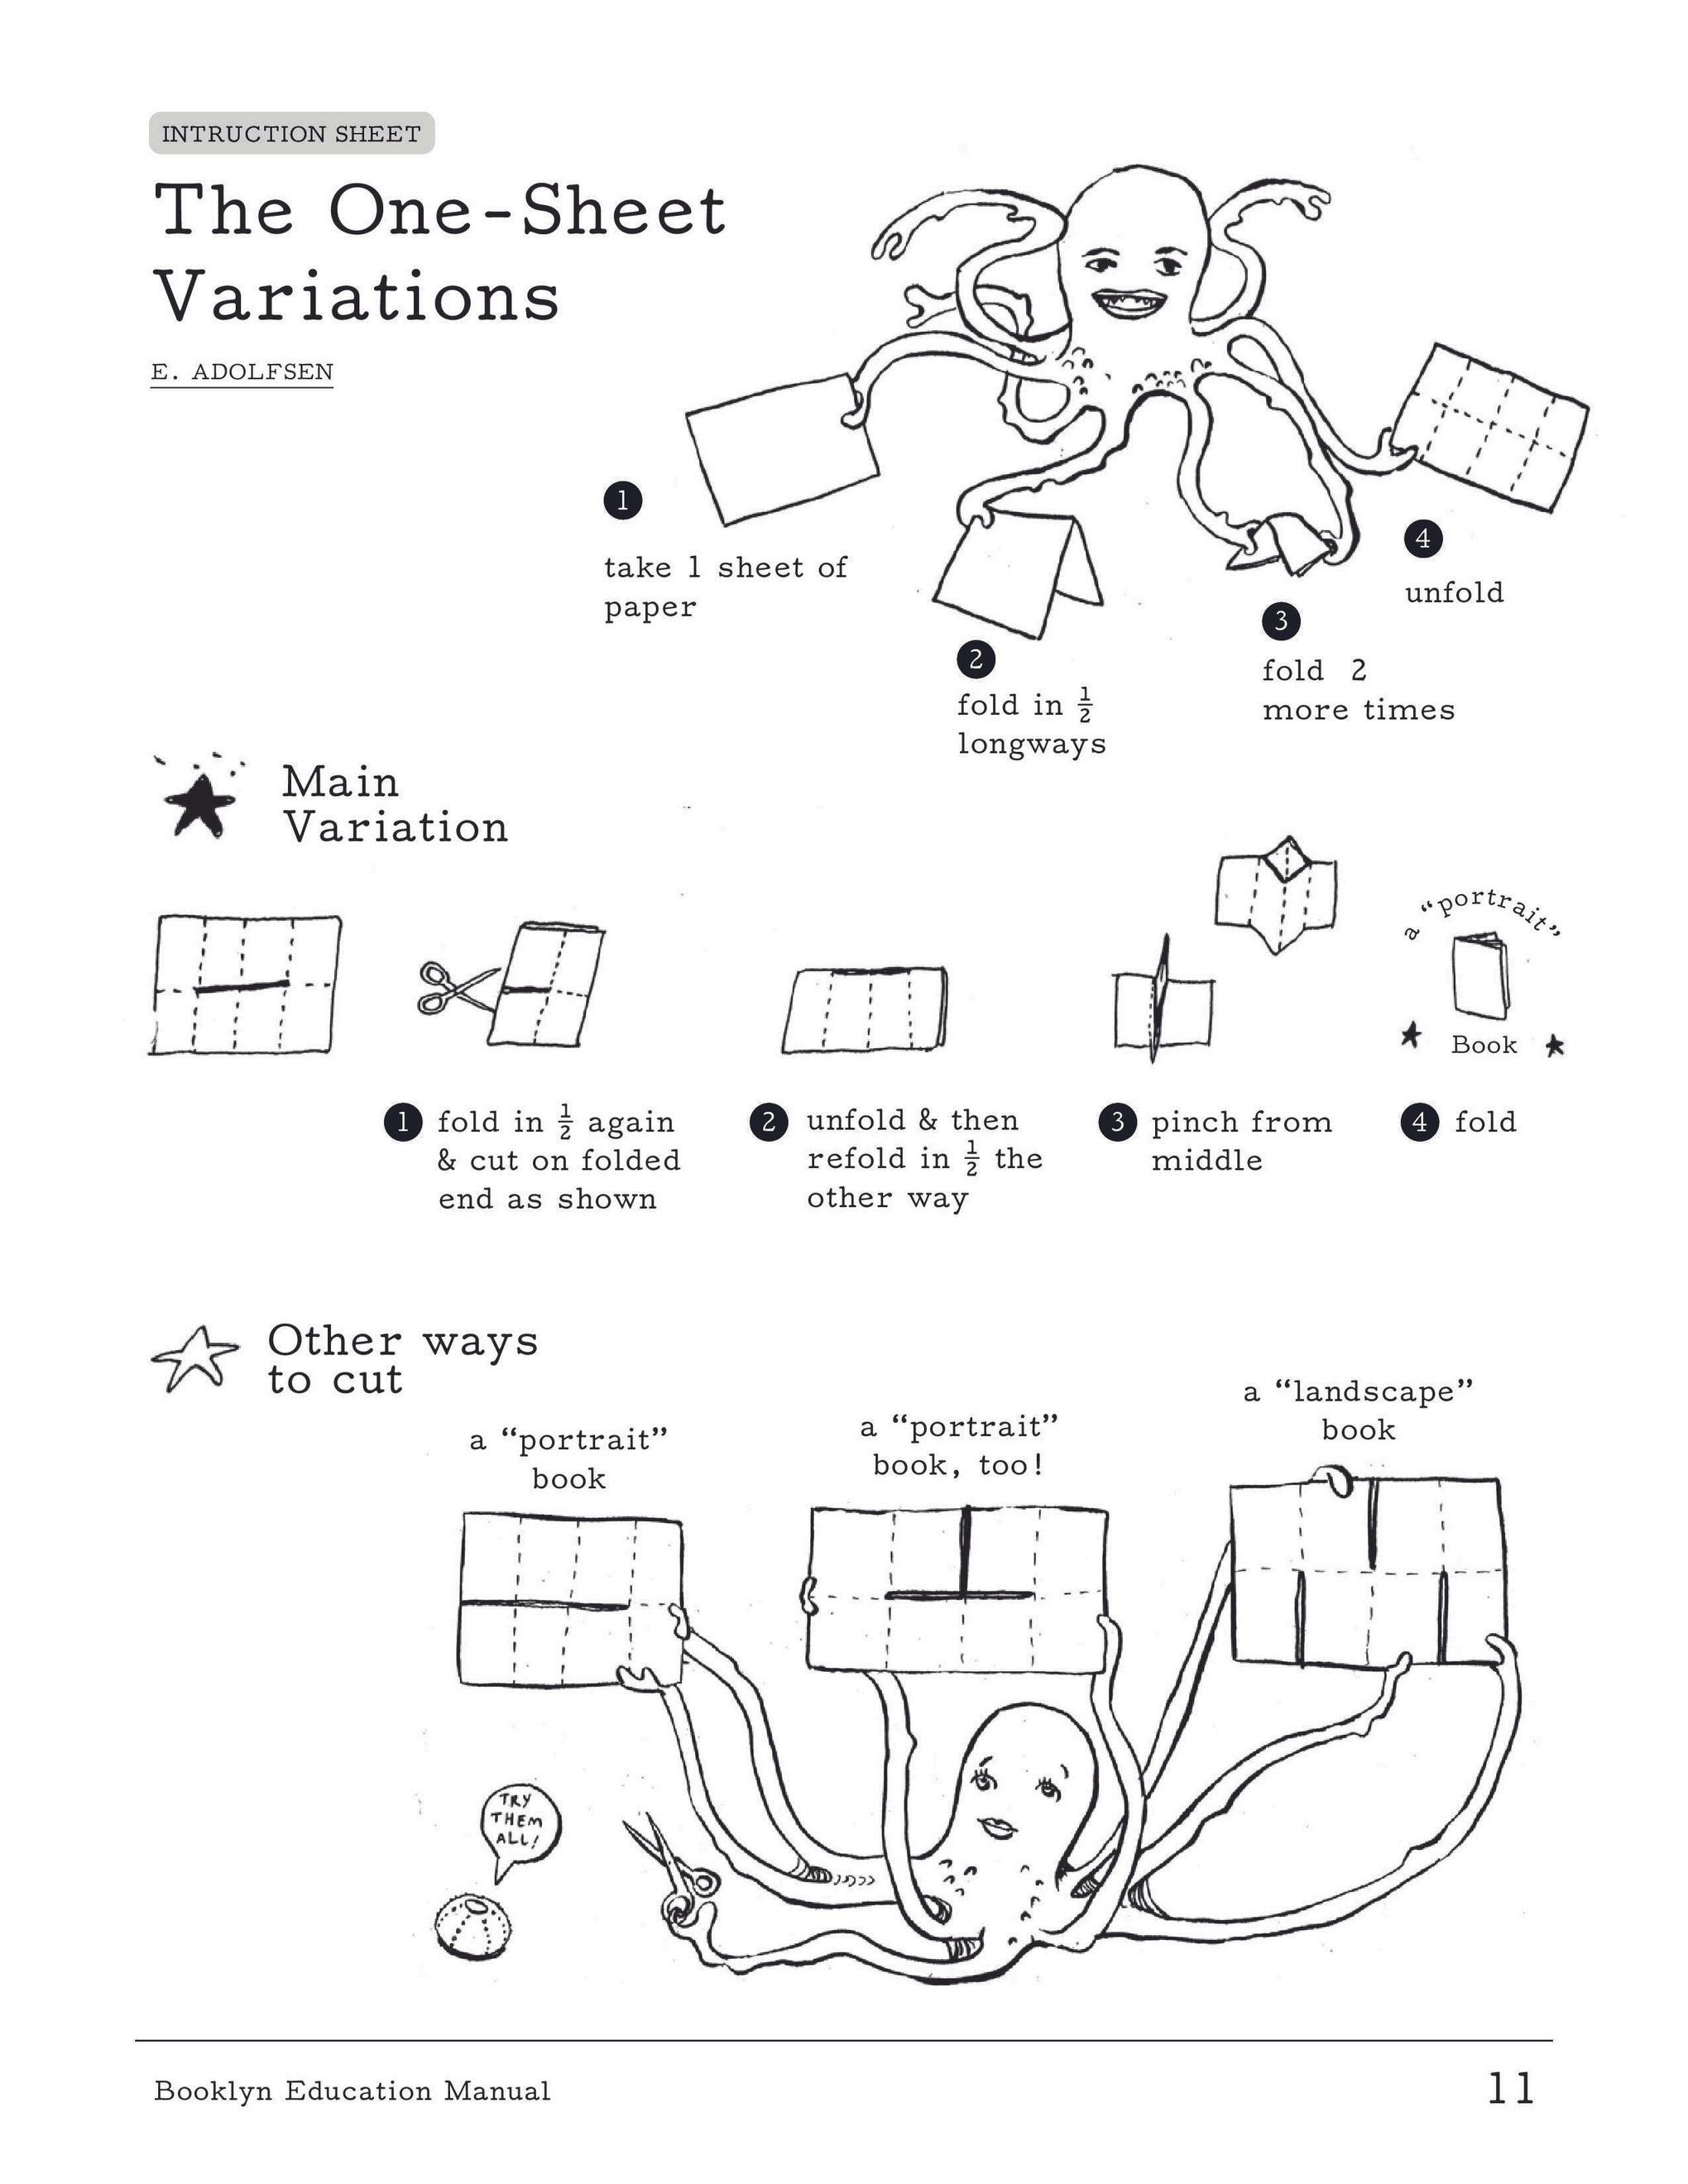
One-sheet zines are great because…
They do not require special supplies, just paper, scissors, and something to write or draw with.
They are simple and quick for creators of all ages with limited time or resources.
They are easy to duplicate and distribute. And they fit into your back pocket!
Instructions
1.
Take one sheet of paper.
2.
3.
Fold in ½ long ways or lengthwise (we call this a “hot dog fold”).
Unfold the paper, then fold in ½ on the short side or widthwise (we call this the “hamburger fold”).
4.
Unfold the paper flat. Fold the short ends of the paper into the middle crease. You are folding each half of the paper in half again.
5. Then fold it in half hamburger fold style.
Unfold the paper flat and you should see eight boxes.
7.
6. Cut through the folded edge down to the center crease (as shown on the next page).
8. Push the paper in completely so it creates a “plus” or “x”.
11.
Unfold the paper flat. Fold longways (“hot dog”), hold the ends of the paper in the middle, and “pinch” or push to the center so that you see a diamond shape emerge in the center.
9. Flatten onto a table creating a rectangle and fold over as shown. 10. Burnish all sides and edges with a bone folder or flat edge for a crispy, finished look.
This will create an eight-page zine: a cover page, back page and six interior pages. Any size paper can be used. Standard Letter size is usually the easiest but using Legal or Tabloid size will give you bigger pages to work on. We find the bigger sizes can be good for kiddos still developing fine motor skills.
This page is from the Booklyn Education Manual. Download the full manual: bit.ly/booklyneducation
1.
To make a half-letter zine, use standard letter-sized paper, 8.5” x 11” Fold the paper in half widthwise so that it measures to 8.5” tall x 5.5” wide.
2.
Use as many pieces of paper as are needed for the zine. Place text, and imagery on the pages.
Remember to leave ¼” margin around the edges, including the folded edge.
3.
The middle page will create a full 8.5 x 11 spread, in case you would like to have a large landscape image. When finished, print in a printer or copier.
4.
When scanning or printing, be sure to check the way you flip your page over so ensure the pages print the correct side up. When using a copier make sure you select 2-sided - to - 2sided for your input and output to make sure you scan both. Fold in half and bind the spine.
You can use a long-armed stapler or pamphlet stitch.
When making a longer zine make an outline of what you might want on each page to determine the length of your zine and how many flat sheets of paper you will need. Remember: when you fold a single sheet of paper you get four pages so your zine needs to be an even number of pages.
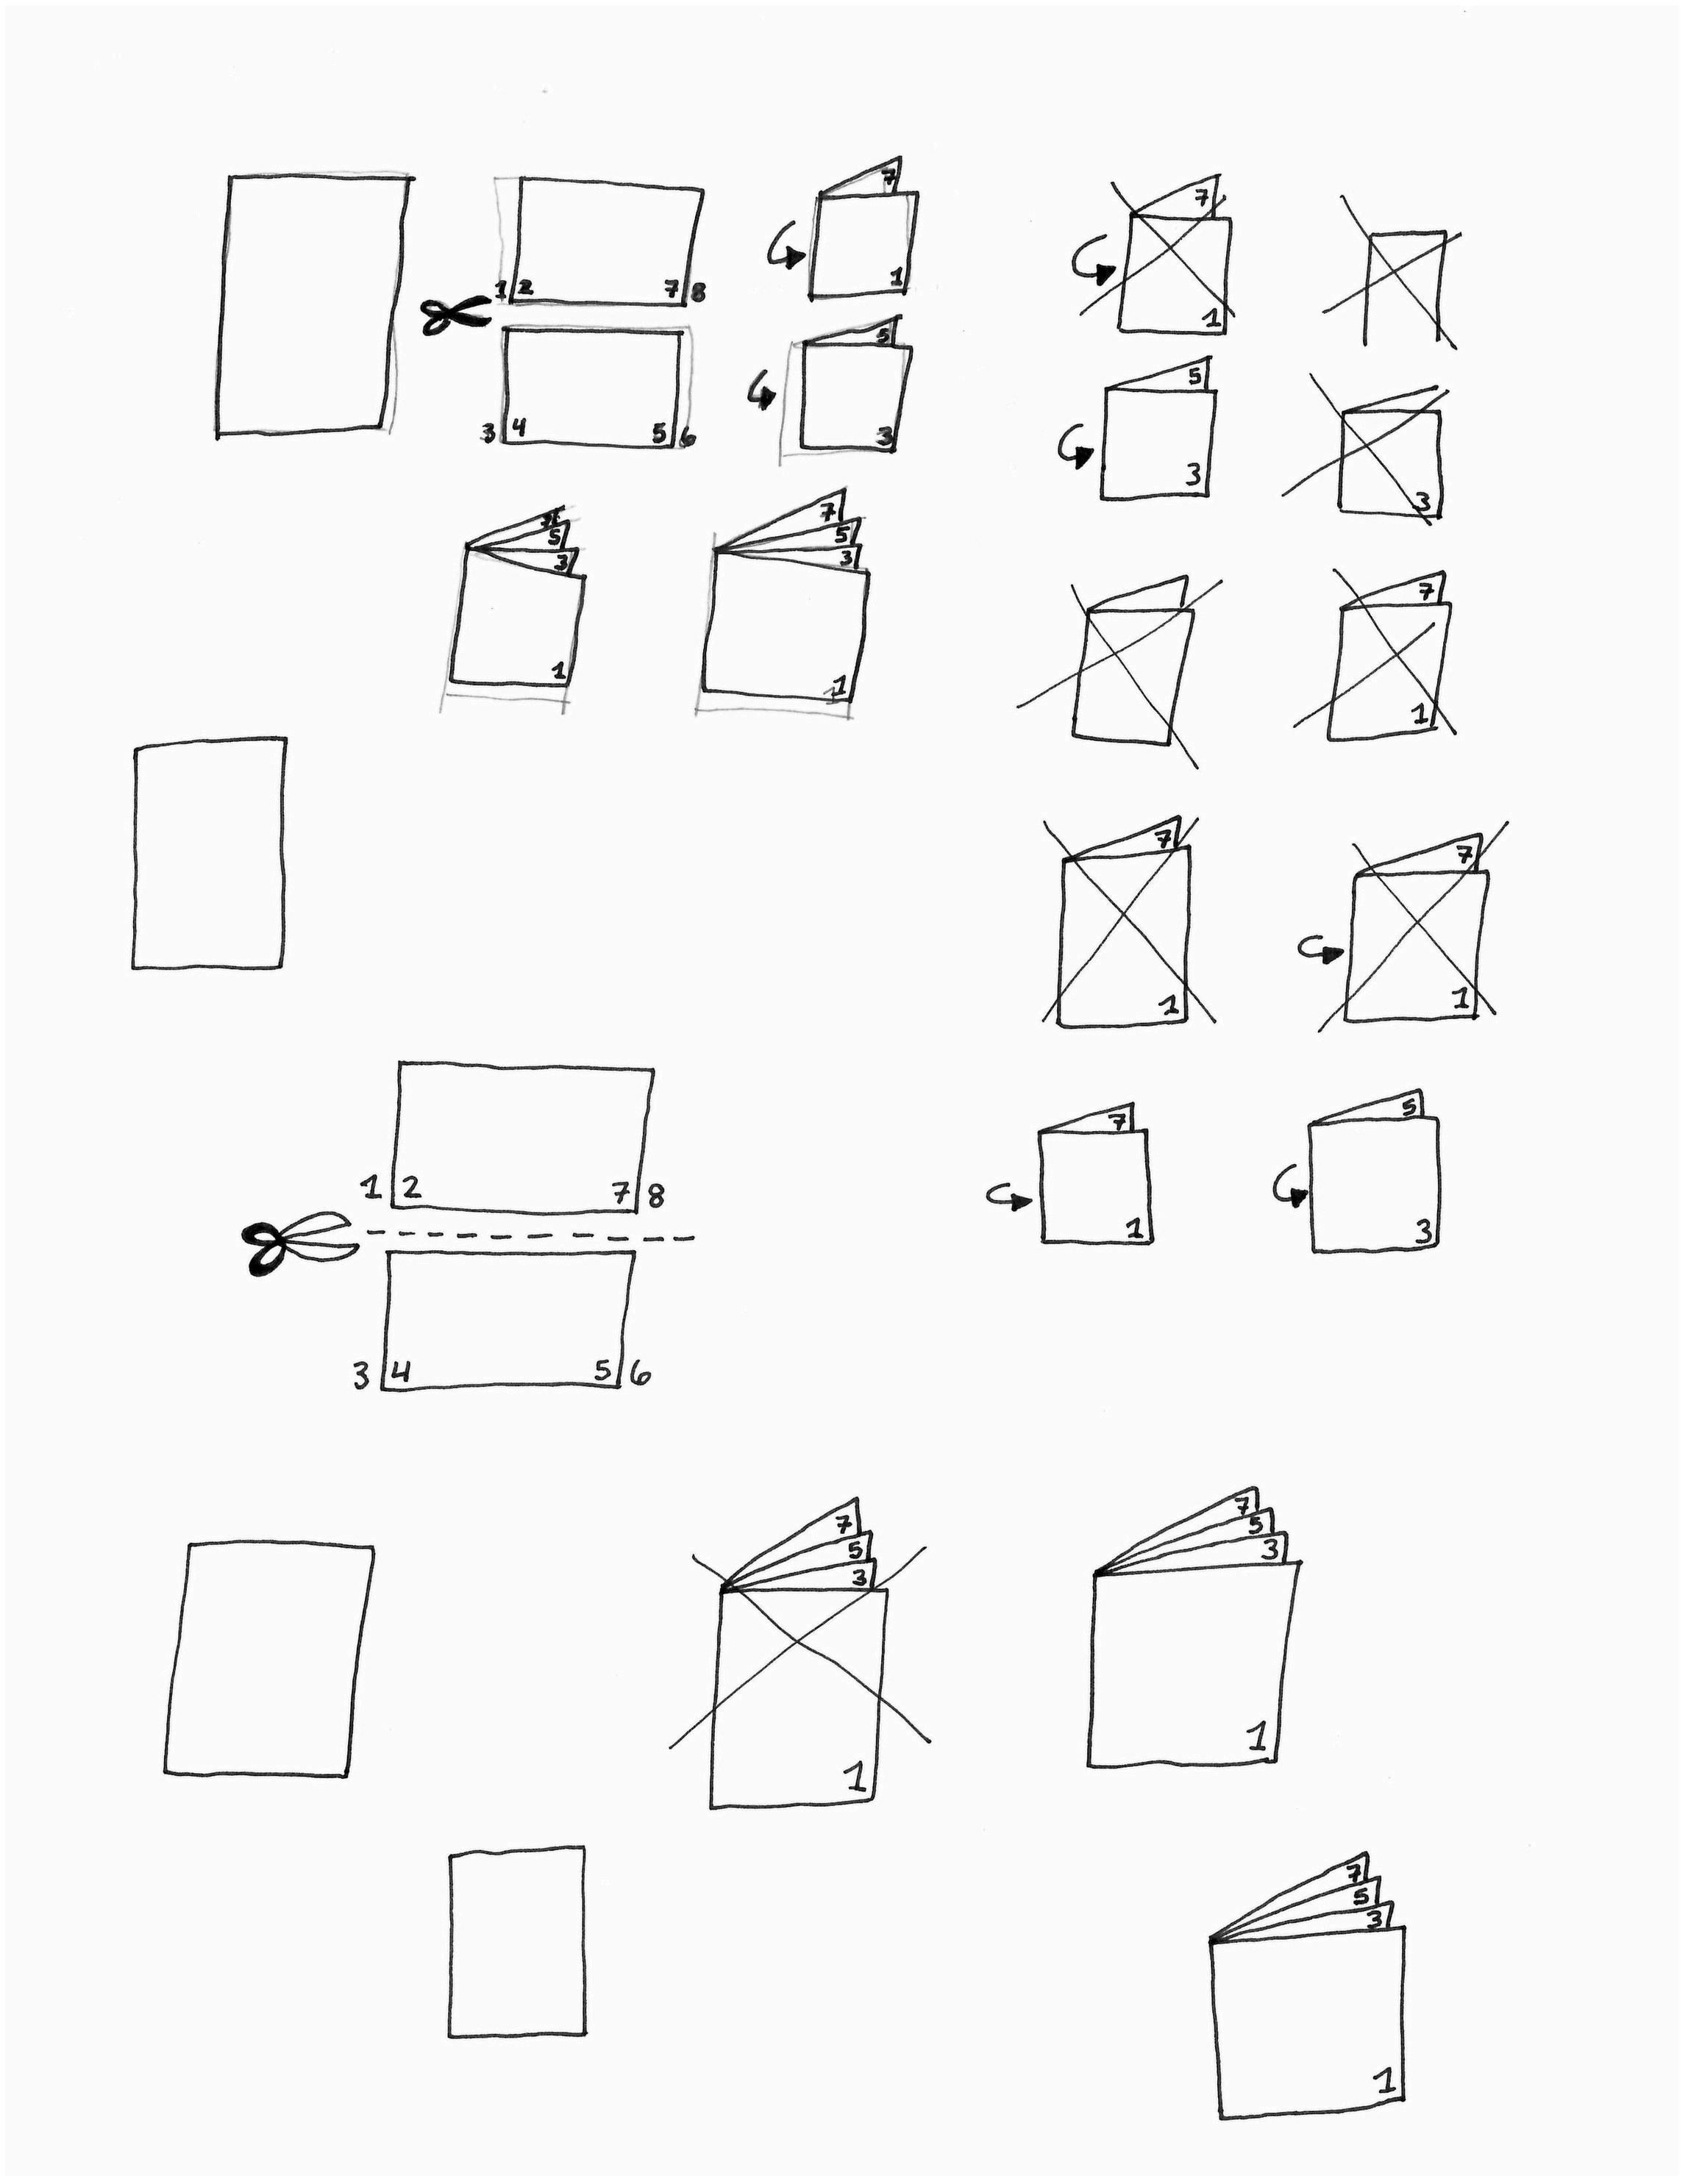
1.Fold two sheets of paper widthwise and then lengthwise without opening it flat.
2. Insert one of the folded pieces of paper into the other. This creates a zine with eight pages. Do not staple!!
3. Participants work on the content of their zines. They can either label each page with the page number and open the sheet flat to work on or work on the pages while in folded zine form. They should only work on the paper side that is visible, as that is what will be copied.
4. When the books are done, they can be scanned and printed or copied. Instructions below.
Side 1:
Separate your folios so you have two folded halves of paper and open them flat. Put each folded paper on the scanner/copier, next to each other, so it takes up the space of a letter-sized piece of paper. One side is the peak fold side, one side is the valley fold side. Keep the peaks/valleys the same while copying. Once Side 1 is scanned, the printer will either be ready to scan Side 2, or will print Side 1.
In the case that the printer has printed Side 1, put the piece of paper back in, prepared to print Side 2.
Side 2:
Flip the ½ pages over on the short edge and scan the other side. Remember to keep the peak sides and valley sides together! This will produce one page printed with Side 1 and Side 2, front and back. This should result in the 8 pages of the zine being printed.
Cut the sheet in half widthwise and fold the sections. Insert the inside fold into the book, so the pages are in order bind to finish.
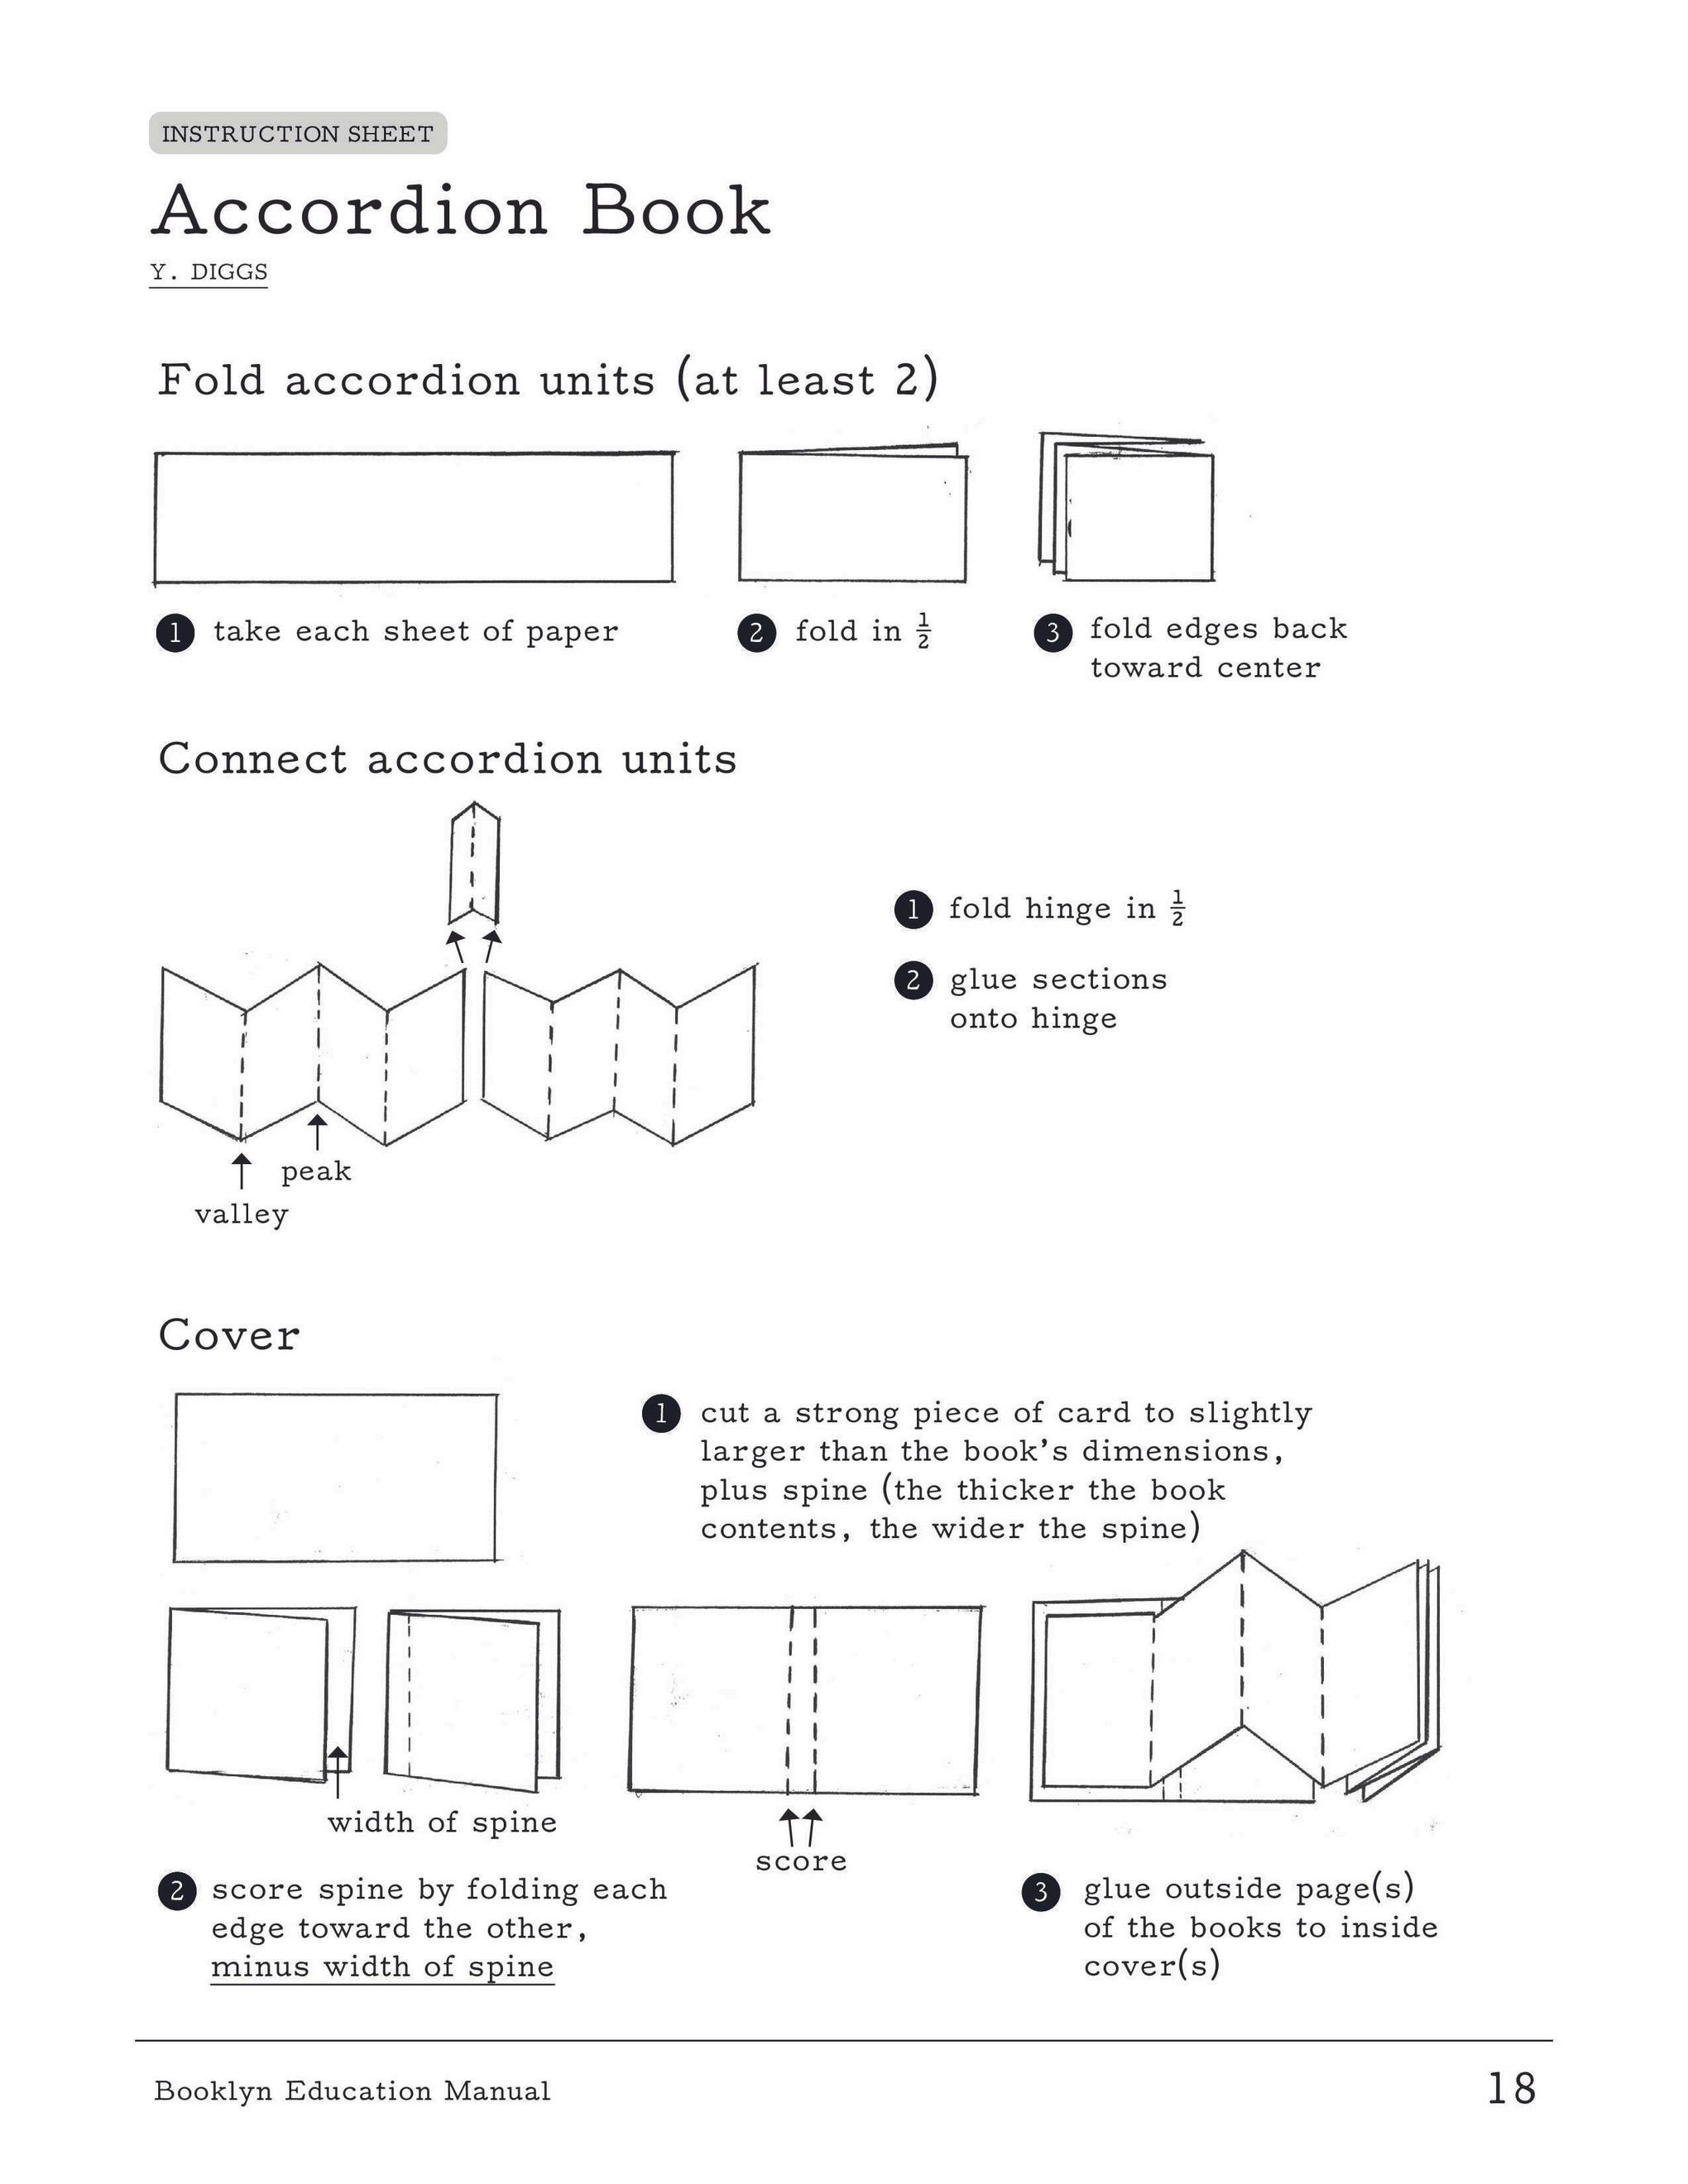
An accordion fold can be done with any size paper. We recommend starting with 8.5 inch x 11 inch standard size. Fold the sheet of paper in half length wise so you have a piece that is 4.25 inch high and 11.5 inches long.
1. Cut along the fold so you have two pieces.
3.
2. Using scrap paper trim a piece of paper that is one inch wide by 4.25 long - this is your connector.
Take your first cut half of the paper and fold is as outlined below 4. Fold in half widthwise.
a. Then fold the edges in towards the fold line, creating a “M” or “W” shape, with four equal sections.
b. Place your folded strips of paper so that they create the “W” shape with the ends of the paper sticking up in the air and are laid out next to each other on the short end.
5. Fold your connector piece in half lengthwise.
6. Put glue all over one side connector.
7. Place one short end of your long strip of folded paper on to the connector.
9.
8. Place the short end of your other long strip onto the connector so your two “W”s are now one long piece of paper.
This is an accordion fold! It gives the illusion of an accordion, with the paper running back and forth. You can add as many folded sections with connectors as you like.
To create the cover we recommend cutting a piece of card stock about 1/4 inch larger than the inside of the zine. Glue one full page of the end of your accordion fold to the inside cover to attach your zine.
This
This page is from the Booklyn Education Manual. Download the full manual: bit.ly/booklyneducation

This page is from the Booklyn Education Manual. Download the full manual: bit ly/booklyneducation
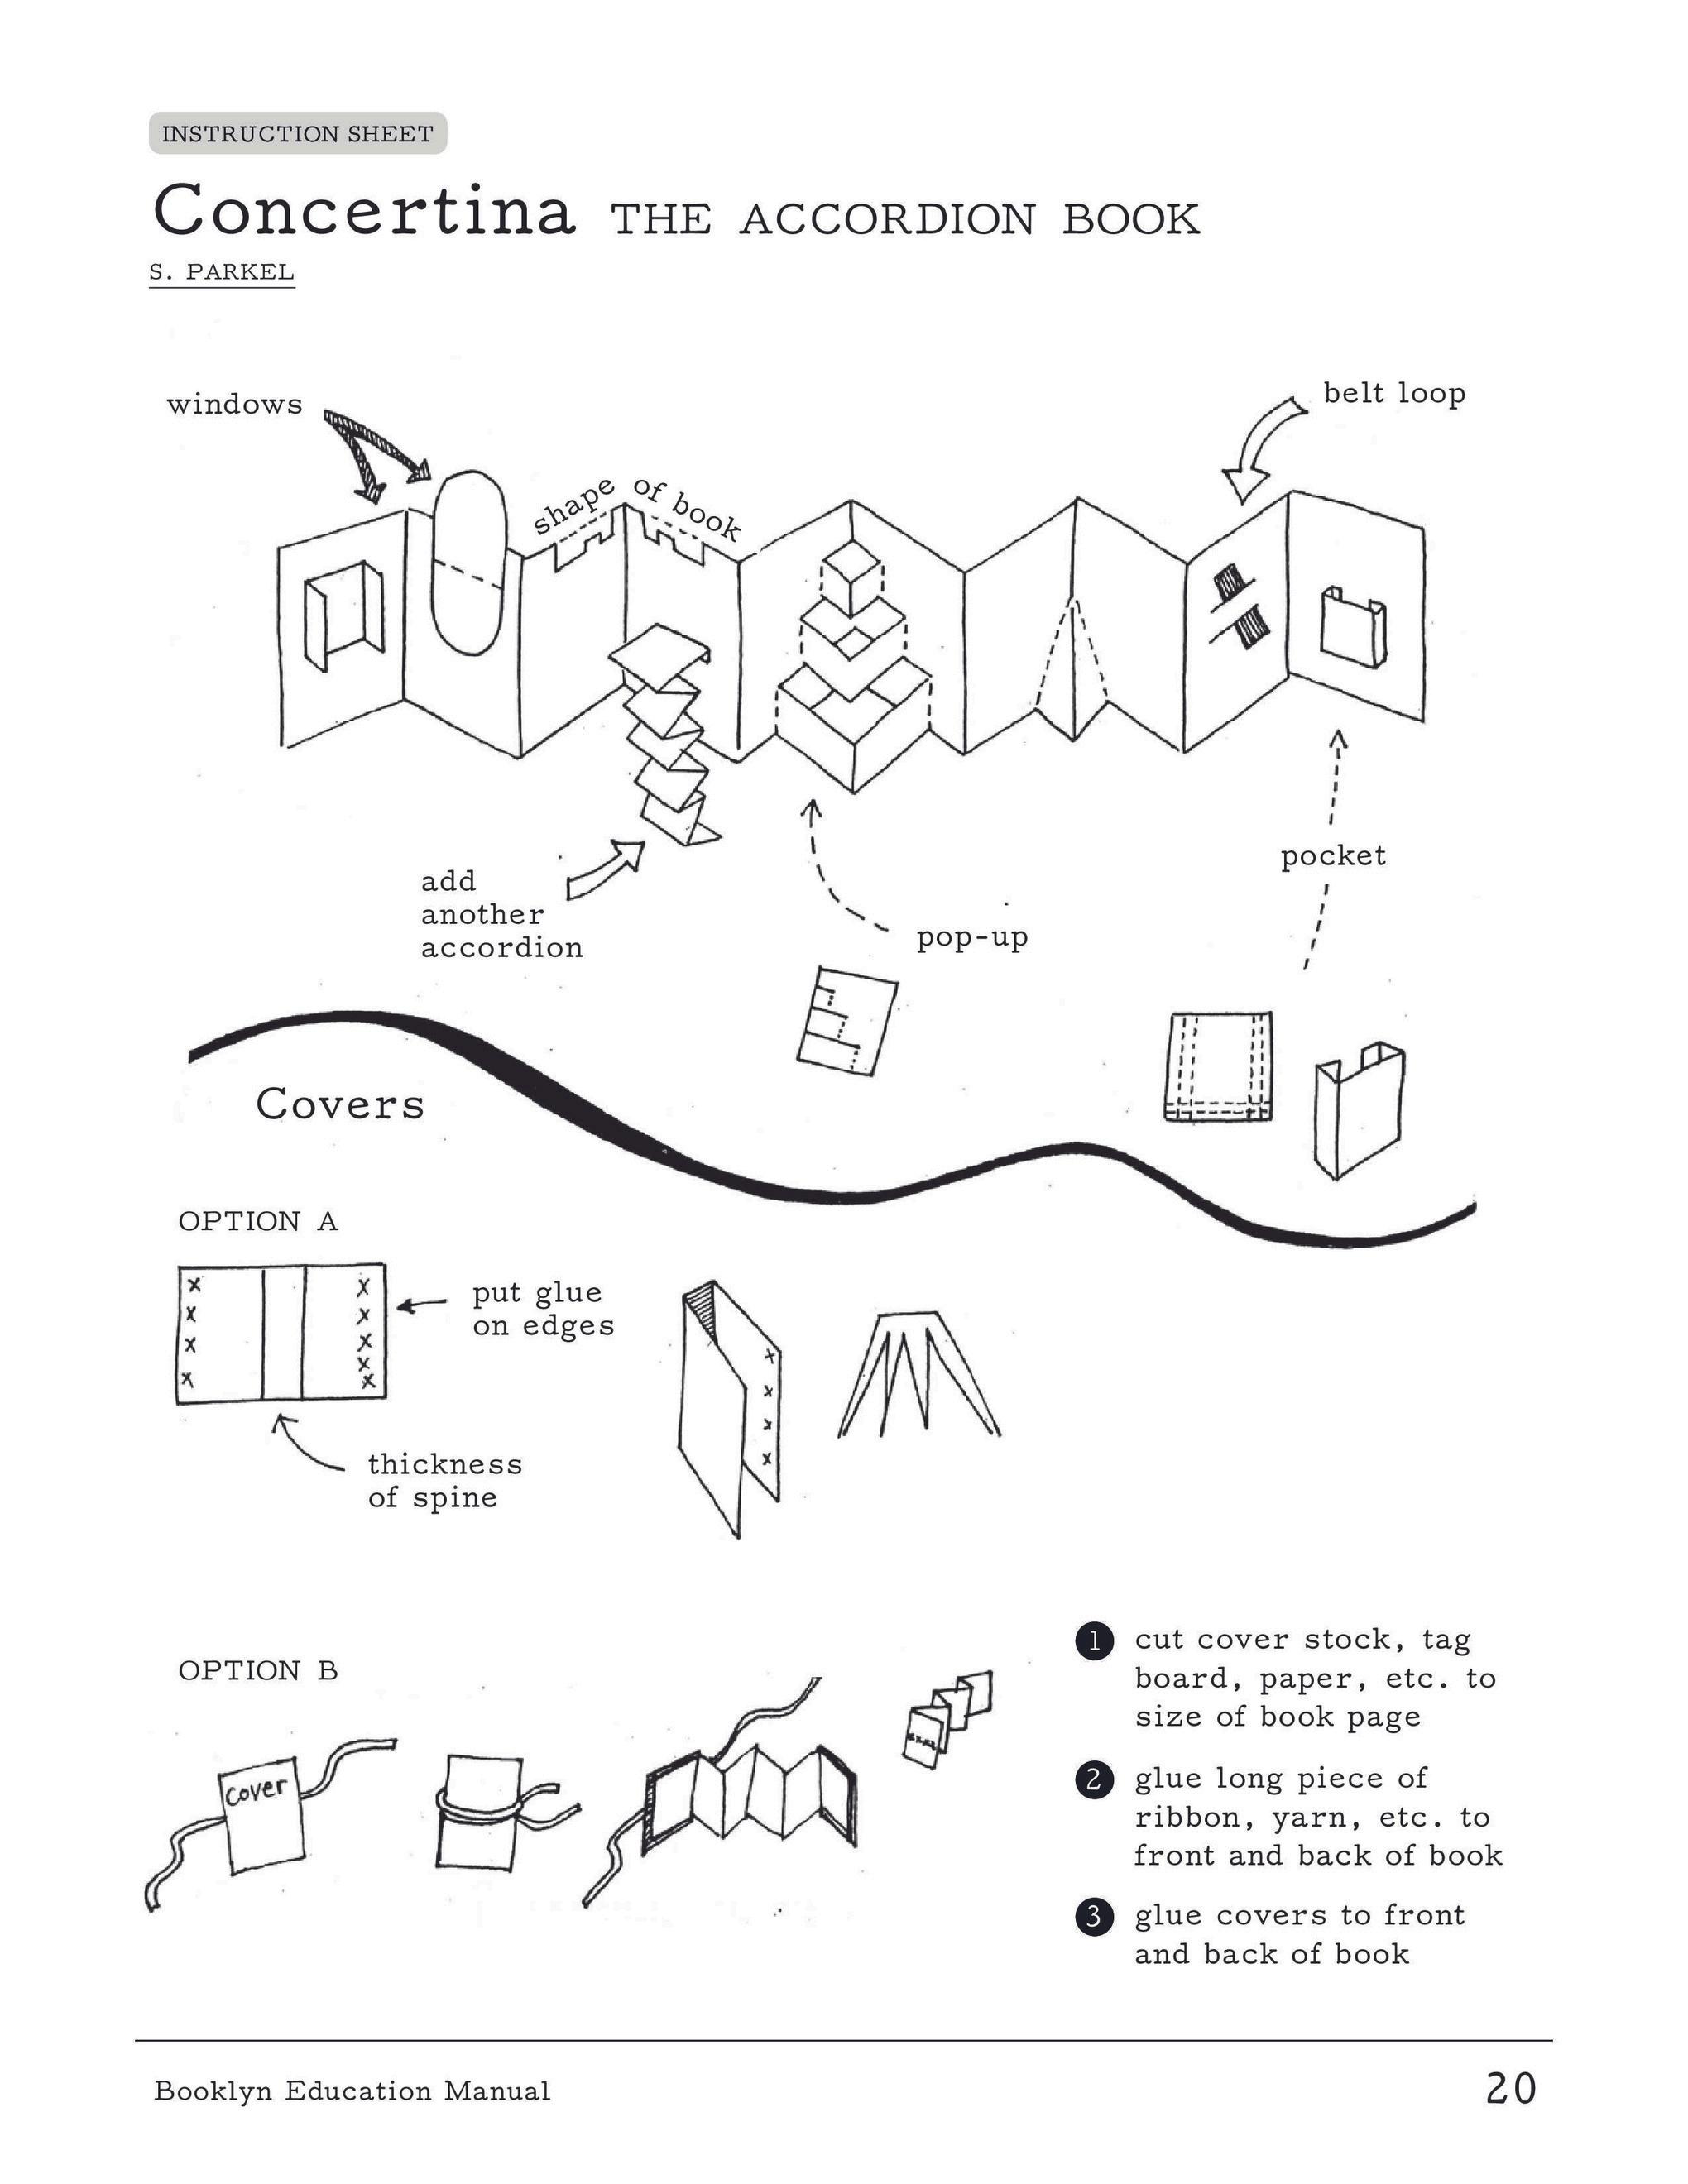
There are two main ways to make copies of your zines
Scan your master flats to a computer, create a digital file and print using a printer 1.
Scan and print using a copy machine. 2.
There are pros and cons to both options and typically people will go with whatever they have access to. In the library, using the copier will most likely be the easiest option. We do not recommend putting zine pages through the top feeder of a copier, but instead lift the top of the copier and put the pages directly on the glass to be scanned/printed.
The one-sheet zine on Standard/Letter sized paper is the easiest to duplicate. Put the image side down on the glass, put in the number of copies you want and hit print. Copies will come out as whole sheets which you will have to cut and fold into the mini-zine format.
Each copier is a little different and there are a lot of settings you can play around with. There will be some trial and error in copying, but don’t get discouraged! It is part of the process.
2-sided to 2-sided: If a zinester is making a zine that has double-sided pages, they will need to use the copiers’ 2-sided to 2-sided function. This scans one side of the document and allows you to flip the page over on the glass so the other side can be scanned and then both sides are printed at the same time.
Contrast, Density, and Lightness: There is often a function on printers and copiers that allows you to adjust contrast. This means the darks will be darker and the lights may be lighter. Sometimes this is also called density, which will just make the dark colors darker. Contrast is often found in Settings. When you make a copy of a copy using a photocopier the colors can come out extra dark. It can be useful to make a lighter duplicate of your master flat that you make copies from, called a copy flat.
Black & white vs. Grayscale vs Color: Zinesters can create a zine in black/white, grayscale or color. Each zinester should decide what is best for their vision, but there are some things they might want to know about the quality of each when printing and copying.
Black and white tends to create a good facsimile because the printer can easily pick up the contrast.
Grayscale can be more challenging with a printer/copier, depending on the original image and the quality of the printer. For example, if a zine is created in pencil, some scanners may not be able to detect it, or some printers may print it as black. The printer can be set to Black/White, which may print the pencil as black. Or the printer can be set to color and the pencil may print as gray.
Color copiers and printers vary in quality. It’s important to know that the copy may not be an exact color replica of the original because of the different ways that the specific copier/printer may read the material.
Scanning: If the library worker or zinester chooses to scan in a zine to print it out later, or to make digital changes to it, it’s important to note the Dots Per Inch (DPI) settings. You want them to be at least 300 if not higher to make sure the scan is crisp. The scanner window will generally have a field that allows for a change in DPI.
We find it best to create zines using black & white materials and copy zines with black & white as the output and up the contrast. If zines are made using color items but are printed in black and white we recommend using grayscale as the output color
Mostzi ny pages. togethe
Folded he folded
Regula zineif thebin

Longa tapler is12.5”andcanbeusedtobindwithasaddlestitchzinesofvarying sizes.
Pamphletstitch:Apamphletstitchusesanawl,thread,andneedleto stitchthefoldedzinetogetherwiththreeorfiveholes.Childrenand someadultswillneedsupervisionwhilelearninghowtodothisstitch. Moredetailsonthefollowingpage.
Sewing:Useasewingmachinetosewthespineofazine.

Other:Zinesterscanhavefundecidingonbindingmaterialsbecause, muchlikeeverypartofzine-making,therearenorules!Ifitholds,it canbind,suchasmetalbrads,twistties,binderclips,spiralbinding, paperclips,clothespins.Wedonotrecommendusingarubberband tobindyourzineastheytendtopinchpagesanddegradeovertime.
Standard staplers are typically too short to achieve a good saddle stitch (except for quarter size zines). Instead, use a long-arm stapler. These types of staplers can be purchased from an office supply store or requested as part of your BPL Zine Box.
To use a long-armed stapler, simply open your zine flat so it is several sheets of paper stacked on top of each other. Place the zine, cover side facing up, into the long throat of the stapler, you may need to adjust the depth by moving the stopper to fit your zine.
Line the middle crease of your zine to the crimp area and press hard on the stapler handle. Most zines use two staples to secure them: one towards the top and one towards the bottom but both situated toward the middle. The more staples, the more evenly spaced, the less likely your zine is to fall apart.
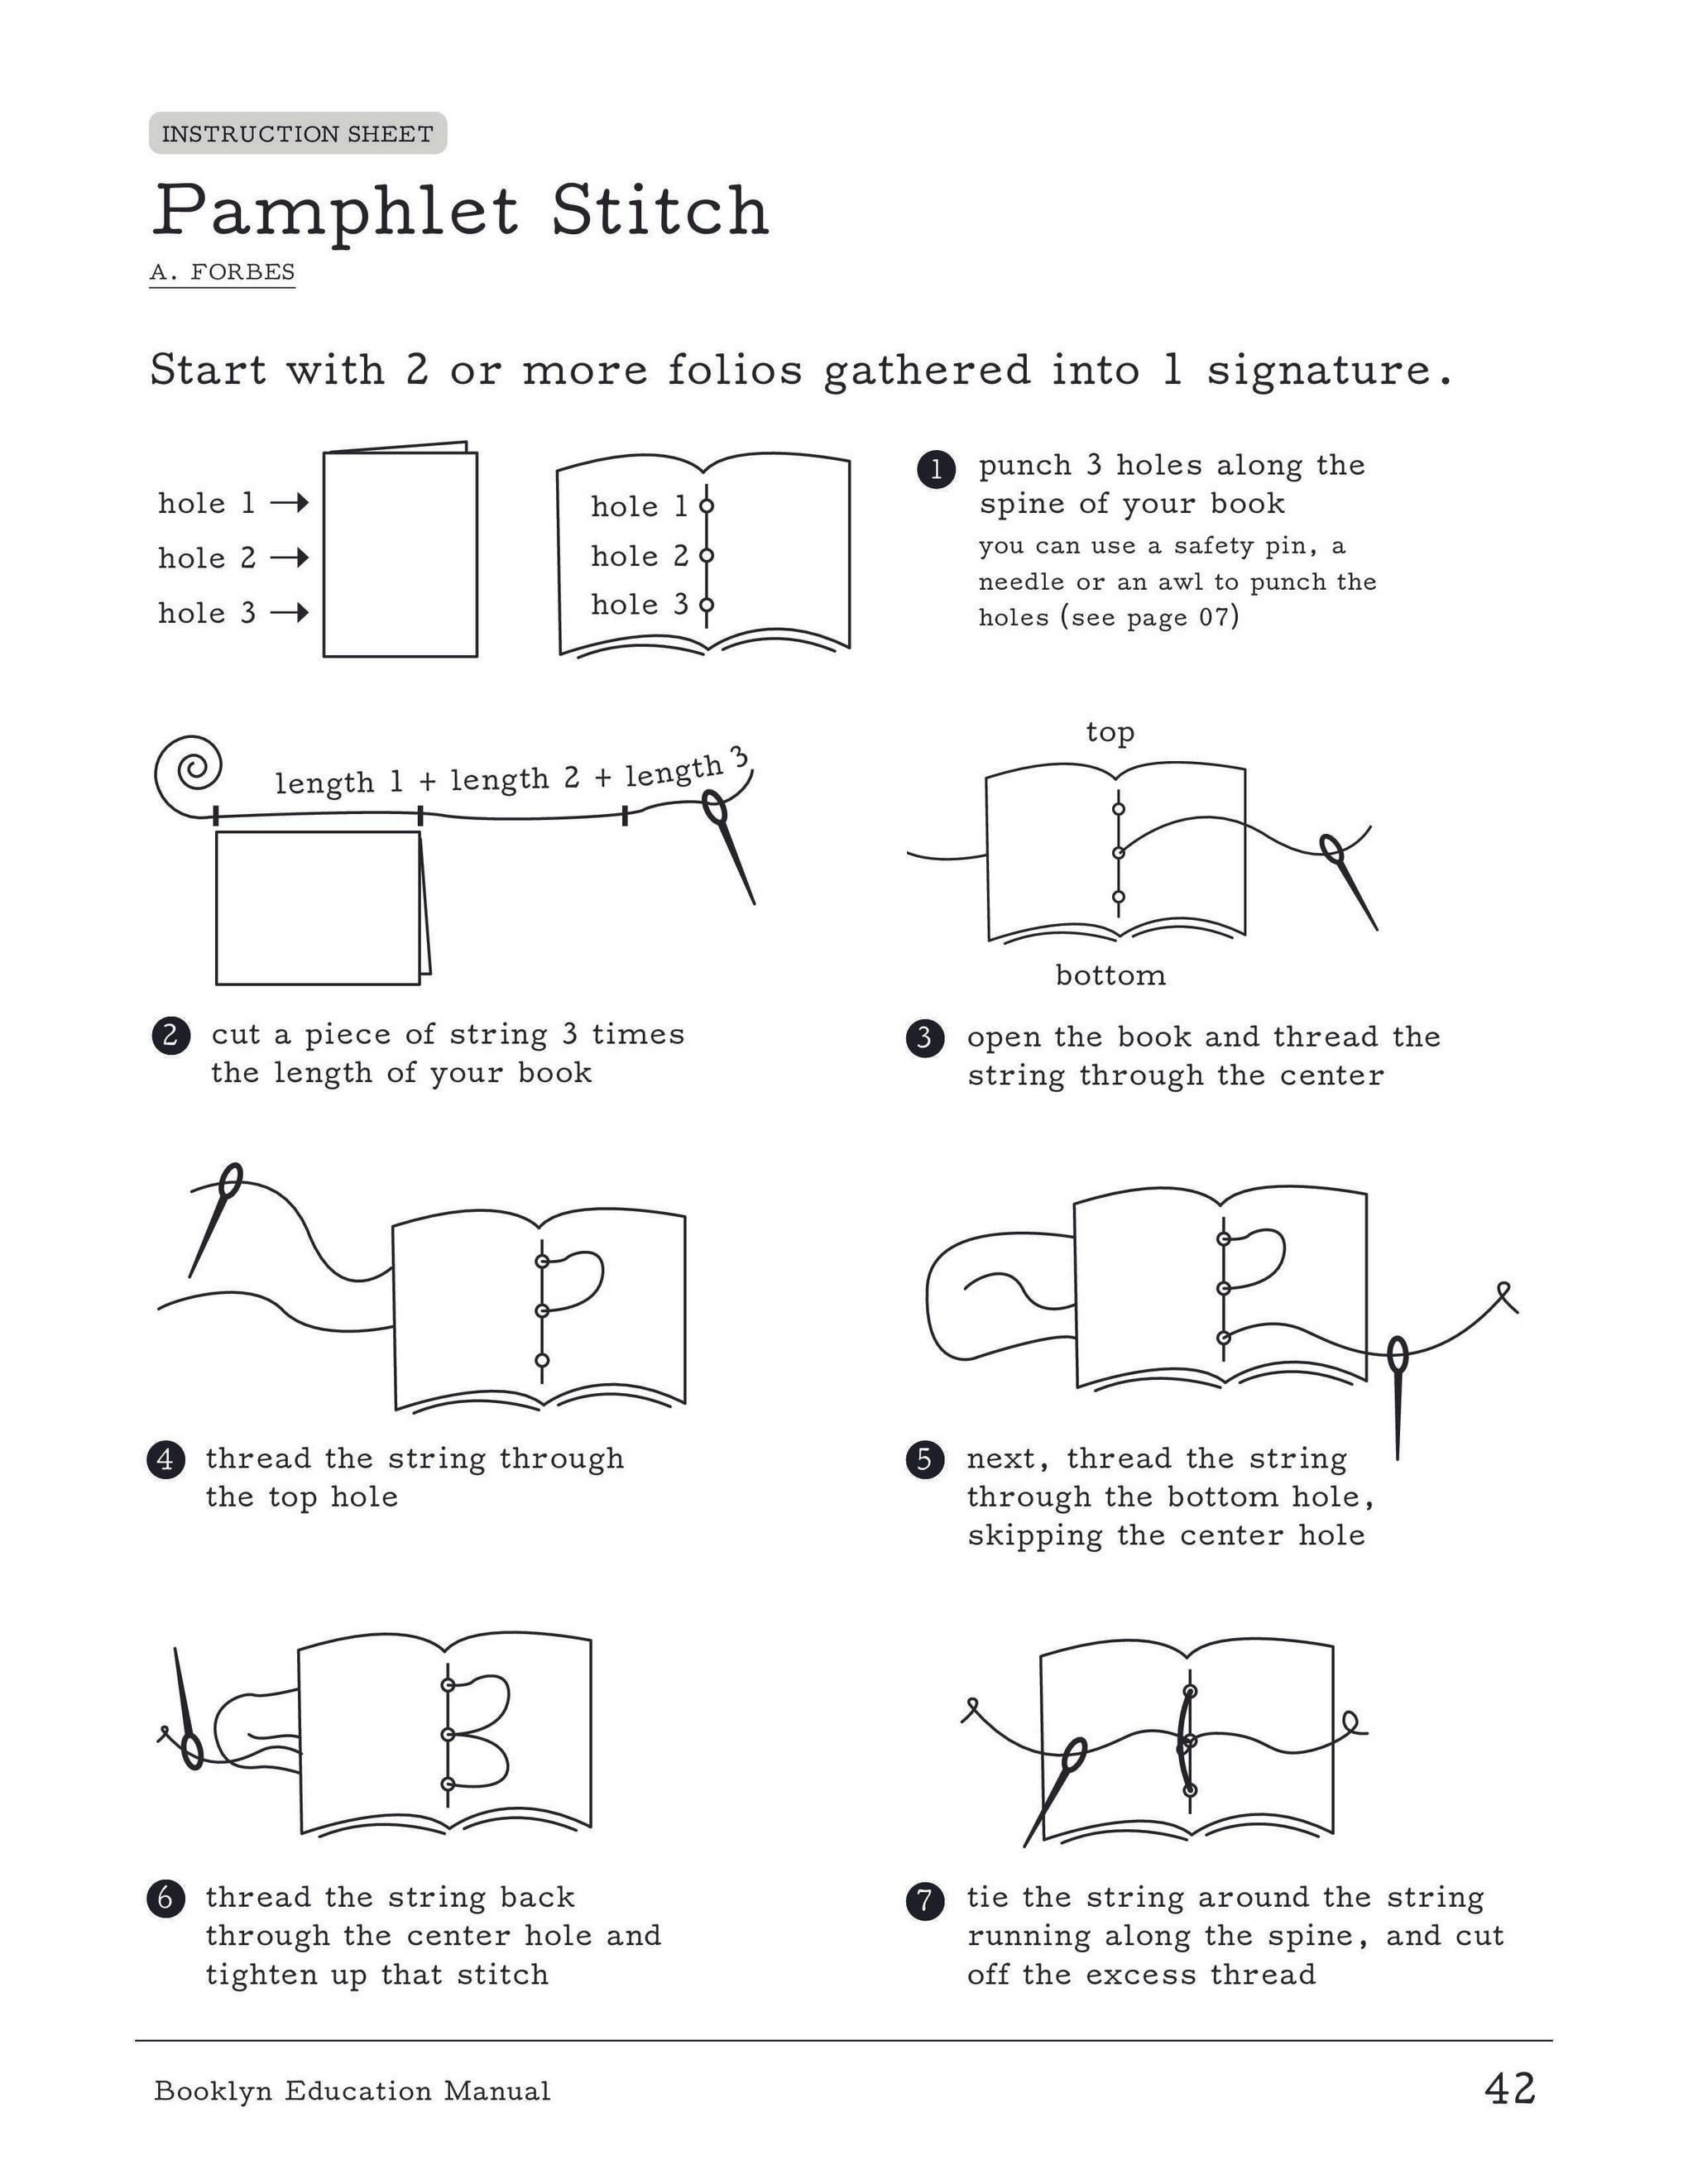
Use a pencil and ruler to mark out the three holes on the spine. You want one hole in the middle of the spine and a hole on either side, equal distance from the top/bottom of the page and the middle hole.
Punch 3 holes along the spine of the zine using an awl. Place a cutting mat or thick magazine on the table and carefully push the sharp point through the spine.
If you don’t have an awl a safety pin can work to create holes
Cut a piece of string 2x the length of the zine. Open the zine, and thread the string through the center hole. If the zinesters wants the tie at the end to appear on the outside of the book, start threading the string on the outside of the book. If the zinester wants the tie at the end to appear on the inside of the book, start threading the string on the inside of the book. Thread the string through the top hole. Next, thread the string through the bottom hole, skipping the center hole.
Thread the string back through the center hole. Tie the string around the string running along the spine, and cut off the excess string.
This page is from the Booklyn Education Manual. Download the full manual: bit.ly/booklyneducation
The most important thing about zine making is there are infinite ways to create them. There is not a “wrong” way to make a zine. If zines are created by an individual/small group in a way that makes sense to them, and their intention is that it’s a zine - it’s a zine!
As we have learned in this handbook, some zines are created completely by hand, start to finish, using tactile methods like collage, stamping, drawing, painting, writing, and printing. Zinesters may also scan their work into a computer and arrange it for printing using MS Word, Adobe InDesign, Canva, or other software.
Some zinesters create their work as a completely digital experience. Perhaps that means they type it in Microsoft Word and then it’s ready for publication. Some may be designed using software like Canva or Adobe InDesign. As we saw through our brief zine history, the methods for creating zines change through time, but it doesn’t change the fact that it is a method of sharing information for individuals outside of mainstream culture.
Creating zines by hand requires physical everyday materials and access to a means of copying them like a scanner to printer or photocopier. Creating a zine digitally requires access to computers, software, some training to use the software as well as access to a scanner to printer or photocopier. Digital-only zines bypass that last requirement, as they are made using a computer, tablet, or smartphone and posted directly online.
When picking a font, the zinester should decide if they will be printing the zine as a half-letter booklet or a full-page book that is stapled. If it is a half-letter, it is good to remember the text will print ½ size. It is a good rule for accessibility and readability to keep your fonts at size 11 and above.
Mini-zine/One-page zine in Canva:
Create a blank custom size page that is 11 in wide by 8.5 in high, change the setting to show rulers and guides. Put a guideline in the following places: Length: 5.5”
Width: 4.25”, 8.5”, 12.665”
Any text or images put on the top row should be upside down. We still find it best practice to keep your words and images in the center of the boxes giving enough space on all sides. But when making a zine digitally you can technically put your words and designs all the way to the edge, just make sure to select “Fit to Printable Area” when printing.
Half-size zines in Canva:
Option 1:
Make a blank flyer document 11” wide by 8.5” high. There needs to be a blank “page” for each side of a sheet of paper. If the zinester wants their zine to be 20 pages, the zine will need 5 sheets of paper, so in Canva there needs to be 10 blank “pages”. Put a guideline at 8.5 and keep images and word within 1/3 from the edges and middle guideline.
Option 2:
Create a new design and select “zine”. This creates a zine with 5.8” x 8.3” pages. You can add as many pages as you like but the end number must be divisible by 4. When your design is finished, go to “share”, “download”, select PDF Open PDF in Adobe Acrobat and select print. Under Page Sizing & Handling, Click Booklet. Booklet subset: Both Sides
Binding: Left
Print! The program will automatically create the booklet. The front cover and back cover will be visible as the first page that is printed.
Not everyone is confident in their drawing abilities or feels their handwriting is the most legible. Some may also be too young to fully articulate their thoughts into words. Everyone has different levels of ability when it comes to creating.
There are many ways to encourage creativity in your patrons. Ask them questions that do not have a yes/no answer
Give them time to explore zines and materials to see what sparks
Offer prompts
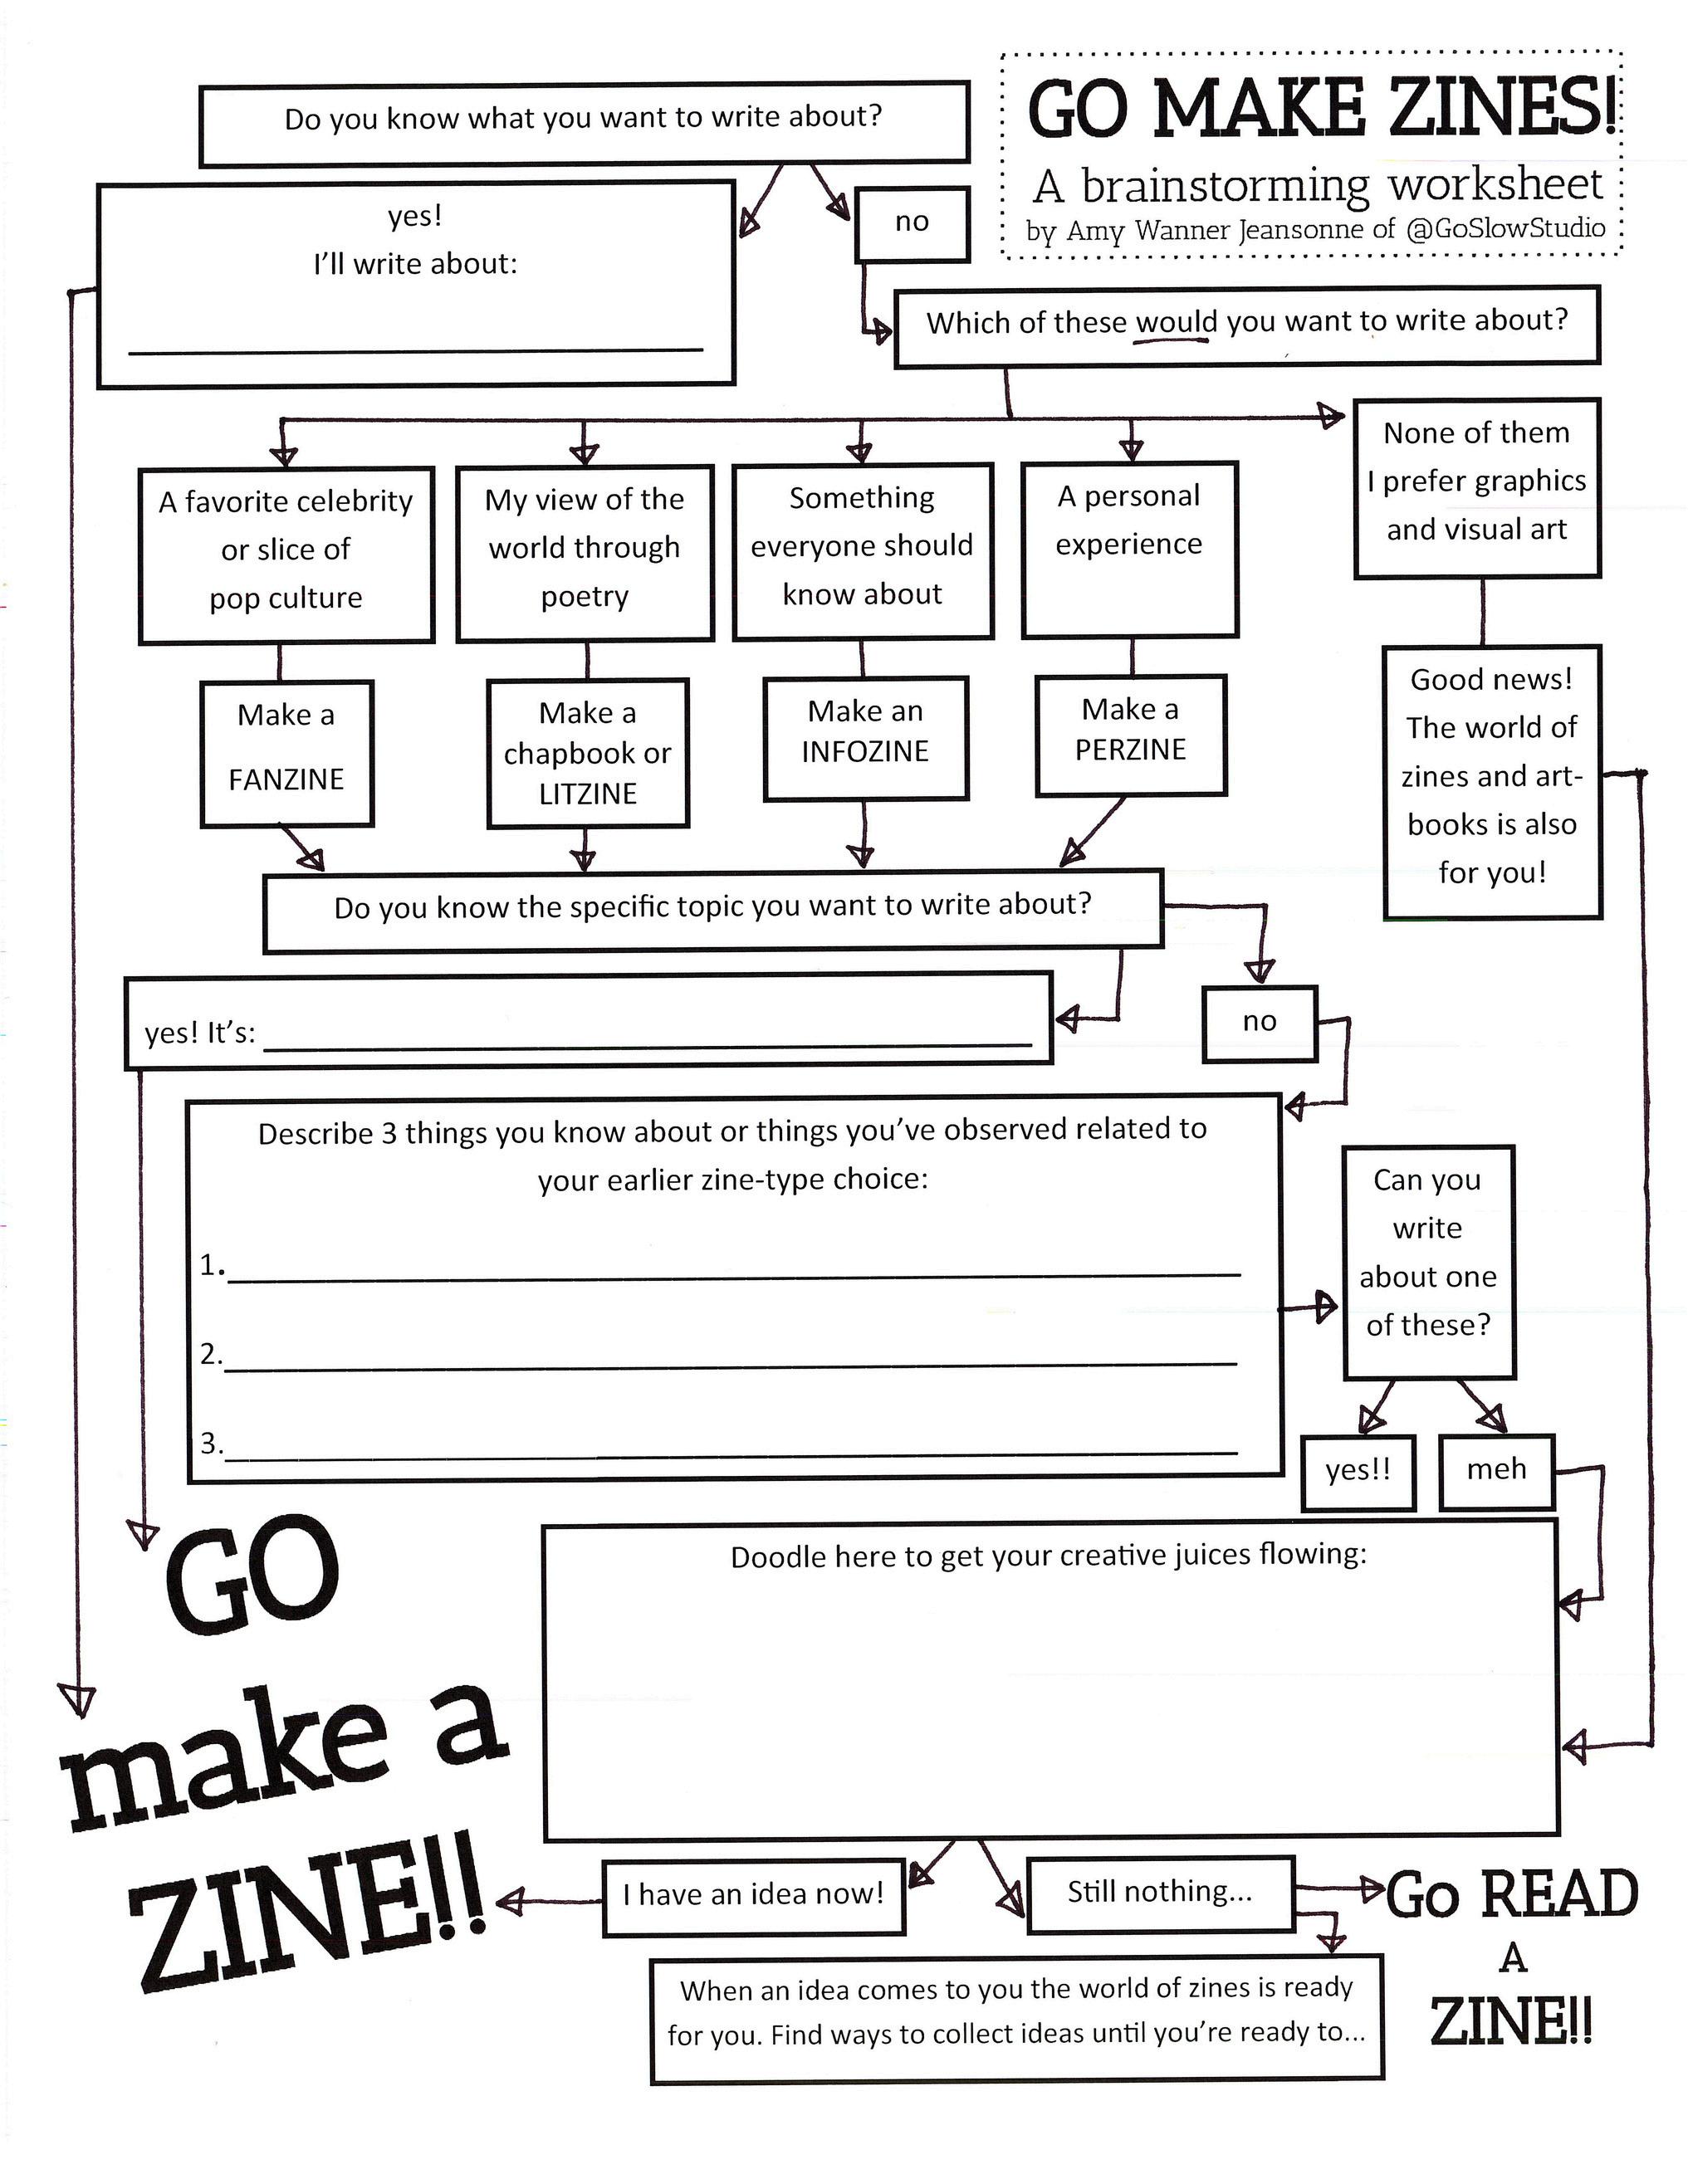
Have them complete the “Go Make Zines” worksheet by Amy Winner (see BPL Wiki for printable version)
Offering a wide variety of mark-making materials can also help encourage those who may not feel the most “artsy.”
Rubbings: anything that has a raised surface can be turned into a rubbing. Lay a blank piece of paper on top of the object and rub a crayon over the surface. Leaves, textured walls, raised text all make great surfaces for rubbings.
Stamping: Stamping is the act of putting ink on an object and pressing it into paper. There are pre-made stamps mounted on blocks or with handles or you can create your own stamps
Press a textured fabric like burlap or lace or any object with a texture can be pressed into a stamp pad and then stamped onto paper. Look around your branch for inspiration!
Make your own stamps by cutting shapes or letters out of foam sheets and gluing them to the top of jar lids.
Check out a set of stamps to be included in your BPL Zine Box!
Cleaning stamps properly keeps them in good working condition. The easiest is to rub a wet paper towel or baby wipe over the rubber until all ink is removed. Let dry before packing away.
Provide a framework for the activity, but allow for participant zinemakers to make their own decisions.
Activities that are too open-ended (i.e. “come make a zine about anything you want”) can be overwhelming or not specific enough for participants to dive right in.
We think of zine teaching like setting the table for a dinner party, describing the menu of foods offered, but never telling people what they should eat or how they should eat them.
We like to remind people that they never have to do it the way we are describing.
Icebreaker questions are a great way to connect with your participant zine makers before diving into the learning process.
Tip: you can tie the icebreaker question into a zine prompt! Like what would be your superpower or where is your favorite place.
Closing a workshop by inviting participants to read from a zine they made or to share a “rose, bud, and thorn” is a great way to process and share what was learned and how the workshop impacted participants.
We have found that yellow markers do not copy and print well no matter if you print them in black & white, color, or greyscale. We recommend removing avoiding yellow!
Whatever is a “best practice” for kids, is usually good when teaching any age level!
Ask if participants are okay with you making copies of their zines and sharing them with the BPL Zine Box Collection. If they say yes, please put them in the pouch with the handbook!
Based on the number of child participants, it is good to have helpers in the room, in addition to the library worker facilitating the workshop. Booklyn Inc. uses a 4:1 child-to-educator ratio. Teen interns or volunteers are great helpers for these activities. You can also encourage older kids who seem to be “getting the hang of things” to help out those who might be struggling.
Allow kids to enjoy the process of making more than the product. Encourage kids by focusing on exploration, curiosity, and personal reflection, as much as the child feels they would like to.
Use easy-to-remember fun words like “hamburger” or “hot dog” for folds. The facilitator can explore words to use with the children that resonate with them. Maybe it is veggie burger or book for widthwise. Maybe it is snake or stick of butter for lengthwise.
Use a template zine. A template zine allows the creator to fill in answers and follow prompts on pages. Booklyn uses an “All About Me” template for kids which creates a space to introduce themselves to the workshop group, to feel heard, be seen, and start to build community. Templates are available for download on the BPL Zine Box Wiki page.
Stickers and stamps are a fun way to engage kids in zine-making. These pre-existing materials can offer an alternative to those who may not feel confident in their ability to write or draw.
Making copies isn’t always something kids want to do. We’ve heard reasons like, “it’s too much work” or “I only want to make one.” Because duplicating and distributing is an important part of zine culture, we try to bridge this with things that some kids can appreciate in duplicate forms, like trading cards (Pokemon, baseball cards, etc.). Another solution is the facilitator can bottomline the copying/printing of the zines and fold them with the children, as a separate activity.
The hardest part might be for the teen zinester to come up with an idea, or feel that they have anything worth sharing. Having lots of prompts can help.
Spending a few minutes free writing or drafting ideas on a piece of scrap paper can help participants to lay out their ideas.
Engage with the teens, ask them about what they like/don’t like, what they do with their friends, what is something they wish they had known before entering middle/high school. Just by chatting with them you can pull out some great ideas for zines.
Showing zines made by other teens can break the ice.
Remind them that “the first pancake is never perfect!” The first zine they make may not come out exactly how they envisioned but that is part of the process.
If they don’t finish their zine at the workshop encourage them to take materials home and work on it, then to bring it back when they are done.
Some great prompts for teens:
A day in your life
Have them make a fan zine about something they love Singer or band, style, video games, snacks, anything!
A list of your favorite songs or musical artists
Step-by-step instructions for how to do something
How to: tie your shoes, ride the subway, make a smoothie, do your eyebrows, study for a test, draw a cat, etc
Your drink order depending on the seasons (summer vs. winter)
Another popular one is your bodega order for breakfast/lunch
Ranking snacks and candies
A list of things people wouldn’t know by looking at them
Summer break ideas (will you travel? stay home? work?)
Affirmations and/or self-care tips
Start with a little history or explanation of why you’d want to make a zine in the first place. Share some prompt ideas before diving in.
Adults often feel they “aren’t creative.” Give them space and time to play around with different materials (stamps, collage, drawing). Remind them that this isn’t about the product but about the process (it is okay if they don’t finish their zine).
Be clear with instructions. Show your actions rather than just tell.
Leave enough open studio time in the second half of the workshop for participants to create and explore what they’ve learned. At least 30+ minutes would be ideal.
Examples of zines to look through are very helpful to offer ideas or to inspire questions. Allow them to also just sit and read the example zines if they don’t feel like engaging in making.
For super adults/older adults it is important to have material accessible for different dexterities among participants. For example, pre-cut materials, stamps, stickers/washi tape, and adaptable scissors.
Some great prompt ideas for adults and older adults:
Haikus or poems
Interview yourself (what are questions you wish people asked you?)
A memory from last year, from five years ago, ten years ago
Or things you are looking forward to in the next year, five years, etc
Letters to your past or future self
Experiences living or working in NYC
Your favorite “secret” spots in the city
How to do (this is a great prompt for all ages!)


How-to zine
Everyone knows how to do something! Can be as complicated as navigating the subway to something as simple as crossing the street safely.
Check the “Best Practices for Teens” and “Adults” to get some more ideas for how-to prompts
Things I Like/Favorites/Fanzines
Music! Food! Artists! Books! Trees! Shoes! Ice cream flavors! You can also juxtapose it with Things You Don’t Like Great idea for teens: “ruin someone else’s fandom”
Tell a story about a time you were hurt, physically or emotionally What happened? How did you feel? How did you process your feelings? What did you learn?
How things change during the passing seasons
What does your neighborhood look like Your drink orders
Your outfits Your routines
Your experience of a recent event
A big storm or other natural event (eclipses! rainbows!)
A recent moment in history (election, protest, news story)
A fight with someone
A holiday
Zine-making tied to themes
Black icons for Black History Month
How to help the planet for Earth Day
Processing emotions for Trans Day of Visibility
Banned Books Week
This page is from the Booklyn Education Manual. Download the full manual: bit.ly/booklyneducation
This page is from the Booklyn Education Manual. Download the full manual:
This page is from the Booklyn Education Manual. Download the full manual: bit.ly/booklyneducation
This page is from the Booklyn Education Manual. Download the full manual: bit.ly/booklyneducation
This page is from the Booklyn Education Manual. Download the full manual: bit.ly/booklyneducation
This
This page is from the Booklyn Education Manual. Download the full manual: bit.ly/booklyneducation
This page is from the Booklyn Education Manual. Download the full manual: bit.ly/booklyneducation
Now that you have the knowledge, it is time to put it into practice!
When creating a zine program you have two options: making it very obviously and explicitly about zines being sneaky about how your program is for zine making
Some people may not know what zines are; by putting the word in the title, some may think the program isn’t right for them. Instead of calling your program Zine-making you could instead use language related to the theme of the program. For example: Do-It-Yourself Publishing Make a Mini-Comic Share Your Story
Creative Mark-Making
Then, during the workshop itself you can explain patrons will be making zines as part of the activity.
You can offer zine-making as an outreach program. Zine making materials travel well to schools, shelters, parks, and other non-library spaces. When talking to schools you can work with specific subject teachers to use zines in project-based learning settings. Like poetry zines, zines instead of essays or posters, collecting stories from a class for a collaborative zine, the possibilities are endless! If you’d like some more tips on using zines in schools or at other outreach events, please contact Emma (eeriksson@bklynlibrary.org).
We have created a “Zine-Making” tag for you to use in your event calendar listings and there are flier templates you can access on our BPL Wiki page - The BPL Zine Box.