4 minute read
Step By Step

ZENITH INSTALLATION GUIDE
Zenith from Wilsonart has blazed a trail as the first super thin solid laminate worksurface. This hardwearing product is ideal for a variety of kitchen and bathroom applications and can be worked on site for custom fitting of bespoke drainer grooves and shelving, as well as under mount sinks and all formats of hobs. Here Wilsonart have listed some top tips to ensure the highest quality Zenith installation. There is an installation kit available to purchase, providing all the consumables needed for a successful install and a full installation guide also available to download here.
Advertisement
1
1. Handling and Planning
Zenith is a solid laminate and a 3m worktop weighs in at 38kg, we recommend it should be carried horizontally by two people. Planning where to position joints is paramount – avoid hob or sink cut outs. Silicon sealer must be used to fix Zenith to base units. Ensure a 25mm gap at each end between Zenith and heat-generating appliances like an AGA. No specialist tooling required just standard installation tooling, check out the video for a full listing Wilsonart Zenith Installation Tools Video
2
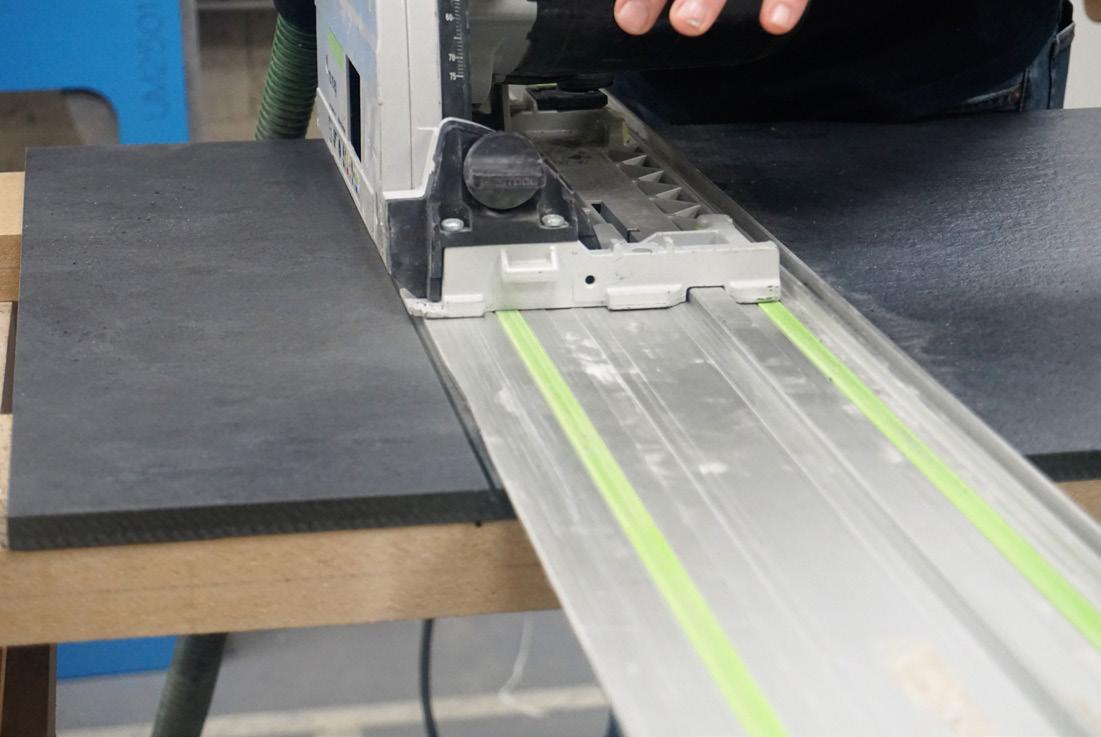
2. Cutting Zenith worksurfaces are very hardwearing and must be worked with clean, sharp cutters to produce a professional finish. Using a portable hand-held circular saw slowly cut the worktop by plunging in three 4-5mm increments. Finish all exposed edges and finished ends by skimming with a hand router with a sharp blade, allowing 2-3mm for final skim to size. Wilsonart Zenith Cutting Video
4a
4b

5

6
Scribe Zenith to the wall with a planer or jigsaw with a metal blade, sand top and bottom edges to remove any chipping that have occurred during cutting. Wilsonart Zenith Scribing Video
4. Jointing a: Using a biscuit joint machine form pockets for No.20 biscuits, it is important you apply biscuits as they act as a self-leveller ensuring a discreet even joint. Insert a minimum of three biscuits per join and carry out a dry fit.
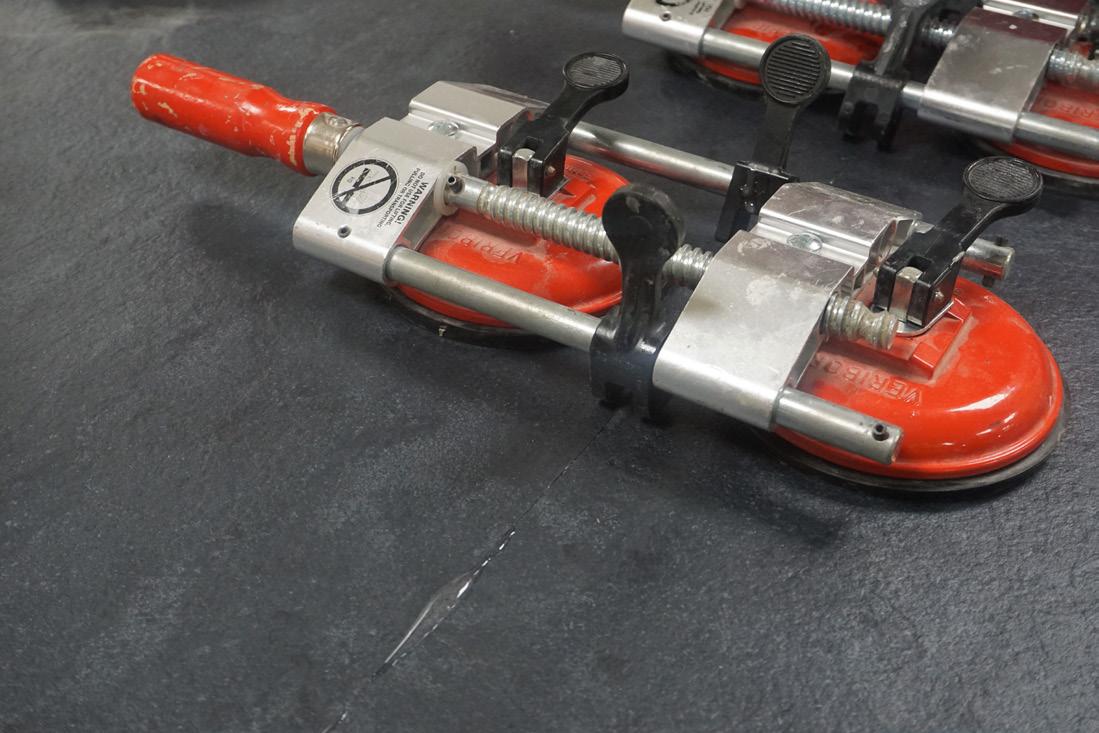
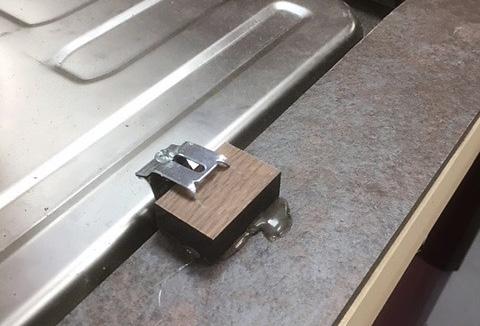
b: Clean the joint, then mix the clear two part epoxy resin and apply to biscuits and the joint itself. To pull the worktops together use either the suction cup or hot melt blocks method. For a corner joint, you can opt for a mason’s mitre or a simple butt joint, either way ensure biscuits are still used. Wilsonart Zenith Jointing Video
5. Drilling Holes and inserts can be drilled through or part of the thickness of the material using the correct drill bits or hole saws. Where part drilling is required ensure a minimum thickness of 3/4.5mm remains. For tap holes or pop up sockets the material should be cut completely through using the correct diameter hole saw allowing the worktop to support the accessory. Avoid using flat Spade drill bits or Auger type drill bites. Wilsonart Zenith Drilling Video
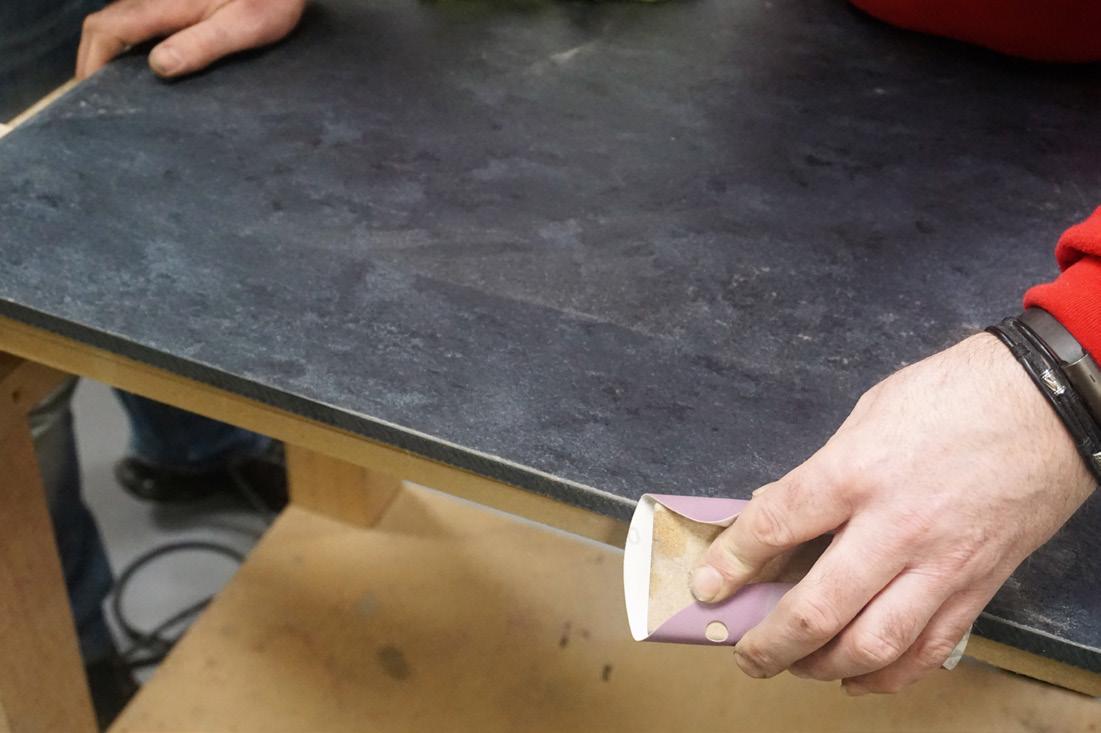
6. Profiling edges Simply use a 240 grit sanding block to lightly soften the edges on top and bottom. The recommended finished edge is square but sanding will remove the sharpness of the raw edge. Wilsonart Zenith Profiling Edges Video
7
8
10

7. Sink Installation Zenith is ideal for both Inset and under mount sinks. Both stainless steel and composite sinks can be fitted. Ensure a distance of at least 150mm between the inset cut and the joint edge. A minimum of 40mm to the front edge should be allowed. For installation of sink clips drill hole to a depth of 8mm and with the recommended diameter place the spreading dowel insert into the hole and tap flush. Remember when placing inserts avoid obstructing any tap holes or drainer grooves. Wilsonart Zenith Inset Sink Installation Video.
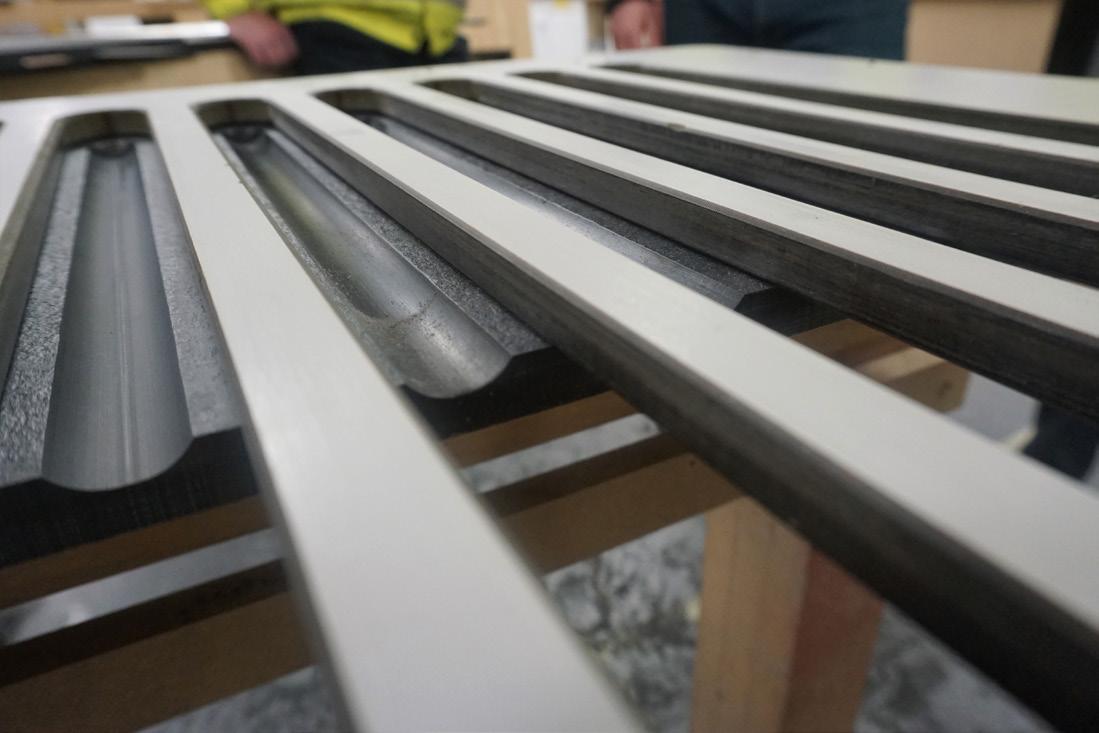
8. Drainer Grooves for Under mount Sinks
Drainer grooves can be created for under mount sinks, simply use good quality cutters and masking tape to guide positioning. Using a hand router with a 30mm bush guide and radius cutter, set your groove depth and work smoothly when processing. You may need to sand out any router chatter lines that may have occurred Wilsonart Zenith Undermount Sink Installation Video
9. Hob Installation
Zenith surfaces are compatible with most hobs and fitting clips but if an additional packer is required to secure the clips simply use the surface cut out from the hob. If installing an oven under a hob a 40mm ventilation gap must be present, if this is not present due to the thinness of Zenith we recommend dropping the oven and moving the filler panel from the bottom of the oven to the top. Wilsonart Zenith Hob Installation Video
10. Finishing and Maintenance Using a random orbital sander or palm sander finish the edges by sanding with 180 & 240 grit papers in a constant flat motion. Finally finish with a 400grit ultrafine paper / scotch brite. If desired apply a layer of boiled linseed oil to the edges to enhance the aesthetics. To maintain Zenith simply wipe down with a mild detergent and buff dry. Wilsonart Worktops Zenith Finishing Video