Setting Up Camp
line.
order
as early as possible. Here are 10 tips to help your camp program
1. Plan Early. Most camp sign ups are posted early in the first quarter of the year. In order to compete, you’ll want your camps posted as early as you can! This also creates a longer time frame in which to fill your seats.
2. Check the Competition. Other PYOPs are not your only competitors. Parents will look at ALL camp options in your area. Looking at how much other camps charge and what their programs offer can help you make decisions on how to structure and price your program to remain competitive.
3. Set a Budget. Include everything you’ll need to keep summer camps running smoothly--from staffing to snacks--and factor in all of your costs. This will help you set a price that results in profits for the business.
4. Secure Inventory. If you plan to use specific shapes, secure your inventory prior to posting the project. Customers will not be happy if you cancel a camp or change out projects because you can not get inventory.
5. Make Sign Ups Easy. Whenever possible, have an option to sign up online to lock down sales. Having a clear description of programs and the ability to sign up 24/7 is crucial to filling seats.
6. Market & Advertise. Check into local opportunities to market and advertise your camp programs. Purchase ads in publications or websites with Summer Camp issues. Some schools, daycares, etc. may even allow you to provide flyers to go home with kids. If they resist, tempt them by offering a special discount code just for their customers.
7. Promote in House. In addition to promoting on social media, in emails, and with posters and flyers, have a display in your studio and a dedicated web page with camp projects and themes. Be sure
to train employees how to talk about camps to walk-ins and during parties to spark interest. If a customer expresses interest, employees can offer to sign them up right then and there. This prevents people from changing their minds or forgetting to sign up later.
8. Attract Repeat Campers. Offer a different theme each week, or have a few project options for a popular theme. For instance, if you do a few weeks of “Mystical & Magical” camp, offer a selection of unicorns, fairies, cauldrons, dragons, etc. so repeat campers can choose a different item.
9. Have Fun! There’s no better advertisement for your business than happy campers. Word of mouth is still the strongest form of advertising. Give those campers something to talk about!
10. Get Feedback. Ask attendees and parents to review the projects and the overall experience and get permission to use feedback in testimonials. Make it simple and have kids and parents do it during camp. For kids, “How many smiles do you give this project/ instructor/week, etc.?” For parents, 3-5 multiple choice questions with optional comments. Use feedback to plan future programs.
But
Scan the QR code for an exclusive video with Ammie Y’all as she shares her experience planning for summer camp!

3 See more at BISQUEIMPORTS.COM
Camps can be a wonderful opportunity to add more to your bottom
In
to have a successful camp program, you’ll want to plan early and sell seats
be set up for success!
wait... there’s more!


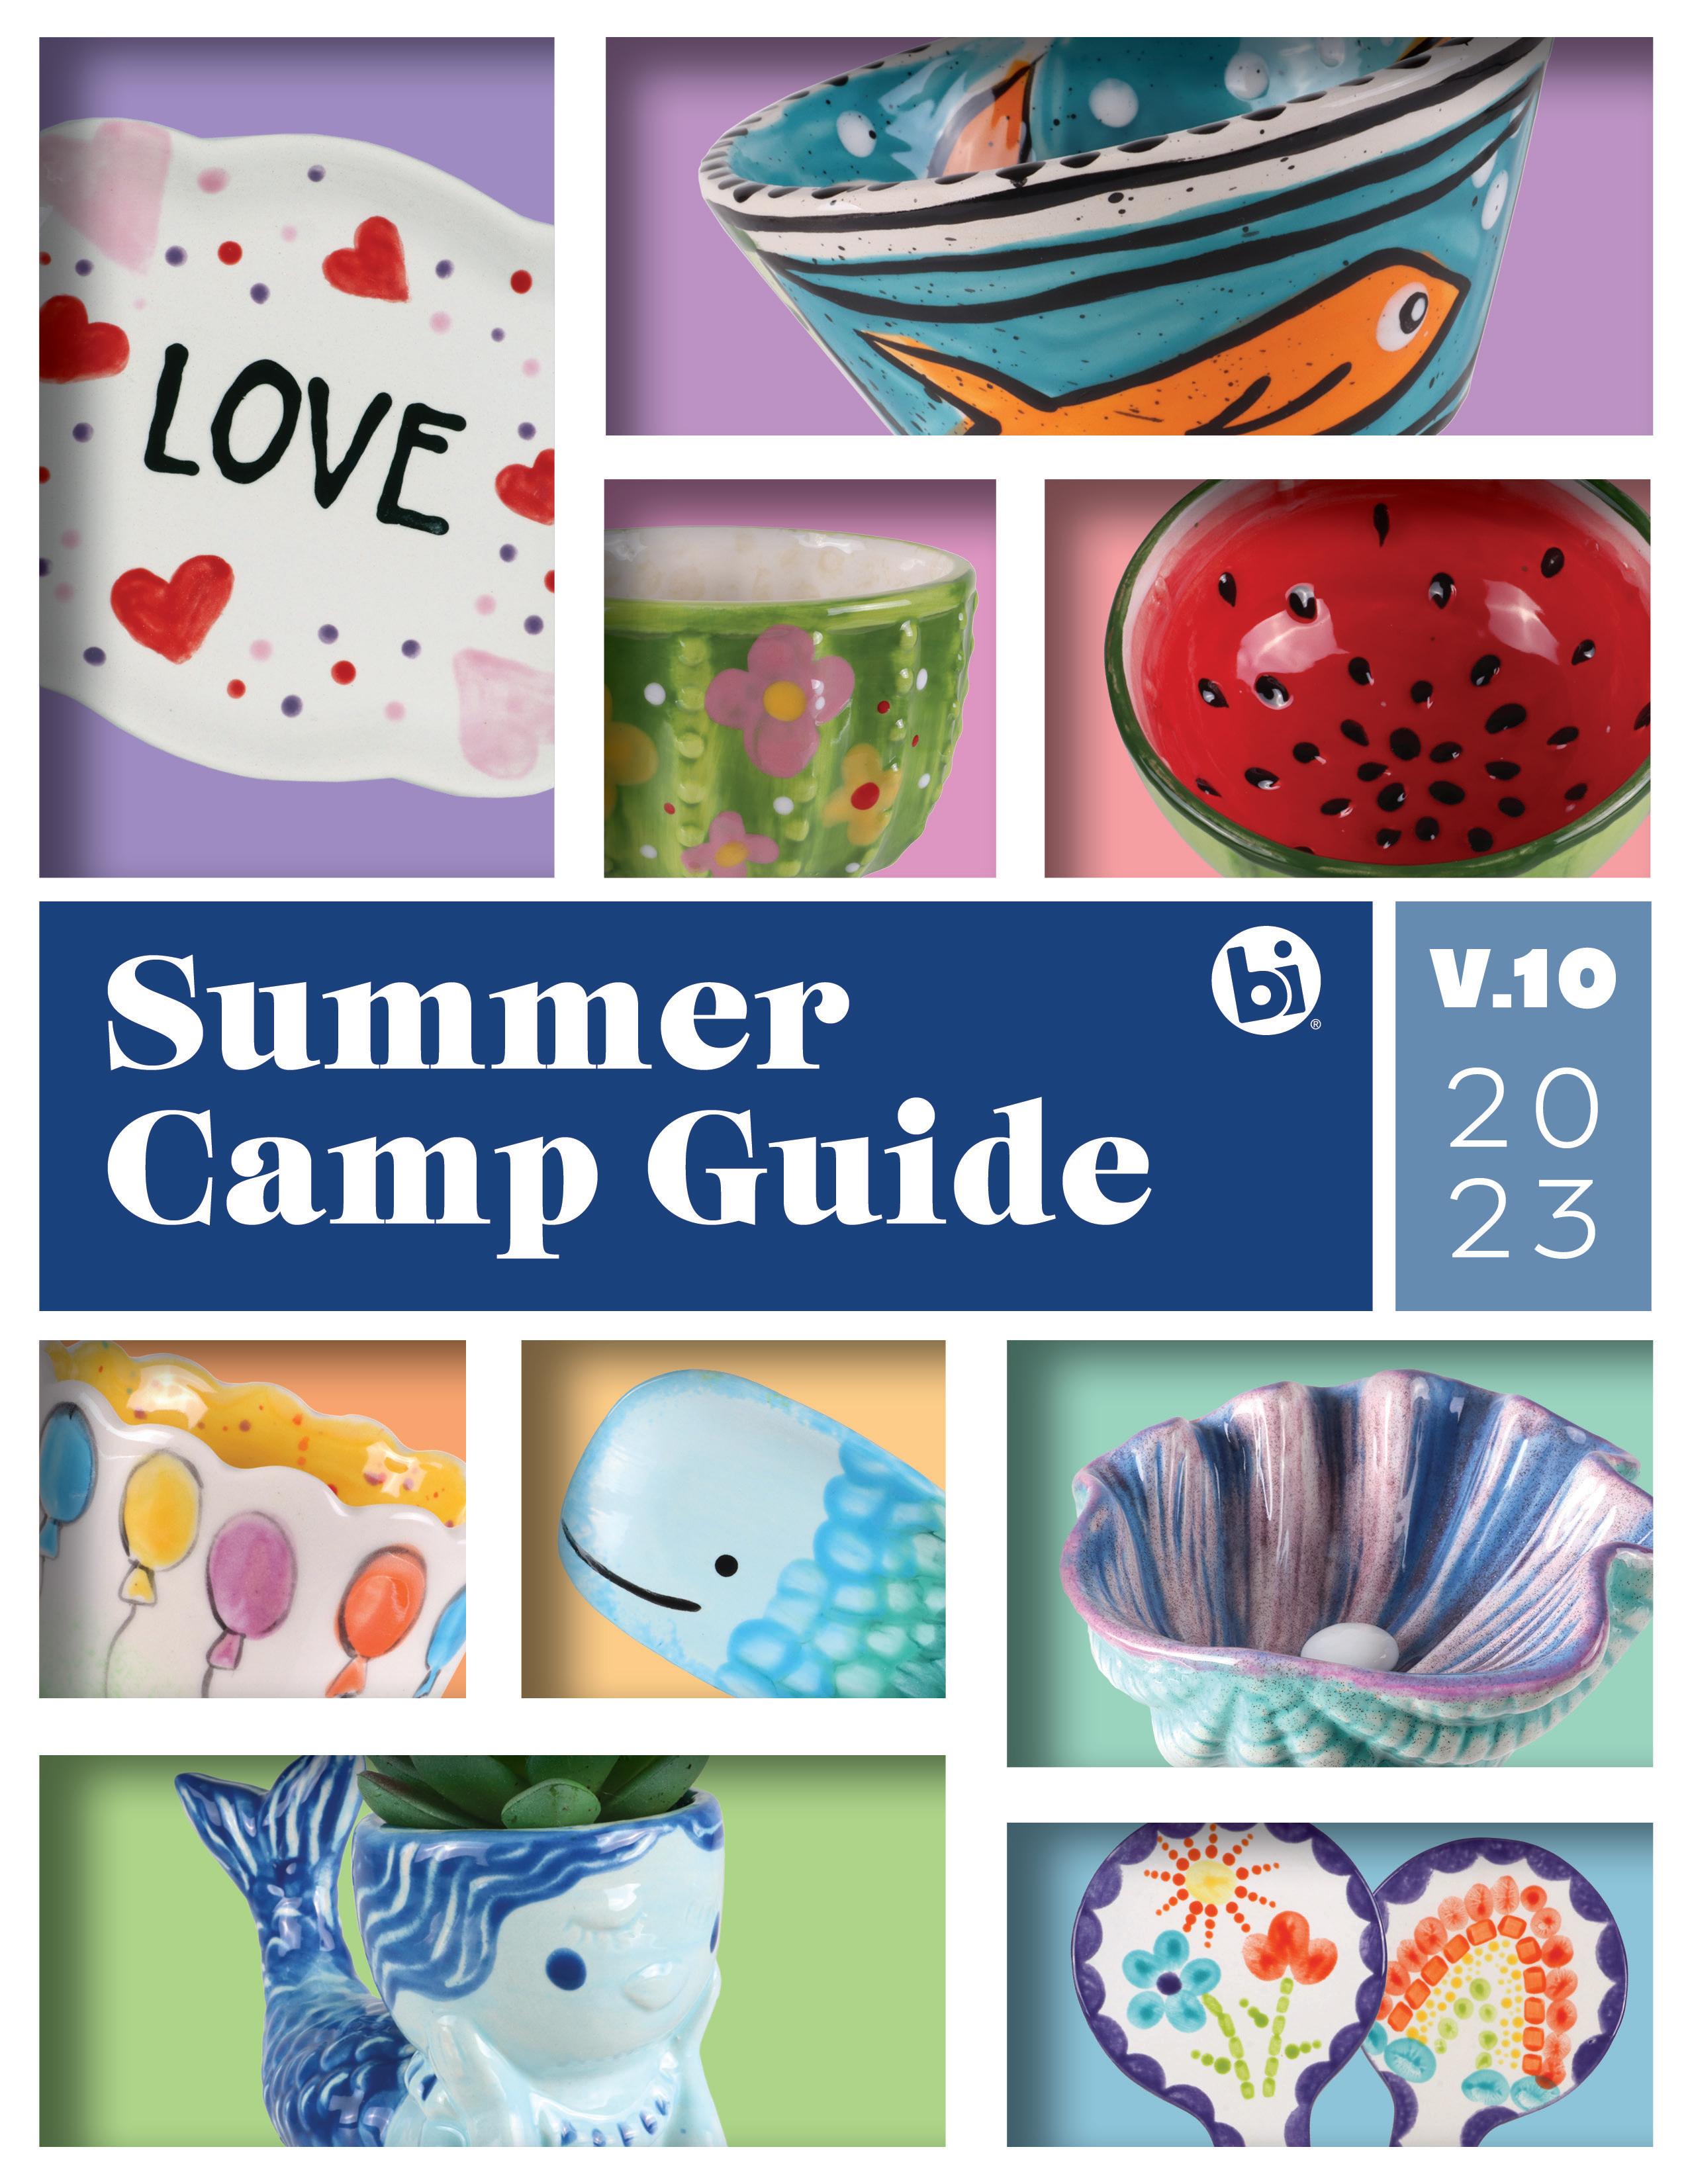
4 SUMMER CAMP GUIDE • VOL 10 REPRESENTING THE TOP BRANDS IN THE INDUSTRY, THESE CREATIVES CAME READY TO CRAFT! Meet the Artists Amy Latta Creations FT. AMY LATTA Ammie Y’all FT. AMMIE WILLIAMS Brush Strokes FT. COURTNEY JOYNER Crafty Chica FT. KATHY CANO-MURILLO


5 See more at BISQUEIMPORTS.COM Mayco FT. ELIZABETH CAREY Colorobbia FT. ALINE KARPOYAN Bisque Imports FT. GRAYSON TOAL Bisque Imports FT. LINDSEY HUTCHINS Bisque Imports FT. MALIA HALFORD
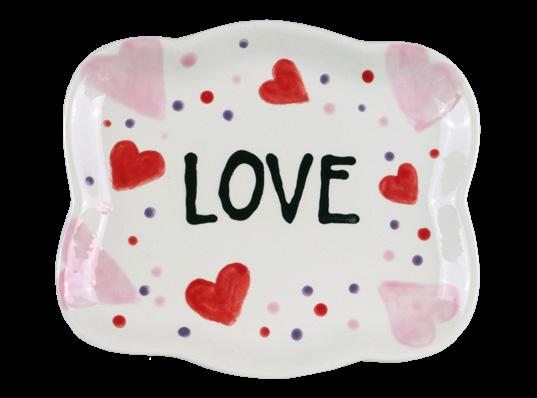
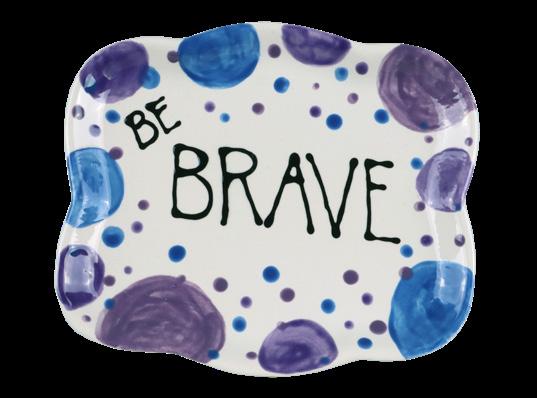
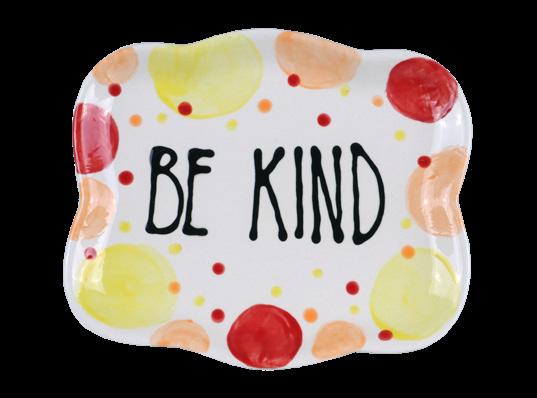
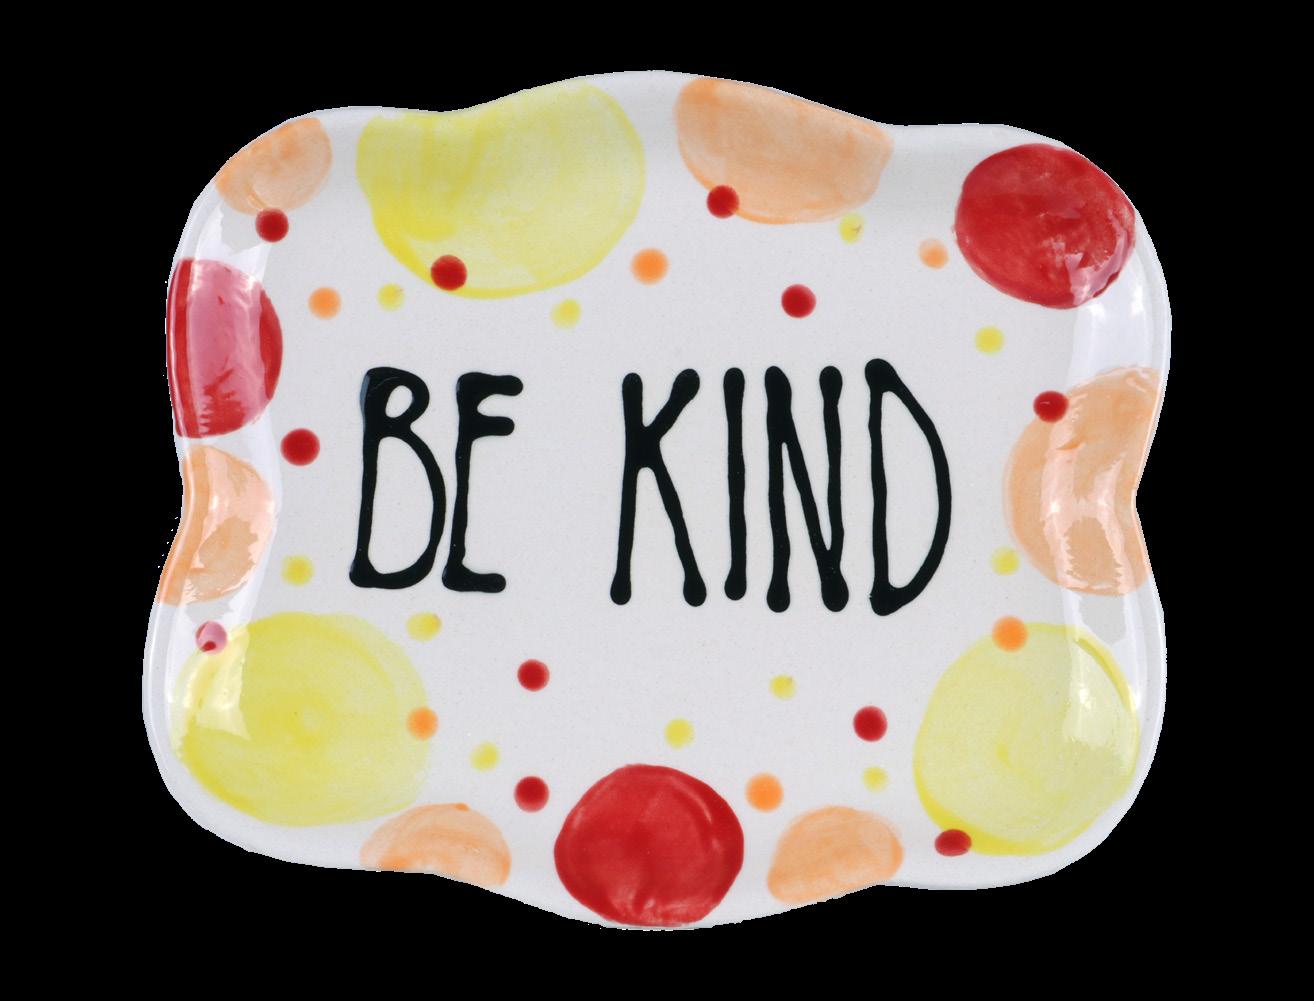
This project works best when there is no background color, specifically where the word(s) will be written. Writer bottles are easier to use on unpainted pottery.
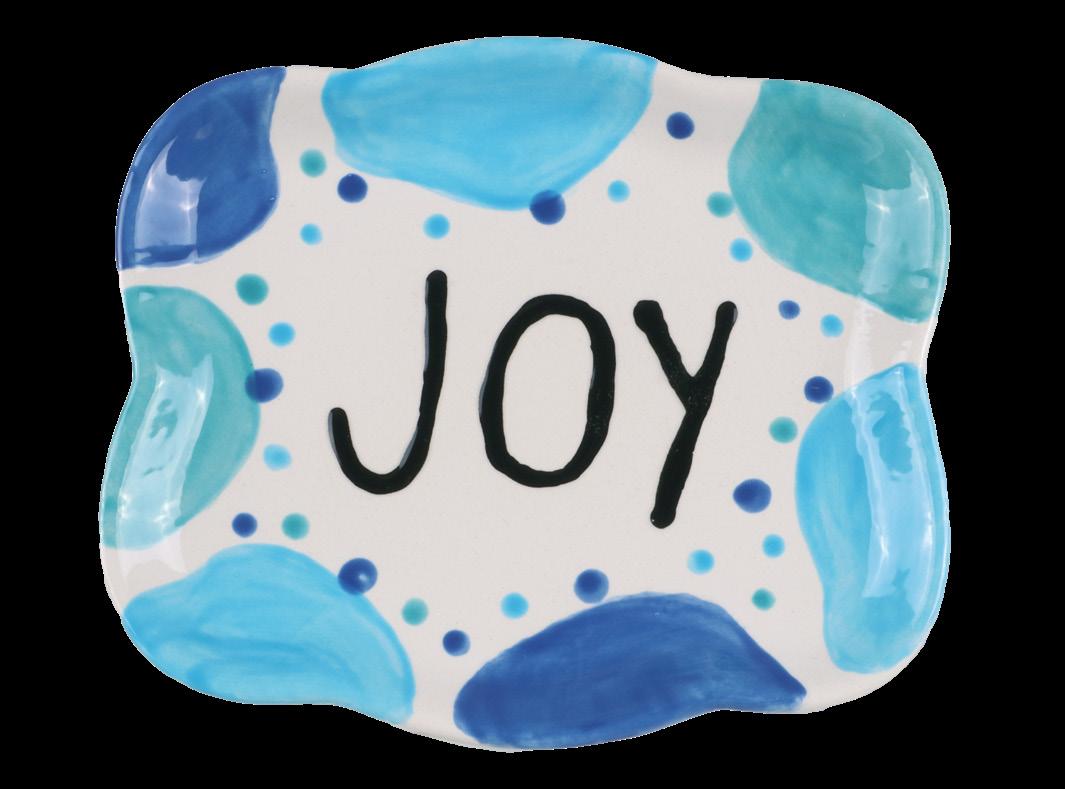
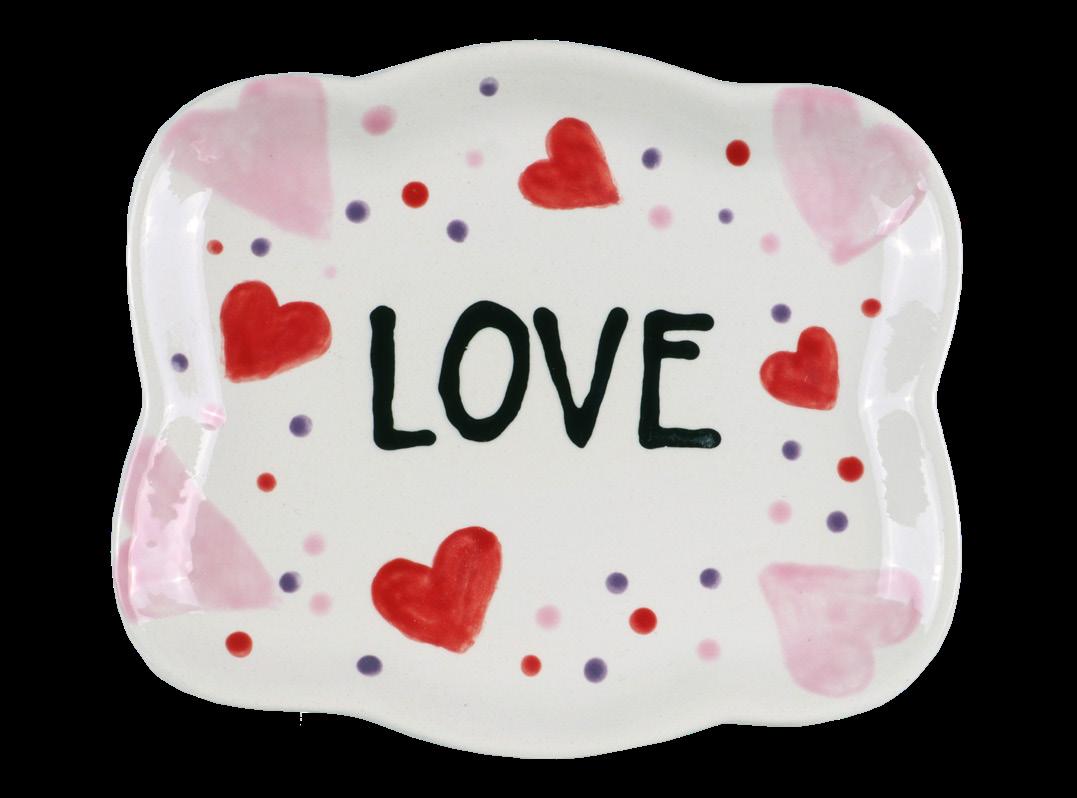
1. Brainstorm inspirational words or short phrases (2/3 words at most) with the group. Have them choose a word or phrase for their plate.
2. Have campers use a pencil to lightly sketch out circles around the edges of the plate, avoiding the area where they will write the word(s).

3. Have campers choose a color palette for their plates.
4. Guide the kids in painting 2-3 coats of color on each of the circles. Let each coat dry to the touch before applying another layer.
5. Instruct on how to do the whimsical print font by moving the x-height of letters.
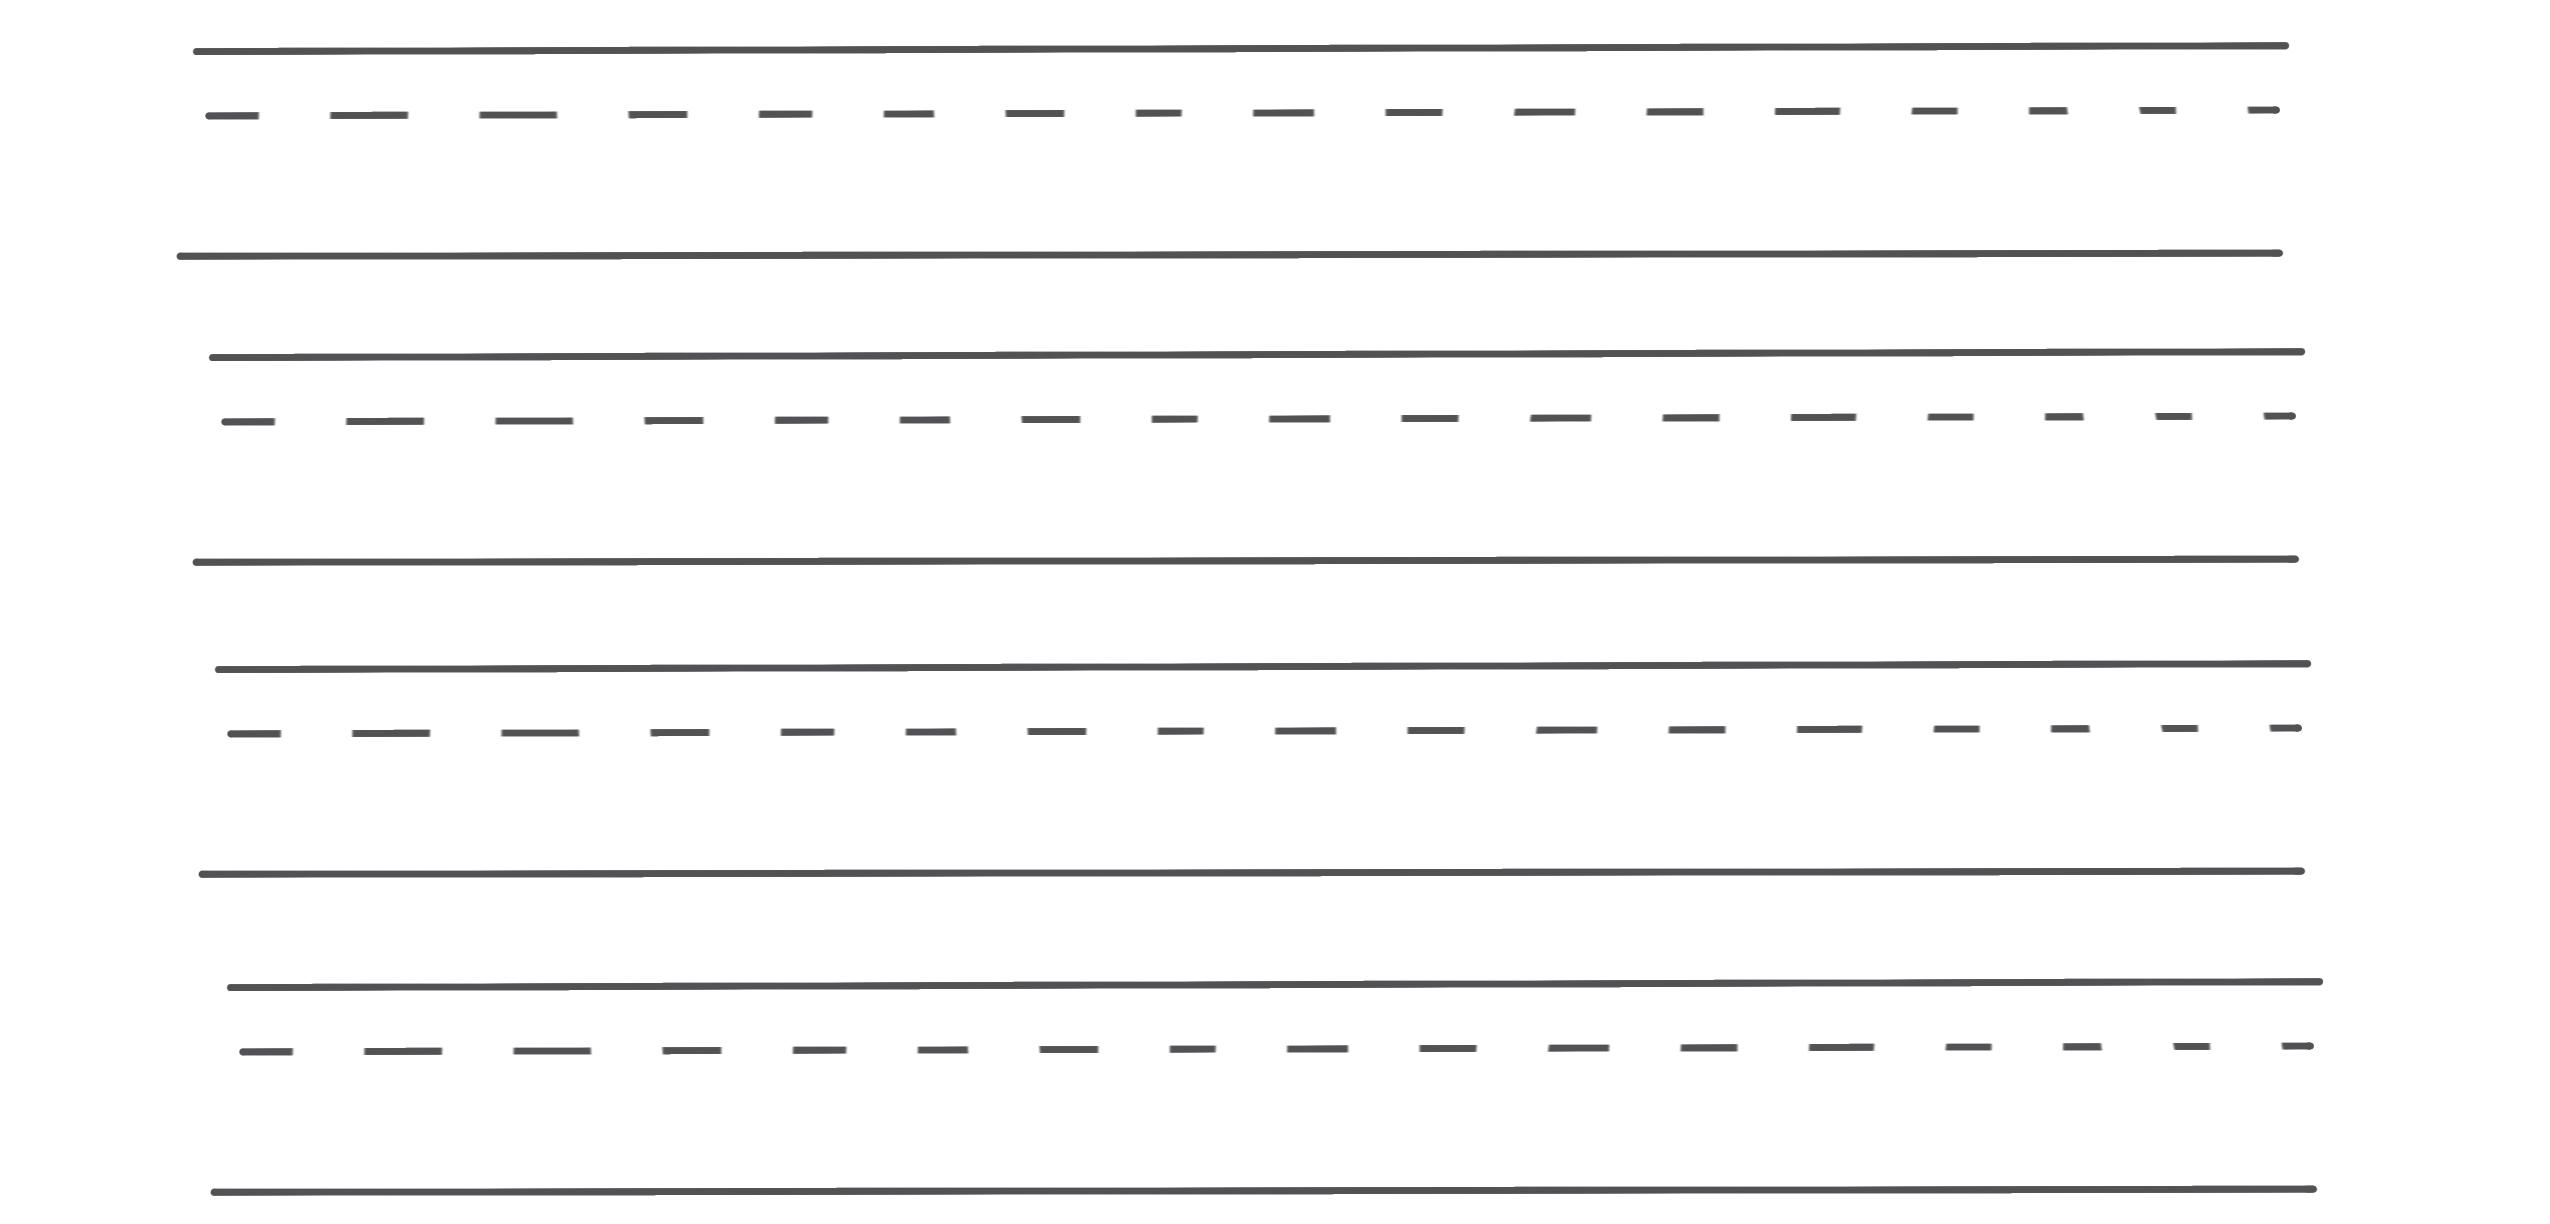
6. Have campers practice writing the word(s) they chose on the practice page.
TIP: Watch Amy’s video tutorial on diyprostudios.com for detailed instruction on how to do whimsical print. Scan the QR code to get started.

7. Model how to use a writer bottle by gently squeezing until the color begins to flow out of the tip. 8. Have campers practice writing their word(s) again using the writer bottle. 9. Have campers lightly sketch their word(s) on the plate with a pencil. 10. Next, have campers trace over the pencil using the writer bottle. 11. Have campers use a Dotting Gyre or q-tips to add small dot accents to the plate in colors of their choice. 12. Clear glaze and fire to cone 06. Enjoy!
Tip: If they make an error with the writer bottle, don’t wipe it! Let it dry and then gently sand it off with sandpaper. Brush off dust and then make the necessary corrections.
6 SUMMER CAMP GUIDE • VOL 10
Whimsical Print Plates | 725 BUBBLE DISH
Assorted Glazes
9631 Detail Bottle
Bottle
Round Brush
Tips
Page
SUPPLIES
NOTES
•
(Your Choice) •
• 9636 Medium Tip for Detail
• Medium (#4-#6)
• DOTG01 Dotting Gyre or Q
• Lettering Tutorial
COLORS


7 See more at BISQUEIMPORTS.COM
COLORS SUPPLIES
• SC015 Tuxedo
• SC016 Cotton Tail
• SC028 Blue Isle
• SC097 Cant-elope
• SC098 Slime Time
• SC036 Irish Luck
• SC001 Pink-A-Boo
• SC088 Tu Tu Tango
• DOTG01 Dotting Gyre
• Small Round Brush
• Medium Flat Brush
• Liner Brush
• Template (Page 20)
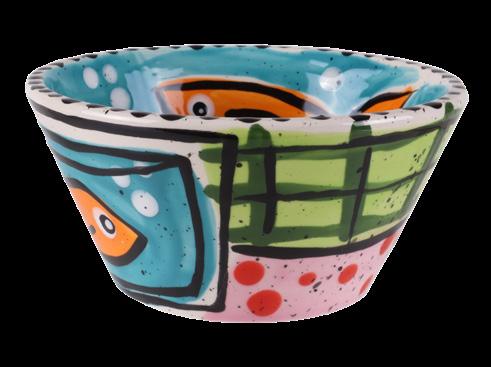
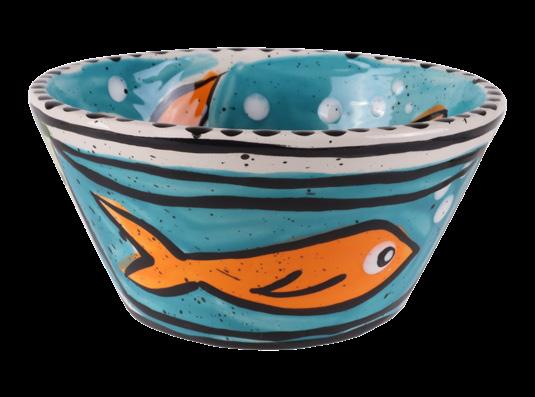
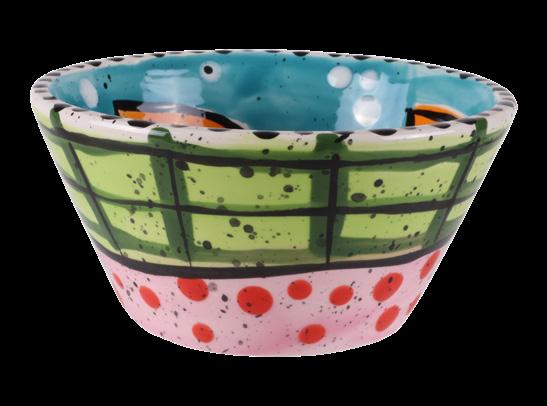
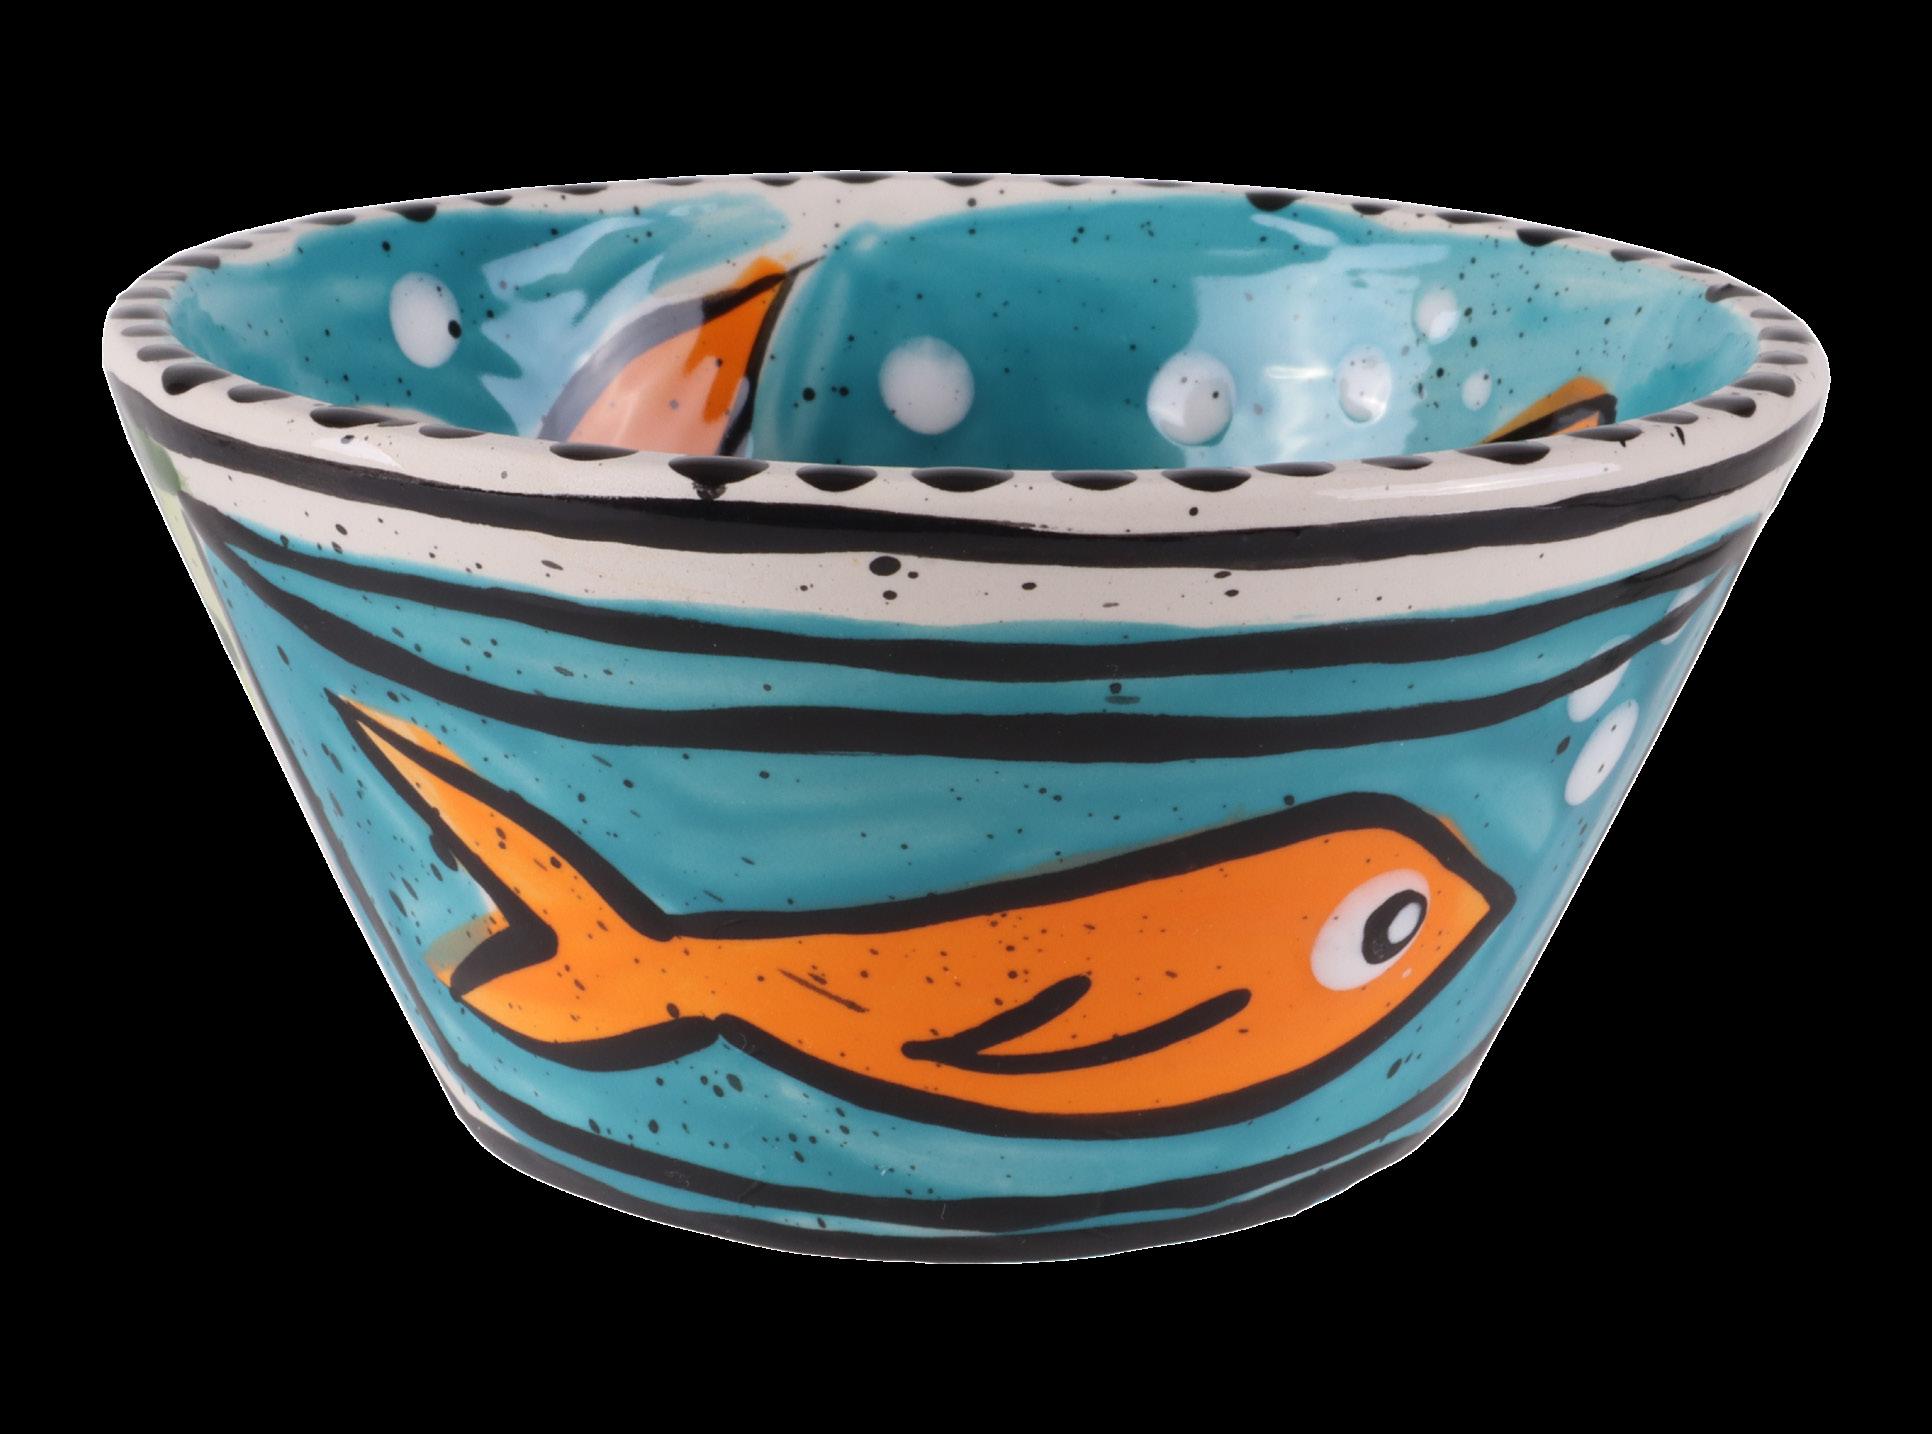
1. Draw or transfer the design onto the bowl.
2. Use a small round brush to paint the areas that are water with 3 coats of Blue Isle. Be sure to paint around the fish and not over them, and leave a small gap of white where the fish bowl will be.
3. Paint the wall color with 3 coats of Slime Time using the medium flat brush.
4. Paint the table color with 3 coats of Pink A Boo using the medium flat brush.
5. Use the small round brush to paint the fish with 3 coats of Cantelope.
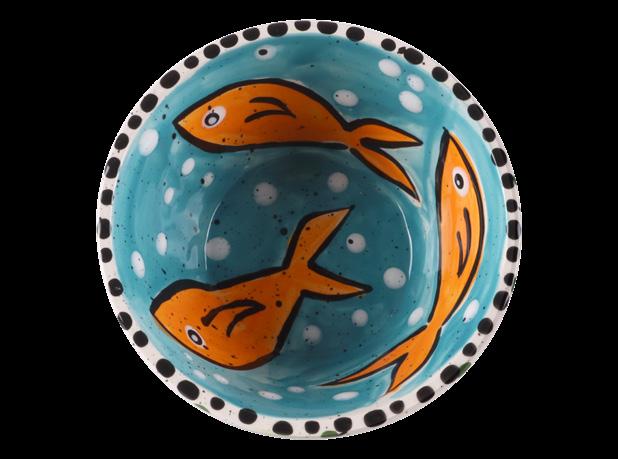
6. Use the small round brush or liner brush to add a grid (horizontal and vertical lines) on the wall using 1-2 coats of Irish Luck.
7. Use the dotting gyre to add Tu Tu Tango dots on top of the table.
8. Use the dotting gyre to add Cotton Tail eyeballs and air bubbles to the fish.
9. Use a liner brush to outline the fish, water bowl, and grid with Tuxedo.
10. Add Tuxedo dots on top of the Cotton Tail eyes.
11. Use a small round brush to thin down a pile of Tuxedo to an ink-like consistency. Holding the brush in your dominant hand, use the pointer finger of your non dominant hand to pull the bristles back, splattering the bowl with Tuxedo. Repeat until you have the desired splatter look.
12. Use the dotting gyre to add dots along the rim of the bowl.

13. Write your name on the bottom.
14. Clear glaze and fire to cone 06.
8 SUMMER CAMP GUIDE • VOL 10 Fish Bowl Snack Bowl | 144 YUKON SUNDAE BOWL
COLORS
• SC008 Just Froggy
• SC027 Sour Apple
• SC054 Vanilla Dip
SUPPLIES
• DOTG01 Dotting Gyre
• Sponge
• Assorted Brushes
• Bubble Wrap
• Tooth Brush
1. Paint 1 coat of Just Froggy (or alternate dark color) over the entire outside of the bowl. Let dry for a couple of minutes.
2. Using a slightly damp sponge, remove as much or as little paint from the outside of the bowl to create a distressed look.
3. Thin a small amount of Sour Apple glaze with water.
4. Apply 1-2 coats of thinned glaze over the entire outside of the bowl. Let dry.
5. Add a dime sized amount of neutral sand color (we used Vanilla Dip) to a small plate or flat palette. Use your finger to spread paint to create a thin layer.
6. Using a small piece of bubble wrap, dip into the sand color paint and then press into the inside of the bowl. Continue to do this until you have the inside covered with texture.
7. Keep your project simple and fire as is, or let campers add some extras.
8. Extras: add flowers to the outside of the bowl using fingerprints. Add desired flower colors to a paint palette, dip campers’ fingers into the paint, then press onto the outside of the bowl in a flower shape. Make sure to add a center using a different color.
9. Use a Dotting Gyre or the end of a paintbrush to add smaller accent dots around your design.
10. Clear glaze and fire to Cone 06.
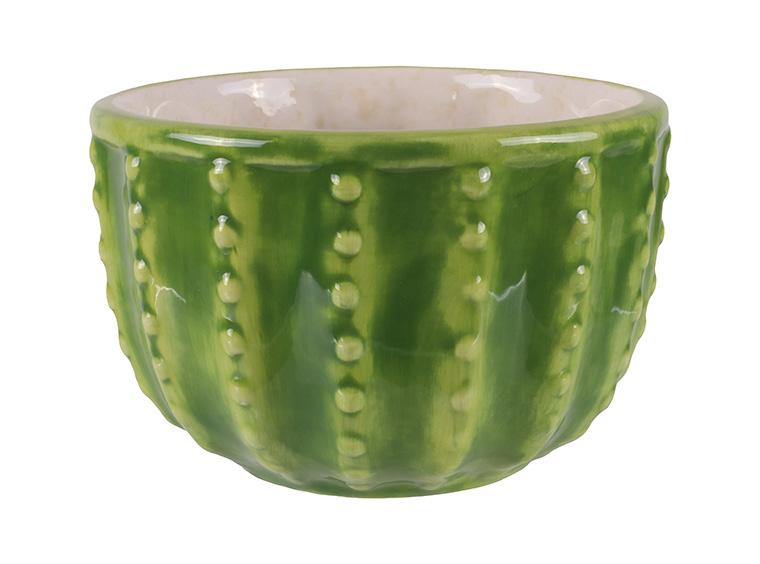
Tip: Adding a light splatter paint fleck using a toothbrush in white, yellow or pink to the outside could be a fun detail option too! Feel free to also use alternate (non traditional cactus) colors to give older campers full artistic control.
9 See more at BISQUEIMPORTS.COM
• Assorted Colors for Flowers/Accents Cactus Bowls | 2200 CACTUS BOWL
NOTES
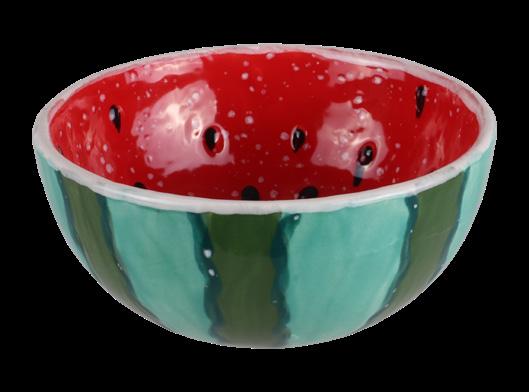
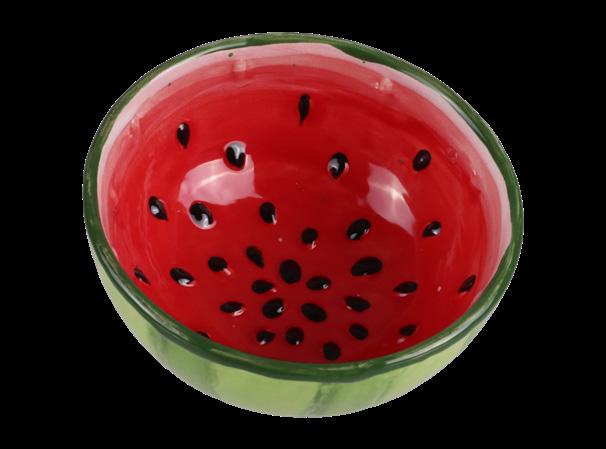
These little watermelon balls are so cute and functional. You can use them to eat a small snack or to hold objects such as jewelry or change. The best part is you can color them bright and cheerful to fit your decor.

COLORS “BOWL 1”
• SC098 Slime Time
• SC007 Leapin’ Lizard
• SC087 Ruby Slippers
• SC015 Tuxedo
• SC016 Cotton Tail
COLORS “BOWL 2”
• SC009 Jaded
• SC026 Green Thumb
• SP274 Speckled Hot Tamale
• SC015 Tuxedo
• SC016 Cotton Tail
“BOWL 1”
INSTRUCTIONS
1. Use a soft cloth to remove any debris from the bowl.
2. Use a medium round brush to apply two coats of Ruby Slippers to the inside of the bowl, leaving ½” from the top.
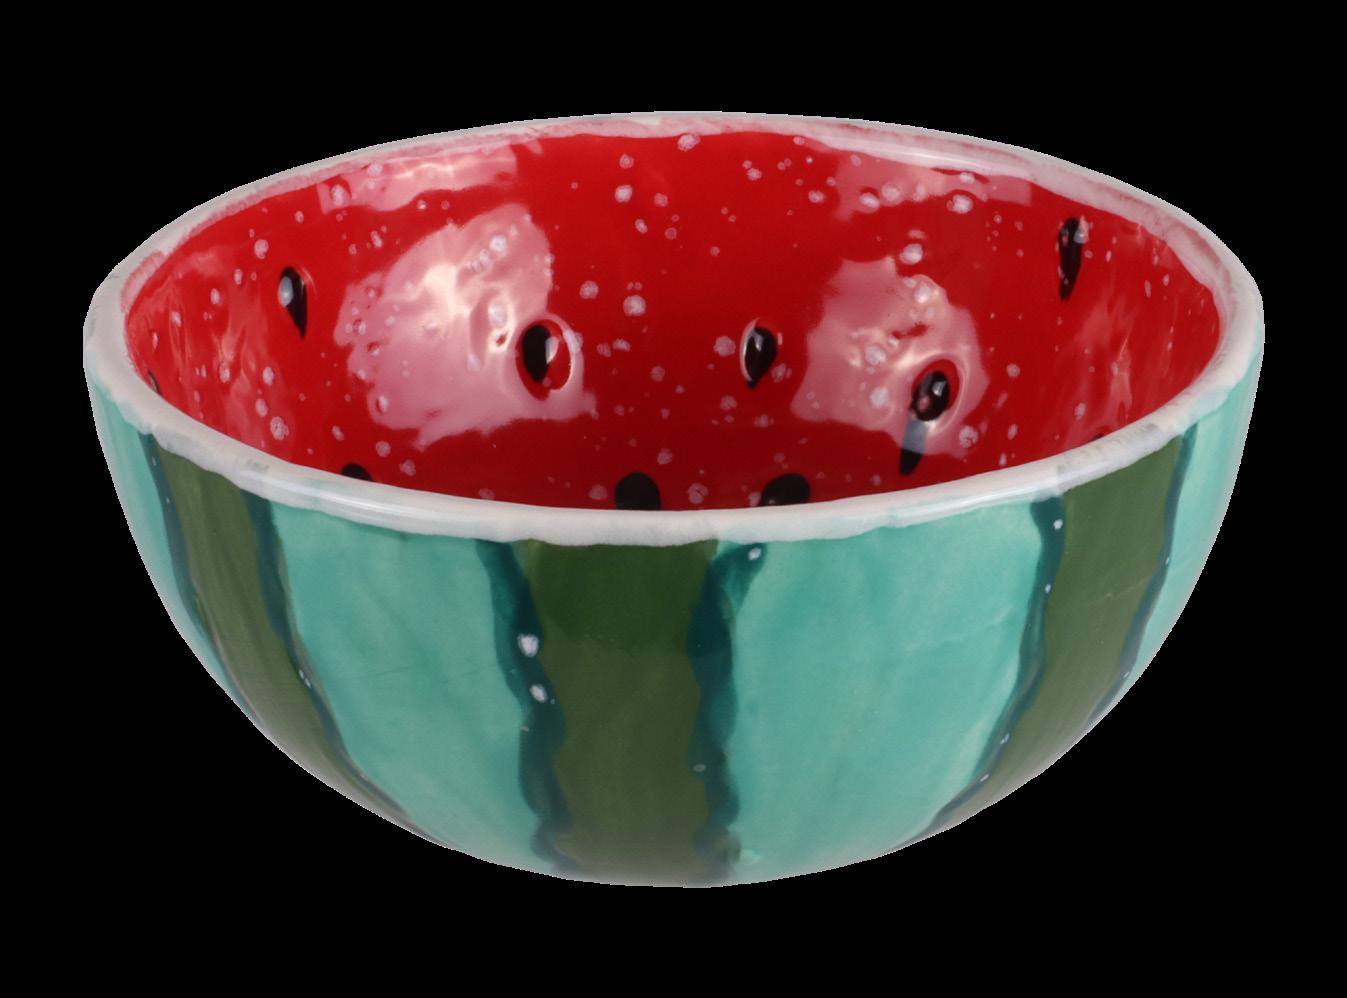
3. Add one sheer coat of Ruby Slippers around the remaining top, then add a line of Cotton Tail. Let dry and use a small liner brush to color the seeds using Tuxedo glaze.
4. Let it dry and add glaze to the outside of the bowl. Apply two coats of Mayco Stroke & Coat, Slime time in every other section and two coats of Leapin’ Lizard on the other sections.
5. Let dry. Use a damp cloth to remove any glaze from the rim of the bowl.
6. Add thin layer of Leapin’ Lizard around the rim of the bowl.
7. Let dry and add a second coat. Fire to cone 06.
“BOWL 2”
INSTRUCTIONS
1. Use a soft cloth to remove any debris from the bowl.
2. Use a medium round brush to apply two coats of Speckled Hot Tamale to the inside of the bowl. Let dry and use a small liner brush to color the seeds using Mayco Stroke & Coat, Tuxedo glaze.
3. Let it dry and add glaze to the outside of the bowl. Apply two coats of Mayco Stroke & Coat, Jaded in every other section and two coats of Green Thumb on the other sections.
4. Let dry. Use a damp cloth to remove any glaze from the rim of the bowl.
5. Add a thin layer of Cotton Tail around the rim of the bowl.
6. Let dry and add a second coat. Fire to cone 06.
10 SUMMER CAMP GUIDE • VOL 10 Juicy Watermelon Bowls | 213
WATERMELON SAUCE BOWL
COLORS
• BLS901 Sunny Tuscany
• BLS904 Strawberry Field
• BLS908 Black Swan
• BLS903 Pumpkin Head
• BLS928 Blue Lagoon
• BLS921 Mad Hatter
• BLS935 Fiorentina
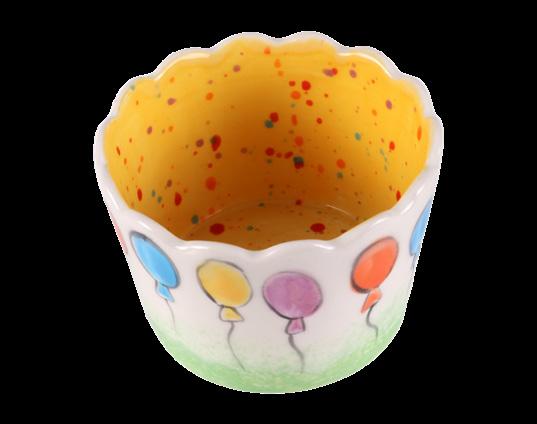
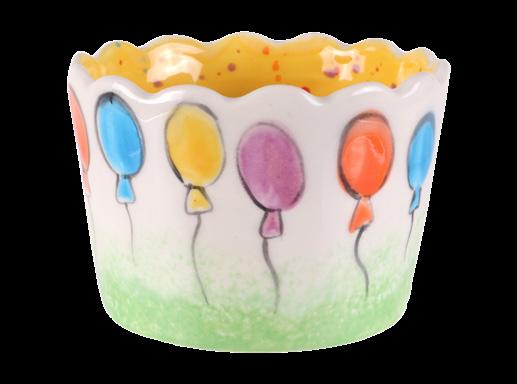
INSTRUCTIONS
1. Paint inside of bowl 3 coats BLS-901 Sunny Tuscany and let dry.
2. Make splatters inside the bowl with all the different colors.
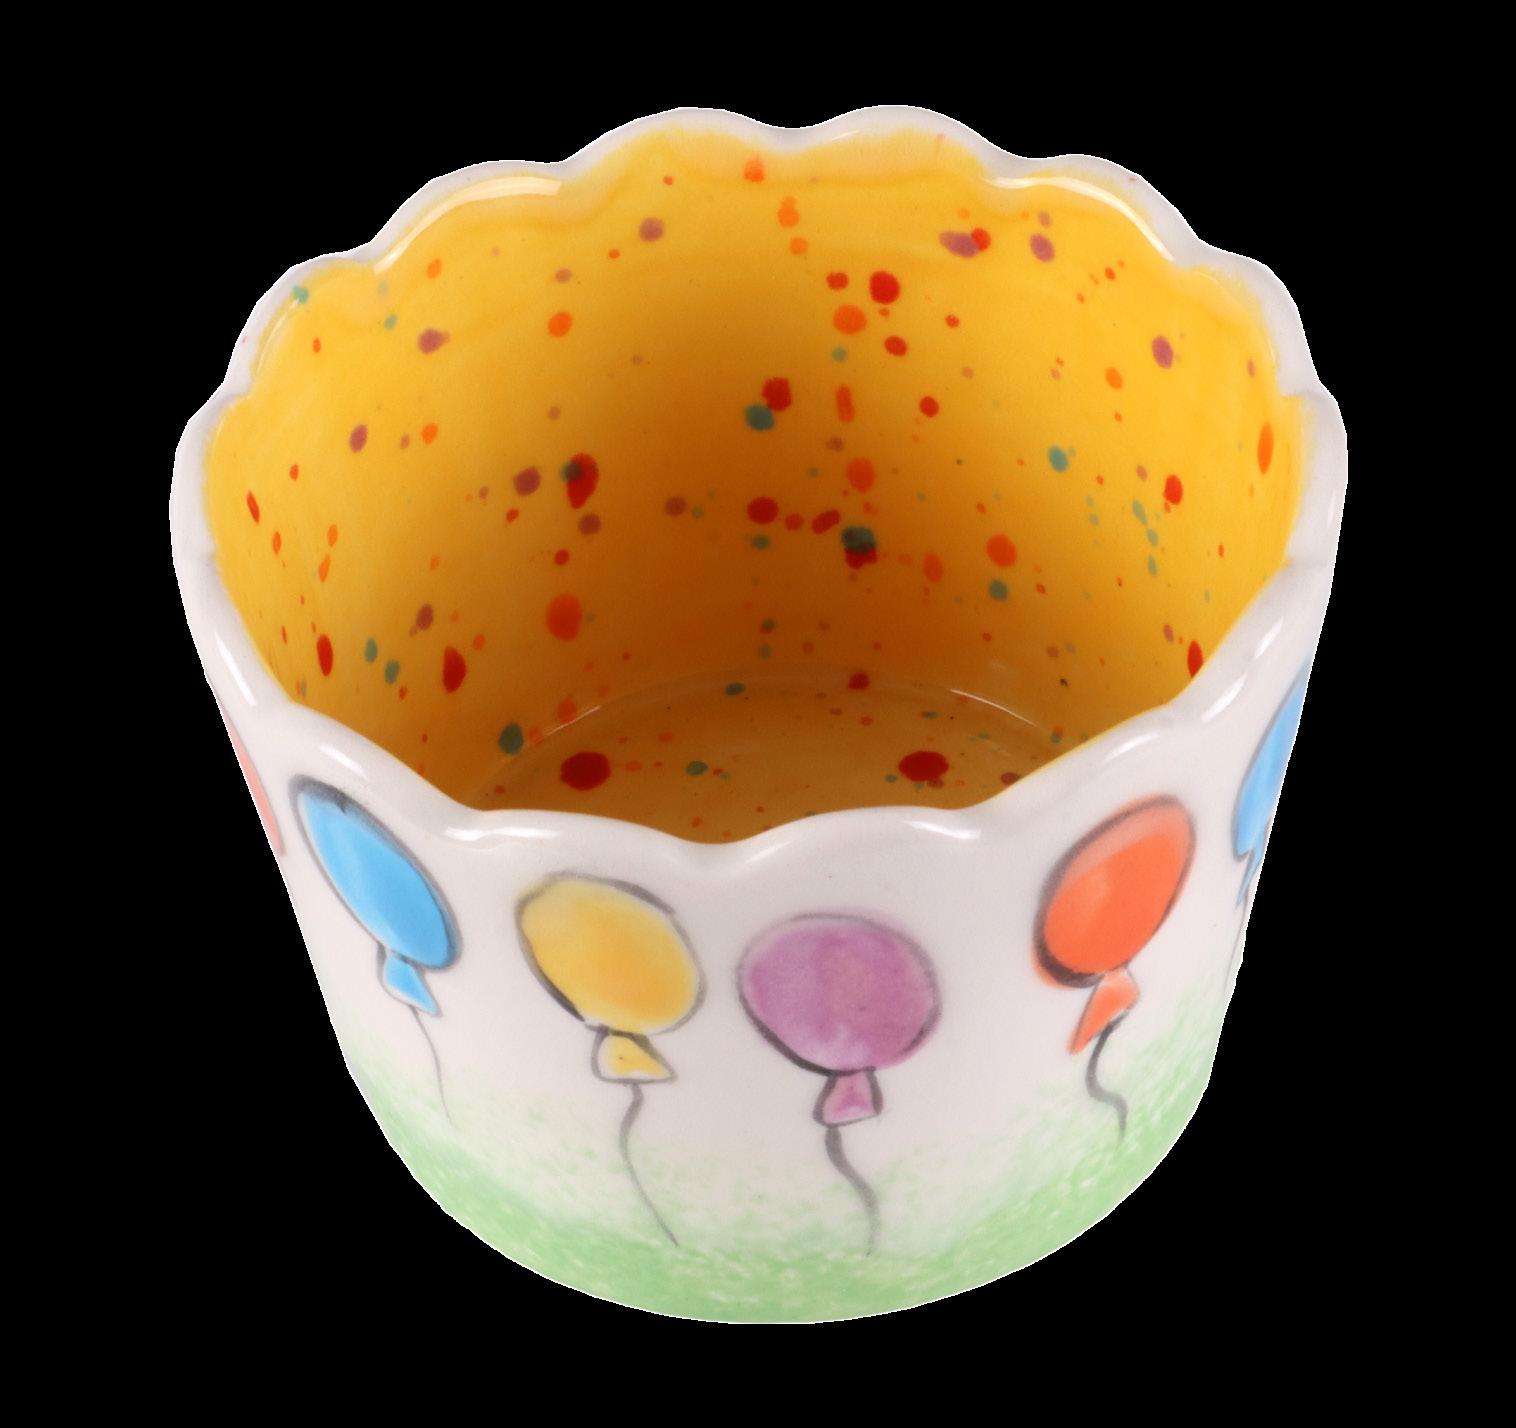

3. Pour Strawberry Field, Bue Lagoon, Pumpkin Head, and Fiorentina onto your palette. Dip fingers in each color, one at a time, then stamp onto your piece to make balloon rounds.With a sponge dab some green paint on the bottom to make it look like grass.
4. Change to “Dab some Mad Hatter on the bottom of the piece with a sponge to make it look like grass.
5. Outline balloons and add strings with thinned out Black Swan glaze.
6. Allow piece to dry completely, then clear glaze and fire to cone 06.
11 See more at BISQUEIMPORTS.COM Curvy Sunday
312
Bowl |
CURVY SUNDAE BOWL
COLORS SUPPLIES
• SC009 Jaded
• SC010 Teal Next Time
• SC011 Blue Yonder
• SC015 Tuxedo
• SC045 My Blue Heaven
• NTCLR3 Clear One Dipping
• RB144P #4 Soft Fan
• RB110 10/0 Detail Liner
• Sponge
• Water
• Palette
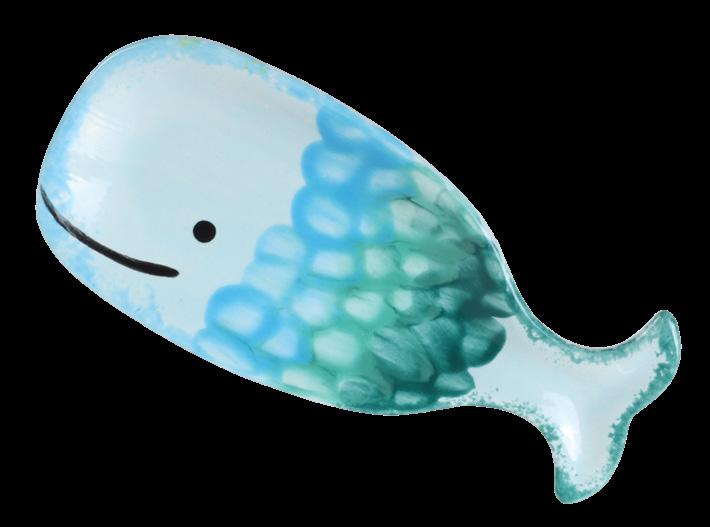
INSTRUCTIONS
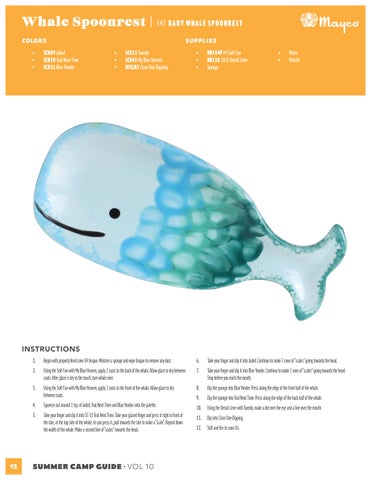
1. Begin with properly fired cone 04 bisque. Moisten a sponge and wipe bisque to remove any dust.
2. Using the Soft Fan with My Blue Heaven, apply 2 coats to the back of the whale. Allow glaze to dry between coats. After glaze is dry to the touch, turn whale over.
3. Using the Soft Fan with My Blue Heaven, apply 2 coats to the front of the whale. Allow glaze to dry between coats.
4. Squeeze out around 1 tsp. of Jaded, Teal Next Time and Blue Yonder onto the palette.
5. Take your finger and dip it into SC-10 Teal Next Time. Take your glazed finger and press it right in front of the tale, at the top side of the whale. As you press it, pull towards the tale to make a “scale”. Repeat down the width of the whale. Make a second line of “scales” towards the head.

6. Take your finger and dip it into Jaded. Continue to make 2 rows of “scales” going towards the head.
7. Take your finger and dip it into Blue Yonder. Continue to make 2 rows of “scales” going towards the head. Stop before you reach the mouth.
8. Dip the sponge into Blue Yonder. Press along the edge of the front half of the whale.
9. Dip the sponge into Teal Next Time. Press along the edge of the back half of the whale.
10. Using the Detail Liner with Tuxedo, make a dot over the eye and a line over the mouth.
11. Dip into Clear One Dipping.
12. Stilt and fire to cone 06.
12 SUMMER CAMP GUIDE • VOL 10 Whale Spoonrest | 547 BABY WHALE SPOONREST
COLORS SUPPLIES
•
•
•
“DOTTED”
INSTRUCTIONS
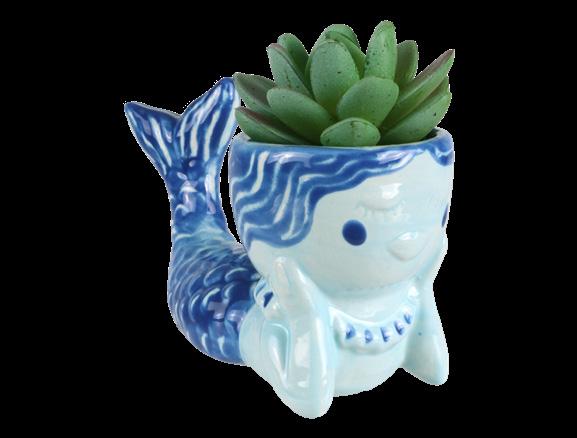
1. With a medium paintbrush, paint 2 coats of My Blue Haven to the mermaid’s head, torso, and tip of her tail. Since we are shooting for a washed-out, watercolor look, your coats do not have to be fully thorough or heavy. Be sure to paint into the inside of the head where the soil will lie.
2. Next, paint two washed-out coats of Cara-bein Blue on the tail. Blend some water into your paint pallet to create a lighter, toned-down hue.
3. Once your tail is covered, take a dotter tool or a skinny detail brush and begin adding dots on each pre-detailed scale groove in the tail.
4. Add two circle dots on her cheeks and on the end of her tail. Create a dotted pattern around the rim of her head.
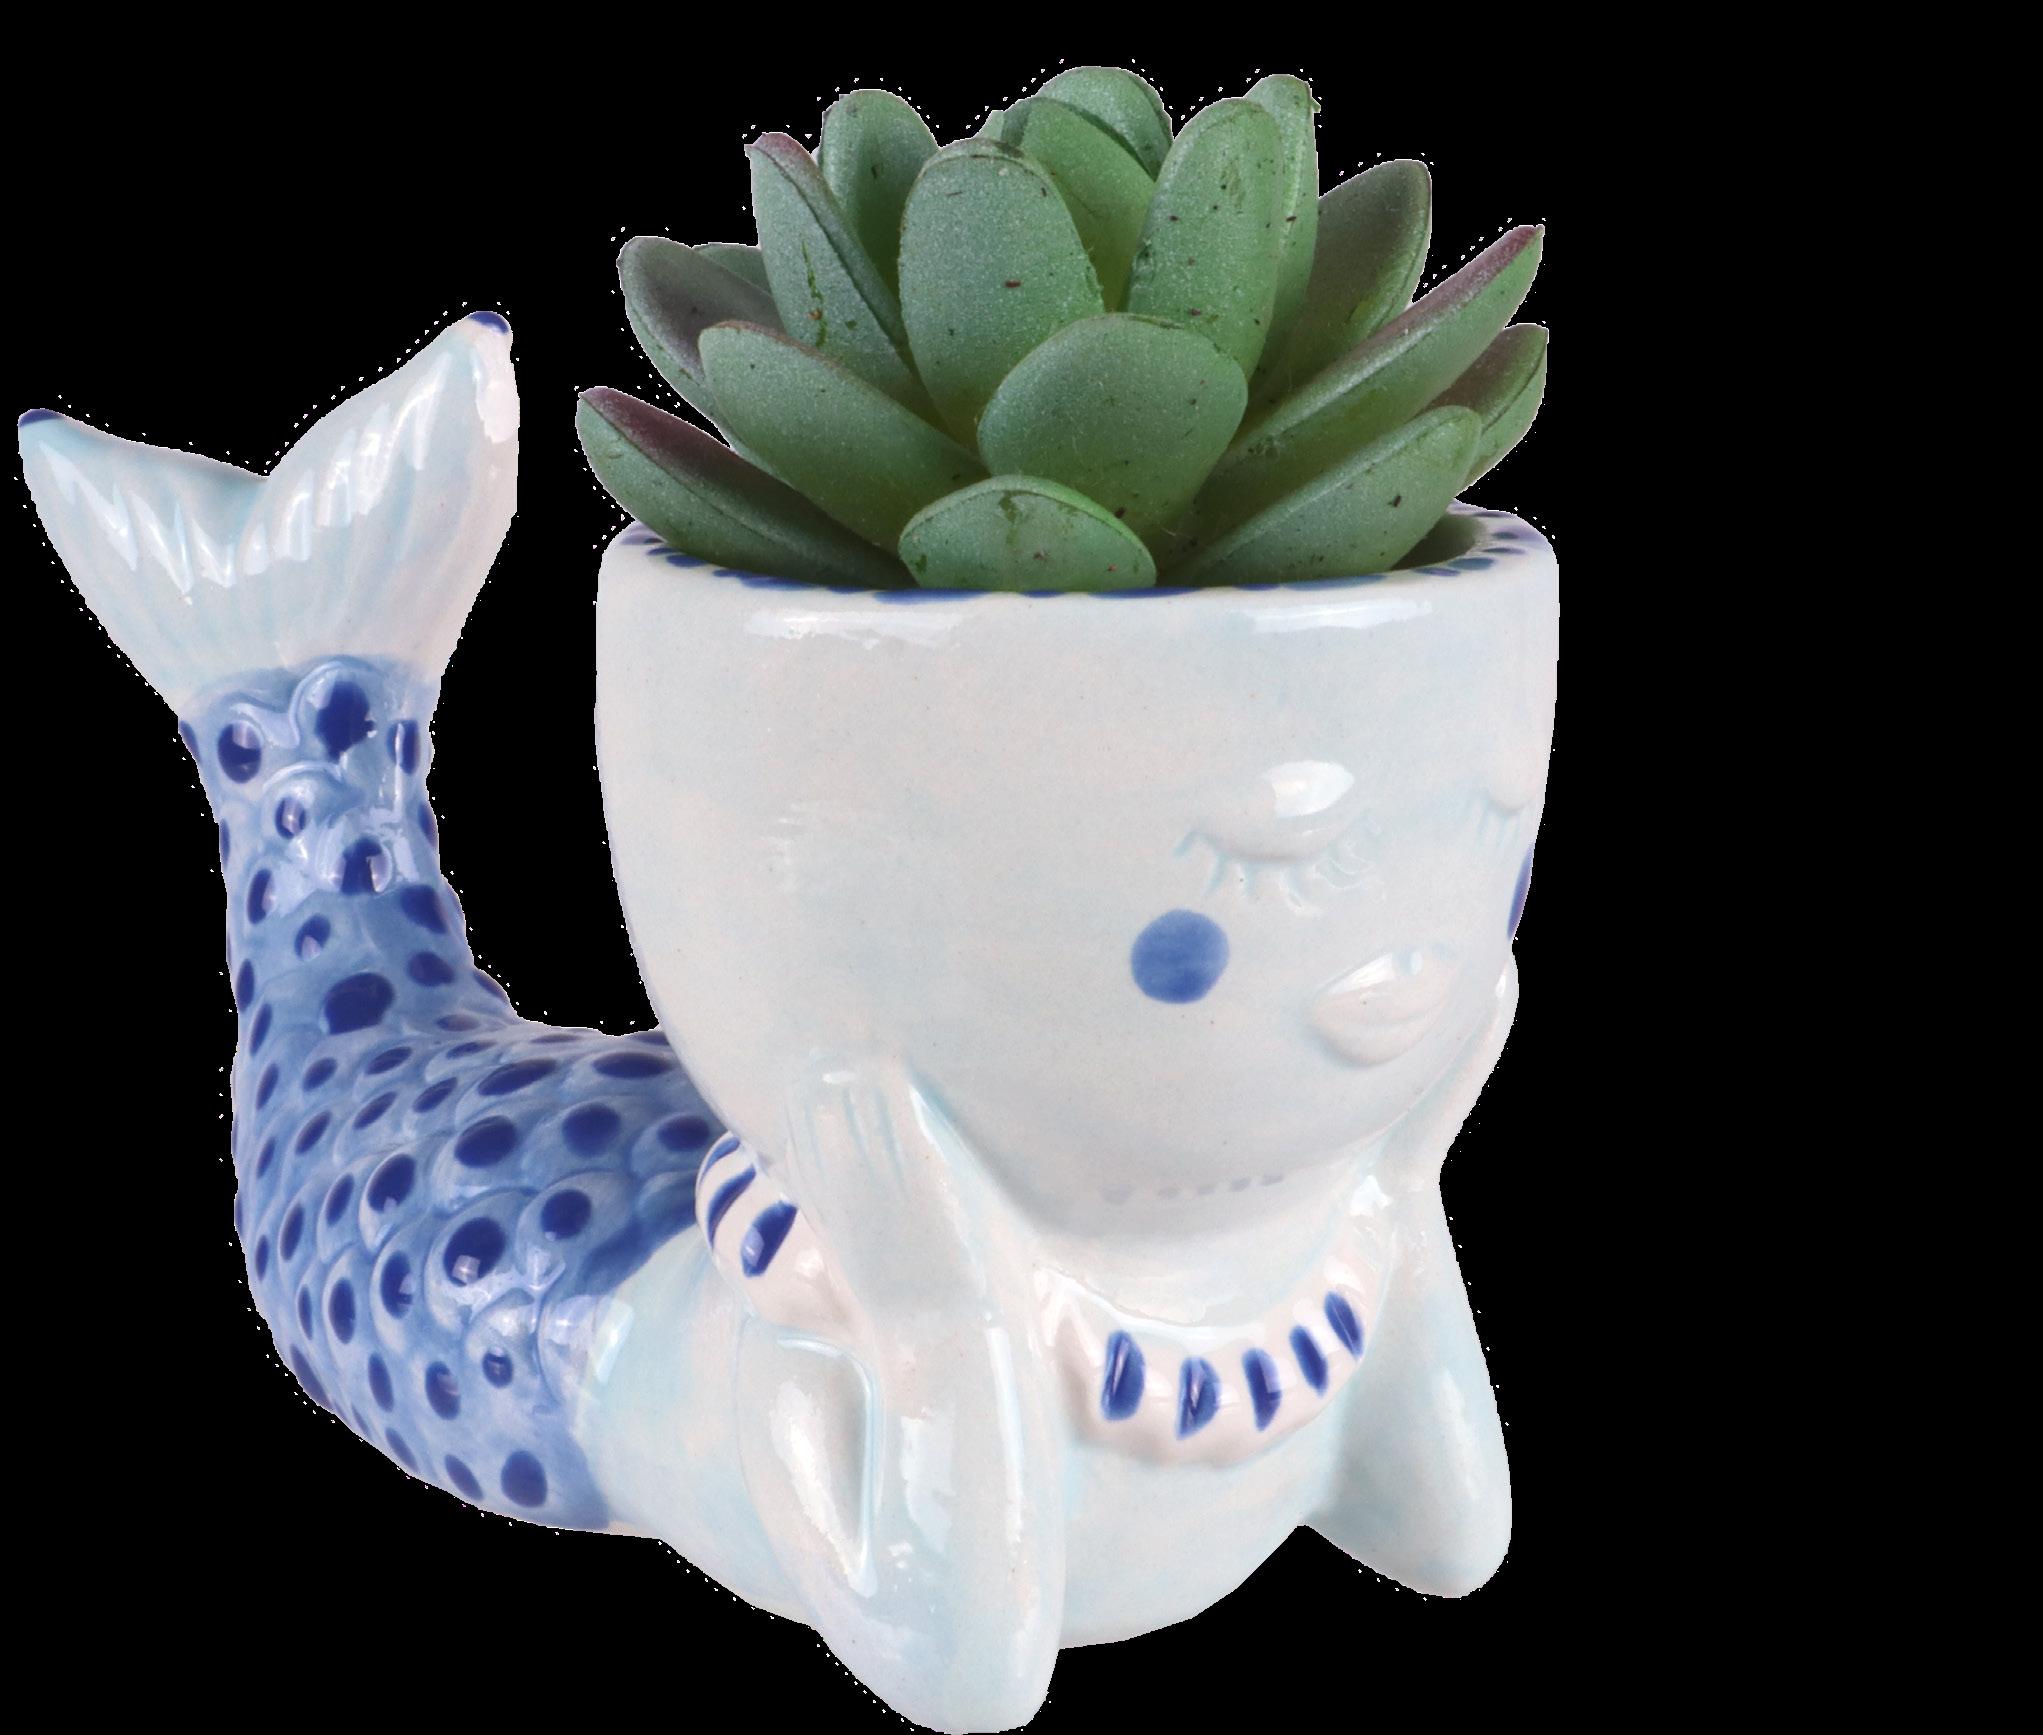
5. Lastly, with a small detail brush, sketch in blue grooves to her necklace where they naturally lie.
Optional : If you want to add more detail to her face, feel free to do so! While this project does require a medium level of precision, it also leans on the simpler side of detail work to ensure kids in middle school and up can complete it. Dot and line work is essential in increasing paint skill and preciseness!
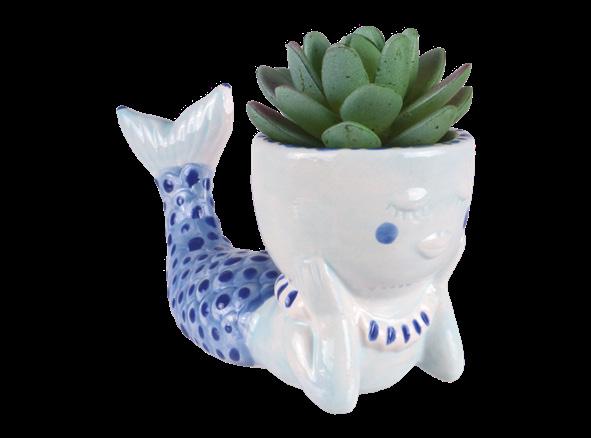
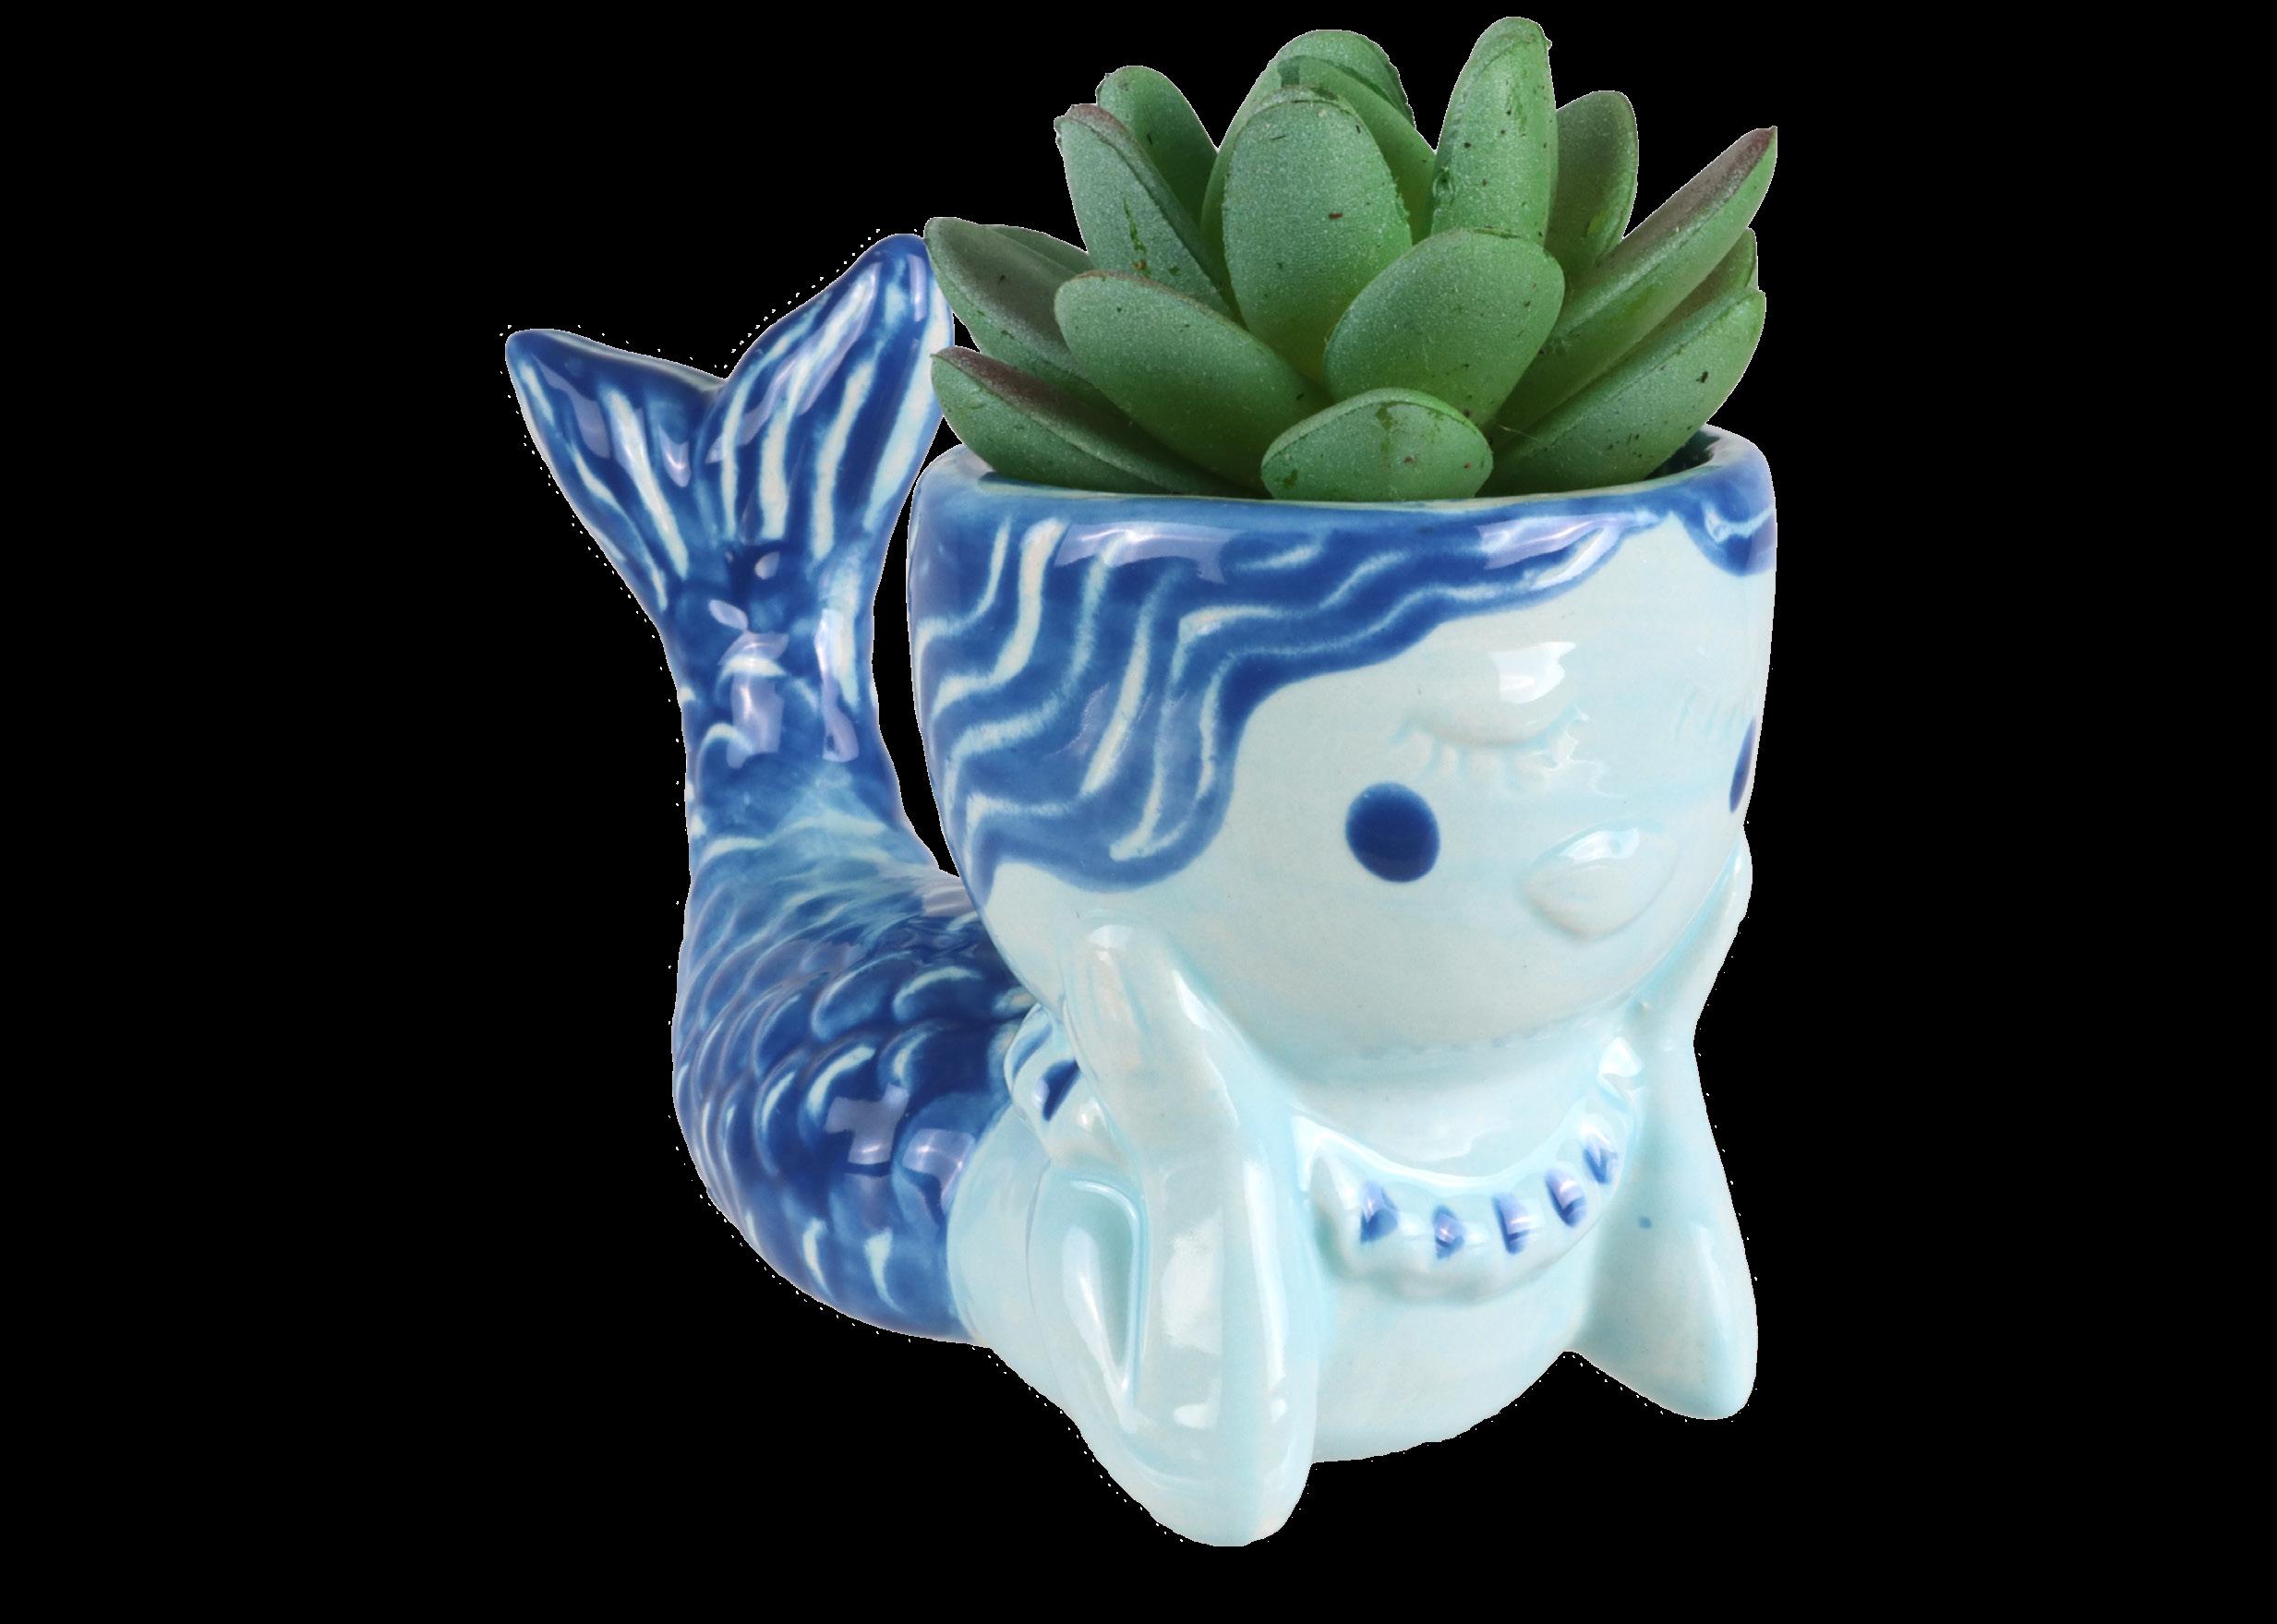
13 See more at BISQUEIMPORTS.COM Monochrome Mermaids | 3956 PEARL THE MERMAID PLANTER
SC076 Cara-bein Blue
SC045 My Blue Haven
•
•
Medium Round Pointed Brush
Small Round Brush
Detail Brush
This summer, let’s dive into a simple, yet versatile project with many artistic and educational benefits. Given that this monochromatic mermaid planter project only requires two colors, a lighter and a darker, it can easily be finished in any hue of the painter’s choice. If campers want to step outside the bounds of the blue, ocean zone, the same patterns and processes can be carried out with any color choices! I’ve created two versions of a similar-looking mermaid that should only take roughly an hour to create. Each project hones in on a specific painting skill that is foundational in ceramic painting and feasible for many young ages. I do recommend these projects be carried out on an age level of 10 and up.
If you’re seeking to carry out a more thorough, well-rounded workshop approach to camps, these projects could allow you to bring in some of Earth’s ripe treasures: plants and soil. Once their mermaids are fired, you could hold a plant potting workshop. Not only does finishing out the mermaid project with personal plants create a camp experience that stretches beyond the ceramic world, it also invites kids to see the functionality of their work in your studio. Instead of giving the planter to their caretaker to finish, they get to learn to do it themselves! If you are someone who values plant care and education, this portion of the project is a rich opportunity for you to shed light on matters of all things plants, care, and green!
“SGRAFFITO”
INSTRUCTIONS
1. With a medium paintbrush, paint 2 coats of My Blue Haven to the entire mermaid body and tail. Be sure to paint into the inside of the head where the soil will lie.
2. With a small/medium paintbrush, begin painting the tail in Cara-bein Blue. It’s best to allow your strokes to ease over the shells, creating pockets where no paint falls into where the natural grooves lie. Paint 2 solid coats of blue onto the tail.
3. While you’re waiting for the tail to dry to medium-dryness, begin adding hair details onto the head with a small detail brush. The lines of hair do not have to be perfect by any means! Remember, the mermaid is swimming in the ocean after all, and no one’s hair looks perfect when wet!
4. Once the tail has reached a dry, yet malleable consistency, it’s time to begin the sgraffito process. Take the sharp, angled end of a small paintbrush and begin carving out half-circle grooves into her scales. Follow the pattern that already exists on the tail for ease. You want to pull back the paint until you reach the light
blue layer underneath. Try not to pull back too far to where the white bisque base shows through. But if it does, it will still be just as neat!
5. You can play around and etch in as many sgraffito designs into your tail as you want.
6. With your small detail brush, add in two circle cheeks of Cara-bein Blue on her face. These add liveliness to her face.
7. Allow project to dry completely, then clear glaze and fire to cone 06.
Optional: If you want to add more detail to her face, feel free to do so! While this project does require a medium level of precision, it also leans on the simpler side of detail work to ensure kids in middle school and up can complete it.
14 SUMMER CAMP GUIDE • VOL 10
NOTES
•
•
•
•
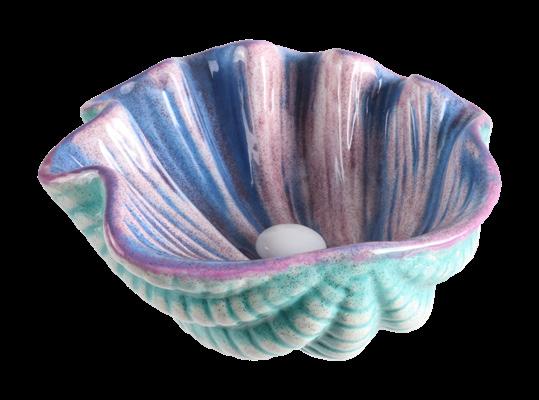
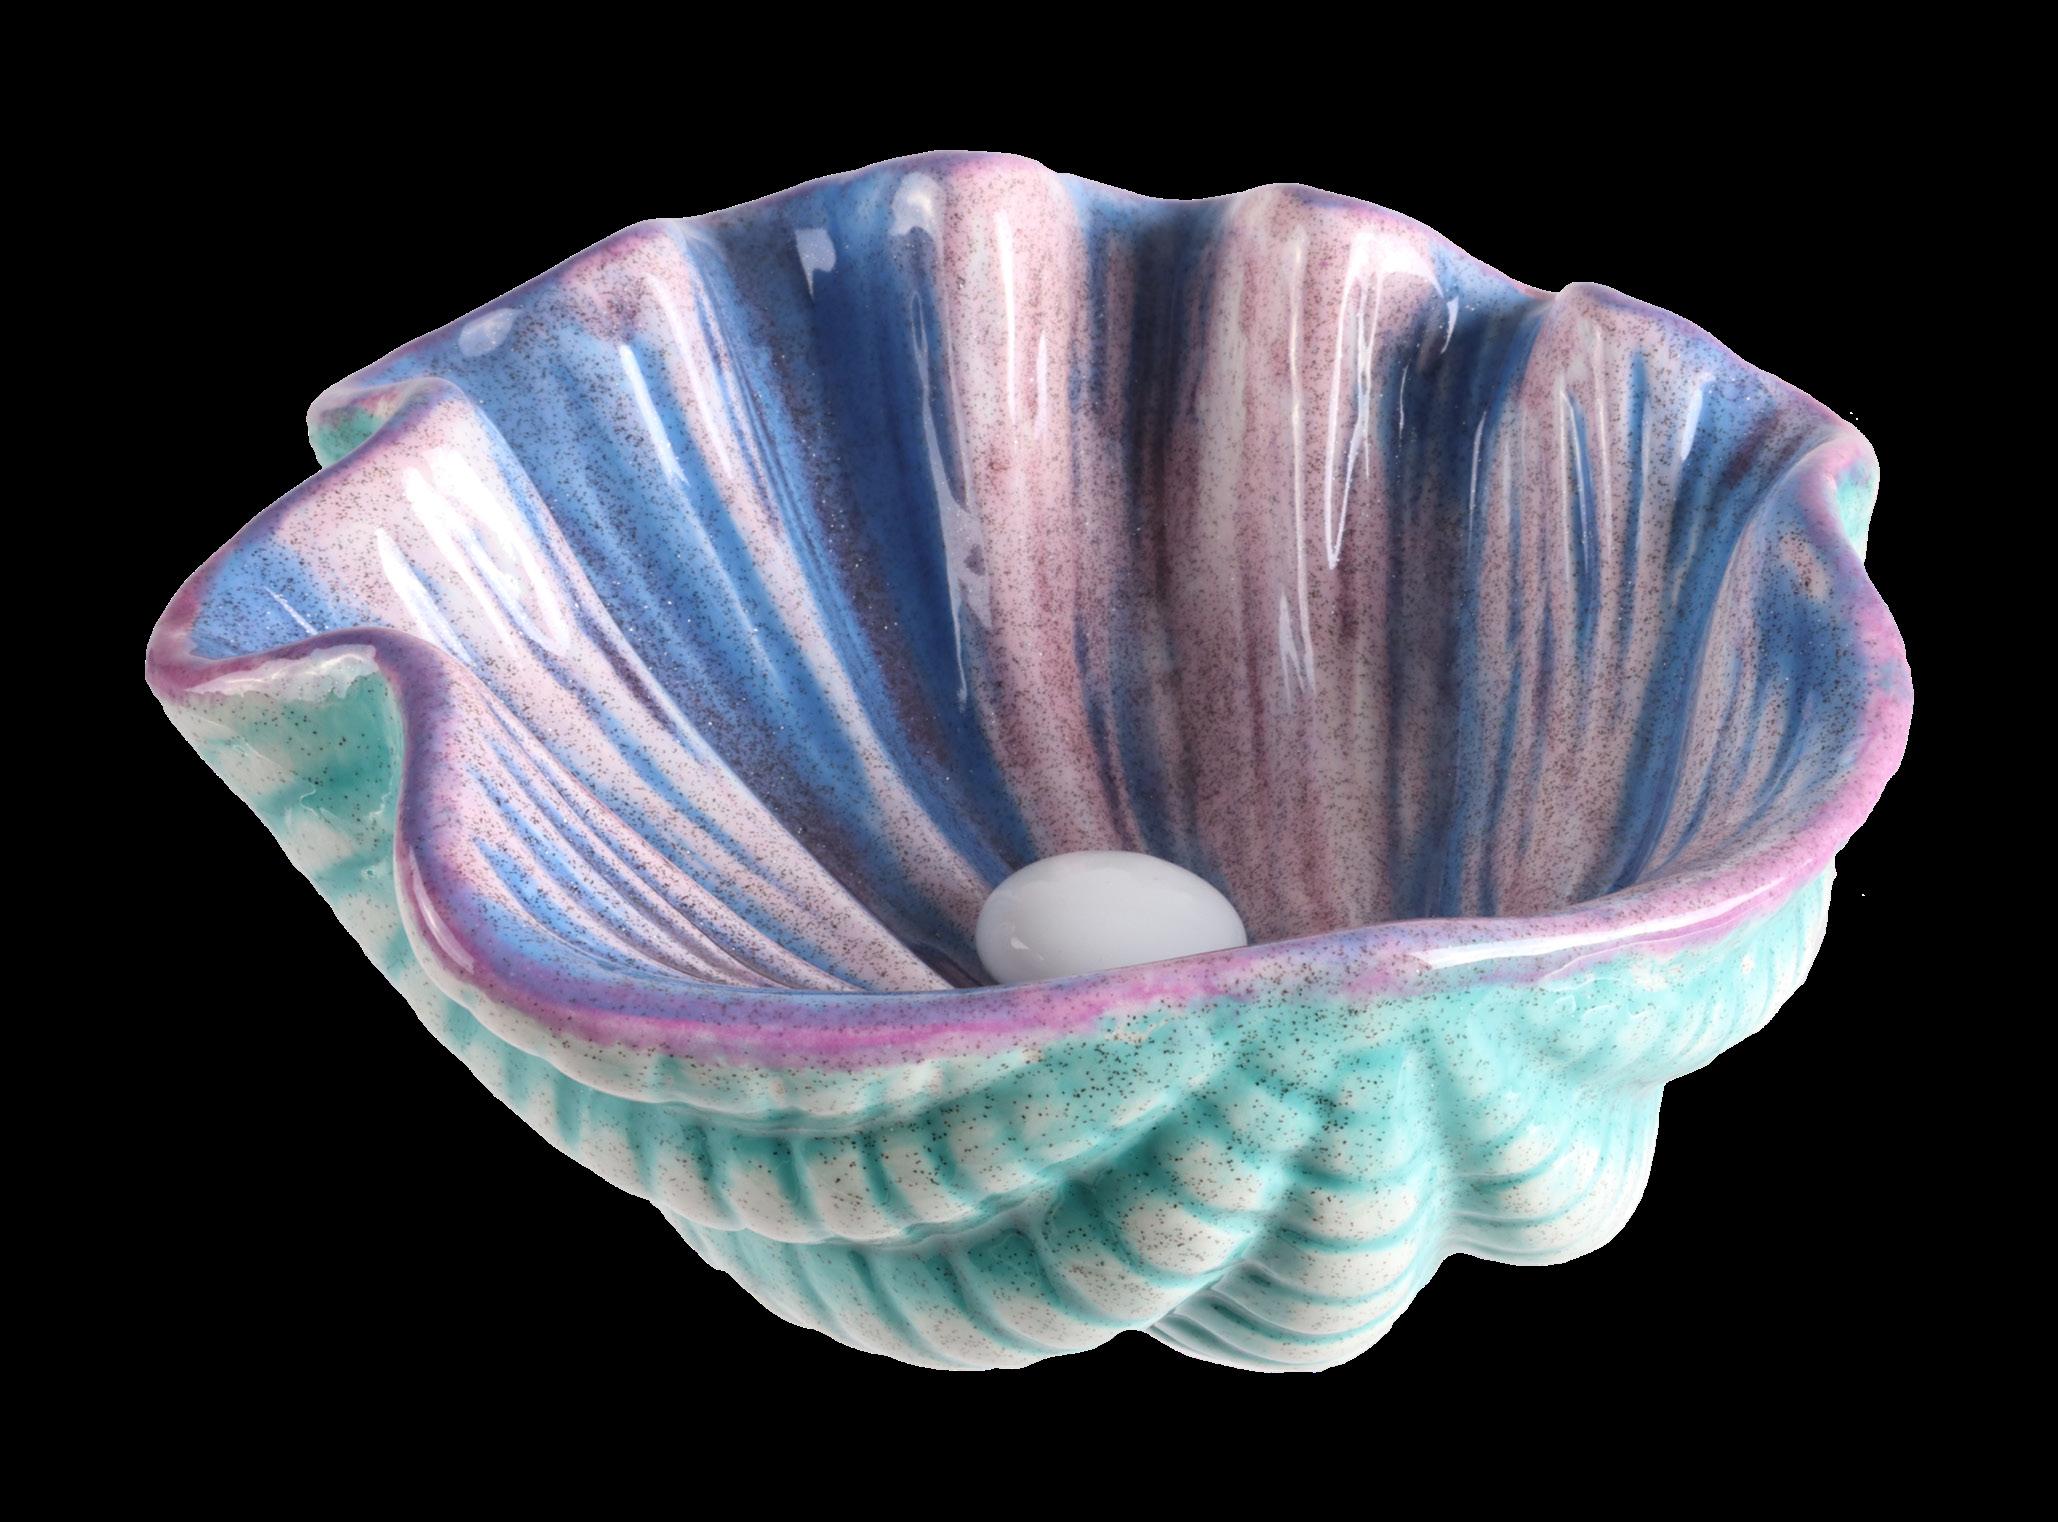
INSTRUCTIONS
1. Paint 1-2 coats of Blue Hawaii on the inside of the shell.
2. Paint 1-3 coats of Mermaid’s Song on the outside of the shell.
3. Take a damp sponge and wipe away the glaze from the raised surfaces of the shell, leaving glaze in the nooks and crannies.
4. Paint 2 layers of Pinky Toes inside the shell over the Blue Hawaii.
•
•
•
5. Paint 2 layers of Dusty Clear on the outside of the shell over the Mermaid’s Song.
6. Take a sponge paint dotter and dab it into some Arazmatazz. Dab the excess off the sponge and pounce along the rim of the shell dish.
7. No clear glaze required. Fire to Cone 06. 8. After firing, use E-6000 to glue a Snowfall Mosaic Pebble inside the dish as the “pearl”. Let the glue dry for 12 hours. Enjoy!
15 See more at BISQUEIMPORTS.COM
Mermaid Shell Dish | 195 GIANT CLAM SHELL DISH
Magic
BLS929 Blue Hawaii
BLS919 Mermaid’s Song
BLS934 Arazmatazz
HSS005 Dusty Clear
• HSS101 Pinky Toes
• C500-R10 Cobalt Round Brush 10
9599 Hydra Art Sponge
9591 Paint Dotters
• 8301 E-6000 Adhesive
BIM485 Snowfall Mosaic Pebble 15-20mm COLORS SUPPLIES
•
•
•
•
•
•
•
•
•
•
INSTRUCTIONS
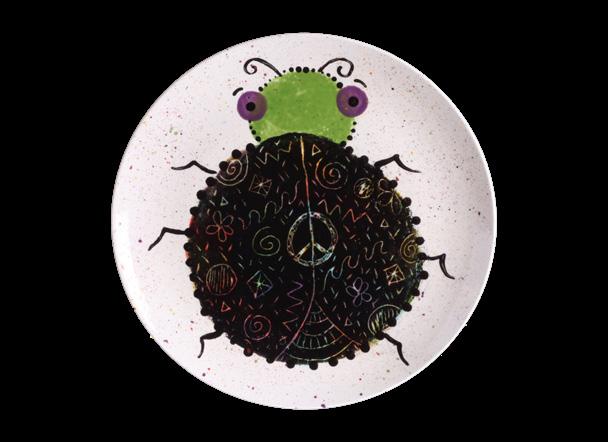
1. Flip the plate over to see the hanging holes on the back. Use a pencil to make a tiny X on the front side of the plate to mark the top so it hangs properly.
2. Use a pencil to lightly trace your choice of circle templates on the plate to create the bug’s head and body. You can also use a small paper plate, juice container lid, bottle cap, etc.
3. Use a large sponge paint dotter or cotton balls to add colorful splotches inside the big circle (the body). Ensure that kids dab off the excess glaze so it doesn’t make thick puddles on the bug. Try to cover the entire big circle that’s the bug’s body.
4. Use a medium sponge paint dotter or cotton ball to fill in the smaller circle (the head) with your choice of color.
5. Use a small sponge paint dotter or cotton swab with your choice of color to make 2 eyes either side of the bug’s head.
6. Use a clean, large sponge paint dotter or cotton ball to pounce a thin layer of Tuxedo over the colorful splotches inside the big circle.
7. When the glaze is no longer shiny (slightly damp), take a toothpick or wooden skewer to gently etch doodles and patterns in the Tuxedo glaze. Press lightly to reveal colorful doodles. Do not scratch all the way down to the white plate.
8. Dip the toothpick/skewer into Tuxedo and draw antennas, eyebrows, and legs on your bug. Get a good amount of glaze on the toothpick/skewer and pull the glaze to make the designs.
9. Dip the # 6 spoke of the dotting gyre in Tuxedo, then dot to add pupils to the bug’s eyes and dots around the head and body of the bug. Be sure to dip, then dot to make perfect sized dots each time.
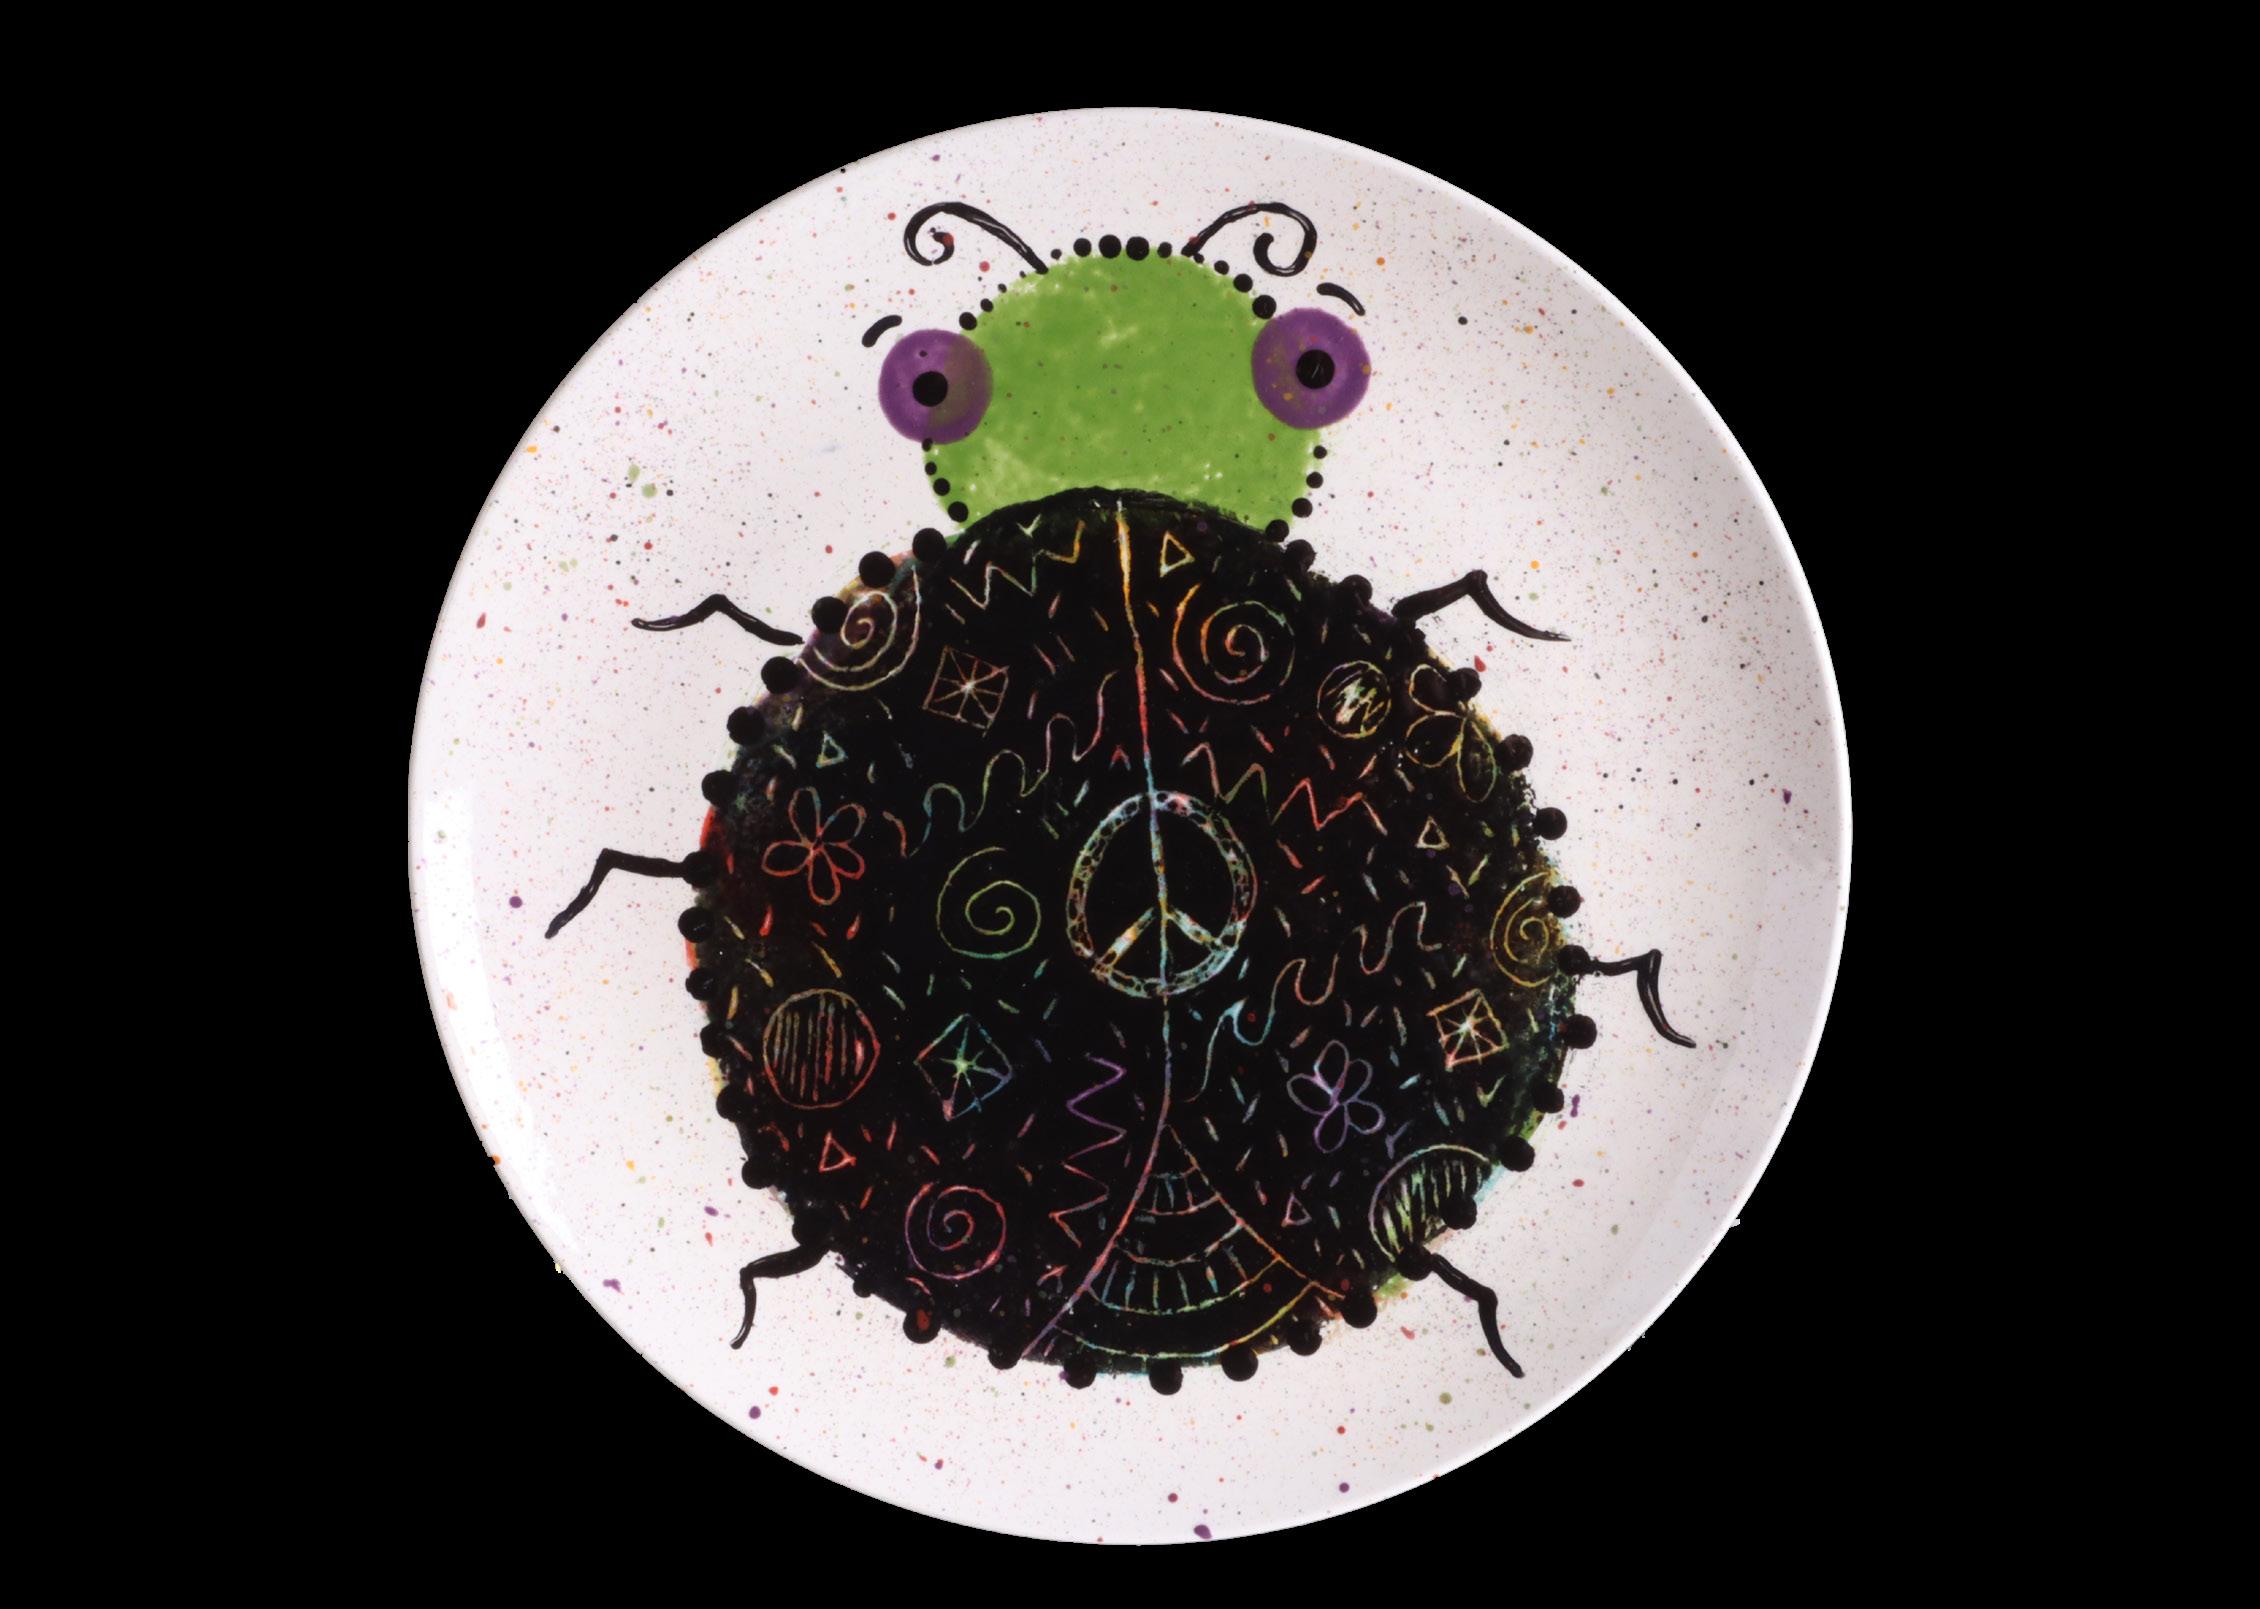
10. Optional: Dip the bristles of a toothbrush into the excess colors on the palette. Rub the bristles with your finger to spray colorful splattersl over the plate.
11. When the plate is completely dry, sweep off the glaze shavings with a dry brush.
12. Clear Glaze and fire to Cone 06. Enjoy!
16 SUMMER CAMP GUIDE • VOL 10 Doodle Bug Plate | 106 HANGING COUPE PLATE SMALL
SC071 Purple-licious
SC026 Green Thumb
Blue Isle
SC028
SC097 Cant-elope
SC073 Candy Apple Red
SC015 Tuxedo
9591 Paint Dotters
DOTG01 Dotting Gyre
Toothpicks or Wooden Skewers
Toothbrush
#2 Pencil
•
•
Circle Templates (Page 21) COLORS SUPPLIES
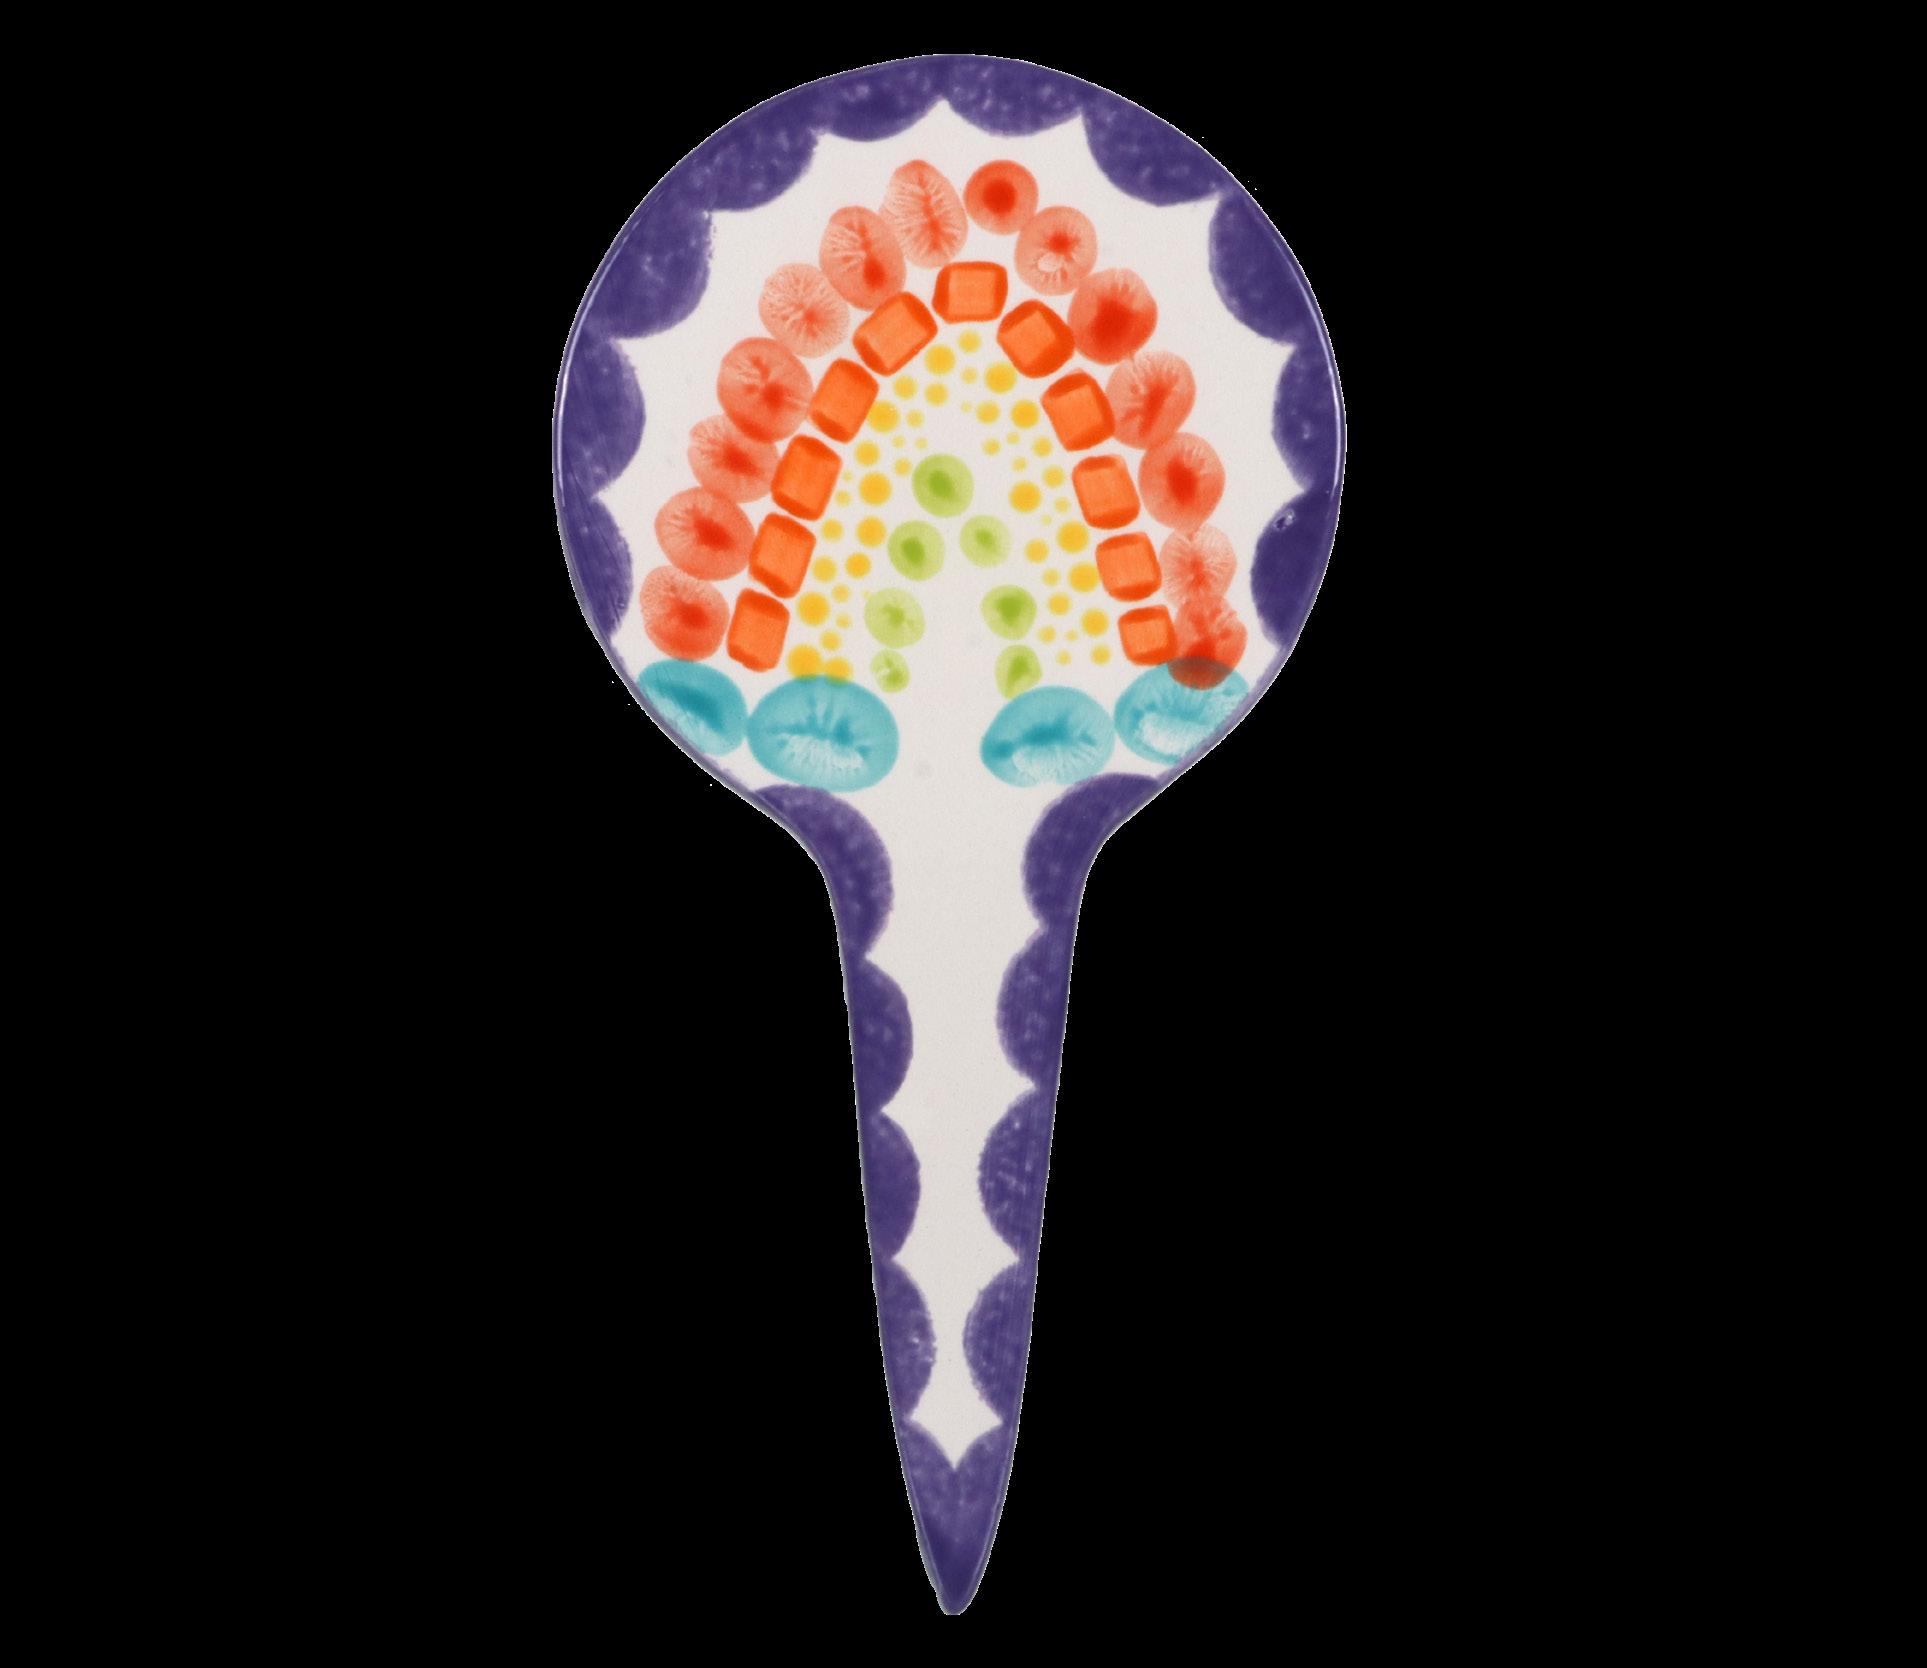
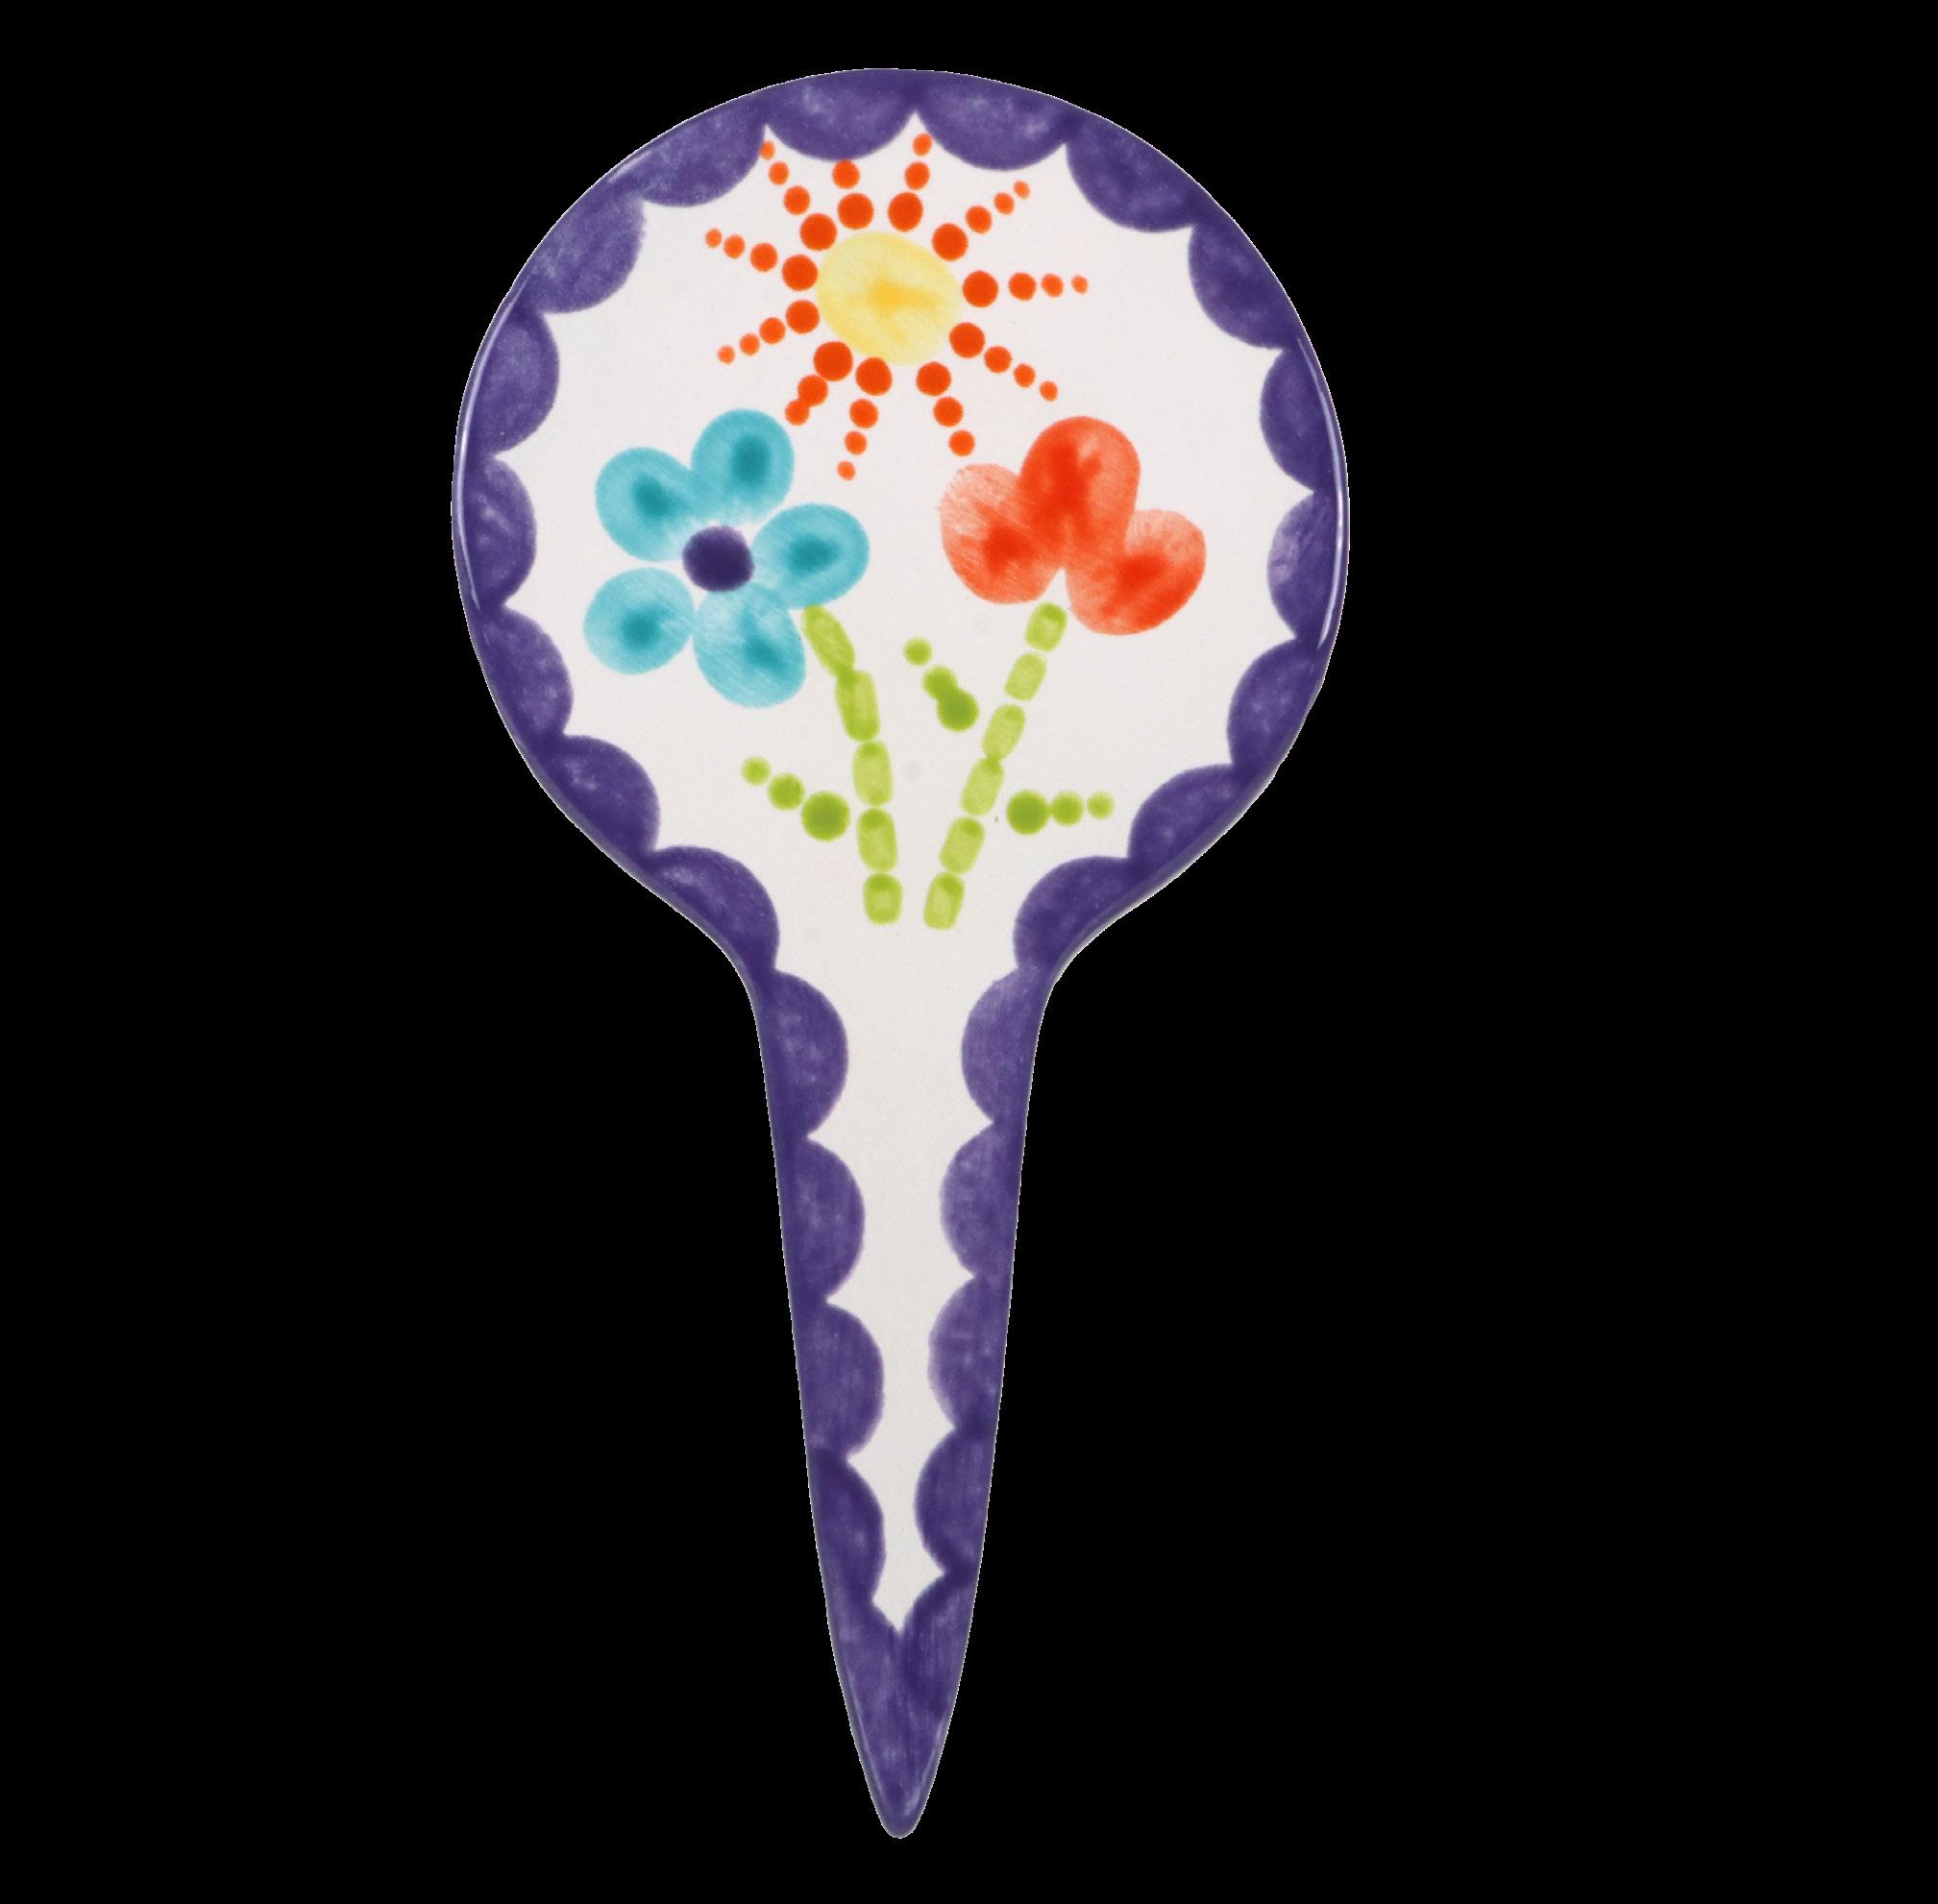
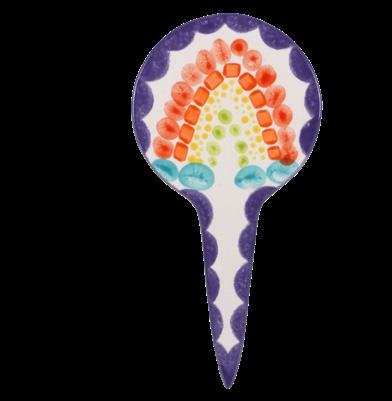
17 See more at BISQUEIMPORTS.COM Painting detail lines and fine details can be tricky for NOTES Fingerprint Art Garden Stake | 741 9” GARDEN STAKE COLORS SUPPLIES Tip: Level up this project for older campers by adding detail lines or other fun embellishments to the fingerprinted designs!
NOTES
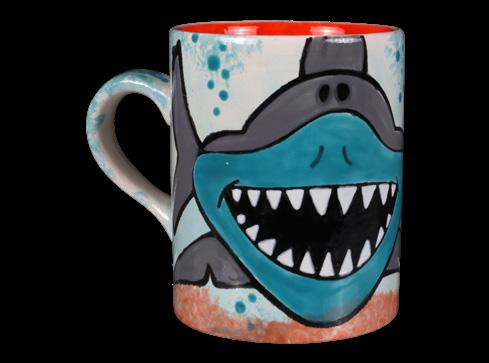
Silkscreens are a super cool tool to transfer detailed designs onto bisque with ease! Once your design is screened, simply paint inside the lines. It’s like magic!
•
•
INSTRUCTIONS
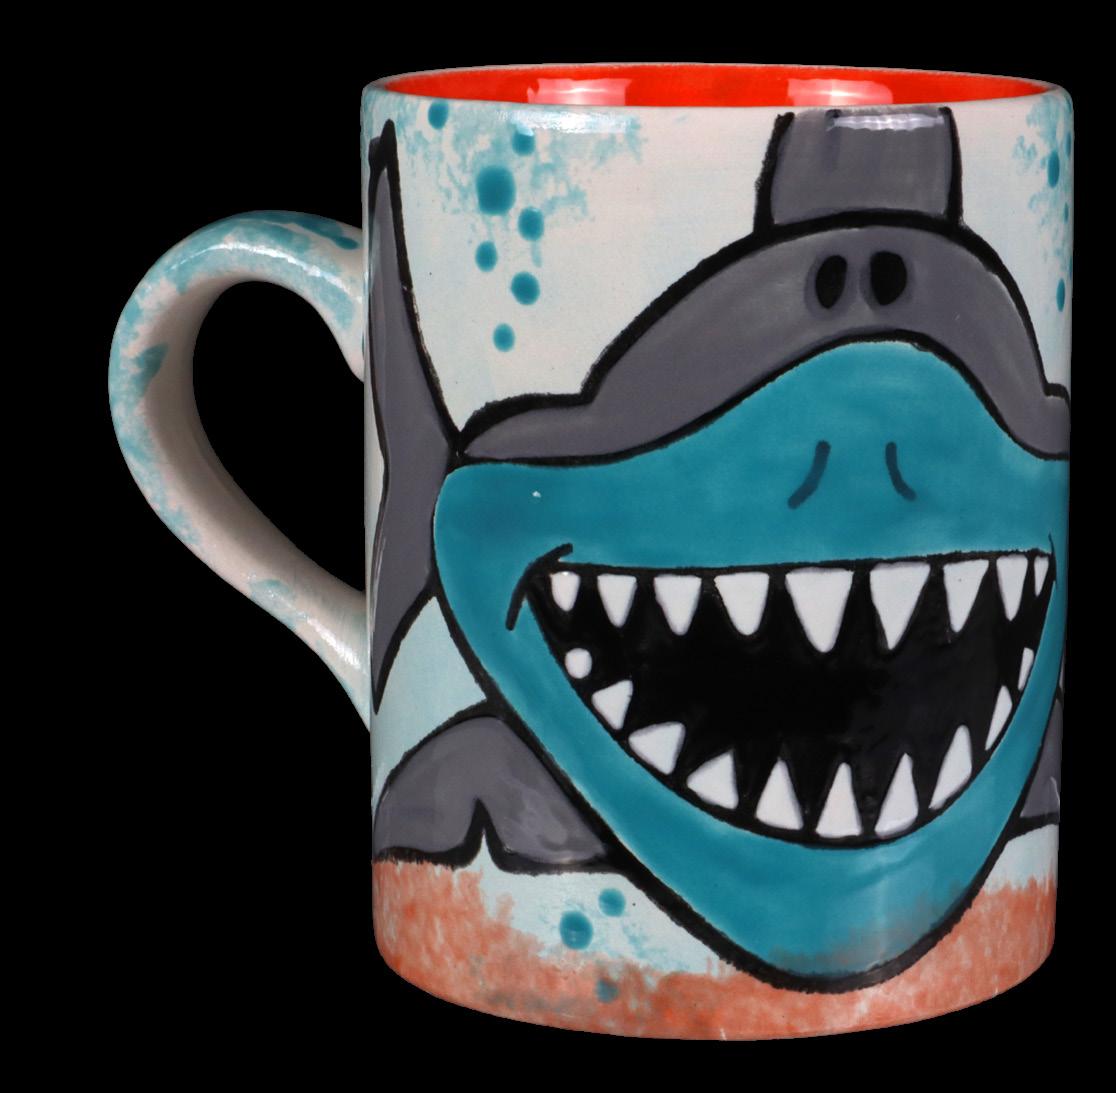
1. Wipe down the mug with a clean dry Hydra Art Sponge.
2. In a small cup, mix a 1-to-1 mixture of water and Blue Isle to make a color wash. Use a fan brush to brush the color over the mug surface and handle. Encourage little artists to make big “swish swish!” motions with their fan brush!
3. Along the bottom edge, sponge a layer of Basketball using a wool sponge. Let the mug dry completely.
4. Allow campers to pick their favorite design from the Shark Silkscreen. If you prefer, have designs pre-cut for easy sharing! Secure the silkscreen design to the mug surface using Art Tape.
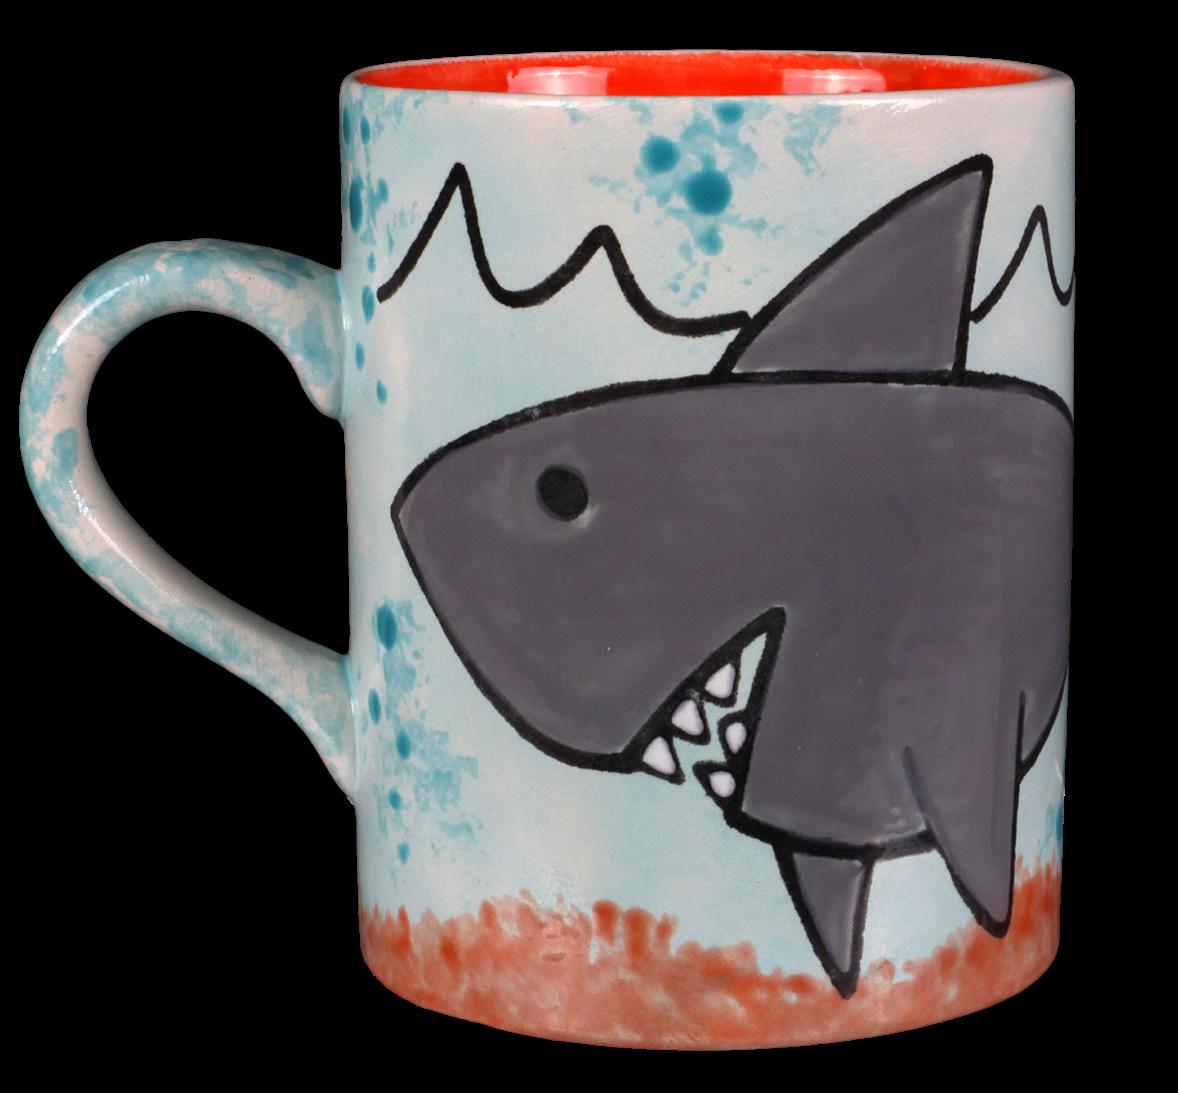

5. Pour a quarter-sized amount of Tuxedo onto your palette. Add a pinch of Silkscreen Medium to the glaze color, then mix using the end of your paintbrush until you reach a thick peanut butter consistency.
6. Dip your finger in the thickened glaze color, and rub the color into the screen design, one small area at a time. Dab and smooth the paint into the screen until all areas are filled with color.
Tip: For this step, we recommend demonstrating this technique in front of campers. If you’re able, have campers practice on a small tile before working with their mug project. Try to use other silkscreen designs on hand, as they can take time to fully dry after use.
7. Once completed, gently lift and remove the silkscreen and art tape. Immediately rinse the silkscreen off to remove any glaze.
8. Time to get creative! Have painters “paint inside the lines” to add color to their shark silkscreen design. Use smaller brushes and be sure to paint 2-3 coats of glaze. We used Cotton Tail to paint the shark teeth, plus Gray Hare and/or Blue Isle to paint the shark body.
9. Add texture marks around the shark design using Blue Isle and a wool sponge.
10. Create bubbles around the mug using Blue Isle and a Dotting Gyre. This can also be done using a cotton swab, paintbrush handle, or pencil eraser!
11. Paint the mug’s inside with 3 coats of Tu Tu Tango. 12. Allow the project to dry completely, then clear glaze and fire to cone 06.
18 SUMMER CAMP GUIDE • VOL 10
Fin-Tastic Shark Mug | 445 10 OUNCE PERFECT MUG COLORS
SC015 Tuxedo
SC016 Cotton Tail
SC028 Blue Isle
•
•
•
SCO35 Gray Hare
SC080 Basketball
SC0888 Tu Tu Tango • SS5012 Shark Silkscreen
8010 1/2” Art Tape
9599 Hydra Art Sponge
AC3104 Silkscreen Medium
DOTG01 Dotting Gyre
R2090 Wool Sponge Set
Assorted Paint Brushes
Fan Brush
Small Cup SUPPLIES
•
•
•
•
•
•
•
•
•
19 See more at BISQUEIMPORTS.COM Templates NOT SURE HOW TO USE TRANSFER PAPER? SCAN THE QR CODE FOR A HELPFUL VIDEO! • FISH BOWL SNACK BOWL PAGE 8 • DOODLE BUG PLATE PAGE 16 • FINGERPRINT ART GARDEN STAKE PAGE 17
20 SUMMER CAMP GUIDE • VOL 10 Fish Bowl Snack Bowl | PAGE 8
21 See more at BISQUEIMPORTS.COM Doodle Bug Plate | PAGE 16
22 SUMMER CAMP GUIDE • VOL 10 Fingerprint
| PAGE 17
Art Garden Stake

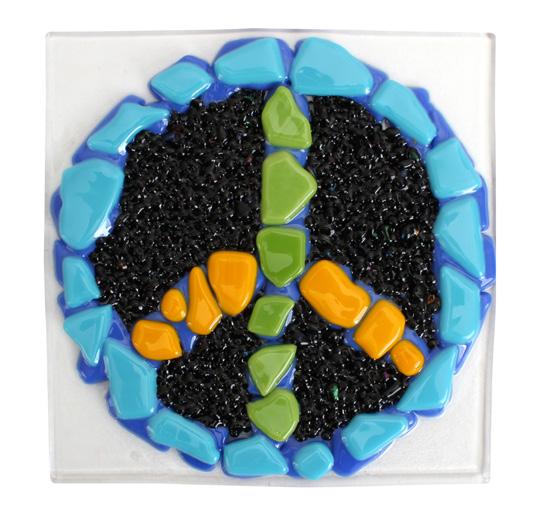

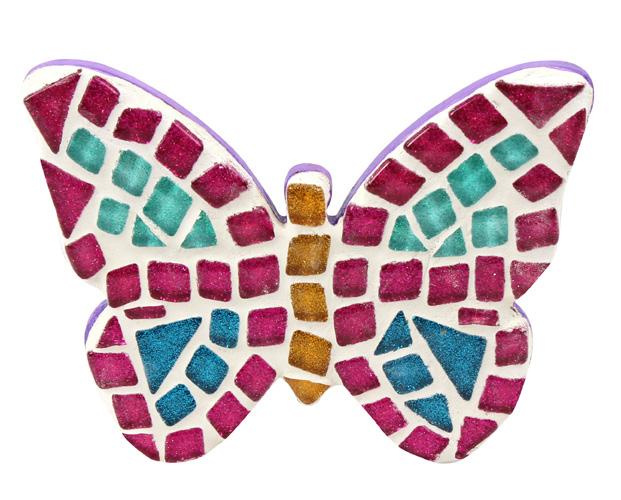

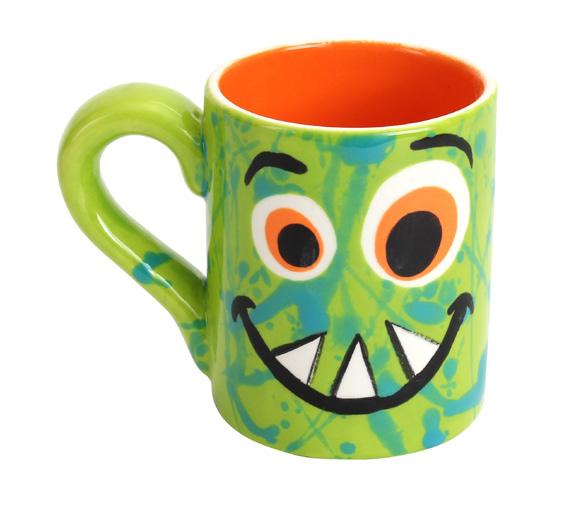


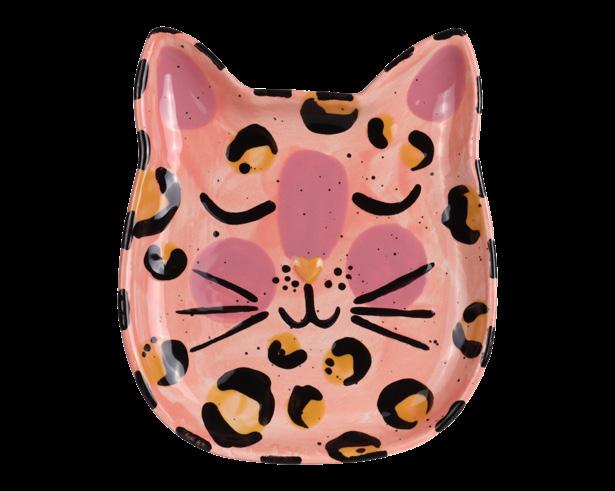
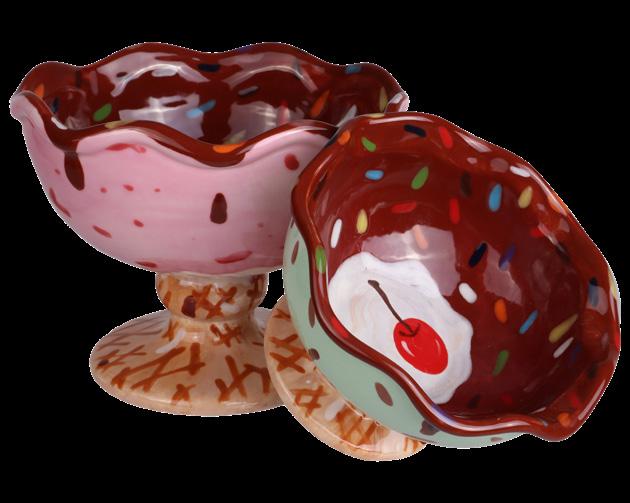


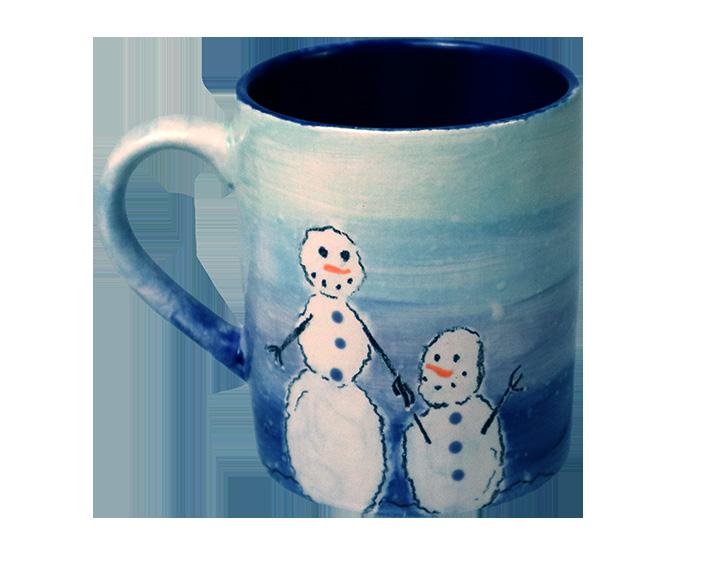
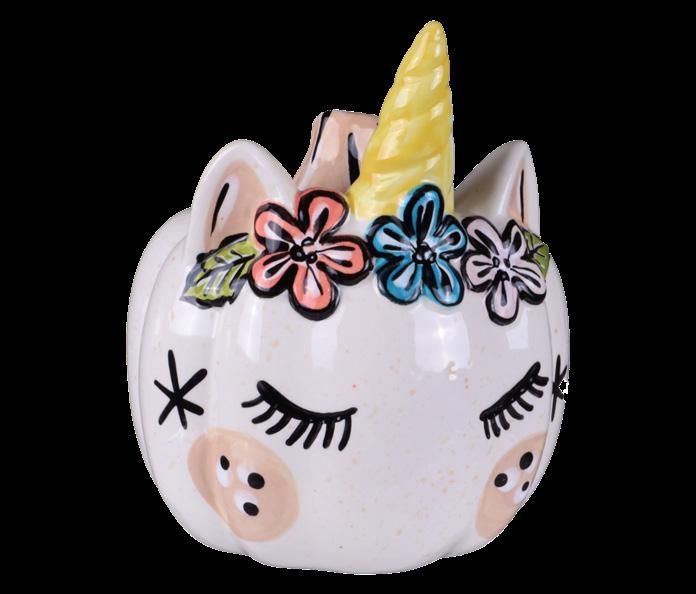
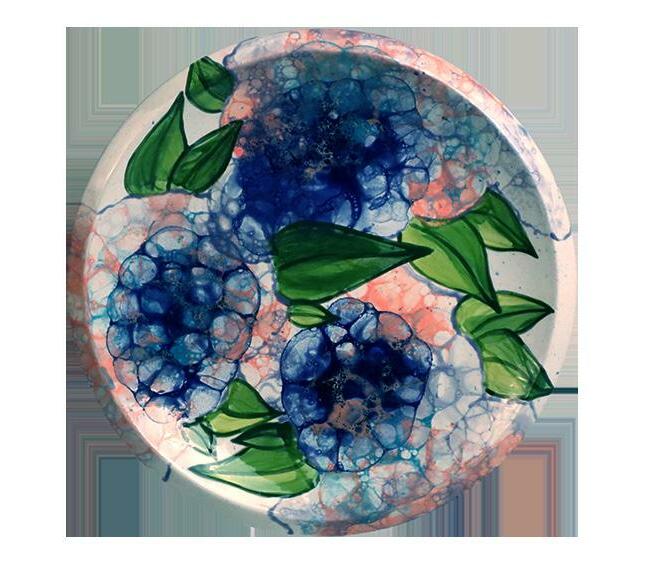


23 See more at BISQUEIMPORTS.COM BEAKER BASH ACRYLIC More Projects Online BITV is a great resource for brainstorming ideas for your campers! Offering a variety of projects, you can find activities for any experience level with a helpful list of all the supplies you need! Scan the QR code to browse our library of crafty creations! PEACE IT OUT WARM GLASS/KILN BUTTERFLY SHIMMER MOSAIC MUG MONSTER GLAZE/KILN CAT FACE DISH GLAZE/KILN SUNDAE BOWL SET GLAZE/KILN PRO PERK MEMBERS HAVE ACCESS TO EVEN MORE CONTENT! YOU MAY ALREADY BE A MEMEBER - SCAN THE QR CODE FOR DETAILS! LET IT SNOW MUG UNICORN PUMPKIN BUBBLY HYDRANGEA PLATE GLAZE/KILN ACRYLIC GLAZE/KILN