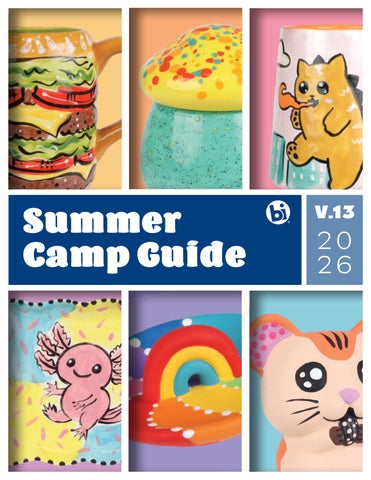
Summer Camp Guide
V.13
20 26
WELC O ME TO T H E
Summer Camp Guide VOLUME 13 2026 Hi, everyone! Get ready to dive into a brand-new season of creativity! The 2026 Summer Camp Guide (Volume 13) is your go-to resource for hassle-free summer camp planning—packed with inspiration, color, and plenty of personality. In this guide, our amazing artists share trendy, camp-ready projects—each complete with step-by-step instructions and painting tips n’ tricks. These projects are designed for summer camp artists of all ages and are packed with playful characters and bold, colorful designs that kids love. Be sure to check out even more tips on the “Setting Up Camp” page for expert advice on how to jump-start a program that fits your business model. The Bisque Imports team is absolutely thrilled to bring you Volume 13 in our Summer Camp Guide series, and we can’t wait to see these projects come to life in your studio. Be sure to explore all of our Summer Camp Guides for even more inspiration!
Your friends, The Bisque Imports Crew
Setting Up Camp.............................................................................................................. iv More Projects Online....................................................................................................... v Burger Buddy Mug...........................................................................................................1 Pinky the Flamingo Floaty..............................................................................................2 Colorful Toadstool Box....................................................................................................3 Popcorn Bowl....................................................................................................................4 Catzilla Mug......................................................................................................................5 Sharkfin Box......................................................................................................................6 Baby Axolotl Plate............................................................................................................7 Marshmallow Rainbow Mug............................................................................................8 Color Whirl Ring Dish......................................................................................................9 Glow BRO....................................................................................................................... 10 Little Nibbles................................................................................................................. 11 Squishmelon Mug......................................................................................................... 12 Templates................................................................................................................. 13-15
ii
SUMMER CAMP GUIDE • VOL 13
BURGER BUDDY MUG & PINKY THE FLAMINGO FLOATY FT. AMMIE WILLIAMS
POPCORN BOWL & TOADSTOOL BOX
FT. ELIZABETH CAREY
CATZILLA MUG & SHARKFIN BOX FT. JESSIE STERLING
BABY AXOLOTL PLATE & MARSHMALLOW RAINBOW MUG
FT. KATHY CANO-MURILLO
COLOR WHIRL RING DISH & GLOW BRO
FT. ALEXIS FAHRENHOLZ
LITTLE NIBBLES & SQUISHMELON MUG FT. MALIA HALFORD
Setting Up Camp
Camps can be a wonderful opportunity to add more to your bottom line. In order to have a successful camp program, you’ll want to plan early and sell seats as early as possible. Here are 10 tips to help your camp program be set up for success!
1. Plan Early. Most camp sign ups are posted early in the first quarter of the year. In order to compete, you’ll want your camps posted as early as you can! This also creates a longer time frame in which to fill your seats. 2. Check the Competition. Other PYOPs are not your only competitors. Parents will look at ALL camp options in your area. Looking at how much other camps charge and what their programs offer can help you make decisions on how to structure and price your program to remain competitive. 3. Set a Budget. Include everything you’ll need to keep summer camps running smoothly--from staffing to snacks--and factor in all of your costs. This will help you set a price that results in profits for the business. 4. Secure Inventory. If you plan to use specific shapes, secure your inventory prior to posting the project. Customers will not be happy if you cancel a camp or change out projects because you can not get inventory. 5. Make Sign Ups Easy. Whenever possible, have an option to sign up online to lock down sales. Having a clear description of programs and the ability to sign up 24/7 is crucial to filling seats. 6. Market & Advertise. Check into local opportunities to market and advertise your camp programs. Purchase ads in publications or websites with Summer Camp issues. Some schools, daycares, etc. may even allow you to provide flyers to go home with kids. If they resist, tempt them by offering a special discount code just for their customers. 7. Promote in House. In addition to promoting on social media, in emails, and with posters and flyers, have a display in your studio and a dedicated web page with camp projects and themes. Be sure
iv
SUMMER CAMP GUIDE • VOL 13
to train employees how to talk about camps to walk-ins and during parties to spark interest. If a customer expresses interest, employees can offer to sign them up right then and there. This prevents people from changing their minds or forgetting to sign up later. 8. Attract Repeat Campers. Offer a different theme each week, or have a few project options for a popular theme. For instance, if you do a few weeks of “Mystical & Magical” camp, offer a selection of unicorns, fairies, cauldrons, dragons, etc. so repeat campers can choose a different item. 9. Have Fun! There’s no better advertisement for your business than happy campers. Word of mouth is still the strongest form of advertising. Give those campers something to talk about! 10. Get Feedback. Ask attendees and parents to review the projects and the overall experience and get permission to use feedback in testimonials. Make it simple and have kids and parents do it during camp. For kids, “How many smiles do you give this project/ instructor/week, etc.?” For parents, 3-5 multiple choice questions with optional comments. Use feedback to plan future programs.
But wait... there’s more!
Scan the QR code for an exclusive video with Ammie Y’all as she shares her experience planning for summer camp!
More Projects Online
Our Projects page is a great resource for brainstorming ideas for your campers! Offering a variety of projects, you can find activities for any experience level with a helpful list of all the supplies you need! Scan the QR code to browse our library of crafty creations!
CUTE CACTI & SUCCULENT GLASS WARM GLASS/KILN
SWEET SUMMER FRAME ACRYLIC
FLOWER DOODLE BOWL GLAZE/KILN
CAMPFIRE TREAT BOX GLAZE/KILN
DAISY DAZE PLATE GLAZE/KILN
LITTLE SPROUT SNACK CUP GLAZE/KILN
PRO PERK MEMBERS HAVE ACCESS TO EVEN MORE CONTENT!
MAJESTIC LIGHTED DRAGON GLAZE/KILN
MAKE A WISH CUP GLAZE/KILN
GRANNY SQUARE RAINBOW VASE GLAZE/KILN
YOU MAY ALREADY BE A MEMBER - SCAN THE QR CODE FOR DETAILS!
See more at BISQUEIMPORTS.COM
v
Burger Buddy Mug | 836 Kampai Mug CO LO R S • SC005 Tiger Tail • SC027 Sour Apple • SC026 Green Thumb • SC073 Candy Apple Red
SUPPLIES • SC024 Dandelion • SC041 Brown Cow • SC048 Camel Back • SC016 Cotton Tail
INSTRUCTIONS 1. Wipe down the piece with a Hydra Art Sponge to remove any dust and debris. 2.
3.
Fill in the bun with 3 coats of Tiger Tail using a small round brush.
4.
Fill in the lettuce with 2 coats of Sour Apple, using swirly brush strokes to create texture.
5. 1
Sketch the design on the mug using a pencil. Start with a horizontal line across the top and bottom. Add wavy lines for the lettuce, wide scalloped lines for the tomatoes, triangles for the cheese, and a line of small repetitive ”u” shapes for the burger patty.
Fill in the tomatoes with 3 coats of Candy Apple Red.
SUMMER CAMP GUIDE • VOL 13
• 9599 Hydra Art Sponge • #2 Pencil • Small Round Brush • Liner Brush
• Fan Brush
6.
Fill in the cheese with 3 coats of Dandelion.
7.
Fill in the burger with 3 coats of Brown Cow.
8.
Use a liner brush to add wavy lines of Green Thumb to the lettuce.
9.
Use a small round brush to add dots of Camel Back to the burger.
10.
Use a liner brush (or writer bottle!) to add white highlights to each section and teardrop-shaped sesame seeds to the top bun.
11.
Use a fan brush to paint the inside with 3 coats of Sour Apple.
12.
Clear glaze and fire to cone 06.
Pinky the Flamingo Floaty | 872 Floaty Friends Flamingo Figurine CO LO R S • SC095 Pinkie Swear • SC016 Cotton Tail • SC088 Tu Tu Tango • SC023 Jack O’ Lantern
SUPPLIES • SC015 Tuxedo • SC003 Wine About It • SC001 Pink-A-Boo
INSTRUCTIONS 1. Wipe down the piece with a Hydra Art Sponge to remove any dust and debris.
• 9599 Hydra Art Sponge • #2 Pencil • Small Round Brush • Medium Round Brush
• Liner Brush
6.
Use a liner brush to add stripes of Cotton Tail, Tu Tu Tango, Jack O’ Lantern, and Tuxedo down the beak.
2.
Use a pencil to lightly sketch wings on the side of the flamingo.
7.
3.
Apply 3 coats of Pinkie Swear to the flamingo with a medium round brush, letting each coat dry before adding the next. Avoid the eyes and beak.
Use the liner brush again to add Tuxedo details to the wings and eyes.
8.
Use a liner brush to add lines of Wine About It to the texture around the floaty, then add a horizontal line around the float to enhance the texture.
9.
Clear glaze and fire to cone 06.
4. 5.
Fill in the wings with 3 coats of Pink-A-Boo using a small round brush. Use a small round brush to add 3 coats of Cotton Tail to the eyes.
See more at BISQUEIMPORTS.COM
2
Colorful Toadstool Box | 2259 Toadstool Box CO LO R S • SC006 Sunkissed • SC009 Jaded • SC088 Tu Tu Tango • SC097 Cant-elope
SUPPLIES • SP209 Speckled Jaded • NT-CLR Dipping
• RB144 #4 Soft Fan • 9599 Hydra Art Sponge • Paper plate
INSTRUCTIONS 1.
Begin with properly fired shelf cone 04 bisque. Moisten a clean Hydra Art Sponge and wipe bisque to remove any dust.
4.
Using a #4 Soft Fan with Speckled Jaded, apply 2 coats to the base of the mushroom. Allow glaze to dry between coats.
2.
Prepare your glaze crumbles: Squeeze out around 1 tbsp of Jaded, Tu Tu Tango, and Cant-elope onto different areas of the paper plate. Shake the paper plate so the glaze flattens. Let dry overnight or use a hairdryer. After the glaze is completely dry, bend the paper plate until the glaze starts cracking. Break the glaze into tiny bits using the handle of the brush.
5.
Dip the base of the mushroom into NT-CLR Dipping. NOTE: Do not dip the top of the mushroom. The glaze crumbles can fall off into the glaze.
6.
Stilt and fire to cone 06.
3.
3
Using a #4 Soft Fan with Sunkissed, apply 1 coat to the top of the mushroom. After it is dry, apply a heavy second coat. While the glaze is still wet, sprinkle the glaze crumbles on the top. Gently press them into the glaze.
SUMMER CAMP GUIDE • VOL 13
Popcorn Bowl | 3276 Tilted Bowl CO LO R S • SC006 Sunkissed • SC016 Cotton Tail • SC025 Crackerjack Brown • SC074 Hot Tamale
SUPPLIES • NT-CLR Dipping
• RB144 #4 Soft Fan • RB106 #6 Script Liner • 8010 ½” Art Tape • 9599 Hydra Art Sponge
• 9591 Paint Dotters • Pencil • Palette
INSTRUCTIONS 1.
Begin with properly fired shelf cone 04 bisque. Moisten a clean Hydra Art Sponge and wipe bisque to remove any dust.
2.
Use ½” Art Tape to tape vertical lines going down the outside of the bowl.
3.
Using a #4 Soft Fan with Hot Tamale, apply 2 coats to the outside of the bowl. Allow glaze to dry between coats.
4.
After the glaze is dry to the touch, remove the tape. Do not wait until the glaze is completely dry, or it could chip.
5.
Using a #6 Script Liner, apply 1 coat Hot Tamale to the rim of the bowl.
6.
Squeeze out around 1 tbsp of Sunkissed onto the palette. Squeeze out ¼ tbsp of Cotton Tail on top. Lightly mix the two glazes using the tip of the pencil.
7.
Take a small Paint Dotter and dip it into the mixed glaze. Stamp it onto the inside of the bowl. Repeat in the same location so that you have a cluster of 3 stamps that look like popcorn. You can also use the eraser on your pencil as a smaller stamp. Do some single stamps to fill up the space between the popcorn clusters.
8.
Squeeze out around 1 tsp of Crackerjack Brown onto the palette. Dip the pointed end of the pencil into the glaze. Stamp 1-4 dots on each cluster of popcorn. These will be the hulls.
9.
Dip into NT-CLR Dipping glaze.
10.
Stilt and fire to cone 06. TIP: If a child cannot use the tape, they can use RB106 #6 Script Liner to paint the stripes on the outside of the bowl.
See more at BISQUEIMPORTS.COM
4
Catzilla Mug |
2244 Way Uptown Mug
CO LO R S • SC009 Jaded • SC015 Tuxedo • SC023 Jack O’Lantern • SC051 Poo Bear
SUPPLIES • SC054 Vanilla Dip • SC085 Orkid
• 9599 Hydra Art Sponge • #2 Pencil • Tissue Paper • Toothpick
• Two Paper Strips: 3/4”-1” wide & 1”-1 ½” wide • Water-based Marker • Assorted Brushes • Catzilla Template (page 14)
INSTRUCTIONS
5
1.
Wipe down the piece with a Hydra Art Sponge to remove any dust and debris.
2.
Transfer your design! Lay a sheet of tissue paper over the printed cat template, then trace the design with a #2 pencil. Lay the tissue design onto the mug surface with the cat’s foot touching the bottom. Trace the design with a marker to transfer the design to the mug.
3.
Use a pencil or water-based marker to sketch clouds in the sky, making a long oval with a bump in the middle.
4.
With a fan brush, water down Orkid to a milky consistency and cover the entire outside of the mug with one sloppy coat.
5.
Use the two strips of paper to make the buildings around the bottom of the mug around the cat. Dip one side of the paper into Jaded, lay it down on the mug, then pull the strip of paper straight down to make the buildings. Alternate the height and sizes of paper, making more buildings to fill in the remaining area around the mug.
6.
Use a small round brush to fill in the cat with 3 coats of Poo Bear.
7.
Use the tapered end of a paintbrush to scratch out windows in rows on the Jaded buildings.
SUMMER CAMP GUIDE • VOL 13
8.
Use 2-3 coats of Jack O’Lantern to fill in the fire in the cat’s mouth. Use the same color to add small flames at the corners of the buildings.
9.
Use 3 coats of Vanilla Dip to fill in each cloud.
10.
Add zig-zag stripes on the cat’s back with 3 coats of Vanilla Dip.
11.
Use a toothpick to add a few more “buildings” behind the Jaded buildings by scratching out rectangle shapes. Then, scratch a grid inside each building to look like windows.
12.
Use a detail brush to water down Tuxedo to a milky consistency. Outline the cat, buildings, and clouds. Add the paw prints, mouth and eyes as well.
13.
Add Orkid oval-shaped cheeks on the cat under the eyes.
14.
Use a fan brush to apply 3 coats of Jack O’Lantern on the inside of the mug.
15.
Allow your project to dry completely, then clear glaze and fire to cone 06.
Sharkfin Box |
974 Sharkfin Box
CO LO R S • BLS906 Silk Road • BLS961 Taupe • BLS962 Teal
SUPPLIES • BLS983 Grey Celadon
• 9599 Hydra Art Sponge • #2 Pencil or Water-based Marker • Shader Brush
• Detail Brush
INSTRUCTIONS 1.
Wipe down the piece with a Hydra Art Sponge to remove any dust and debris.
2.
Use a #2 pencil to sketch a shark on the inside of the box bottom.
3.
Also on the box bottom, sketch an elongated tear drop shape on one side so that it looks like the shark is swimming in circles. Add two triangle side fins, and then add a triangle shaped tail fin so that only a silhouette of the shark is visible from above.
4.
5.
Using a Hydra Art Sponge, lightly dab Grey Celadon starting just below the sharks and working upward to the top of the lid, surrounding the shark fin. You do not need to cover the bottom of the bowl, but you may if desired. Continue dabbing this color over the entire lid and box bottom. As you dab, allow some of the white bisque to remain visible for a soft, water-like texture. Clean the sponge, then dab Teal along the bottom of the box bottom
and up around the sharks. Add a few light “sprays” of color above and around the shark tails and bodies so the Teal softly fades into the lighter blue background. 6.
On the lid, heavily dab Teal in an oval shape around the shark fin.
7.
Next, use Teal on the inside of the box bottom, dabbing a darker halfmoon shape so the color pools toward the bottom.
8.
Use a shader brush to paint the shark fin on top, the sharks on the side of the box bottom, and the shark drawing inside the bowl with 3 coats of Taupe.
9.
Using a detail brush, paint smaller fish swimming around the sharks and the wavy lines on the lid with 2 coats of Silk Road.
10.
Allow your project to dry completely, then clear glaze and fire to cone 06.
See more at BISQUEIMPORTS.COM
6
Baby Axolotl Plate | 766 Small Sassy Plate CO LO R S
SUPPLIES
• SC006 Sunkissed • SC015 Tuxedo • SC017 Cheeky Pinky • SC028 Blue Isle
• 9599 Hydra Art Sponge • SARALRED Saral Transfer Paper • #2 Pencil • Liner Brush
• Round Brush • Scissors • Axolotl Template (page 15)
INSTRUCTIONS 1.
Wipe the piece with a damp Hydra Art Sponge to remove dust and debris.
6.
Lightly sketch a design section from the bottom left corner of the plate up to the right corner. Fill this area with 3 coats of Sunkissed.
2.
Cut out a piece of Saral Transfer Paper of similar size to the axolotl template design.
7.
On the remaining areas of the plate, apply 3 coats of Blue Isle.
Place the Saral Transfer Paper onto the plate surface with the red side facing down.
8.
Use a liner brush and Tuxedo to outline the axolotl design.
3.
9.
Add Tuxedo dots to the rim of the plate.
4.
Place the template on top of the transfer paper, then use a pencil to trace the design onto the plate. Remove to reveal the transferred design.
10.
Add Cheeky Pinky dashes all around the plate background like confetti!
11.
Allow your project to fully dry, then clear glaze and fire to cone 06.
5. 7
Apply 3 coats of Cheeky Pinky to fill in the axolotl.
SUMMER CAMP GUIDE • VOL 13
Marshmallow Rainbow Mug | C C2666 Low and Slow Drip Mug CO LO R S • SC016 Cotton Tail • SC054 Vanilla Dip • SC006 Sunkissed • SC075 Orange-A-Peel • SC074 Hot Tamale
SUPPLIES • SC017 Cheeky Pinky • SC053 Purple Haze • SC011 Blue Yonder • SC098 Slime Time
• 9599 Hydra Art Sponge • Liner Brush • Round Brush
INSTRUCTIONS 1. 2.
3.
Wipe the piece with a damp Hydra Art Sponge to remove dust and debris. Apply glaze in diagonal stripes around the bottom portion of the mug. Start painting the first diagonal stripe with Sunkissed (include the handle), followed by Orange-a-Peel, and then continue through the rest of the listed colors. Apply 3 coats of each stripe color for solid coverage.
4.
Apply 3 coats of Vanilla Dip to the drip area and inside the mug.
5.
Apply 2-3 coats of Cotton Tail around the drip area.
6.
Use a liner brush to outline the drip area with Cotton Tail.
7.
Add decorative Cotton Tail dots all over the rainbow area using the rounded end of a paintbrush.
8.
Allow your project to fully dry, then clear glaze and fire to cone 06.
Use a damp sponge to remove any glaze from the upper section of the mug where the white “marshmallow” drip will go. See more at BISQUEIMPORTS.COM
8
Color Whirl Ring Dish | AY3309 Ammie’s Rainbow Ring Dish CO LO R S • DASK354 Americana Value Pack • True Red • Cadmium Yellow • Dessert Turquoise • Bright Orange
SUPPLIES • Sour Apple • True Blue • Lavender • Carousel Pink • Snow White
• 9599 Hydra Art Sponge • DOTG01 Dotting Gyre • Assorted Brushes • #2 Pencil
INSTRUCTIONS 1.
Wipe down the bisque with a clean Hydra Art Sponge to remove dust and debris.
2.
Use a pencil to draw your swirl design around the ring dish.
6.
TIP: Use the rainbow shape as your base. Let the lines of the rainbow guide the direction of your swirl lines.
If desired, paint over the rim and underside of the dish with your rainbow swirl colors as well.
7.
Paint the rainbow arches using three colors in this order from top to bottom: True Red, Cadmium Yellow, and Desert Turquoise.
Using a Dotting Gyre and Snow White, dot along the swirl lines to outline them.
8.
TIP: For a fun look, start with smaller dots closest to the rainbow arch, then gradually increase the dot size as you move outward to the rim.
9.
Allow your project to dry completely, then enjoy!
3.
9
4.
Time to paint your rainbow swirl! Paint the first swirl section with True Red.
5.
Then, continue to paint the swirl sections with each color of the rainbow. We painted the sections in the following color order – True Red, Bright Orange, Cadmium Yellow, Sour Apple, Dessert Turquoise,
SUMMER CAMP GUIDE • VOL 13
True Blue, Lavender, and Carousel Pink – but feel free to paint your swirl using your favorite colors!
Glow BRO | 3263 Ringo The Octopus Party Pal CO LO R S
SUPPLIES
• SC015 Tuxedo • SC024 Dandelion • SC042 Butter Me Up • SC076 Cara-bein Blue
• 9599 Hydra Art Sponge • PP3002 Blue Glow In The Dark • Assorted Brushes • Cotton Swabs
• Rubbing Alcohol
INSTRUCTIONS 1.
Wipe down the piece with a Hydra Art Sponge to remove any dust and debris.
2.
Apply 2 coats of Cara-bein Blue to the octopus body, except the two inner circles of the eyes.
5.
Apply circles of Blue Glow in the Dark glaze around the rubbing alcohol rings.
3.
Dilute Dandelion on your palette to a skim milk consistency. Apply the diluted color to the octopus body, except for the two inner circles of the eyes.
6.
Apply 1 coat of Butter Me Up to the octopus’ iris.
7.
Apply 1 coat of Tuxedo to the octopus’ pupil.
8.
Allow your project to dry completely, then clear glaze and fire to cone 06.
4.
Quickly, while the Dandelion color is still wet, gently dip a cotton swab into rubbing alcohol, then repeatedly dot the cotton swab all
over the octopus body. This will create ring designs all over your project! Let dry.
See more at BISQUEIMPORTS.COM
10
Little Nibbles | 2437 Nibbles Party Pal CO LO R S • BLN01 Pink Acrylic • BLN02 Orange Acrylic • DA500 Cotton Ball Acrylic • DA501 White Birch Acrylic
SUPPLIES • DA503 Pink Cadillac Acrylic • DA536 Coffee Bean Acrylic • DA539 Black Tie Satin Acrylic
• DOTG01 Dotting Gyre • Assorted Brushes
INSTRUCTIONS 1.
Paint the body of the figurine with White Birch Acrylic.
7.
Paint the eyes with Black Tie Satin Acrylic.
2.
Paint the fur section on the head, the ears, and fur spots on the body with Orange Acrylic.
8.
Paint the raised dots on each eye with Cotton Ball Acrylic. Use a Dotting Gyre here if desired!
3.
Paint the figurine’s hands, feet, and tail with Coffee Bean Acrylic.
9.
Add small White Birch spots to the seed.
4.
Paint the inside of each ear and nose with Pink Cadillac Acrylic.
10.
5.
Use a Dotting Gyre, pencil eraser, or the rounded handle of a paintbrush to add Pink Acrylic dots to the inside of each ear.
Paint the engraved lines on the whiskers, mouth, hands, and feet with Black Tie Satin Acrylic.
11.
Add some Black Tie Satin brushstrokes to the forehead.
Paint the seed with Black Tie Satin Acrylic.
12.
Allow your project to fully dry.
6. 11
SUMMER CAMP GUIDE • VOL 13
Squishmelon Mug | 2438 Kutie Kawaii Mug CO LO R S • SC002 Melon-Choly • SC015 Tuxedo • SC016 Cotton Tail • SC026 Green Thumb
SUPPLIES • SC027 Sour Apple • SC070 Pink-A-Dot • SC088 Tu Tu Tango
• 9599 Hydra Art Sponge • DOTG01 Dotting Gyre • Assorted Brushes • #2 Pencil or Water-Based Marker
INSTRUCTIONS 1.
Wipe the piece with a damp Hydra Art Sponge to remove dust and debris.
2.
Use a #2 pencil or water-based marker to lightly sketch a rounded shape around the face of the mug character.
3.
Paint the outline of the face (along the sketched line) with 1-2 coats of Cotton Tail.
4.
Mix ½ Melon-Choly and ½ Tu Tu Tango on your palette. Use 2-3 coats of this color mixture to paint the face.
5.
Paint the body and handle with 2-3 coats of Sour Apple.
6.
Paint the cheeks with 2-3 coats of Pink-A-Dot. Accent with a Cotton Tail line.
7.
Paint the eyes, mouth, and eyelashes with Tuxedo.
8.
Add a small Cotton Tail dot to each eye.
9.
Paint Tuxedo watermelon seeds around the face. Accent with Cotton Tail.
10.
Paint the feet with 2-3 coats of Green Thumb.
11.
Add Green Thumb wavy lines (2-3 coats) around the body, like a watermelon.
12.
Outline the Green Thumb wavy lines with Tuxedo.
13.
Paint the inside of the mug with 2-3 coats of Tu Tu Tango.
14.
Use a Dotting Gyre to add Tuxedo Dots along the rim of the mug.
15.
Allow the project to dry completely, then clear glaze and fire to cone 06.
See more at BISQUEIMPORTS.COM
12
Templates N OT S U R E H O W TO U S E T R A N S F E R PA P E R? S C A N T H E Q R C O D E F O R A H E L P F U L V I D E O!
CATZ I L LA M U G ................................................................ PA G E 5 B A B Y A XO LOT L P LAT E ................................................... PA G E 7
13
SUMMER CAMP GUIDE • VOL 13
Catzilla Mug | PA G E 5
See more at BISQUEIMPORTS.COM
14
Baby Axolotl Plate | PA G E 7
15
SUMMER CAMP GUIDE • VOL 13
Notes
See more at BISQUEIMPORTS.COM
16
Notes
17
SUMMER CAMP GUIDE • VOL 13
Notes
See more at BISQUEIMPORTS.COM
18
See you next year, campers! FOR MORE FROM BI SCAN THE QR CODE!