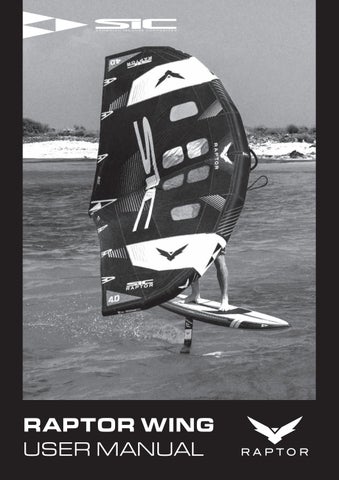

RAPTOR WING USER MANUAL
Congratulations on Your Purchase of Your SIC Foiling Gear!
Nothing beats the thrill of harnessing the power of the wind and ocean to lift off and glide silently above the water’s surface. The masterfully crafted Raptor foils and wings provide the products you need to enter the thrilling realm of foiling and build your skills.
For all of us at SIC, we are proud to bring you quality products at an affordable price with excellent performance.
Please take time to read through this manual. It contains details about your equipment and information on its operation and maintenance. Familiarizing yourself with your foiling gear before using it on the water will ensure safety and prevent accidents.
WARNING
Do not use any SIC product unless you have read and understand these warnings, cautions, and instructions for your security and protection. This information is subject to change at any time. For updates, please visit our website at www.sicmaui.com/support.
If you are under the age of 18, you should have your parent or guardian read these warnings, cautions, and instructions and should not use this product unless you are under such a person’s proper guidance and supervision.
These products expose the user to many unavoidable and unexpected risks, injuries, dangers, and hazards. The product suppliers are not responsible for any damage to property, or any personal injury caused by the user’s use, misuse, abuse, or irresponsible use of this product.
RECOMMENDED FOILING PRACTICE
Foiling is a highly diverse sport with many disciplines and ability levels. As with all sports, there can be certain inherent risks. The following contains key safety points to remember when using all SIC equipment and accessories.
• Foiling can be very dangerous and physically demanding. The user of this product should understand that participation may involve serious injury or death.
• Minors should always be under adult supervision.
• Check your equipment before use for signs of wear and failure. These items should be repaired or replaced immediately and before further use.
• Take time to observe conditions including sea state, tides, currents, weather and forecast before you go out on the water. Beware of foiling in offshore or strong winds.
• Watch out for other foil users, surfers, paddlers, swimmers, and children. Make sure you always keep your equipment under control.
• Make sure to stay hydrated during foiling. Foiling is a physically demanding sport, and dehydration can also occur in cold temperatures.
• Never foil alone.
• As you learn the sport, work within your limitations, and do not exceed them.
• Keep these warnings, cautions, and instructions for future reference.
• Seek foiling instructions from a licensed or certified instructor.
• Always wear a leash.
• Always use appropriate protective gear and a personal floatation device as well as the correct protective clothing for the conditions, such as a wetsuit or UV top.
• Watch out when surfacing after falling in. The equipment may be closer than you expected due to waves, wind, board leash, etc.
• Be aware conditions can change. Always return to the shore when you notice a change of conditions and thoroughly assess before getting back into the water. Especially when you notice a significant increase in wind or waves.
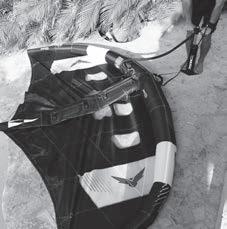
WING INFLATION INSTRUCTIONS
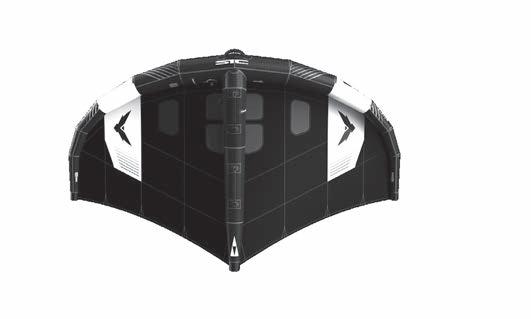
3. LEADING EDGE HANDLE
4. WING TIP
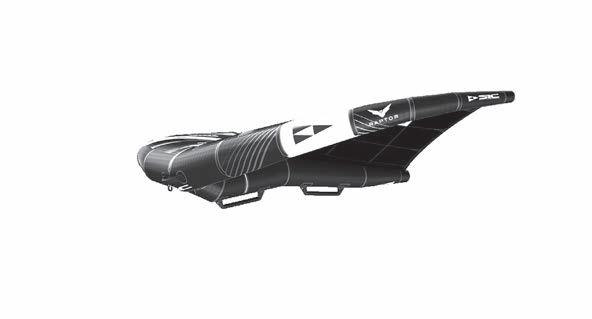
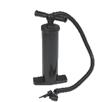
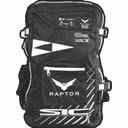
Accessory Items Included
7. BACK HANDLE
8. CARRY HANDLE & WRIST LEASH LOOP
• BACKPACK • PUMP • WRIST LEASH • REPAIR KIT
INFLATING YOUR WING

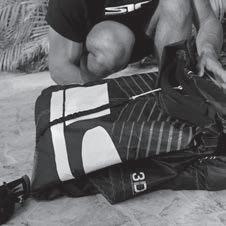
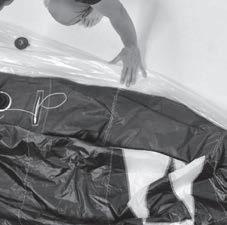
1. Find a spot clear of sharp objects to inflate your wing.
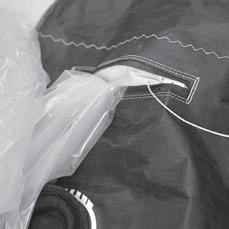
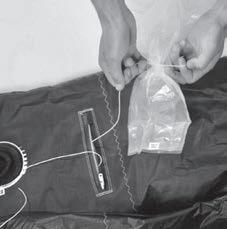
4. Attach the pump tether clip to the leash loop. When you step on the pump you will create an anchor and it will prevent the wing from flying away.
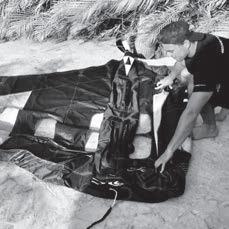
2. Unroll the wing with the center strut facing up and into the wind direction.
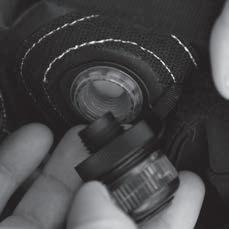
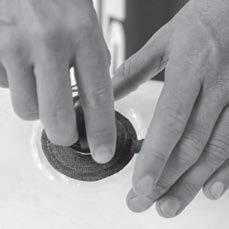
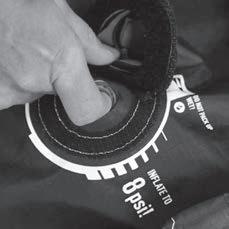
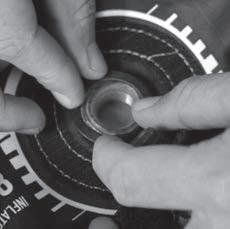
5. Check to see if the valves and seals are clean and free of debris.

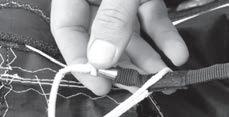
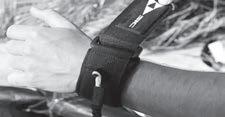
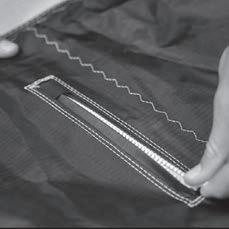
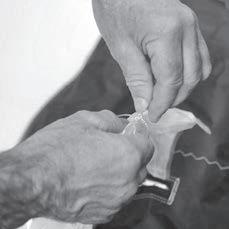
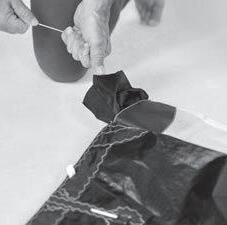
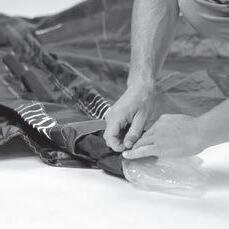
3. Attach your wrist leash to the leash loop located on the center front of the leading edge and attach it to your wrist.
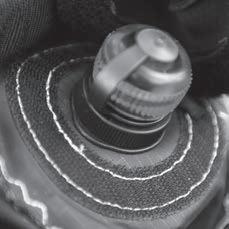
6. Tighten the valve firmly to ensure no air will leak.
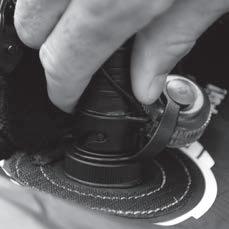
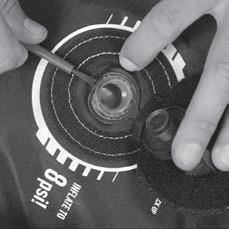
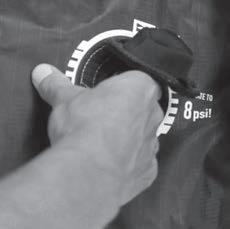
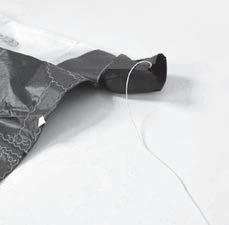
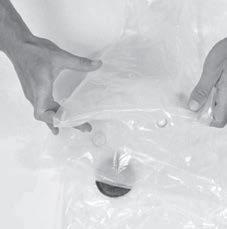
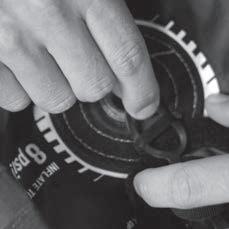
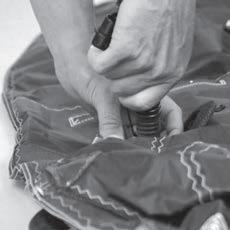
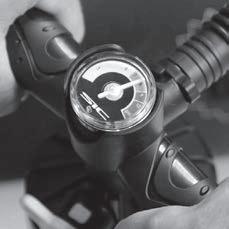
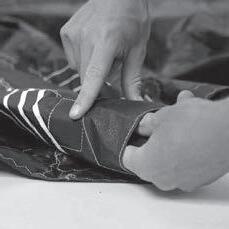
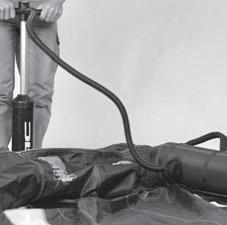
7. Open valve cap, attach the pump and inflate the leading edge until it starts to register on the pump pressure gage. This is the moment when you can inspect the wing to see if there is a twist in the bladder. A twisted bladder can damage your wing and affect wing performance. If there is no twist, inflate to 8 PSI maximum.

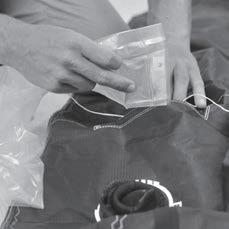
9. Screw on the valve cap and close the neoprene protection covers.
AFTER USE CARE
10. Check your wing for punctures or tears before use.
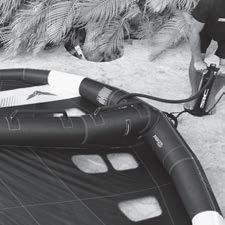
8. Inflate the center strut partway and inspect for bladder twist. Continue inflating the center strut to 8 PSI maximum.
11. When you disconnect the pump tether clip be advised your wing must be secured to an anchor at all times. Please note, your board and foil may not be a reliable anchor. If you choose to secure your wing to your board or foil, the foil could puncture the wing.
CLEANING YOUR WING - After using the wing, rinse it thoroughly with fresh water to remove any sand, salt, or dirt. Pay special attention to the leading edge and struts.
DRYING YOUR WING - To prevent mold or mildew, rinse the wing, and let it dry completely before storing it. Hang the wing to dry in a shaded and well-ventilated area. Wipe the window material with a soft rag to avoid water stains.
STORING YOUR WING - Ensure the wing is completely dry and free of sand or debris. Roll it up according to the instructions, put it in the designated bag, and store it in a dry, cool, dark place. Avoid hard objects, e.g., Miniboom handles pressing against the window material may stretch or puncture the fabric. Avoid storing it in direct sunlight or a hot temperature environment.
INSPECT YOUR WING - Before using the wing, inspect it carefully for any signs of damage, such as cuts, tears, or punctures. Check the valves, seams, and stitching for any signs of wear and tear.
REPAIR PROMPTLY - If you notice any damage, repair it promptly using a patch kit designed for inflatable wings. Ignoring small damage can lead to more significant damage and affect the wing’s performance and safety.
AVOID SHARP OBJECT EXPOSURE - Be careful not to expose the wing to sharp objects that could puncture it, such as rocks or tree branches. Avoid dragging it on the ground when setting up or taking down the wing.
NOTE: Cold temperatures can cause the window material to become brittle and prone to cracking. When using or storing the wing in low-temperature environments, it’s recommended to allow it to warm up to room temperature.
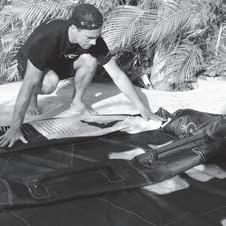
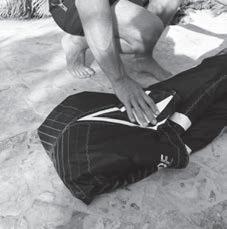
1. Find a spot clear of sharp objects to deflate your wing. Unscrew both valve bases to deflate the wing and make sure no debris, rocks, or water enter the valve because this may damage the bladder material.

3. Overlay left and right folded panels over the center struct.
5. Wrap leash around the folded panels to secure.

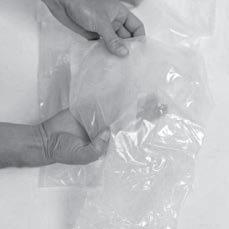
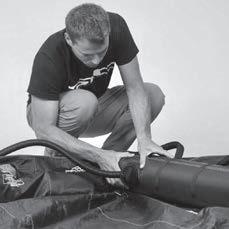
2. Begin folding the wing from wingtip towards the center strut, forcing air out along the way. We recommend folding in 6–8-inch panels, avoiding creasing the windows. Once you get next to the valve add weight to the folded side to prevent it from unfolding while you fold from the other side.
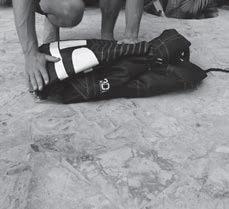

4. Fold the wing in two parts. Start from the trailing edge up to the first boom, then fold over the second boom. Fold the remaining top quarter over the folded panels leaving the wing size visible for easy identification.

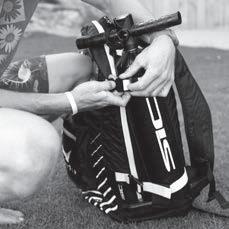
7. Store pump hose inside the bag and attach the pump body to the outside of the bag.
6. Store wing in bag.
CHANGING AND REPAIRING YOUR RAPTOR WING
Changing and repairing your Raptor wing is a two-person job. Before you begin, make sure your wing is rinsed with fresh water, is now dry, and has no sand or salt present. The preferred location for changing your bladder is inside. If that is not an option, find a spot clear of debris and sharp objects with minimal wind.
Required Tools:
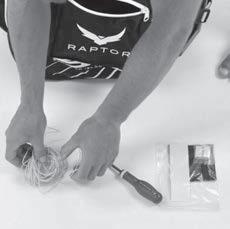
• 2x 7-meter thin rope or string for threading the bladder.
• Flat head screwdriver to help pull out the valve.
Optional Tools:
• Talcum powder to help prevent friction from when pulling the bladder in and out of the sleeve.
• Spray bottle with dishwashing soap to help show bladder leaks.
LEADING EDGE BLADDER REPAIR
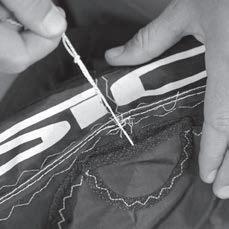
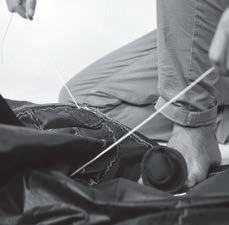
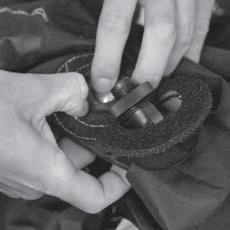
1. Unfold the wing strut side up and unscrew the leading-edge valve.

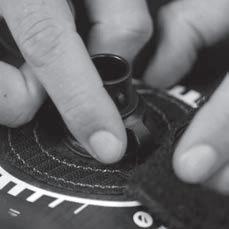
2. Remove the valve security ring.
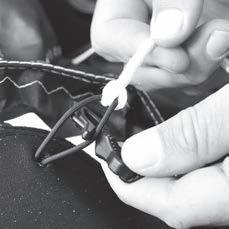
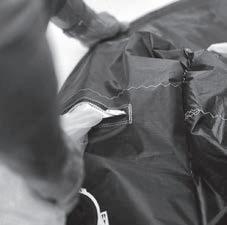
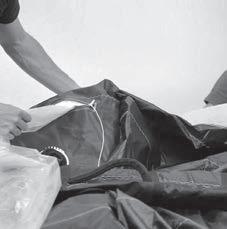
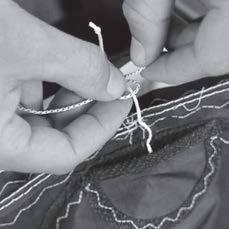
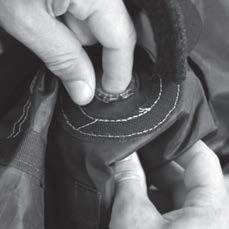
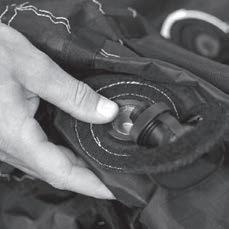
3. Open the zipper located next to the valve and on the inside of the leading edge, the valve base is attached by Velcro. Reach into the leading edge through the zipper and detach the valve base.
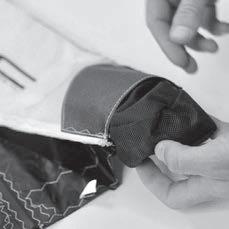
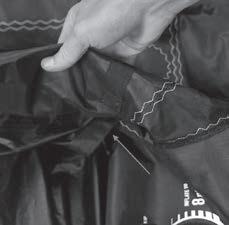
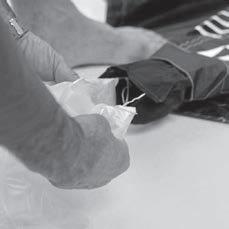
4. Next, move to the wing tips. The wing tips are secured closed by Velcro. Detach the Velcro and pull out the bladder about 10cm.
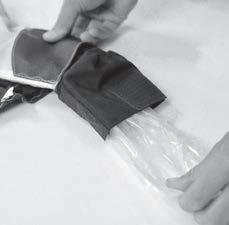
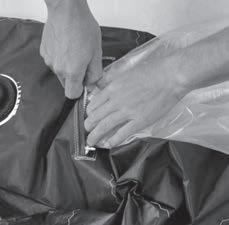
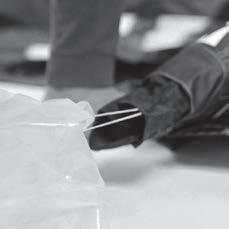
5. Take your 7-meter thin rope/string and make a snug knot around the bladder end. This will act as a threading tool later. Repeat these steps on the other wing tip.
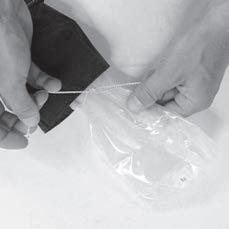
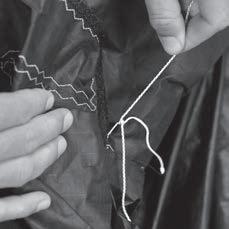
6. If you are assisted, one person will hold the wing tip while the other goes to the zipper and pulls out the bladder. Repeat these steps on the other wing tip until the bladder is completely removed from both sides.
7. Untie the string from the tip of the bladder. NOTE: The string remains inside the sleeve as a means to later pull the bladder back through the sleeve. Repeat these steps for the other wing tip.
Once bladder is completely removed you know can begin bladder inspection for your repair.
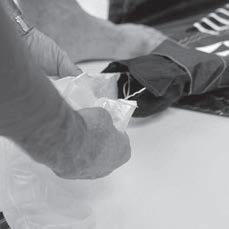
WING BLADDER REPAIR
1. Pump up the bladder and inspect for visual punctures or tears.

• If you are in a quiet environment, try to hear the hissing sound of the leak.
• If you cannot hear the hissing sound, you can submerge the bladder in water and look for bubbles or spray soapy water on to the suspected leaking area and look for more bubbles.
2. Mark the leaking area with a permanent marker. NOTE: If there is a tear larger than 1 centimeter, we recommend bringing it to a professional repair shop and getting the bladder welded.

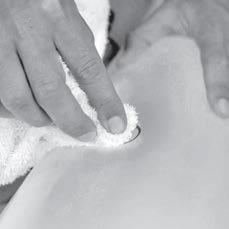
3. Clean with alcohol and lightly rough bladder with included sanding paper located in the repair kit.
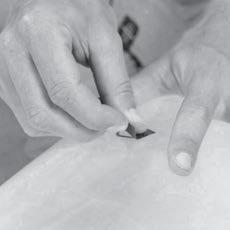
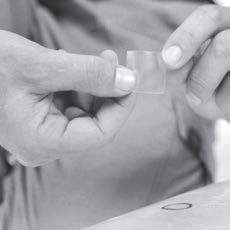
4. Remove the patch from the repair kit and soften the corners by cutting the sharp edges. This will prevent the patch from pulling up. Deflate your wing slightly and place the patch on the leak and let the patch cure.
5. Reinflate your wing to inspect the leak has been repaired.
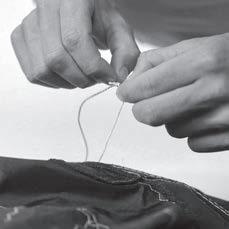
RE-INSERTING THE LEADING-EDGE BLADDER
1. Lay out your bladder along the leading edge to ensure there are no twists and the valve is positioned to properly match up with the valve hole in the canopy.
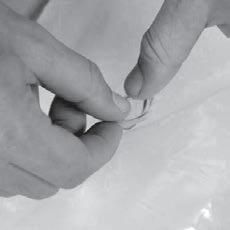
2. Re-tie the string to the end of the bladder. You can apply talcum powder to the dried bladder material for a smoother re-entry.
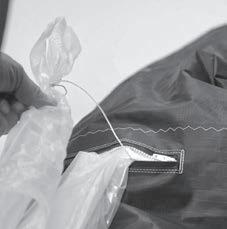
3. Fold the bladder in an accordion fashion next to the zipper This allows the bladder to neatly enter the sleeve without twisting. Then Place the bladder back in through the zipper.
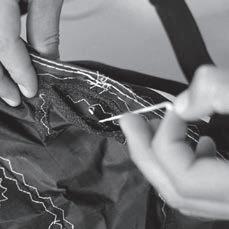
4. If assisted, have one person slowly pull the rope at the wing tip. Maintain tension in the flattened leading-edge sleeve. The other person gradually feeds the bladder into the zipper. Avoid twisting the bladder. Once the bladder is sticking out the wing tip, de-wrinkle the Dacron sleeve.
5. Once the bladder tip reaches the wing tip, now you are ready to insert the other side.

6. Fold the bladder in an accordion fashion next to the zipper. Repeat the above feeding instructions for the second side.

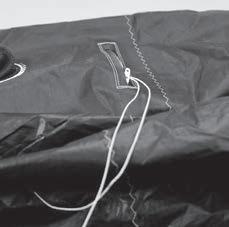
7. Go back up to the zipper, stuff extra bladder material into the zipper
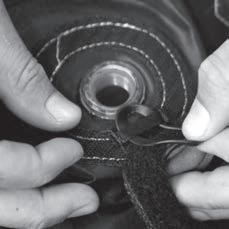
8. Reach straight into the zipper and reseat the valve base. Avoid twisting it. Make sure no bladder material is pinched between the hole and valve base. Close the zipper.
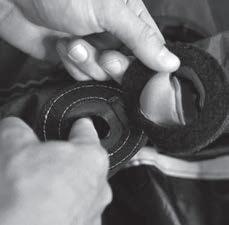
9. Install the valve secure ring and screw valve adapter.
10. Once bladder has been completely fed into the sleeve, untie the string from the wing tips.
11. Lightly inflate the wing and massage the segments to make sure there are no wrinkles or twists. DO NOT fully PRESSURIZE WHEN WING TIPS ARE OPENED.

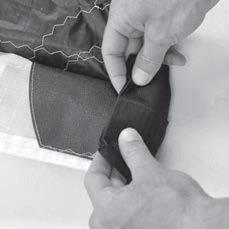
12. Deflate the LE and at the wing tips, stuff the 10 cm of the end of the bladder back in the sleeve. Then fold the wing tips, including the remaining bladder matching the textile sleeves. Be sure to fold Velcro facing out. Secure Velcro to the inner wall.
13. Inflate the LE to full 8psi pressure and leave it inflated for 24 hours to make sure there is no more leaking.

CENTER STRUT REPAIR
1. The newest version of the Raptor zipper access both on the Leading the Strut.
Older pockets wher need to untie the bladder to access. Either way bladder has been accessed, removing and installing the bladder is the same.
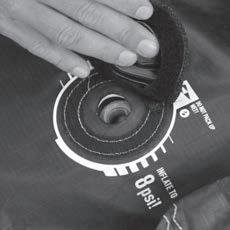
B. BOTTOM CENTER STRUT WEBBING POCKET is located at the bottom of the center strut near where the leading edge and the center strut intersect.
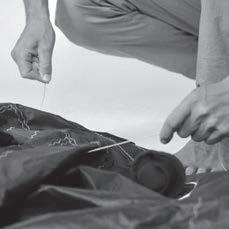
2. Locate the TOP CENTER STRUT WEBBING POCKET (A) and untie the two white bladder strings and unthread the string from the fabric security loop. Then tie on your threading string.
3. Locate the BOTTOM CENTER STRUT WEBBING POCKET (B) and untie the white bladder string and unthread the string from the fabric security loop. Then tie on your threading string.
4. You now should have two strings attached to the bladder.
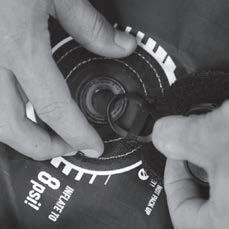
5. Remove the secure ring from the strut valve base.
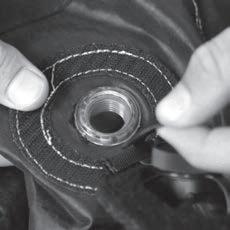
6. Hold the valve cover and use your thumb to push the valve base through the strut hole.
7. Open Velcro at the strut tip and begin to gently pull out the bladder. If you have assistance, one person should hold the canopy taught by the leading handle while the other gently pulls out the bladder. When the bladder is completely out, untie the white bladder strings from the threading string.
DO NOT PULL THE TREADING STRINGS OUT OF THE CENTER STRUT. You will need these to rethread the bladder once repaired.


8. Follow the repair instructions of the leadingedge bladder to locate the leak.
*Optional Talcum powder can be applied to assist in the following steps.
9. Retie the threading strings to the center strut bladder white strings.
10. With the valve side up, fold the bladder in accordion style. This will help prevent the bladder from twisting when you pull it back into the strut.
11. Have your assistant pull both string lines simultaneously at the top of the center strut while the other person ensures the bladder gets fed back in evenly, avoiding twisting.
12. Detach the threading string from the white bladder string. Retie the white strings back to the TOP CENTER STRUT WEBBING POCKET (A) and the BOTTOM CENTER STRUT WEBBING POCKET (B) treading both through the security fabric loop.
12-A
13. Locate the valve base through the repair zipper and check with your fingers the bladder is not twisted. Stick your finger into the valve location to locate and pull back the valve base and attach the Velcro of the valve base to the Velcro of the inside of the struct. Make sure not to pinch bladder material between the valve Velcro. Important to check if the Velcro got attached aligned to avoid twists and potential damage to the wing.
13-B
13-A
14. Install a secure ring and inflate the strut lightly.

15. Massage the strut sleeve to make sure the bladder is not twisted. Make sure both sides of the strut fill with air. Important: While the wing tip is open, do not fully pressurize. Make sure to pull out the bladder.

16. Go to the end of the center strut and stuff in the bladder until 1 cm is sticking out.
17. Inflate the wing lightly to double-check all is ok. Then increase pressure to 8psi and leave for 24 hours.
LIMITED WARRANTY
When this equipment is purchased from an authorized SIC dealer by a retail customer, SIC warrants that this product will be free from defects in materials and workmanship for two (2) Years from the date of purchase by the original retail customer This warranty is solely for the benefit of the original retail purchaser and may not be assigned. For retail customer Limited Warranty claims, proof of purchase from an authorized SIC Dealer is required. If the date of the purchase cannot be established, SIC will decide based upon the last production year of the particular model or on the condition of the equipment claimed. If you have any questions about the SIC Limited Warranty or procedures for making claims thereunder, please contact SIC at www.sicmaui.com/support.
The SIC Warranty Center will determine if the product is covered under this Limited Warranty. If covered at SIC’s sole option, SIC will repair or replace the product in question. All returns must be made through SIC authorized dealers. SIC does not accept returns directly from customers.
Customers must call for a Return Authorization Number before returning any product under this Limited Warranty. All authorized returns must be sent to SIC’s Warranty Center at the country’s main distribution warranty office, freight prepaid. SIC will pay the freight for the return shipment. Return shipment will either be consolidated with the authorized retailer’s next shipment or paid by SIC at SIC’s sole option. Repair or replacement of any product under this Limited Warranty is not available for ordinary wear and tear, including scratches, discoloration, or damage caused by misuse, abuse, unauthorized modifications or repairs, accidents, heat, excessive exposure to sunlight, improper handling, storage, maintenance or care; incorrect setup, use in commercial, rental or teaching environments; use in a shallow reef, shore break or any blow or impact with a hard object or any other irresponsible use. THE FOREGOING LIMITED WARRANTY IS EXCLUSIVE AND IN LIEU OF ALL OTHER WARRANTIES OF QUALITY AND PERFORMANCE, WRITTEN, ORAL, OR IMPLIED, AND ALL OTHER WARRANTIES, INCLUDING ANY IMPLIED WARRANTIES OF MERCHANTABILITY OR FITNESS FOR A PARTICULAR PURPOSE, ARE HEREBY DISCLAIMED. IN NO EVENT SHALL SIC BE LIABLE FOR SPECIAL, INDIRECT, INCIDENTAL, CONSEQUENTIAL, STATUTORY OR EXEMPLARY DAMAGES WHETHER IN CONTRACT, TORT NEGLIGENCE, STRICT LIABILITY OR OTHERWISE including, without limitation, loss to property other than this product, loss of use of said product or other property or other economic losses. SIC shall not be liable for contribution or indemnification, whatever the cause. Some jurisdictions do not allow limitation on how long an implied warranty lasts and/or the exclusion or limitation of incidental or consequential damages, so the above limitation and exclusion may not apply to particular customers. SIC’s obligations under any warranty shall be limited to the greatest extent allowed by law as provided in the SIC Limited Warranty. This Limited Warranty gives you specific legal rights; you may also have other rights, which vary from one jurisdiction to another.
www. sicmaui.com/support
RELEASE OF LIABILITY
By assembling or using this SIC Maui product, you agree that you have read and understood the SIC Maui instructions and warnings contained in this guide and all other printed material on the product before using this SIC Maui product in any way. Also, you agree and ensure that any additional users of this SIC Maui product read and understand the instructions and warning contained in this guide and all other printed material on the product before permitting that person to use this SIC Maui product.
ASSUMPTION OF RISK
Foiling is a HAZARDOUS activity The use of any SIC Maui product involves inherent risks and dangers that may result in severe injury and death of both the user and others. In using this SIC Maui product and any of its components, you freely agree to assume and accept any known and unknown risks of injury to you and nonuser third parties when using this equipment. The risks of foiling can be significantly reduced by adhering to instructions and warnings contained in this guide and by using common sense. Always check all parts of your product thoroughly before each use. Failure to do so may result in personal injury or death.
RELEASE AND WAIVER OF CLAIMS
By using this SIC Maui product, you hereby agree to waive all claims that you have or may have in the future against Tahe Outdoors and all related parties resulting from the use of this SIC Maui product. Furthermore, you release Tahe Outdoors and all associated parties from all liability for any loss, damage, injury, or expense that any user/s of this product may suffer, or that any user/s next of kin may suffer, due to any cause whatsoever, including but not limited to, negligence or breach of contract in the part of Tahe Outdoors and all related parties in the design or manufacture of this SIC Maui product and any of its components. In the event of injury, death, or incapacity, all provisions contained herein shall be effective and binding upon your heirs, next of kin, executors, administrators, assignees, and representatives. Tahe Outdoors and all related parties have not made and expressly deny any oral or written representations other than what is set forth within this SIC Maui User Guide.
Photo: Charless DASHER