


Maggie Anderson editor-in-chief
Delia Rangel
managing editor
Agustin Gonzalez III digital director
Sarah Skalski illustration director
Editorial
senior editors Arietta Hallock, Sophia Leone asst. editors Daisy Polowetzky, Ava Bartholomew print writers Maggie Anderson, Delia Rangel, Agustin Gonzalez III, Kelsey O'Leary, Scarlett Ottley, Claire Peretta, Ava Ascenzo, Abigail Green, Ava Bartholomew, Roman Verna, Maya Rizzo, Taegan Covino, Daisy Polowetzky, Tori Wyffels, Julia Favaro, Mara Greene
Digital
social media team Lucy Upton, Caitlin Berenson, Cindy Gao, Caitlyn Costello, Samantha Espiritu, Daphnee Chu, Sarah Schoenecker, Julia Favaro
digital writers Julia Favaro, Tori Wyffels, Claire Peretta, Izzy Giacoppo, Annabel Adams
faculty advisor Aileen Gallagher
Charlotte Little creative director
Ella Fling photo director
Abbey Fitzpatrick
social media director
head designer Olivia Dublin designers Andie Mannis, Daniela Iuso, Francis Sales, Charlotte Little, Margaret DeTitta, Mara Greene, Olivia Dublin, Amelia Flinchbaugh, Jiamin Chen, Samantha Kurland, Angie Houissa, Beckett Painchaud
Illustration
assistant illustratrion director Allie Alongi illustrators Madeleine Herberger, Ayaka Quesen, Dorothea Dolan, Duyen Pham, Brynne Baird, Cancan Jin, Belen Osborne, Caroline Moser, Jade Booker, Alissar Youssef, Flynn Ledoux, Jackie Riel
Photo
photographers Gillian Arend, Abbey Fitzpatrick, Alicia Hoppes, Riya Mehra, Ola Czartorjska, Nina Gerzema, Sean Sterling
Baked is Syracuse University’s student-run food magazine. Founded in 2011, Baked aims to widen food options for SU students by introducing kitchen amateurs to cooking, highlighting local businesses and eateries, and connecting readers to the greater Syracuse food community. Baked publishes one issue each semester.
bakedmagazine.com
@bakedmagazine
@bakedmagazine
What to Bake When You're Baked
Holy Split!
The Science Behind the Smash Burger
Knead to Impress
Many Ways to Matcha
Whiskey Business
High on Flavor
Munchies: How to Cure Them
The Perfect Popover
Now Arriving At: Fermentation Station
Listen to your Cravings
Just Cook. 'It’s Not That Deep.'
Get Down and Dirty
School & Vine
Celebrating Spring
Sip, Relax, Repeat


I’ve been avoiding this... the dreaded goodbye. We all have. The denial of the passing days, the short few weeks that define our last chapter at SU.
College isn’t all sunshine and rainbows. It’s a combination of putting yourself out there enough times to find friends that stick, figuring out which readings you can skip over so you can make it to Wednesday night flip, and making life-defining decisions (and ones that aren’t so serious).
Nonetheless, college is bliss. It’s a period of exponential growth. The mishaps, the excitement, the uncertainty that all builds up to the people we are today. And though I’m not quite ready to leave the nest, I crave the adventure that lies before me. I’m drawn to the endless possibilities my future holds. I yearn for the power to continue shaping a life that reflects everything I aspire to be.
This is our spring re-bloom.
As you glaze over the pages of our spring issue, may you explore your own cravings and uncover what it is you truly want. Lean into what pulls you, whether it be a late night snack or, just once, riding a Veo across campus.
Upon nearing these final days, I want to say thank you to my Baked family for all of your incredible work — to the countless writers, editors, photographers, illustrators, designers, and socials team that make all of this possible. More importantly, thank you for giving me the space to learn, grow, and do what I love most: write.
Now reader, from snacks to stories, highs to happy hour — thanks for getting Baked with me one last time.
As always, stay hungry!


Delia Rangel, Managing Editor Maggie Anderson, Editor-in-Chief


Charlotte Little, Creative Director
Written by Kelsey O’Leary | Photographs by Gillian Arend & Abbey Fitzpatrick
As someone who has spent countless nights creating treats that satisfy both my creative cravings and the munchies, here’s my guide to the best things to bake while you’re baked!
I’m not saying I always make everything perfectly after indulging, but I love to start baking and see what I can come up with. In particular, I would not recommend trying to make a ¼ batch of cookies — the math does not math. Still, the result was somehow tasty. The last time I tried that, I ended up with too
much sugar compared to literally everything else, and not enough baking soda. This made the edges of the cookies lacey and crispy because there was no rise to the cookies. I should have prefaced with this, but a chocolate chip cookie is my classic, so having the final product not even look like one of my cookies… let’s just say was a shock. Since then, I’ve gotten a little better with my own baked baking, and now I’m here to share. So sit back, relax and, well, I think you know what to do next!
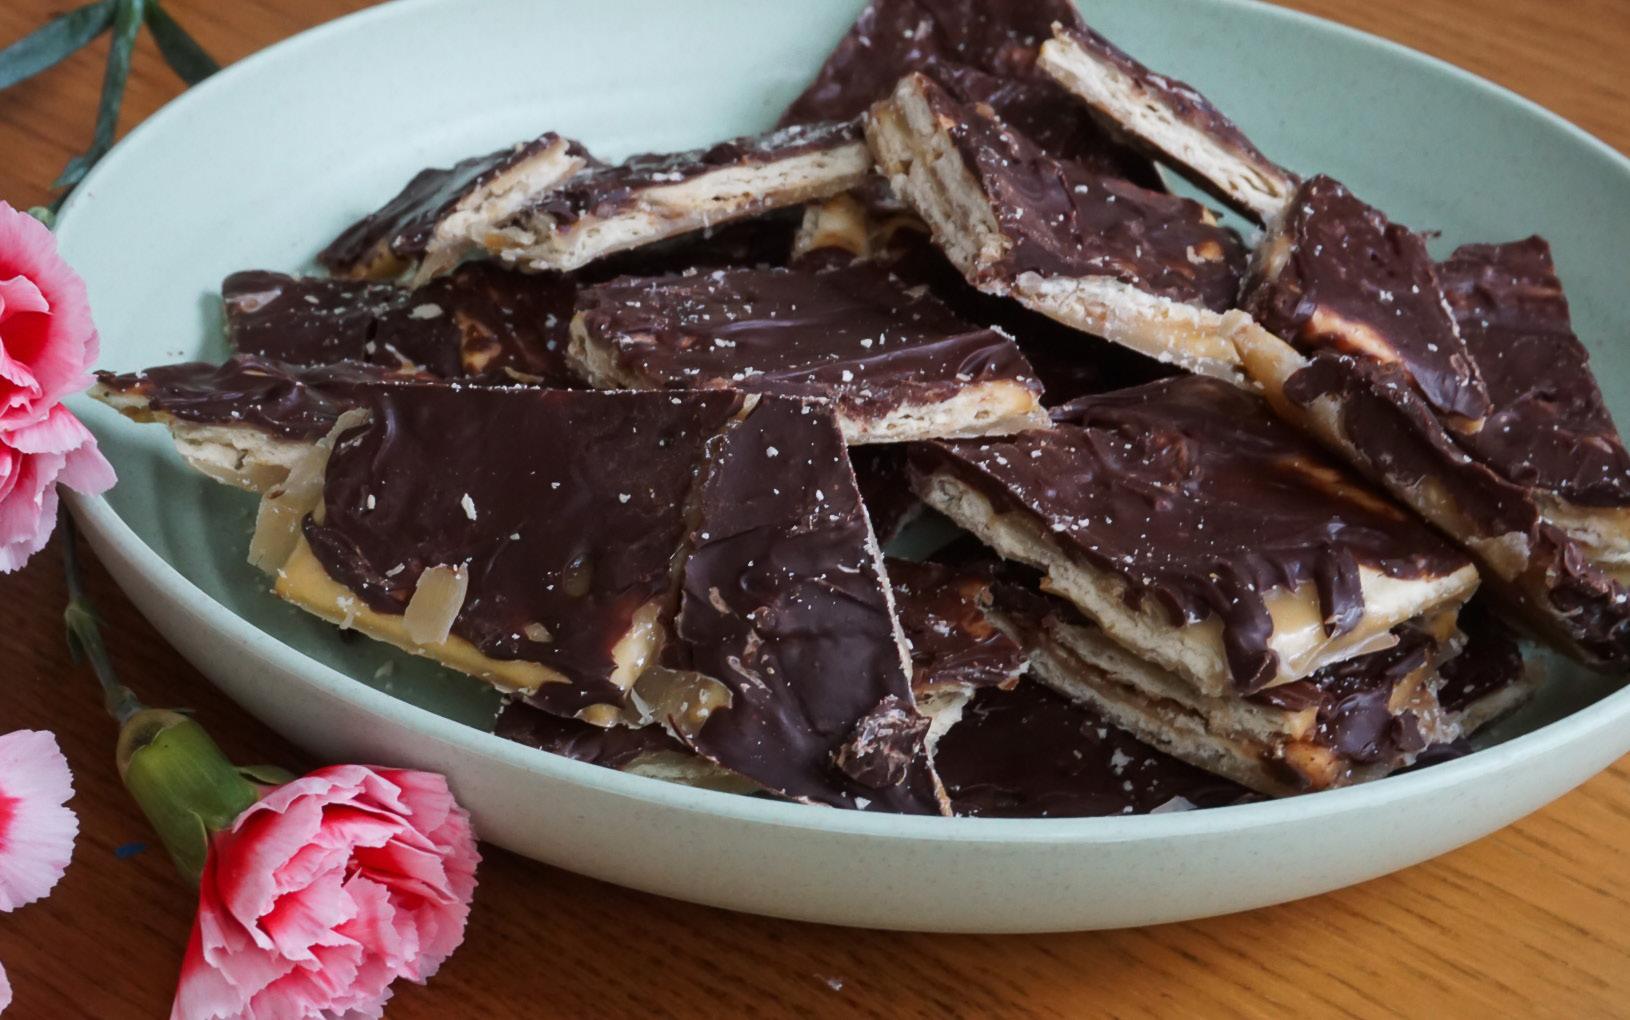
This is NOT what you’re thinking. This is the most addicting mixture of sweet, salty, and crunchy. Whenever I make this, people go crazy for it. It’s a staple for my friends and family and is so easy to pull together. You can also keep the ingredients around which is very helpful for when you finish the batch and need to make another one!
Ingredients:
• 1 cup butter
• 1 cup brown sugar
• ¼ teaspoon salt (optional)
• 1 teaspoon vanilla extract (optional)
• 1-2 boxes saltine crackers (depending on pan size)
• 1 bag mini chocolate chips (semi-sweet recommended)
Directions:
1. Start by preheating your oven to 350 F.
2. Then, in a pot on the stove over low heat, make a simple caramel by melting the butter and brown sugar together. Make sure to stir this often as it melts so nothing burns.
3. Once the butter and sugar get melting, you can choose to add the salt and vanilla. Keep stirring occasionally until the butter and sugar start to foam. Once foamy, start stirring constantly until everything thickens up, then turn off the heat and keep stirring until everything has completely come together in a smooth caramel sauce.
4. In between stirring the caramel, line a baking sheet with parchment paper, and make sure the parchment goes all the way to the edges of the tray (I’ve used greased foil for this and it works, but can be tricky).
5. Lay out the saltine crackers across the tray until they are completely covering it.
6. When the caramel is finished, it will thicken up and become super silky. Pour the caramel over the crackers and use a rubber spatula to spread the caramel evenly and out to the edges.
7. Add the tray to the oven and then bake for about 7 minutes.
8. Take the tray out of the oven and pour the chocolate chips over the top, they will start to melt from the residual heat (this is why I say mini chips; they melt faster). After the chips melt a little, spread the chocolate out to the edges and then let the tray cool on the stove for about 5 minutes so the tray is warm but can be picked up. Then, add to the freezer for 15 minutes (sorry for the wait, but it is so worth it).
9. I find the longer they sit the better, but as soon as they are set you can break the sheet apart (or cut them into smaller pieces, but that’s not as fun) and start snacking because they’ll be gone before you know it!
10. If you’re planning on bringing these anywhere, I recommend storing them in the fridge in a Tupperware to keep them from melting together.
I am now going to do the unthinkable and ask for your patience, but we all know you’re waiting for your gummy to kick in anyway. The cookie dough has to sit in the fridge, but it's so worth it for how fluffy and addicting the cookies are. I brought these to my friend’s house last time I made them, and they were gone before I left!
Ingredients:
• 1 stick + 2 tablespoons butter
• 2 ½ cups all-purpose flour
• 1 teaspoon baking powder
• 1 ¼ teaspoons ground cinnamon
• ½ teaspoon kosher salt
• 1 cup granulated sugar
• ¼ cup light brown sugar
• 2 eggs
• 2 teaspoons vanilla
• ½ cup powdered sugar
Directions:

1. In a pot over medium-low heat add the butter, making sure it is first cut up into some smaller pieces. Let the butter melt and wait for it to start getting foamy — this is normal. Keep stirring until you see some amber color coming through under the foam. Take the pot off the heat and let the butter cool while you get started on the rest.
2. While you wait, get a small bowl to combine the flour, baking powder, cinnamon, and salt. Mixing this before will help make sure everything gets combined. I normally like a onebowl recipe, but this works, just trust.
3. Now that the butter is cool, add the granulated sugar and brown sugar to the pot and stir to combine.
4. Next, add the eggs (why the butter needs to cool off the heat) and the vanilla, mixing until smooth. Slowly stir in the flour and mix until just combined. Then cover the pot and let it sit in the fridge (I say 30 minutes, but 1 hour is probably better if you really have the time).
5. After your 30 minutes (SET A TIMER), preheat the oven to 350 F. Line a baking tray with parchment paper and set that aside.
6. Add the powdered sugar to a shallow bowl or plate. Roll the dough into 1-1½ tablespoon sized balls, then roll them through the powdered sugar and place them on the baking sheet (you can fit 12-15 depending on the size).
7. Bake for 10-12 minutes. They will turn a little golden, but it is not a drastic color change.
8. Let them cool for at least 10 minutes so they are set (the last time you are waiting, I promise), then enjoy!

This single-serve cobbler is so easy and can be customized depending on your mood. We have all been there, the munchies hit and you have found the movie or book you want to settle in with, but what treat will you have? Now you can keep the ingredients on hand for this and make it in no time.
Ingredients:
• ½ cup frozen berries
• ½ tablespoon granulated sugar
• 1 tablespoon butter
• 1 tablespoon brown sugar
• 2 tablespoons oats
• 1 tablespoon flour
• Pinch of salt
Directions:
1. Grab your favorite mug and add the berries to the bottom (you can eyeball half a cup or measure it out, it will be okay either way).
2. Sprinkle the granulated sugar over the berries, mix, and set aside (you can add a squeeze of lemon if you wish, but I do not).
3. In a small bowl, melt the butter then mix in the brown sugar, oats, flour, and salt until combined.
4. Dump this mixture over the berries and then start with microwaving for 60-90 seconds (you may need more or less depending on the microwave). If the top doesn’t look set add another 15-30 seconds.
5. Let cool for several minutes to avoid burning your tongue, then enjoy!

I hope these recipes get you inspired and excited to start baking when you are thinking of getting baked. DO NOT FORGET to set your timers for the oven and the fridge! You can also take some of these recipes and make them your own. In the cobbler, try different berries or even peaches; for the cookies, add flavors you love like peppermint instead of cinnamon, or even substitute a little cocoa powder for some of the flour; you can experiment with different toppings on the crac — the options are endless. My golden rule is always to have fun when you are baking, you might not know what the outcome will be, but hopefully, something yummy. If not, you can always try again.

Written by Delia Rangel | Illustration by Cancan Jin
Bananas have a secret, and it’s kind of crazy — bananas, if you will. Every banana you’ve ever eaten is essentially a clone, a fraud.
Unlike most fruits, bananas don’t grow from seeds. They’re instead propagated from cuttings, making them genetic clones. While there’s hundreds of banana varieties worldwide, only one dominates U.S. grocery stores, the Cavendish. This single variety is the backbone of commercial banana farming, making it the only type most Americans ever taste.
The Cavendish banana is everywhere, but what many don’t realize is that every single one is a clone. Because they don’t reproduce naturally through seeds, farmers rely on cuttings to cultivate new plants, resulting in an entire global crop that shares the same DNA. This consistency guarantees the same taste and appearance in every bunch, but it also leaves the Cavendish vulnerable. According to National Geographic, since every tree has an identical immune system, a single disease could easily wipe out the world’s banana supply.
Before the Cavendish came the Gros Michel banana, which was wiped out in the 1960s due to a strain of Panama Disease. The strain struck Central America and eliminated the Gros Michel completely. The banana was abandoned for the Cavendish, which was then immune to the disease.
The bananas we know today may be at risk of a new strain of that same disease, according to National Geographic. The strain has been spreading since the 90s across Eastern Asia, Africa, and Europe. While North American climate is unsuitable to produce the fruit on a commercial scale, South America is the only safe haven for the Cavendish. Some researchers believe the strain has already hit parts of the continent, though it could take decades to infect the species entirely.
While researchers find ways to save our beloved clones, we can create a pretty tasty dessert in the meantime. I fondly remember childhood summers spent in the Bay Area, eating a banana split with my grandpa and brothers. If you’re not from California and have never had the joy of a Fosters Freeze banana split, I truly feel for you. But don’t worry, luckily you can still grab some bananas (cloned, of course) and recreate the magic at home.
• 1 banana
• 1 scoop of vanilla, chocolate, and strawberry ice cream
• Chocolate syrup
• Chopped strawberries
• Chopped pineapple
• Whipped cream
• Maraschino cherries
• Chopped peanuts
This iconic desert is simple to assemble and delivers every time. Slice your clone (banana) through the middle lengthwise and scoop your ice cream on top. Drizzle with chocolate and whipped cream to your liking and top with strawberries, pineapple, peanuts, and a bright red maraschino cherry.
Enjoy!


Written by Claire Peretta | Photographs by Alicia Hoppes & Riya Mehra
Saying that you want to start trying more elaborate recipes is easier said than done, especially when obstacles like budgets, tools, and lack of access to unique ingredients get in your way. As an amateur chef and broke college student myself, I’ve been craving to level up my cooking game. And I know I’m not alone! But what if I told you there were ways to make simple dishes look and feel more complex than they actually are, without getting too complicated? Below are four tips and tricks to make simple, everyday foods Michelin Star-worthy.
First and foremost, baking and cooking is an art. Let’s get colorful!
Your immediate thought when you read the word “colorful” might have been food dye, right? Well, this tip is even easier. Sometimes, one of the most effortless ways to make a simple dish look more complex is to just add veggies.
In a perfect world, you might have the time to split your dough into sections and dye them into a technicolor array. Sadly, college students have busy schedules, so getting some fresh vegetables or using some that your parents brought you during their last visit might be the way to go.
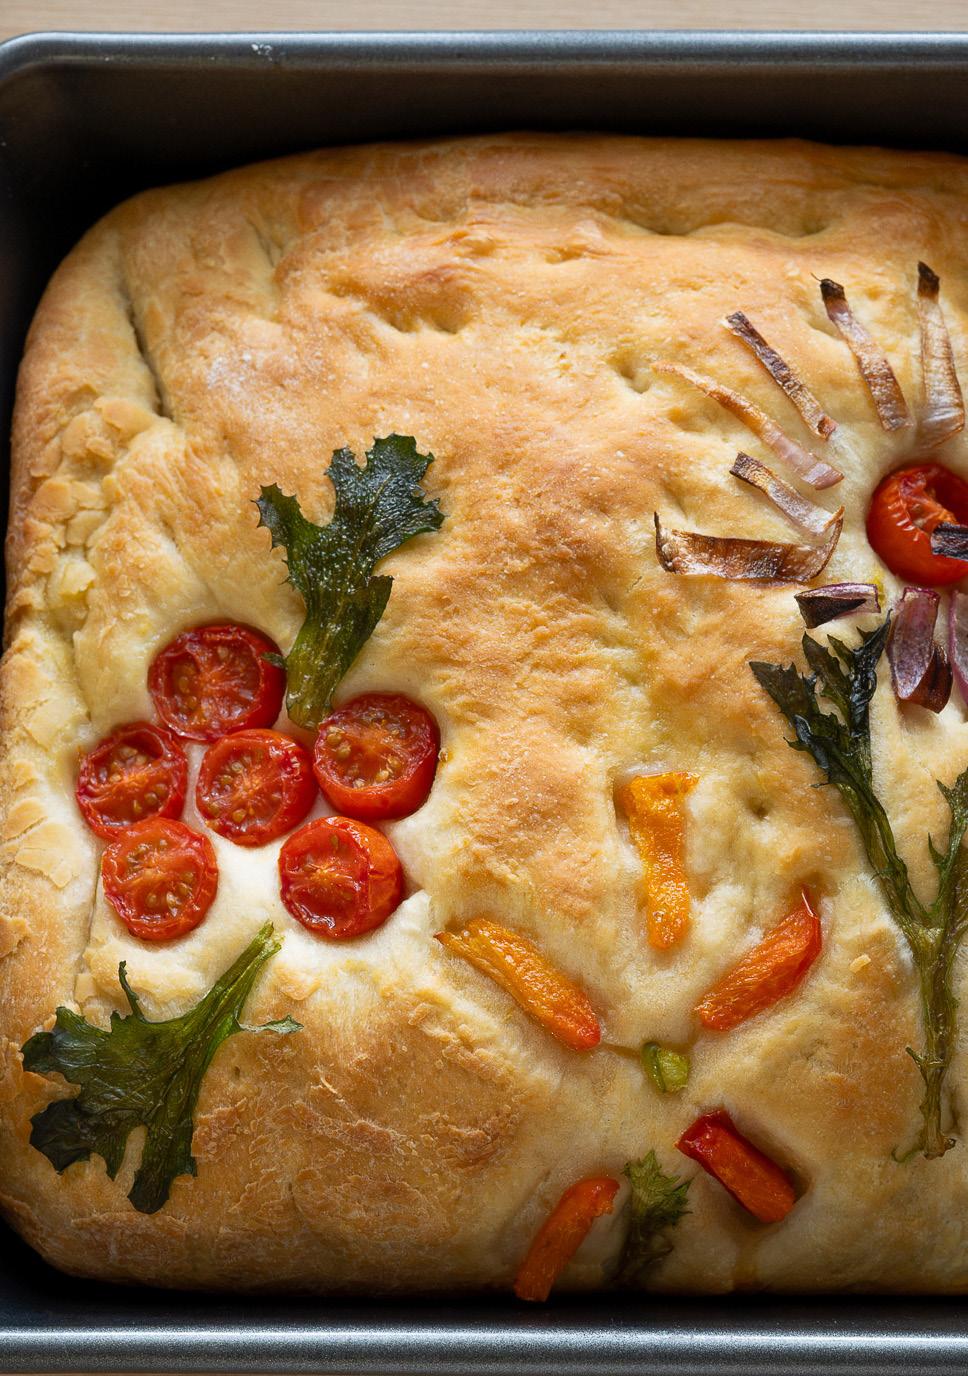
Now, this tip works best with flat doughs, such as focaccia or pizza, but by all means, do not let that stop you. Once you have an assortment of vegetables and your dough of choice, in a pan or onto a baking sheet, flatten the dough by pressing it down and apply a medium layer of oil (preferably olive) to the top of it. Press this lightly into the dough with your fingertips. With a knife, slice your veggies into thin strips, particularly for things like bell peppers, onion, and lettuce, and cut your rounder vegetables, like baby tomatoes, in half. With the variety of chopped-up veggies, you now have a palette of colors and shapes to work
with. Using these, decorate the top of your dough by pressing the vegetables onto it in different designs and patterns, just like you would with paint on a canvas. Then, bake! In mine, I used arugula as flower stems and leaves and baby tomatoes, onion, and bell pepper strips to make the flower petals.
Using vegetables not only brings vibrant color to your dish but dicing them into different shapes and sizes and organizing them in creative layouts can amplify a dish from basic to Picasso. And the best part? You can use fruit and pastry dough instead. Just get creative!
Craving something a little different but just as easy? Try out some basic molding techniques!
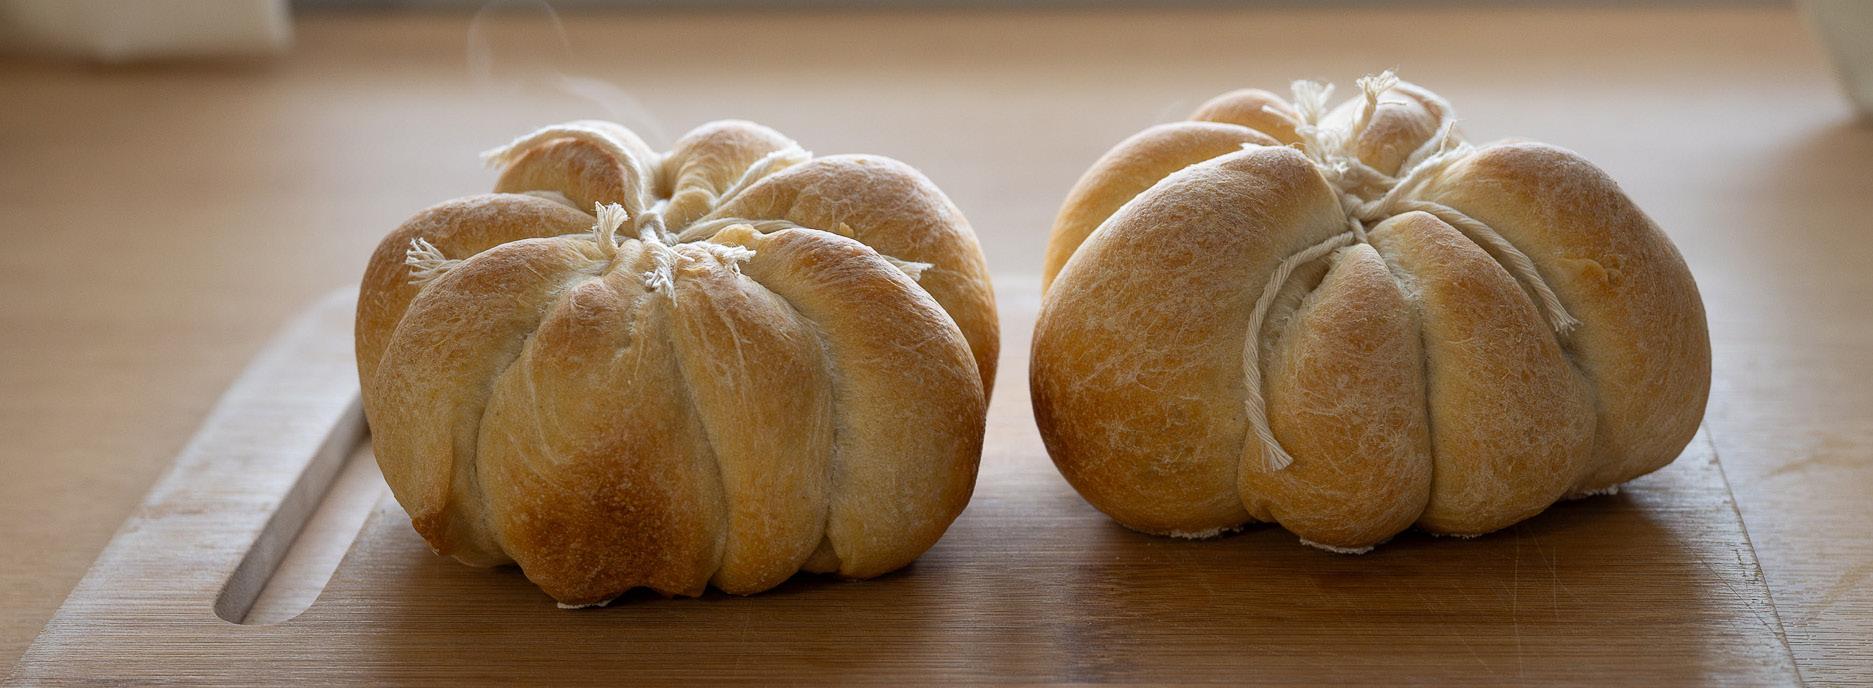
For any dough that rises, i.e. pastry dough, bread dough, etc., kitchen twine will tie your creations into all sorts of shapes and sizes. For example, take four evenly sized pieces of string and loop them around a ball of dough in opposite directions — vertically, horizontally, and diagonally both ways — tight enough to create shallow indents. Once baked and expanded in size, the roll of dough forms into a pumpkin shape! It might not seem like much, but molding your dough can take your dishes from simple to fun, plus, you can adjust the way you tie the kitchen twine in order to create a variety of different configurations!
If you’re dealing with batter, like cupcakes or muffins, don’t think that in order to make your dish, let’s say, star-shaped, you need to buy an expensive star-shaped cupcake tray. Tin foil is here to the rescue!
First, place cupcake liners into the cupcake tray and pour your batter. Once this is done, an easy way to elevate the look of what you’re baking is to roll up five tiny balls of tinfoil per cupcake liner, wedge them between the tray and liner into evenly spaced places circling your scoops of batter, and in doing so you should have molded your batter into a star shape! Or, in light of spring, little flowers. Of course, you don’t have to stop here. With two flat slabs of tinfoil and one rounded ball you can make hearts, and with three marblesized rolls of tinfoil you can make a bunny! The options are endless, and you don’t need to buy eighty-seven different trays to make them.
The best part of using twine and tinfoil is that they can be so versatile and effortless and still help you construct your foods into unique and creative formations!
No pan, twine, or tinfoil? Twist your way to intricacy!
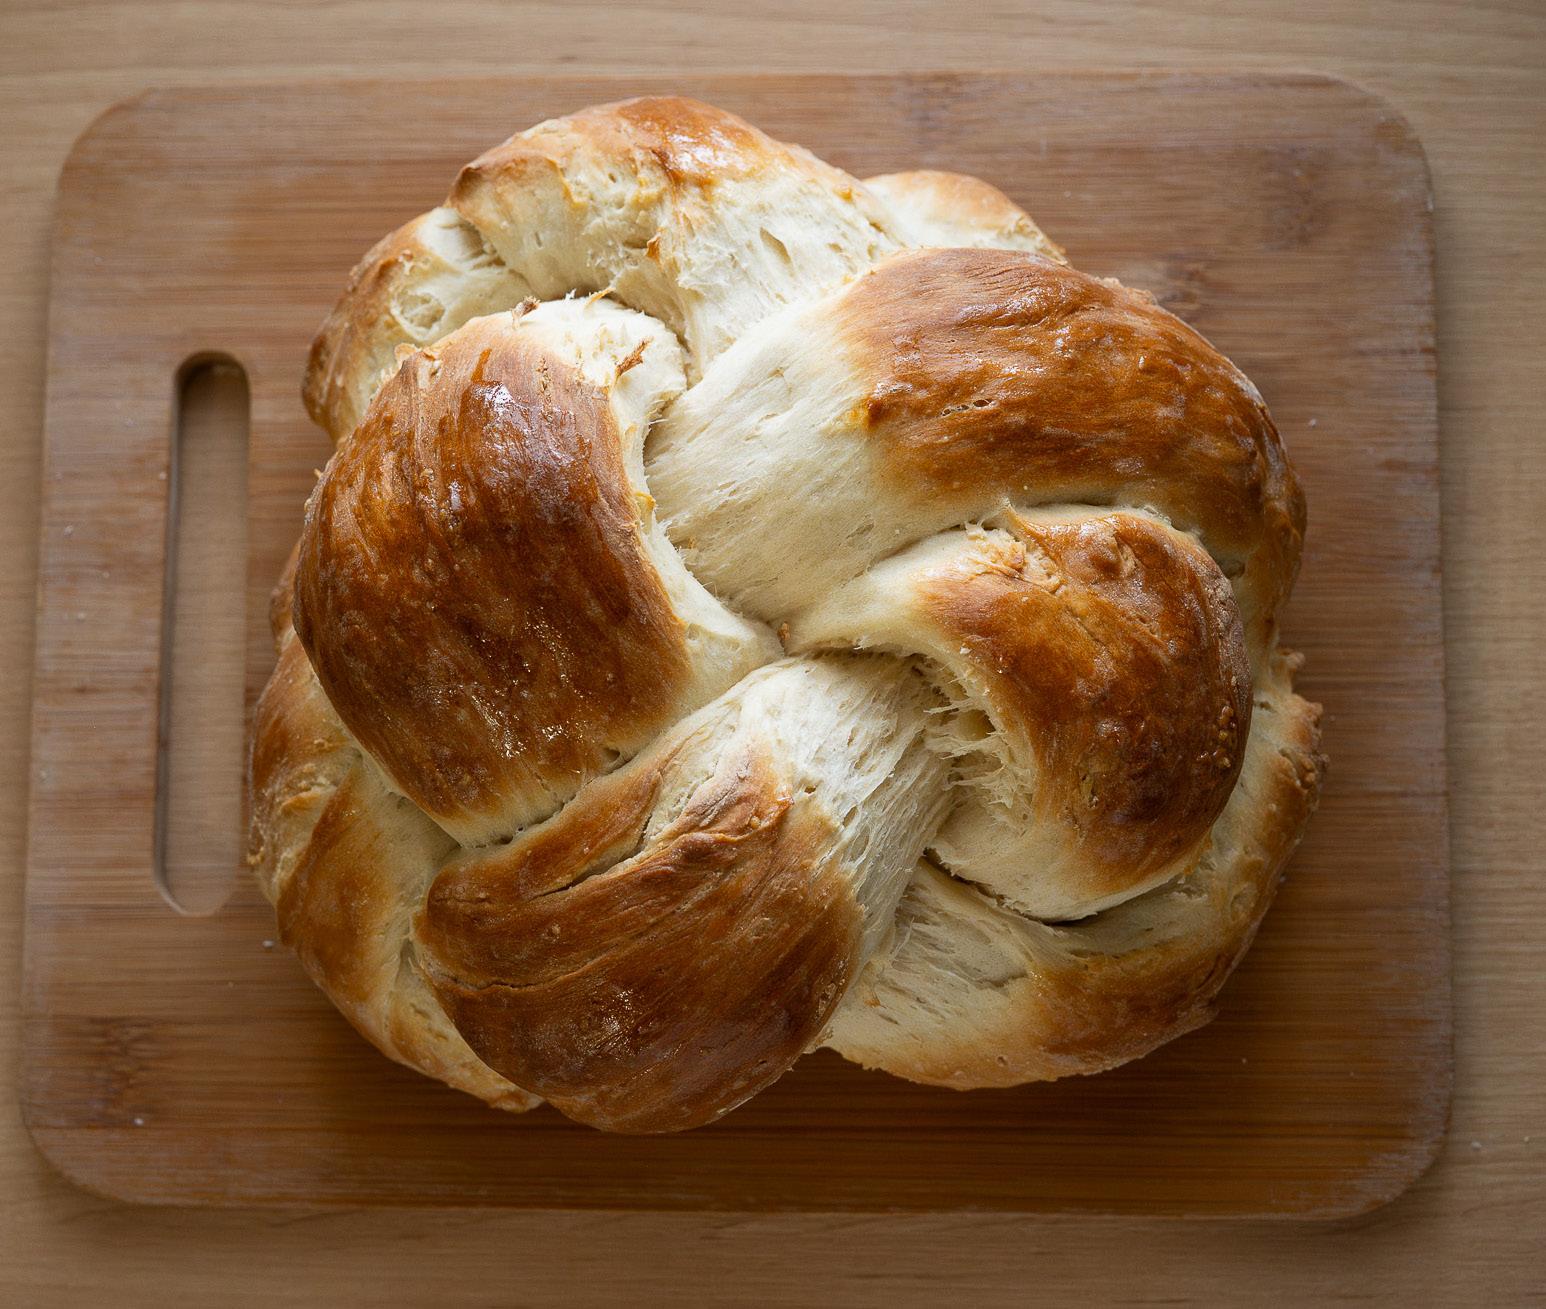
Another way to make your simple dishes look complex, especially if you’re not working with batter or can’t use pans, twine, or tinfoil, is through twisting. Why keep your dough sitting plainly when it could be a braid or a knot — optical illusions that make it hard for guests to figure out where the delicacy even starts?
To knot your dough, follow these three easy steps:
1. Split it into four even sections and roll them into equal-length ropes. If you’re making a batch of say, rolls, make sure you split your dough into however many portions you want and then proceed with step one.
2. Place two of your ropes next to each other vertically, and the other two on top of them horizontally and in the center. From here, tuck the left side of the top horizontal rope under the top half of the first vertical rope and the right side of the bottom horizontal rope under the bottom half of the second vertical rope.
3. Cross all the loose ends over their adjacents, and then tuck them under your round of dough, pinching them together.
For the braid, it’s a little more complicated, but still easy, as long as you know how to keep track! (This trick makes longer loaves/ rolls compared to the knots).
1. Split your dough into four even sections and roll them into equal-length ropes.
2. Lay each rope in front of you vertically and pinch them together at their top ends. From here, there is a simple pattern to follow to finish the braid: take the far-right rope and cross it OVER the one immediately to its left. Now, take the far-LEFT rope and cross it UNDER the rope to its right and OVER the rope right after that. Repeat the same pattern until you reach the end of your dough.
3. Once you have reached the bottom, pinch those four loose ends together. Fold the pinched ends under the dough and do the same to the top ends as well.
Now you have knotted and/or braided loaves and rolls, and you’ve taken your dish from ordinary to extraordinary! You can use these techniques with other types of dough as well to make things like twisted cookies and wound-up pastries. The kitchen is your oyster!

Want something even more complex without getting too complicated? Let’s talk patterns.
What if your recipe doesn’t require baking? What if we boil the dough like pasta or steam it like dumplings? One of the easiest yet still seemingly complicated ways to vamp up dishes like these is to dress the dough up! With a little food coloring (yes, we need it this time), a pattern can make a simple dish go a long way. For example, homemade pasta is made with as little as egg and flour, and dumpling wrappers with as little as flour and water! Easy enough to start, right? But what if we could make them striped? Once you make your dough, whether it's pasta, dumplings, or what have you, all you need to do to add pattern and style to your dish is separate, color, stack, and roll.
1. First, make your dough. Once you’ve done that, split it into four equal sections, and use food coloring to dye each part a different color (at least have two colors).
2. With a rolling pin (or, if you’re a rollingpin-less person like me, a cup) flatten out each section of dough, and make sure they are all relatively even in shape and size.
3. From here, stack your sections on top of one another so you have four layers. With a knife, cut the now singular, layered piece into smaller sections, each about an inch to an inch and a half wide, and flip them on their side so their layers are facing upwards.
4. Start rolling out these pieces until you have one large, striped, flattened piece of dough (make sure that the dough’s thickness correlates to the recipe you’re making — some require thicker pieces than others). For the pasta, you’ll have to cut some more if you’re looking to make noodles, and for dumplings, you’ll have to form circles or squares to fill and fold, but taking your dough from plain to striped was that easy! Separate, color, stack, roll.
To do anything other than stripes, most often you will simply need to separate your dough into at least two sections, color them, then roll one out flat and make your design with the second color, stacking it on top of your flattened piece, and roll it all out flat again so your design is embedded.
There are so many patterns you can try and so many ways to style these dishes in any way you want, as long as you understand the basics of how to start. Easy, but impressive!
The wonderful part about all of these recipes is that they can work on a variety of different doughs and be used in a multitude of different ways, you just have to have the creativity and the passion to do so. Making your simple dishes look complex is far easier than it is made out to be, and if you don’t have the budget for fancy products or the tools to create fancy designs for those more elaborate recipes, these are some of the easiest tips and tricks to get you closer to where you want to be.
Good luck and have fun!
Written by Ava Ascenzo | Illustration by Ayaka Quesen
Spring is right around the corner, and you know what that means? It’s matcha season. The snow is fizzling out, and so is the cider. Wellness is in, fresh air is in, and matcha is in. The great thing about the popular powder is that there are, in fact, many ways to matcha. You can drink it, eat it, and even wear it! Essentially, matcha is everywhere and can be added to everything.
It’s important to know the difference between ceremonial grade matcha and culinary grade matcha, according to the ArtfulTea blog. Ceremonial grade is the highest quality matcha, with a subtle flavor. It is meant to be consumed on its own. Culinary grade matcha is lower quality with a bolder flavor. It’s designed to be added to lattes and other recipes. Depending on your recipe, ceremonial grade matcha might be a better alternative to culinary grade, or vice versa.
Here are a few recipes with both types of matcha powder that will brighten up your spring!
The Classic Matcha
You can’t go wrong with a classic matcha! This subtle drink is perfect for a slow spring morning, especially when you need your caffeine. A classic matcha is a great recommendation for those looking for a healthy alternative to coffee.
Instructions:
Ingredients:
• Ceremonial grade matcha powder
• Water
In a sifter or mesh strainer, add a one-teaspoon scoop of matcha powder per cup. Then, sift the powder into a bowl and add a small amount of hot water. Whisk until smooth. Finally, add up to six ounces of water and whisk until frothy. Utilize your personal taste and play around with these ratios!
The Matcha Latte
A sweeter alternative to a classic matcha, this latte has a bolder flavor. The best part is, you still get all of the benefits of matcha: higher energy, metabolism, and tranquility.
Instructions:
First, use a sifter or mesh strainer to sift your matcha until it becomes lump-free. Then, spoon the matcha into a large mug. Whisk in hot water until frothy. Then whisk in milk until well-combined. Finally, taste and add additional water, milk, and/or sweetener to your liking.

Ingredients:
• ½ to 1 teaspoon of culinary grade matcha powder
• ¼ cup hot water
• ¼ cup milk of choice
• Honey, stevia or sweetener of choice (optional)
Note: Using full-fat milk will create a richer latte, whereas non-fat milk will lighten it. Almond milk and oat milk are great alternatives to try!

Instructions:
Craving matcha and cookies? Here is a great way to combine the two! As an easy and quick recipe, these matcha cookies are a sweet way to turn a matcha hater into a matcha lover! This recipe makes roughly ten cookies.
Ingredients:
• ½ cup unsalted butter at room temperature
• ¾ cup granulated sugar
• 1 egg
• 1 ½ cups all-purpose flour
• ½ teaspoon salt
• ½ teaspoon baking soda
• ½ teaspoon baking powder
• 4 teaspoons culinary grade matcha powder
• 2/3 cup white chocolate chips
First, use an electric hand mixer to whip your room-temperature butter and sugar. Mix in the egg until combined. Sift in the flour, matcha powder, salt, baking powder, and baking soda. Fold with a spatula. Then, fold in the white chocolate chips. Divide the dough into 10 equal balls, and place on baking pans. Use parchment paper and leave enough space for the cookies to spread. Let the cookie dough rest in the fridge for 1 hour, and preheat the oven to 347 F. Finally, place the cookies in the oven and bake for 10 minutes. Add more white chocolate chips to the top of the cookies and bake for another 5 minutes. Bonus: add nuts or raspberries for a stronger flavor! Store at room temperature in an air-tight jar.
After one of those days, we all need a sweet treat post dinner. With its rich and heavy consistency, infused with sweet matcha, this no-churn matcha ice cream will be sure to satisfy your sweet tooth!
Ingredients:
• 14 ounces condensed milk
• 1 teaspoon vanilla extract
• ¼ teaspoon salt
• 2 tablespoons culinary grade matcha powder
• 2 cups heavy cream
Note: Adding more matcha powder won’t hurt! If you want to have a stronger matcha flavor, then add more than 2 tablespoons of powder. Be sure to sift it to avoid clumps.
Instructions:
In a large bowl, add condensed milk, vanilla extract, salt, and matcha powder. Mix well until combined and set aside. Then, whip heavy cream until it forms stiff peaks, or when the mixture is thick, fluffy, and stable (approximately 5 minutes). Add about half of the whipped cream to the bowl with the matcha condensed milk mixture. Mix together until the color is a uniform green. Then, add the rest of the whipped cream and gently fold it into the mixture. Be careful not to deflate the whipped cream. Finally, pour the cream into a freezer-safe container and freeze for 6 hours or overnight.


Written by Maggie Anderson | Illustration by Brynne Baird | Photographs by Sean Sterling
Ok, I’m not technically a food critic. I am, however, a major foodie. So, let’s just say for the purposes of this review that I know exactly what I’m talking about.
I’m a food connoisseur. A master reviewer. Think Guy Fieri, Rachel Ray level expert.
Now that we’re on the same page, it’s time to ruffle some feathers and find out if this coop’s worth clucking about.
Recently, a friend of mine recommended I check out The Whiskey Coop, a restaurant new to Armory Square last August. To prepare, because no food critic shows up blind, I stalked the website. Needless to say, I was quite pleased.
An elaborate array of dishes and bites filled the bold, mustard-yellow menu. With titles like “Catfished” and “Cluck Norris” my attention was pulled in a hundred different directions, leaving me craving a taste of everything. Aside from the clever names, the menu stood out for its variety of glutenfree, vegan, and vegetarian options, ensuring everyone can enjoy a cluckin’ good meal.
My main takeaway — if you like fried chicken, look no further. The only drawback: the drink menu was nowhere to be seen online. And I had high expectations for these drinks because I mean, hello, it is
With research out of the way, the next step was to inspect the nest.
First impressions: rustic, speakeasy-esque tavern with a weathered charm. Brick walls line a majority of the joint with rugged wooden floors throughout. Soft music fills the space between lingering conversations, with a live music feel that’s occasionally enhanced by actual live performances.
The place screams intimate and cozy, yet has a sultry, rough-around-the-edges allure. It is equally suited for a casual night out with friends or a memorable first date.
The Whiskey Coop.
Though the website left me a bit in the dark, the drink menu offered by the waitress did not disappoint. The menu, or perhaps, the book presented pages upon pages of whiskey varietals and cocktail combinations to choose from. It was an indecisive person’s nightmare, (trust me, I should know).
After carefully looking through countless options of house, rye, Tennessee, corn whiskey and more, I pondered over the mixed section. Our table landed on the Scarlet O’Hara, the Peach Mule, and my drink of choice, the Ginger Snapple.
The O’Hara was strong with its combination of Coop Infinity Barrel Bourbon and Solerno Blood Orange Liqueur. The fruity flavor created a nice after-taste with each sip. A more subtle beverage, the mule went down light and easy with flavors of peach and lime. You could say it was peachy keen. Moving on from my cringe-worthy pun to the ginger concoction for the ginger girl (me). The Ginger Snapple was sweet, iced-tea-like, and made with Proper 12 Apple Whiskey, more tolerable for beginner whiskey drinkers.
Whether you’re a liquor rookie or a seasoned sipper, it’s safe to say there are plenty of picks for you.

Ok, let’s talk about what you’ve all been desperately waiting for — the food! I’m sure you’re just dying to know whether The Wac Arnold or the Hot Mess caught my eye. Spoiler alert, neither.
If you know me at all, you’re familiar with my slight obsession with pickles (dill of course). So naturally I was drawn to the Pickle Rick. But before I get ahead of myself, let’s talk starters. Obviously the Fried Pickle Spears were calling my name, as were the Maple Brussels and the Bourbon Braised Wings. Though upon deliberation with my crew, we settled on the Corn Fritters.

They came out quickly and perfectly warm, points for promptness. As for the presentation, I’ll be honest, they resembled chicken nuggets quite a bit. But the drizzled hot honey and spices around the rim of the dish added an elevated touch (dare I say high-class McNuggets?). The fried crust was perfectly crisp, like ASMR-worthy crisp.
Next up, sniff test. The fritters had a quite subtle scent, with the hot honey dominating my senses. And finally, a bite. The combination of a crunchy outer shell and a creamy, fluffy filling was a texture extravaganza in my mouth. They tasted of sweet corn, with a nice kick from the hot honey. I enjoyed the fritters, but they weren’t anything super special. Still, I’d say worth a try.
Ok, the moment I’ve been waiting for. PICKLE RICK! This signature sandwich is stacked with buttermilk-battered fried chicken, the house Szechuan Sauce, dill pickles, and cilantro aioli. And if that wasn’t enough of a dill-light, the dish is topped with fried pickles. The chicken was wonderfully crunchy, the sauce sweet like a glaze, the pickles absolutely perfect. As a pickle enthusiast, I’d say these dills were on par.
I love you, Pickle Rick.
Served alongside this masterpiece was a helping of house-made kettle chips. They were thick and airy, crispy, and lightly salted. Each chip was fried to perfection, toasted to a light-golden hue.
From the unique vibe to the specialty drinks and most importantly, the food, you’ll find you get a cluckin’ good bang for your buck.
So, whether you’re after a peck-tacular meal or an egg-ceptional drink, take a trip and inspect this whiskey business for yourself.

Written by Abigail Sadie Green | Illustrations by Duyem Pham
“Ramen noodles combined with mac and cheese on lime tortilla chips.” “Oreo crumbs sprinkled on cheddar goldfish.” “Pickles and toasted bread.”
“Anything edible I can find.” These are some of the food combinations Syracuse University students say they crave while they are under the influence, specifically when high on cannabis — perhaps the only time these combinations are imaginable and acceptable.
If we’re being honest, we’ve all eaten something we aren’t proud of, even sober. Hunger is a powerful feeling, and so are cravings. Some of us may have even eaten things we’ll take to our graves before we tell anyone else, and that’s okay. We aren’t proud of it, but hunger is irresistible, and even more so when our minds aren’t fully our own — enter the power of the munchies.
While sober cravings and hunger are strong, munchies are downright irresistible. Because of this, it would be ignorant to try and fight the munchies… so what if I said you don’t have to feel guilty for them?
You may have heard about THC, the active ingredient in cannabis, which affects our senses like smell, appetite, and, of course, taste. All factors as to why munchies are so enticing. Here are five specific ways THC impacts hunger:
Increased sensitivity to smells: THC enhances your sensitivity to food aromas, making them more powerful.
Activation of tongue receptors: This leads the brain to crave “fatty foods” more strongly.
Dopamine release: THC triggers the release of dopamine, amplifying the pleasure associated with eating.
Ghrelin hormone release: THC stimulates the production of ghrelin, the hormone that drives hunger.
Lowered inhibitions: THC reduces your resistance to indulging in unhealthy foods.
THC is powerful and also to blame for the snacks you devour after a smoke session. In addition to THC, there are other scientific explanations for changes in behavior
Links between creativity and cannabis use might help explain the inventive munchie combinations. Recent studies have explored the relationship between cannabis use and perceived creativity, shedding light on why people often associate being high with increased innovation. One study found that cannabis can induce a state of joviality, meaning users experience elevated moods and a more positive outlook. This shift in mindset leads people to perceive their own ideas as more creative than they might when sober.
Interestingly, the better a participant’s mood, the more highly they rated their own thoughts in terms of creativity. However, this perception of creativity does not translate to actual novelty, debunking the myth that cannabis enhances creative ability. That being said, this boost in perceived creativity isn’t without its perks. An elevated mood and increased self-confidence can be powerful, encouraging individuals to take risks and explore new ideas they wouldn't otherwise. While cannabis may not make someone a creative genius, it can provide the mindset to pursue ideas with greater confidence when sober.
Next time you find yourself feeling guilty for munching after a smoke sesh, instead, embrace it and enjoy all of your unique food combinations!

Written by Agustin Gonzalez III | Illustrations by Alissar Youssef
So I bet you just had a great session, either by yourself or with a community of people you feel safe around. The vibes are vibing, MF DOOM is playing in the background, and then it hits you: you need food, and you need it now! Rummaging through the fridge and cabinets, you eagerly search for that one food item that will satisfy that craving. The sad news is, you have no idea what you need so you end up eating a full pack of string cheese and leftover pasta from the previous weekend. That’s no way to go out, but I got you covered so it doesn’t happen again. Here are three recipes my friends love to have when the munchies attack!
Ingredients Directions
• 2 slices of sourdough bread
• 2 tablespoons unsalted butter, softened
• ¼ cup mild cheddar cheese, grated
• ¼ cup muenster cheese, grated
• ¼ cup gruyere cheese, grated
1. Grab two slices of sourdough bread and place it onto a plate.
2. Take the softened butter and spread a tablespoon onto one side of each piece of bread.
3. Take the grated cheeses and put onto the unbuttered side of one piece of the bread.

4. Put the other piece of bread on top with the buttered side facing up.
5. Lay the sandwich in a pan on medium-low heat.
6. Use a weight (heavy pot, chef’s press, plate, etc.) to apply even pressure to the sandwich to maintain even heat distribution.
7. Cook for 5-7 minutes or until golden brown, then flip the grilled cheese and wait another 4-5 minutes or until golden brown.
Ingredients
• 3-4 ounces of caviar
• ¼ cup crème fraîche
• ¼ cup finely chopped chives
• ¼ cup finely chopped shallots
• 1 bag of Party Size Cool Ranch Doritos
Directions
1. Mix the crème fraîche, chives, and shallots together in a bowl.
2. Spread the mixture evenly into a shallow dish.
3. Top the mixture with enough caviar to cover.
4. Enjoy!

Ingredients Directions
• 4 hot dog buns
• Unsalted butter, softened
• 4 beef franks
• 2 Roma tomatoes
• 2 jalapeños
• ¾ of a large yellow onion
• 2 tablespoons neutral oil
• Salt

1. Roughly chop the tomatoes and set aside.
2. Cut the tops off the jalapeños and julienne them. You may scrape the seeds out if you want it to be less spicy.
3. Julienne the onions.
4. Butter the buns and toast in a pan for 5-8 minutes or until golden brown.
5. Score the beef franks with a knife and place in a pan with oil.
6. Cook for 7 minutes or until cooked evenly and browned.
7. Throw the jalapeños, tomatoes, and onions in the pan and sauté for 8 minutes or until you see browning on them.

Written by Ava Bartholomew
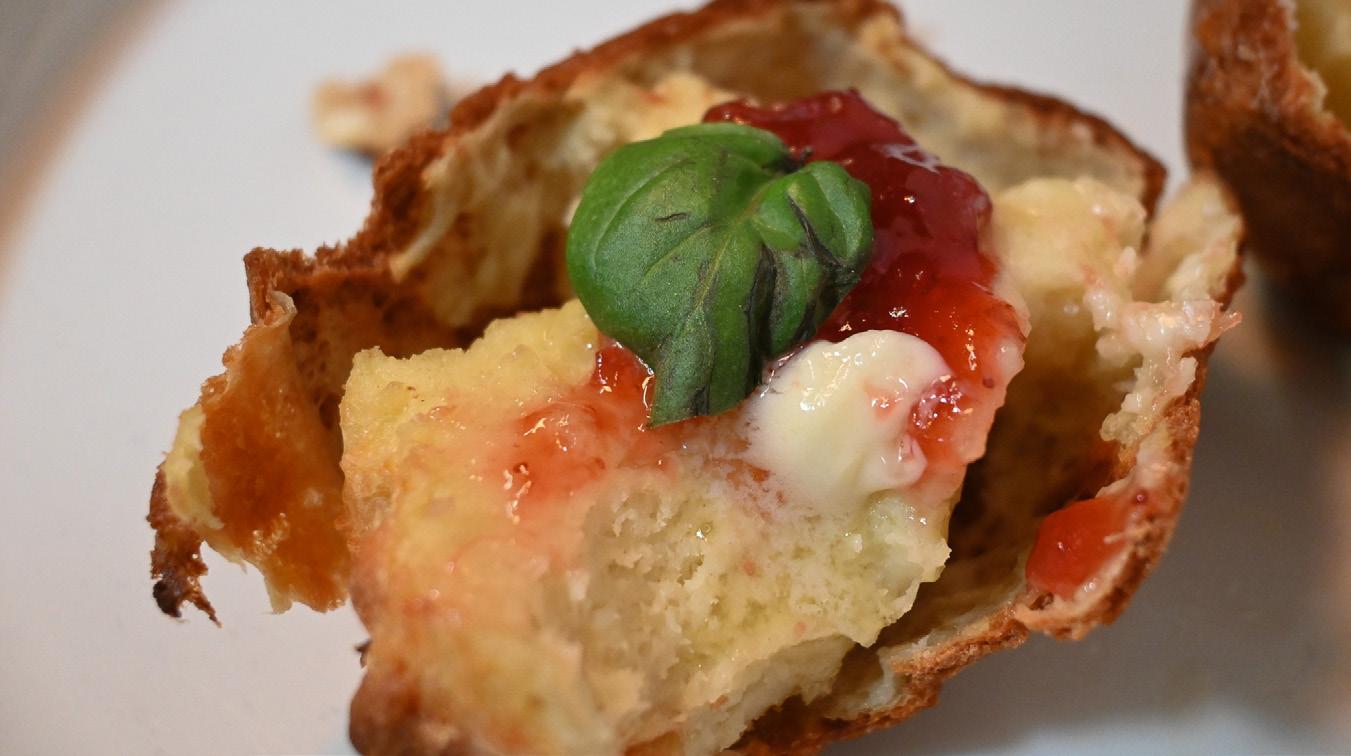
“One and a half, one and a half, three.” That’s what my mom always says.
From waking up to the warm, fragrant smells coming from the cast iron pan, to standing by my mom’s side as she blended the three simple ingredients, the memories I cherish most stem from that one simple phrase. As I recited those words with her on countless early mornings, the recipe for popovers was the first I ever memorized — a sentiment she shares, as does much of our family.
The popover tradition began with my great-grandmother, Chrystal, and her four daughters Rita, LeeAnn, Landra, and Erla, my nanny. As the story goes, Chrystal was the master, while my great-grandfather, Paul, was the connoisseur. As her daughters grew and began their own families, they spent decades trying to replicate her perfect popovers for their own children and grandchildren.
These five, beautiful women have all since passed on from this world. And yet, at each of their memorials, tucked between choked sobs and streaming tears, the inevitable story about their personal popover quests always, even if for the briefest moment, lit the room with smiles.
If you could ask these four sisters now if they ever achieved a popover as perfect as their mom’s, they’d probably tell you no. But if you were to ask their spouses and children, their nieces and nephews, their friends and neighbors, you would get a vastly different answer.
The thing is, I don’t believe the perfect popover recipe actually exists. What does exist are the memories formed when making them. Each generation in my family always says that their mom did it better than they ever could.
Maybe it’s not that they do it better. Maybe it simply is that there is no better feeling than when someone you love cooks for you.
Below is my papa’s recipe for popovers. Much of his recipe is what he learned from Erla, his wife, and the time he spent talking with Chrystal. Some of his tips and tricks, however, come from years of experimenting, always aiming to continue the quest when my nanny no longer could. Ever the storyteller, my papa has not only continued the popover tradition but is always sure to share a family memory while we enjoy this breakfast treat. The added bonus of eating a popover made by my papa is that he frequently serves them with his homemade jams.
• 3 room temperature eggs
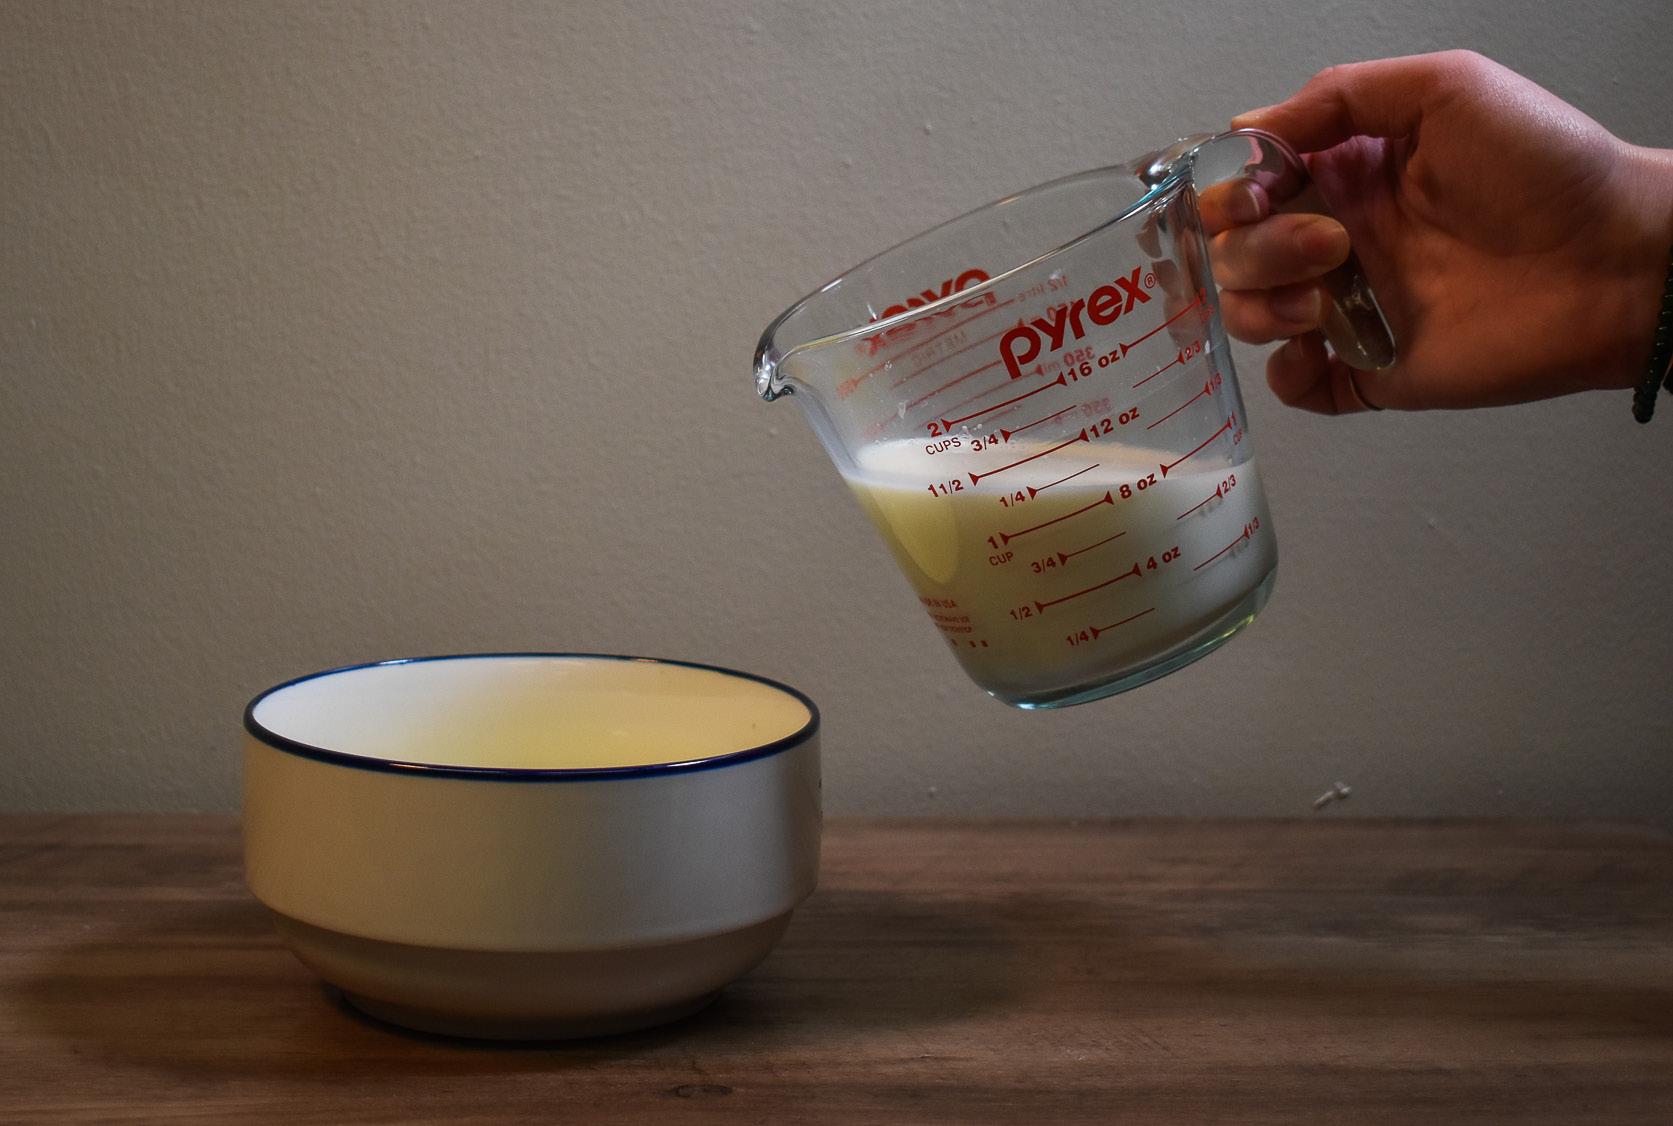
• 1 ½ cups tepid (warmed) milk
• 1 ½ cups flour
• Pinch of Salt
• 3 tablespoons melted butter (optional)

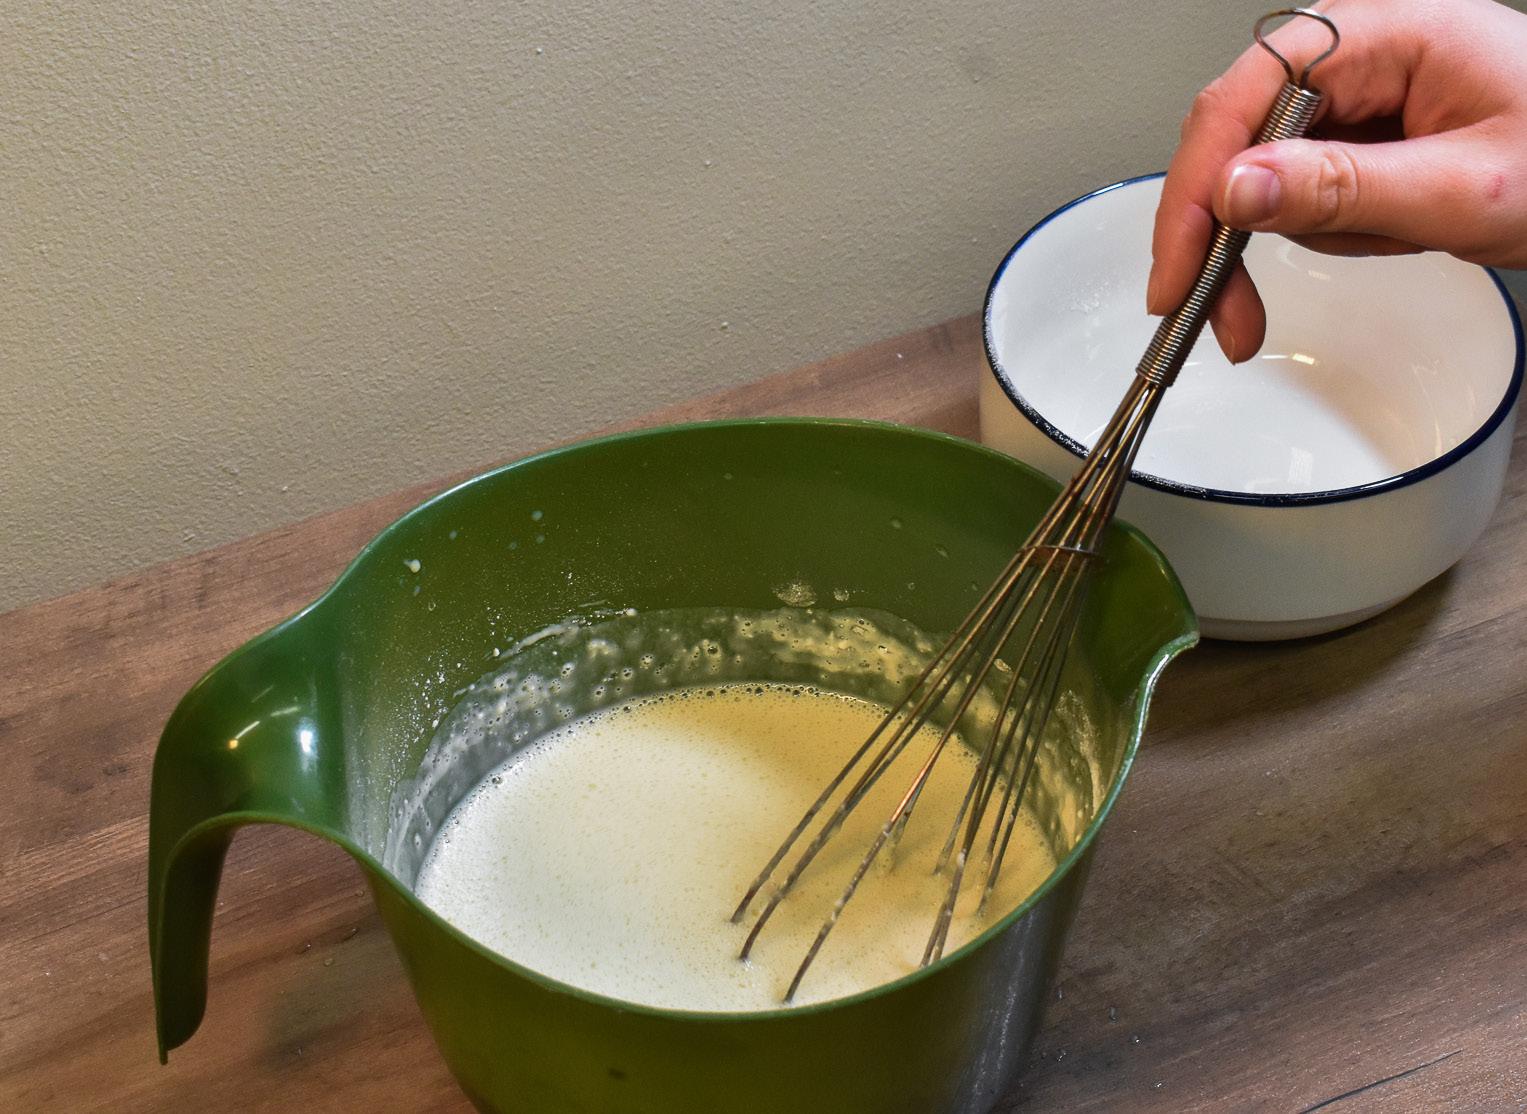
1. In a medium-sized mixing bowl, beat the eggs on a low speed until pale, yellow, and frothy.
2. Beat the tepid milk into the eggs until well combined.
3. Slowly add the flour into the mixture until well combined. Then stir in the pinch of salt. If you choose to add the butter, mix that in alongside the salt.
4. Let the batter sit at room temperature for 30 minutes.
5. Preheat the oven to 450 F, while the batter rests.
6. In each cup of a popover pan, pour roughly one teaspoon of high-smoke oil, such as canola or sunflower oil. Spread the oil around the edges of the cup, leaving a small pool of oil at the bottom. Place the popover pan in the oven for at least 10 minutes.
7. Remove the popover pan from the oven and pour the batter into each cup to just under the brim. The oil should sizzle and bubble as the batter is poured into the pan — that means the pan is hot enough.
8. Place the pan on a lower rack in the oven, as the popovers will rise, and bake for 20 minutes.
9. Lower the oven temperature to 350 F and bake for another 20 minutes.
10. Remove from the oven and let cool slightly.
11. Cut in half, serve with butter and jam and enjoy!
Get funky this spring! Here’s how to use fermentation to add a delicious and healthy twist to your food.
Written by Roman Verna | Illustrations by Madeleine Herberger
Let’s be honest. Fermentation isn’t exactly a word that makes your mouth water when you hear it. For many, it prompts pictures of stinky cheese, strongly flavored sauerkraut, and bowls of slop that claim to be “gut-healthy,” or the cure to some obscure problem. But that’s not what fermentation has to be. In fact, that’s only a minuscule part of what fermentation is. In reality, there are endless flavors, textures, and culinary experiences that can be discovered through fermentation. Here are some unique recipes that put a twist on what fermentation really is.
Spring is the time of blooming flowers and green grass, and for many, the light at the end of the tunnel that is winter. But for foragers across the nation, it means something even better — spruce tip season. Spruce tips are small, bright green clusters of new-growth needles that sprout on the end of old branches on mighty spruce trees of all varieties. They’re also completely edible and have a pleasant and citrusy note to them. This syrup is more than that though; in fact, it yields a flavor like nothing else. It still retains some of the zest of the fresh tips but also gives off an almost vanilla-y flavor. It’s truly something you need to try to understand. And here’s how to make it!
Ingredients
• 3 cups of medium-growth spruce tips (can be harvested in early spring off of any type of large, healthy spruce tree)
• 2 ½ cups of brown sugar (use more for a sweeter flavor)
Directions
1. In a colander, wash your fresh spruce tips lightly with cold water and lay out to air dry until no water remains (tips should not be dried out though).
2. Once cleaned, start layering the spruce tips in a quart-sized mason jar, alternating layers between sugar and spruce tips.
3. Make sure to leave a little headroom and then seal with both lids included with the mason jar.
4. Put the jar in a cool, dark place to ferment. Make sure to open the jar every other day to prevent gas buildup and explosion.
5. Keep an eye on the sugar in the jar — once it turns into a liquid and the tips turn brown, strain out the syrup into a new, smaller jar. This will usually happen around 20-30 days, depending on your climate.
6. Add the syrup to a small pot and bring to a boil, then shut off. This ensures any bad bacteria will be killed off and the syrup will have a thicker texture.
7. Pour back into a small mason jar. The syrup will keep in a pantry for months, and can be drizzled over ice cream, pancakes, or anything you desire!
Spring and summer is the time for cookouts. Burgers, hot dogs, sausages — you name it, someone’s grilling it. And just as synonymous with backyard barbeques are the condiments. Ketchup, relish, and mustard are tried and true — but who’s to say they couldn’t be a little tastier? After all, if you’re putting so much work into the protein, the toppings should highlight that. What most people don’t realize is that all mustard is a fermented product and can be made so much better at home with just a few steps. This recipe yields a “middle ground” mustard; it maintains creaminess but still keeps the whole grains for texture.
Ingredients
• 6 tablespoons brown mustard seeds
• 5 tablespoons yellow mustard seeds
• 1 tablespoon yellow mustard powder
• 1 tablespoon sugar
• 1 tablespoon salt
• ¼ cup apple cider vinegar
• ¼ cup white wine vinegar (or white verjus, if available)
• 5 tablespoons leftover pickle juice (substitute 3 tablespoons water and 2 tablespoons apple cider vinegar if you don’t have any)
Directions
1. In a mortar and pestle or food processor, dump in the brown and yellow mustard seeds (but not the powder) and pulse until seeds are cracked open but not a fine powder.
2. In a bowl, combine cracked seeds, mustard powder, and salt. Mix until homogeneous.
3. In a liquid measuring cup, combine the apple cider vinegar, white wine vinegar, and pickle juice (or substitute).
4. Add the liquid to the bowl with the seeds and stir to combine; the mixture should look very loose at this point.
5. Transfer the contents of the bowl into a medium mason jar and seal. Store at room temperature.
6. Check on the mustard every day to monitor thickness. On day three, open the jar and taste.
7. If the texture is too thin, leave for a little longer. If too thick, cut with a little water. Once finished, store in the same jar, but refrigerate.
8. Enjoy on burgers, hot dogs, sausages, sandwiches, or anything you desire!
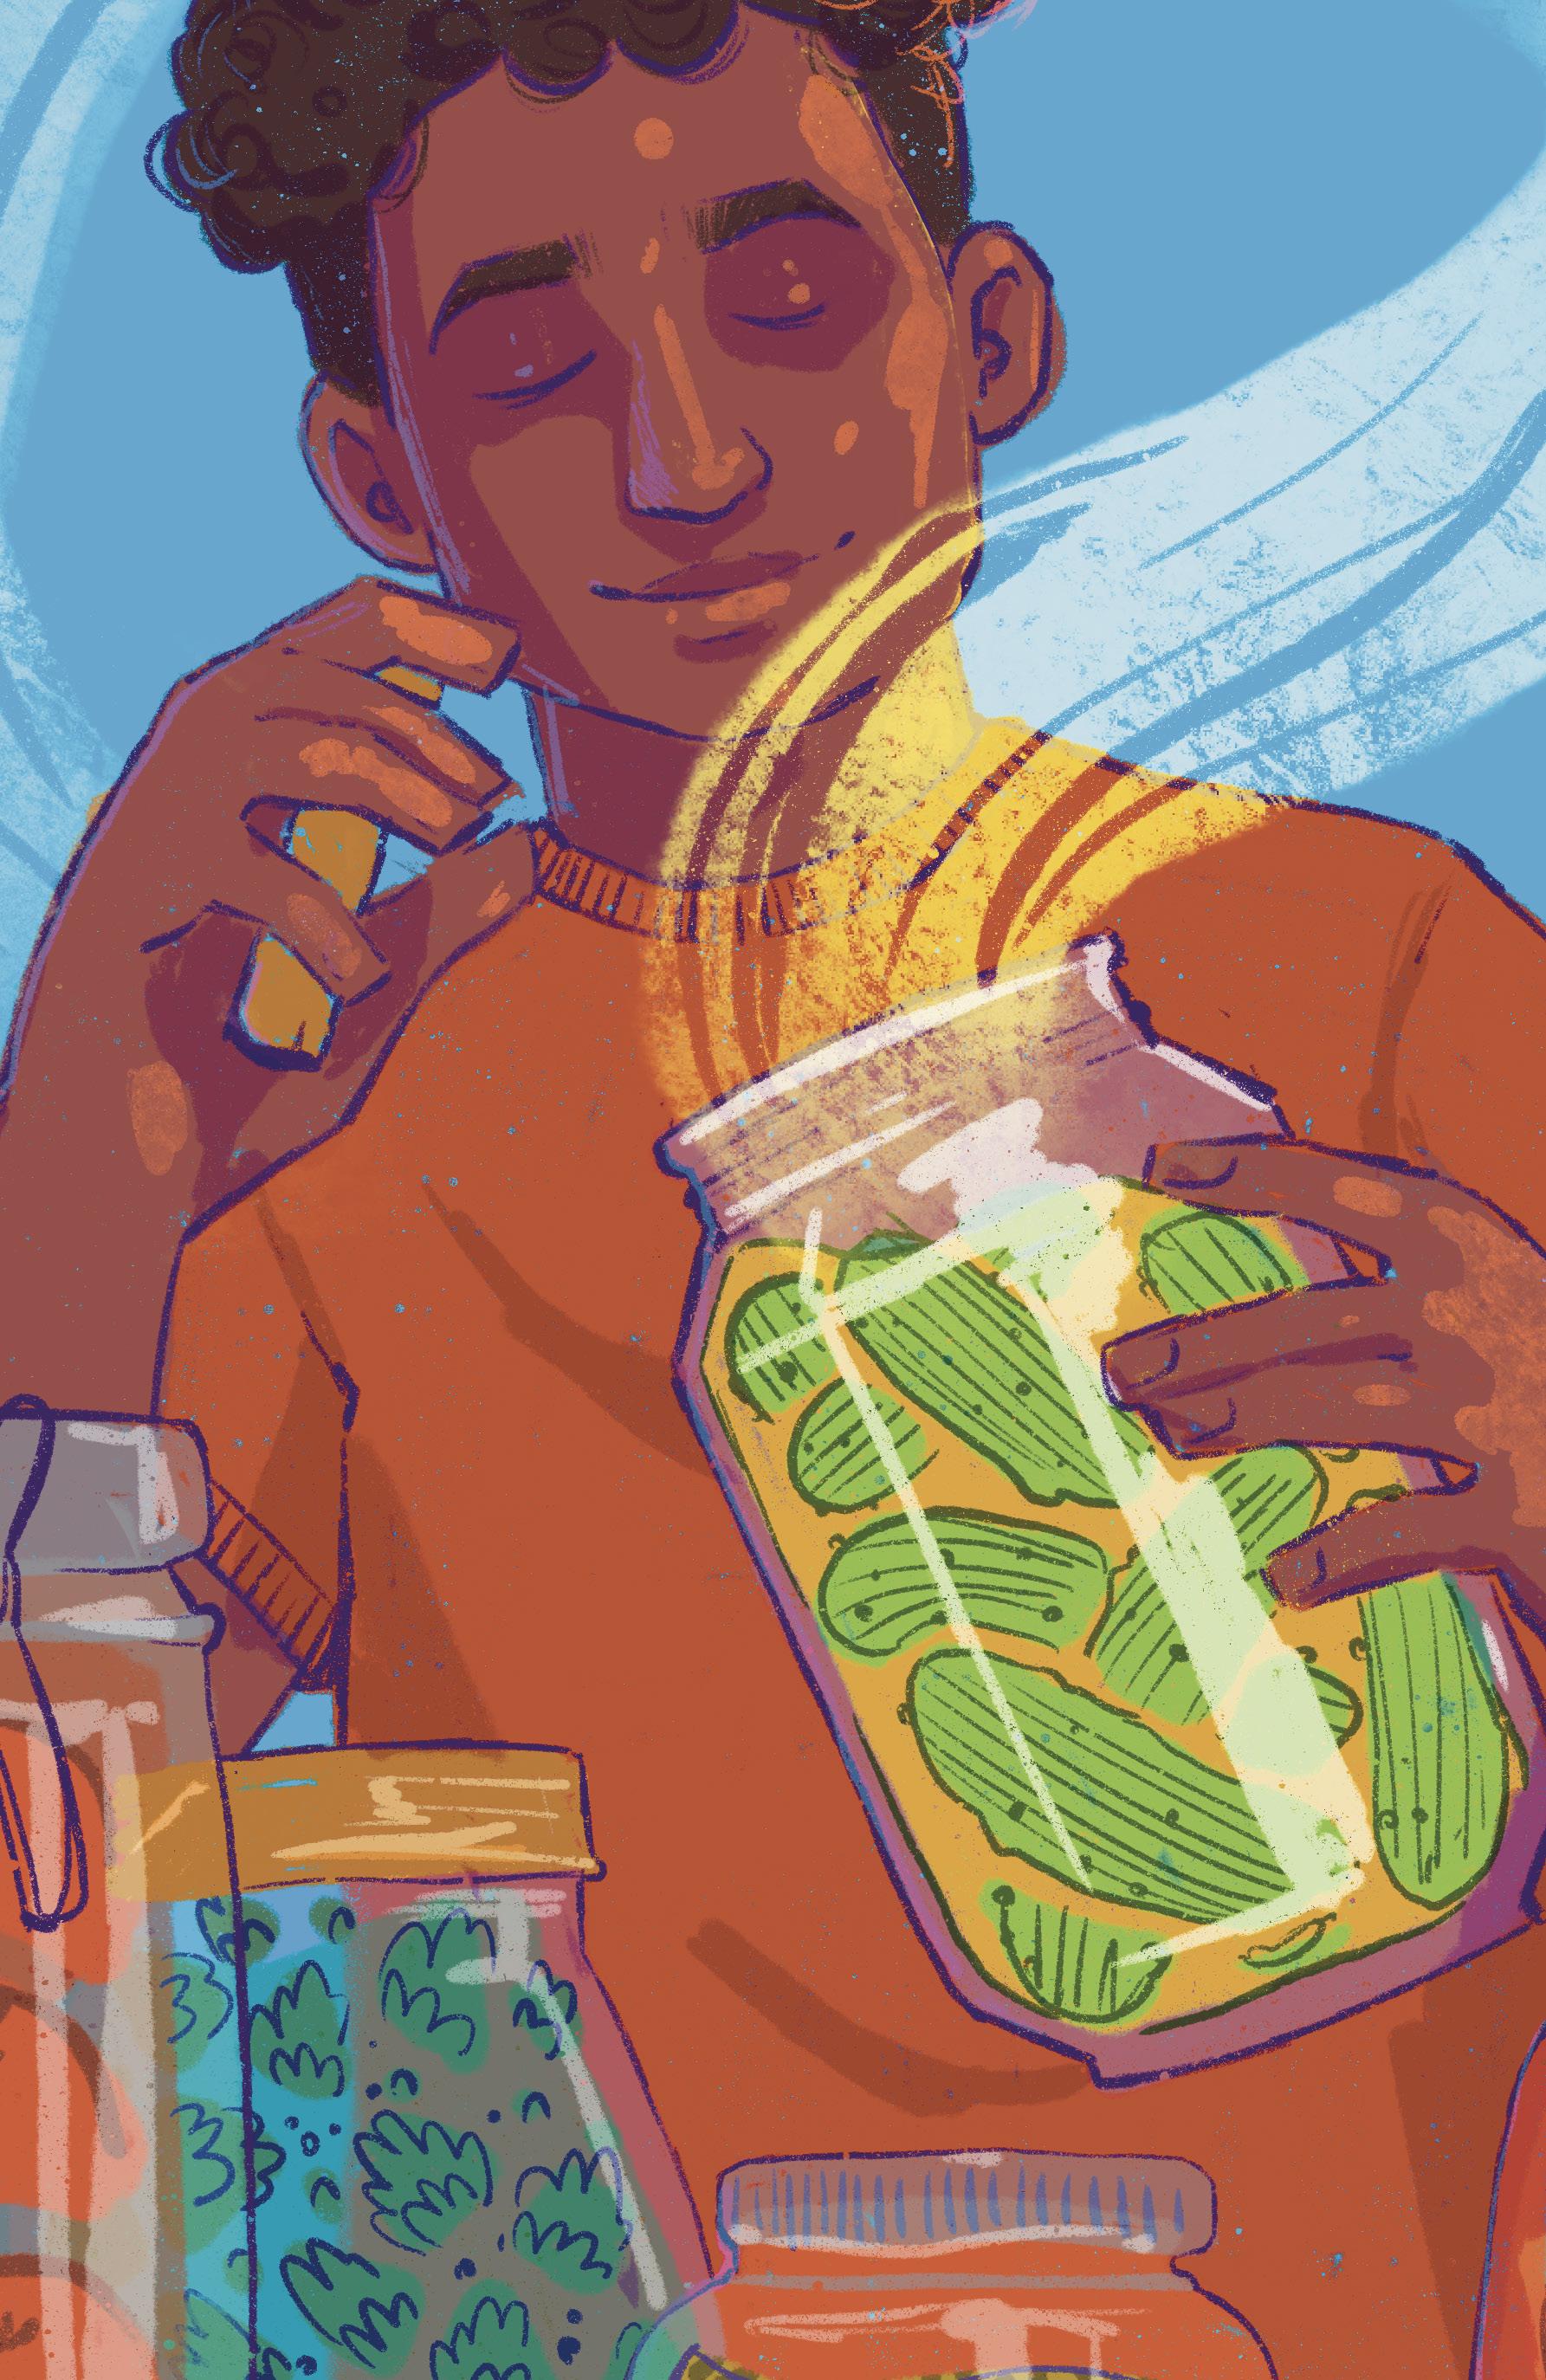
Written by Maya Rizzo | Illustrations by Sarah Mednick
&
Genre: R&B/Soft Pop
• Snooze - SZA
• Thinkin Bout You - Frank Ocean
• Best Part - Daniel Caesar, H.E.R.
• WAIT FOR U - Future, Drake, Tems
• Nights Like This - Kehlani, Ty Dolla $ign
• Adorn - Miguel
Food craving = Creamy Mac & Cheese
The soothing and soulful voices of artists like SZA and Frank Ocean pair great with a classic comfort food, mac and cheese. To be more specific, creamy mac and cheese. Imagine steamy elbow noodles smothered in gooey cheese sauce that warms your soul after each bite.


Genre: Hip Hop/Rap/Pop
• Not Like Us - Kendrick Lamar
• DENIAL IS A RIVER - Doechii
• Sticky - Tyler, The Creator, GloRilla, Sexyy Red, Lil Wayne
• Never Lose Me - Flo Milli, Lil Yachty
• Jimmy Cooks - Drake, 21 Savage
• MIDDLE CHILD - J. Cole
Food craving = Acai Bowl
The high energy of artists like Kendrick and Doechii are a perfect match with the energy an acai bowl will give you. Acai is considered a superfood, filled with nutrients to get you through a gym sesh. Acai bowls are not only healthy, but delicious, leaving you feeling confident and refreshed. Think of a thick acai smoothie layer topped with fresh fruit and crunchy granola, drizzled with sweet honey.
Genre: Indie/Electro/Pop
• I’ve Been In Love - Jungle
• The Less I Know The Better - Tame Impala
• Bed Chem - Sabrina Carpenter
• The Spins - Mac Miller
• Put Your Records On - Corinne Bailey Rae
• Unwritten - Natasha Bedingfield
Food craving = Lemon Bars

Songs like “Unwritten” and “Put Your Records On” can be described by the bright yellow color of a lemon bar. This tiny dessert has the perfect balance of sweet and tangy flavors. At the base of the bar is a buttery and crumbly crust, filled with smooth lemon curd filling and dusted with powdered sugar. Biting into the bar is like an explosion of sunshine in your mouth!

Genre: Party Pop Hits
• All Of The Lights - Kanye West, Rihanna, Kid Cudi
• 360 - Charli xcx
• I Gotta Feeling - Black Eyed Peas
• Time of Our Lives - Pitbull, Ne-Yo
• HOT TO GO! - Chappell Roan
• Starships - Nicki Minaj
Food craving = Loaded Nachos
Loaded nachos are the perfect party snack for a Friday night out! Picture crispy tortilla chips piled high with melted cheese, topped off with layers of seasoned ground beef, creamy guacamole, fresh salsa, and cool sour cream. Add some spice with jalapeños or a drizzle of hot sauce. These nachos set the scene for a bold and memorable night, just like Pitbull.
Genre: Childhood Throwbacks
• Last Friday Night (T.G.I.F.) - Katy Perry
• You Belong With Me - Taylor Swift
• Counting Stars - OneRepublic
• Believer - Imagine Dragons
• Stressed Out - Twenty One Pilots
• Maps - Maroon 5
Food Craving = Mama's Chicken Noodle Soup
These nostalgic songs bring back comfort and memories, just like a classic chicken noodle soup. Envision rich chicken broth, filling the air with the aroma of herbs and spices. Tender chunks of chicken float alongside perfectly cooked noodles, creating a satisfying and heartwarming dish. This warm bowl of goodness takes you back to your childhood with every slurp, just like these songs.

The reward of diving into all opportunities, with Jannie Huang.
Written by Taegan Covino | Photographs by Alicia Hoppes
Working in food wasn’t always in the plan for graphic design Professor Jannie Huang, who started her first two years of college in liberal arts and finished as a fine arts major.
Growing up in New Jersey, Huang claims the only reason she applied to the University of Massachusetts Amherst was because one of her friends told her to. This decision ultimately led to a connection that brought her to her first internship at Sony Pictures Digital Entertainment, and in turn a job offer at its NYC firm after college. It was only when the company relocated to the West Coast and Huang was left without a job that she considered culinary school.
“It was very scary,” she recalled. Yet the fond memories of cooking scallion pancakes and soy sauce wings with her father throughout her childhood reminded Huang of her love for cooking and inspired her to jump full force into her culinary journey.
Huang’s cultural roots in the kitchen with her father are what truly sparked her love for cooking, and she considers scallion pancakes to be one of her forever favorite dishes because of it.
“It’s nostalgia for me, it’s what I love to eat,” Huang said.

Although the taste obviously contributes, it really is the significance to her family that makes this dish so important to Huang, and it remains a part of her life today as a parent.
“Every weekend we would make scallion pancakes, and now I still make them every Sunday, to the point where my son, who is Caucasian, now expects them every Sunday,” Huang said. “My daughter on the other hand, who is half Chinese, claims to not like them, which has me wondering where I went wrong.”
Going to culinary school wasn’t a goodbye from Huang’s web design passion though, just a temporary leave.
“I’ve never been a fan of putting all of my eggs in one basket,” she said.
Her exit from Sony Pictures turned out to be the perfect opportunity to explore another passion: cooking. After three months at what was once the French Culinary Institute and is now the International Culinary Center, Huang realized that tests and school weren’t exactly her foretay, and definitely weren’t going to pay the bills. She then found a freelance gig that became a full-time job at Condé Nast.


Although she looks back on this experience just as fondly as her others, it was ultimately Huang’s decision to leave Condé Nast and apply to Food Network that gave her that thrilling intersection between her two passions, food and design. Although the company was looking for someone to fill their empty Senior Designer position, it was still a very scary application. As Huang recalls, “It was the first time I applied somewhere with no prior connections; I just cold applied, and they hired me.”
Huang made some of the most incredible connections of her life at Food Network, including her now wife, Carrie, whom she said she is forever grateful to have met there. Jannie and Carrie fell in love almost instantly and dreamed of opening a restaurant together, which was their original plan after leaving Food Network in 2007 to move to Portland, Oregon.
Huang isn’t one for sticking to plans though, as her Just Cook Jannie website motto says, “It’s not that deep.” The big plans of opening their own restaurant were not quite realistic at the time. Jannie’s short-lived experience in culinary school and Carrie’s lack of restaurant experience since high school did not make them the most equipped to open a restaurant, nonetheless they set out in the food industry. After three months of Huang staging at a restaurant, while her wife served at another, they came up with a new plan: a joint PR and web design agency called Little Green Pickle, where the two could combine their strengths and help the local businesses of Portland.
However, with Huang’s constant drive to jump on every opportunity possible, this just wasn’t going to be enough. The two decided to take it a step further by co-founding what became a nationally renowned food festival, Feast Portland. The festival was an unbelievable hit, seeing over 300 vendors, famous chefs from across the nation, and 20,000 tickets sold, which was everything the two could have hoped for. Huang admits on her website that they were in fact absolutely nuts for this, but don’t regret it for a second, and it only further grew the connections they had developed at Food Network.
Jannie and Carrie eventually decided that it was time to retire from their crazy life of year-long planning for Feast Portland while also managing constant clients at Little Green Pickle, and they made their way to Syracuse. They now both teach here at SU, Carrie as a public relations professor and Jannie as a professor for VIS 207, an introductory graphic design course.
“I’m just having a blast meeting everyone,” she said.“Hopefully they’ll let me teach VIS 207 again next semester.”
Huang’s passion for cooking will never leave her though, and she continues to test recipes and post content on her Just Cook Jannie website and Instagram, which she started in a time of isolation during the pandemic. She has dreams of opening a culinary studio in the future, but worries that she may never retire with how many new ideas she comes up with.
“I’ve been trying to say yes to most things lately, I don’t like to say no,” she shared.
Huang’s eager approach to life is something we can all take advice from. Her ambitious nature has led her to unbelievable opportunities with lasting connections, which she says have been her favorite part. She advises people looking to get into the culinary field to prioritize financial security and follow their gut.
“Do it when it just feels right,” she said.“You’ll know.”
Written by Daisy Polowetzky | Illustrations by Jade Booker
If you are one of the many avid watchers of Hulu’s hit series “The Secret Lives of Mormon Wives,” you’ve probably noticed one particular accessory in the hands of the wives: a Swig Drinks cup.
In one episode of the reality show following eight Mormon mom influencers in Provo, Utah, cast members Jessi Ngatikaura, Demi Engemann, and Layla Taylor can be seen ordering dirty sodas at their local Swig, igniting a craze on social media.
For the wives, dirty soda is their dirty little secret.
“Six out of the seven days of the week, I’m having at least one 44-ounce soda,” Taylor said in episode five.
Founded in Saint George, Utah in 2010, Swig is a drive-through soda chain, known for its dirty sodas. Since the consumption of alcohol and caffeine is against the Mormon religion, Swig is very popular in Western states like Utah, which has a large Mormon population.
Taylor and the rest of the cast’s Swig orders are not much of a secret, though.
Taylor’s go-to order is called the “Bloody Wild”: Mountain Dew, mango puree, strawberry puree, and added coconut cream, according to BuzzFeed. Aside from the jaw-dropping amount of sugar Taylor must consume six out of the seven days of the week, her order sounds pretty delicious.
Dirty soda is just like a regular soda, except with added syrups, cream, or juices. The classic dirty soda recipe, however, contains Diet Coke, coconut syrup, lime juice, and non-dairy creamer.
Nicole Tanner, the founder of Swig, was inspired to open the soda chain from her family trips to Sonic, The New York Times reported. Today, Swig has over 50 locations and continues to expand across the United States.

Swig’s online menu is a soda lover’s dream. Customers can either choose to create their own concoction or choose from a seemingly endless list of cleverly named pre-made sodas. The “Unlucky Ducky” combines Sprite, lemonade, strawberry, and is topped with a gummy shark. “Poppin’ Pineapple” includes Sprite, pineapple, watermelon, and strawberry popping pearls. No matter your mood, Swig has the flavors to curb your soda craving.
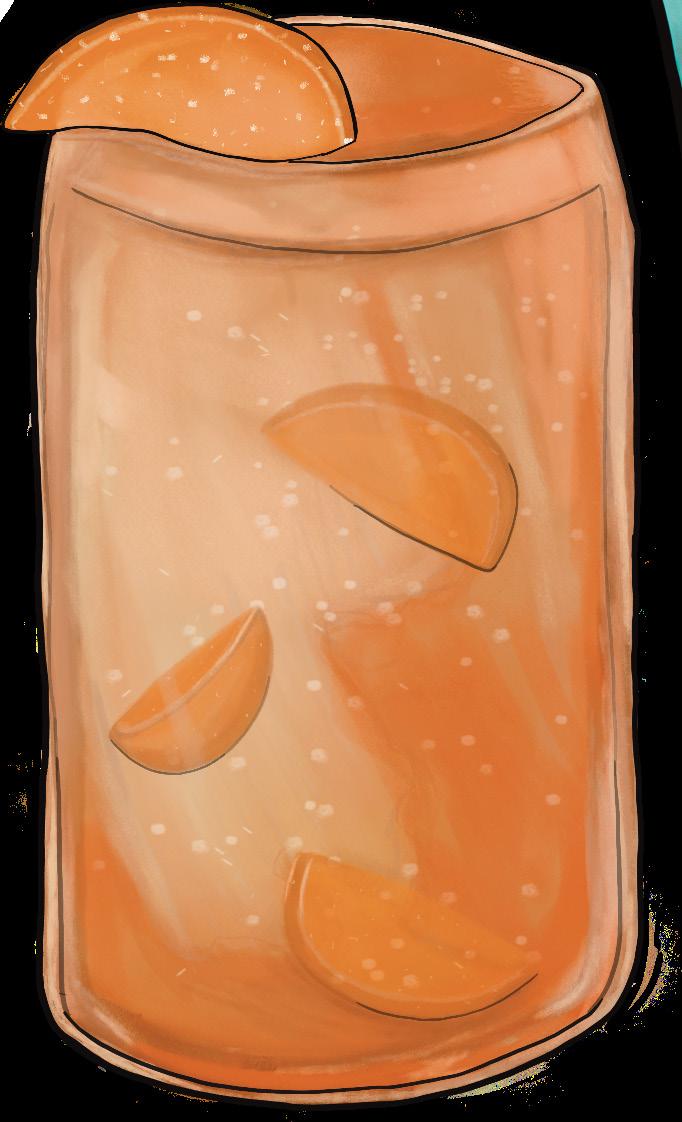
The dirty soda trend has even spread to college campuses, far from western Swig locations. Students who frequent Syracuse University’s Ernie Davis and Sadler dining halls can now make their own dirty soda with the help of a newly added dirty soda machine. While the machines only offer coconut-lime flavored syrup, students are already putting it to the test.
Spencer Howard, a sophomore at SU, tried the dirty soda machine in Sadler Hall shortly after it was installed. While Howard says the coconut-lime syrup was a fun addition to his Diet Pepsi, he did say that the syrup had an artificial taste to it.
“It tasted really like a candle,” he said.
Overall, Howard approves of the new dirty soda machines in SU dining halls. He says the new drink options show initiative by the university to spice up a usually bland dining experience.
Even if you decide not to get down and dirty with your soda, the popularity of dirty soda is sure to not fall flat.
I think things like [this] are good for SU to implement because it keeps things interesting, even though sometimes it’s not the most successful. “ ”


Written by Tori Wyffels | Photographs by Ola Czartorjska
Nestled in a typical suburban neighborhood just off East Seneca Turnpike, School & Vine is an unexpected destination for a luxury dining experience. From the outside, its bland brick exterior seems like nothing special. But step inside and you will discover this restored schoolhouse is hiding some of the best-kept culinary secrets in Onondaga County. School & Vine has flown under the radar of many Syracuse University students, but maintains a buzzing atmosphere with its loyal, more local, crowd. While you may be the only patron under 40 on a lively weekend night, the delectable dishes are well worth it.
School & Vine found its home in the historic Southwood Two-Teacher Schoolhouse, which was listed on the National Register of Historic Places in 2000. The art deco building was constructed in the late 1930s and operated for roughly 30 years, offering primary and secondary education to the surrounding town. It was completely renovated to house the dining space, bar, and kitchen, but the picture of the schoolhouse in its former glory is showcased in the restaurant’s foyer, paying homage to the history of the property.
The one-room dining area offers a warm and intimate atmosphere, with enticing smells from the kitchen wafting through. The restaurant also offers comfortable bar seating, perfect for more casual nights out. The cocktail menu is just as carefully crafted as the food menu, featuring drinks like pomegranate cosmopolitans and Mexican martinis, each intended to complement the unique menu options. The food menu is heavily influenced by American and Italian cuisines, with some Asianfusion elements like the chicken lemongrass dumplings and the sesamecrusted ahi tuna salad. The global influence on each dish creates a more diverse flavor palate. The strong bistro-style influence offers the various pastas and inventive burger options. With a balance of comfort food and exciting dishes that are unique to this spot, every guest can find something to enjoy.
What sells School & Vine the most? The service. Quality of service can completely change a dining experience. The food may be the best in the world, but poor service will automatically disqualify that restaurant from being at the top. Every server and bartender at School & Vine is dedicated to their craft — and it would be unfair to suggest that serving and bartending is not a craft when done correctly. They take the time to recommend what menu items would be best for you and your desired experience. They sell, sell, sell the menu. You may wind up convinced to order all three desserts — and you won’t be mad about it. The staff is so personable that you’ll be tempted to grab a drink with them after indulging in their suggestions.
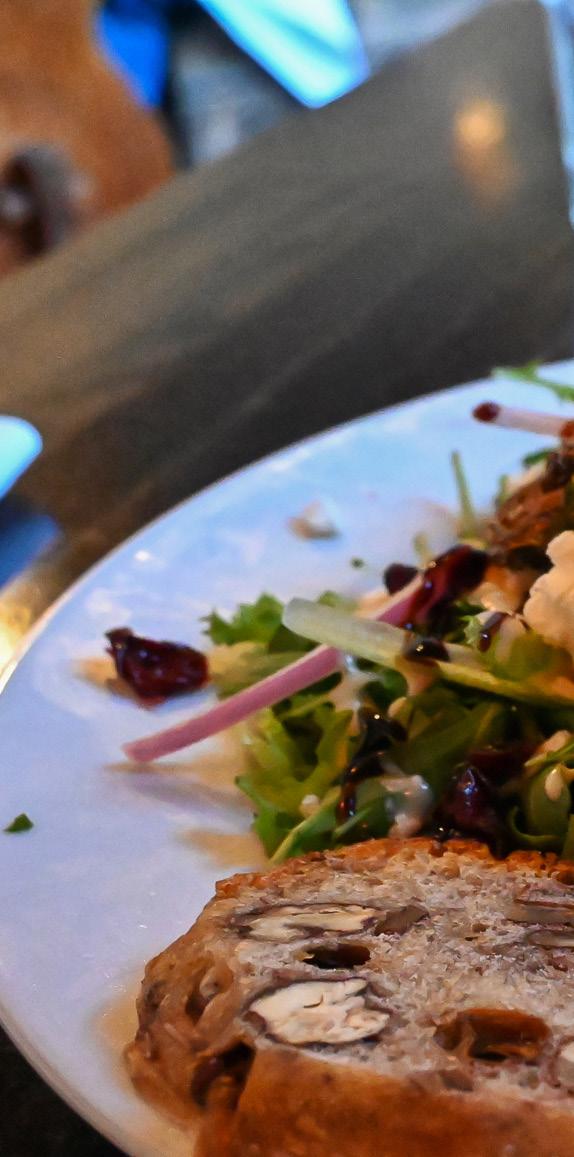
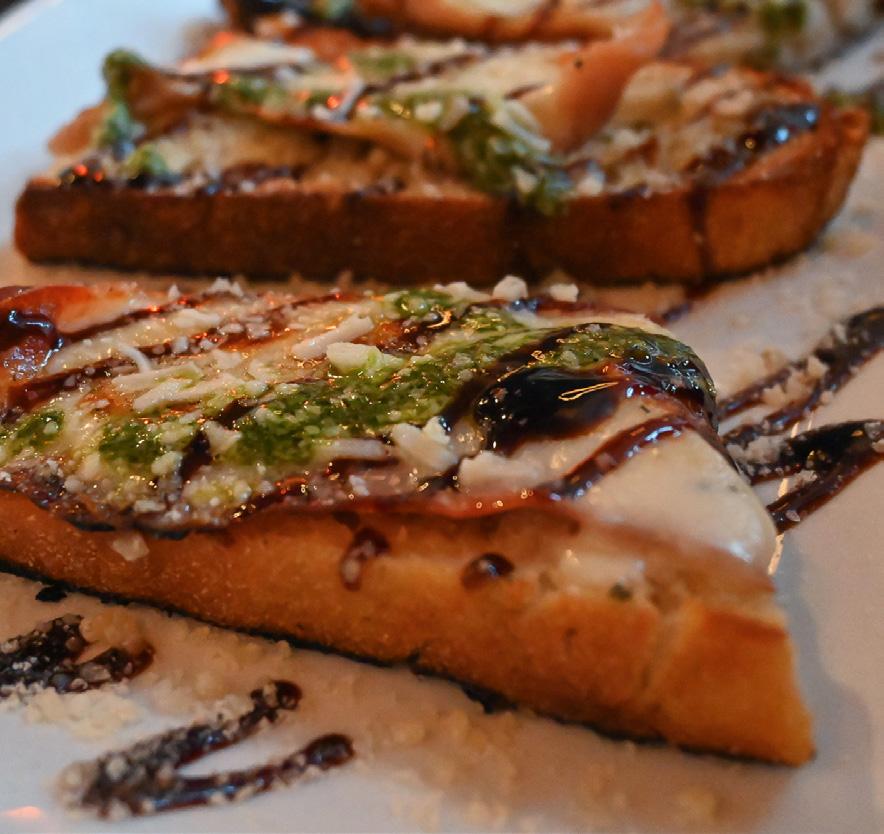
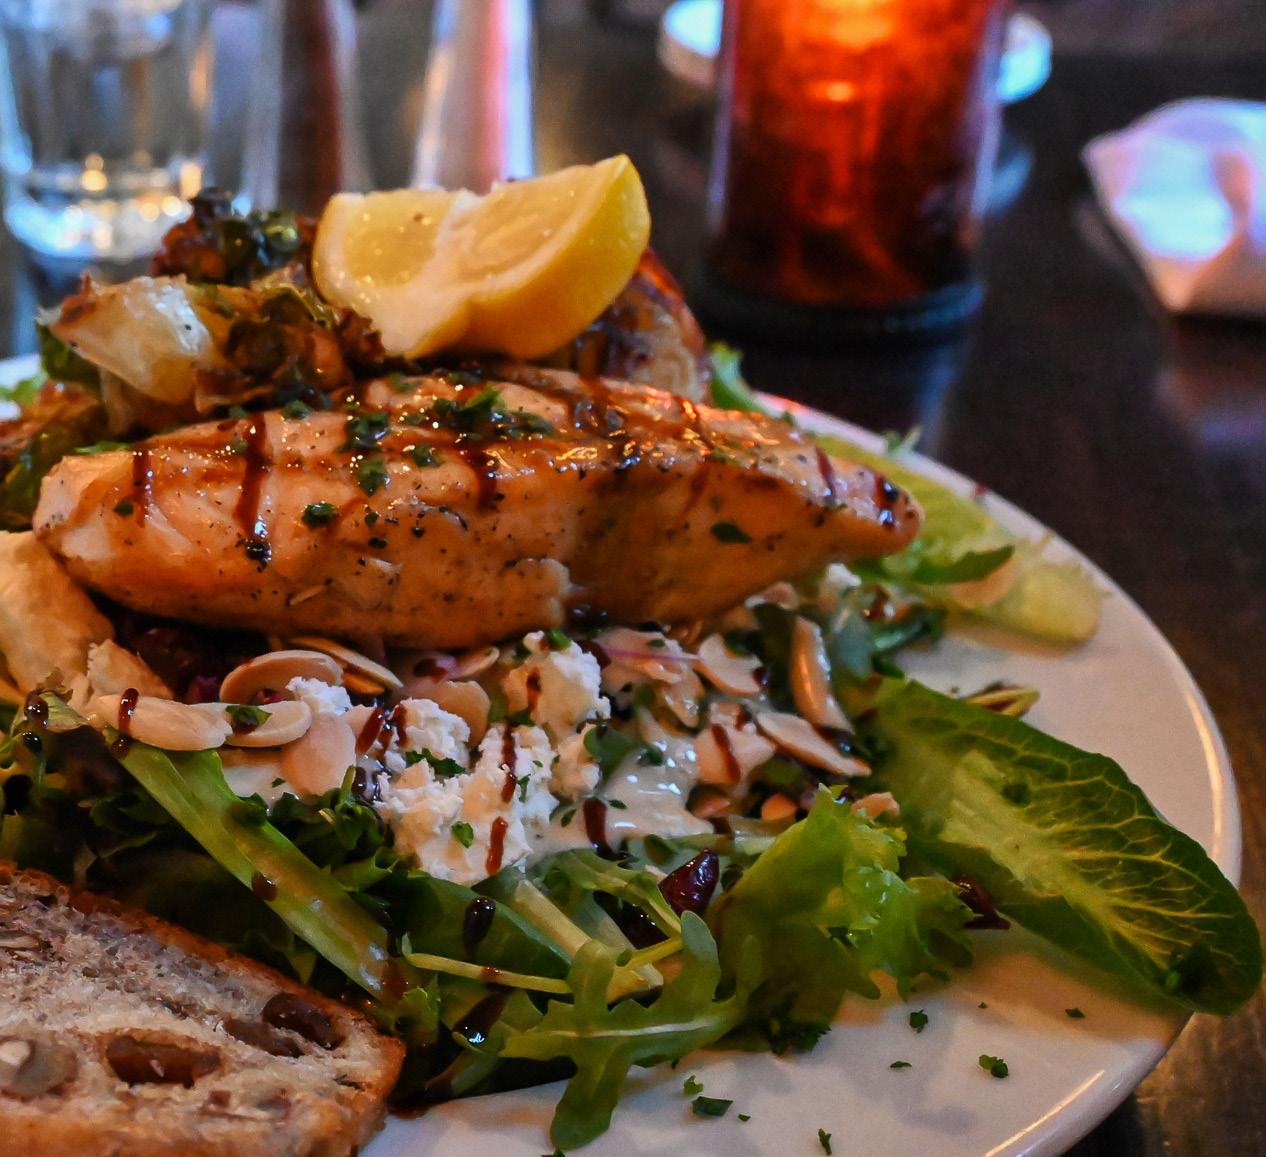
The star menu items, as per the suggestion of Cyle the server, are the weekly oysters, the duck bacon wontons, the brie and bacon jam burger, and the steak frites. The oysters are costly, at $3.25 per oyster, but are the best quality you can get in Central New York. They’re fresh and silky, tasting nostalgic of summer on the East Coast. The mignonette and cocktail sauce is traditional, providing vibrant flavor to cut the salty ocean taste. The duck bacon wontons served with a sweet chili aioli are incredibly rich but a mustorder. These flaky pillows encapsulate a warm, meaty interior that explodes with flavor.
If you’re craving a dish with that “wow” factor, look no further than the brie and bacon jam burger. The brie and jam are accompanied by a balsamic aioli that balances the intense flavors and creates a perfect bite. Eating this burger is like that scene in Ratatouille where Remy bites into the strawberry and cheese and experiences culinary heaven. It is that good. The steak, which lies atop a bed of garlic bread and garlic fries, is consistent with the rest of their delicious meals. The meat is high quality, providing a tender and buttery bite.
With a menu full of fusion-fueled dishes and stellar ingredients, School & Vine offers a special dining experience. Don’t be surprised to have some of the best bites Central New York has to offer.


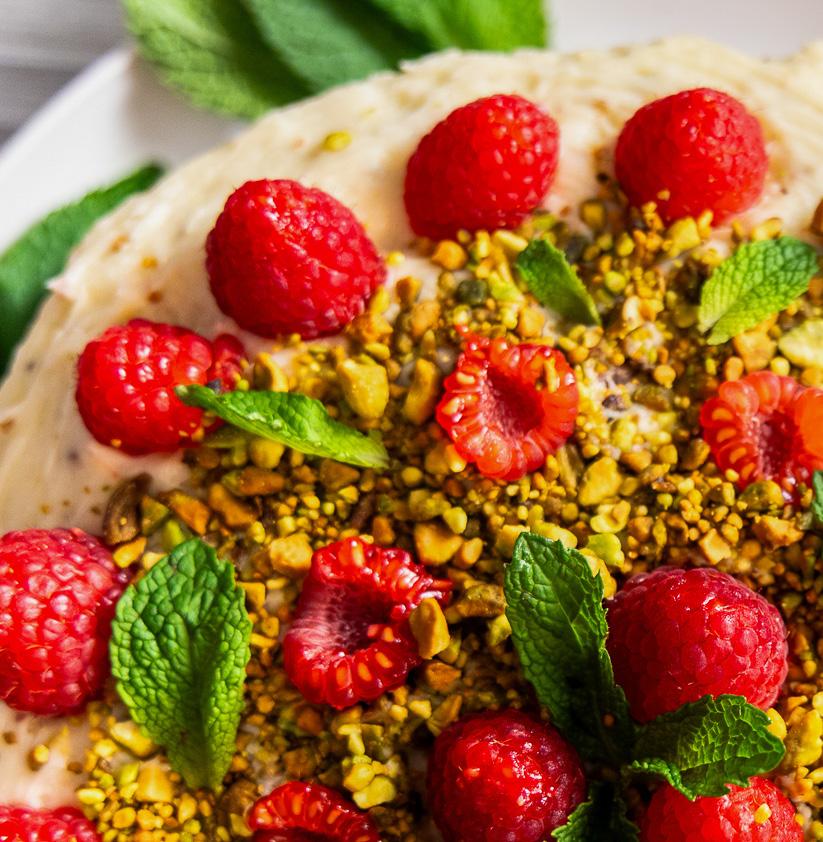
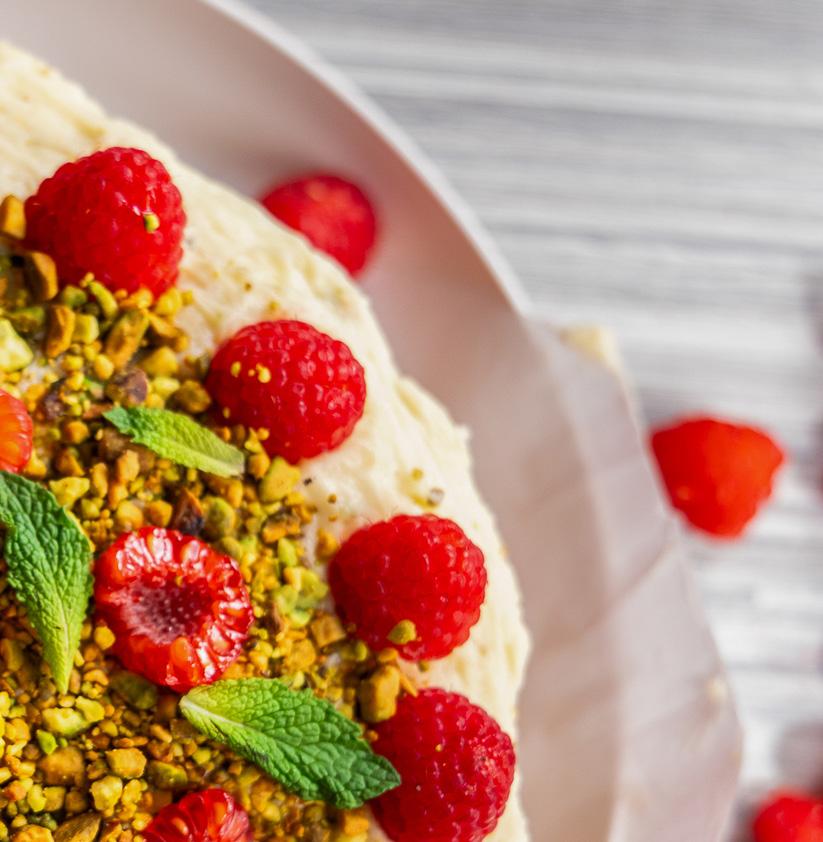
Ring in the Season with a Pistachio Raspberry Cake!
Written by Julia Favaro | Photographs by Nina Gerzema
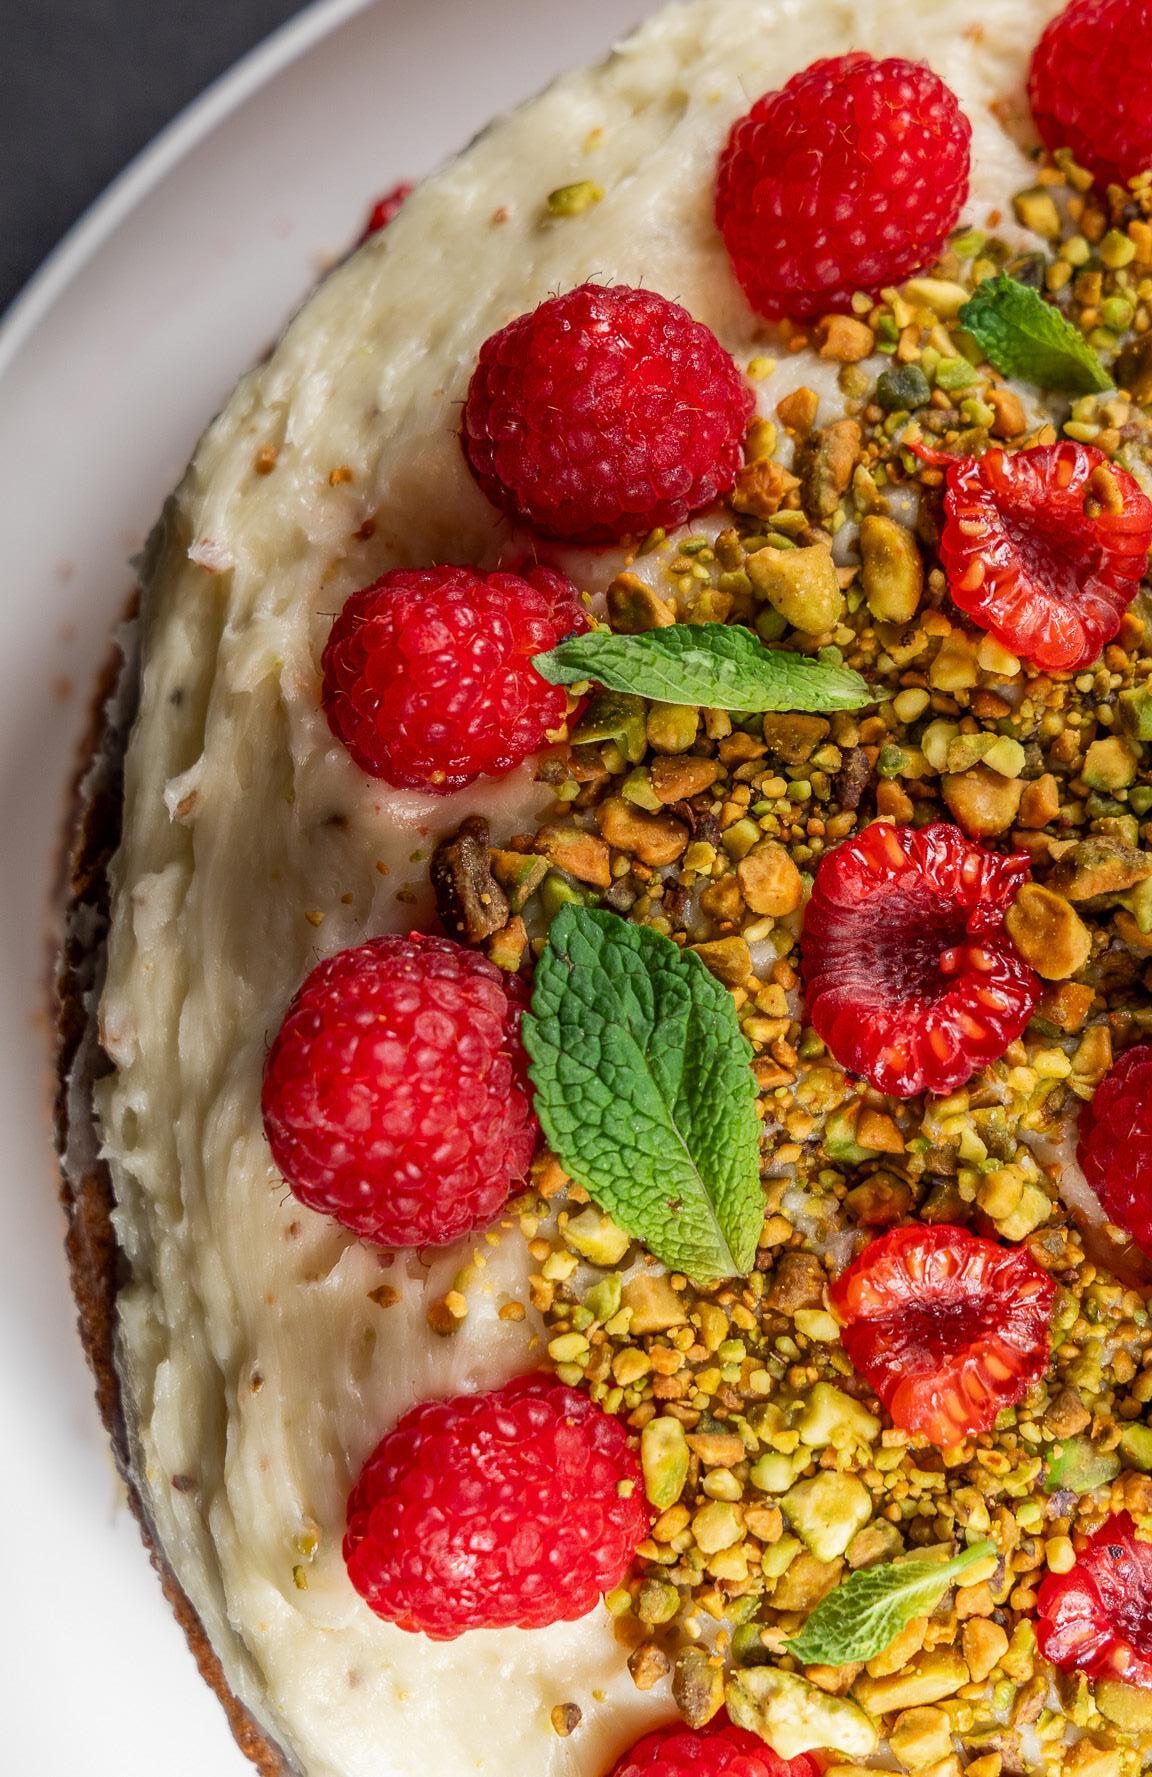
This winter, I’ve spent every day dreaming of the first signs of spring. Once spring arrives, I plan on celebrating. One of my favorite ways to celebrate is with food, more specifically, an extravagant cake. I was immediately hooked when I saw this pistachio raspberry cake on Pinterest and knew it would be perfect for celebrating spring. I’m a cake lover through and through. Every year for my birthday I get a Junior’s chocolate cake.
The best part isn't just eating the cake on my birthday, but being greeted by the leftovers every time I open the fridge. Spending the following week eating forkfuls of chocolate cake from the fridge is just as sweet. Cake isn't just for birthdays anymore. Let this vibrant pistachio raspberry treat show that cake should be used to appreciate all celebrations, especially the arrival of spring.
Ingredients:
Cake
• 2 sticks + 1 ½ tablespoons unsalted butter, softened
• 1 cup + 1 tablespoon granulated sugar
• 1 teaspoon vanilla paste
• 4 large eggs
• 1 ¼ cup flour
• 2 teaspoons baking powder
• ¼ teaspoon salt
• ¾ cup ground pistachios
Raspberry Filling
• Store-bought raspberry jam or homemade
Instructions:
Buttercream
• 14 tablespoons + 1 teaspoon unsalted butter, softened
• 2 1/3 cups powdered sugar, sifted
• 3 tablespoons raspberry jam
• ½ teaspoon salt
• 1 teaspoon lemon juice
Decoration
• Freeze-dried raspberry pieces
• Fresh raspberries
• Raspberry filling
• Pistachios
• Mint leaves
1. Preheat oven to 355 F. Grease and line two 2 by 20 cake pans with parchment paper.
2. Using a stand mixer with a paddle or handheld mixer, cream the butter and granulated sugar for 3-5 minutes until smooth and lighter in color. Add the vanilla and mix.
3. Add the eggs one at a time. Mix until smooth.
4. Add the sifted flour and baking powder. Then, fold in the ground pistachios and salt until just combined.
5. Pour batter into cake pans.
6. Bake for about 35 minutes, or until a skewer comes out clean. Bake time may vary based on the oven. Remove from the oven and let cakes cool in the pans for 15 minutes. Then, place cakes on a wire rack to cool further.
7. Make the buttercream. In a stand mixer with a paddle or a handheld mixer, cream together the butter and sifted powdered sugar. Cream until the icing has grown in size and lightened in color. Add the raspberry jam, salt, and lemon juice. Mix until combined.
8. Use a piping bag to pipe the buttercream onto the bottom layer. Using a piping bag or spoon, add the raspberry jam on top. Place the second cake layer and decorate with the remaining buttercream, jam, and toppings!

Written by Mara Greene | Illustrations by Sarah Mednick
Photographs by Sean Sterling & Gillian Arend
Idiscovered the magic of THC beverages at a bar in Los Angeles last summer. As someone who doesn’t like the feeling of being drunk but loves to go out for a drink with the girls, I felt like I could finally join in on the fun. That only increased when I came to Syracuse and discovered the wide variety offered in town, for super affordable prices. Even Beak & Skiff is getting in on the action. THC beverages are a good alternative to getting drunk and give a relaxed but elevated vibe. Whether you’re going dancing or chilling on the couch, these drinks are good enough to make you trade in your solo cup.
Ayrloom, founded by Beak & Skiff, has been around as a consumer cannabis brand for a few years now in Syracuse. It offers over 10 flavors of THC and CBD sodas, lemonades, and seltzers. However, I’d like to argue that the Cannabis Infused Honeycrisp Fresh Apple Cider is truly the star of the show. It
features the classic Beak & Skiff cider flavor we all know and love, with notes of honey and of course, cannabis. Its Cannabis Infused Vanilla Cola is wildly refreshing, and a great option for people who dislike the flavor of cannabis, as it’s concealed by the perfect crisp cola. Both of these award-winning drinks, and most in the Ayrloom beverage collection, are offered in multiple strengths, as well as a CBD-only form. They range from $3.50 to $5 per can, depending on THC potency.
Altua is another big name in the THC drink industry, with its Blood Orange Spritzer placing in the 2024 High Spirits Awards. With a sweet, light profile, this is the ultimate THC rendition of the classic mimosa. With 5 milligrams of THC, it’s a good option for people who don’t want the full kick of a 10-milligram can, which is the standard. It’s beyond enjoyable, and with a champagne-inspired base, it has a sophisticated air to it that feels like you’re drinking an


expensive craft cocktail. The best of both worlds! Altua also offers a tangy yet balanced Pomegranate flavor in the same style, which is equally as elegant. As an added benefit, both of these options are gluten-free and vegan. These too are sold at $5 a can, which seems to be uniform across brands in Syracuse.
TUNE is newer to the scene, founded in 2022, and its seltzers are packed with flavor. Of its four signature flavors, Black Cherry is the shining star. Made from real fruit juice and sweetened with honey, this is a great alcohol-free alternative to those who love White Claw. With just the right amount of bubbles and a tart cherry flair, it packs the perfect 10-milligram punch. It matches the vibe of absolutely any party. This is the perfect summer pick-up, and I know I’ll be bringing it on every beach trip. This superstar seltzer and its CBD twin, TUNE Down, are also $5 each, or $20 a four-pack.
MyHi STIKs are your on-the-go option for a night out. Slip a STIK into your pocket and add between 5 to 20 milligrams of THC to any non-alcoholic beverage of your choice once you get to your location. This drink powder contains a fast-acting form of THC for when you need a quick fix, or something a bit more discreet than a can. Personally, I love putting their Boisterous Berry STIK into sparkling lemonade. It’s the perfect complement to the cannabis-forward profile of the powder, which has sweet notes of strawberry. They come in five flavors, including a flavorless option. These are sold at $40 for a pack of 10 and are also available individually for less!
With so many exciting options available, there’s never been a better time to explore what's out there. As more people seek alternatives to alcohol, THC beverages are proving to be a great and affordable substitute for traditional drinking, offering a social and relaxing experience without the hangover. With innovation and variety on the rise, the future of cannabis-infused drinks looks brighter than ever. Whether you prefer a sweet cider, a bubbly spritzer, or a quick and convenient powder mix, there’s something for everyone. So grab a can, sip back, and enjoy the ride!

