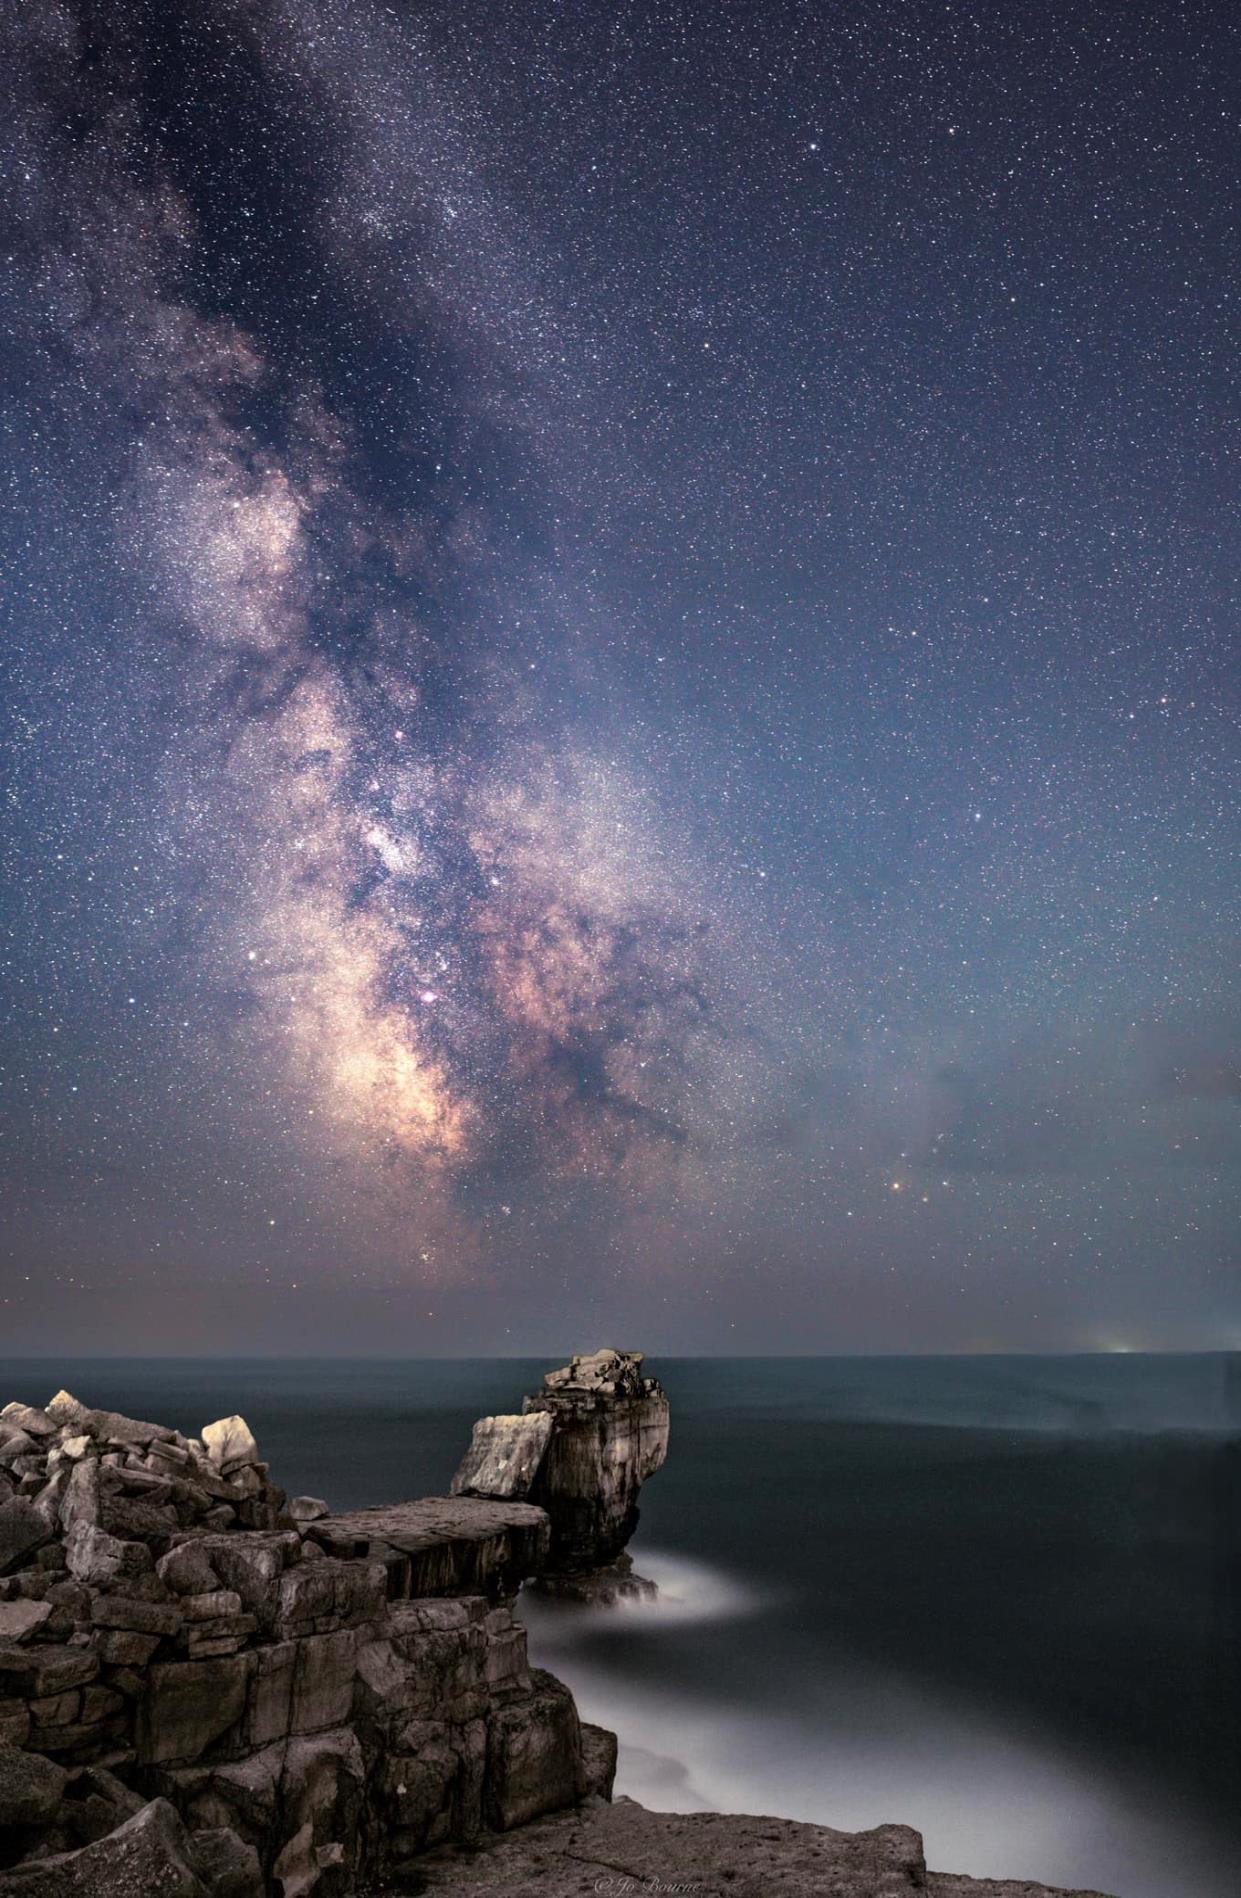
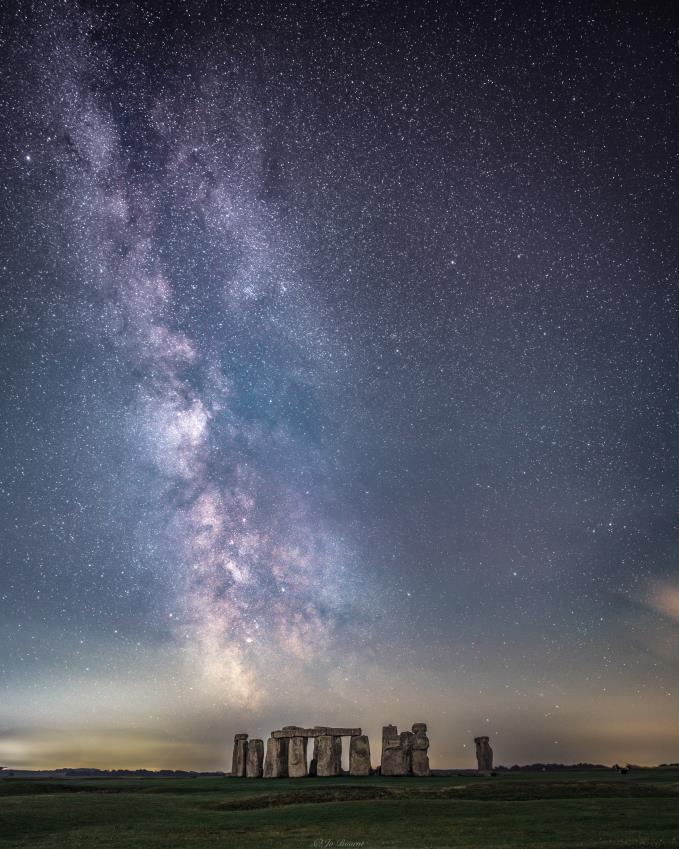
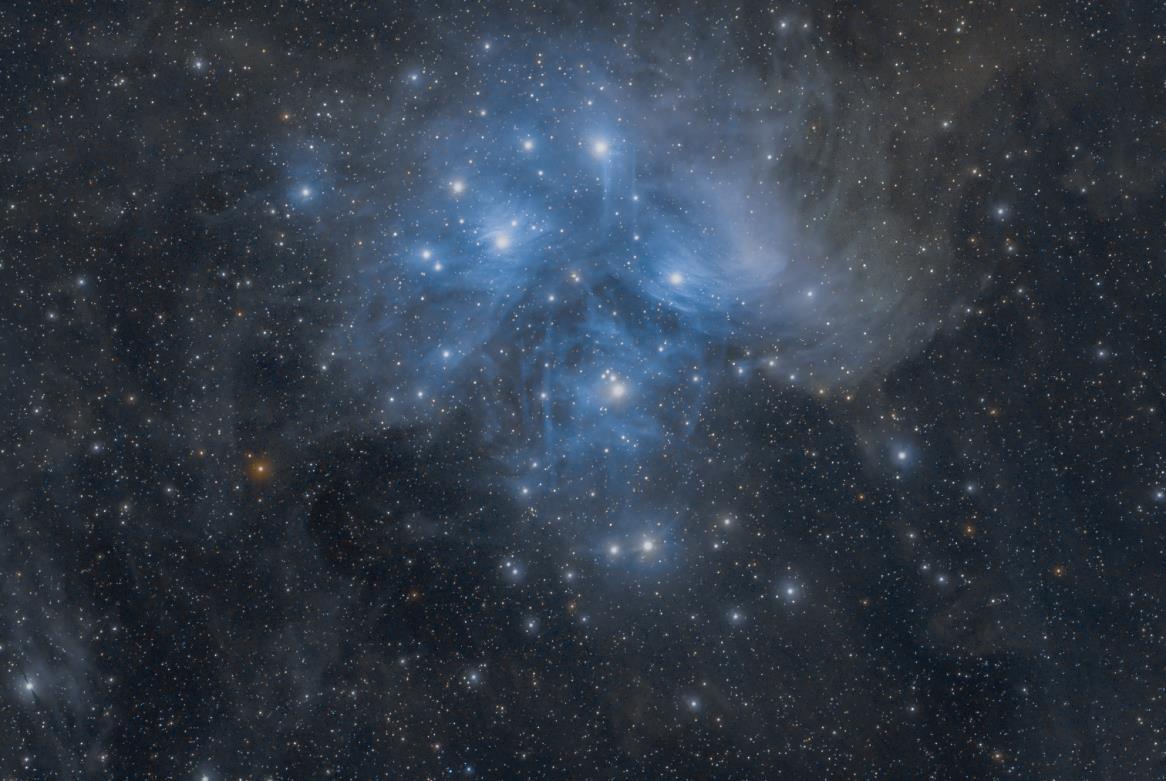
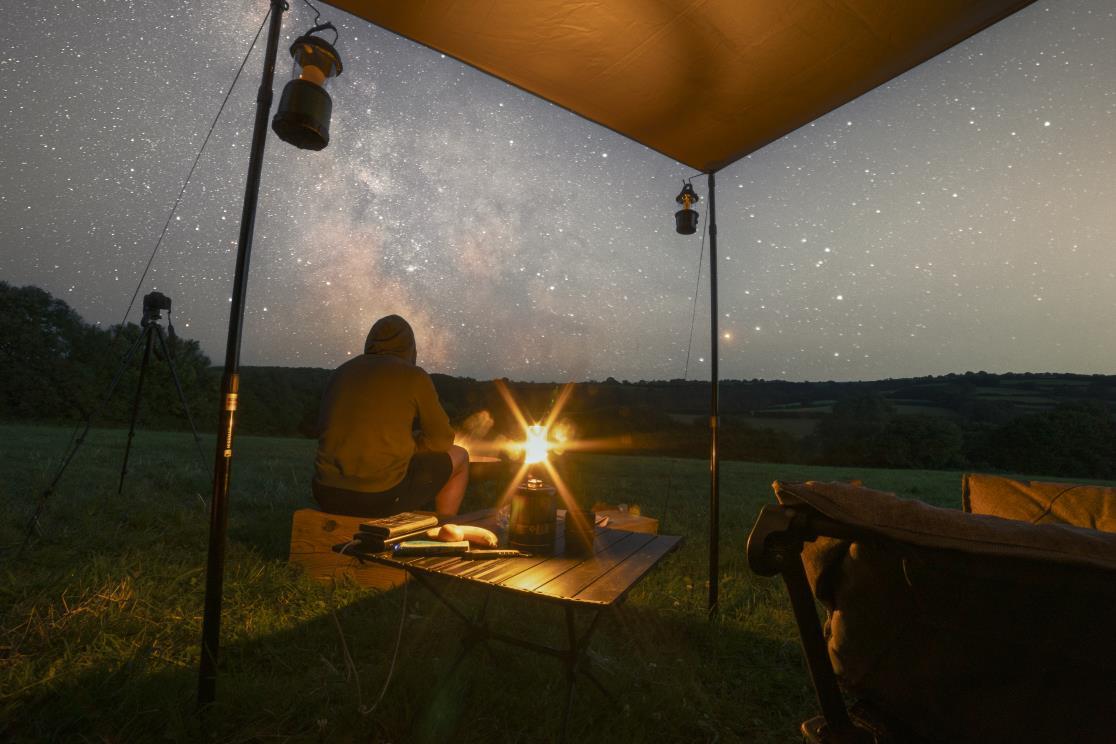
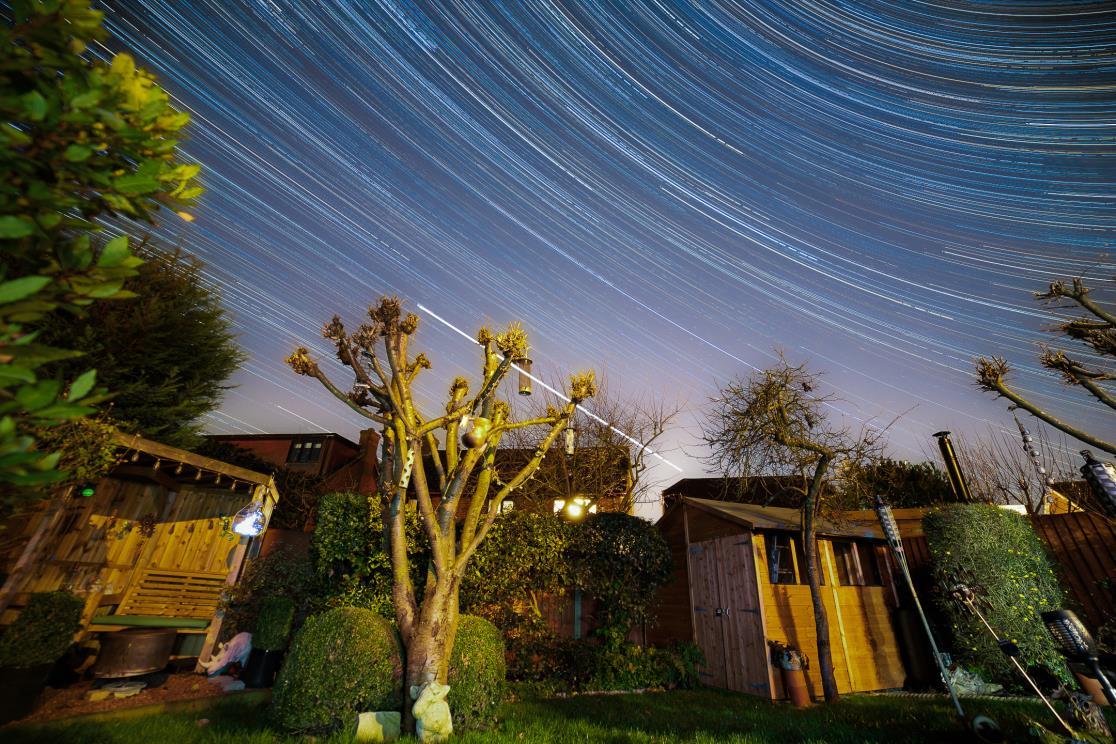
This month our cover image was taken by Jo Bourne from the UK. We will be seeing more from Jo in the very near future. To see your images published and for a chance to gain the Front Cover position email editor@AstronomyABC.com
How did you get started in astrophotography Jo?
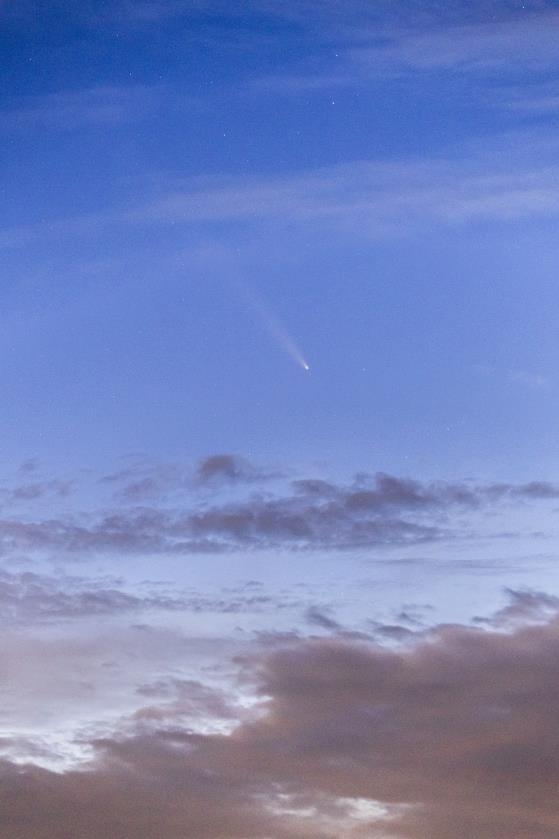
I have always been interested in astronomy and I first got interested in landscape astrophotography in 2020. I wanted to capture comet NEOWISE and with no understanding of how to use a dslr camera I had to learn quick! I purchased the canon nifty fifty lens to go with my Canon 60D and practiced in my back garden during lockdown. My first image was noctilucent clouds and after that I was hooked on capturing those electric blue clouds. I wanted to image the milky way in the galactic core season so I had to invest in a wide angle lens the Tokina 1116 F2.8 . I enjoy going out and taking pictures of the night sky and hope to encourage people to look up.
What a year 23/24 has been! I have always wanted to see the Aurora Borealis and image them and to be able to do this on land in the uk about 7 times, well I would never had believed it! I had a go at imaging the zodiacal light but I need to find a better place for that this year. Milky Way core season I love doing especially right at the beginning of the season We asked Jo “What sort of equipment do you prefer to use?”
I have been using the Sony mirrorless range for a few years now and really enjoy using the equipment and lenses. It makes my backpack lighter which is vital. A good steady tripod is as important to me especially as I’m doing long exposures. Carbon fibre tripods I find are the best. Good quality warm clothing feather down jacket and thermals. There is nothing worse than getting freezing cold! A dew heater for those still cold nights. A backpack to carry my equipment around and some good walking boots too. The other equally important equipment is a good coffee flask to keep me going all night.
“What people inspire you?”
Nigel Bradbury (FRAS ) has inspired me with his knowledge of the night sky and the pictures he took of the night sky and the Aurora Borealis.With his expertise and guidance I was put on the right track right from the beginning of my Astrophotography journey. I have learnt so much.
“What I would like to image in 2025”
I would like to image a better photograph of the zodiacal light in March. Orion over a cloud inversion. Hopefully have another good Noctilucent cloud season and more Aurora Borealis
Ivana Peranic—Competition Winner TBAIC
My name is Ivana and like many, I took up astronomy in 2020. I got a small telescope to see comet Neowise and thought I’d just stick to visual, but as you know, it’s a slippery slope!
Living in Brighton, UK, clear and dark skies are a bit hard to come by. I focused my efforts on planetary and lunar imaging because they’re not as affected by light pollution, and after that branched out into deep space, solar, and even ISS. My space is limited and streetlamps bright, but I persevere!
My latest image of the solar system taken in 2022/2023 planetary season has recently been shortlisted at the first European Astrofest imaging competition. It took a while to assemble all the planets, waiting for the best time for each one, and for Mercury I had to take the scope to the South Downs because in the city don’t have enough clearance from the horizon. I upgraded from an 8” to a 9.25” SCT halfway, and for Venus I got a monochrome planetary camera and UV and IR pass filters to learn to get some details of its cloud structures.
By diversifying my equipment, I’m keeping myself as busy as the weather allows, and I have something to do throughout the year. I’m looking forward to the next planetary season and hoping it will be better than the previous, as well as looking forward to seeing and imaging Mars again!
Andrew Smith from nPAE Travels to Tainai
It was with great excitement that I planned my trip to the Tainai Star Party, not only was I going to get to travel to Japan for the second time in my life, but I’d get to experience one of the largest star parties in the world from behind the scenes!
The journey there was on Cathy Pacific airlines via Hong Kong. Long haul is of course different to the short European hops us Brits generally get to do when travelling to the continent for vacations. Not only are the aircraft significantly larger, double isled, but the service is more of a throwback to the golden era of travel with inflight meals provided and a drink as much as you like bar along with seat back monitors for movies and games to play during the 9 hours to Hong Kong and then the additional 5 to Tokyo.
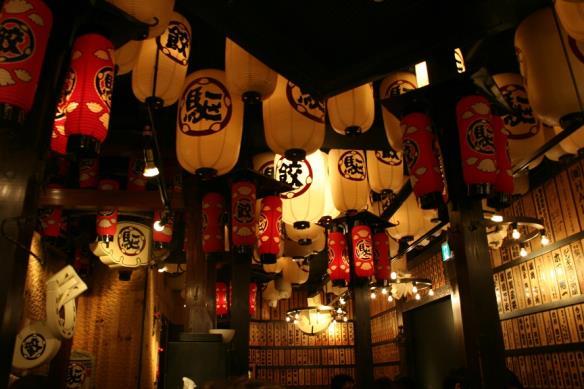
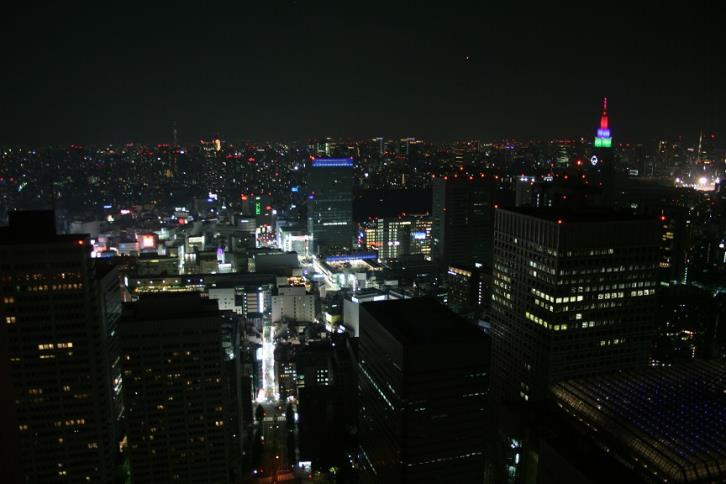
If you’ve never been to an Asian mega city Tokyo is tricky to explain. Imagine London or New York stacked on top of itself 5 times over; where everywhere is like Piccadilly Circus or Times Square and all the buildings have a nearly new quality. That begins to feel like how I felt in Tokyo. If you’d like to have some numbers put on it, Shinjuku station has over 200 exits! The department store comparison is that Daslu in São Paulo is known for having its own helipad; the shoe department inside Saks 5th avenue has its own zip code and Daimaru in Tokyo has all that plus its own skinkansen terminus! Japan is not as expensive as it used to be, but it’s not cheap either. But ignore the price, feel the quality! If you suffer from short arms it’s probably not your kind of destination!
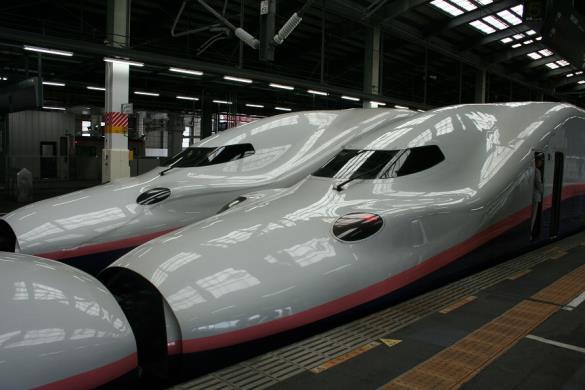
Travelling to Niigata was straight forward. It’s a 2 hour ride on the skinkansen. Japan Rail offer a rail pass for foreigners which is tremendous value. 5 days travel within 14 days for USD 150. However you must buy this in advance via their website.
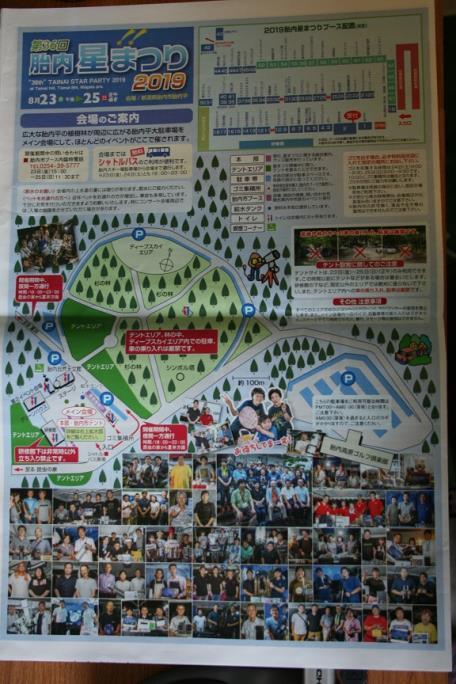
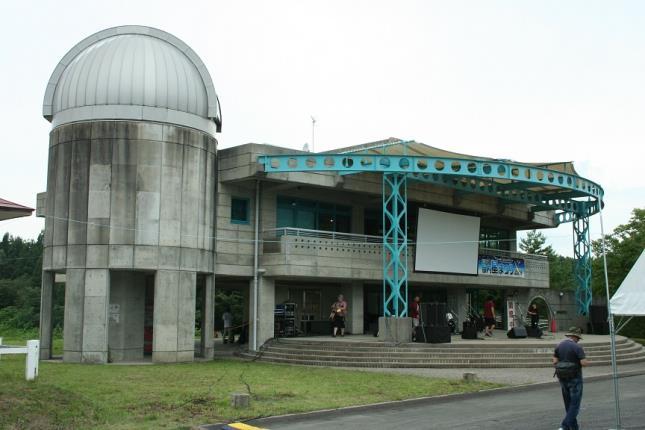
Tainai is a little known ski resort on the north side of Honshu prefecture. They also have an observatory nestled between the slopes and the summer golf course. This is the site of the star party. The nearest big city is Niigata. To get there you can either fly to Tokyo and then take a shinkansen train ride, or fly to Niigata and then drive. You will need a hire car as the nearest train station, Nakajo, is a 20 minute car ride. I’d chosen the Tokyo route specifically for the skinkansen experience and fortunately our translator was also our driver.
The Tainai star party is busy, many thousands of people go. If you book far enough in advance the hotel to get is the Royal Tainai Park Hotel opposite the golf course. The area between the telescope dome complex and golf course is given over to camping. If you want to get fully involved this is the place to pitch your tent. We had neither booked far enough in advance, nor the depth of pocket for a royal experience so we took a cheap option in Toyosaka, a small town about half an hour’s drive away. Thankfully this was the only real mistake of the trip. This was a budget hotel and cheap for a reason!
The star party goes non-stop for 2.5 days. As well as access to the custom built F8 60cm Ritchey-Chrétien telescope in the dome, there is a programme of events throughout so there is always something going on in addition to the star gazing and solar observing. There is a stage with live events and music. There is tennis and trekking around the resort for those who like active pursuits.
Don’t be intimidated or put off if you don’t speak Japanese. The Japanese are super friendly and won’t expect you to speak any. Whilst we did have the benefit of a professional translator, using a translate app on ours phones got us a long way. When you see what is on offer to look through you’ll just want to dive right in anyhow.
All Pictures by Andrew Smith
Observing wise this is a Bortle 3 site at an elevation of 200m, so it’s good but not amazing. The view from the dome is 360° and there are people on hand to operate the main telescope.
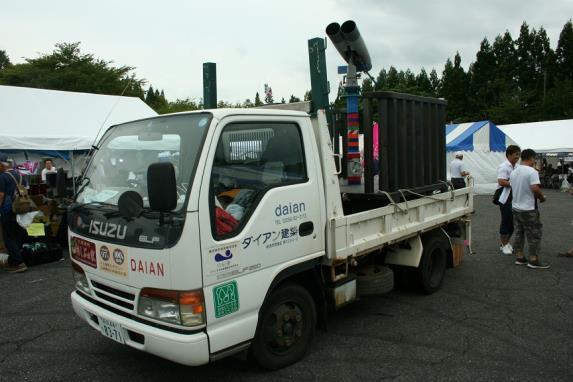
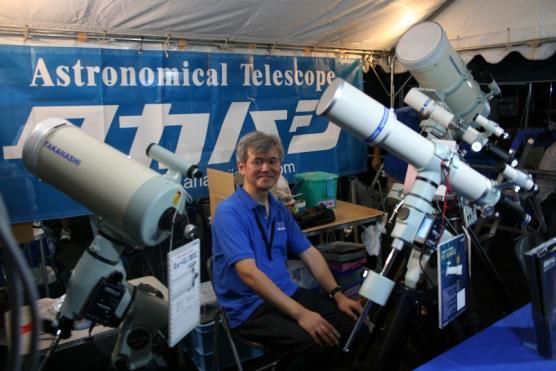
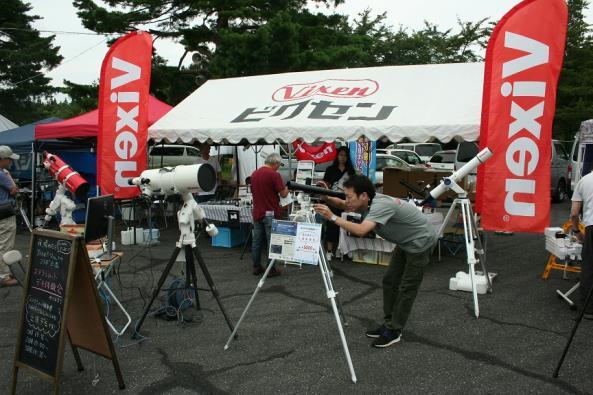
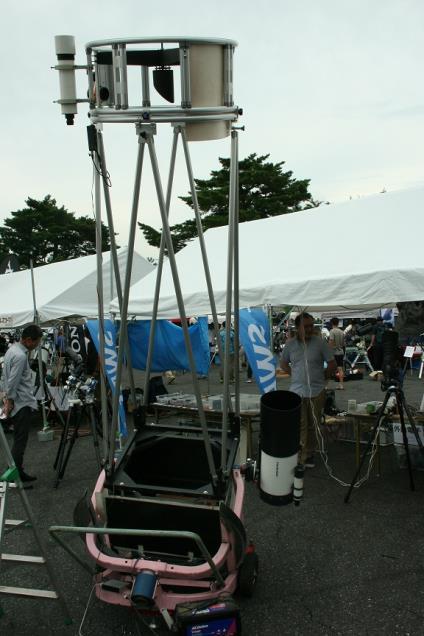
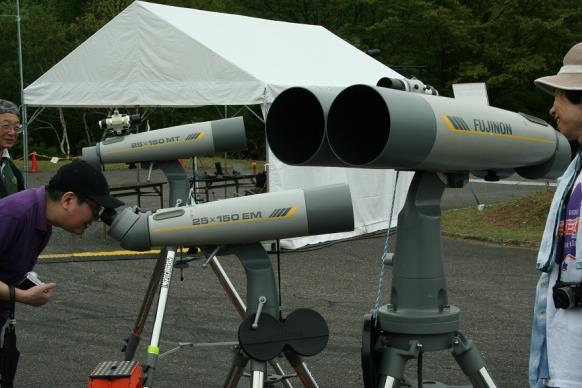
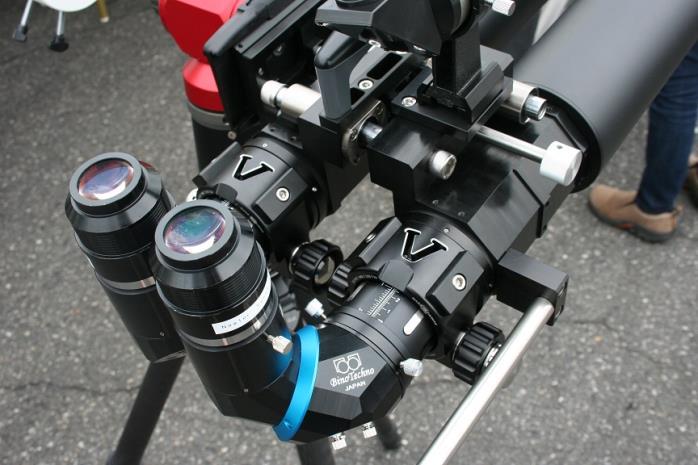
The big draw are the famous name Japanese manufacturers will all their high end kit. The nice thing is not only can you chat to the very people who design and make them, you get to compare the whole Takahashi and Vixen lines side beside and you also have people with crazy stuff like flatbed truck mounted Fujinon binoculars!
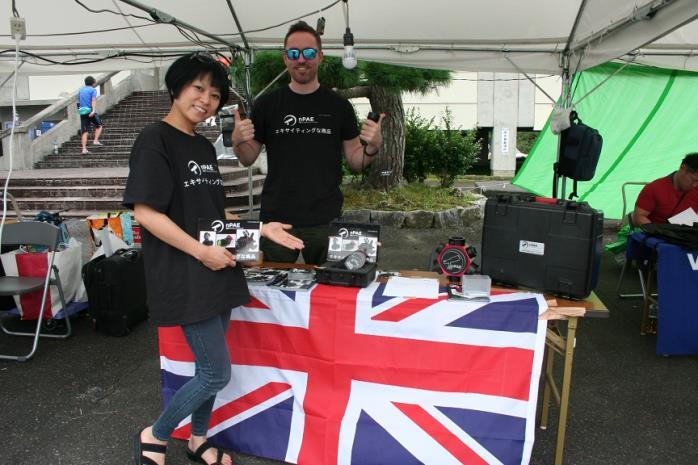
As well as the big names you have people like Bino Techno who specialise in incredible binoculars and right in amongst it, keeping the British end up and literally flying the flag, was nPAE Precision Astro Engineering!
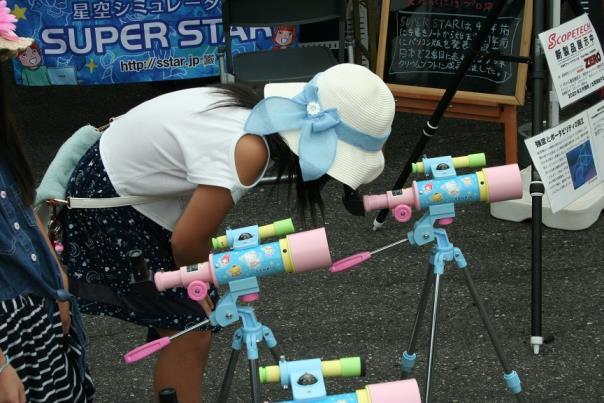
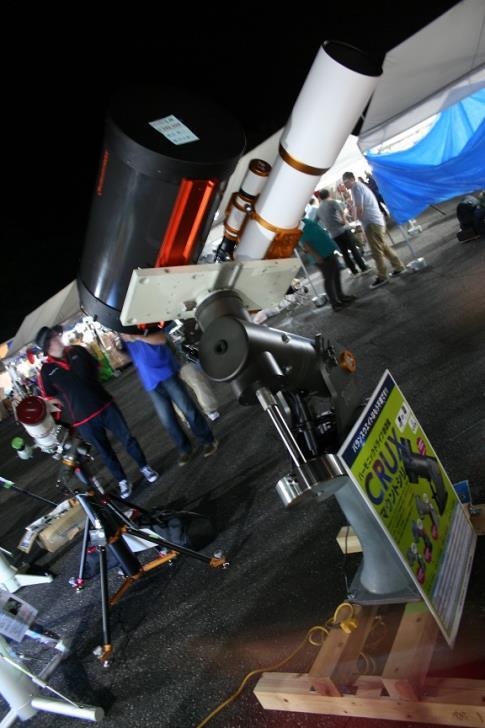
As well as the manufacturers there are many retailers who set up their shops with complete setups that you can try out for the duration of the event. There were some good bargains to be had. Any pair of binos in this box was just £23 (¥3000).
Laid out at the back of the exhibition stands was the food court selling a large range of Japanese fast foods and drinks. There is also an enclosed restaurant for those who don’t like the open air dining experience.
Niigata is famous for its sake and within the shinkansen station is a sake museum featuring over 100 different sakes to sample. It is great fun to try different varieties, just don’t get too drunk!
Overall the Tainai Star Party and Japan are a fantastic experience and come thoroughly recommended. I’m very thankful to nPAE Precision Astro Engineering for giving me the opportunity to go with them.
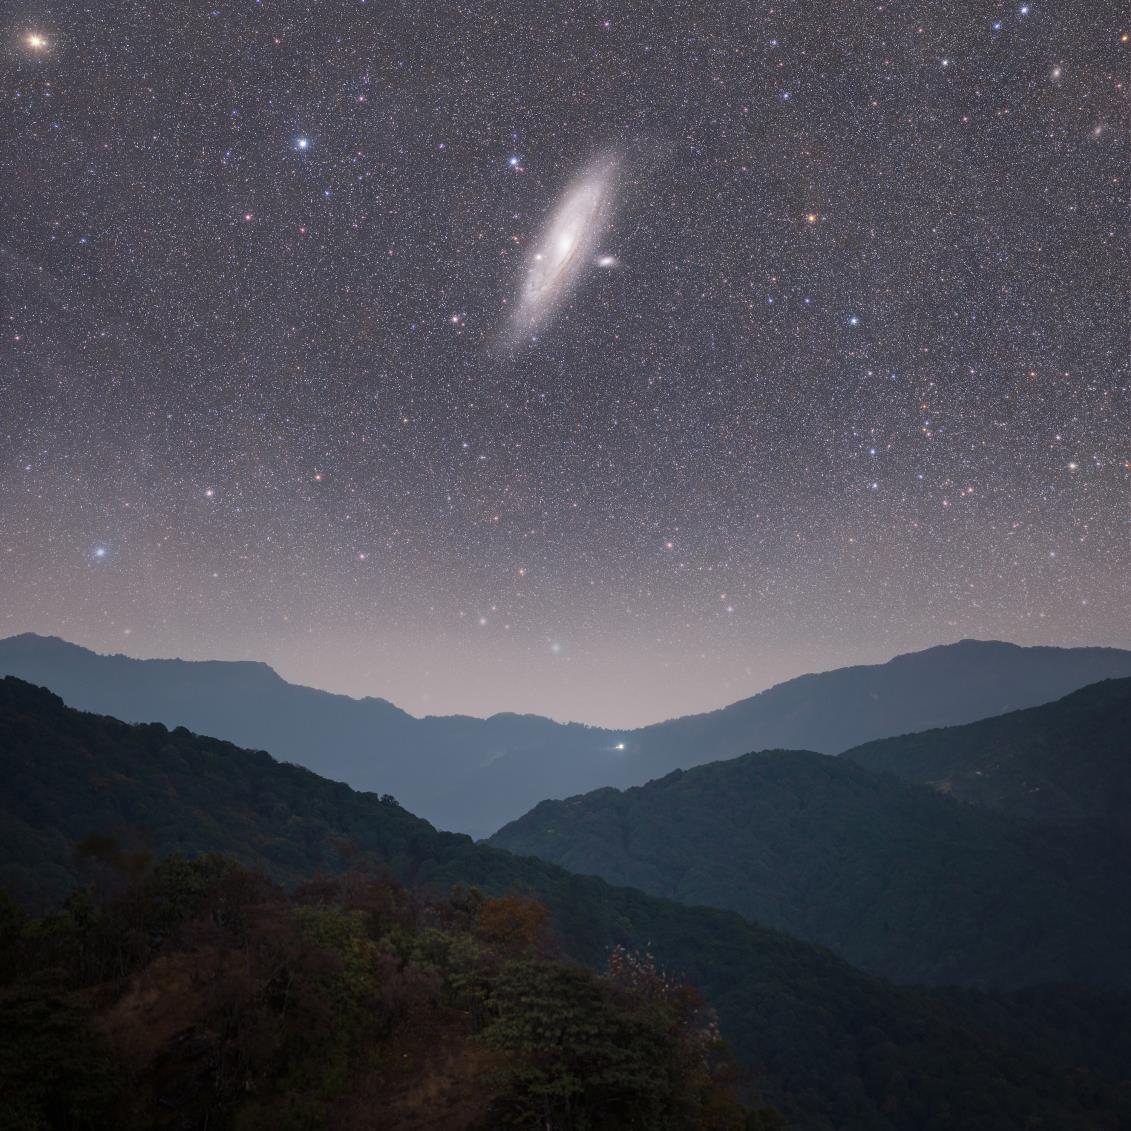
EXIF: 60 × 60 seconds, f/2.8, ISO 1600 (sky), 5 × 120 seconds, f/2, ISO 1000 (foreground)
Location: Singalila National Park, Nepal
Date: 3rd November 2024
Post-processing: Sequator, Pixinsight, Adobe Camera Raw, Photoshop
I have always been fascinated with deepscapes, and it becomes more exciting for me when that includes Andromeda. Even after photographing it for so many times from so many places, its sheer size in our night sky never fails to amaze me!
The present image depicting the setting of Andromeda over the Singalila range was captured on the last day of my Singalila National Park tour and was also the last image of the tour. It was also the only deepscape image I could photograph over four days. This happened because of the horizon, which remained almost always hazy, making it nearly impossible to get a decent image.
I started this image when Andromeda was around 20° above the horizon and ended when it was around 8° altitude after an hour. The images of the foreground part followed this. During processing the image, I was surprised to find hints of IFN showing up. Considering the little integration time and how low it was, I never expected to come across IFN. However, I went gentle with the background stretching as it was meant to be a deepscape image.
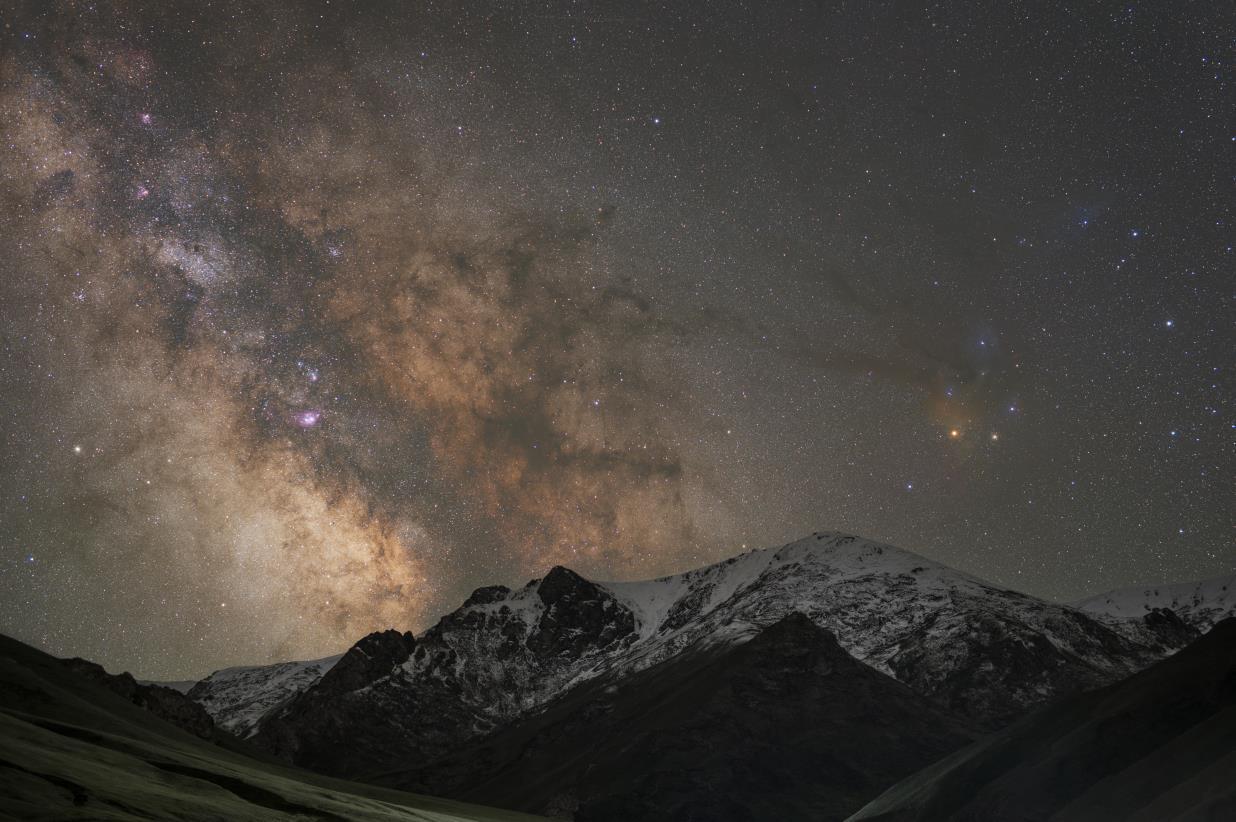
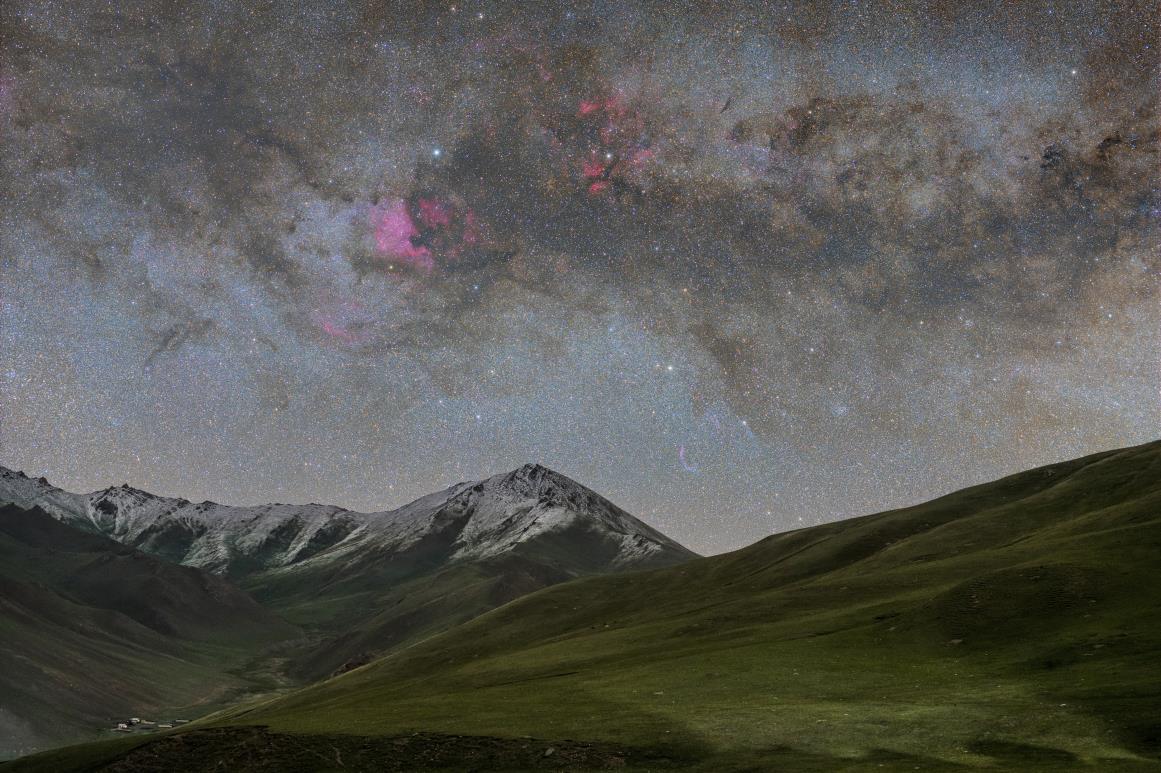
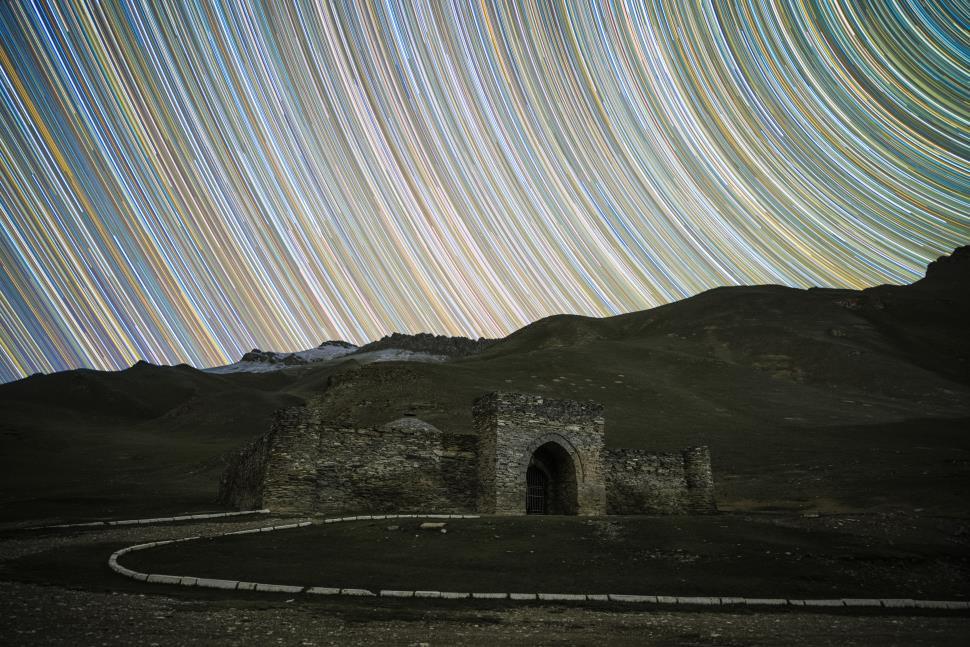
Rising Milky Way at Tash Rabat
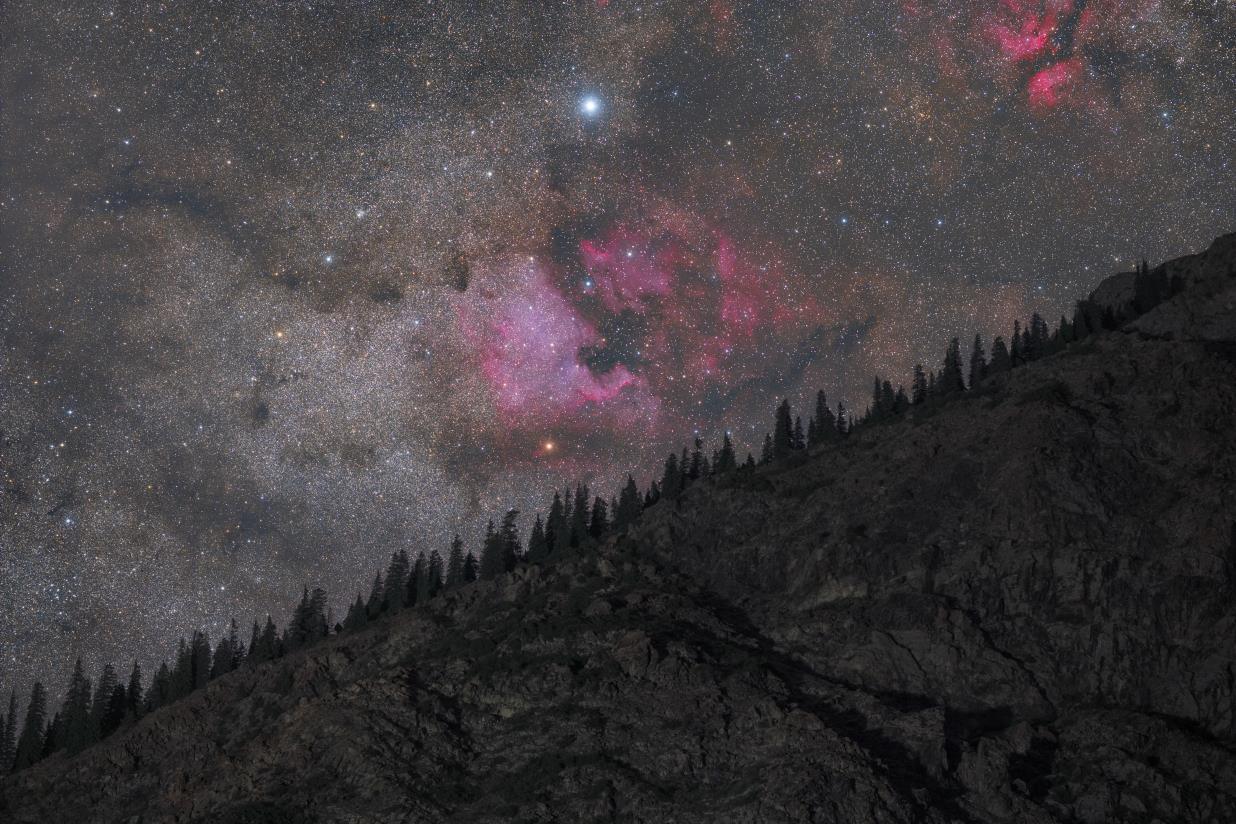
Cygnus Arm at Tash Rabat
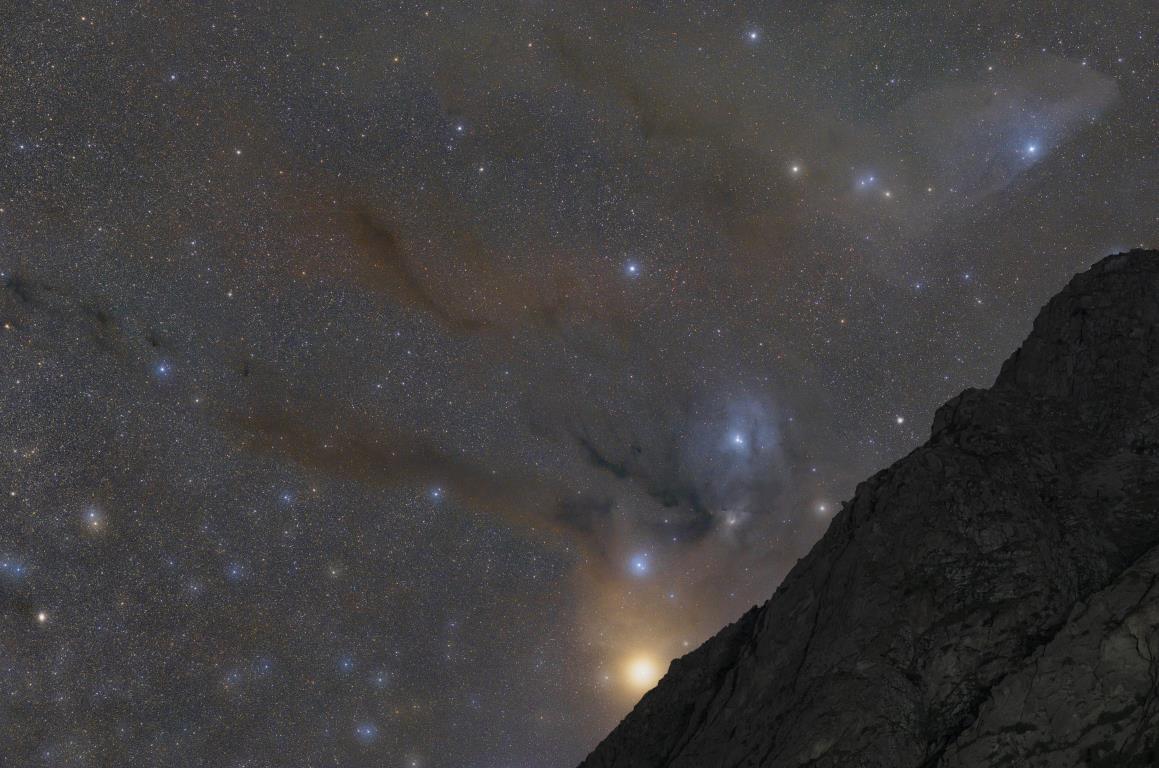
Rho Ophiuchi at Barksoon Valley
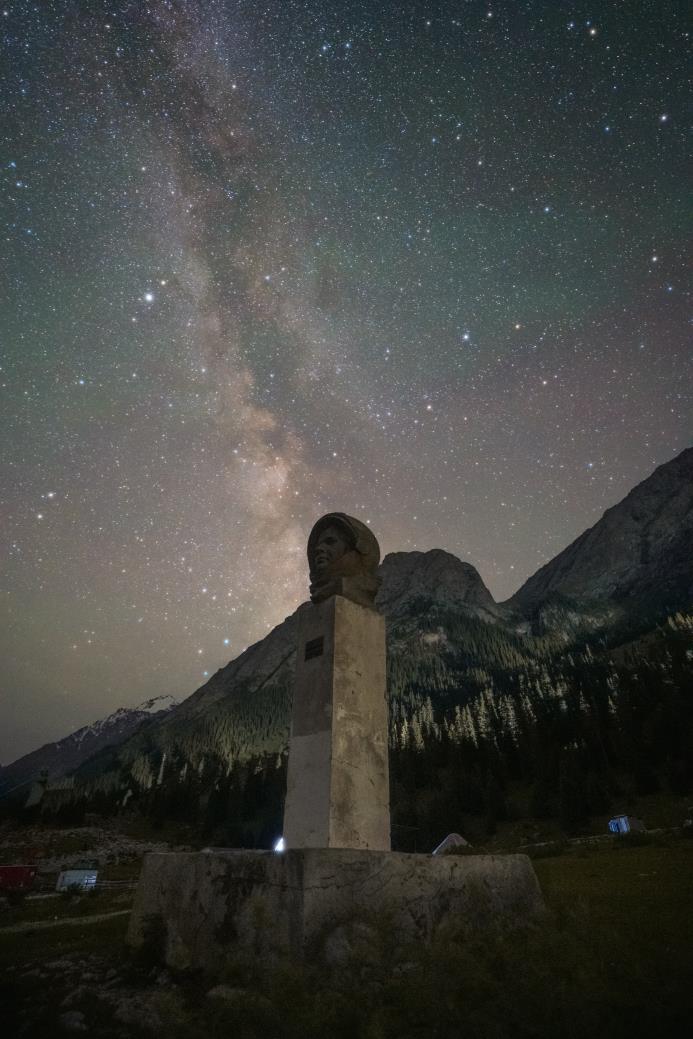
Milky Way Behind Gagarin Statue
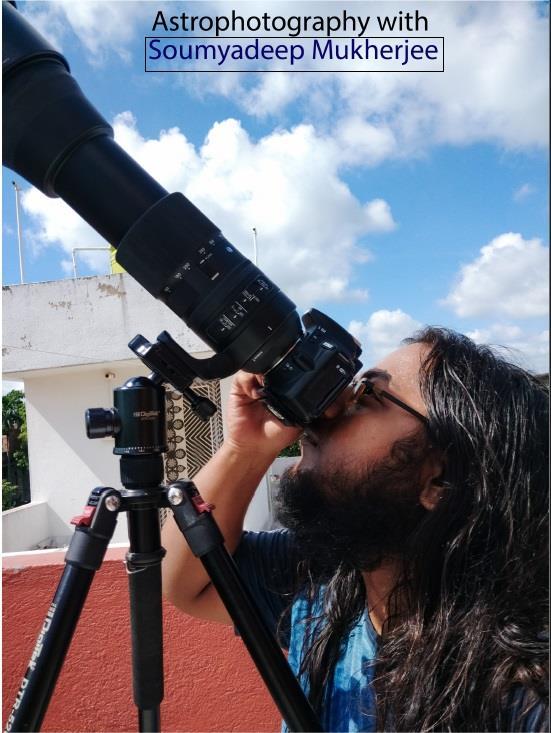
We hope you are enjoying the dedication and skill of this talented Astrophotographer and we look forward to more submissions from Soumyadeep in the forthcoming issues of Amateur Astrophotography Magazine.
To find more examples of his work please follow him on Instagram and be sure to browse his website which can be found here
Instagram Name: soumyadeepmukherjeephotos
Website: https://astronomadsbangla.com/
Tash Rabat Star Trail
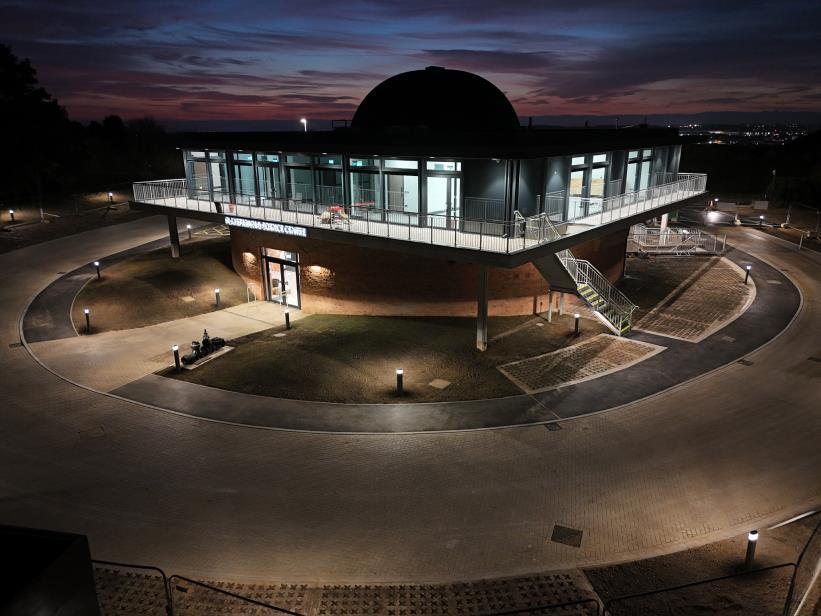
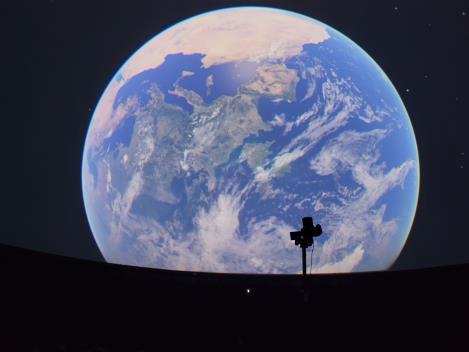
Nestled just outside Sutton-in-Ashfield, Sherwood Observatory is home to a brand new 59-seat Planetarium that provides stargazers with the opportunity to watch immersive audio-visiual shows inside the dome.
Home of the Mansfield and Sutton Astronomical Society, now renamed Sherwood Observatory (charity number 1187777), the site also houses an exhibition on the history of human space flight in a carefully preserved Victorian reservoir in the basement of the new science centre. The original Sherwood Observatory Newtonian Telescope is on the same site, and is open to the public during open evenings and open days, which are held roughly once per month. Sherwood Observatory also hosts the base station for the UK amateur meteor detection network, which has users as far afield and Portugal and Sweden. Their radio astronomy centre is currently closed for refurbishment and will open again early next year.
The charity’s members have a long history of educational outreach, previously hosting school and scout, guides and brownie groups at the observatory telescope. The new development takes this mission to a whole new level, enabling their staff and volunteers to inspire even more young minds with their passion for astronomy.
Booking is via the website, which also hosts a gallery of impressive astrophotography and the option to buy gift vouchers to pass on to family and friends.
Looking for somewhere new and interesting to host your next event? Sherwood Observatory is also making its facilities available for private hire, so check it out if you are looking for an astro theme for your next event.
You can explore everything Sherwood Observatory has to offer at sherwood-observatory.org.uk.
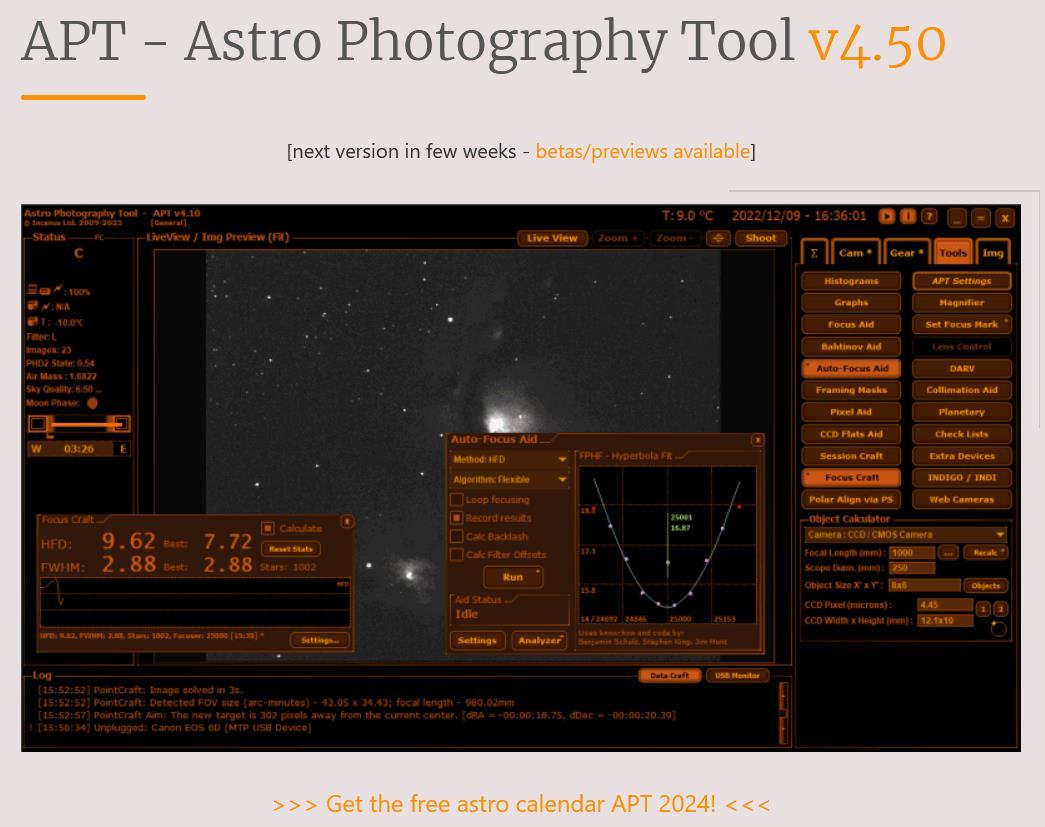
APT stands for "AstroPhotography Tool" and it is like Swiss army knife for your astro imaging sessions. No matter what cameras and other devices you have, APT has the right tool to be in help, from your first imaging attempts upto gathering scientific data. It is defining standards for an imaging and data acquisition software since year 2009 using the real-life experience of many astro photographers from all over the world and one of the APT authors. It works on MS Windows Vista, 7, 8, 8.1, 10 and 11.
Time unlimited "demo" version of this astrophotography software is available in the Downloads page.
How and Why to support APT you can find at - Having alternatives drives the progress! WE
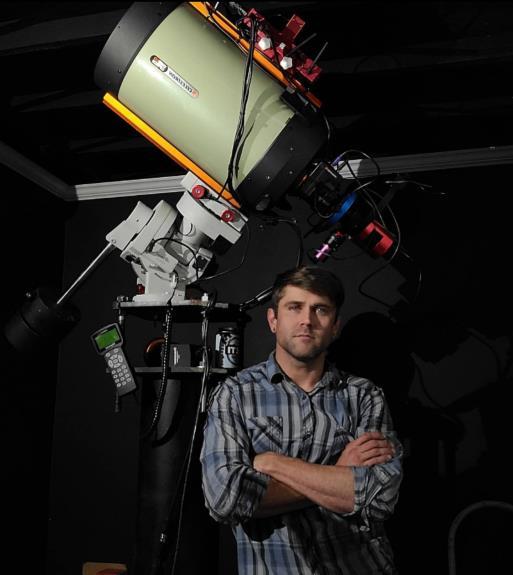
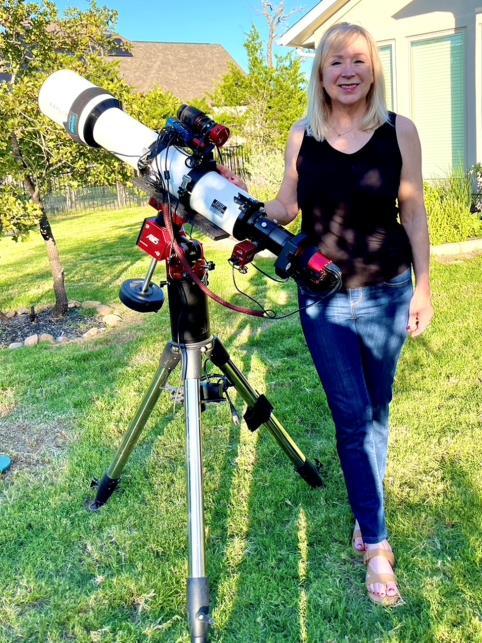
Hi, my name is Dodie Reagan, and I started doing amateur astrophotography in 2017. A lot has changed since then, in equipment, software, processing, and in my own personal approach to astrophotography.
Like a lot of us, I began as an observer and thought I would never be interested in astrophotography. Then, someone in an astronomy club meeting showed me their image of Jupiter, taken with an 8” SCT. Since I had recently acquired an 8” SCT, I was excited to try my hand at it, and down the rabbit hole I went!
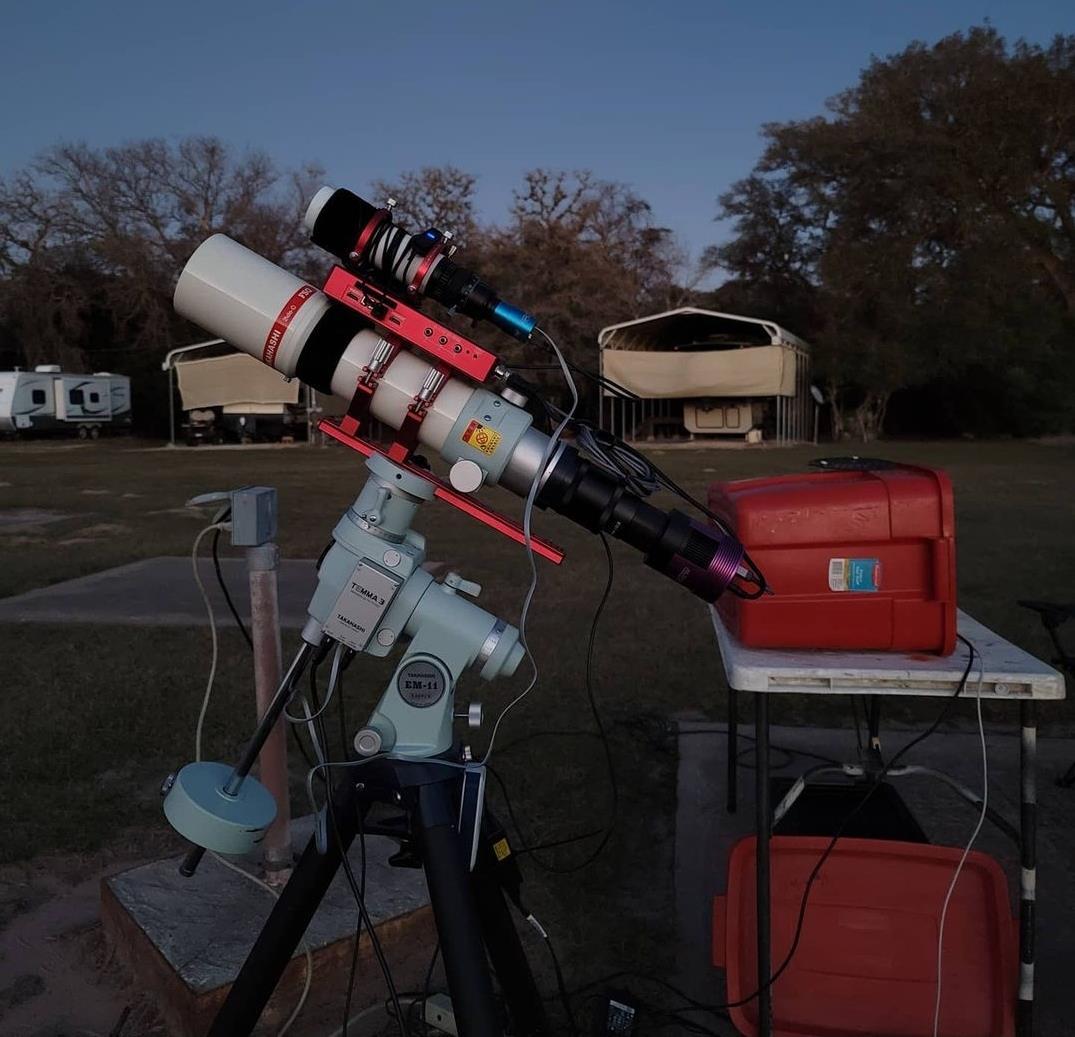
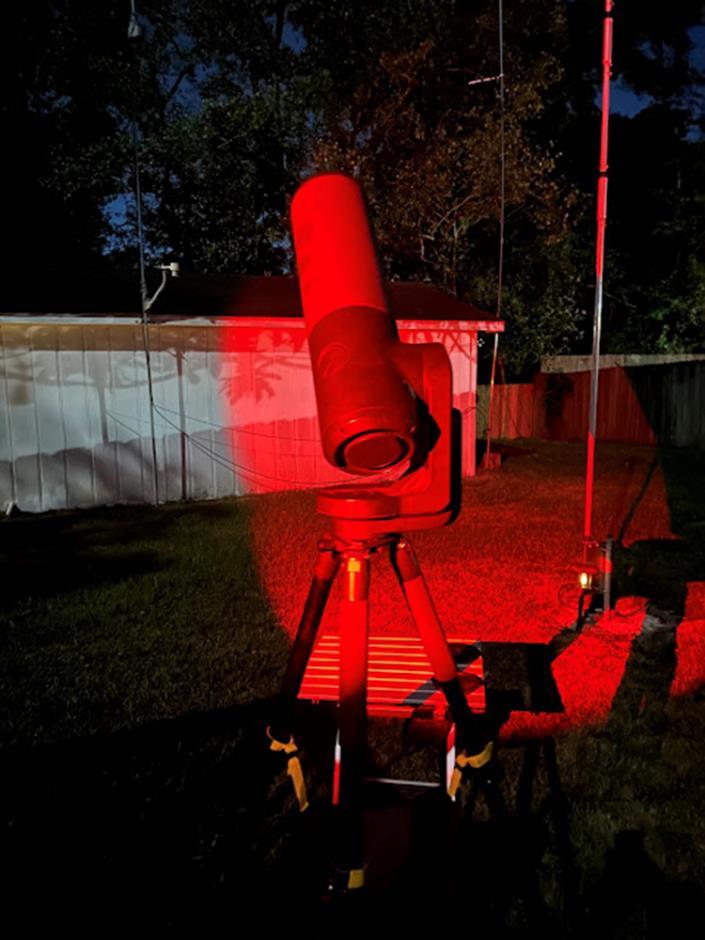
Here is my current set-up, including my ZWO AM5 mount, Explore Scientific 127mm ED APO refractor and ZWO ASI 1600mm camera. Since this photo was taken I have added a mini-computer that rides under the refractor, and I remote in with my Dell laptop.
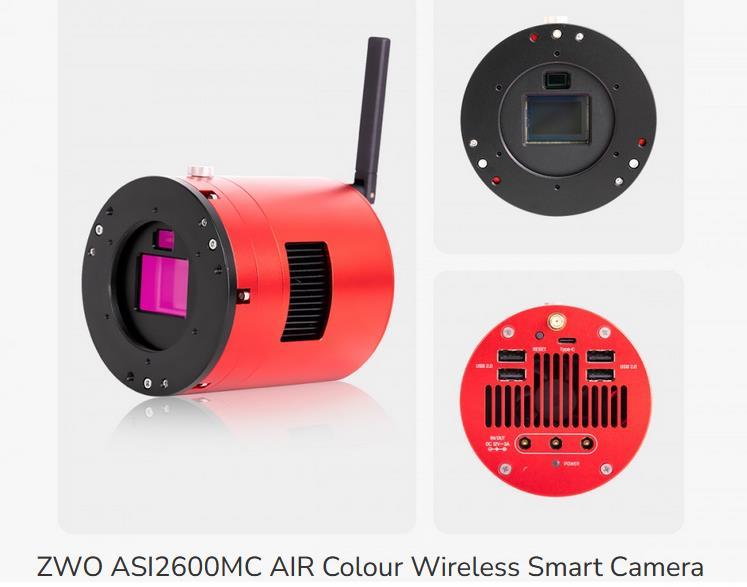
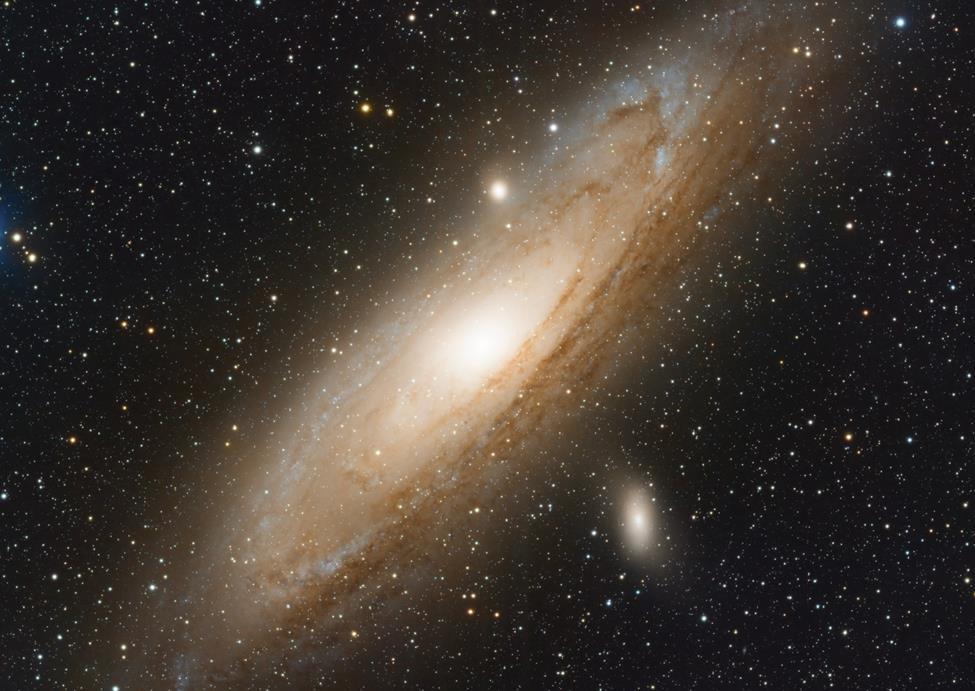
Andromeda. I still have the 8” SCT for observing and of course planetary imaging, and I have an Explore Scientific 80mm APO refractor that needs to be used. I have a ZWO ASI 2600MC camera but find I reach for the 1600mm more often.
My husband and I live in Central Texas about 20 miles east of Austin, and I am fortunate to have a back yard with Bortle 4 skies and a good view in all directions. Being in Texas, we get a lot of dry, clear nights, and we are a 4-hour drive from Bortle 2 skies in west Texas. In ten hours we can be under Bortle 1 In addition to the 127mm, I have a William Optics Z61 for wide field objects such as skies in Oklahoma.
Primarily I image from the back yard, but I do attend three annual star parties when I can: The legendary Texas Star Party near Fort Davis and McDonald Observatory; Eldorado Star Party in west Texas; and Okie-Tex Star Party on the Black Mesa in the panhandle of Oklahoma. All of these events, as well as my involvement in Texas Astronomical Society of Dallas since 2015, have been key to my growth as an astrophotographer.
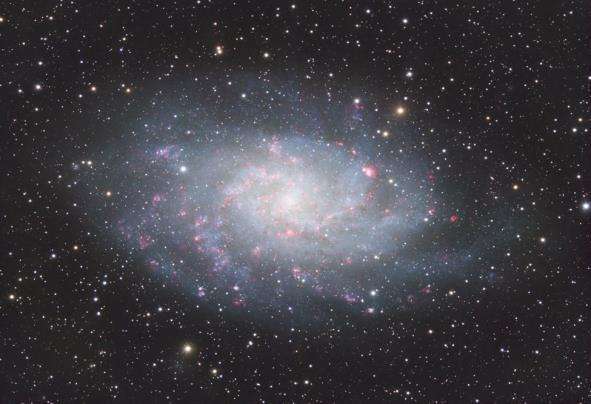
M33 with 17.5 hours of HaRGB
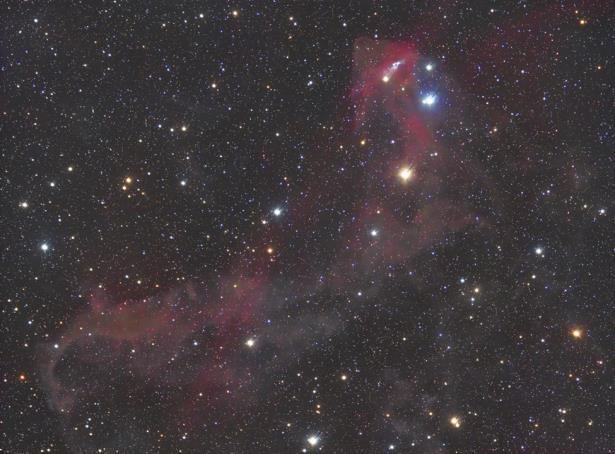
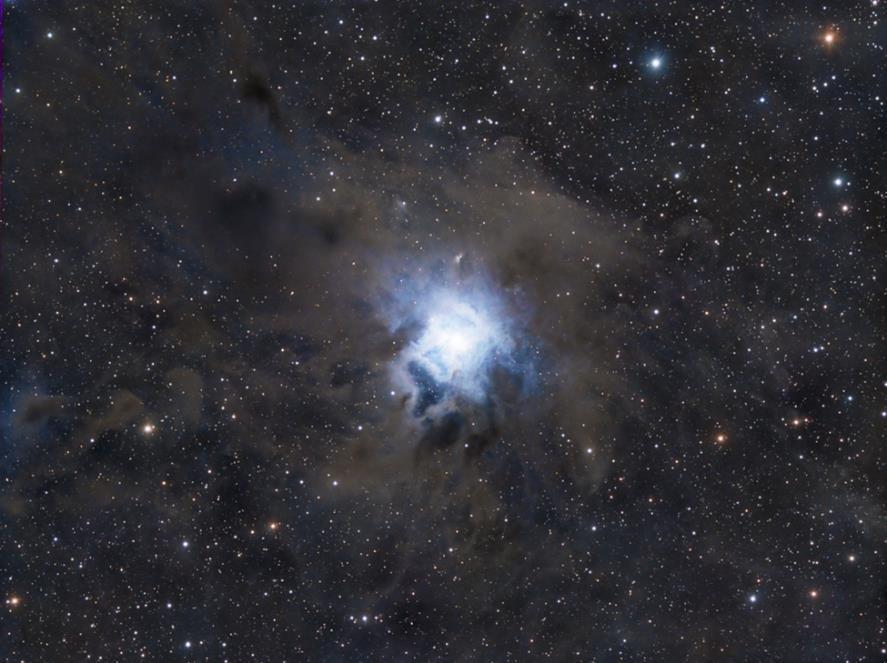
I do enjoy large galaxies and bright nebulas, but also have recently begun to appreciate reflection nebulas. Here is one I did recently.
Going forward, my goals are to improve my skills with N.I.N.A. software to become more automated, and to improve my skills in processing narrowband images. I process exclusively in PixInsight and there are always new processes and scripts to improve our processing.
Clear skies!
M31 with 13 hours of RGB
The Iris Nebula with 9.5 hours of LRGB
Technical Review Takahashi FSQ-85EDX
Primaluce Lab PLUS Hardware and Sesto Senso II Focus Motor
Even if you have just started your journey into this incredible Hobby you likely know that the name Takahashi is synonymous with highend quality Optical instruments. In this review I would like to detail out some of the technical specs and some of my own experience in using this Incredible "Baby" Quadruplet. As I'm sure a number of us in this hobby enjoy organization I'll go by section and bullet point.
• Finder Scope: Optional, typically used with a red dot or optical finder
• Mounting: Compatible with various mounts including alt-azimuth or equatorial mounts
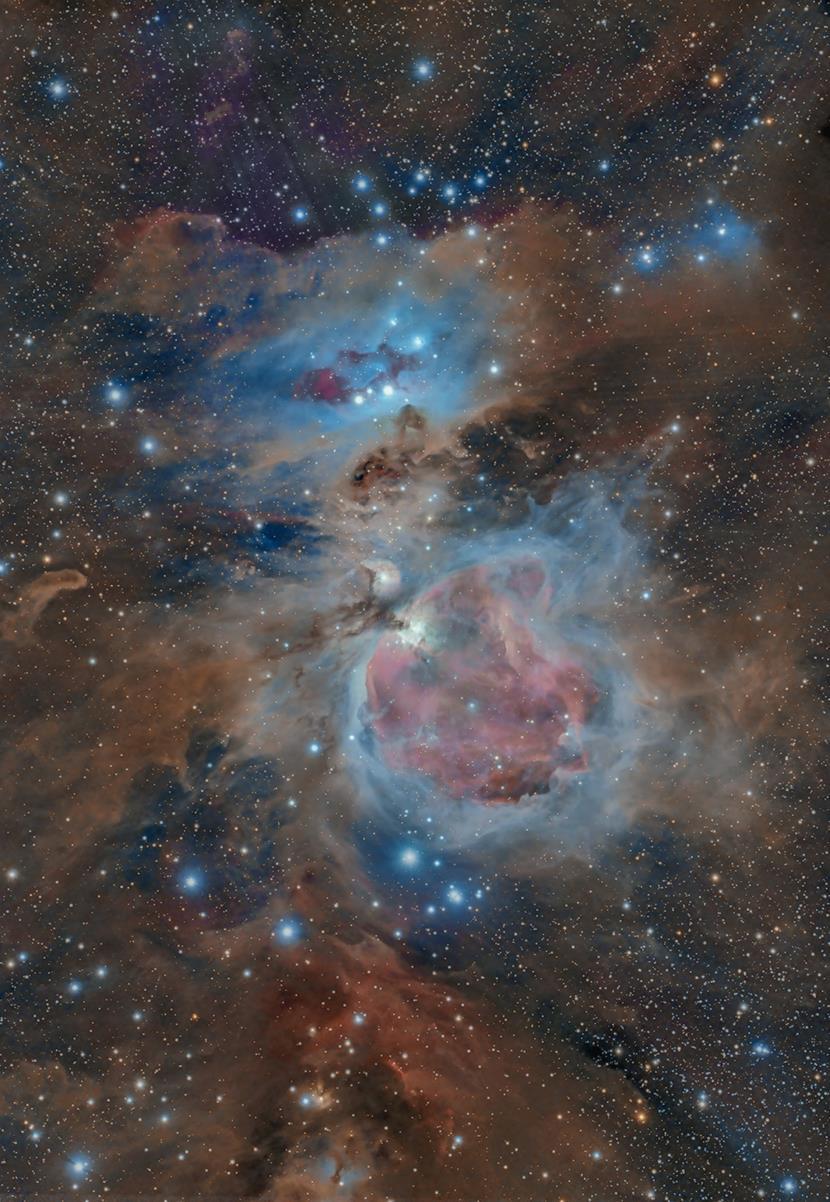
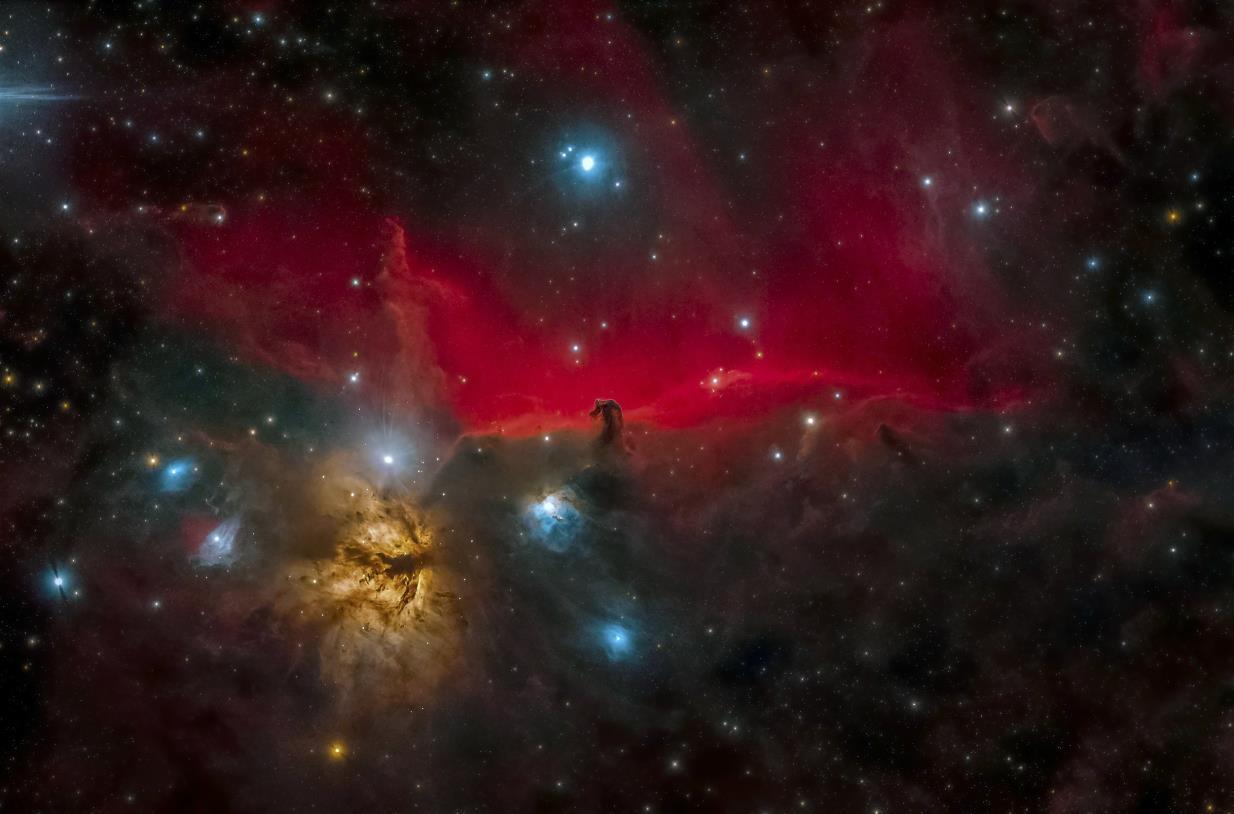
My experiences over three nights capturing the Orion Nebula (M42) and the Horsehead Nebula (Barnard 33) for the first time with this setup during the winter of 2020 from a dark site highlights the exceptional performance and user -friendly aspects of the FSQ-85 especially when paired with Prima Luce's Eagle 3 Pro Control Unit, high quality mounting rings and plates, and incredibly precise automation hardware.
Prima Luce Eagle 3 Pro: This was my first experience using a centralized control unit and the freedom on control this provided compared to using just a laptop a gamechanger. Since merely shifting my control location from next to my imaging rig to inside the house from the front or back yards of my house I have utilized two of Prima Luce's Eagles to control both remote setups located 75 miles away under darker skies in my remote observatory. In all cases I have loved working with Prima Luce's equipment. Not only is their equipment top notch but once you've had the good fortune to meet Tom Bramwell either via phone, email, or in-person you quickly know how top notch their customer service is as well!
Prima Luce PLUS Mounting Hardware: Pairing the Takahashi FSQ-85 with Prima Luce Lab mounting hardware ensures stability and ease of use. The dovetail plate and tube rings securely hold the telescope, providing a reliable platform for astrophotography and observation sessions. Prima Luce Lab's solutions are known for their quality and compatibility with a variety of mounts, enhancing flexibility in setup configurations.
Prima Luce Sesto Senso II Auto Focuser: This high-end autofocusing option integrates seamlessly with the FSQ-85, offering precise and automated focusing capabilities. Its motorized design allows for remote adjustments ensuring optimal focus during imaging sessions. The Sesto Senso II enhances image session efficiency by eliminating the need for manual focusing adjustments, particularly beneficial under challenging conditions such as cold winter nights or any evening with big temperature shifts. And the consistent, highprecision nature of the Sesto Senso II means you have more usable subs at the end of your session with only the seeing shifting the HFR/FWHM values.
• Setup and Integration: Setting up the FSQ-85 with Prima Luce mounting hardware is straightforward and quick. The system's lightweight design and intuitive assembly process allow you to start observing or imaging promptly. This ease of setup encourages frequent use, regardless of how tiring the day has been.
• Portability: another huge factor that made the fsq85 my personal choice for a wide field Imaging refractor was its ease of portability. The tube can be unscrewed in the middle even allowing for ease of Airline transport without having to check the scope. We all know how easy things can get shaken up and thrown out of alignment so being able to take the Optics on board the plane in a carry-on bag was a huge benefit.
• Imaging Performance: Capturing the Orion Nebula and the Horsehead Nebula demonstrates the FSQ-85's superb optical quality and the precision of the Sesto Senso II Auto Focuser. The Petzval design provides excellent color correction and sharpness, revealing intricate details within nebulae and other celestial objects. The automated focusing capability of the Sesto Senso II ensures that images are consistently sharp and welldefined, enhancing the quality of your astrophotography.
• Data Processing: Processing the data captured from M42 and the Horsehead Nebula was a rewarding experience. The high-quality images obtained from the FSQ-85 required minimal processing to bring out fine details and enhance overall clarity. This efficiency in data processing is a testament to the telescope's optical excellence and the precision of the auto focuser, allowing you to focus more on enjoying the results rather than extensive post-processing.
• Personal Impact: Owning a telescope of the FSQ-85's caliber has a profound effect on your enthusiasm for astronomy. Despite the challenges of a busy day or adverse weather conditions, the desire to explore the night sky remains strong. The telescope's capability to deliver breathtaking views and capture stunning images motivates you to regularly venture out under the stars, rejuvenating your passion for astronomy and providing a therapeutic escape from daily pressures.
Conclusion: The Takahashi FSQ-85 refractor, when combined with Prima Luce mounting hardware and the Sesto Senso II Auto Focuser, offers an outstanding platform for both novice and experienced astronomers alike. Your experience capturing iconic nebulae and the telescope's impact on your personal astronomy journey underscore its exceptional performance, ease of use, and ability to inspire exploration. Whether for imaging or visual observation, the FSQ-85 delivers on its promise of delivering high-quality views and memorable astronomical experiences, making it a cherished asset for any astronomy enthusiast.
Images and words by Dustin Enfinger
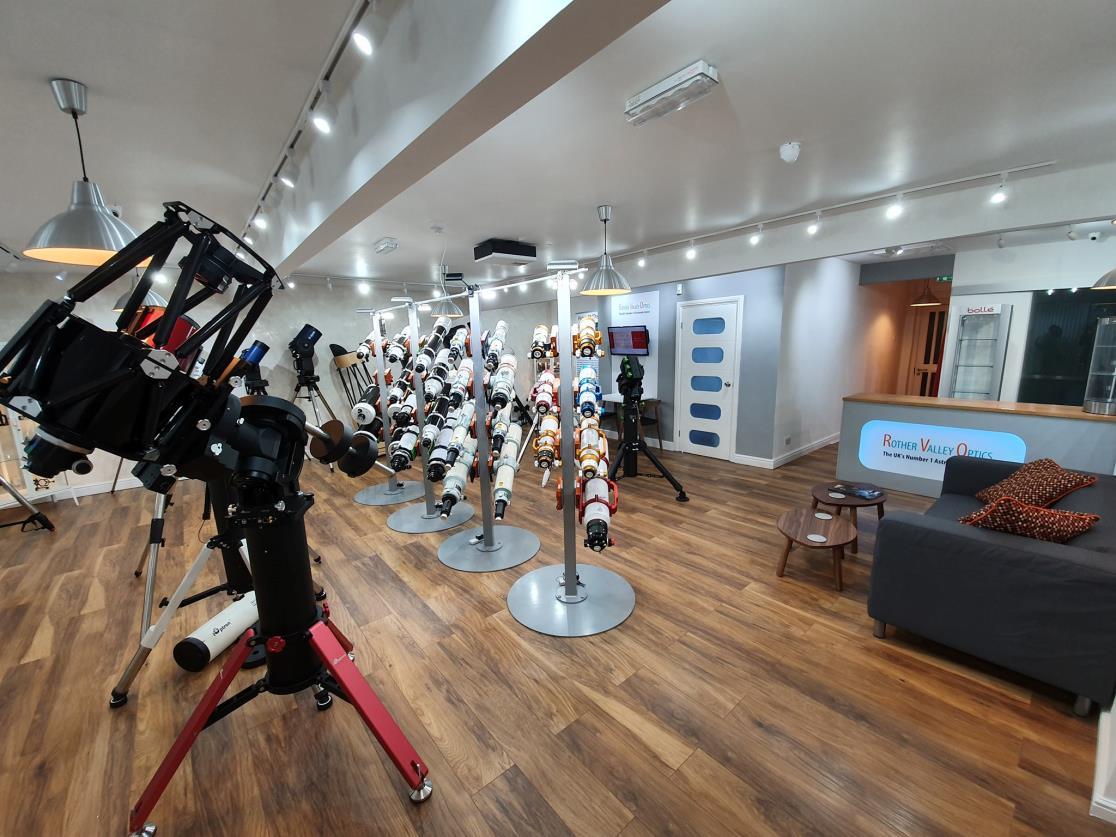
Rother Valley Optics is the largest one stop shop for all your optical needs. We stock the latest ranges in Telescopes, Binoculars, Spotting Scopes and every accessory that you could possibly need.
Developed to optimize the capture process. Striving for stress-free astrophotography sessions.
AstroWorld TV
Have you ever had an issue with observational astronomy or astrophotography and did not know where to turn?
Who do I ask? What do I believe from the internet?
We formed AstroWorld to help astronomers and astrophotographers and to stop them from making the same mistakes we did AstroWorld’s shows are on YouTube, Facebook, and Twitch, every Wednesday and Friday night
Our guest list keeps expanding and we cannot wait to see what the future will bring, and as always…
Keep Imaging, Keep Educating, and Clear Skies!
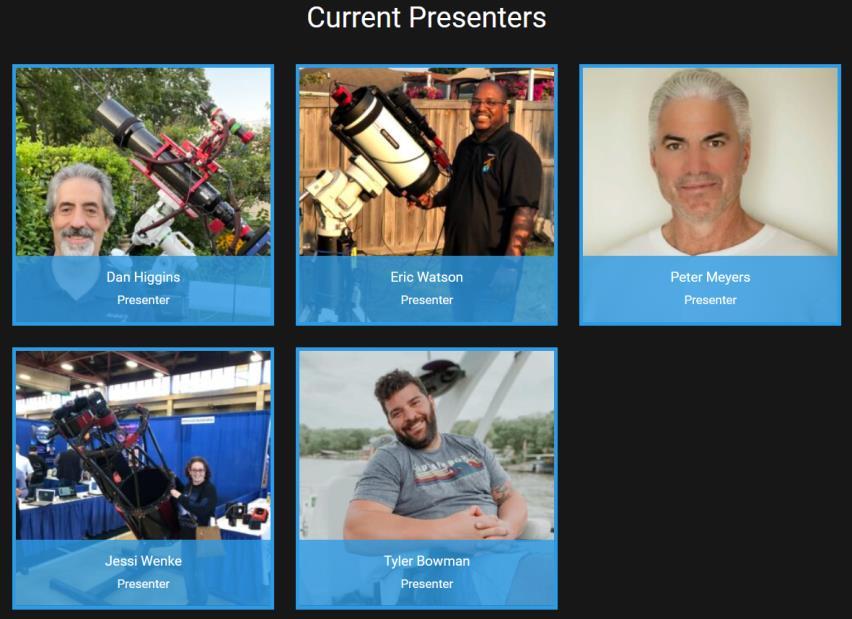
Dan Higgins Founder, AstroWorld
AstroPalooza is an event featuring many prominent authorities in Astrophotography and Astronomy. This is our second event and its gonna be STELLAR! The Guest list is below! Don’t forget to check out the tentative schedule and vote for the Picture poll at the bottom of the page! https://www.youtube.com/c/AstroWorldTV
Astronomy Shows and Events
To see your event or show, exhibition or outreach gathering listed here, just email editor@astronomyabc.com and we will add it to the list.
Send us your pictures, reports and let us know about anything you would want to advertise. The more, the merrier. If you recognise the people or the show, let us know!
By Kind Permission, Reproduced Here
The One and Only Uncle Rod’s Astro Blog
Tuesday, November 26, 2024
Issue #610: Ch-ch-ch-changes!
We preempt your regularly scheduled program… Originally, thisun was gonna be about me, your Old Uncle, turning my SeeStar S50, Suzie, and 10-inch Dob, Zelda, loose on the fall globulars chapter in UAG (“The Urban Astronomer’s Guide,” for the uninitiated). Then, as it sometimes does, everything—well, a couple of things— changed.
Thanks to the kindness of a friend of mine, Jack Estes, who is also a longtime friend of this here AstroBlog, and an amateur astronomer/imager extraordinaire, I was able to level up in the smartscope world. To the tune of Unistellar’s Equinox (the first iteration as opposed to the new Equinox 2).
“What in pea-turkey is they-at, Unk?” It’s a smartscope, Skeeter, you might say the smartscope that set the pattern for what these instruments would be like. Specifically, it is a 4-inch (114mm) reflector with its secondary replaced by an image sensor. It is made by a French company, Unistellar, which now offers several rather advanced smartscopes.
Other specifics? The Unistellar is as above a 114mm reflecting telescope, one with a focal ratio of f/4, meaning its focal length comes in at 456mm. Like almost all other smartscopes, it rides on a one-arm goto fork mount. Other than that? It features a Sony Exmor IMX224 imaging sensor with a field of about ½ degree. Also like her sisters, the Equinox is powered by a USB-C rechargeable battery and operated via wi-fi with an app on your smartphone.
That was what I had gleaned from talking to Jack, reading the manual, and watching cottonpickin’ YouTube videos. That reading and watching (and downloading of the iOS app) done, I began anxiously awaiting the scope’s arrival at Chaos Manor South
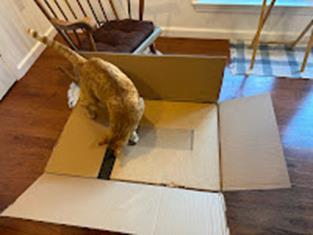
Your impatient old Uncle didn’t have long to wait. In just a few days, a largish box was on the doorstep of Chaos Manor South, and your decrepit correspondent had somehow manhandled it into the Sunroom, traditional staging area for new (or at least new-to-me) telescopes. I went to work, aided by Wilbur Wright, second in command of our feline detachment.
What was inside that box? An attractive and light but not too light and sturdy tripod. With the legs fully extended, it was a smidge over four feet in height; ‘bout the same as my Manfrotto. And there was the telescope herself, a pretty, two-toned black and gray thing on her one-arm-bandit mount. Finally, there was a small box of accessories that contained a charger, some extra knob-headed bolts (for the tripod I presumed), and a set of Allen wrenches for collimation. All in all, Unistellar’s box/presentation reminded me of what Apple might do if they sold telescopes. The lid of the inner box was emblazoned with the words, “Prepare to be Amazed.” We’d see, I reckoned.
Hot dog! New telescope (are there any sweeter words than those?)! I’d get her into the backyard and get ready to go! Not so fast, Unk, not so fast. In the excitement, your silly Old Uncle had forgot this was the evening of the Mobile Amateur Radio Club’s yearly TNXgiving Potluck dinner party with our sister club, the Deep South Amateur Radio Club.
Being President of the MARC, it was incumbent upon Unk to be there, natcherly. I told Miss Dorothy, “Guess I’ll try the new telescope when we get home.” She just laughed. Indeed, upon our return I was way too tuckered to do anything other than imbibe a few cold 807s in the company of the cats as we watched silly YouTube videos. “Tomorrow night, for sure!”
Strangely, the arrival of the Unistellar Equinox had coincided with a short span of cool and clear evenings. Only downer? There would be a fat Full Moon on the rise. I hoped to get in a few minutes with the Unistellar before Luna got too high. While Jack had provided me with some instructions to get me started beyond what was in the manual (typical of today’s manuals) and on the Unistellar website, I still felt like I was flying by the seat of my pants when I headed for the backyard with this sizable smartscope (still very manageable for Unk, nevertheless, at about 20 pounds).
Out in the back forty in my customary spot adjacent to the deck, I got the scope mounted on the tripod by means of lowering its base into the custom-style head and fastening a couple of retaining bolts. Now to wait for darkness, which, thankfully, is arriving at a decent hour now that that dadgum DST has been turned off. Standing there in the gloaming, I had to admit the Equinox looked impressive and a lot more “telescopey” than the oddly shaped (sorry, girl) Suzie.
When darkness fell, I finally got started. First step was powering up the Equinox via a pushbutton switch not unlike that on the SeeStar. Scope on and button illuminated a purplish hue, I connected to the scope with the Unistellar app for the first time. Now, I relied on what Jack told me to do in his quick start instructions, beginning with leveling the tripod, which I did in rather hurried fashion. Your jaded old Uncle had to admit he was now right excited about this 4-inch telescope.
Hokay, the app said I was connected to the scope, so this was rubber-hits-road. Next step would be moving the OTA to an altitude of about 45 degrees. After a bit of fumbling around to figure out Unistellar’s onscreen joystick trope, I got the tube pointed at said 45 degrees. Hell, y’all, I even remembered to remove the aperture cover! I gotta tell you I was heartened by the sounds the Equinox made as I slewed her. None of that old-timey Meade-style weasels with tuberculosis noise. The sound emitted by her altitude motor was sure and steady.
Next up? Time to do what Unistellar calls “orientation.” What I call it is a “plate solve.” Mash the appropriate button on the app, and the Equinox takes pictures and figures out where it is from the star field. It seemed to me this worked near as I could tell from what the app said. Before trying a goto, however, I would need to take a manual dark frame, which Unistellar refers to as a “sensor calibration.” I might have figured that out on my own eventually, I reckon, but thank goodness I had Jack’s quick-start instructions.
The Equinox does not have automatic focus, so you focus manually by turning the large knob at the rear end of the tube, which I assume moves the primary mirror forward and back leaving the secondary (the camera) undisturbed. While the quick-start instructions Unistellar furnishes advise you just to focus on a starfield by eye, Jack told me to go whole hog in Bahtinov mask function.
With only a mite of fumbling, I found Altair in the app’s object list (the Unistellar app works with lists rather than a star atlas) and sent the scope there. The Equinox hummed reassuringly, headed in the proper direction, and soon had Altair in the frame. I centered up a little bit and installed the Bahtinov mask a plastic one that is normally stowed attached to the aperture cover. As Jack had instructed, I used the onscreen live-view controls to make Altair pretty dim, and focused till the star spikes were properly spaced. Focus wasn’t far off to begin with, testament to the scope’s mechanical quality, but I could have done better. I should have zoomed in on the star a bit, but, yeah, I was excited. I got OK fo
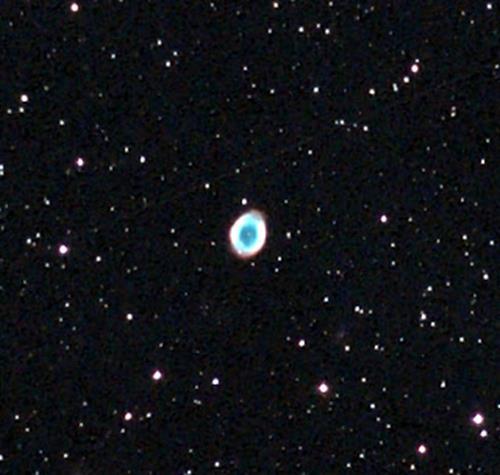
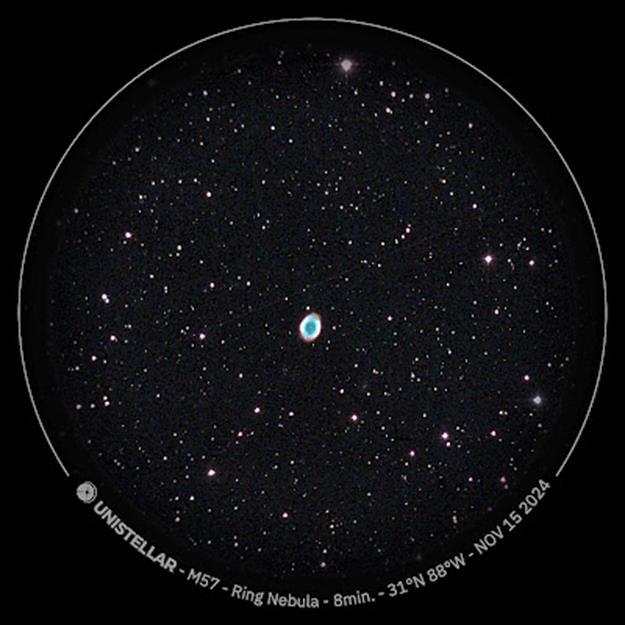
Now came proof in the pudding time. First light object? I figgered M57 would be it. Nice an’ bright, but also small. I wanted to see what a smartscope with more focal length would do for me. So, having found that magic Ring in the apps list, I sent the Equinox that-a-way, and held my breath
When the Equinox stopped, there was that glorious ring. Was it huge on the phone? No. But it was considerably more than the wee spot it is with the SeeStar. While Suzie’s ring is identifiable, good luck being able to make out the central star no matter how much you zoom. With the Unistellar, even unzoomed on the phone screen, I could see the center of the Ring wasn’t dark and make out there was something else there. Just a bit of zooming/ cropping, as you can see here, delivers that central star detail on the Ring itself. Was I happy? You betcha
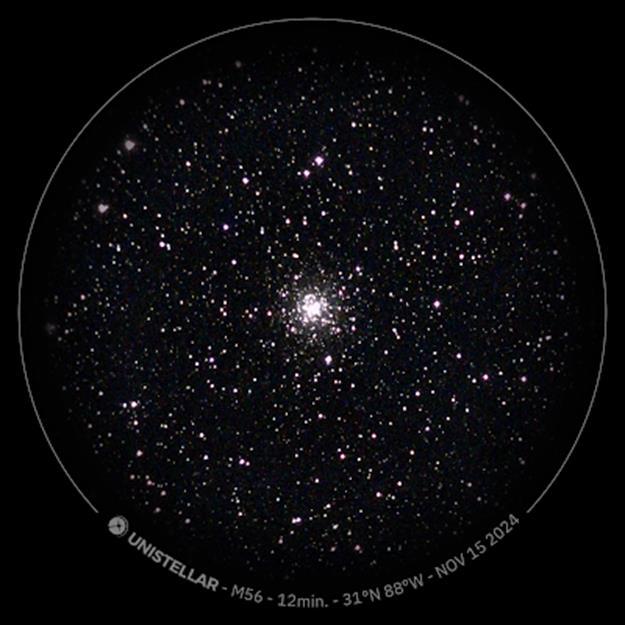
Alas, wouldn’t you know it? By now the clouds was rolling in. I did do two other objects in quick succession, M2 and M56. One thing I noted on both objects? The exposures went quickly with no frames dropped. It’s normal for the SeeStar to reject a sizable number of due to star trailing. The Equinox’s tracking was better. In part, that’s attributable to the shorter 4-second exposures, but I suspect the gears are a lot more refined than those in li’l Suze. Shorter exposures were not a problem, by the way, thanks to the Equinox’s sensitive camera. Almost too sensitive if’n you ask me. My single problem at first light was blowing out the cores of globs (as you can see, M57 is also somewhat overexposed. I didn’t have a clue about settings for exposures on this first night. Ah, well, NEXT TIME. And rest assured, you will learn a lot more about this amazing telescope in the future. And with that, Evie’s first light night with me had come and gone.
Evie? As you well know, all my scopes tell me their names. For some reason, I thought that would take a while with this one. Nope. As we were headed back to Chaos Manor South’s den for cold 807s and TV with the felines, the girl said,
“Hey, y’all! I’m Evie! Unk, are we gonna be friends?” “We sure are Evie, we sure are!”
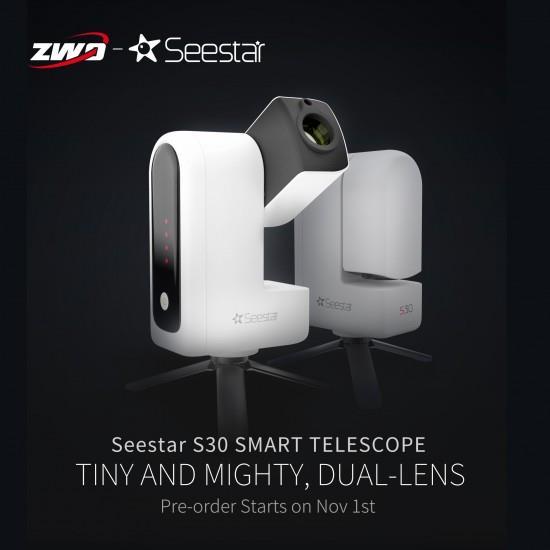
But I said changes, and I meant more than one. The arrival of Evie was just the first change at smartscope-crazy Chaos Manor South! I soon learned I’d got the assignment for the Sky & Telescope Test Report on ZWO’s new smartscope, the S30. You’ll learn all about it in a coming issue of S&T. Stay tuned
Next Time: As has long been the tradition ‘round Chaos Manor South and the Little Old AstroBlog, next month’s entry will appear on Christmas Eve and will maybe be a mite more sentimental and briefer (well, maybe) than usual. See y’all then.
Nota Bene Department: I had a request for the observing list from The Urban Astronomer’s Guide in computer form the other day. I rummaged around and found that despite the shutdown of the Yahoogroup that supported UAG with observing planner files, I’ve still got one. Specifically, it’s in SkyTools 3 format (which some other planning programs will be able to import). If you’d like a copy, shoot me an email at rodmollise@southalabama.edu and I’ll get the file on its way to ya.
Featured Reader
James Burrill
Featured Reader
James Burrill
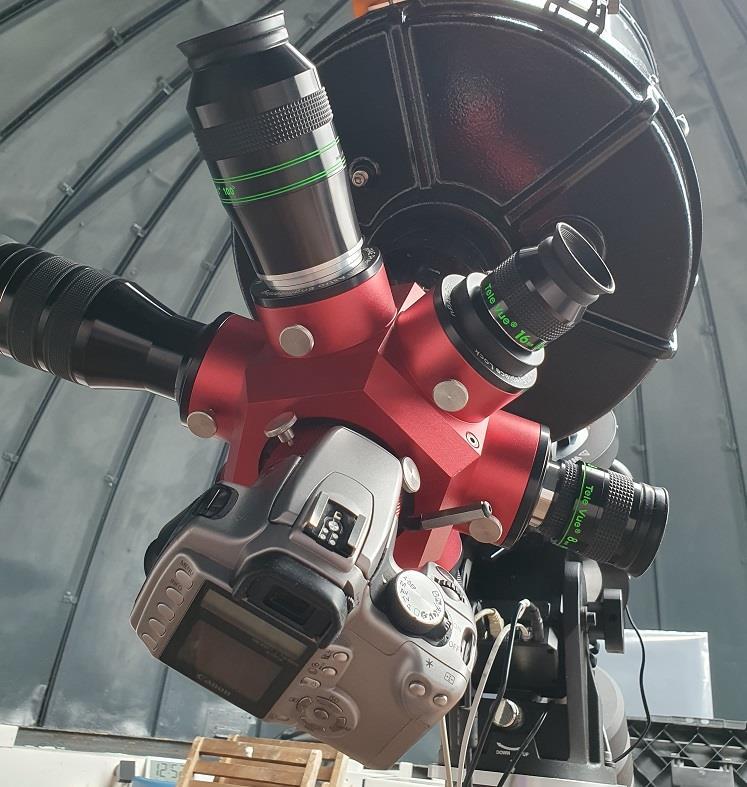
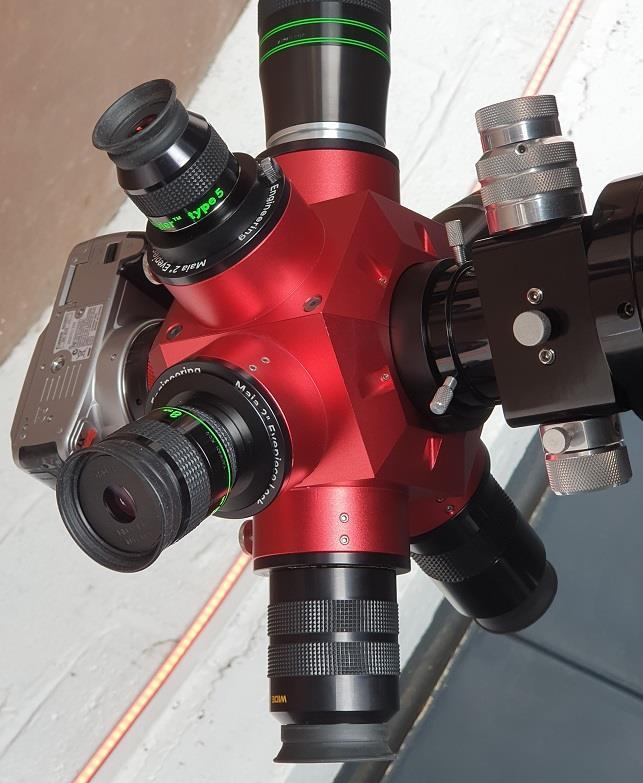
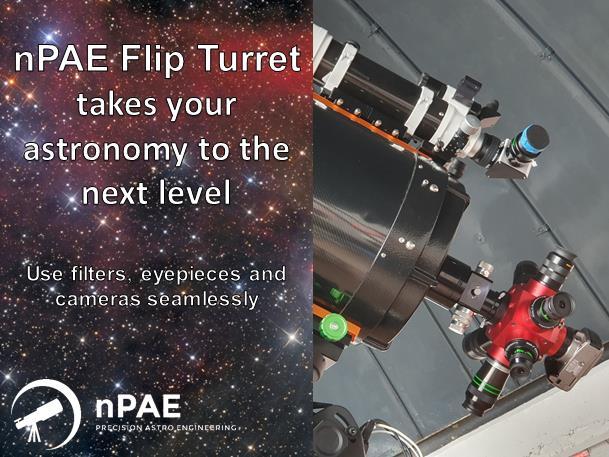
nPAE Flip Turret Review
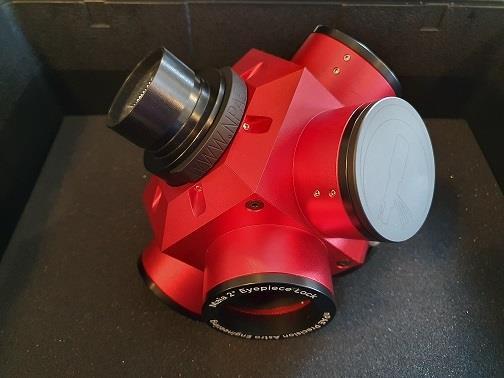
The world’s only production flip turret is now available! For the first time your filters, eyepieces AND camera can all be accommodated in the same focal plane on one unit. For large telescope owners the nPAE Flip Turret opens up new observing and astrophotography opportunities.
Observe with 6 different magnifications with up to 2 filters. You can mix and match combinations of filters like polariser and colour. Flip the 1/10th wave certified mirror and start narrow band or white light astrophotography on your camera.
Observe with 6 different magnifications with up to 2 filters. You can mix and match combinations of filters like polariser and colour. Flip the 1/10th wave certified mirror and start narrow band or white light astrophotography on your camera.
Like all nPAE products the Flip Turret incorporates aerospace design engineering with 5 axis CNC machining. Made from 6083 aluminium which offers high tensile strength, high durability, anticorrosion, dimensional accuracy and fine surface finish the Flip Turret is elegant and sophisticated.
With novel features such as our dual filter system and bezel torque control the 2” Flip Turret will take the functionality of your large telescope to the next level.
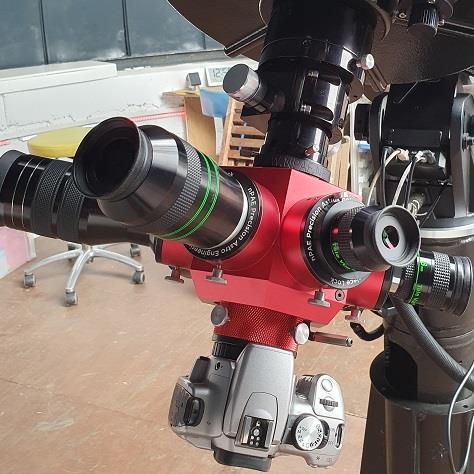
The first main feature of the nPAE FlipTurret is that it effortlessly holds six 2” accessories. Shown here with a selection of #televue #skywatcher and #meade eyepieces you can rotate the turret in either direction to access the desired eyepiece. You can finally make use of all your eyepieces together! During those moments of good quality seeing you can swap for high magnification. Now you can switch between wide field and narrow field for nebulas and plan-
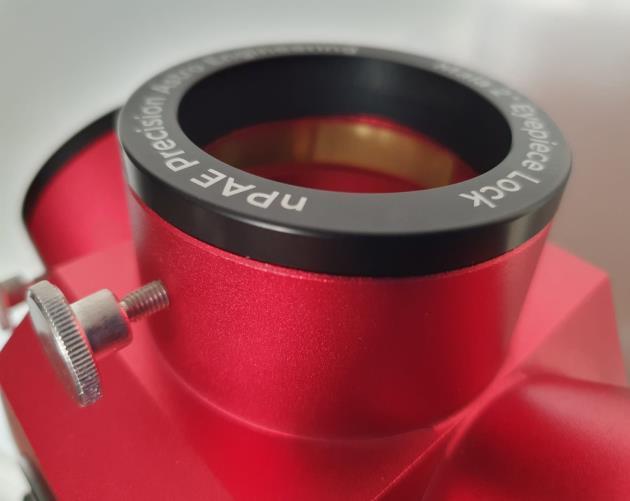
The second key feature of the Flip Turret are the parfocal rings. This is the feature that keeps all the eyepieces in the same focal plane, so no more fiddling with that focuser! Each lock has parfocal ring that can be adjusted to add between 0 to 4.5mm of additional backfocus, or the parfocal ring can detached to remove 5mm in one step. The back focus of the Flip Turret is 152mm, so the parfocal ring can adjust that figure to between 156.5mm and 147mm. You can see the maximum open position on the photo above.
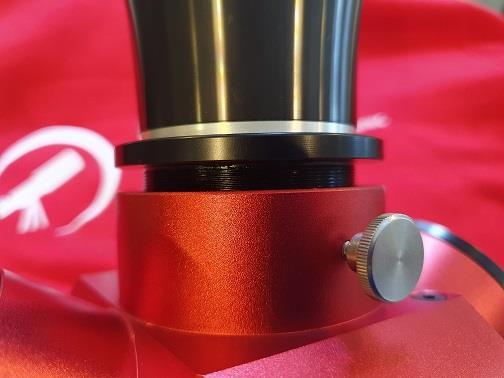
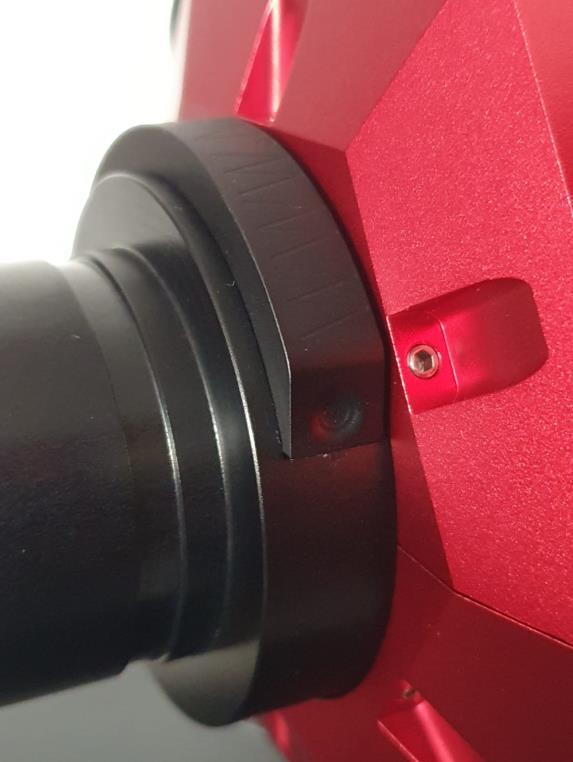
The next feature of the 2” Flip Turret is the eyepiece locks. The clamping mechanism of the Flip Turret locks are via a brass compression ring which is closed with a thumbscrew AND an M4 flat point screw. They are 120° apart with the flat point screw towards the rear. This enables the outreach feature. Often, during high person usage, thumbscrews will come loose and even be fiddled with by curious fingers! With the Flip Turret you can engage the flat point screws and remove the thumbscrews entirely so your eyepieces will remain secure throughout the event.
This is also a good time to talk about the bezel torque control. If you use very large eyepieces the torque of the bezel will be changed by the amount of mass rotating. The torque can be increased – all the way to full lock – by the 6 M4 nylon tipped flat point screws on the front of the bezel.
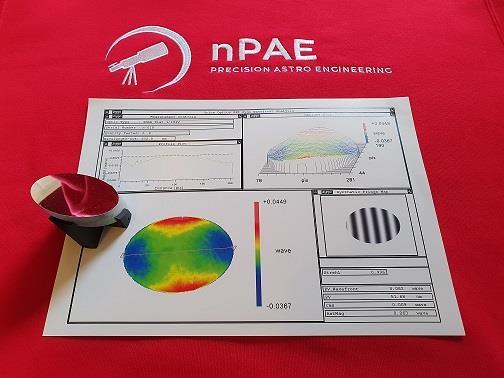
As with all our 2” products the Flip Turret comes with certified optics. The mirror is 1/10th wave or better and have a Strehl ratio of 0.9. Remove the weak link in your optical train and enjoy unrivalled views.
The Flip Turret mirror is oversized so the light cone is always fully accommodated. And the mirror flips, revealing your camera for astrophotography!
The nPAE 2 inch filter system is unique to all nPAE’s 2 inch products. For visual astronomy you can double up your filters and use say a polariser at the front and then hydrogen alpha or coloured filters in the sleds to tease out finer details, then switch to narrow band for astrophotography. Each Flip Turret comes with 3 filter sleds.
The winning feature of the flip turret is the moveable mirror allowing astrophotography alongside visual astronomy. The mirror is held in the up and down positions with neodymium magnets so you can be sure your astrophotography won’t suffer any interruptions as the telescope moves.
The camera connector is with our 2” Maia lock which accepts all 2” camera noses and it adjustable on the x and y axis. Fine tuning focus can be achieved with the parfocal ring. If you desire a threaded attachment the Maia lock can be unscrewed to use the M68 thread. Just turn the lever and off you go!
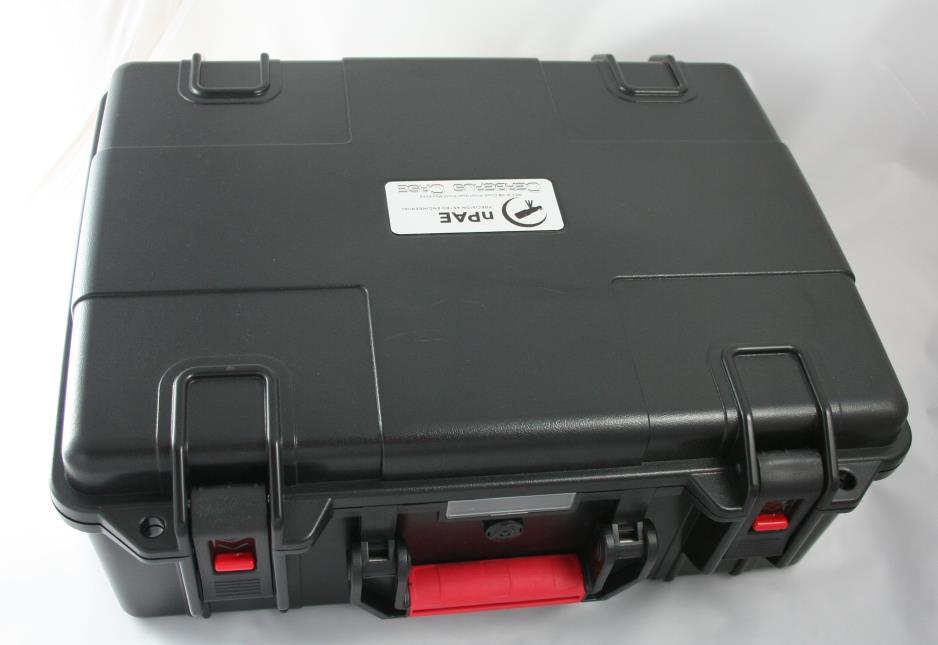
Protecting your Flip Turret during transport is the nPAE Cerberus case. These super tough cases are crush resistant, dust resistant, impact resistant and water resistant to 1m! The Cerberus Case is rated at IP67 and IK-08. There is additional space for transporting other equipment inside.
A Founder’s Biography
What
is your name?
Dustin Enfinger
Where are you from originally and how old are you?
I am a Houston Texas native. I am 39 years old. Born December 30th 1984.
What is your role in the magazine?
Co-Owner and Technical Editor
When and how did you get into astrophotography?
My first experience with astronomy and subsequently astrophotography was April 18th 2018. My best friend Billy's stepmother Laura asked me to set up a telescope that belonged to her late husband, Billy Sr. I had never used a telescope but understood how they functioned and as soon as I had the moon in focus I was immediately drawn to hold my phone camera up to the eyepiece.
Where do you do most of your imaging from?
I always have one or two setups that are portable and I also shoot from a remote observatory that I designed and built myself in 2021.
What are you currently working on in the hobby?
Currently the magazine consumes the majority of my time in the hobby as we've been gearing up for the relaunch. For me the magazine is a much wider reaching opportunity for me to do what I've come to enjoy the most in the hobby which is simply learning and connecting others to information to help improve their proficiency in every aspect of AP, from hardware control to image processing. This started during the four years that I worked at Takahashi America.
What are some of your favorite experiences in astrophotography?
I would say my favorite experiences have been really instances where I've gotten the chance to work with others and meet other industry professionals while working for Takahashi. The most notable experiences for me were having the opportunity to fly out to Utah and it help establish an astronomy program for a high-end camping facility by the name of Yonder Escalante, and attending both the last AIC event in San Jose 2022 and first post-covid NEAF event in 2023. At these events I was able to meet many of the knowledgeable and passionate individuals with whom I had been working as well many new contacts from a multitude of trusted and respected manufacturers and distributors of astronomical equipment.
Any last closing words?
Endlessly grateful and looking forward to continued collaboration by way of this publication with everyone that I have met both as former customers, astronomy club members, and friends in the astronomy/AP industry. There are too many of you to list by name and it wouldn't feel right to exclude anyone due to character limitations, so I will just say you know who you are.