Our people share their cultural connections and memories created around the dining table.


Our people share their cultural connections and memories created around the dining table.
A huge thank you to everyone who participated in the Share Your Colours Employee Resource Group and taste.com.au's vibrant Taste the World campaign! We were delighted to discover the rich cultural connections and cherished memories you shared, all centred around the dining table. As a celebration of these global
flavours, one winning recipe received a $500 voucher, 10 standout recipes were selected for publication on taste.com.au, and an additional 40+ delicious entries have been included in this special Share Your Colours digital cookbook
We hope you enjoy exploring and trying these wonderful dishes from our people.


We are excited to announce the winner and finalists of the Share Your Colours and Taste the World recipe competition. The taste.com.au team has worked with the winner and finalists to prepare the recipes for publication online. Find their recipes here:
Anthony Trinidad, Audience Manager, Free News & Lifestyle Publishing. Polvoron (page 94)
Ana Murphy, Senior Digital Producer, Client Delivery. Mayak eggs (page 16)
Erika Rutledge, PR & Talent Manager, State & Community Mastheads Publishing. Guasacaca (page 24)
Eva Su, Executive, Engagement Consumer Engagement TAP. Lu Rou Fan (page 70)
Liana Columbro, Event Executive, State & Community Mastheads Publishing. Pasta, Napoletana sauce with beef marrow bones (page 46)
Sean Callinan, Editorial Design Lead, The Australian & Prestige Editorial. Orange-guajillo pulled pork (page 68)
Swapnil Gupta, System Capability Specialist, Enablement & Operations. Tehri (page 78)
Urun Tasci, Head of Finance –Production, Property and Logistics. Pastirmali kuru fasulye (page 60)
Eva Neumann, Change Manager, Enablement & Operations. German plum cake (page 88)
Olga Bellette, Client Partner, Real Estate, SMB Growth & Marketplace. Kourabiethes (page 82)


LILLIAN SALEH, SHARE YOUR COLOURS SPONSOR
Growing up in a Lebanese family, food was never just about nourishment – it was the thread that wove us together through every joy and sorrow. It marked every chapter of life – from the laughter of birthday dinners filled with music and mezze, to the quiet reverence of mercy meals, where plates of kibbeh nayyeh and tabouleh brought comfort in the face of grief.
The smell from Mum’s kitchen was more than a signal that dinner was ready – it was the scent of belonging.
The aroma of garlic and onion sizzling in olive oil, fresh parsley and tomato being chopped, or bread baking in the oven – all welcoming us home like a warm embrace after a long day at school or later, work.
Our dining table was where we shared more than meals – it was where we shared ourselves. We passed around bowls and Lebanese bread and stories, asked for advice, celebrated achievements, and commiserated losses. No matter what life brought, the table brought us back together.
Now, with my own family, food holds the same sacred space. Cooking is how we show love; our meals are how we stay connected. I see the same magic I grew up with unfold around our table. Just like it was for me, food remains our ritual, our language, our anchor.
Share Your Colours invites you to our News Corp Australia table as we share the recipes and stories that have special meaning to our colleagues, and invite you to share yours.

Share Your Colours is about creating meaningful connections in the workplace. So often, the ideas on how we express this through multiculturalism leads to food. This is the first time that News Corp Australia staff, around the country, have brought together an array of cherished recipes and sentimental stories to share with their peers. Further to that, working in collaboration with taste.com.au has shown how our tapestry of cultures can introduce new ideas and experiences with authenticity.
Let this be a new connection point with your colleagues. If you do try making one of these recipes, you may wish to let the author know. Share a photo, ask if you got it right! You might make a dish and want to bring it into the office to share. It may also be as simple as just wanting to grow your culinary repertoire.
Heartfelt thanks to everyone who has participated in this project, and to Arcon Viray that believed this would be a powerful and wholesome initiative.
Food has the power to connect us in ways words sometimes can't. At News Corp Australia, where storytelling is at our core, food becomes another beautiful way to share who we are.
Share Your Colours is all about celebrating multiculturalism – of the vibrant dishes, spices, smells and traditions that we bring into the workplace. It's an invitation to step outside the familiar, try new recipes, and strike up a conversation with your colleagues over a plate of food that means something to them. Growing up in Vietnam, food was our loudest
love language. Fresh herbs, sizzling street stalls, markets at 5am. Even as our country was rebuilding after the war, we always came together at mealtime. We have a saying: “Even thunder won’t interrupt a family meal”. That’s how sacred food is to connection.
Imagine what it means when you try a colleague’s family recipe. So let’s keep sharing – our cultures, our meals, our stories. Because this is what makes News Corp Australia not just a workplace, but a community.


Warra enib (stuffed grapevine leaves)
Traditional Cretan ntakos
Mayak eggs
Tuna crudo
Nonna’s lentil soup
Mushroom miso soup
Guasacaca

Drunk ham
Tagliata, rucola and grana
Bacon wrapped stuffed meatloaf
Duck vindaloo
Angamali pork roast

Pasta, Napoletana sauce with beef marrow
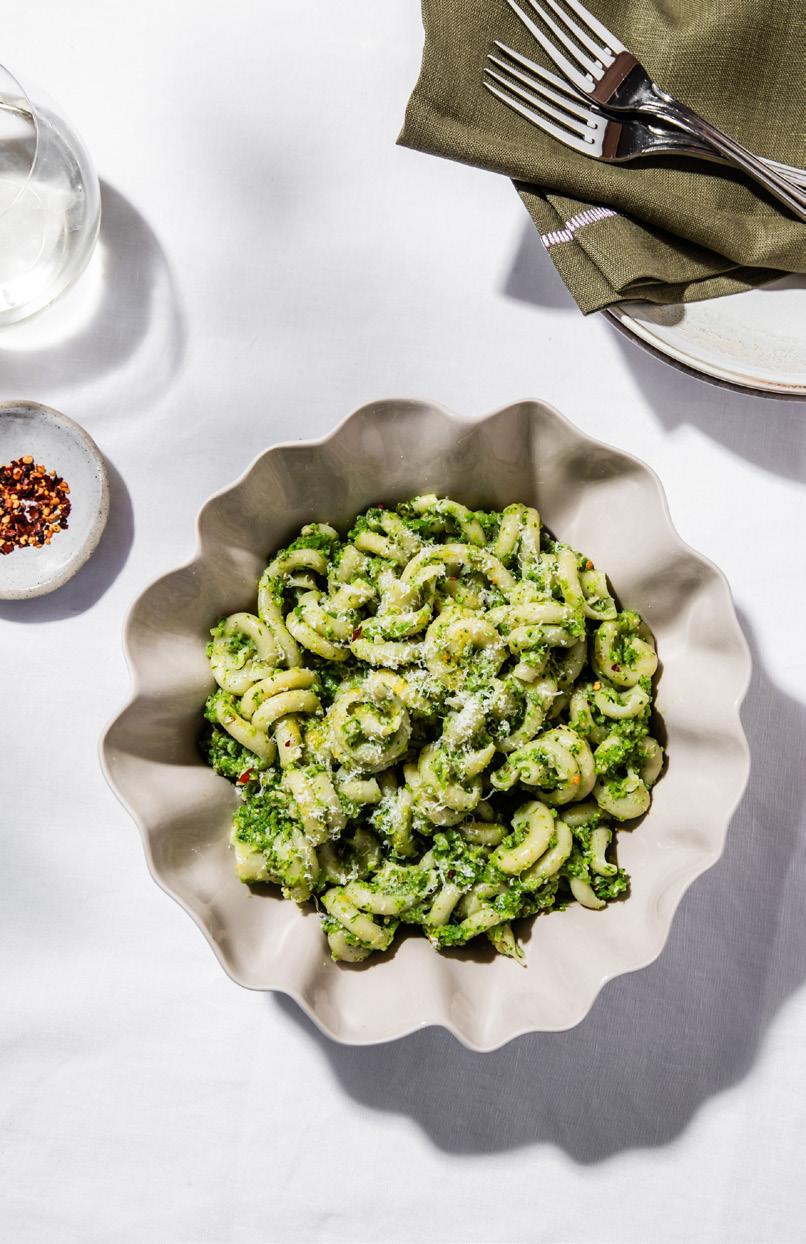
Pasta broccoli
Tatan’s baked fennel gratin
Baked rigatoni
Risotto and meatballs
Kim-chi stew
Pastirmali kuru fasulye
Bazella w ris
Lynnie’s family lasagna
Slow-cooked Indian goat curry
Orange-guajillo pulled pork
Supercharged banana bread

Lu Rou Fan (Taiwanese pork rice)
Grandma’s curried sausages
Sri Lankan potato curry
Pumpkin red cowpeas curry
Tehri rice
Kourabiethes (Greek shortbread)
Vanillekipferl (Austrian shortbread)
Supercharged banana bread
German plum cake
Brigadeiro
Struffoli
Polvoron (Filipino shortbread)
Bastani Sonnati (Persian saffron ice-cream)
Matcha warabi mochi
Power-packed protein truffles Kanji (Indian fermented drink)

FOOD IS ALWAYS A GOOD IDEA


+ Warra enib (stuffed grapevine leaves)
+ Traditional Cretan ntakos
+ Mayak eggs
+ Tuna crudo
+ Nonna’s lentil soup
+ Mushroom miso soup
+ Guasacaca
Angeline Khoury
This is a dish I keep very close to my heart. Growing up in a Lebanese household I used to always help my Tayta (grandma) roll the vine leaves up and one thing I asked her to do before she passed was teach me how to make all my favourite Arabic dishes – this being one of them. It's the perfect starter before your main meal and you can make in bulk.
PREP: 45m
Vine leaves
1 tbsp olive oil
• 1 medium onion, diced
• 500g ground mince meat 2 tbsp 7 spice mix
• 2 tbsp salt to taste 500g rice, thoroughly rinsed
• 300g/ 1 jar vine leaves, rinsed
To cook
1 large onion, diced
• 2 cloves of garlic, minced
COOK: 1h
MAKES 40
½ can diced tomatoes
• ½ cup lemon juice
• 1 tsp salt
2 tbsp 7 spice mix
To make filling: Heat oil in a medium pan and cook onion until clear. Add mince. Add 1 tbsp 7 spice mix and 1 tbsp salt. Set aside to cool. Once mince meat mixture is cool, add into a bowl with the washed rice. Add remaining 1 tbsp 7 spice mix and 1 tbsp salt and mix well.

Try sourcing Lebanese spice mix instead of 7 spice mix – it’s what gives it the correct flavour (head to an Arabic grocer to find the correct spice mix). To get the best grapevine leaves, visit an Arabic grocer as well! If the vine leaves feel stiff, soak each leaf in boiling water for 60-90 seconds.

Stuff the vine leaves: Place one leaf, smooth-side down, on a clean work surface. Place one teaspoon of the filling towards the bottom of the leaf, leaving a tiny bit of space at the bottom of the leaf. Roll the bottom of the leaf over the filling and fold/tuck the sides in. Continue rolling and tucking until all rolled. Repeat with remaining vine leaves.
Assembling the pot: Place the onion, garlic and tomatoes in the base of a large pot. Place your rolled vine
leaves in a spiral, starting with the outer layer and moving your way in. Once one layer is complete, begin the next layer on top of the last.
Cooking the vine leaves: To prevent the vine leaves from rising and moving around while cooking, place a large plate or several small plates (2-4 small plates depending on the size of pot) on top of the vine leaves. Combine the lemon juice, salt and 7 spice mix and add to pot. Add water
until the water is slightly showing on the sides of the plates. (You do not want the plates under water). Turn up the heat and bring to a boil. Allow to boil for 5-10 minutes or until the water disappears and drops below the surface. Turn the heat down to low and let simmer for 40 minutes to 1 hour or until all liquid is absorbed and rice is tender. Remove from heat and let the pot sit for 15 minutes until cool. Serve it straight from the pot or flip the pot onto a large plate and enjoy!

Eleni Paneras
I love Cretan ntakos because it’s light, flavourful and incredibly easy to make. It's a delicious choice for any meal ‒ breakfast, lunch or dinner. Kali orexi ‒ it’s always a delicious choice!
• 4 large round barley rusks
• ½ cup extra virgin olive oil
• 150g feta cheese
50g ricotta cheese or myzithra
3 large tomatoes
• 1 small red onion, finely chopped
• Fresh or dried oregano
Salt and pepper
PREP: 15m
COOK: 1m
Soak the barley rusks in water for a couple of seconds then drizzle each one with olive oil. Combine the feta and the myzithra together with a fork. Place tomatoes in boiling water for about 50 seconds, then plunge into ice water. Peel and mash with a fork. Spread tomato on rusks. Place cheese on top of tomato. Add red onion. Drizzle with olive oil, add a sprinkle of oregano and season to taste.
SERVES 4
Barley rusks are available at most large delis or fruit shops. Briefly soak them in water before coating with extra virgin olive oil for the perfect texture. Blanching the tomatoes loosens the skin for easy peeling and mashing. Myzithra is a traditional Greek cheese, usually made from sheep or goat's milk.
Ana Murphy
Soft-boiled eggs take a spa day in a sweet, savoury and spicy marinade, emerging as the life of any mealtime party. But beware, they're often called 'crack eggs' as they are addictive!
PREP: 15m
MARINATE: 6-12h
6 large eggs
COOK: 10m
Cooked rice, noodles or avocado toast, to serve Marinade
• ½ cup soy sauce
• ½ cup water
• ¼ cup honey (or maple syrup)
5 cloves garlic, minced
2 spring onions, finely chopped
1 small onion, very finely chopped
• 1–2 red or green chillies, sliced (optional)
• 1 tbsp sesame oil
• 1 tbsp vinegar
• 1 tbsp sesame seeds
SERVES 2
Bring water to a boil in a medium pot. Lower eggs gently into the water (they’re delicate stars). Boil for 6 minutes. No more. No less. Ice bath those babies immediately to lock in that gooey yolk and avoid sad rubbery centres. Peel with kindness – tap gently and peel slowly. Whisper affirmations if needed.
Mix the marinade: In a bowl, combine soy sauce, water, honey, garlic, spring onions, onion, chillies, sesame oil, vinegar and sesame seeds. Stir. Smell. Feel accomplished. Place eggs in a container and pour over marinade. Cover and refrigerate for 6–12 hours. Patience builds flavour.
Serve like a star: Halve the eggs, arrange dramatically over rice, noodles or avocado toast (yes, really!), and spoon over extra marinade. Satisfaction guaranteed.


Marinade magic: Feel free to add a splash of mirin or a dash of gochugaru (Korean chili flakes) to customise the flavour. Spice it up: Adjust the number of chillies to dial the heat up or down. Remember, with great spice comes great responsibility. Leftover marinade?
Instant noodle upgrade. You’re welcome.
Fun fact: These eggs aren’t just for rice! They’re the perfect topping for avocado toast, salads and pretty much anything else for a salty, flavoursome burst.

To bring the best flavours out of the crudo, get the fresh fish from the fishmongers on the day. You can swap the tuna for seafood of your liking, we’ve had great success with scallops and prawns. Lower the spice by swapping the jalapeno for microgreens. Change the orange pieces for peach or mango slices depending on seasonal availability. You can prepare the dressing to last for several days if properly stored in the fridge.
PREP: 10m
Marcus Billingham-Yuen
SERVES 4
This was the dish that impressed my in-laws! It's a blend of my partner’s and my own cultural heritage on a plate. A sweet, salty and tangy combo, this tuna crudo is dressed with olive oil infused with kaffir lime.

• 4 kaffir lime leaves
• ½ cup olive oil
150g sashimi grade tuna, thinly sliced
• 1 orange, peeled, seeds removed, cut into wedges
3 jalapenos, thinly sliced
• Seeds from 1 pomegranate
• 1 kaffir lime leaf, finely chopped
Dressing
2 tbsp kaffir lime leaf oil
3 tbsp orange juice
• 1 tbsp lemon juice
• 2 tsp capers
• 1 tsp caper juice
2 tbsp extra virgin olive oil

Make the kaffir oil: Blanch kaffir lime leaves in boiling water. Pat the leaves dry and mix together with olive oil in a bowl. Set aside for at least an hour to infuse, then remove the leaves.
Make the dressing: Combine the 2 tbsp of kaffir olive oil mixture with the remaining dressing ingredients in a mixing bowl. Stir well. Season with salt and pepper to taste.
To assemble: Arrange the tuna slices and orange on a plate. Top each piece of tuna with a slice of jalapeno. Drizzle dressing over the tuna and orange and sprinkle over pomegranate seeds and chopped kaffir lime leaf. Serve and enjoy.
Anna Colnan
This lentil soup recipe was one of my Nonna’s all-time classics. Humble ingredients, outrageously tasty and actually pretty damn healthy. This dish was the original definition of ugly-delicious.
PREP: 10m SERVES 4
INGREDIENTS
1 tbsp olive oil
1 brown onion, diced
• 3 cloves of garlic
• 4 cups vegetable stock (could potentially need more depending on how long the lentils take to cook)
2 cups dry green lentils
Crispy ciabatta or sourdough bread, to serve
COOK: 50m
METHOD
Heat the olive oil In a large saucepan over medium heat. Add onion and cook slowly for about 8 minutes. When the onion is soft, add garlic and cook for about 1 minute or until fragrant.
Reduce heat to low. Add the stock and the lentils. Cover the pot and simmer for about 35 minutes or until tender (this can vary, so you’ll need to taste the lentils to make sure they’re properly cooked and not grainy).
When lentils are cooked, transfer 2 cups of the mixture into a blender and blend until smooth. Stir the puree into the soup and season. Serve with crispy ciabatta or sourdough bread.


Eunice Oh
A quick and easy recipe that takes me back to my travels in Tokyo ‒ waking up to a traditional Japanese breakfast of rice, grilled fish and miso soup.
• 600ml fish/dashi stock (I used a dashi stock packet and added 600ml water)
½ cup white miso paste
• 1 cup white mushrooms, sliced
• 300g firm tofu, cut into 1cm cubes
• 1 tsp soy sauce, to taste
• 1 spring onion, thinly sliced
Place the stock in a medium saucepan over medium heat. Place the lid on and bring to a boil. Place a sieve in the stock, add the miso and whisk the miso to dissolve the miso. Add mushroom and tofu. Cook for 3 minutes. Add soy sauce to taste. Divide among serving bowls. Top with spring onion and serve.
PREP: 5m SERVES 4
COOK: 15m
I used white cup mushrooms, but any mushrooms will work. I switch it up with shiitake, enoki or oyster. I used firm tofu but silken tofu works as well. Buy dashi stock packets from your local Japanese grocer. To make this vegetarian-friendly, you can change the fish/dashi stock to a vegetable stock. If you don’t have white miso paste you can use red miso paste.
Erika Rutledge
TasteAtlas (a world food atlas) just ranked guasacaca (pronounced Wah-Sah-Caca) as the sixth best sauce in the world! Made from a base of avocado, this wickedly delicious savoury Venezuelan sauce can be eaten with absolutely everything. From dipping chips and topping grilled steak and seafood to elevating your regular schmegular avo on toast, guasacaca is the ultimate umami food buddy that’s been missing in your life.
Throw all ingredients in a blender and blend until the sauce is a smooth, creamy texture. Adjust salt and pepper to your liking.
PREP: 10m
MAKES 1.5 CUPS

• ½ bunch fresh coriander
½ ripe avocado, peeled and seeded (Hass is best)
• ½ medium red onion, roughly chopped
½ green capsicum, seeded and roughly chopped
• 2 garlic cloves
2 tbsp white vinegar
¼ cup water
2 tbsp vegetable oil (not olive oil)
• ¾ tsp salt
• ¼ tsp black pepper
Creating guasacaca is incredibly easy and it’s a staple in Venezuelan cuisine. Simply blend all the ingredients together!
Guasacaca may sound similar in ingredients to guacamole but they are vastly different in taste and texture. They are like cousins who look alike but have very different personalities.
Because it is blended, guasacaca has a way smoother consistency compared to the chunkier texture of guacamole.
Guasacaca also needs a generous amount of fresh coriander, way more than guacamole (coriander haters: I swear even you will love this sauce).
The tanginess of guasacaca comes from the vinegar, which guacamole doesn’t have. Vinegar is a signature ingredient in traditional Venezuelan guasacaca and its acidity is crucial to the distinctive taste.

Guasacaca includes green capsicum and omits Jalapeño or Serrano peppers (which are often found in guacamole).
Be cautious with the amount of onion in guasacaca, as too much will make it bitter. Stick to the recommended amount in the recipe ONLY!
Surprisingly, there’s a traditional version of Venezuelan guasacaca that
doesn’t include avocado (Guasacaca Venezolana sin aguacate). This one is from my town in Venezuela and it is INCREDIBLE, especially on steak/grilled meats. It might seem weird to leave out the avocado, but I promise you this version is equally as amazing! Give it a try.
You can prepare guasacaca in advance, but it needs to be stored in the refrigerator. It’s at its best when consumed within 24 to 48
hours. Nonetheless, it can last in the fridge for up to 5 days. The vinegar preserves its colour and freshness.
You can use yellow capsicum if you must, but the sauce won’t be the vibrant green.
You can also use red wine vinegar or apple cider vinegar, but again, the white vinegar is integral to flavour. It’s best just to stick to the recipe verbatim for best results!

+ Drunk ham
+ Tagliata, rucola and grana
+ Bacon-wrapped stuffed meatloaf
+ Duck vindaloo
+ Angamali pork roast
+ Miso-glazed pork ribs
+ Skewered chicken inasal
+ Corn fritters and pulled pork

+ Air Fryer lemongrass chicken and rice
+ Pasta, napoletana sauce with beef marrow
+ Pasta broccoli
+ Tatan’s baked fennel gratin
+ Baked rigatoni
+ Risotto and meatballs
+ Kim-chi stew
+ Pastirmali kuru fasulye
+ Bazella w ris
+ Lynnie’s family lasagna
+ Slow-cooked Indian goat curry
+ Orange-guajillo pulled pork
+ Lu Rou Fan (Taiwanese pork rice)
+ Grandma’s curried sausages
+ Sri Lankan potato curry
+ Pumpkin red cowpeas curry
+ Tehri rice


This ham has been the star of Christmas with family, a “Friendsmas” feast and it even won over my first boyfriend’s family. Plus, it makes so many leftovers that by the end of the week, you might swear off ham … at least until next year. For the best bang for your buck, Aldi hams are my go to ‒ big, delicious and won’t leave you living off instant noodles for the next month. This is a no-tools, no-fuss recipe that looks impressively fancy but is secretly super easy. So let’s give your drunk aunty and your judgy nanna something to talk about for the duration of lunch.
Priscilla Clonan
This recipe has been passed down from generation to generation to enjoy with family and friends on Christmas Day. Each granddaughter has their own unique twist on Margie’s (Grandma’s) ham … this is mine.
COOK: 2h 20m
PREP: 30m SERVES MANY
• 1 Australian half leg ham (on the bone)
1 x 400g can pineapple rings (keep the juice!)
1½ cups white wine
1 cup brown sugar
• 1 tbsp mustard powder
• Glacé cherries
• Toothpicks
Preheat oven to 250°C. Place the ham in a deep-sided dish with the skin on and cook for 20 minutes. Carefully remove the ham from the oven and peel off the skin (it will be hot!). Score the ham about 2cm deep in a diagonal pattern.
In a bowl, combine the juice from the can of pineapples and the wine. Pour the mixture over the ham. Reduce the oven temperature to 180°C and bake for 1½ hours, basting every 10 minutes for max juiciness. Remove the ham and set aside the remaining liquid.
Combine the reserved liquid from ham, brown sugar and mustard powder. Stir until combined, then spread the paste over the ham. Bake for another 10 minutes.
Add the finishing touches: Place pineapple slices on top of the ham. Place a glacé cherry in the middle of each pineapple slice. Secure everything with toothpicks Bake for a final 20 minutes. Voila!
Bragging rights are officially yours for the rest of the night.
PREP: 15m
Andres Costa
COOK: 10m
SERVES 2

Tagliata (shredded meat), rucola (rocket salad) and grana (Parmesan) with balsamic vinegar is a delish and easy combination. In Italy, you'll find this main dish listed under 'Secondi' on menus in virtually every restaurant. It truly shines in areas like the Po Valley ('Pianura Padana'), where they raise prized Chianina cattle, famous for producing the Florentine T-bone steak.
• T-bone steak (thick, at least 600g or over) or rib-eye to same size
• Salt and pepper, to taste
• Olive oil
• 1 bag rocket salad
Small block Parmesan
1 punnet cherry tomatoes, (any variety)
• Balsamic vinegar glaze
METHOD
Cook the steak for 5 minutes each side, including the bone side (it should be served medium). Set aside to rest before cutting the steak into strips.
Season the meat with a pinch of salt, drizzle of olive oil and cracked pepper. (If needed, the meat can be preheated in the microwave for a minute.)
Lay a bed of rocket on a platter dish. Carefully add the steak slices on the rocket and scatter some more rocket on top. Using a potato peeler, shave the Parmesan block and add to the dish. Cut the cherry tomatoes in half or leave them whole if they are too small.
Season again with a pinch of salt and drizzle of olive oil.
Finally, drizzle the balsamic glaze in a straight line or circle to make it look nice. Buon Appetito!


Broccoli rabe is Italian broccoli. If you cannot find rabe, spinach may be used. Parmesan cheese can be used instead of Pecorino Romano cheese. Mild smoked paprika and oregano can be used for extra seasoning. Store any leftovers in the fridge which can be enjoyed cold the next day. The meatloaf can be prepared the day before. Cover it with cling wrap and keep in the fridge. Cooking time is approximate. Please adjust to comply with your oven.
Annamaria Mavromatis
This delicious meatloaf was shared with family on special occasions. My mum later taught me how to make it and I, to this day, still make it for my family and my grandchildren love it. The dish brings back so many beautiful family memories.
• 2 cups dense bread (sourdough, ciabatta or continental)
2kg pork and veal mince
• ¼ garlic, chopped
• 1 medium onion, finely chopped
• 1 cup flat leaf parsley, chopped
1 cup Pecorino Romano cheese, grated
3 eggs
• 1 cup seasoned breadcrumbs
• 700g thin sliced ham
• 250g provolone cheese, thinly sliced
• 1½ cups cooked broccoli rabe, drained well and roughly chopped
• 500g bacon rashes
• Salt and pepper
• Roast vegetables or fresh seasonal greens, to serve
Place bread in a bowl and cover with water, leave for 5 mins and squeeze thoroughly. In a large bowl, mix the mince, soaked bread, garlic, onion, parsley, grated cheese, eggs and breadcrumbs. Season to taste. Mix until well combined.
Flatten the meat mixture onto parchment paper into a large rectangular shape, approx 6cm (¼ inch) thick. Place a layer of ham then a layer of provolone cheese and lastly a layer of the cooked broccoli rabe. Gently roll up meat mixture using the parchment paper to help you along. Wrap the bacon to cover the entire meatloaf. Place in a sprayed baking dish and bake in a 180°C fan forced or 200°C conventional oven for approx 1 hr 45 mins or until bacon is crispy and the meat is fully cooked. Rest for 15-20 mins before cutting into slices. .
COOK: 1h 45m
PREP: 20m SERVES 8-10
PREP: 15m
Michael Miller
COOK: 1h 15m
SERVES 6
I first visited India at the age of 10 and have been there dozens of times since. I have a strong affinity for the country, people and its cuisine. We try to make Mondays “curry night” in the Miller home, and I’m always trying to increase the repertoire. The duck vindaloo has become a firm favourite, with this particular recipe taken from Madhur Jaffrey's Ultimate Curry Bible.
The vindaloo has its origins in the state of Goa on the southwestern coast of India, and is a fusion of Indian and Portuguese culinary traditions. The Portuguese introduced this dish to Goa during their colonial rule, and over time, it was adapted by the local population to include Indian spices, such as cumin, mustard seeds, and chilli. While most people might think of beef as the prime meat in a vindaloo, the rich and gamey flavour of the duck pairs well with the robust, spicy sauce
½ tsp ground turmeric
1 tbsp ground cumin
• 1 tbsp red paprika
• 1 tbsp ground coriander
• 1 tsp cayenne pepper
• 1½ tsp garam masala
4 tbsp corn or peanut oil
2.7kg duck, jointed and partially skinned
• ½ tsp whole brown mustard seeds
• ¼ tsp whole fenugreek seeds
15 fresh curry leaves
2 medium brown onions, peeled and sliced into half rings
2 tbsp peeled and finely grated fresh ginger
• 10 medium cloves garlic, crushed to a pulp
• 2 medium tomatoes, peeled and chopped
120ml cider vinegar
• 1¾ tsp salt
• 1 tbsp sugar
Mix together the turmeric, cumin, paprika, coriander, cayenne pepper and garam masala in a small bowl and set aside.
Pour the oil into a large, widelidded pan and set over a medium-high heat. When the oil is hot, put in as many duck pieces, skin side down, as the pan will hold easily in a single layer. Lightly brown the duck, about 3-4 minutes per side and

remove to a bowl. Brown all the duck pieces this way and remove.
Add the mustard and fenugreek seeds to the hot fat and as soon as the mustard seeds start to pop, which will happen in a matter of seconds, put in the curry leaves and onions. Stir and fry them until the onion begins to brown at the edges. Now put
in the ginger and garlic. Stir and fry for a minute. Add the mixed spices from the small bowl and stir for 30 seconds. Add the tomatoes and cook, stirring, until they have softened, about 2-3 minutes. Scrape the bottom of the pan as you do this. Now add the browned duck pieces, the vinegar, salt, sugar and 475ml of water. Stir and bring to the boil.
Cover, reduce the heat to low, and cook gently for 45 minutes, lifting the lid occasionally to stir. Increase the heat to medium-low and simmer, partially covered, a bit more vigorously, stirring more frequently, for a further 30 minutes or until the duck is tender and the sauce has thickened slightly. Remove as much fat as possible before serving.
PREP: 40-50m
MARINATE: 4h
Jismon Elias
COOK: 30-40m
This dish is a testament to the vibrant culinary heritage of Angamali, Kerala. Tender cubes of pork are marinated in a symphony of aromatic spices, then slow-cooked to perfection. Caramelised onions and a rich spice blend form the flavourful base, while a final flourish of freshly ground black pepper adds the perfect finish. It’s a harmonious blend of traditional Angamali flavours, designed to tantalise the taste buds and evoke the warmth of a Kerala kitchen.
SERVES 6-8
Marinade
• 1kg pork shoulder, cut into 2.5cm (1-inch) cubes
2 tbsp Kashmiri chilli powder
• 1 tsp ground turmeric
• 2 tbsp ground coriander
• 2 tbsp Meat Masala
• 1 tbsp ginger-garlic paste (equal parts finely ground fresh ginger and garlic)
1 medium red onion, thinly sliced
• 1 tbsp coconut vinegar (or lime juice)
1 sprig fresh curry leaves
• Salt to taste
For the roast
• 3½ tbsp coconut oil
• 1 cinnamon stick, 7.5cm
A few fresh curry leaves
• 2 medium red onions, thinly sliced
8 cloves garlic, finely chopped
• 2 green chillies, slit lengthwise
• 2 tbsp Kashmiri chilli powder
• 1 tsp ground turmeric
2 tbsp ground coriander
2 tbsp Meat Masala
• 2 tsp freshly ground black pepper
For garnish (optional)
Fresh coriander leaves, chopped
Crispy fried curry leaves
Marinating the pork: In a large bowl, combine the pork cubes with Kashmiri chilli powder, turmeric, coriander, Meat Masala, ginger-garlic paste, red onion, coconut vinegar, curry leaves, and salt. Mix thoroughly, ensuring the pork is well-coated. Marinate for at least 1 hour, preferably 4 hours or overnight in the refrigerator, to allow the flavours to penetrate.
Partially cook the pork: Heat a wok or heavy-bottomed pan over medium heat. Add the marinated pork and cook, stirring occasionally, until the pork is about 80 per cent cooked. This step helps tenderise the meat and allows it to absorb the spices fully.
Creating the aromatic base: In a separate pan, heat 3 tbsp coconut oil over medium heat. Add the cinnamon stick and curry leaves, allowing them to release their aroma. Add the red onion, chopped garlic and green chillies. Sauté until the onions are golden and caramelised.
Building the spice foundation: Reduce the heat to low. Add the Kashmiri chilli powder, turmeric, coriander and Meat Masala. Sauté the spices until fragrant, ensuring they don’t burn.
Combining and simmering: Add the partially cooked pork to the pan with the spice mixture. Stir well, ensuring the pork is evenly coated. Add the remaining coconut oil, and continue to cook, stirring frequently, until the pork is tender and the flavours are well-integrated.
Peppercorn finish: Just before serving, stir in the freshly ground black pepper. This adds a pungent, aromatic finish to the dish.
Serving: Garnish with fresh coriander leaves and crispy curry leaves. Serve hot with appam (thin, bowl-shaped pancake with crispy edges and a soft centre), parotta (flaky, layered flatbread), or steamed rice.


Chilli powder: Adjust the amount of Kashmiri chilli powder to your desired level of heat.
Coconut vinegar/lime juice: The vinegar adds a tangy complexity. If you don’t have vinegar, lime juice is a suitable substitute.
Garlic: Add more garlic if you love it.
Garnish: The garnishes are optional but add a vibrant finish to the dish.
Salt: Adjust the amount of salt to your taste.


If you don’t have a garlic crusher or a microplane for the ginger, chop both as finely as you can or use a box grater to grate as finely as possible.
Ketjap Manis can be replaced with a mixture of dark soy or Tamari and palm sugar. Use equal quantities of soy and sugar. If you don't have palm sugar, use brown, raw or white sugar. Even maple syrup or golden syrup will work. Make sure you stir until sugar has dissolved in the soy sauce.
The marinade can be made into a dressing for salad or noodles. Add with some citrus juice: lime, lemon, orange or a combination. Add the juice to taste and some vegetable or peanut oil.
Alison Luscombe
Delicious sticky pork ribs, slow cooked until tender. Serve with your favourite Asian side dishes. Amazing with Chang’s Crispy Noodle Salad, noodles or rice.
One rack of baby back pork ribs (approximately 2kg)
Marinade
• 4 tbsp white miso
• 3 tbsp Ketjap Manis (sweet and sticky soy sauce)
• 2 heaped tsp crushed garlic
• 2 heaped tsp microplaned ginger
• Shaoxing Wine or dry sherry to taste (1 tbsp at least)
Asian sides
Wombok cabbage, shredded
• Carrot, grated
• Spring onions, sliced
• Coriander leaves, chopped
• Slivered almonds or peanuts, toasted Chang’s Crispy Noodle Salad
PREP: 10m
MARINATE: 6h SERVES 4-6
COOK: 1h 10m REST: 20m
Mix marinade ingredients together. Rub generously all over the ribs. Place ribs on a rack over an oven tray and let rest uncovered in the fridge for a minimum of 6 hours or overnight. If leaving overnight, lightly cover with plastic film.
Preheat a fan-forced oven to 180°C. Remove ribs from fridge, uncover and bring to room temperature. Place a small amount of water in the bottom of the tray, approximately ½ cup. Cover with a strip of baking paper and then foil over the top. Cook on the middle rack in the oven for 40 minutes.
Remove the foil and the baking paper, and cook another 20 minutes. Remove from the oven and let ribs rest for 20 minutes lightly covered. Slice into riblets and serve with Asian sides. If using Chang's Crispy Noodle Salad, use the packet dressing on the noodles and Asian sides, if you like.
Tip: This marinade is also delicious on pork or lamb chops, and even chicken pieces.
PREP: 30-45m
MARINATE: 2-4h
COOK: 30m
SERVES 4-5
Get ready for an Aussie-Filipino juicy, citrusy, sweet, smoky flavour bomb!
2kg chicken wings, wing tips removed (see Recipe Tips)
Annatto oil dipping sauce
• 1½ cups vegetable oil
• 2 tbsp Annatto powder
1 bay leaf
• 2 garlic cloves, crushed Marinade
1½ tbsp Annatto powder
• 2-3 garlic cloves, peeled
• ¼ cup coconut vinegar or rice wine vinegar
2 lemongrass roots (white part only)
• ¼ cup calamansi or lime juice
• 1 thumb-sized ginger, peeled
1 tsp onion powder
• ¼ cup packed brown sugar
½ cup water
• 1 cube chicken boullion
• 1 tsp smoked paprika
½ tsp light soy sauce
• 1 tsp salt
• ½ tsp white or black pepper
2 bay leaves
Vinegar dipping sauce
• ¼ coconut or rice wine vinegar ¼ cup water
• 2 tbsp brown sugar
• 2 cloves garlic, finely diced 1/4 small red onion, finely diced
• Squeeze of calamansi or lime juice
• Optional: few splashes of fish sauce, adjusted to preference
Optional: Sliced Thai or birdseye chilli (with/without seeds)
Garnish: Store bought or freshly fried garlic or shallots Assembly
• Bamboo skewers no less than 18cm in length
• 1-2 stalks of lemongrass for brushing marinade, white root crushed and roughly sliced
Combine the oil, annatto powder, bay leaf and garlic in a small pot. Cook on a medium heat for 5 mins or until the annatto powder is well dissolved. Remove from heat, allow to seep and when cool, strain. Combine vinegar dipping sauce ingredients in a bowl and set aside.
Blend all the marinade ingredients (except the bay leaves) in a food processor. In a large bowl or ziplock bag, combine the chicken wings, marinade and bay leaves. Mix to coat each chicken piece. Marinate in the fridge for 2-4 hours.
Soak the bamboo skewers in cold water to ensure they don't burn on the grill or oven. Remove the marinated chicken from the fridge and place each wing on a skewer.
Divide the annatto oil dipping sauce in half (reserve other half for a dipping sauce). Baste each side of the wing with the annatto oil prior to cooking. Preferably grill over charcoal, turning as needed, basting with the annatto oil and lemongrass ‘brush’.
Serve with jasmine rice topped with a spoon of annatto oil and fried garlic/ shallots on top. Serve with the vinegar dipping sauce and extra annatto oil.


This recipe calls for use of chicken wings (sans the wing tips) although traditionally cooked with chicken maryland or whole spatchcock/butterflied. To remove the wing tips, slice them off at the joint, then slice the skin between the drum and thigh, avoid slicing through the joint.
Skewered chicken inasal (wings or other pieces) is not commonly served in this manner but is reminiscent of many other Filipino skewered BBQ dishes often served at parties and gatherings, that are easily cooked and eaten. Annatto (Achuete) seeds or powder is the star ingredient of this dish and can be purchased from Asian grocers. It gives a distinctive mild smoky and sweet flavour that naturally coats the chicken with a signature golden hue. The powder is more readily available and is used for this recipe. Coconut vinegar lends to give the tangy flavour to the dish and can be found at Asian grocers. Rice wine vinegar can be used as a substitute and is more accessible. Calamansi is a small Filipino citrus that is a hybrid of kumquat and provides mandarin flavours in many Filipino dishes and sauces. Use fresh lime juice as an alternate.
PREP: 25m
Tanya Brabon
COOK: 8h
REST: 2h
Our recipe was developed during the team catch-up. Everyone nominated ingredients and AI-NewsGPT helped develop the basic recipe. I tested and added my own touches.
SERVES 4-6
1.4kg pork shoulder
• American mustard
Boars Night Out – White Lightning Double Garlic Butter
Rub
Lane’s BBQ Magic Dust
• 330ml Coke No Sugar
• Whole bottle of Three Threes BBQ Sauce
Saffron and corn fritters
Pinch of saffron
• 2 or 3 cups of fresh corn kernels, charred on a BBQ
• 200g Perfect Italiano Perfect Bakes Grated Cheese
• 3 eggs
2 cloves minced garlic
• 2 shallots, finely chopped
• 1 cup plain flour
1 tsp baking powder
• ¼ cup fresh chilli, finely chopped, slice another chilli to leave as garnish
• 1 tbsp Mingle Everything Bagel
Seasoning (must be Mingle Everything Bagel Seasoning)
• Olive oil
• 1 tbsp sour cream
Guacamole
• 3 ripe avocados
• Half a lemon, squeezed
1 or 2 cloves micro-grated or minced garlic
1 tsp garlic powder
• 2 tbsp ground cumin
1 tbsp sweet chilli sauce
• 1 cup coriander, chopped
• ½ cup Greek yoghurt
Coat the pork shoulder in the mustard and then heavily sprinkle over the garlic butter rub and the magic dust making sure everything is totally covered. Place the pork in the smoker on 120°C for about 4 hours or until you see a good amount of set bark on it.
Put the pork in an alfoil tray and pour in a bottle 330ml or can 375ml can of Coke No Sugar. Cover the tray and the pork tightly with foil. Put the pork back in the smoker for approximately 4 hours until the internal temperature probe is about 93°C and when putting the probe into the meat, it is tender. Remove the meat from the smoker and baste in the Three Three’s Smoky BBQ Sauce. Place in an esky for about 2 hours so it gradually drops in temperature and soaks in the BBQ sauce. Shred with two forks.
Corn fritters: Place the saffron into a small bowl with 2 tbsp water and let it steep for about 10 mins. In a large mixing bowl, combine corn kernels, cheese, eggs, water from the saffron, minced garlic and shallots. Add the flour, baking powder, finely chopped chilli and salt and pepper to taste. Mix until everything is combined and the batter is thick.
Pour olive oil into the medium pan, enough to coat the bottom of your pan. Make sure the pan is on a medium heat. Pour batter into the pan to the size of the fritter you want. You don’t want them too big or they won’t cook evenly. You only want them small to medium-sized. Cook for about 3-5 mins depending on the size of the fritter. You will see bubbles appearing in the batter when cooking. When you see quite a few bubbles on the surface flip the fritter to fry the other side. When cooked, remove from the pan and drain on paper towel.
Guacamole: De-shell the avocado flesh and mash in a bowl with the juice of half a lemon. With a microplane, grate 1 clove of garlic into the mix and add the garlic powder, spices, sweet chilli sauce and coriander. Mix in the Greek yoghurt and give it a really good stir, mashing more as you are mixing.
To serve: Place a cup of the pulled pork on a plate and place 2-3 (depending on the size and how hungry you are) fritters on top. Dollop a big spoonful of the guacamole on top of the fritters and then top with a dollop of sour cream or yoghurt, sliced chillies and coriander for decoration.


Who doesn’t love pulled pork? We have a smoker so I have done pulled pork in the smoker and it is amazing, but slow-cooked pork can be just as good and much less messing around with a slow-cooker. Instead of the Coke No Sugar I have used a tin of beer before and it is next level. I just prefer the taste of the Coke No Sugar. When my husband cooks it, he uses beer. I used a whole bottle of Smoky BBQ Sauce (I use Three Threes Smoky BBQ Sauce). Seriously, it is the only one I like. You can use frozen corn, tinned corn or oven-baked corn as an alternative to the BBQ charred but I like the taste and texture the BBQ corn gives the dish. You can’t get the same taste with frozen or tinned corn. Cheddar or Parmesan cheese can be used for the fritters but I just like the Perfect Bakes Cheese as it gives the fritters a bit more of a molten cheese texture with the mozzarella in the Perfect Bakes Cheese. In the guacamole, I like to use the Greek yoghurt as I feel it gives the dish a creamier taste. I have used fresh chilli instead of chilli flakes to give it an extra kick, but you can use chilli flakes instead. Coriander – some people love it and some people hate it. You can totally leave it out if you want or use parsley as a substitute.

Protein options: You can swap chicken thighs for chicken breasts if you're aiming for a leaner, higher-protein option. That said, I stick with thighs as they’re juicier and soak up the flavours beautifully.
Lemongrass prep: Make sure to finely dice the lemongrass for the best flavour infusion. Just a heads-up: lemongrass can burn slightly in the air fryer, so feel free to pick off any overly charred bits before serving.
Serving suggestion: Add a side of stir-fried or steamed greens like bok choy, spinach, or broccoli to round out the meal.
Nalina Tran
This is one of my go-to comfort meals – a protein-packed dish full of bold, vibrant Vietnamese flavours and infused with a lemongrass fragrance. I learned it from my mum, who always takes pride in marinating and chargrilling, but living in the city pushed me to adapt it for a faster, more flexible routine. It’s quick, nourishing and still holds that homemade warmth. Pair it with your favourite greens and some rice for a wholesome homecooked meal.
• 500g boneless chicken thighs
2 stems lemongrass, white part only, finely minced
• 2 cloves garlic, thinly sliced
• 1 small red onion, diced
1 tbsp brown sugar
1 tbsp fish sauce
1 tbsp soy sauce
• 1 tsp honey
• ½ tsp chicken salt to taste
Cooking oil spray
MARINATE: 2h
COOK: 25m
Marinate the chicken: In a bowl, combine the chicken thighs with the lemongrass, garlic, onion, brown sugar, fish sauce, soy sauce, honey, and chicken salt. Mix well to ensure the chicken is evenly coated. Cover and refrigerate for at least 2 hours, preferably overnight for deeper flavour.
Preheat your oven or air fryer to 200°C. Arrange the marinated chicken on a tray or in the air fryer basket. Lightly spray the chicken with oil to help it crisp up. Cook for 25 minutes approximately, or until golden brown and fully cooked through, flipping halfway if needed.
Serve hot with steamed white rice. Garnish with fresh herbs or sliced chilli if desired.
SERVES 3


Our Italian family live and breathe pasta, we hope you love this as much as we do!
‒ Recipe on next page.


Liana Columbro
PREP: 30m
COOK: 1h 30m
SERVES 4
Bone marrow, rich in collagen and nutrients, has long been valued for its health benefits. Incorporating marrow bones into Napoletana sauce enhances its depth and nutrition. As the sauce simmers, the marrow melts, infusing it with a rich, buttery flavour. After cooking, the bones are removed and the softened marrow can be spread on crusty bread, offering a luxurious accompaniment to the pasta. Dig in!
2 tbsp olive oil
500g beef marrow bones
• 1 small onion, finely chopped
• Salt
• 2 garlic gloves, finely chopped
½ celery stalk, sliced
1 small carrot, chopped
800g Mutti crushed tomatoes
• ¼ cup water
• 1 tsp chicken stock powder
• 1 tsp beef stock powder
1 whole small red hot chilli (optional)
• 2 parsley sprigs, whole
• 1 basil sprig, whole
• 500g pasta (tagliatelle)
Parmesan to serve with pasta
Crusty bread to serve with beef bone marrow
In a large pot on medium-high heat, add 1 tbsp oil and beef bones and sear until lightly brown on each side. Set aside in a bowl and prepare the Napoletana sauce.
Bring the pot to medium heat, add remaining oil and onion and lightly salt. Fry for 1 minute to soften but not brown. Add garlic, celery and carrot. Add crushed tomatoes, water, chicken and beef stock, chilli, parsley, basil and season. Bring to boil. Add in beef bones making sure they are fully submerged, then reduce to simmer on low for 1 hour until the bones are fully cooked through. The bone marrow will turn light brown and slightly translucent in colour and should be soft and gelatinous when cooked.

Bring a pot of salted water to boil. Add pasta and cook until al dente. Strain when ready. Serve the Napoletana sauce on the pasta and sprinkle with Parmesan to serve. Remove the beef bones, scoop out the marrow and spread on crusty bread, drizzled with Napoletana sauce, as a side to the pasta dish.

Originating from Naples in Southern Italy, Napoletana sauce, or sugo Napoletano, is a foundational tomato-based sauce for many Italian dishes. Traditionally, this sauce is slow-cooked with simple ingredients like tomatoes, garlic and basil, embodying the essence of cucina povera ‒ the 'poor kitchen'. Cucina povera emphasises resourcefulness and flavour, ‘cooking with what they had’ in the Italian village. This sauce serves as a base for various pasta dishes –Napoletana sauce with braised pork ribs, bolognese, slow-cooked beef ragu or meatballs. Different meat cuts can be added to the sauce as a form of protein. This recipe uses beef bone marrow as a resourceful way to make sure every part of the animal is utilised.
Optional ingredients. Our Malaysian friends have started to include this into their weekly school night dinner rotation. And they add crispy crushed prosciutto on top. Yum. Enjoy. Nonna would be proud.
PREP: 10m
Silvana Palmieri
COOK: 20m
SERVES 4
This recipe holds a special place in my heart. It's a simple and fast five-ingredient rustic pasta dish. It comes from my mum’s village in Calabria. My mum used to make it for her family and now I’m making it for my family.

• 2 medium/large broccoli heads, cut into florets and stems chopped evenly
• Salt and pepper
• 50ml extra virgin olive oil
4 garlic cloves (or 1 per person and 1 for the pot)
• 500g pasta (My family prefers short pasta ie. Penne, but you can use whichever pasta your family prefers)
• 75g grated pecorino or Parmigiano cheese

Cut off the broccoli florets, keeping their size roughly consistent. Pick off the leaves from the remaining stems, set aside. Peel/cut off the woody/hard skin from the stem. Chop stem into smaller even pieces. Wash broccoli thoroughly and strain water.
Bring 5 litres of water to the boil. Add salt. Add the broccoli to the rolling boiling water and cook broccoli for 3-4 minutes. On low heat, add a generous amount of olive oil (about 50ml) to a medium-sized pot or pan. Add crushed garlic and let simmer slowly ‒ do not burn. After 3-4 minutes, using a sieve, transfer the broccoli directly from the water pot to the oil pan. Keep ½ cup of pasta water for later (in case you need it). Mix and cover the broccoli in the delicious garlic and oil. You want some of the broccoli to break and mash up, so keep stirring and gently moving the broccoli. (Just don’t break all of it, you want some florets to remain in tack).
Bring the water pot back up to the boil and add the pasta. Remember to always follow the packet cooking instructions. Once the pasta is cooked, drain and add pasta to the broccoli pot. Add pepper and a generous amount of grated cheese to the pasta. If the pasta is too dry, slowly add small amounts (tablespoons at a time) of the pasta sauce to thicken the delicious sauce coating the pasta. Serve hot. Add more cheese and mix (because pasta always needs cheese).
PREP: 20m
COOK: 30-40m
SERVES 4-6
My mother is of French origin and often enjoyed this dish growing up in the countryside near Lyon. Her aunty (“Tatan”) would make it for her and when I visited as a child, her aunty made it for us. I was five and fussy, but devoured it! I now make it for my family, enjoying the special memories and embracing my mother’s heritage with home style French cooking that you don’t often see!
• 4 fennel (cut into quarters)
50g salted butter
4 rashers of bacon, diced
• 2 tbsp plain flour (approx)
• 2 cups chicken stock (approx)
• Gruyere cheese, grated
METHOD
Boil water in a medium-sized pan and place cut fennel in with a pinch of salt (depending on your preference, you can add more). Cook until soft, then drain. Set aside.
To make the sauce, sauté butter and diced bacon in a pan. Add flour slowly to make a roux, using a whisk is best here. Add chicken stock slowly and thicken. You can add more of the flour or stock as you see the consistency building up and thicken.
Place fennel in a baking dish and pour the sauce over the top, sprinkling with grated Gruyere cheese. Bake until crispy and golden, usually around 30 mins.
This dish is rich! It’s French after all. It has the same punch as a Tartiflette, so if you want to tone it down, add less butter and cheese.
Make it easier: If you want a really cheat version, just place the fennel in a dish and pour a tub of cream all over and top with some grated cheese.
Make it vegetarian: If you want more veggies, I sometimes add potato, too. And the bacon is optional.
How to serve: Best served with a roast – I enjoy it with pork because you can use the sauce as a gravy substitute.

Cheese: You can use a different cheese but Gruyere gives it an authentic flavour.

PREP: 10m
Kelly Baird
COOK: 1h 30m
SERVES 6
This recipe was given to my mum by my aunty after a dinner together one evening. It was forever known in our family from that day forward as “Aunty Nita’s spaghetti". It's what we called it as kids, but we only use rigatoni pasta. It consists of simple staple ingredients which make a tasty dish that can be eaten hot or cold by itself or with a simple salad. The recipe makes loads and is very family friendly.
• ¾ pkt rigatoni pasta
• Olive oil
• 3 cloves garlic, crushed (or measure with your heart)
• 3 tbsp tomato paste
• 1 x 400g can crushed tomatoes
500g pork mince
Salt and pepper
• Pinch of nutmeg
• 6 eggs
• 500ml milk
¼–½ cup grated Parmesan
Split into two baking dishes to reduce the cooking time. Freeze one portion for an easy weeknight dinner or to share with friends. Add diced carrots, diced zucchini, fresh basil and chilli flakes to up the vegetable count and add another depth of flavour.
Preheat your oven to 180°C (fan forced). Bring a pot of salted water to the boil and add the pasta. Follow packet instructions.
Add some olive oil to a pan over medium heat and lightly fry garlic and tomato paste. Once aromatic add tomato and stir to combine. Add pork mince and break up with mince masher. Season with salt, pepper and nutmeg. Simmer for 15 mins or until mince is cooked. Don’t allow mixture to reduce too greatly. Combine the eggs with milk and whisk. Add Parmesan and stir to combine.
Combine pasta, mince and egg mixture (it will appear quite a wet mixture ‒ trust the process). Transfer to a large oiled baking dish (lasagna) and sprinkle with more Parmesan. Bake for about 1 hour or until 'set' and golden on top.
Rachel Furolo
A much-loved dish from my childhood, that was coined by my mum Nicole. It’s a hearty warm hug in a bowl that is surprisingly uncommon outside our family.
PREP: 15m SERVES 8-10
Meatballs
300g pork mince
700g beef mince
4 eggs, beaten
• 1 cup grated Parmigiano Reggiano
½ cup milk
¼ cup chopped parsley
• 2 garlic cloves, finely chopped
• 1 tsp salt
¼–½ cup of breadcrumbs
Tomato sauce
• 2 tbs olive oil
• 2 garlic cloves, finely chopped
• 700ml bottle of tomato passata
1 x 400g can peeled tomatoes
COOK: 1h 15m
• ¼ cup tomato paste
1 cup water
Risotto
1.5L chicken stock
• 70g unsalted butter
• 1 tsp olive oil
• 1 brown onion, finely diced
1 cup arborio rice
Splash of white wine
• 1 cup mixed frozen vegetables (peas, corn, carrot)
• ½ cup Parmigiano Reggiano
To make the meatballs: Place the pork and beef into a large bowl and mix together. Add in beaten eggs, Parmigiano, milk, parsley, garlic
and salt. Mix until it’s all very well combined. Add breadcrumbs ‒ start with ¼ cup and mix together, seeing if the mixture holds so the balls will keep their shape. Add up to another ¼ cup if needed. Set aside.
Prepare the tomato sauce: Add olive oil and garlic to a large pot on medium heat. Cook garlic for 1-2 minutes (don’t let it brown) then add passata, tomatoes and tomato paste. Add the water and bring to the boil, then turn down heat to low. Place a bowl of warm water beside the pot to dampen your hands. Shape meat mixture into mediumsized balls, wetting your hands each time to get a smooth exterior. Gently drop each meatball into the sauce. Put lid on and cook for about 40-50 minutes, until sauce has thickened.
Risotto: Warm the stock in a small saucepan next to your main risotto pot. Place 50g butter and the olive oil into a deep pot on medium heat. Once melted, add onion and cook until translucent, around 5 minutes. Add the rice and stir, cooking for 1 minute. Add a splash of white wine to deglaze the pan and let it absorb. Start adding stock one ladle at a time and stir continuously as it starts to absorb. This is a time consuming but very worthy process, so be patient. You’ll notice the rice starts to thicken and become creamy and ‘risotto like’ after about 20-30 minutes but it can’t be rushed. Once all your stock has gone in, add frozen vegetables and cook for 5 minutes. Turn off heat but leave risotto on the stove, add in Parmesan and remaining butter, then stir to combine.
Risotto and meatballs: Serve meatballs on a bed of risotto. Drizzle with extra sauce if desired.


The pork and beef mixture makes for a softer, less rubbery consistency but one or the other can be used. Don’t skimp on arborio rice, other rice varieties won’t give you the same creamy texture. Good quality tomato passata and peeled tomatoes will make for a tastier sauce (Mutti is a good supermarket brand). Chicken stock can be substituted for vegetable or beef. Meatballs freeze incredibly well and can stay in the fridge for up to 3 months.

You can make this dish with tofu, chicken or beef, making it suitable for all diets. It’s healthy, low fat and very simple to prepare. You can easily control the spice level based on how much red chilli paste you add. It goes well over some rice ‒ serve with some white or brown rice from the rice cooker.
Justin Edwards
A delicious, spicy, umami stew that can be vegan, vegetarian or meat based ‒ easy to prepare and very tasty. This is my own take on a dish I discovered to make it a bit more Westernised and suitable for meal prep ‒ so you can make a few days worth at a time.
• Olive oil
• 250g kim-chi, chopped
• 1 onion, sliced
2 red capsicum, roughly chopped
2 carrots, diced
• diced celeriac or ½ cauliflower, cut into florets
• Other vegetables – you can also use green beans and fennel. It will taste good with just about any vegetable 250ml vegetable stock (can use cube)
1 tbsp Gochujang ‒ Korean red chilli paste (more to taste)
• 2 tbsp soy sauce (can use sweet soy)
• 400g tofu, chicken or beef
Heat a small amount of oil in a large saucepan or pot. Add kim-chi and onion and cook for 2-3 mins. Add capsicum, carrot, cauliflower and other vegetables of choice, cover and cook for 5-10 mins until carrot softens. Add stock, Gochujang, soy and chosen protein, mix well. Bring to boil, cover and simmer for 20-30 mins over low heat. Serve with some white or brown rice.
PREP: 15m SERVES 4
COOK: 40m
PREP: Soak beans overnight
Urun Tasci
COOK: 1h 15m
SERVES 4-6
Pastirmali kuru fasulye (Turkish white bean stew with beef pastrami) is a comforting and traditional Turkish stew made with white beans and savoury slices of pastırma ‒ a flavourful, air-dried cured beef. It is a very common dish in Turkish homes, especially in colder months. It’s typically served with fluffy şehriyeli pilav (rice pilaf with orzo) and pickles on the side, making it a satisfying and nostalgic meal. and simmer for about 35-40 mins, or until tender. Skim off any foam during cooking. Drain and set aside.
• 2 cups dried white beans (such as cannellini or navy beans)
2 tbsp olive oil
• 1 tbsp butter
• 1 large onion, finely chopped
• 1 tomato, diced
• 1 green capsicum, chopped
1 tbsp tomato paste
1 tsp sweet or hot red pepper paste (optional)
• 1 tsp paprika or hot chilli
Salt and black pepper, to taste Water
• 5-6 slices of pastırma (Turkish cured beef, you can use beef pastrami but make sure you dry it before using)
Turkish rice pilaf with orzo
• 1 cup medium-grain rice
2 tbsp butter
Olive oil
• 2 tbsp orzo
• 2 cups hot chicken/beef broth
• Salt to taste
Rinse the beans and soak them in water overnight. This softens them and reduces cooking time. If you’re in a rush, do a quick soak by boiling them for 5 minutes, then leaving them covered for 1 hour.
Drain the soaked beans, place them in a pot, and add enough water to cover them by about 2 inches. Bring to a boil, then lower the heat
In a large pot, heat the olive oil and butter. Add the onion and sauté until soft. Stir in the tomato and capsicum. Cook for a few minutes until softened. Add tomato paste and (if using) red pepper paste. Sauté for 2-3 mins to deepen the flavour. Season with paprika, salt, and black pepper. Add the cooked beans to the pot. Stir well to coat everything evenly, then add just enough water to cover the beans. Simmer gently for 15-20 mins. Place the slices of pastırma on top. Cover the pot and cook for another 10 mins so the pastırma flavours infuse the stew.
Turkish rice pilaf: Wash the rice in cold water until the water runs clear.
In case you don’t want to deal with the bean soaking you can use cans of cannellini beans, however, I strongly recommend using dry beans.
Turkish pastirma can be found in Middle Eastern or Turkish grocery stores. If you can’t find it, feel free to use beef pastrami.

Drain well. In a medium saucepan, melt the butter with olive oil. Add the orzo and toast until golden, stirring constantly. Add the drained rice and stir for a couple of minutes to coat it well with the butter and oil. Pour in the hot broth or water, season with salt, and bring to a boil. Then lower the heat, cover, and let it simmer for about 12–15 mins, or
If you want to make a vegan/vegetarian version, simply remove the pastrami, replace butter with vegetable or olive oil and replace the chicken/beef stock with vegetable stock.
until all the liquid is absorbed. Once cooked, turn off the heat and let the rice rest, covered, for 10 mins. Fluff gently with a fork before serving. Spoon a generous portion of pilaf onto one side of the plate or into a shallow bowl. Ladle the pastırmalı kuru fasulye right next to the pilaf or slightly overlapping it. Let some of that rich tomato broth soak into
the rice. That’s the magic bite!
Serve with a side of Turşu (pickled veggies), cacık (yoghurt-cucumber dip), or just plain thick yoghurt for balance. In many homes, this is a one-plate meal, but if you’re hosting, you can serve the pilaf and the bean stew in separate bowls and let everyone help themselves.

Lillian Saleh
This recipe is a family favourite. Passed down from our mum Chahide, who was taught it by her mum growing up in their small village in the mountains of north Lebanon. Today, it's a winter favourite. Quick, easy and such a hearty, comforting dish.
PREP: 20m SERVES 4
• 2 tbsp olive oil
1 onion, diced
500g chicken breast, diced, or meat of choice (diced beef or mince also works well)
500g baby frozen peas
• 2 tbsp tomato paste
• 750ml water
• Salt and pepper, to taste
Lebanese rice
2 tbsp olive oil
20g butter
• 2 handfuls vermicelli noodles
• 2 cups long grain rice, washed
• Pinch of salt
COOK: 20m
Heat olive oil in medium pot and add onion. Cook until golden. Add chicken and cook until seared. Add peas and stir. Mix tomato paste with the water and pour over chicken and peas. Stir and bring to a gentle simmer for 20 mins.
Meanwhile, to make the Lebanese rice, in a saucepan add the olive oil and butter. Add vermicelli noodles and stir until brown (but not burnt). Add the rice and a pinch of salt. Stir, bring to boil and then simmer for 18 mins on medium heat.
To plate, add rice to a bowl and add stew on top. Sahtan!
PREP: 30-45m
Monique Witten
COOK: 2h 15m
This was my Nan’s recipe originally and she passed the recipe onto my mum (Lynnie). Now I make it for my family. This recipe easily feeds 12 people depending on the portion size. A great dish to cook for family gatherings and can be cooked ahead of time.
Meat sauce
• ½ cup olive oil
2 large onions, diced
4 cloves of garlic, crushed
• 1kg beef mince, high quality
• 500g tomato paste
• 4 x 410g crushed or chopped tinned tomatoes
• 2 tbsp fresh or dried parsley
• 1½ tbsp dried oregano
• 1½ tbsp dried basil
• 1½ tablespoon white sugar
4-5 drops Tabasco sauce
Salt and pepper, to taste
Cheese filling
• 750g full cream ricotta (fresh from the deli) or cream style cottage cheese, drained
• ⅔ cup freshly grated Parmesan
• 2 x lightly beaten eggs
• ¼ cup chopped fresh parsley
Salt and pepper to taste
Bechamel sauce
• 125g of butter
• 4 tbsp of plain flour
• 3 cups of milk, full cream
• 1 x jar of thickened cream
¼ cup of Parmesan cheese
Cornflour (optional)
Other ingredients
• 2 x 250g San Remo large instant curly lasagna
Fresh or ground nutmeg
Additional Parmesan cheese
For the meat sauce: Heat the olive oil in a large pot over medium heat. Add the onion and garlic. Add the mince, breaking it up. Once browned add the rest of the meat sauce ingredients and let it simmer for an hour to enhance the flavour.
For the cheese filling: Combine all ingredients in a bowl and mix well by hand or with a beater on low speed. Set aside.


For the bechamel sauce: Melt the butter in a pot over low heat. Remove from the heat and then add a splash of water (1 tablespoon) to cool the butter down. Blend in the flour one tablespoon at a time to make a smooth paste. Gradually add in 3 cups of milk, stirring as you pour in, then add the thickened cream.
Put the pot back on heat on a low simmer, stirring continuously, until the sauce thickens. Remove from
heat again and add the Parmesan cheese and stir. If the texture is too thin, thicken gradually with some cornflour. Tip: When using cornflour, add to a separate bowl first and mix a tablespoon of cornflour with a dash of milk to make a thick paste. Then add the paste to the sauce and bring back to the boil. Set the bechamel sauce aside.
Assemble the lasagna: Pour half the meat sauce into a large rectangular baking dish. Cover the meat sauce with a layer of lasagna sheets. Cover the layer of lasagna sheets with the cheese filling. Add another layer of
lasagna sheets and top with cheese filling. Be generous with the lasagna sheets – break up pieces if need be to fill any gaps to ensure all meat/ cheese sauce is covered. Top with remaining meat sauce. Cover meat sauce completely with the bechamel sauce. Then sprinkle with some Parmesan cheese and ground or freshly grated nutmeg to finish.
Bake in a moderate oven on 165°C fan forced for 1 hour or more until lasagna is cooked soft. Depending on the time of day, pour yourself a glass of wine or make a cuppa tea. Relax and enjoy. Buon Appetito.
PREP: 20m
Nivi Palta
COOK: 3h
SERVES 4
This is one of my all-time favourite curries, a cherished recipe from my mum with a modern twist to suit busy professionals like myself ‒ juggling work, home and kids all at once. Traditionally, this dish is slow-cooked for three hours in a heavy-based pot over low heat on a gas stove. However, since moving from India 13 years ago, I’ve adapted it to the oven (so while it’s cooking I can utilise my time doing other things), treating it like a slow roast infused with rich Indian spices.
4-5 tomatoes (you could also use a can of Coles Italian)
• 8 cloves garlic
• 2 inches fresh ginger
3 tbsp neutral oil or Ghee
1kg goat meat (you could also use lamb or beef)
• 4 medium red onions, chopped
• 1 tbsp ground coriander
• 2 tsp garam masala
• Salt to taste
• ¼ tsp chilli powder to taste
3-4 cups warm water or chicken/beef stock
• Fresh coriander stems
Garam masala
• 4 black cardamom
• 5 green cardamom
• ½ inch cinnamon stick
15 black peppercorns
4 cloves
To make the tomato paste: To a blender, add tomatoes, garlic and ginger. Puree to a smooth paste and set aside.
To make garam masala: To a grinding blender, add all the spices and ground to a fine powder.
Heat a pan on high heat and add a tbsp of neutral oil or Ghee. Sear the meat pieces with little salt and ½ tsp of the garam masala mix.
Preparing the gravy: Heat a pan on medium heat with a tbsp of neutral oil or Ghee. Once hot, add chopped onions and saute until golden. Once onions are golden, add the coriander, garam masala, salt and chilli (if using it) and saute for 1-2 minutes. Add the prepared tomato paste, and let it cook on low to medium heat until it releases oil. This may take 5-7 minutes. Keep stirring to avoid sticking to the pan. Once it releases oil, turn off the heat. Take a deep baking dish, add the seared meat and the gravy and mix well. Add 3-4 cups of water or chicken/beef stock and combine. Add tender coriander stems and mix it well. Seal the dish using aluminium foil. Cook in a fan-forced oven at 180°C for 3 hours. Serve hot with roti or steamed rice.

Using the right cut of meat is important ‒ don’t go for the curry cut. Go to an Indian/Pakistani butcher and ask for the whole goat leg. Ask them to cut that into curry-size pieces. Usually a leg will weigh approximately 2kg so if you don’t want that much you could cook one half and freeze the other half to cook another day. If you prefer boneless then add chicken/beef stock cube to the gravy. Searing the meat on high heat will ensure it stays juicy. If refrigerated or frozen, bring meat to room temperature before cooking.

PREP: 30m
Sean Callinan
COOK: 7-9h
SERVES 6-8
This recipe combines the sweetness of navel oranges with the flavoursome guajillo chili. Celebrate Day of the Dead with the ultimate pulled pork dish.
I was born in Los Angeles and raised between California and New Zealand. My passion for Mexican food was shaped by my formative years in the beach cities of Southern California, a sprawling bi-lingual metropolis with a 48 per cent Latino population. From its taco truck culture to gourmet five-star fusion, the region is home to some of the freshest and most diverse Mexican food on the planet. Frequent family holidays to Baja in the '80s ignited a passion for Mexican street food, born in the dusty streets of downtown Ensenada and lobster shacks on the cliffs at Puerto Nuevo. Border traffic provided ample opportunity to watch human blow-torchers spray huge jets of fire from their mouths in the Tijuana traffic while munching on piping hot churros sold through the car window. These trips formed the backbone of an enduring love for Mexico, its people and the cuisine of Southern California and Northern Baja.

• 1-1½ kg pork shoulder roast
• 2 cups fresh orange juice
• 1½ cups beef stock
1 can (400ml) Popolo pulped tomatoes
• 6 dried guajillo chilies, seeded
• ½ tbsp lemon juice
1 tbsp brown sugar
3 tbsp tomato paste
• Salt and pepper
• 4-6 cloves garlic, depending on taste
½ cup fresh oregano
Optional
• ½ cup of fresh coriander, chopped and stirred through 5 minutes before serving.
• If you can’t find dried guajillo, substitute for dried chipotle ‒ although the flavour will be more smoky.
Use 3 tbsp of dried oregano if you can’t find fresh.

Oil the pork roast, season and sear on all sides until golden brown. Into the base of a slow-cooker, pour in the orange juice, stock, can of tomatoes,
whole de-seeded chillies, lemon juice, sugar and tomato paste. Add salt, pepper and crushed garlic to the mixture and stir thoroughly. Place the pork in the middle of the slow cooker and baste in the liquid. Throw a good handful of fresh oregano over the top of the meat, turn onto a low heat and cook for about 7-9 hours. An hour before you are ready to serve, grab a couple of forks and shred the pork. Remove any rind, chilli and oregano sprigs remaining and cook for a further 60 minutes, letting the meat absorb the liquid. Serve with corn tortillas, fresh crumbled cheddar, Pico de Gallo and crunchy lettuce.
PREP: 20m
REST: 2-3h
Eva Su
COOK: 1h 45m
2

• 1kg pork belly (with skin), 3 strips
2 boiled eggs
• 3 shallots, finely chopped
• 3 garlic cloves, finely chopped
• 1 tbsp brown sugar
1 tbsp rock sugar
2 small rice bowls soy sauce
• 1 small rice bowl rice wine
• 1 tsp white pepper
• 1 tsp five-spice
• 1 star anise
2 bay leaves
Rice, to serve
• Steamed Asian greens, to serve (optional)
Lu Rou Fan is one of the most authentic Taiwanese dishes. This simple yet delicious meal is a collective memory for Taiwanese people.

Hand-chopped pork makes a far superior Lu Rou Fan than ground pork. Sharpen your knife before cutting or freeze the pork belly for about an hour until slightly firm for easier slicing. First cut into 1cm thick slices, then into strips. You can steam the eggs in a rice cooker ‒ they can be braised together with the pork.
Heat a pan (no oil needed), spread the pork belly evenly to sear. Stirfry until the meat turns white and releases a milky broth ‒ keep stirfrying or pour it out to remove the porky smell. Continue frying to render clear pork fat. Add the chopped shallots and stir until fragrant, then add the garlic and stir-fry together. Push the meat to
the side, add both types of sugar to the centre. Heat until it melts and bubbles into caramel, then mix the pork in to coat evenly. The brown sugar gives the meat a richer colour ‒ this step is key to achieving that glossy, appetising look. Pour in soy sauce and stir to bring out its aroma, then add some water to begin simmering. This layering enhances the flavour. Splash in the rice wine, transfer to a deeper pot, add water until the pork is fully submerged. Add white pepper, five-spice, star anise, bay leaves, and the boiled eggs. Once it boils, reduce to low heat and simmer for 1 hour.
Note: Soy sauce saltiness varies ‒ taste as you go. Too sweet?

Add soy sauce. Too salty? Add sugar or water to adjust. Once the meat is richly coloured, turn up the heat to reduce the sauce until it becomes thick, glossy, and amber-like ‒ then it’s done.
Don’t eat it right away ‒ let the whole pot rest for 2–3 hours, or refrigerate overnight. Resting allows the flavours to deepen and improves the taste. Serve with rice and steamed Asian greens.
For a proper Lu Rou Fan (braised pork rice), use pork belly with skin ‒ it’s the skin that gives it that rich, sticky gelatinous texture.
Joshua Slade
A nostalgic twist on a classic, this comforting dish takes me back to visiting my grandma’s and eating dinner with the family on an iconic patterned tablecloth with lace edges. Easy to make, this is a classic winter warmer that stores and freezes well. While not tied to any specific cultural tradition, the dish embodies visiting grandma for me . A tradition of weekly visits to the grandparents, the passing down of recipes and the culinary legacy that connects family members across time (even if it’s just cheap sausages in sauce).
PREP: 10m
• 600g beef chipolatas
• 3 tbsp butter
• 1 large onion, finely diced
1 tsp garlic, minced
2 tbsp Patak’s Korma Paste
• 3 tbsp flour
• Hot water, as needed
• 1 chicken stock cube
• 1 squirt tomato sauce
1 dash Worcestershire sauce
1 heaped tbsp apricot jam
• ½ cup of sultanas (optional)
• ½ lemon, juiced
• 150ml pure cream (add to taste) Basmati rice, for serving
COOK: 30m
In a large pan, cook the sausages over low heat for about 10-15 minutes, turning occasionally until fully cooked and browned. Remove from pan and set aside. In the same pan, melt the butter over medium heat. Add the finely diced onion and minced garlic. Sauté until the onion is translucent and fragrant. Add the korma paste to the pan and stir for a minute or two to let it bloom. Sprinkle the flour over the onion mixture and stir well. Gradually add small amounts of boiling water, stirring constantly to create a smooth sauce. The sauce should stick to the back of your spoon and not have lumps of flour. Once the sauce starts to thicken, add the
SERVES 6
chicken stock cube and stir until dissolved. Add a squirt of tomato sauce, a dash of Worcestershire sauce, and a heaped tablespoon of apricot jam. Stir to combine. Cut the cooked sausages into bite-sized pieces and add them to the sauce. Add sultanas if using. Squeeze in the juice of half a lemon and stir. Pour in about 150ml of cream, adjusting the amount to achieve your desired sauce consistency. Remember not to thin the sauce too much. Cover the pan with a lid and let the dish simmer gently while you cook the basmati rice according to package instructions. Serve the curried sausages over a bed of fluffy basmati rice.


While not Grandma’s recipe, for a richer flavour you could try using a mix of beef and pork sausages. Adjust the amount of cream to your liking but be careful not to thin the sauce too much. You can add vegetables like carrots, pumpkin, peas, or celery. It is worth taking the time to cook the sausages slowly and on low heat, so the sausage casing doesn’t burn for a better texture. Standard sausages are fine. While traditional recipes call for Keen’s curry powder, I do recommend the Patak’s Korma Paste or any korma paste of your choice for this recipe. This dish is mild with no heat in it so if you wanted to spice it up you could explore using a spicier curry paste like a vindaloo paste. While some of the measurements lack specificity, it carries the true nature of making this with my grandma which is to measure with your heart. This is one of those meals that is simply better the next day. If you are adding sultanas they will absorb the moisture in the dish and swell into sweet little flavour explosions.

If you’re looking for protein, you can substitute this with chicken (thighs or breast) and it tastes just as good. Adjust the spice levels as you wish ‒ you’ll need at least a little curry powder to get the flavour, but you can always add more coconut milk for a milder taste. When I’m in a rush I substitute the coconut milk with just normal milk (skim or full fat) ‒ I can’t tell the difference! Best served with rice, daal, yoghurt and papadums. You can get papadums at Coles or Woolworths. Place 3 at a time in the microwave for 30 seconds, turning over halfway through. If you can’t find curry leaves, you can omit them.
Yokini Carlson
Like many Sri Lankan mothers, my mum never had a recipe for her amazing curries, so my husband and I are preserving her vegetarian meals in "Cooking with Amma” classes.
• 2 tbsp oil
• 1 tsp mustard seeds
1 tsp fennel seeds
1 onion, diced
• 2 potatoes, peeled and diced
• 1 curry leaf
• 1 tbsp salt
• Hot water
2 tbsp curry powder
2 tbsp coconut milk
• Rice, to serve
Turn wok on low heat and add oil, mustard seeds, fennel seeds and onion and cook for 5 mins or until translucent. Add the potato, curry leaf and salt and fry for a few minutes. Cover the potatoes with hot water, add the curry powder and stir to mix in.
Turn wok to medium heat and cover with lid. After 5 mins check the water level. If potatoes aren’t cooked but water has evaporated, add more water and put lid back on. After 5-7 minutes water will have fully evaporated and potato cooked. Then add coconut milk and a little more hot water if needed. If too watery, keep on low heat to cook a bit. Taste test and add milk, salt or water as needed. Serve with a bowl of rice, daal, yoghurt and papadums, or just with rice!
PREP: 10m SERVES 4
COOK: 20m
PREP: 15-20m
Priyanka Jacob
COOK: 25-30m
I love the sweet flavour of this curry. It’s great because it combines vegetables and protein in one dish and the pumpkin keeps my stomach feeling light and good. I enjoy it the most with rice. This curry is inspired by a traditional dish made during the Onam festival.
Onam is a vibrant festival in Kerala celebrated with the grand feast known as “Onam Sadya”, featuring more than 20 to 30 vegetarian dishes served on banana leaves. Among these is Pumpkin Ellissery, a flavourful curry that combines pumpkin, coconut and spices.
Inspired by this traditional dish, the Onam version has less gravy and more coconut, but my mother tweaked it a bit to make it lighter and add her personal touch. She made this delicious curry for me when she visited me in Australia and now it’s a weekly staple for me. I can even enjoy it on its own!
¾ cup red cowpeas (red lobia), washed well
• 2 cups pumpkin, diced
Salt to taste
½ tsp ground turmeric
• ½ cup grated coconut
• 15-20 curry leaves
• ½ tsp fennel seeds
• ½ tsp cumin seeds
1 green chilli, slit
2 tbsp oil (coconut oil preferred)
½ tsp mustard seeds
• 2 medium dried red chillies, halved
2 shallots, finely chopped
3-4 cloves garlic, minced (optional)
• ¼ cup tamarind water, strained from cleaned tamarind
• 1 tsp Desi Ghee or butter, (optional)
Pressure cooking: Add red cowpeas and pumpkin to a pressure cooker. Pour in enough water to cover them, plus a little extra. Add a pinch of salt and turmeric. Stir well. Close the lid and cook on low flame until 2 whistles. Once done, allow the pressure to release naturally.
Open and check: The cowpeas should be soft, and the pumpkin should be mashable.

For a sweeter flavour, add jaggery powder during 'Final simmering' step to enhance the natural sweetness of the pumpkin.
For a stronger garlic flavour, add minced garlic during 'Tempering and cooking' step to get a rich bite in the curry.
These additions complement the natural flavours of the pumpkin and spices, giving the dish a delightful balance.
Blending the coconut mixture: In a blender/mixer, blend the grated coconut, 10 curry leaves, fennel seeds, and cumin seeds with a little water. Add green chilli and blend again into a smooth paste.
Tempering and cooking: In a separate pan, heat coconut oil. Add mustard seeds and let them splutter. Add remaining 10 curry leaves, dried red chillies and shallots. Sauté until the shallots turn golden. Add the
blended coconut mixture to this and stir for a few minutes. Take a spoonful of the cooked pumpkincowpeas mixture from the pressure cooker and mix it into the pan. Stir well and cook for 1-2 minutes.
Final simmering: Transfer everything back into the pressure cooker and bring it to a low flame. Using a spoon, stir well so that almost ¾ of the cooked pumpkin is almost smashed to create a thick and creamy
consistency. If the curry is too thick, add hot water to adjust consistency. Add the strained tamarind water and let it boil for 5 minutes. Finally, add Desi Ghee or butter and turn off the flame.
Serving: Let the curry rest for a few minutes before serving. Stir well before transferring into a bowl or plate. Enjoy with steamed rice, chapati, or on its own!
PREP: 10m
COOK: 30m
SERVES 2-3
Tehri, a vegetarian rice dish, is believed to have originated in the Awadh region of India, specifically for Hindu bookkeepers in the courts of the Nawabs, as a variation of biryani. Tehri is a beautiful, aromatic, easy one-pot dish. The mix of flavours, spices and vegetables makes it both comforting and satisfying. It's my personal favourite because it reminds me of the summer and winter vacation days when Mum didn't have to spend hours cooking. This one-pot dish would become the hero of the evening accompanied with yoghurt or vegetable soup or maybe drinks for adults. Tehri is so versatile that you can really make it your own. You can keep it simple with just vegetables or add protein like tofu chunks or paneer to make it heartier. Adding some raita, a salad, or even a crispy papadum on the side can elevate the dish and make it feel extra special.
• 1 cup basmati rice
• 1½ tbsp olive oil or Ghee
½ tsp cumin seeds
1 inch cinnamon stick
1 bay leaf
• Dried red chilli to taste
• 2-3 cloves
• 2-3 green cardamom
1 cup finely chopped onion
1½ tbsp garlic, minced
• 1½ tsp ginger, minced
• 1 green chilli (optional)
• ½ tsp ground turmeric
• 1 tsp ground coriander
1 tsp salt
1 large potato, cubed
• ½ cup peas
2 carrots, chopped
100g cauliflower florets
• 2 cups water
Wash the rice until water runs clear. Now soak the rice for approx 8-10 minutes. Add oil or Ghee in a large heavy-based pan and let it heat up. Add cumin seeds, cinnamon stick, bay leaf, dried red chilli, cloves and cardamom. I personally add them in this order as all whole spices have a specific way of releasing aroma and this order results in maximum output. The moment those whole spices hit the hot oil or Ghee, the aroma fills the kitchen and sets the stage for the whole dish. Let the cumin seeds crackle and then add finely chopped onion, minced
ginger, minced garlic and slit green chilli (optional). Once the onion softens ‒ add turmeric, coriander and salt. Mix everything well. Then add the potato, peas, carrot and cauliflower. Mix again and fry veggies on medium flame for approx 2-3 mins.
Now drain the rice and add rice to the pot. Give it a good mix ‒ don’t overmix or soaked grains will break and you will not get a long grain. Now add 2 cups of water. Cover the pot with lid and cook for approx 1520 mins on medium heat (until the time water disappears from the top of the rice). Covering the pot and cooking on a medium heat is key!
This allows the rice to cook gently, absorbing all the flavours from the spices and vegetables while the steam helps it become perfectly fluffy. When the water disappears from the top of the rice, you know it’s almost done and the grains will be tender and aromatic. It’s always satisfying when you lift the lid and see the rice cooked to perfection, with all those lovely spices mixed in.
The last few minutes are when the magic really happens! Fluff the rice using a fork. Serve hot with a drizzle of melted butter or Ghee, Greek yoghurt or raita, some pickle and salad. The aroma and the anticipation of that first bite are enough to make anyone’s mouth water. There’s something so comforting about this dish ... It’s hard to resist!


Soak rice in water: Soaking the rice for 10 minutes before cooking helps release some of the starch, making the grains fluffier and allowing them to absorb the flavours better. It definitely adds to the overall aroma and taste of the Tehri.
Sourcing: The spice sections at Coles and Woolworths usually have everything you need, from cumin and coriander to cardamom and turmeric. The beauty of this recipe is to spice it with both whole spices and basic ground spices. For best results: Using a heavy-based pot ensures even heat distribution, preventing the rice from burning at the bottom while the rest of it cooks. This also helps retain moisture, keeping the Tehri soft.

+ Kourabiethes (Greek shortbread)
+ Vanillekipferl (Austrian shortbread)
+ Supercharged banana bread
+ German plum cake
+ Brigadeiro
+ Struffoli
+ Polvoron (Filipino shortbread)
IN THE MOOD FOR SOMETHING SWEET

+ Bastani Sonnati (Persian saffron ice-cream)
+ Matcha warabi mochi
+ Power-packed protein truffles
+ Kanji (Indian fermented drink)


Olga Bellette
These biscuits were always in the pantry while growing up. My mother still makes them using her 1970s Kenwood Mixer. Mum wrote it out in English to share with her friends from other nationalities who she attended English language classes with in the '80s.
3 cups unsalted butter
• 1¼ cups icing sugar
• 2 egg yolks
• 3 tbsp brandy
• 2 tbsp milk
3 sachets vanilla sugar
1½ cups crushed roasted almonds
• 1 tsp baking powder
• 9 cups flour (half self-raising, half plain
4 Roses flour)
PREP: 45m
COOK: 15m
Beat the butter until soft, add the icing sugar. Beat well for about 30 minutes. Add the egg yolks, brandy, milk, vanilla, almonds and baking powder. Reduce the speed and slowly add the flour until mixture is right consistency ‒ soft enough to create shapes. Use cookie cutters to create shapes. Cook at 180°C on the bottom shelf of oven for 10 minutes. Then move to top shelf for another 5 minutes. Coat with icing sugar.
MAKES 73
PREP: 30m
FRIDGE: 1h
Lisa Harries
COOK: 10-12m
MAKES 40
AUSTRIAN RECIPE HOMEMADE
I learnt how to bake from a great aunt who had migrated from Austria in the '50s. Her home always had some kind of Kuchen (cake) or array of homemade biscuits. Though this recipe is traditionally a Christmas recipe, we pretty much had them year round. They were always served when guests came to visit, a morning or afternoon tea wasn’t complete without them.
Making them together was always as much of the experience as sharing them at the table.
For the dough
• 210g unsalted butter
250g plain flour
70g icing sugar
• 100g almond meal
Topping
• 2 heaped tbsp icing sugar
• 2 heaped tbsp caster sugar
Mix all the dough ingredients in a large bowl to create a shortcrust dough. Split in half and roll each segment of dough into a ball. Wrap in cling film and refrigerate for one hour.
Preheat oven to 200°C. Line a couple of baking trays with baking paper. Break walnut-sized pieces of the dough and roll into a little log about the size of your little finger. Bend into a crescent shape. Repeat until the dough is used up. Place the crescents on the baking tray, keeping a little distance between as they will spread a little. Bake in the oven for around 10 mins or until they turn a light brown colour.
Once cooked, and still warm, combine the icing sugar and the caster sugar in a bowl and mix well. Gently toss the biscuits in the sugar mix and place on a rack to cool. Another method is to sprinkle the sugars over the biscuits with a sieve. Share with loved ones.
Any leftovers can be stored in an airtight container for a week or so, but I find that they are always eaten fairly quickly!
No cookie cutters required. Great to make with children.
Some recipes include 1 egg, however without provides a smoother shortbread experience.

I usually leave honey out (or replace with extra mashed banana) but feel free to leave in if you like it sweeter.
You can substitute the variety of seeds with anything you have on hand (ie: nuts, sultanas, frozen berries etc).
This banana bread is nice warmed/toasted and served with Greek yoghurt, or coconut yoghurt and berries!
I slice the entire loaf, wrap separately and freeze!

Sharlee Murray
I love cooking with (and for) my daughter. This nutritious twist on a classic is a favourite in our house. Packed with veggies and wholesome ingredients, it’s a quick and easy win for both my busy toddler and me, perfect for snacks on the go or a healthy anytime treat with a cuppa!
¼ cup melted coconut oil or extravirgin olive oil
• ¼ cup honey
2 eggs
4 mashed ripe bananas
• ¼ cup milk
• 1 tsp baking soda (not baking powder)
• 1 tsp vanilla extract
• Pinch of salt
½ tsp ground cinnamon
1 cup wholemeal plain flour
• ¾ cups wholemeal spelt flour
• 1 zucchini, grated
• 1 carrot, grated
2 tbsp chia seeds
3 tbsp sunflower seeds
2 tbsp hemp seeds
• 3 tbsp pumpkin seeds
PREP: 10m
COOK: 50m
Preheat oven to 165°C and line a loaf pan with baking paper. In a large bowl, beat the oil and honey together with a whisk. Add the eggs and beat well, then whisk in the mashed bananas and milk. If your coconut oil solidifies on contact with cold ingredients, warm for 10 seconds in the microwave. Add baking soda, vanilla, salt and cinnamon, and whisk to blend. Stir in the flours, just until combined. Fold in grated zucchini and carrot, and the seed mix. Pour the batter into your greased loaf pan and sprinkle lightly with cinnamon. If you’d like a pretty swirled effect, run the tip of a knife across the batter in a zig-zag pattern. Bake for approx 50 minutes, or until a skewer comes out clean (it may need to be checked between 45-55 mins). If you can wait, let the bread cool in the loaf pan for around 10 minutes. Transfer to a wire rack to cool and enjoy!
SERVES 10
PREP: 20m
Eva Neumann
COOK: 50m
Dough and crumble (streusel)
150g cold butter (don’t use margarine)
• 300g plain flour
150g white sugar
1 tbsp vanilla extract
Cinnamon to taste (optional)
Filling
• 800g plums (with core)
• 1 tsp butter
6 tbsp sugar (you can reduce this if the plums are already quite sweet)
2 tbsp plain flour
Some vanilla extract, to taste
• Cinnamon, to taste (optional)
This plum cake reminds me of the ‘Kaffee & Kuchen’ tradition in Germany on late summer days... and English friends hilariously failing to pronounce ‘Pflaumenstreuselkuchen’ ‒ try it!
Set oven temperature to 180°C (fan-forced). Prepare spring baking tin by putting baking paper on the bottom and spreading a thin layer of butter around the edges of the tin.
For the dough: Using a handheld mixer with the hook attachment, combine the cold butter (cut in cubes), flour, sugar, vanilla and optional cinnamon until you get a crumbly mix (similar to coarse sand). Use clean hands to flatten the dough mixture lightly in a bowl and put this covered in the fridge.
For the filling: Wash your plums and cut them in quarters (or smaller slices for a juicier filling)
and remove the core. Heat the butter in a frying pan and add your plums. Sprinkle the sugar over to let it dissolve on medium heat (this will happen in a couple of minutes). Add the flour to thicken up your mixture ‒ combine well and let it cook for about 2 minutes. Add vanilla and cinnamon (to taste) and remove from heat and set aside.
Putting it together: Use about ⅔ of the dough mix and press this into your baking tin. I usually use a tablespoon to flatten the mix and ensure it’s packed tightly and evenly with no holes. You can push this up a little on the sides (about half a centimetre or a bit less) which will make cutting a bit easier later. Spread your plum mixture over the base ‒ you can just pour it over and spread it out. Use your hands to form the crumble topping with the remaining dough

mix (I usually roll little balls together with the palms of my hands and then crumble this over the cake mixture with my fingers). Spread your crumble evenly over the cake ‒ it’s quite generous and that’s just how you want it. It’s ok if the crumbles are different sizes ‒ some bigger, some smaller. Optional sprinkle of
sugar and cinnamon (or cinnamon sugar) over the topping. Bake for 45 minutes (until you’ve got a golden crumble topping). Serve with double cream, vanilla ice-cream, both or nothing and enjoy it on its own! This will keep in the fridge for a few days but I promise it won’t last that long!
This cake is on the sweeter side and depending on the plums you can reduce the sugar ‒ season to taste. I prefer using black plums but you can really use any kind. It goes well with double cream or vanilla ice-cream but also fantastic on its own.

PREP: 5m FRIDGE: 1h
COOK: 15m
MAKES 2O
Brigadeiro ( pronunciation: bree-gah-DAY-roh) is a Brazilian chocolate truffle garnished with sprinkles. It’s usually served in a candy cup, but we Brazilians eat it with a spoon (from a small bowl). There’s not a single children’s party without it. Otherwise, it’s not a real party. It can be a dessert or a treat after a meal. Or the best comfort when you have one of those days.
• 397g can sweetened condensed milk
1 tbsp butter
3 tbsp unsweetened cocoa powder, sifted
• A pinch of salt to enhance the flavour
• Chocolate sprinkles or any other you prefer
Don’t stop stirring. It takes about 10-15 minutes to thicken. The right consistency is when you lift the spoon and it makes thick lines that don’t melt on the surface. I like to change the cocoa powder for 70% dark chocolate. Add 1-2 tablespoons of thick cream for each recipe, it will make the recipe creamier. Don’t add the cream until it has a nice shiny texture. Enhance the flavour by adding a pinch of salt or a dash of vanilla. For round nice balls after adding the sprinkles, I put the balls in a sieve and stir for some seconds so the balls will be symmetrical.
Lightly grease a plate and leave it on the side. In a medium nonstick pan, combine the condensed milk, butter and cocoa powder over medium heat and mix it well. After 10-12 minutes it will start getting thicker, and once you can run your silicone spatula through the middle of it without it running back together for 2-3 seconds, it is done. Pour the mixture onto the lightly greased plate and let it chill in the fridge for 1 hour. In the meantime, prepare the candy cups and place the sprinkles in a bowl.
Once chilled, you can start rolling into little balls. Put some butter or spray oil on your hands, and roll a tablespoon of the mixture into a small ball. Roll it over the sprinkles. Place the balls in the candy cups.
PREP: 45m
COOK: 15m Melissa Librandi
This dessert was only ever made at Christmas time, so you had to wait an entire year to eat these little honey balls of goodness. My Nonna would make them with my mum (which meant she just gave out directions and criticised everything my mother did). It was entertaining to watch the process and I couldn’t wait to get my fingers on the sticky honey.
• 4 large eggs
• 3 tbsp sugar
• ¼ cup melted butter
1 tsp pure vanilla extract
SERVES 8
2 tbsp Grand Marnier liquor (limoncello, grappa or rum are also good choices)
1 whole lemon, zest (you can also use orange zest)
• ¼ teaspoon fine sea salt
1 teaspoon baking powder
2½ cups all purpose flour (plus approximately 2 to 3 tablespoons for kneading)
Vegetable oil (for deep frying)
Honey mixture
• 1 cup honey
• 1 orange, grated zest
Sprinkles (of your choice)
In a medium-sized bowl whisk together the eggs, sugar, melted butter, vanilla extract, liquor and zest. Stir in the salt, baking powder and flour, just until you achieve a soft malleable dough. Transfer the dough to a lightly floured work surface and with floured hands knead lightly for a minute, while adding in only enough flour to achieve a slightly tacky dough. Cover the dough with plastic wrap and allow it to rest for 30 mins.
Cut off small pieces of dough at a time and roll out into 1/2 inch thick ropes. If the dough feels sticky, dust your hands lightly with flour. Cut the ropes into small pieces (the size of a hazelnut) and shape into round balls with your hands. Transfer the shaped balls to parchment-lined cookie sheets and repeat with
the remaining dough. (You’ll need 2 parchment-lined cookie sheets).
Fill a large, heavy, deep pan with oil, reaching about 2 inches high in the pan. Heat the oil over medium-high heat to about 175°C (or 350°F). Use a candy thermometre for accuracy. Fill a spider ladle or skimmer ladle with some pieces of dough and then gently lower the ladle into the hot oil. Fry until golden brown for about 11/2 to 2 minutes, then transfer onto a tray lined with paper towel to drain. Repeat with remaining pieces of dough. I fried the tiny balls in 3 batches.
In a separate large frying pan, heat the honey and orange zest to a gentle simmer over low heat. Remove the warmed honey from the heat. Add all the fried struffoli to the warmed honey and gently stir until the fried balls are evenly coated. Arrange the honey balls on a serving platter and pour any remaining honey mixture over the struffoli.
Top with sprinkles of your choice and serve slightly warm or when cool.


Cooking and baking are not where I shine so unless I can convince my sister to keep the tradition going, the recipe will unfortunately disappear from our Christmas table with my mum and her sisters. I have taken this recipe from an online Italian cookbook. I can’t ask my mum for her original recipe without opening myself up to criticism for not taking the time to learn how to make them!
Reference: marisasitaliankitchen.com/struffoli-italian-honey-balls

PREP: 5m
COOK: 10m
FRIDGE: 2h
Filipino food can be an acquired taste. This dessert is a simple entry into some of the rich and flavour-packed foods from the Philippines.
• 1½ cups flour
• 1 cup milk powder
• 1/2 cup sugar, plus 1 tbsp extra
• 125g butter
MAKES 30-45
Brown flour over medium heat, stirring constantly. Once golden, sift using a fine sieve. Mix together in a bowl with milk powder and sugar. Melt butter, then mix thoroughly with the dry mixture. Let it cool for 4-5 minutes. Shape the mixture using moulds or a cookie cutter. Don’t wrap them just yet. Once all moulded, place on a tray and let them cool in the fridge for 1-2 hours. Wrap the cooled moulded Polvoron in cellophane wrappers.
Optional ingredients: Peanuts, cashews, toasted rice, or crushed Oreo cookies can be added into the mix. Ensure they are well chopped or crushed before mixing. For milk powder, I usually use Sunshine Milk Powder by Nestle. You will also require a small mould or cookie cutter to create the small shapes. Try to pack the mould tightly to avoid crumbling. Traditionally, they are served wrapped in colourful cellophane.
PREP: 30-45m + overnight
Reihaneh Azad
COOK: 15m
MAKES 1.5L

1L full cream milk (A2 or Farmhouse Gold recommended)
⅓ cup rosewater (Yek o Yek brand, see Recipe Tips)
• ¼ cup strong brewed saffron (see Recipe Tips)
• ½ tsp freshly ground cardamom (optional)
500g caster sugar
2 heaped tsp salep (available from Persian grocers; ensure freshness for best results)
Persian saffron, rosewater and pistachio ice-cream is floral, chewy, creamy and just magic. It tastes like home, summer holidays, and every good memory rolled into one scoop. It’s indulgent, nostalgic and always worth the effort.
This recipe doesn’t use eggs or traditional custard like most icecream, but it does rely on proper mixing and patience. You can make it in the freezer with manual mixing, or with an ice-cream maker. Don’t skip the multiple mixing steps if using the freezer method ‒ that’s what prevents ice crystals and gives the ice-cream a smooth, elastic finish.
100g thickened cream (Bulla or Devondale brand)
• 50-100g raw pistachios, chopped
• 100g frozen cream, broken into small shards (freeze in a thin layer, approx. 5mm thick)
Prepare the milk base: Pour milk into a medium-sized, heavy-based saucepan and place over medium heat. Allow it to come to a gentle boil. Keep an eye on it, it will start to rise as it heats. As soon as it
begins to boil, reduce heat to low. Add the ⅓ cup rosewater and ¼ cup brewed saffron. Stir gently to combine. For an additional twist, you can add in ground cardamom, too.
Prepare the thickening mixture: In a separate bowl, combine the caster sugar and salep. Whisk thoroughly to remove any lumps. This step is important! If salep clumps, it won’t activate properly and your ice-cream won’t have that signature elasticity. Combine and stir. With the milk still on low heat, start adding the sugar-salep mix one spoon at a time, stirring constantly with your other hand. Wait until each spoonful
dissolves completely before adding the next. This prevents clumping and gives you a smooth, slightly stretchy base. Continue stirring for a few more minutes until the mixture begins to slightly thicken. It won’t become custard-thick ‒ just a bit more viscous and silky.
Freezer method (no machine needed): Transfer the mixture to a metal bowl (a KitchenAid metal mixer bowl works great here) and let it cool in the fridge – ideally overnight. The cooler the mix, the better the final texture. Once chilled, place in the freezer. Every 40 minutes, remove and stir vigorously with a spatula or the paddle attachment of your stand mixer. This breaks up ice crystals and encourages the salep to create that stretchy texture. After 3-4 rounds of stirring (around 2-3 hours total), the ice-cream should begin to resemble a soft-serve consistency. Now gently fold in the chopped pistachios and frozen cream shards. Transfer to a freezer-safe container (like a reusable ice-cream tub), cover and freeze for at least 8 hours or overnight.
Ice-cream maker method: After preparing the milk base, cool in the fridge ‒ overnight is ideal. Pour into


Rosewater is available in most supermarkets, most have a very strong aroma and you may require less than quoted. For a more nostalgic aroma like ice-creams in Tehran, go for Yek o Yek (available at Persian grocers).
To get the best out of your saffron: Crush a pinch of saffron threads with a sugar cube till you have a very fine powder. Place in a small dish with one ice cube and let it melt naturally (this step helps develop the vibrant colour). Once melted, add just enough hot water to make up ¼ cup. This infuses both the colour and aroma beautifully.
your ice-cream maker and churn according to the manufacturer’s instructions. The mix will be more elastic than a standard custard, so keep an eye on it to ensure even mixing. Once it starts to resemble soft-serve, add pistachios and frozen cream shards. Transfer to a container and freeze overnight.
Serving suggestions: My favourite way to serve this is between two crisp wafers like the ice-cream vendors of my childhood in Tehran. Or if icecream sandwiches aren’t your thing, you can scoop into cones or bowls with a sprinkle of crushed pistachios and a few dried rose petals.

This version is matcha-flavoured, but you can leave out the matcha for a simpler taste. Feel free to adjust the sugar to your liking, add more if you prefer it sweeter. If you’re short on time, chill the mochi in ice water to cool them quickly. As for toppings, sprinkle on as much or as little as you like!
PREP: 5m
Daiki Tanabe
Warabi Mochi is a soft jelly-like Japanese dessert that melts in your mouth. My mother has made it since I was a child. This is my mother's recipe but she also has her own Instagram and Youtube cooking channel as well! Instagram: @straightoutta_osaka and Youtube channel
COOK: 15m
FRIDGE: 30m-1h
SERVES 2-3
• 50g warabi mochiko (warabimochi starch)
50g brown sugar
3g matcha powder
• 300ml water
Topping
• 10g kinako (soybean flour)
• 5-10g brown sugar
Pinch of salt
3g matcha powder
First, prepare a tray to cool the matcha warabi mochi. Cover the tray with plastic wrap and sprinkle a little water ‒ this helps prevent the warabi mochi from sticking. Place the warabi mochi powder in a bowl. Add the brown sugar and matcha powder, then mix well. Add 300ml of water and mix again, then strain the mixture through a sieve into a pan. This step helps
make the matcha warabi mochi smoother. Stir over medium-low heat. When lumps start forming, increase your mixing speed. Crush and fold the lumps as you stir. Once the mixture becomes thick and lumpy, reduce the heat to low and mix thoroughly. Turn off the heat when the mixture is stretchy and glossy, then continue mixing with the residual heat. While it’s chilling, prepare two toppings:
Mix kinako, sugar and a pinch of salt for a simple kinako flavour.
For the second, add matcha powder to the kinako, sugar and salt mixture for a matcha-flavoured topping.
Once chilled, cut the warabi mochi into bite-sized pieces. Sprinkle the toppings generously and enjoy your matcha warabi mochi with two delicious toppings! Pour the mixture onto the prepared tray. Cover with plastic wrap and refrigerate for 30 minutes to 1 hour. Be careful ‒ if left in the fridge too long, it may harden too much.
PREP: 20-30m
Kapil Bakshi
COOK: 10-15m
MAKES 10-12
A nutritious, sugar-free, energy-boosting treat combining Indian superfoods with Western flair, ideal for a pre-workout snack or guilt-free indulgence. I love how this dish perfectly balances rich, earthy flavours with health-boosting ingredients, making it both delicious, nourishing, and sugar-free. While not tied to a specific festival, it draws from traditional Indian snack-making methods, making it a modern twist on age-old flavours.
• 1200g kalonji seeds (black cumin)
200g black sesame seeds
• 300g pumpkin seeds
• 150g poppy seeds
• 150g sesame seeds
• 150g sunflower seeds
100g tukmaria (sweet basil) seeds
• 1 tbsp Pure New Zealand Ghee (or coconut oil for a dairy-free version)
• 45g (1½ scoops) moong daal powder
• 45g (1½ scoops) besan (gram flour)
• 45g (1½ scoops) raagi flour
25 pitted dates, soaked in warm water for 10 minutes
• 120g roasted mixed nuts (e.g, almonds, cashews, walnuts, finely chopped)
• ½ tsp ground green
cardamom seeds, mashed into a smooth paste (optional)
• 100g dark chocolate, melted (for coating)
Optional
Cocoa powder (for rolling the truffles instead of using chocolate coating)
1 tbsp chia seeds or flaxseeds (substitute for tukmaria seeds for a different texture)
Shredded coconut
Make the super seed roast: Heat a pan over medium heat. Add the seeds (kalonji, black sesame, pumpkin, poppy, sesame, sunflower and tukmaria) into the pan in a single layer. Toast the seeds for about 5-7 mins, stirring frequently, until they become aromatic and slightly golden. Be careful not to burn them. Remove the seeds from the pan and set aside to cool.
In the same pan, add 1 tbsp Ghee (or coconut oil) and heat over low heat. Add the moong daal powder, besan, and raagi flour into the pan. Roast the flours in the Ghee for 3–5 minutes, stirring constantly until they turn golden brown and release a nutty aroma. This process enhances the flavour. Once roasted, remove from heat and set aside to cool.
Drain the dates and mash the dates into a smooth paste. Chop the mixed nuts into small pieces (or pulse them in a food processor) until finely chopped, but not too fine. Set them aside.
Bringing it all together: In a large mixing bowl, combine the roasted seeds, roasted flours, chopped nuts, and mashed dates. Mix thoroughly to combine all ingredients. If you’re using cardamom, add it now and stir well to evenly distribute.
The decadent finishing touch (Optional but worth it!): Melt the dark chocolate in a heatproof bowl over a double boiler or in the microwave in 30-second intervals, stirring after each interval until smooth. Once the chocolate is melted, dip each truffle into the chocolate and coat evenly. If using shredded coconut, roll each ball in coconut. Place the coated truffles on a parchment-lined tray and allow them to set for 10–15 minutes at room temperature, or place them in the fridge to speed up the process.

Sweetness: If you prefer a less sweet version, reduce the number of dates or substitute with a lower-sugar sweetener like stevia or monk fruit sweetener.
Spices: Add more cardamom if you enjoy a stronger aroma, or omit it entirely if you prefer a more neutral flavour profile.
Texture: If you like smoother truffles, pulse the seeds, nuts, and dates in a food processor for a finer texture.
Chocolate coating: For a lighter option, roll the truffles in cocoa powder instead of dipping them in chocolate.
Storage: Store in an airtight container in the fridge for up to 1 week, or freeze them for up to 1 month.

Karishma Marwha
The drink has probiotic benefits that aid digestion and boost gut health, especially during seasonal changes when immunity might be lower. It brings back childhood memories where mum used to make this during the summer or during festivals like Holi, when the weather can fluctuate and potentially impact immunity.
5-6 carrots, medium-sized
2 beetroots, small-sized
• 8 cups (2L) water
• 2 tsp red chilli powder
• 2 tbsp yellow mustard seeds or 1 tbsp black mustard seeds
• 1 tbsp black salt or pink salt or regular salt
Rinse and then peel the carrots and beetroots. Cut the carrots and beetroots into long sticks. Boil the water and let it cool to room temperature. In a clean ceramic or glass jar, add the carrots, beetroots, chilli powder, mustard seeds, salt and water. Mix all ingredients. Cover loosely with a lid or secure and tie a muslin cloth/cheese cloth on the top of the jar or bottle. Keep the jars in the sun for 1 to 2 days (if sunny) or up-to 3 to 4 days (if cloudy). Shake the jar every day. When the kanji tastes sour, it means the drink is fermented.
PREP: 15m SERVES 8
Refrigerate or serve with a few ice cubes.
Traditionally, Kanji recipe is made with black carrots and this drink has a dark purple colour. However, as black carrots are less common in Australia, you can make it with orange carrots. The drink is fermented and stored in a glass or ceramic jar. Make sure to check the weather forecast before planning to make this drink as the jars are kept in the sunlight so the drink is allowed to ferment. The sour-tangy carrots and beets can be included in a salad or add as toppings to your wraps, burgers or sandwiches.


Celebrating and showcasing News Corp Australia’s multicultural community.
A heartfelt thank you to everyone who participated in the Share Your Colours and taste.com.au's vibrant Taste the World campaign!
We were thrilled to uncover the rich cultural connections and cherished memories you shared, all centred around the dining table.
As a celebration of these global flavours, more than 40 delicious entries have been included in this special Share Your Colours digital cookbook. We hope you enjoy exploring and trying these wonderful dishes from our people.
Share Your Colours is News Corp Australia’s newest Employee Resource Group, celebrating our multicultural community. Our mission is to
foster an inclusive workplace that recognises and celebrates the diverse heritage and traditions of our workforce.
By embracing diversity, we aim to drive innovation and set best practice standards.
Colour symbolises diversity, identity, and unity, representing excitement and creativity.
We invite all staff to engage with our ERG, whether as active members or allies. Join us in sharing your colours and contributing to a vibrant, inclusive environment.
We look forward to hearing from you at shareyourcolours@news.com.au

shareyourcolours@news.com.au