

About This Guide
Do you have family photos and heirlooms? Preserving these items - along with their storiesis one of the ways you can ensure your legacy for future generations. Using archival storage materials is an important part of this process. Archival storage supplies protect your valuable memories because they are made of materials that will not damage the contents.
Before you get to storage, though, there is work to be done, and this guide provides a foundation for planning a family archive project. Then, when you’re ready to place your items into archival storage, consult the guide for recommendations. A guide for family historians, collectors, and memory-keepers, the information here will help you plan archival storage for your photos and paper collections.
What is archival storage? It means that the storage container and environment are suitable for the needs of long-term preservation of the objects. The materials used to make boxes and enclosures are free from chemicals that speed up the deterioration process of photos or objects, and they are stored out of the light in a climate-controlled, clean location. Archival storage won’t stop the deterioration of objects, but it won’t hasten it.
Although there are many Archival Methods products listed in this guide, you won’t see detailed materials specifications, size and color options, or pricing. That information is on our website, www.archivalmethods.com. Know that our products meet the highest archival standards!
Archival Methods was founded over twenty years ago, and many of our products are manufactured in our facility in Rochester, NY. Our goal is to provide the best available archival products while supporting customers with excellent service and guidance. We love to talk about projects with our customers!

Call or email us, or connect on social media.

Preservation Guide
COVER IMAGES
Ambrotype photograph of the Genesee River in Rochester, NY taken in 1877 by George Eastman, founder of the Eastman Kodak Company. Image courtesy of the George Eastman Museum.
Digital image taken from a similar vantage point in 2022. Image courtesy of Jenn Libby.
We are grateful to the George Eastman Museum for permission to use this historic photograph of the Genesee River and the Broad Street Aqueduct. The historic stone aqueduct, built between 1836 and 1842, once carried the Erie Canal over the Genesee River.
We chose this image to highlight the importance of the river and canal in Rochester’s history, and also our rich photographic tradition. Archival Methods is proud to be a trusted supplier of archival storage supplies to individuals and institutions saving our cultural heritage.
Curating Your Collection
As you go through your family history collection, you’ll act as a curator, deciding what to keep and how to save and store it. Use the steps in the “4 Ds” framework to help you through your project. These steps apply if you choose one small project to start or tackle your entire collection. It may take some time, but saving your family memories and stories is always worthwhile!
HAVE DAMAGED PHOTOS OR OBJECTS?
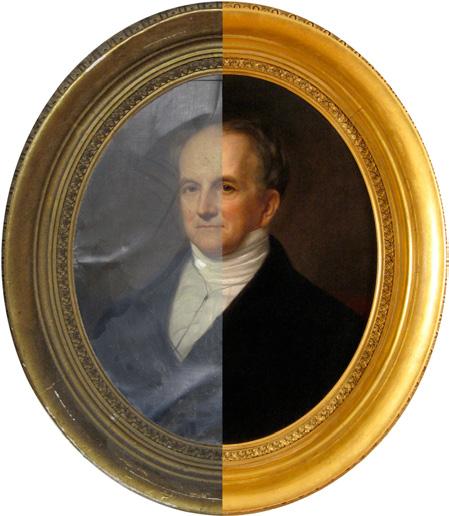
Sometimes, a photograph or object is too damaged to handle without causing more problems or needs significant cleaning. Restoration or repair work is called “conservation” and requires the services of a trained conservator. National professional organizations have Find a Conservator search tools.
American Institute for Conservation: culturalheritage.org
Australian Institute for the Conservation of Cultural Material: aiccm.org.au
1. DECIDE what to keep
Start with your “why,” your intentions for your family history project. Are you downsizing and want to pass on heirlooms to your kids? Is there a milestone event you’d like to celebrate with photos and stories?
Once you’ve gathered the photos and memorabilia, it’s time to curate them. For photos, use the ABCs method to edit your collection.*

A: album-worthy photos - your best that should be scanned and backed up.
B: boxed photos support the A photos but are stored away and not necessarily digitized.
C: you CAN toss photos! Especially doubles, blurry shots, and scenery without people.
S: tells a story. Keep photos that have a special memory or story behind them.
Objects like memorabilia and heirlooms can take up lots of storage space, so you’ll also need to edit them. Are there items like travel brochures or kids' artwork that you can save an image of but not keep the original? Document larger objects like paintings or a china set and then let them go if necessary.
Canadian Association of Professional Conservators: capc-acrp.cn
Institute of Conservation (UK): conservationregister.com
2. DOCUMENT what you know
Capturing the information and stories about your family archive is an essential part of the process. As you sort through your items, take notes about the who/what/when/where/why (or as much of it as you know!).
Write on the backs of photos with a pencil or an archival ink pen. For a temporary (non-archival) solution, jot notes on sticky notes or in a notebook. These details can be added to the image metadata once things are digitized.
Recording yourself or relatives talking about family photos or heirlooms is a great option. Use your phone to record audio or video and save those files alongside the digitized images.
These stories make up your family legacy, and your relatives and descendants will thank you for recording them.
* From Photo Organizing Made Easy: Going From Overwhelmed to Overjoyed by Cathi Nelson. Image: Abbott Lawrence by G.P.A. Healy, Private Collection, Hamilton, MA; 19th century painting and frame before and after restoration. http://www. oliverbrothersonline.com3. DIGITIZE and back up
Digitizing your family archive is critical to ensuring it’s backed up and safe from anything that might befall the originals. Digital images are also easily shared with family and friends through email, photo books, online galleries, and more.
There are several ways to digitize photos and twodimensional items, ranging from apps on your phone that take an “ok” quality capture to dedicated scanners or even camera scanning with a DSLR.
You’ll want to make sure you rename files and perhaps even add metadata to make them searchable so that the stories and details are accessible. The Photo Managers* provides courses and support as well as a directory of certified professional photo organizers who can help.
Since you can’t scan three-dimensional items, consider digitizing them through a photo. You can set up a simple backdrop in your home, work with a photographer, or take videos with your phone.
Collect these images in one central place, like an external hard drive that is easily backed up.
* thephotomanagers.com
BACK UP YOUR COLLECTION
Once you’ve digitized your family photos and heirlooms, backing up that digital collection is critical. You can follow the 3-2-1 backup method
4. DETERMINE a storage plan
Plan for archival storage after you have decided what to keep and digitized things. Keep in mind: What storage space is available in your home? How often do you want to access your collection? What is your budget? Prioritize fragile or valuable items in your collection as you plan for storage.
BOXES FOR STORAGE
Store items in archival boxes if you don’t need to access your collection often. You can pack them away on a high shelf to sit undisturbed. Make sure to label each box with the contents and note where to find the digitized images.
BINDERS FOR STORAGE
3 copies of your photo collection.
2 types of storage; for example, one copy on your computer and one on an external hard drive.

1 copy should be stored off-site, in the cloud, with a relative, or in a safe deposit box.
Binders allow you to view and enjoy your photos more frequently. Use archival pages, whether paper or plastic, and choose a binder that is archival. A slipcase protects from light and dust on all sides.

 Item #01-011
Storage Environment
Before planning for storage containers, consider the overall environment where you’ll keep your family history collection.
Light causes fading of photos and textiles, high humidity and temperatures encourage mold growth and insects, while cold and dry conditions can cause brittleness and cracking.

A dark, dry, and climate-controlled area is best , where the conditions do not fluctuate much, and there is little chance of pests.
EMERGENCY PREPAREDNESS
Digitizing and backing up your family history collection is the most important thing you can do to be preapred in case of fire, flooding, or natural disaster. Also, plan what photos you'll take if you have to evacuate.

SUITABLE STORAGE LOCATIONS
Your photos and heirlooms should live where you live! Here are some good options for storing boxes, bins, or binders of photos in your home.

High shelf in a closet
Bookshelf or cabinet
Under a bed
Choose a second floor if possible
Away from areas prone to leaks
Water damaged photos can be salvaged . If you have wet photos, start with this information from the Northeast Document Conservation Center.
https://bit.ly/wet-photos
If you do one thing for your photos and heirlooms, move them from your garage, basement, or attic to the main part of your home.
SAFE STORAGE CHECKLIST
Storage Location
The safest spot is on a high shelf in the main part of the house and away from any water sources.

Temperature
A range of 60° - 75°F (15°25°C) is best for photos and heirlooms. Avoid regular fluctuations outside this range.
Relative Humidity
Keep relative humidity consistently between 3555%. Desiccant containers or dehumidifiers can help.
Sunlight
Store photos and objects in closed boxes. Frame with UV-filtering glass or acrylic, and keep anything on display out of direct sunlight.
Pests
Store family heirlooms in locations that are free of insects or rodents.
Concerned about humidity in your storage area?
Purchase a simple hygrometer and keep an eye on the readings. Desiccant canisters can absorb moisture in archival storage boxes.
Desiccant Canister
Absorbs moisture in 3 cubic feet of closed space, such as a box. Reusable; restore by heating in an oven.

Item #53-001
Dust
Well-fitting lids on boxes and slipcases for binders help protect contents from damaging dust particles.
Preparing a Workspace
There are some tools that will be helpful as you work with the photo and paper items in your family history collection. Gathering these supplies and preparing a dedicated workspace will start your project off right.
SUGGESTED SUPPLIES

Gently wipe dust off photos or objects with a microfiber cloth or soft brush that won't damage the surface.

PREPARATION CHECKLIST
Find a location where you can keep your work undisturbed while in process
Spread out on a clean, well-lit table space
Temporary storage containers help with sorting No food or drink around your items

Unflavored floss can help remove photos stuck to album pages. Starting at a corner, gently work it between the photo and page.
Spying details in a photo or document can help with identification and dating. Have a magnifying glass on hand.

Use archival ink for labeling dividers inside photo storage boxes. It won't fade over time or damage contents. Item #99-TLP3

Available at craft stores; use it to help remove photos stuck in albums. Gently lift up a corner, sliding the spatula between the photo and the page.
Handy for temporarily keeping track of sorted photos and project notes. Don't stick them to photos, though!
 1. 2.
3.
1. Microfiber Cloth
2. Dental Floss
3. Magnifying Glass
4. Archival Pen
5. Craft Spatula
5. 4.
6. Sticky Notes
WHEN TO WEAR GLOVES
Fingerprints and the oils on your hands can easily mar photographs and negatives. When handling these items, wear fitted, clean, lint-free cotton gloves (#61-001).
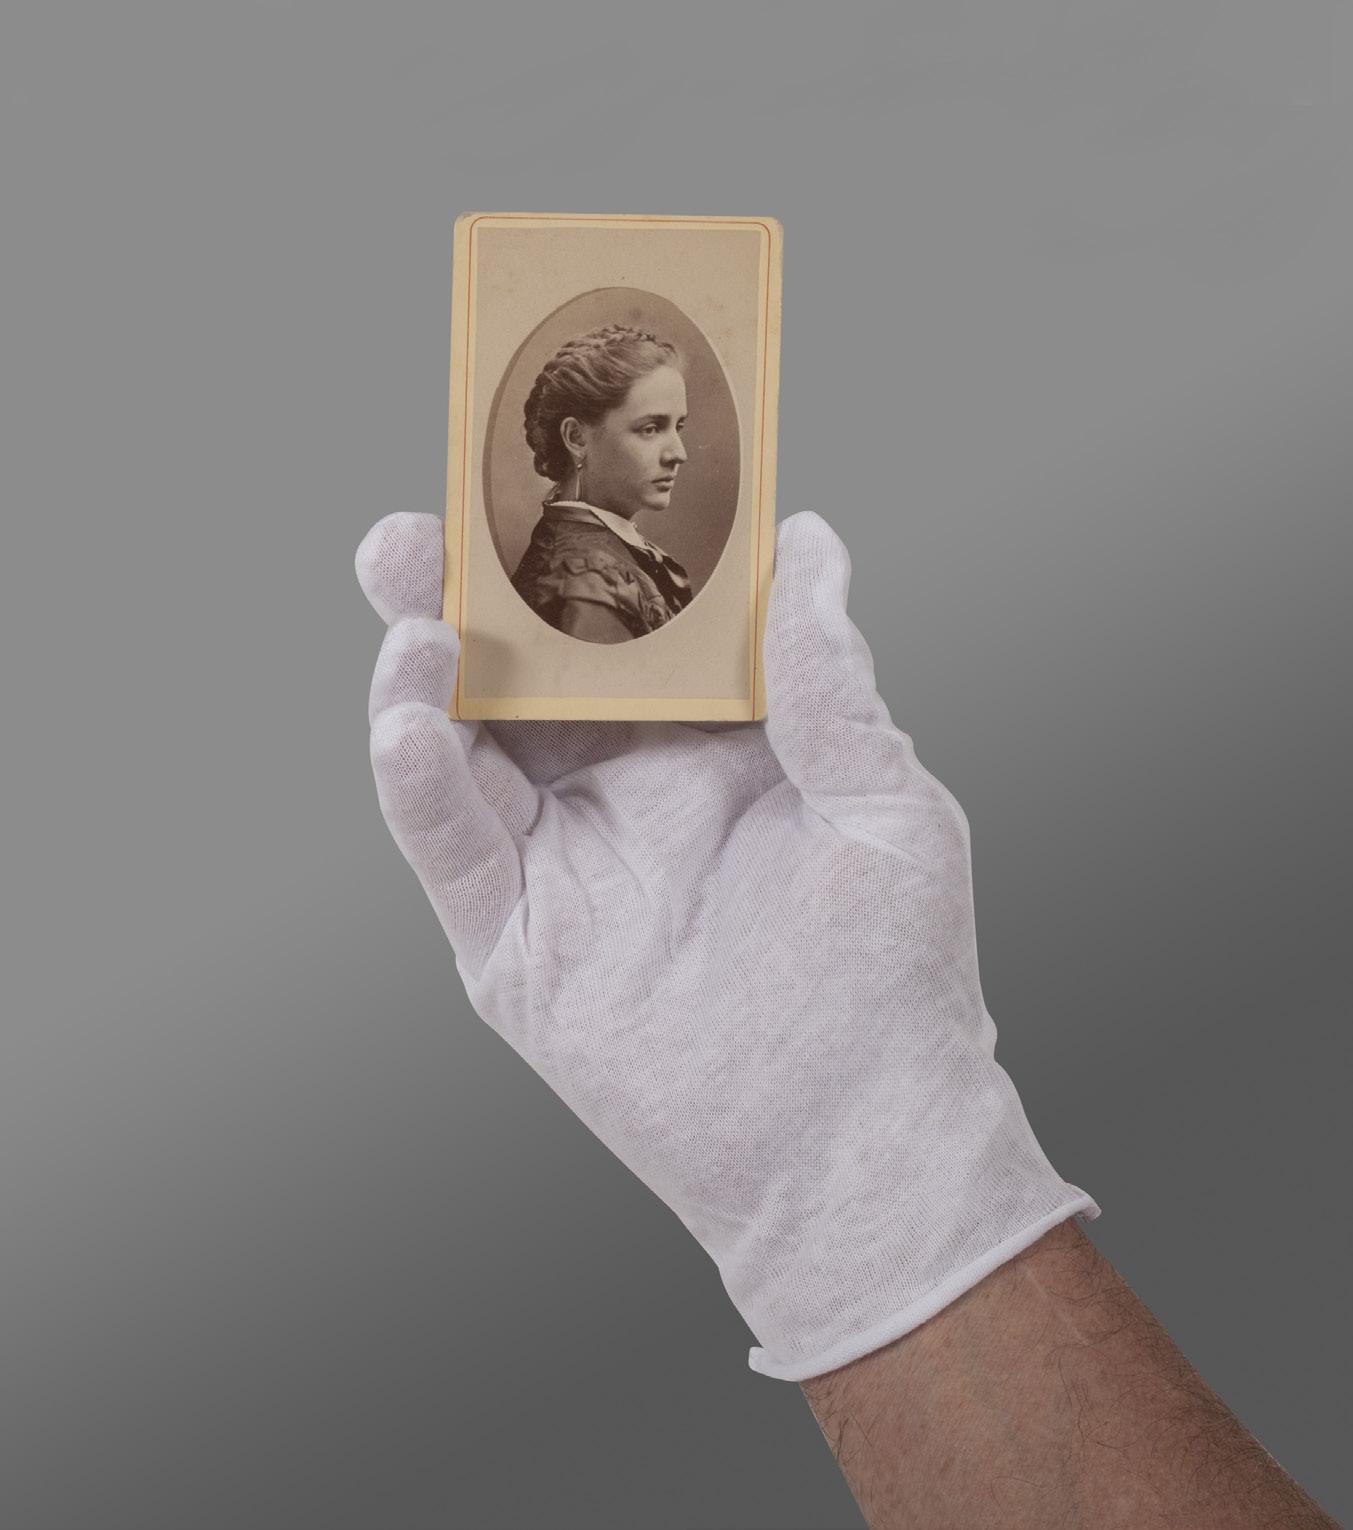
Do not wear gloves for better dexterity when handling paper items like documents, letters, books, or newspapers. Clean, dry hands are best.
WEAR GLOVES
Photographs
Negatives
Paintings
Leather, Metal
NO NEED FOR GLOVES
Paper, Books
Textiles
Glass, China
Ceramics
7.
Use these to divide sections of photos or to identify groups of items as you sort.
Item #02-04-Index
A soft pencil for writing on the backs of photos, documents, and glass or metal surfaces.


Item #99-8222
Document information about your photos as you organize. Envelopes hold up to 36 prints.
Item #29-46PN
9. Photo Envelopes 8. Stabilo-All Pencils Index Cards 9. 7. 7. 8.Storage Tips
Layers of protection are the best way to shield heirlooms from the deteriorating more quickly. The more layers surrounding an object, the less chance it will be affected by physical forces, light, dust, or pests and the more stable its environment.
Supports and enclosures are necessary for fragile items and can help with organization. Photos or objects in good shape can go right into the storage container - an archival box or binder.
USING ENCLOSURES
Enclosures such as folders, bags, or sleeves lend another layer of protection to fragile heirlooms and can provide more organization. Plastic is best for objects that will be handled often or where viewability is important. Paper sacrifices the view for the price point and provides more room to add a label or notes. More details on page 14 - 15,
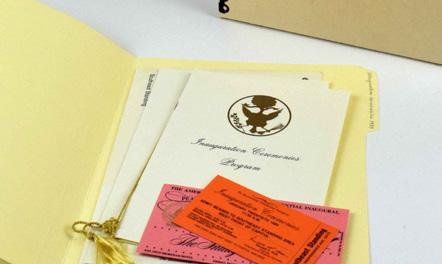
An archival folder protects and organizes photos, documents, or memorabilia.
USING INTERLEAVING
Interleaving is the act of inserting blank pieces of paper, or “leaves,” between something. This works for the pages of photo albums and scrapbooks, and for items in a folder or stacked in a box. Archival paper will protect each item from the other as they are touching. Using Archival Tissue ( Item #45-001) or Archival Thin Paper ( Item #145-0810) ensures you’re not adding too much bulk to the album or box.
Scan to learn more about storing scrapbooks and vintage photo albums
SUPPORTING FRAGILE ITEMS
Wrapping books or albums in archival plastic bags provides extra protection.

ARE PLASTICS PHOTO-SAFE?
Yes! There are inert plastics that will not off-gas or negatively affect photographs or other objects. All of our plastic enclosures are made from one of these three types and have passed the Photographic Activity Test (PAT), a measure of their archival qualities.

Polyester
Polyethylene
Polypropylene
Fragile photos or documents will benefit from the extra support of a piece of archival cardstock slipped into their enclosure, whether a binder page or an individual sleeve or bag. There is no need to attach the item to the cardstock.

The cardstock also gives you an area to write a caption.
Scan to learn more about storing fragile photos
GUIDELINES FOR PACKING OBJECTS
Remove extraneous materials such as paper clips, rubber bands, and staples that will deteriorate and can cause damage. If there is tape on the photo or document remove it if it flakes off easily. Otherwise, store the item in its own enclosure.
Before packing, give a quick clean by wiping objects or photos with a microfiber cloth or brush.
PRO TIP: Use PEC-12 (Item #140-2044) to remove non-waterbased stains, grease, and inks from photographs.
Unfold and flatten papers to store them flat, if possible. Creases weaken the paper and it will tear here first. This also applies to textiles. If you must fold them, place crumpled archival tissue in the folds to pad them, preventing them from becoming too sharp.
Isolate newsprint in separate enclosures, either folders, envelopes, plastic sleeves, or plastic bags. The paper’s extreme acidity damages anything it comes into contact with.
PRO TIP: Make a good scan of your newspaper clippings before storing them. A Newspaper Kit (Item #63-912-TN) lets you store several together.
Pack like objects together, or at least objects of similar size and weight. Make sure you can easily lift the box.
PRO TIP: If you plan on stacking boxes, be sure to use ones with metal edging that provides the necessary rigidity.
Pad spaces around objects in a box with crumpled archival tissue ( Item #45-002). Leave space between objects and the container walls. Don’t overcrowd boxes.
Include a packing list with boxes and binders - a description and/or photos of the contents - and label the outside of the box.
PRO TIP: So future relatives know your items are stored safely, make a note that items were packed with archival-quality materials.
Boxes
For photos and heirlooms you don’t need to access frequently, archival boxes are the most economical storage solution. They provide physical protection from light, dust, pests, and damage from mishandling. Metal edges keep the corners rigid when boxes are stacked.

With many size options, you’re sure to find the right fit for what you are storing. Our boxes are handcrafted in Rochester, NY with acid and ligninfree, buffered materials.
Scan the QR code below for information about which type of box works for what you are storing.
Drop Front Boxes
Our most popular storage for photographs and documents. The hinged “drop front” panel allows you to safely insert or remove materials without bending or flexing the contents. Access items at the bottom without removing materials on the top of the stack. Fragile items or different types of items can be separated by Crystal Clear Bags (Item #86-0406) or Archival Tissue (Item #45-001)
Ideal for: Fragile or larger photographs, documents, 2-D artwork

Item #01-112 or Item #01-030
Short Top Boxes
General-purpose containers for safely storing many types of photos and memorabilia. The removable, close-fitting tops protect from dust, and metal edging along the corners provides extra rigidity when stacking.
Ideal for: Photographs, postcards, stereo cards, negatives, CDs/DVDs, collectibles, other memorabilia
Related: 4 x 6 Simple Kit (Item #60-1050)
Item #04-004
Full Top Boxes
These sturdy containers range from 1-1/4” to 5” deep. The collection of 3” deep boxes is perfect for storing books and photo albums. Metal edges ensure the structural integrity of the boxes even when stacked. Tissue (Item #45-001) and Poly Bags (Item #35-201) for extra protection can be ordered separately.
Ideal for: Books, family bibles, scrapbooks, photo albums
Related: Book Storage Kit (Item #04-BOOK)
Item #04-596

Scan to learn which box is right for your storage project
Document Boxes
Store photos or documents upright in letter or legal-sized document boxes. (Fragile items should be stored flat.) Use archival file folders (Item #24-301) to organize and protect. If the box is not full, spacers (Item #03-818) ensure everything stays upright.
Ideal for: Larger printed photos, documents, genealogy research files
Related: Document Storage Kit (Item #03-055)
Item #03-005
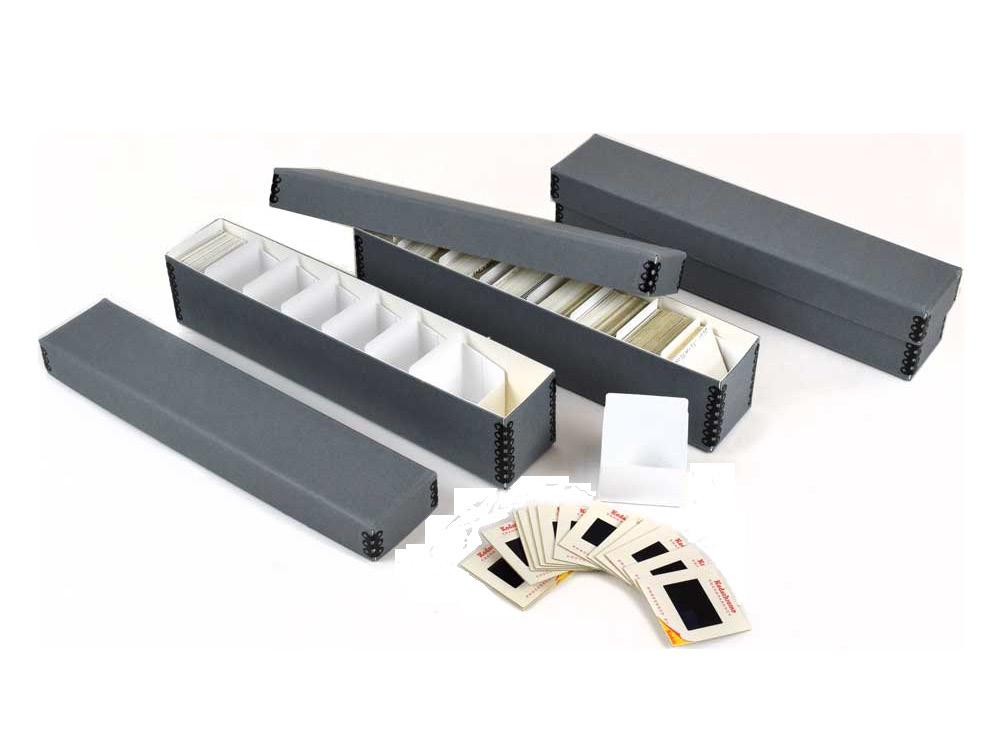
Get your slides out of carousels and boxes from the photo lab and into this space-saving archival storage. Slide Tray Bins (Item #07-002) and Dividers (Item #07-2214) allow you to further organize within these boxes. They also are great for storing collections of small items
Ideal for: Slides, medals, pins, coins, collectibles
Related: Slide Storage Kit (Item #07-062)
Item #07-001-3
Binder-in-Box™
Onyx Portfolio Boxes
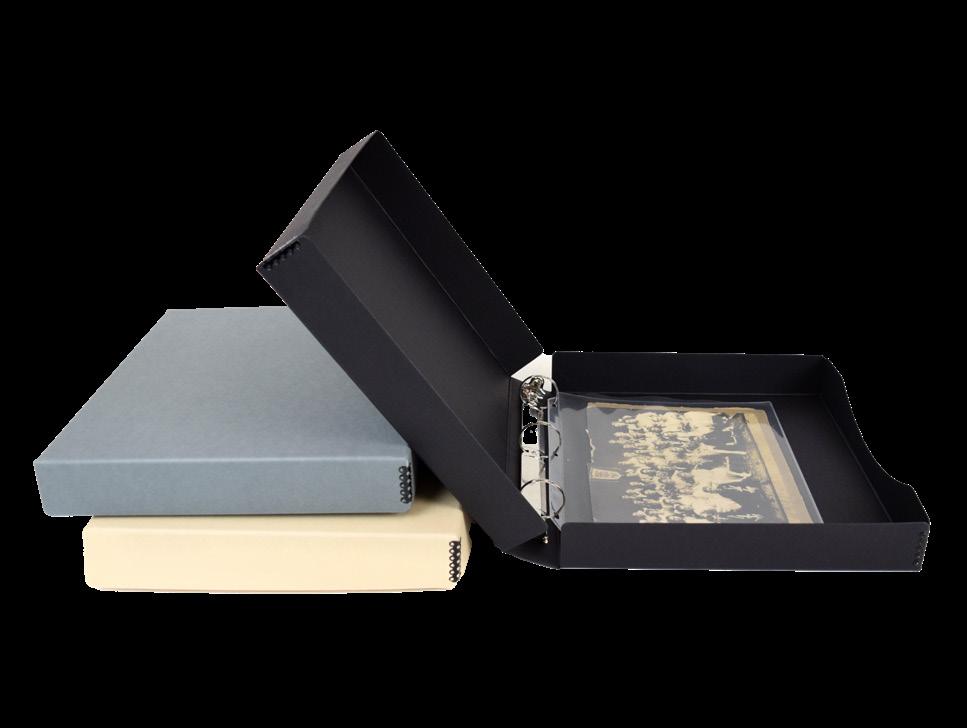
The protection of a box with the display capabilities of an album. The clamshell lid allows for easy handling of the contents. Ruggedly constructed with a hinge on the long side, the box opens flat and withstands repeated opening and closing.


Ideal for: Prints, documents, 2-D artwork
Combining the protection of an archival, metal edge box with the convenience of a three-ring binder. The binder box is ideal for organizing photo files, documents, or genealogical records. It lends itself especially well to “active storage” of collections, where work is repeatedly accessed. With a 1 1/2" O-ring, the maximum capacity is 60 pages of prints in page protectors. Black, Gray, Tan.
Item #06-001
Item #10-023
Hinged Lid Boxes
An optimal box for safely storing prints, films, and postcards. The undercut front panels allow contents to be easily filed and sorted, and the hinged lid will not get misplaced.

Ideal for: Prints, postcards, CD/DVDs, film reels, family heirlooms, collectibles
Related: Archive 900 Kit (Item #60-900)
Item #02-103
Binders
For photographs or documents that you want to view and enjoy more frequently, storage in a binder makes sense. Plastic binder pages or archival paper scrapbook pages are sold separately.

Collector Grade Binders
High-quality binder board core is bound in library–grade buckram with an acid-free card stock lining. The 1-1/2" D-Ring Binder holds about 60 Print Pages and the 2-1/2" D-Ring Binder holds about 85 Print Pages.
Item #17-5010
Binder and Slipcase Sets
Slipcased binders dramatically enhance the security of your items by protecting the contents on all sides. Available colors: black, red, blue, and forest green with a black slipcase. Ideal for: Photographs, slides, documents, letters, ephemera, trading cards

Item #18-5310
Page Lifters
Flip binder contents without stressing punched holes and risking tears.

Item #17-000
Binder-in-Box™
The protection of a metal edge box with the convenience of a 3-ring binder. Useful for “active storage” of collections where work is often accessed. Maximum capacity is about 60 pages. Ideal for: Photographs, documents, letters, and ephemera up to size 8.5” x 11"
Takes the design features and solid construction of our Onyx Portfolio Box and incorporates a 3-ring locking binder mechanism. The result is an elegant, fully enclosed presentation binder. Available in 1-1/2" and 2-1/2" D-Ring sizes.

Item #62-150

BINDER PAGES

Scan to see all binder page options on our website
CREATE CUSTOM ALBUMS
Design your own album by attaching photos and memorabilia direcly to pages. Options are Mounting Pages (Item #152-1011), or sheets with Page Protectors (Item #33-101)


Learn about storing photos and more in binders

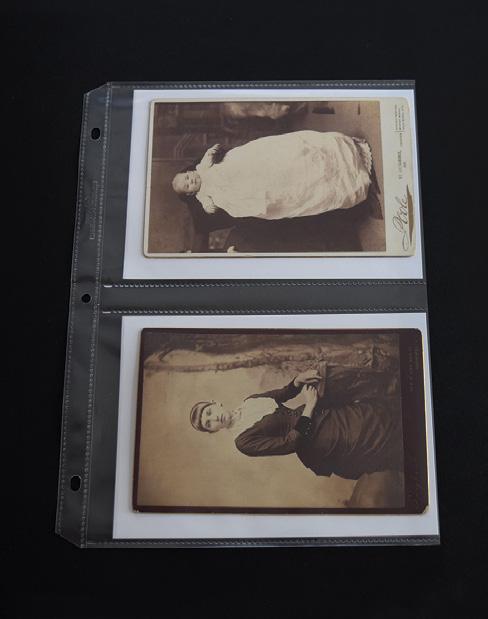

Adhere items with Mounting Corners (Item #50-010) or easy-to-apply Gudy Dots (Item #58-Gudy-Dot).

Enclosures
If a photo or document is fragile or damaged or will be handled frequently, you should place it in its own enclosure for extra protection before storing.
Folders are the most economical and provide lots of space for labels. Clear bags and sleeves allow you to see what you're storing.
The options listed here are just a selection of what’s available on our website.
WHAT NEEDS AN ENCLOSURE?
Fragile or damaged photographs
Photos with adhesive residue
Negatives
Cased photographs and tintypes


Newspapers & clippings
Fragile or torn documents
Scrapbooks & albums with loose pages
Letters with multiple pages
Charcoal, pastel, or chalk artwork
Vintage books with crumbly leather covers
Memorabilia that should be stored together
BAGS
Polyethylene Bags
Economical protection from handling, dust, and moisture. Sized for postcards, sheet music, magazines, and comic books. In packages of 10 or 100.

Item #35-201
Crystal Clear Bags

Excellent clarity and with the protection of a resealable adhesive flap closure. Bags are sized to accommodate a thickness of matted prints or multiple prints.
Item #86-0406
SLEEVES
3-Sided Sleeves
Polypropylene offers excellent clarity and low electrostatic charge.
Open on one short side with no flap closure. Sized to hold multiple prints.
Item #390-46
HD Poly Envelopes
Made of high-density (HD) polyethylene, with a frosted appearance. Free of naturallyoccurring electrostatic cling so they won't attract dust.
Item #34-303
FOLDERS & ENVELOPES ORGANIZING
File Folders

Organize and protect with archival manila envelopes. Great for vertical storage in a Document Box or hanging files.


Item #23-001
Flap Envelopes
Open on Long Side
Store flat items in these folders. A non-adhesive flap on the long side of the envelope keeps items in place.
Item #21-002
LABELING BOXES AND ENCLOSURES
Saving any details you know about photos or objects is an important part of the archive project. Using an enclosure and then labeling (or writing on the inside support) provides room to capture this information.
Labeling the outside of boxes is also critical so you don’t have to disturb contents to know what’s inside.
Adhesive Back Vinyl Labels
For boxes or binders. Use the provided insert or print your own labels to slip into the holder.
Item #37-695
Archive Envelopes

Recreate the organization of your photo lab envelopes with an archival option. Holds 4x6" or 5x7" prints with front pocket for negatives.

Item #29-46PN
Index Cards
Useful for sorting, labeling, and cataloging your collections. Available in various sizes and tab configurations.
Item #02-04-Index
Labeling Paper Enclosures
If you’re using paper enclosures like a folder or envelope, write directly on the enclosure with a pencil (Item #9982111) or an archival pen (Item #99-005)

Labeling When Using Plastic Enclosures
Slip a cardstock insert (Item #79-46) into the plastic bag, sleeve, or photo pocket for writing information as well as providing physical support.
Framing
For the family photographs, documents, or other heirlooms that you want to enjoy every day, framing is a good option. The frame provides physical protection, and as long as archival materials are used, it is being safely preserved. The caveat is that these treasured items must be hung away from direct sunlight. Even when using UV filtering glass or acrylic, UV damage will eventually occur. Consider making reproductions of photos or documents that you want to display, and store the originals in archival boxes.
FRAMING TIPS
Use archival matboard, backing, and UVfiltering glass or acrylic


Have a thick enough mat so that what's being framed doesn't touch the glass
Hang out of direct sunlight
Hang on an interior wall; they bear less changes in temperature and moisture conditions than exterior walls
UV Filtering Acrylic

A lightweight, shatter-resistant alternative to glass, our UV filtering acrylic protects artwork against harmful ultraviolet rays that can fade your images over time. Each sheet is 1/8" thick and filters out 98% of UV rays.
Item #190-810
Custom Mat Cutting
Get single window or multi-window mats cut to your exact specifications. Select your matboard and backing types, window size, and window position. We can also hinge the backing.
Search for Custom Mats on our website
Custom Frames
Send us dimensions of your matted photo, choose a style, and receive 4 lengths of frame to assemble. Mats, acrylic, and hardware kits for assembly and hanging are sold separately. Search for Custom Frames on our website

PolarWhiteItem#96-425
BrightWhiteItem#40-425
Metal Frame Kits
Choose the frame profile, finish and size. Kit comes with frame, hardware, hanging wire, UV-filtering acrylic, a pre-cut window mat, mounting corners, and foamcore backing.
Wood Frame Kits
These come with all the same components except a window mat (order separately). Frames are easily reopened to access photos. Solid wood frames come in three finishes: Maple, Black, and White.


Item #212-1114
MATBOARD THICKNESS
Matboard is made by laminating paper sheets together with a natural starch adhesive to create different thicknesses.


2-ply = 1/32"
4-ply = 1/16"
8-ply = 1/8"
WarmWhiteItem#43-425
AntiqueWhiteItem#41-425
NaturalWhiteItem#44-425
BlackItem#49-425
TYPES OF BOARDS
PearlWhiteItem#97-425
All but the Pearl White is 100% cotton fiber "museum board," buffered to provide extra protection against destructive acids. The Pearl White is "conservation board;" also archival and buffered, but manufactured from purified wood fiber and more economical.
Item #95-810-21Storage Kits
When it comes to the organization and storage of your prints, artwork, and collectibles it is easy to feel somewhat overwhelmed, even for the most experienced archivist. We want to do everything possible to make this process easy, efficient, and effective.
Our kits make properly preserving and storing your photos and artwork much easier by providing you with everything you need in handy, easy-to-use packages. Helpful video instructions show you just how to safely store your items in them.
Whether you have photographs loose or in albums, letters, newspapers, documents, or threedimensional heirlooms or memorabilia, we have a kit to help you preserve them.
Information about the 4 x 6 Simple Kit
Archive 900 Kit
One of our most popular kits, this offers a simple, compact storage for your photographs and negatives. Organize and protect with Archive Envelopes and further sort and catalog the photos with Index Cards.


Ideal for: 4 x 6” and 5 x 7” photographs and 35mm negatives
Related: 5 x 7" Archive 200 Kit (Item #60-200)
Item #60-900
Learn about how to use our Textile Storage Kit
Make your own storage solution with Create-a-Kit
Downsize the footprint of your slide collection! This space-saving design provides multiple layers of protection for your valuable slides. Slide tray bins and slide dividers allow for organization, labeling, and accessibility. Available for 1,200 or 2,400 slides.
Ideal for: Cardboard, plastic, or glassmounted 35mm slides
Item #07-062
4 x 6 Simple Kit
Store and organize 4 x 6" prints simply and archivally! Holds 1,050 prints. Kit includes box, index card dividers, and a spacer. The pre-scored spacer can be folded to take up extra space so photos don't fall over.


Ideal for: Prints, postcards
Item #60-1050
Kits provide a double-level of protection by storing newspapers or magazines in polyethylene bags and then the box. They come sized for small and large magazined and folded and unfolded newspapers.

Ideal for: Newspapers, magazines, Playbills, pamphlets
Item #63-912
Create-a-Kit
Make the most of your storage box by separating contents into caddies for extra organization and protection. Mix and match the inserts to best suit your storage needs.
Ideal for: Various photo formats, slides, home movies, audio cassettes, memorabilia, and other small collectibles
Item #60-2700
Book Storage Kit
These kits come in Small, Medium, and Large boxes to fit a variety of books or albums. A polyethylene bag is included to wrap the book for an extra layer of protection and keep any loose parts together.

Ideal for: Books, Bibles, photo albums, scrapbooks, framed photographs
Item #04-BOOK
Textile Storage Kit
Protect fragile garments, quilts, and other textiles by wrapping them in the included unbuffered archival tissue, then storing in an archival box. A desiccant canister provides moisture control within the box.

Ideal for: Clothing, wedding dresses, veils, quilts, household linens, personal accessories
Item #04-500
Object Storage Kit
This kit is offered in two sizes - 9 or 16 compartments - to conveniently organize a diverse assortment of treasures. Compartment Dividers can be ordered separately and can be trimmed to fit dresser drawers and other box sizes. Tissue (Item #45-001) sold separately.


Ideal for: Christmas ornaments, family heirlooms, collectibles
Item #04-OSK
Digital Storage Kit
Organize and store your USB flash drives and camera memory cards in this convenient kit. Stores up to 48 USB drives and includes an Indexing Card and Labels to help you organize your digital back-ups.
Ideal for: USB thumb drives, flash cards, other portable storage devices or small collectibles
Item #60-601
Compartment Storage Kit
Provides convenient storage for a collection of family heirlooms or other objects. Has a divider insert with four compartments, and a top tray to hold documentation or larger, flat items. Tissue (Item #45-001) sold separately.
Ideal for: Three-dimensional heirlooms or memorabilia
Item #60-28-DT
Educational Resources
Look for more information about archival storage and preservation at these online resources.


Archival Methods Blog & Videos

Refer to the many articles on our blog (archivalmethods.com/blog) and Help Center videos (archivalmethods.com/help-center/videos) for detailed information, including:
• Product tutorials
• Family history projects
• Presentation ideas
• Matting and framing solutions
• Preserving different types of items
Information from the American Institute for Conservation
connectingtocollections.org/resources/

Advice about photos, paper, books, A/V, and digital media
archives.gov/preservation
Conserve-o-Gram series includes caring for objects
nps.gov/museum/publications/ conserveogram/conserv.html
Guidance on library materials, including newspapers & comics
loc.gov/preservation/
Includes preservation and disaster planning information
nedcc.org/free-resources/ preservation-leaflets/overview
Resources for organizing your photo collection
thephotomanagers.com
Why Archival Methods?


Customer Service
Our knowledgeable team provides quick, helpful responses to your questions. Call or email us today!


Made in USA
Boxes, cases, and portfolios are handcrafted in our Rochester, NY manufacturing facility.


Careful Shipping
Your order will be expertly packed for maximum product cushioning using recyclable materials.
PAT Verified

We use archival quality materials that have passed the Photographic Activity Test (PAT).

In-Depth Information
Our blog articles and videos on the website provide detailed information about our products, how-to guides, and other preservation tips.
Custom Options


Can't find exactly the size you need? We can create boxes or binders and cut photo mats and frames to meet your specific dimensions.

