

It is of highest importance that we maintain a welcoming, clean, and comfortable environment that reflects the high standards of Nordic Health Group and ensures a positive experience for all patients.
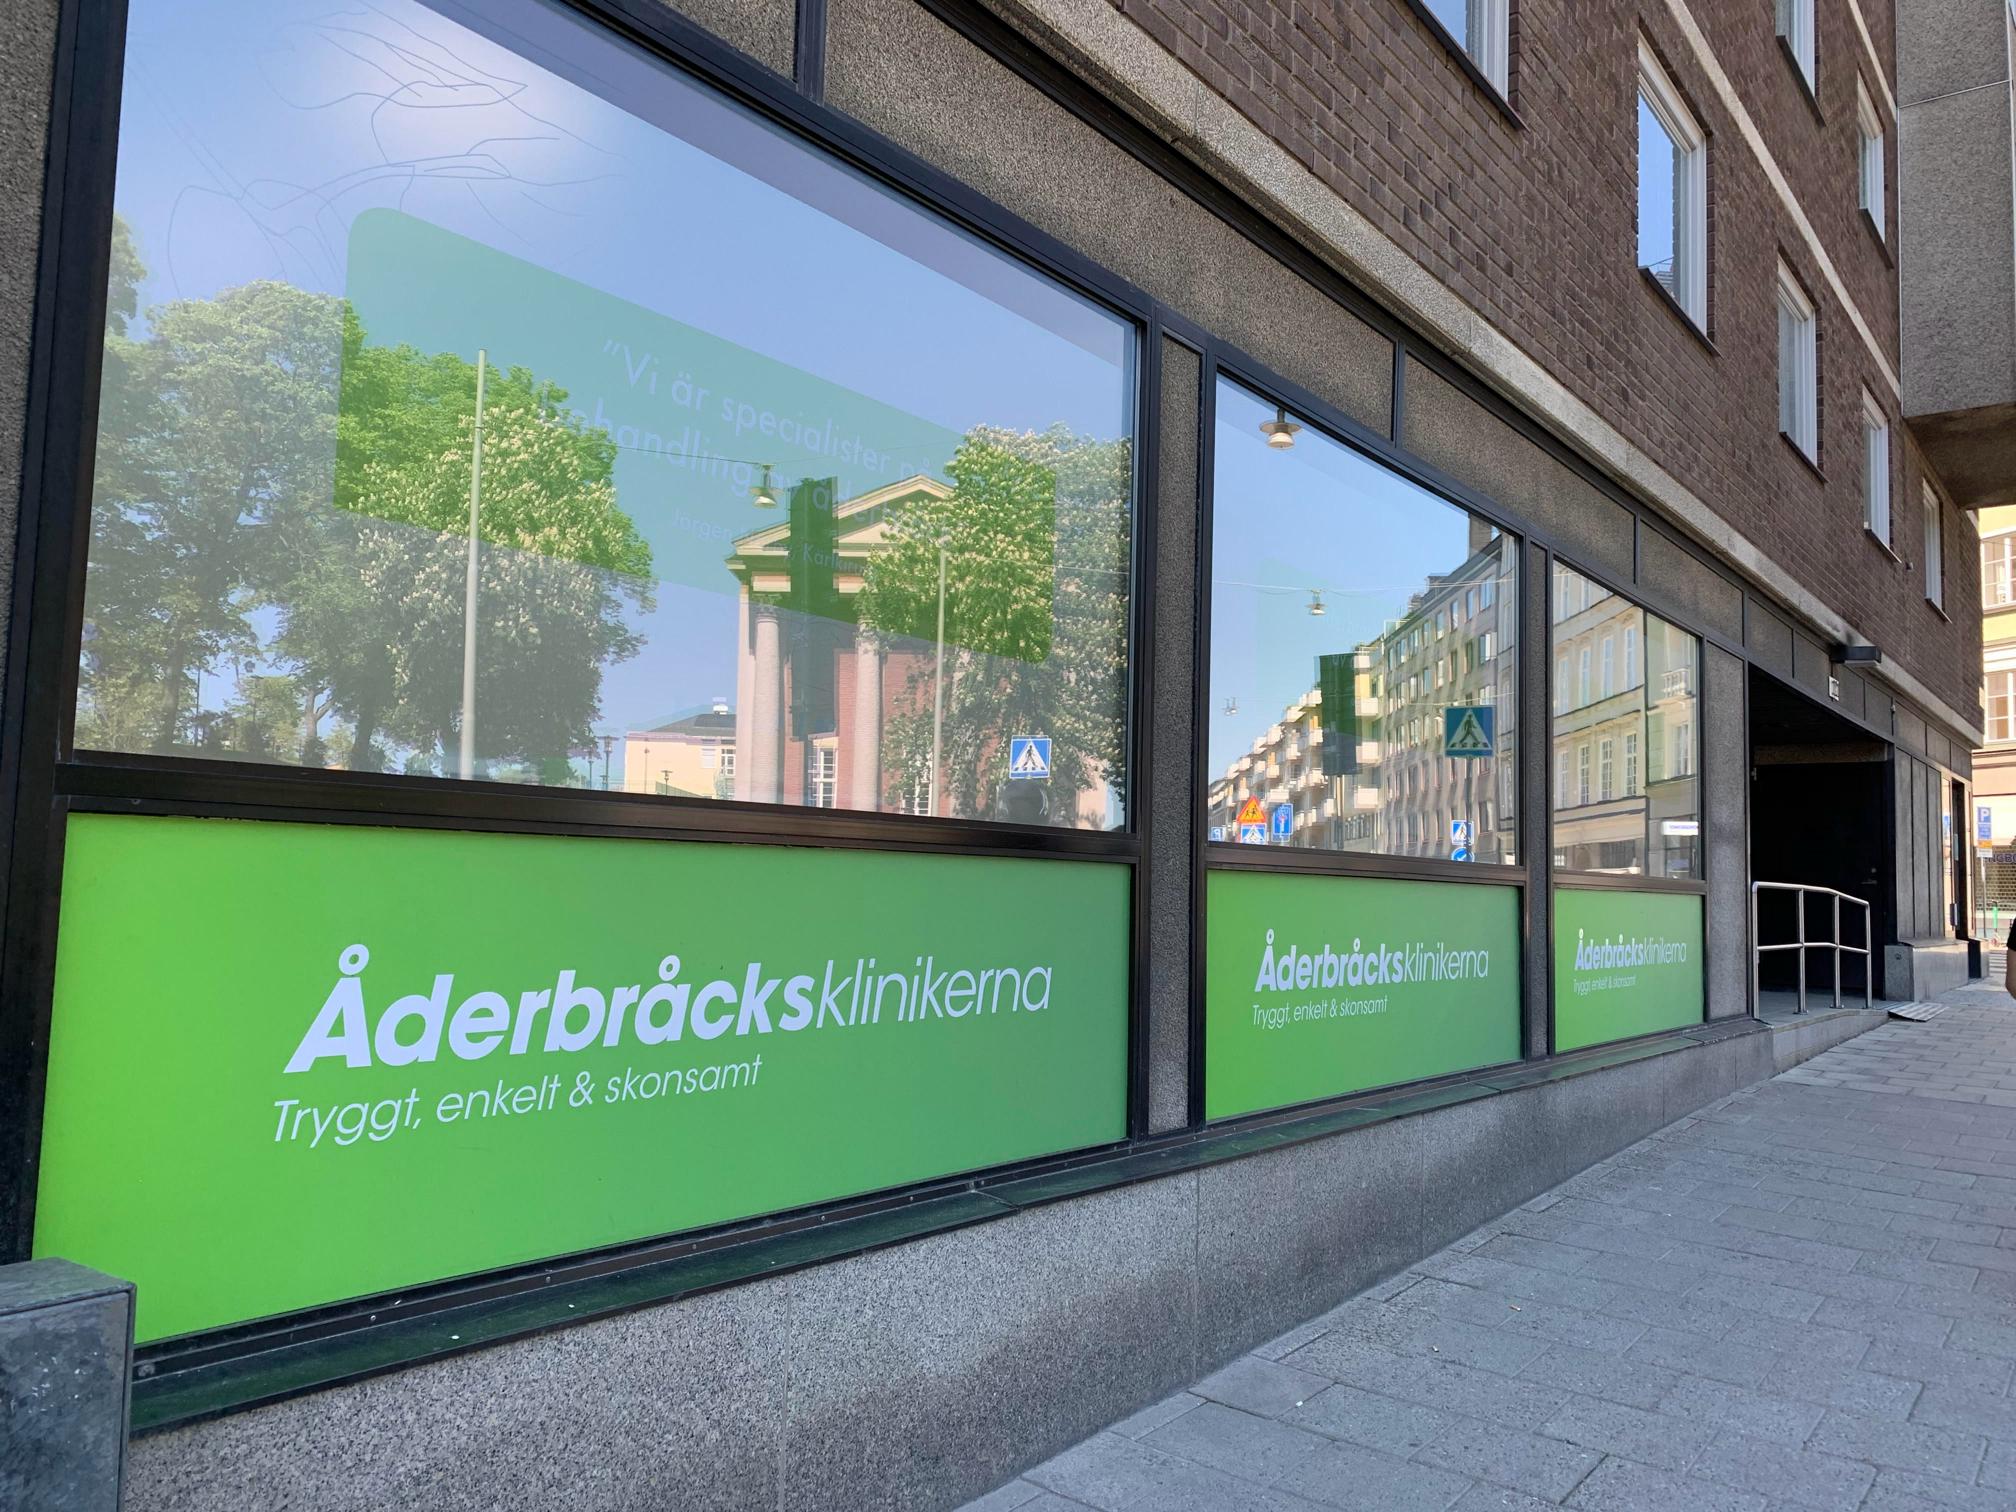
2.1.1.1 Ensure that the patients can easily find the clinic. As a minimum there must be signage:
• Signage outside the clinic
• Indoor signage to guide patients to the clinic, especially in larger buildings with multiple turns.
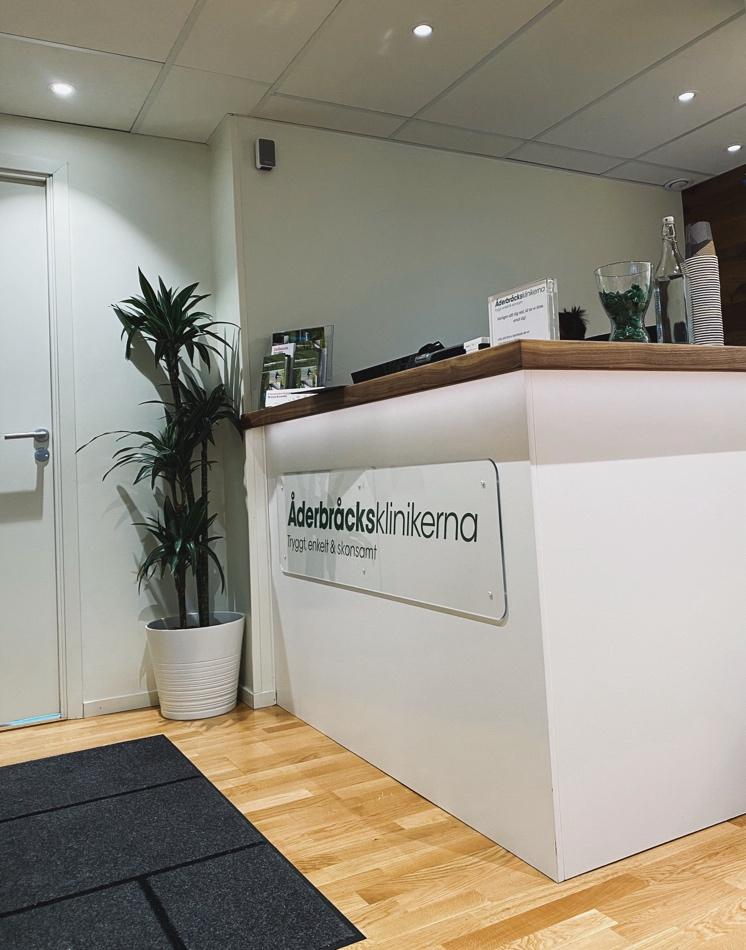
• Signage at the reception
2.1.1.2 Signs should be strategically placed in areas where patients need direction, such as at entrances, waiting areas, and corridors. Ensure signs are free from damage, smudges, or wear and tear.
2.1.1.3 Ensure all signs within the clinic are clear, professional, and easy to read.
2.1.1.4 If Signage and Navigation does not live up to these standards, or new signage is needed or needs to be updated, address it immediately to the Clinic Coordinator, who is responsible for resolving this.
Signage & Navigation

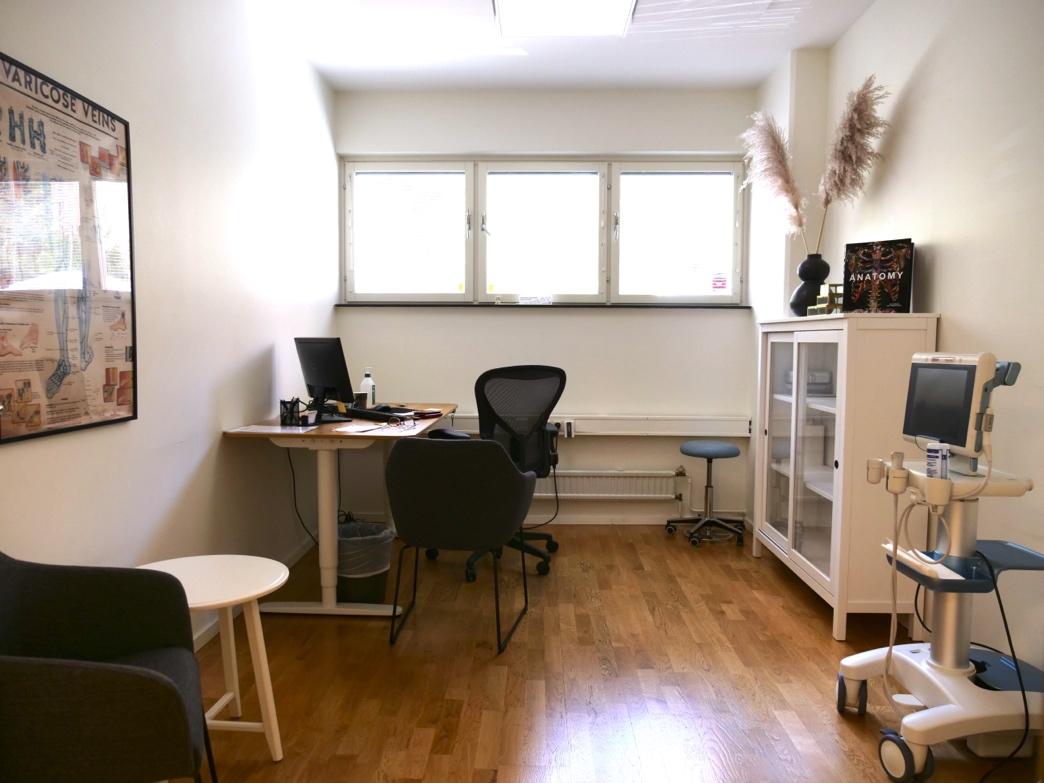
2.1.2.1 The waiting area should be furnished with comfortable chairs or sofas that are clean and in good condition.
2.1.2.2 The layout should allow for easy movement and not feel cramped.
2.1.2.3 Ensure that coffee, tea, and water is available for the patients.
2.1.2.4 Ensure that supplies are always stocked, and that the area is kept clean and inviting. Remove any items, packages or boxes immediately.
2.1.2.5 The waiting area should have a calming atmosphere. Soft background music (singer songwriter, folk, soft electronic or r’n’b music and similar) should be turned on in the waiting area.
2.1.2.6 Lighting should be bright enough for visibility but not harsh or glaring. Soft, warm lights are ideal for creating a comfortable environment.
2.1.2.7 Replace any burnt-out bulbs or contact the janitor or any other relevant person immediately.
2.1.2.8 If the waiting area requires significant actions beyond what can be easily managed, such as broken furniture or WIFI issues, promptly report the issue to the Clinic Coordinator, who is responsible for ensuring its resolution.


3.1.1 The clinic must be thoroughly cleaned each clinic day by a cleaning service, including sweeping and wiping down all surfaces. Pay special attention to high-traffic areas such as the reception, waiting rooms, and restrooms.
3.1.2 Ensure that trash bins are emptied regularly throughout the day to avoid overflow.
3.1.3 Waste should be disposed of correctly, and bins should be kept clean.
3.1.4 The reception and waiting areas should be free from clutter.
3.1.5 Magazines, brochures, and any promotional materials should be neatly organized.
3.1.6 Ensure that the clinic is well-ventilated to maintain fresh air throughout the day.
3.1.7 Open the windows or doors if needed during the day.
3.1.8 Ensure a mild natural scent in the clinic.
3.1.9 Personal items should be kept out of sight.
3.1.10 Promptly remove any accumulated dirt, including soil, paper, and dishware, throughout the day.
3.1.11 If the cleanliness and tidiness require significant actions beyond what can be easily managed, such as replacement of cleaning personnel, address it immediately to the Clinic Coordinator, who is responsible for resolving this.
Cleanliness and Tidiness

2.1.4.1 To ensure patients have access to all necessary information, the clinic must provide and prominently display essential materials, including:
• Health declarations
• Brochures
• Business cards should be provided only if specifically requested by the surgeon
2.1.4.2 Health declarations should be easily accessible at the reception or in the waiting area, allowing patients to complete them upon arrival. Make sure to have sufficient amount of health declarations printed upon arrival and ready for each day.
2.1.4.3 Brochures should be neatly organized and readily available in the waiting area.
2.1.4.4 Business cards should be available at the reception desk, if requested by the surgeon
2.1.4.5 Ensure that all materials are up to date, in good condition, and replenished regularly. Damaged or outdated materials should be replaced.
This Code of Conduct protocol outlines the standards and expectations for all employees to ensure a professional, ethical, and supportive work environment.
Employees are expected to maintain a high level of professionalism in all interactions, both within the organization and with external stakeholders. This includes punctuality, appropriate dress, and respectful communication.
2.2.1.1 Always maintain a neat and professional appearance.
2.2.1.2 Wear appropriate attire that reflects the professionalism of Nordic Health Group.
2.2.1.3 Ensure personal hygiene and grooming are attended to.
2.2.1.4 For receptionist:
• Wear business casual or professional attire.
• Acceptable clothing includes blouses, dress shirts, slacks, skirts, and dresses.
• Avoid overly casual clothing such as jeans, shorts, t-shirts, and athletic wear.
• Ensure clothing is clean, pressed, and in good condition.
2.2.1.5 For nurses and surgeons:
• The provided work uniform must be used with a name tag at all times.
• Jewellery such as rings, bracelets, or wristwatches must not be worn. Earrings and other jewellery may be worn if they do not hang down into the work area.
• Ensure clothing is clean, pressed, and in good condition.
• Long hair and facial hair must be secured so that it does not hang down or fall into the work area.
• Nails must be short and free of nail polish and other artificial materials.
• Bandages, plasters, or similar items must not be used on hands and forearms.
2.2.2.1 Treat colleagues, patients, and partners with respect and courtesy.
2.2.2.2 Be punctual and reliable in all work-related commitments.
2.2.2.3 Maintain a positive and professional attitude, especially in stressful situations.
2.2.2.4 Be attentive and actively listen to patients and colleagues.
We must not sell in the sense of convincing or persuading our patients into a treatment they do not want. However, most of our patients have a problem they want solved, so it’s about giving them the best basis to make their decisions. We do this by asking good questions that make patients' motivations clear to themselves and reframing patients' answers to help them convince themselves.
2.2.3.1 Use curious sentences like:
• “Tell me about your current situation…”
• “How is your problem with varicose veins right now?”
• “What is the biggest influence on your life? How does it limit you?”
• “Why did you choose to come to the consultation now? What made you think you should get treatment now instead of just living with it for another year?”
2.2.3.2 Encourage the patients by saying “Many choose to do something about it right now instead of waiting 10 more years”
2.2.3.3 Communicate the Core Benefits such as:
• “Not to be disturbed at night by pain.”
• “To be able to run again.”
• “Go for a long walk with your partner.”
• “To be able to walk proudly from the beach without the embarrassment of varicose veins.”
2.2.3.4 Use the right words and avoid using:
• "Pain"; instead, say “That you can feel it.”
• "Surgery"; instead, say “Treatment.”
• "Cosmetics"; instead, say “Varicose veins are classified as medical.”
2.2.4 Problem Solving and Responsibility
Effective problem-solving and a strong sense of responsibility are key to maintaining a high standard of care and operational excellence. Our employees are expected to approach challenges with a proactive mindset, engage in constructive dialogue, and take full ownership of their tasks. By doing so, we foster an environment of continuous improvement and accountability, ensuring the best outcomes for our team and our patients.
2.2.4.1 Approach problems with a positive and proactive attitude.
2.2.4.2 Engage in open dialogue to understand and resolve issues collaboratively.
2.2.4.3 Utilize available resources and seek assistance when needed to solve problems effectively.
2.2.5 Responsibility
2.2.5.1 Take ownership of tasks and follow through to completion.
2.2.5.2 Be proactive in identifying areas for improvement and suggesting solutions.
2.2.5.3 Hold yourself accountable for your actions and their impact on the team and patients.
3.1.1 Change Status for
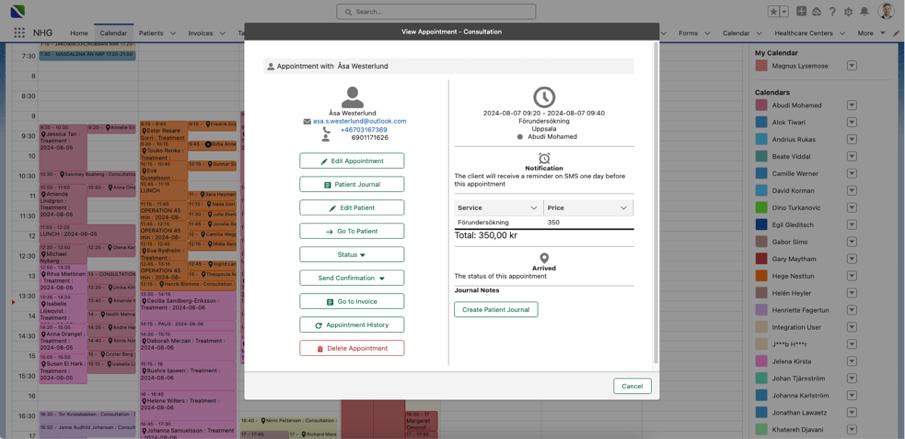
1. Navigate from the calendar to the appointment.
2. Click “Status”
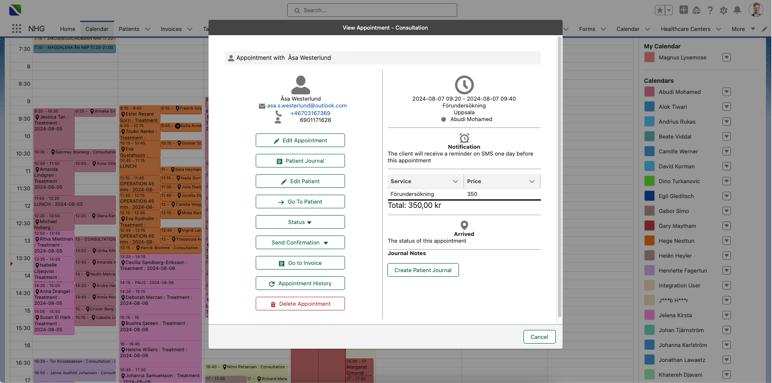
3. Choose “Arrived”.

4. If a patient is not showing up for some reason, please mark the patient as “No Show” by:
5. Navigating to the patient through the calendar
6. Click “Status”
7. Choose instead “No show”
3.1.2.1 If the patient has not filled in the health declaration digitally, you must ensure they fill in one manually.
3.1.2.2 Scan or take a photo of the health declaration and upload the file to the patient’s journal.
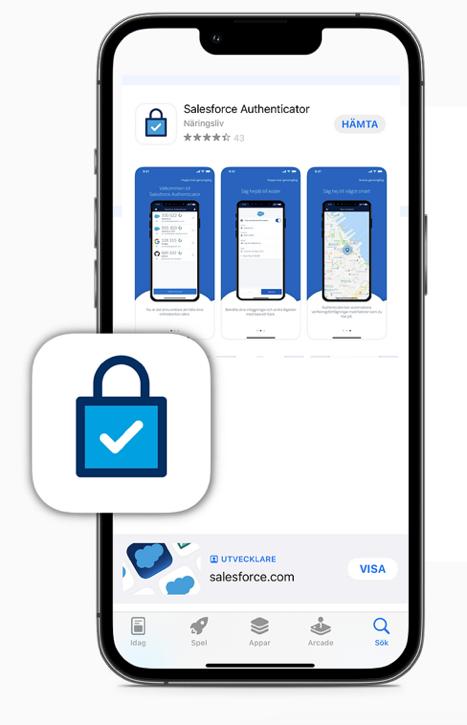
3.1.2.2.1 If you have access to a scanner, that's great. If not, it's best to download the Salesforce app to your phone and upload the image from there. The app is called Salesforce in both the App Store and Google Play, and it has this logo:

3.1.2.3 When you want to upload the form to the patient’s record on your mobile, follow these steps:
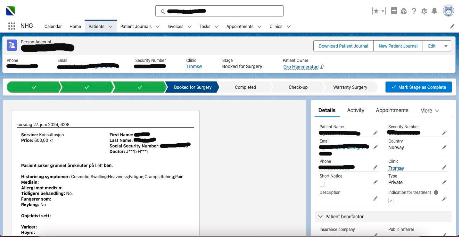
1. Select the appointment to open the patient information. Note that if you are far down in the calendar, you may need to scroll up to see the patient details.
2. Select "Go To Patient."
3. Select "More."
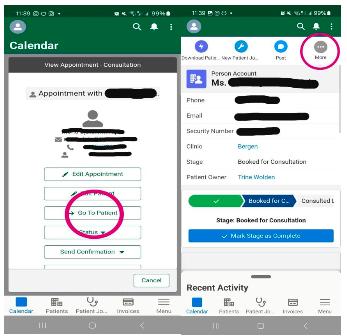
4. Then select on "File":
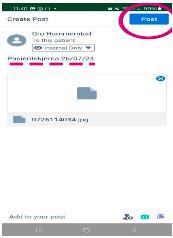
5. "Create Post" will open. From here, you can take a picture of the patient form and upload it directly. Select "Take photo":

6. After taking the photo, you can label it with "Patient Form" and today’s date, as shown below, and then tap on "Post." The form will then be added to the patient’s record.
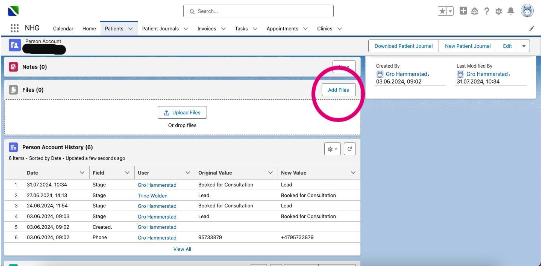
7. If you have a scanner available, you can easily scan the form to your computer. In Salesforce, you need to go to the patient’s profile and scroll down to “Files.” Here you can upload the form by clicking on “Add files.”
8. When you have checked that the file is correctly uploaded you must shred the health declarations to secure confidential information.
3.1.3 Create an Appointment for the Patient
3.1.3.1 Ensure that the first available time is offered, and there is no unnecessary gaps in the schedule.
3.1.3.2 When you want to create a booking, you should do it by using the soft bookings. Soft bookings are preliminary bookings, that indicates the current time slots that are available for bookings. Do the following:
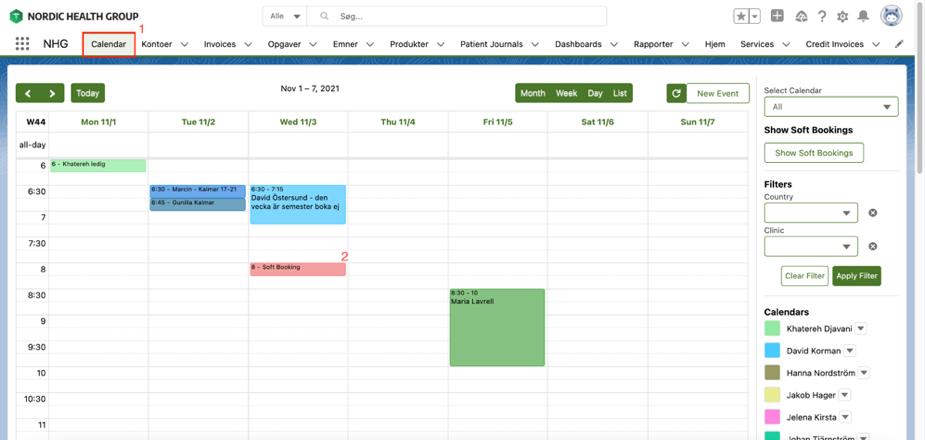
1. Go to “Calendar” in the menu bar
2. Click on a Soft Booking time slot (you can select “Show Soft Bookings” in the right menu. By clicking on this button, you only see available booking. (Remember to untick “Show soft bookings” when you want to see all bookings including the actual appointments”
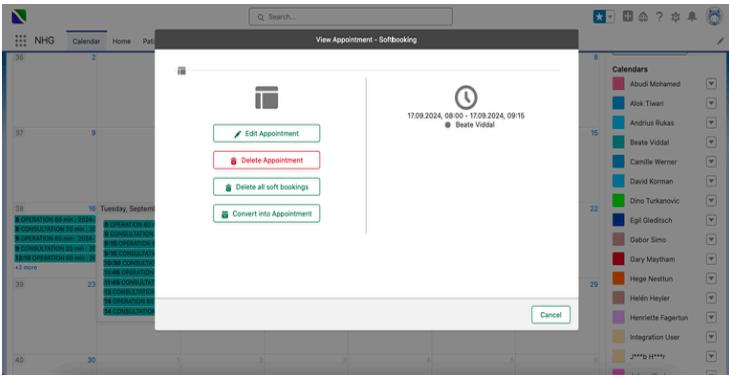
3. Click “convert into appointment”
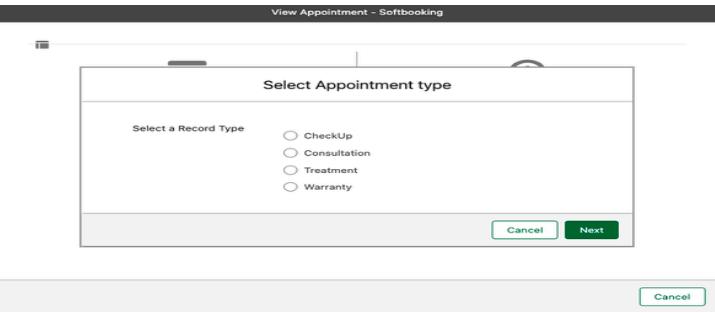
4. Here, select "Treatment" since you are booking a treatment, and then click "Next."
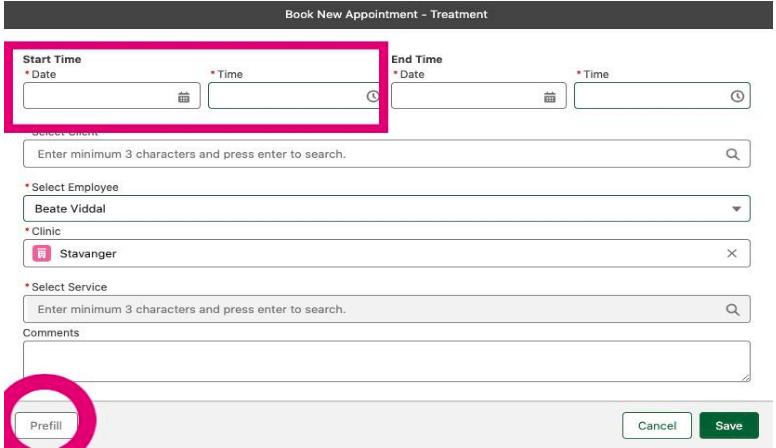
5. It's important to check that the date and time of the appointment you have selected are correct. If this is not already filled in, you need to enter the date and time when the appointment starts in the first two fields.
6. The vascular surgeon has already entered all the information regarding the price and duration of the treatment. Once you have searched for and found the correct patient, click on the patient’s name and then on the magic button at the bottom left - "Prefill." The rest of the necessary information will be filled in automatically, and it may look like this.
7. Finally, click "Save," and the treatment will be booked. The patient will receive a confirmation by email and SMS shortly after, and they will also get an SMS reminder the day before the appointment.
3.1.3.3 If soft bookings are not available in case of a late cancellation or similar, you can create an appointment directly instead:
1. Go to “Calendar” in the menu bar
2. Click on an available slot in the calendar
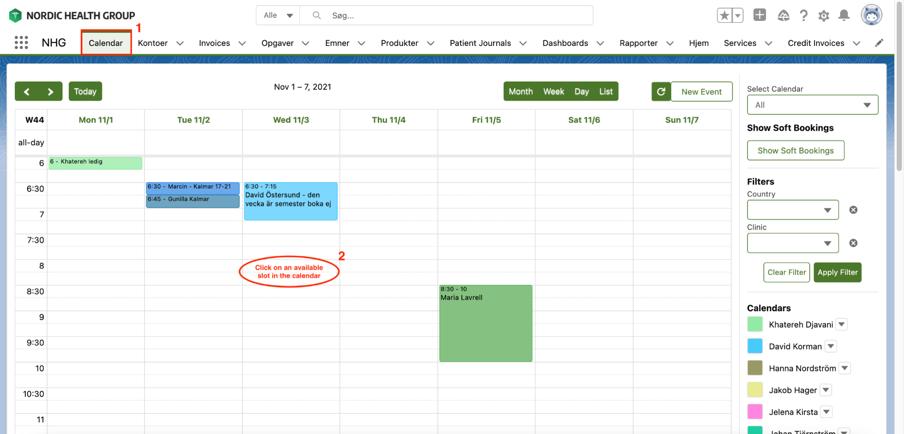
3. Select “Appointment” in the pop-up and click “Next”
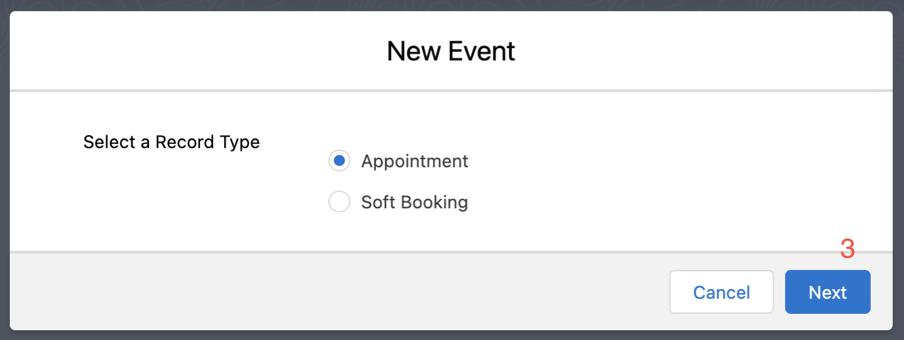
4. Book the appointment as described above and as if you have used Soft Bookings.
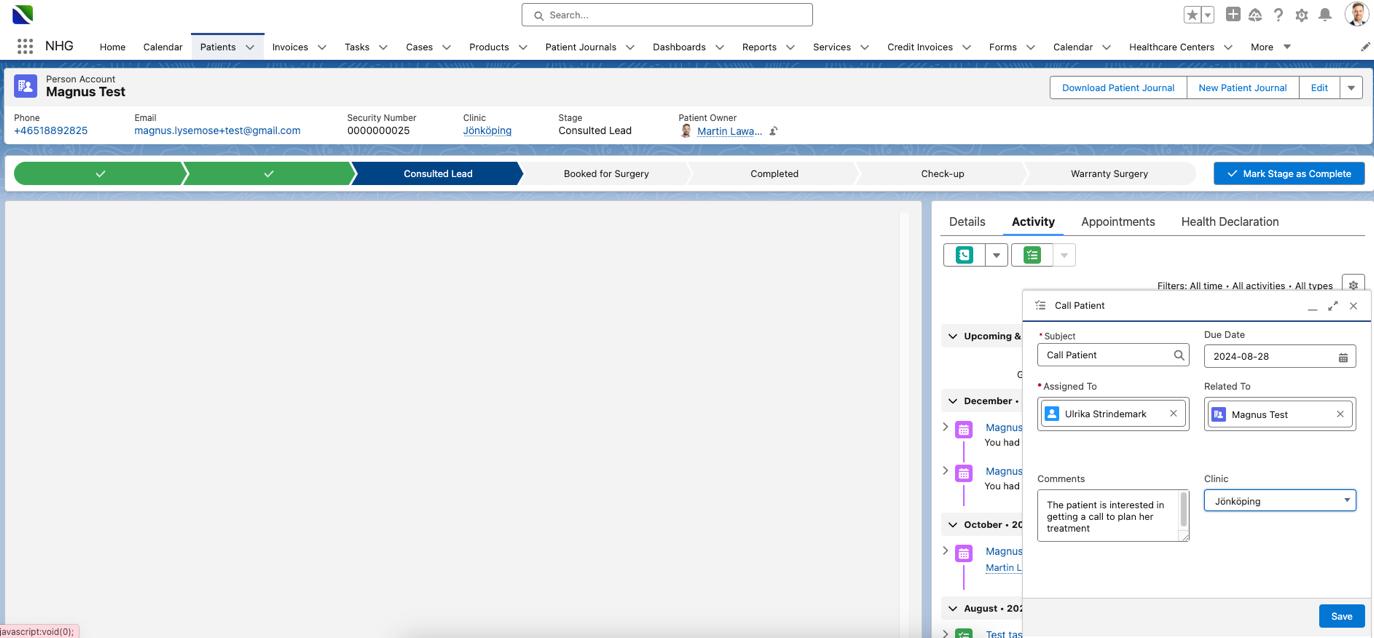
1. Navigate to the patient and Select “Activities”
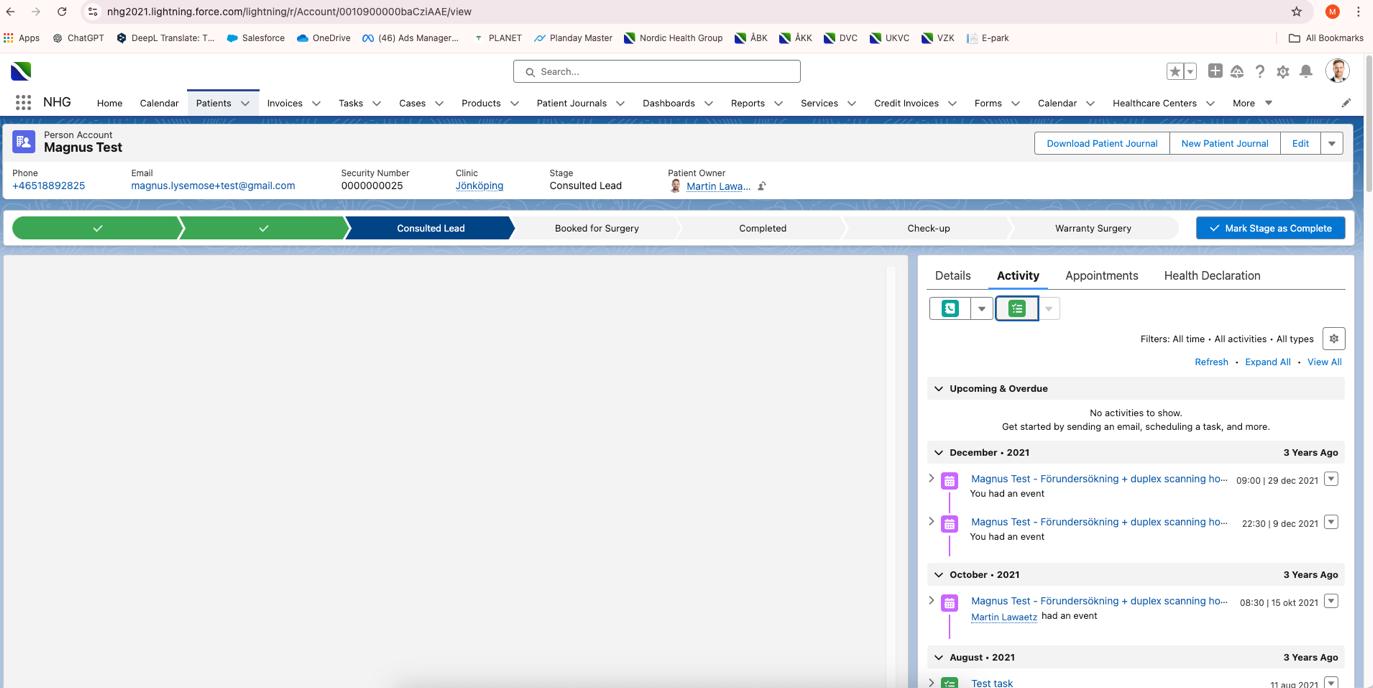
2. Click on the icon “Tasks
3. Fill in the following required details and press save:
1. Subject
2. Due Date (deadline)
3. Assigned To (select the person who should handle the task)
4. Related to (don’t change it, as it should be the patient related to the task)
5. Comments (describe any details and what needs to be done)
6. Clinic (the patient’s clinic)
3.1.5.1 Sometimes its necessary to access the patient’s record to check details, such as the cost of treatment or how long it will take. To find the patient in Salesforce:
1. Click on the patient’s appointment in your calendar, or
2. Search for the patient’s name in the search bar at the top of the page.
3. You will see all the patient’s information, including when they had their consultation, and so on. The information we usually need is further down the page.
4. Here, you can see that the patient is scheduled to treat one leg, and all three treatment methods (laser, foam sclerotherapy, and phlebectomy) will be used. You can also see that the allocated time, and the price (when booking treatments, we use the "Prefill" button, which automatically fills in all this information).

3.1.6 Create an Invoice in Patient Journal
3.1.6.1 Always make the invoice just after the payment, it will minimize the number of errors, since it will be fresh in memory.
3.1.6.2 If a patient for some reason don’t have to pay, then you don’t have to make an invoice. If you make an invoice for 0 kronor, then the financial department will have extra work to do and you would have done something you didn’t have to do.
3.1.6.3 Choose the patient from the calendar
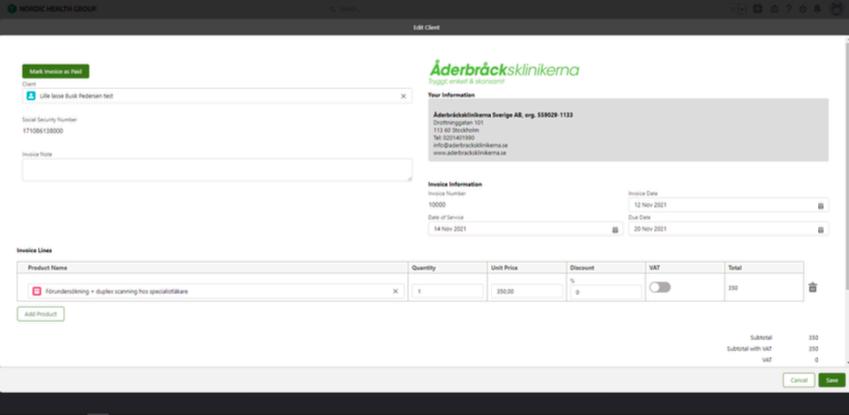
3.1.6.4 Select “Create New Invoice”
3.1.6.5 By creating the invoice from the calendar, it automatically takes the information from the booking and inserts it into the invoice. Please check if the unit price is correct (price of the service).
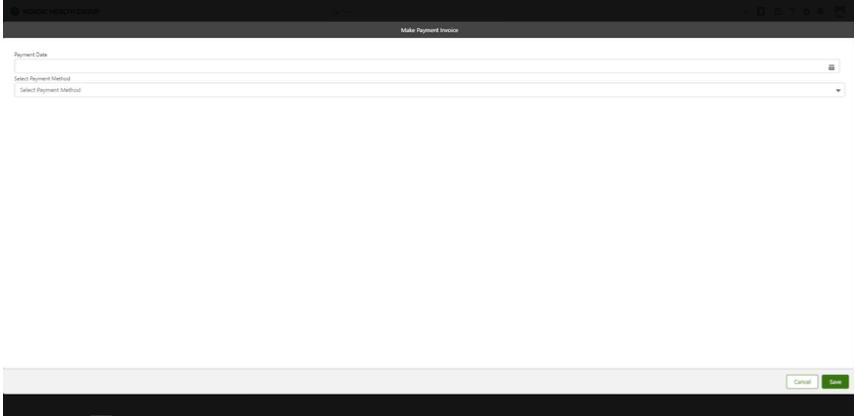
3.1.6.6 In the top left corner, click “Mark Invoice as Paid”.
3.1.6.7 After selecting on “Mark Invoice as Paid” you can then select the payment date and method. The date should always be current date. You can select a variety of payment methods, please be aware that you select the correct one, which the patient has paid with. If the patient pays with “Swish”, you select “Swish”.
3.1.6.8 Select “Send Confirmation” to send a confirmation to the patient.
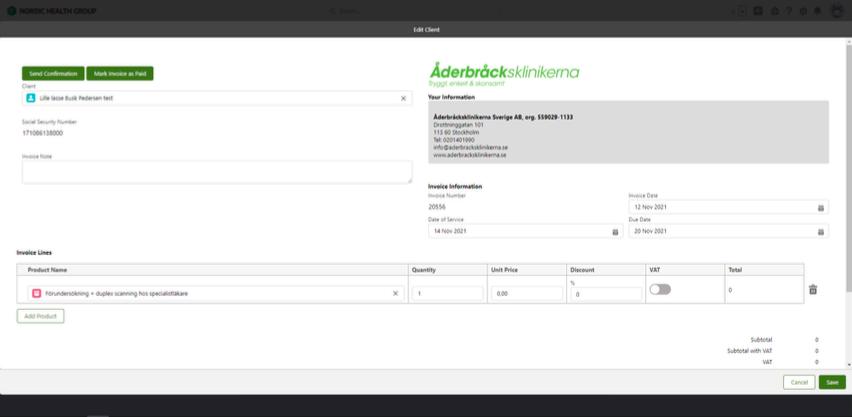
3.1.6.9 Save the invoice.
Logging into Salesforce for the First Time
3.1.7.1 You have received your Salesforce login details via email. Contact your Clinic Coordinator if you need assistance.
3.1.7.2 Use the desktop version as a standard on your PC. Salesforce can be downloaded to your phone or tablet. Search for Salesforce.

3.1.7.3 Salesforce has made security changes to the user login which requires every user to use 2FA (two factor authentication) when logging in.
3.1.7.4 Follow these steps:
1. Download The Salesforce Authenticator app to your smartphone.
2. Select “Add Account”
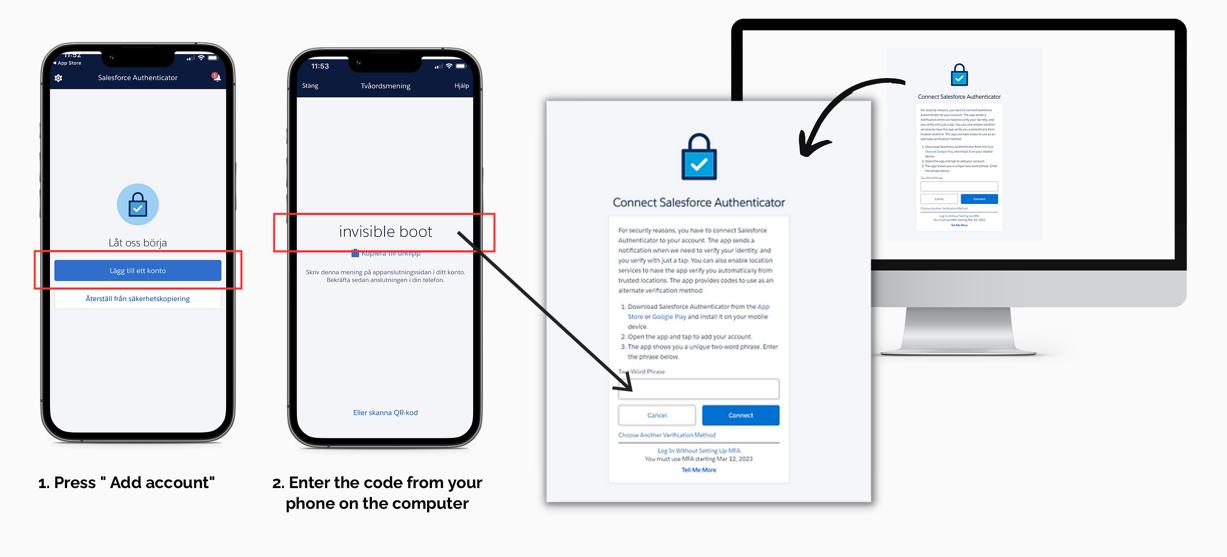
3. Enter the code from your phone on the computer.
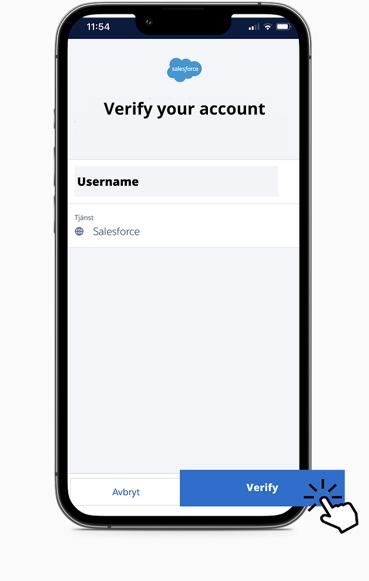
4. Enter your Salesforce username (this is not necessarily your mail) and verify your account.
5. Next time you will log into Salesforce on your computer, this will show:
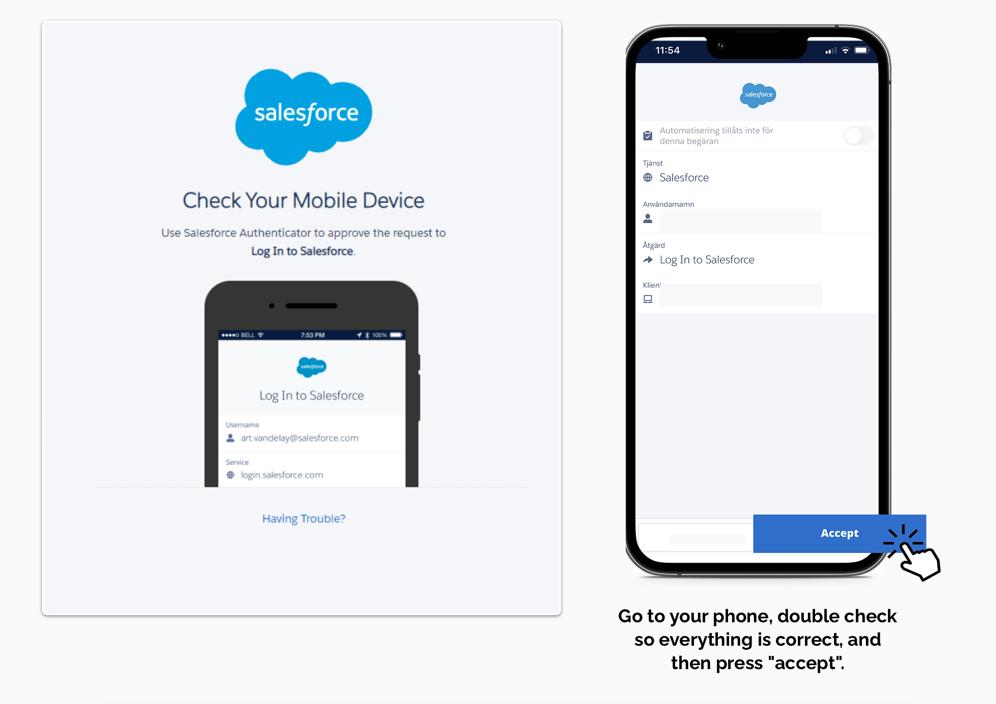
3.1.7.5 When you are logged in to Salesforce, the first thing you should do is check the calendar. Click on "Calendar" (green circle) to open the calendar on today’s date. The first time you open it, you will also need to select the clinic you want to view the calendar for (blue circle):
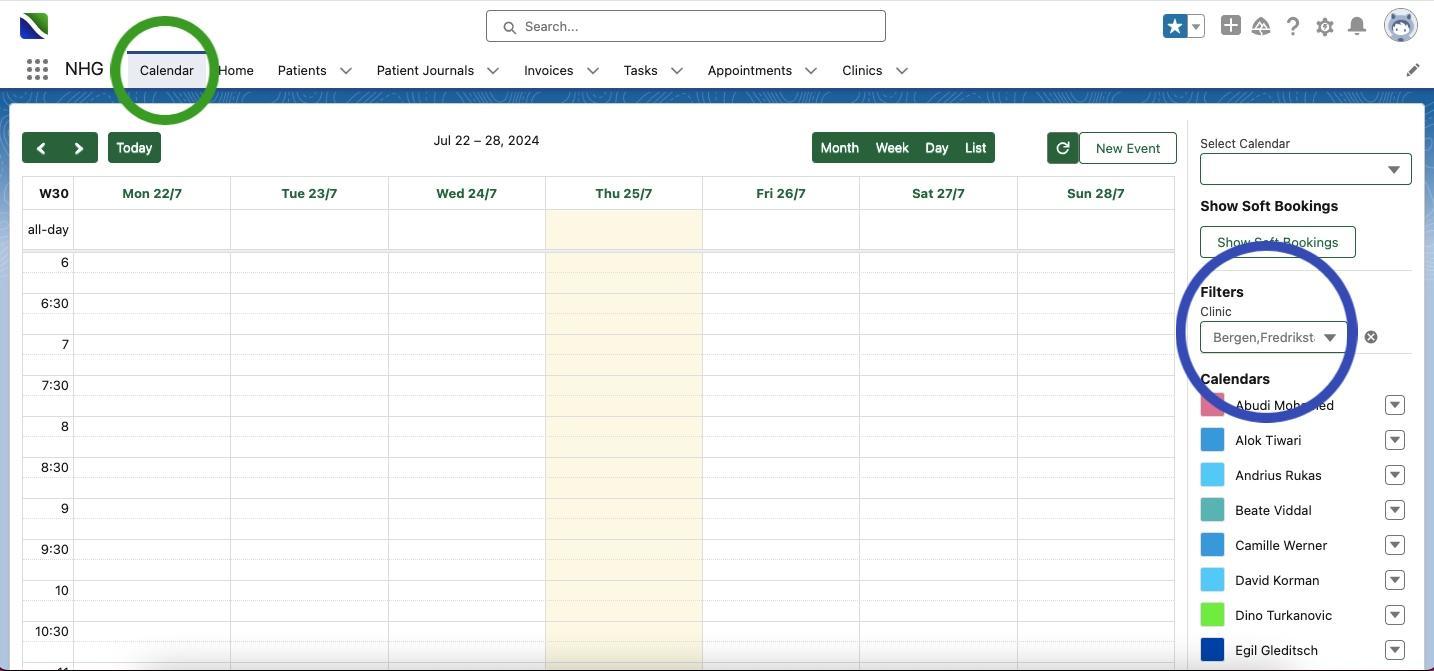
3.1.7.6 Once you have selected the clinic you work at, it will automatically be selected the next time you open the calendar.
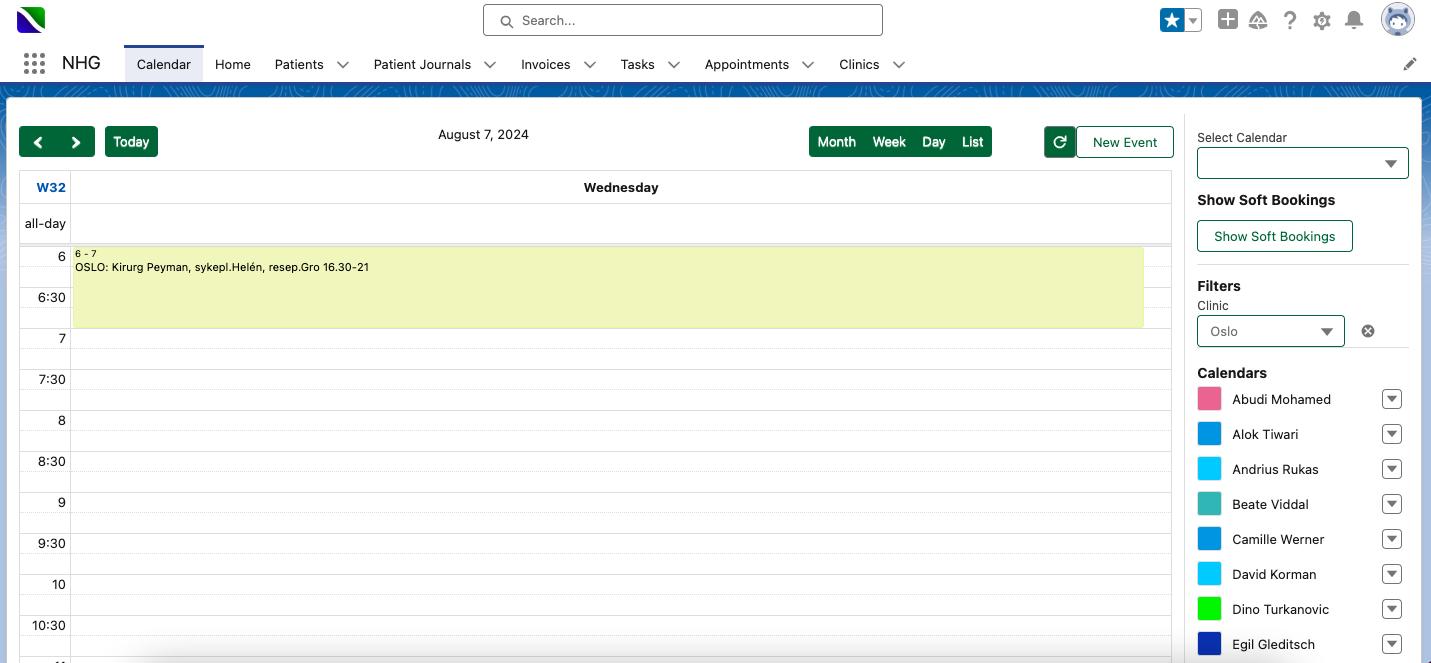
3.1.7.7 To get a better overview of the patients scheduled for the day you are working, it is recommended to select the "Day" view. This changes the view from the whole week to just the day you want to see. It may look like this:
3.1.7.8 Ensure to scroll down to ensure that you see the entire day:
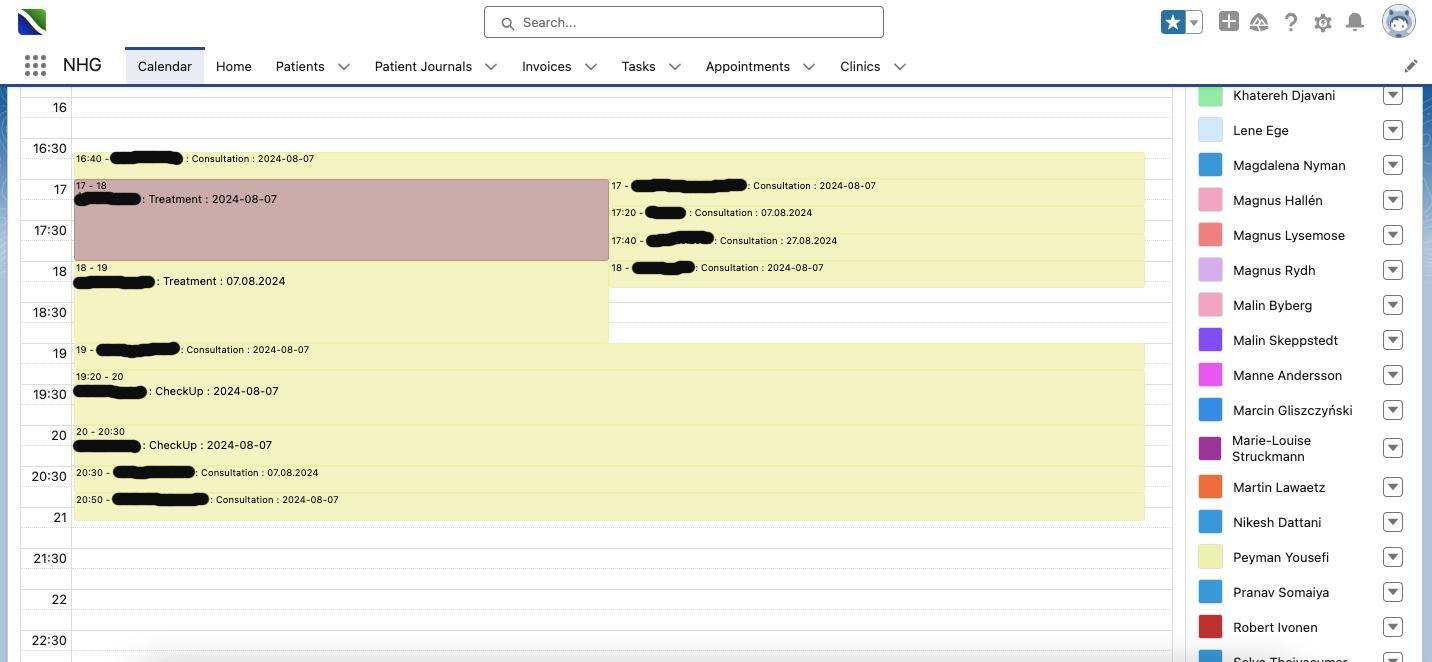
3.1.7.9 Patients coming for treatment are marked as “Treatment,” and those coming for consultations are marked as “Consultation.” “CheckUp” indicates that the patient has previously had a treatment and is coming in for a follow-up.
3.1.7.10 You may want to keep this Calendar view open in a separate tab, so you can easily check if it’s one of “your” patients calling, and you should take the call, as well as having a quick overview of your patients when they arrive.
3.1.8.1 If you have forgotten your password, you can reset it yourself Follow these steps:
1. On the login page, click the blue link (below the input fields to enter your username and password).
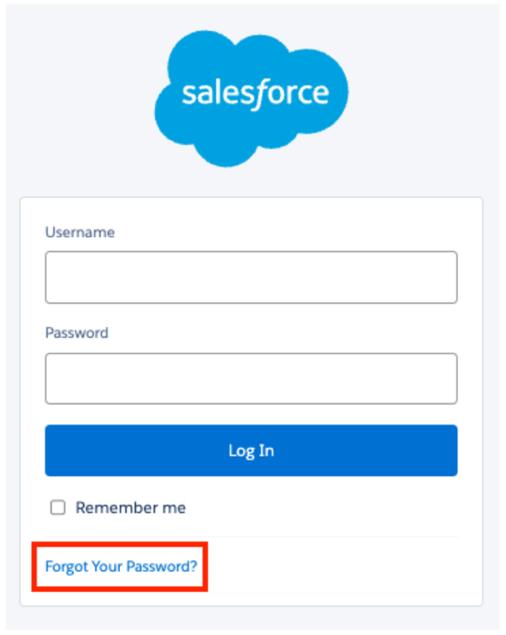
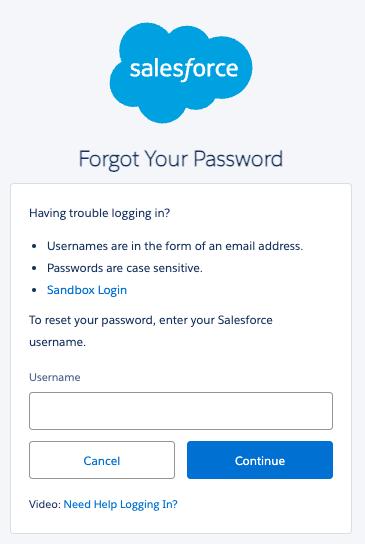
2. On the next screen, enter your username and click continue.
(Important: Your username might be different from your email. Your username has previously been provided to you via email, so it’s important to check previous emails)
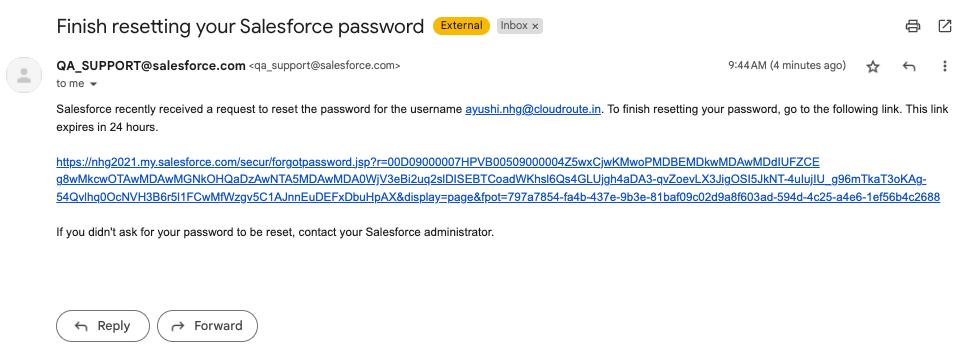
3. Check your email inbox for an email that looks like this and click the link in the email.
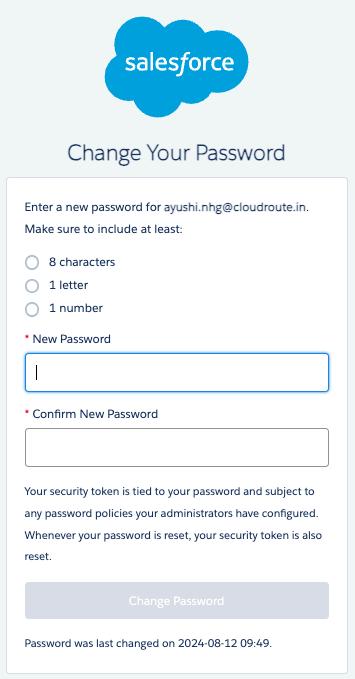
4. Enter a new password and click the “Change Password” button to finish creating a new password.
5. If you need to reset your authentication, you must write to Lasse at lp@nordichealthgroup.com or via Slack.
3.2.1 Requesting a Google Review if the Patient Has a Google Account
6.1.1.1 Use the QR code provided and have them to scan.
6.1.1.2 Alternatively follow these 6 steps:
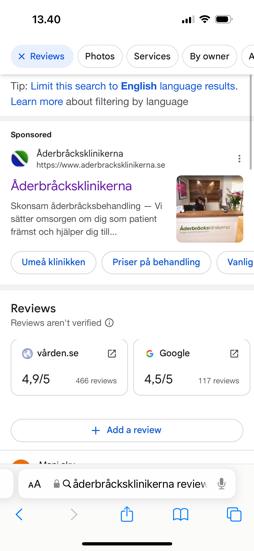
1. Guide them to search for the clinic on Google and choose “Review” in the upper bar.
2. Click “Reviews”
3. Click “Add Review”
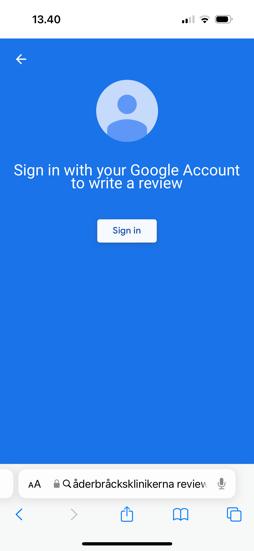
4. Click “Sign In” and sign in with your Google account.
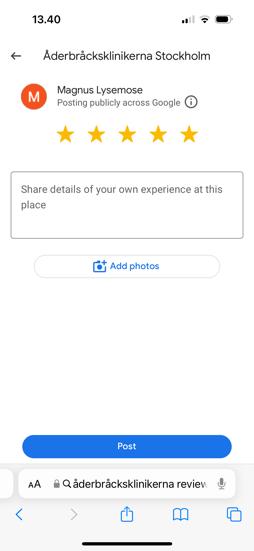
5. Choose the rating
6. Click “Post”


3.2.2 Requesting a Google Review if the Patient Does Not Have a Google Account
6.1.1.3 If the patient does not have a Google account, offer to show them how to create one quickly.
6.1.1.4 Explain that the process takes less than 3 minutes and allows them to leave a review immediately: "If you don't have a Google account, I can help you create one. It only takes a couple of minutes."
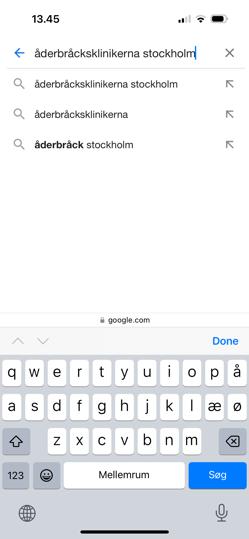
6.1.1.5 Follow these 16 steps:
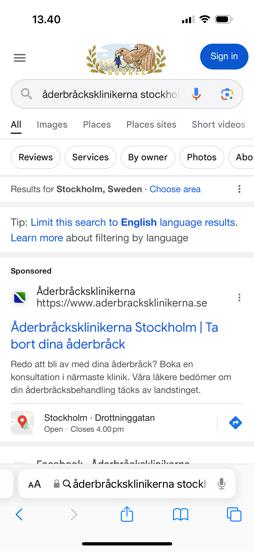
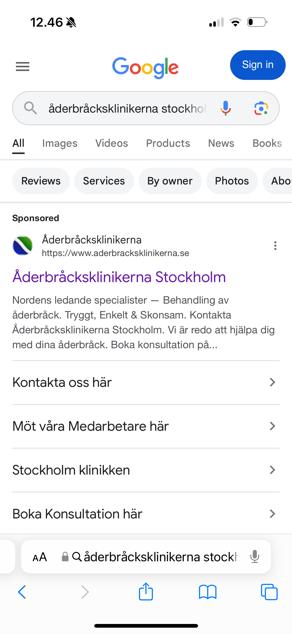
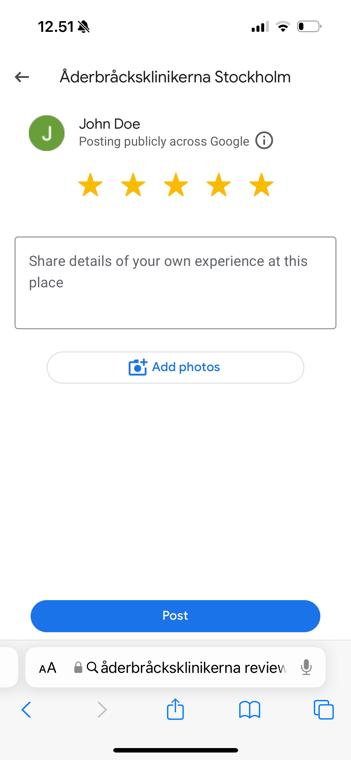
1. Search for the clinic in the search bar = Name + city (e.g. Åderbråcksklinikerna Stockholm).
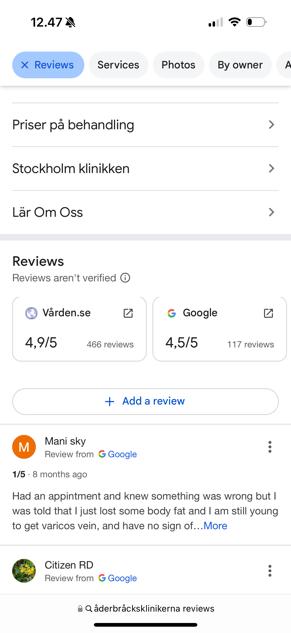
2. Scroll down until you see “Add a review”
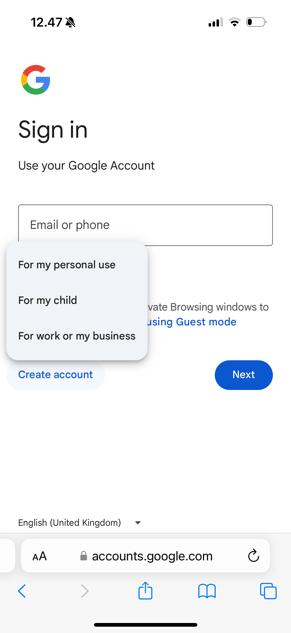
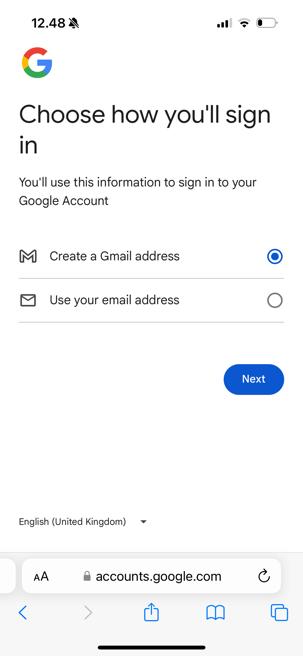
3. Select “Create Account”
4. Select “For my personal use”
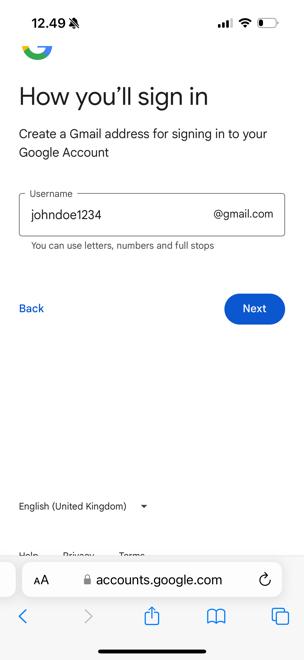
5. Select “Create a Google address”, and click “Next”
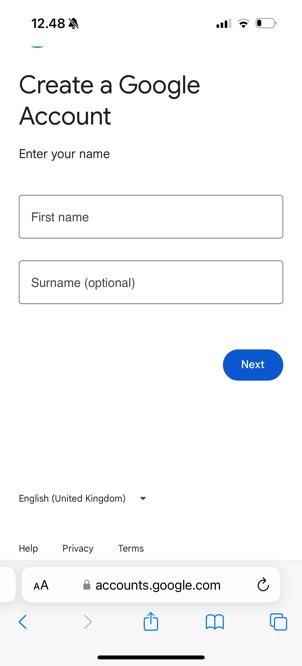
6. Type your first name, and click “Next”
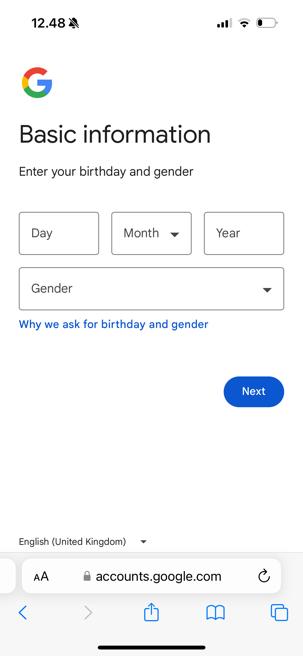
7. Type your birthday and select gender, and click “Next”
8. Choose your new mail address, and click “Next”
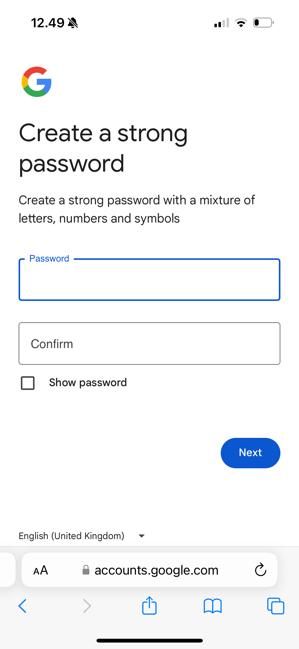
9. Create a new password, confirm it, and click “Next”
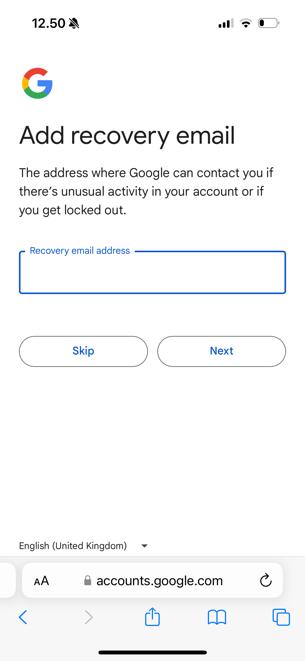
10. Skip “Add recovery mail”, and click “Next”
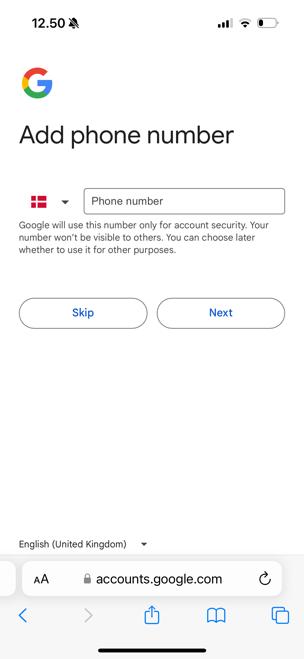
11. Skip “Add recovery phone number”, and click “Next”
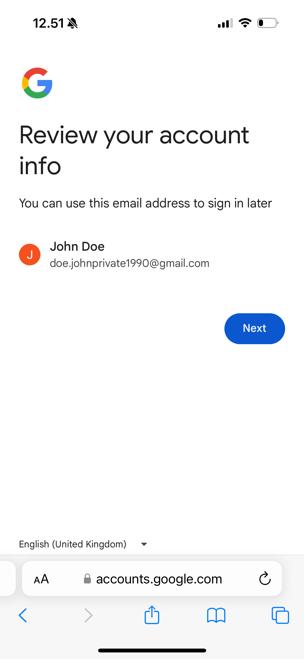
12. Review your account info and click “Next”
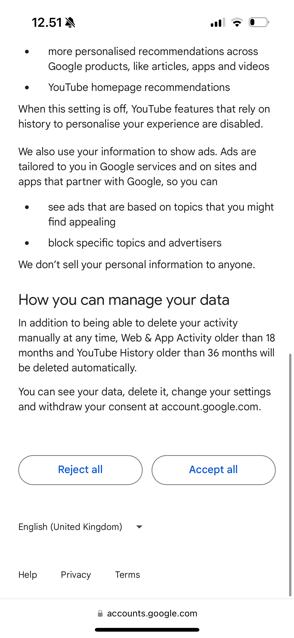
13. Select “Accept All”
14. Select “Confirm”
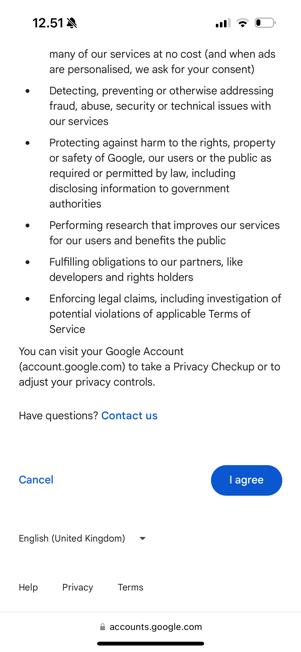
15. Select “I agree”
16. Choose your rating, give a brief description of your experience and select “Post”


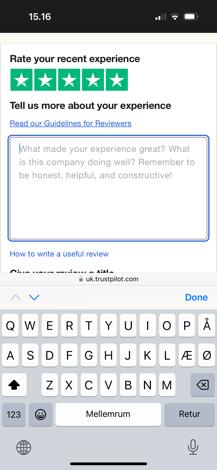
3.2.3 Requesting a Trustpilot Review
3.2.3.1 Follow these 7 steps:
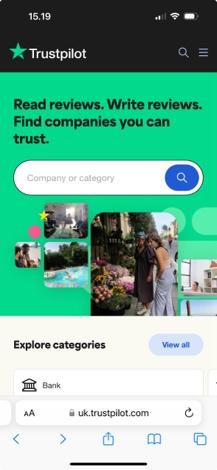
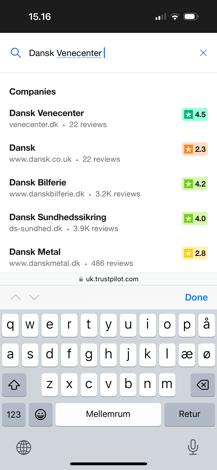
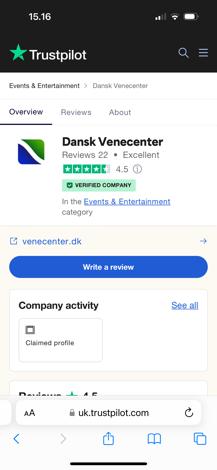
1. Go to Trustpilot.com
2. Type the company name, e.g. Dansk Venecenter
3. Select “Write a review”
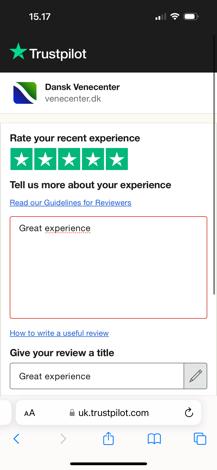
4. Rate the experience
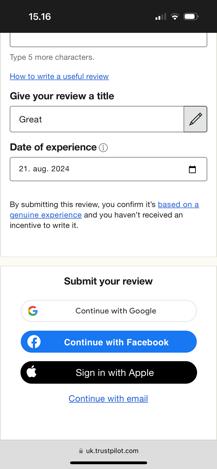
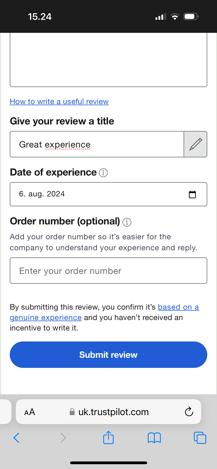
5. Fill in the description, date and title
6. Continue with an account on either mail, Facebook, Google, Apple.
7. Submit the review.


3.3.1.1 Ensure the Nets terminal is turned on and ready for use.
3.3.1.2 Enter the amount to be paid on the terminal.
3.3.1.3 Ask the patient to insert their card into the terminal or use contactless payment if their card supports it.
3.3.1.4 Ask the patient to enter their PIN code and press "OK".
3.3.1.5 Wait for the terminal to approve the payment. This may take a few seconds.
3.3.1.6 Once the payment is completed, print the receipt and give it to the patient.
Note: Under no circumstances should money be refunded through the terminal at the clinic. If a refund is necessary, contact HQ for instructions.
3.3.2.1 Ensure the clinic’s Swish number is available.
3.3.2.2 Inform the patient of the amount to be paid.
3.3.2.3 Ask the patient to open their Swish app on their smartphone.
3.3.2.4 Ask the patient to enter the clinic’s Swish number and the agreed amount in the Swish app.
3.3.2.5 Ask the patient to confirm the payment in the app. This may involve using their BankID or other security verification.
3.3.2.6 Check that the payment has been completed on the patient’s phone.
3.3.3.1 Ensure all transactions for the day have been completed.
3.3.3.2 On the Nets terminal, press the menu button to access the main menu.
3.3.3.3 Navigate to the "Reconciliation" or "End of Day" using the arrow keys or press 6.
3.3.3.4 Select "Reconciliation" or "End of Day" and press "Enter."
3.3.3.5 The terminal will process all transactions and generate a summary report.
3.3.3.6 Review the summary report printed by the terminal. It will show the total amount processed and the number of transactions.
3.3.3.7 If there are any discrepancies, investigate and resolve them before closing the day’s accounts. Contact your Clinic Coordinator if necessary for assistance.

Understanding how to use Planday is essential as it directly impacts your ability to secure shifts and ensure accurate payment. Planday is our primary tool for scheduling shifts and tracking work hours. Familiarizing yourself with this platform will help you manage your schedule effectively and make sure your work hours are recorded correctly, which is crucial for timely and accurate payroll.
3.4.1.1 Registration of Hours/Shifts in Planday: When a shift agreement is made, it is recorded in Planday by the head office. The planned shift in Planday is the one that constitutes the agreement.
3.4.1.2 Changes to Shifts: Employees are responsible for registering any changes from the original plan in Planday. To have a change in the shift approved, a comment explaining the reason for the change must be included.
3.4.1.3 Verification of Hours at the End of the Month: Employees are responsible for verifying that the hours are correct in Planday by the 5th of the following month. For example, your hours for May should be accurate and checked by you no later than the 5th of June. If you do not have changes to the hours recorded in Planday, no further action is needed. If you have changes or if the schedule does not match, you need to update the registration in Planday and make a note of what was changed and why. These changes will be reviewed by the head office before payroll is processed.
3.4.1.4 Approval of Hours and Payroll: Approval of hours occurs at the head office after the 5th of each month. Any changes submitted after this date cannot be included in the current payroll run and will be processed in the next payroll cycle.
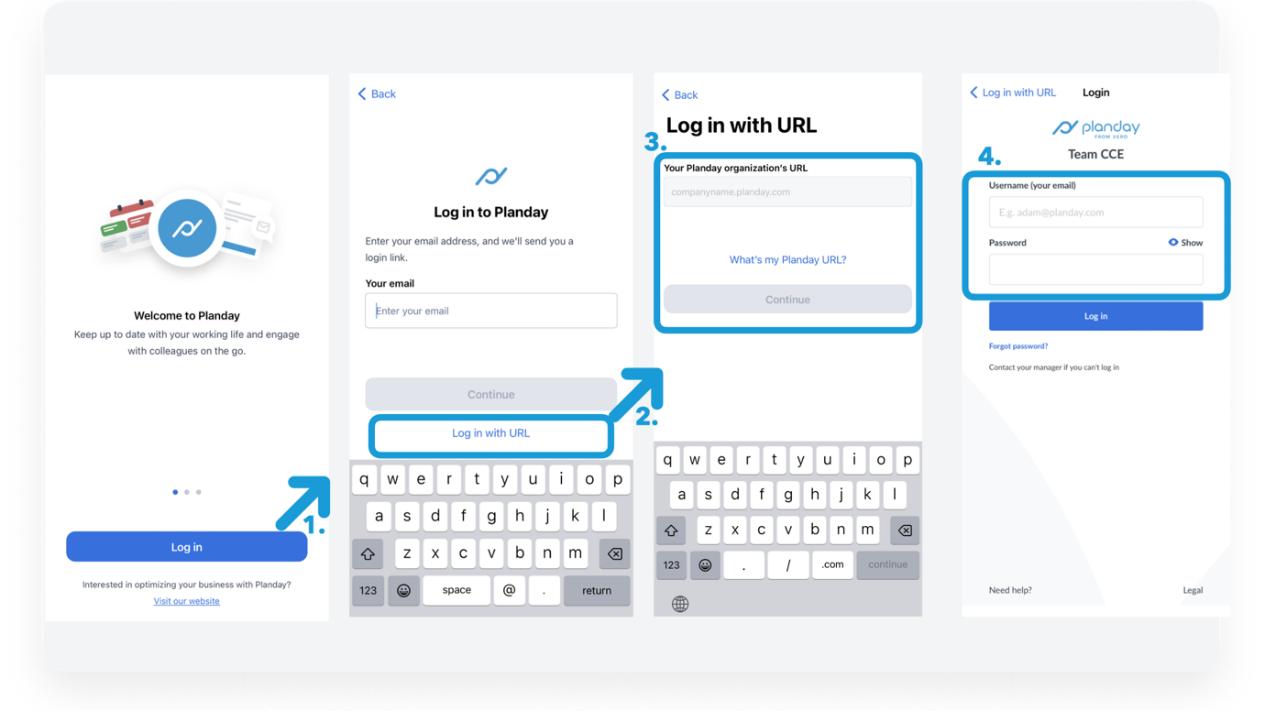
3.4.2.1 If you still need to, download the Planday app for free from your device's App Store by searching for Planday Employee Scheduling. The app works on most Android and iPhone devices.
3.4.2.2 You will need this Planday URL to log in
3.4.2.3 Your username will be your email address.
3.4.2.4 Your password can be set up by clicking the invite sent by your manager to your email.
3.4.2.5 You can also from the log in screen, tap Log in with URL.
3.4.2.6 Type our company's Planday URL, nordichealthgroup-master.planday.com, then type your credentials to log in.
3.4.3
When you log in to Planday, you will be greeted by the first page, which is 'Overview'. Here, you can get an overview of the most frequently used features in Planday.
3.4.4.1 You can find your scheduled appointments by go to the ‘Overview’ and ‘Your schedule’. By pressing ‘See all’ you will get a list of all your upcoming shift.
3.4.4.2 You can also go to ‘More’ and select ‘Your hours’.
3.4.4.3 Here you'll see the information displayed for a month, showing a summary of your hours.
3.4.4.4 The start date aligns with your company's pay period set by the administrator.

3.4.5.1 You will see your total working hours for each shift in ‘Your schedule’
3.4.5.2 Your manager is responsible for scheduling your working hours in Planday after the agreement has been done. Each shift will be logged with a half-hour before the start time of the treatments/examinations and half-hour after. This extra time is to account for preparation and wrap-up duties that are part of your role.
3.4.5.3 If there are changes to the program, such as a 30-minute delay that extends your shift, you must manually update this in Planday. To do this, go into the system and adjust your shift duration accordingly. Please note that this change will only be approved if you provide a clear and detailed explanation for why your shift was extended. Without this explanation, the change may not be accepted, and you may not be compensated for the extra time.
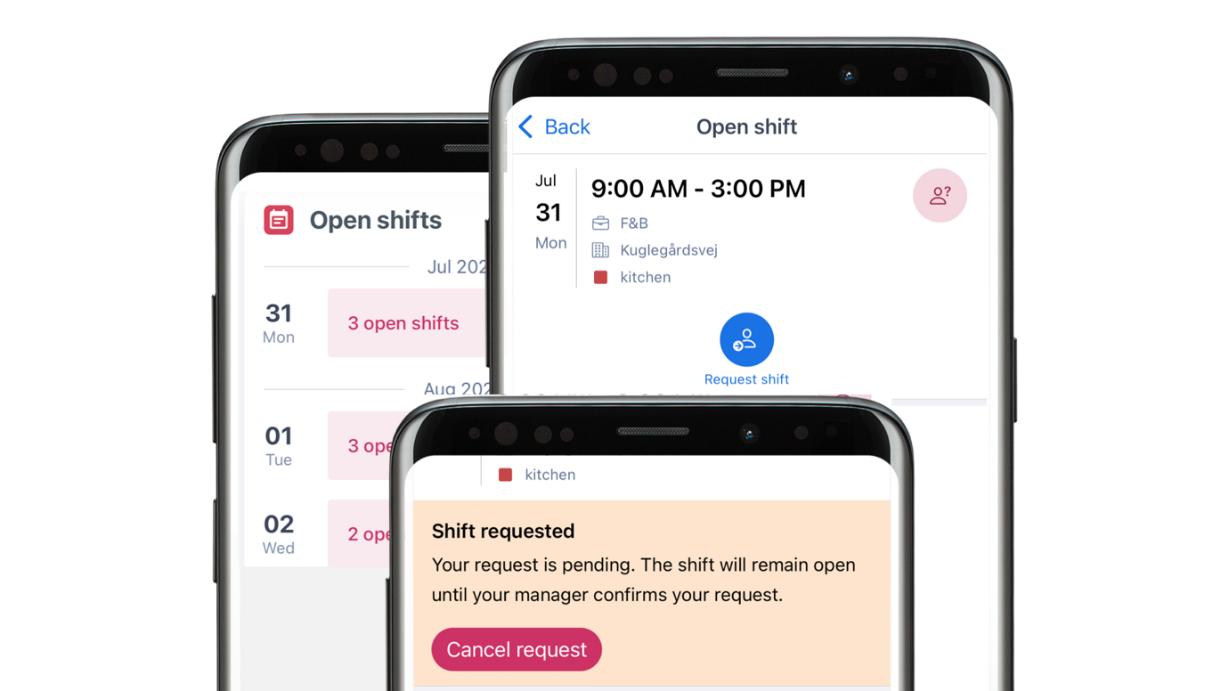
3.4.6.1 Open shifts are available shifts that are up for grabs. You can ask to take these open and available shifts by pressing Request shift. The responsible manager has to approve your request before the shift can be yours.
3.4.6.2 You can see all the available shift in ‘Overview’ > ‘Open shifts’ > ‘View all’.
3.4.7.1 We ask you to use Planday to register your availability. This makes it possible to get an overview of when you are available with a minimum of messages, mails and phone calls. Availably makes it easier to offer you open shifts or see if you are free for work.
3.4.7.2 You can change your availability by go to ‘More’ and ‘Availability’. Press ‘Edit’ in the right corner of the screen and mark all the days that you are available and then press ‘Available’ and ‘Done’. Do the same to mark the days that you are not able to work by pressing ‘Unavailable’ and ‘Done’.
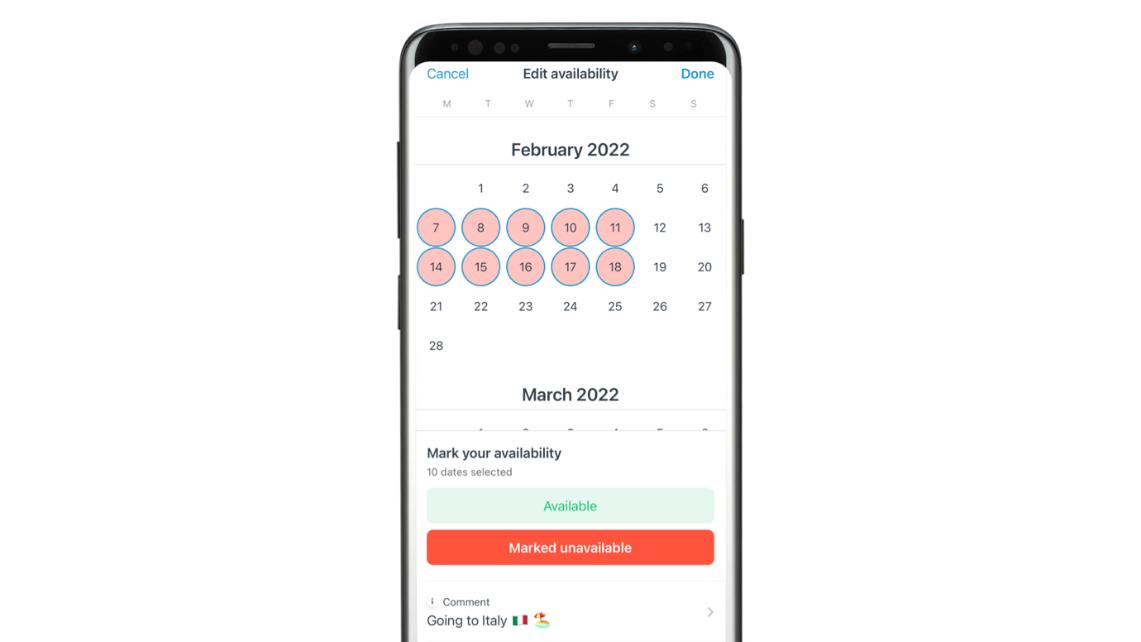
By pressing More in the bottom right-hand corner of your screen, you'll find more options in your Planday app. In this section, you can manage your requests, see your shifts, your worked hours, register your holiday or availability and much more.
Adhere to the time registration rules as outlined in the Framework for Employees at NHG available on Planet. Employees are required to accurately record their working hours and any changes to their schedules. It is the responsibility of both the employee and the workplace to ensure compliance with these rules. This ensures accurate payroll processing and adherence to organizational policies.
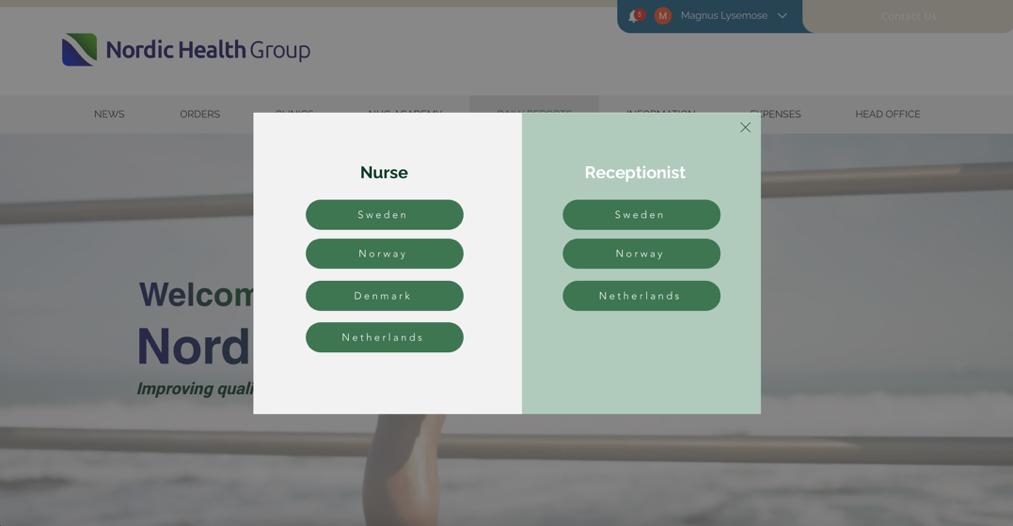
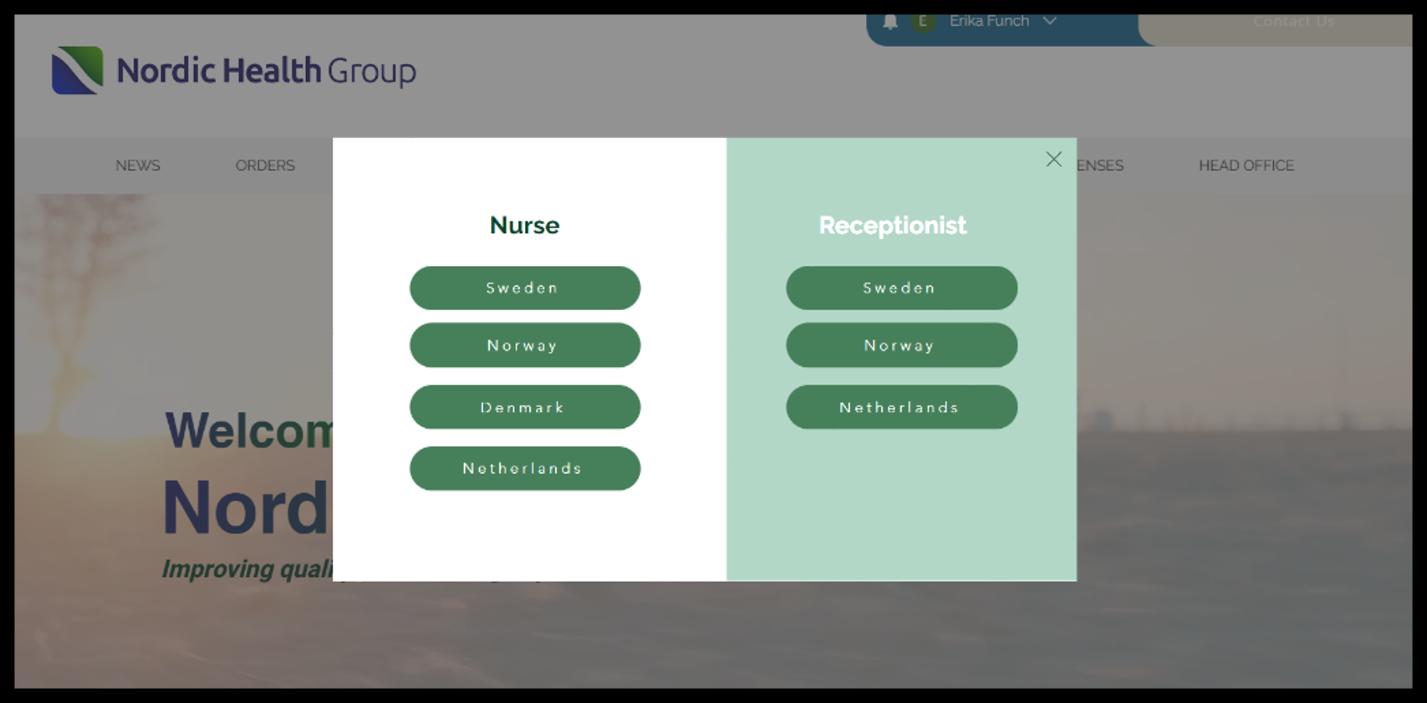
3.5.1 For Receptionists: Submitting the Daily Report
1. Navigate to www.planet.nordichealthgroup.com
2. Click “Employee Login” and log in (if you encounter login issues, please contact your Clinic Coordinator).

3. Click “Daily Report”
4. Choose your country in the right menu for Receptionist
5. Select and type:
1. Date
2. Your Clinic
3. Your name

6. Submit details about today’s consultations:
1. How many consultations
2. How many of them was booked for a treatment
3. If relevant, an explanation is needed for each of the patients, who did not choose to book a treatment. (E.g. Lena was going for holiday in July and did not want to book right now. She might get back to us in august)

7. Submit details about how many 5 star reviews you have received.
8. Confirm that:

1. All payment and invoices are processed accurately.
2. The payment terminal is reconciled
3. All essential non-medical supplies are stocked or that you have acted
4. The clinic is fully operational and in accordance with our Facility Standard protocol, and if not that you have taken action.
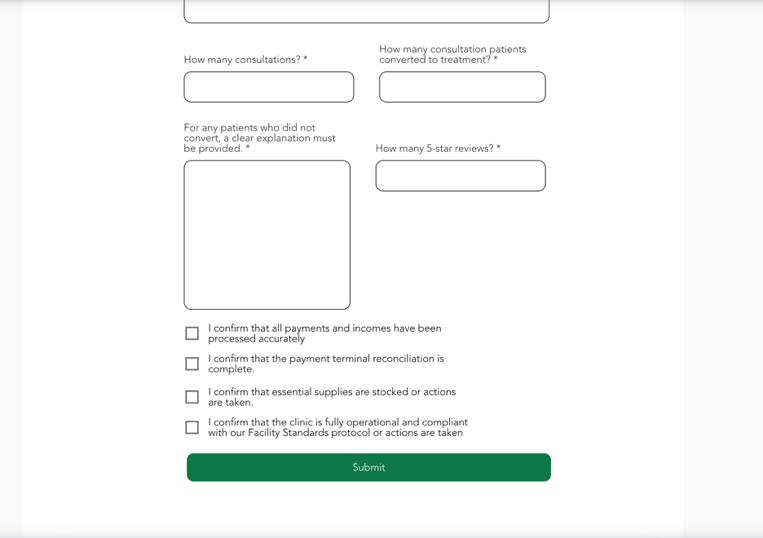
9. Submit the form.
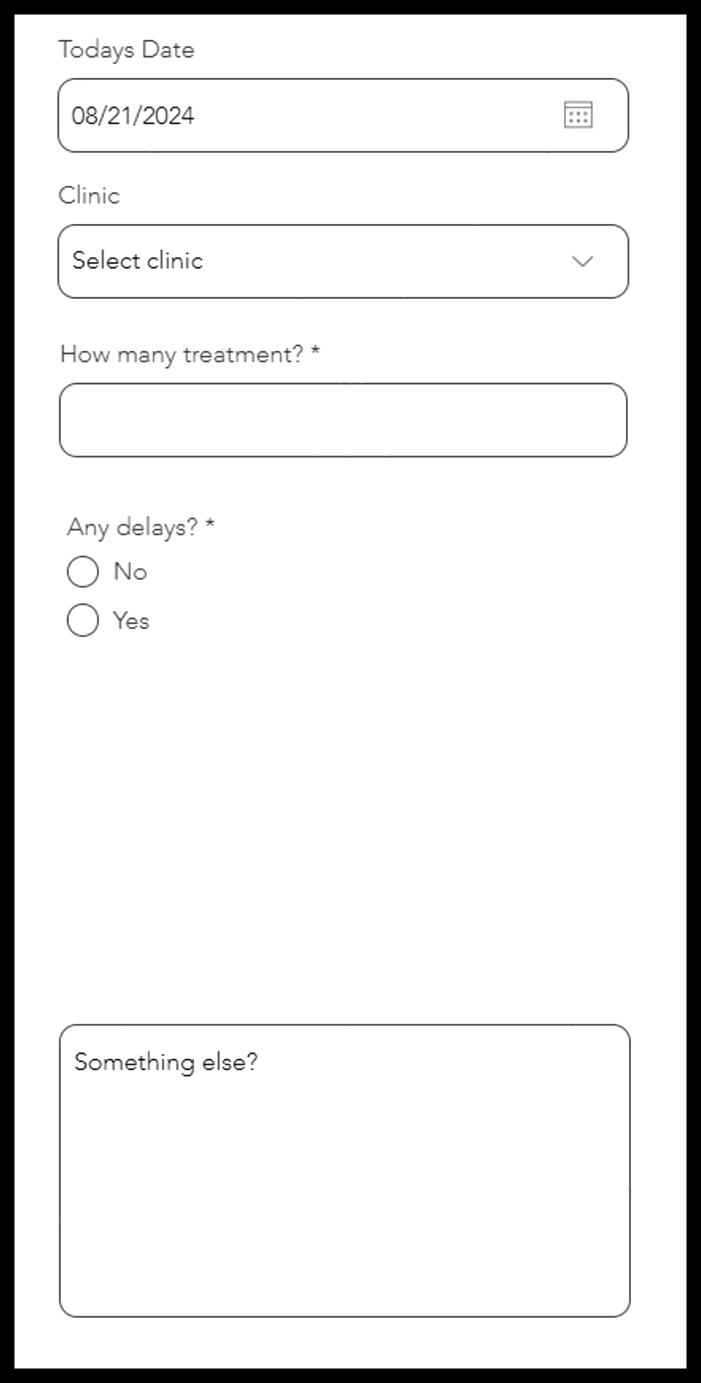
3.5.2 For Nurses: Submitting the Daily Report
1. Navigate to www.planet.nordichealthgroup.com
2. Click “Employee Login” and log in (if you encounter login issues, please contact your Clinic Coordinator).
3. Click “Daily Report”
4. Choose your country in the left menu for Nurses
5. Submit:
1. Today’s date
2. Your Clinic
3. How many treatments?
4. Any delays?
5. Something else?


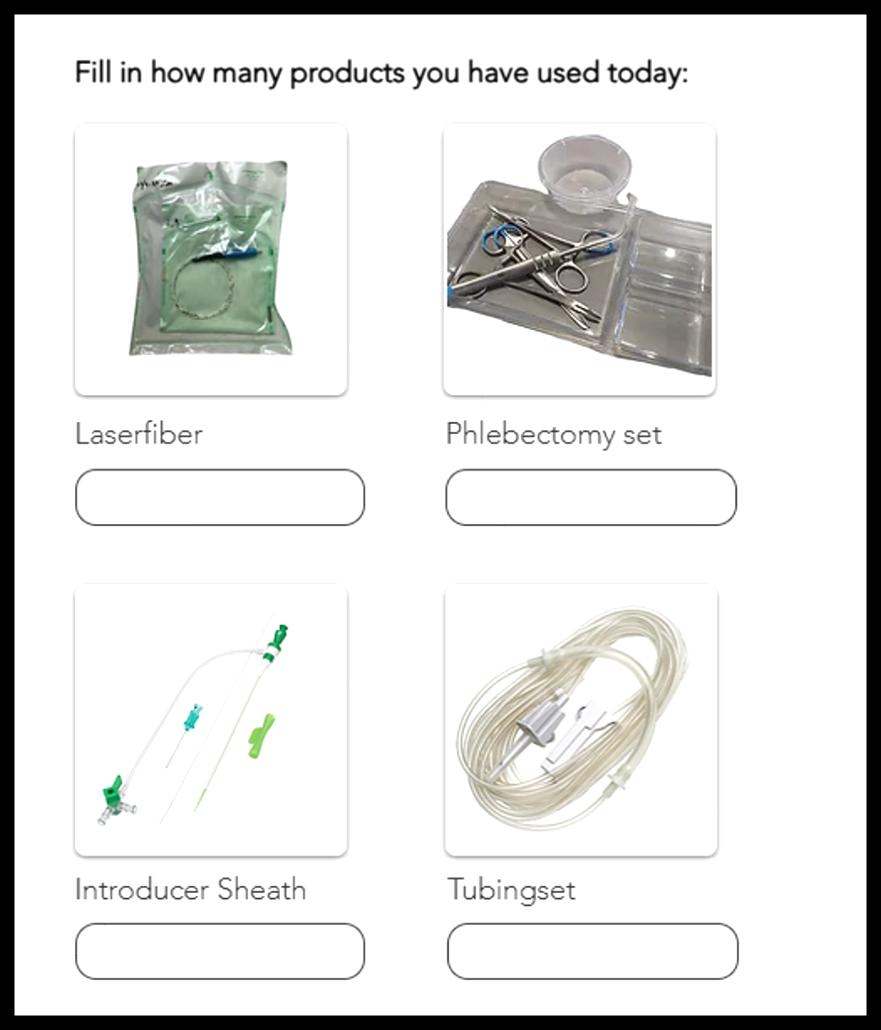
6. Submit details about how many products you have used today:
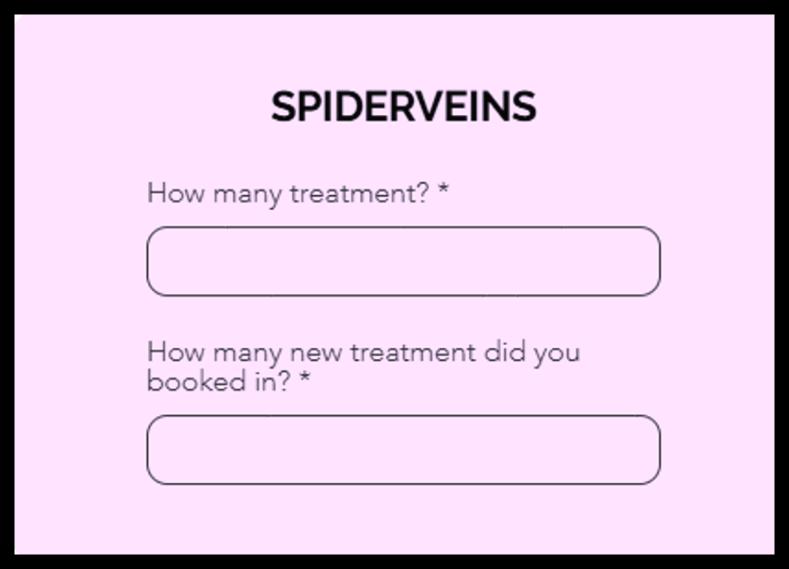
7. If there has been any Spidervein treatments, fill in:
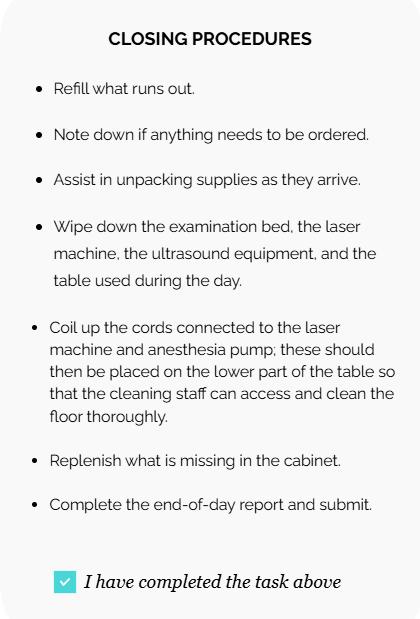
8. Confirm that you have completed closing procedures:
• Refill and restock what is needed.
• Note down if anything needs to be ordered.
• Assist in unpacking supplies as they arrive.
• Wipe down the examination bed, the laser machine, the ultrasound equipment, and the table used during the day.
• Coil up the cords connected to the laser machine and anaesthesia pump; these should then be placed on the lower part of the table so that the cleaning staff can access and clean the floor thoroughly.
• Replenish what is missing in the cabinet.
• Complete the end-of-day report and submit.

9. Submit the form
3.6.1 Handling Calls via Aircall
3.6.1.1 AirCall is the app we use for phone management. You can download it to your phone.
3.6.1.2 Contact your Clinic Coordinator if you need assistance with login.

3.6.1.3 You should have received your login information for AirCall via email. When patients call our main number, the calls are routed to those logged into AirCall. If you are working at the clinic outside of regular phone hours, please follow these guidelines:
1. Open Salesforce in a separate window to view all patients scheduled for that day as patients may call for directions, delays, or cancellations be prepared to assist them with these inquiries.
2. When a call comes in and the patient is registered in the system, their name will appear, and you can easily look them up.
3. If a call involves issues you cannot handle, ask the caller to ring back during regular business hours.
4. Once a call is completed, select a reason for the call using the "tags" menu in AirCall.
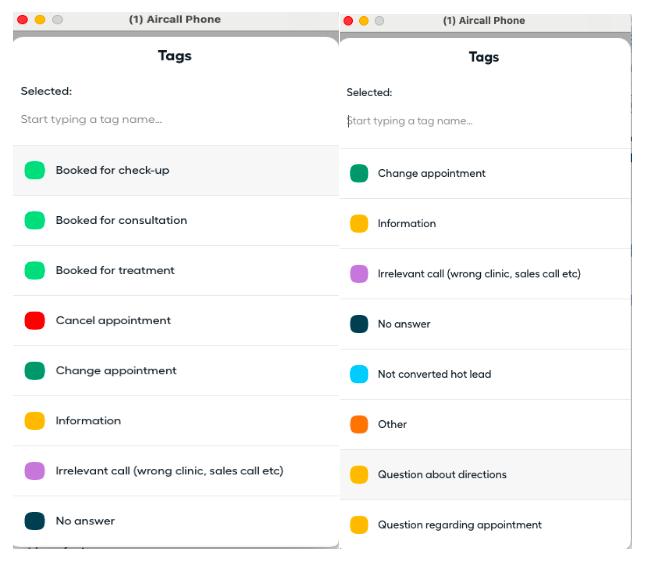
5. Ensure you exit the "tags" menu promptly to free up the line, allowing other calls to come through to the clinic.
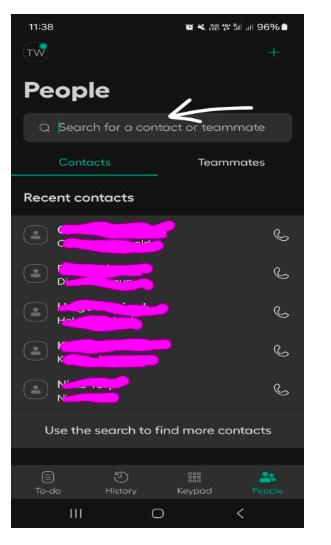
6. If a patient has not arrived for their appointment by the scheduled time, contact them immediately to determine the reason for their delay.
7. To call the patient, navigate to "People" in Salesforce, search for the patient’s name, and click "Call."
3.7.1 Get Started with Slack
3.7.1.1 Slack is the messaging platform we use for internal communication.

3.7.1.2 You should have received an invitation to join Slack via email. Accept the invitation to begin using the platform.
3.7.1.3 Contact your Clinic Coordinator if you need assistance with login.
3.7.1.4 Download Slack from www.slack.com and install it on your device.
3.7.1.5 Once you are logged in, you can search for and connect with your designated contact person or any other team members.
- Åderbråcksklinikerna
4.1.1.1 Draping set, phlebectomy set, tubing set, probe cover, jelco needles, introducer set and laser fiber are ordered via order@nordichealthgroup.com
4.1.1.2 Others treatment items are ordered directly in Mediq: Homepage | Mediq B2B
4.1.1.3 Pharmacy products are ordered continued on Planet: Apoteket Orders Swe | THE PLANET (nordichealthgroup.com)
4.1.2 Orders from Mediq SE
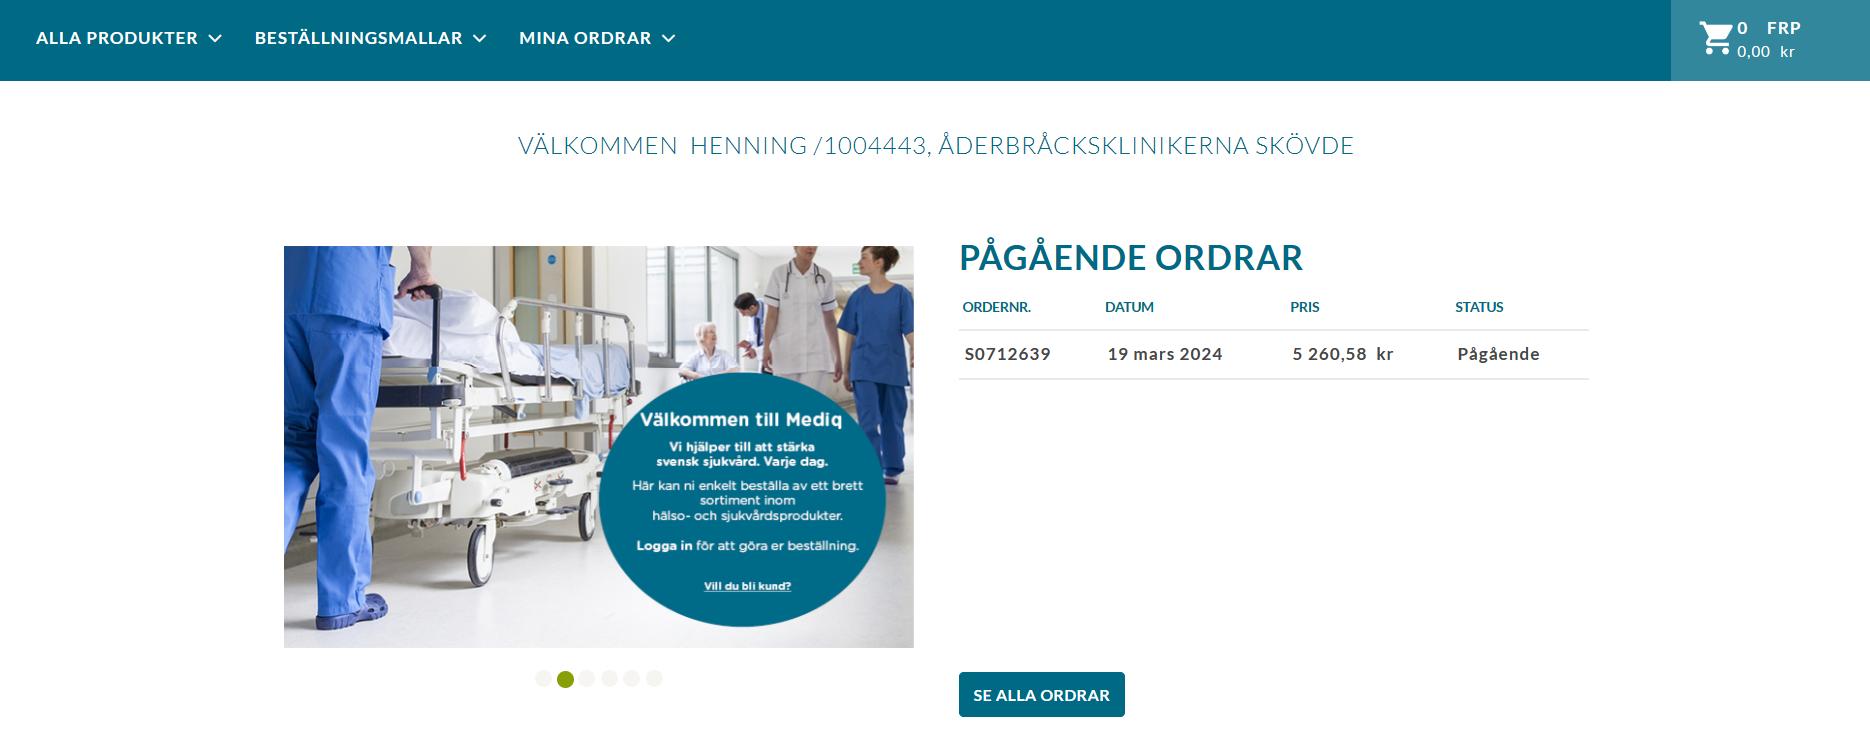
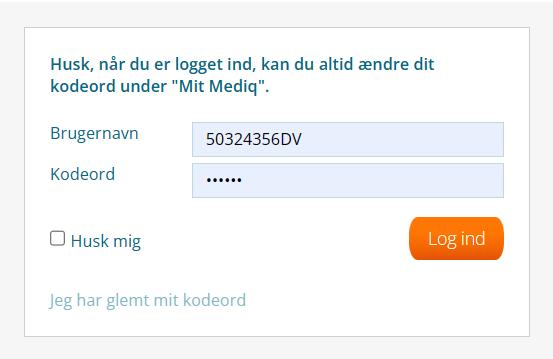
1. Go to Mediq's website: Homepage | Mediq B2B
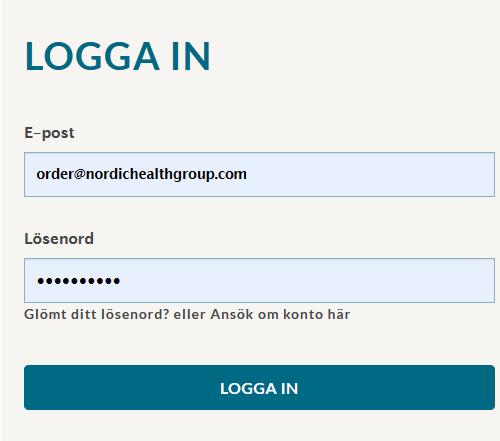
2. Log in by filling in your email and password and press log in (if you cannot login contact your Clinic Coordinator).
3. Go to 'Order Templates' and select 'All Order Templates'
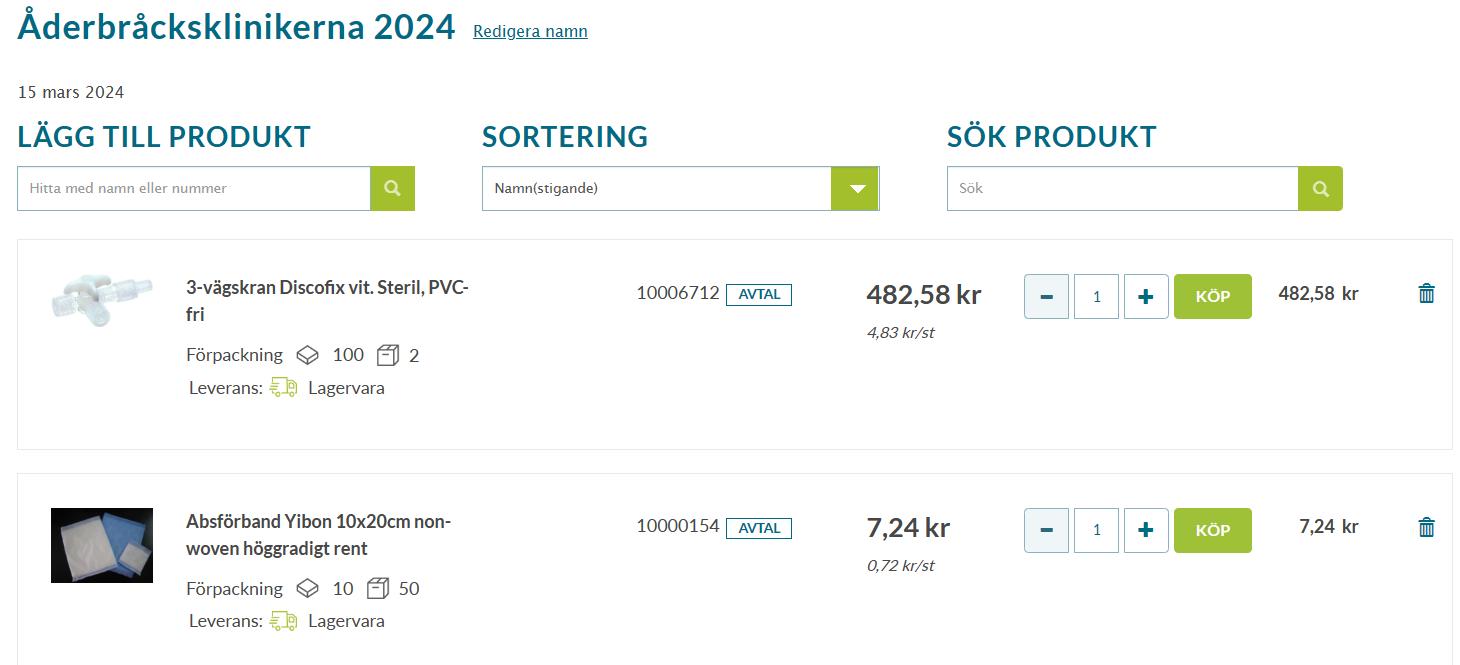
4. Here you select the order template called " Aderbråcksklinikerna 2024 " by pressing 'Edit/Buy'

5. Now you see the order list and select articles by selecting quantity and press ‘Buy’.
6. When you have chosen the number of items and put them in the basket, press

7. Check and confirm your order and press ‘Next’
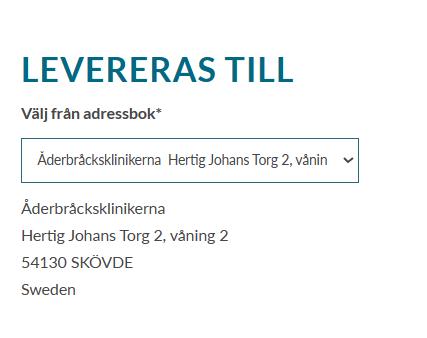
8. Select delivery address and delivery date and press ‘Next’
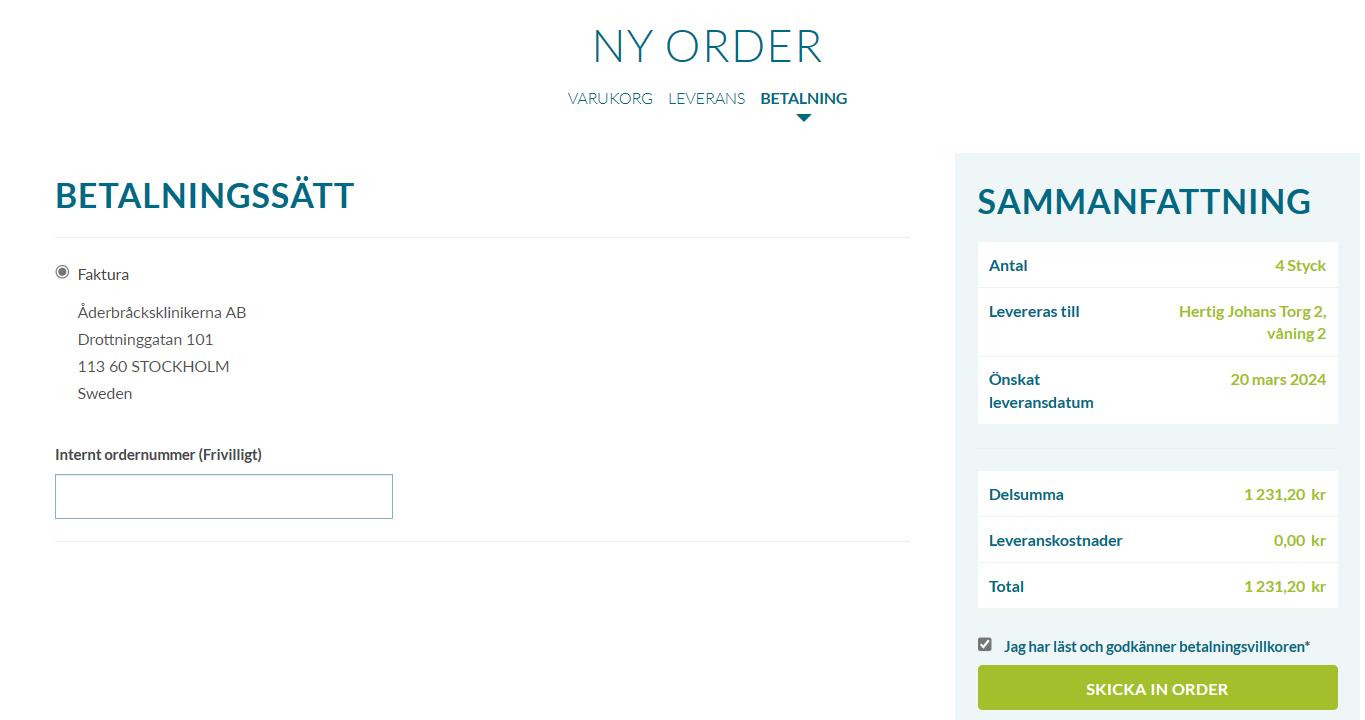
9. Now you can submit the order
4.1.2.1 Points to pay attention to:
• Only order items from the order template.
• Consider the size of the order. For orders above SEK 1,000, we avoid delivery costs.
• Ensure correct address and delivery date
• Please check the size of the item you are ordering. How many are there in a box?
4.1.3 Orders from Apoteket SE
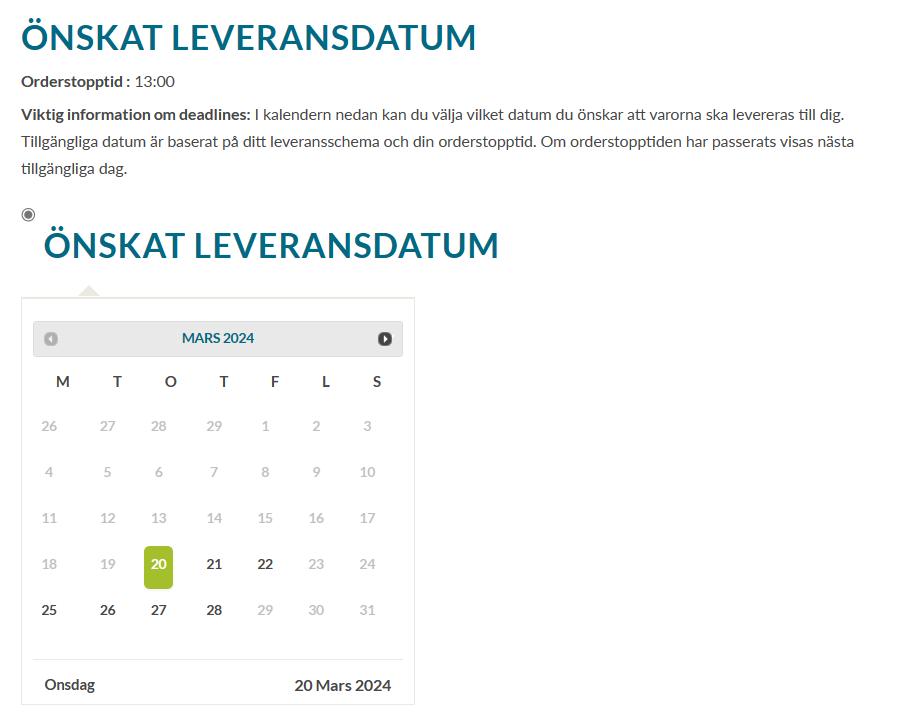
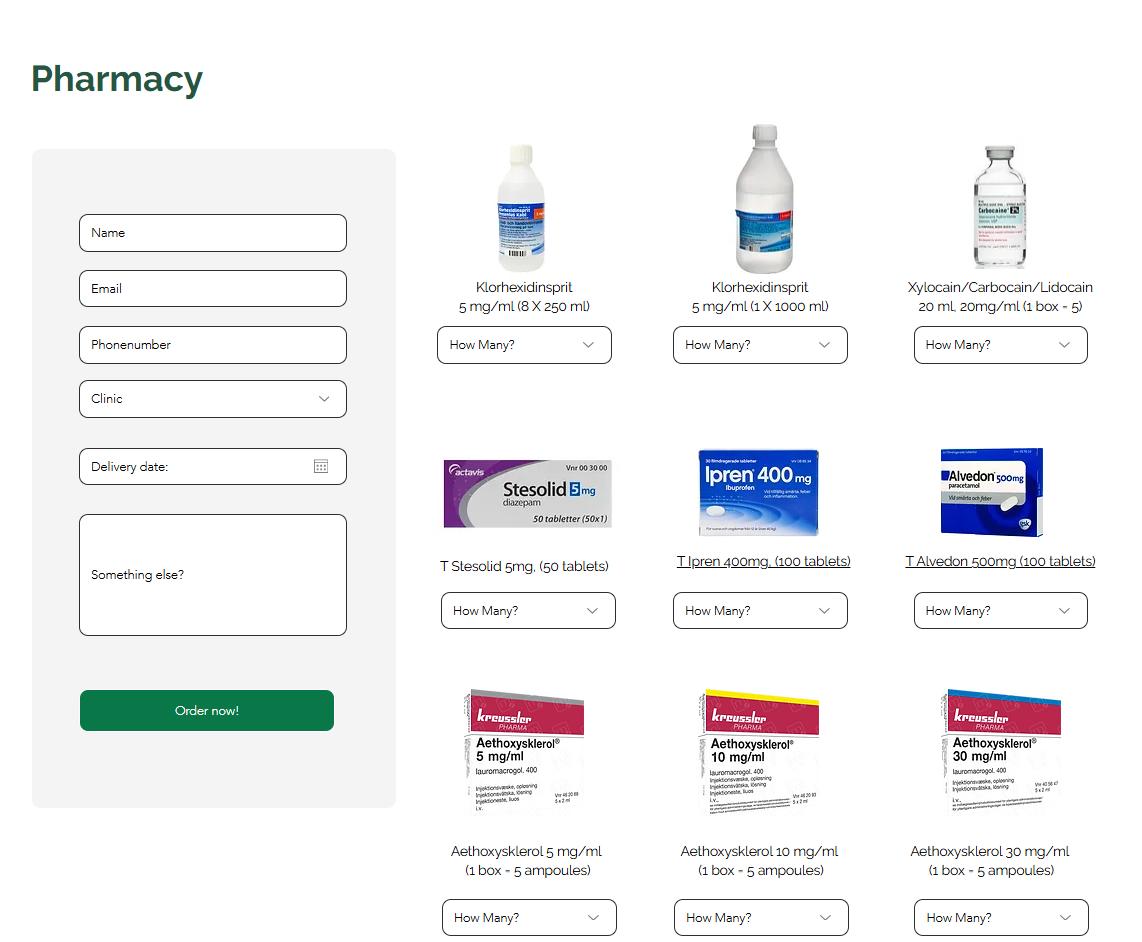
1. To place an order for pharmacy items, log in to Planet (if you cannot login to Planet, contact your Clinic Coordinator).
2. Go to Orders > Sweden > Pharmacy.
3. Here, fill in all the information in the left column and select the quantity for each item you wish to order. Pay attention to the size/quantity of items per unit.

4.2.1.1 Draping set, phlebectomy set, tubing set, probe cover, jelco needles, introducer set and laser fiber ordered continued on the email order@nordichealthgroup.com
4.2.1.2 Others treatment items ordered directly in Mediq: Welcome to Mediq Denmark
4.2.1.3 Pharmacy products can you order by email: lev@skanderborg-apotek.dk by filling in the template.
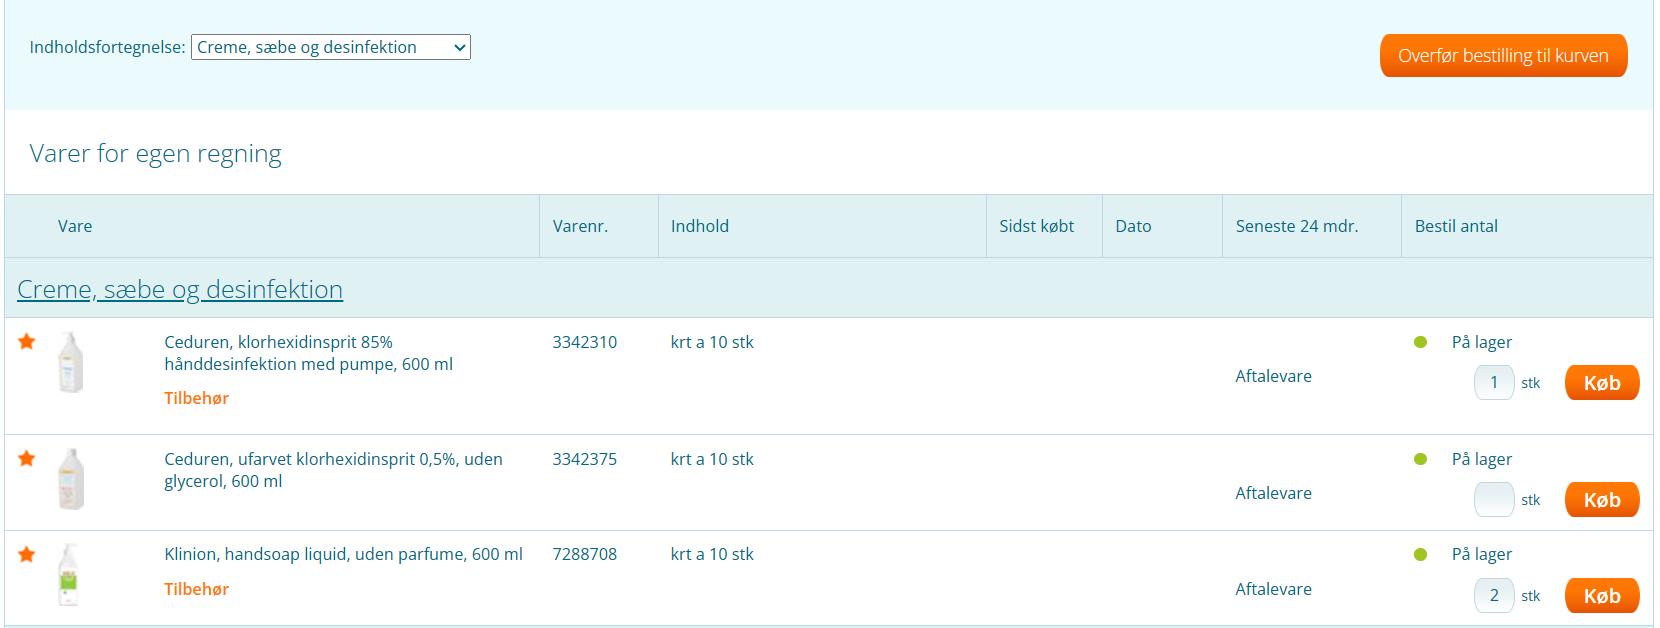
4.2.2 Order from Mediq DK
1. Go to Mediq's website: Mediq Danmark A/S e-handel
2. Log in with your username and password. Log in by pressing “Log in”

3. Go to the order list by pressing


4. Choose the items you want by specifying the quantity.
5. When you have chosen the number of all the articles you want to order, you put them in the basket by pressing

6. If you want to receive a notification on your mobile, you enter your number and otherwise the rest should be filled in beforehand.
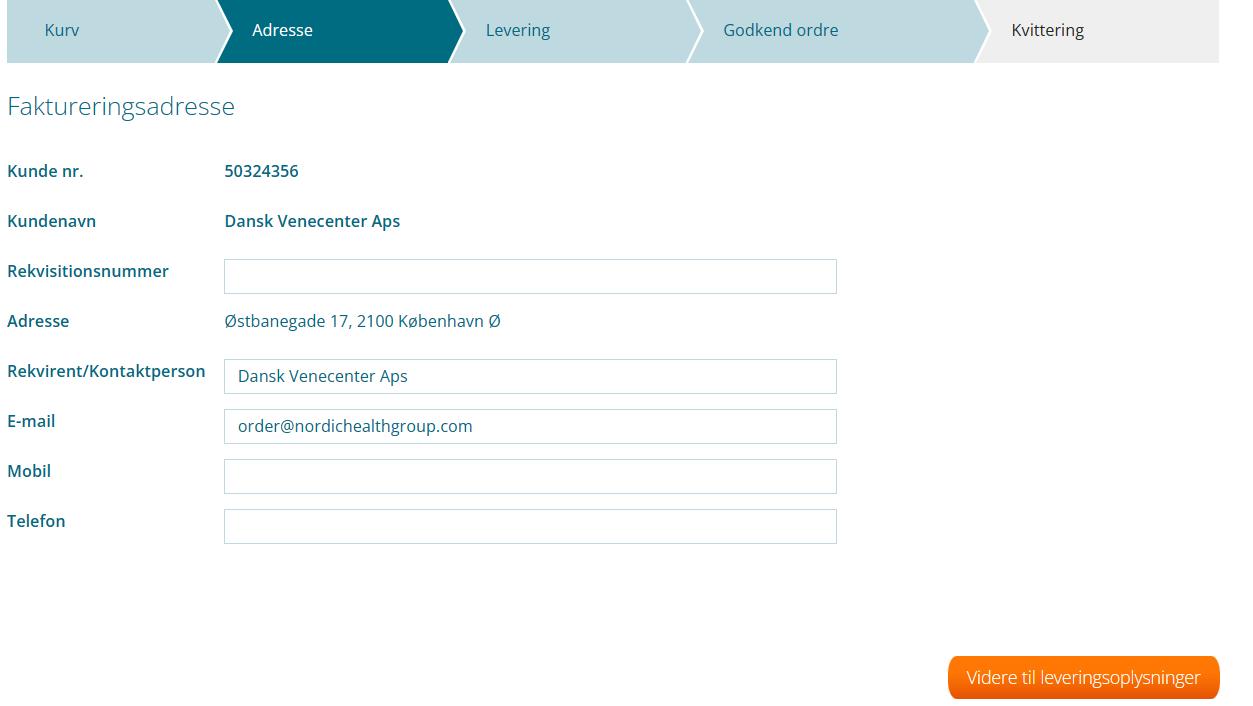
7. Complete the order by pressing

4.2.2.1 Points to note when ordering:
• Only order items from the available on the Reorder list.
• Consider the size of the order. For orders over DKK 500, we avoid shipping.
• Ensure correct address and delivery date.
4.2.3 Orders from Pharmacy DK
4.2.3.1 Pharmacy items can be ordered by email at: lev@skanderborg-apotek.dk by using this template:
Kære Anette.
Hermed bestilling på kundenr. 2387
Eks.
• NaCl 1000ml, (2 boxes)
• Carbocain 20mg/ml + adrenalin 5 mikrogram/ml (8 boxes)
AutorisationsID: xxxx
Læges Autid: xxxx
Det kan sendes til: [Adresse]
Leveransdato: xxxx-xx-xx
Faktura: faktura@venecenter.dk"
Mvh Xxxx xxxx
4.2.3.2 The customer number for the clinics is:
• 2386 Herning
• 2389 Kolding
• 2387 Kbh
• 2388 Odense
• 2469 Viborg
• 06612 Åbyhøj
4.3.1.1 Draping set, phlebectomy set, tubing set, probe cover, jelcon needles, introduction set and laser fiber order via order@nordichealthgroup.com
4.3.1.2 Others treatment items ordered directly in Mediq: Homepage | Mediq nettbutikk (mediqnorge.no)
4.3.1.3 Pharmacy products order directly in Apoteket: Webpharma - Fyrstikktorget Pharmacy - Log in (teleapoteket.no)
4.3.2 Orders from Mediq NO
1. Go to Mediq's website: Website | Mediq online store (mediqnorge.no)
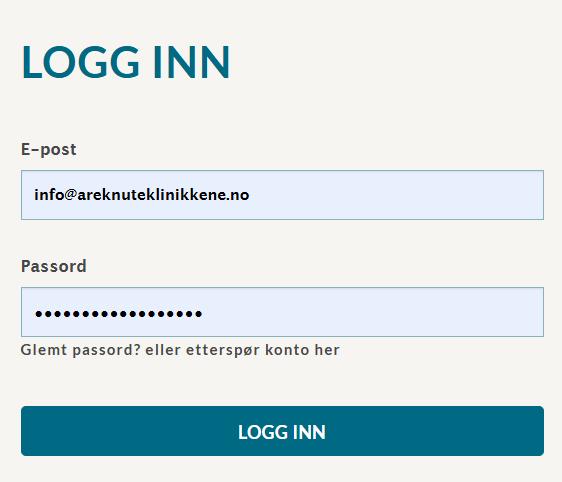
2. Log in by entering your email address and password, and press log in.

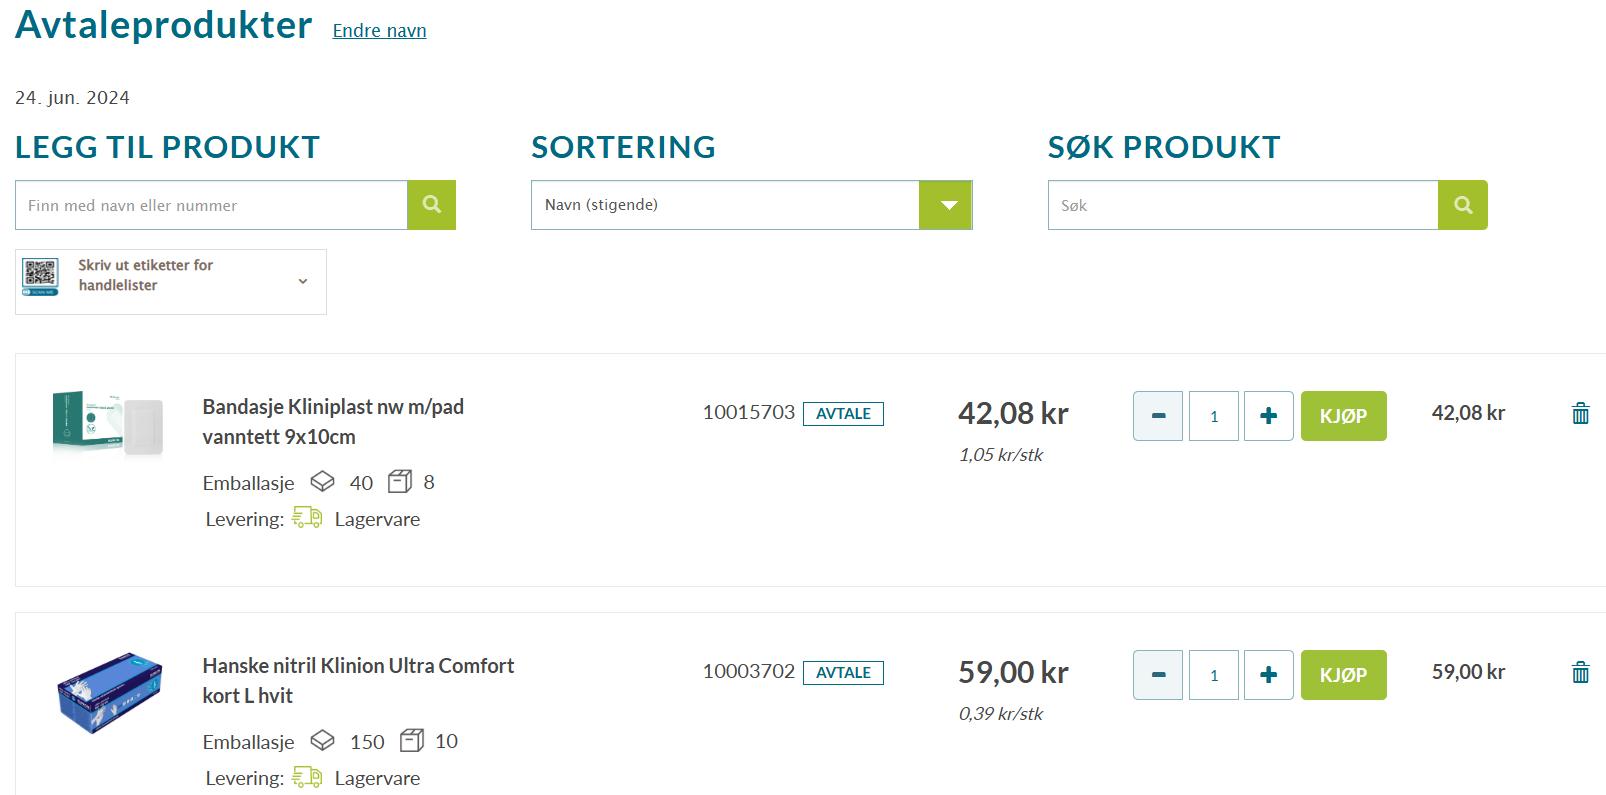
3. Go to 'Shopping lists' and select 'All shopping lists'

4. Here you select the order template called "Agreement products" by pressing 'Edit/Buy'


5. Now you see the order list and select articles by choosing quantity and pressing ‘Buy’.


6. When you have selected the number of items and placed them in the shopping cart, press 7. and then

8. Check your order and press ‘Next’.
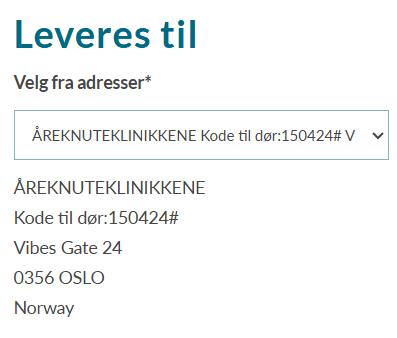
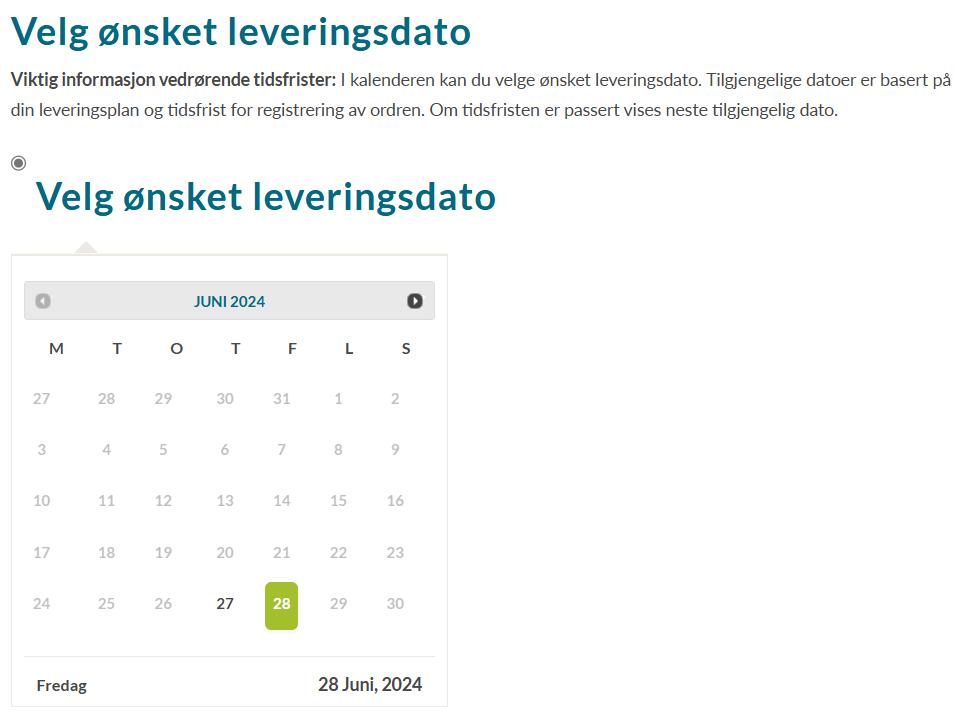
9. Select delivery address and delivery date and press ‘Next’.


10. Now you can submit the order.

4.3.2.1 Points to be aware of:
• Only order items from the contract products handlists.
• Consider the size of the order. For orders over SEK 1,000, we avoid delivery costs.
• Ensure correct address and delivery date.
• Please check the size of the item you are ordering, e.g. the quantity of items in each box.
4.3.3 Orders from Apoteket NO
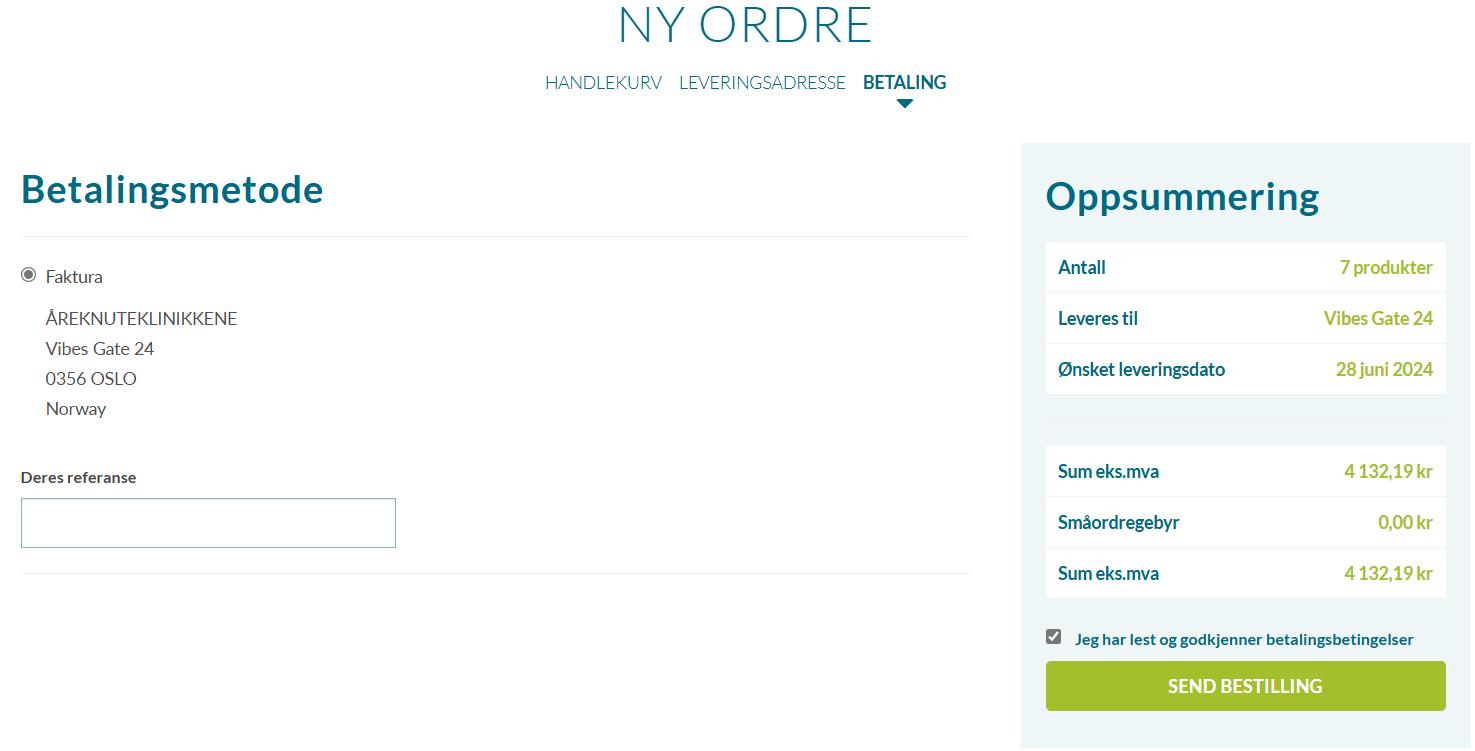
1. Go to Apoteket's website: Webpharma - Fyrstikktorget Pharmacy - Log in (teleapoteket.no)
2. Press the Login button.
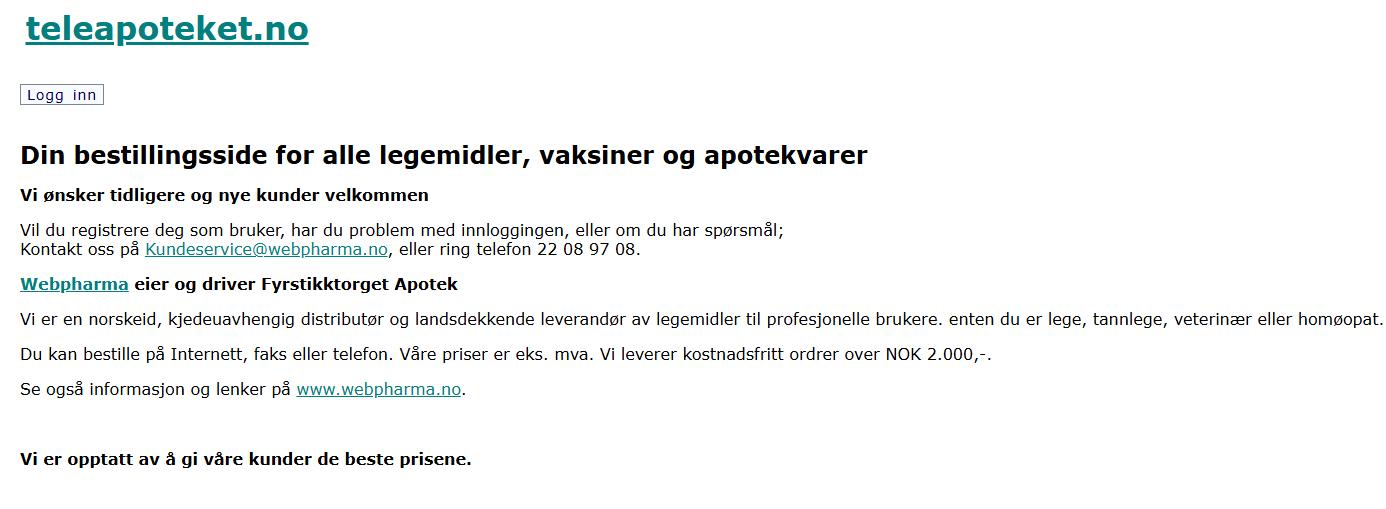

3. Enter the username and password, and press log in.


4. Here you select function: "Bestillingsskjema" and press OK.
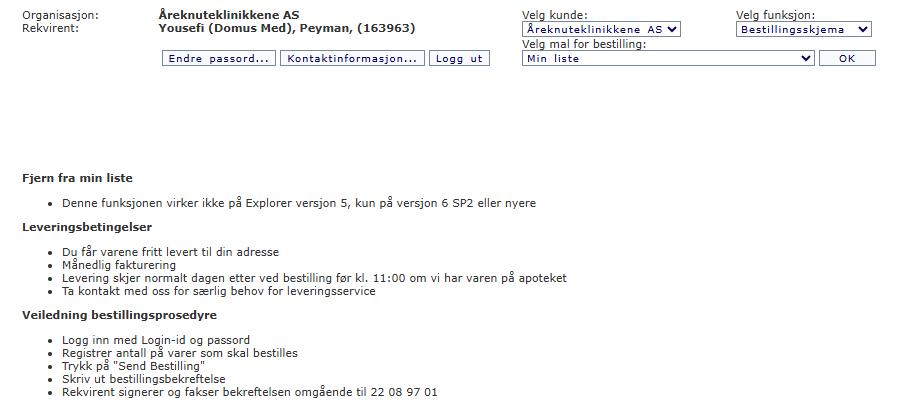

5. Now you see the order list and select articles by selecting the number of products to be used and complete the order by pressing 'Foreta bestelling':


4.4.1 Order Procedure
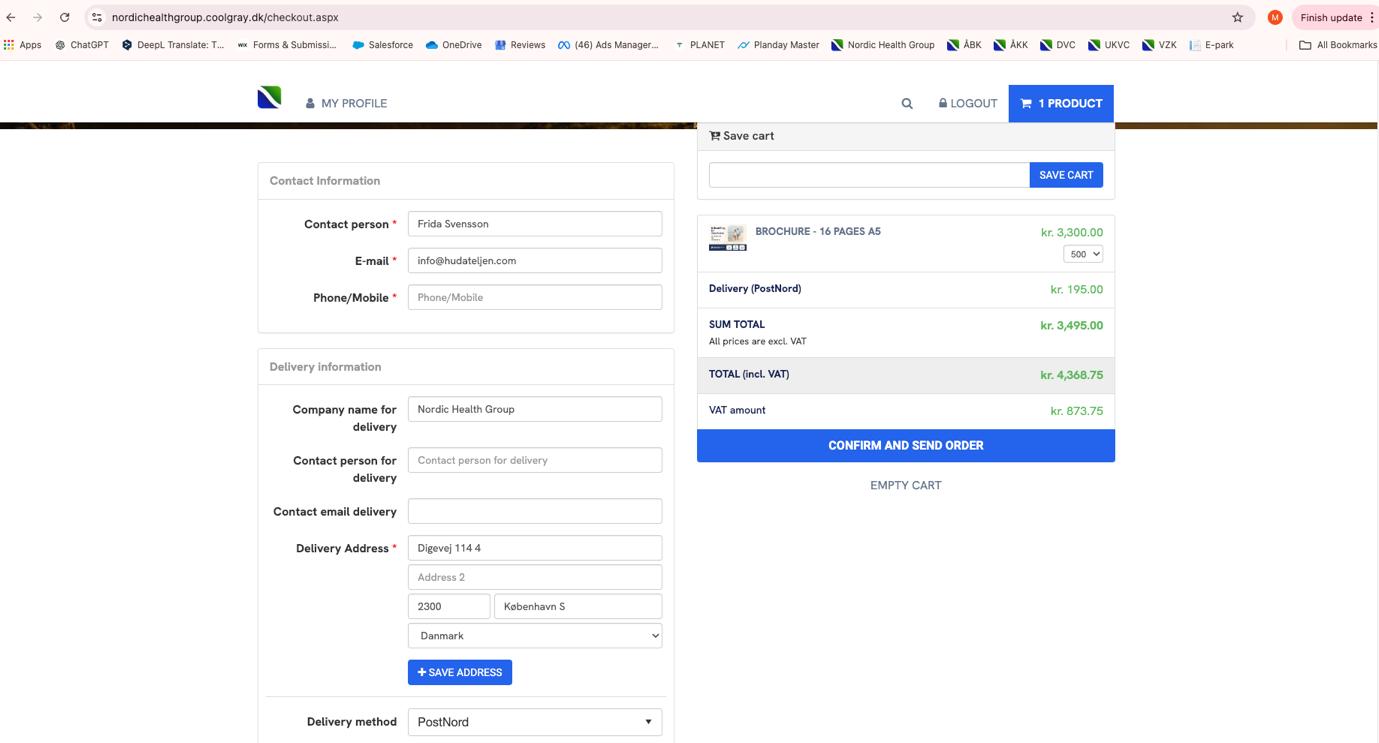
4.4.1.1 From October 2024 all orders of marketing and patient information materials must be placed through Coolgray by following these steps:
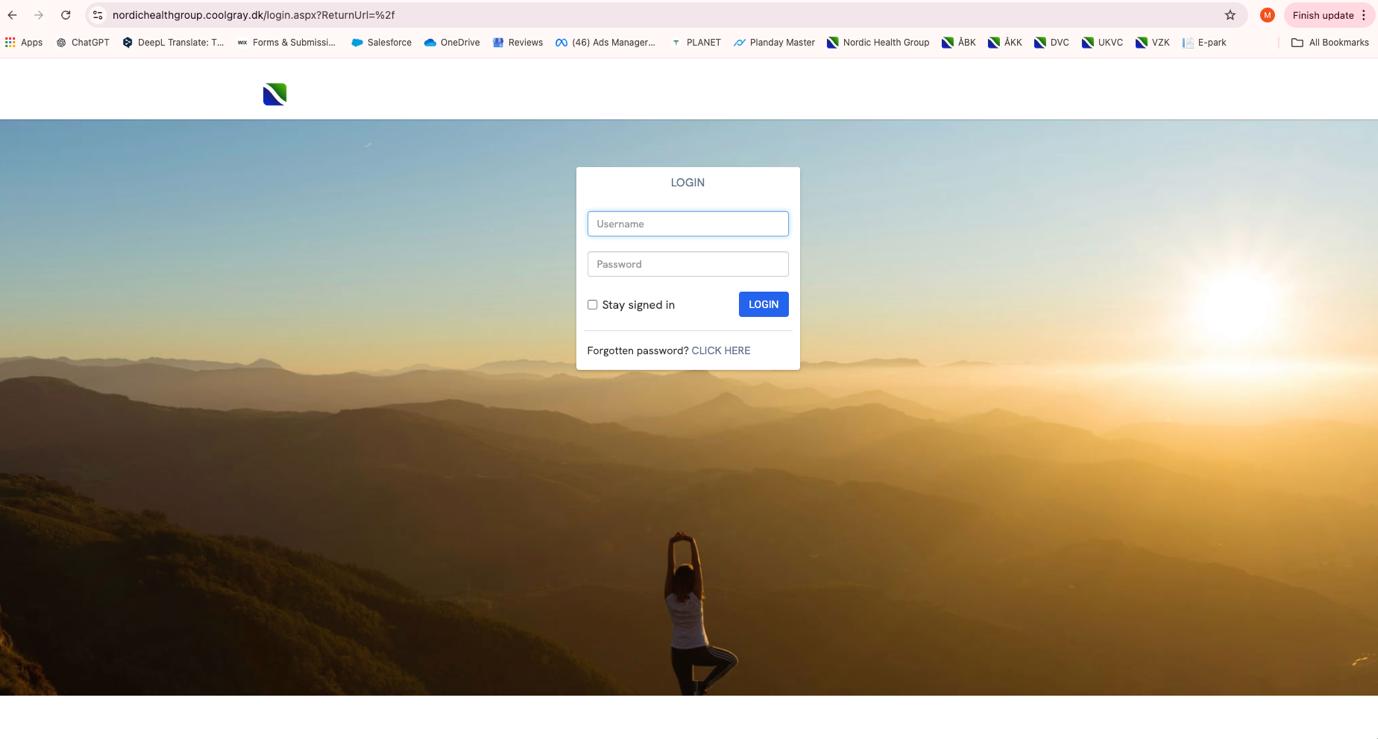
4.4.1.2 Navigate to https://nordichealthgroup.coolgray.dk/
4.4.1.3 You can login with your mail and password: nhg1234. Contact your Clinic Coordinator if you cannot login.
4.4.1.4 Place the number of items you need and select “Add to Card” (Be aware that the initial price for starting the production is high, so please buy to supplies to last up to a year - or at least for 6 months
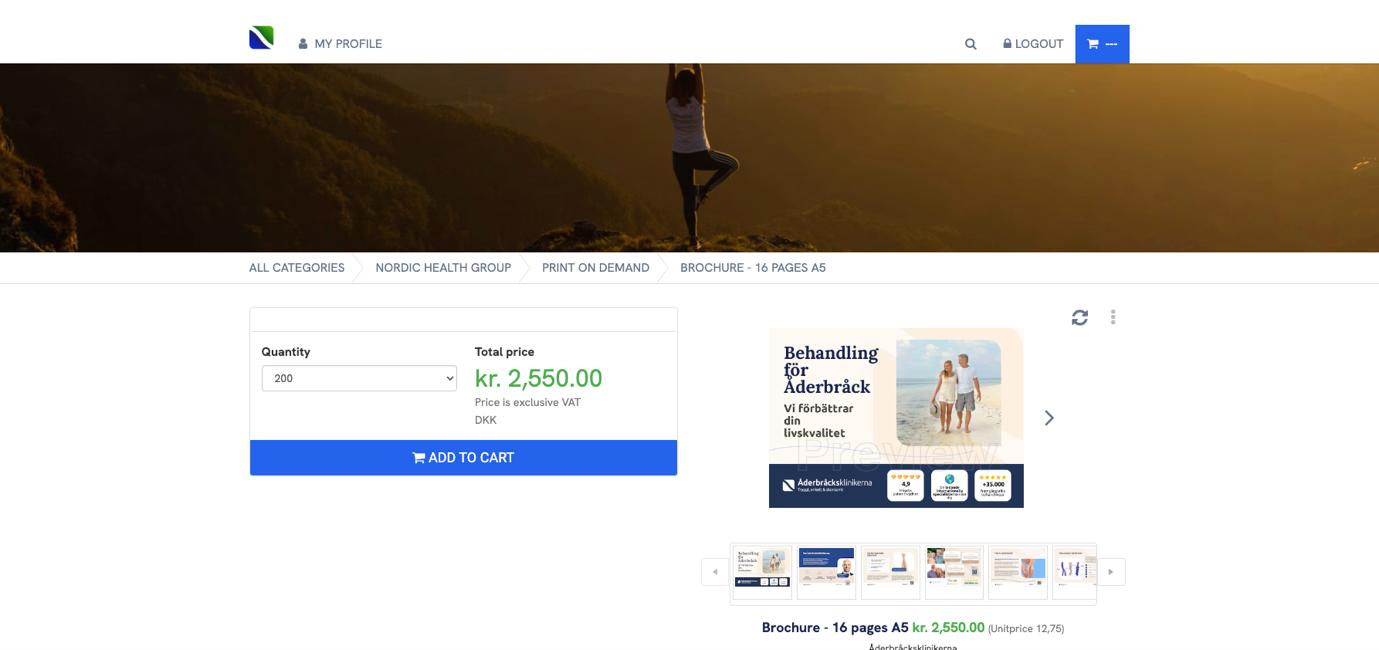
4.4.1.5 Select “Go to Card”
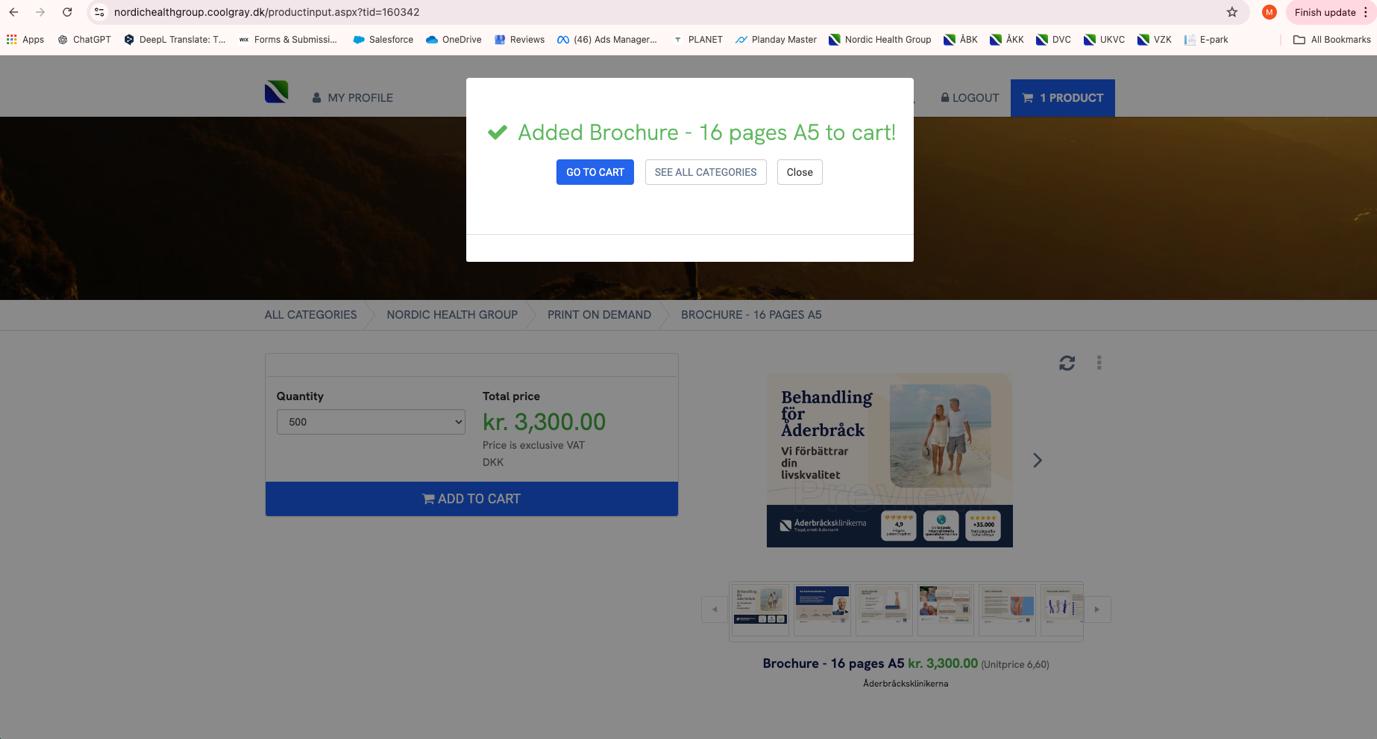
4.4.1.6 Fill in the following details:
1. Company name
2. Contact person (you)
3. Contact mail delivery (you)
4. Delivery address for your clinic.
5. Select “Confirm and Send order”
Attention: The delivery address is automatically set to the Nordic Health Group headquarter, so you must change this.