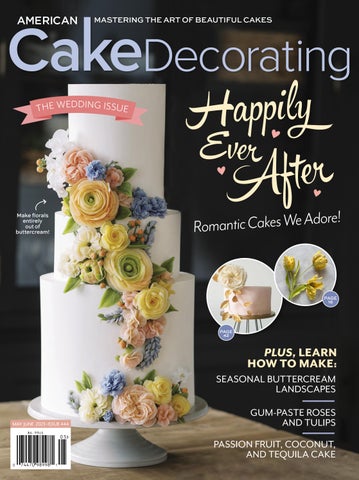
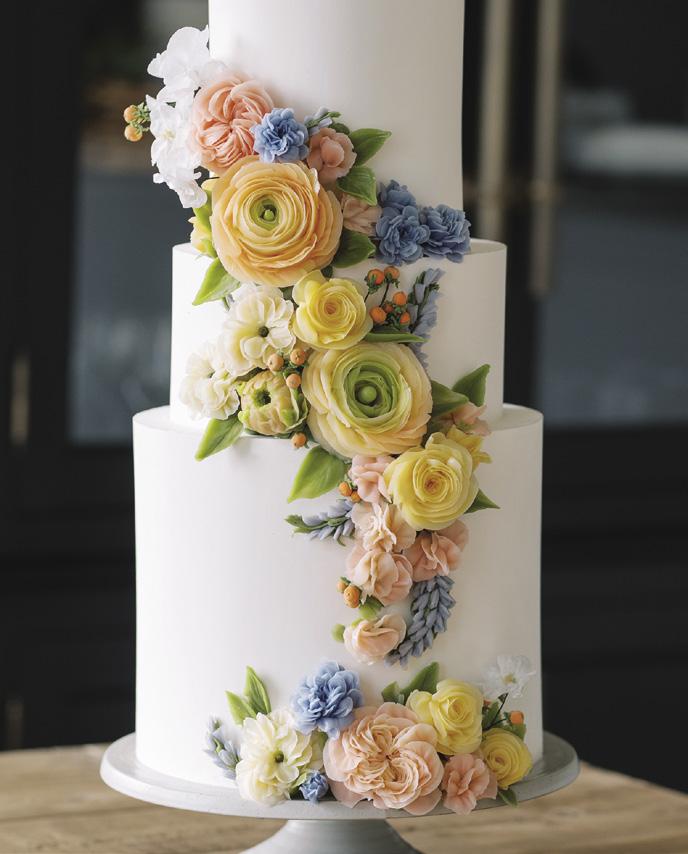
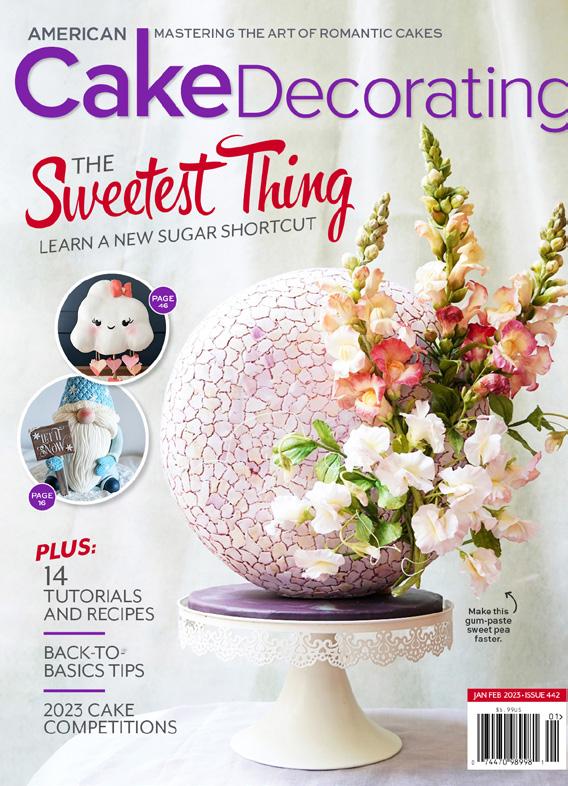
MAY JUNE 2023 • ISSUE 444 MASTERING THE ART OF BEAUTIFUL CAKES Romantic Cakes We Adore! HappilyEverAfter Make florals entirely out of buttercream! SEASONAL BUTTERCREAM LANDSCAPES GUM-PASTE ROSES AND TULIPS PASSION FRUIT, COCONUT, AND TEQUILA CAKE PLUS, LEARN HOW TO MAKE: THE WED D ING ISSUE PAGE 42 PAGE 16
FROM OUR PARTNER

Hello
ACD READERS & FANS


LETTER FROM THE EDITOR
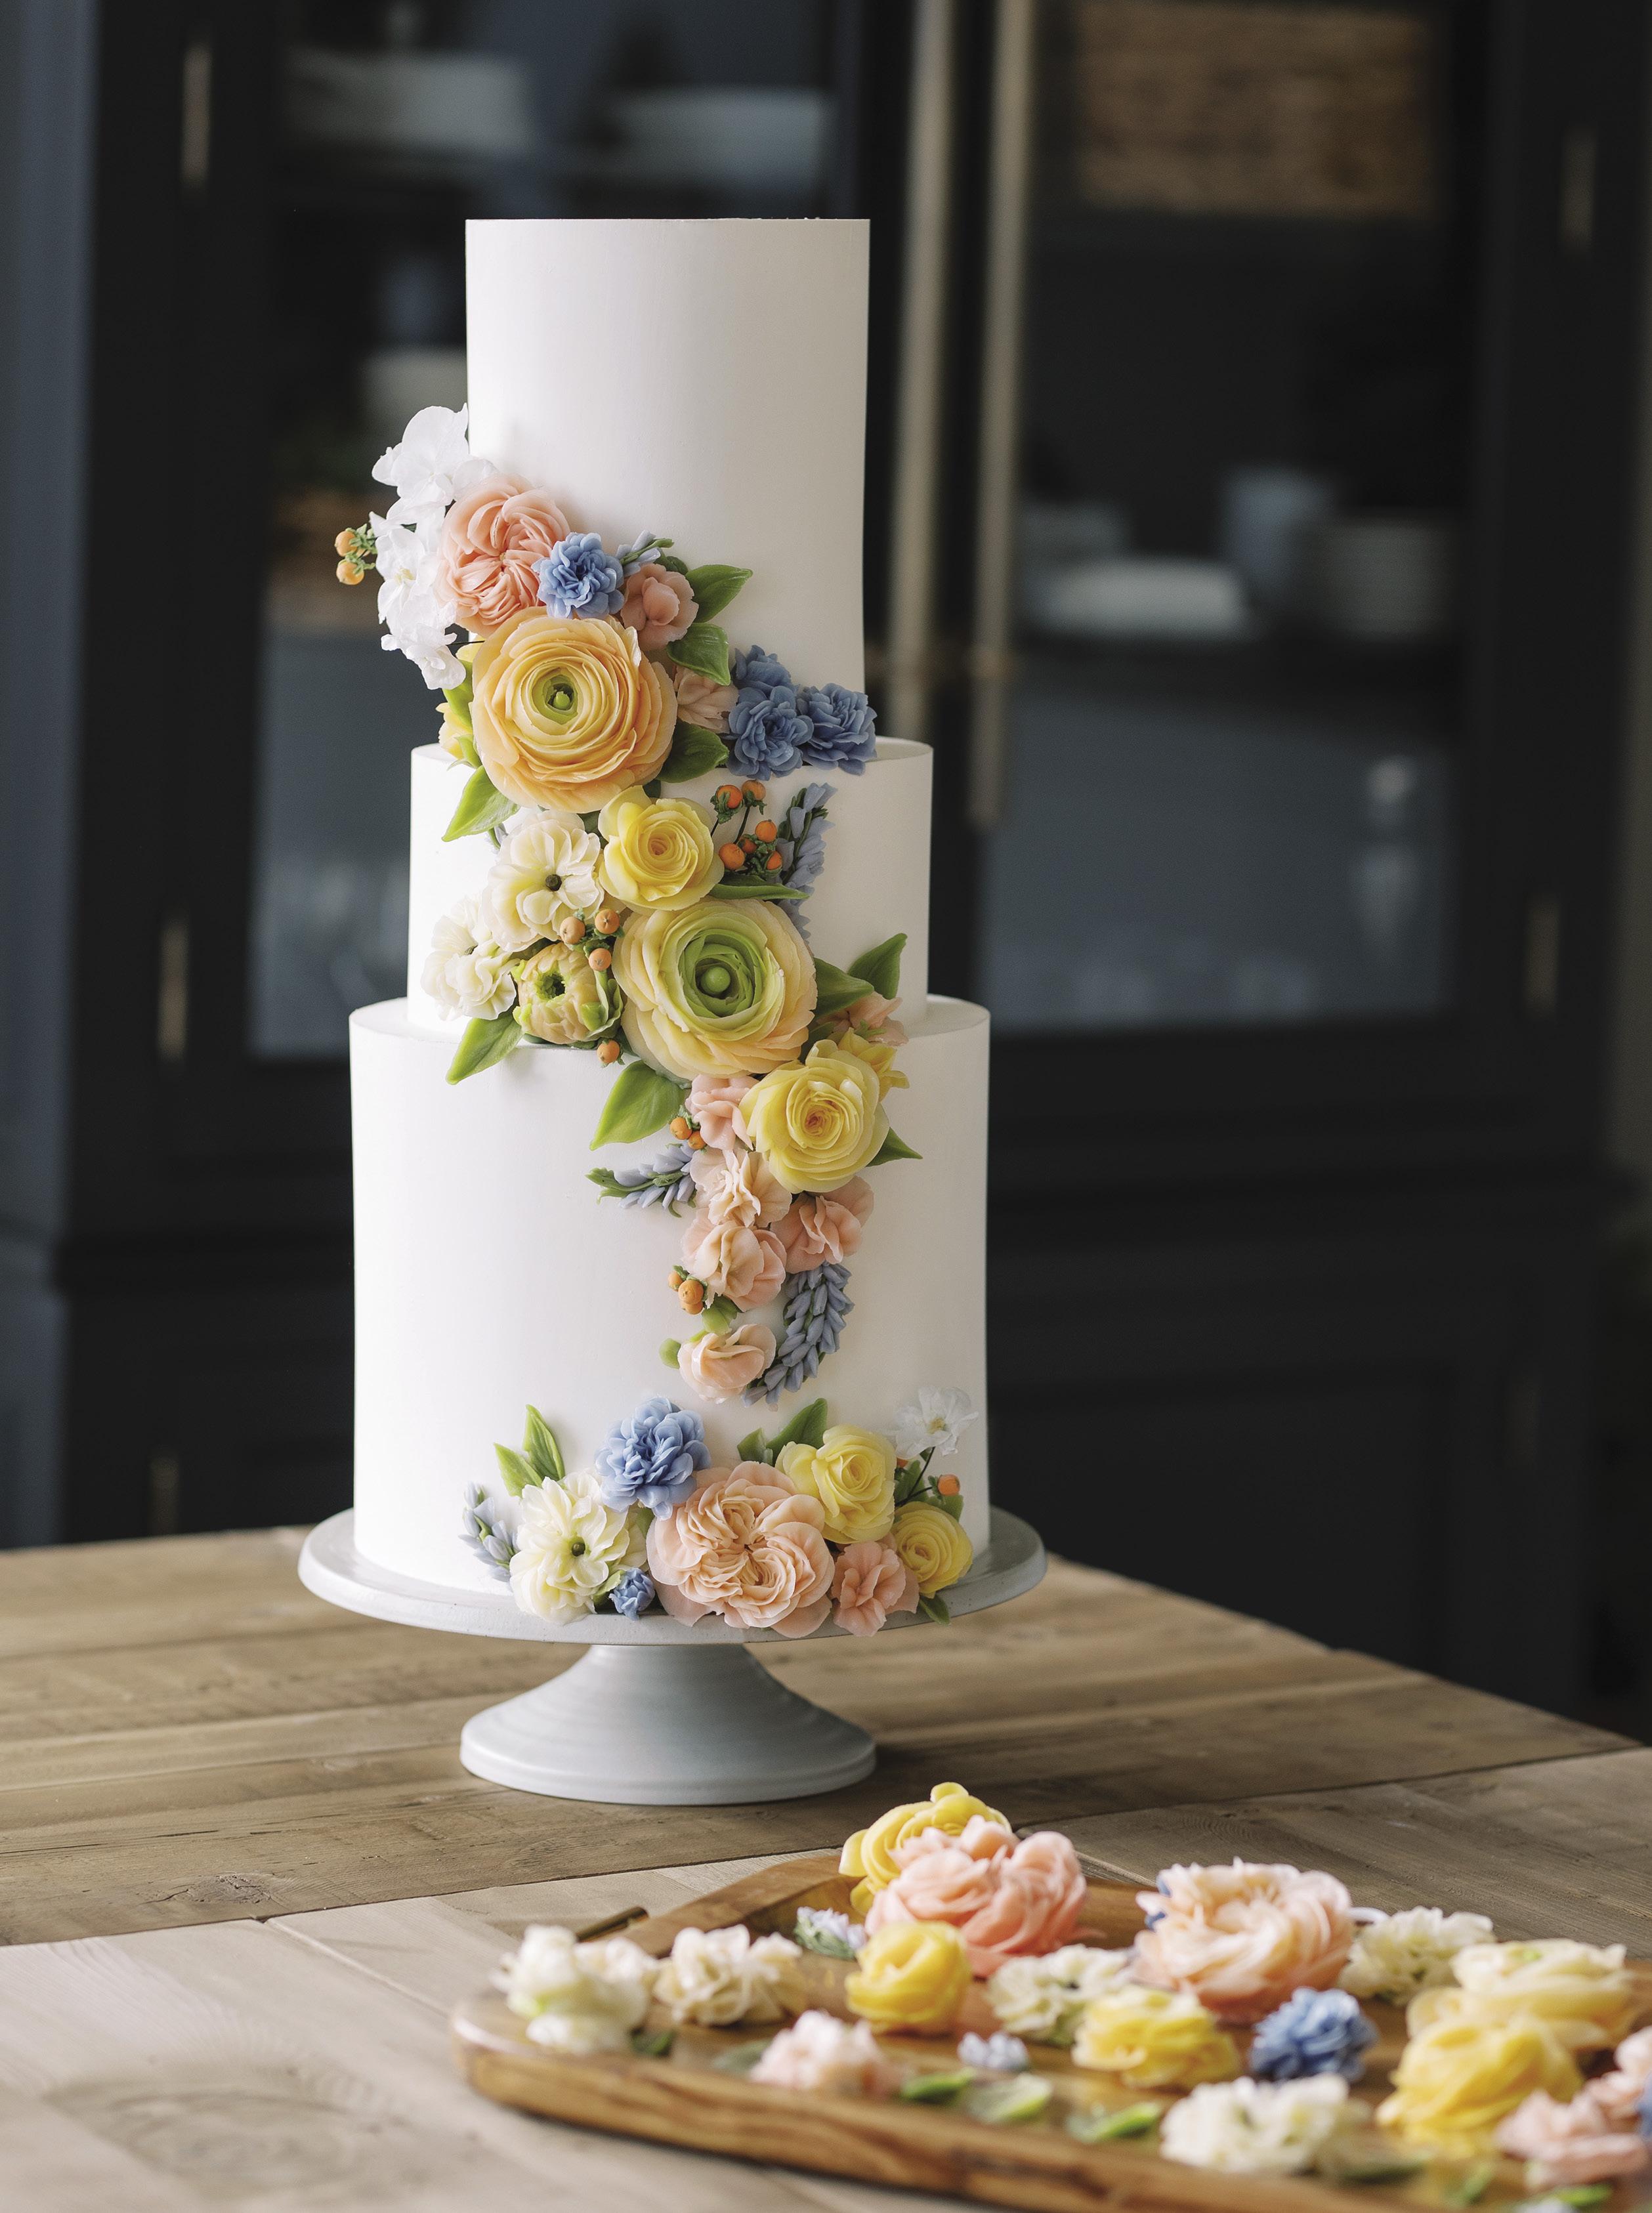
There’s something about the wedding issue that’s just so special! Each year when I begin working on it with my incredible contributors, I can’t help but get swept up in the romance among the pages. And though trends come and go, the tradition of a having a wedding cake stands the test of time. The tutorials you’re about to find prove that!
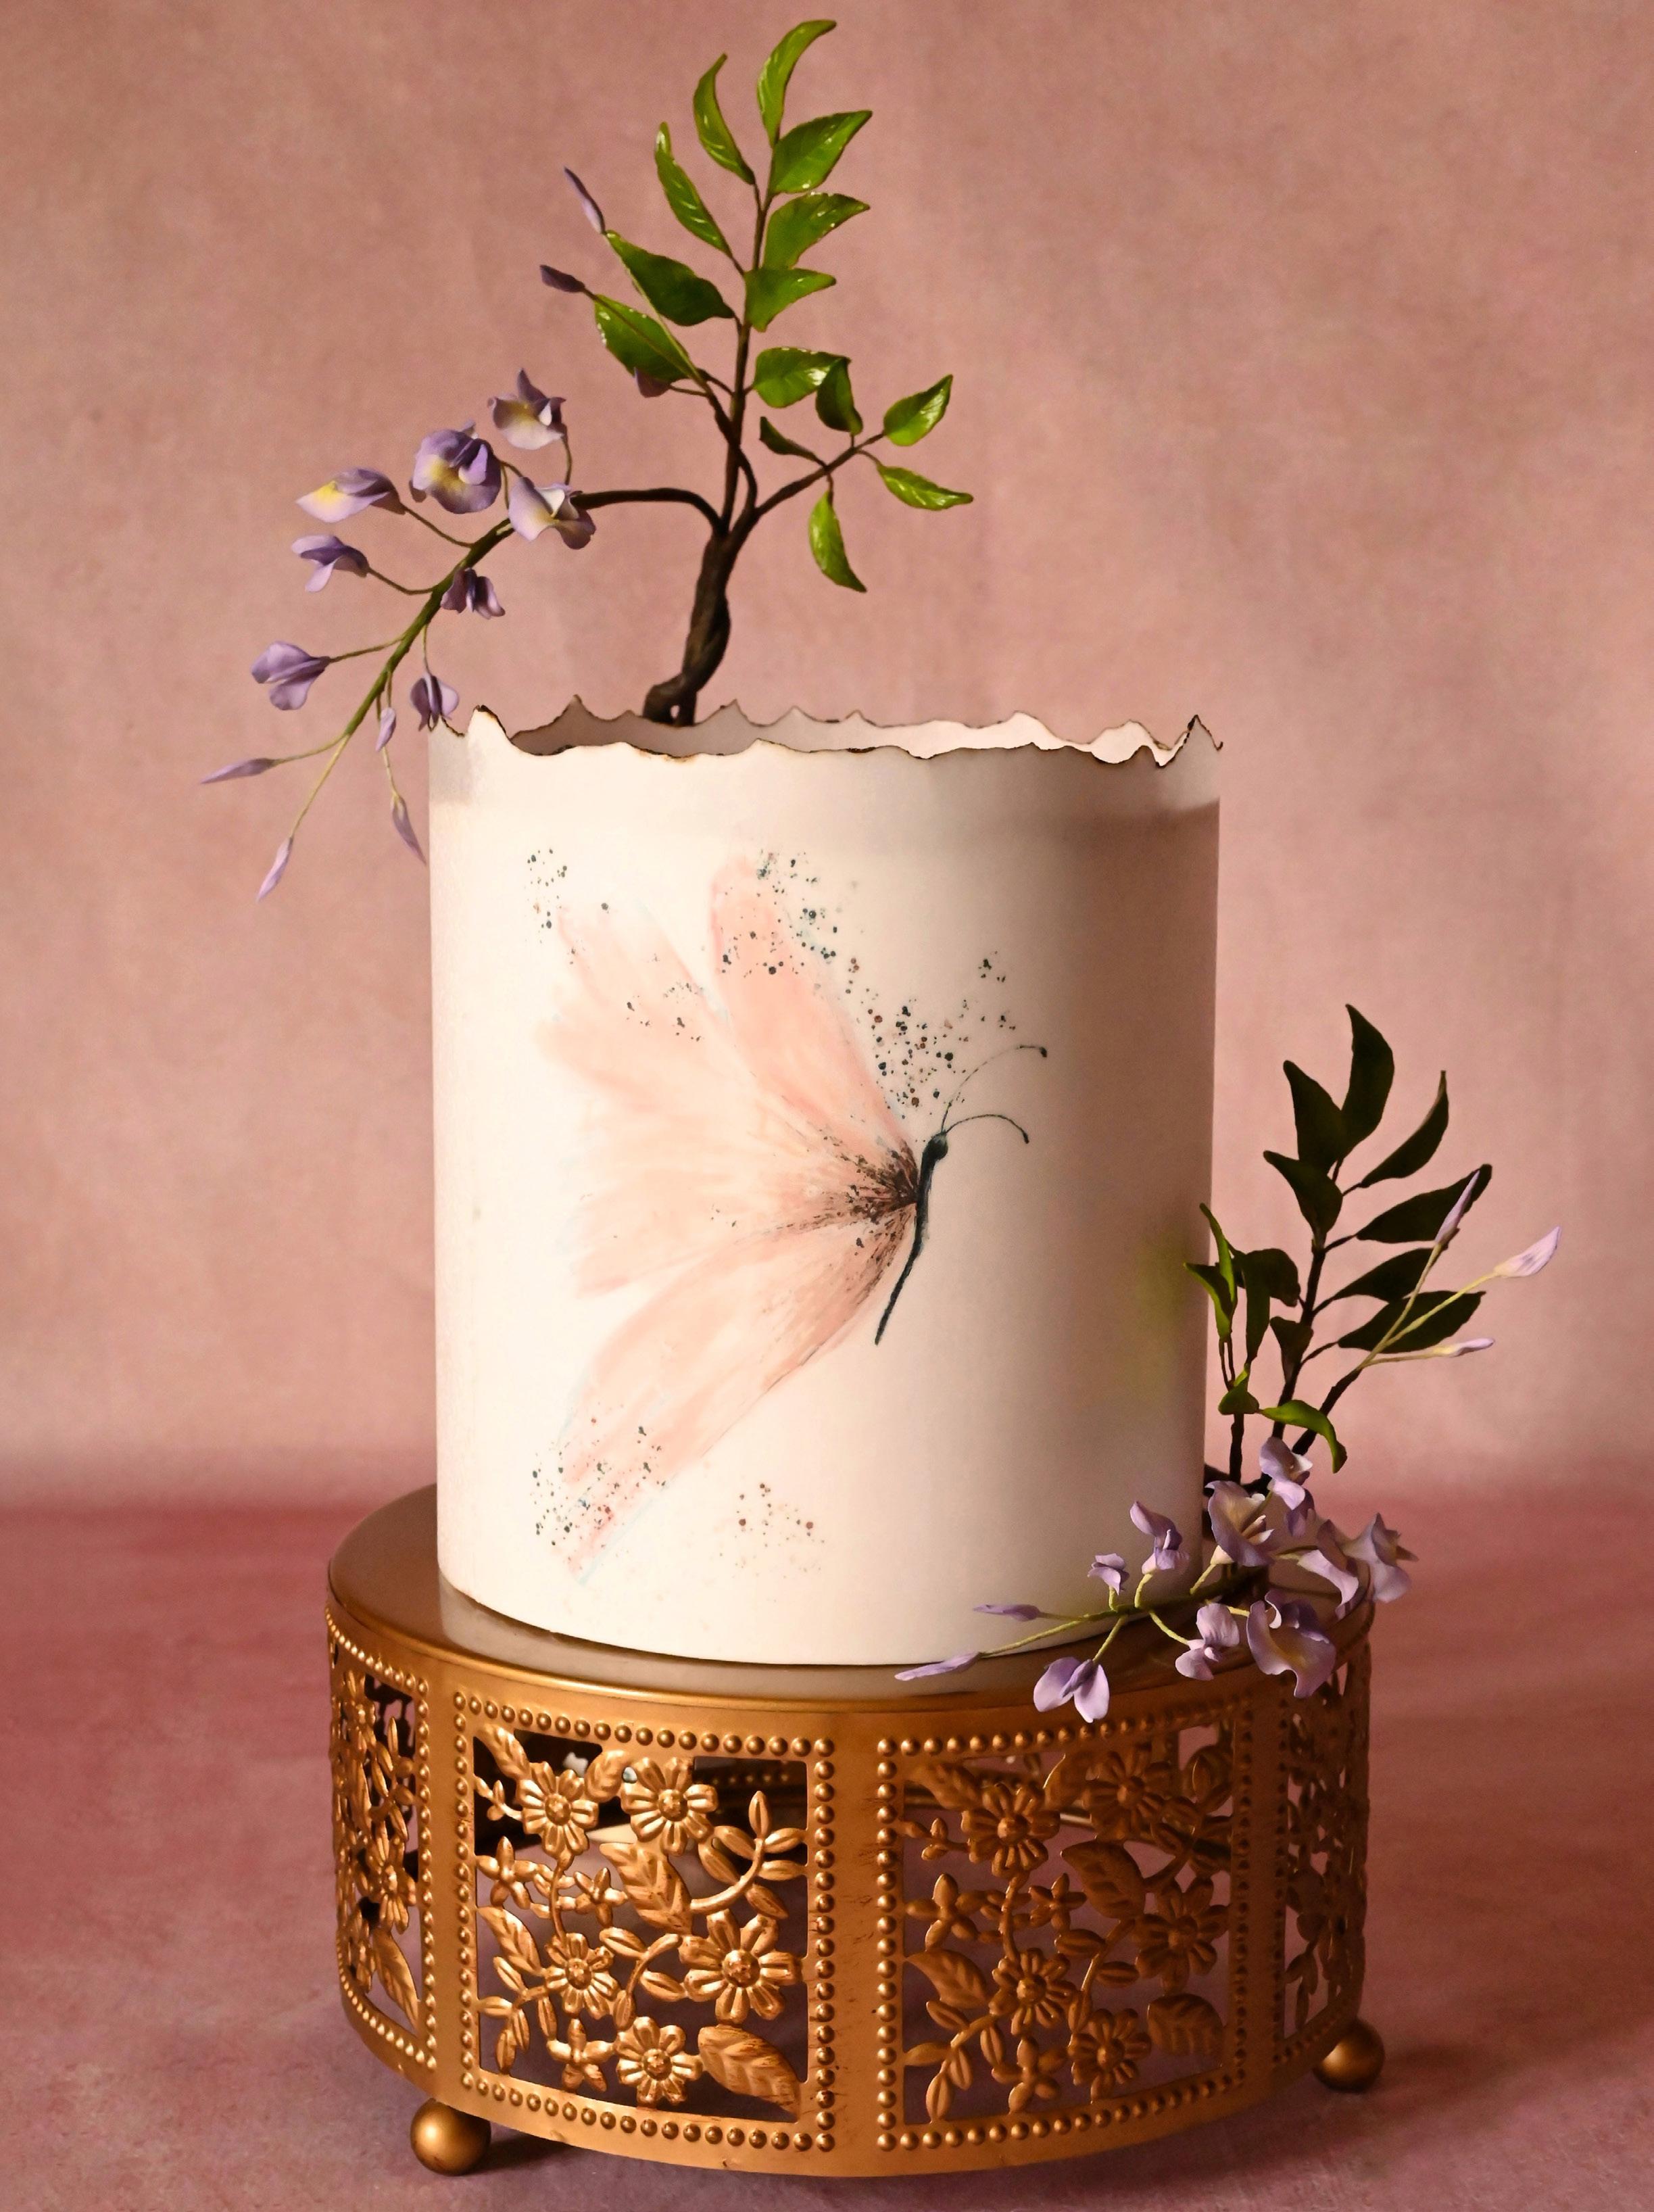
If you weren’t already blown away by cover star Dara Waitkus, you will be when you realize it’s all made from buttercream. Her tutorial teaches the basics of a realistic rose that you’ll have in your decorating repertoire forever! But if gum paste is more your medium, we’ve got you covered there too. Check out the David Austin charity rose for a truly stunning presentation, realistic parrot tulips for a pop of spring, or little wisteria branches for a delicate touch.
Of course, we don’t stop there. We’ve got edible doodles, whimsical wafer-paper and gum-paste sails, and so much more. And because wedding season is the biggest moneymaker for most cottage and professional businesses, we included some very sage advice about finding the right clients and offering wedding cakes as favors on the big day.
So, get ready to fall in love with this issue like I did! We’ll live happily ever after with some newfound skills and tasty keepsake recipes. I think I’m going to start with that tequila cake and see where the summer takes me.
From my kitchen to yours,
We’d like to meet you…

Join our incredible community of cakers on your favorite platform, and don’t forget to sign up for our newsletter to stay up to date on all things cake! Want to pitch an idea or just want to say hello? Email annmarie@americancakedecorating.com. americancakedecorating.com/blog americancakedecorating.com instagram.com/americancakedecorating facebook.com/groups/ACDCakeTalk facebook.com/americancakedecorating May | June 2023 americancakedecorating.com 1 TUTORIAL
Publisher/CEO Grace McNamara
Associate Publisher Ania McNamara-Munzer
Managing Editor AnnMarie Mattila
Creative Director Brenda Drake Lesch
Copy Editor
Social Media Coordinator
Maude Campbell
Corina E. Buzdugan
Contributors Stephanie Ashcraft, Christina Bjorn, Scott Bradshaw, Aimee Hines, Eszter Kanyári, Kristen Lavallee, Seri Lopez, Cydni N. Mitchell, Sandra Palladino, Daisy Parreño, Natasha Pickowicz, Pooja Nanda Sareen, Jean Schapowal, Veronica Seta, Sabrina Siguoin, Sharon Siriwardena, Tammy Varela, Dara Waitkus
Subscriptions 651-330-0574; 1 Year $19.95
AmericanCakeDecorating.com
Editorial Director: Please direct all correspondence, photos, and press releases to AnnMarie Mattila, annmarie@americancakedecorating.com, or mail to American Cake Decorating, 4707 Hwy 61 N #255, St Paul, MN 55110.
Subscription Questions & Changes: Send address changes to, New Mailing Address: American Cake Decorating, 4707 Hwy 61 N #255, St Paul, MN 55110 or email contact@ americancakedecorating.com. Please notify us of address changes four to six weeks ahead of time. The post office is under no obligation to forward your magazine. If the postal authorities notify us that your magazine is undeliverable, we have no further obligation unless we receive a corrected address within one year. We cannot be responsible for non-delivery. The staff of American Cake Decorating magazine and AIM Communications LLC have reviewed contributions and advertising materials with the understanding that the information is original, accurate, and reliable, but we cannot be held responsible for such content. Please note that some of the techniques may be suitable for private home use, but are not necessarily appropriate for cakes destined for sale. American Cake Decorating magazine (ISSN 1094-8732) published bimonthly by AIM Communications, LLC, 4707 Hwy 61 N #255, St Paul, MN 55110. Tel: 651-330-0574; Fax: 651-756-8141. Visit our website at www.americancakedecorating.com Periodicals postage paid at St. Paul, MN, and additional mailing offices. Postmaster: Send address changes to American Cake Decorating magazine, 4707 Hwy 61 N #255, St Paul, MN 55110. Allow 60 days for address change. Copyright ©2023 by AIM Communications, LLC. Reproduction in whole or part without written permission prohibited.
May | June 2023. Issue 444.
2 americancakedecorating.com May | June 2023
IN THIS ISSUE
CAKE TALK | 4
News, events, and more.
YOU MADE IT! | 6
Celebrating 1980s television. SHOPPING | 13
The bridal boutique is open for business.
MEET THE MAKER | 14
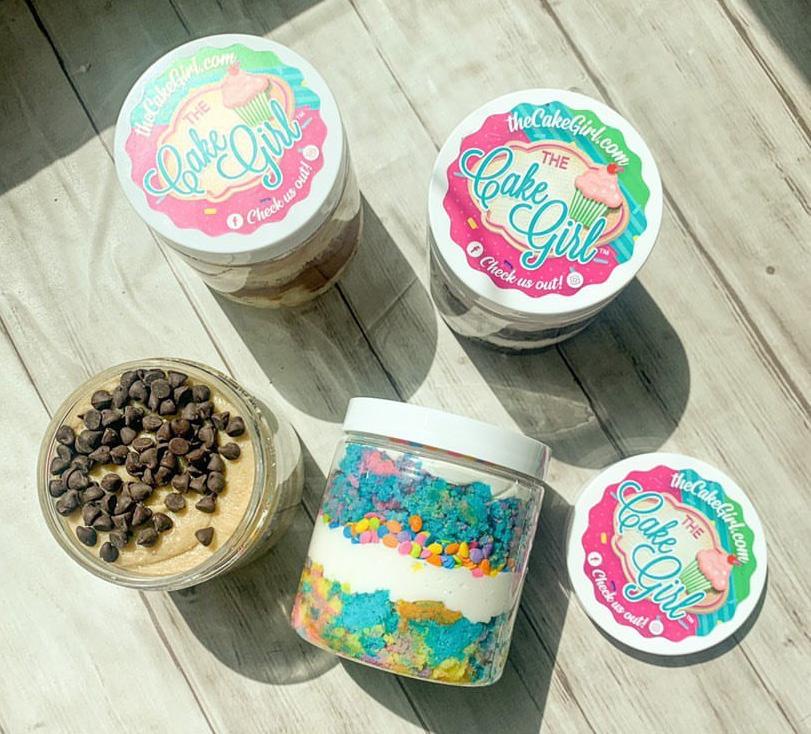
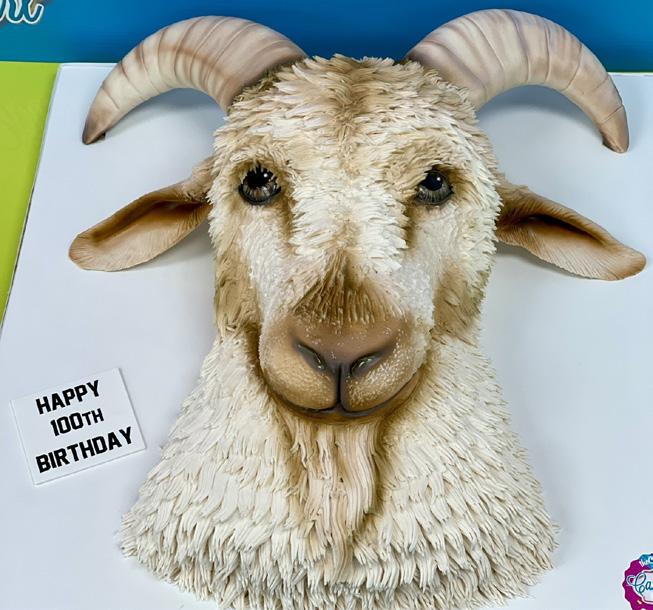
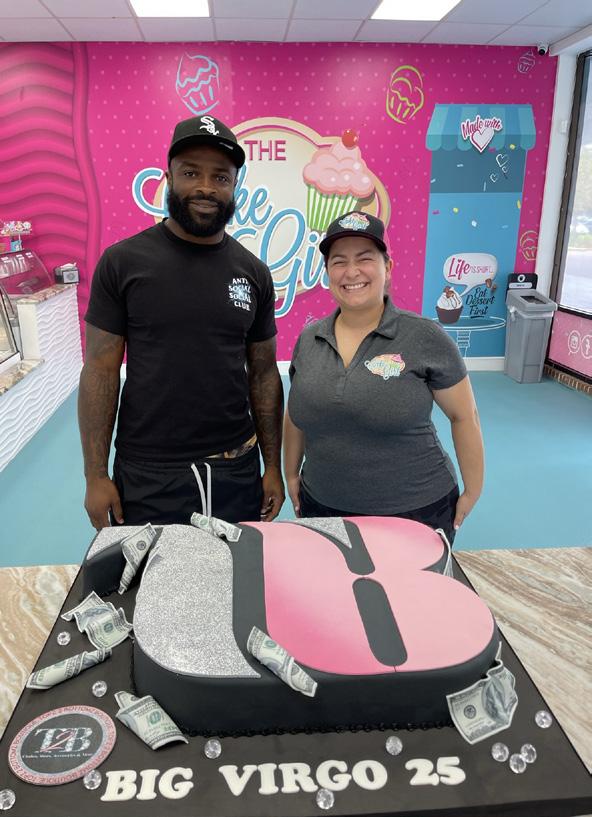
The Cake Girl, Kristen Lavallee, talks shop.
SWEET BOSS | 24
Cyd Mitchell helps you find the right clients.
ASK AN EXPERT | 40
Consider using cake as a wedding favor.
CAKE ALCHEMIST | 50
Go out on a limb with Scott Bradshaw.
CAKE COLLABORATION | 67
Art deco architecture made from sugar.
LAST BITE | 74
Quick strawberry jam.
RECIPES &
TUTORIALS
THE REALISTIC BUTTERCREAM ROSE | 8
Dara Waitkus teaches the fundamentals.
PARROT TULIPS | 16
Realistic sugar flowers for spring from Daisy Parreño.
WHITE ON WHITE WEDDING | 20
Sandra Palladino has a monochrome moment.
CAKE DIFFICULTY KEY
I “DO”-ODLE | 26 Grab those edible markers thanks to Jean Schapowal.
LEMON POPPY SEED CAKE | 32 An easy recipe from Stephanie Ashcraft’s cookbook.
RANG-O-NOOR | 34 Get ornately colorful with Pooja Nanda Sareen.
DAVID AUSTIN CHARITY ROSE | 42 Eszter Kanyári’s sugar flower makes a unique statement.
WAFER-PAPER WHIMSY | 47 Learn abstract textures with Aimee Hines.
BEGINNER: INTERMEDIATE: ADVANCED:
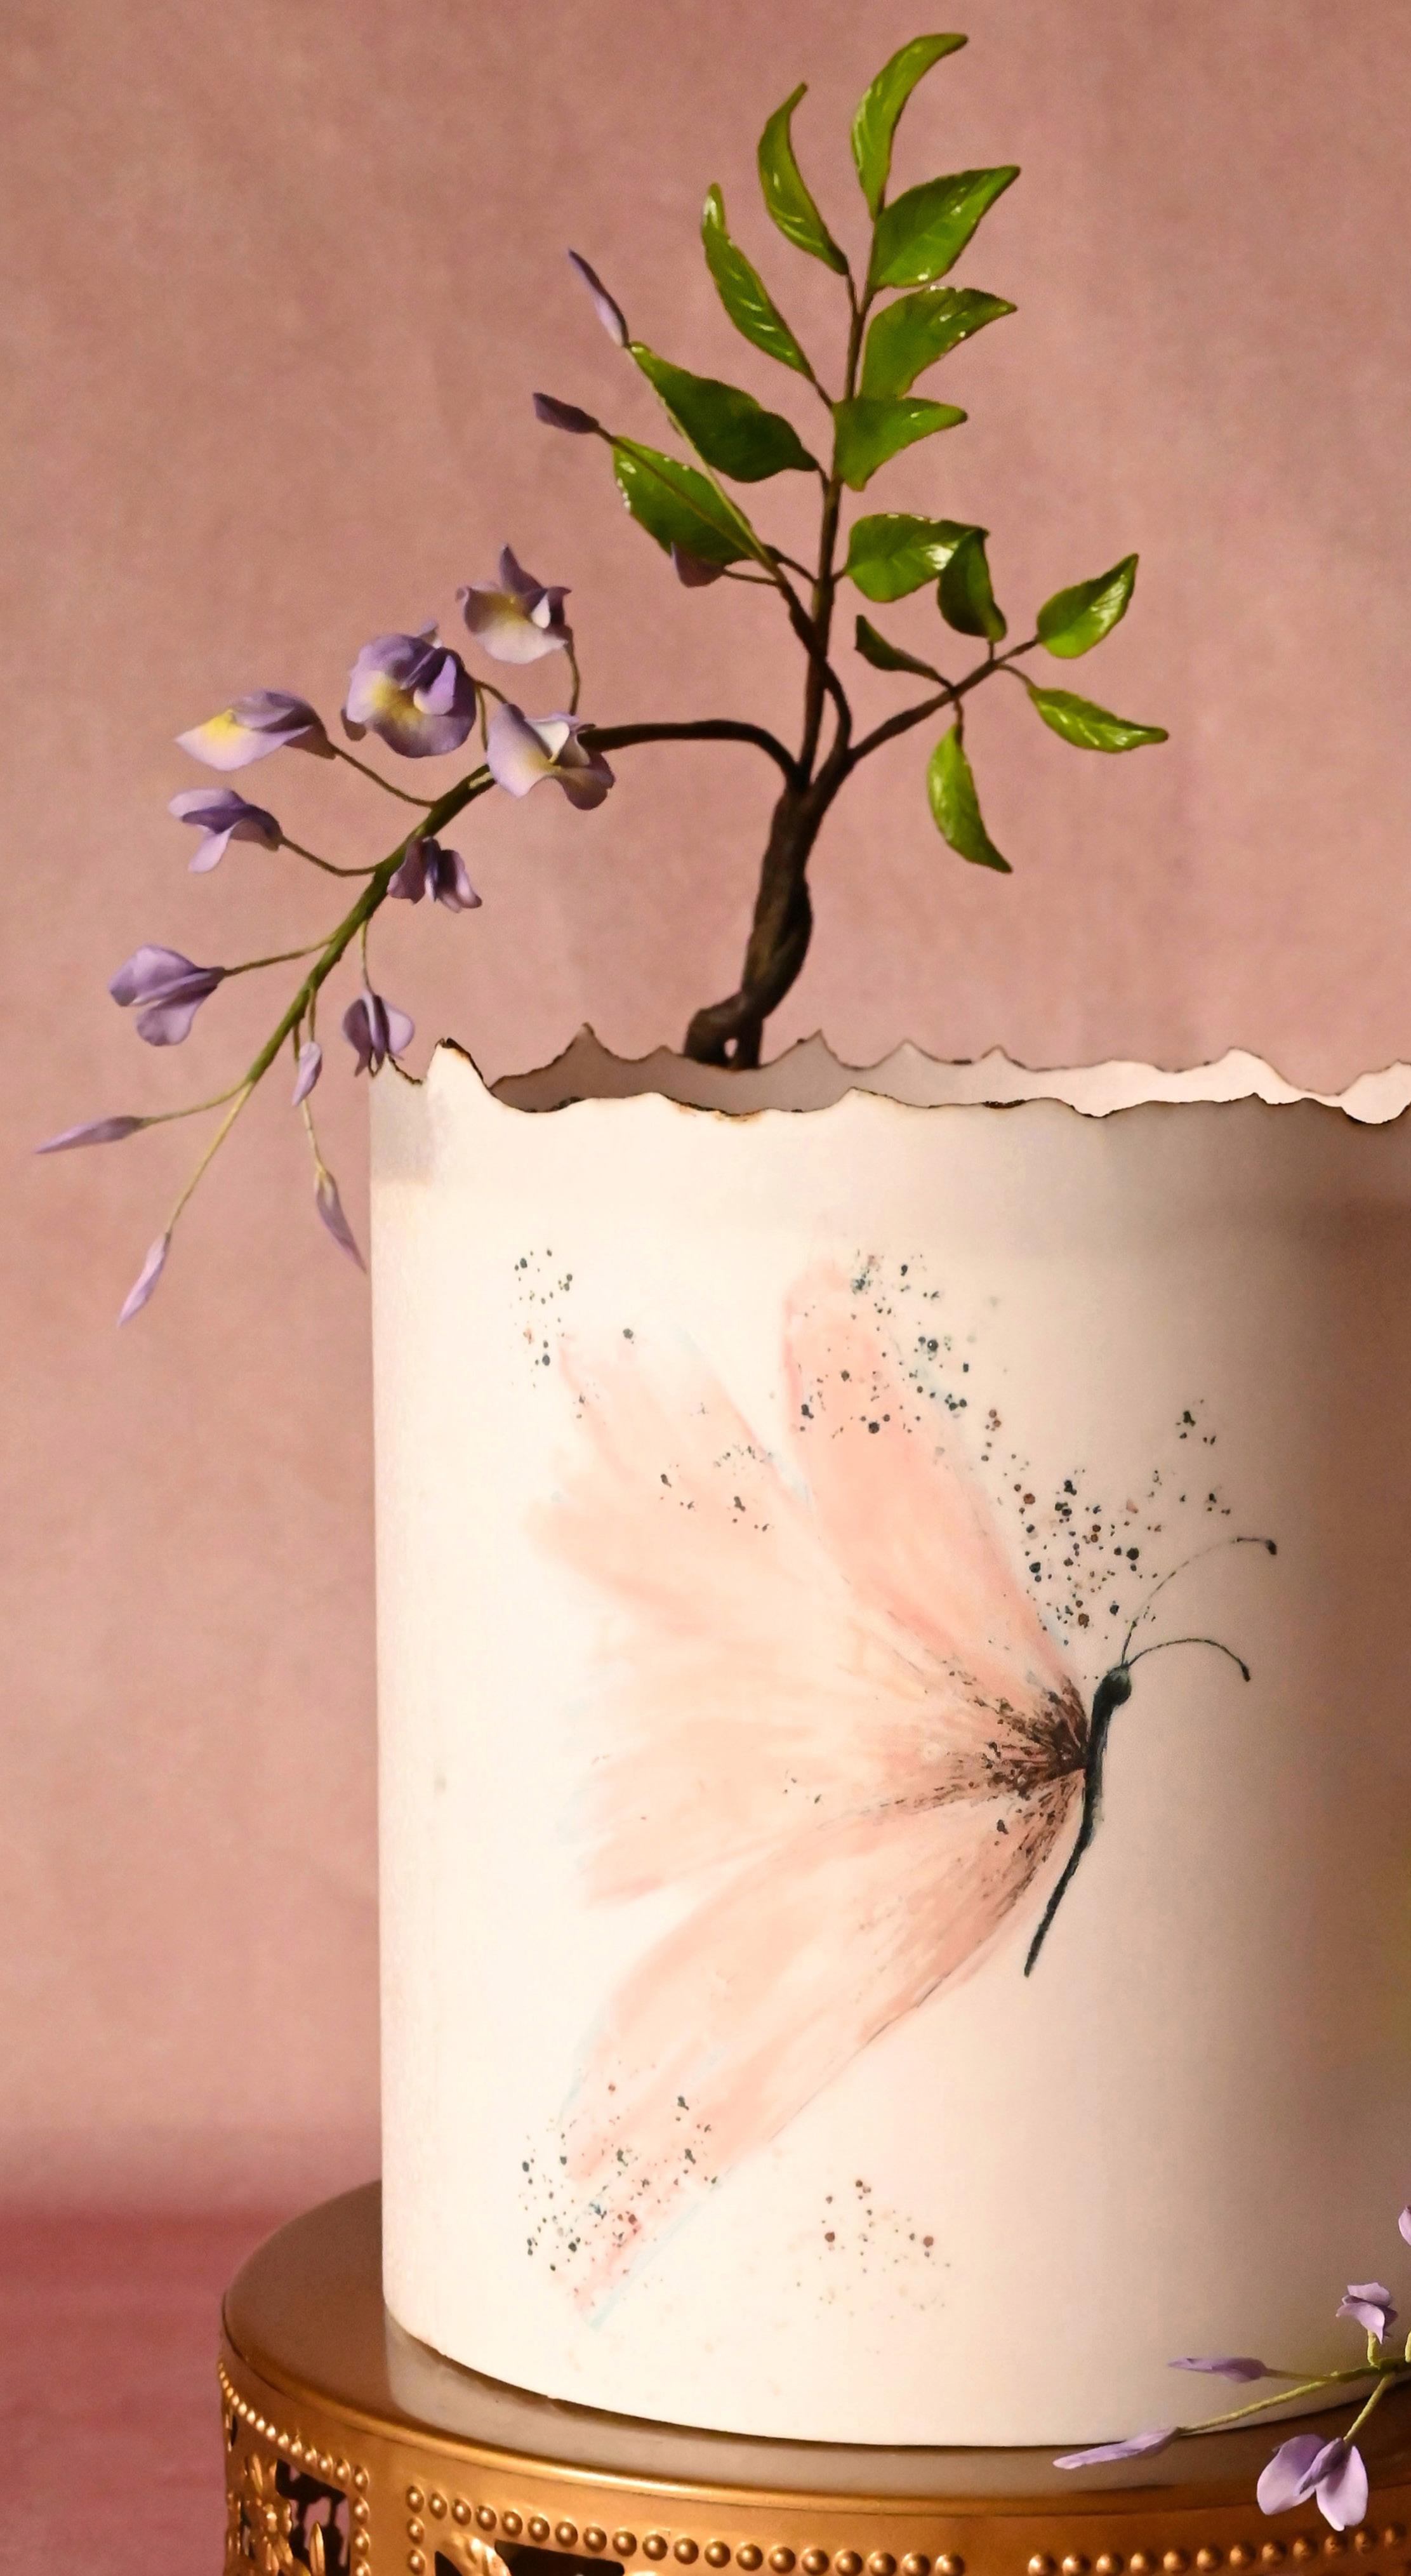
SEASONAL BUTTERCREAM LANDSCAPE | 54 Sabrina Siguoin paints a pretty picture.
WISPY WISTERIA | 56 Delicate flowers made by Veronica Seta.
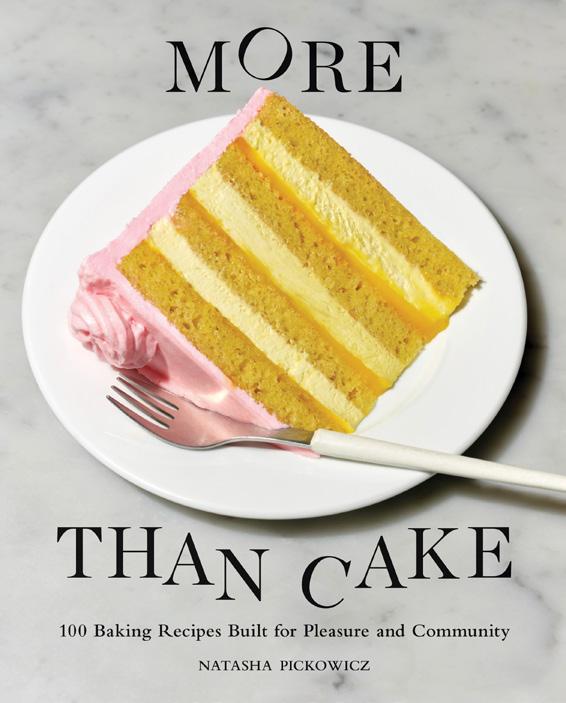
PASSION FRUIT, COCONUT, & TEQUILA LAYER CAKE | 64
A sneak peek inside Natasha Pickowicz’s new book.
DRESS-INSPIRED WEDDING CAKE | 70 Cake imitates clothing with Seri Lopez.

EXPERT:

May | June 2023 americancakedecorating.com 3
AMERICAN CAKE DECORATING MAY/JUNE 2023 ISSUE 444
8 26 34 56
ON THE COVER
CAKE Talk
Connect with the community here and on social media for irresistible cake inspiration, sweet giveaways, essential news, and exclusive offers.
SCHOOL YOURSELF
New Educational Tools to Continue Your Baking Journey
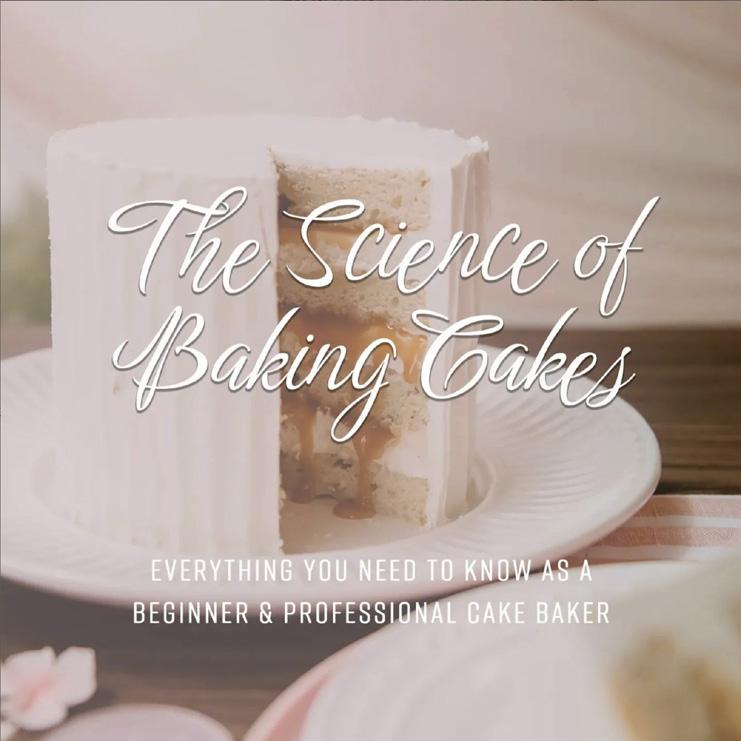
The Science of Baking Cakes
By Emerlie Miller Grandy
This 41-page e-book will help you better understand how from-scratch cake baking works so you can learn how to better source and tweak your own recipes. You will learn mixing methods, meringue methods, leavening types, types of cakes, how to troubleshoot recipes, and so much more. It’s jam-packed with everything you need to know as a beginner and professional cake baker. For more information, visit stan.store/Emerlieann/Emerlieaa_store/page/112526
BUY THE BOOK
New Releases in Cake Baking and Decorating
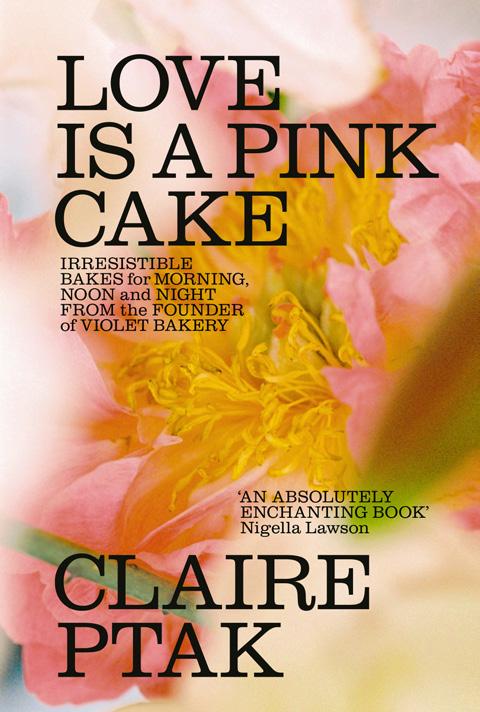
Love Is a Pink Cake: Irresistible Bakes for Morning, Noon, and Night
By Claire Ptak
W. W. Norton & Company (May
2, 2023)
Renowned for the wedding cake she created for Prince Harry and Meghan Markle, Claire Ptak knows there’s nothing like a cake when it comes to expressions and celebrations of love. A Chez Panisse alum, Ptak is a Northern California native who now runs the wildly successful Violet Bakery in London. Reflecting on her upbringing and love of in-season produce, she shares 75 sweet and savory creations. Her bakes are homey yet elevated, made with quality ingredients, so as to extract the best possible flavors. Included are gluten-free, refined sugar-free, and vegan bakes, as well as the sought-after recipe for the Duke and Duchess’ lemon elderflower cake.
A Sweet Floral Life: Romantic Arrangements for Fresh and Sugar Flowers
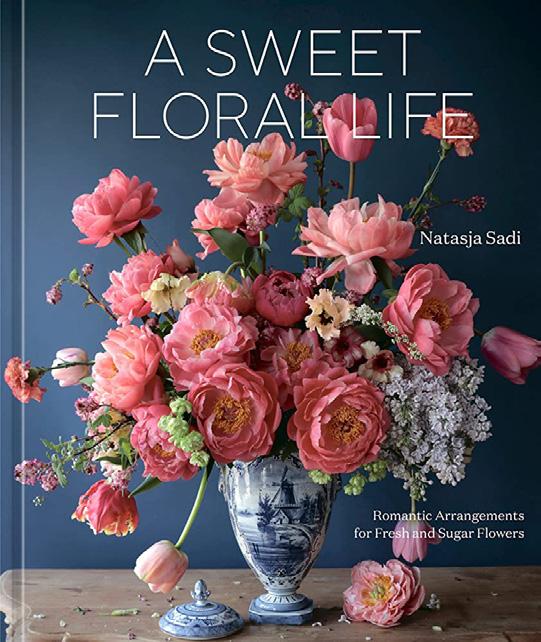 By Natasja Sadi Ten Speed Press (April
25, 2023)
Rising Instagram star Natasja Sadi’s floral arrangements have a sumptuous, old-world look straight out of a classical painting. But among the glorious profusion of fresh flowers, there is often a surprise twist: handmade sugar flowers (traditionally used in cake decorating) that are indistinguishable from real ones and last forever. In A Sweet Floral Life, Sadi guides you through her creative process of flower arranging and developing your personal style, along with tutorials for seasonal arrangements, living and entertaining with flowers, and how to photograph flowers.
4 americancakedecorating.com May | June 2023 NEWS, REVIEWS, & GIVEAWAYS
March April ICING SMILES BAKER OF THE MONTH


NAMRATHA SUDARSHAN SUSAN PARNES

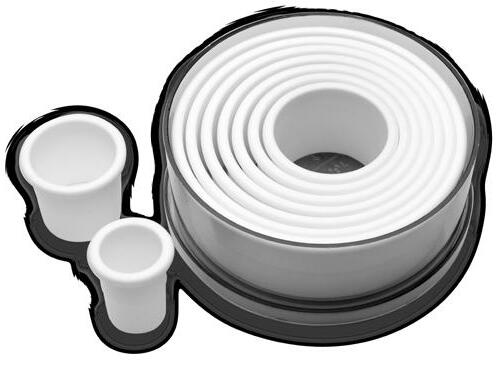
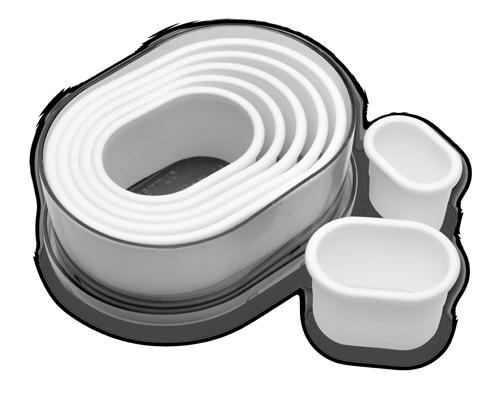
NEWS, REVIEWS, & GIVEAWAYS www.atecousa.com Visit the Ateco website for all of our latest cake decorating tools and products.
7 Piece Plain Football Set No. 5755
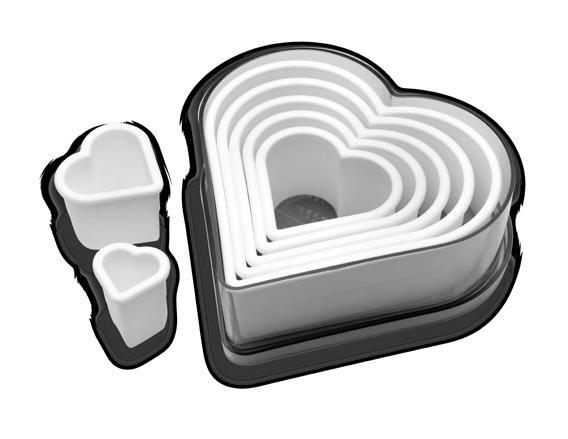
7 Piece Plain Heart Cutter Set No. 5751
5 Piece Plain Star Cutter Set No. 5750
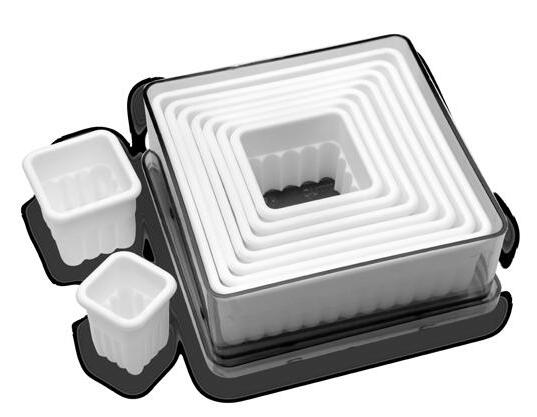
9 Piece Fluted SquareCutter Set No. 5703
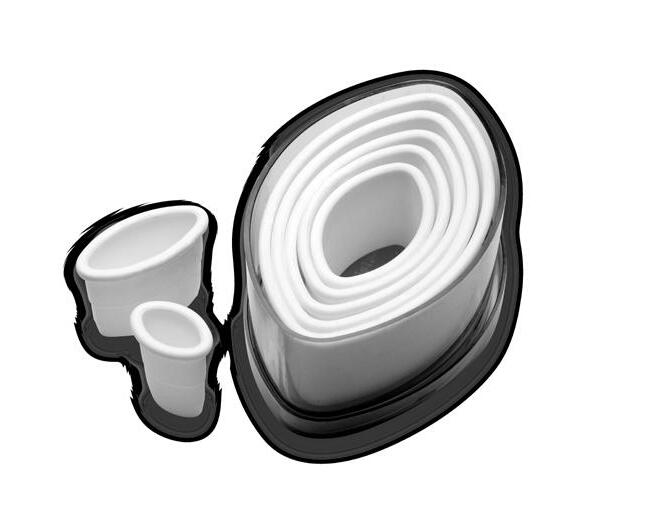
7 Piece Plain Oval Cutter Set No. 5754
9 Piece Plain Square Cutter Set No. 5753
9 Piece Plain Round Cutter Set No. 5757
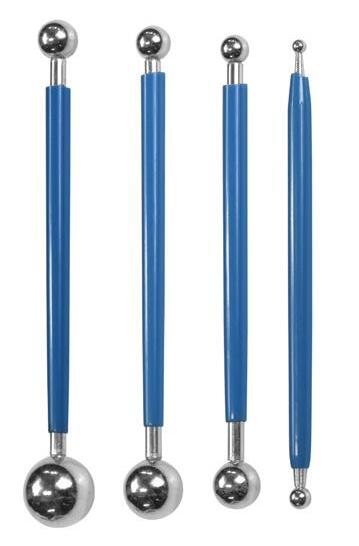
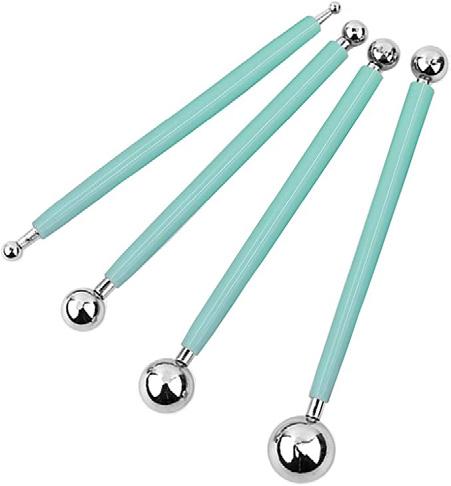
4 PIECE MODELING BALL TOOL SET No. 4213 ACD_V3_2.25.22.indd 1 2/28/22 3:14 PM
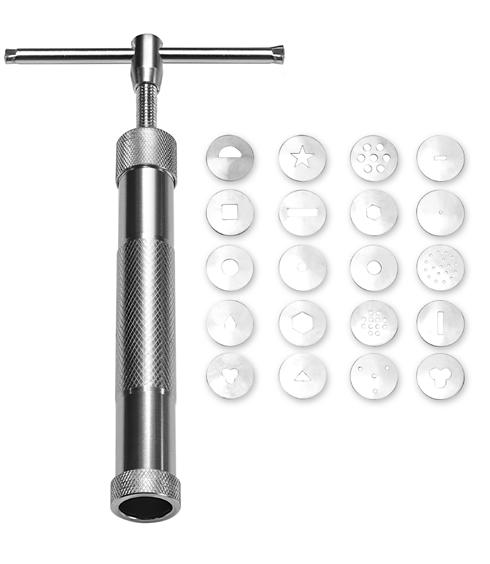
FONDANT EXTRUDER WITH 20 DESIGN PLATES No. 558
Ruby, the fourth type of chocolate, is now available in a baking chip and ready to take the category by storm! Its naturally present signature color and fruity flavor will surprise and delight your consumers without added colors or flavors. Add ruby chips to your baked goods to deliver on intense indulgence. For more information, visit barry-callebaut.com
NEW PRODUCT RELEASES
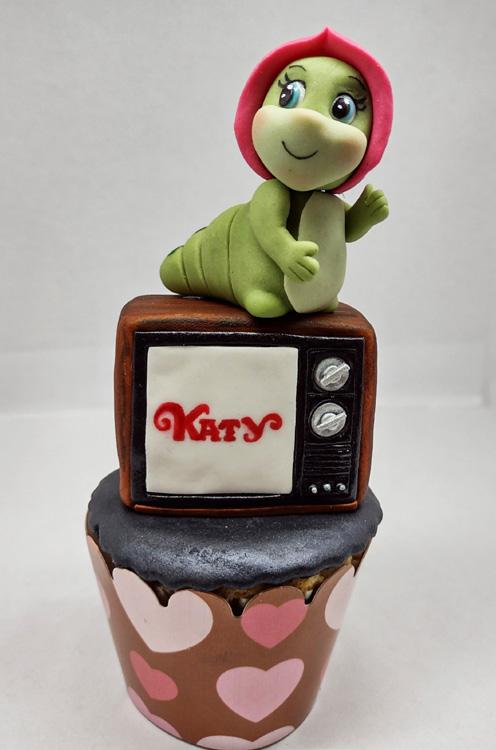
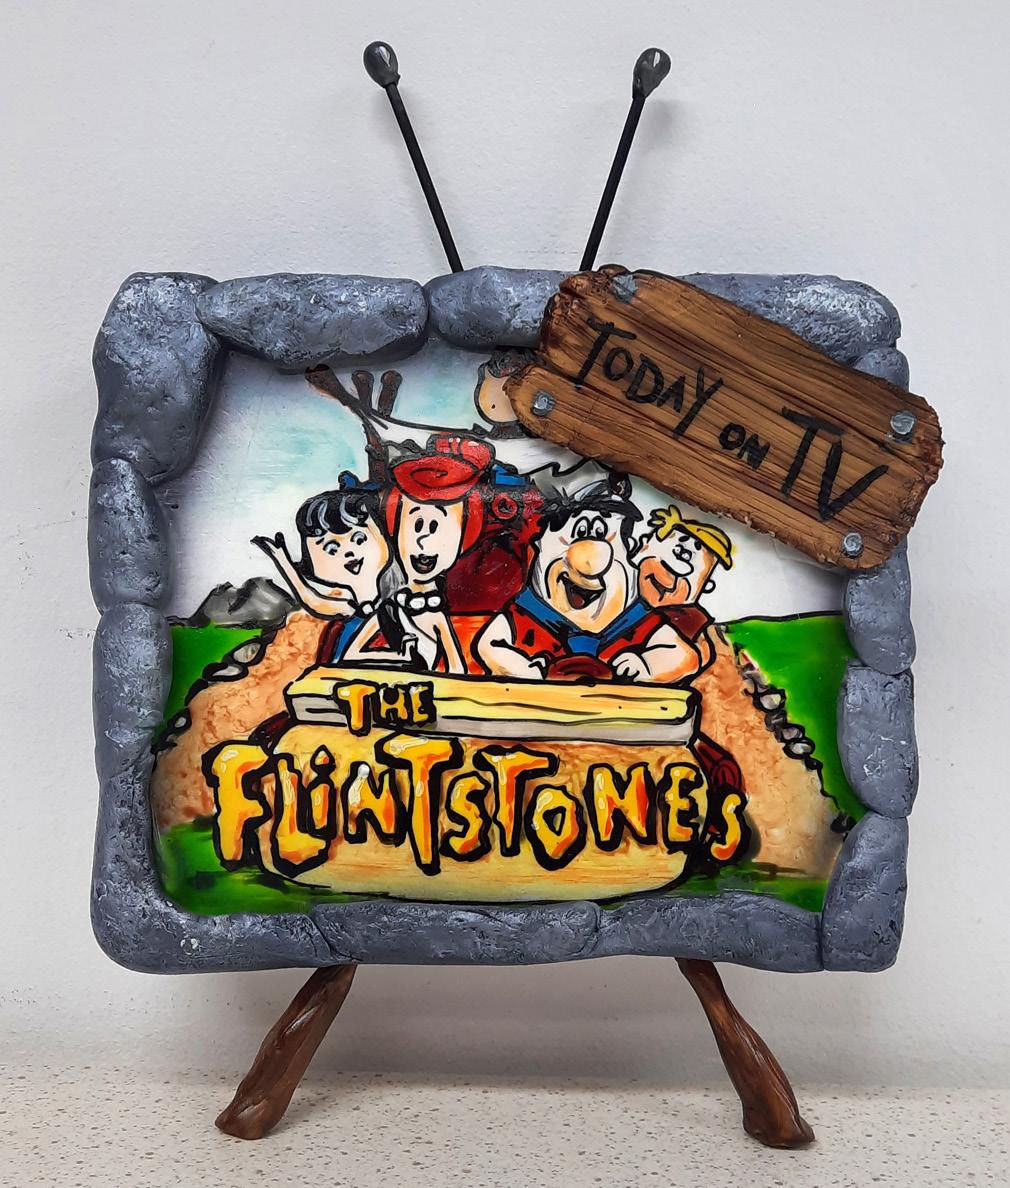
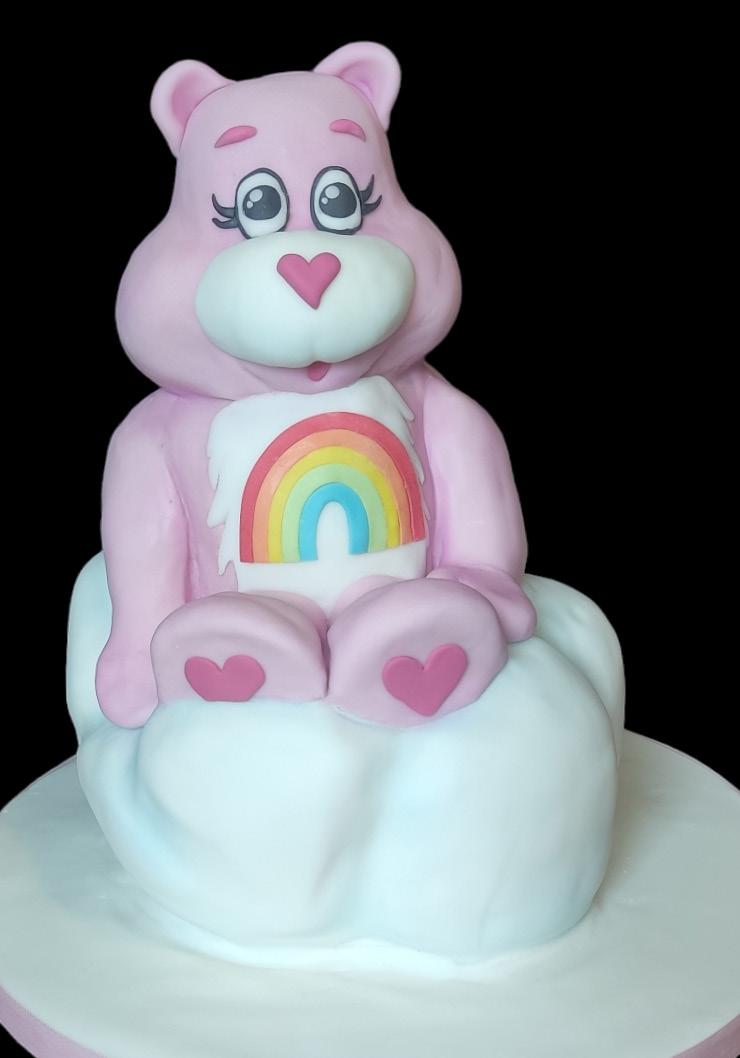
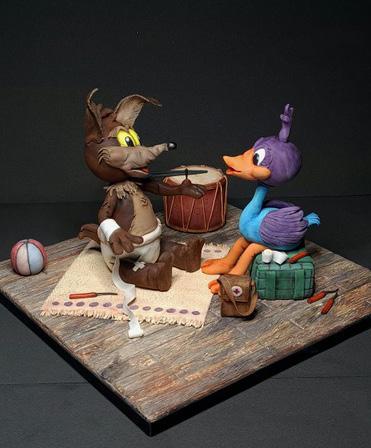
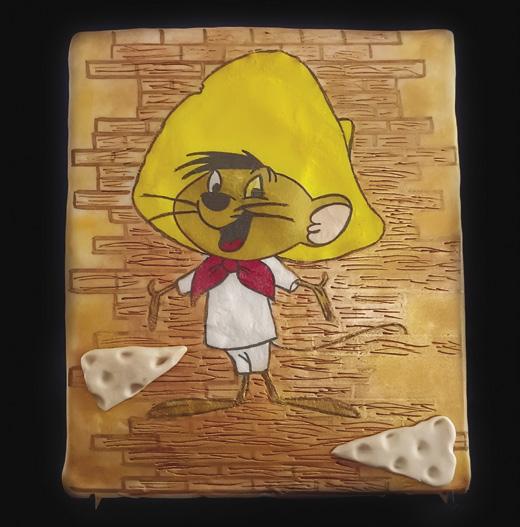
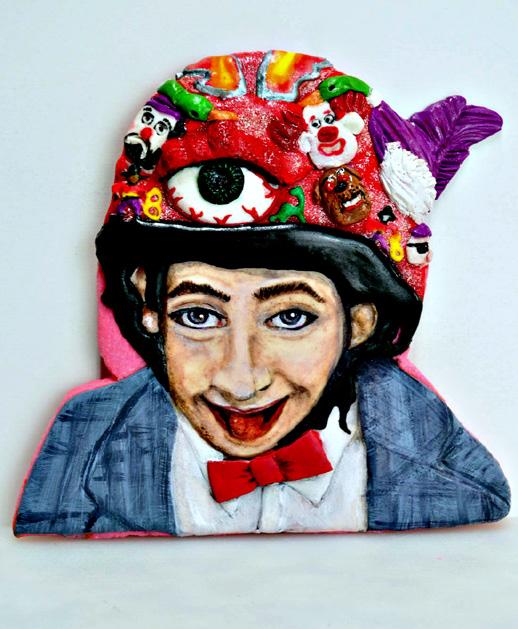
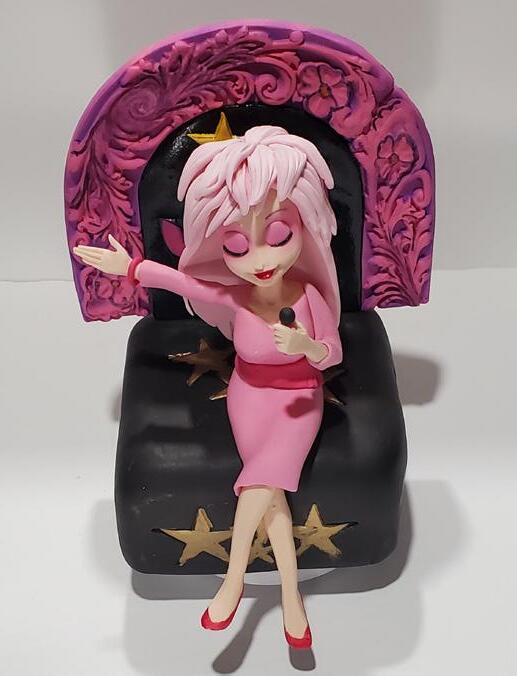
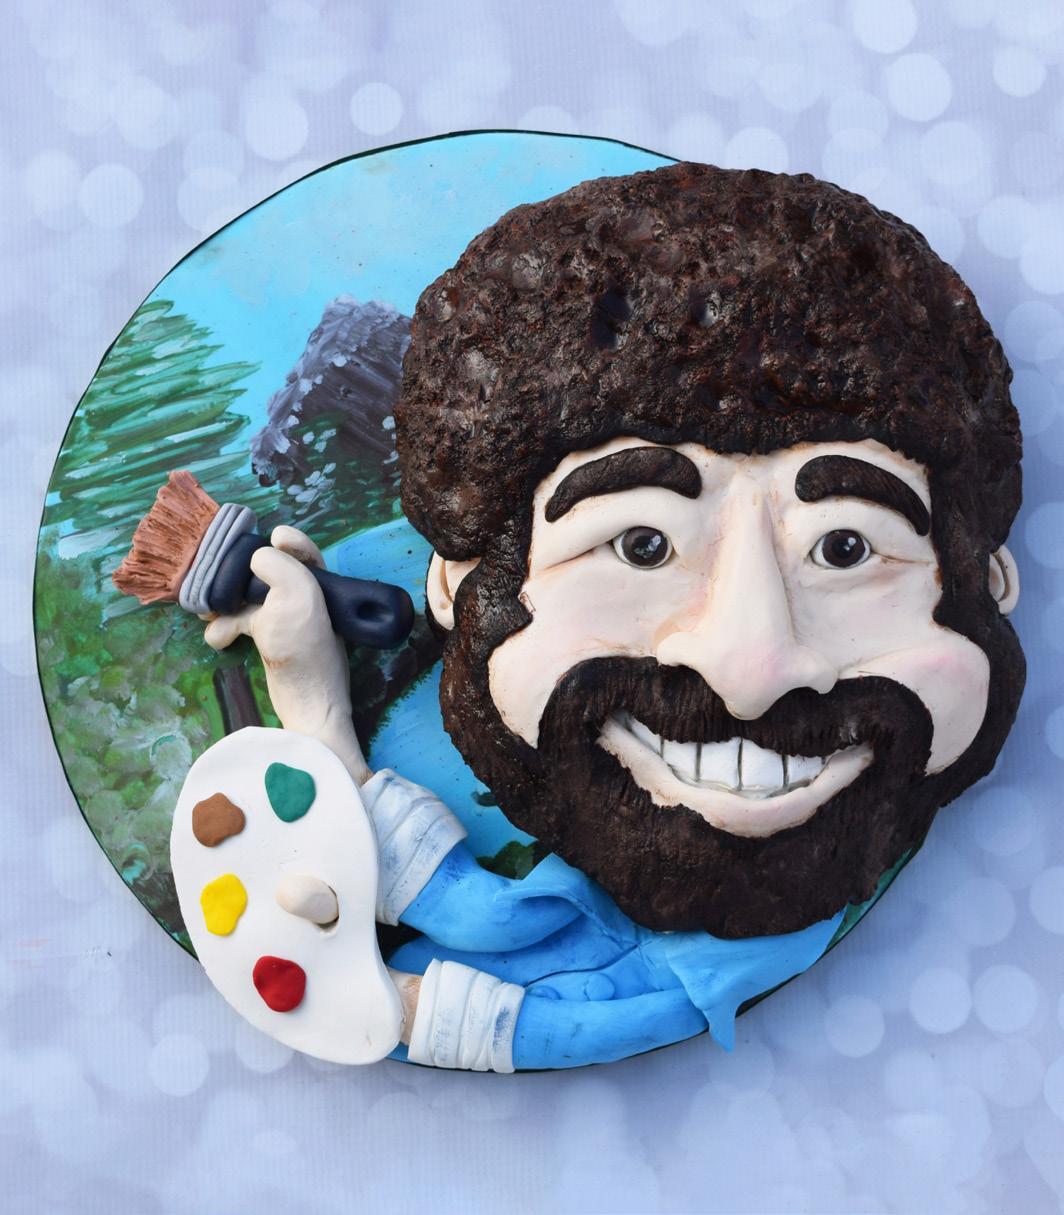
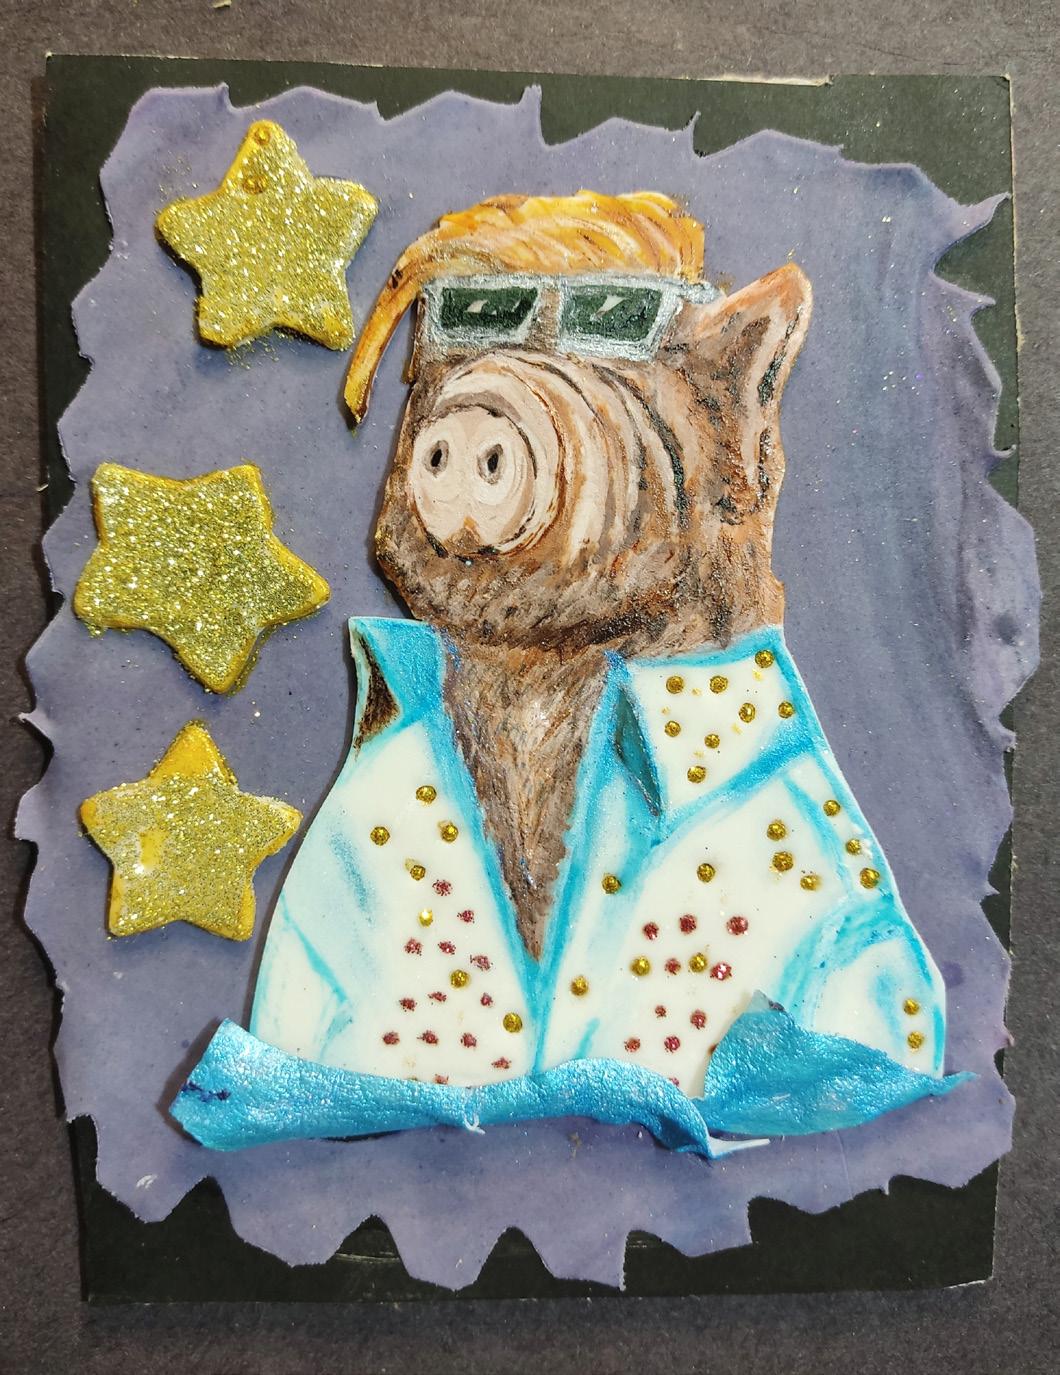
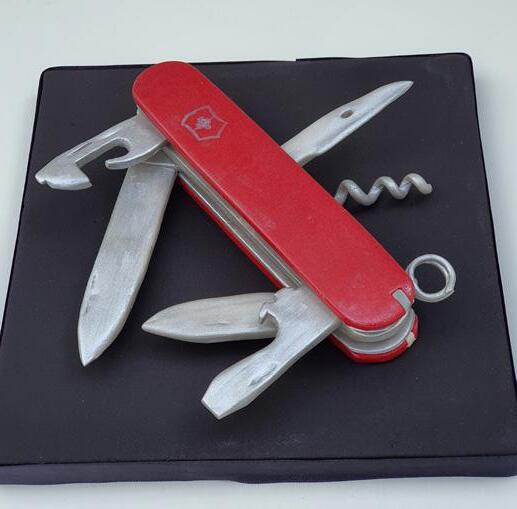
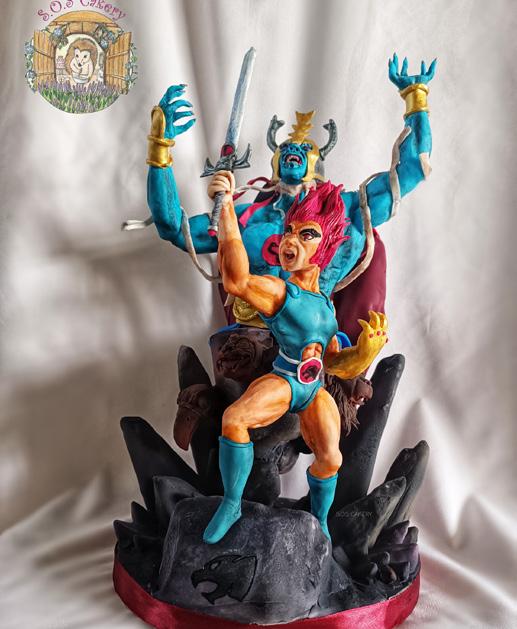
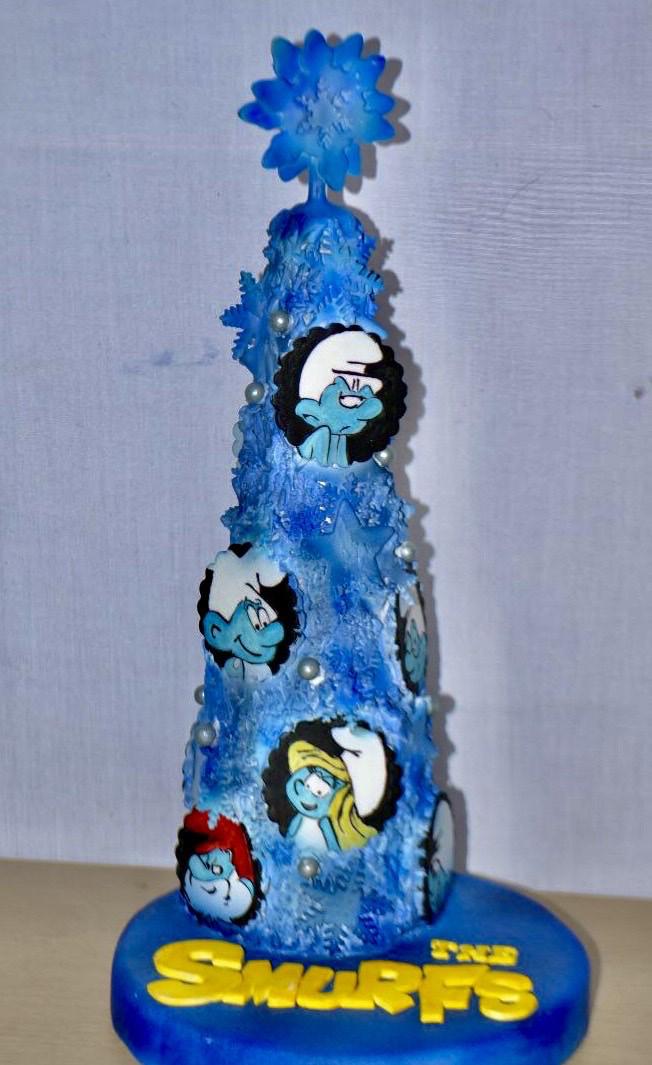
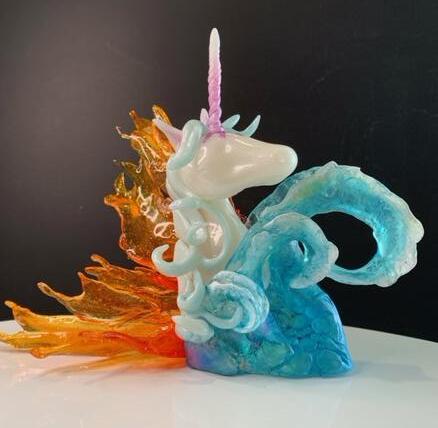
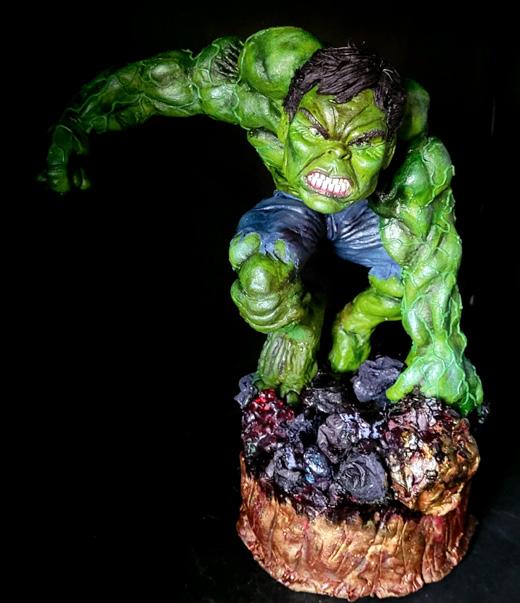
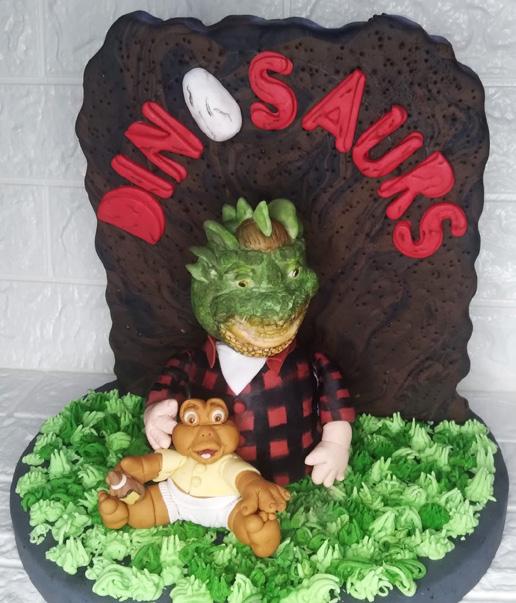
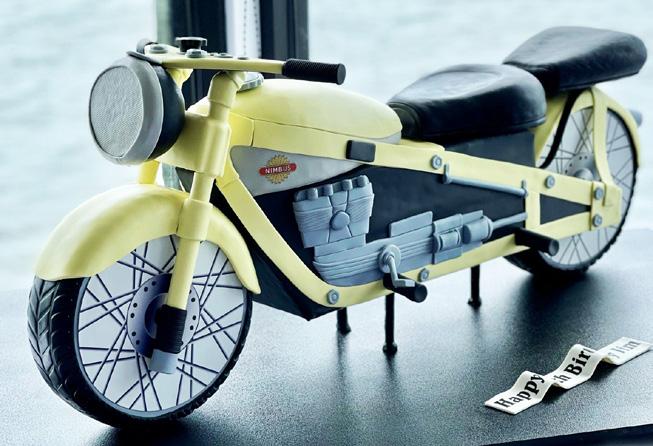
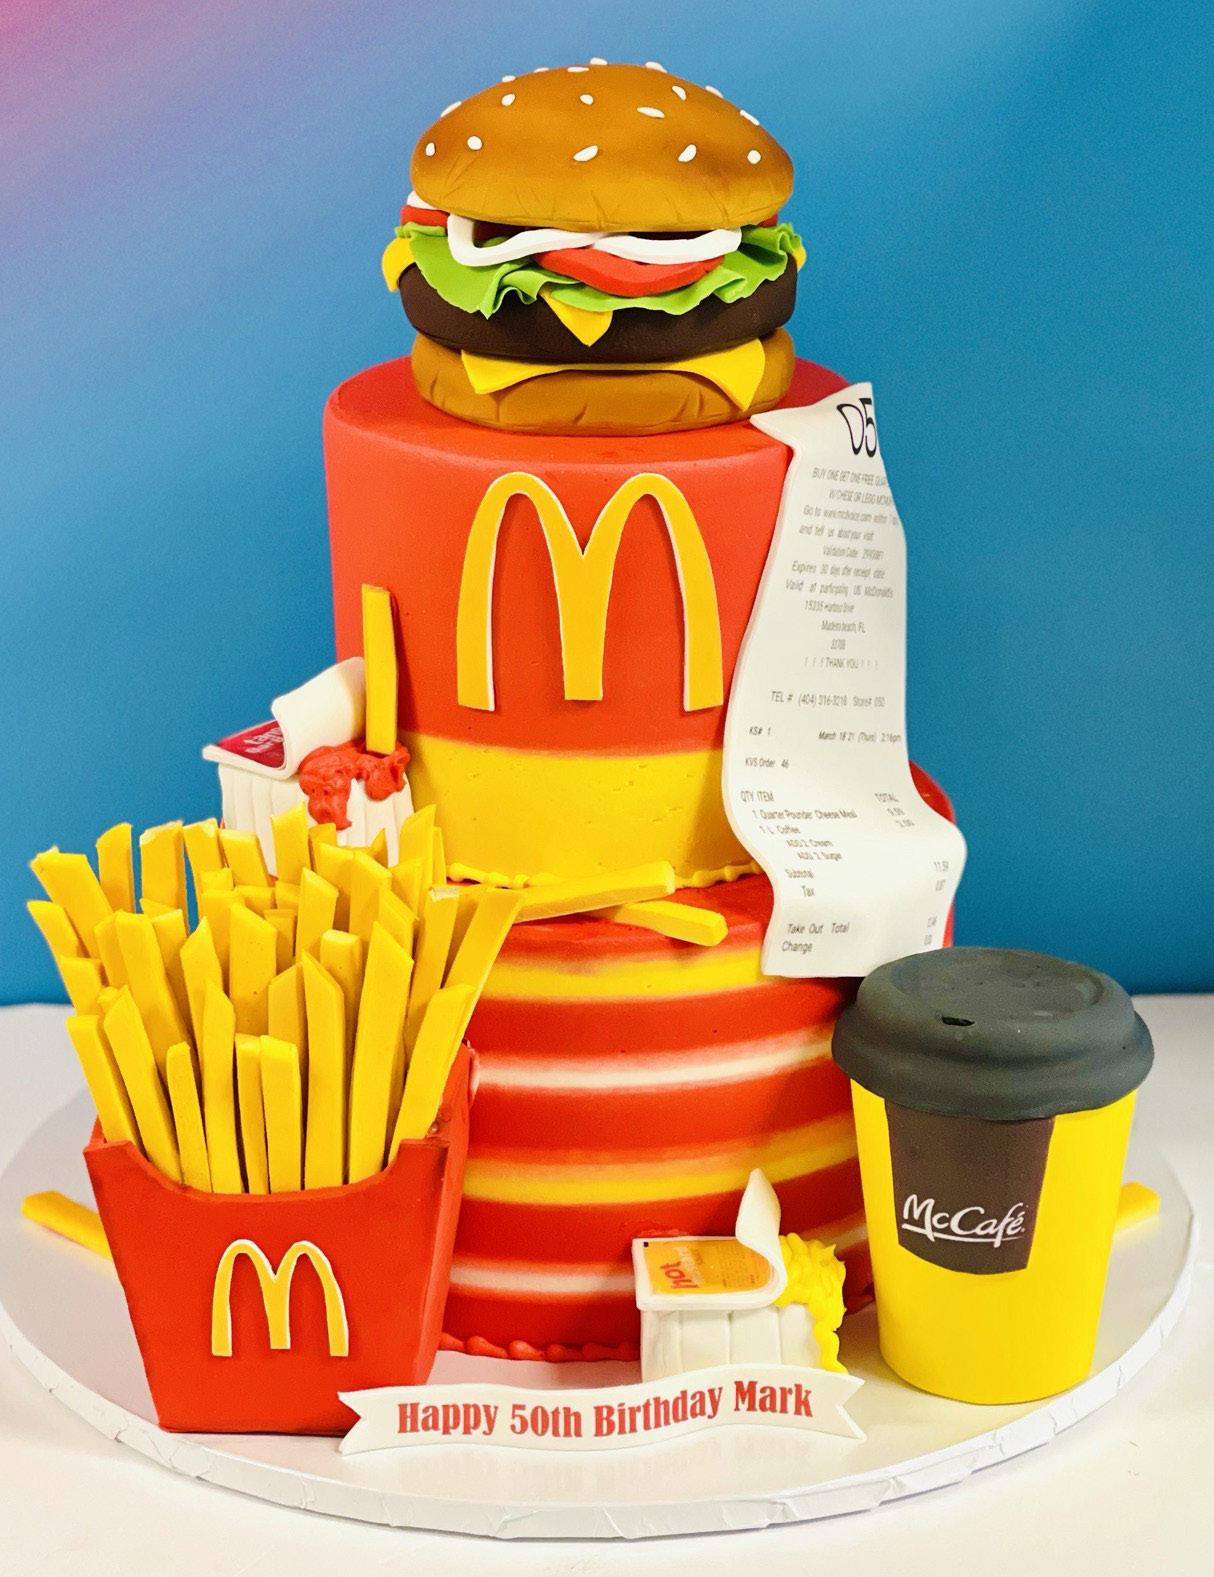
YOU MADE IT! YOU MADE IT!
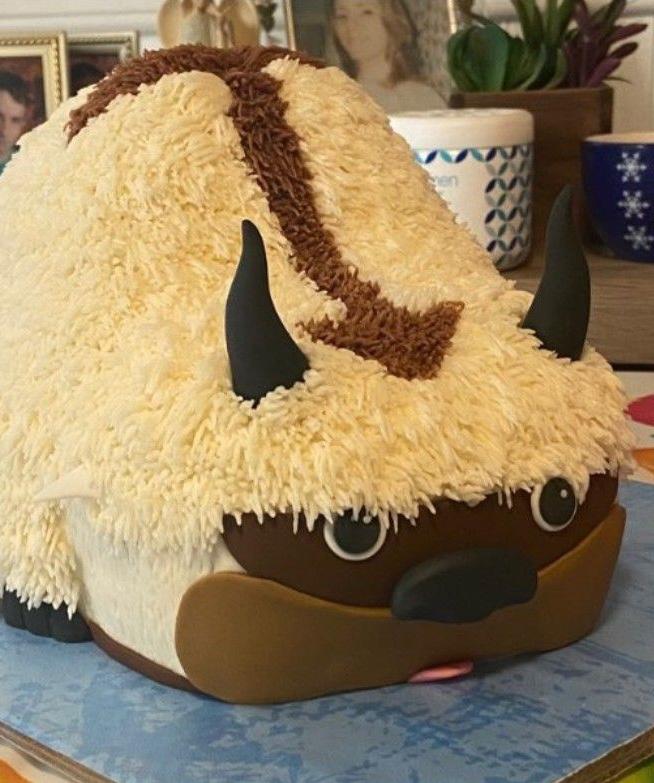
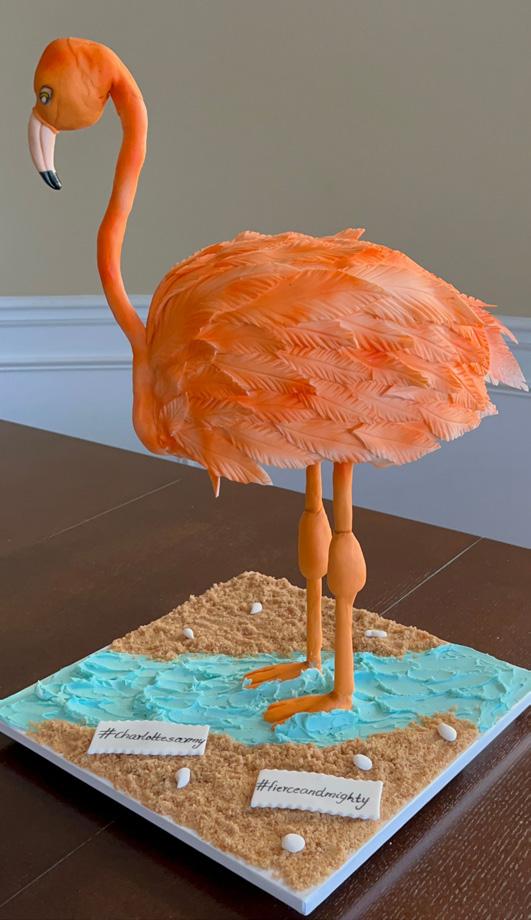
ACD contributor Tammy Varela recently organized a totally awesome cake collaboration based on some of the most iconic 1980s television series. Check out all these rad creations!
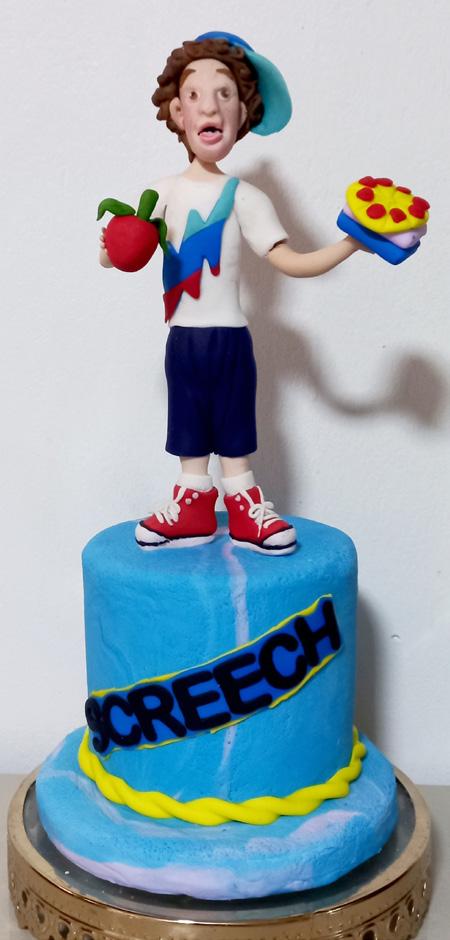
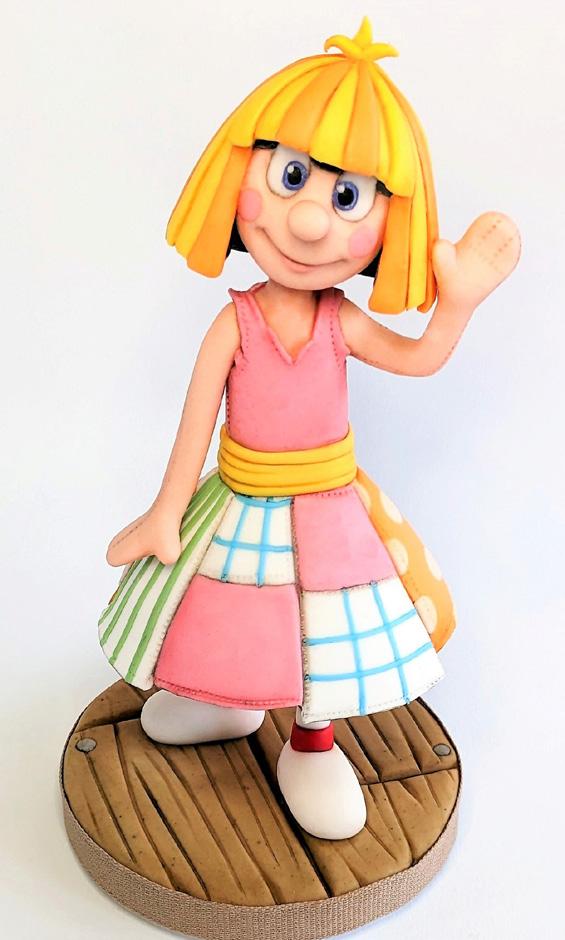
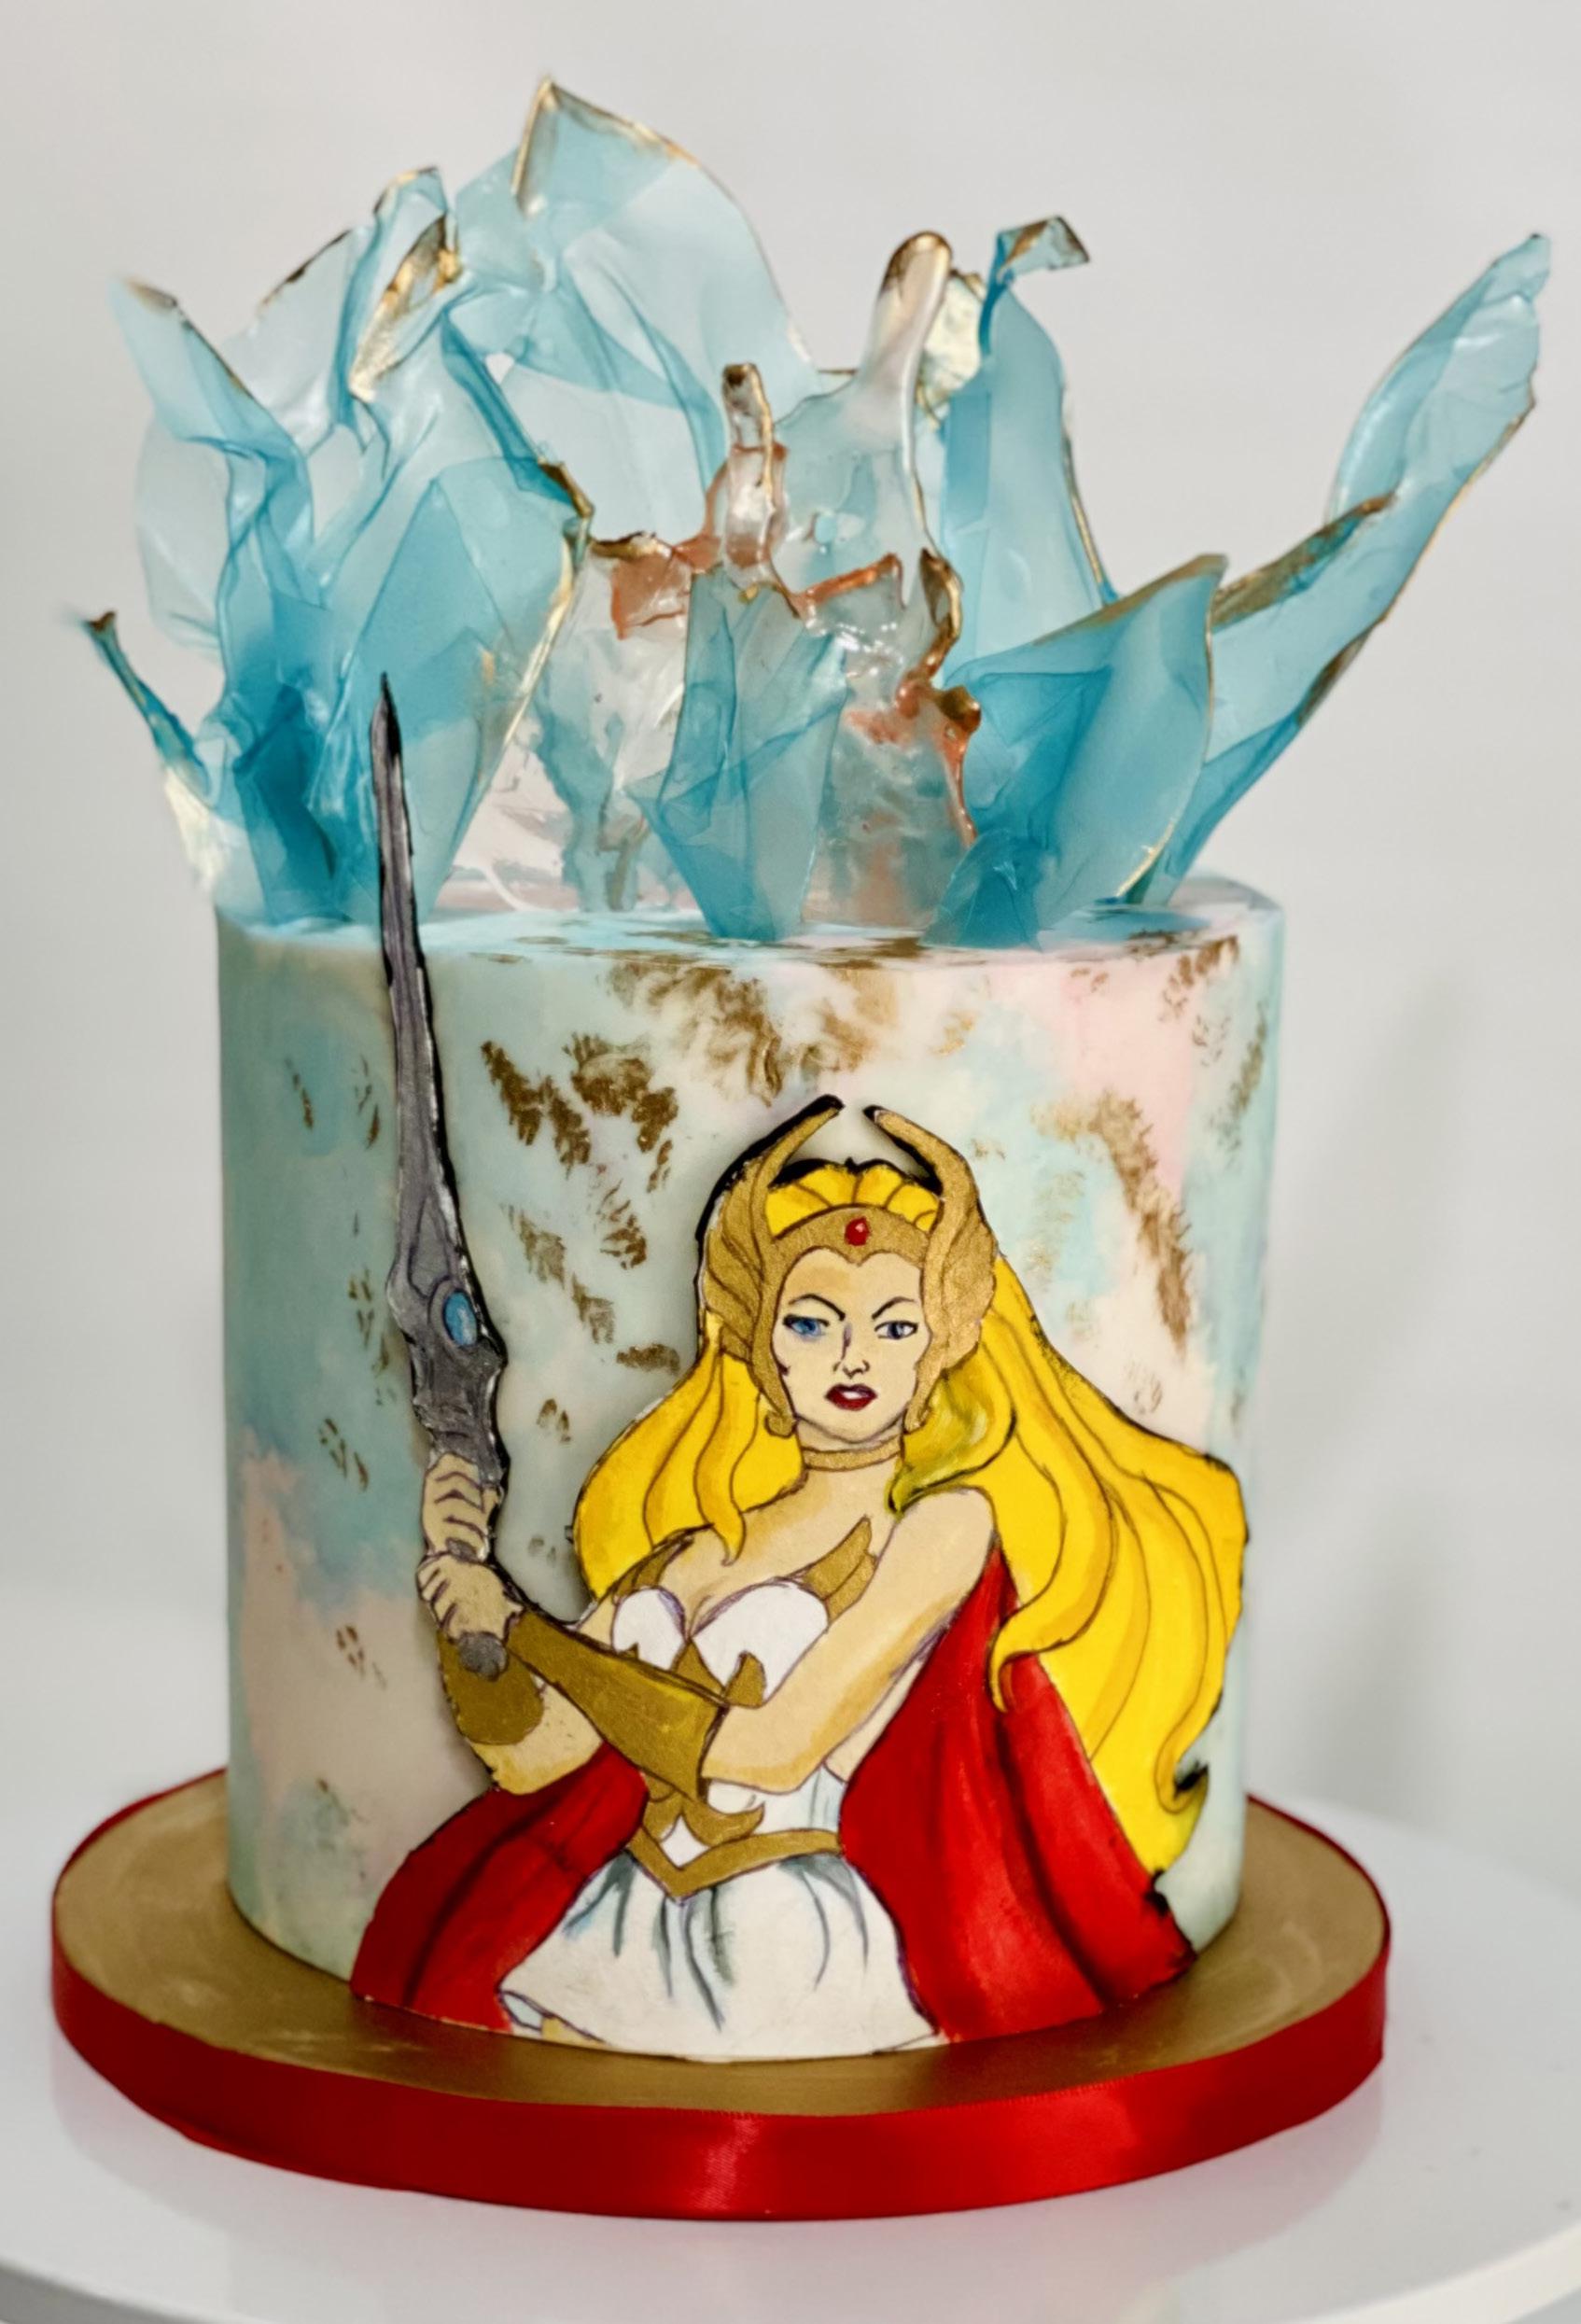
6 americancakedecorating.com May | June 2023 READER GALLERY
Lisa CourtneyRigby
Guadalupe Alberta Garcia Rebollo
Ellen Marie Barker
Miluska Villanueva Cavero
Tammy Varela
Iva Rohacova
May | June 2023 americancakedecorating.com 7 READER GALLERY facebook.com/AmericanCakeDecorating instagram.com/AmericanCakeDecorating
Hilda Ccoiru
Heather Salmon Caines
Gabriela Chacon
Henry Ng
Marce Ledesma Gomez
Katherine Miller
Mitchie Curran
Fiona McKillop
Gloria Collantes
Doreen Zilske
Ina Vica
Jean Schapowal
The Realistic
BUTTERCREAM ROSE
Learn the Fundamentals
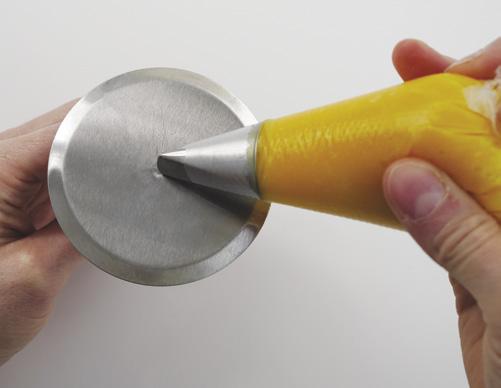
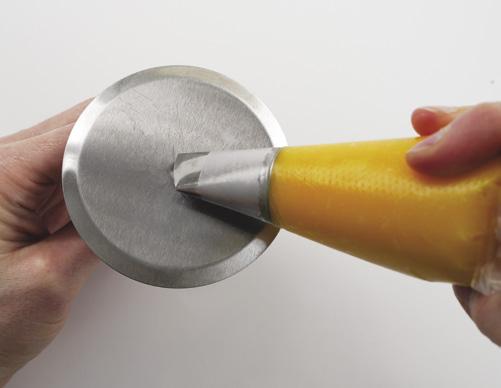
Before you begin rose piping, let’s cover some basic piping tip positions.
1. The closed tip position is where the thin end of the piping tip points inward toward you.

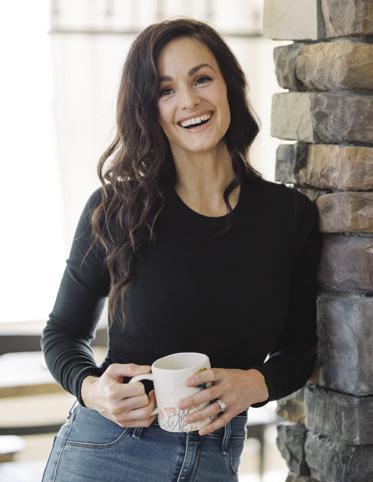
 BY DARA WAITKUS
Dara Waitkus is a mom, a wife, and the owner of The Piped Peony and The Piped Peony Academy. Beginning her cake decorating journey as a pandemic hobby, this newly found skill quickly became an obsession, which led to the development of her own unique buttercream flower piping style, the forming of an online academy, and an appearance on national television! Dara is an expert in piping realistic buttercream flowers and buttercream color matching, as well as buttercream color theory. When she isn’t baking or teaching, Dara can be found spending quality time with her two children that she adores.
thepipedpeony.com facebook.com/dpipedreams instagram.com/thepipedpeony
LEVEL:
COMPONENTS
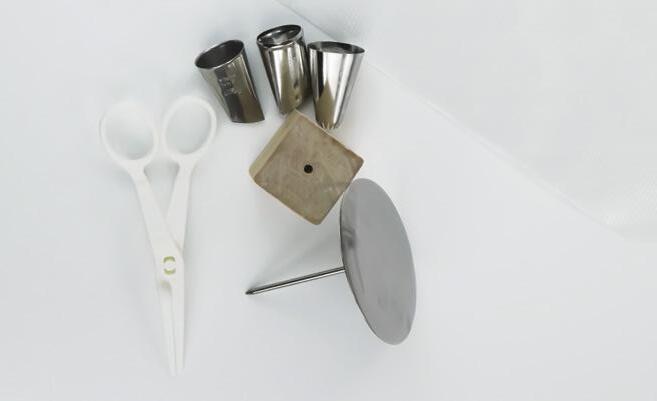
Edibles:
Buttercream
Equipment:
Piping bags
Piping tips: 4B (Wilton), 124K (Ateco), and 1062 (G.G.Cakraft)
Flower nail
Flower lifter
2. The neutral tip position is where the thin end of the piping tip points upward to the ceiling.
3. The open tip position is when the thin end of the tip is aimed away from you.
WHAT YOU NEED
8 americancakedecorating.com May | June 2023
TUTORIAL
The key to a successful cake is a pipable buttercream that is slightly firm with a smooth texture.
Tip: THE LOWER PETALS WILL HELP CONCEAL ANY IMPERFECTIONS AS THE PETALS OVERLAP THE BASE OF THE FLOWER.
TUTORIAL
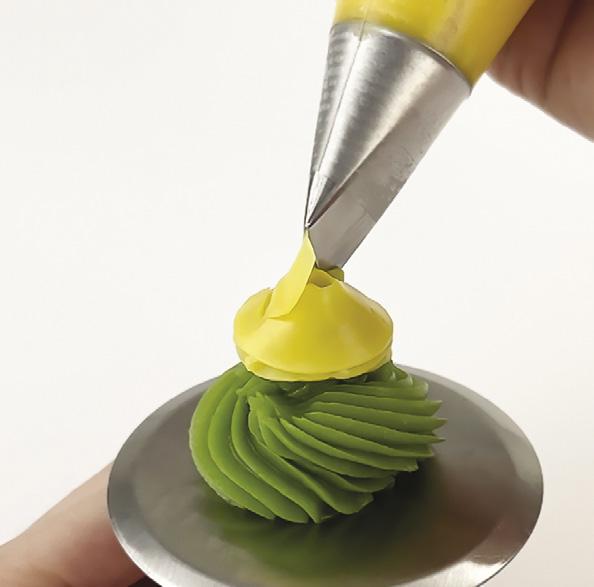
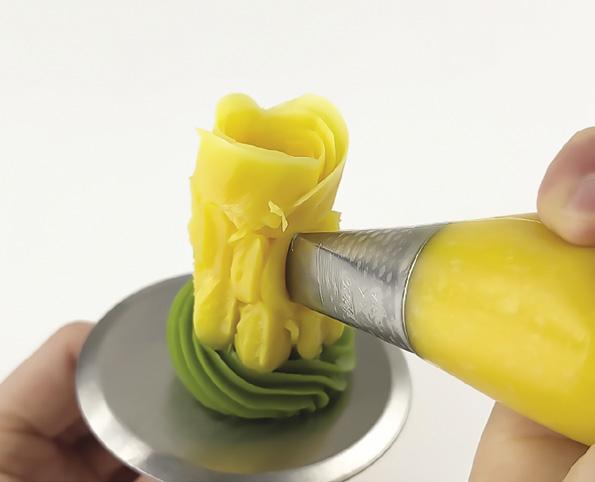
PIPE THE BASE
1. Using the 4B tip, pipe a large base in the center of the flower nail.
2. Pipe a small bud in the center of the base.
3. Using a slightly closed tip position and the 124K tip, twirl the flower nail slowly to create a small hat on top of the bud.
4. Layer 3 more hats on top of the bud with the 124K tip.
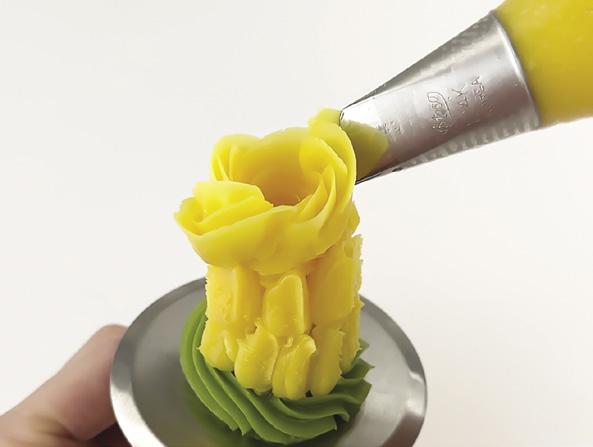
5. Using the neutral tip position, move the 124K tip up to the center of the hat and then gently squeeze the bag and twirl the flower nail slowly to make the first funnel level.
6. Repeat this process 2 more times, moving the tip up the funnel slightly to create each new level. You should make 3 to 4 funnel levels in total.
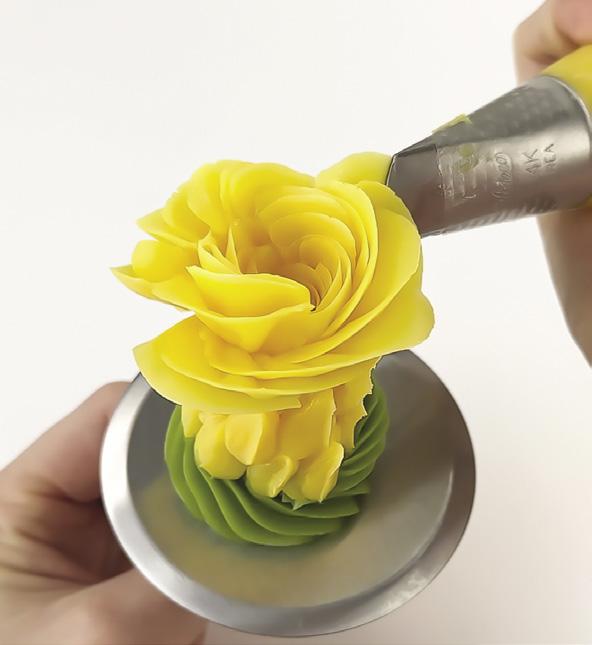
PIPE THE CENTER PETALS
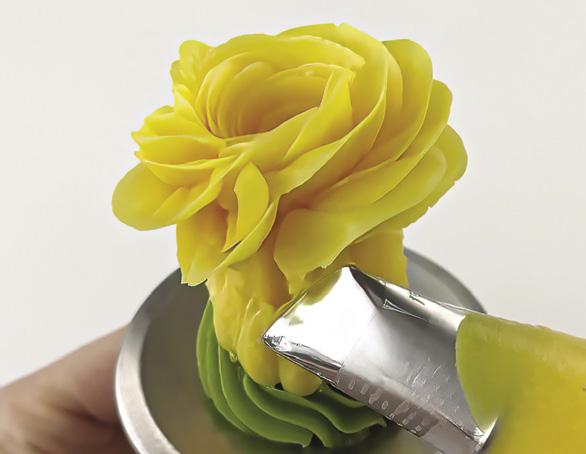
1. With the neutral tip position and the 124K tip, begin layering petals around the top of the funnel, making each center petal slightly taller than the last.


2. Continue layering increasingly taller petals around the funnel with the neutral tip position and the 124K tip. Make 2 to 4 layers of center petals.
3. At this point, the flower may become top heavy. Using the 124K tip, pipe buttercream support pillars all around the funnel to support the flower.
Tip: TO ACHIEVE THE MOST REALISTIC APPEARANCE, TWIRL THE FLOWER NAIL TO WRAP PETALS INSTEAD OF PULLING WITH YOUR PIPING HAND TO WRAP PETALS. FOLLOW THIS TIP THROUGHOUT ALL THE STEPS.
10 americancakedecorating.com May | June 2023 TUTORIAL 1 1 2 3 4 5 6 2
TUTORIAL
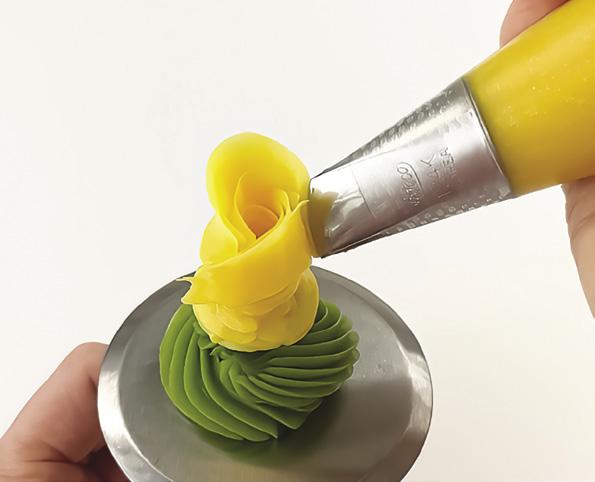
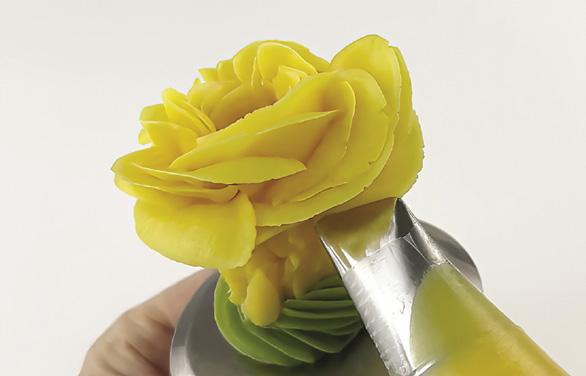
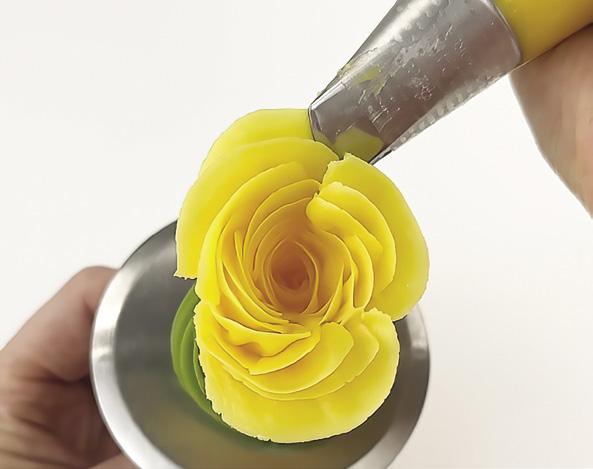
PIPE THE INNER AND OUTER PETALS
1. Using a slightly open tip position and the 124K tip, start from behind the center petals and twirl the flower nail as you move the piping tip in a downward diagonal direction, which will add movement to your flower. Make 2 to 4 layers of inner petals.
2. Using an open tip position and the 124K tip, layer a few taller outer petals behind the inner petals.
3. Layer a few outer petals in a downward diagonal direction to create a blossoming effect. Make 2 to 3 layers of outer petals.
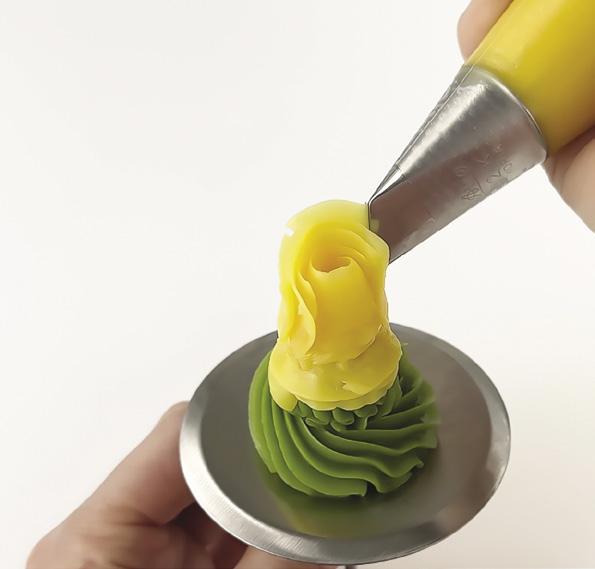
PIPE THE LOWER PETALS
1. Using a completely open tip position and the 1062 tip, place the tip near the bottom of the flower underneath an outer petal.
2. Attach a lower petal to an outer petal and apply pressure as you slowly twirl the flower nail while gradually moving the piping tip in a downward diagonal direction.
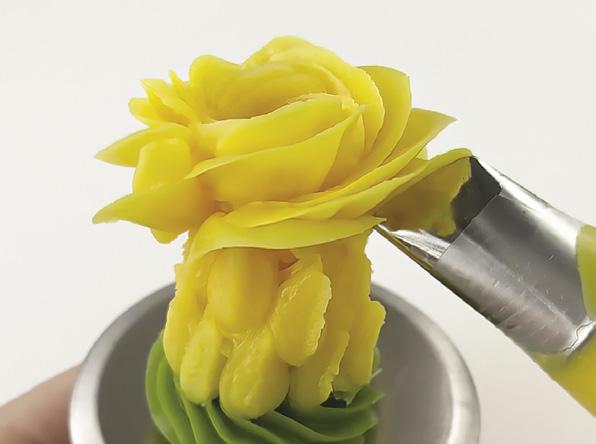
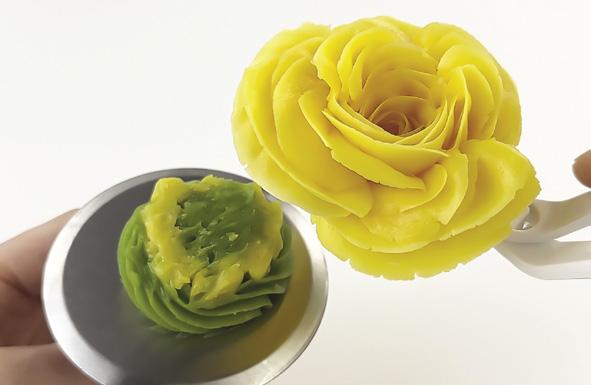
3. To finish the petal stroke, once the tip reaches the bottom portion of the rose, lightly release the pressure on the piping bag while continuing to twirl the flower nail. Repeat this step, adding 3 to 5 lower petals around the base of the rose.
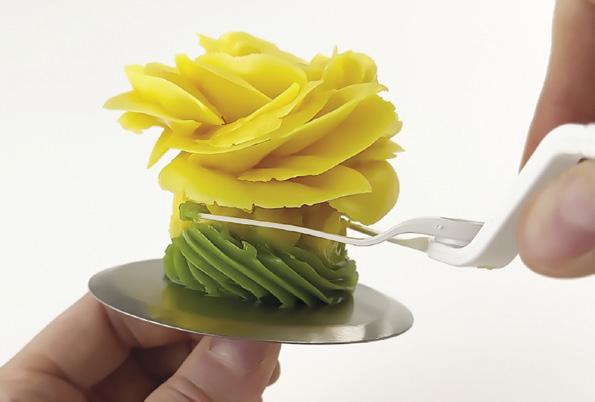
REMOVE AND PLACE THE FLOWER
1. Insert the flower lifter into the base, just below the lower petals.
2. Gently lift the flower off the base while slowly twirling the flower nail. Place the rose on the cake. Press down firmly on the flower lifter and slowly pull the lifter out from underneath the flower. ACD
TUTORIAL 12 americancakedecorating.com May | June 2023 1 1 2 2 3 1 2 3 3
T
ip: IF YOU ARE LEFT-HANDED, USE A 1061 TIP INSTEAD OF 1062.
Bridal Boutique Edit
Everything you need to make gorgeous wedding cakes this season.
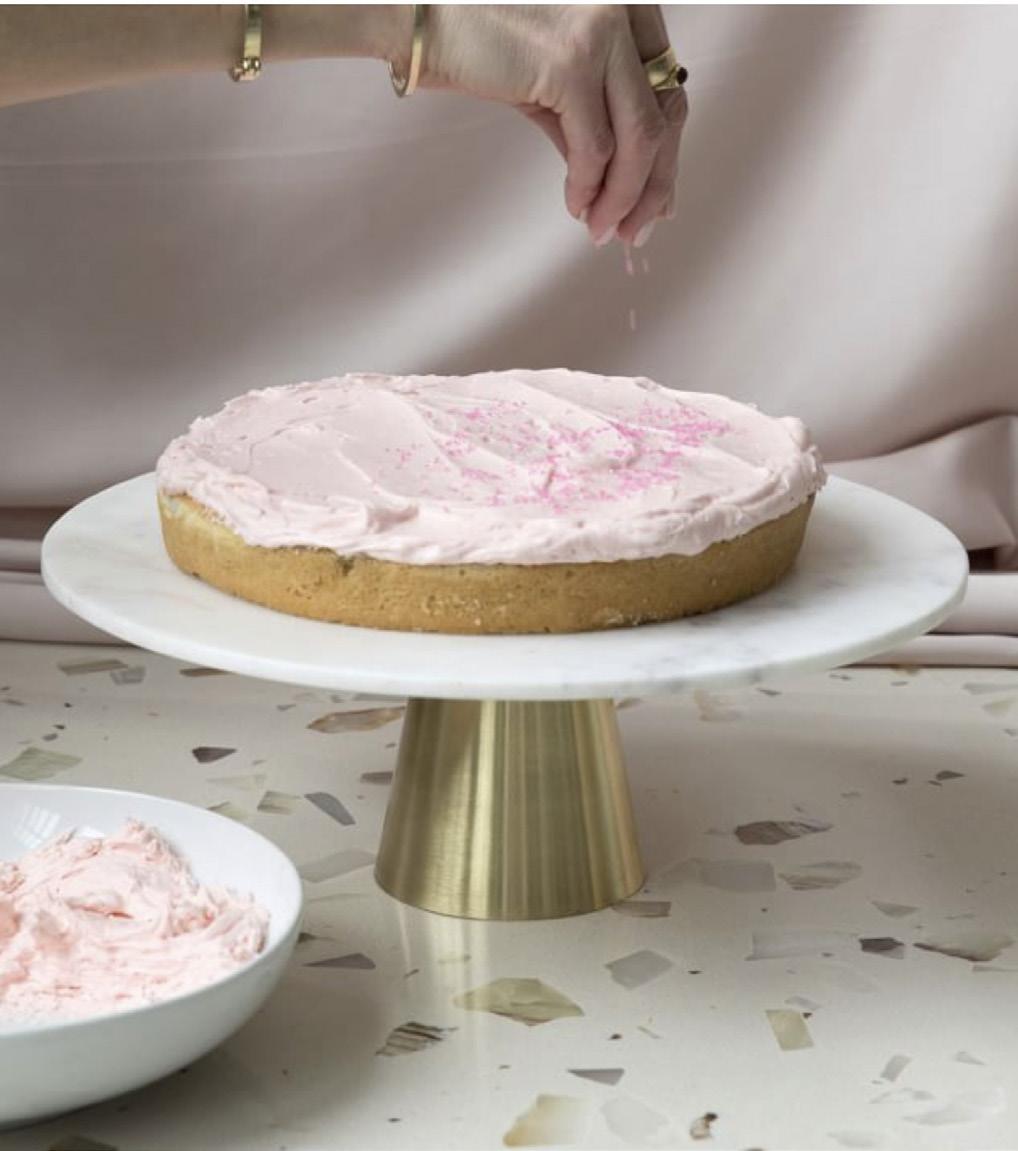
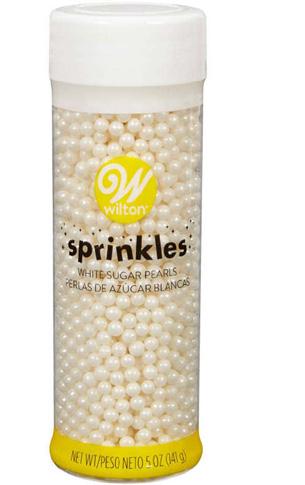
Place your sprinkles exactly where you want them!

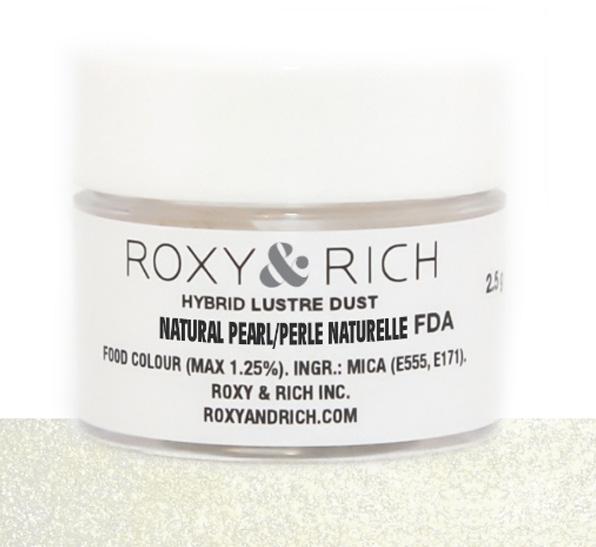
Roxy & Rich Natural Pearl Hybrid Luster Dust, $7, bakedeco.com


May | June 2023 americancakedecorating.com 13
SHOPPING
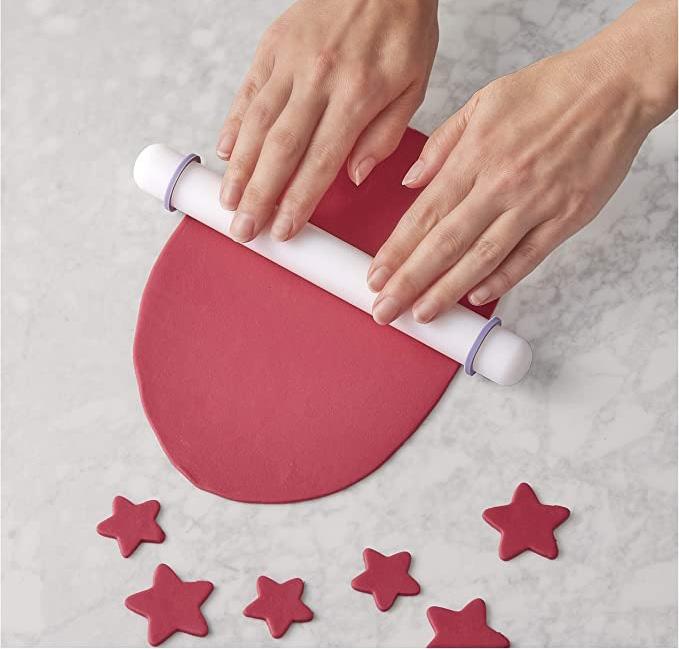
Wilton Fondant Rolling Pin, $7, amazon.com
Handheld Steamer, $25, amazon.com
LorAnn Isomalt, $15, amazon.com
Sprinkle Pen, $23, shopsweetelizabeth.com
Wilton White Sugar Pearls, $6, bakedeco.com
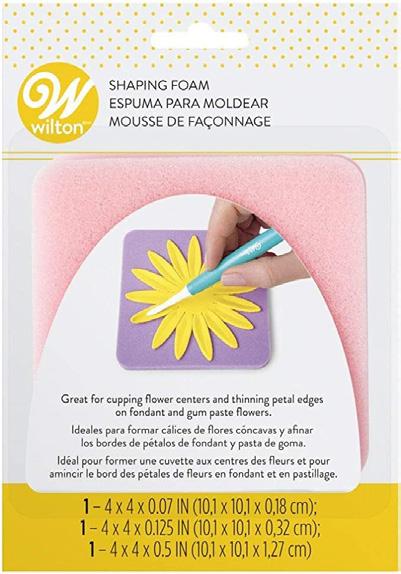
Wilton Fondant Shaping Foam, $8, amazon.com
Ball Tool Set, $11, amazon.com
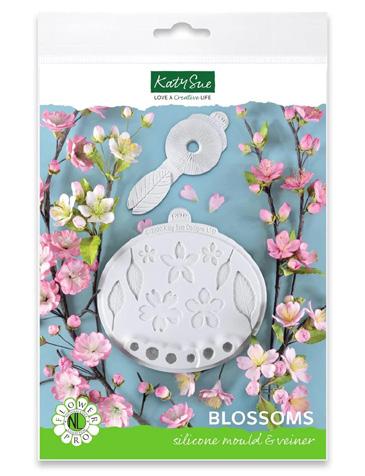
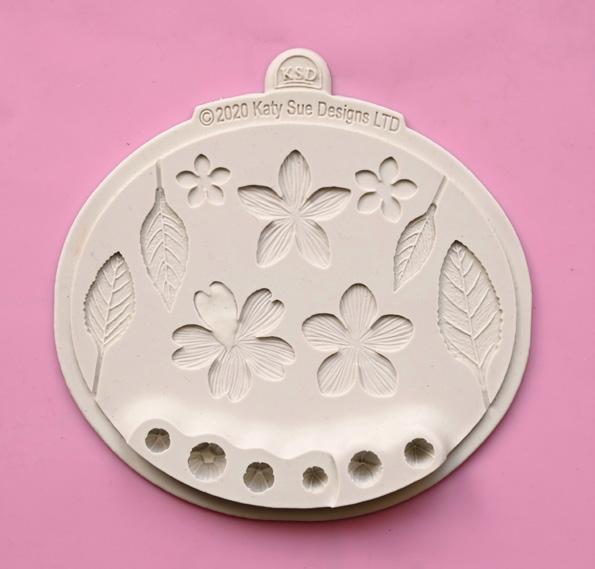
Flower Pro Blossoms Silicone Mold and Veiner, $25, katysuedesigns.us.com
Madison Marble and Brass Cake Stand, $45, westelm.com
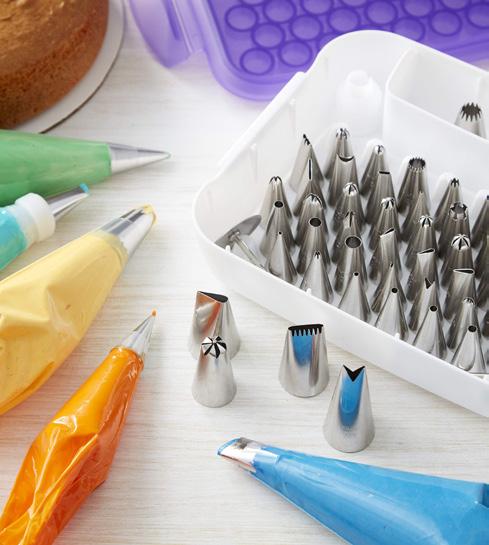
Wilton 55-Piece Cake Supply Master Decorating Tip Set, $38, amazon.com
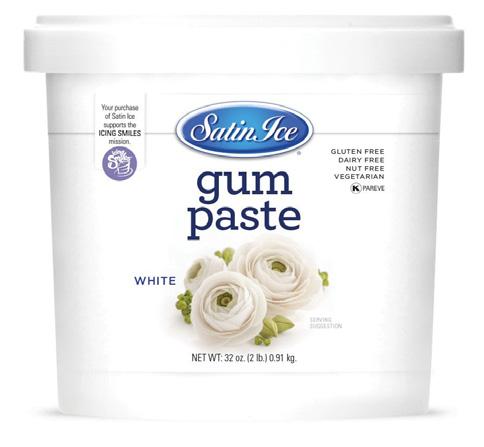
Satin Ice White Gum Paste, $13, bakedeco.com
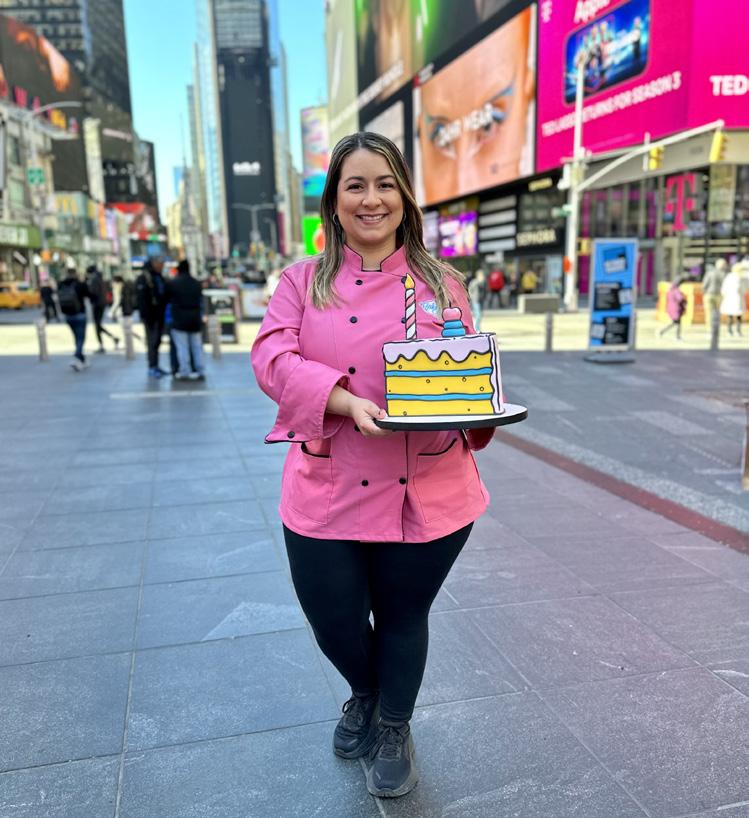
KRISTINA LAVALLEE KRISTINA LAVALLEE
ACD: What is your favorite tool to work with and why?
KL: One of my favorite tools is my fondant sheeter machine. It allows me to have a very consistent work product and creates a lot of efficiencies while creating cakes.

ACD: How do you find your inspiration?
KL: I find inspiration in my bakery through the work I create with my team and the inspiration of my clients. Their passions and dedication inspire me to work hard and to meet and exceed the expectations of our clients. My mother, Chef Margarita Perez, is also my inspiration. At a young age, she inspired my love for food service and to start my own business. Growing up, my mom had her own catering company and I was always in the kitchen learning
Since Kristina Lavallee was a young girl growing up in Puerto Rico, she always had a passion for gourmet sweets. She would beg her parents to take her to the grocery store just so she could see the cakes and baked goods. She gained a lot of experience in the kitchen while working side by side with her mother, who is a chef and caterer. thecakegirl.com instagram.com/thecakegirl/
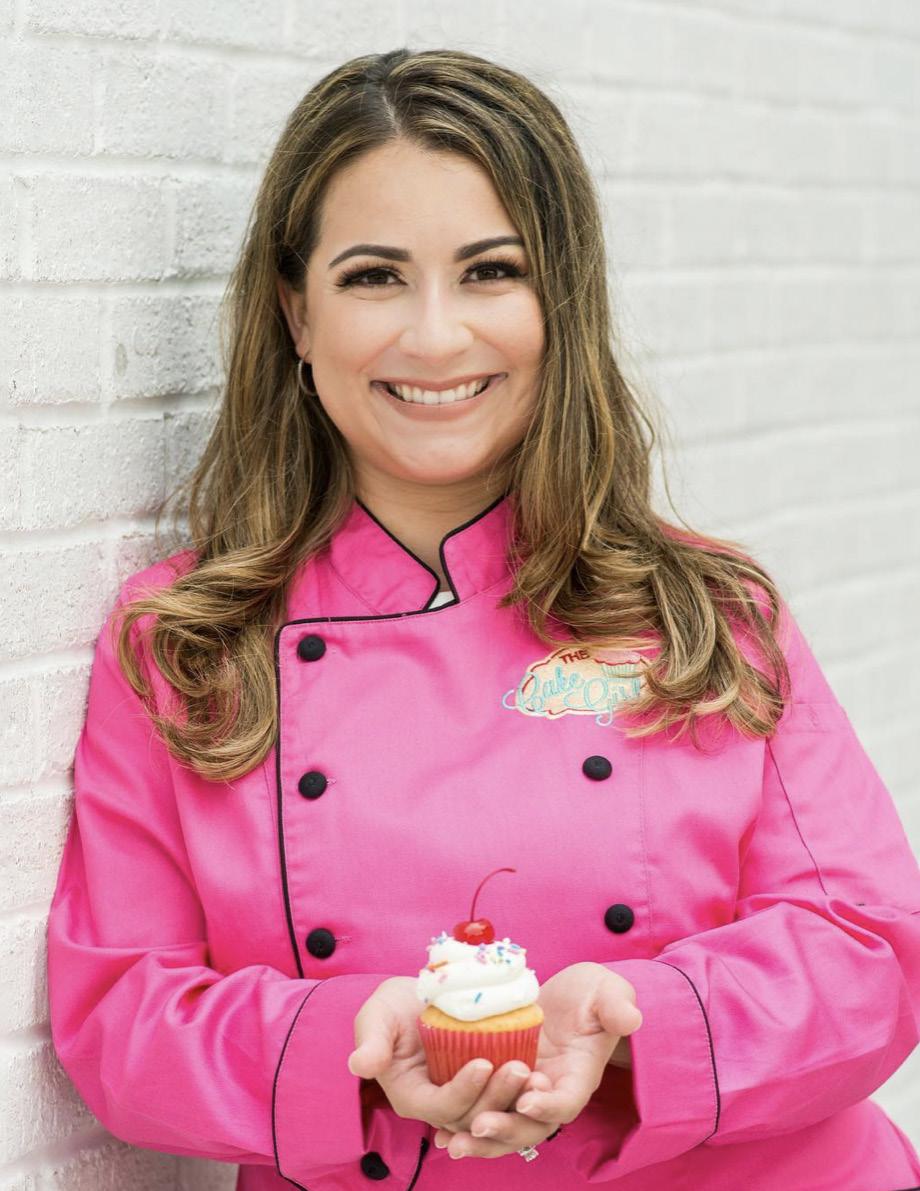
American Cake Decorating: What is your favorite thing about being a baker?
Kristina Lavallee: My absolute favorite thing about being a baker is being able to use my creativity to help bring someone’s vision to life. I enjoy listening to my clients describe
Her mother taught her to cook with love and always use the highest quality ingredients.
She graduated high school in 2005 and went on to continue her education at the University of Central Florida Rosen College of Hospitality Management. She has worked in small local bakeries, custom high-end bakeries, and a wholesale bakery. After gaining experience in these environments, she knew that she wanted to follow her dreams of having her own business. In 2009, she opened The Cake Girl. She and her husband, Kirby, are entrepreneurs and are in the process of building it into a national brand.
their inspiration for their cake and be able to take that and make it into a beautiful work of art that they can eat and enjoy. I also love that every project is unique and different. There’s always something new and fun to work on!
14 americancakedecorating.com May | June 2023 MEET THE MAKER
the foundations for food service operations with her. I had a passion early on in my childhood for baking and pastry and my mom played an active role in pushing me to learn the industry. She always pushed me to be the best at my craft and showed me through her dedication that there were no shortcuts to being the best.
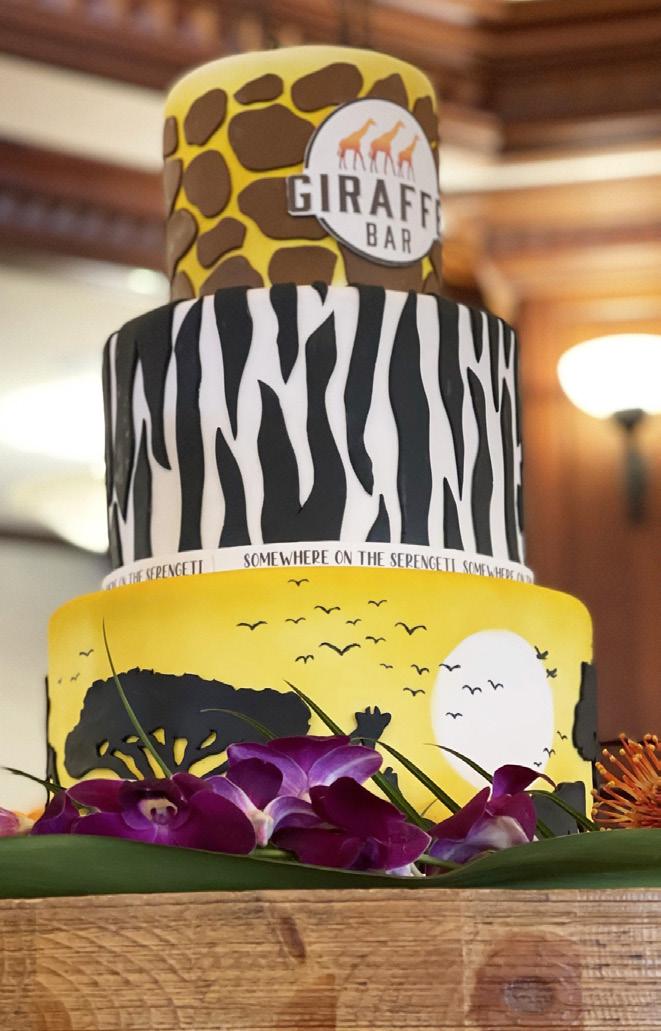
ACD: Tell us about your experience baking for Tom Brady!
KL: From the moment I got the text message from Leonard Fournette asking about doing a fun cake for the GOAT, I was super excited! The entire experience from designing the cake, baking it, and then delivering it was very fun for my team and me, especially knowing that out of all the bakeries in Tampa Bay, Leonard chose us. This meant so much for me since our business was also a vendor at the Super Bowl when it was in Tampa. We attended the game and got to experience a huge success and win for Tampa Bay. Within an hour or two of delivering the cake, my phone started to blow up with text messages and phone calls from media channels all over the United States wanting the details of the cake and one of the biggest questions was “What flavor was the cake?” Within minutes of the first news network reporting on the cake, we went viral. It was a very humbling and meaningful experience.
ACD: What has been your biggest challenge so far?
KL: One of the biggest challenges I have been facing as my business continues to grow is finding talented team members. With the high caliber of high-end cakes we do, I have to be selective in who I bring on my team. I focus on finding passionate people that may have less experience and work closely with them.
ACD: What do you want to accomplish in the near future?
KL: One of my biggest goals in the next 12 months is taking The
Cake Girl brand nationally through franchising. Both my husband, Kirby, and I have focused on building a strong brand over the past several years. Since the early years of opening our business, we have been developing processes and procedures that can be duplicated across multiple locations. We want to continue our work and make a positive difference in other’s lives along the way. We are very excited for the growth of The Cake Girl and look forward to continuing to connect with entrepreneurs who want to bake the world a better place! ACD
May | June 2023 americancakedecorating.com 15
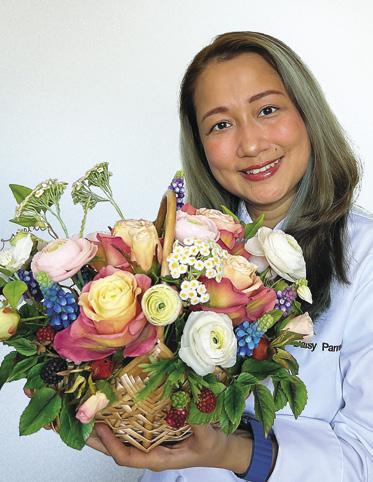
PARROTTulips
BY DAISY PARREÑO
LEVEL: Edibles:
COMPONENTS
Daisy Parreño is a graduate of culinary from the Center for Culinary Arts in the Philippines. She first came across her love for decorating cakes in 2011, when her and her husband visited a local cake shop for their wedding. On that very day, she thought how beautiful those cakes were and got so attracted that she was so keen to learn how to make them. It was then that she started to join cake decorating classes and visited all possible baking exhibits to learn from the experts. Given the starting knowledge then, Daisy took the opportunity to open up her home-based business, En Papillote Bakeshop. From then simple cupcakes and cake design to now creating beautiful arts in decorating cakes using sugar flowers, she was able to be recognized at various competitions, such as winning gold at Cake Fiesta and silver at Cake Star.
facebook.com/EnPapillotebyMASYS/
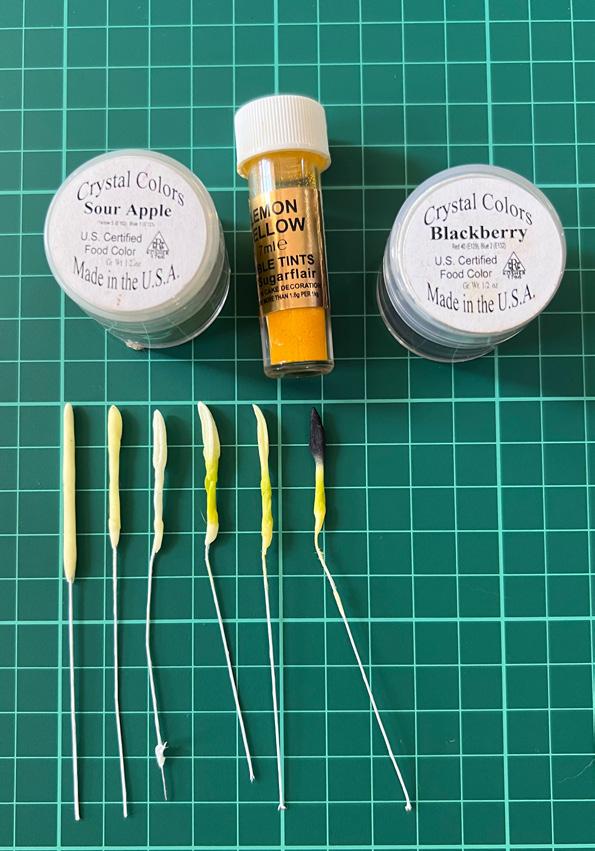
Gum paste: light green and light yellow
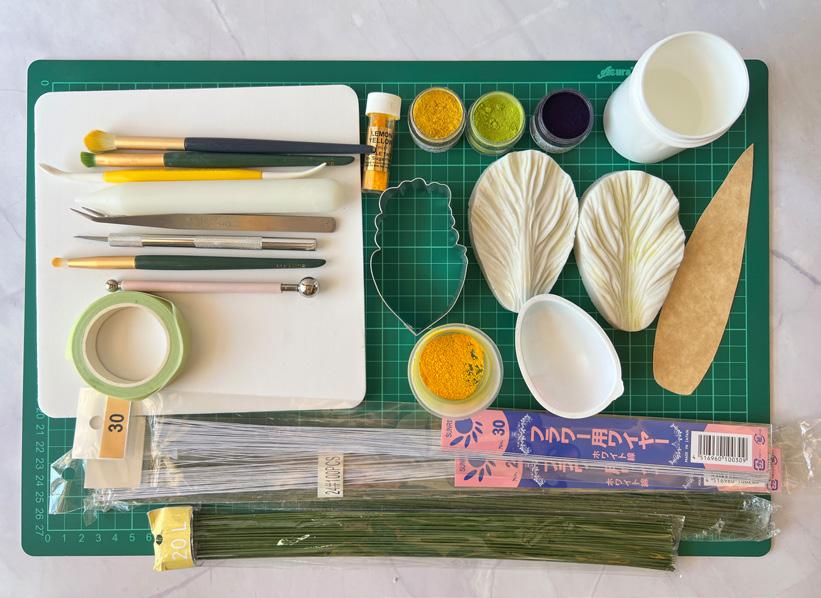
Petal dust: lemon yellow, sour apple, blackberry, and gooseberry
Fine semolina flour
Edible glue
Equipment:
Floral wire: 16 or 18, 22, 26 or 28, and 30 gauge
Dresden tool
Paintbrushes
Angled tweezers
Green floral tape
Veining board
Parrot tulip cutter
Parrot tulip veiner
Foam pad
Egg-shaped mold
Leaf cutter
Ball tool
WHAT YOU NEED
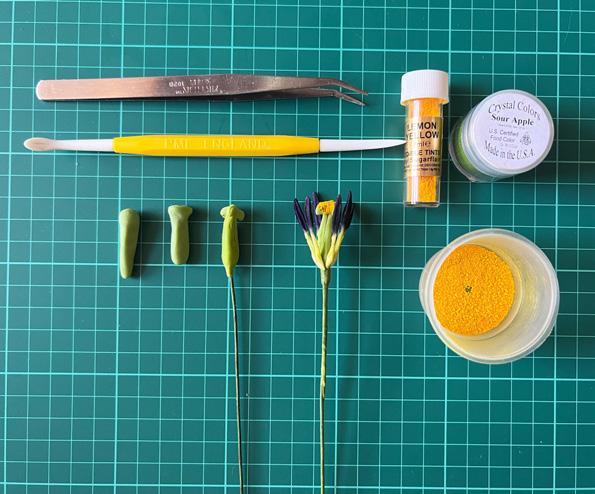
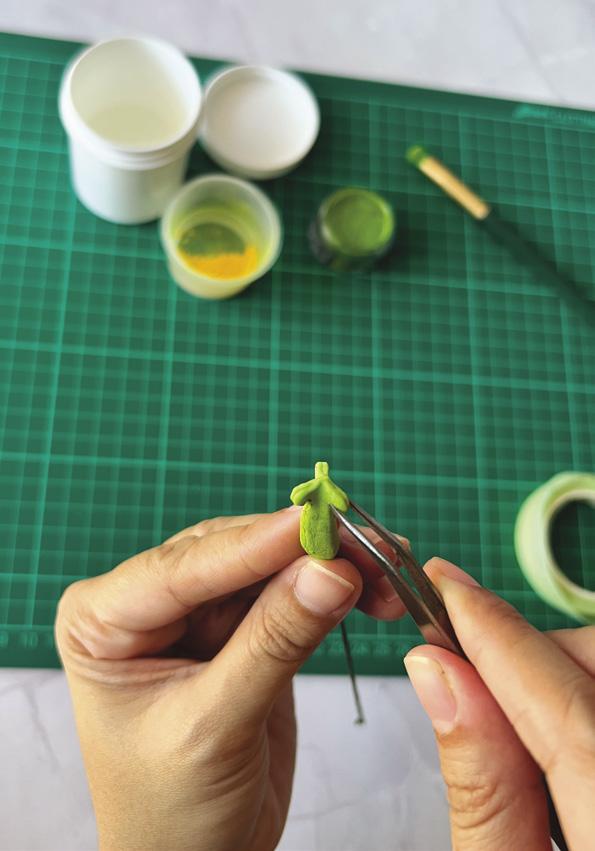
FORM THE PISTIL AND THE STAMEN
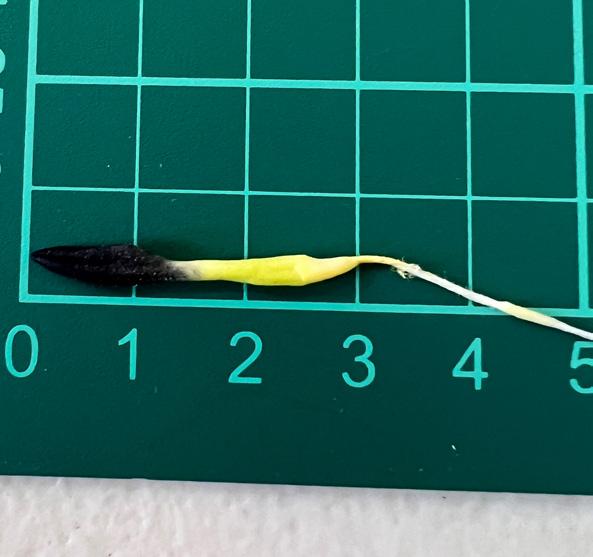
1. To create the stamen, twiddle a small amount of light green gum paste on a 30-gauge floral wire about 1 inch long. Make the top a little broader and taper to the tip. Using a Dresden tool, make indentations in the stamen. Make 6 stamens with 2 to 3 indentions each.
2. Dust the lower part of the stamen with lemon yellow petal dust and dust the rest with sour apple. Dust the head of the stamen heavily with blackberry petal dust to serve as the pollen.
16 americancakedecorating.com May | June 2023 TUTORIAL
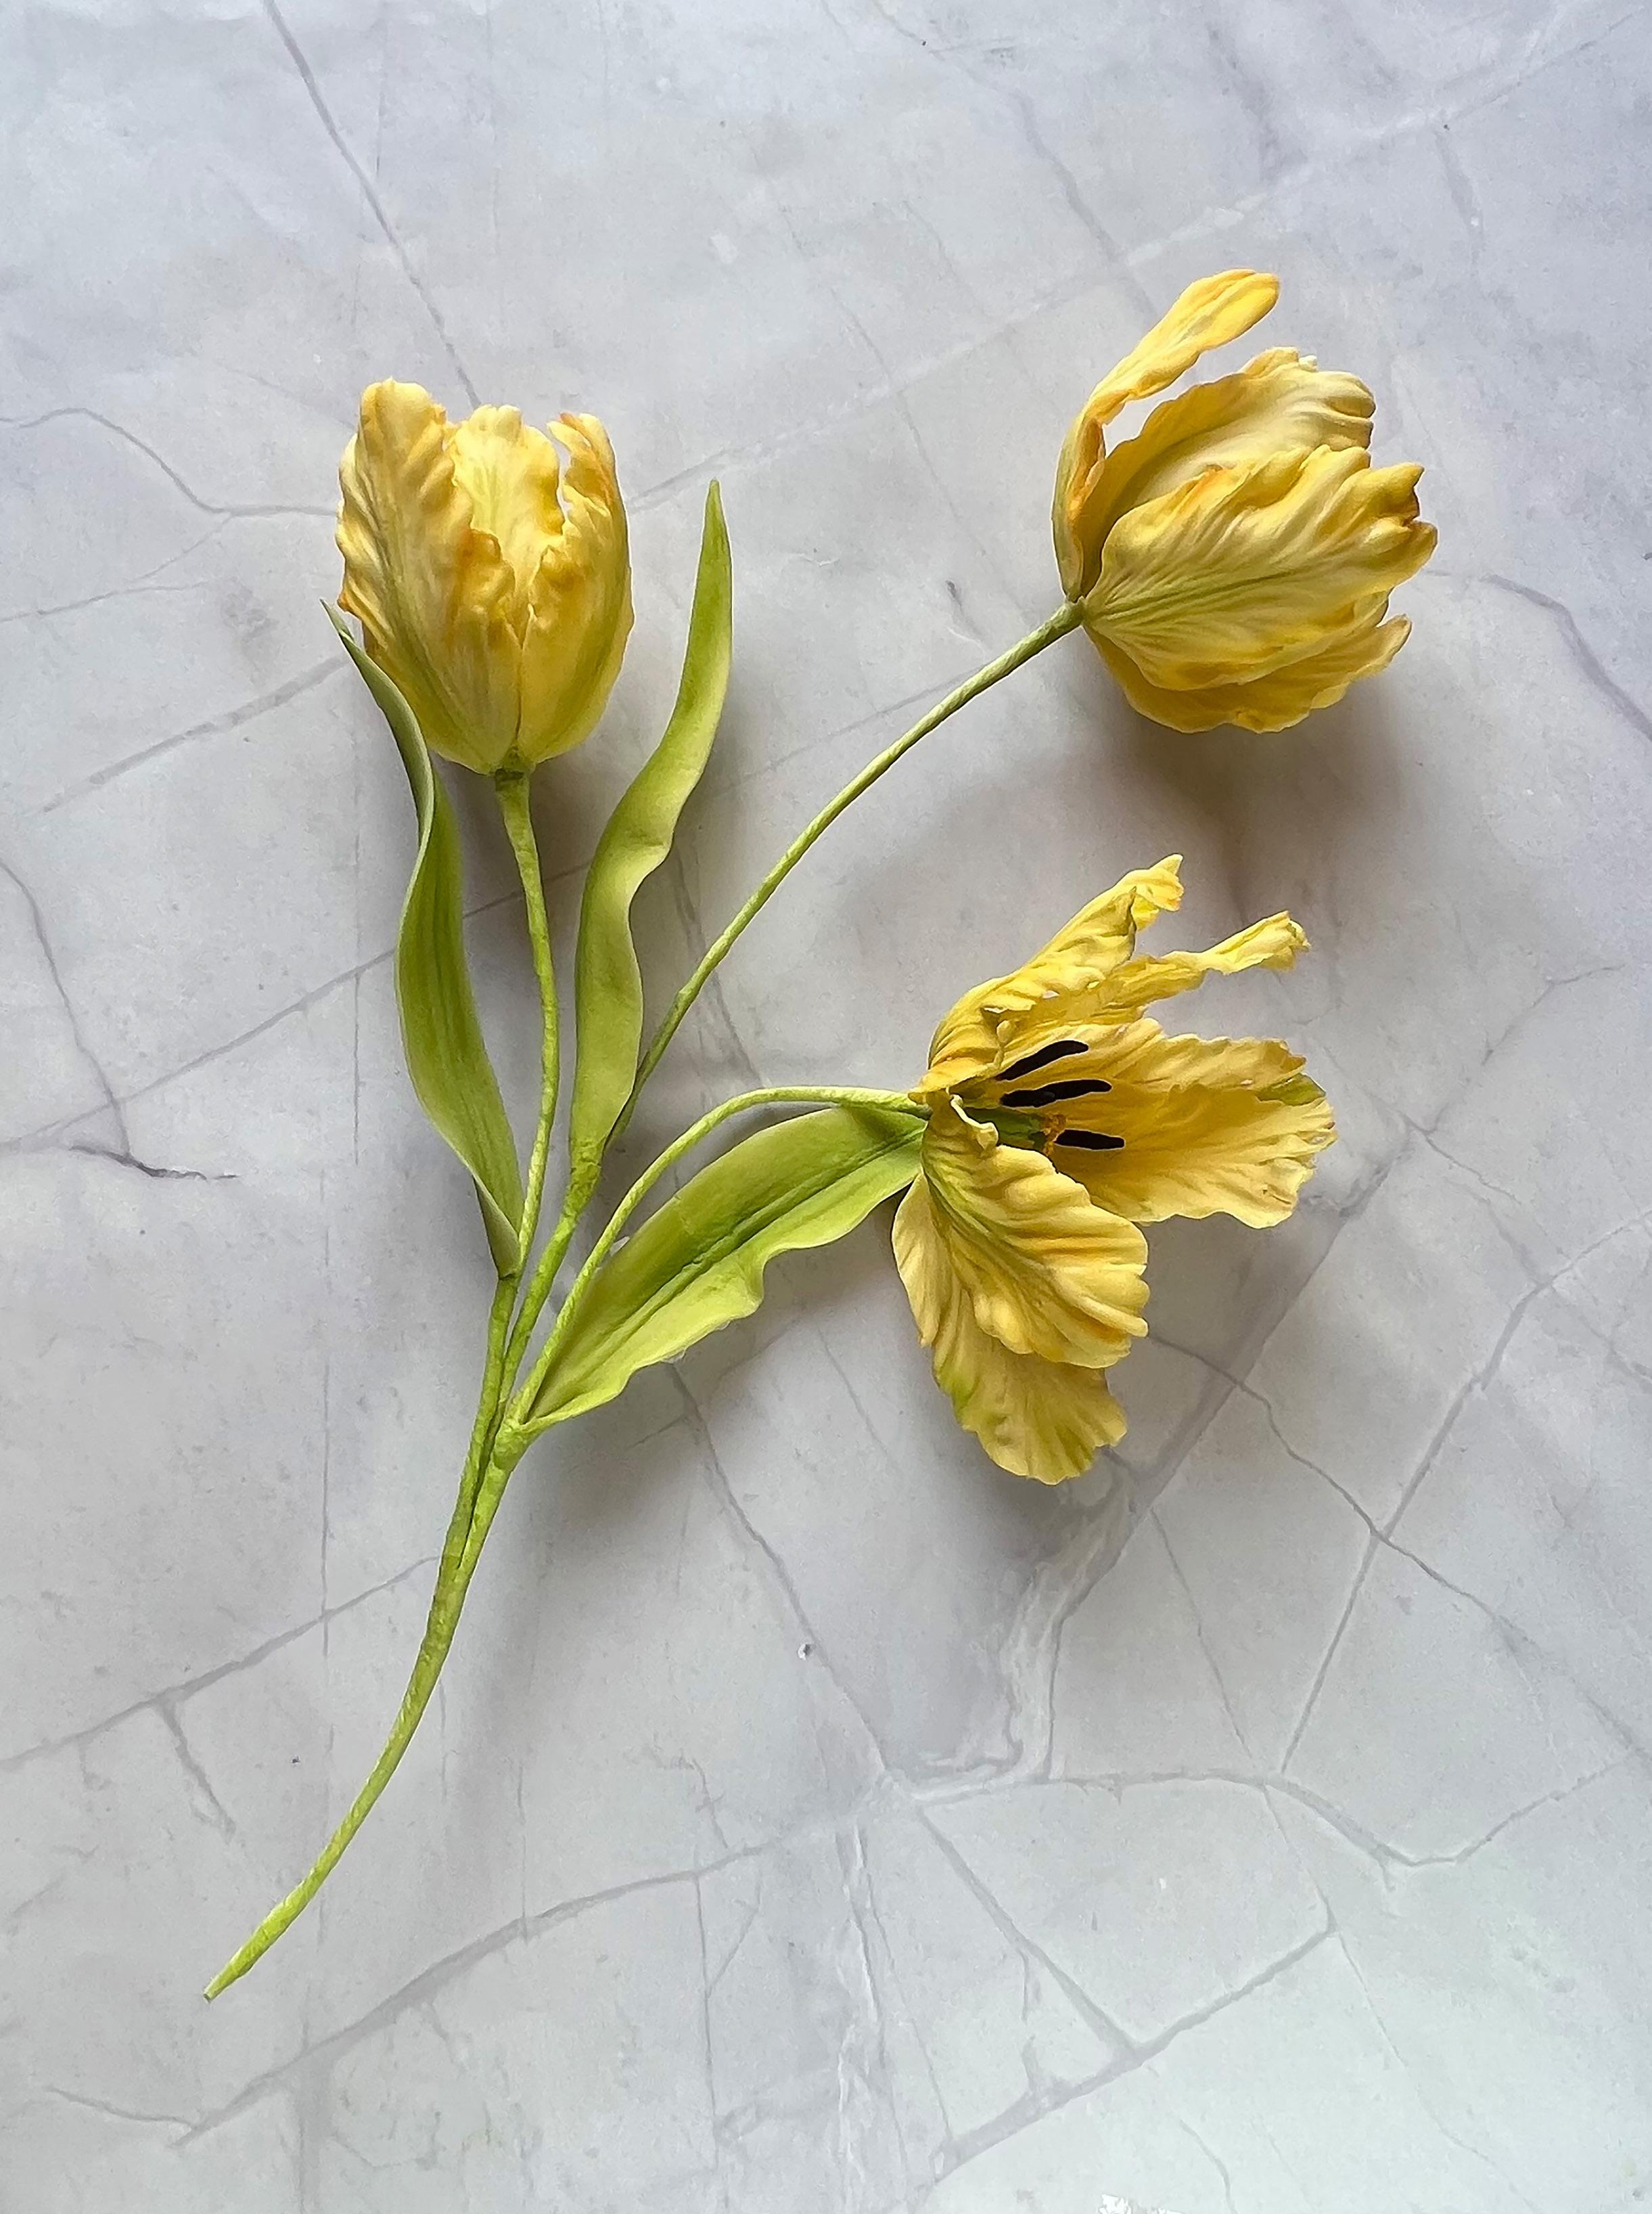
Parrot tulips are known for their bright colors and fringed petals. All you need is petal dust and a few tools to re-create them!
TUTORIAL
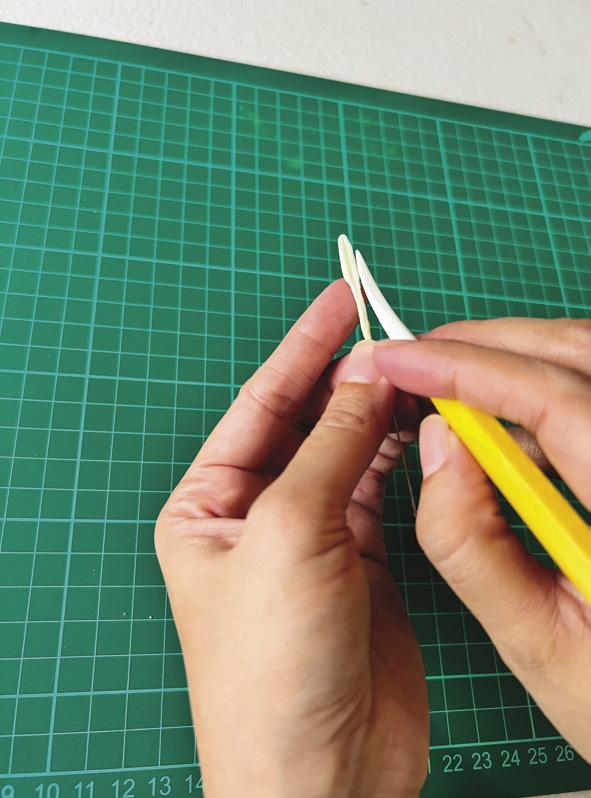
3. To create the pistil, twiddle a thicker piece of light green gum paste on a 16- or an 18-gauge floral wire. Shape it into a triangular tube, about 1 inch long and ¼ inch thick. Shape the top, then pinch it with angled tweezers to create the stigma. Make 3 stigma on top of the pistil. Set the pistil aside to dry.
4. Combine fine semolina flour and lemon yellow petal dust. Put edible glue on top of the stigma and dip it into the colored semolina. Dust the pistil with light green petal dust.
5. Using green floral tape, attach 6 pieces of stamen to the pistil. The stamen should be a little higher than the pistil.
MAKE THE PETALS
1. Roll out light yellow gum paste not too thin. Leave the middle part a little thicker for the wire or use a veining board. Use the parrot tulip cutter to cut out a petal and insert a 26- or 28-gauge floral wire.
2. Dust the middle part of the petal with sour apple petal dust and the outer part of the petal with lemon yellow. Add more sour apple petal dust on the edges of the petal in random places.
3. Vein the petal using the parrot tulip veiner.
4. Place the petal on a foam pad and use the broader part of the Dresden tool to add curls and movement. Starting from the tip of the petal going inward, drag your Dresden tool with medium pressure. Do this on all top parts of the petal.
5. To mimic the shape of a real flower, bend the lower part of the petal. Dry the petal on an egg-shaped mold. Make 6 petals in total.
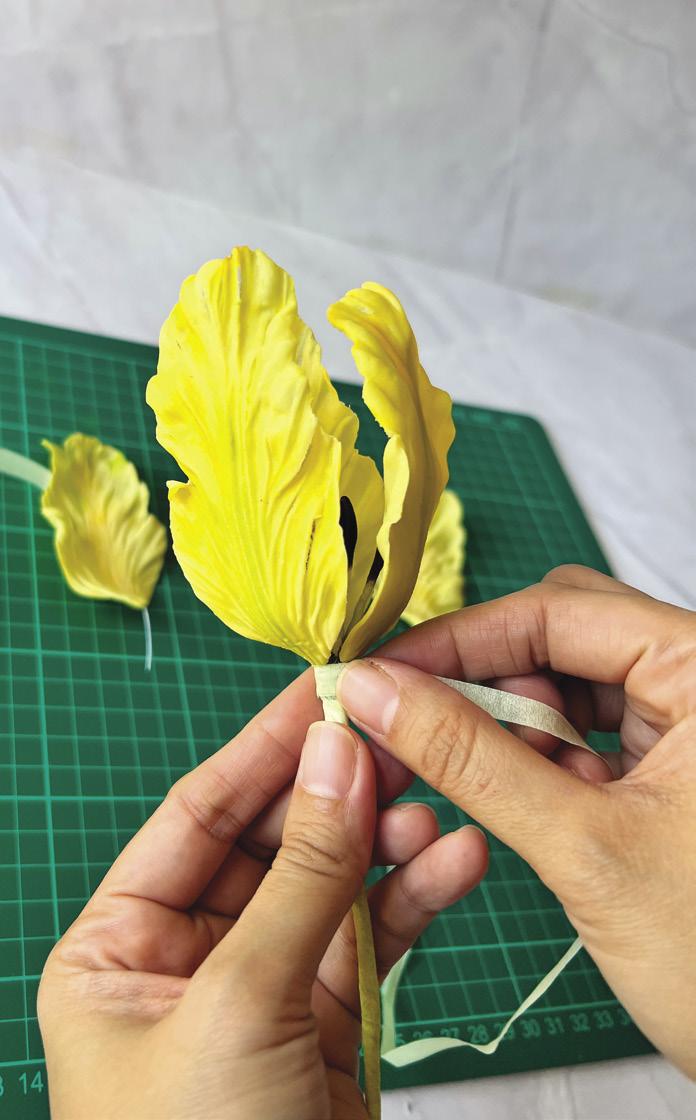
6. While the petals are in the leathery stage of drying, using green floral tape, attach the first 3 petals to the pistil. Then, attach the remaining 3 petals in between the first 3. Wrap the stem over and over with floral tape until it is on the size you prefer since tulips have thicker stems.
18 americancakedecorating.com May | June 2023 TUTORIAL
1 2a 2b 3
4&5
Tip: THE VEINS HELP CREATE TEXTURE AND MOVEMENT AND WILL GIVE YOUR FLOWER A NATURAL LOOK.
Tip: LEAVE YOUR FLOWER TO DRY FOR 3 DAYS TO A WEEK, THEN STEAM THEM. THIS WILL ENHANCE THE COLOR AND BLEND THE DUST EVENLY.
ADD THE LEAVES
1. Roll out light green gum paste on a veining board, leaving a thick middle part for the wire. Using an elongated leaf cutter, cut out a leaf and insert a 22-gauge floral wire.
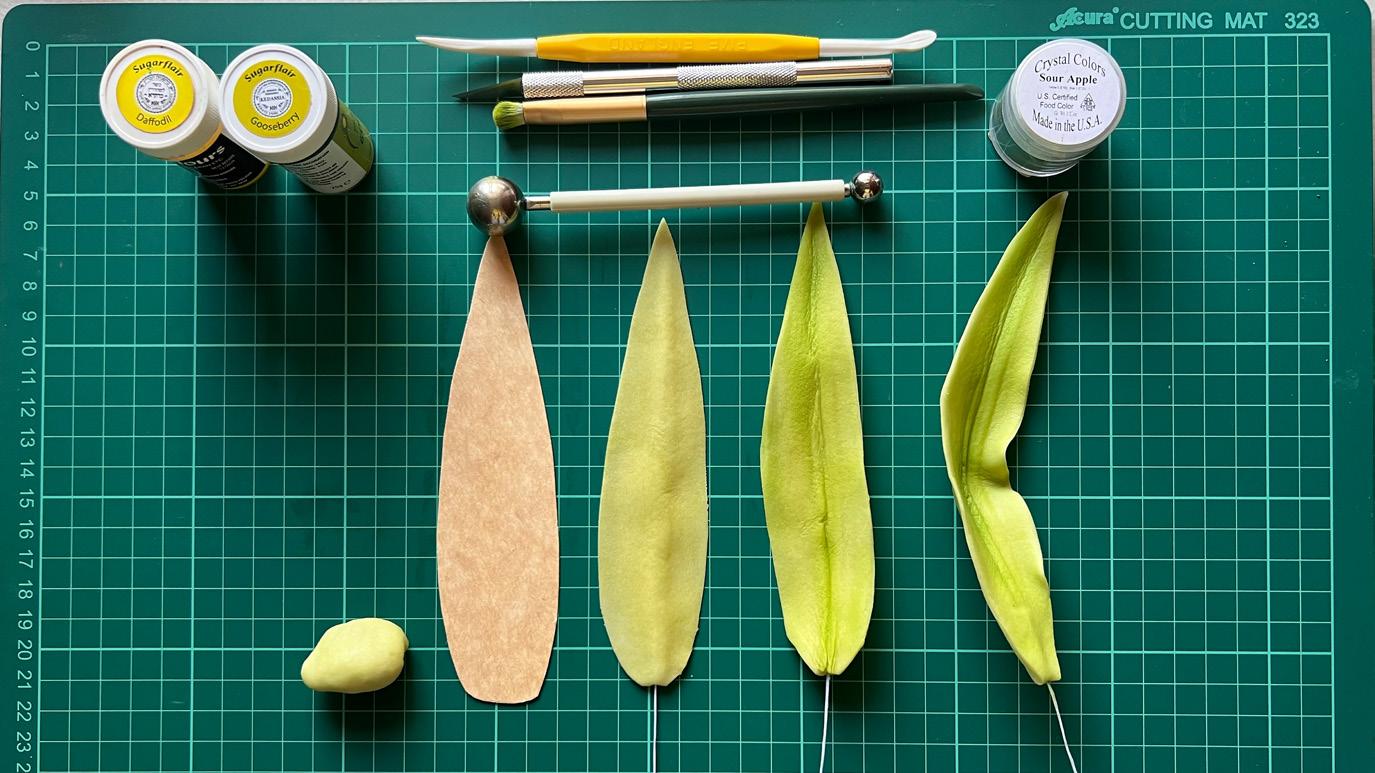
2. Using the thinner side of your Dresden tool, vein the leaf. Starting from bottom upward, use a ball tool to thin the edge of your leaf.
3. Dust your leaf with gooseberry or sour apple petal dust, then slightly fold it in the middle. Form and dry it as you want them to look in your arrangement. Make 1 to 2 leaves per tulip. ACD
Tip: THE VEINS HELP CREATE TEXTURE AND MOVEMENT AND WILL GIVE YOUR FLOWER A NATURAL LOOK.
May | June 2023 americancakedecorating.com 19 TUTORIAL
1–5 6 1–3
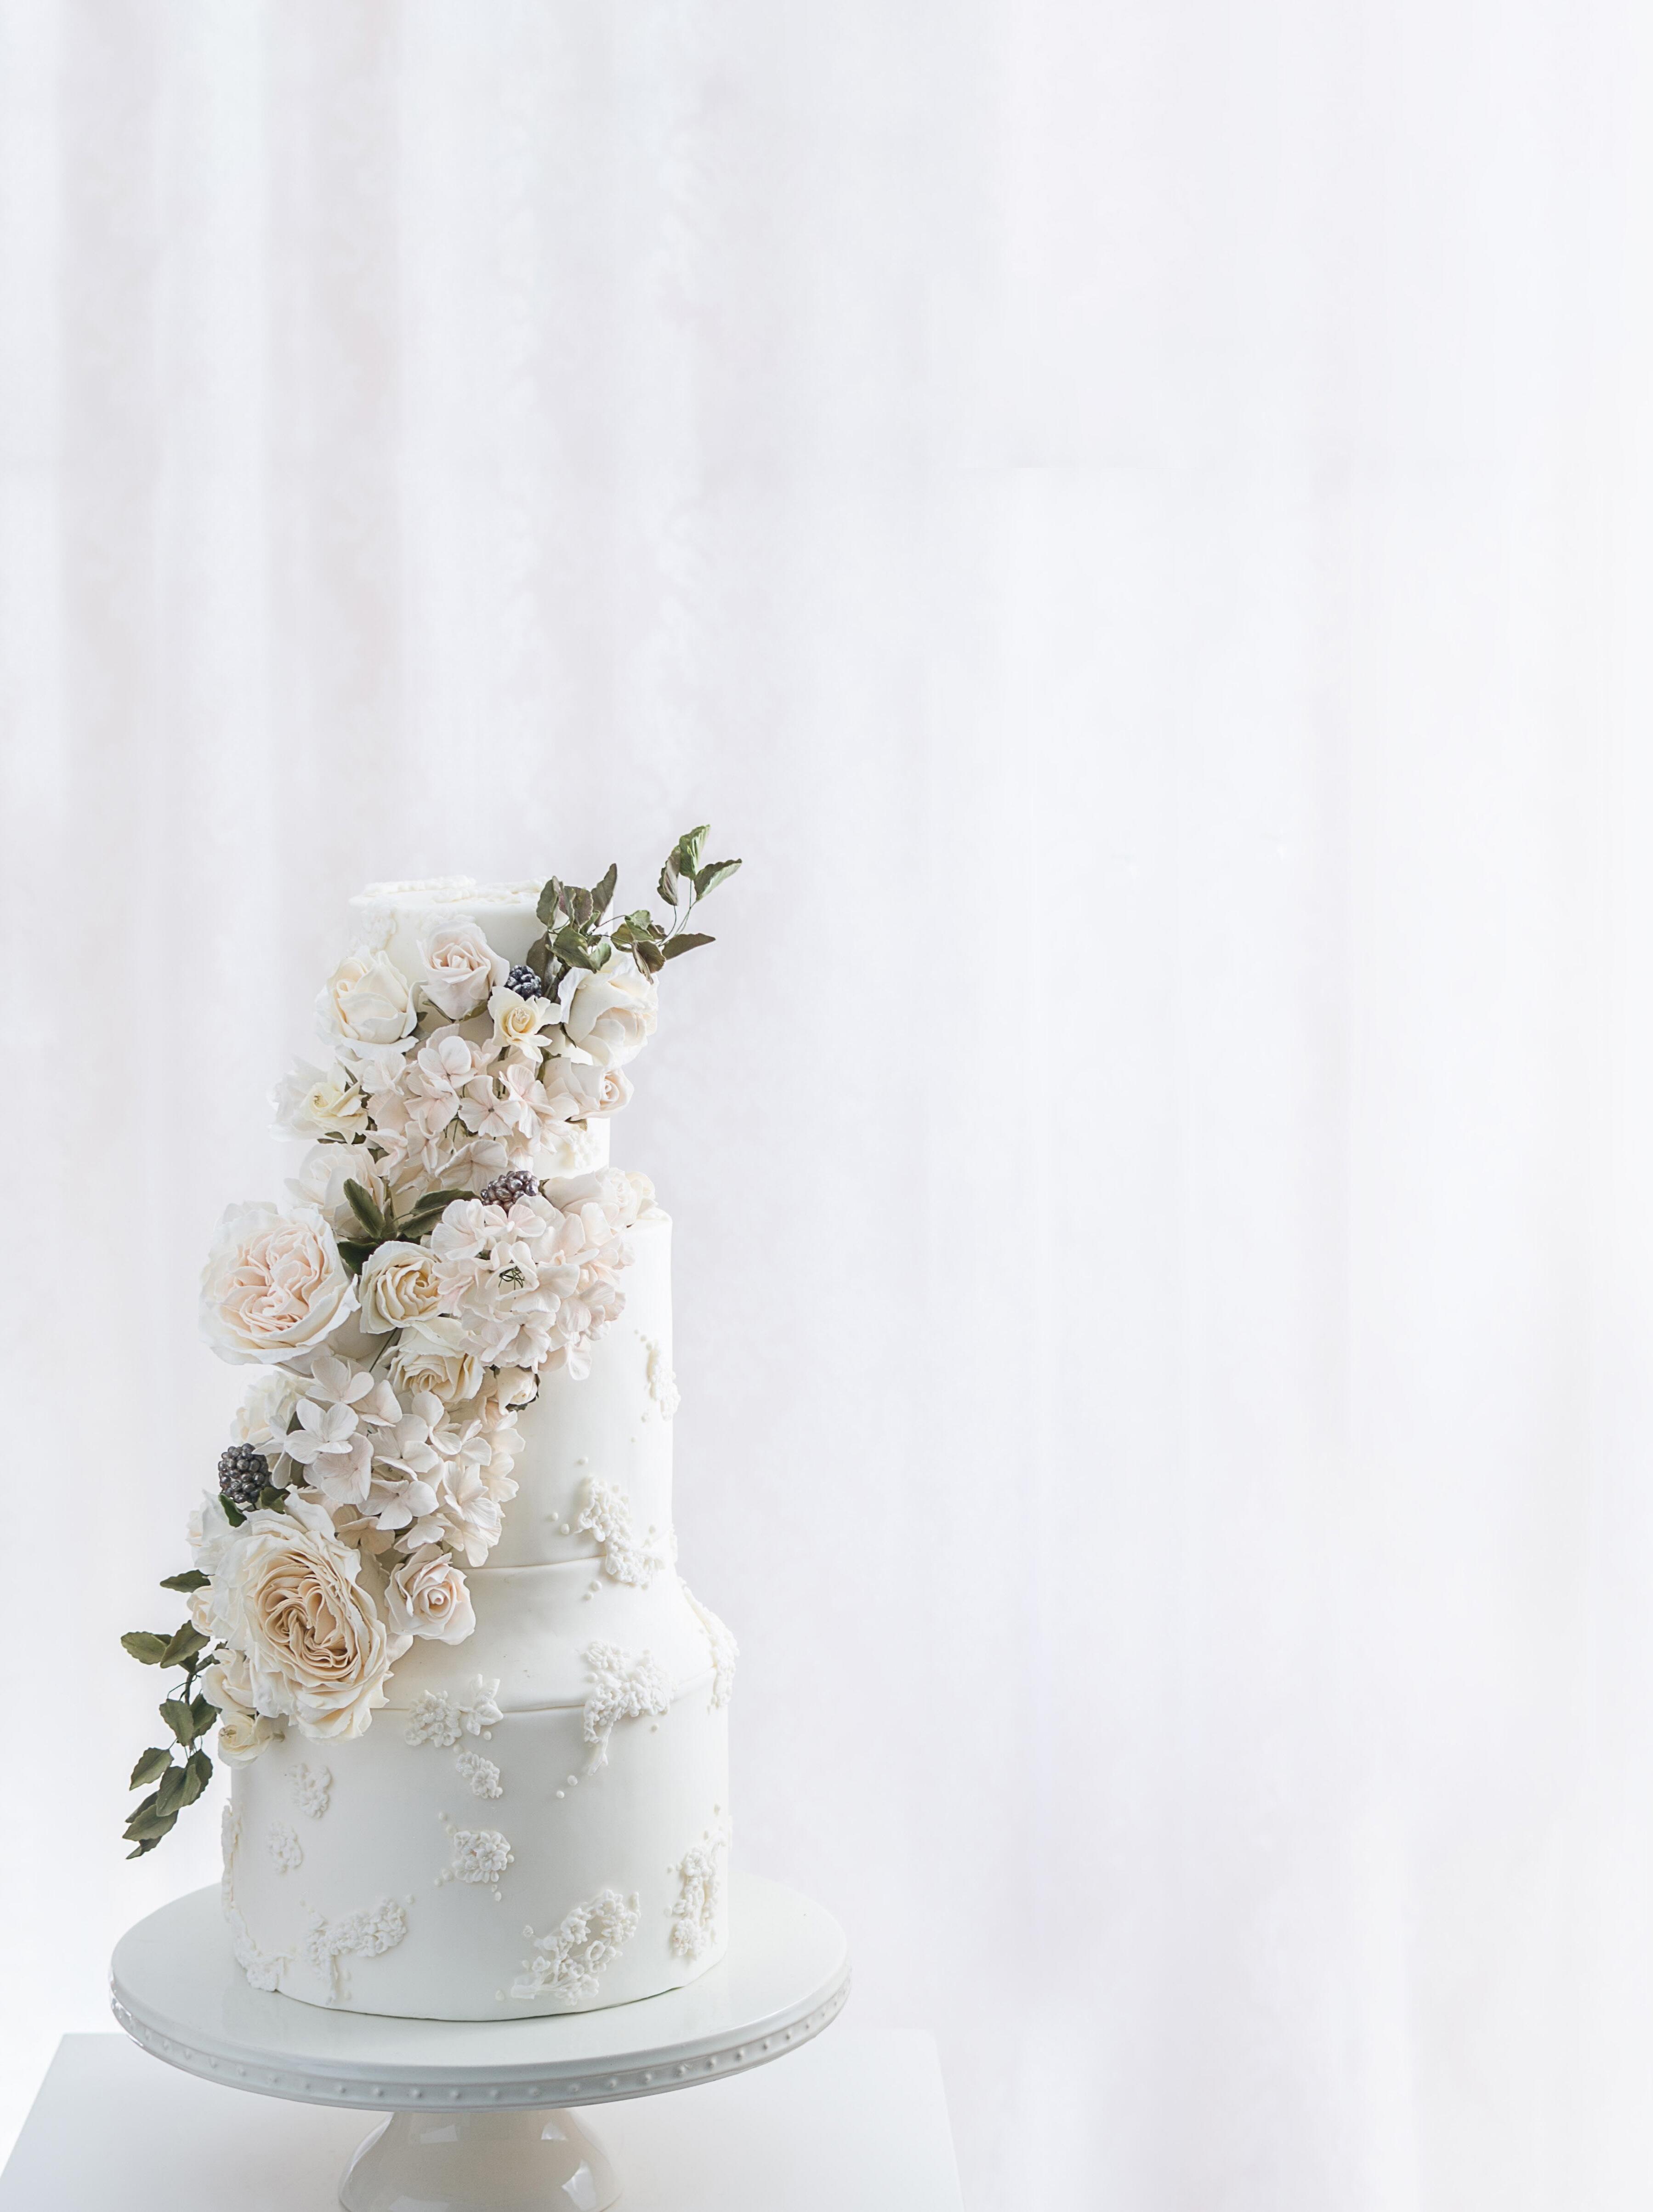
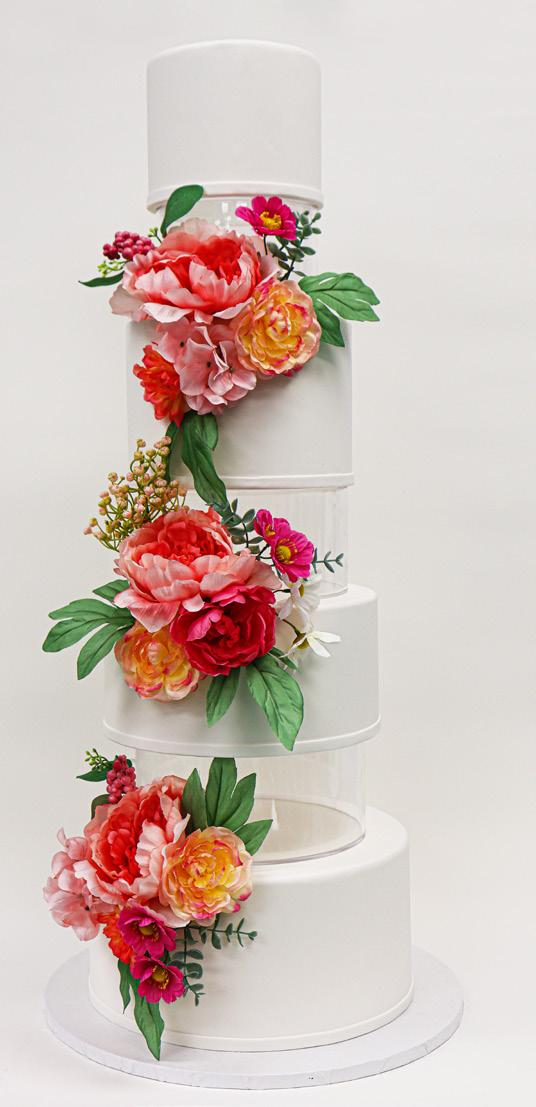
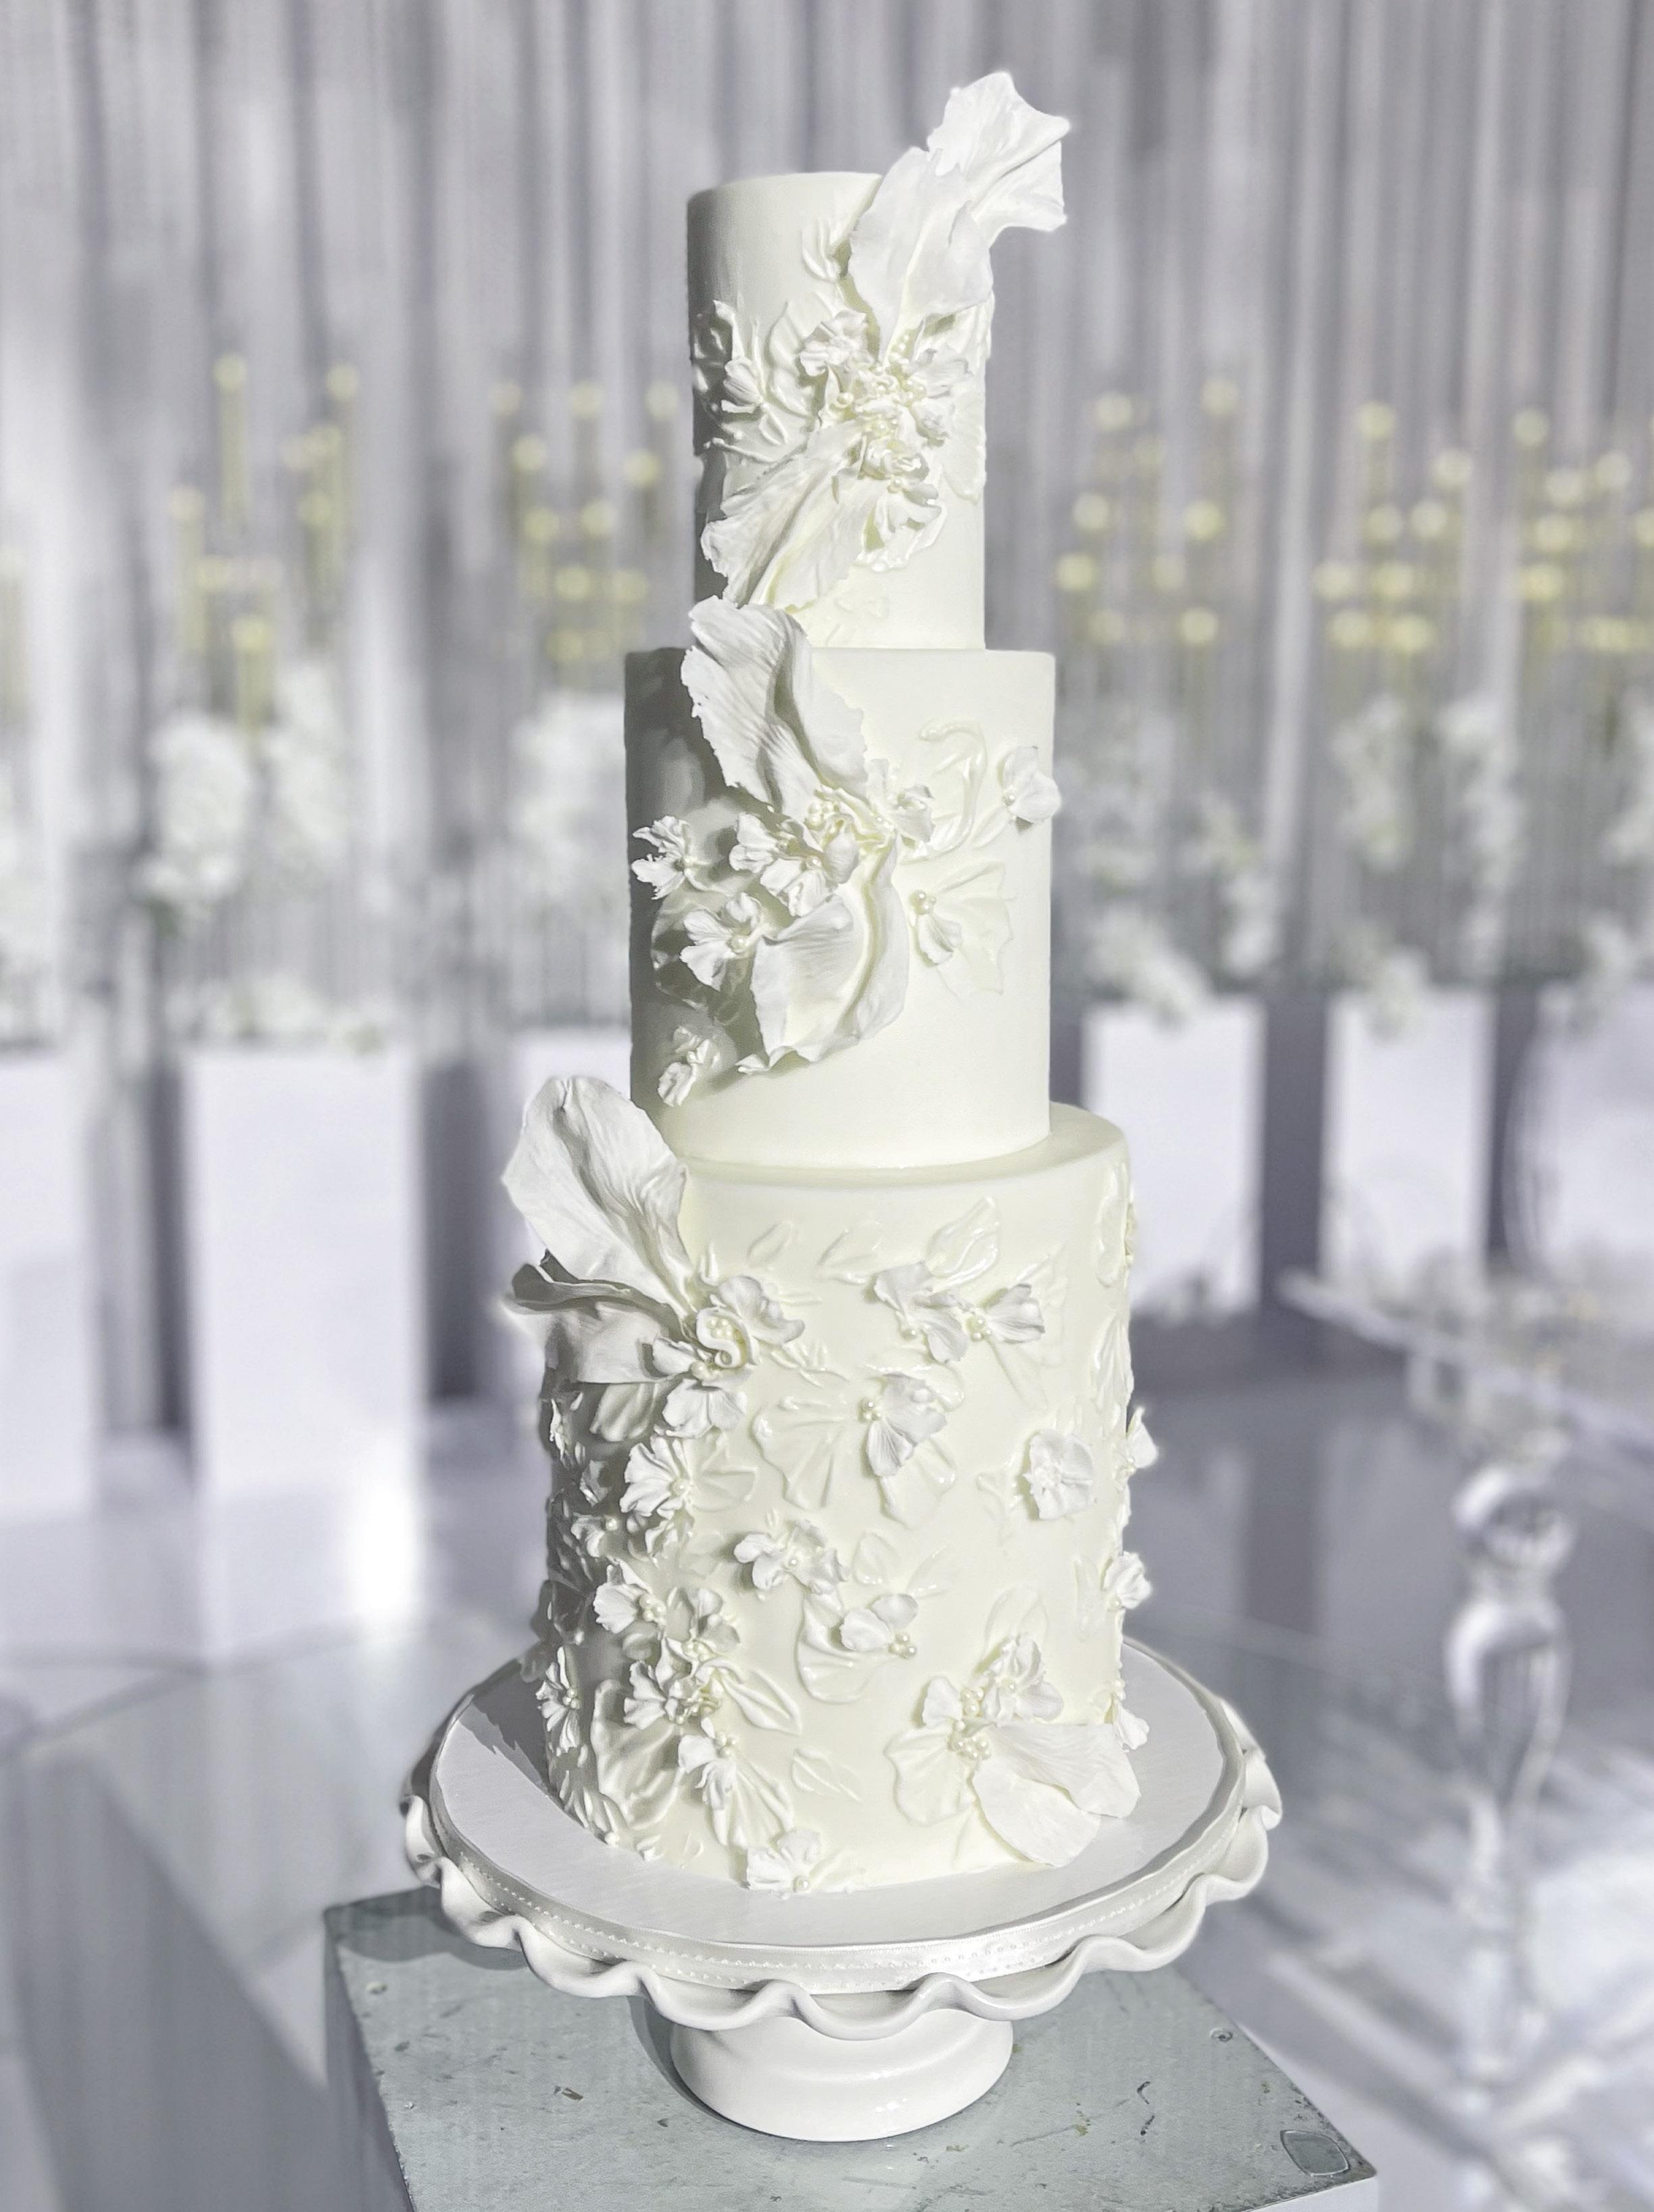
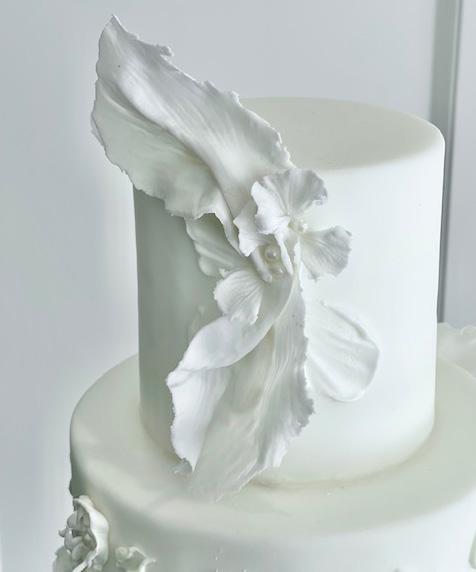
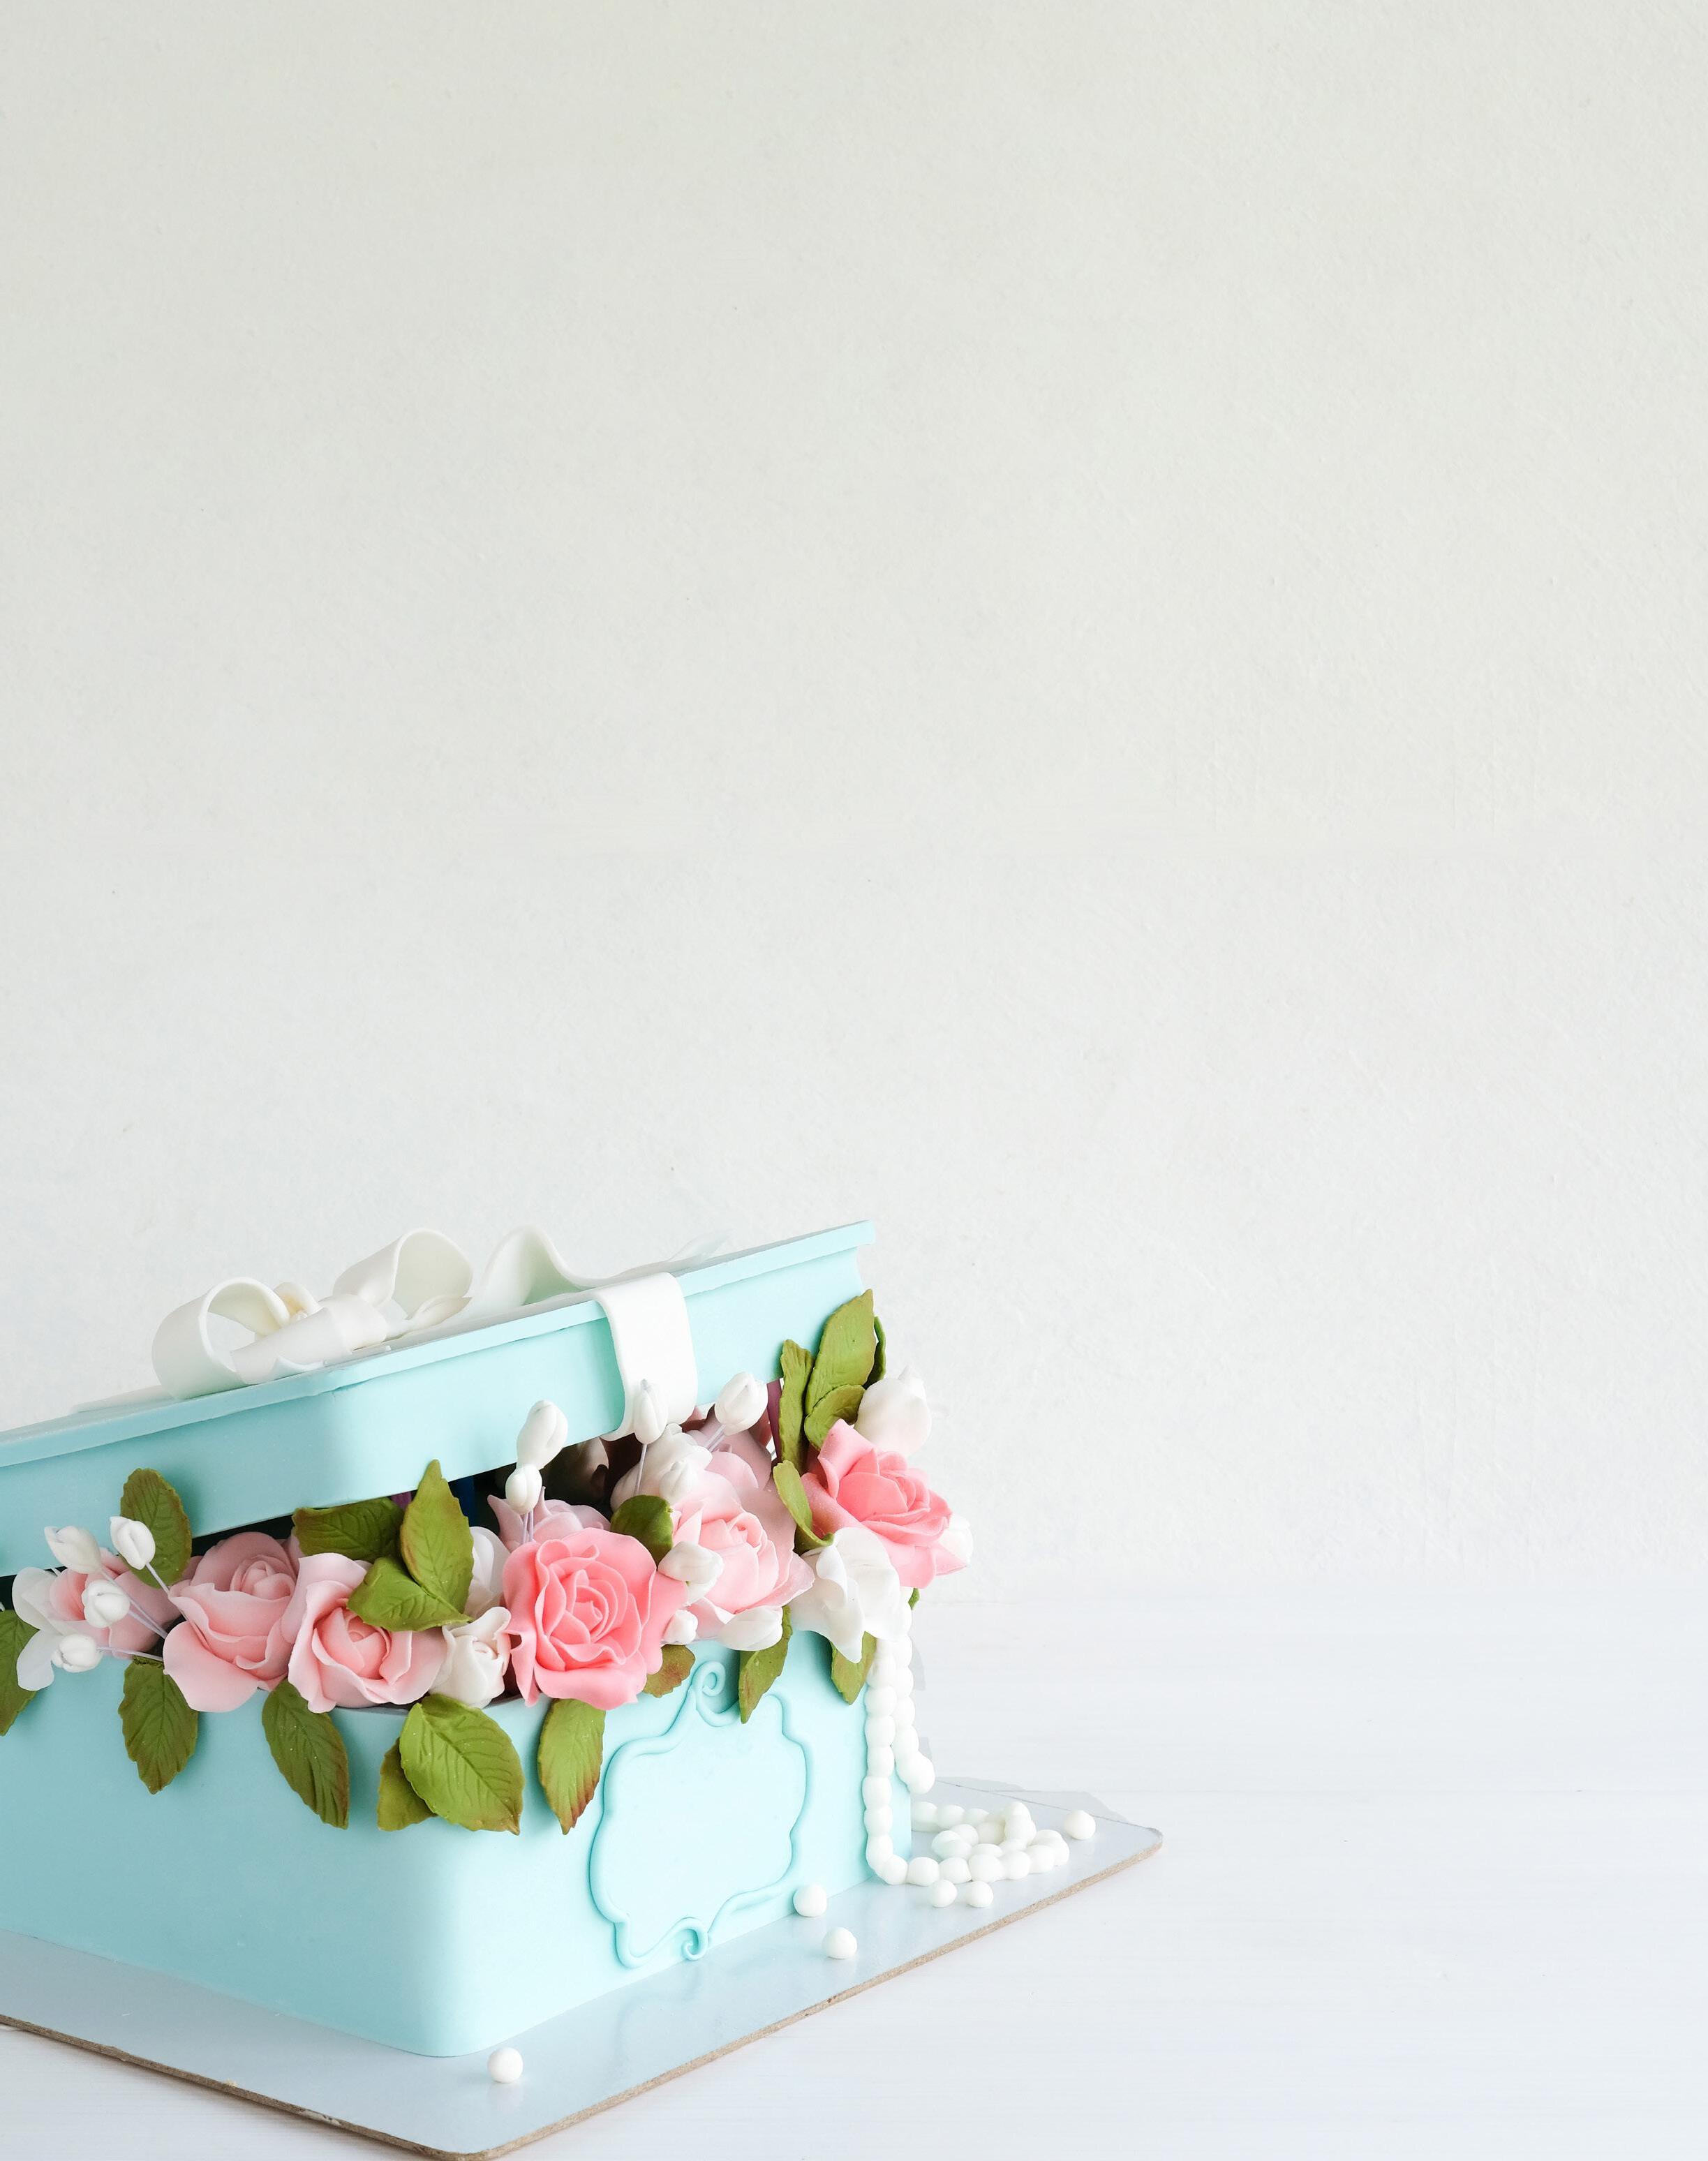
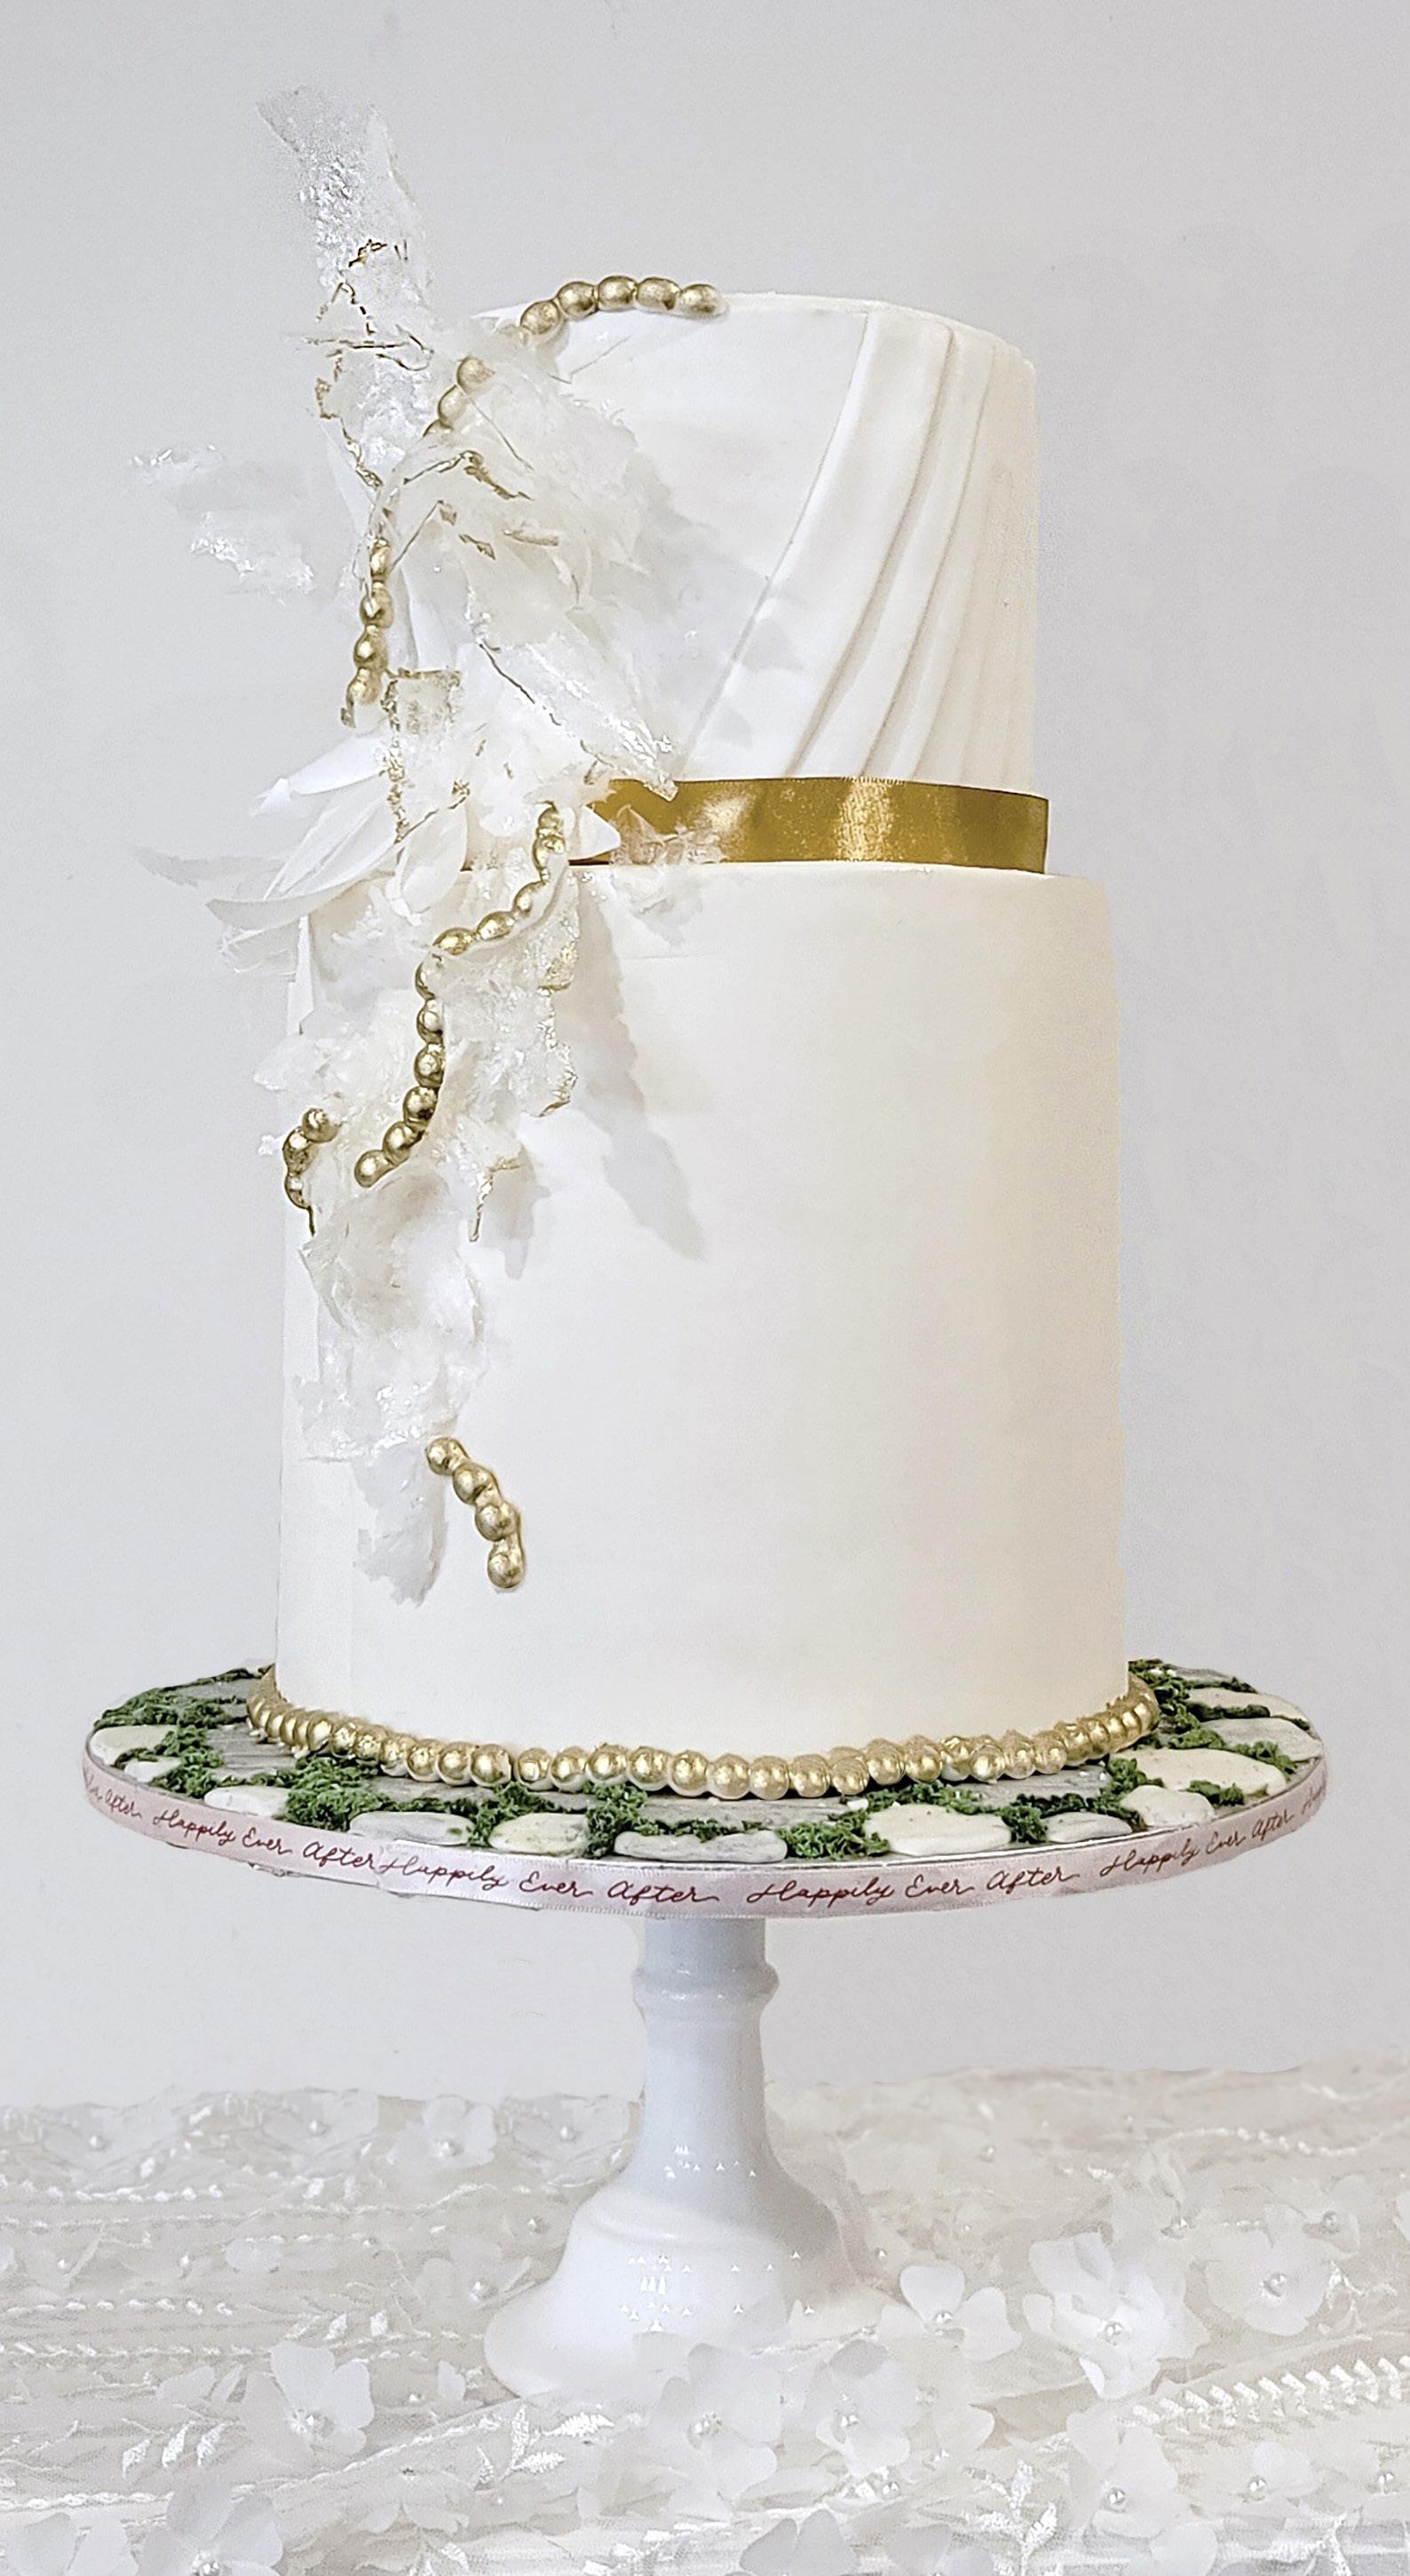
WHITE WHITE on Wedding
BY SANDRA PALLADINO
LEVEL:
COMPONENTS
Sandra
Palladino started cake decorating as a hobby with her grandmother at 15 years old. She had the pleasure of taking classes and learning from renowned cake decorator Geraldine Randlesome.
Sandra’s hobby has since developed into a passion for creating sweet creations for all occasions. Sandra specializes in custom fondant cakes and sugarcraft. She has been featured in American Cake Decorating, Wedluxe, and Elegant Wedding magazines.

instagram.com/sandrassweetcreations/
Edibles:
Royal icing
Confectioners’ sugar
Gum paste
Water
Sugar pearls
Equipment:
Palette knives
Rolling pin
Large peony petal veiner
Bowl
Small flower veiner
Egg carton or cake pop mold
Tweezers
Ribbon cutter
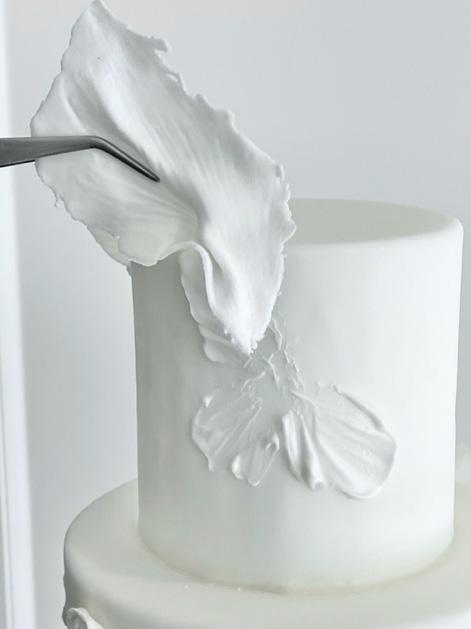
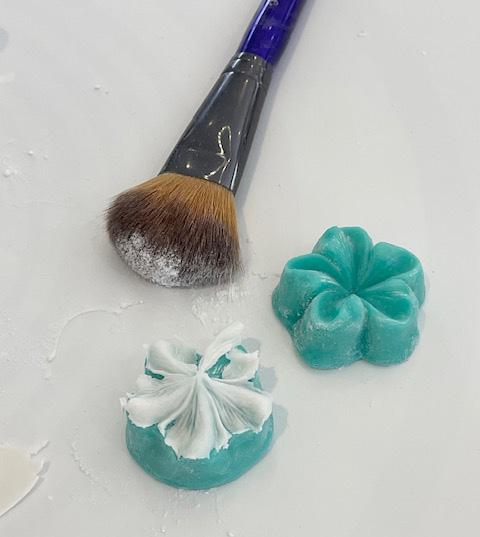
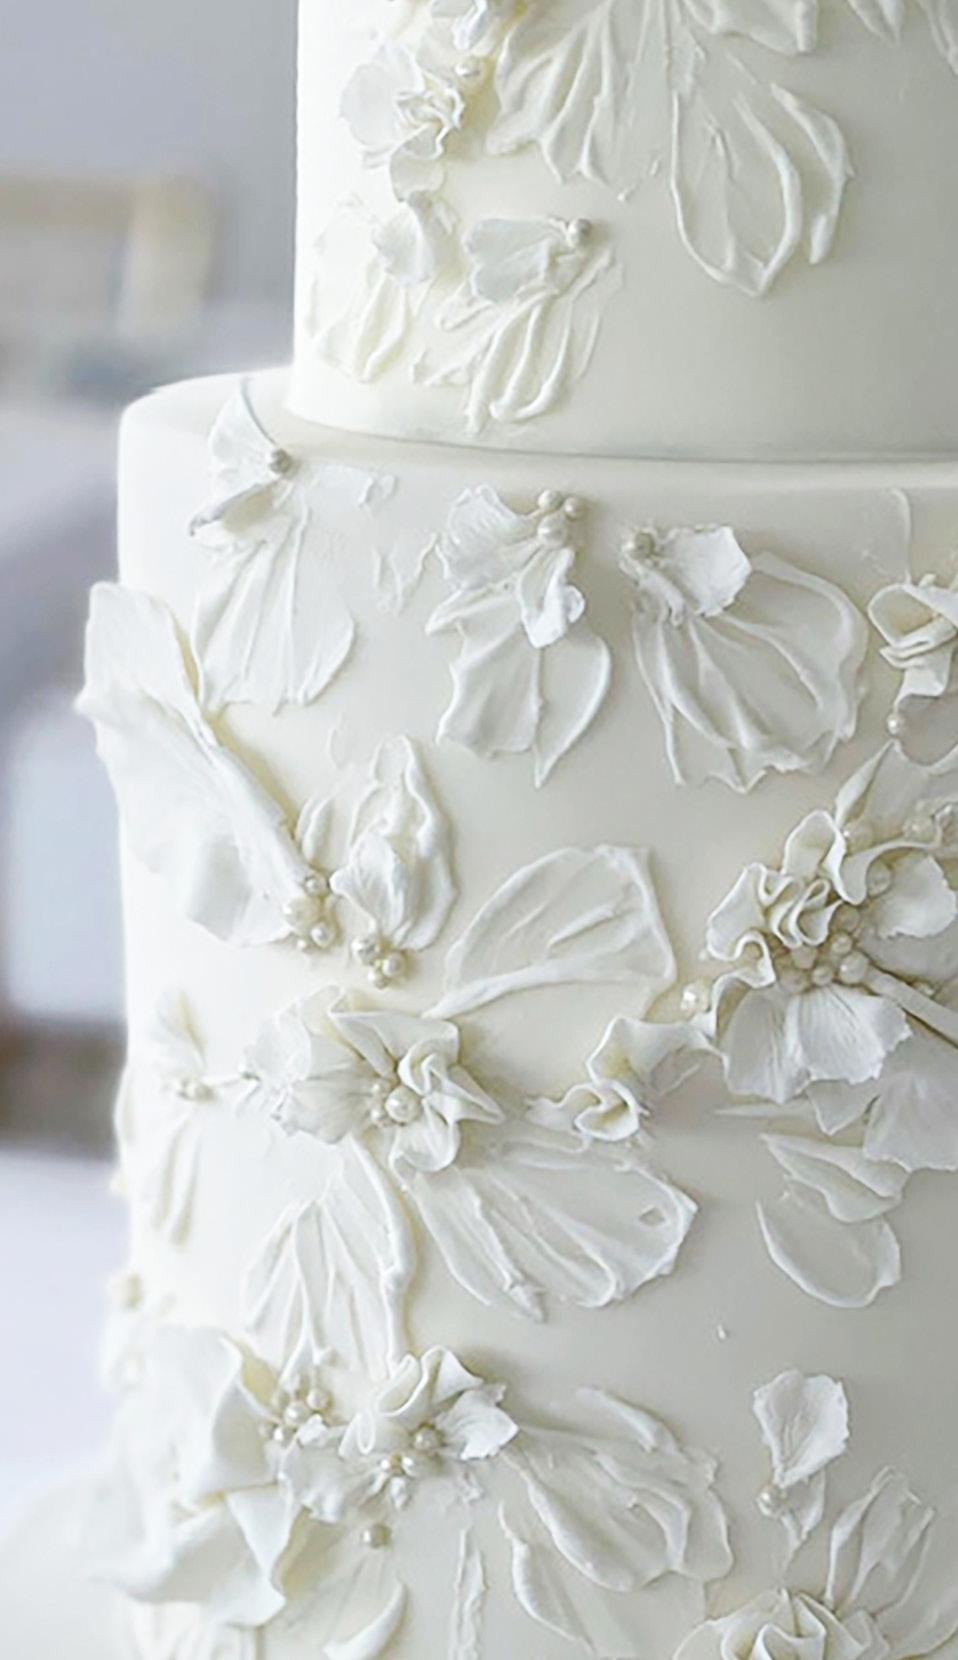
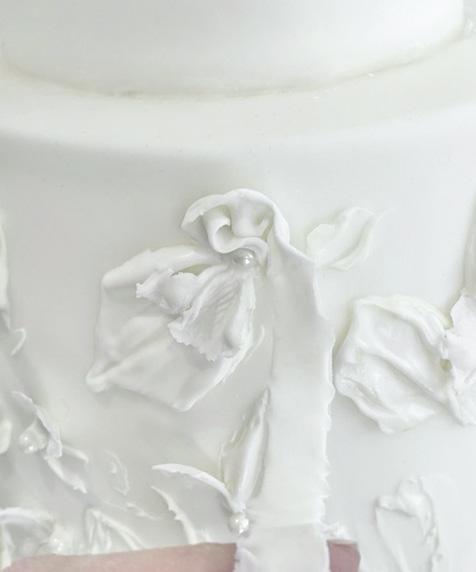
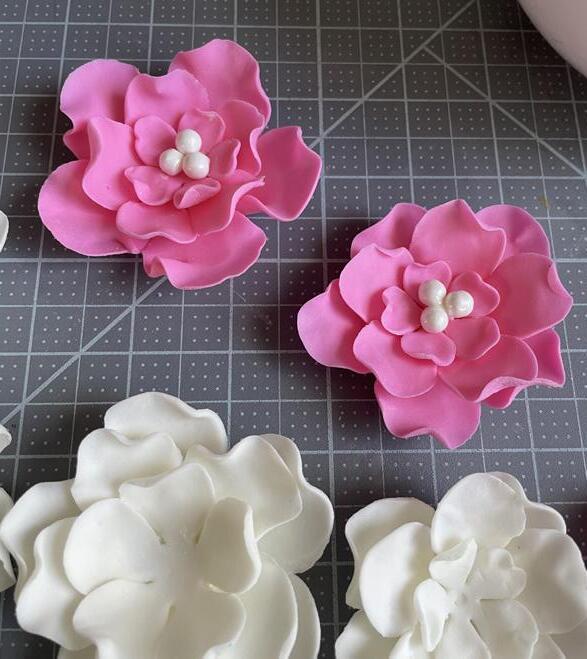
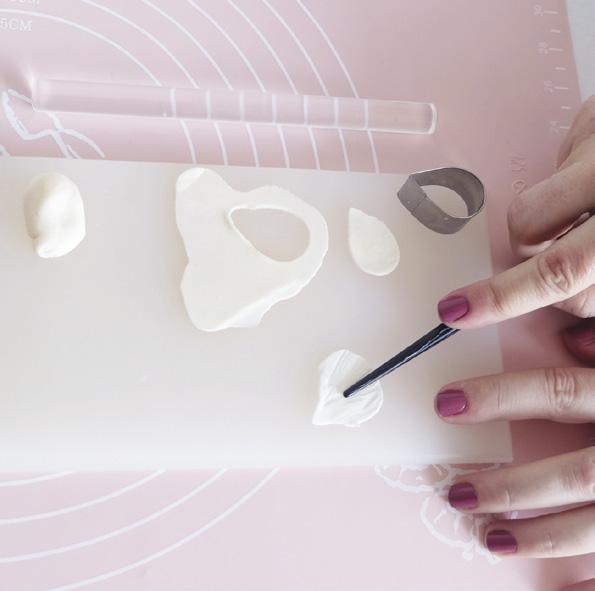
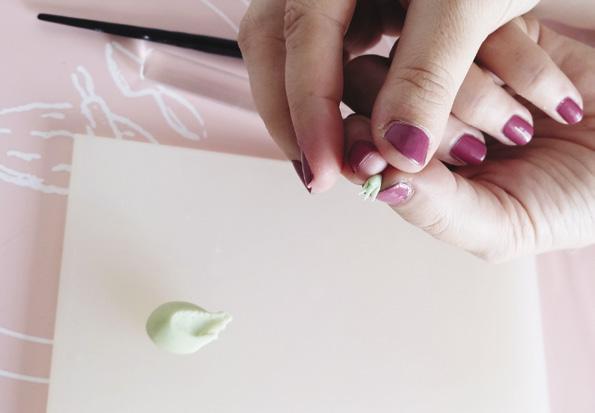
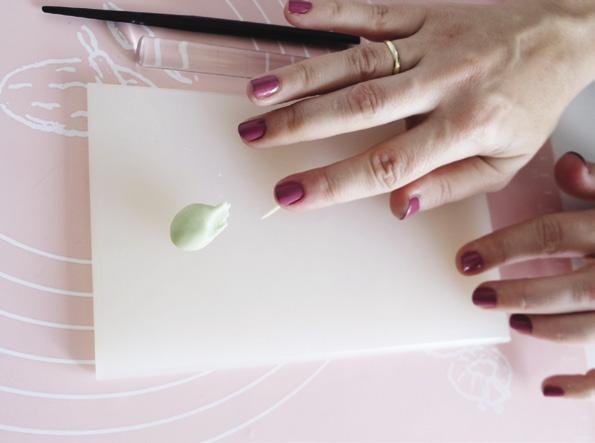
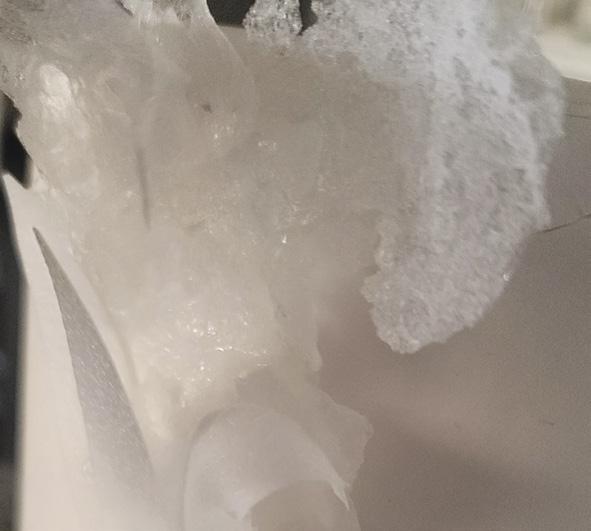
LAYER THE ROYAL ICING PETALS
1. Using royal icing and palette knives, cover the cake in thick painted flower petals. Play around with
different-size palette knives and amounts of royal icing to create large and small petals.
20 americancakedecorating.com May | June 2023 TUTORIAL
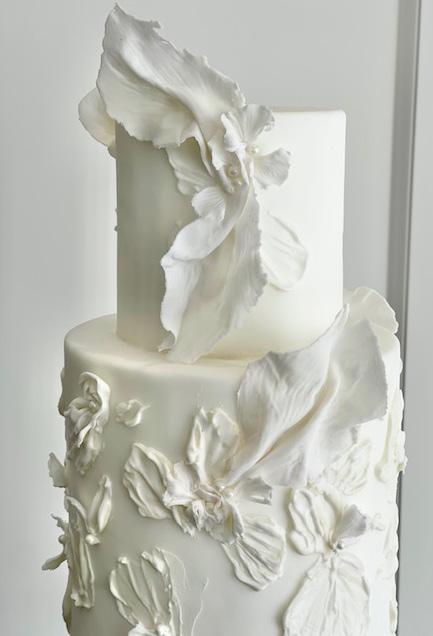
Layers of royal icing, gum paste, and sugar pearls create a stunning all-white display.
TUTORIAL
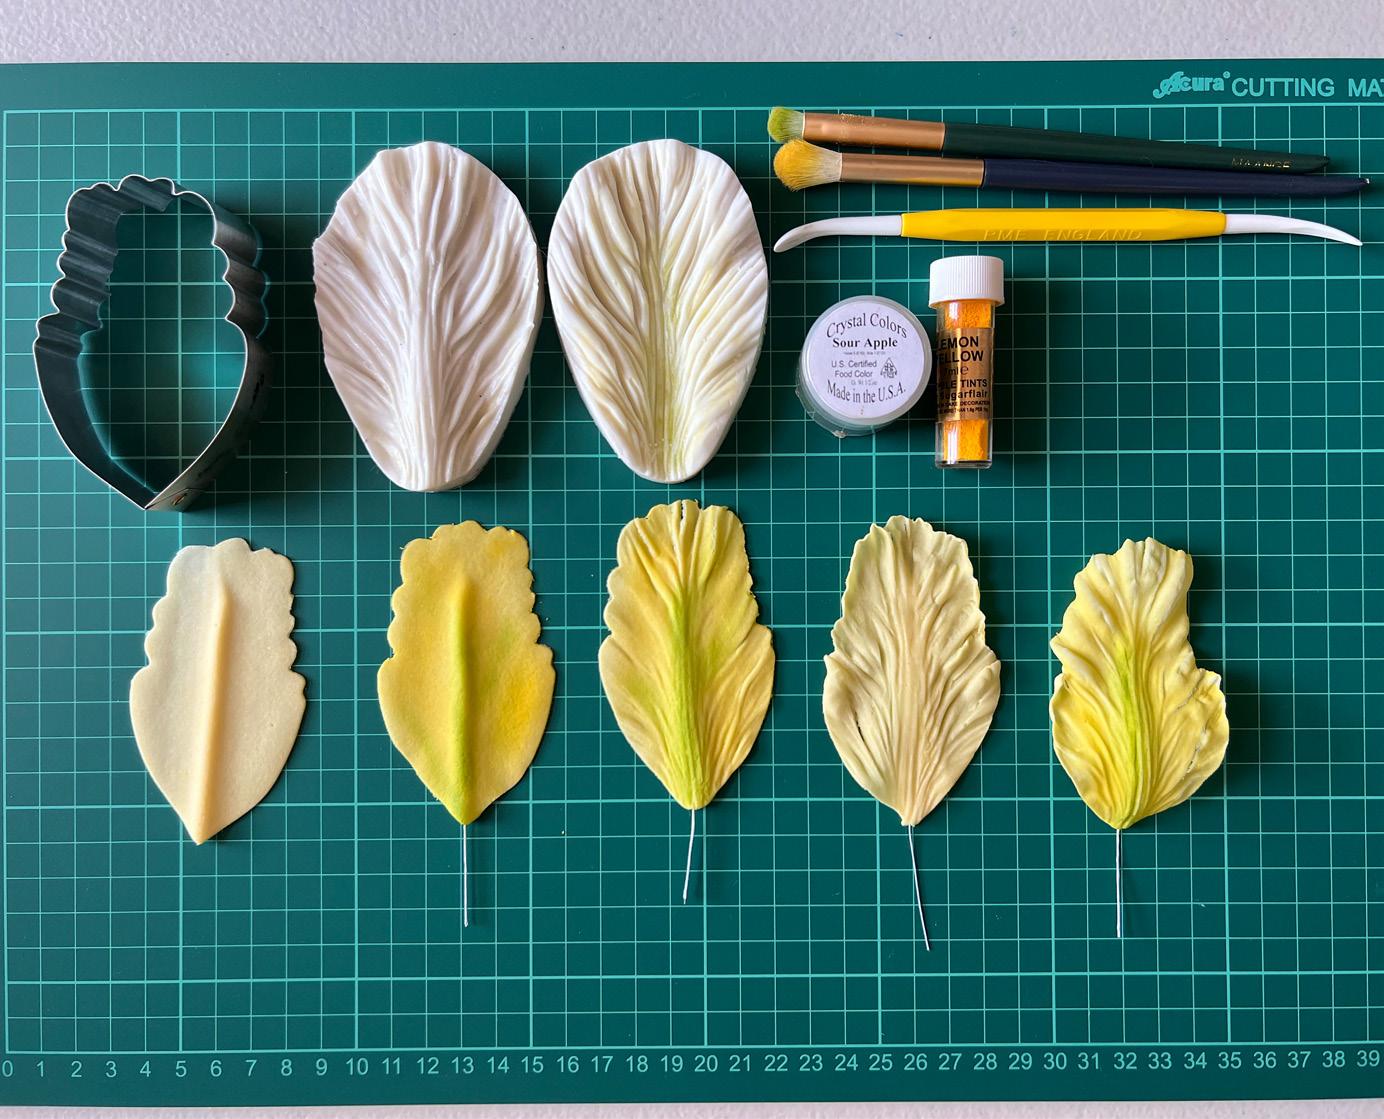
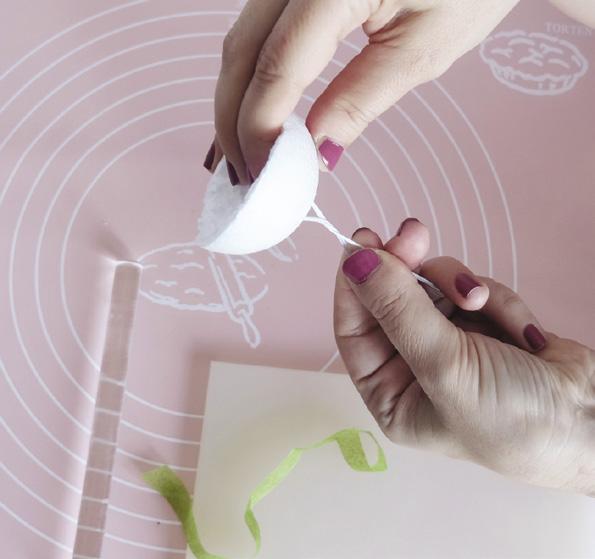
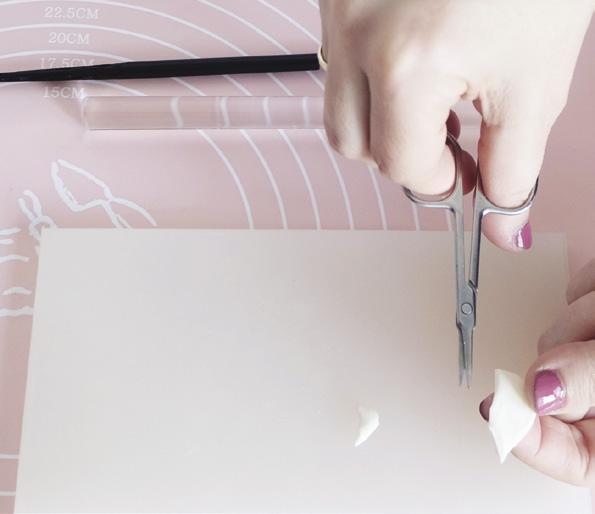
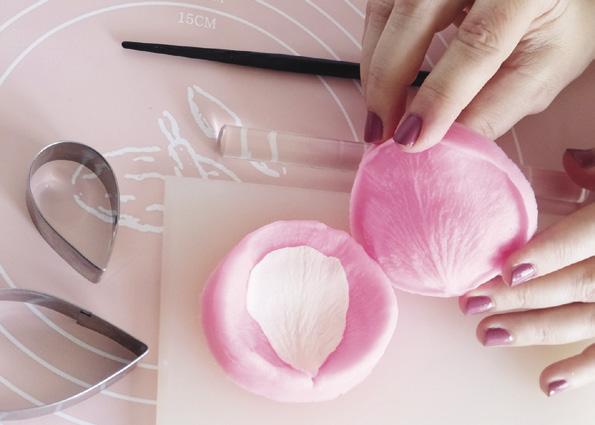
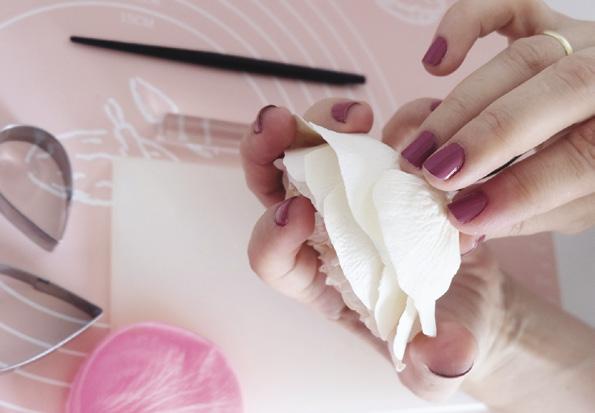
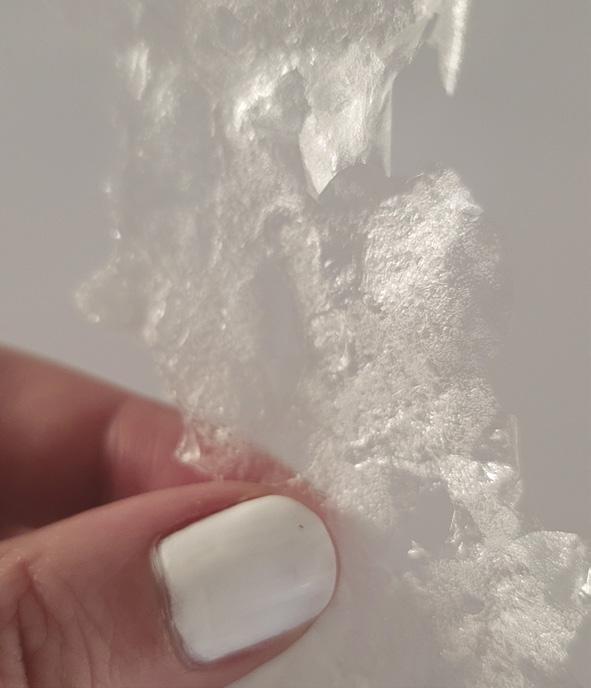
CREATE THE GUM-PASTE PETALS
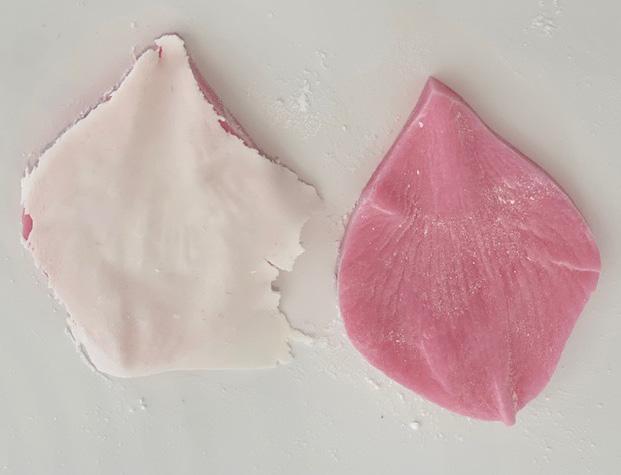
1. Dust confectioners’ sugar on the peony petal veiner and your work space. Roll out some gum paste as thin as possible. Place the gum paste on 1 side of the veiner and the other veiner on top. Rip off the excess that hangs off and press the silicone mold together.
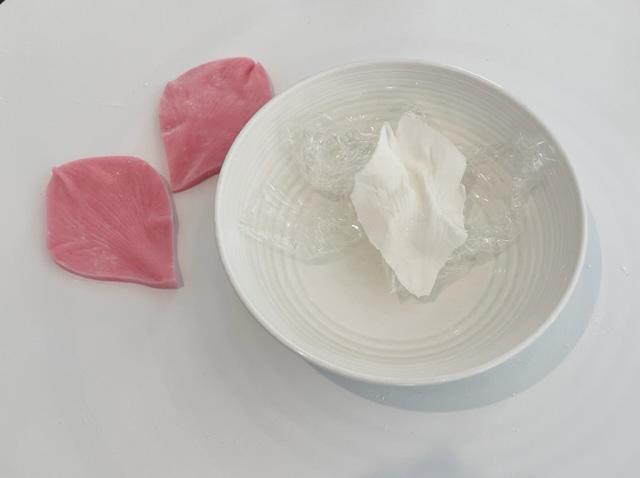
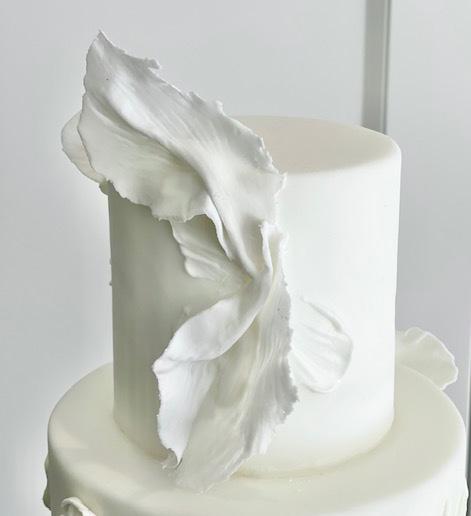
2. Carefully remove the gumpaste petal and place it in or on top of a bowl to dry. Play around with the petals and the directions you want them to dry in. Create as many as you would like.
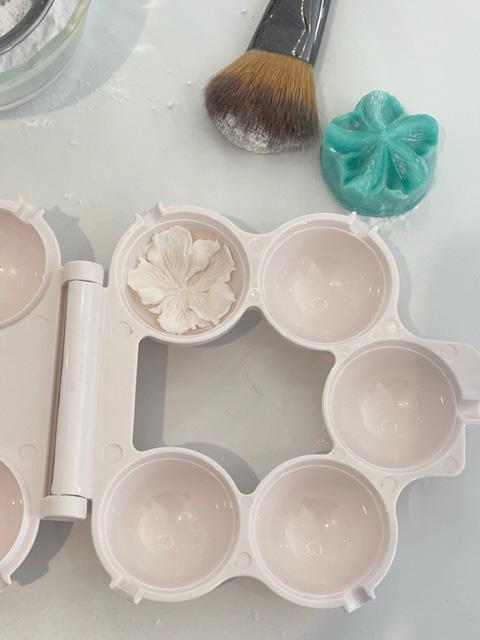
3. Dust confectioners’ sugar on the small flower veiner. Roll out more gum paste as thin as possible and place it on top of the veiner. Press the silicone molds together and rip off the excess gum paste. Make as many as you like. You can let these dry in an egg carton or a cake pop mold.
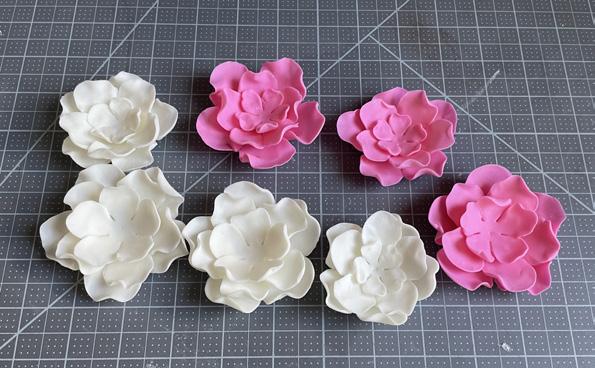
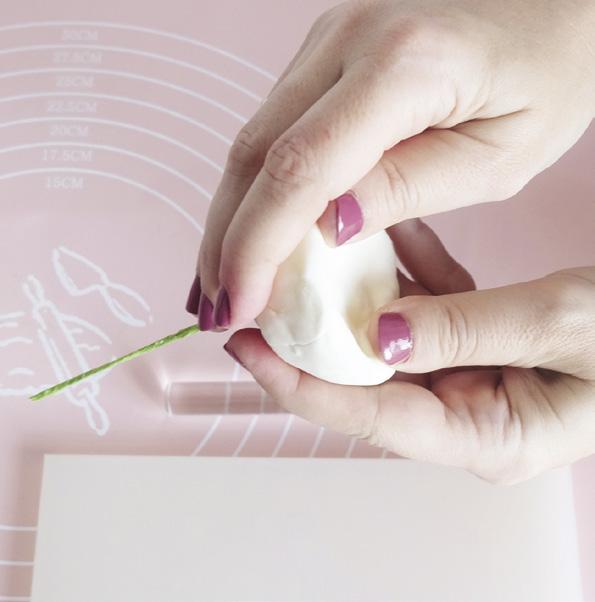
APPLY THE PETALS
1. Once all your petals are somewhat dry, you can start placing them onto your cake with tweezers. Start with the larger petals and overlap them onto the thick royal icing painted flowers. Stick the
petals on with a bit of water or a couple dabs of royal icing.
2. Cluster the petals together in any direction or design you like. If the petals aren’t completely dry, you have a bit of flexibility in movement and direction when applying them onto the cake.
3. Using water or royal icing, apply the smaller flowers in and around the large petals. I use some whole flowers but also break petals off to place in smaller areas.
22 americancakedecorating.com May | June 2023 TUTORIAL
1 1 2 2 3a 3b T
ip: DON’T WORRY IF ANY OF THE PETALS RIP OR AREN’T PERFECT. IMPERFECTIONS MAKE IT MORE REALISTIC.
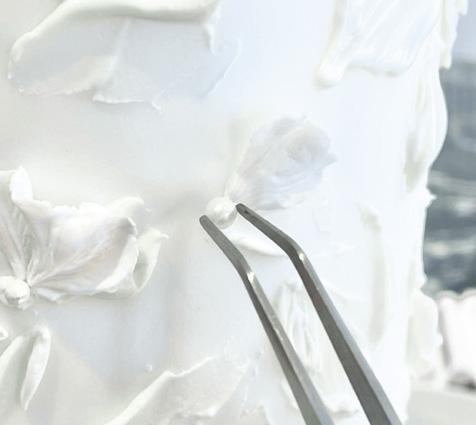
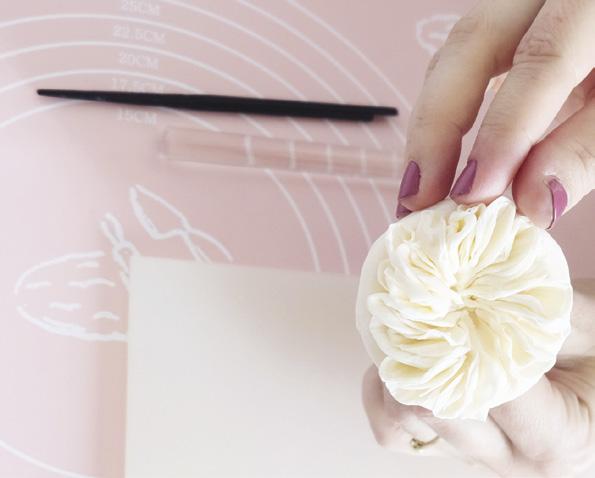
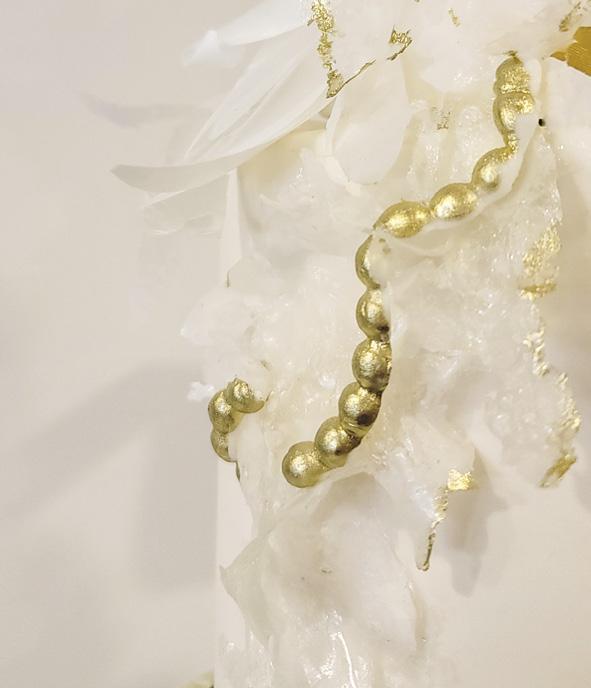
ADD THE FINISHING TOUCHES
1. Apply a small amount of royal icing onto sugar pearls and attach them to the center of the flowers or at the tip of the flower petals. I like to cluster them in odd numbers and use tweezers to apply the sugar pearls 1 at a time.
2. Roll out gum paste as thin as possible. Using a ribbon cutter, cut out thin long strips. Wrap them around the sugar pearls, petals, and flowers to fill in gaps and areas where it seems bare.

3. Keep applying petals, sugar pearls, and ribbons onto the cake until you are satisfied with the overall look. ACD
ip: FOR ADDED TEXTURE, USE A BALL TOOL TO CREATE RIPPLES ON THE EDGES OF THE GUM-PASTE STRIPS.
Tip: YOU CAN CREATE MANY DIFFERENT VARIATIONS USING THIS SAME TECHNIQUE. EACH CAKE WILL BE A UNIQUE, ONE-OF-AKIND CREATION.
May | June 2023 americancakedecorating.com 23 TUTORIAL
1a 1b 2 3 3
T
STYLE FINDING CLIENTS THAT FIT YOUR
BY CYDNI N. MITCHELL
Are you a wedding cake designer who wants to attract more clients who appreciate your unique design aesthetic? Do you find yourself creating cakes that don’t excite you, just to satisfy the demands of clients who don’t share your vision? It can be frustrating to spend hours creating a cake that doesn’t align with your style, but the good news is that there are steps you can take to attract more clients who are interested in your particular design aesthetic. These five strategies can help you book the right orders so you can feel inspired to create the cakes you truly want to make.
1CREATE A PORTFOLIO OF THE DESIGNS THAT INSPIRE YOU.
A visually stunning portfolio that showcases your best work is essential to attracting clients who appreciate your design aesthetic. Your portfolio should display a variety of styles and designs that demonstrate your versatility and expertise. It should include high-quality images that showcase your attention to
detail and the quality of your work. Then, share that portfolio on your website, social media, and wedding directory listings.
If you specialize in a particular style, such as vintage or modern, make sure to include photos that showcase your skills in that area. The point of the portfolio is to show potential clients what you’re capable of. If you have a clear and consistent design aesthetic showcased in your
portfolio, you’ll attract clients who appreciate your specific style. For example, if your portfolio is filled with rustic and vintage designs, clients who are looking for a modern or minimalist cake will know that you’re not the right fit for their needs—and you won’t waste time on consultations that won’t lead to bookings.
2NETWORK WITH OTHER VENDORS.
Building relationships with other local wedding vendors is crucial for expanding your reach and increasing your chances of booking more clients. Attending bridal shows, wedding fairs, and other industry events is a great way to meet and connect with other vendors in your area. Partnering with photographers, florists, and event planners to offer package deals that include your cakes can also be a mutually beneficial strategy. Not only does this increase your visibility, but it also helps build relationships that can lead to referrals.
In addition to attending events and partnering with other vendors, building relationships with other vendors in the wedding industry can also help you gain more exposure. Consider reaching out to other vendors to collaborate on styled photo shoots or weddings that showcase your skills and unique design aesthetic. For instance, you could collaborate with a wedding planner to create a dessert table
24 americancakedecorating.com May | June 2023 SWEET BOSS
that complements their overall wedding theme. By building relationships with other local vendors, you can expand your reach and gain new clients who appreciate your unique style and designs.
3 LEVERAGE SOCIAL MEDIA.
Social media is a powerful tool for promoting your business and connecting with potential clients. Platforms like Instagram and Pinterest are popular among wedding vendors and couples planning their wedding. Regularly posting high-quality photos and videos of your cakes on these platforms is a great way to showcase your work and increase your visibility. Make sure to use relevant hashtags such as #rusticweddingcakes or #woodlandweddingcakes to reach potential clients who are interested in your specific design aesthetic and who are searching for inspiration online.
Also, consider partnering with influencers in the wedding industry to showcase your work to a wider audience. This can help you gain more exposure and attract new clients who appreciate your unique design aesthetic. You could also offer exclusive discounts or promotions for your social media followers to incentivize them to book with you.
4
OFFER INTERVIEWSTYLE TASTINGS AND CONSULTATIONS.
Cake tastings not only allow potential clients to sample your cakes, but they can also serve as an opportunity for you to interview the couple and ensure that you’re a good fit for each other. Use this time to get to know the couple. Ask questions that help you better understand their vision for the wedding as well as their preferences.
The tasting should be interview style to make sure that you want to work with the client just as much as they want to work with you. For example, if a couple wants a rustic-style cake, ask them about their favorite flavors and design elements that would complement their overall wedding theme. By offering personalized service and getting to know your clients, you can build trust and rapport and ensure that you create a cake that exceed their expectations.
5SPECIALIZE IN A NICHE. Focusing on a particular niche can give you a competitive edge and attract clients who are specifically interested in your style. Whether it’s rustic-, bohemian-, or vintage-style cakes, specializing in a particular aesthetic can help you establish yourself as an expert in your
community. While you don’t have to limit yourself to that particular niche, showcasing your expertise in that specific design type will draw potential clients who are interested in your style. By positioning yourself as a go-to wedding cake designer for that niche, you can increase your chances of booking clients who want cakes that you’re actually inspired to create. Attracting clients who appreciate your design aesthetic can take some legwork, but it’s definitely worth the effort. Remember to be authentic to your design aesthetic and to focus on providing personalized service to each client. By following these strategies, you can build a thriving wedding cake business that allows you to create cakes that inspire you and impress your clients.
Cydni N. Mitchell (a.k.a. Cyd) is a bakery consultant and the sweet business coach behind Sweet Fest®. Based in Atlanta, GA, Sweet Fest® is an online company that supports the business needs of the sweets community in the areas of professional development, marketing, branding, and web design. By trade, Cyd is an accountant and financial analyst with a master’s from the Kenan-Flagler Business School at the University of North Carolina at Chapel Hill. She is the co-founder of the Sugar Coin Academy, an online business academy for business owners in the baking and sweets industry, and she is also the organizer of The Ultimate Sugar Show, Georgia’s largest annual baking and sweets expo in Atlanta. ACD
thesweetfest.com
facebook.com/thesweetfest
instagram.com/sweet_fest
May | June 2023 americancakedecorating.com 25 SWEET BOSS
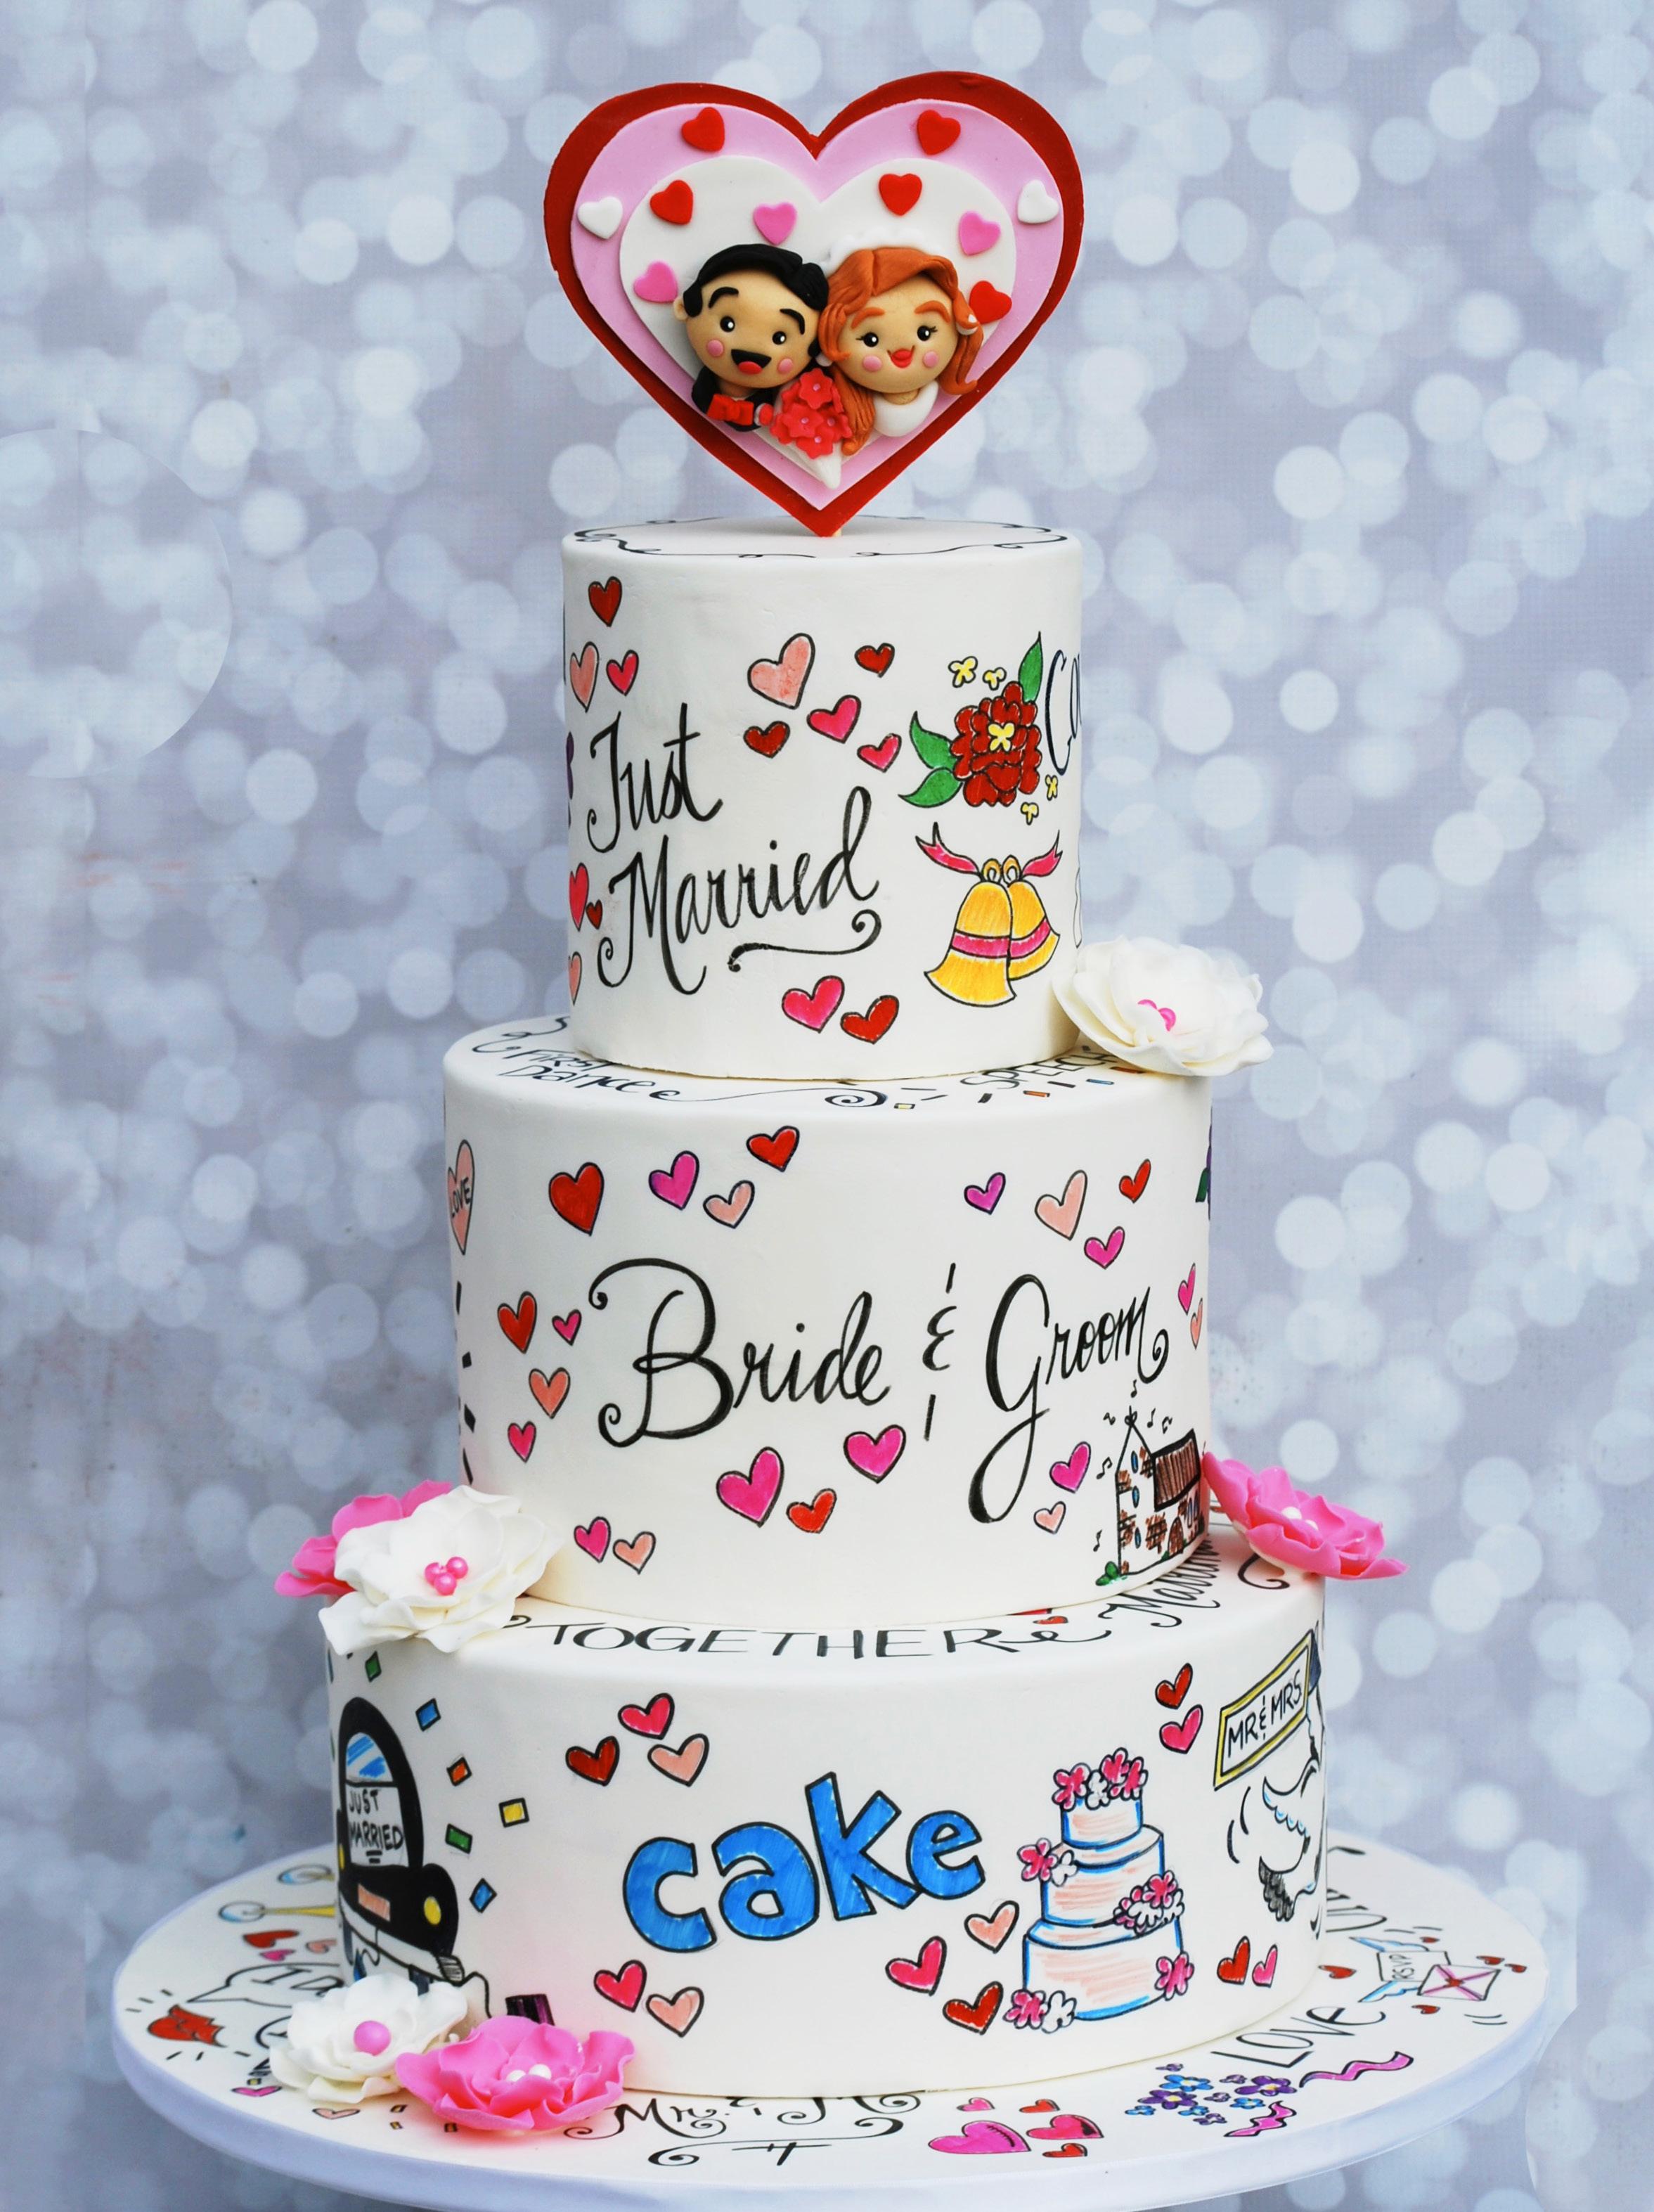
I “DO”-odle I “DO”-odle
BY JEAN SCHAPOWAL
Jean Schapowal from Cakes with Character is an awardwinning cake artist based in Long Island, NY. Having been a cartooning and illustration major in art school, Jean has been bringing her cartoony comic-book style to her cake creations for more than 15 years. Jean competes regularly in cake shows across the country, placing with many of her entries, and contributes to many online cake collaborations and has even appeared on numerous TV cake challenges. She loves to create fun and engaging pieces, cakes that “pop.” When people see one of her creations, they can say, “Oh, that’s a Jean cake!”
cakeswithcharacterbyjean.com
facebook.com/momschap instagram.com/momschap
LEVEL:
COMPONENTS
Edibles:
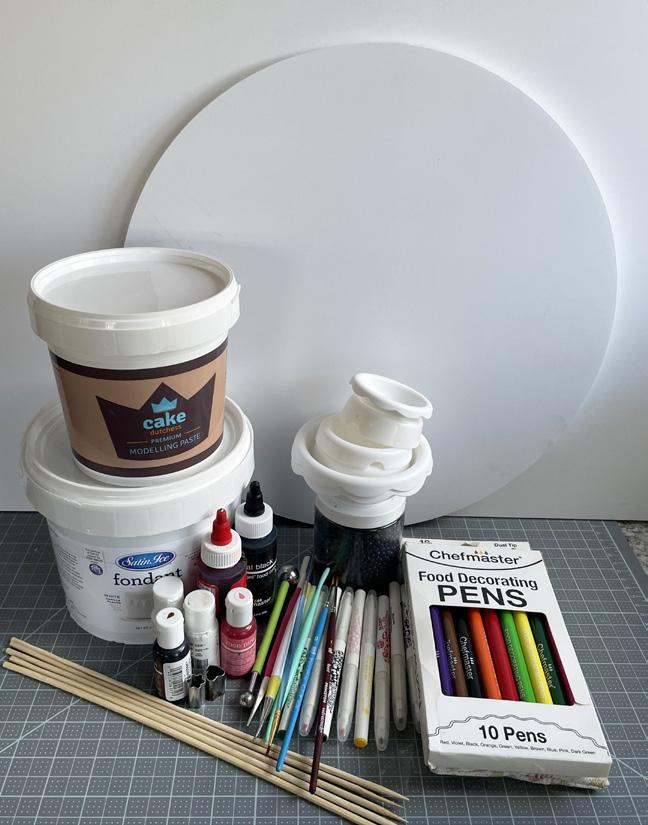
Modeling paste: white, pink, red, beige, black, and brown (Cake Dutchess)
Black sugar pearls
Water
Various edible markers
Edible white paint
Chocolate
6-, 9-, and 12-inch fondant-covered cakes
Various sugar pearls
Piping gel
Equipment:
Rolling pin
5-petal flower cutters
Ball tool
Foam pad
Flower formers
Heart cutters
Scallop and comb tool (PME)
Paintbrushes
18-inch cake drum covered in fondant
Skewer
TUTORIAL
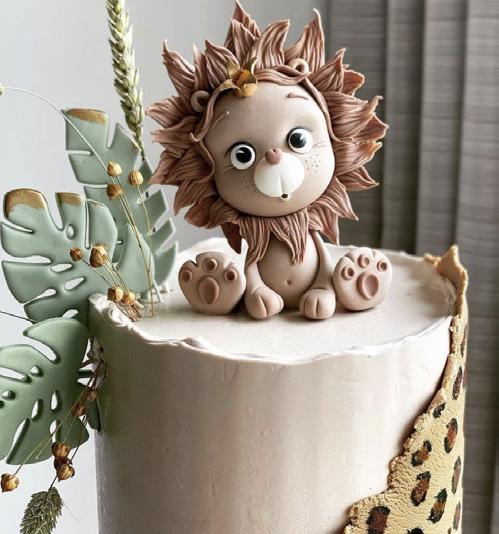
Doodling on a cake makes for a unique wedding cake—and adding an adorable custom topper makes it even better!
TUTORIAL
YOU NEED
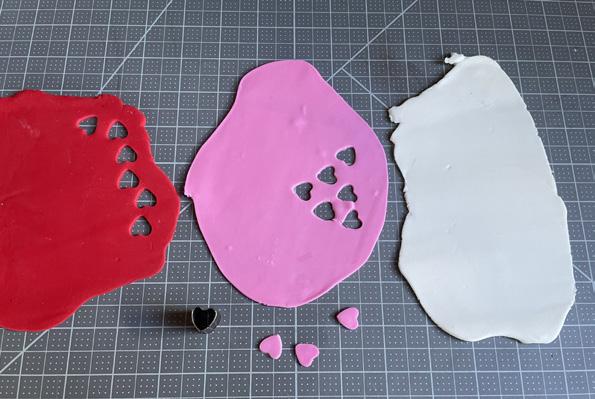
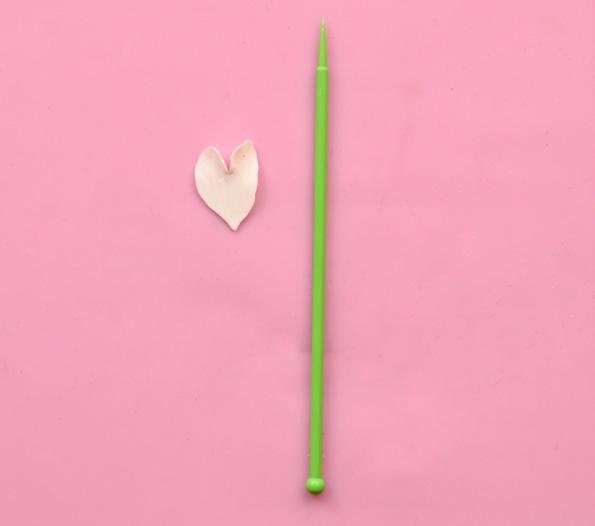
PREP THE FLOWERS AND HEARTS
1. Beginning a day or so earlier than you plan to assemble your cake, roll out white modeling paste and cut it with various 5-petal flower cutters.
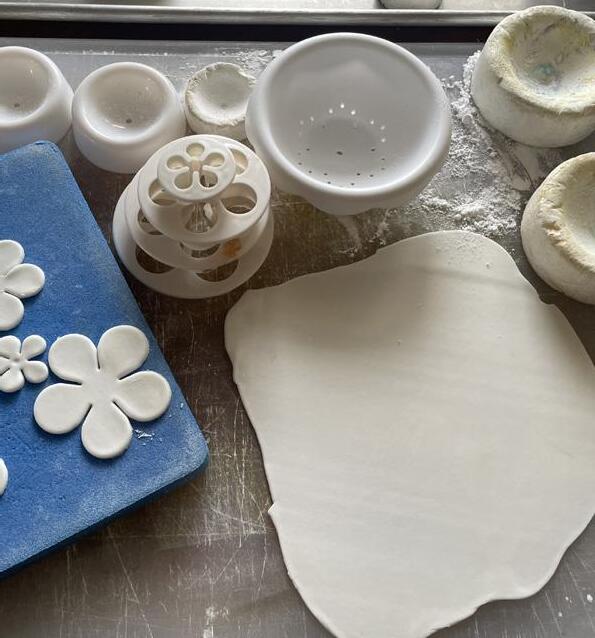
2. Using a ball tool, work the edges of the petals on a foam pad.
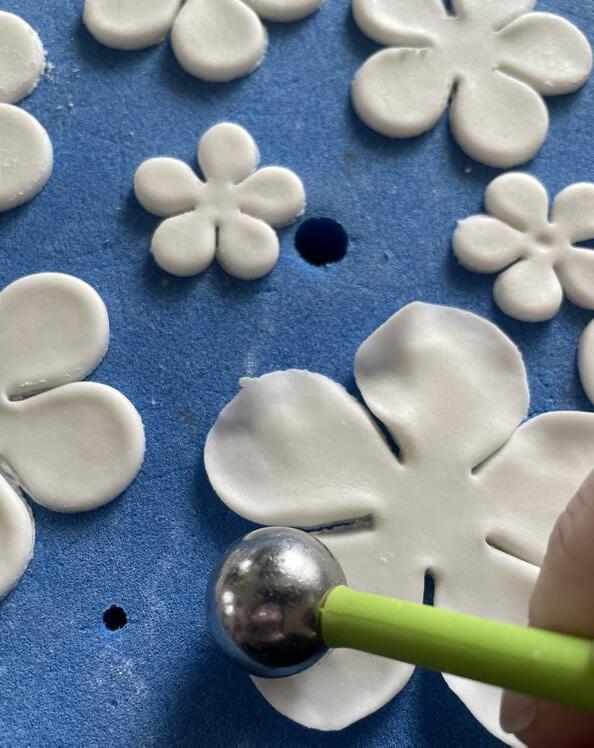
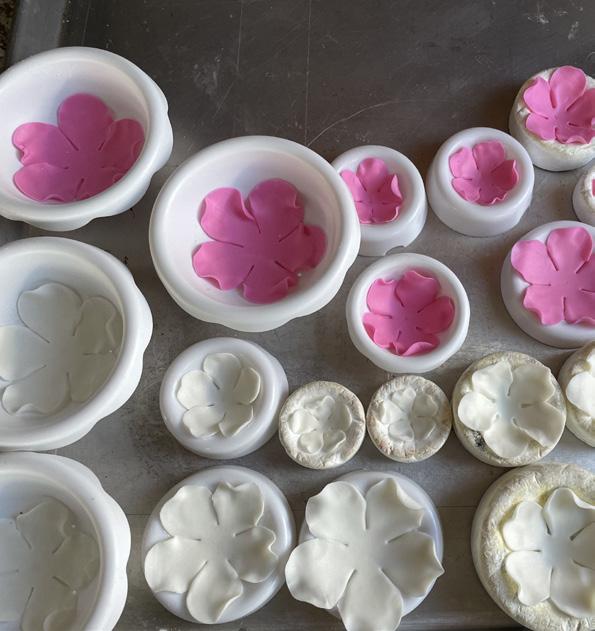
3. Repeat Steps 1 and 2 with pink gum paste. Place them all in flower formers to dry.
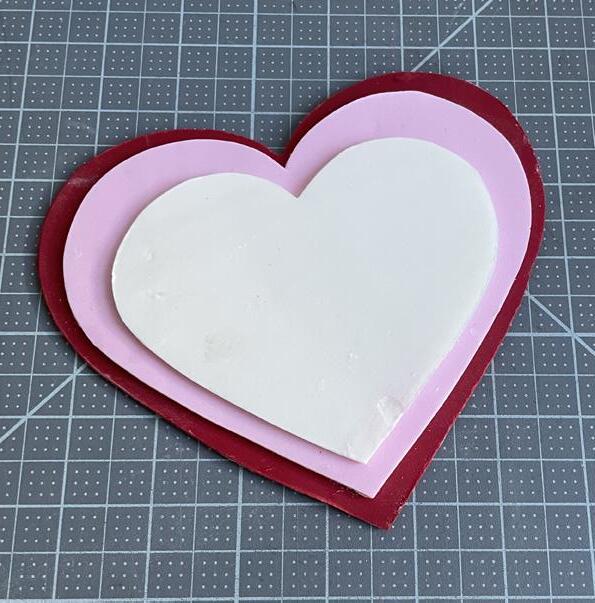
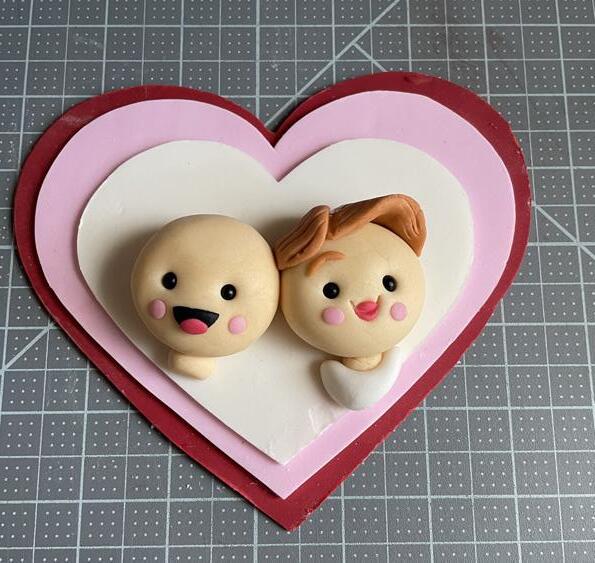
4. Cut out pink, red, and white hearts for the topper and stack them. Set them aside to stiffen up.
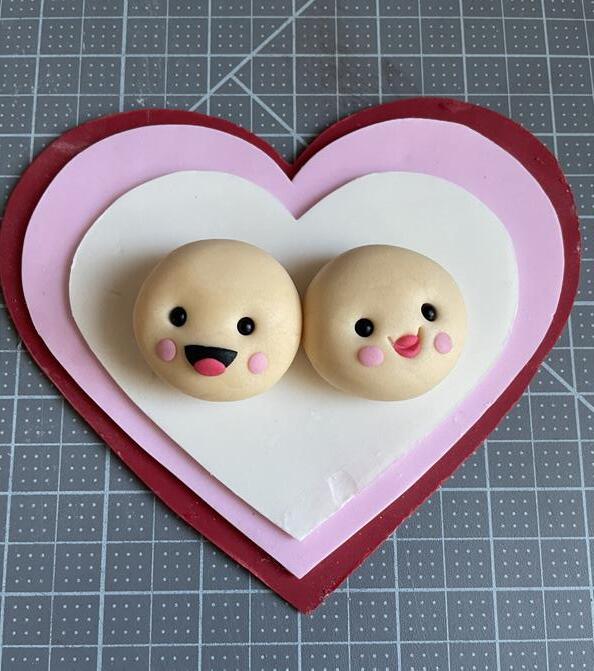
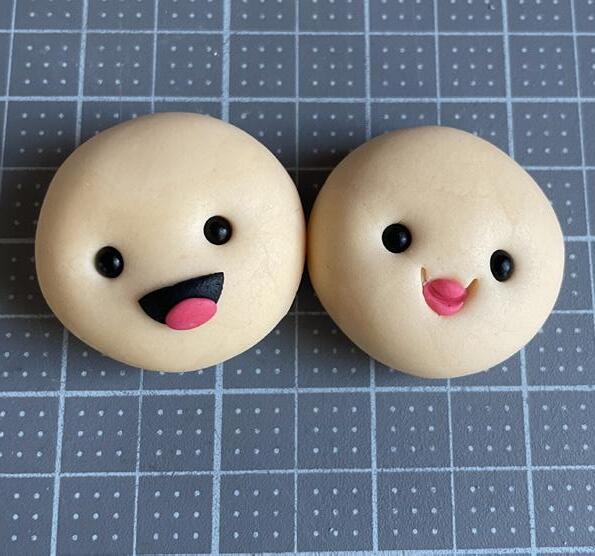
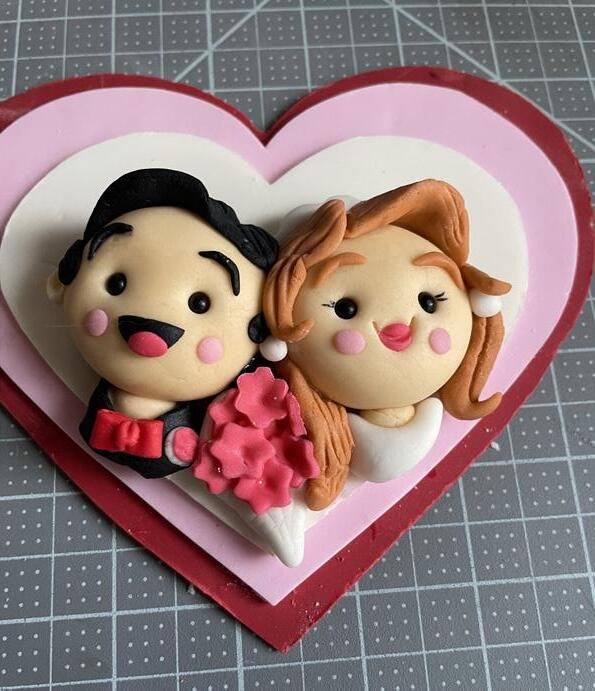
MAKE THE BRIDE AND GROOM
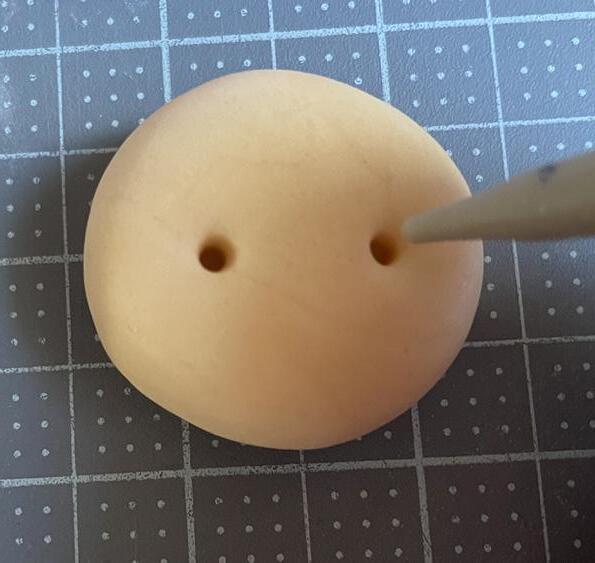
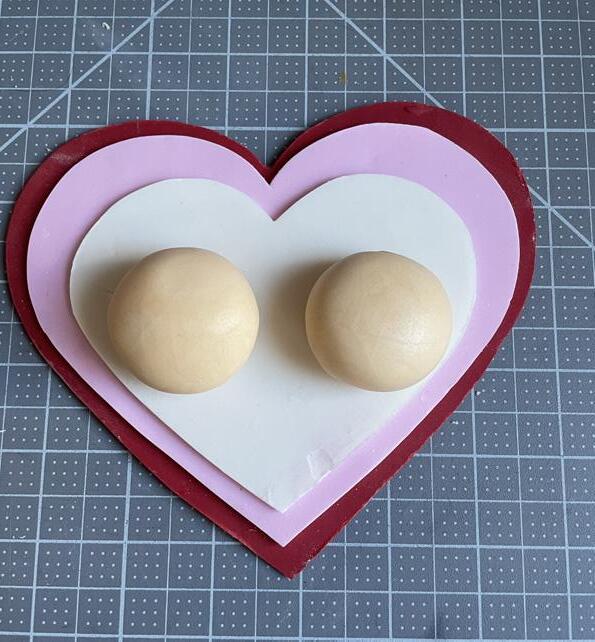
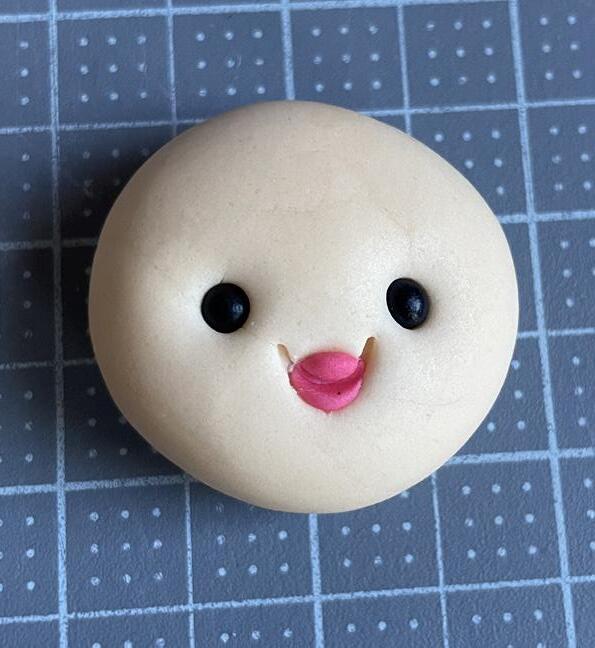
1. For the heads, roll out 2 golf ball–size pieces of beige modeling paste and flatten them slightly.
2. Using a bone tool, make holes in both heads for the eyes and add black sugar pearls.
3. Place a small piece of pink modeling paste where the mouth will be. Using the scallop and comb tool, press to create the mouth on the bride.
4. Using black and pink modeling paste, create the mouth on the groom.
5. Add some small lighter pieces of pink modeling paste for the cheeks and then, with a little bit of water, attach both heads to the stacked hearts.
28 americancakedecorating.com May | June 2023 TUTORIAL
1 2 3 1 2 4 T
ip: INSTEAD OF MODELING PASTE, YOU CAN USE GUM PASTE OR FONDANT MIXED WITH TYLOSE POWDER.
WHAT
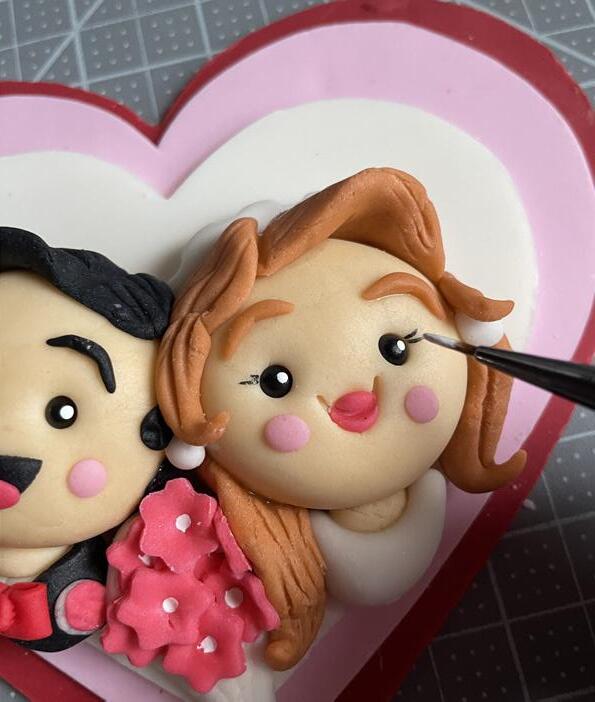
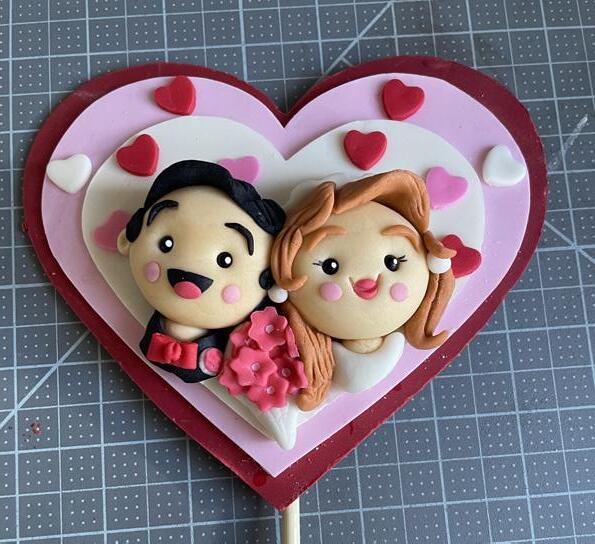
ADD THE COUPLE’S DETAILS
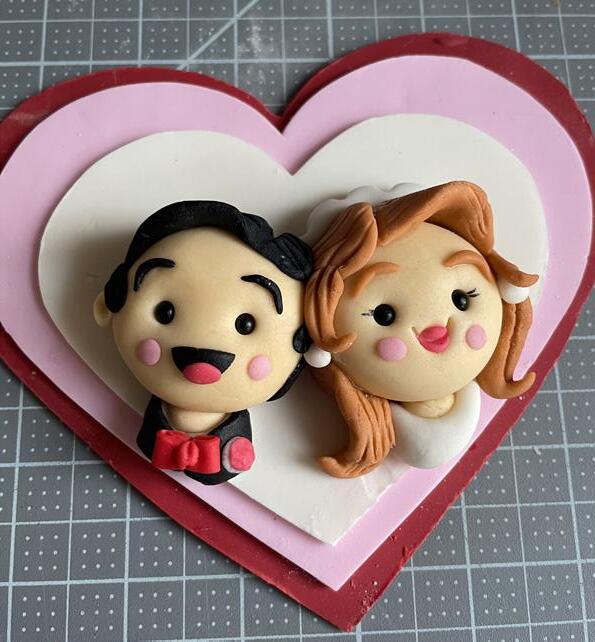
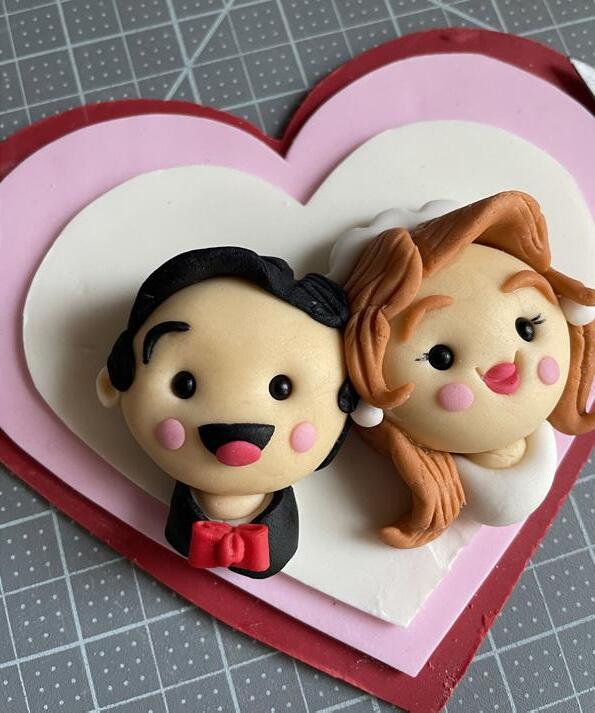

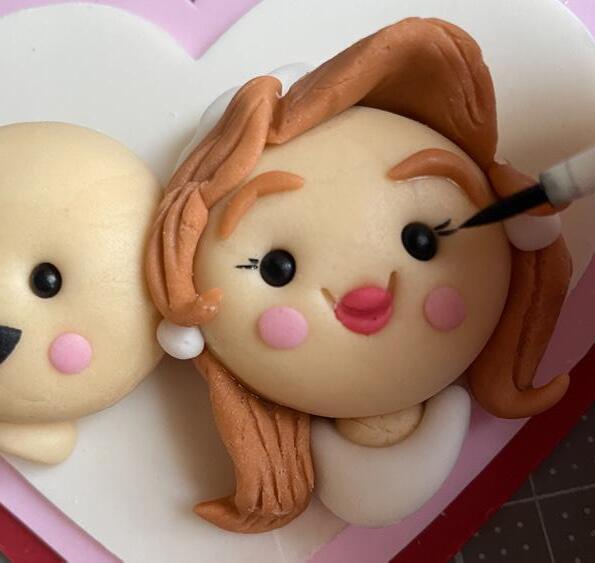
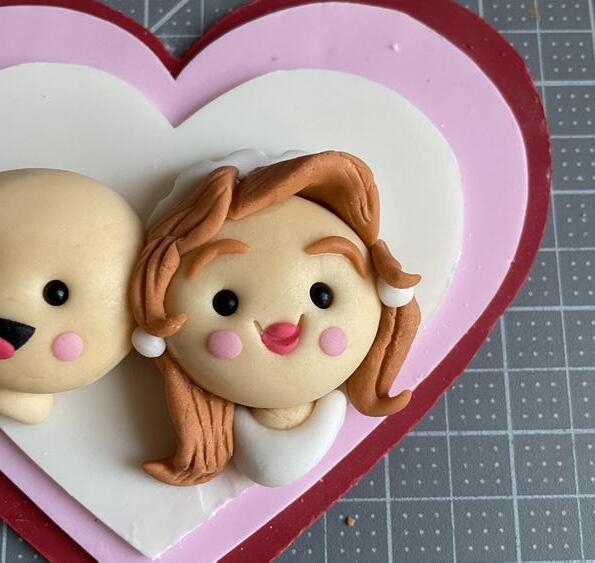
1. Add a small bit of beige modeling paste for the neck of both the bride and groom. Wrap a small piece of white modeling paste around the neck of the bride and start creating the bride’s hair in any style with brown modeling paste.
2. Add brown eyebrows, white earrings, and a small stripe
of white modeling paste on top of the bride to create her veil.
3. Using a black edible marker, make eyelashes.
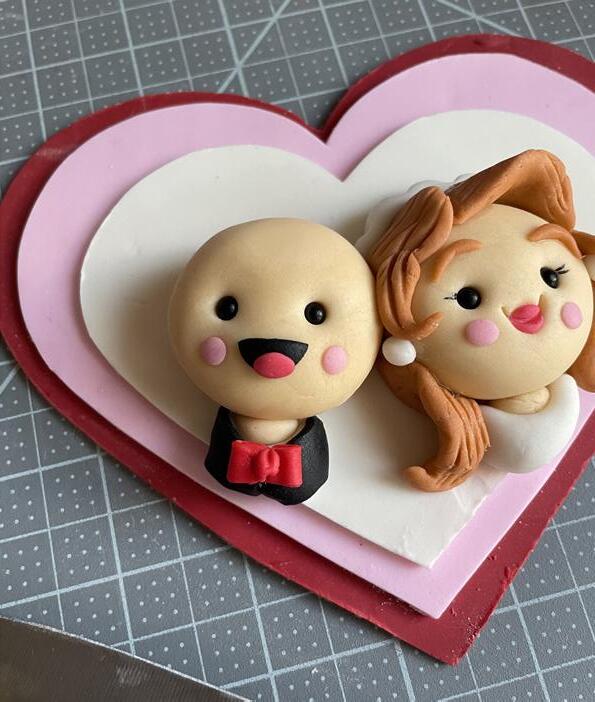
4. To create the groom’s tux, add some black modeling paste around the white.
5. Create a small red bow tie on the tux.
6. Using black modeling paste, create the groom’s hair and eyebrows.
7. Using some white and pink modeling paste, create a little boutonnière.
May | June 2023 americancakedecorating.com 29 TUTORIAL
1 2 3 4 5 6 7 3 4 5
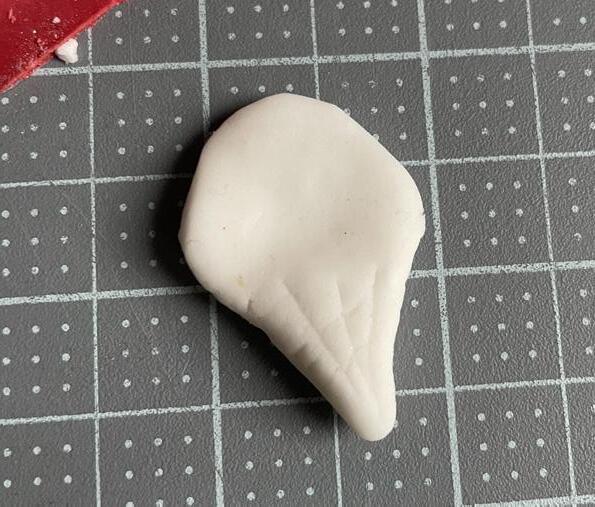
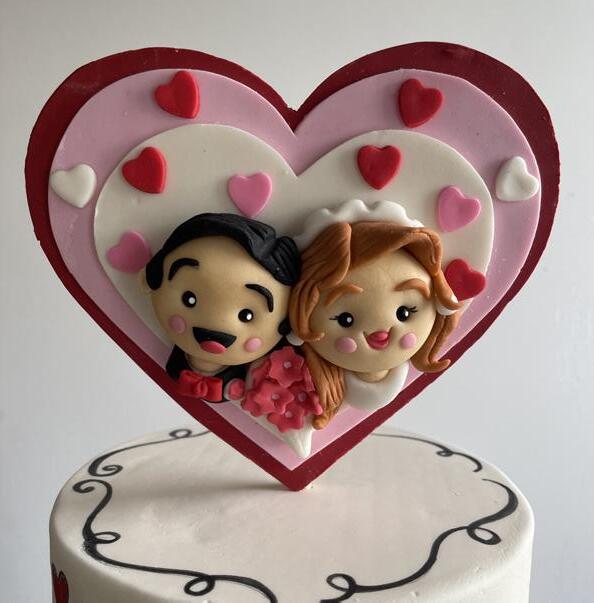
FINISH THE TOPPER
1. To form a bouquet, create a teardrop shape out of white modeling paste and flatten the rounded end.
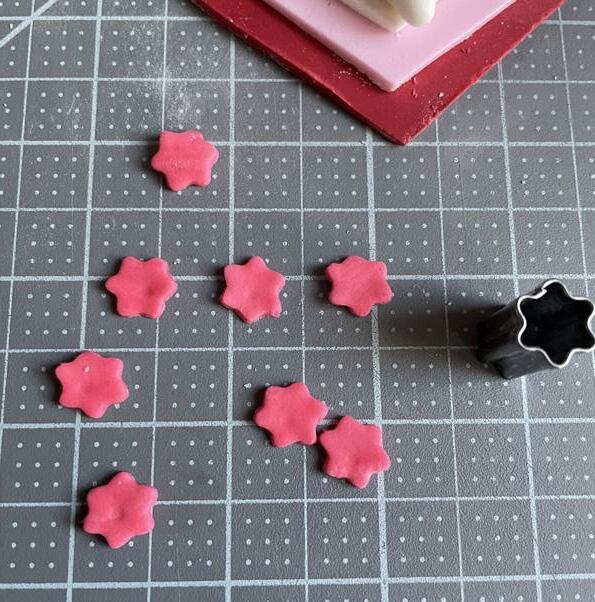
2. Using a small flower cutter, make several pink flowers.
3. Using a little bit of water, place the bouquet between the bride and groom. Attach the flowers by doing the same.
4. Using some edible white paint, add accents to the eyes and to the centers of all the flowers.
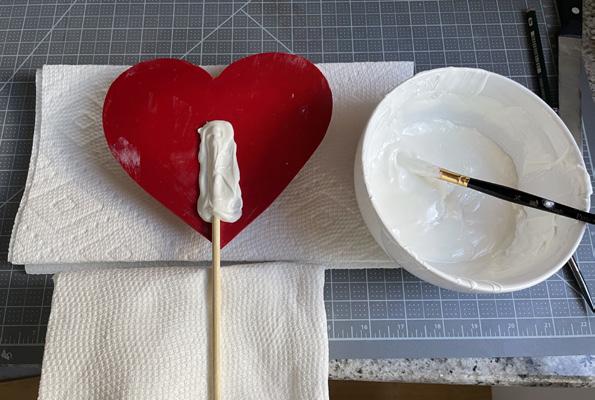
5. Using a small heart cutter, cut out various pieces of pink, red, and white modeling paste.
6. Melt some chocolate and attach a skewer to the back of the heart topper.
7. Using a little bit of water, attach some of those small colored hearts to the topper.

30 americancakedecorating.com May | June 2023 TUTORIAL
1 2 3 4
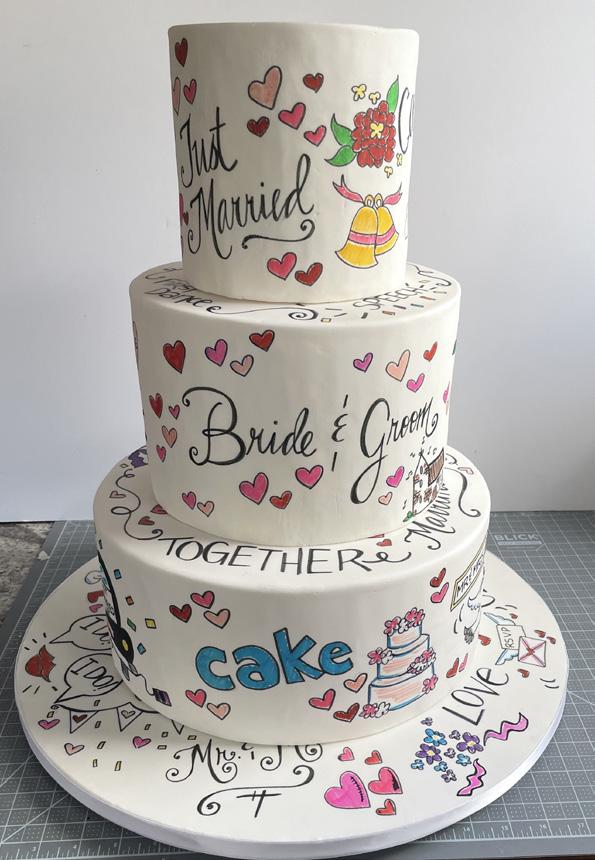
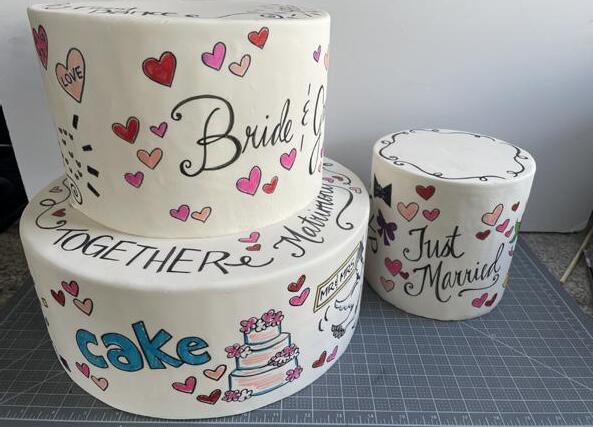
DOODLE THE CAKES
1. Take various colors of edible markers and begin decorating the cakes and the cake drum. Use romantic sayings,
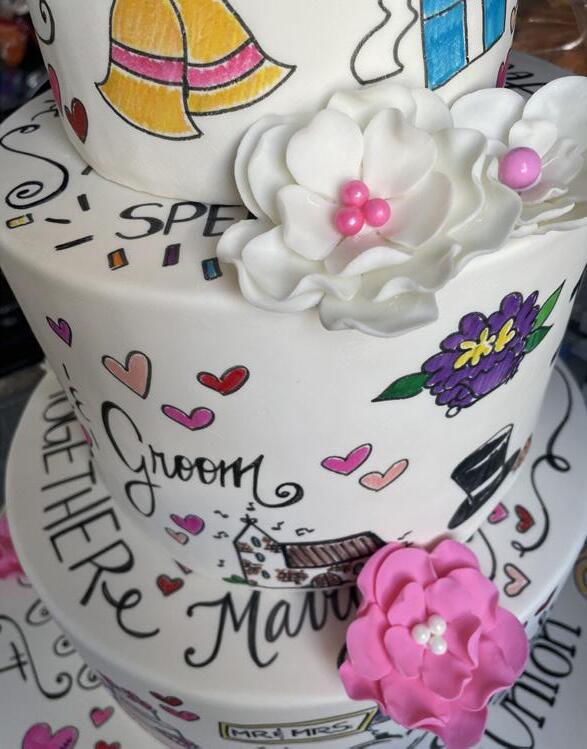
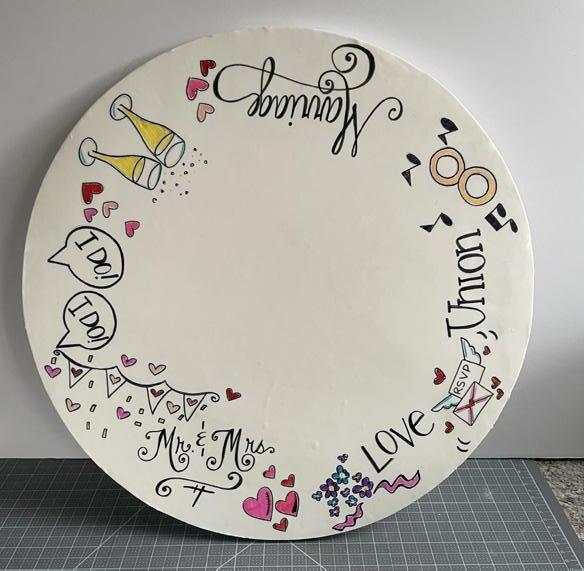
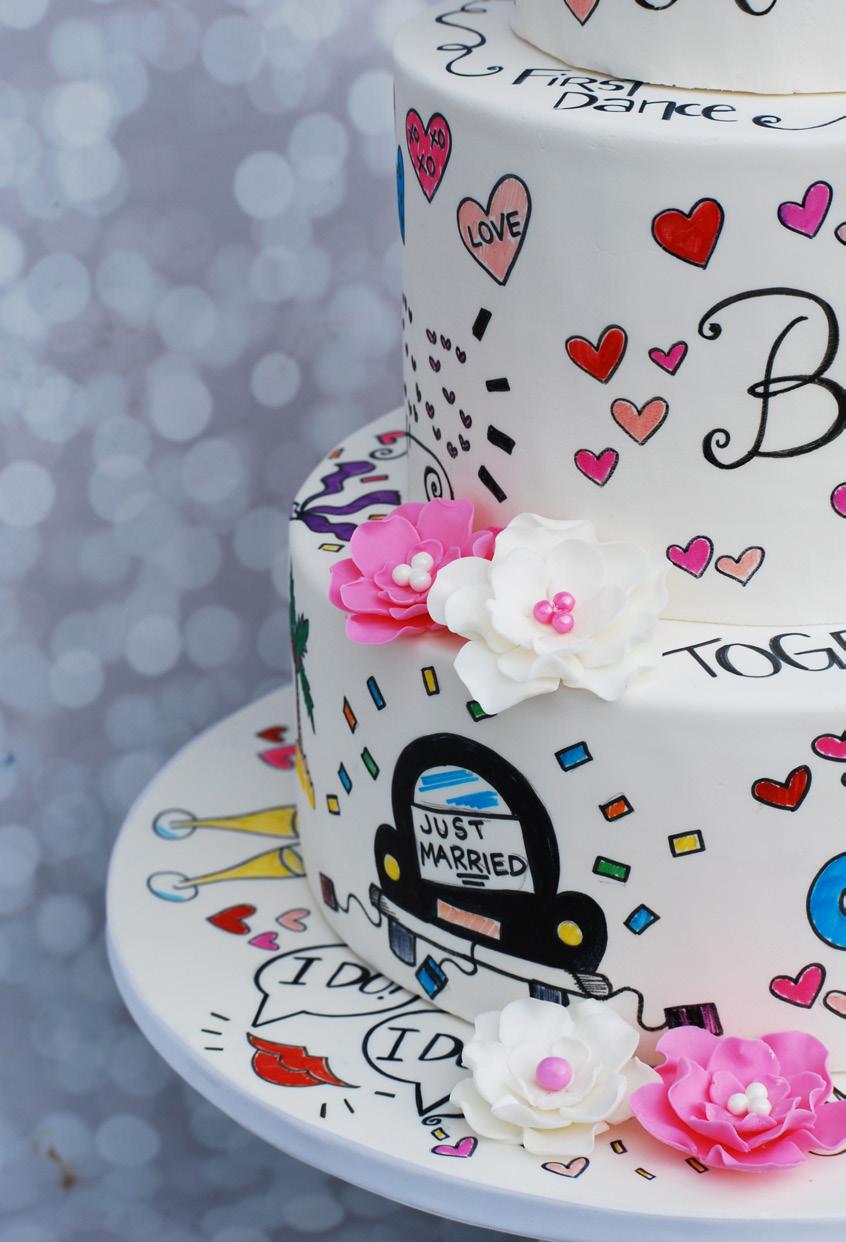
synonyms for the word “marriage,” and any cute wedding- or romantic-themed doodles.
2. Stack the cakes and figure out the placing before securing all of the tiers.
pearls, create the centers of all your flowers. Attach them with a little piping gel.
4. Attach the flowers how would like them to appear on your cake. ACD
ADD THE FINAL DETAILS
1. Attach the topper to the cake.
2. Take the set flowers and stack them to create dimension.
3. Using various-size sugar
May | June 2023 americancakedecorating.com 31 TUTORIAL
5 1a 1b 1 2 4 3 2 6 7
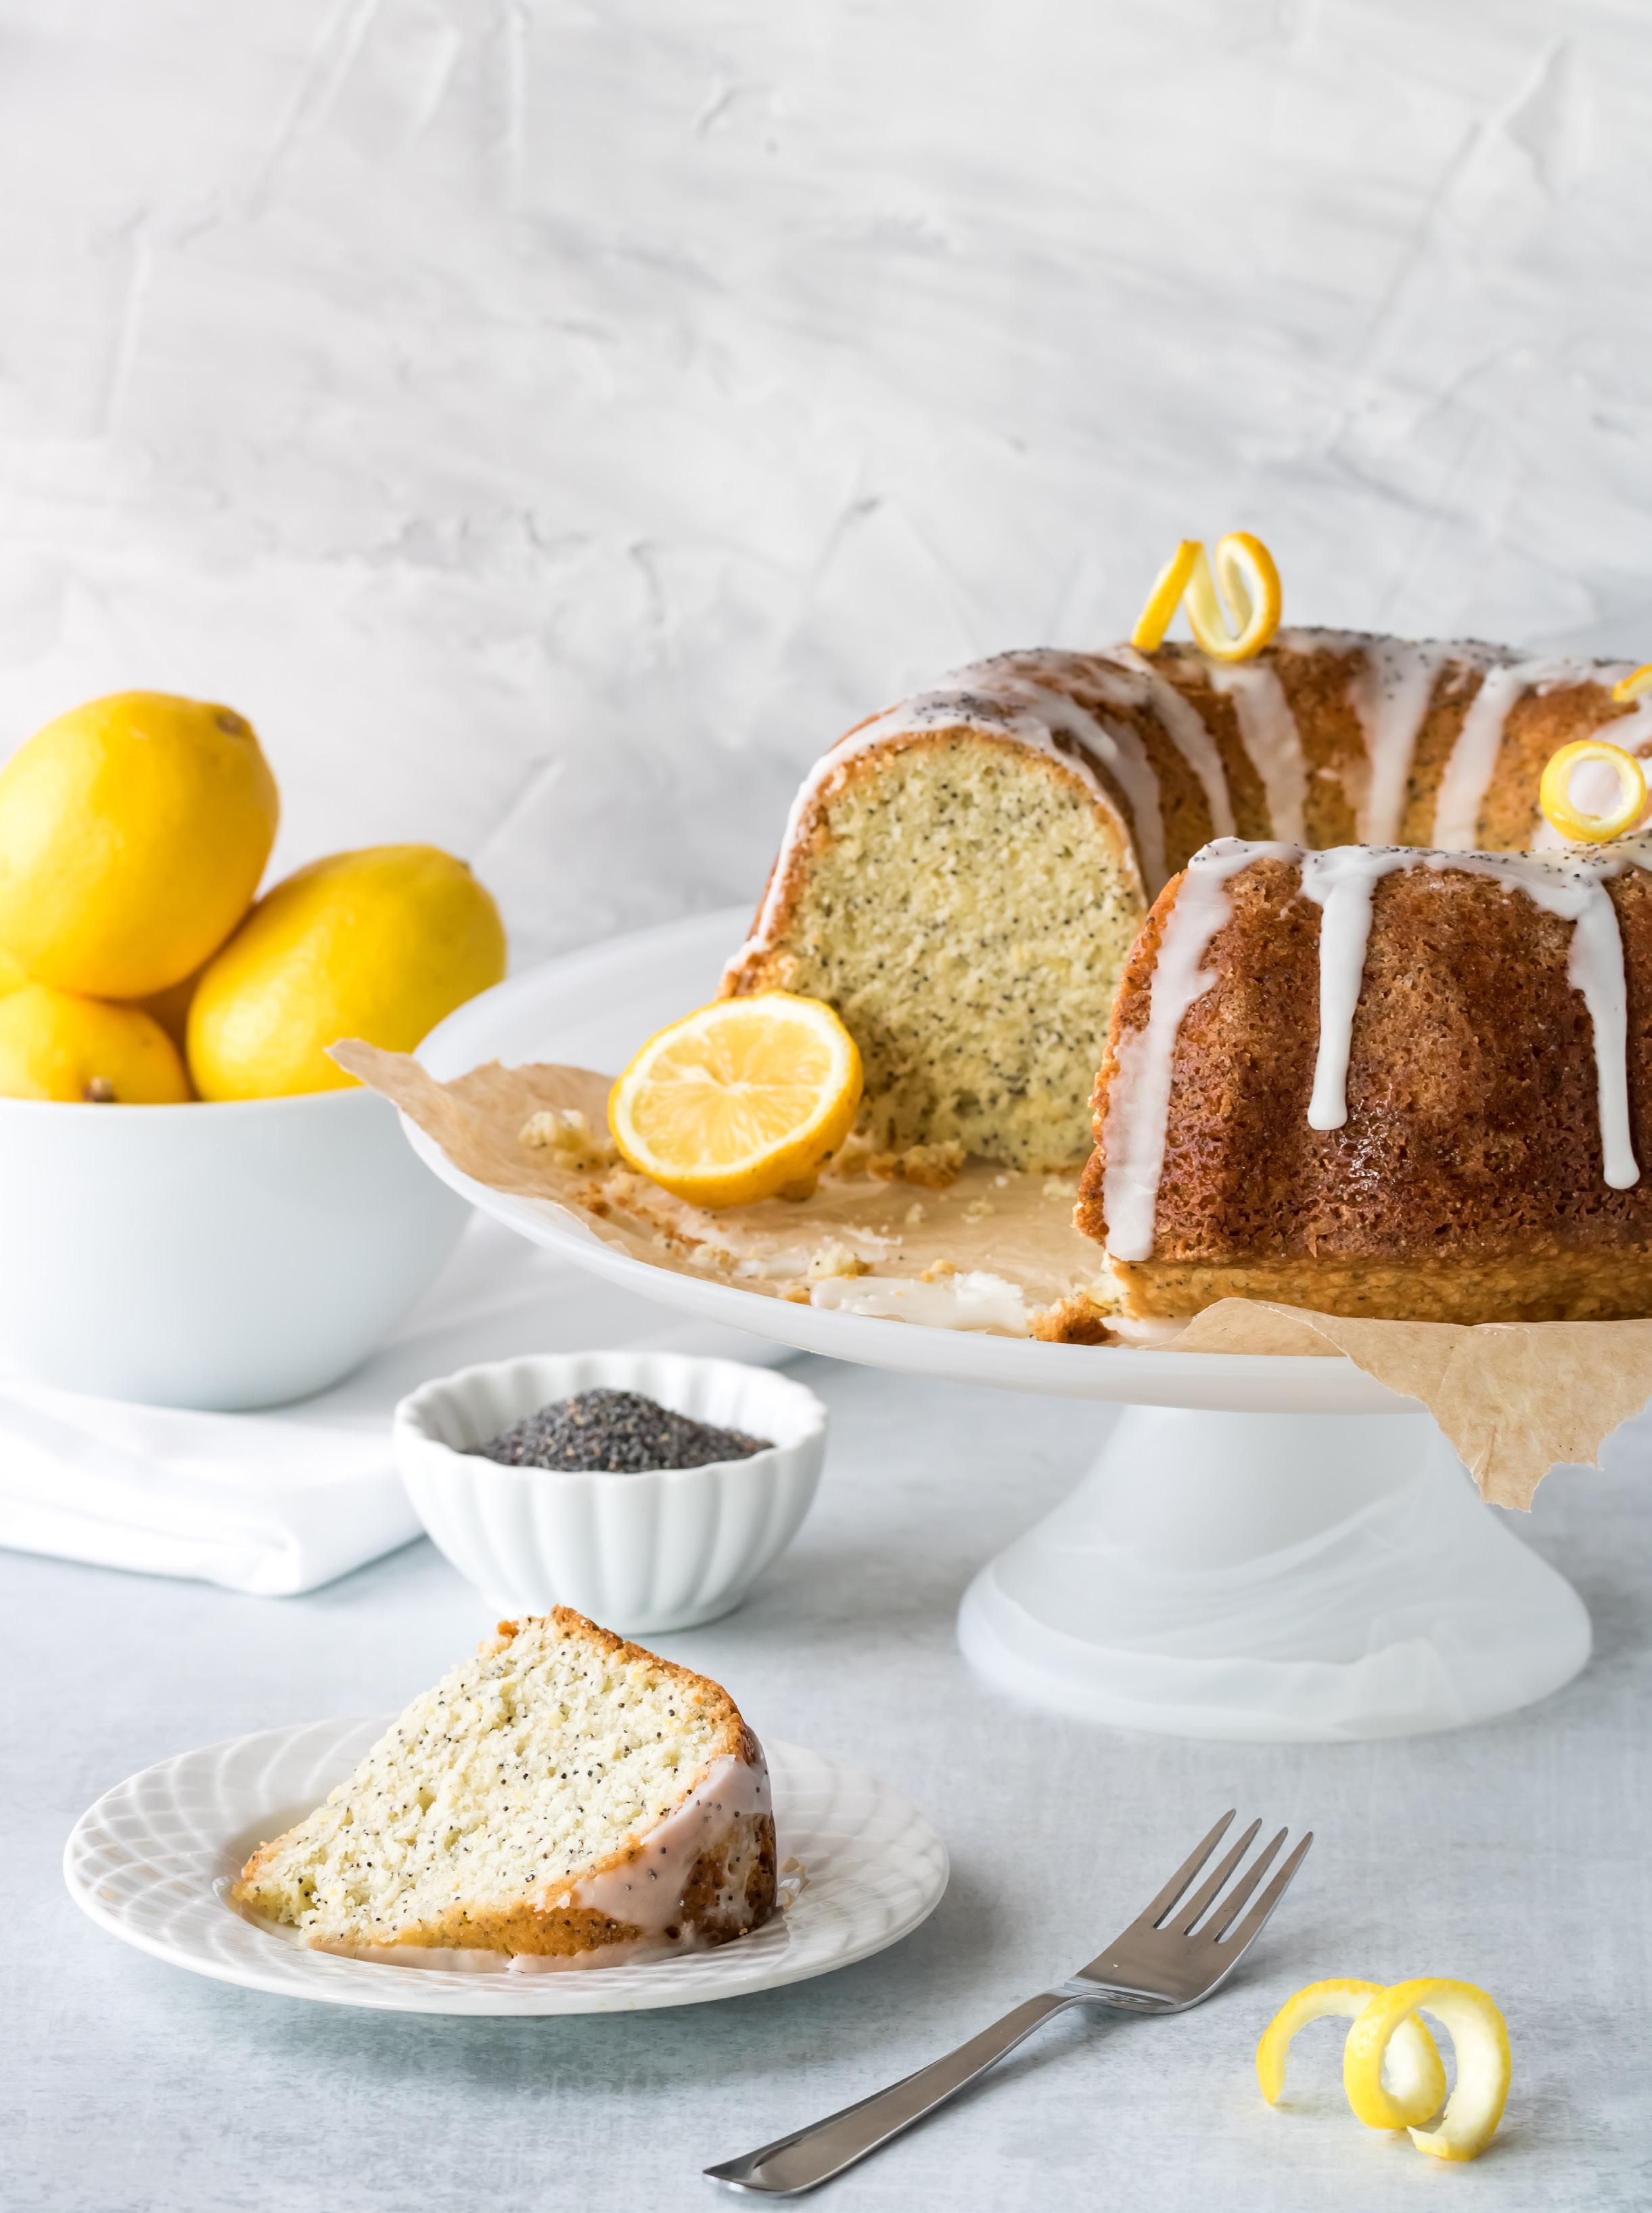
LEMON
POPPY SEED CAKE
BY STEPHANIE ASHCRAFT
LEVEL:
Makes 16 servings
Ingredients
CAKE
1 lemon cake mix
1 small box lemon instant pudding
2 tablespoons poppy seeds
4 eggs
¼ cup vegetable oil
¼ cup applesauce
1 cup water
GLAZE
⅓ cup lemon juice
1⅓ cups powdered sugar
Instructions
1. Preheat oven to 350 degrees.
2. In a large bowl, mix all cake ingredients together until smooth. Pour batter into a
greased and floured bundt pan and bake 50 minutes.
3. Invert hot cake onto a platter. Mix lemon juice with powdered sugar. Pierce the top of the cake generously with a fork and pour icing onto hot cake. Allow icing to soak into cake 5 minutes. ACD
HELPFUL HINTS
• Always beat cake batter with an electric mixer for at least 2 minutes.
• Always grease and flour the cake pan or spray it with oil.
• Bake cakes on the middle oven rack, never on the top or bottom racks.
• To see if a cake is done, insert a toothpick into the center—if it comes out clean, it’s done. If the cake springs back when touched, that also means it’s done.
Excerpted from 101 Things to Do with a Cake Mix by Stephanie Ashcraft. Copyright 2023.
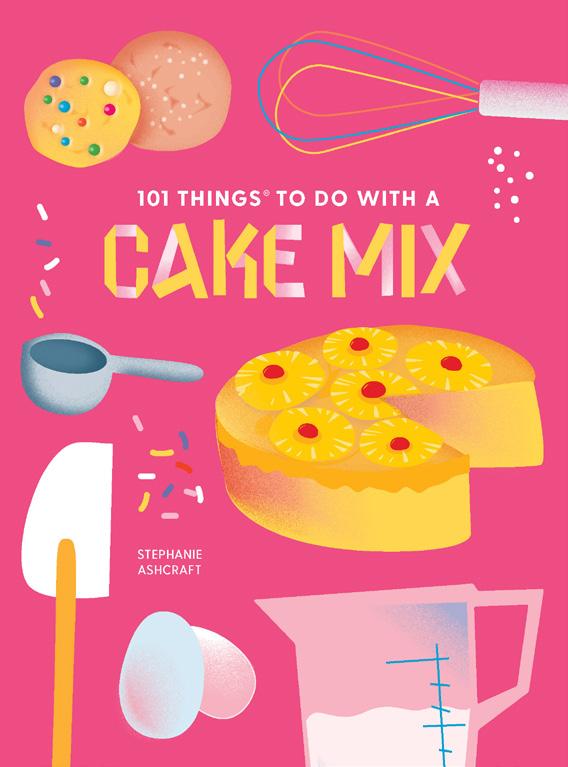
Published with permission from Gibbs Smith.
• The first time you try a recipe, check the cake 5 minutes before its minimum cooking time ends—each oven heats differently.
32 americancakedecorating.com May | June 2023 BAKE THE BOOK
BAKE THE BOOK
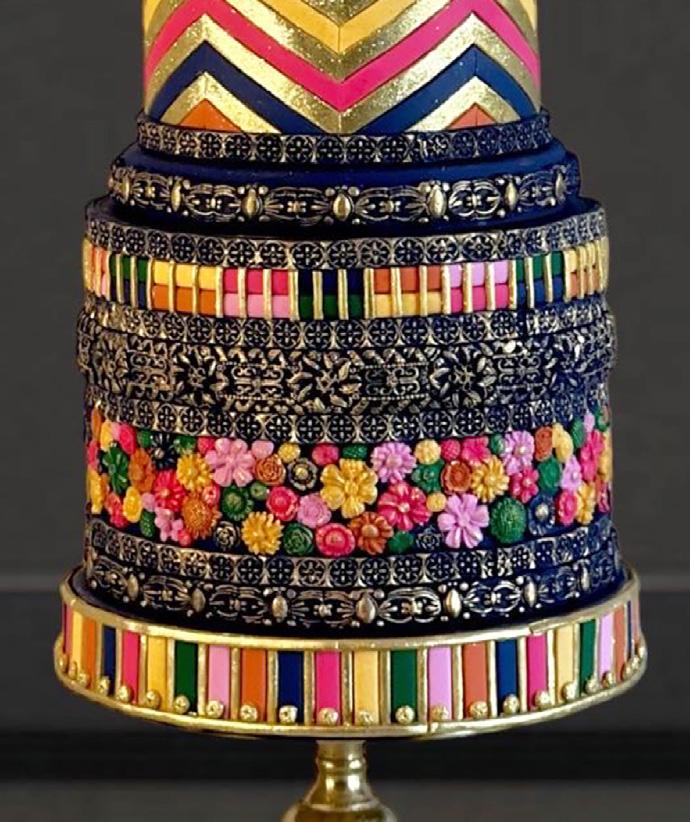
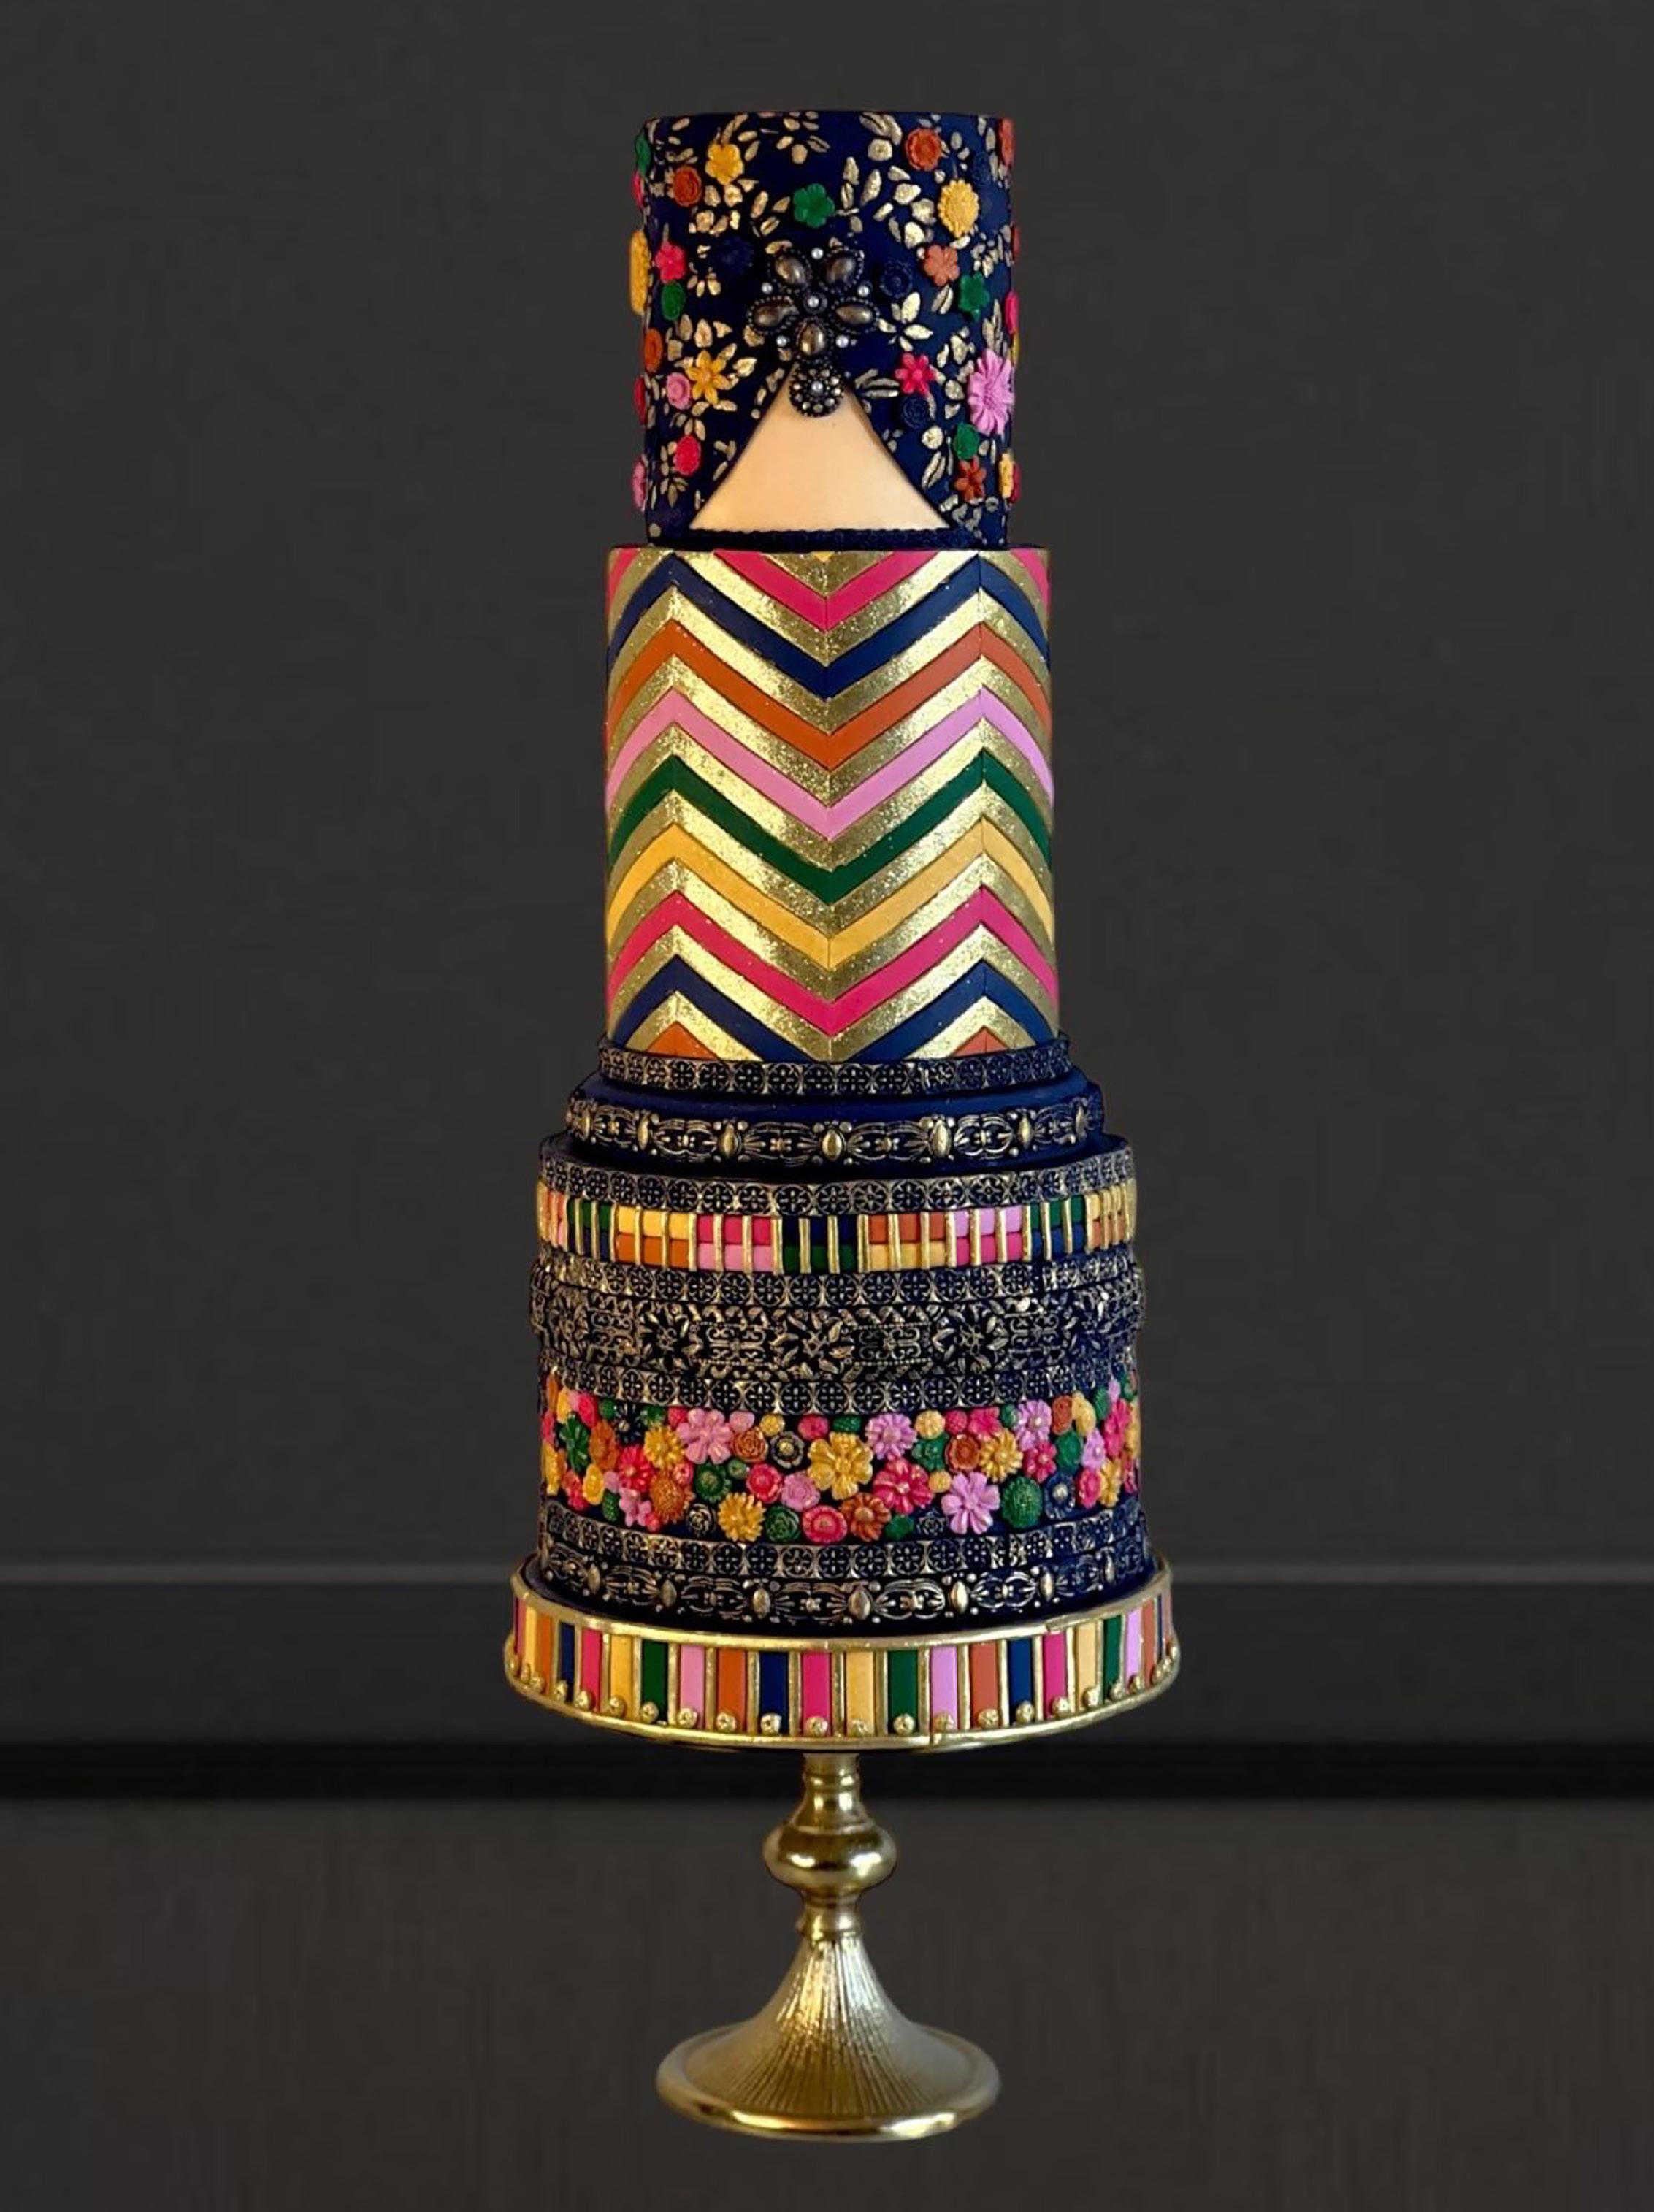
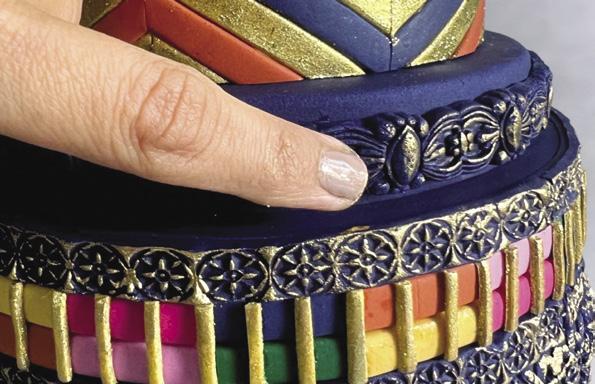
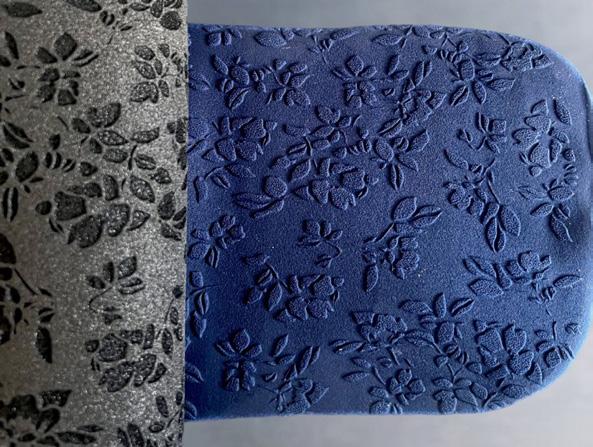
RANG-O-NOOR
BY POOJA NANDA SAREEN
COMPONENTS
Inspiration
Edibles:
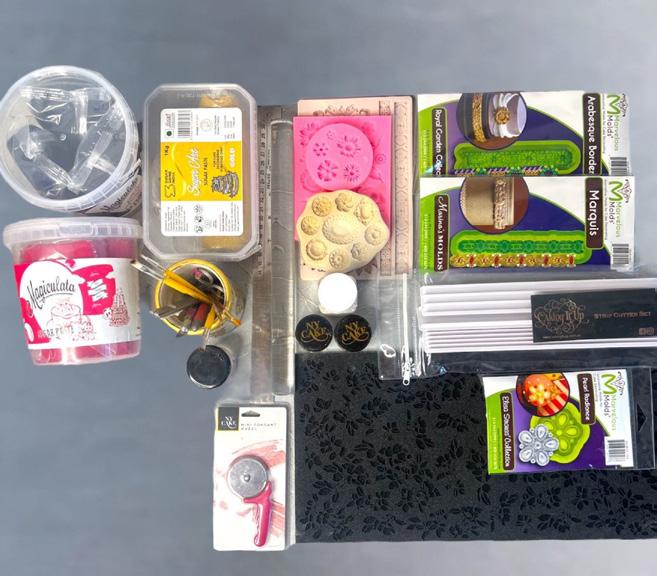
Fondant: navy blue, fuchsia, emerald green, light pink, burnt orange, and yellow (Magic Colours)
Gold sugar paste (Sugar Shine India)
Vegetable shortening
Piping gel
Gold luster dust (NY Cake)
Vodka
White pearl dragées
Equipment:
Parchment paper
Pencil
Measuring scale
X-Acto knife
Paintbrushes
Arabesque mold (Marvelous Molds)
Agadir mold (Redesign with Prima)

Small floral silicone mold
Floral foam stamp
Rolling pin
for
Strip cutters: #2 and #3 (Caking It Up)
Pooja Nanda Sareen, from Sugar Fancies by Pooja, is an international award-winning cake artist from New Delhi, India. Her cakes are renowned for their novelty, elegance, and intricate design with a flair for craftsmanship. Her versatile works include mainly couture cakes, sugar flowers, chandelier cakes, and wedding cakes with the use of various skilled techniques. She is also known as one of the predominant instructors in the cake industry of India, as well as across the globe online.
facebook.com/sugarfanciesbypooja

instagram.com/sugarfanciesbypooja
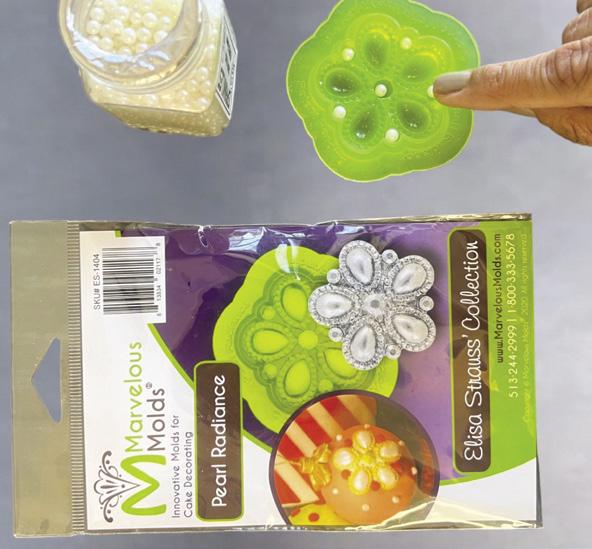
Pearl radiance mold (Marvelous Molds)
34 americancakedecorating.com May | June 2023 TUTORIAL
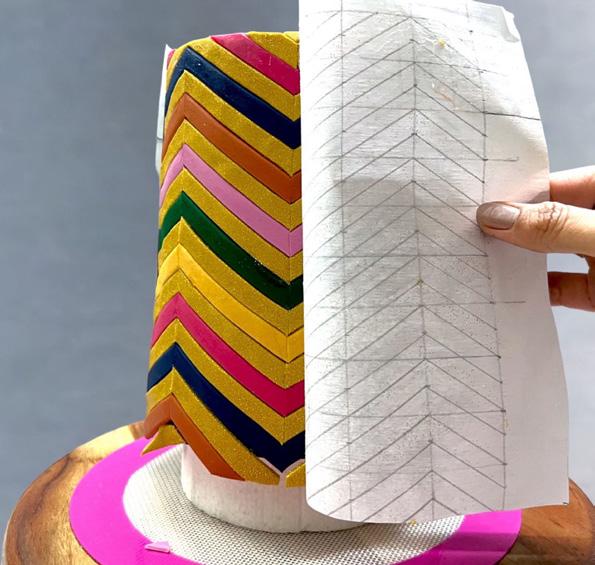
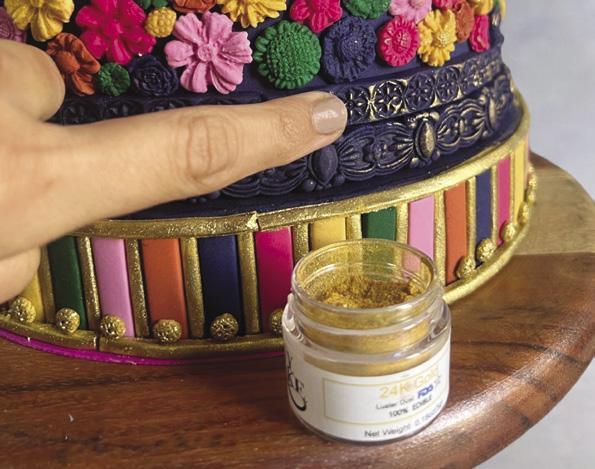
This cake translates to “glistening beauty” and is inspired by the vibrant and ornate details of an outfit.
WHAT YOU NEED Pooja’s cake
LEVEL:
TUTORIAL
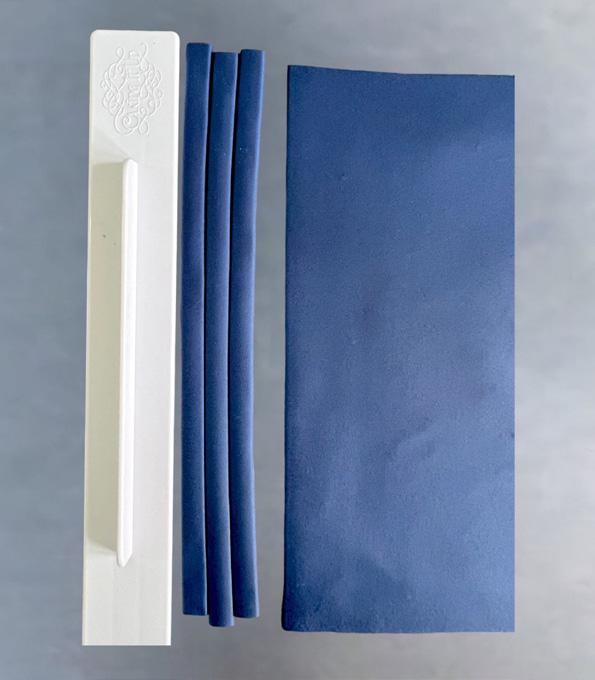
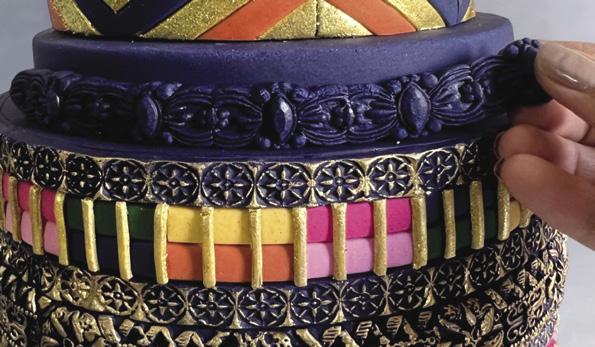
MAKE THE MIDDLE TIER
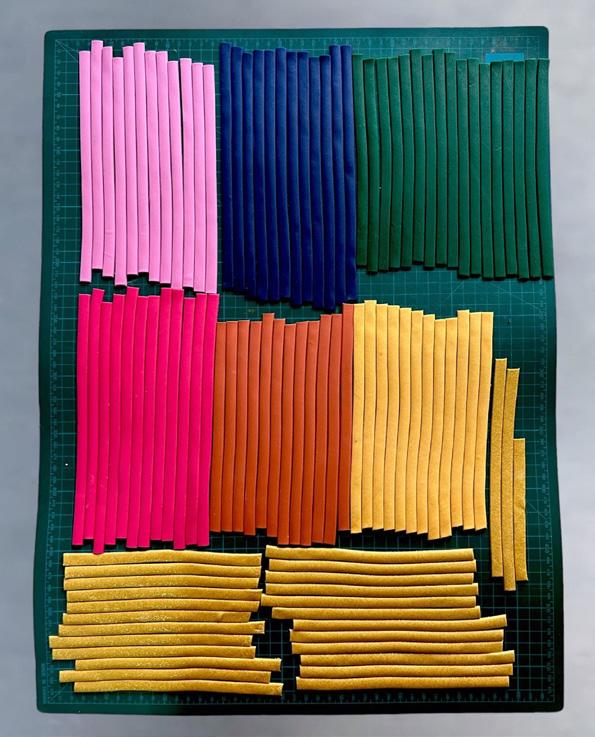
1. Using a #2 strip cutter, cut strips of all 6 colors of fondant and set them aside to dry for 30 minutes.
2. Repeat the same process with gold sugar paste.
3. Using a pencil and a measuring scale, draw a chevron pattern on parchment paper. Flip the parchment paper over and apply a very thin layer of vegetable shortening all over the paper.
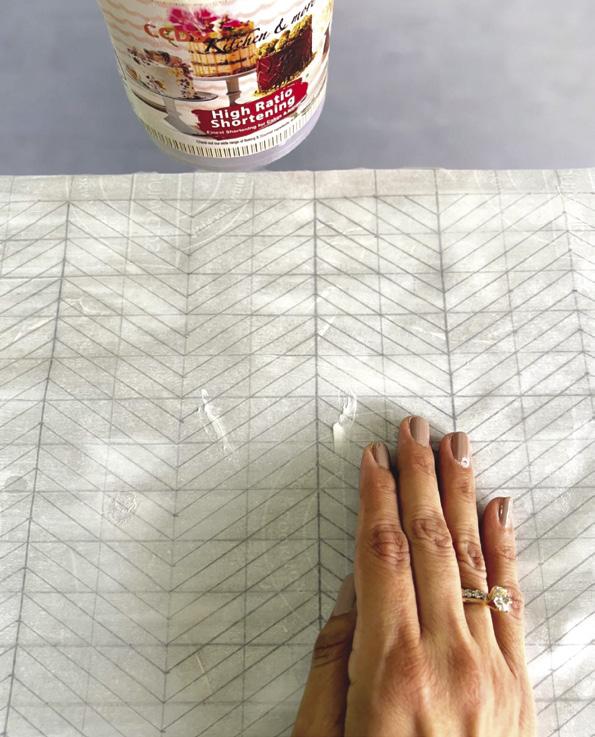
4. Apply the fondant strips and alternate them with the gold strips to create a pattern.
5. Once all the strips are done, cut the extra from the sides, aligning the chevron pattern.
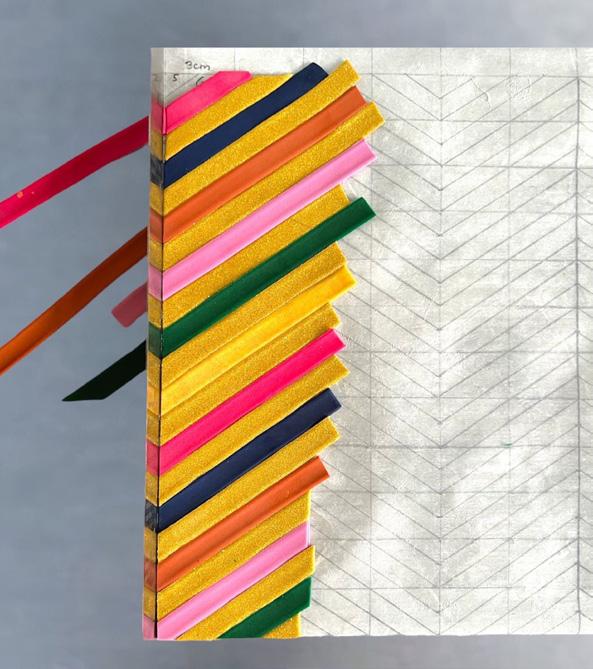
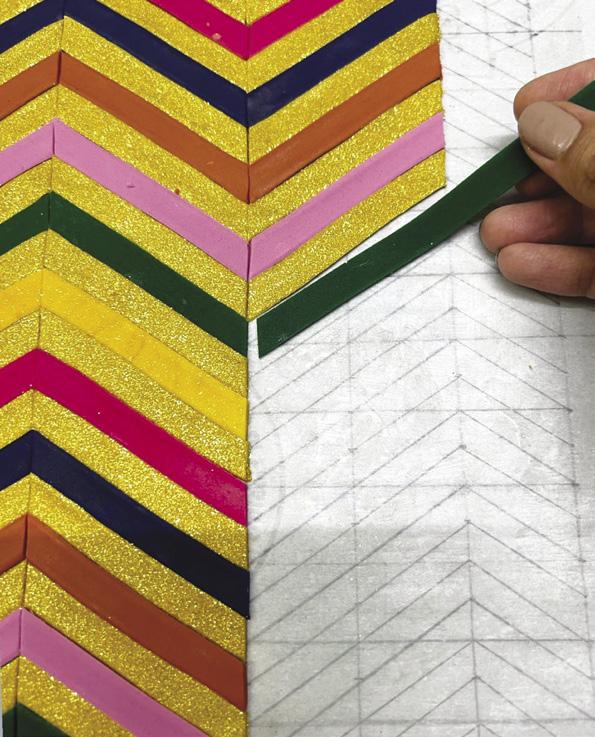
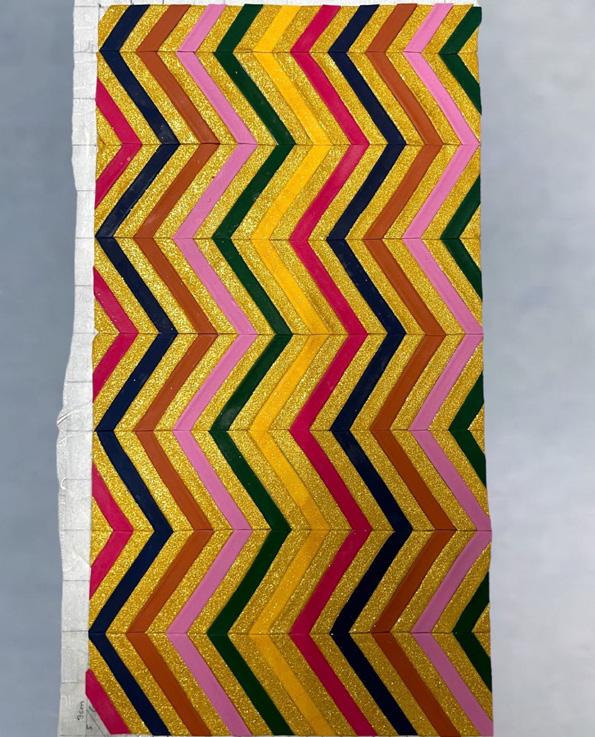
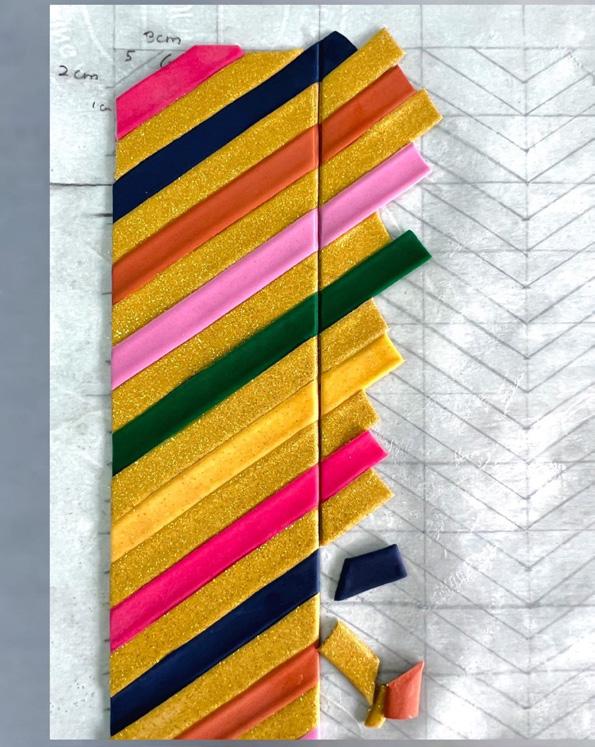
6. Continue applying the strips until the parchment paper is covered.
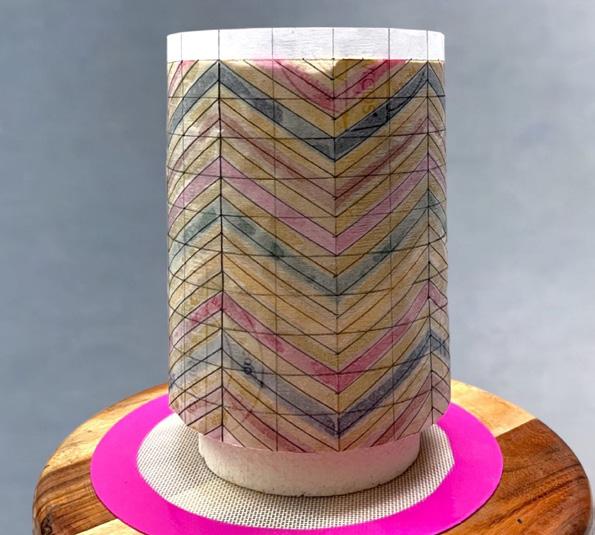
7. Brush the surface with piping gel, wrap the chevron pattern around the cake, and gently massage it all around.
8. Carefully remove the parchment paper from the cake to reveal the chevron pattern.
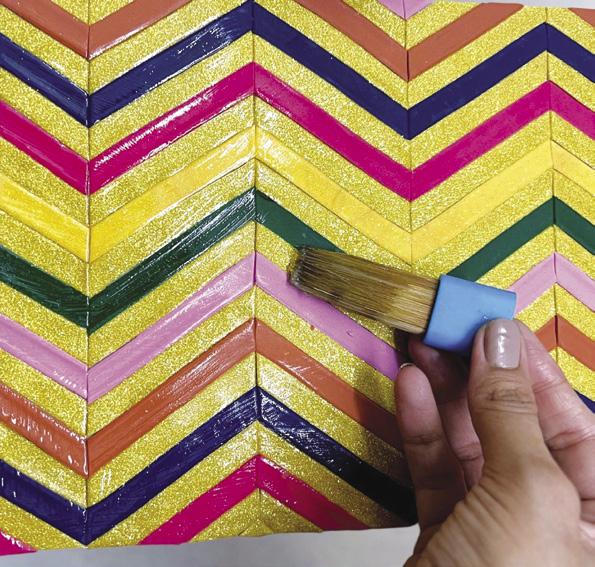
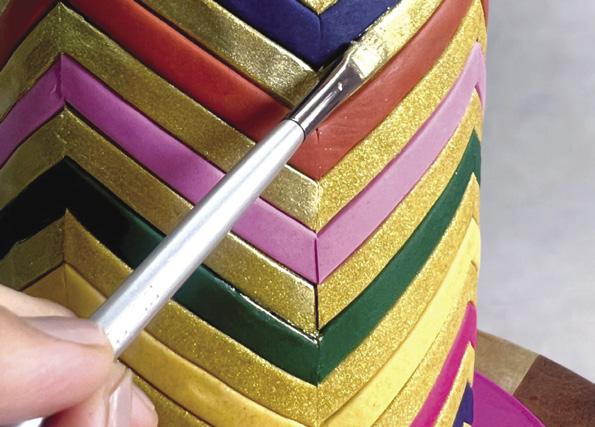
9. Dilute some gold luster dust with vodka and paint the mixture over all the golden strips to achieve a brighter look.
36 americancakedecorating.com May | June 2023 TUTORIAL
1 5
2 3 4
6b 7a 6a
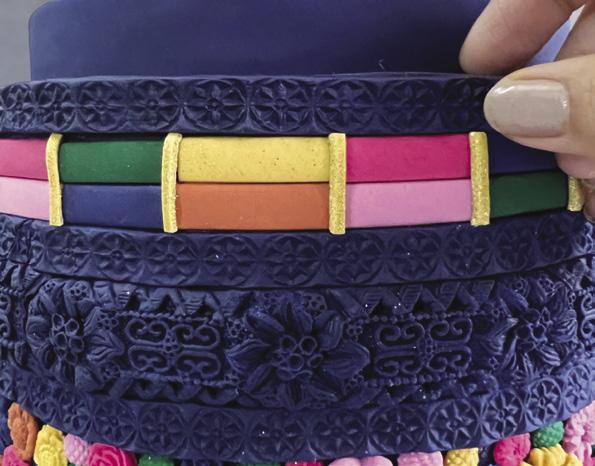
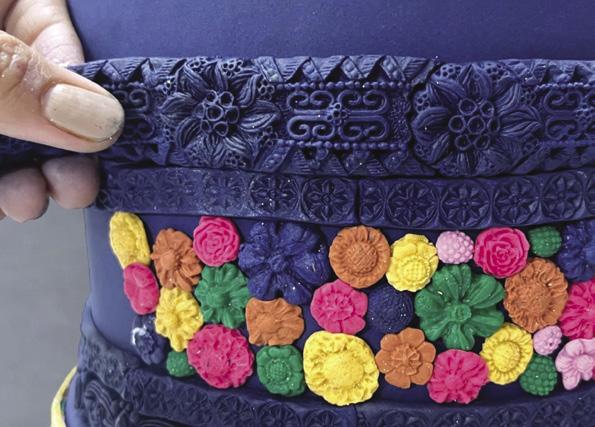
MOLD THE BOTTOM TIER

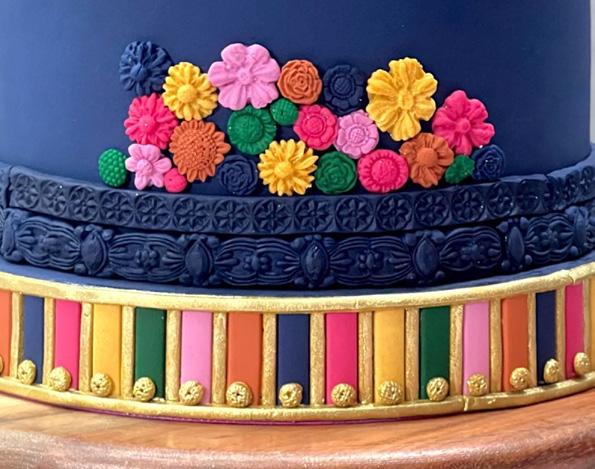
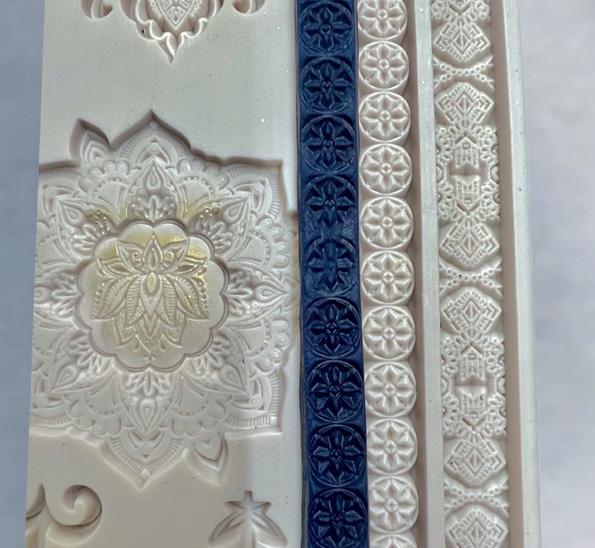
1. Add navy fondant to the arabesque and agadir molds.
2. Remove the molded pieces of fondant and attach them to the bottom tier.
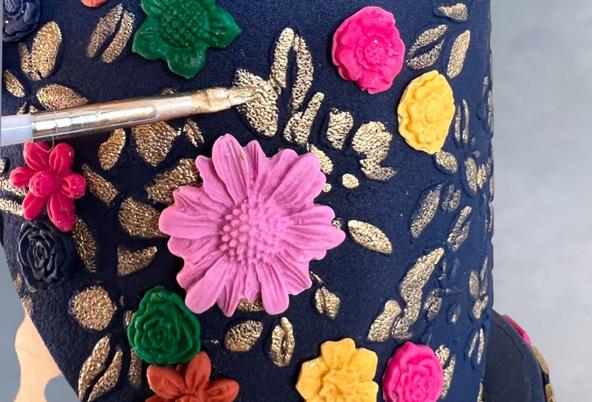
3. Using any small floral silicone mold, create different-size flowers in all 6 fondant colors and apply them in clusters.
4. Apply another layer of the navy fondant molded in the arabesque and agadir molds.
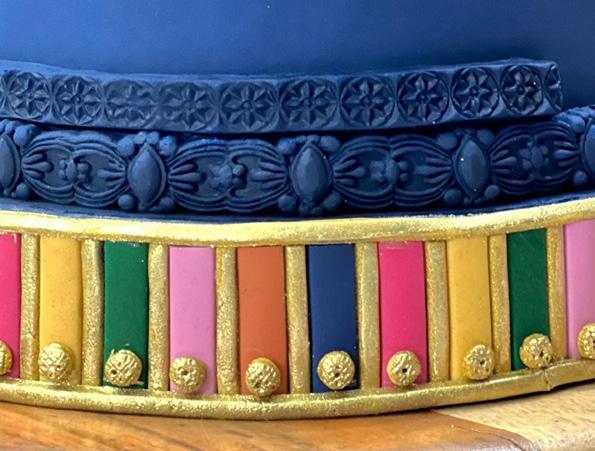
5. Take more 1-inch fondant strips of all 6 colors and apply them horizontally. Create 2 layers.
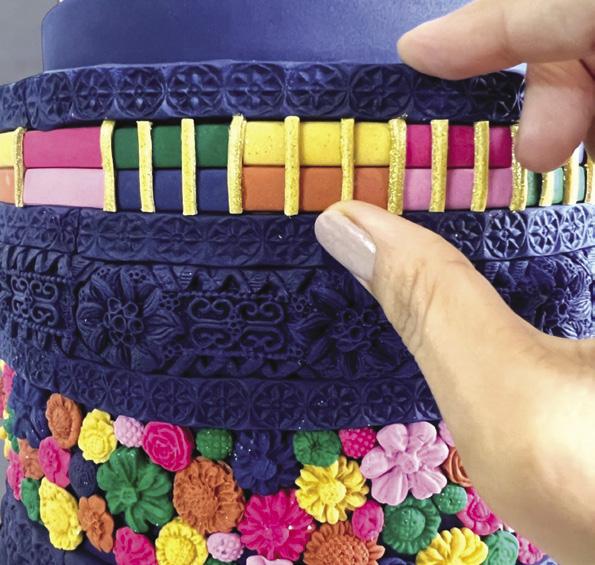
6. Using 1-inch thin gold strips,
apply them vertically between the joints of the colored fondant and then another 2 gold strips in between.
7. Apply 1 more layer of navy fondant pressed in the agadir mold.
8. Gently rub gold luster dust all over the navy fondant borders.


May | June 2023 americancakedecorating.com 37 TUTORIAL
1a 1b 2 3a 7b 8 9
3b 4 5 6a 6b 7
ADD THE MIDDLETIER SEPARATOR
1. Add navy fondant to the arabesque mold and attach it to the middle-tier separator.
2. Rub gold luster dust over the pattern.
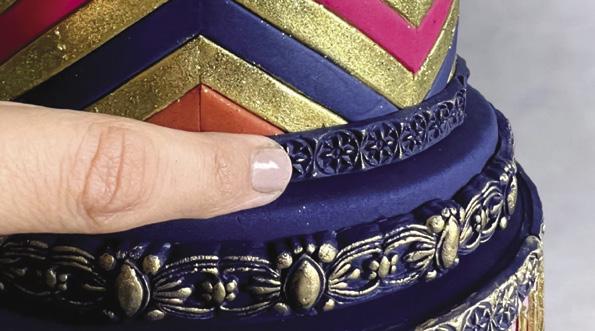
3. Apply 1 more layer of navy fondant pressed into the agadir mold to the bottom of the middle tier.
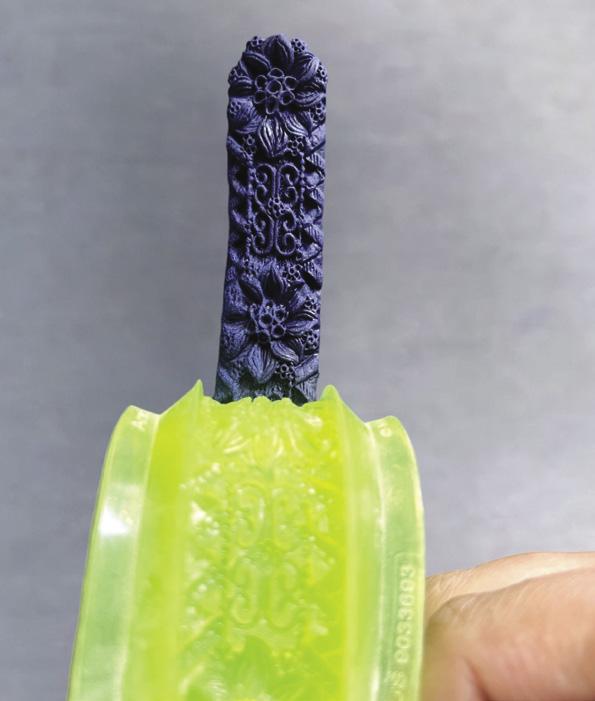
it with some gold luster dust.
3. Apply small flowers in colored fondant on top. Allow them to rest 5 to 10 minutes.
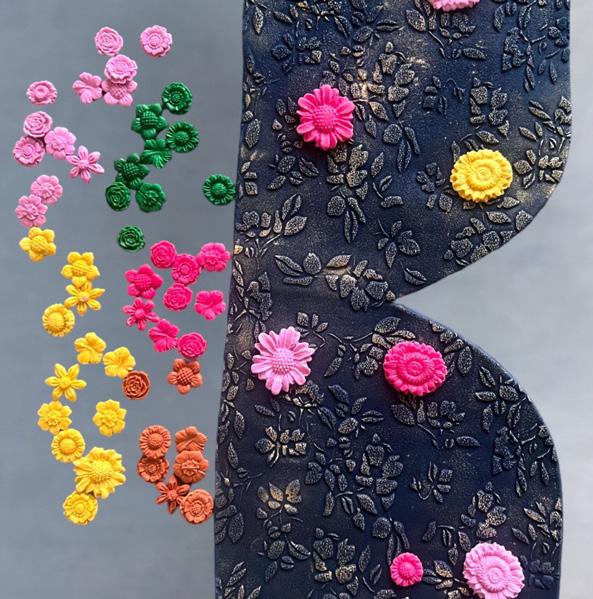
4. Apply the fondant onto the cake and repaint the raised pattern with more gold luster dust for extra shine.
5. To create a brooch, add pearl white dragées into the pearl radiance mold and then press a piece of navy fondant into the mold.
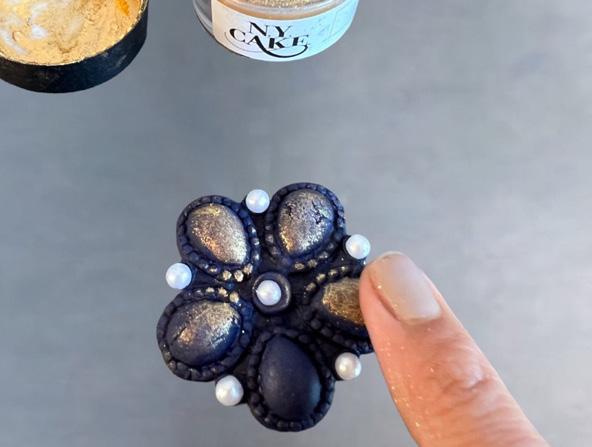
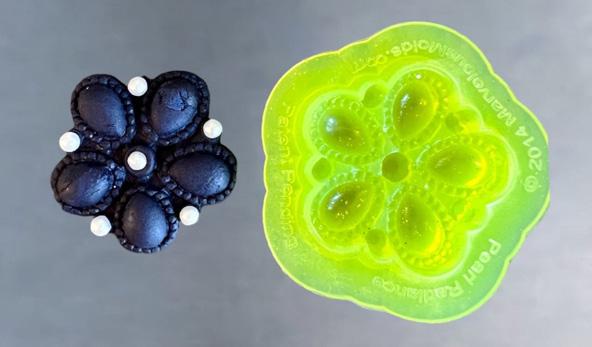
6. Remove the brooch from the mold, dust it with gold luster dust, and attach it to the cake. ACD
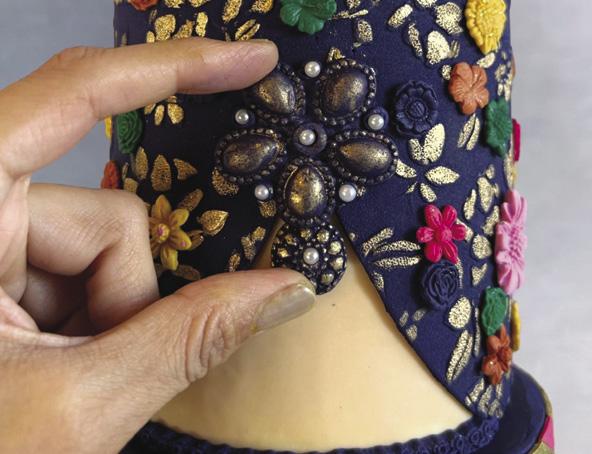
FINISH WITH THE TOP TIER
1. Roll out navy blue fondant and then press it with a floral foam stamp.
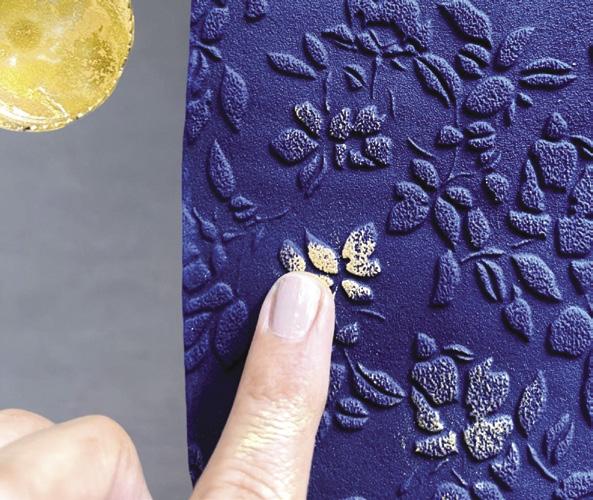
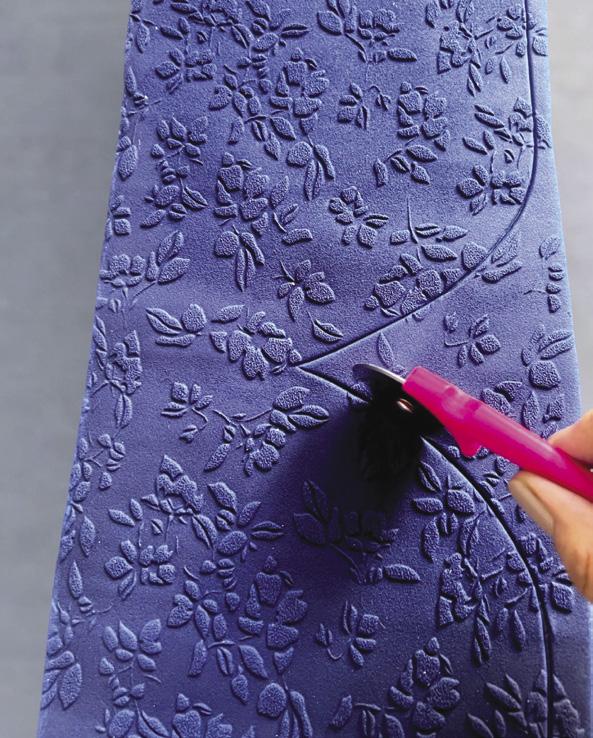
2. Cut the fondant in a shape of a blouse neckline and then rub
38 americancakedecorating.com May | June 2023 TUTORIAL
1 2 1 2a 2b 4 5b 6b 6a 5a 3 8 3


GRAB
AmericanCakeDecorating.com/shop
A PRINT OR DIGITAL ISSUE!
BY CHRISTINA BJORN
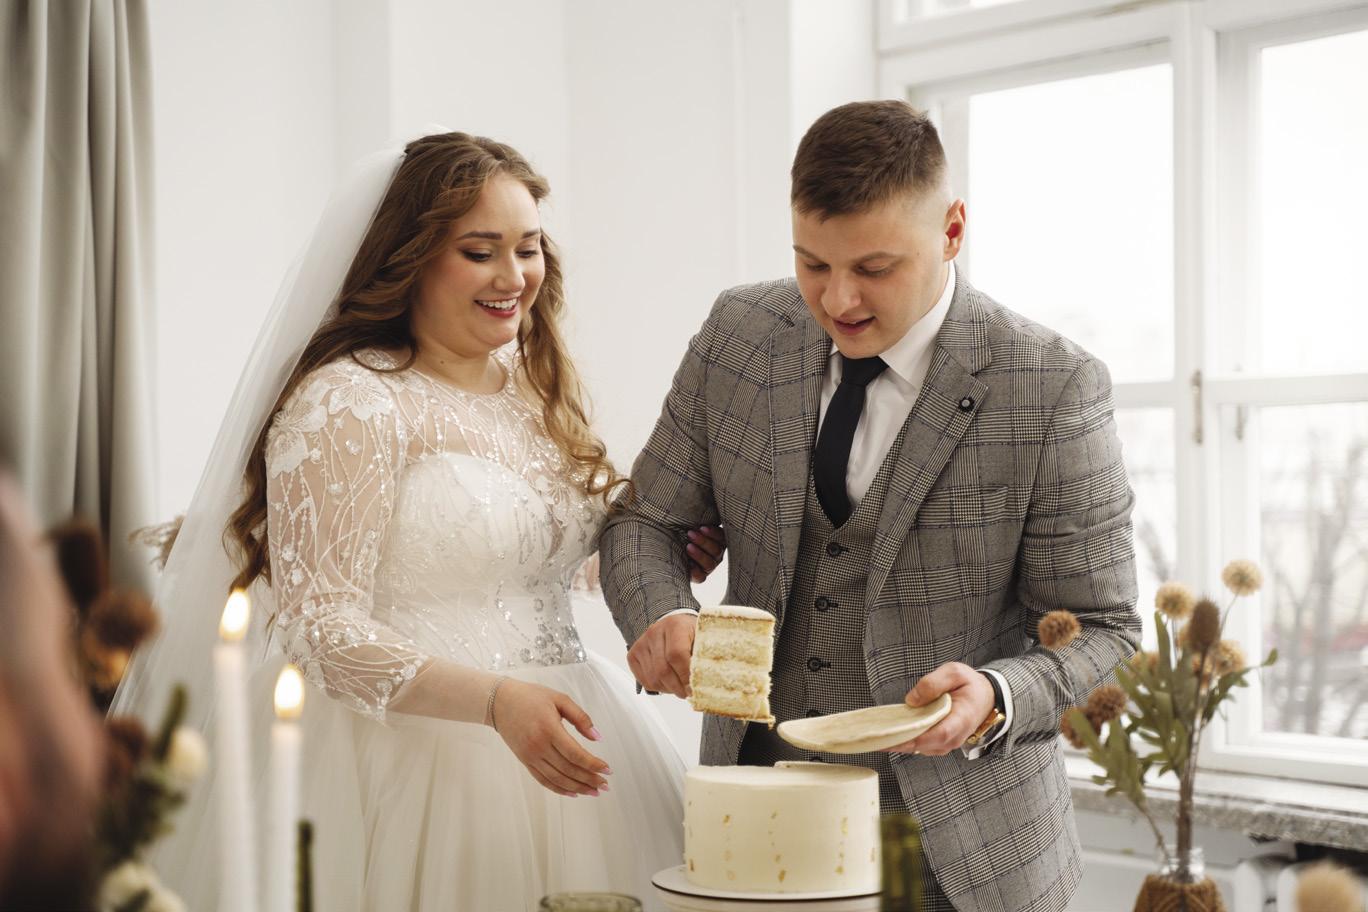
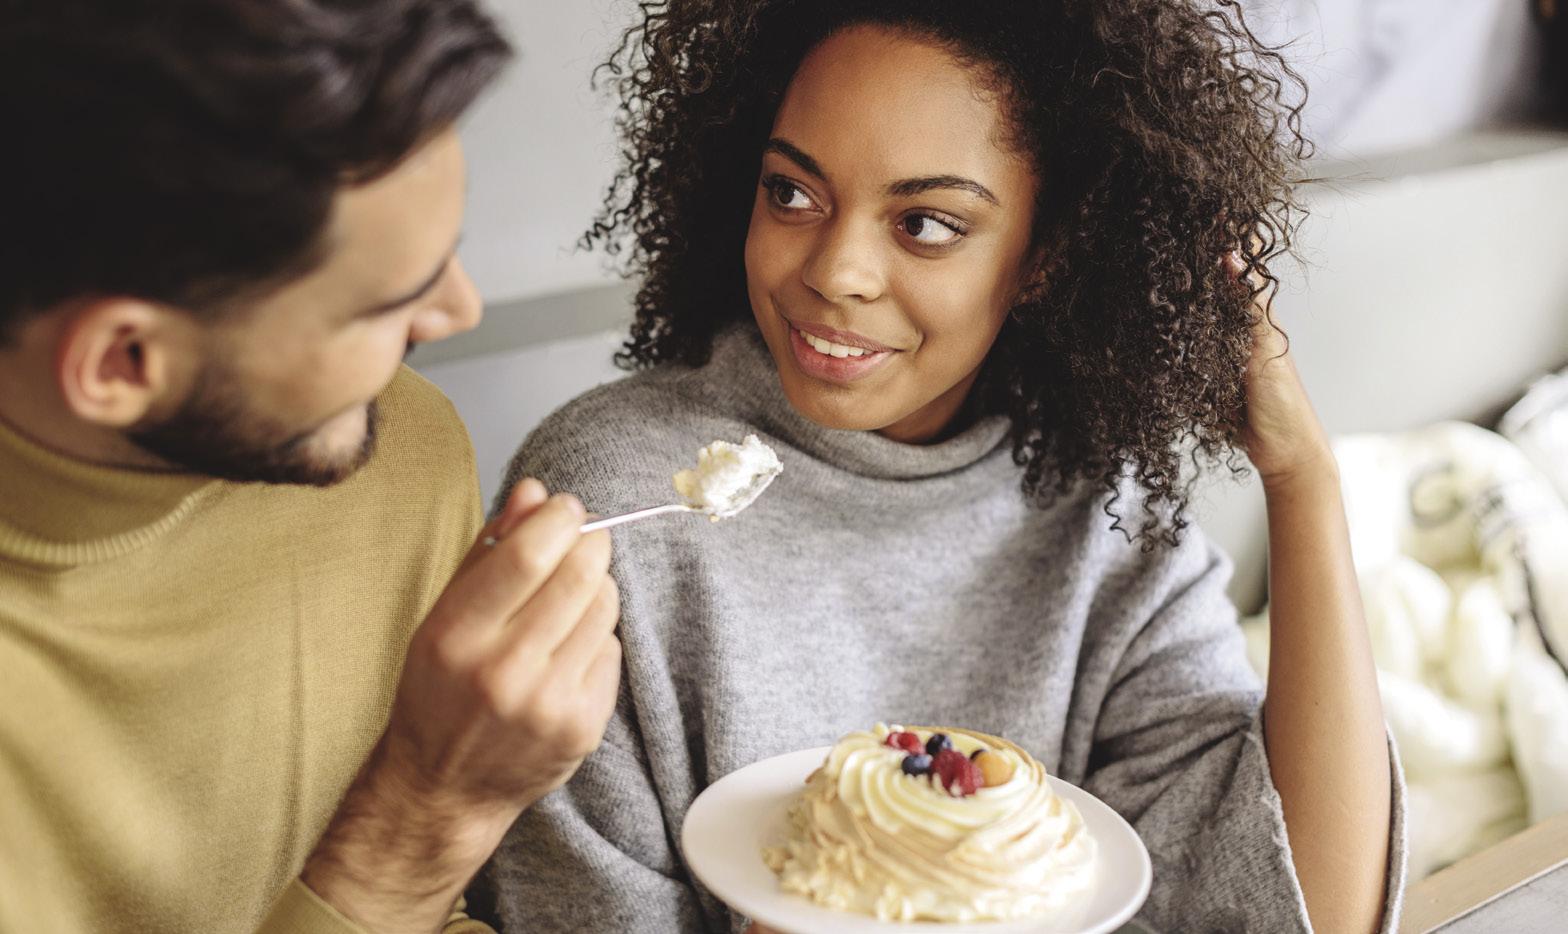
FAVOR Do Yourself a
Awedding cake is not just a dessert: it is a reflection of the couple’s love story and an important aspect of any wedding reception. The design, taste, and flavor of the cake all play a vital role in creating a memorable experience for guests. However, traditional wedding cakes can be expensive and adding individual guest favors to the budget can become an added expense. This is where wedding cakes as guest favors come in as a practical and budget-friendly option to offer to clients. Here, we explore the benefits of suggesting to use a wedding cake as guest favors as well.
SAVE THEM MONEY.
Instead of spending money on both a wedding cake and individual guest favors, they can combine the two. This can significantly cut costs, especially if they’re working with a tight budget. It is a practical option that allows you to provide guests with a delightful treat to enjoy and take home, while also serving as a centerpiece that reflects the couple’s love story.
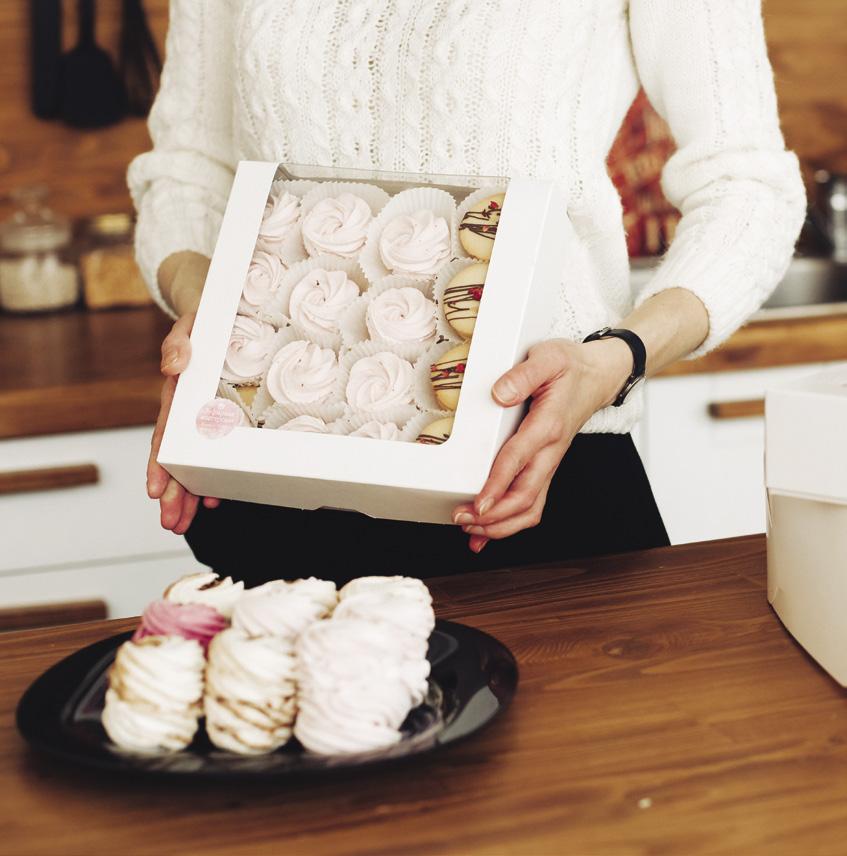
SPECIALIZE WITH PACKAGING.
Whether you choose to package slices or mini cakes in individual boxes or bags, create a dessert charcuterie with other sweets like macarons, cookies, or chocolates or
add personalized stickers or ribbons. The packaging can be an extraspecial touch.
STAY FLEXIBLE WITH SIZES.
You can choose to provide slices, mini cakes, or even cupcakes. Wedding cakes as guest favors offer a multitude of options to choose from, including a vast array of flavors and designs that cater to various tastes and preferences.
CUSTOMIZE FLAVORS.
With the ability to customize the cake to fit the wedding theme, couples can choose from classic flavors like vanilla and chocolate or opt for more unique options such as lavender, rose, or champagne. Additionally, couples
Christina Bjorn is an international award-winning cake artist, cookbook author, and the owner of Not Your Nana’s Bakery. She has traveled the world and across the country to compete in cake competitions and is a highly celebrated baker with many awards and accolades. Along with winning Sugar Rush, the popular Netflix series, she has been featured on Food Network as a competitor and a judge. Christina serves on the board of directors for the Ultimate Sugar Show and is a Sugar Coin Academy Ambassador. She has worked with a wide range of people from corporate events and celebrity clientele; however, at the heart of her business is weddings and it is what she is truly passionate about. She is also part of the sweets industry duo Bake Girl Magic and serves as the host and head judge for the largest dessert competition in the U.S., Dessert Wars. Christina has also been a judge on Food Network’s Buddy vs. Duff and won the Food Network Canada’s The Big Bake and Netflix’s Sugar Rush.
notyournanasbakery.com facebook.com/notyournanasbakery instagram.com/notyournanasbakery
40 americancakedecorating.com May | June 2023 ASK AN EXPERT
can choose from a range of designs, including intricate frosting patterns, edible flowers, or personalized messages to create a unique and unforgettable wedding favor for their guests.
DOUBLE THE DECORATIONS.
Cake favors can also double as decorations. You can place the slices, mini cakes, or cupcakes on a table along with the wedding cake as a display or use them as seat assignment markers for guests. This not only serves as an eye-catching display, but it also helps guests find their seats.
REDUCE WASTE.
When it comes to wedding cakes, many couples face the challenge of trying to balance design and size to ensure there are just enough servings for all their guests and not too much
extra left over. The wedding cake can also be served along with a faux cake or on its own. This way, the couple can enjoy an elaborate wedding cake design but keep the number of servings close to what they need for a smaller guest count. In addition to being a practical solution, serving the wedding cake alongside a faux cake can also add to the overall aesthetic of the reception. The wedding cake is often a visual focal point of the reception and displaying it prominently can enhance the ambience of the event.
CATER TO ALLERGIES.
With wedding cakes as an alternative to traditional favors, there are no limitations on flavor options. Especially if there are allergy concerns for your guests, you can offer a variety of flavors to ensure that everyone’s tastes are catered to.
This provides a way for couples to be mindful of guests with food allergies and still offer a sweet treat that everyone can enjoy.
CUSTOMIZE, CUSTOMIZE, CUSTOMIZE.
You can choose to decorate the slices or mini cakes to fit the wedding theme. This can include adding personalized messages or designs or incorporating the wedding colors into the cake’s frosting or decorations. It is a thoughtful and personal way to thank guests for attending the wedding and serves as a lasting memory of the special day.
Turning a wedding cake into guest favors is a creative, budgetfriendly, and convenient option that guests will love. With a wide range of packaging options, flavors, and designs, it’s easy to customize the cake to fit any type wedding. ACD
May | June 2023 americancakedecorating.com 41 ASK AN EXPERT
Mark & Jenna Marshall table 8
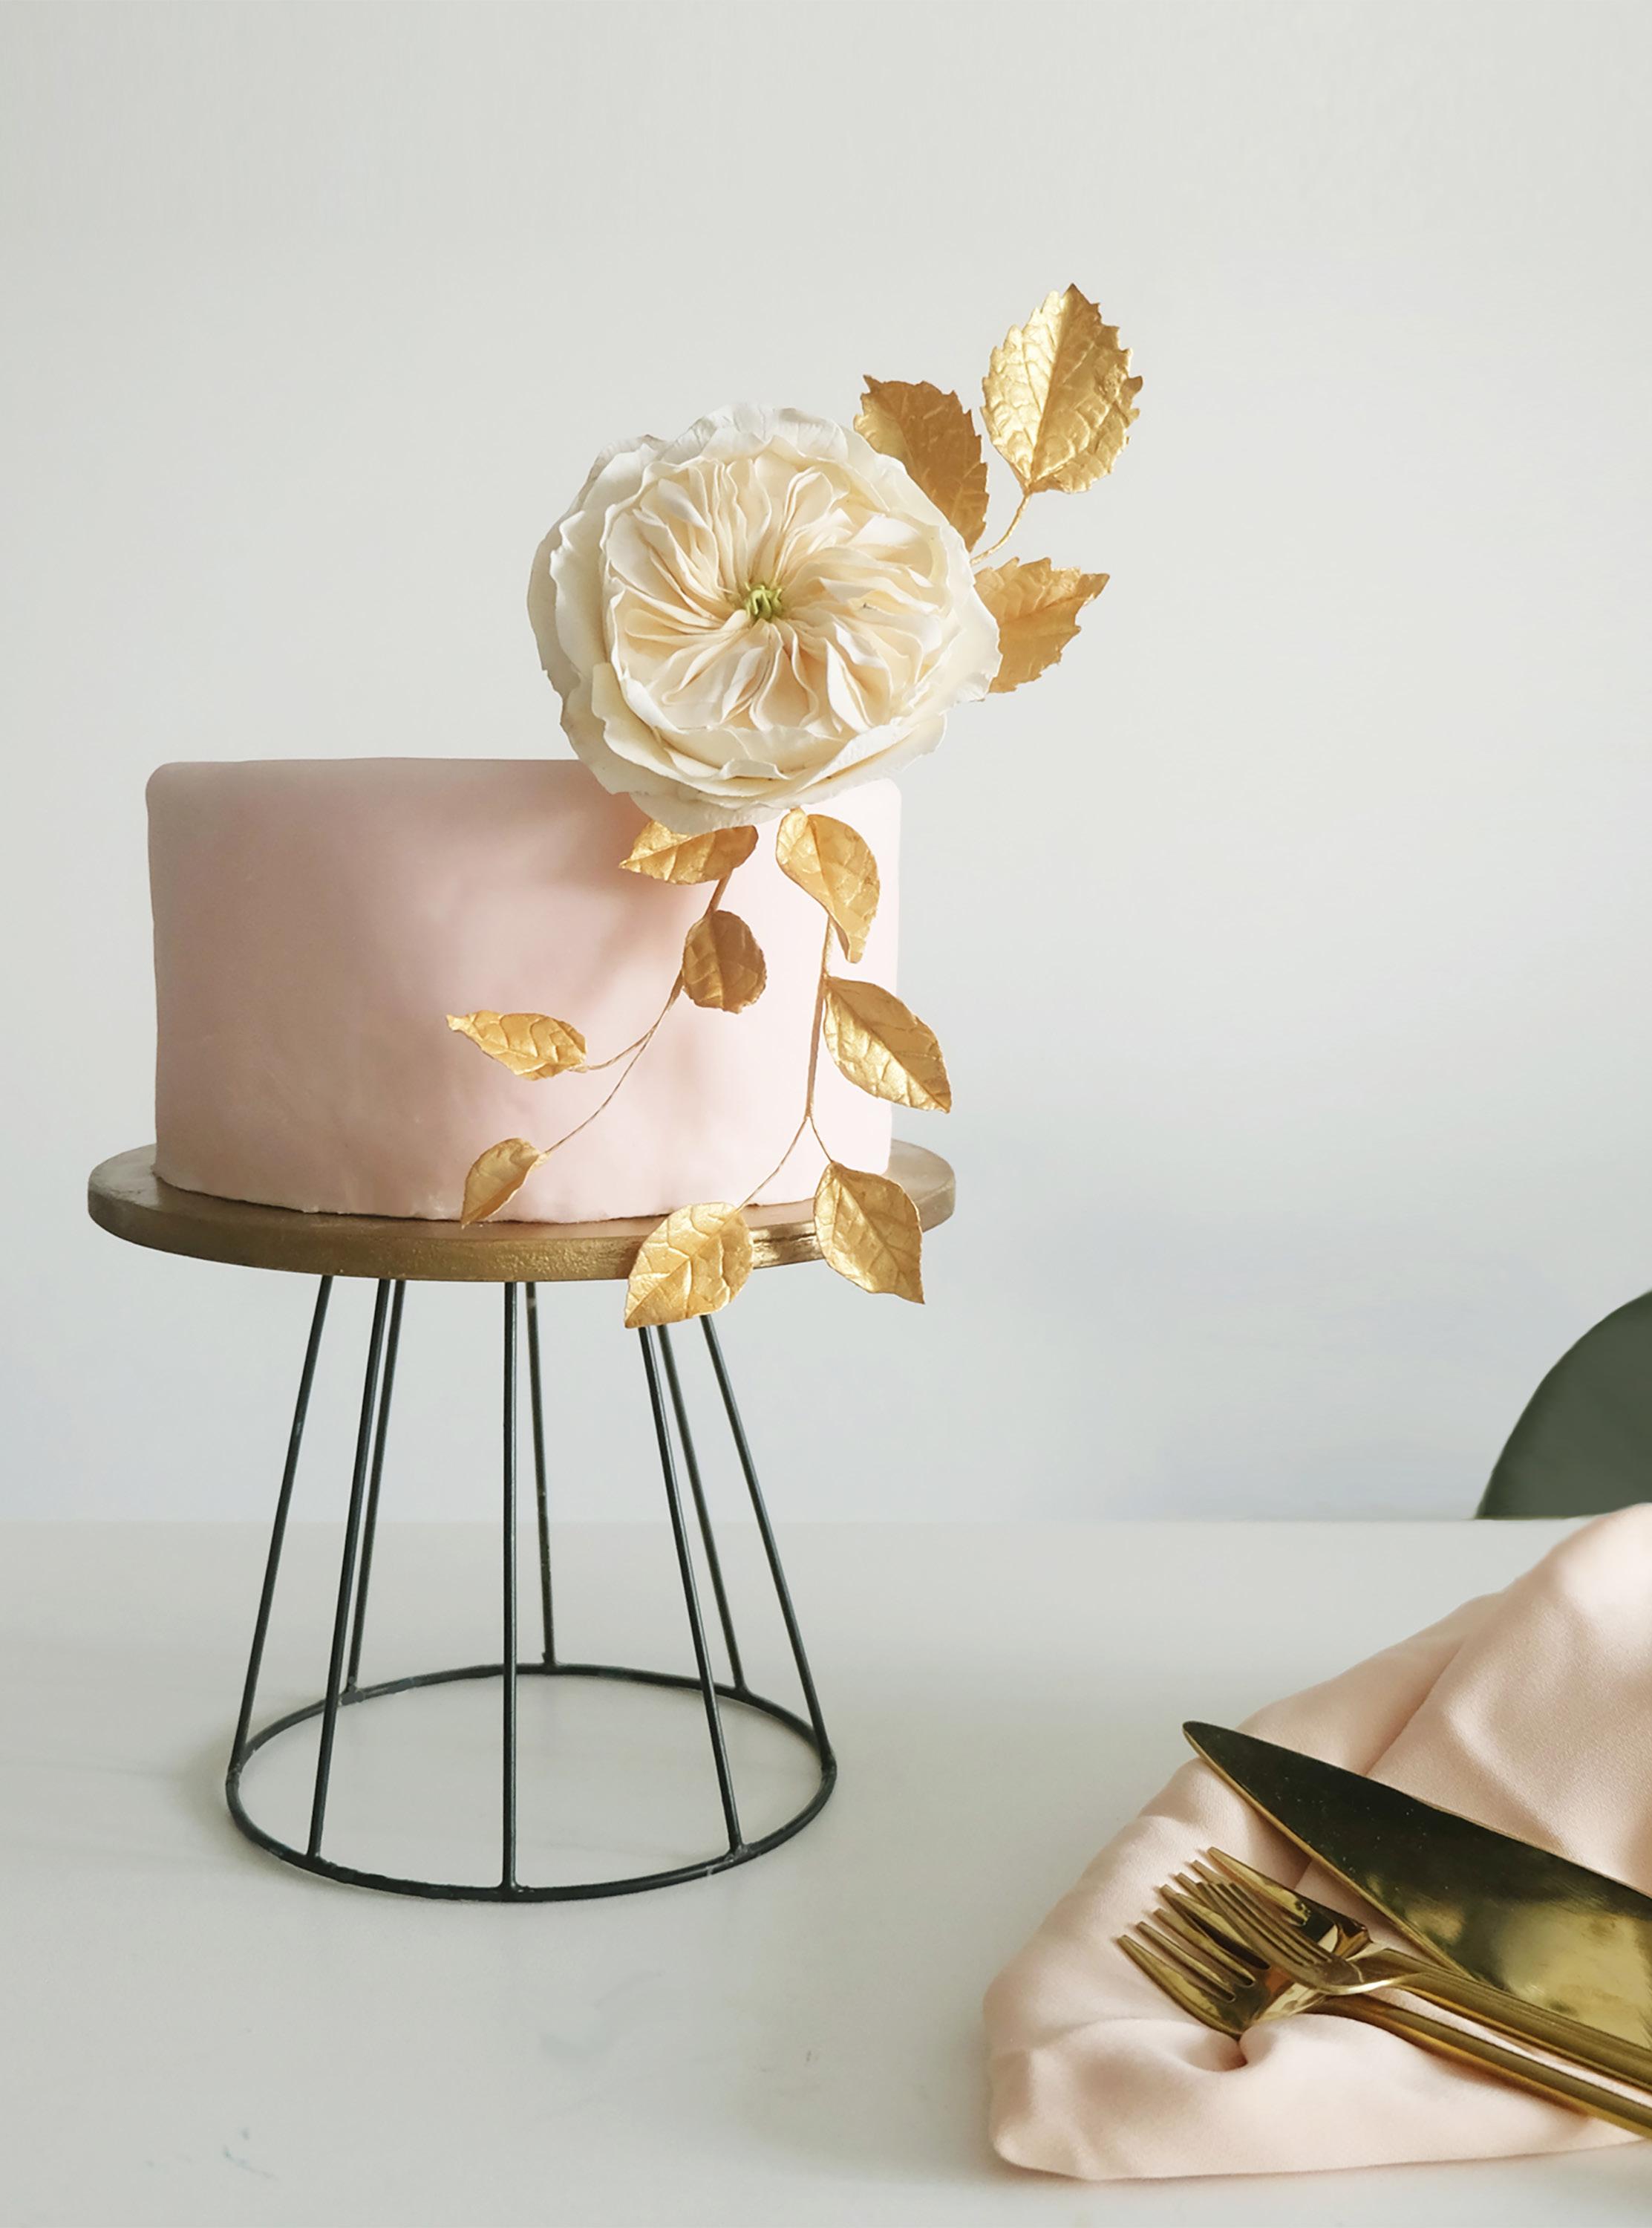
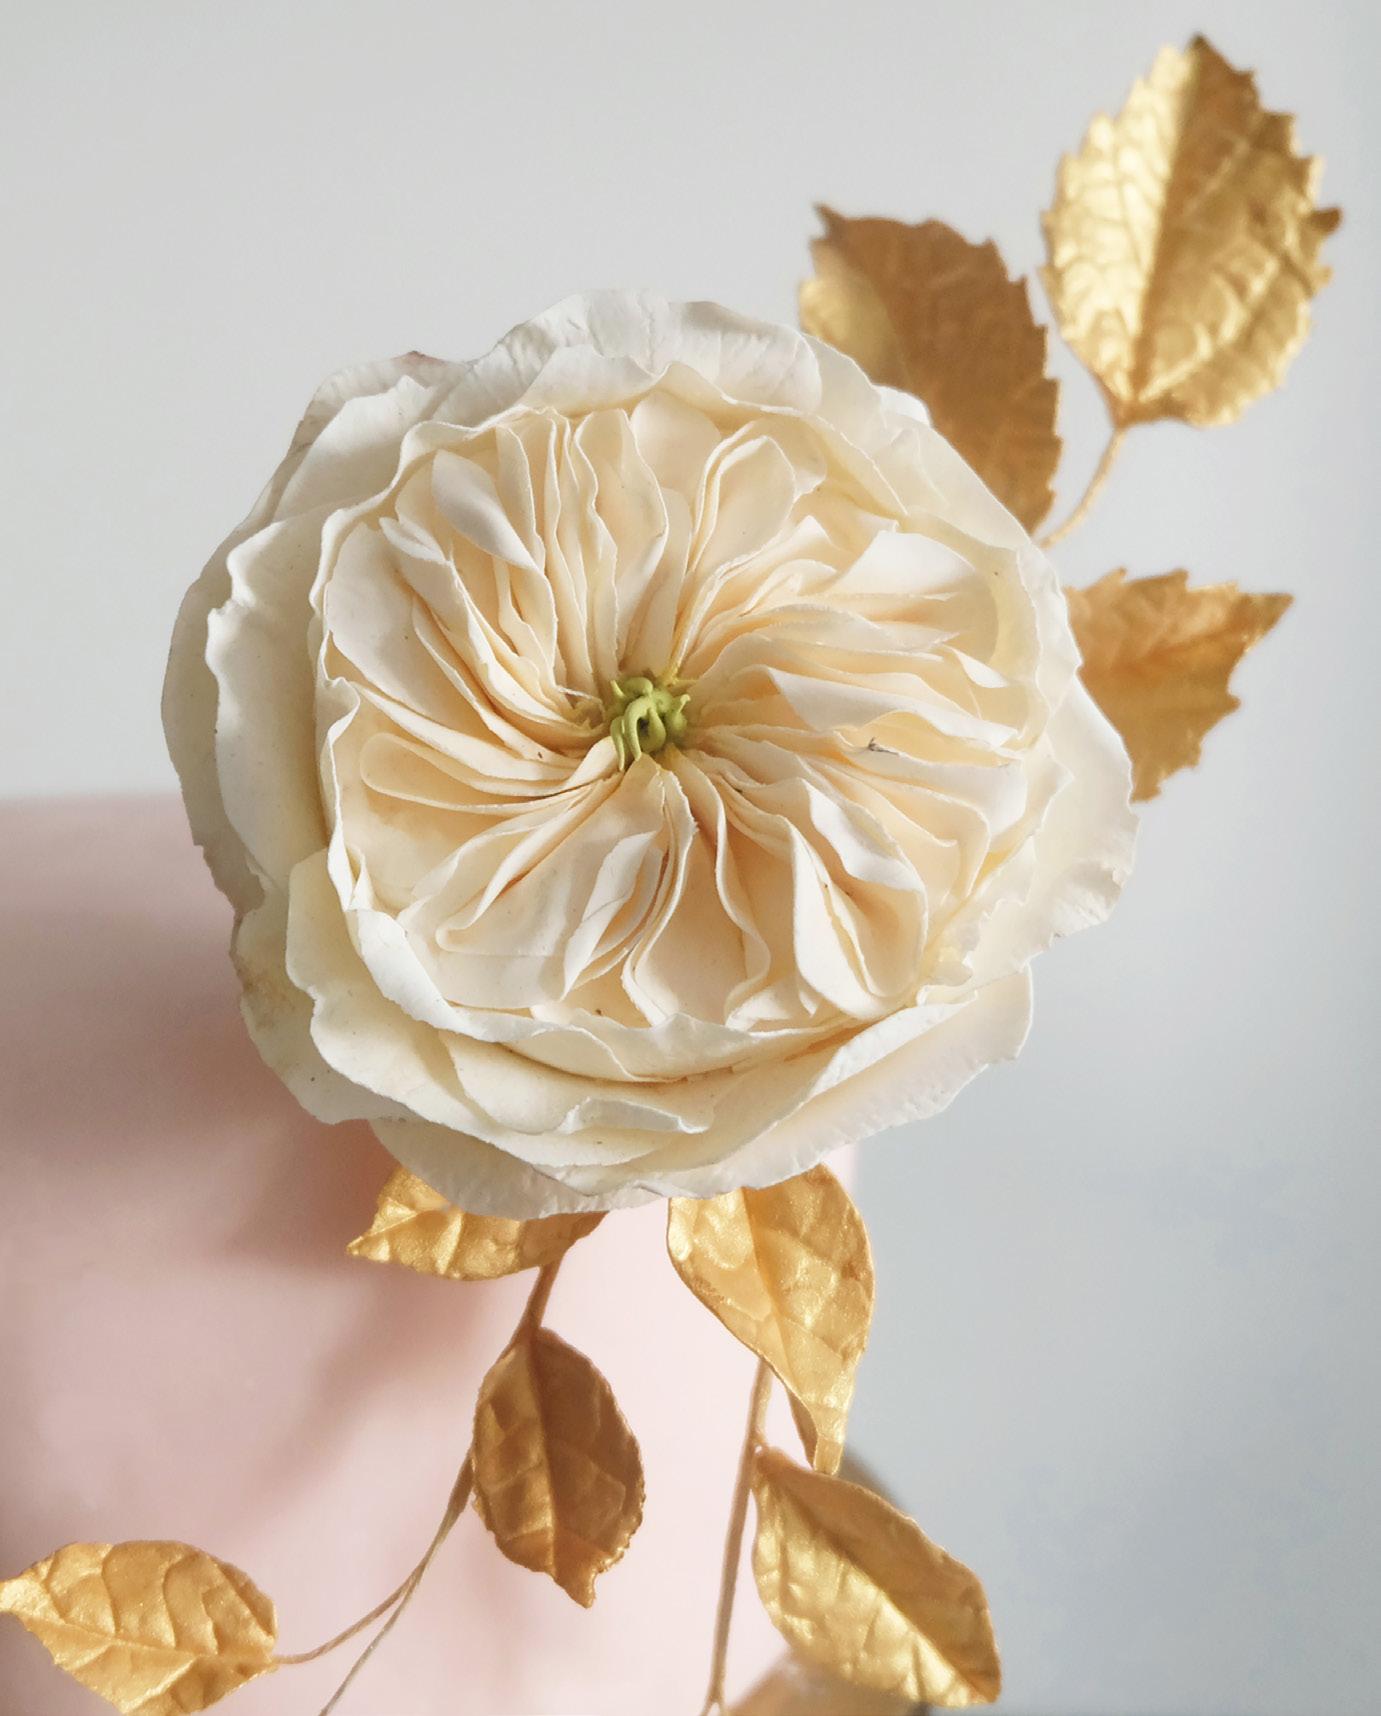
DAVID AUSTINCharity Rose
BY ESZTER KANYÁRI
LEVEL: Edibles:
COMPONENTS
Inspired by the cakes and sugar flowers by Maggie Austin back in 2013, Eszter
Kanyári decided she wanted to do something similar but struggled to find resources to learn. Finally, in 2018, the designer, economist, and event planner working at a multinational company found Petra Hajnal’s workshop where she could acquire the basics of sugarcraft and develop her style with the help of various training videos, books, and magazines. Eszter now wants to teach and share her acquired sugar knowledge.
sugarcraft.hu
Gum paste: peach and light green
Edible glue or water
Petal dust: peach and dark khaki
Equipment:
2-inch Styrofoam ball
18-gauge floral wire
Green floral wire
Rolling pin
Nonstick board
Rose petal cutters: small, medium, and large
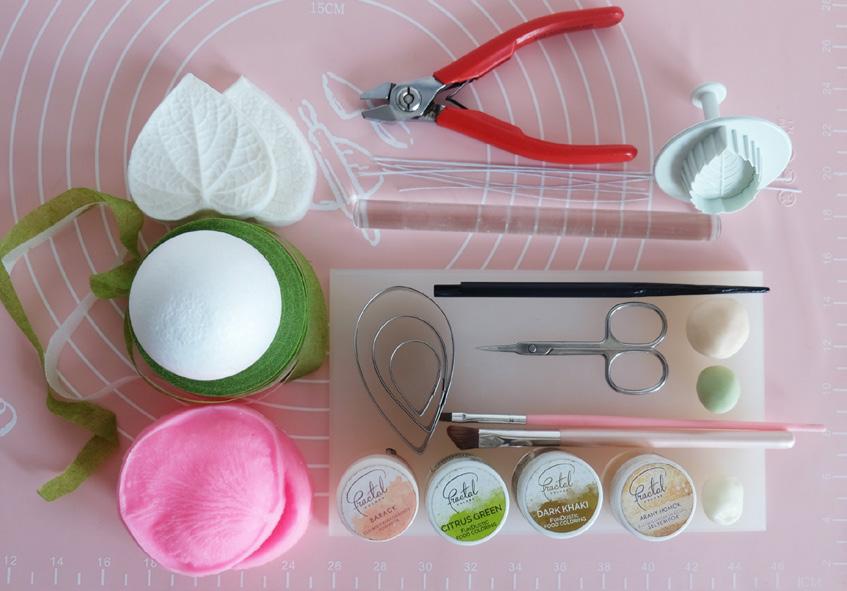
Foam pad
Ball tool
Dresden tool
Small scissors
Rose petal veiner
Paintbrush
facebook.com/sugarcraftbyeszterkanyari instagram.com/sugarcraftbykanyarieszter
WHAT YOU NEED
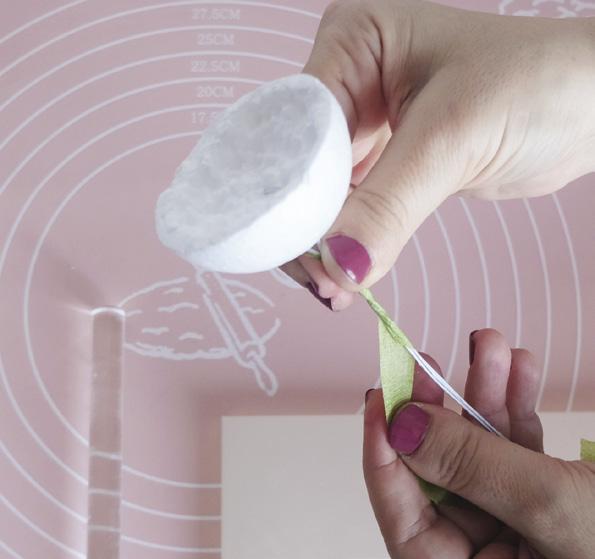
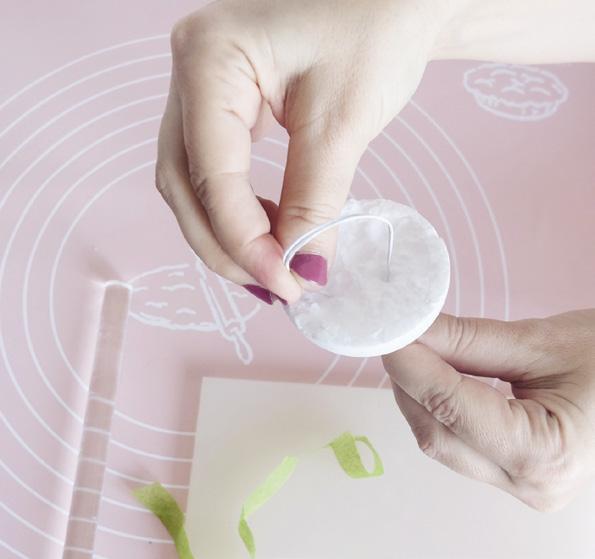
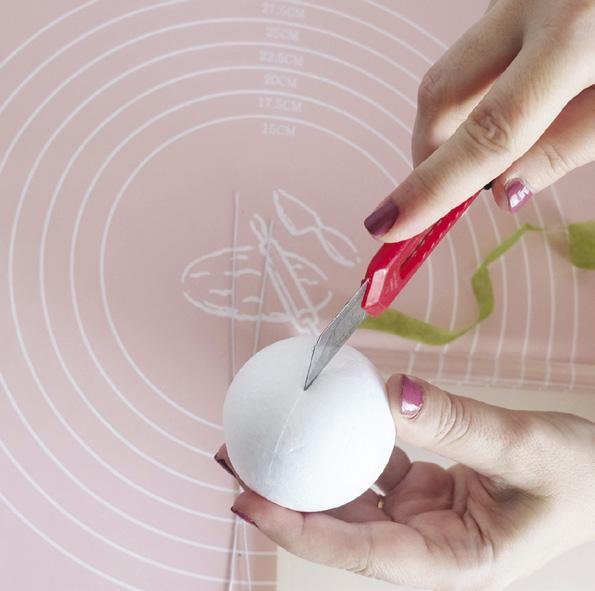
FORM THE CENTER
1. Cut the Styrofoam ball in half. With your fingers, remove the center of 1 half to create a bowl shape.
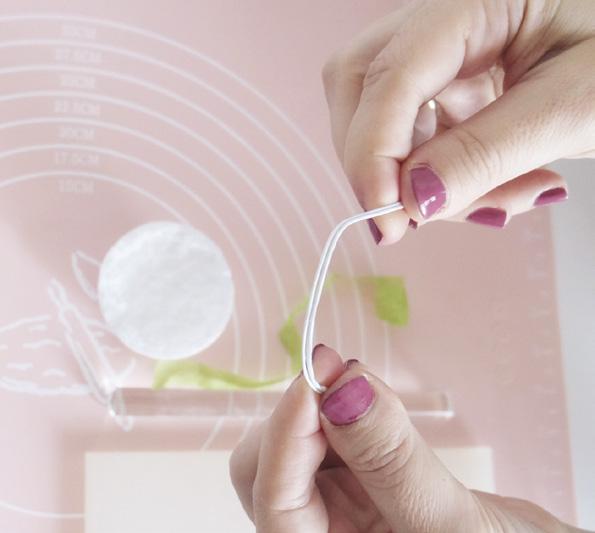
2. Cut an 18-gauge floral wire in half and fold it into a “U” shape.
3. Push the ends of the wire through the bowl shape near the center.
4. To create a stem, twist the end parts of wire together under the bottom.
42 americancakedecorating.com May | June 2023 TUTORIAL
This type of rose can be a unique statement flower on a small intimate wedding cake. Try it with metallic gold leaves for an ultra-modern look.
5. Wrap the wires with green floral tape.
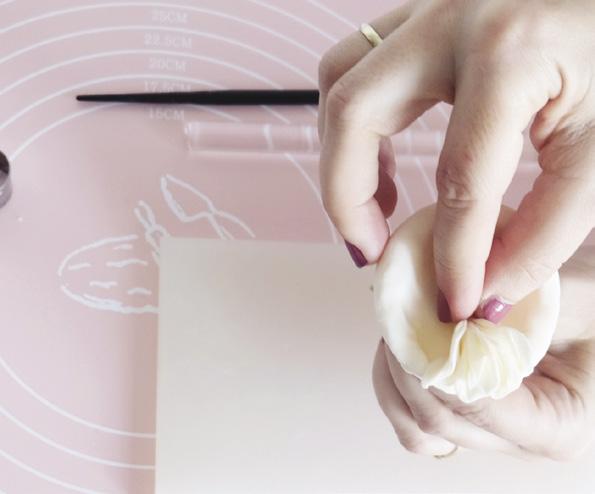
6. Roll out some peach gum paste on a nonstick board, cover the sphere, and secure it with edible glue or water. Push and smooth the paste with your hands. Let the flower center dry.
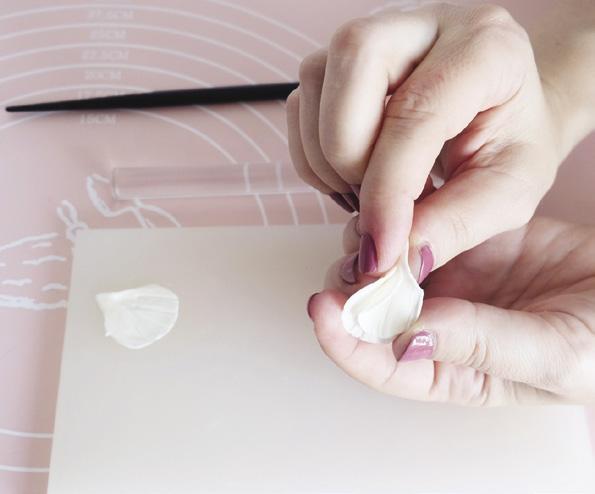
ADD THE INNER PETALS
1. On a nonstick surface, thinly roll out some peach gum paste and cut out some petals with a small rose petal cutter.
2. Place the petals on a foam pad and soften the edges with a ball tool. Then, use your Dresden tool to add veining texture at the edges.
3. Stick 2 of the petals together, leaving some space on the top.
4. Fold the petals in half and, with your fingers, press them together at the bottom.
5. Using small scissors, cut the bottom edge of the folded petals.
6. Stick 5 sets of the folded petals together into a bunch. Using edible glue or water, place the petal bunch onto the flower center.
7. Repeat Steps 1 through 6. You will need 4 bunch batches to fill up the center.
44 americancakedecorating.com May | June 2023 TUTORIAL
1 1&2 2 3&4 3 5 5 4 6 7 6
ip:
PETALS
TO
OTHER.
ADD THE OUTER PETALS
1. On a nonstick board, roll out some peach gum paste and cut out 5 to 6 petals with a medium rose petal cutter.

2. Place the petals on a foam pad and soften the edges with a ball tool.
3. Press the petals into the rose petal veiner.
4. Attach the petals 1 at a time around the base of the center.
5. To create a second layer, repeats Steps 1 through 4.
6. Repeat Steps 1 through 5, using the large petal cutter to create 2 more layers.
ADD THE FINISHING TOUCHES
1. Take a peppercorn-size piece of light green gum paste and roll it on a nonstick board.
2. Make 5 to 6 pieces of rolled gum paste and glue them together.
3. Glue this piece into the center of the flower.
4. Highlight the bottom part of the petals with peach petal dust and, for a rustic look, add some dark khaki petal dust to some of the large petals. ACD
46 americancakedecorating.com May | June 2023 TUTORIAL 3 1 2 3&4 4–6
T
IF THE GUM PASTE HAS STARTED TO DRY, ADD SOME EDIBLE GLUE OR WATER TO ADHERE THE
EACH
WAFERPAPER WHIMSY
BY AIMEE HINES
Create abstract textures and movement with wafer paper to form feathers and lace for a unique cake design.
LEVEL:
COMPONENTS
Edibles:
Wafer paper
Water
Edible glue
Gold or pearl dust
Equipment:
Scissors or herb shears
Steamer
Paintbrush or water brush
Blender
Nonstick frying pan
May | June 2023 americancakedecorating.com 47 TUTORIAL
MAKE THE EDIBLE FEATHERS
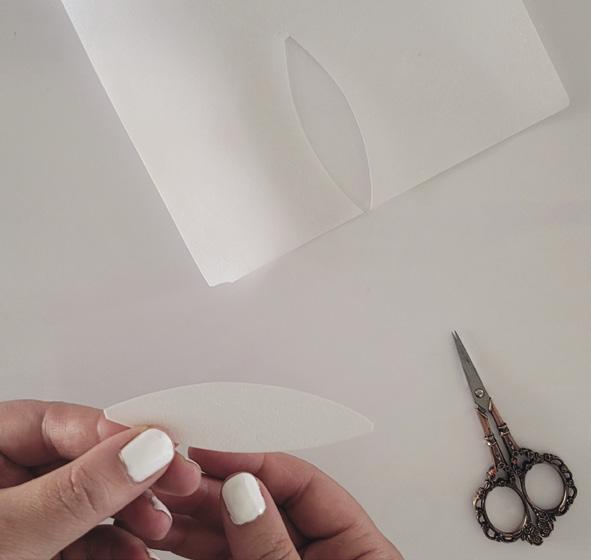
1. Cut water paper into elongated football shapes. Cut as many as you need to cover the perimeter or a quadrant of the cake.
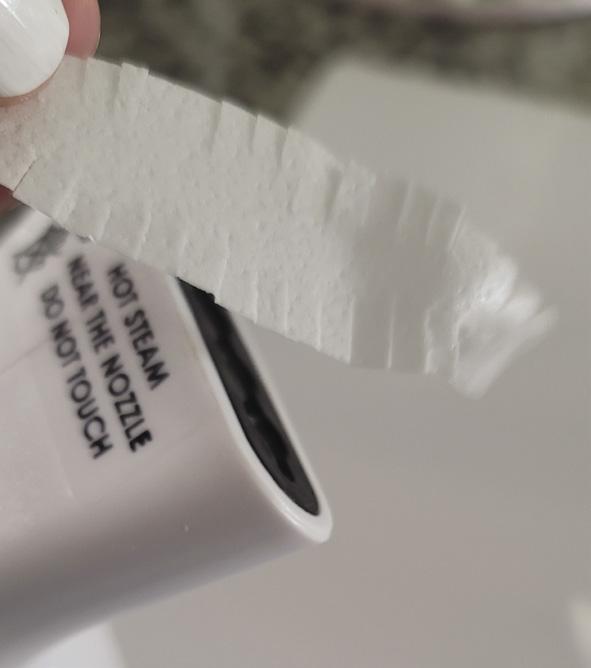
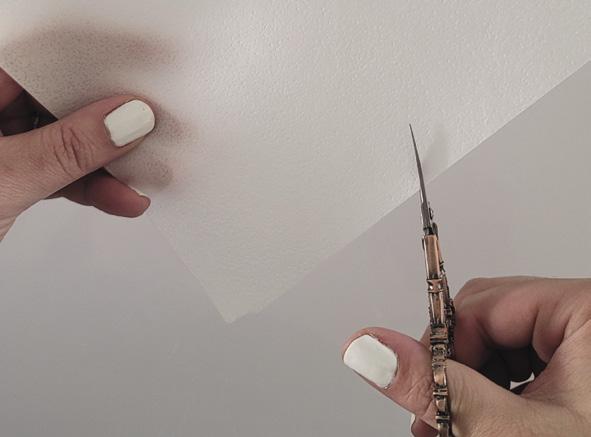
2. Use scissors or herb shears to snip feathered edges on your wafer paper. To give variation, you can keep some of the edges smooth.
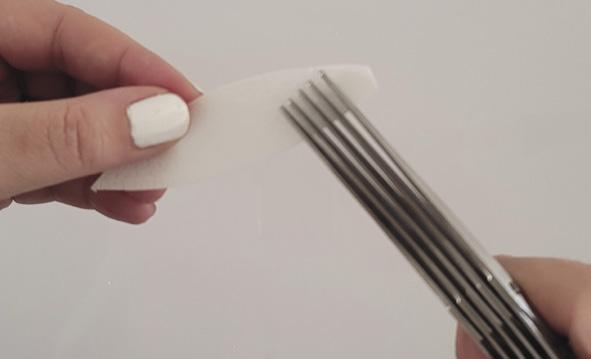
3. Steam the wafer paper and curl the edges gently to place them in a pattern on the side of your selected cake tier.
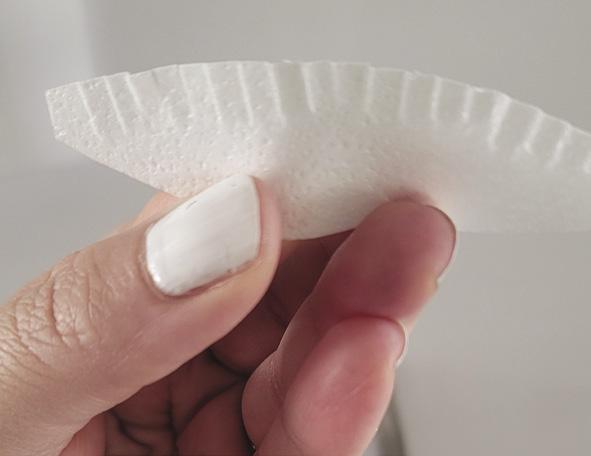
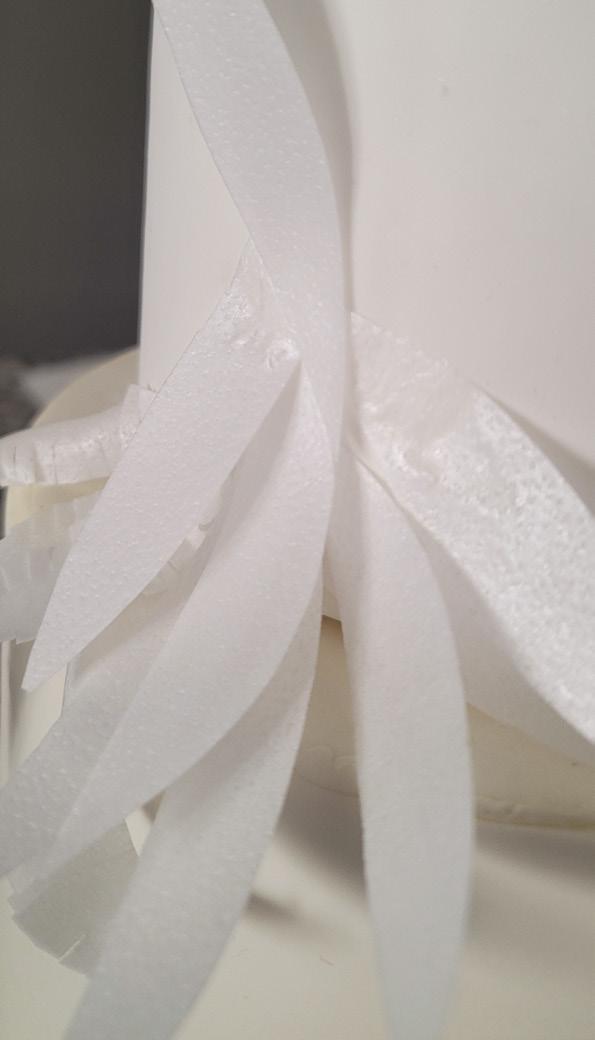
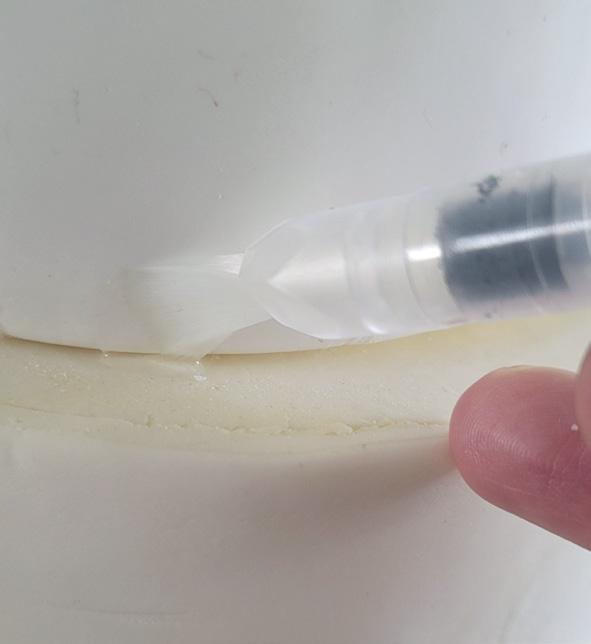
4. Adhere the wafer paper with water or edible glue. Use a paintbrush or water brush to assist you in gluing the paper.
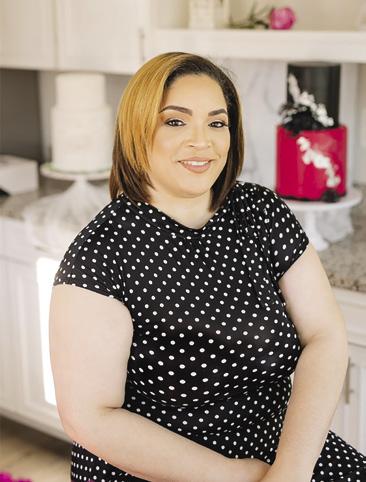
Aimee Hines is a sugar artist in the Baltimore, MD, region specializing in novelty cakes, sugar cookies, and luxury desserts. She has been baking since childhood, where she learned the basics. Aimee is a physical and occupational therapist and has incorporated her love of baking into her work as a rehabilitative clinician. She was affectionately called “Cake Doctor” by her siblings, which is when she coined Cake Doctor Aimee by Aimee Jay. Her love of confectionery art grew while reading books, watching cake shows, reading magazines, attending classes, and participating in Maryland ICES. Today, she is continuing to advance her skills in hyperrealistic art, sculpting, piping, and painting.
cakedoctoraimee.com facebook.com/cakedoctoraimee instagram.com/cakedoctoraimee
48 americancakedecorating.com May | June 2023 TUTORIAL
1a 1b 4a 4b 2a 2b 3 T
ip: IF NEEDED, YOU CAN USE A TEMPLATE TO MAKE SURE ALL OF THE SHAPES ARE THE SAME SIZE.
MAKE THE EDIBLE LACE
1. Combine 15 grams of wafer paper and 150 milliliters of water in a blender.
2. Cook the mixture in a nonstick frying pan on medium heat to create bubbles and dehydrate the paper, forming a lace texture.
3. Remove the lace from the pan and break it into pieces to apply it onto the cake.
4. Finish this off with edible gold or pearl dust. ACD
May | June 2023 americancakedecorating.com 49 TUTORIAL
3a 4 3b 2 Tag us in Your Photos! FOR A CHANCE TO BE FEATURED ON OUR INSTAGRAM FEED @americancakedecorating
SOYOUCOOL, KNOT BELIEVE
BY SCOTT BRADSHAW
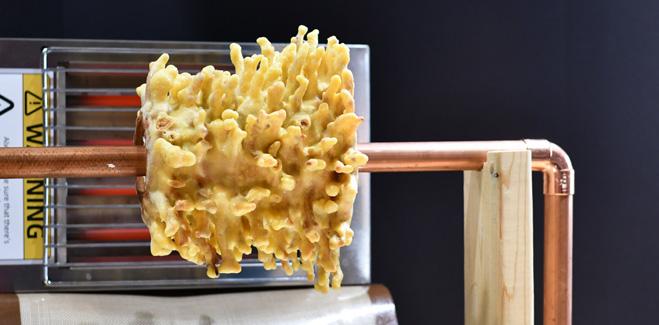
Years ago, I manipulated a rotisserie air fryer so it would work with the door open because I wanted to make a baumkuchen. A baumkuchen is a German spit-roasted cake, which translates into “tree cake” or “log cake,” and is wildly popular in Japan as a wedding cake. The idea is to
pour batter over a round spit roast in front of a fire and add layers as the batter cooks. The cake is hollow down the middle and sliced into bite-size pieces. I was quite happy with myself for figuring out how to make it and wanted to do an article on making it for this magazine, but my editor at the time said “No,”
Scott Bradshaw is the owner of sevenravensbakehouse. com, an entertaining blog which strives to get people to look at food and recipes in a twisted way … as twisted as an old phone cord. Scott grew up in Texas, and has lived in Arizona, Nevada, and Missouri. He makes Plainville, MA, his home these days with his saintly husband and a bossy little Pomeranian.

sevenravensbakehouse.com
tiktok.com/@goosecaboose70
explaining something about causing fires and using appliances in ways expressly against manufacturer rules and something about lawsuits. Blah blah blah… you know.
In hindsight, she was correct, because on my first attempt to bake a baumkuchen for myself in the air fryer rotisserie oven that I manipulated into running with the door open, it overheated and some minor plastic around the edge melted a little bit and released noxious clouds of toxic smoke, but I digress…
GOING OUT ON A LIMB
Never being one to casually give up on something that roots itself into my brain, I finally devised a safe-ish way to make a baumkuchen—and


50 americancakedecorating.com May | June 2023
THE CAKE ALCHEMIST
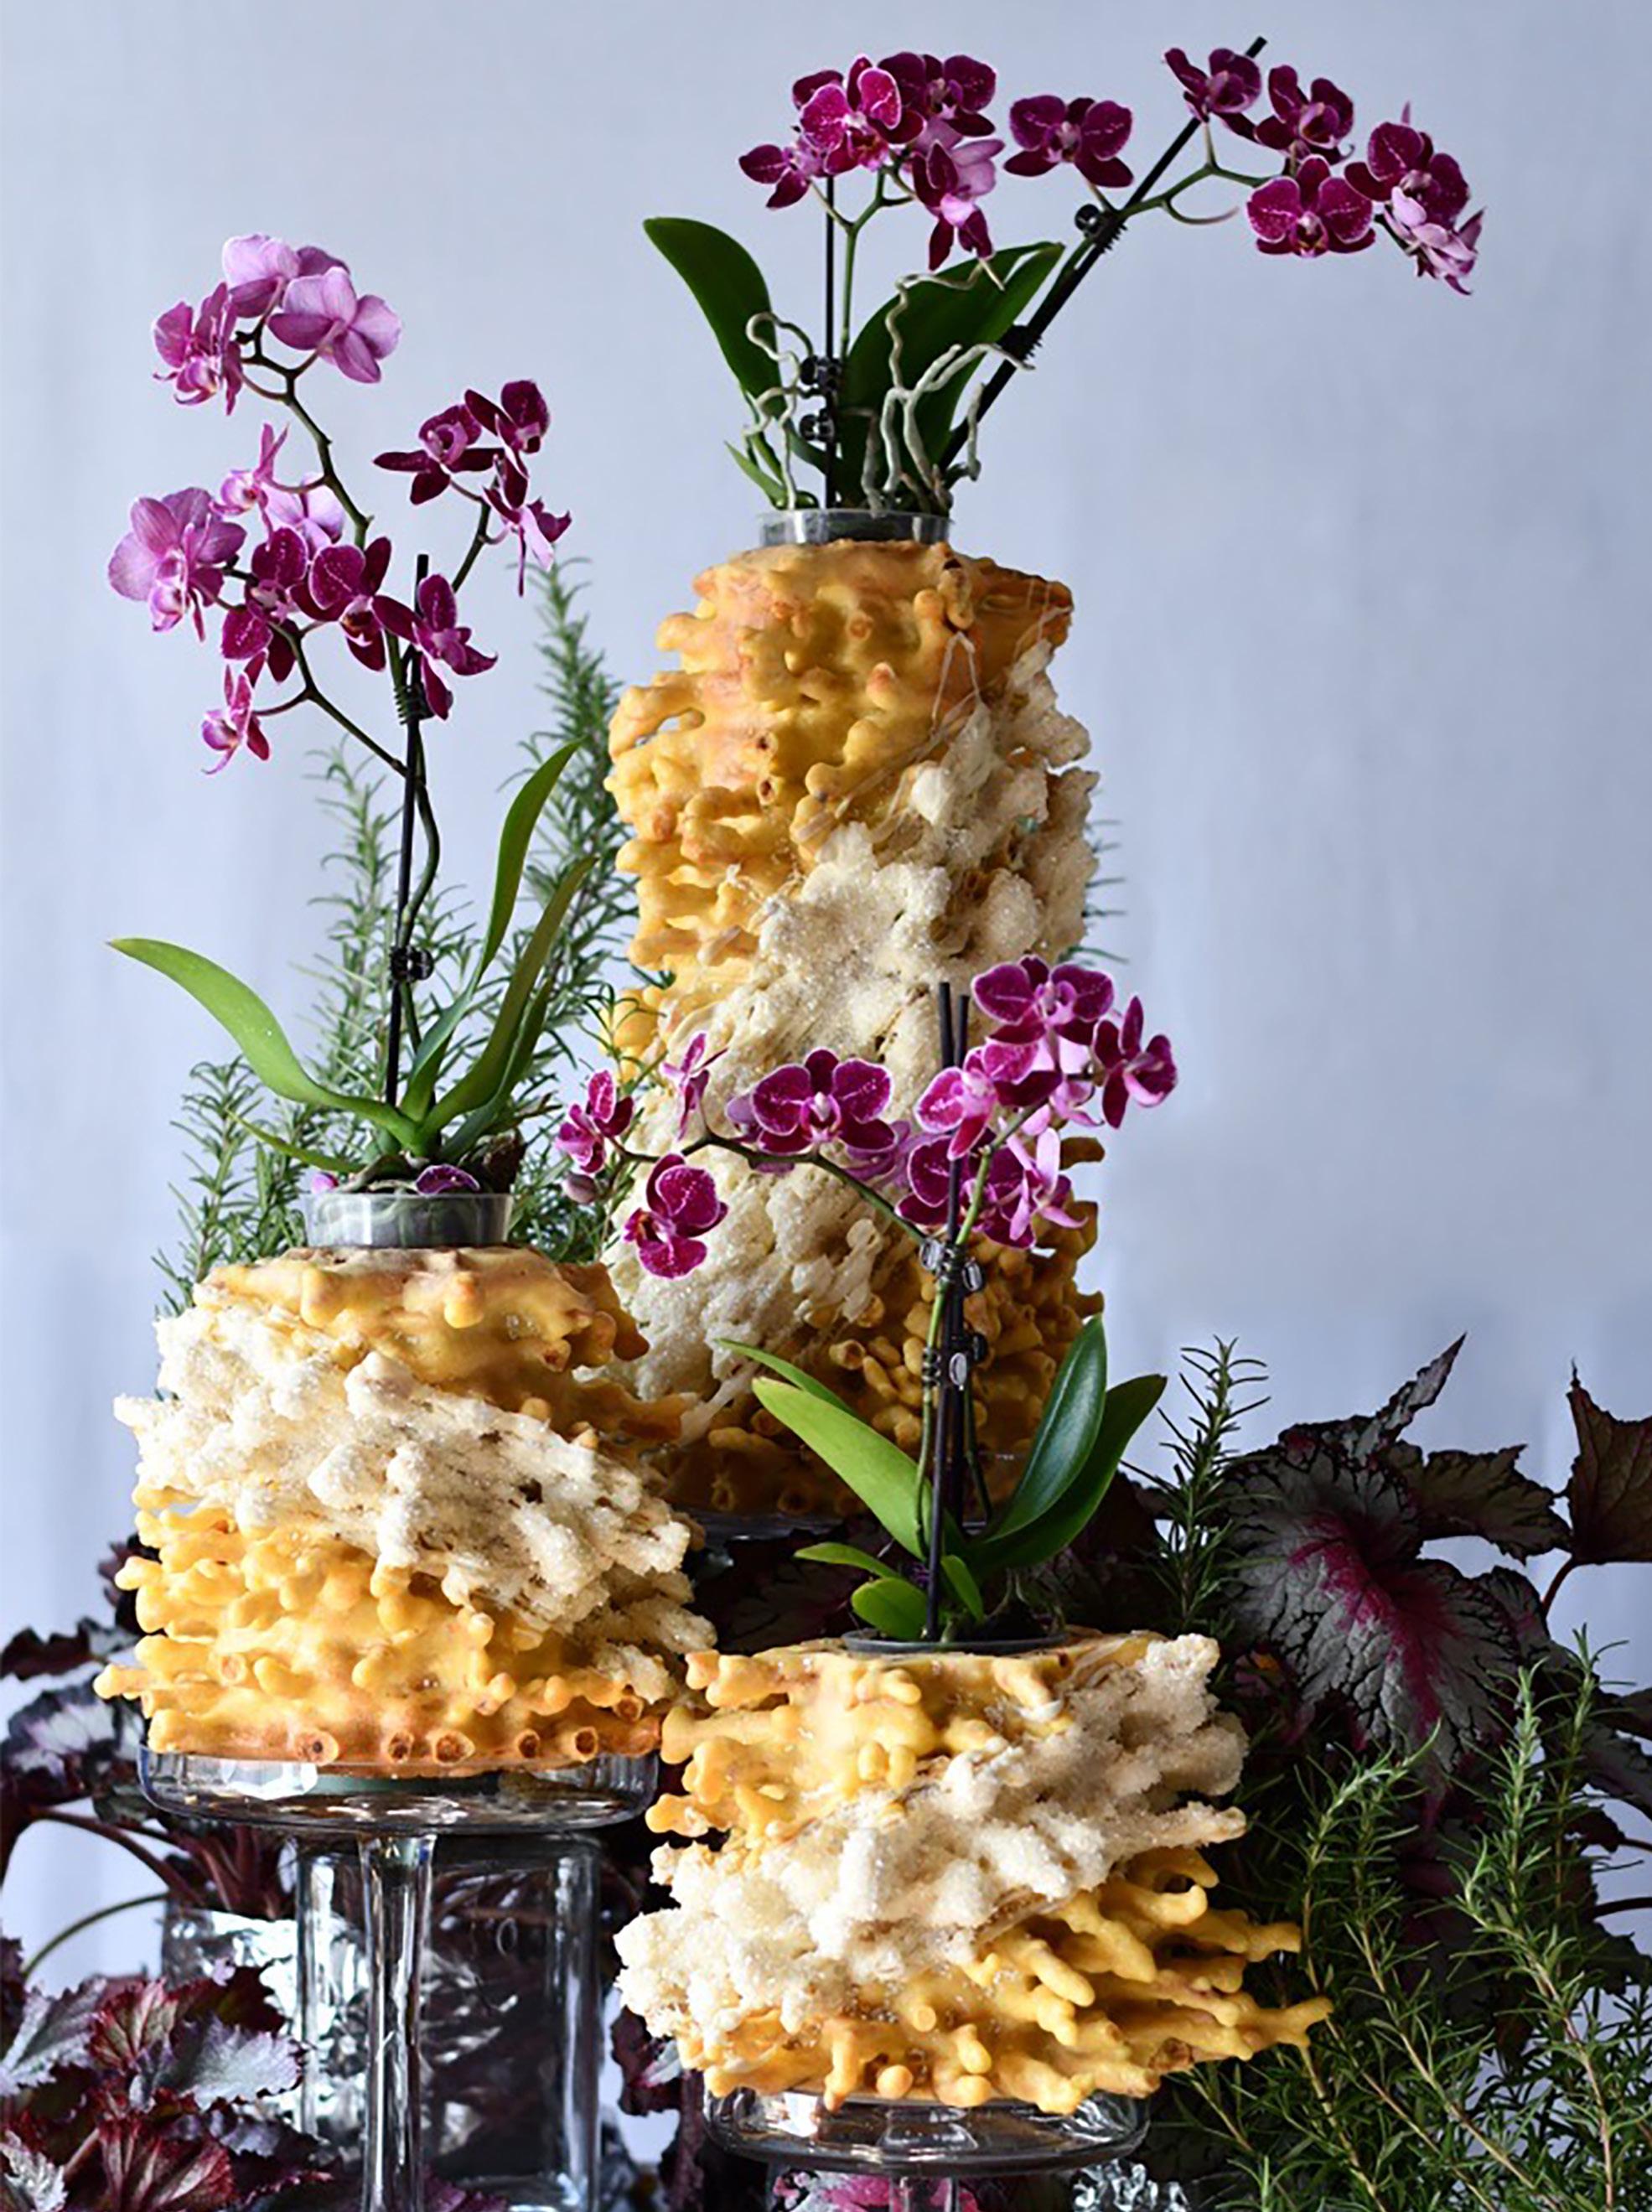
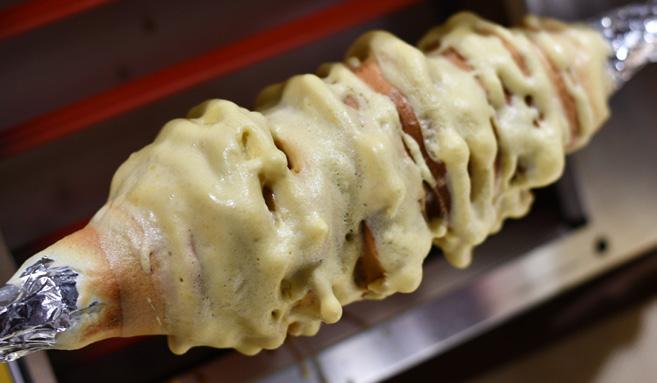
I upped the ante a bit by not just shooting for the log cake but going for the entire tree. Last month, I sold the editor on the fact that I could make a šakotis (sha-ko-tis), which is a tree branch cake from Lithuania.
Šakotis dates from the 16th century and was once baked on tree branches in front of a fire. It also is known as a raguolis cake, which means “spiked” or “horned.” Šakotis cakes are traditional in Lithuania for special events, especially weddings and Christmas, and are dressed up with chocolate, sugar flowers, or real flowers placed in the hollow centers.
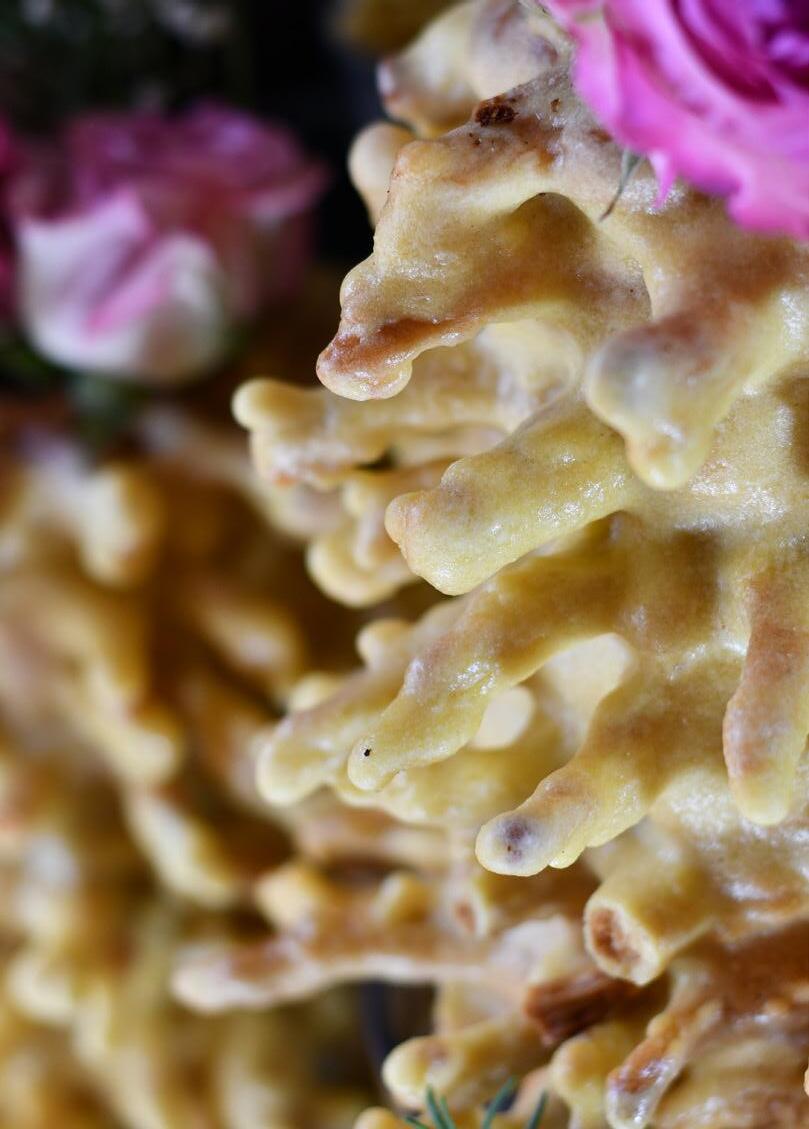
The cake itself is so unique. The texture is something like a bagel— slightly chewy and tender at the same time—and the flavor is a cross between a funnel cake and a waffle with a lemon tingle if you add the lemon zest. It is not highly flavored but something that’s addictively delicious. The cakes are made on special cones or rods in specialty ovens.
First, I’d like to say, if you have access to traditionally made šakotis cakes, just buy them. I always feel it is best to let the people who know what they are doing do what they know. Let the people steeped in their own culture do their thing. It’s a beautiful thing. Also buy them because they are a pain in the “asilas” to make. Be warned, though: Shipping šakotis is not always a good option because of its delicate nature. I broke several

52 americancakedecorating.com May | June 2023 THE CAKE ALCHEMIST
ŠAKOTIS CAKES ARE TRADITIONAL IN LITHUANIA FOR SPECIAL EVENTS, ESPECIALLY WEDDINGS AND CHRISTMAS, AND ARE DRESSED UP WITH CHOCOLATE, SUGAR FLOWERS, OR REAL FLOWERS PLACED IN THE HOLLOW CENTERS.
limbs just moving my cake from room to room to photograph it. I gladly ate them, don’t worry.
BRANCHING OUT
To make a baumkuchen, a spit roast spins at normal rotisserie speed, but for šakotis, it needs to really be moving fast enough to sling the batter off. I couldn’t find a rotisserie that was fast enough to use, so I decided to use a homebuilt crank spit roast. I made it from 1-inch copper pipe because copper was easy to find and easy to cut with a pipe-cutter tool. I used two 90-degree elbows to make a crankshaft. I made two wooden holders, which the crankshaft easily set on and an indoor electric grill I purchased online. I set the grill
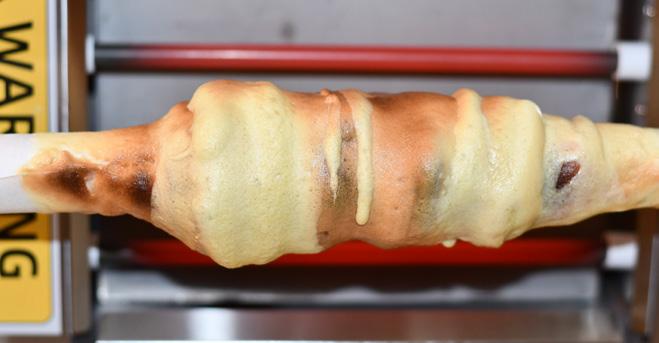
ŠAKOTIS TREE BRANCH CAKE
on its side on top of two concrete blocks used in firepits, which I purchased at Lowe’s. I clamped the wooden spit roast holders on to my counter with towels under them and I plugged in the grill.
DON’T GET STUMPED
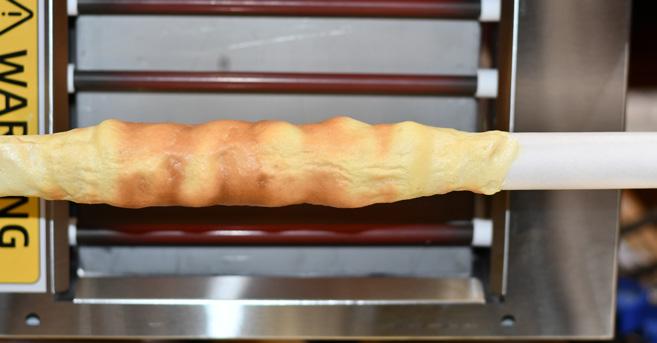
The time to get my šakotis on had finally arrived. I figured it would be an easy 30 minutes. Turns out I was wrong. It took days to figure out the speed and cranking motion needed to cause the branches to form. I had to figure out when to spin it vigorously, when to spin it violently, and when to slow it all down, and just be a rotisserie for it. Always crank the spit roast so that the batter flies away from the heat source. There will be blisters.
4½ cups butter
5 cups sugar
36 eggs
10⅓ cups flour
INGREDIENTS INSTRUCTIONS
3 cups sour cream
Zest of a lemon (optional)
1. Cream the butter and sugar together until it is light and airy. Add the eggs, 1 at a time, beating until all traces of egg are gone before adding the next egg. Alternate adding the flour with the sour cream, then fold in the lemon zest, if using.
2. Secure parchment paper to the spit roast. (Aluminum tape for HVAC works well.) Place the spit roast in front of the heat source. Place a large pan in front to catch batter as it spins off. Using the back of the ladle to spread it, lay down the first ladle of batter onto the spit roast in a thin even layer. Continue adding ladles of batter in a stream to create ridges. The spit roast should move clockwise to throw batter drops away from heat source and into a large collection pan where it can be scraped back up and used again. As cake spins and bakes, “limbs” will begin to form. Keep adding ladles of batter until the cake reaches desired the size or the batter is used up. ACD
May | June 2023 americancakedecorating.com 53 THE CAKE ALCHEMIST
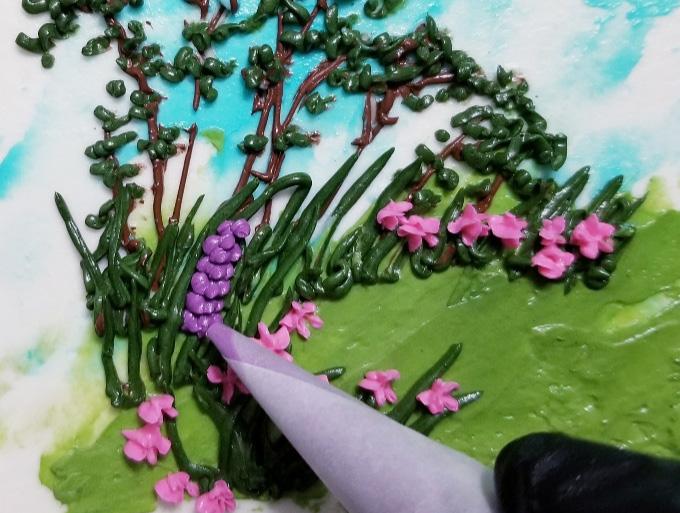
2a 2b 2c 2d
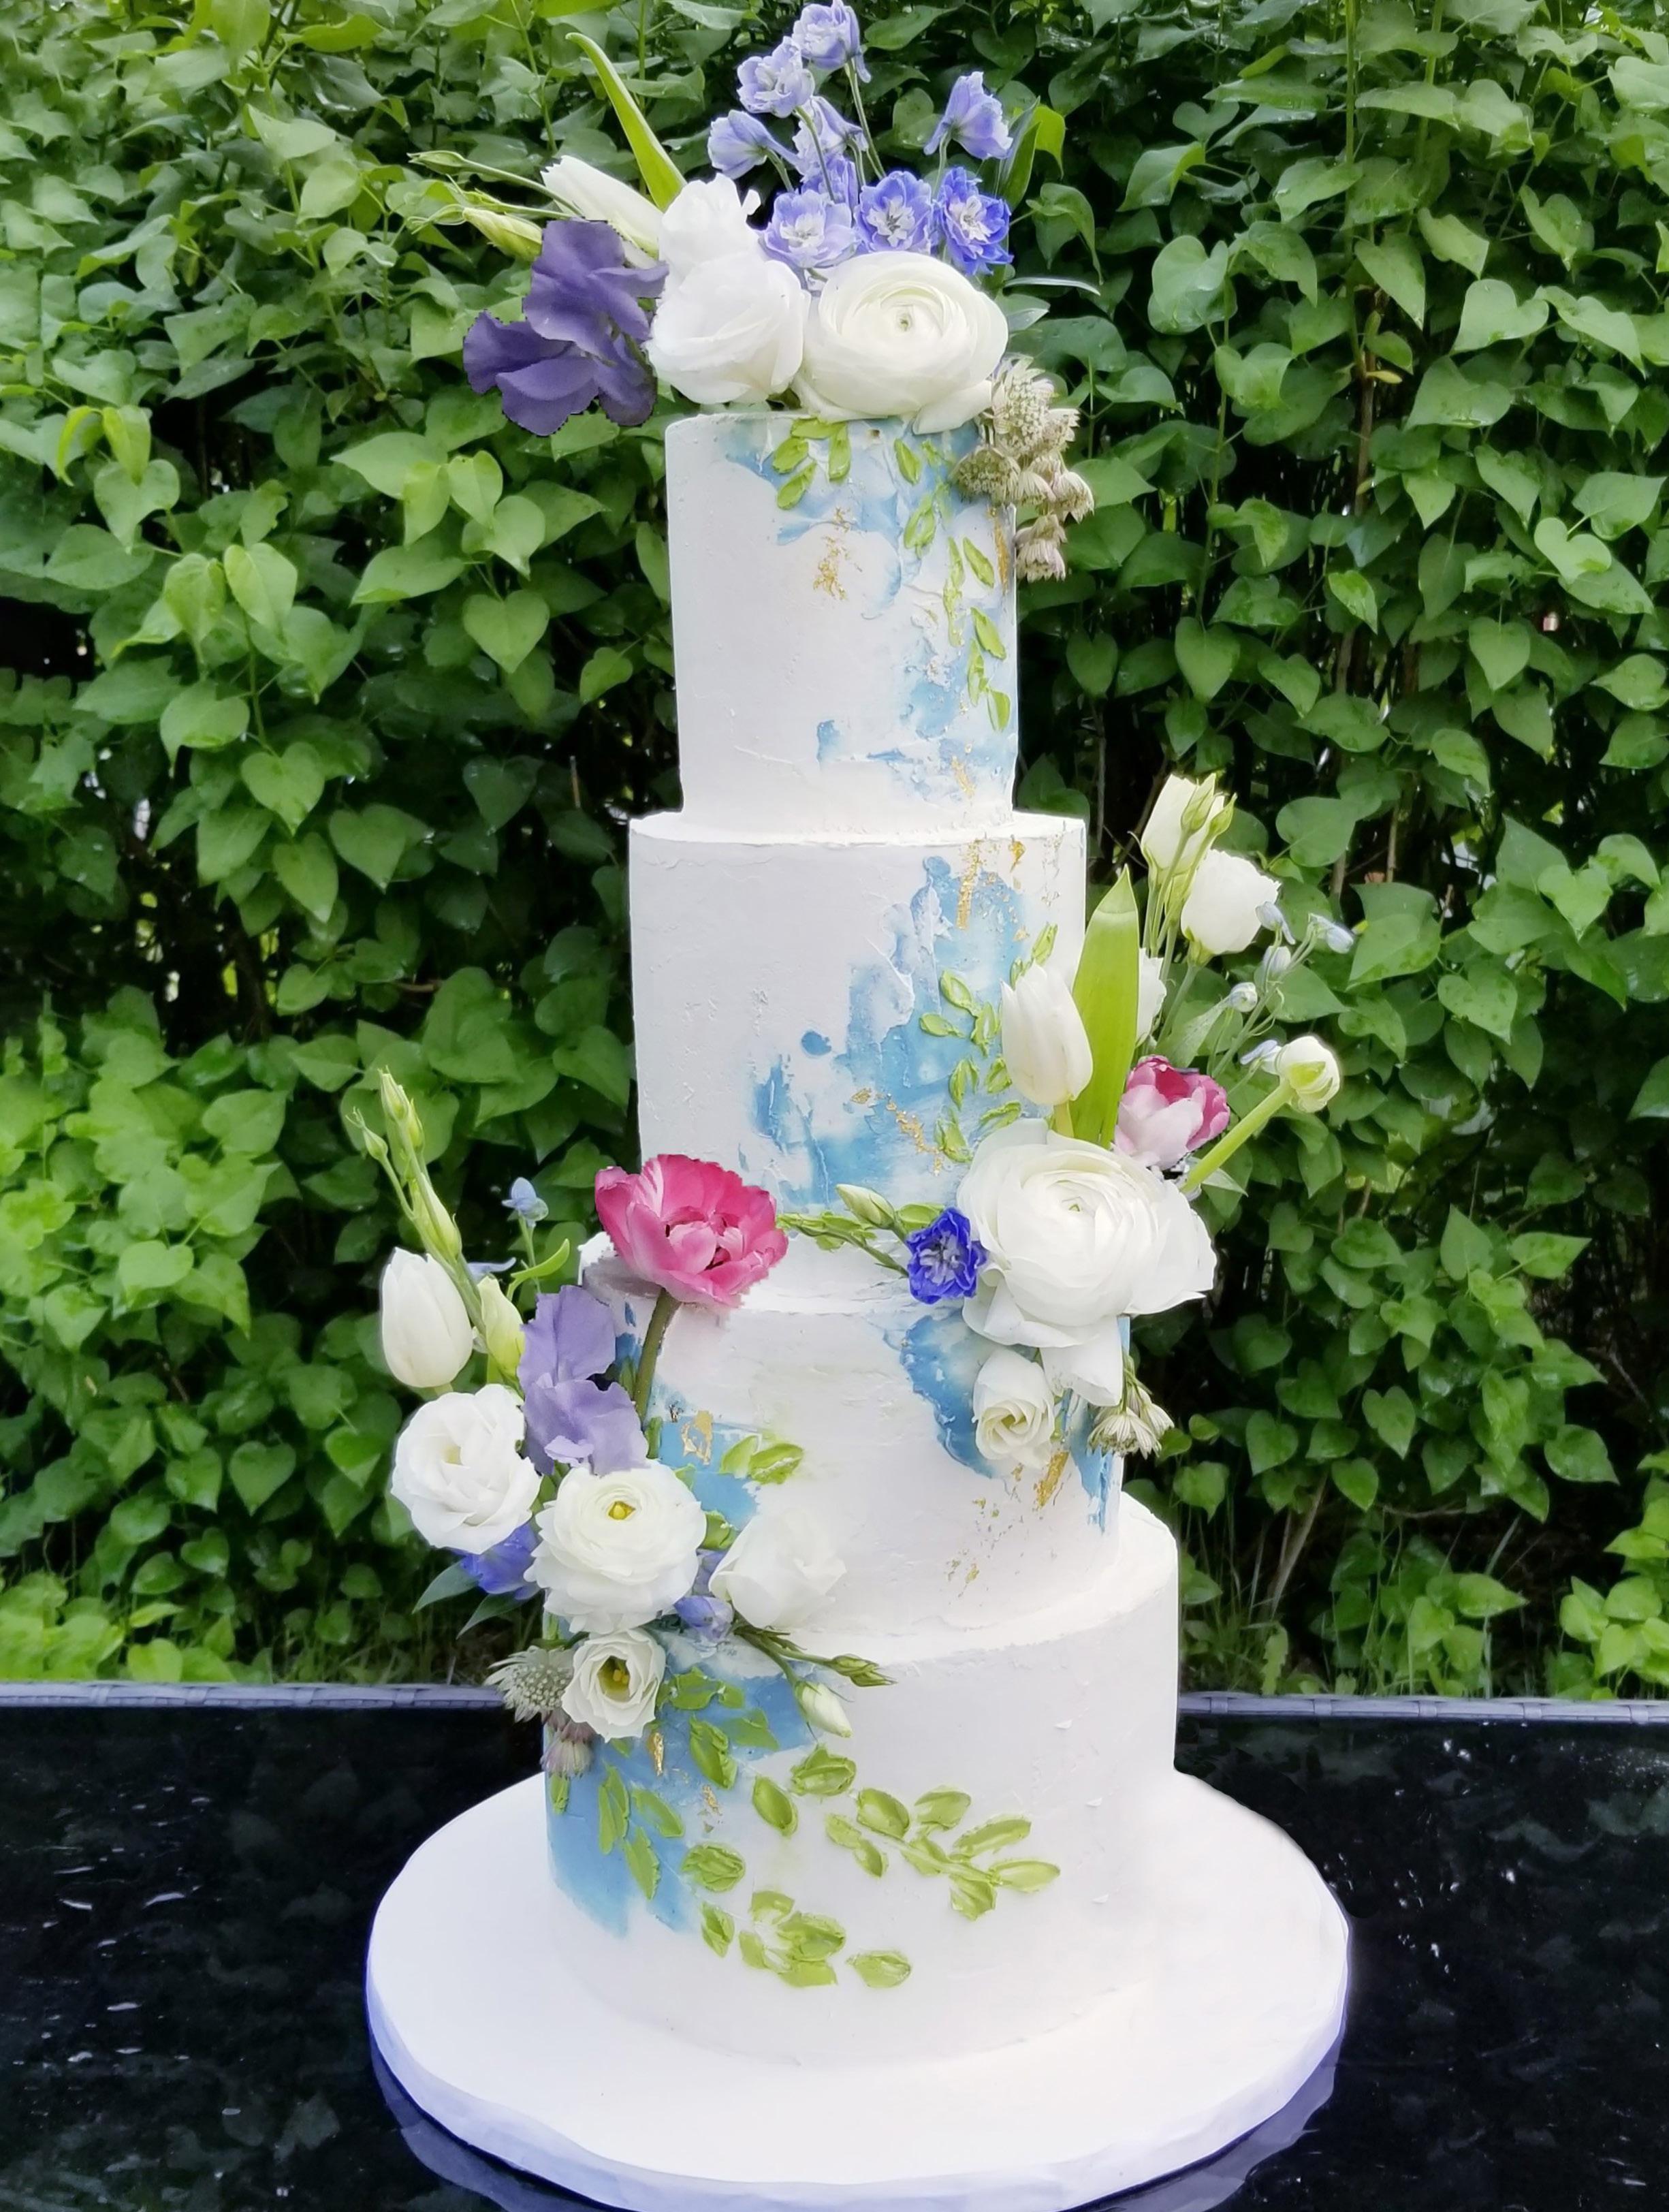
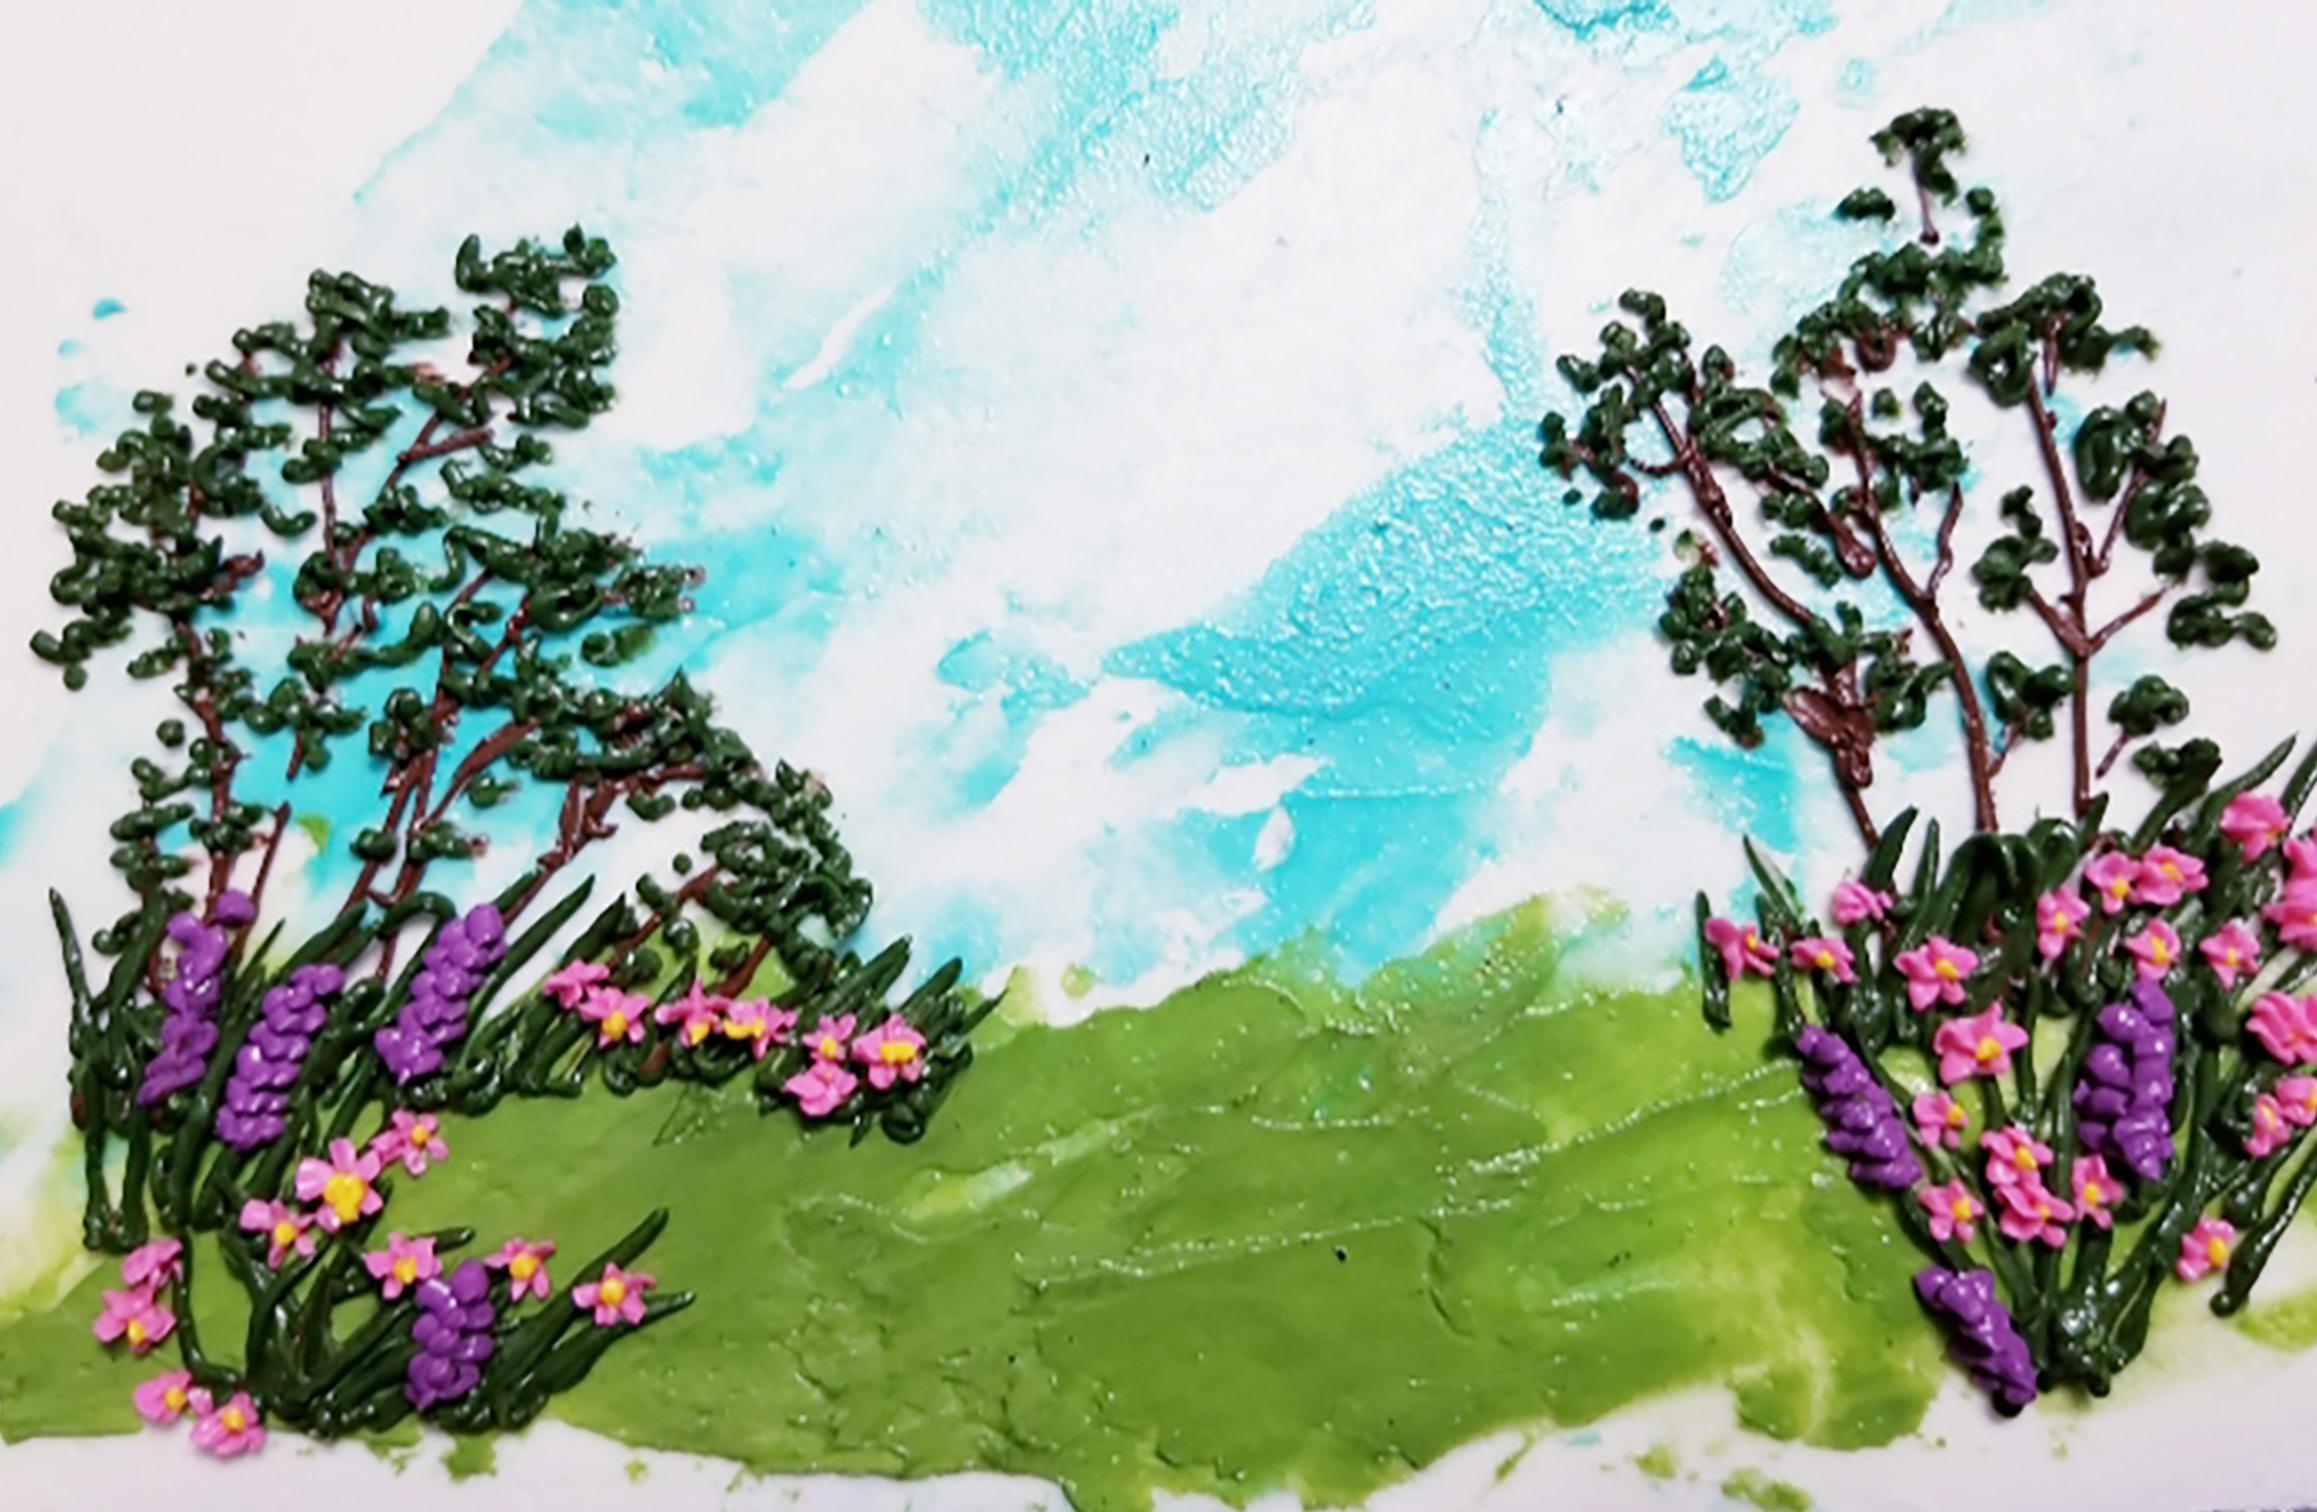
SEASONAL BUTTERCREAM LANDSCAPE
Fresh flowers on a cake decorated with buttercream foliage and a piped landscape create a magnificent mixed-media wedding cake.
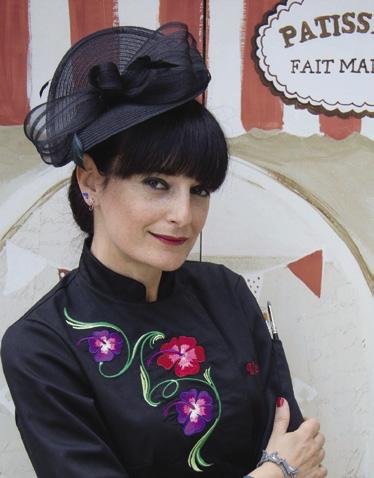
BY SABRINA SIGUOIN Sabrina Sigouin, cake designer and owner of La Belle Pâtissière,
was an interior designer for seven years before she decided to return to school to follow her pastry dreams in 2015. Since 2016, Sabrina has created her own custom cake company, enjoyed Canada’s Baking and Sweets Show as an award winner in 2019, and most recently was a Food Network competitor in 2021.
labellepatissiere.com

facebook.com/labellepatissiere instagram.com/labellepatissiere
LEVEL: Edibles:
COMPONENTS
Buttercream
Cake, filled and crumb-coated
Gel food colors: sky blue, neon green, brown, green moss, pink, purple, and yellow
Equipment:
Paint palette
Offset spatula
Spatula palette knife
Parchment paper
Piping bag
Star tip #24
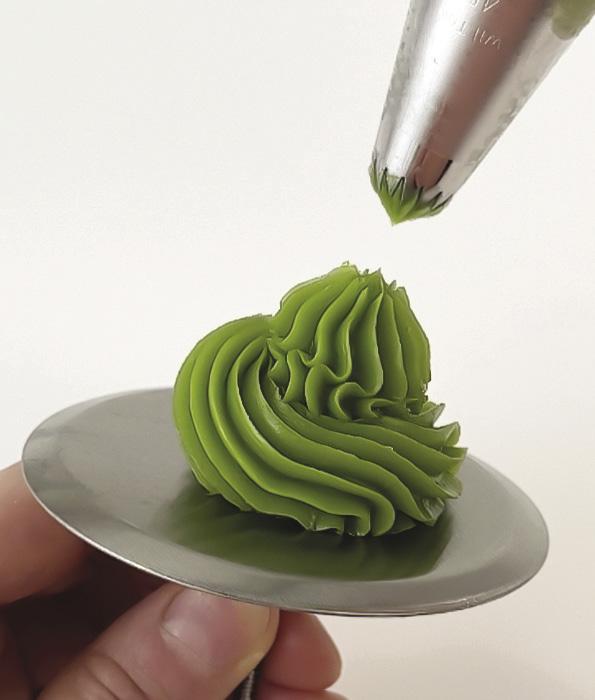
ADD THE BASE FOLIAGE
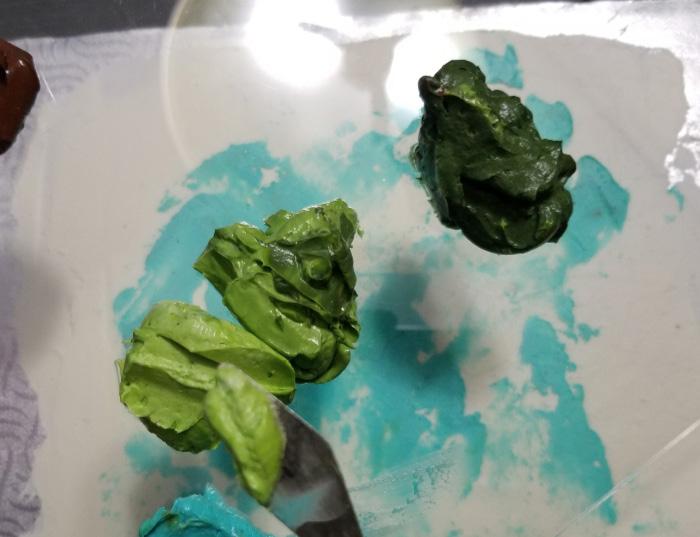
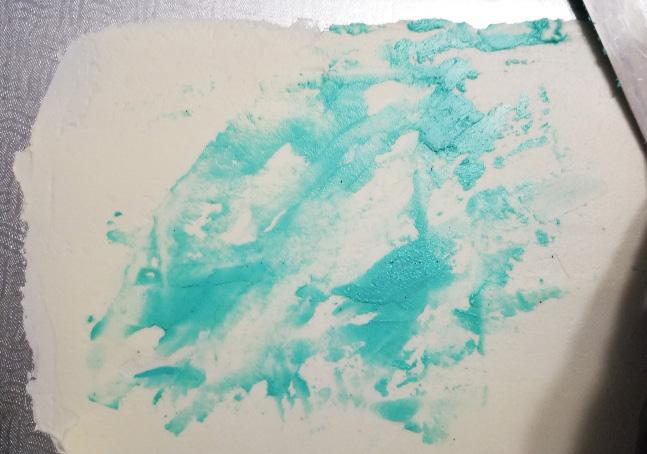
1. Add a base layer of plain buttercream onto your cake. Place it in the refrigerator for a few minutes while you mix the gel food colors with buttercream on a paint palette.
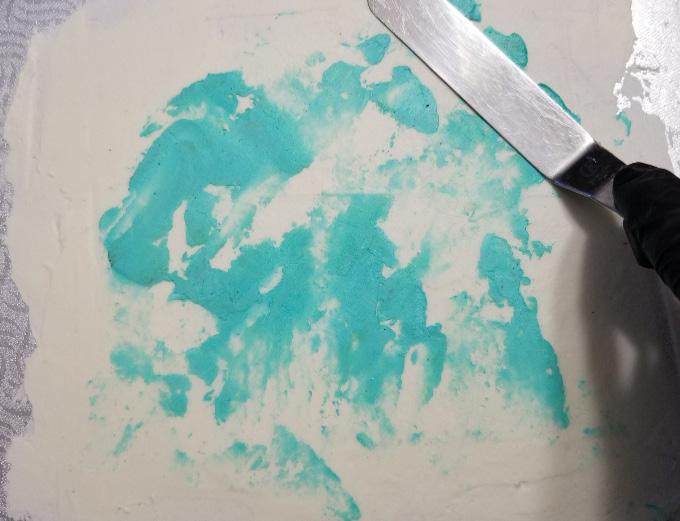
2. Using an offset spatula, place some spots of sky blue gel food color on the white base and spread it to create a sky.
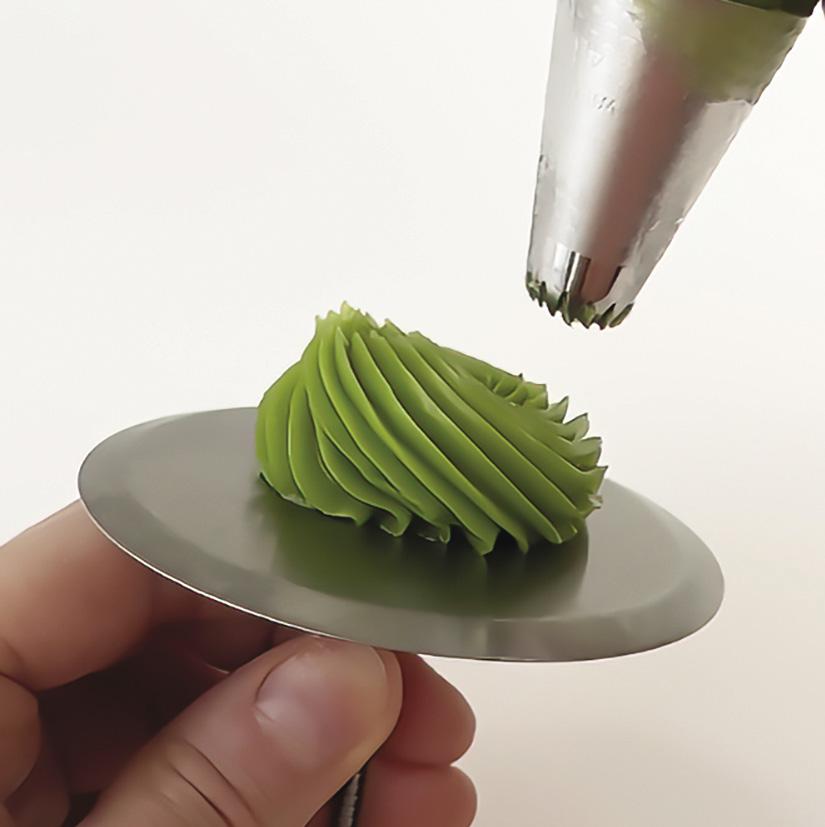
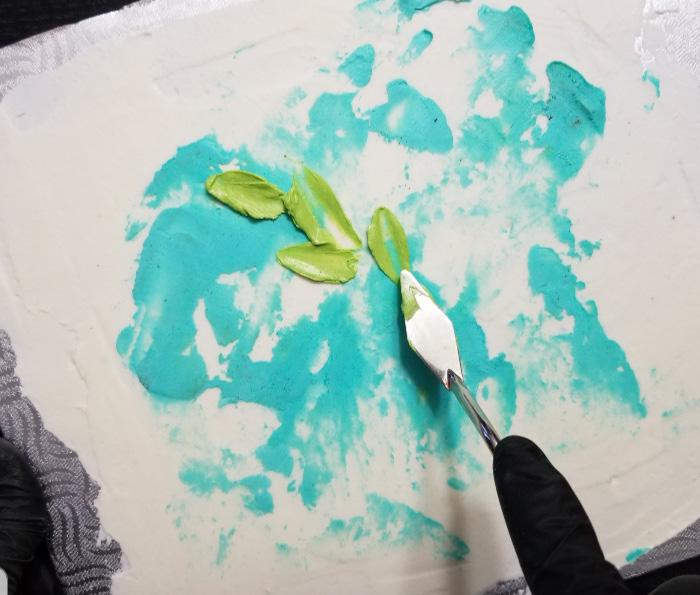
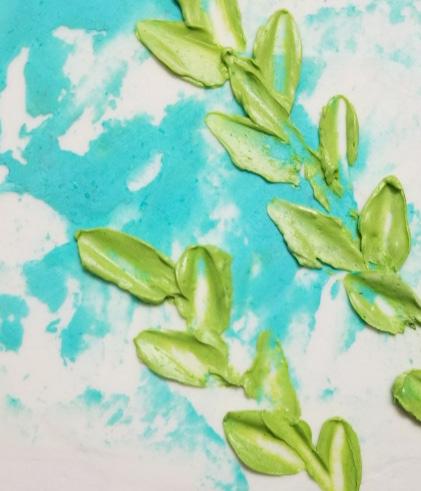
3. Using a spatula palette knife, apply some neon green gel food color to create a leaf. Take a little bit of buttercream on an angle on the back of knife and apply it on a diagonal.
4. Continue to add leaves to create layers of foliage.
54 americancakedecorating.com May | June 2023
TUTORIAL
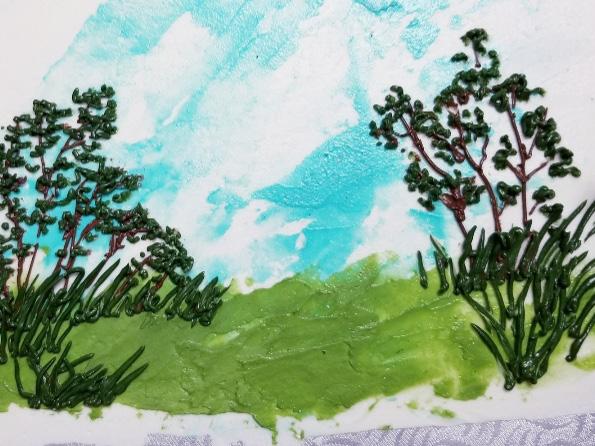
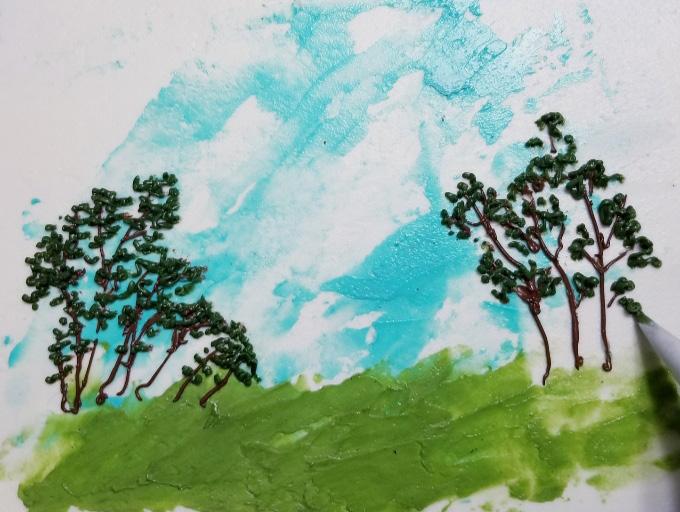
CREATE THE LANDSCAPE
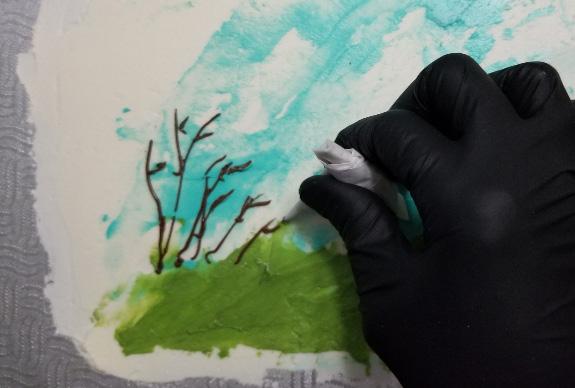
1. Using an offset spatula, place some spots of sky blue gel food color on the white base and spread it to create a sky.
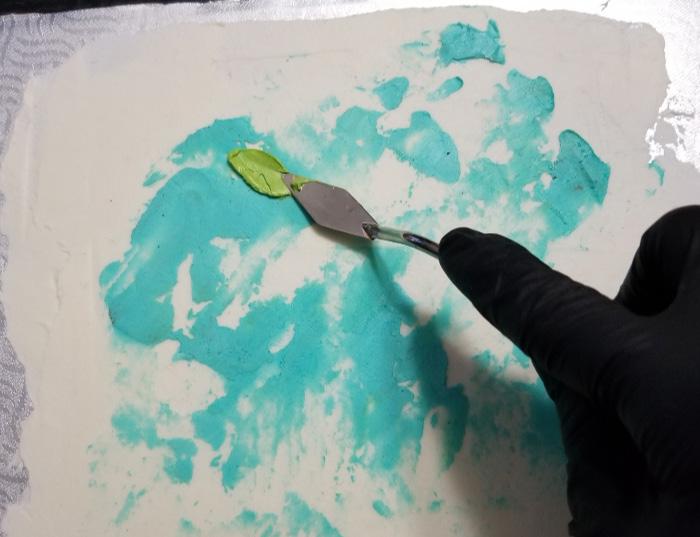

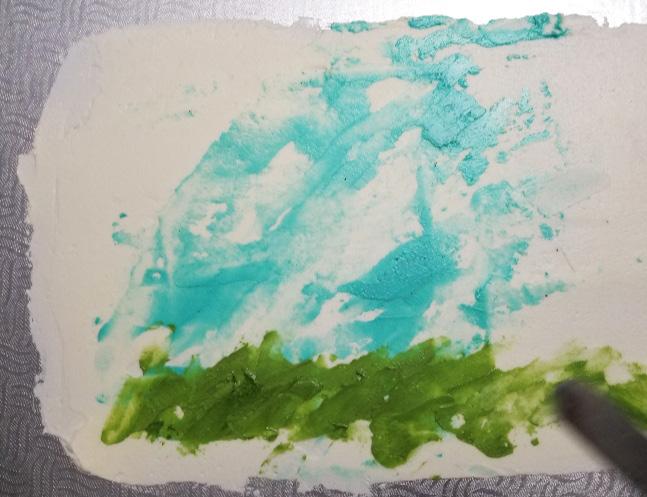
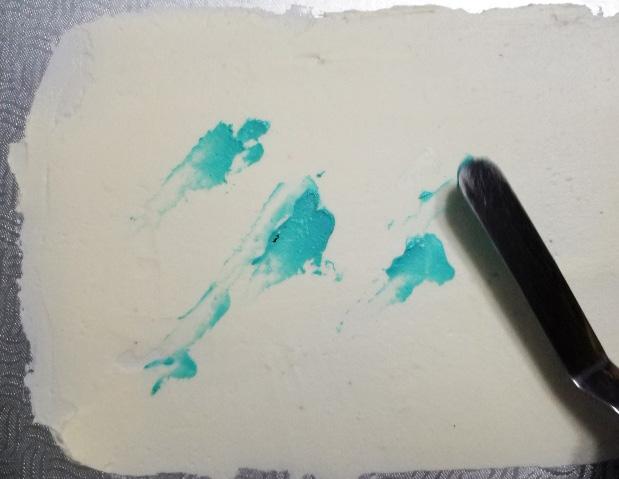
2. Apply some neon green gel food color along the bottom with your spatula. Spread the buttercream to create the grass.
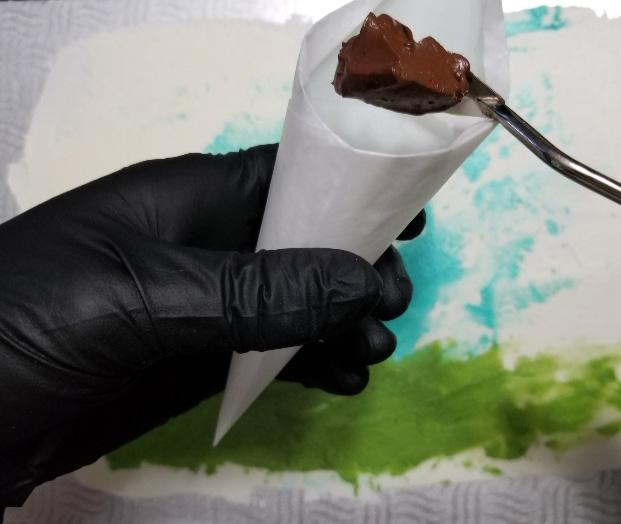
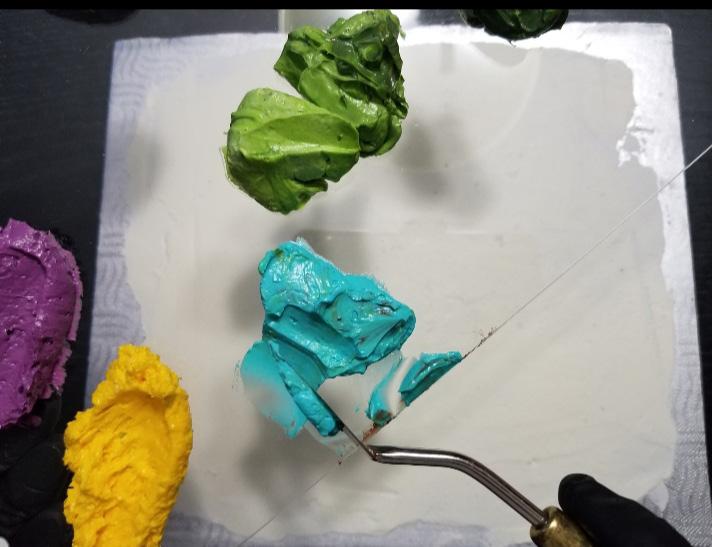
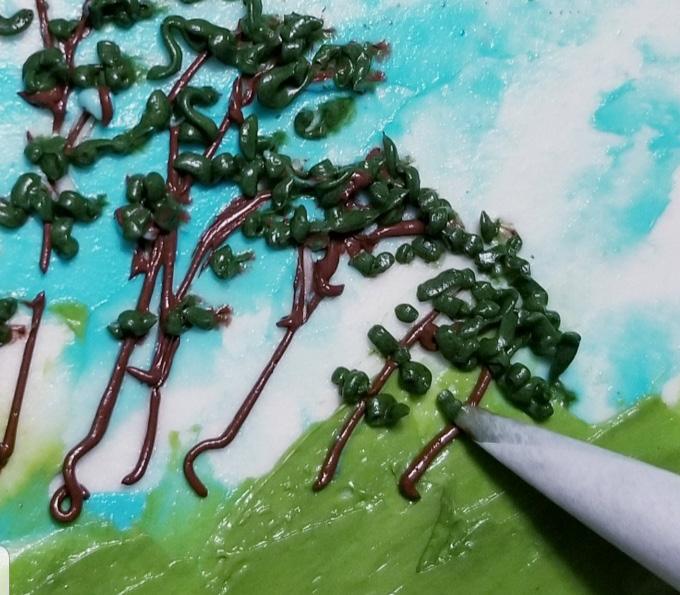
3. Create a cone out of parchment paper and place brown buttercream inside of it.
4. To create tree trunks and branches, pipe the brown buttercream.
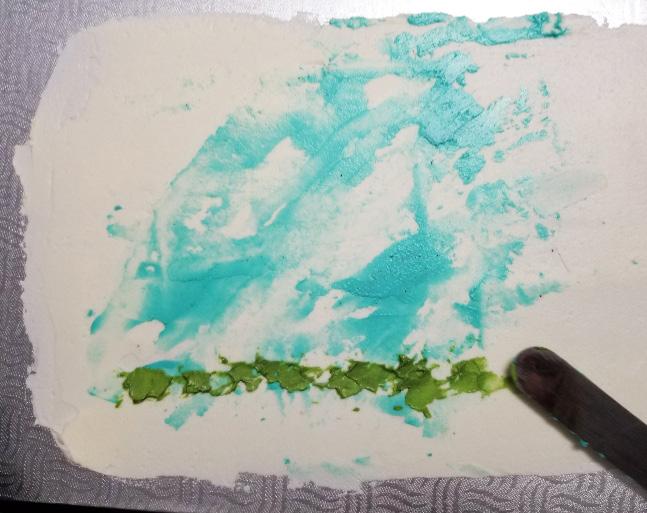
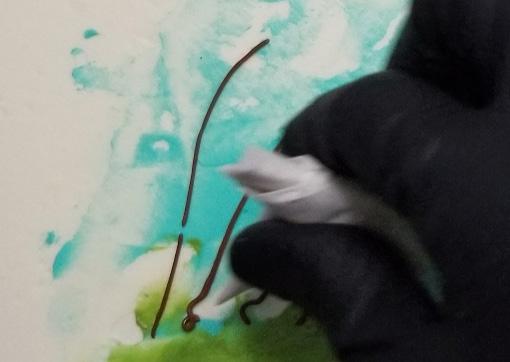
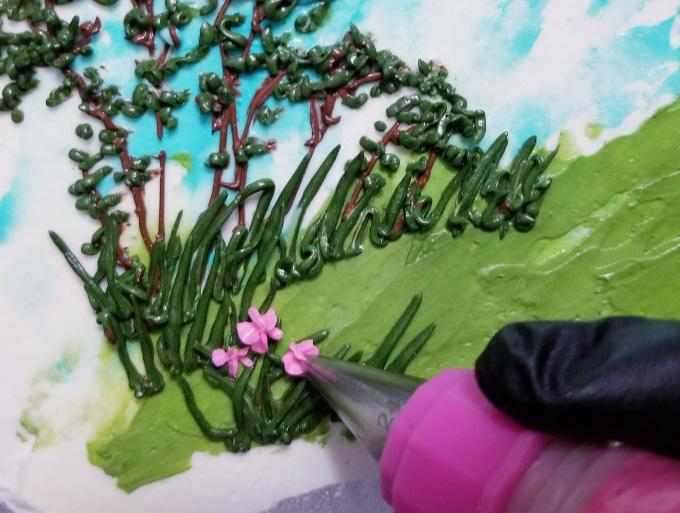
5. Using another cone of parchment paper, apply small dots of green moss buttercream to form leaves.
6. With the same cone and color, make lines to create the grass and higher foliage.
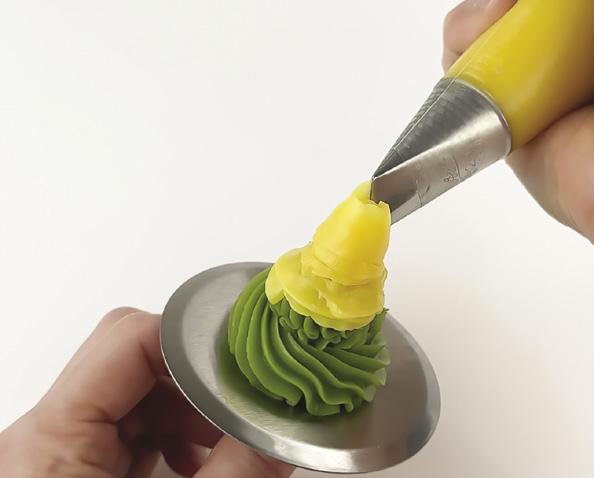
7. To make tiny flowers on the landscape, fill a piping bag fitted with star tip #24 with pink buttercream.
8. With the purple buttercream in a parchment-paper cone, make small dots to create gladioli.
9. Finish the flowers by piping yellow buttercream in the center from another parchment-paper cone. ACD
56 americancakedecorating.com May | June 2023 TUTORIAL
1 1a 1b 4b 2a 2b 3 2a 2b 3a 3b 4a Continue here to add the advanced landscape look.
Want

May | June 2023 americancakedecorating.com 57 TUTORIAL 4b 5 6a 7 9 6b 8 4a
to create this more advanced look, continue with Step 3 to add this look to your cake.
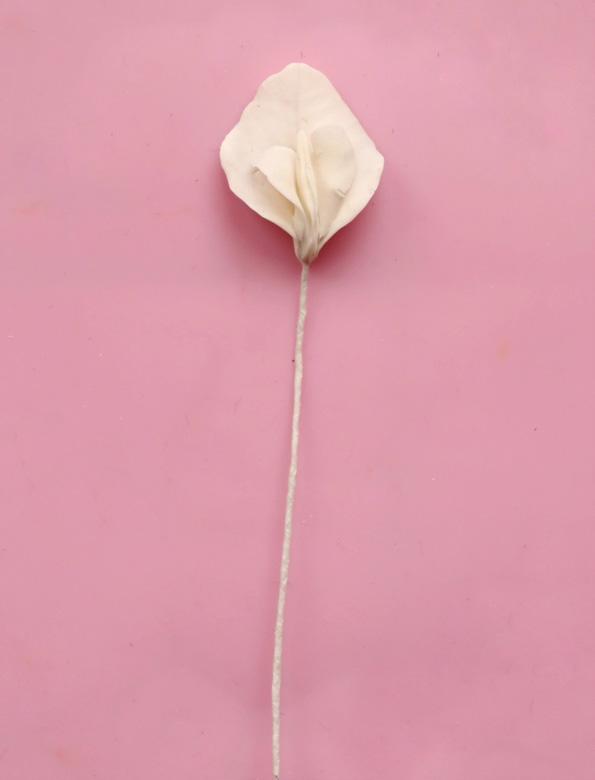
WISPY
Delicate flowers create a thoroughly modern and romantic look.
BY VERONICA SETA
LEVEL:
COMPONENTS
Veronica Seta is a multiaward-winning cake artist from Naples, Italy. She is most known for her stunningly realistic sugar-flower arrangements and classic design aesthetic. Veronica enjoys sharing her passion for cake artistry with others and travels internationally to teach at cake shows. She is an ambassador for many companies in the industry and has been featured in many notable cake magazines and blogs.
facebook.com/veronica.seta.33 instagram.com/veronica_seta
Edibles:
Gum paste: white and light green (Satin Ice)
Edible glue
Petal dust: lime, lemon yellow, pink, lavender, African violet, apple green, foliage green, brown, and aubergine (Sugarflair)


Airbrush colors: green and yellow (Cassie Brown)
Edible glaze
Equipment:
Floral wire: 20, 22, and 28 gauge (Hamilworth)
Floral tape: white, pale green, and brown (Hamilworth)
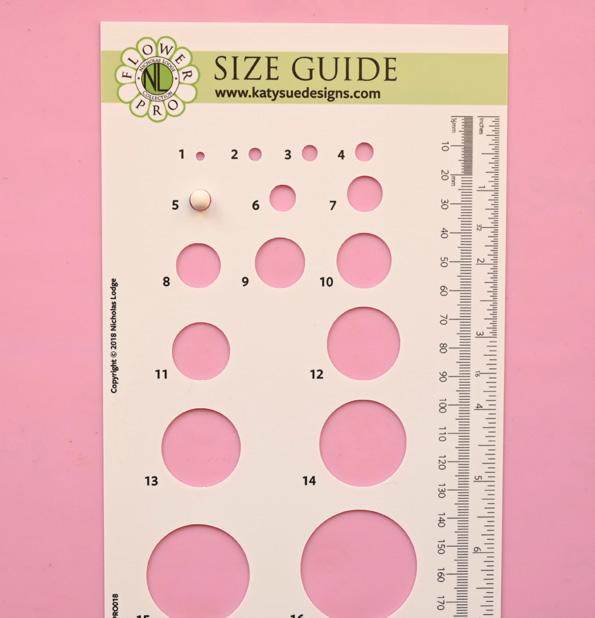
Size guide (Flower Pro by Katy Sue Designs)
Scraper (Flower Pro by Katy Sue Designs)
X-Acto knife
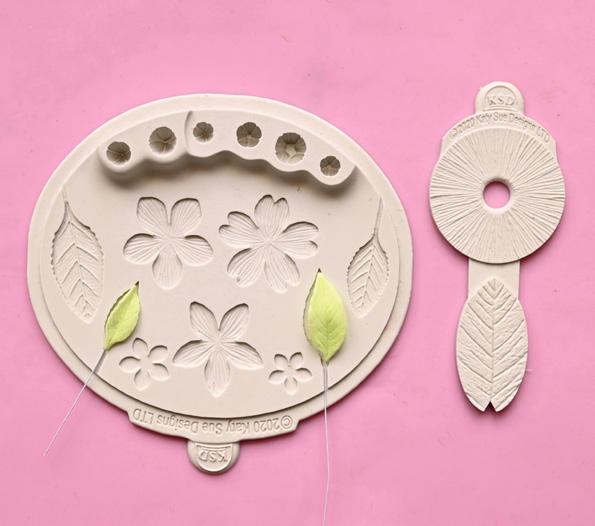
Blossom mold and veiner (Flower Pro by Katy Sue Designs)
Small scissors
Makeup sponge
Ultimate petal veiner (Flower Pro by Katy Sue Designs)
Companion tool (Flower Pro by Katy Sue Designs)
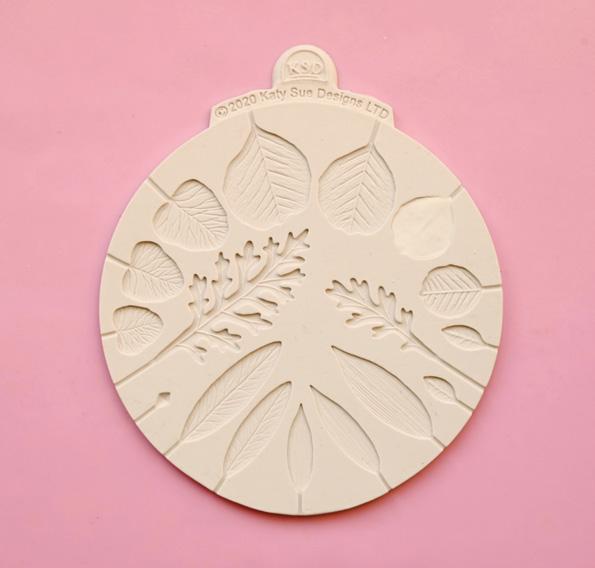
Wedding foliage mold and veiner (Flower Pro by Katy Sue Designs)
Paintbrushes (Cerart)
Airbrush Tissue
Wire cutters
Steamer
58 americancakedecorating.com May | June 2023
TUTORIAL
CREATE THE CENTER
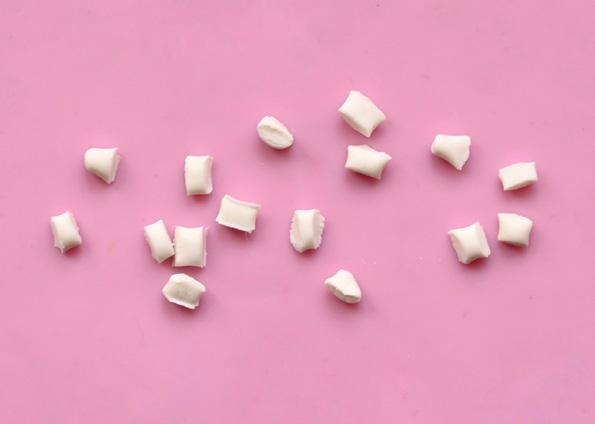
1. Cut 28-gauge floral wires into thirds. Wrap the end of each wire 4 times with white floral tape. Bend 1 end to make a hook and wrap them again 4 more times. Continue to wrap the wire ⅔ of the way down.
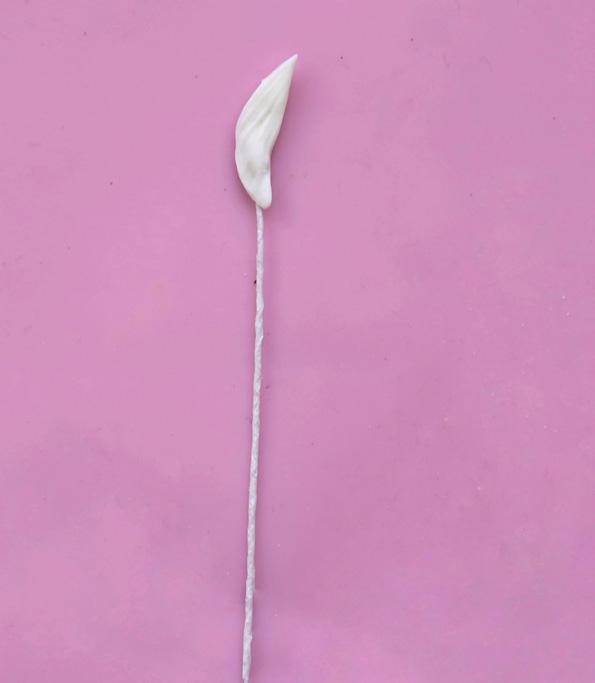
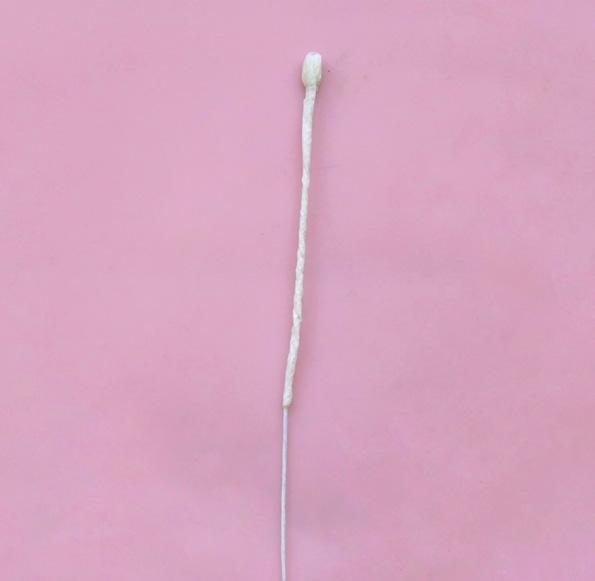
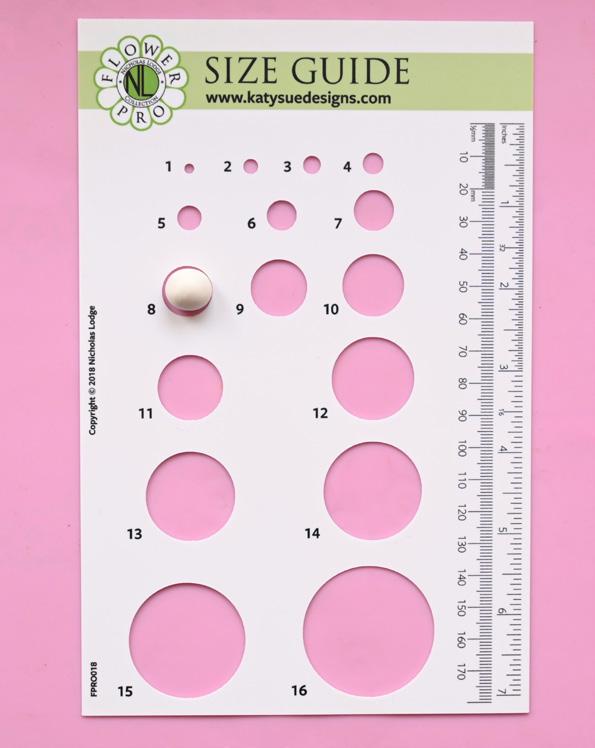
2. Mold a small amount of white gum paste into a tiny ball the size of #8 on a size guide and then form a little sausage shape with a scraper.
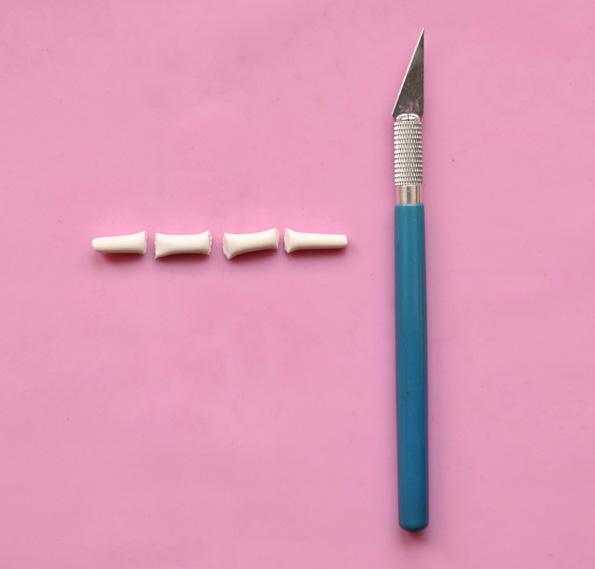
3. Cut the sausage into 4 parts, then cut those into 4 more parts each to get 16 pieces.
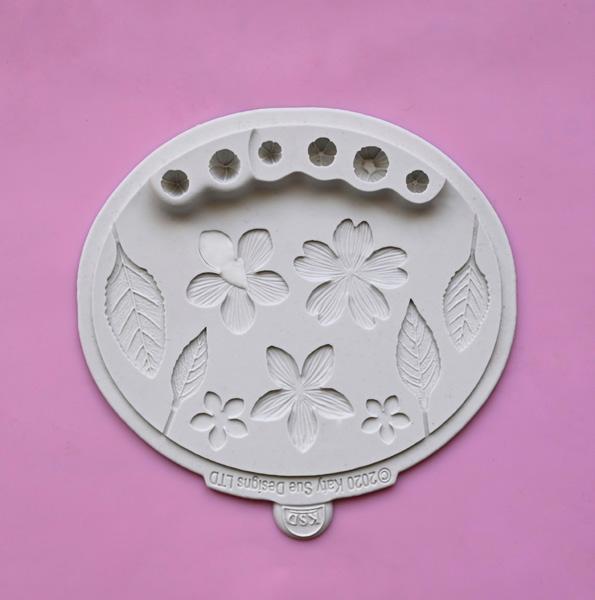
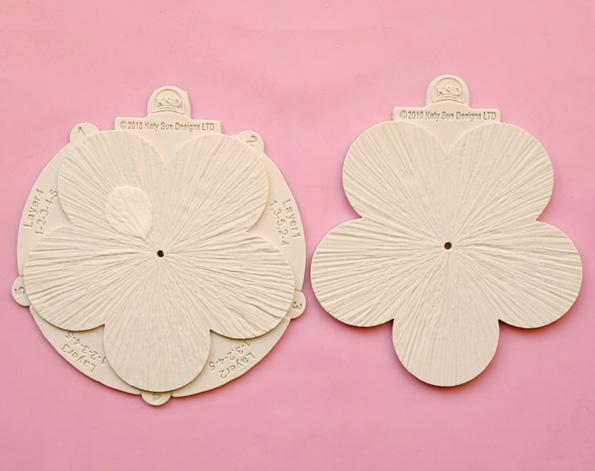
4. Make cones shapes out of the 6 pieces and press them into the petal cavity closest to the large leaf of the blossom mold.
5. Remove them from the mold and, following the veining on the petals, define the edges with a pair of small scissors. Turn them over onto a cosmetic sponge with the smooth side toward you. Brush edible glue over each petal and position them on Step 1’s floral tape bud toward the wide end.
6. Close the petal and pinch to fix the edges. Set it aside to dry. Repeat to create 6 buds.
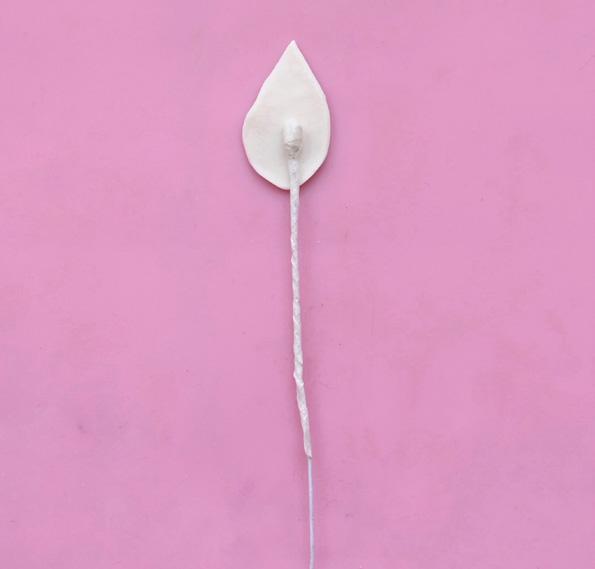
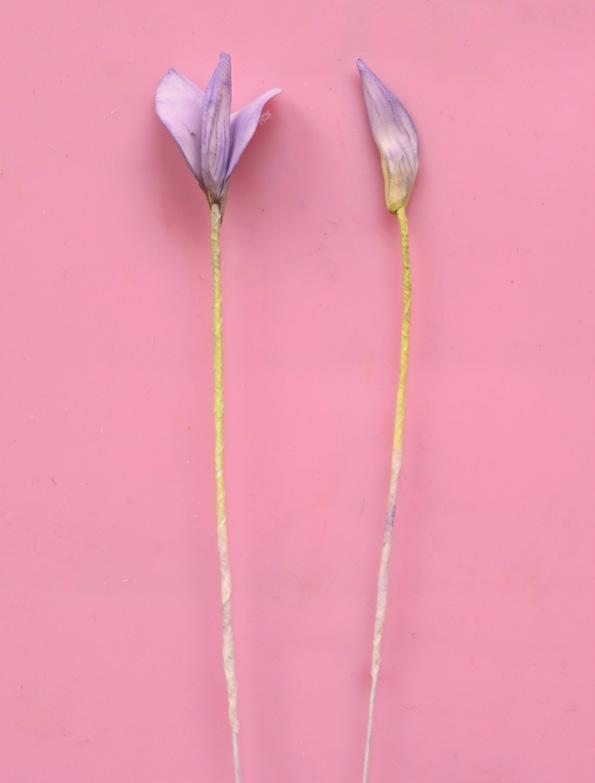
ADD THE SECOND PETAL LAYER
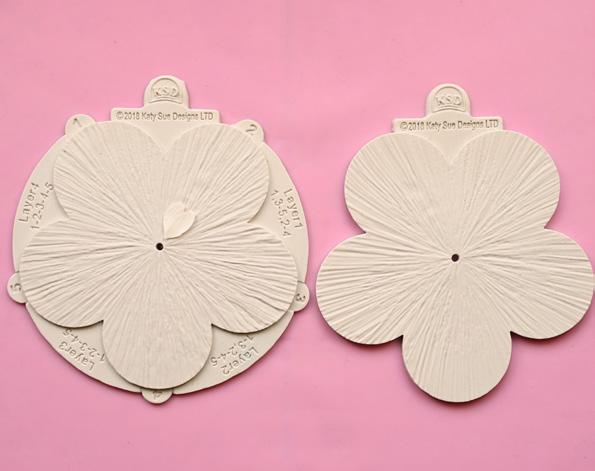
1. Make 9 more cone shapes and press them into the heart-shaped petal cavity.
60 americancakedecorating.com May | June 2023 TUTORIAL
1 2a 4 5 6 3a 2b 3b
Tip: KEEP THE GUM PASTE PIECES IN A PLASTIC BAG TO AVOID THEM DRYING OUT WHILE YOU WORK.
2. Remove them from the mold and use a companion tool to widen the petals into a heart shape. Press the petals into the petal veiner to vein both sides.
3. Cut the petals at the center down ⅓ of the way with scissors. Soften the heart shape with the shaft of the companion tool.
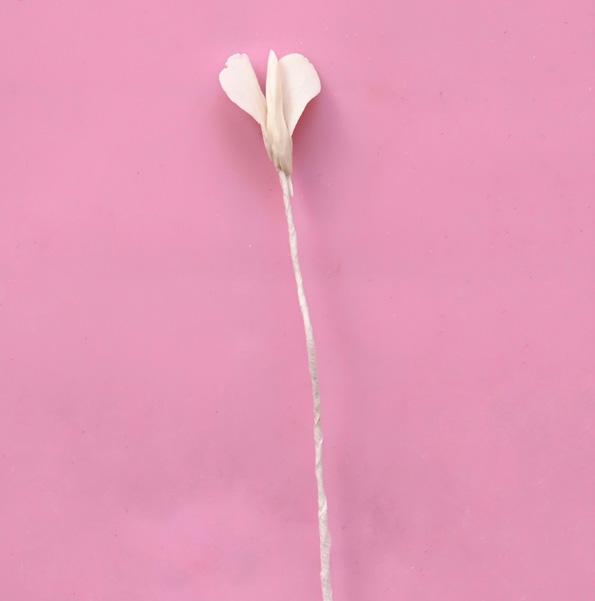
4. Turn the petals over onto your makeup sponge and brush edible glue on the pointed end. Place the center of the flower in the petal and then pinch around them. Open them up like wings and leave them to dry completely for 4 flowers and partially dry for 5 open petals.
5. Mold 5 small balls of white gum paste to the size of #5 on a size guide.
6. Press the gum paste into the cavity of medium silver dollar eucalyptus of the wedding foliage mold.
7. Remove the petals from the mold and press them in the petal veiner. Turn the petals over and frill the edges with the companion tool. Place them on the makeup sponge and vein them down the center with the needle end of the companion tool.
8. Brush edible glue at the base of the petals and wrap them around the center of 5 of the flowers. Pinch them back and hang them upside down to dry.
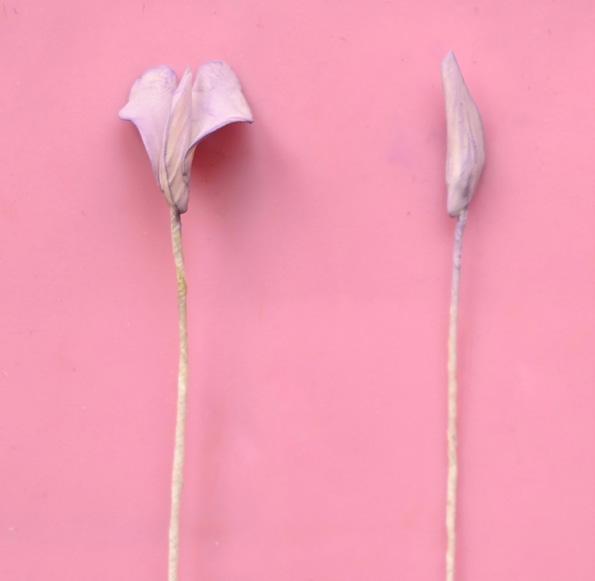
COLOR THE FLOWERS
1. Mix lime and lemon yellow petal dust colors and lightly color the top center of the open flowers. Mix white petal dust with a little bit of pink, lavender, and African violet and color the front and back of the flowers. Dust the edges and the center with African violet. Dust the stems and base with a mixture of lime and apple green.
May | June 2023 americancakedecorating.com 61 TUTORIAL 1 2 3 4 5 6 7 8
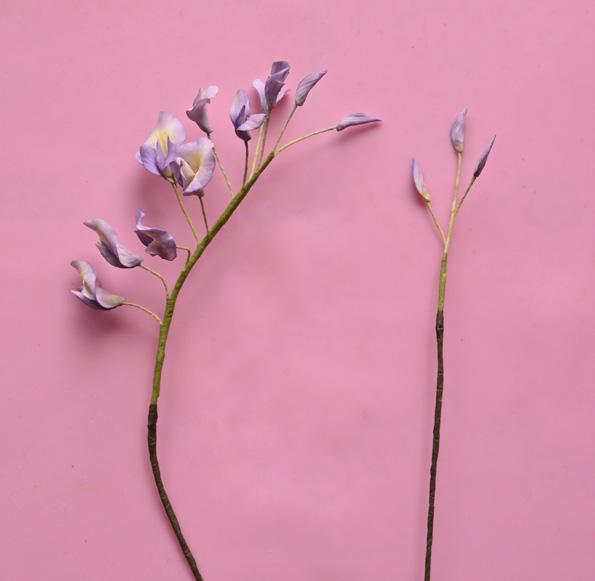
2. Repeat the same process with the buds and blooming flowers.
3. Using pale green floral tape, assemble the wisteria branches using 3 buds, 4 blooming flowers, and 5 open flowers. Add a 20-gauge floral wire as the last flower is attached. Continue taping down the wire with brown floral tape 3 times. Using a 22-gauge floral wire, repeat with a small cluster of 3 buds.

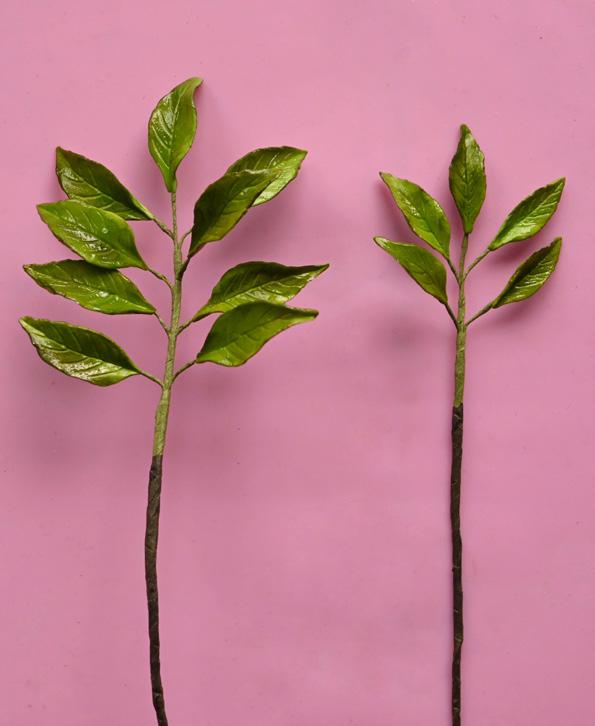
MAKE THE LEAVES
1. Form 9 small cones of pale green gum paste, insert 28-gauge floral wires dipped into edible glue in the cones, and press them into the plainedged leaf cavities of the blossom mold. Press the back veiner on top. Thin the edges and the base of the leaves with the shaft of the companion tool. Leave them to dry. Tape the base of each leaf with pale green floral tape.
2. Airbrush the leaves with a mix of green and yellow and let them dry completely. Dust the edges and center with foliage green petal dust, the base with brown, and the top third with a mixture of brown and aubergine. Glaze the leaves to set.
3. Assemble the leaves with pale green floral tape and add a 22-gauge floral wire where the last set of 2 leaves will sit. Continue wrapping the wires about an inch down, then change to brown floral tape for the rest, wrapping it around 3 times. Texture
the tape with wire cutters to give a wooden effect.
4. Repeat Steps 1 through 3 with the smaller leaf cavity, making a branch with 5 leaves.
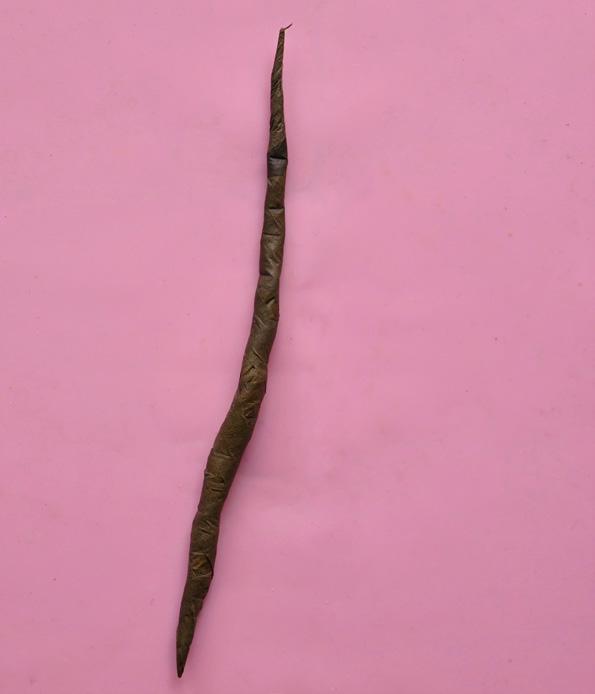
ASSEMBLE THE WISTERIA
1. Starting at 1 corner of a tissue, twist to form a cigar shape for a large branch. Cover it with brown floral tape and wrap it 5 times. Texture it lightly with wire cutters.
2. Bend the main flower group and tape the leaf cluster together with brown floral tape 3 times. Texture the branch like the leaf clusters, then tape the small cluster of 3 buds and small leaves. Twist the 2 branches together and
62 americancakedecorating.com May | June 2023 TUTORIAL
1 1 3 2a 2b
2–4
twist the large branch around them. Secure it with brown floral tape.
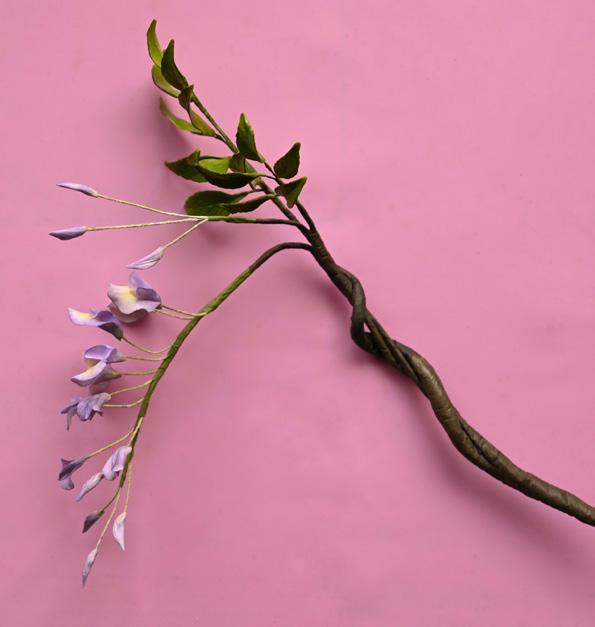
3. Dust the tape with brown petal dust, especially where the pale green and brown floral tapes meet. Steam to set and enhance the colors. ACD
May | June 2023 americancakedecorating.com 63 TUTORIAL 1
2&3
Tip: STEAMING THE ASSEMBLED BRANCHES BEFORE ATTACHING THEM TO THE CAKE WILL HELP SET AND ENHANCE THE COLORS.
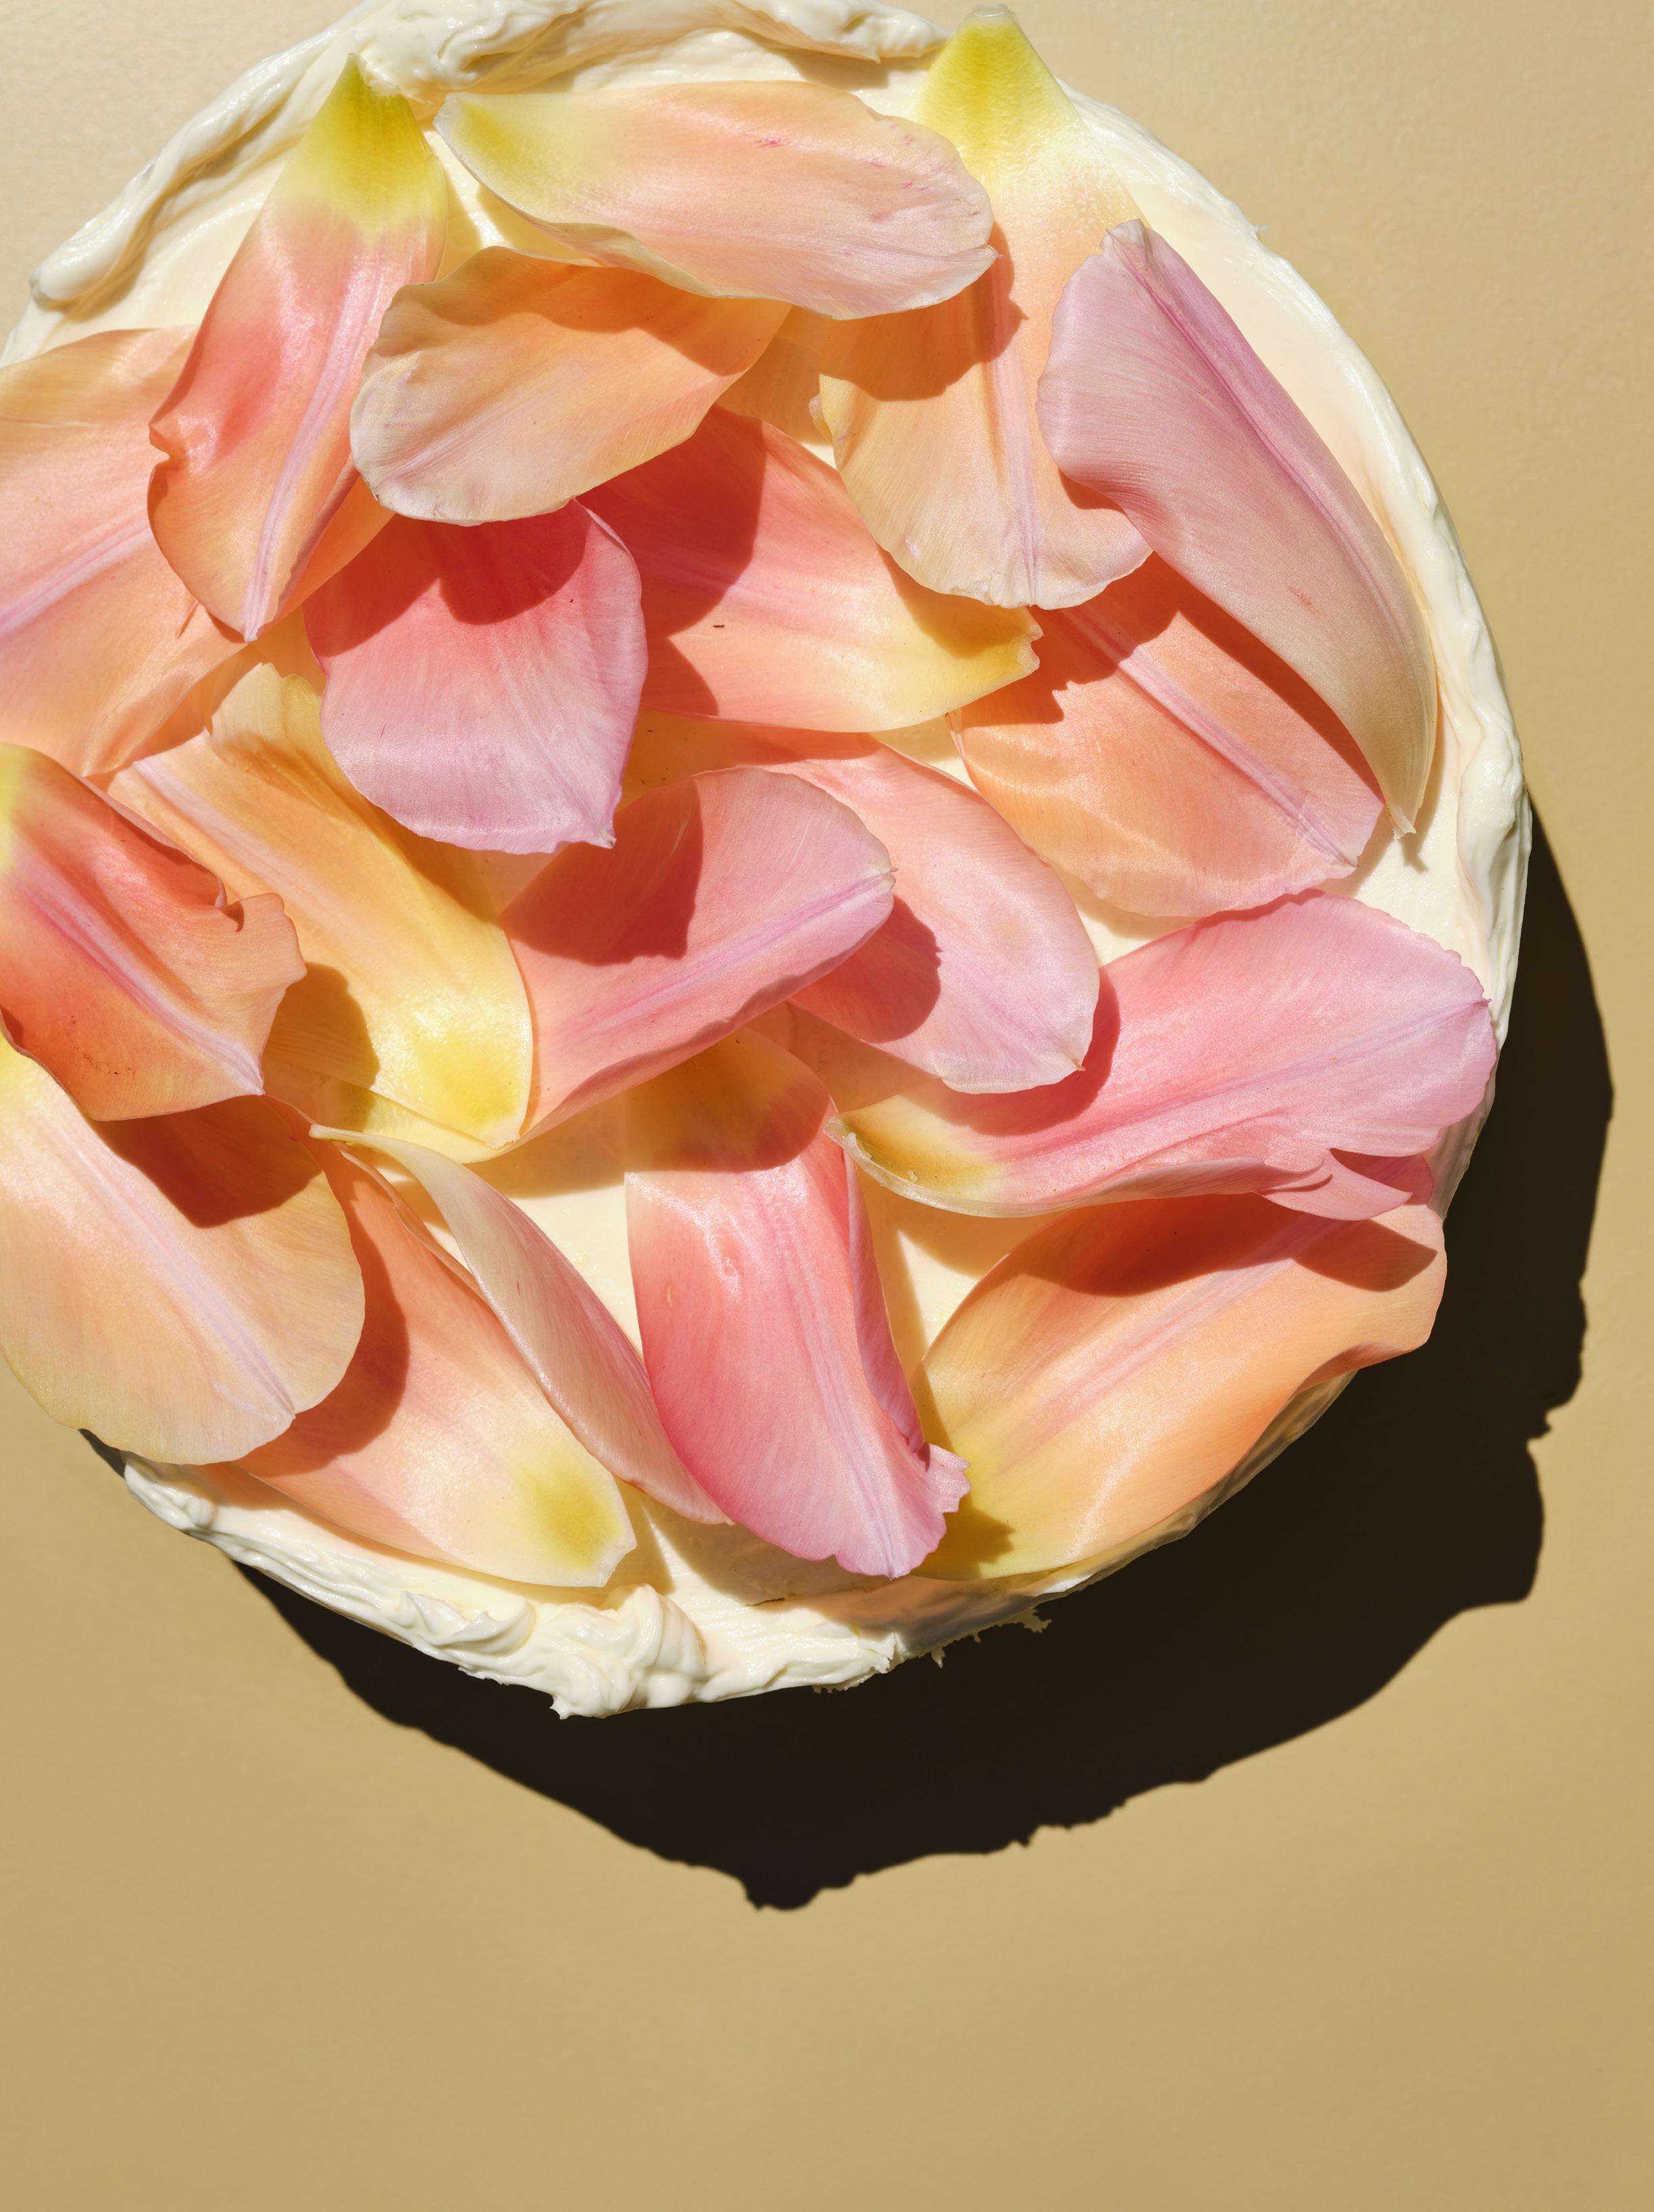
PASSION FRUIT, COCONUT, & TEQUILA Layer Cake
BY NATASHA PICKOWICZ
This cake is always a hit, as popular with couples who want a boozy wedding finale as with friends looking for a really good time. I like to call this cake the Sammy Hagar, in honor of his iconic tequila Cabo Wabo.
Makes one 8-inch layer cake. Serves 8 to 10
LEVEL:
Ingredients
Vanilla Sponge Cake
1 cup (240 grams) cold heavy cream
¾ cup (180 grams) Tequila and Coconut Soak
2 cups (480 grams) Passion Fruit and Olive Oil Curd, at room temperature
½ cup (60 grams) Coconut Streusel
2½ cups (535 grams) Vanilla Bean Swiss Buttercream, at room temperature
A large handful flowers or leaves, like tulips, roses, or pansies
with plastic wrap, being sure that the wrap has plenty of overhang.
Excerpted from More Than Cake: 100 Baking Recipes Built for Pleasure and Community by Natasha Pickowicz (Artisan Books). Copyright © 2023. Photographs by Graydon Herriott.
Instructions
1. Prep the cake mold. Line a deep 8-inch round cake pan (at least 3 inches deep), a springform pan, or a saucepan with straight sides
2. Cut out the cake layers. Using a small, serrated knife and the bottom of the cake mold as a guide, trace an 8-inch circle on the upper left-hand corner of the sheet. Trace another 8-inch circle on the lower right-hand corner of the sponge sheet. Carefully cut out the rounds with the knife and set aside. Use the bottom of the cake mold to trace a half-moon shape on the upper right-hand corner of the sheet, and then another one on the lower left-hand corner of the sheet, and cut these out. Finally, cut out a rectangle 8 inches long and 1 inch wide from the center of the sheet. You’ll piece these 3 scraps together to form a circle for the center layer of the cake.
64 americancakedecorating.com May | June 2023 BAKE THE BOOK
ip: I PREFER TO AGE LAYER CAKES AT LEAST 2 OR EVEN 3 DAYS, SO ALL THE HARMONIOUS FLAVORS CAN MINGLE AND MARRY.
T
3. Whip the cream. In a stand mixer fitted with the whisk (or in a large bowl using a handheld mixer), whip the heavy cream until stiff, about 3 minutes. Keep chilled until ready to build the cake.
4. Build the cake. Place 1 round cake layer in the bottom of the plastic wrap–lined pan. Dab ¼ cup (60 grams) of the tequila coconut soak onto the cake. Add ⅔ cup (160 grams) of the passion fruit curd and spread it evenly. (If the curd feels overly stiff in the container, work it a bit with a small offset spatula or spoon to make it easier to spread.) Sprinkle ¼ cup (30 grams) of the coconut streusel on top. Spoon half of the whipped cream on top and gently smooth and press it out to the edges. (To avoid lifting up any of the coconut crumbs, dab the cream in spoonfuls all over the surface and gently press down to smooth.) Arrange the 2 half-moons and the rectangular piece on top to form a round, then add ¼ cup (60 grams) soak. Layer ⅔ cup (160 grams) curd, the
remaining ¼ cup (30 grams) coconut streusel, and the other half of the whipped cream on top. Finally, place the second round on top to seal the cake shut, and brush the remaining ¼ cup (60 grams) soak on top. (You will have about ⅔ cup (160 grams) passion fruit curd left over, which you need for the buttercream.) Securely wrap the entire cake form in plastic wrap and transfer to the refrigerator to rest for at least 8 hours or to the freezer for at least 5 hours, or up to 3 days, so the flavors can meld.
5. Mix the passion fruit buttercream. After the cake has rested, it will be stable enough to be iced. In a stand mixer fitted with the whisk, whip the buttercream until smooth, about 2 minutes. Add the remaining passion fruit curd and whip until smooth, glossy, and thick, another 3 minutes.
6. Frost the cake. Invert the chilled cake onto a platter or a 10-inch cardboard cake round. (If you have a cake turntable, place the cake, resting on a cardboard round, on the center of the turntable.) Remove the cake form, then peel off the plastic wrap. Use an offset spatula to dollop half of the whipped buttercream all over the surface of the cake. Spread the buttercream all the way to the edges of the cake. Dab the remaining buttercream along the sides of the cake, smoothing each dab to touch the one before, until none of the cake is visible. Once the sides of the cake are roughly covered in buttercream, run the offset spatula along the surface again to smooth. Then, run the offset spatula along the sides of the cake, where the excess buttercream will have gathered, to wipe away excess frosting.
7. Decorate the cake. Scatter the flower petals or leaves over the surface of the cake, letting them fall in a natural way. The cake can sit out in a cool environment for 5 to 6 hours, but on a hot day, beware of greasy-looking icing. And the cake tastes best if the slices are still slightly chilled. If the cake was fully frozen before icing, allow at least 4 hours to thaw before serving. ACD
For all the recipes, check out Natasha’s new book.
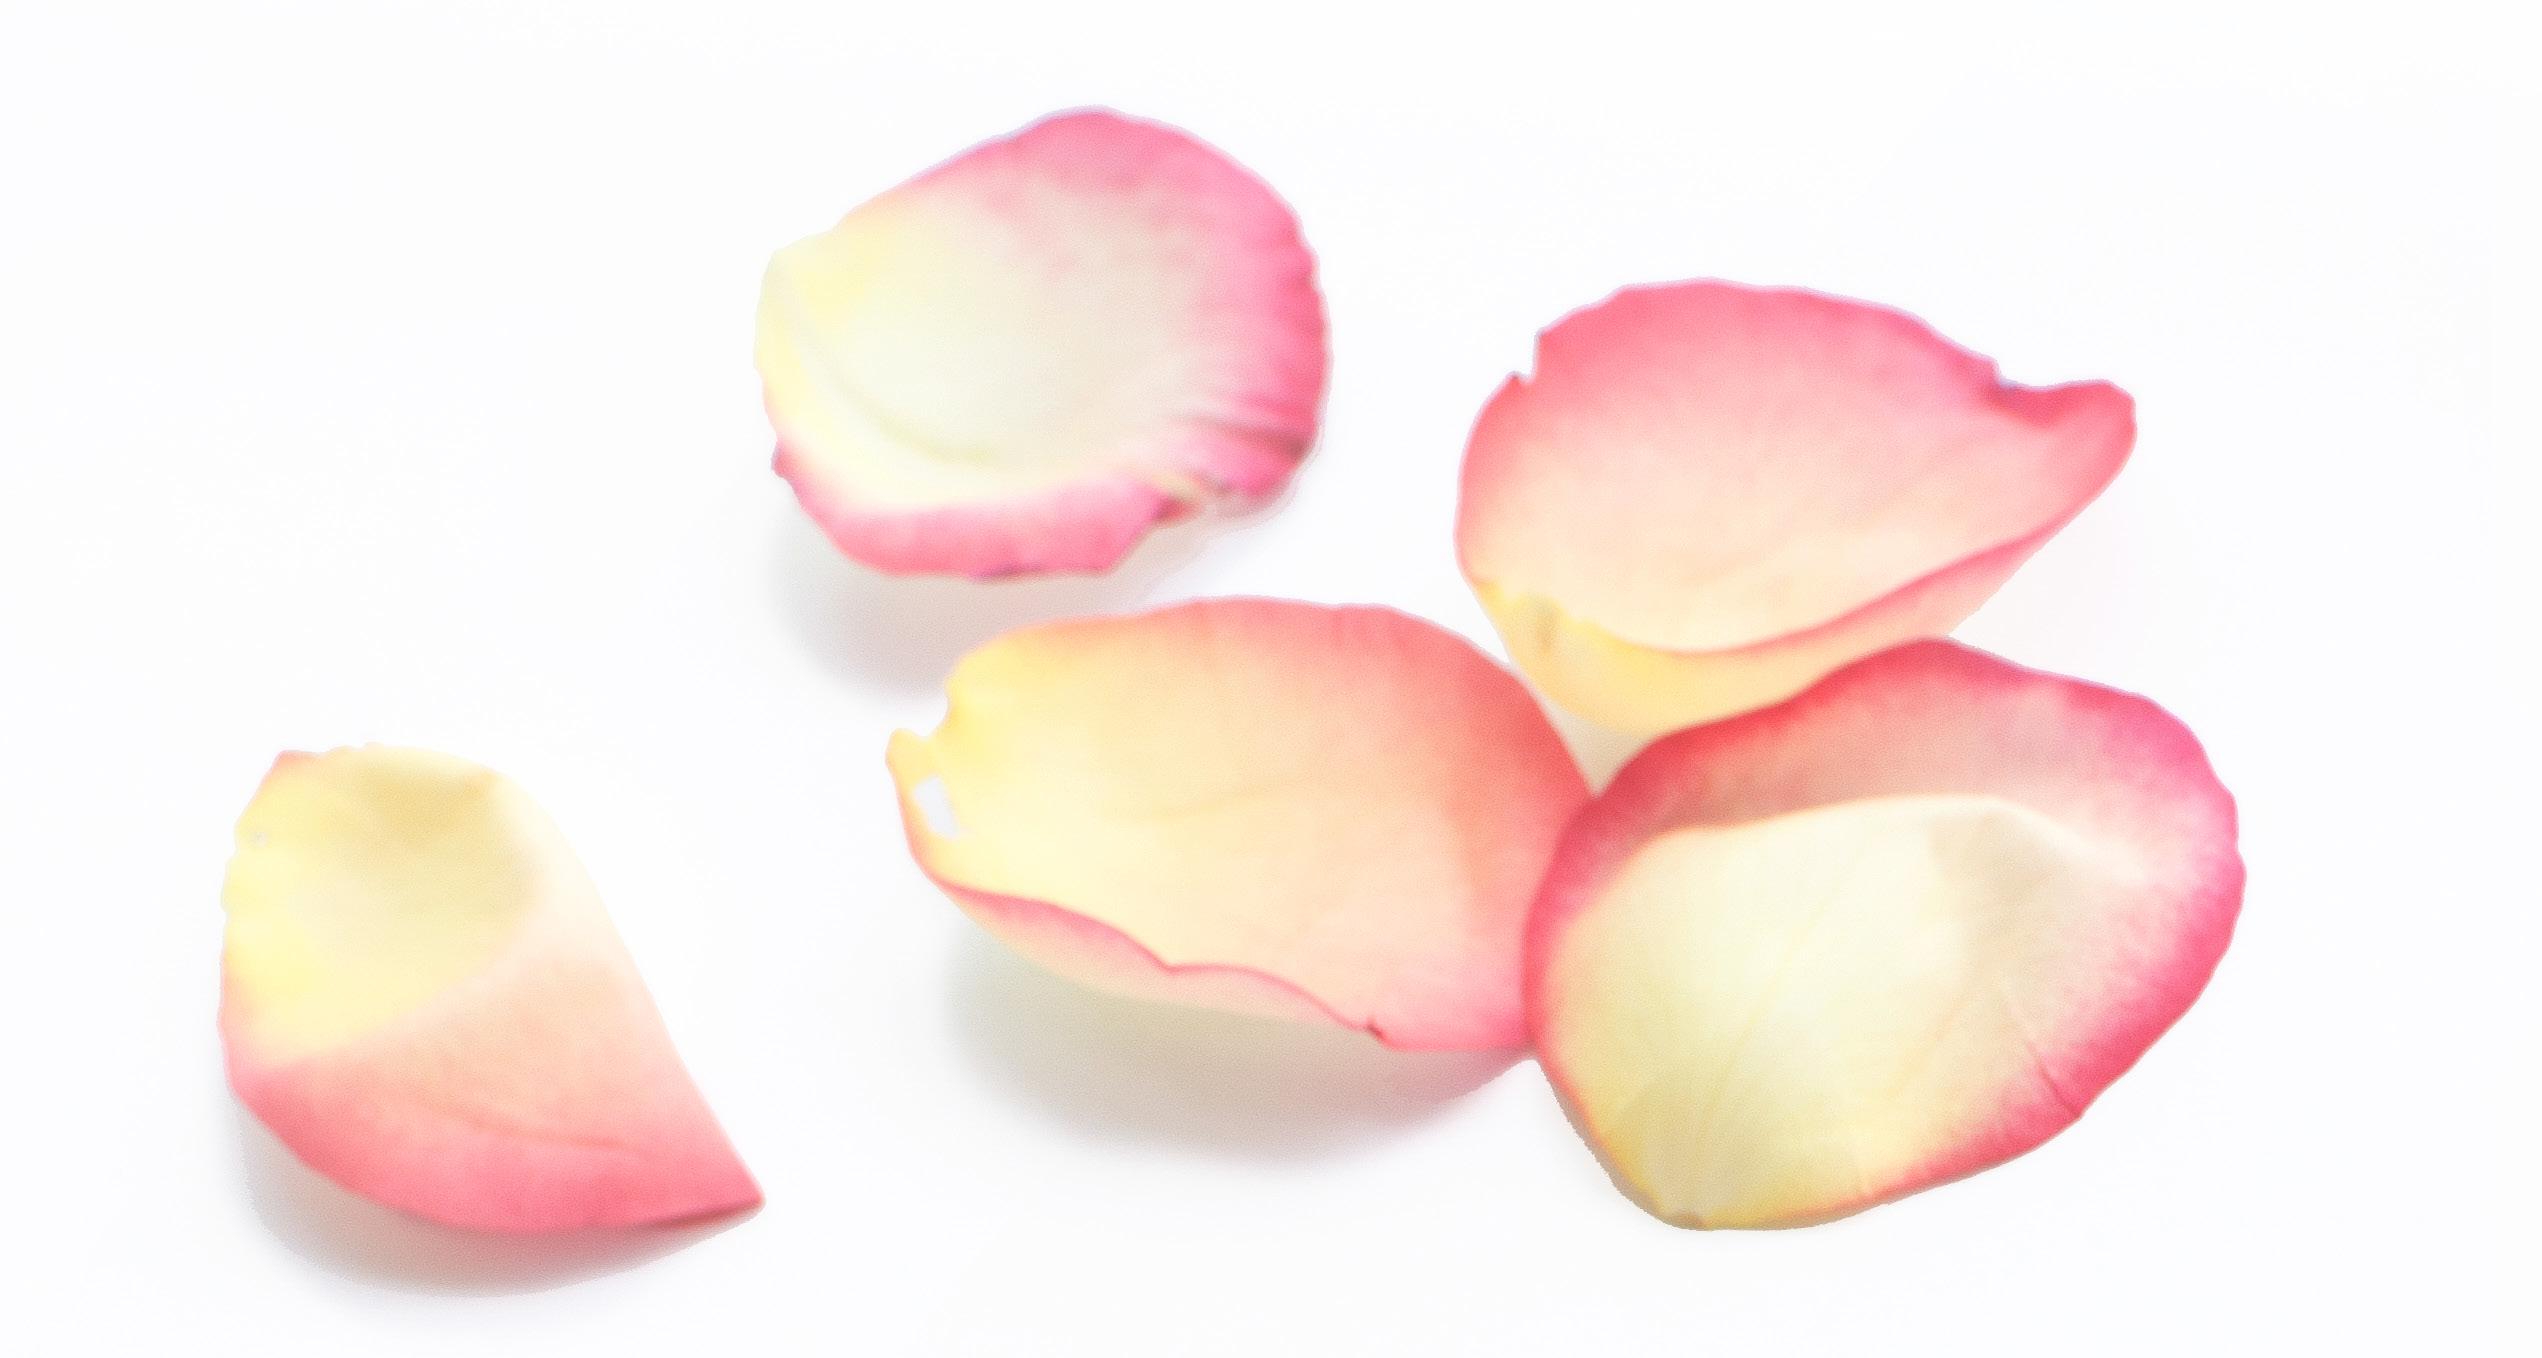
66 americancakedecorating.com May | June 2023 TUTORIAL
T
ip: TULIPS, ROSES OR PANSIES WORK GREAT FOR TOPPING YOUR CAKE.
ART DECO ART DECO

MEETS ARCHITECTURE
BY SHARON SIRIWARDENA
or this collaboration, sugar artists had to explore building structures that are found in our everyday life with art deco elements. They needed to stretch their creativity to make sure it resembled a building or a facade that belonged to a part of a building. With more than 50 artists taking part in the collab, the originality and creativity seen in these pieces are outstanding. You can find all the pieces on the Facebook page. And if you would like to be part of future cake collaborations, we invite artists of all skill levels to join our main cake collaboration group on Facebook called The Cake Collective.
facebook.com/Art-Deco-MeetsArchitecture-A-Cake-CollectiveCollaboration

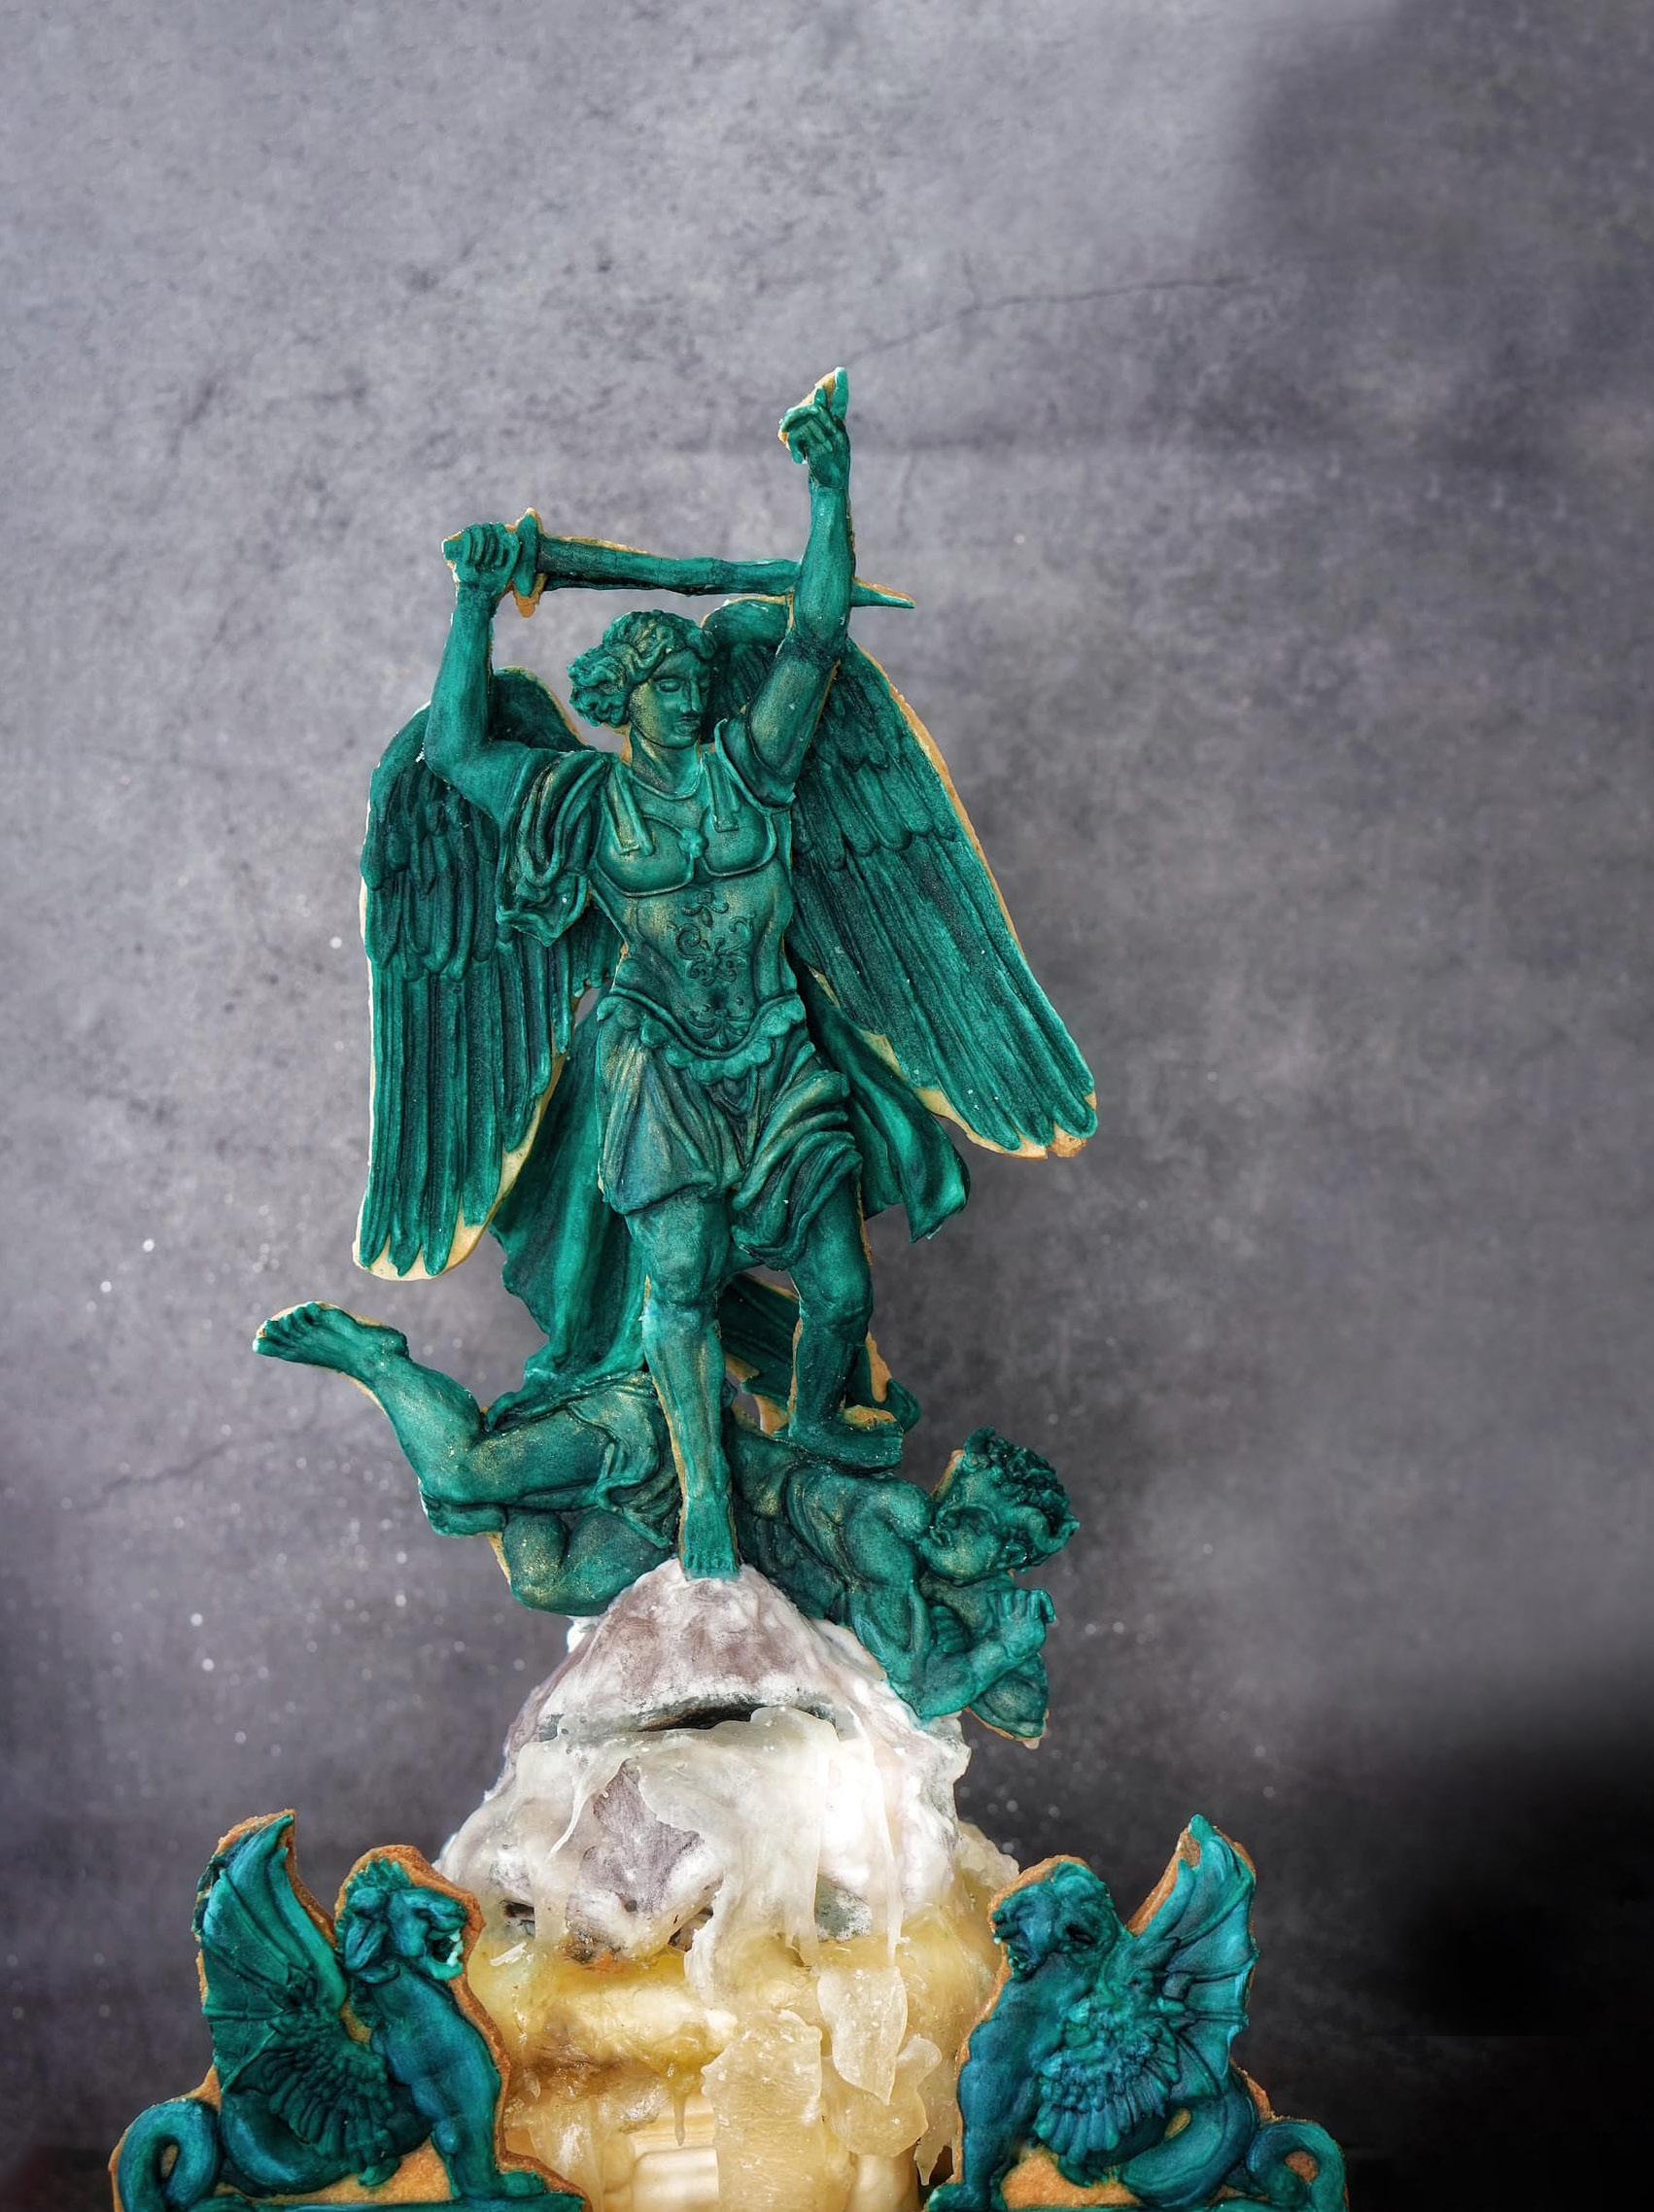
CAKE COLLABORATION
Lê Phan Viên Hy
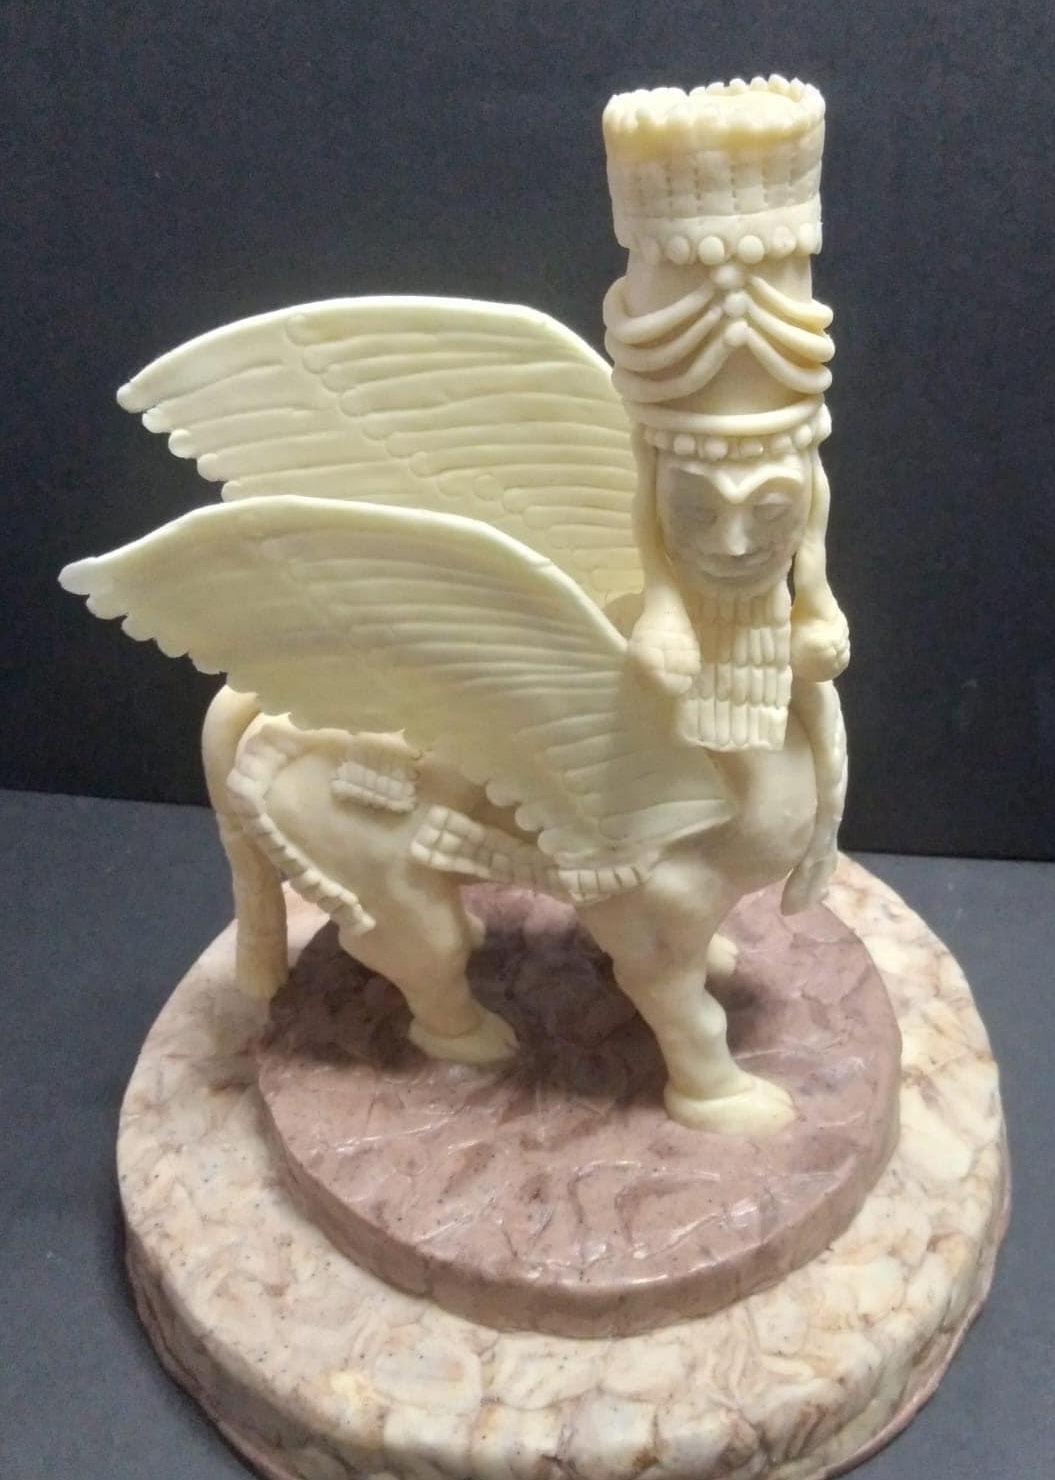
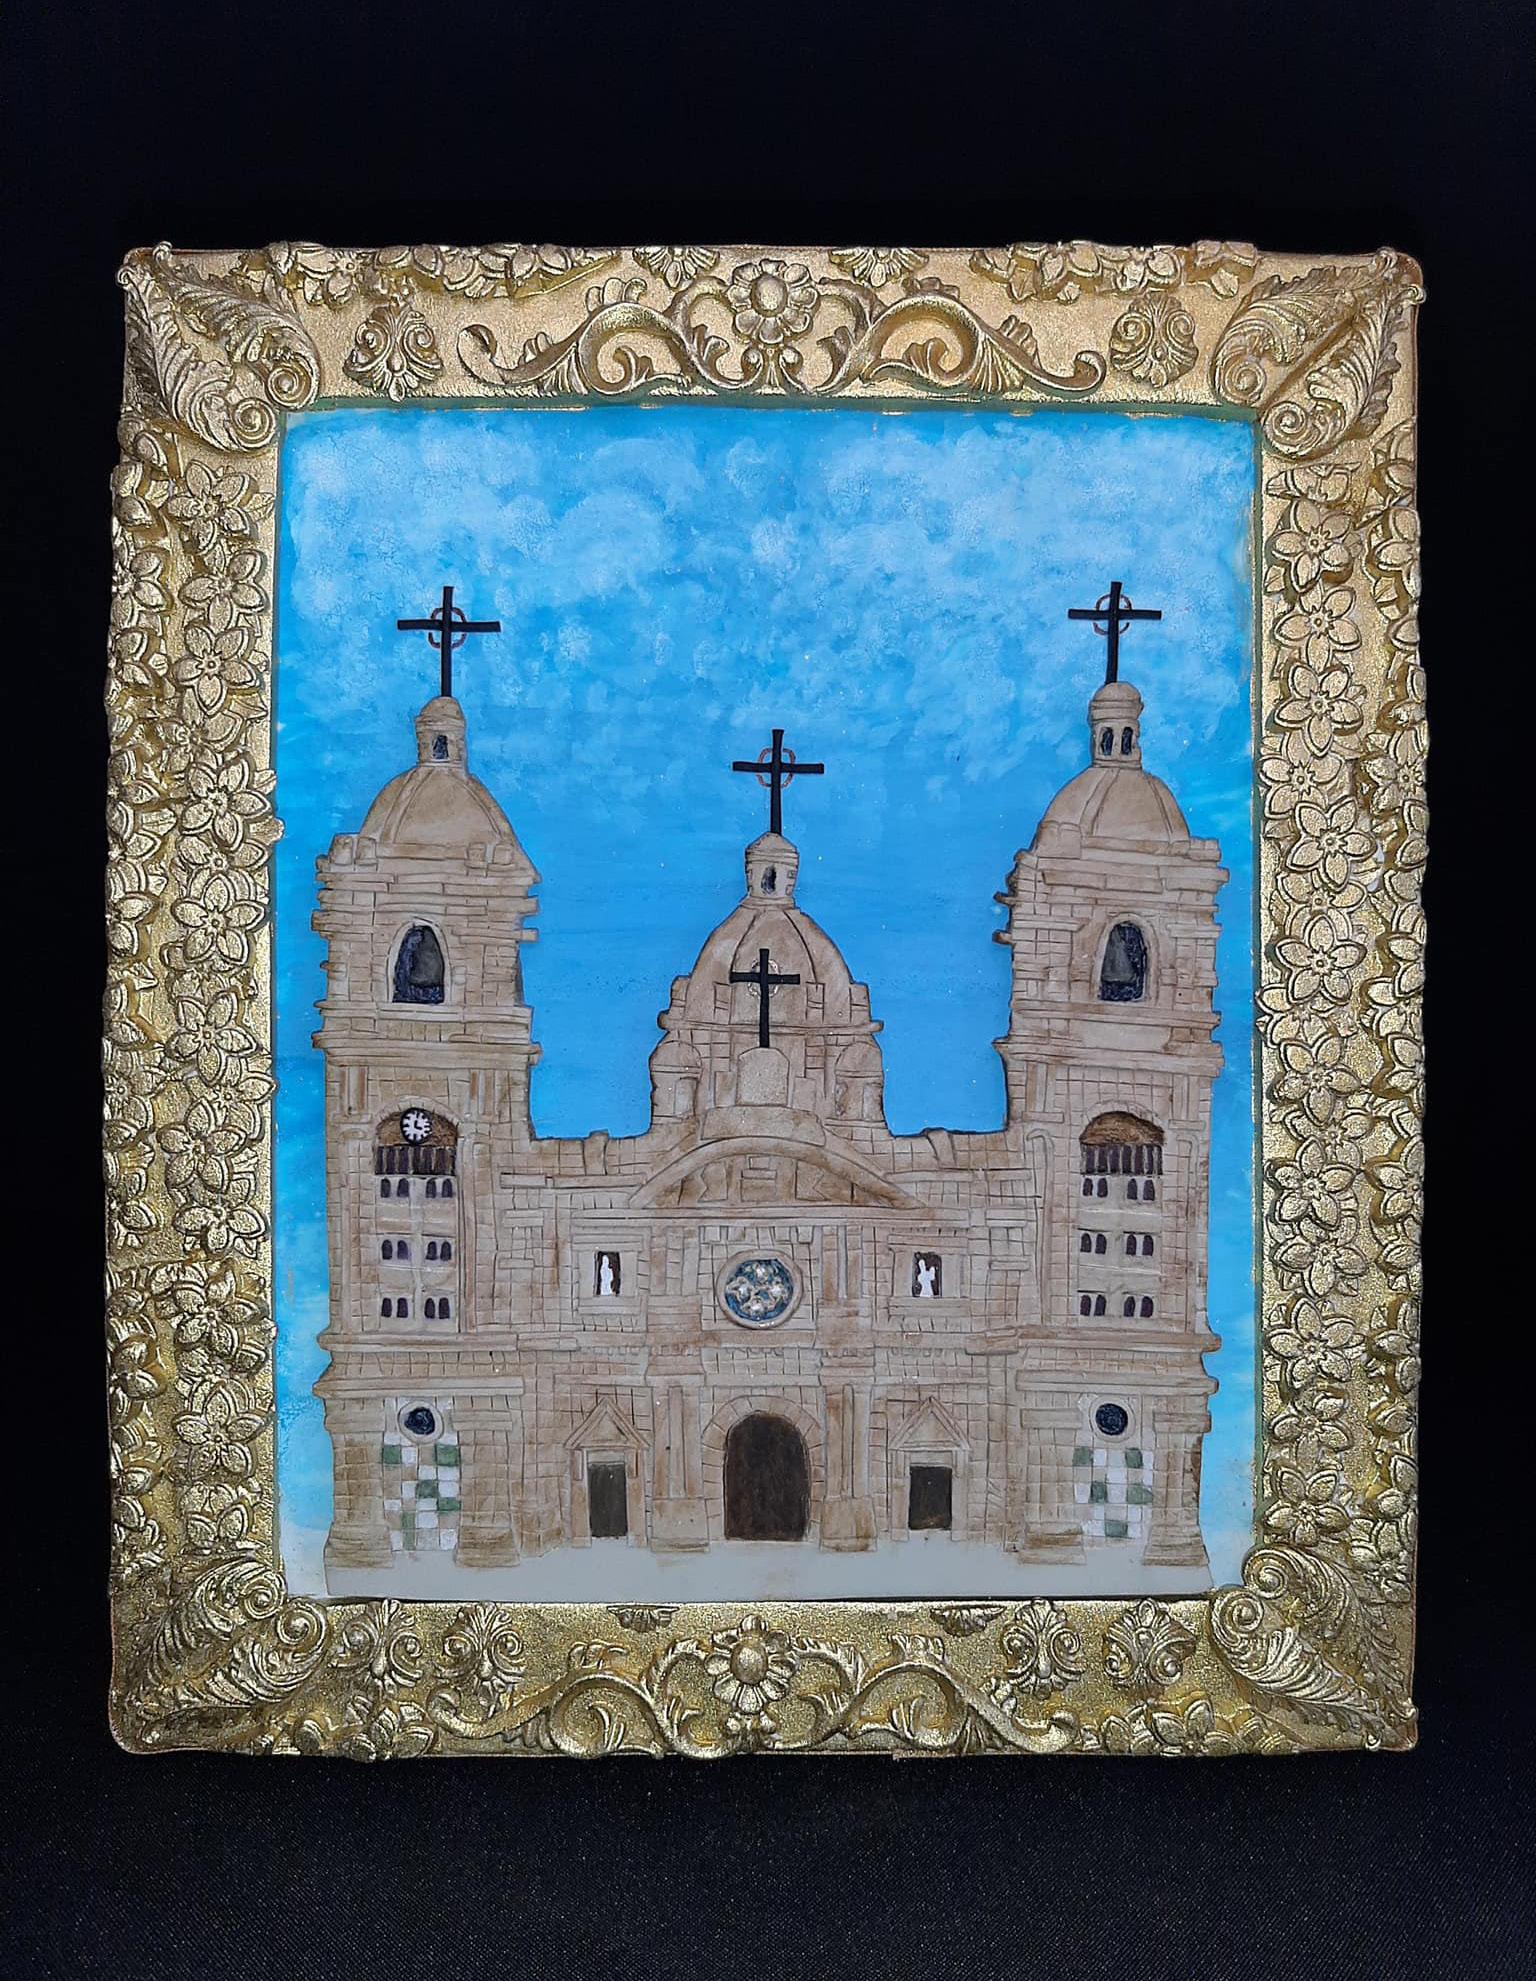
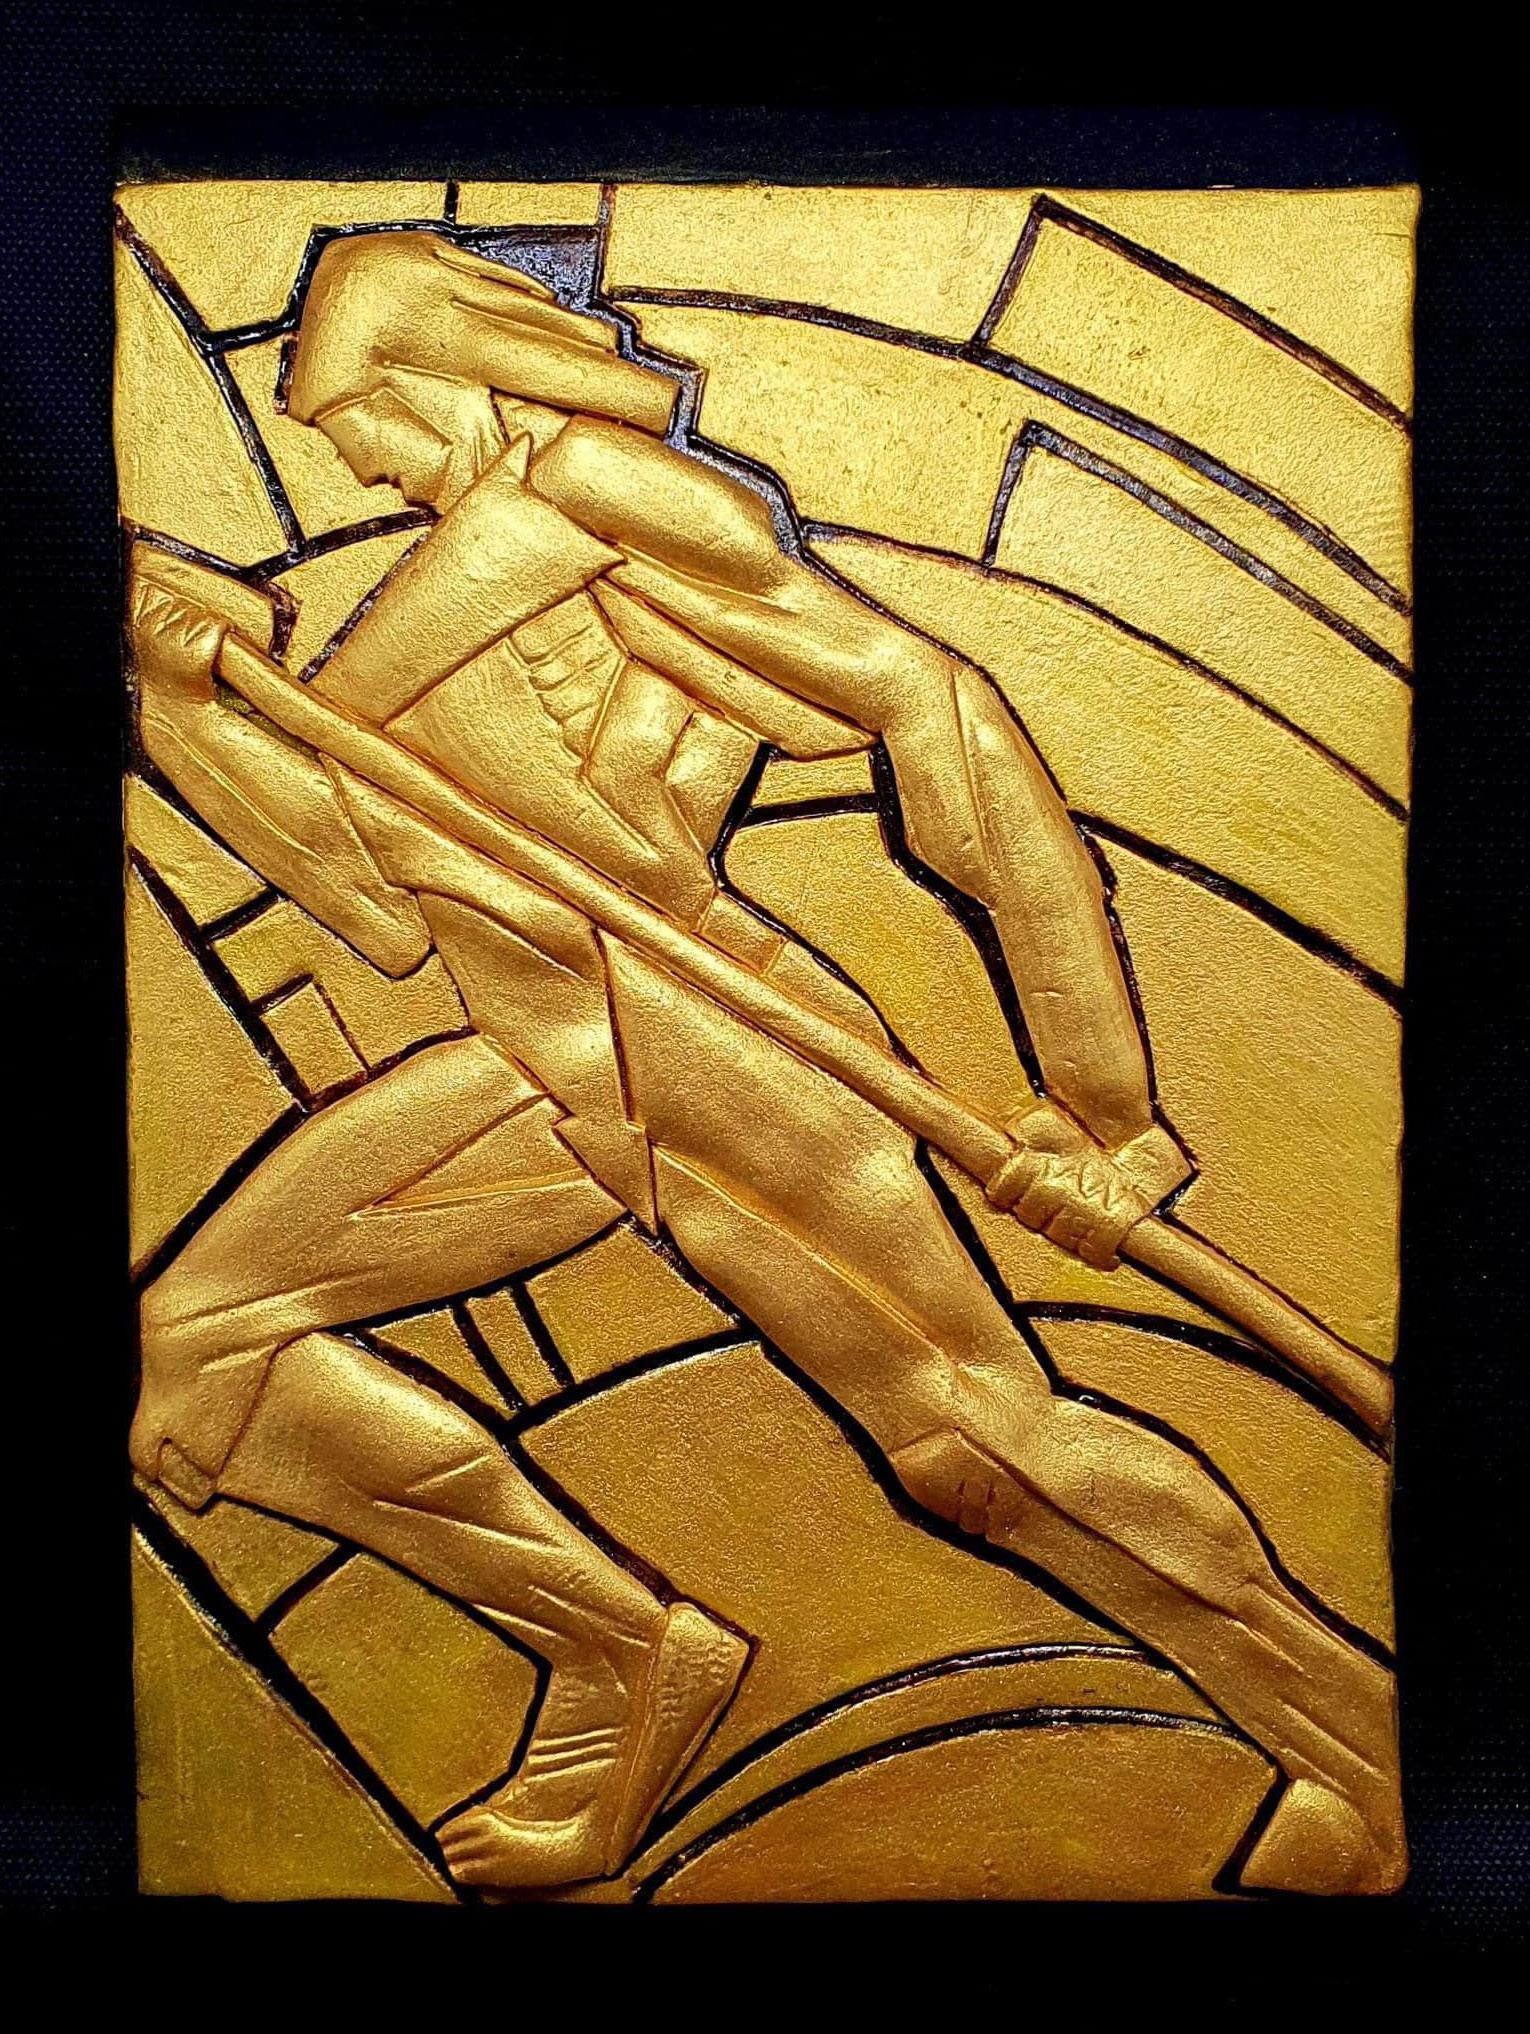
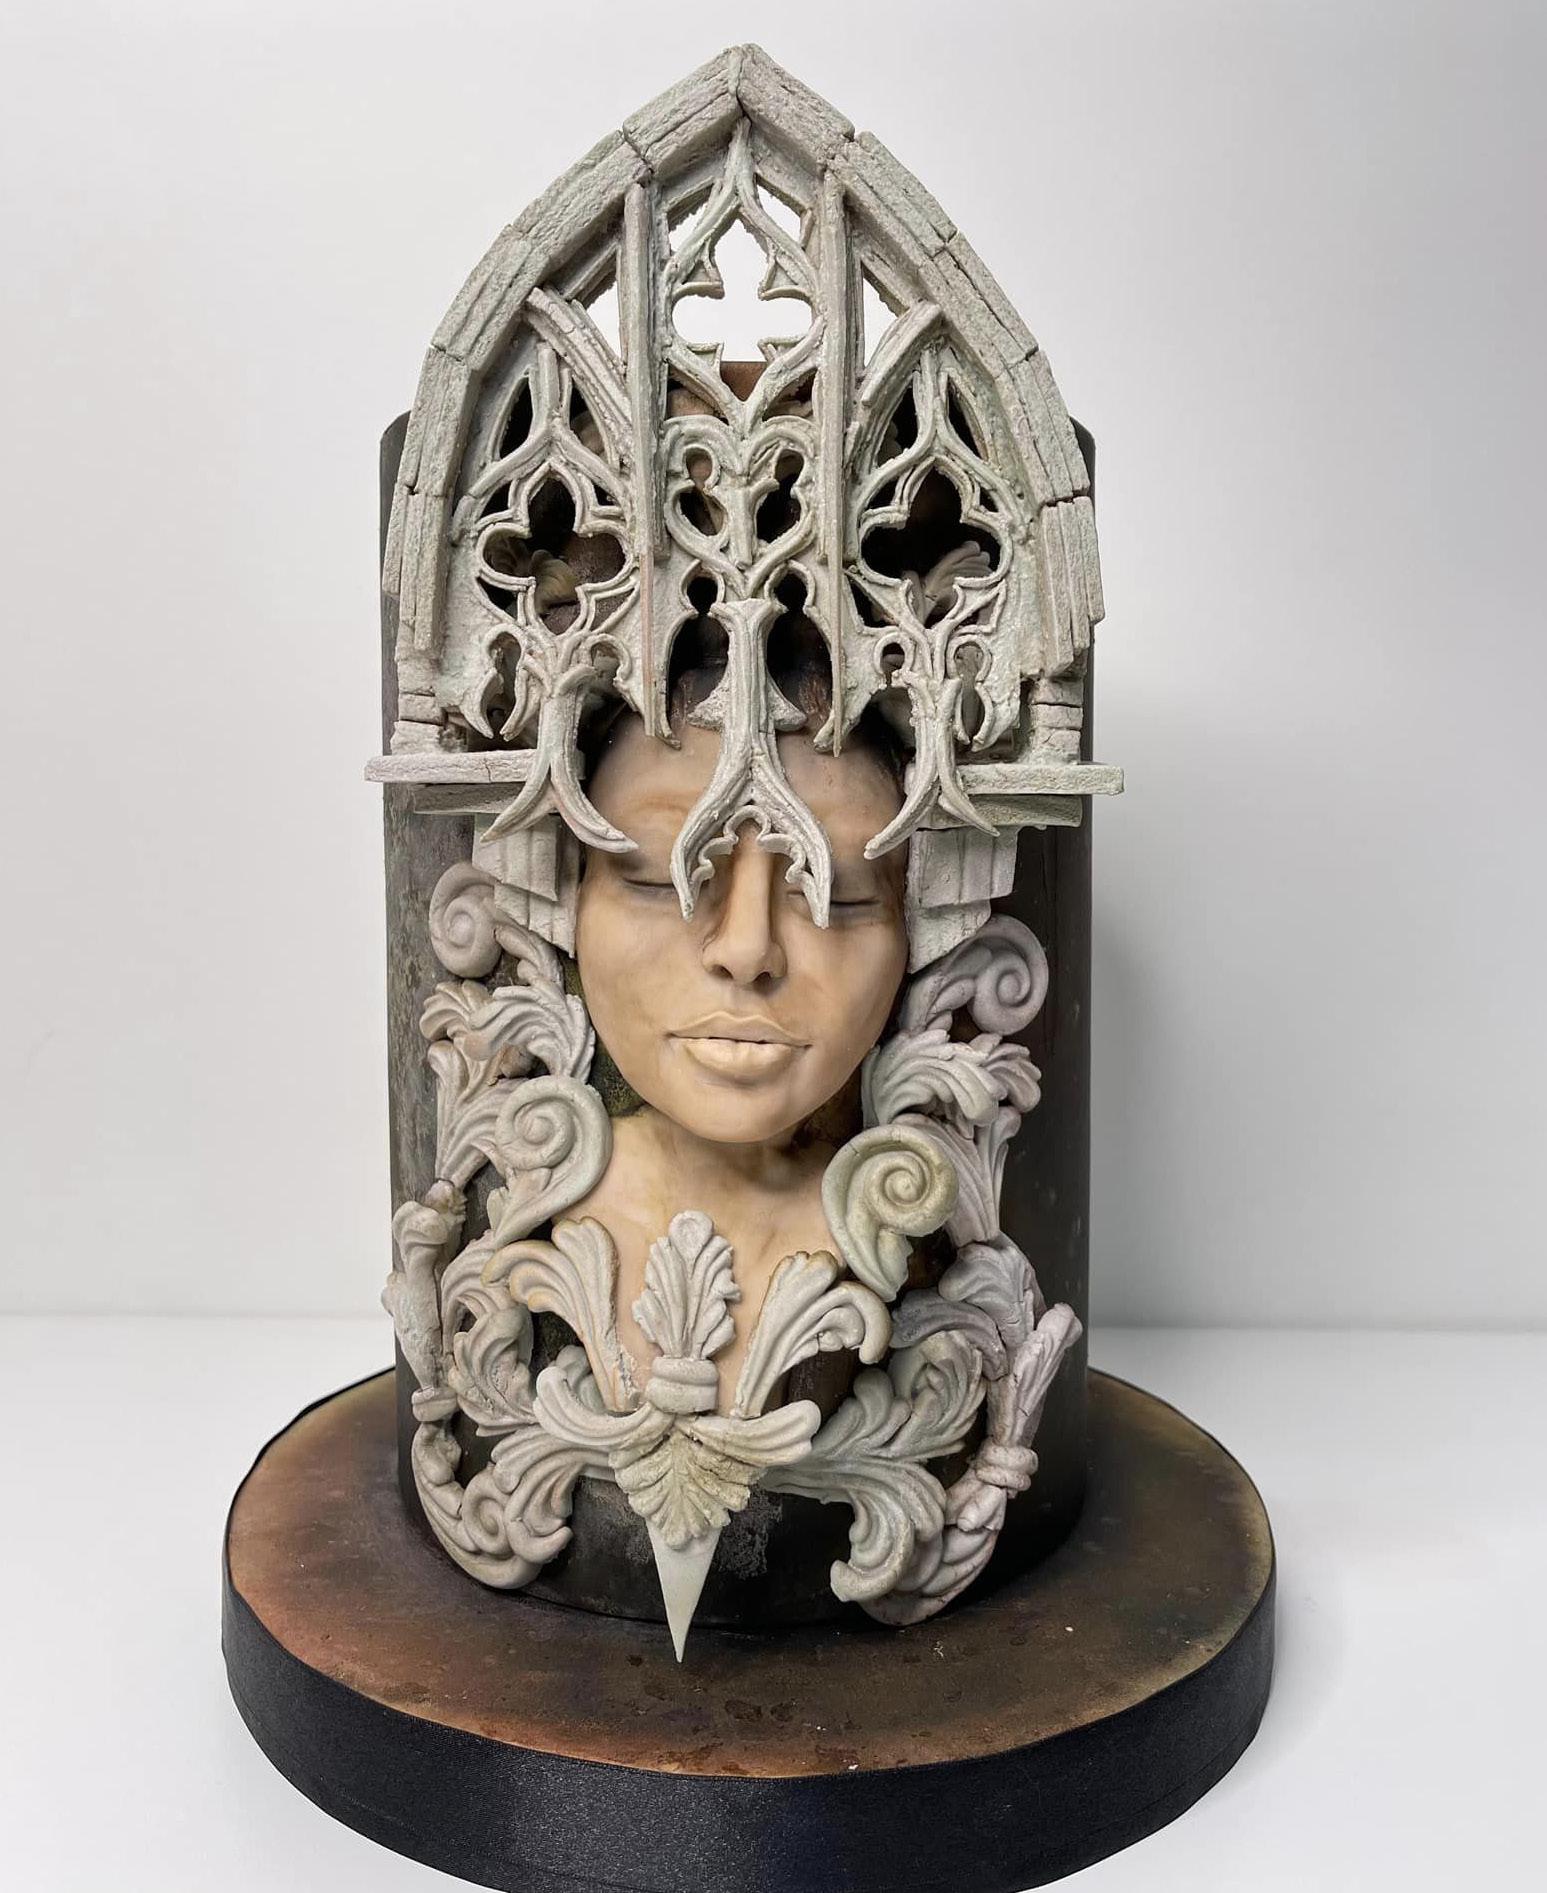 Cholys Guillen Requena
Patricia El Murr Baakliny
Gloria Nancy Bendezú Collantes
Cindy Rocío Gómez Flores
Cholys Guillen Requena
Patricia El Murr Baakliny
Gloria Nancy Bendezú Collantes
Cindy Rocío Gómez Flores
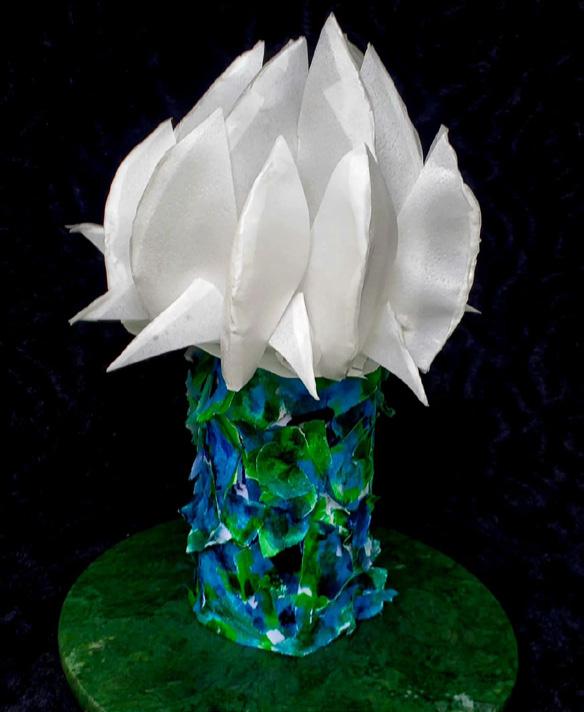
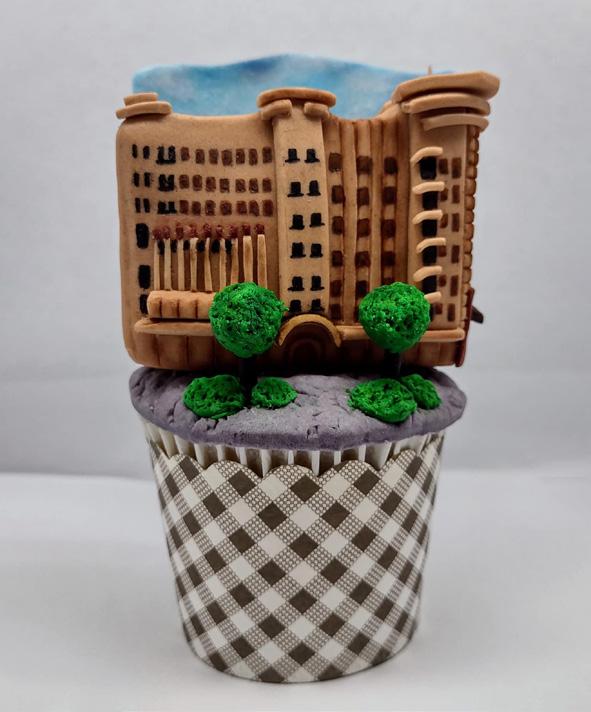
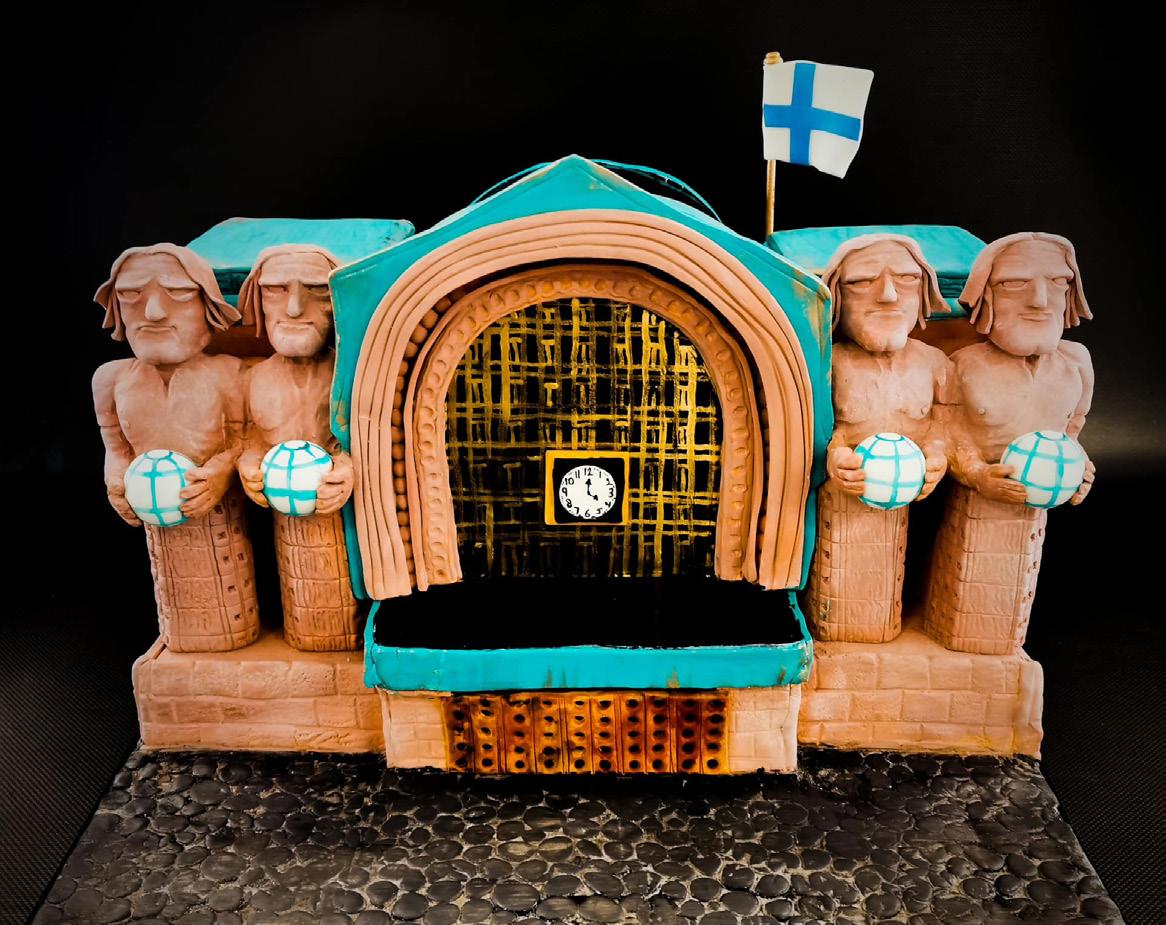
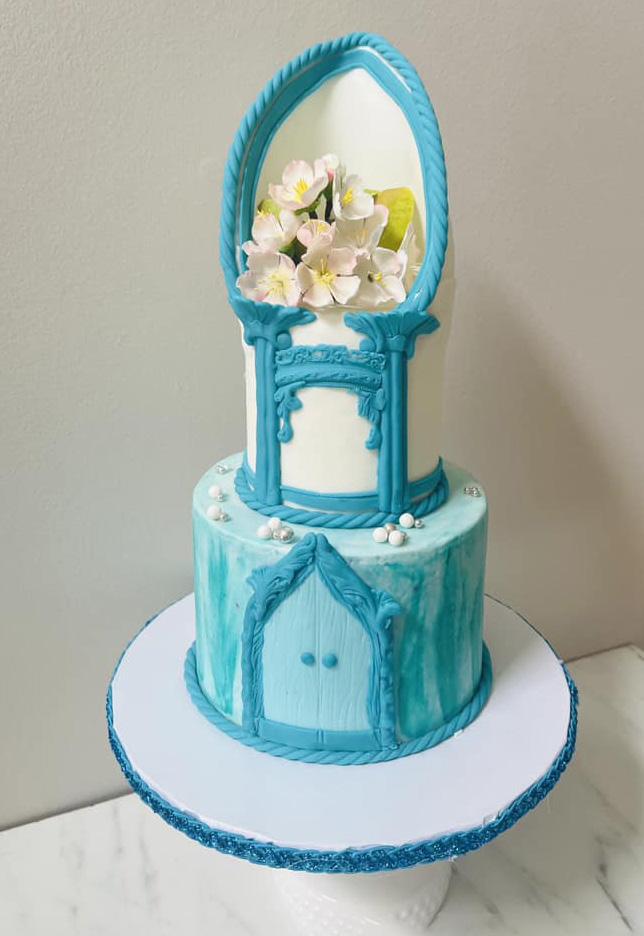


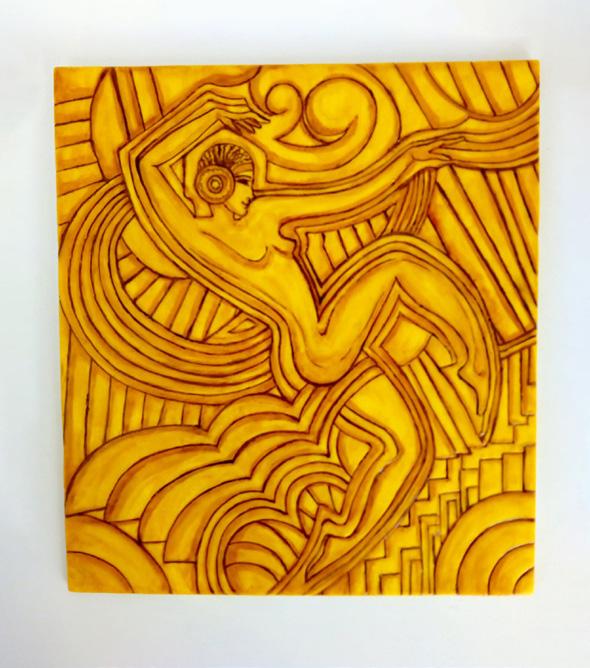
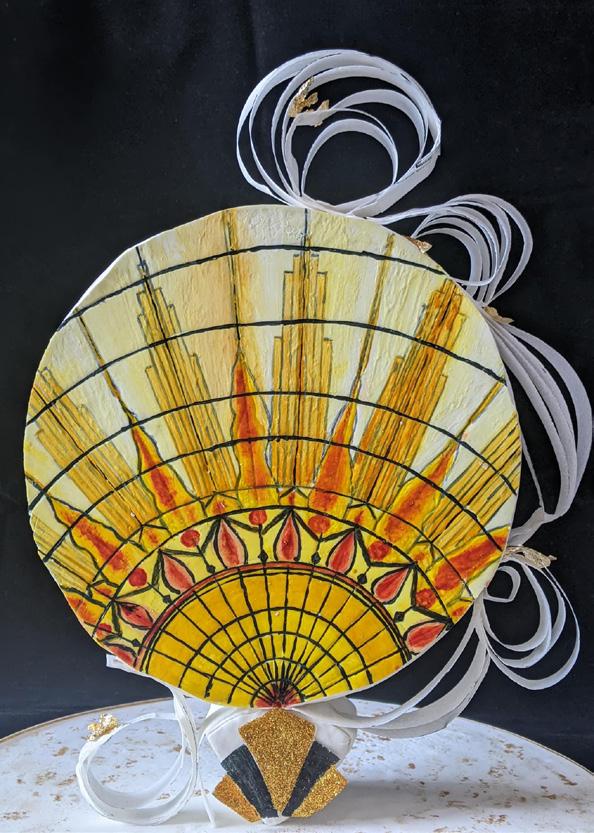
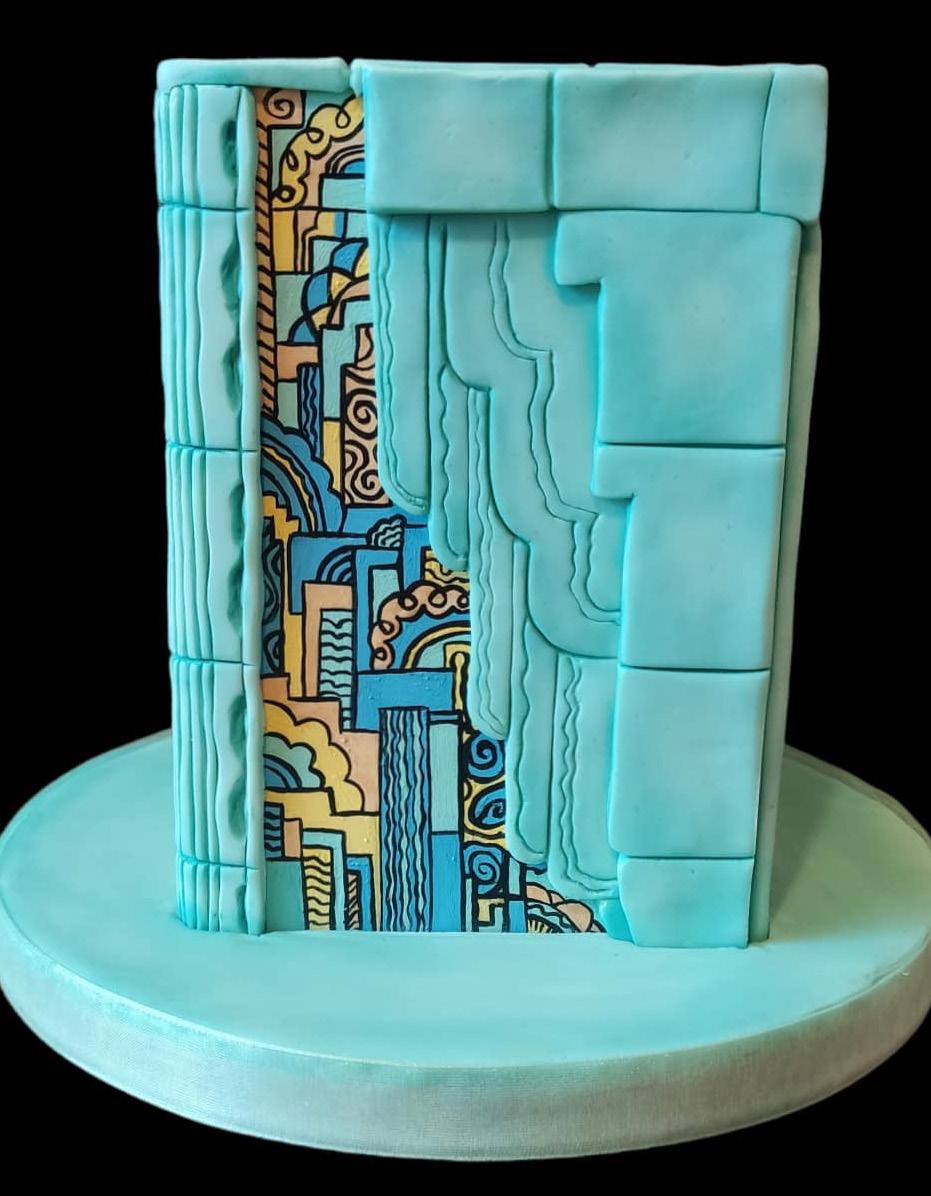
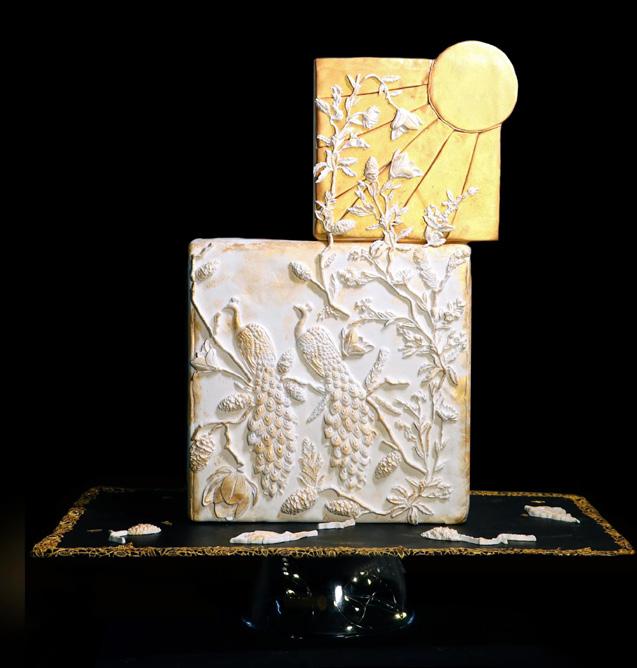
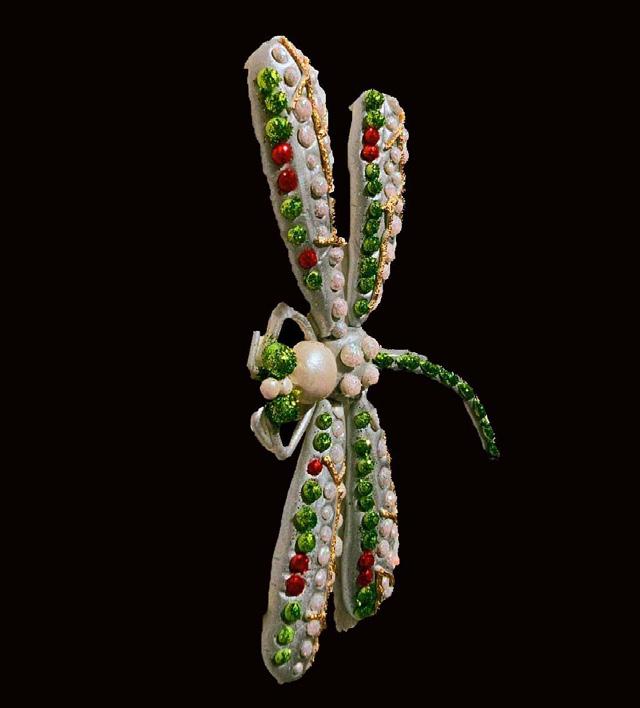
Rita NOÈ
Raksheeta Vora
Swati Maheshwari
Inoka Nishanthi
Sharon Siriwardena
Ellen-Marie Barker
Aaisha Sumbul
Claire Cowburn
Alberta Rebollo
Sakshi Maheswari
Tatiana Amelenko
Rosa Laura Sáenz Castro
DRESS-INSPIRED
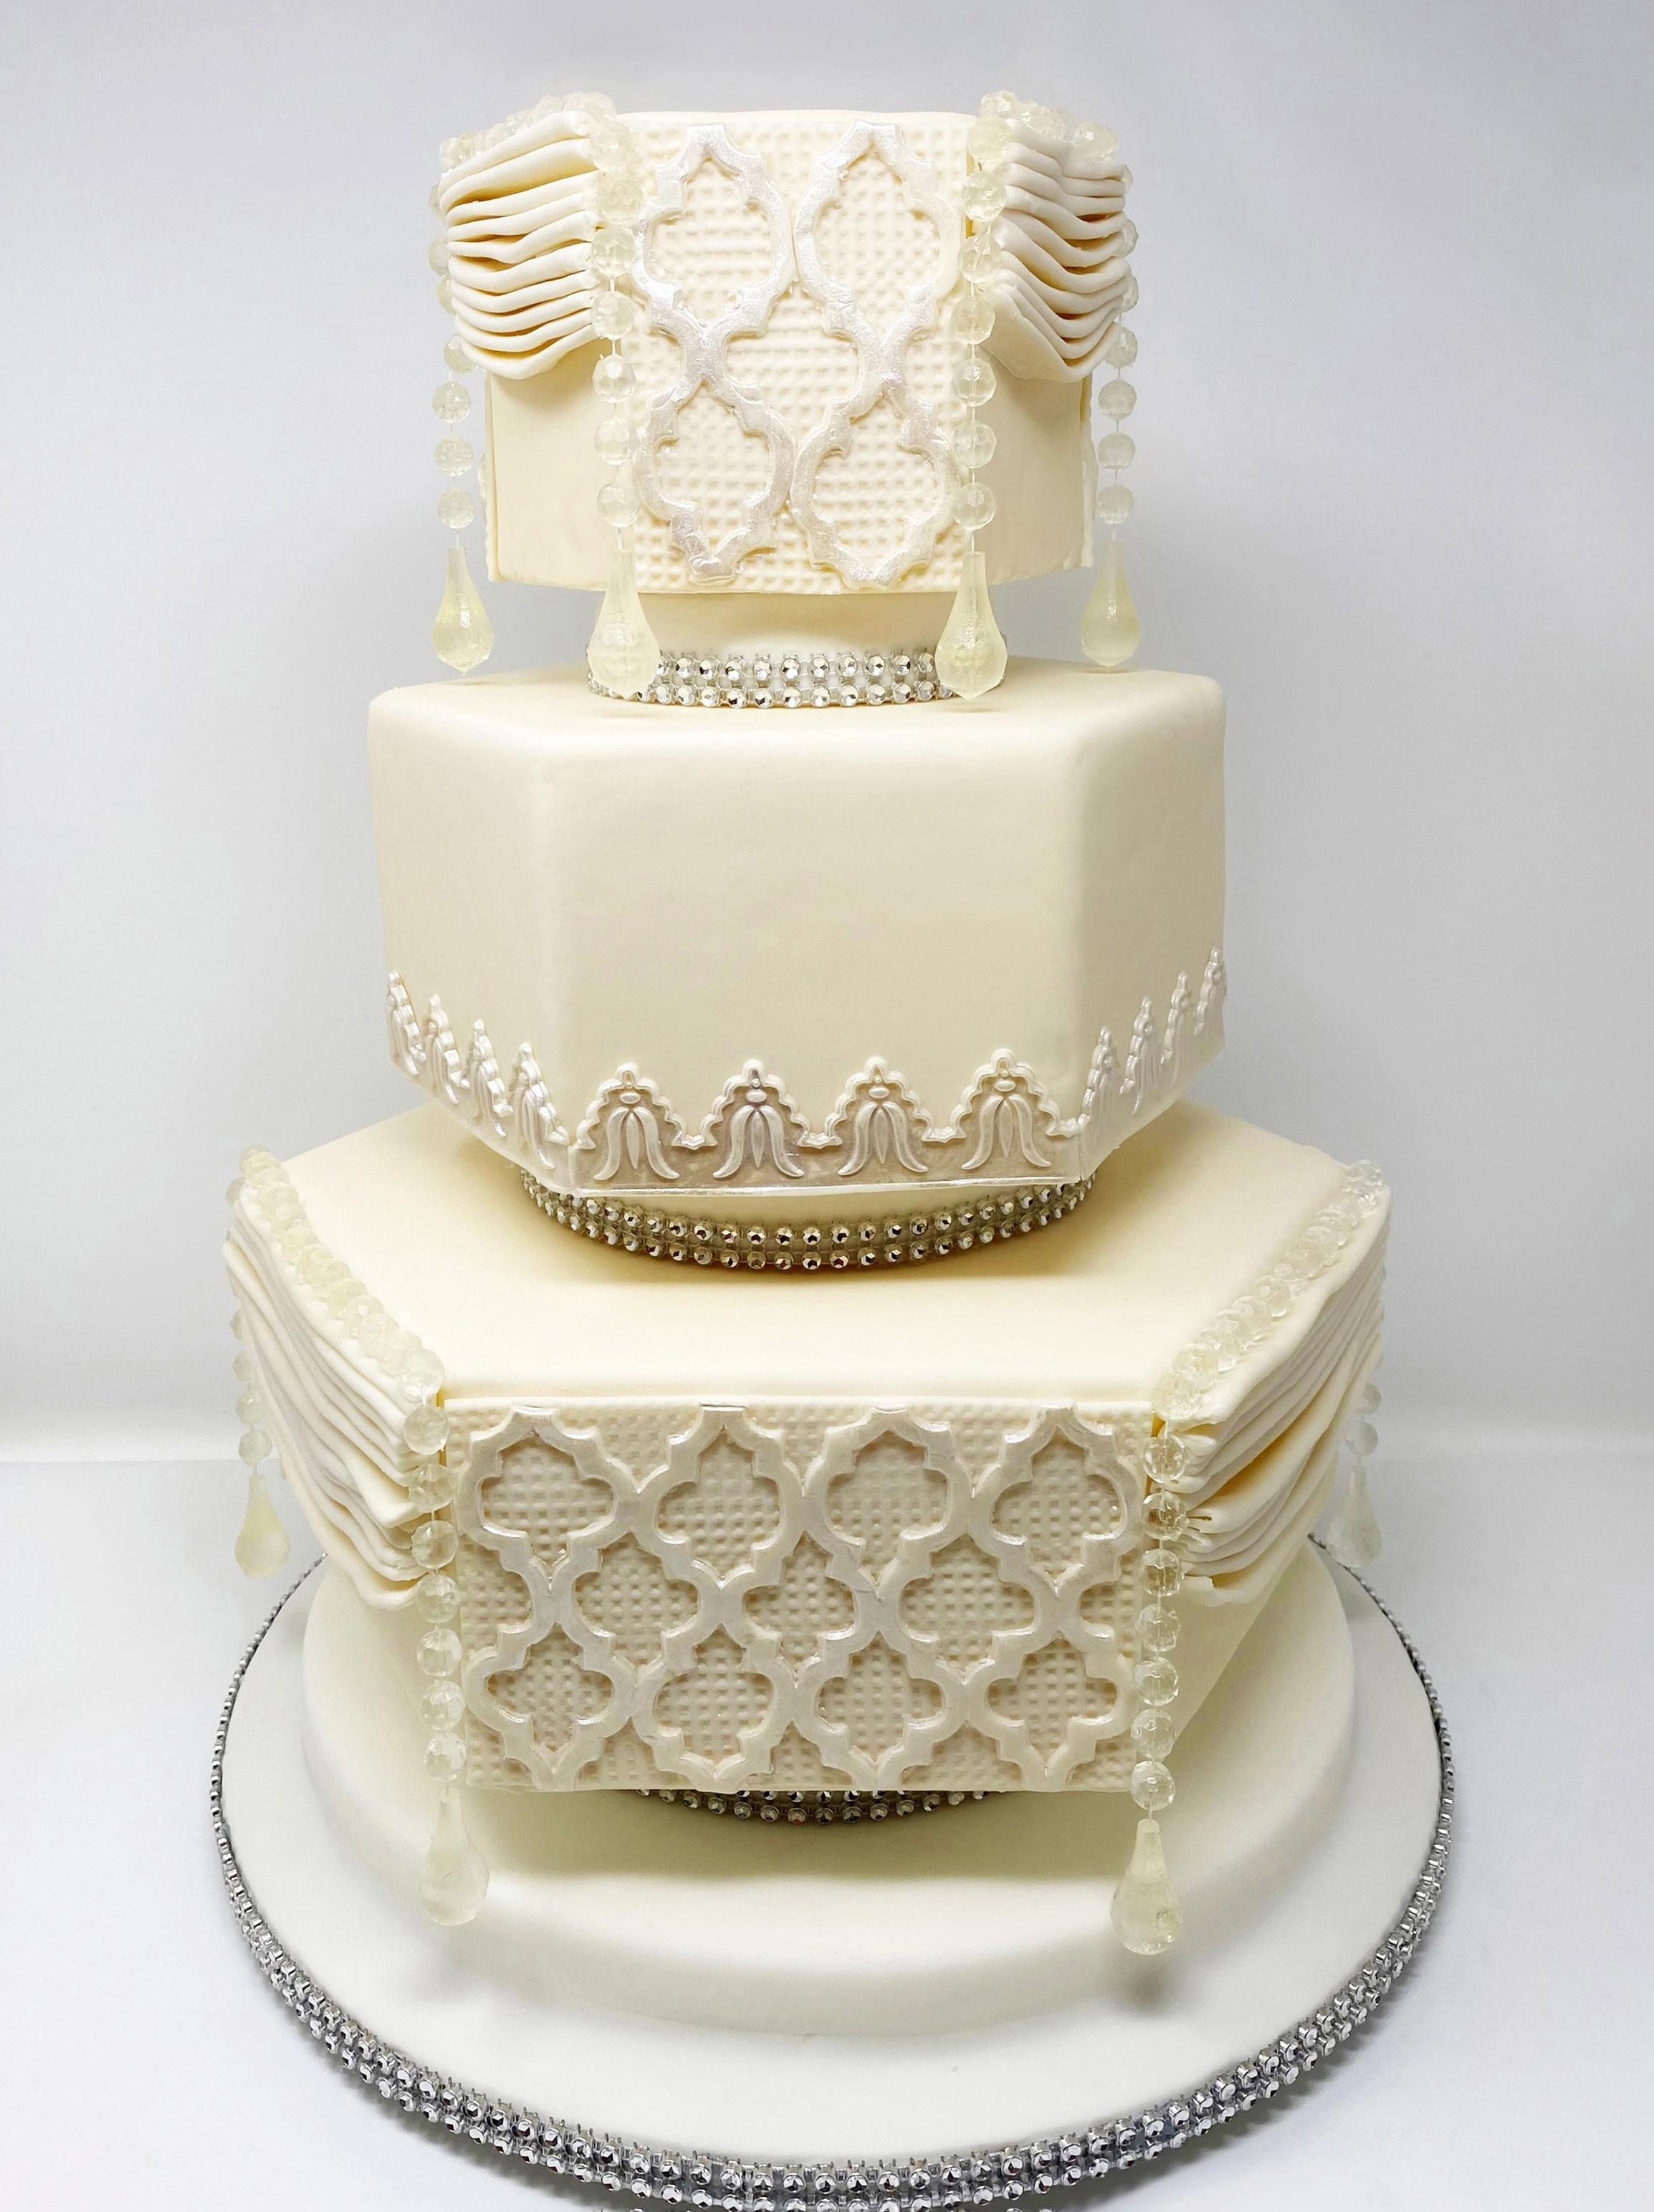 BY SERI LOPEZ
TUTORIAL
This wedding cake was inspired by a photo of a wedding dress posted on Instagram. You may find lots of inspiration through many different mediums, like clothing, jewelry, and artwork.
WEDDING CAKE
LEVEL:
After years of working in environmental engineering and education–IT careers and running her own Pampered Chef business, Seri Lopez took a cake-decorating class and her new career began. She was certified by taking classes at local cake-decorating supply shop in 2002, made her first wedding cake in 2004, and started her business in 2006. She honed her skills in sugar art through master classes under very well-known sugar artists over the years. She has been a Food Network competitor and a winner at both the Oklahoma State Sugar Art Show and Oregon State Fair. She loves making cakes and working with her hands to create.
COMPONENTS
Edibles:
Isomalt
Ivory fondant
Edible glue or water
White sparkle or pearl white luster dust
Lemon extract or vodka
Royal icing
Fondant-covered cake
Equipment:
Silicone measuring cup
Dental floss
Chandelier beading mold
Shears
Plastic wrap
Rolling pin
Textured rolling pin
Ruler
Moroccan silicone mold
Paintbrushes
Pasta machine or sheeter
Dowels
Border mold

Pastry wheel or knife
seriouscake.com facebook.com/SeriousCakecom-155812504431839 instagram.com/seriouscakecom/
May | June 2023 americancakedecorating.com 71 TUTORIAL
WHAT YOU NEED
CREATE THE CHANDELIER BEADS
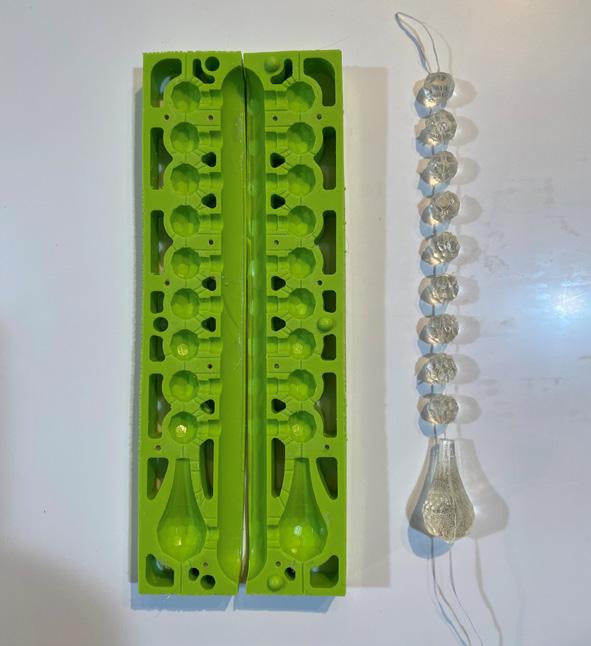
1. Pour about ⅛ cup of isomalt into a silicone measuring cup and heat it in microwave in 30-second bursts until it’s completely melted and pourable. Be careful not to burn the sugar.
2. Place dental floss within the center of the chandelier beading mold and press into the center slit to secure it. Close the mold and make sure the magnets are secure. Starting at one end and slowly moving across the top, pour the hot isomalt into the cavity, filling each hole. Tap the mold on the counter several times, making sure the isomalt has completely entered the cavities. Let the mold sit for at least 15 minutes.
3. When cool, remove the beads. Using a pair of sharp shears, trim the bead away from the stem. Clip the ends of the dental floss off and set the beads aside under plastic wrap until it’s time to assemble the final cake details. Make 12 complete
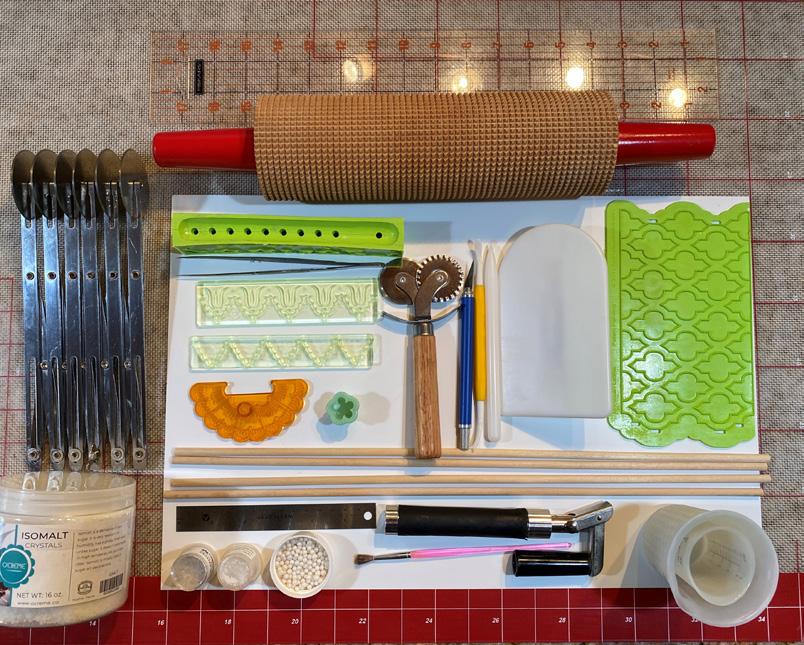
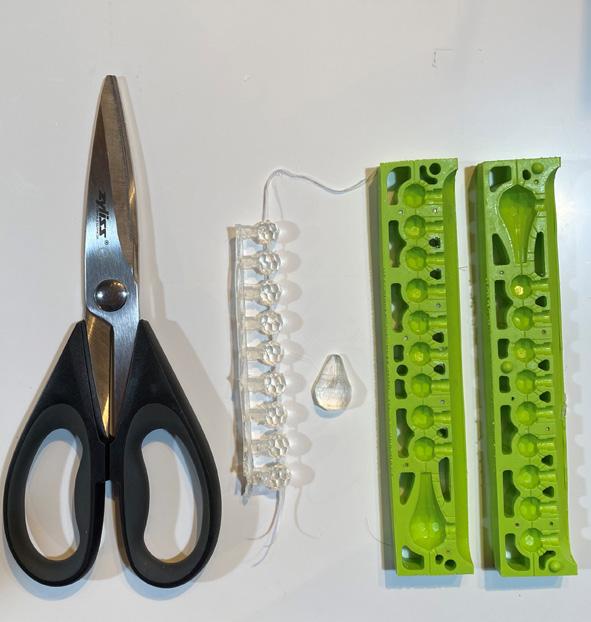
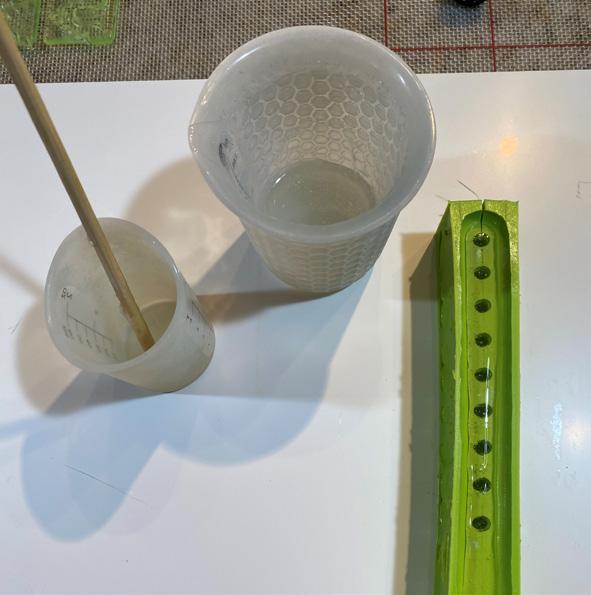
strands of beads, plus an additional 6 without the large bead at the bottom to fill in across the draping.
MAKE THE MOROCCAN OVERLAY PANELS
1. Roll out ivory fondant to about ⅛ inch thick and then roll the textured roller over it. Use your ruler to mark 6-by-4inch panels and cut 3 panels. Repeat this process and cut 3 more panels that measure 4 by 3 inches wide. Let these dry for about an hour to firm up so you don’t lose your texture while handling.
2. Roll out more ivory fondant over the Moroccan silicone mold and trim the edges. Carefully remove all the extra pieces. Flip the trim over, place edible glue or a bit of water on the back side, and lay your dried textured panel over the trim. Flip the panel back over.
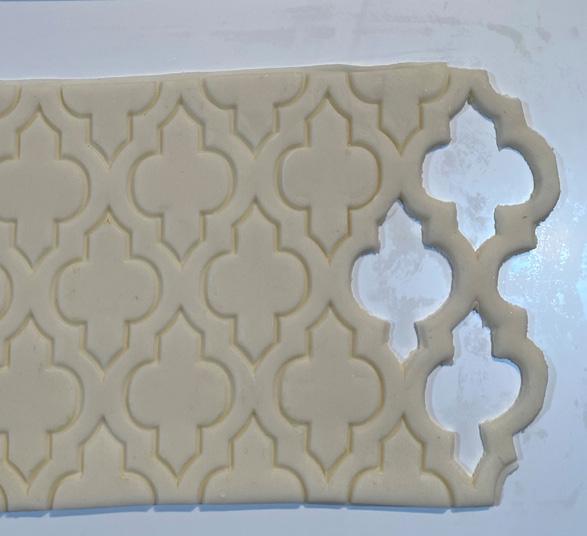
3. When completely dry, use white sparkle or pearl white luster dust mixed with lemon extract or vodka and paint only the overlay. The back panel should remain flat in color for contrast.
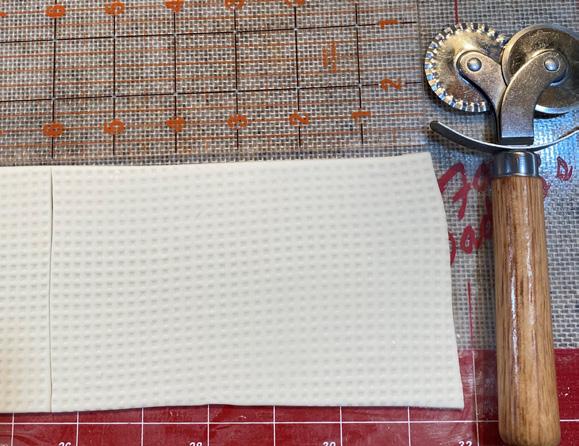
72 americancakedecorating.com May | June 2023 TUTORIAL
1 2
1&2 3a 3b
Tip: USE A SKEWER TO POP ANY AIR BUBBLES THAT RISE WHILE TAPPING THE MOLD ON THE COUNTER.
FOLD THE DRAPING
1. Roll out ivory fondant to number 2 on your pasta machine or sheeter to create a 14-by-8-inch sheet. Brush white sparkle or pearl white luster dust on top of the fondant.
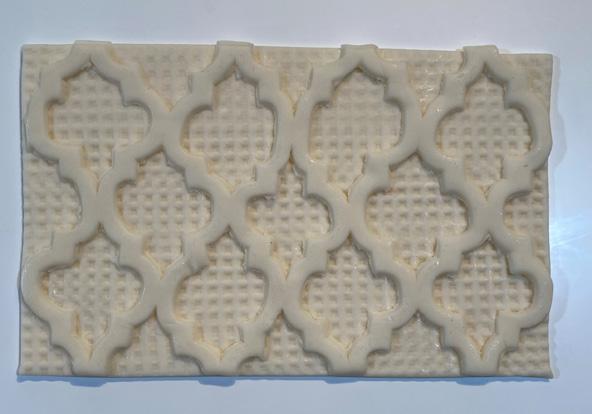
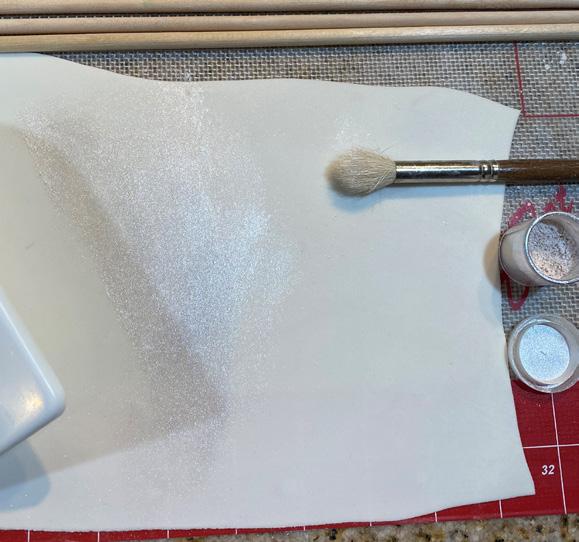
2. Place 5 dowels about ½ inch apart on your work space. Place the fondant sheet on top of the dowels, then add a dowel on top of the fondant in between the original 5 dowels. Gently move the dowels toward each other to squeeze the drapes together. Let it sit for about 10 minutes.
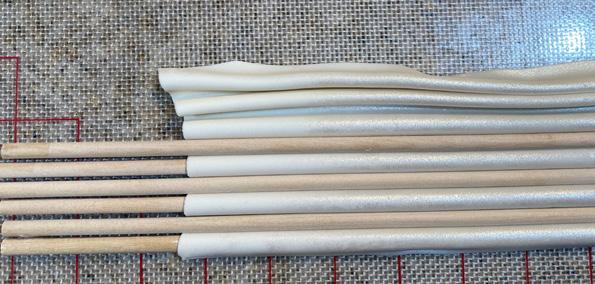
3. Gently slide each dowel out sideways and press the folds together.
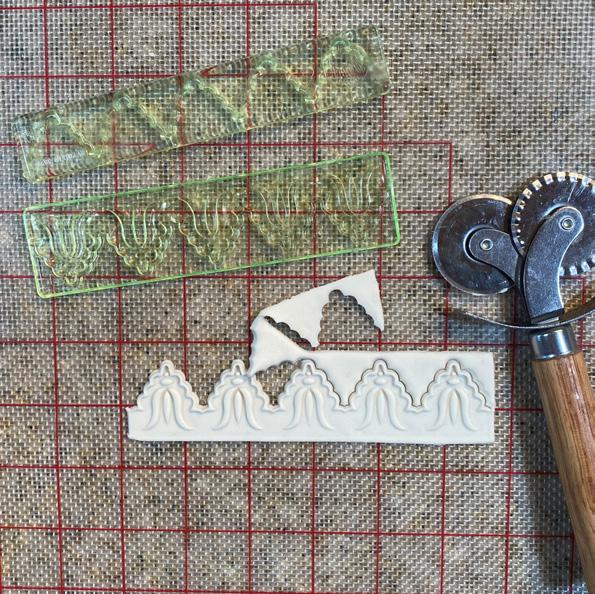
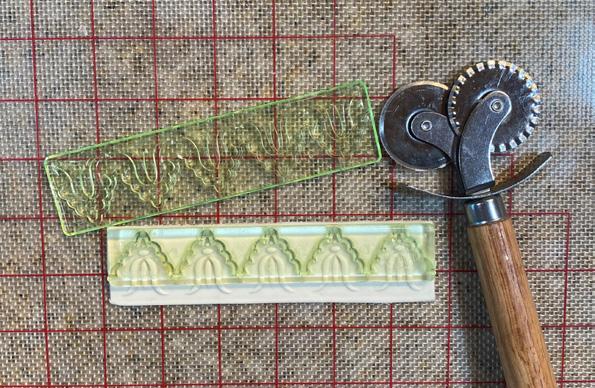
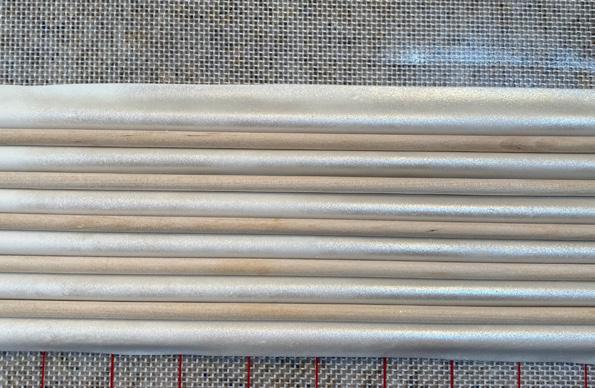
4. Cut 3 sections about 6 inches in size and repeat this process until you have a total of 6 for the bottom tier. Repeat the process again to create 6 drapes for the top tier that measure 3 inches long. Let them dry for 10 minutes.
ADD THE BORDER TRIM
1. Roll out ivory fondant to number 2 on your pasta machine or sheeter. To create clean details, use the bottom part of the border mold to press very firmly into the fondant. Trim all the edges before removing the press with a pastry wheel or knife.
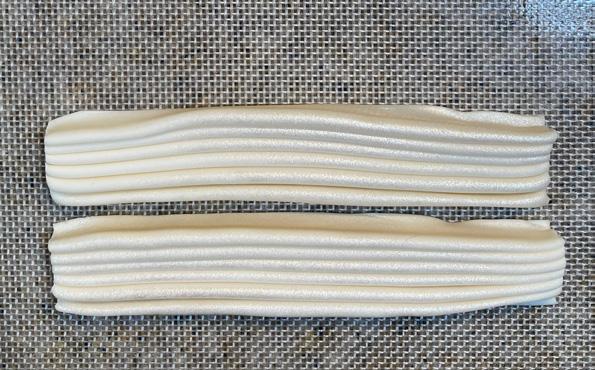
2. Press the border cutter piece on and press firmly it into the fondant to create a clean cut. Make 5 pieces to go around the bottom of your middle tier. Let them dry for at least 30 minutes and then paint them with white sparkle or pearl white luster dust.
ASSEMBLE THE BALANCE
1. Add the Moroccan panels to the bottom tier and attach them with royal icing. Add the draping in the open sections. Repeat the process on the top tier. Let them dry for an hour.
2. With edible glue or a little bit of water, add the border trim to the middle tier.
3. Hang the chandelier beading on the edges of the draping, allowing 2 beads to hang over the edge. Secure it with royal icing. ACD
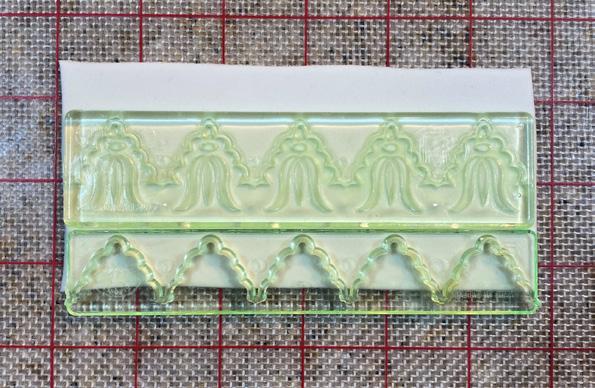
May | June 2023 americancakedecorating.com 73 TUTORIAL 2 4 3 1 3 1a 1b 2
Tip: USE A DAMP PAPER TOWEL AND WIPE THE BACK SIDE OF YOUR OVERLAY TO MAKE IT STICK.
QUICK STRAWBERRY JAM
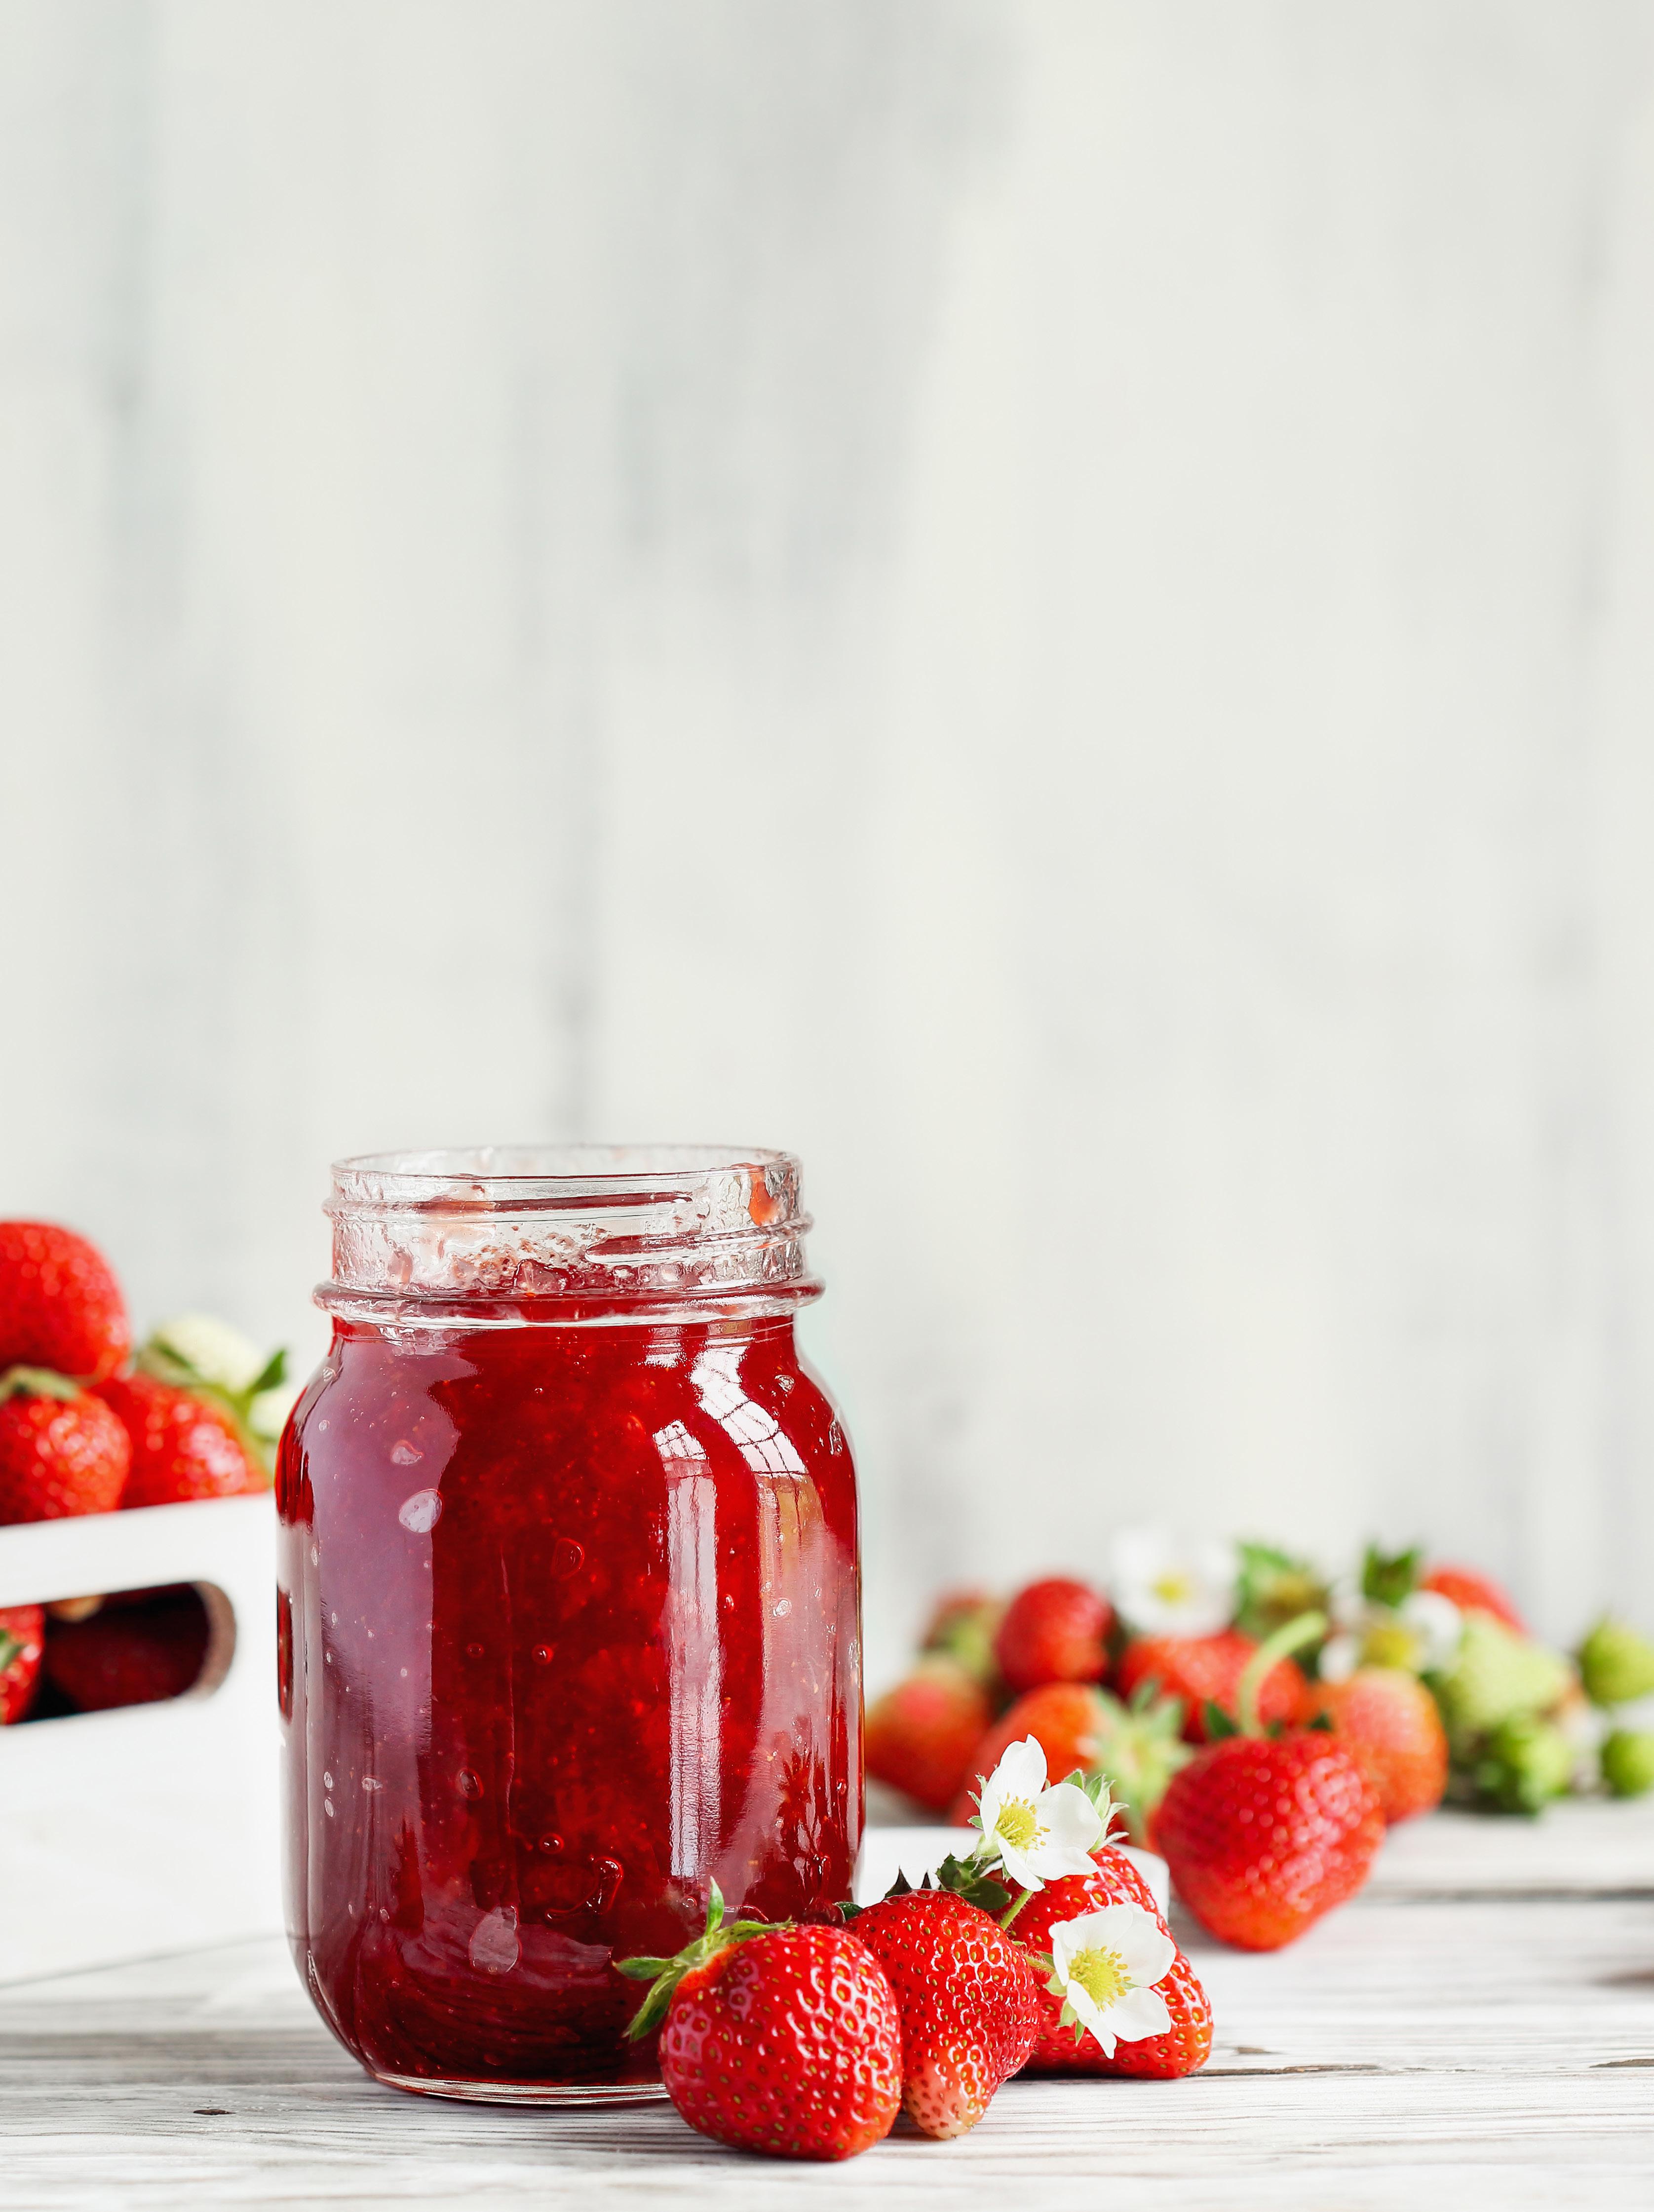 BY ANNMARIE MATTILA
Ingredients
4½ cups ripe strawberries, hulled and coarsely chopped
½–¾ cup granulated sugar
¼ cup honey
¾ cup water
1 tablespoon pectin, preferably Pomona’s Universal Pectin
4–8 teaspoons calcium water
Instructions
1. Place the strawberries into a bowl and use a potato masher or the side of a fork to mash the berries into a chunky paste. Add ½ cup of sugar and honey, stirring to combine. Taste the mixture for sweetness and add more sugar if desired.
2. Bring the water to a simmer in a small saucepan and then remove from heat. Sprinkle in the pectin and whisk until the mixture is thick and smooth. Add to the mashed fruit and mix well.
3. Add 4 teaspoons of calcium water and stir well. The mixture should jell into a sticky mass. If not, continue adding the calcium water, 1 teaspoon at a time, until the mixture thickens.
4. Divide the jam among sterilized glass jars, cover, and refrigerate or freeze. The mixture will last up to a week in the refrigerator. If frozen, it will last up to 6 months. Just thaw in the refrigerator before serving. ACD
LAST BITE
Savor berry season longer by making this easy jam. Also called freezer jam, it skips the complicated canning process and still results in a very stable and delicious mixture. It’s perfect for filling cakes!
WE WANT TO PUBLISH YOU!
CAKE CASTING CALL!
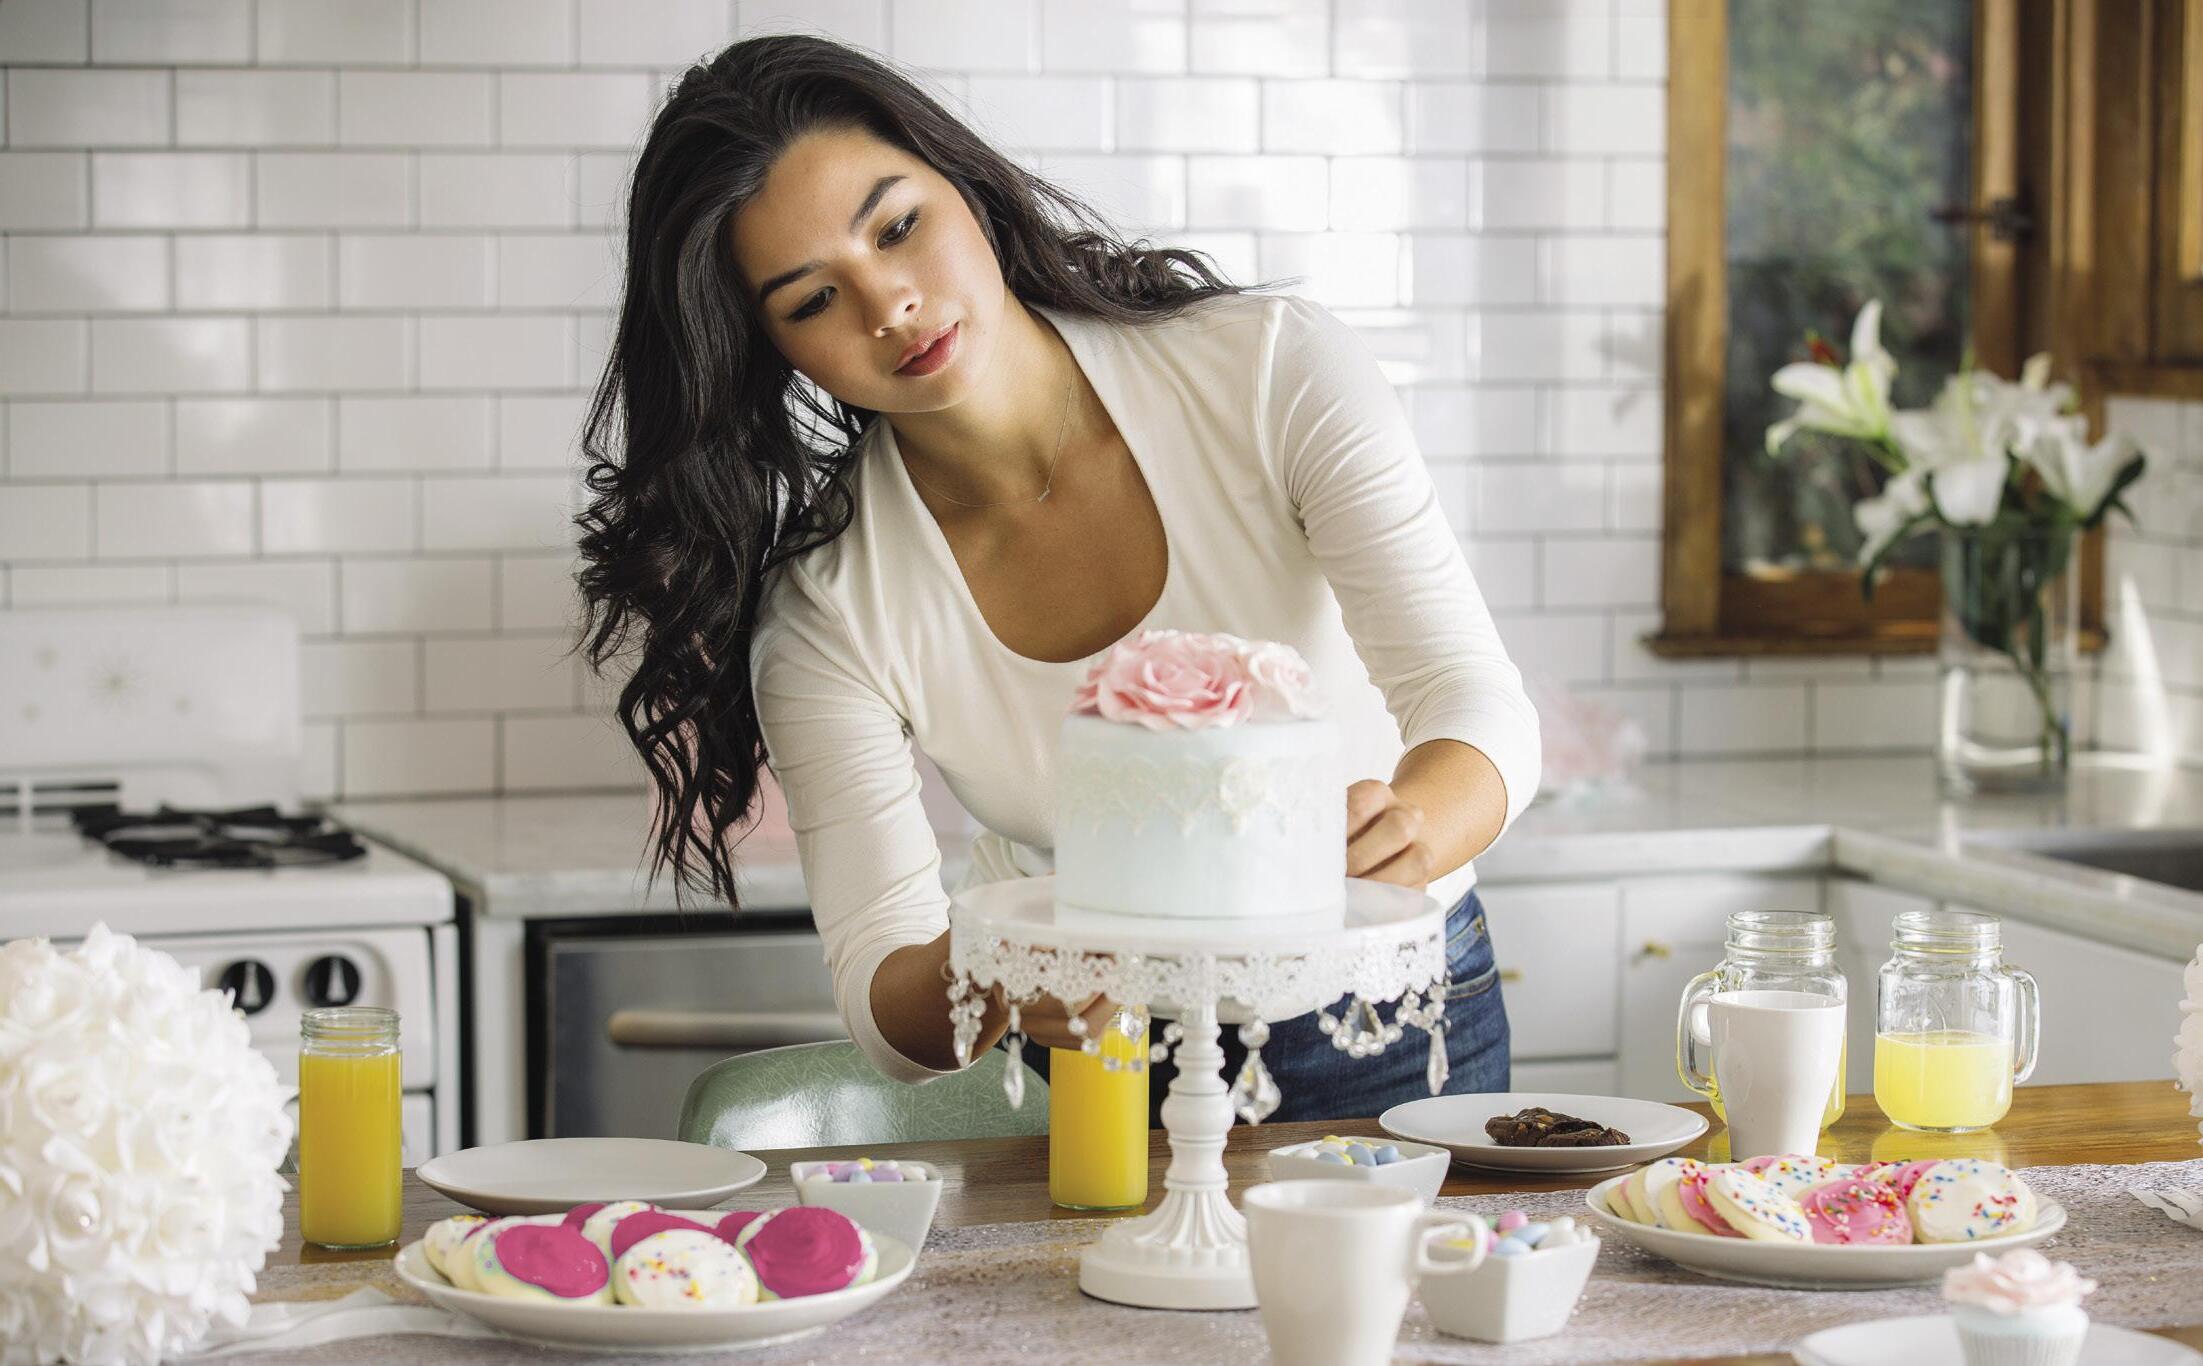
Tick one thing off your bucket list in 2023: Get yourself published in a leading world cake magazine. Getting published raises your profile and helps to showcase your skills, and personality, which can lead to all kinds of exciting opportunities, including teaching at international shows, online tutorial commissions, brand ambassadorships, and more. The first step is easy: Simply get in contact with our editor to discuss which submission opportunities are open, You Made It! themes coming up, and what ACD can do for you.
Get in touch: annmarie@americancakedecorating.com
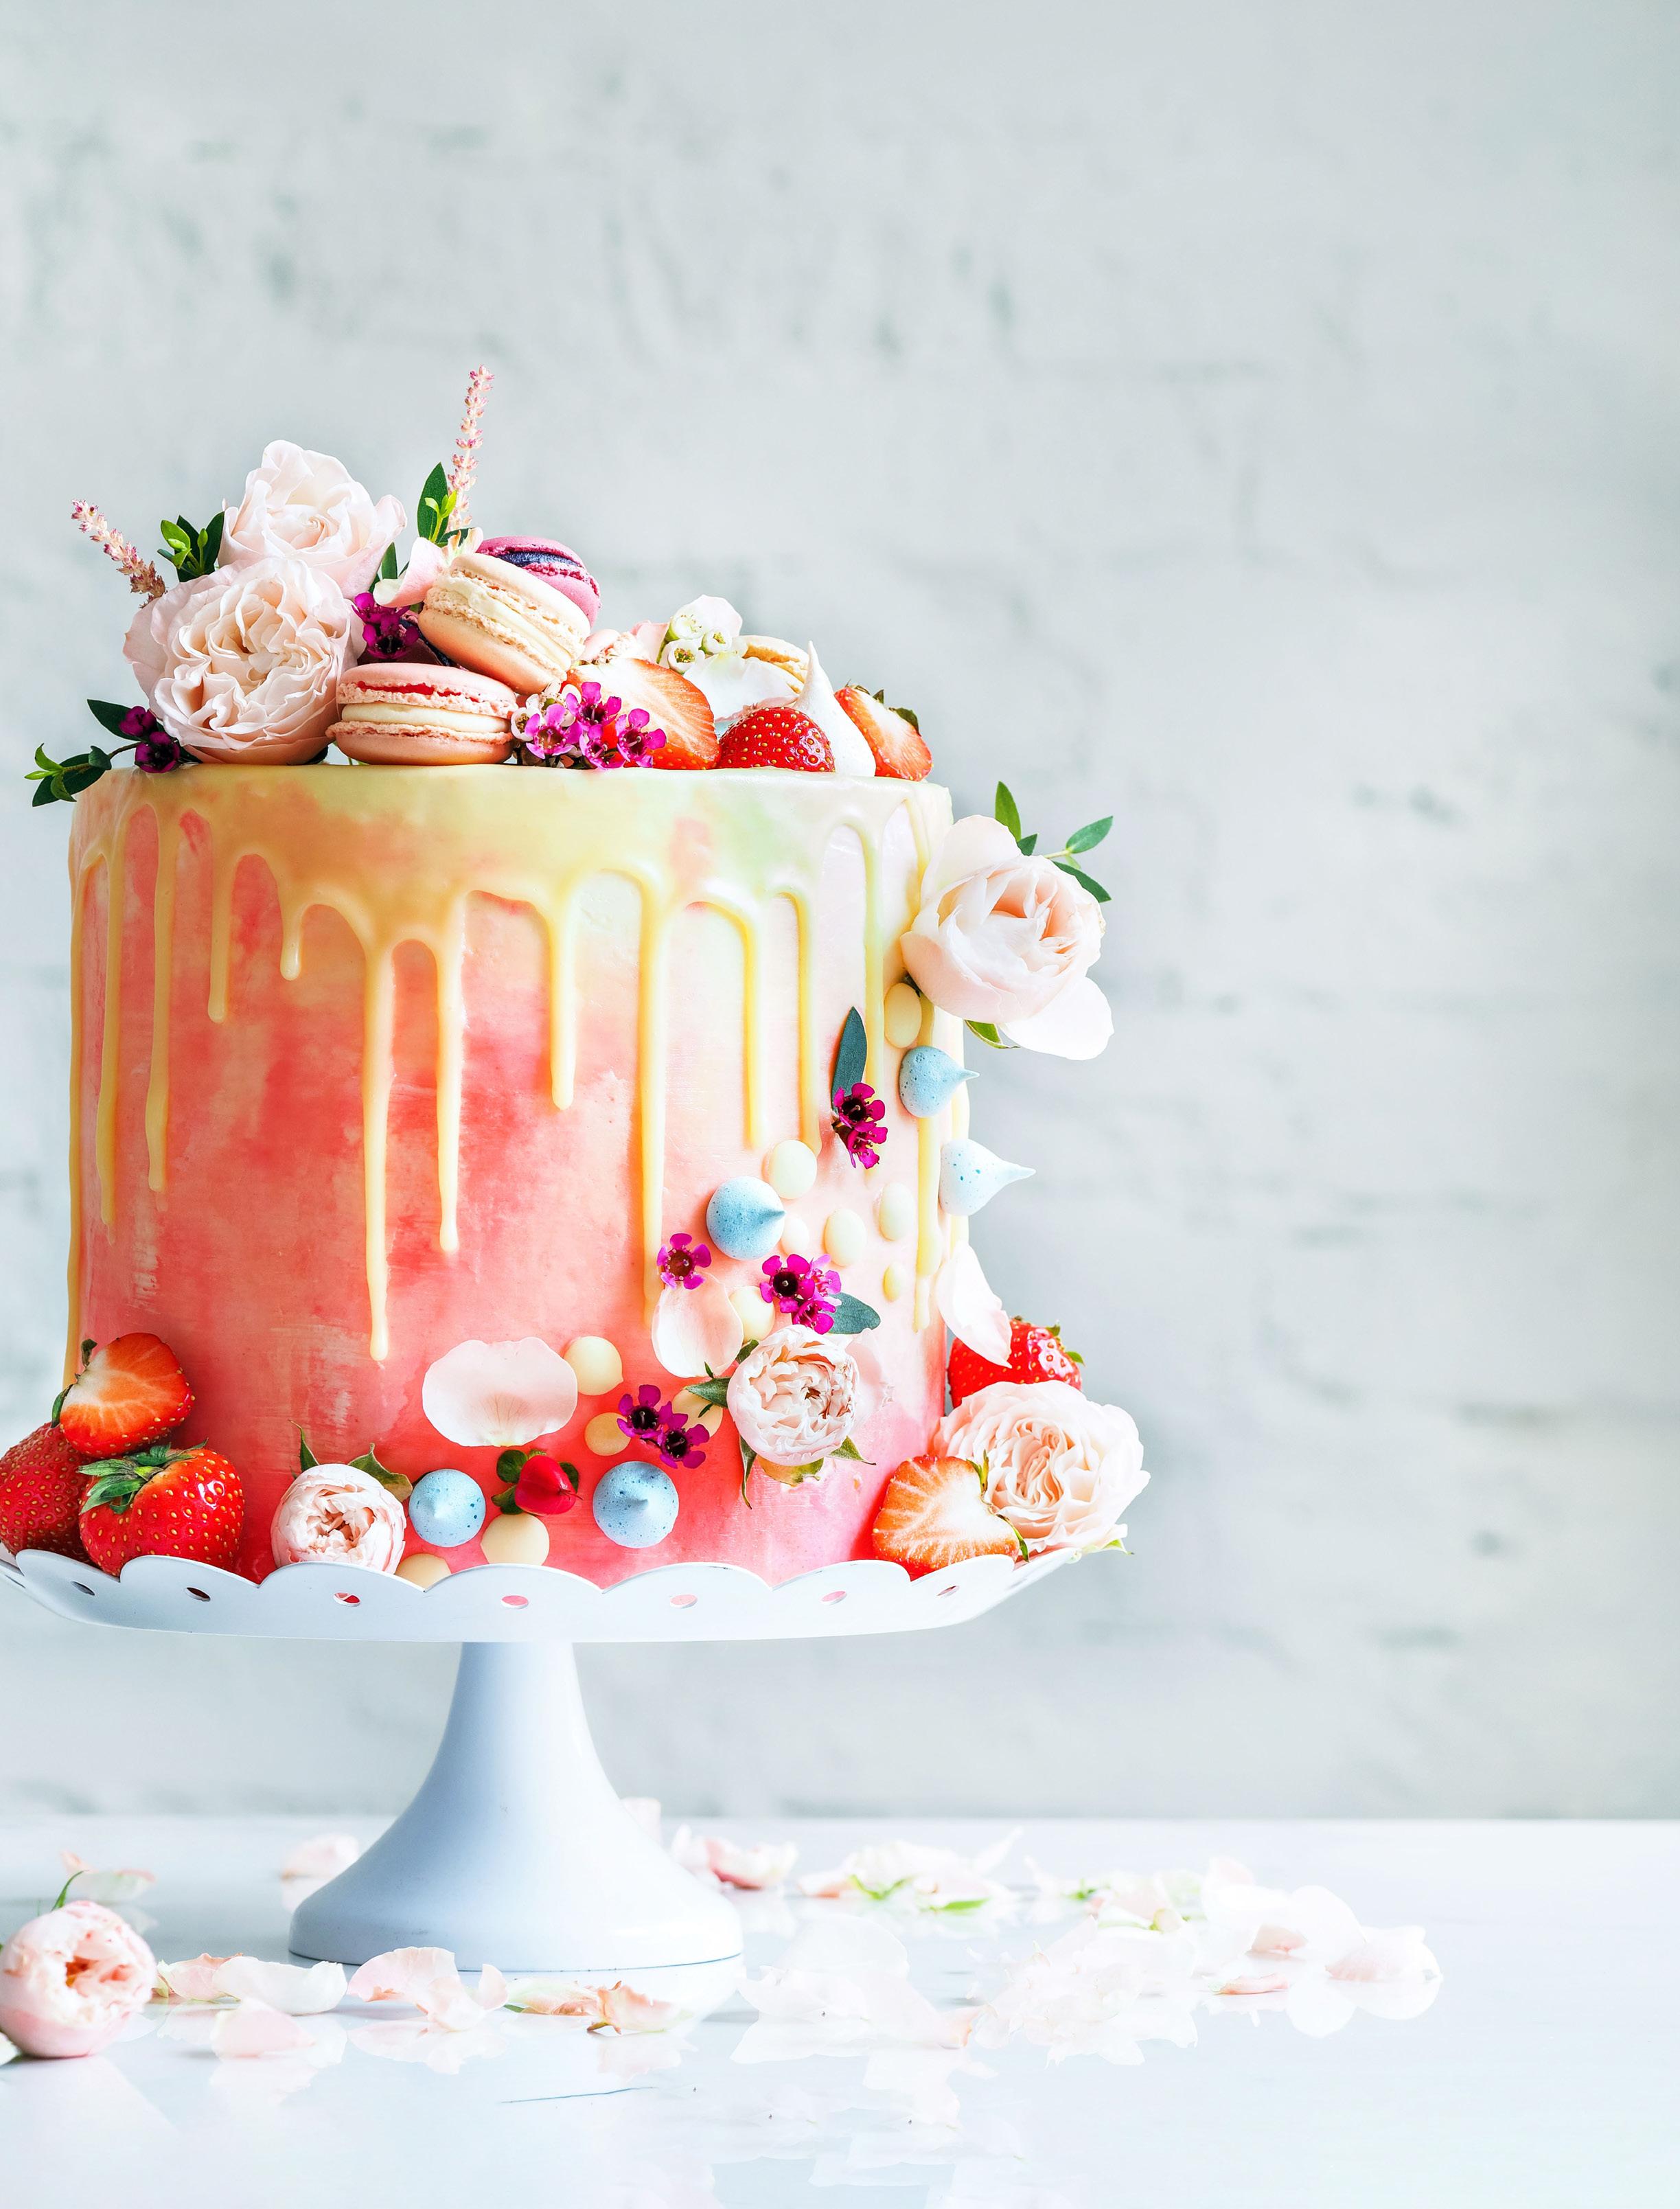
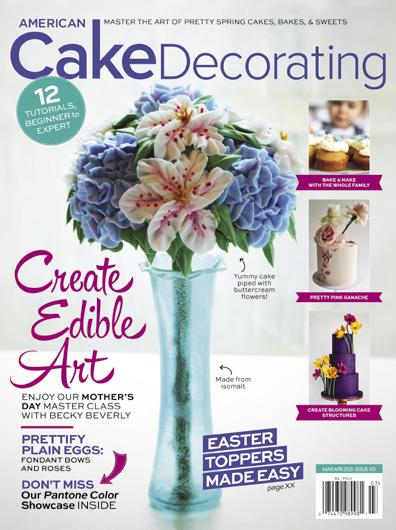

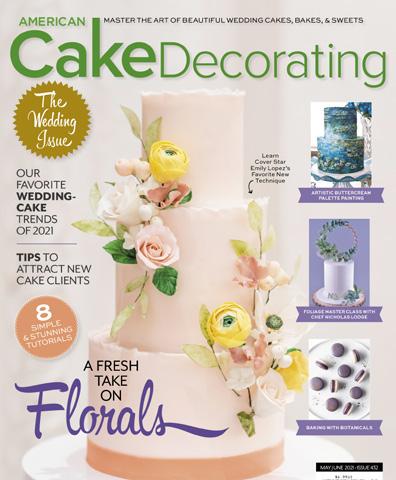

CONTENT You CRAVE Get the americancakedecorating.com Every issue of American Cake Decorating magazine is filled with the latest cake decorating info that our readers want—bringing new ideas, techniques & skills through step-by-step tutorials, themed showcases, new product information & more. ACD inspires creativity by giving all of its readers access to top-level talents from around the world! SUBSCRIBE NOW