2 minute read
Covers and Frames Installation


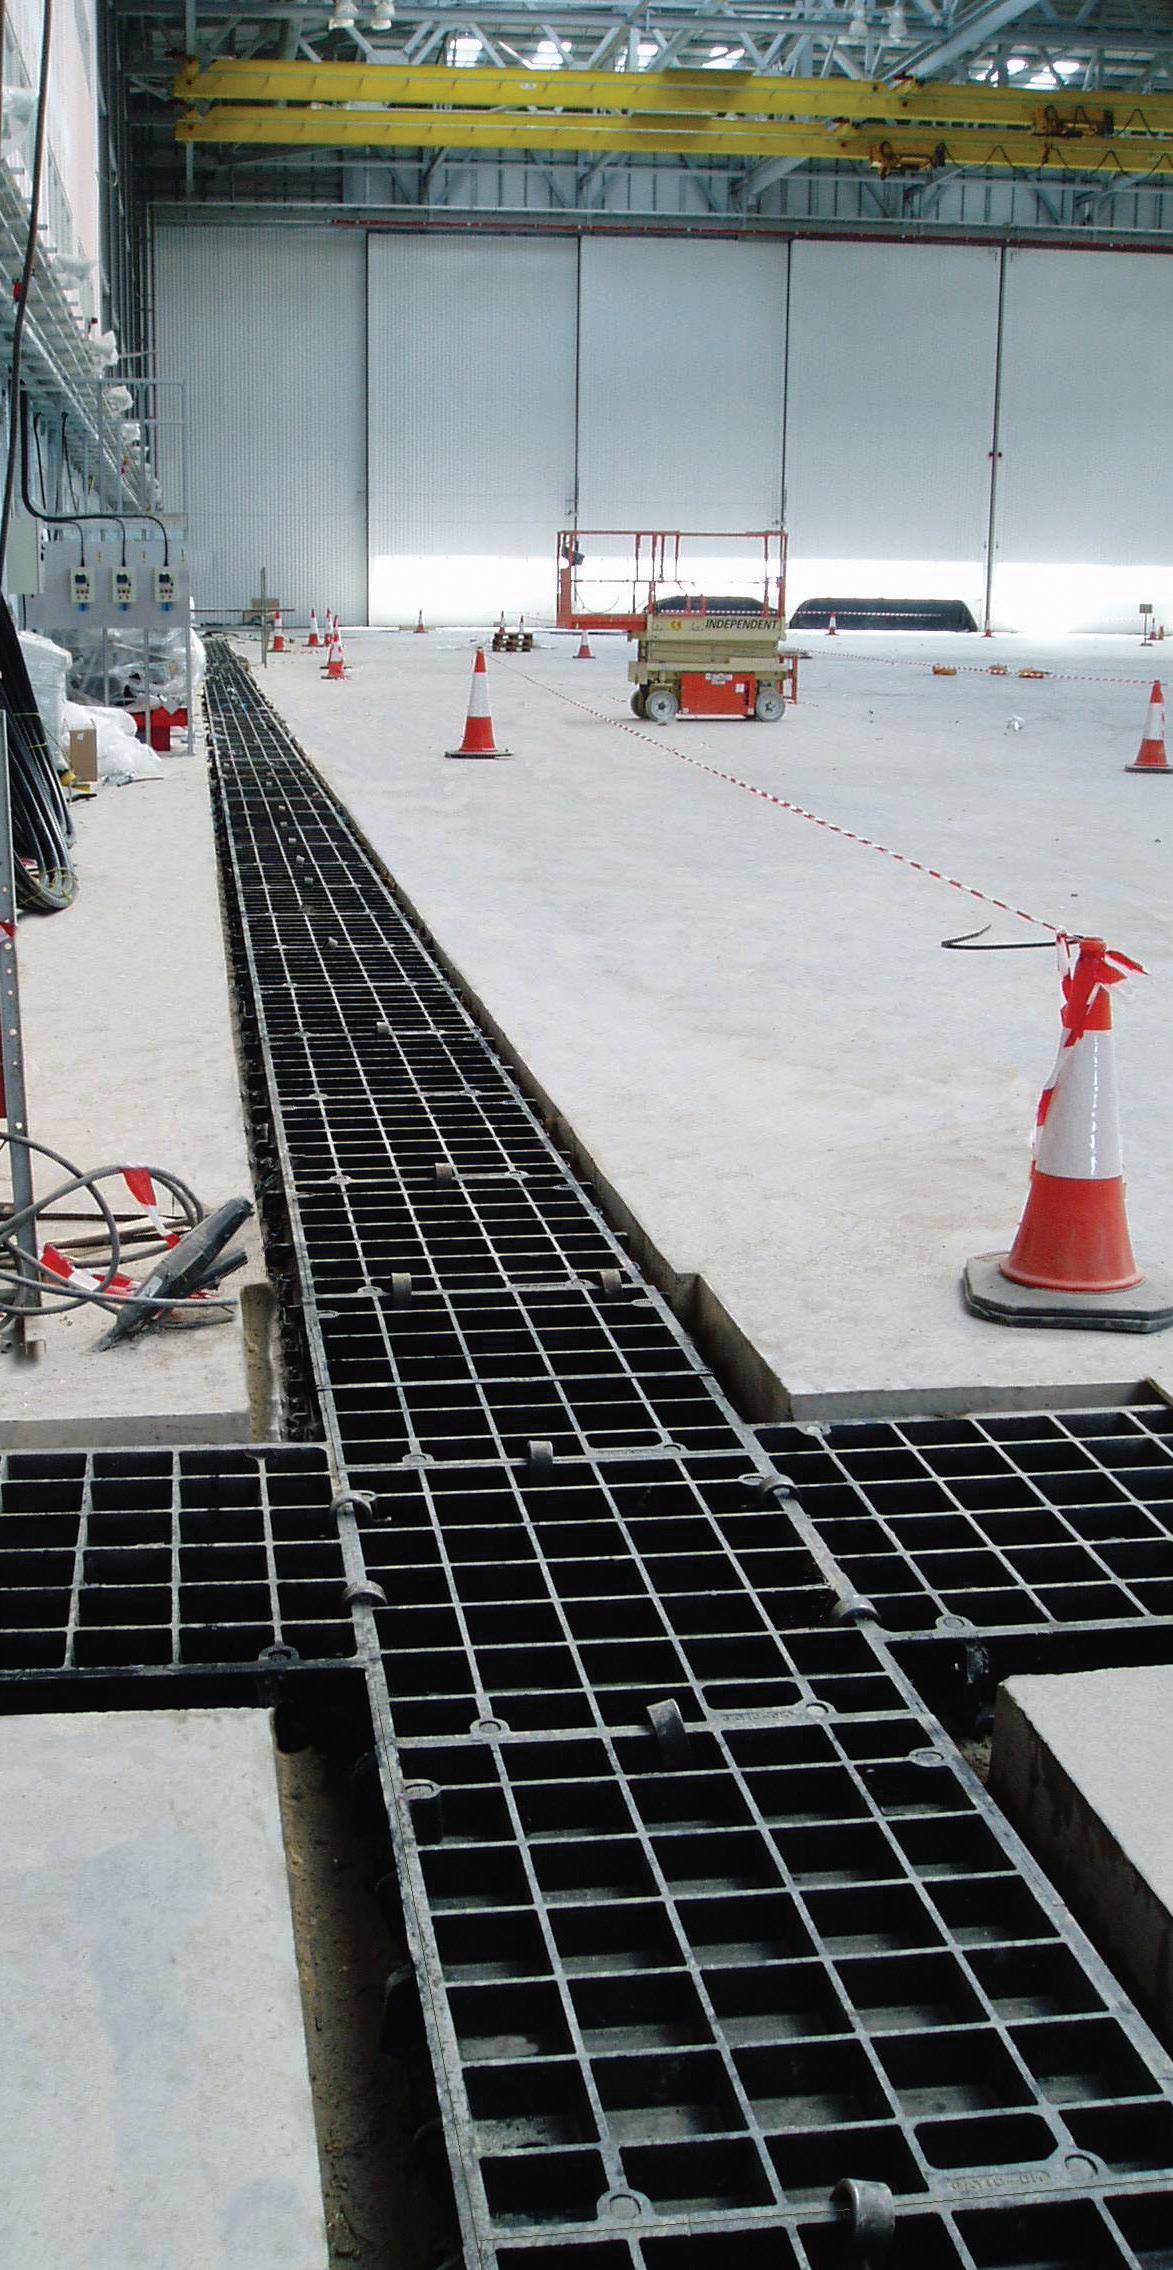
Ducts and trenches
1 Prepare the rebate in accordance with dimensions given in the relevant tables within this publication and/or accompanying drawings. They are also numbered in sequence.
2 Covers and frames are supplied pre-matched and banded together.
Do not remove banding at this stage.
3 Commence at one end of the pit, or if there is a junction then commence at this point. Identify the relevant covers and frames at this location.
4 Place first assembled section squarely over the pit ensuring it is in alignment with the centre of the pit.
5 Identify the next assembly. This is done by locating the next number in the sequence, offering up to the first portion and loosely bolting the frame together. Numbers are painted on the ends of the covers to correspond with the drawings supplied.
6 Adjust the height of the frames to the required level by using the levelling bolts in the frame.
7 Repeat along the length of the trench making sure the covers are following a straight line.
8 Visually check that your covers are in the correct frames and order by looking for the random grinding nicks around each cover perimeter on the top surface.
9 In sections, remove covers from frames and place formwork around inside of pit so that the timber is approximately 10mm above the bottom of the frame. This will prevent spalling of the frame.
Do not pour concrete at this stage.
10 Clean off covers and frame seating faces and replace cover into the frame.
11 Check that the grinding nicks still correspond.
12 Adjust the frame level so that the cover is not rocking. Tap down the corners of the covers with a balk of timber to make sure it is seated fully.
13 Using the assembly clamps provided, clamp the covers to the frames and across cover to cover joints. This will ensure that the covers are seated properly.
14 Moving round the frame, with the covers in place, tighten the frame bolts making sure you do not damage the lead packers or over-tighten the bolt.
15 If covers are of the recessed design, you will need to cover the small holes in the cover base with a small metal or slate plate.
Ducts and trenches
(continued)
16 Insert the plastic keyhole plugs and mask off with tape.
17 Pour concrete around the frames to a depth of about 25mm up the back of the frame and tamp or vibrate as you go.
18 Allow to cure overnight then remove the assembly clamps.
19 Pour concrete into the recessed covers, and around the frames, making sure that you thoroughly tamp and vibrate as you go.
20 Allow concrete to cure overnight.
21 Remove cover and strike shuttering.
22 Clean faces of covers and frame and apply a thin film of graphite grease to the seating faces.
23 Replace cover into the frame and tap down with a balk of timber. Once again make sure that the grinding nicks match up.
24 Allow the concrete to fully mature before any load is applied.