
Getting Started
Registering for Digital Banking
In order to use digital banking and the Alabama ONE mobile app, you must first register for digital banking
1 . Go to alabamaone .org/digitalbanking or the Alabama ONE mobile app
2 . Click “Sign Up!”
3 . Complete the Digital Banking Enrollment form
Logging In For The First Time
1 . Go to alabamaone .org or the Alabama ONE mobile app

2 . Use the digital banking login at the top of the home page to login
3 You will need to receive and enter a Secure Access Code to login for the first time - choose how you would like to receive your secure access code
a . Make sure you have access to the device you requested the secure access code to be sent to
4 . Enter your secure access code and click “Submit”
5 . You now have the option to register your device; if you plan to use this device for future logins, and the device is under your control at all times, click “Register Device”
a . If you are using a public device, do not register the device .
6 . Set your password and click “Submit”
a . Your password must be between 8 and 20 characters long and contain at least one (1) number and one (1) UPPER CASE letter
7 . Follow the prompts to complete the enrollment process
Logging Off
1 From the menu in digital banking, click “Log Off”
How To Register A Device
Registering a browser and device will help you login to digital banking quickly by avoiding the secure access code process . In addition, you will not be able to use the “Forgot Your Password” feature if you have not registered your device and browser .
By registering a browser or device, you are confirming the device is under your control at all times and you intend to use it again to access digital banking in the future .
To register a device:
1 . Login to digital banking
2 . Choose how you would like to receive your secure access code
a Make sure you have access to the device you requested the secure access code to be sent to
3 You will now have the option to register your device; if you plan to access digital banking from this device in the future and the device is in your control at all times, click “Register Device”
a . If the device is public, do not register it . You will need to re-register the browser and device again in the following circumstances:
• If you delete or reinstall the Alabama ONE mobile app
• If your browser does not save cookies
• If you clear your browser history
• If your registration is reset for security purposes
How to Use
the “Forgot Your User ID/Password” Feature
You can use the “Forgot Your Password” or “Forgot Your User ID” link to reset your login credentials if you have forgotten them .
You will only be able to use this feature if you have registered your device and browser
If you forgot your user ID:
1 . Go to alabamaone .org
2 . Click “Forgot User ID” in the digital banking login banner at the top of the page
3 Complete the form
4 Choose how you would like to receive your User ID
If you forgot your password:
1 . Go to alabamaone .org
2 . Click “Forgot Password” in the digital banking login banner at the top of the page
3 . A secure access code is required to confirm your identity; select how you would like to receive your secure access code
a . Make sure you have access to the device you requested the secure access code to be sent to
4 . Enter your secure access code and click “Submit”
5 . Enter your new password, confirm your new password, and then click “submit”
a . Your new password cannot be identical to a password you have used before
b . Your new password must be between 8 and 20 characters long and contain at least one (1) number and one (1) UPPER CASE letter
6 You will now be logged into digital banking
Other Ways to Login
To set up Touch ID and Face ID:
When using the Alabama ONE mobile app, you can use Touch ID or Face ID to easily login to digital banking
1 . From the menu in digital banking, click “Settings” then “Security Preferences”
2 . Click the switch next to “Touch ID”
3 . Click “Continue”
4 Enter your user ID and password to enable Touch ID and Face ID
5 . Click “Authorize”
To set a login passcode:
When using the Alabama ONE mobile app, you can also use a four- digit
login passcode in place of your user ID and password
1 . From the menu, click “Settings” then “Security Preferences”
2 . Click the switch next to “Passcode”
3 . Click “Create Passcode” to create a passcode
4 . Enter your passcode
5 . Confirm your passcode
6 . Enter your user ID and password to activate your login passcode
7 . When logging in, click “Passcode” to the bottom right of the login box
Changing Your Theme
To change to high contrast mode:
1 . From the menu, click “Settings” then “Accessibility”
2 . Click the box next to “Enable high contrast mode” a . High contrast mode is only available in the Alabama ONE theme . If you enable high contrast mode, your theme will be changed to the Alabama ONE theme if you are currently using the ARECU theme .
Homepage Options
Using Quick Actions
From the homepage of digital banking, you will be able to see each account you can view history for . The sidebar of each account includes the following options: View Activity, Quick Transfer, and Nickname Account .

View Activity
View Activity will let you see all activity on each of your accounts . You are able to search transactions and add filters to help you find what you need quickly . You can filter by time, transaction type, description, minimum to maximum amount, check number, or transaction category . You can also print or download your transaction history from the View Activity page
To print your transaction history:

1 . From the View Activity page, click the options icon ( ) 2 . Click “Print”
3 . From the print page, you can choose to print your transactions or save as a PDF
To print your account overview:
1 Click the printer icon at the top right of your dashboard Quick Transfer Quick Transfer will allow you to quickly transfer money between your accounts . To complete a quick transfer: 1 . Click the options icon ( ) next to the account you want to transfer funds from 2 Click “Quick Transfer” 3 Select the account you want to make a transfer to 4 Enter the amount of your transfer
5 Click “Transfer Funds”
a If you would like to make this a recurring transfer, click “Advanced Options” instead of “Transfer Funds” to be taken to the Funds Transfer page (see “To set up a recurring transfer”)
Nickname Account
Nickname Account will allow you to change the name that displays for this particular account .
1 . Click the options icon ( ) next to the account you want to nickname
2 . In the “account nickname” field, insert the nickname you want to give your account
3 . Click “Save”
Grouping & Reordering Accounts
You are able to customize your view on the homepage of digital banking by grouping accounts . You are able to group both internal and external accounts . You can also move your account tiles to customize the appearance of your homepage
To move your account tiles:
• On a desktop or laptop
o Use a mouse to click, drag-and-drop the tile to a new location .
• On a mobile device
o Tap a tile and drag it to the new location .
You can also create account groups to organize your accounts; for example, you can create a group for your savings accounts or loans . Your accounts are automatically grouped into a group titled “Accounts .” You can rename this group by tapping the pencil icon .
To create a new account group:
1 . Click on an account tile and drag it to the new group icon that will appear towards the bottom right-hand side of the screen

a . When the tile is dropped on the new group icon, a new group will be started at the bottom titled “New Group”
2 . Name your new group by clicking in the text bar, then clicking the
check mark when you are finished
To remove an account from a group:
1 . Click on an account tile and drag it to a new group
a . Please note your accounts must all be part of a group
To delete an account group:
1 . Remove all of the accounts within the group
a . When you remove the last account from the group, you will receive a message stating, “You are removing the last account from this group If you continue, your group will be deleted ”
2 . Click “Yes, delete”
How To Find My Account and MICR Number
To find your account number:
1 . Login to digital banking
2 . Click on an account from your dashboard
a Your account number will display at the top of the page
Please note: your account number will be the number before the dash (“-“) . The two numbers following the dash is your account suffix, which you will need to know for certain other online

banking features .
To find your account MICR number:
1 . Login to digital banking
2 . Click on an account from your dashboard
3 . Click “Details” under the account name and number
a . This will open a box that displays your current balance, available balance and account MICR number
Transactions
Viewing Current Transaction History
From your account history page, you can use the filter feature to view transactions from specific time periods .
To get to the account history page:
1 . Login to digital banking
2 . Click on an account from your dashboard
3 . Your transaction history will display
To view account history for a specific day or time period:
1 . From the account history page, click on the filter icon at the top of the page
2 . In the “Time Period” field, select the time frame you would like to view transaction history for
a If you would like to select a range of dates, select “Custom Dates” and use the “Start Date” and “End Date” fields to set your time frame
3 . Click “Apply Filters”
4 . You will then see transaction history only for your selected time frame
Printing Transactions
1 . From your digital banking dashboard, click on the account you would like to print transaction history from
2 . From your Account Details page, click the “options” icon ( ) and choose to print an overview of all your transactions on that account by clicking on “Print”
a . You can also print transaction-specific details by clicking on the specific transaction

*Printing is not available through the Alabama ONE mobile app.

Categorizing Transactions
Transactions for both internal and external accounts are automatically categorized to help you accurately monitor your spending and track your budgets .
To make changes to your transaction categories:
1 . Click on one of your accounts from your dashboard to open the Account Details page
2 . Click on an individual transaction to open the transaction summary
3 . In the details box, click the pencil icon under “Category”
4 . To assign the transaction a new category, simply click the category you want to assign

a . You can also assign subcategories to transactions by clicking the drop-down arrow to the right of the main category
Card Management
Card Management gives you more control over your Alabama ONE Debit or Credit Card.
Card Management tools can be accessed within Digital Banking Simply login, navigate to the main menu, click Digital Banking, and then Card Management .
The first time you use Card Management you will need to Enroll and Agree to the Terms and Conditions, and you will need to do this for each Card that you have .

Once your card has been enrolled in Card Management, click on the image of the Card that you would like to access, and begin exploring the available services, such as:
• Enabling and Disabling your Card
• Requesting a new PIN
• Reporting your Card as lost or stolen
• Setting certain usage controls
• Scheduling alerts
• Submitting travel notifications

Setting Up Card Management
To setup Card Management & add a card:
1 . After logging into Online Banking, bring up the left-hand Menu and select the “Digital Banking” drop down . Then select “Card Management”

2 . Select the card you’d like to enroll

3 Select “Card Controls”

4 Check the Terms and Conditions box and select “Enroll Cards”

5 You’re good to go You can now navigate through Card Controls and select any options you’d like .

Setting Card Controls
To set Card Controls select the specific card you want to use, then choose “Card Controls” option . There are many controls you can set on this tab; like:
Spending
• Limit per transaction
° Make your selection by clicking the transactions you would like to limit . When selecting “Limit per Transaction” box, input a dollar amount that you would not like a transaction to exceed . Transactions can also be limited by setting a Monthly Transaction Limit
Location
• Decline transaction outside of My Region
° Click the box and this will pull up a map to show your location where you can then choose a region or a radius around you where transactions can occur .
• Decline International /Non-U .S . Transactions
° Any transaction that is attempted from anywhere outside of the United States will be denied

Transaction Types
Decline eCommerce Transactions
Any online transaction where the CVV code is needed for the transaction
° CVV code-3-digit security code on back of card
° Example - online shopping, electronic payments, internet banking
Decline Mail/Phone Order Transactions
A transaction that is made without the card being present and all card information is either givenover the phone or by paper through the mail
° Example - paying a utility bill over the phone, mailing your debit card information to pay a utility bill
Decline Recurring Transactions
Transactions that recur monthly, weekly, yearly etc . on a cycled basis .
° Example - Monthly payments for newspaper or magazine subscriptions, streaming services, utility bills, etc .
Decline ATM Transactions
Any transactions done at any ATM or ITM
° Example - withdrawing funds at any ATM
Decline In-Store Transactions
Any Point-of-Sale transactions
° Example - transaction made inside Wal-Mart, Target, small momand-pop locations, etc
Decline Other Transactions
Any transactions considered to be outside of the Transaction Types listed above
° Example – Photography, door-to-door sales, industrial supplies, home banking
Members can set their card/s to receive alerts for:
• All Transactions
° Every transaction made with the card will receive an alert .
Spending Alerts
• Alert per Transaction
° Every transaction made at or above the chosen limit with the card will receive an alert
° After choosing this option, a box will be displayed to input an amount
• Alert per Month Limit
° The member will receive an alert when the member reaches the threshold of the chosen dollar amount each month
° After choosing this option, a box will be displayed to input the monthly spending amount
Location Alerts
• Alerts outside of My Regions
° Any alert that is originated outside of the member-chosen Region .
° When the member chooses the option, a section will populate to set your “My Region” (as pictured above)
• Alerts on International transactions
° Any transaction originated outside of the United States will receive an alert . Transaction Types
• eCommerce transactions
• Mail/Phone Order transactions
• Recurring Transaction Types
Transfers
Making Transfers
To make a transfer:
1 . Click on “Transactions” then “Funds Transfer” from the menu
2 . In the “From Account” field, select the account you would like to make a transfer from
3 . In the “To Account” field, select the account you would like to transfer funds to
4 In the amount field, type the amount you would like to transfer
5 . Use the “Frequency” field to set the frequency of the transfer
a . You can set the transfer to happen once or recur on a regular schedule . If you want to set up a recurring automatic transfer, see the following section (“To set up a recurring transfer”)
6 Choose the date you would like to make the transfer
7 If you would like, you can add a memo to the transfer, which will show in your account history
8 . Click “Transfer Funds”
To make a quick transfer from your dashboard:
1 . From your digital banking dashboard, click the options icon to the right of the account you want to make a transfer from
2 Click “Quick Transfer”
3 Select the account you want to make a transfer to
4 Enter the amount of your transfer
5 Click “Transfer Funds”
a . If you would like to make this a recurring transfer, click “Ad vanced Options” instead of “Transfer Funds” to be taken to the Funds Transfer page
Alternatively:
1 Click the “Transfer Funds” icon at the top of the digital banking dashboard
2 . Follow steps 2 - 7 above in “To make a transfer” to complete your transfer
To set up a recurring transfer:
1 Follow steps 1 – 5 in the previous section, “To make a transfer”
2 Select a start date and an end date, or select the “Forever” option
a . If you opt to repeat forever, you will still need to enter a start date for your initial transfer . Use the calendar to enter a start date for your transaction
3 If you would like, you can add a memo to the transfer, which will show in your account history
4 . Click “Transfer Funds”
Once you have set up a recurring transfer, it will appear under the “Recurring Transactions” tab in your Activity Center . To navigate to the Activity Center, click “Transactions”, then “Activity Center” in the menu .

To edit a recurring transfer:
1 . Click the “Recurring Transactions” tab in the Activity Center
2 . Click the options icon ( ) to the right of the recurring transfer you want to edit
3 Click “Edit Series”
4 Make your edits to the recurring transfer, then click “Transfer Funds”
To cancel a recurring transfer:
1 . Click the “Recurring Transactions” tab in the Activity Center
2 Click the options icon ( ) to the right of the recurring transfer you want to cancel
3 . Click “Cancel Series”
4 . Click “Confirm”
Viewing Transfers
You are able to view or search for existing, pending, or processed transfers from the Funds Transfer Page or from your Activity Center .
To view your transfers from the Funds Transfer page:
1 . Click “Transactions” then “Funds Transfer” from the menu

2 . If you are using the mobile app, click “Transfer Activity” on the upper right of the screen . If you are not using the mobile app, skip this step .
3 . Use the search bar on the right-hand side of the screen to look for a specific transfer, or use the tabs to toggle between “All,” “Pending,” and “Processed” transfers
To view transfers from the Activity Center:
The Activity Center shows a complete list of all of your transfers . The Activity Center does not show other transaction history . To view your account history as a whole, see “Viewing current transaction history . ”
1 . Click “Transactions” then “Activity Center”

2 From the Activity Center Page, click “Transactions” to view all transfers and loan payments made via transfer or click “Recurring Transactions” to view recurring transfers and loan payments .
3 . Use the search bar to search for a specific transfer, or click the filter icon to find transfers meeting specific criteria
Mobile Deposit
Mobile deposit through the Alabama ONE mobile app gives you the opportunity to deposit checks from anywhere .
Enroll
in mobile deposit:
1 . From the menu, click “Transactions” then “Mobile Deposit Enrollment”
2 . Read and accept the terms and conditions
Deposit a check using mobile deposit:
1 . Endorse your check
a . To endorse your check, sign the back of the check on the endorsement line, then add “For Alabama ONE Mobile Deposit Only” and the deposit date
2 . From the Mobile Deposit page, choose the account you want to deposit the check to
3 . Enter the amount of the deposit
4 . Click “Front of check” to take a picture of the front of the check
5 . Click “Back of check” to take a picture of the back of the check
a . Photo tip: make sure you have good lighting and you place your check on a contrasting background . This will help the system identify the edges of the check and read the check .
6 . Click “Submit Deposit”
Deposit made using Mobile Deposit are posted every two hours starting at 10am (10am, 12pm, 2pm, 4pm, and 6pm) . Anything posted after 6pm will be posted to the account after 10am the following business day .
To make a mobile deposit from your dashboard:
1 . Click the “Deposit a Check” icon at the top of your dashboard
2 . Use steps 1 – 6 above to complete your mobile deposit
Direct Deposit Switch
Direct Deposit Switch provides a secure and automated way for switching your Direct Deposit from your account with another financial institution to your Alabama ONE account.
The first time you click on Direct Deposit Switch, you are automatically enrolled to use this service and will receive an email notification .
After your initial automatic enrollment in Direct Deposit Switch, you will then be able to click on Switch Direct Deposits and begin the 3 Step process to switch your existing Direct Deposit from your account with another financial institution to your Alabama ONE account
• Step 1: allows you to search for, or enter, the company that you receive your Direct Deposit from
• Step 2: you will enter your personal information that should match what is associated with your Direct Deposit

• Step 3: you will review the information that you have entered and then submit your request
Direct Deposit Switch requests are sent to companies in a variety of ways, including mailing, faxing, online, electronic, etc . The method of sending is determined by the company receiving the request
• The timeframe of completing a Direct Deposit Switch can vary . The average is 7-15 business days
• Some Direct Deposit Switch requests require at least a 10 business day notice prior to the upcoming Direct Deposit date, and if the request is received by the company in less time than that, then you will receive your Direct Deposit in the account for your previous financial institution, and then the Direct Deposit after that will be sent to your Alabama ONE account .
After submitting a Direct Deposit Switch request, continue to check the request status until it is completed .
To check the status of your Direct Deposit Switch request:
1 . Login to your Alabama ONE Digital Banking account
2 . Navigate to the main menu,
3 . Click Pay & Transfer,
4 . Click Direct Deposit Switch
5 . Next, choose View Existing Switches . Statuses change as the Direct Deposit Switch request goes through the switch process .
Direct Deposit Switch requests that are in an “Incomplete/ Unsubmitted” status should be regularly reviewed, as this means the deposit account is in an inactive status .
Automatic Payment Switch
Automatic Payment Switch provides a speedy and painless way for switching an Automatic Payment from your account with another financial institution to your Alabama ONE account.
Automatic Payment Switch can be accessed within Alabama ONE Digital Banking . Simply login, navigate to the main menu, click Pay & Transfer, and then Automatic Payment Switch . The first time you click on Automatic Payment Switch, You are automatically enrolled to use this service and will receive an email notification .
After your initial automatic enrollment in Automatic Payment Switch, you will then be able to click on Switch Recurring Payments and begin the 3 Step process to switch your existing Automatic Payment from your account with another financial institution to your Alabama ONE account .
• Step 1: allows you to search for, or enter, the company that you make payments to
• Step 2: You will enter your personal information that should match what is associated with your Automatic Payment
• Step 3: you will review the information that you have entered and then submit your request
Automatic Payment Switch requests are sent to companies in a variety of ways, including mailing, faxing, online, electronic, etc . The method of sending is determined by the company receiving the request
• The timeframe of completing a Automatic Payment Switch can vary The average is 7-15 business days
• Some Automatic Payment Switch requests require at least a 10 business day notice prior to the upcoming Automatic Payment date, and if the request is received by the company in less time than that, then your Automatic Payment will come from the account at your previous financial institution, and then the next Automatic Payment will come from your Alabama ONE account .
After submitting an Automatic Payment Switch request, continue to check the request status until it is completed .
To check the status of your Automatic Payment Switch request:
1 . Login to your Alabama ONE Digital Banking account
2 . Navigate to the main menu
3 . Click Pay & Transfer
4 . Click Automatic Payment Switch
5 . Next, choose View Existing Switches
Statuses change as the Automatic Payment Switch request goes through the switch process .
Automatic Payment Switch requests that are in an “Incomplete/ Unsubmitted” status should be regularly reviewed, as this means the deposit account is in an inactive status .
Loans Setting Up Loan Payments
To make a loan payment:
1 . From the menu, click “Transactions”, then “Loan Payments”
2 . In the “From” field, select the account you would like to use to make your loan payment
3 . In the “To” field, select the loan you want to make a payment on
4 . Select your payment type
5 . Enter the payment amount in the “Amount” field
6 . Select the payment date
a . If you would like to setup a recurring loan payment, click the “Make this a recurring transaction” box and follow the steps in the next section (“To set up a recurring loan payment”)
7 If you would like you can add a memo, which will show in your account activity
8 . Click “Submit”
To set up a recurring loan payment:
1 . Follow steps 1 – 6 in the above section (“To make a loan payment”)
2 . Select a start date and an end date, or select the “Forever” option
a If you opt to repeat forever, you will still need to enter a start date for your initial transfer . Use the calendar to enter a start date for your transaction .
3 . If you would like you can add a memo, which will show in your account activity
4 . Click “Submit”
Once you have set up a recurring loan payment, it will appear under the “Recurring Transactions” tab in your Activity Center . To navigate to the Activity Center, click “Transactions”, then “Activity Center” in the menu
To make a loan payment from your dashboard:
1 Click the “Loan Payment” icon at the top of your dashboard
2 Follow the steps above to either make a one-time payment or set up recurring payments
To edit a recurring loan payment:
1 . Click the “Recurring Transactions” tab in the Activity Center
2 . Click the options icon ( ) to the right of the recurring transfer you want to edit
3 Click “Edit Series”
4 Make your edits to the recurring transfer, then click “Transfer Funds”
To cancel a recurring loan payment:
1 . Click the “Recurring Transactions” tab in the Activity Center
2 . Click the options icon ( ) to the right of the recurring transfer you want to cancel
4 . Click “Cancel Series”
5 . Click “Confirm”
Making a Loan Payment using an External Account.
Members can make a Loan Payment from an external account within their Alabama ONE digital banking account . In order to do this, the member must add their external account (see the External Account section of this guide) . Once completed the member can conduct an external Loan Payment using the same steps mentioned above
When using an External Account to make a Loan Payment, if the payment amount is $2,000 .00 or greater, then the transaction will show in the Activity Center in a “Drafted” status . The member will need to approve the payment before the system will process the payment by following these steps:
1 . From the Menu, click Activity Center
2 . Click, Single Transactions
3 . Select the Three Dots
4 . Click, Approve
Once the member has selected to approve the transaction, a verification code will be sent to the member . The member will have to input the verification code for the “Drafted” status to change over to an “Authorized” status within the Activity Center
Credit Card Payments cannot be made with an External Account using the Loan Payment feature . If members need to make a payment on their Credit Card with an External Account, they will need to click on Credit


Credit Cards
Viewing Credit Card Information
To see an overview of your credit card account:
1 . From the dashboard, click on your credit card tile
2 . Click “Details”
a From here, you can view your current balance, available balance, next payment due, and minimum payment due
To view more detailed credit card information:
1 . Click “Credit Card” in the menu
2 . You will be then be taken to the Alabama ONE MasterCard Credit Card Online Portal
Viewing Credit Card Transactions
1 Credit Card Transactions can be viewed in the Transactions section on the homepage of the Credit Card Online Portal, as well as by clicking Account Summary
Making, Managing, and Viewing
Credit Card Payments
To make a payment on your credit card:
1 . Click “Payments” from the menu
2 . The FIRST time that you make a payment from your Payment Account, you will need to add your Payment Account by adding your routing number, account number, and account type for the checking or savings account that you will use to make your credit card payment . Once the Payment Account information is added, it will go through a verification process which can take 3-5 business days . Once the Payment Account is verified, the credit card payment can be processed
a If you want to add a new Payment Account, you can also do so from this page
3 . Choose a payment amount and click “Next”
4 . Choose your payment date and click “Next”
5 . Click “Make a Payment”
6 . You will receive confirmation of your payment
To view your past online payments:
1 Click “Payment Activity” from the menu
2 Your payment history will open
a . Your payment activity only shows payments made through the “Online Credit Card Portal”and will not show payments made by mail or in branch
To change a payment method:
1 . Click “Make Payment” and in the Choose A Payment Account, click “Edit”
To set up recurring payments:
1 . Click “Make Payment” and then click “Enroll” located next to Automatic Payments
Viewing Credit Card Statements
To view statements:
1 . Credit Card Statements can be viewed by clicking on “Statements” on the homepage of the Credit Card Online Portal
2 In order to view Statements from the Credit Card Online Portal, you must be enrolled in Credit Card eStatements . Click “eStatement Enrollment” to enroll in Credit Card eStatements
Editing Contact Information
To update your profile information:
1 . Click “Profile” on the homepage of the Credit Card Online Portal 2 . Click “Edit Profile”
To add a new phone: 1 . Click “Account Services” in the menu 2 . Click “Contact Information” under “My Profile” 3 . Click “Add New Phone” under “Notification Preferences” 4 . Enter your phone number
Bill Pay
Bill Pay makes paying your bills on time easy by allowing you to set up automatic payments directly from your account .
To access Bill Pay, click “Transactions” then “Bill Payment” in the digital banking menu .
Enrolling in Bill Pay
1 . From the Bill Payment page, read the disclosures and click “I Accept” at the bottom of the page
2 Select the account you would like to enroll in Bill Pay, then click “Enroll in Bill Pay”
a . Note: only checking accounts are eligible for Bill Pay
3 . A box that says, “Enrollment successful . You have successfully enrolled in Bill Pay” will pop up; click “Continue to Bill Pay”
4 Set your security question and answer, then click “Accept & Submit”
Adding Your First Payee
You can set up Bill Pay to make payments to a company or to an individual .
To add a company as a payee:
1 . Select “Pay a company”
2
. Search for the company name using the search box, or select the company from the list of commonly selected companies
3
. Insert your account number with the company you selected – for example, your Alabama Power account number
4 . Insert the payee’s ZIP code
5 . Click “Next”
6 . You may be asked to provide more information about the payee; fill out any additional information requested
7 Confirm your information, then click “Next”
To add an individual as a payee:
1 . Select “Pay a person” 2 . Select your payment type
3 . Click “Next”
4 . Fill out the payee’s contact information
5 Insert the payee’s account number
6 Insert the payee’s account routing number
7 . Select the payee’s account type
8 . Add a nickname for your payee
9 . Select the account you want to make the payments from
10 . If you want, add a category for your payment using the “Category’ section
11 . Click “Next”
12 . Select your one-time activation code method, then submit your activation code
Adding, Editing, and Deleting Payees
After enrolling in Bill Pay and setting up your first payee, you can add additional payees, edit, and delete payees from the Bill Pay page .
To add a payee:
1 . From the Bill Pay page, click “Options” at the top right of the page
2 . Click “Add payee”
3 . Type the payee’s name in the “Name” field
4 . Select the payee type
5 . Add a nickname for the payee, if you would like
6 . Choose the payment type
7 . Insert the payee address and phone number in their respective fields
8 If you know the payee account number, insert the account number in the “Enter Payee Account Number” field and confirm in the next box
9 . Click “Preview” to review the payee information
10 Click “Save Payee”
To edit a payee:
1 From the Bill Pay page, click the options icon to the right of the payee you want to edit
2 . Click “Edit payee”
3 . Make your edits, then click “Preview”
4 . Review the payee information, then click “Save Payee”
To delete a payee:
1 From the Bill Pay page, click the options icon to the right of the payee you want to delete
2 . Click “Delete payee”
3 . Click “Delete” in the confirmation box
Setting Up a Bill Payment
To set up a one-time bill payment:
1 . From the Bill Pay page, click on the payee you want to schedule a payment to
a . This will automatically open the payment window . Alternatively, you can click the options icon to the right of the payee name .
2 . Insert the payment amount
3
. Choose your “Pay from account”
4 . Choose your payment delivery date
5 . Click “Submit Payment”
To set up recurring bill payments:
1 . From the Bill Pay page, click “Options” at the top right of the page
2 . Click “Visit Bill Pay Site”
a If this is your first time visiting the Bill Pay site after setting up Bill Pay, you may need to answer some security questions
3 . Click on the payee you want to schedule recurring payments to
4 . Click “Pay Recurring”
5 . Fill out the payee address – this should automatically populate from the information to submit earlier
6 . Choose the account you want to make the payments from
7 . Choose the amount for your recurring payments
8 Choose the frequency of your payments
9 Choose the date(s) for the payments to be sent
10 Select the start date for your recurring payments
11 If you want to select an end date, select “Yes” under “Will this payment series end?”
a . Select the date for your last recurring bill payment
b . Alternatively, you can choose for the payments to end after your total payments have reached a set total
12 Add a memo – we suggest including your name and the purpose of the payment, including your account number with the payee if
13 Click “Submit”
To set up a bill payment from your dashboard:
1 . Click the “Pay a Bill” icon at the top of your dashboard
2 . Follow the steps above to either make a one-time bill payment or a recurring payment
Editing and Cancelling Recurring Bill Payments
To edit your recurring bill payments:
1 . From the Bill Pay page, click “Options” at the top right of the page
2 . Click “Visit Bill Pay Site”
3 . Click on the payee you want to edit the payments for
4
. Click “Edit recurring”
5 . You can choose to skip a single payment, edit a single payment, or edit all of your future payments
a If you are skipping a payment, select the payment you want to skip
b If you are editing a single payment, select the payment you want to edit and click “Continue”
i . Make your edits, then click “Submit”
c . If you want to edit all of your future payments, select “Edit entire series” and click “Continue”
i Make your edits, then click “Submit”
To cancel all of your recurring bill payments to a payee:
1 From the Bill Pay page, click “Options” at the top right of the page
2 Click “Visit Bill Pay Site”
3 . Click on the payee you want to edit the payments for
4 . Click “Edit recurring”
5 . Select “Edit entire series”
6 . Scroll to the bottom of the page and select “I would like to stop this payment”
a . Choose to stop the payment immediately or after the next payment processes
7 . Click “Submit”
External Accounts
Linking and adding your external accounts to digital banking enables you to manage your accounts from one app .
• Linking your external account allows you to view your account balance and account transactions from your dash board . Your account will also be added to financial tools to give a better overall picture of your finances
• Adding your external account allows you to view your account balance and account transactions, make transfers across your external accounts and your Alabama ONE accounts, and will be linked to financial tools .
You can identify your AOCU accounts by locating the “ONE” icon next to

the account name .

External accounts will have the logo of the other financial institution before the account name
Linking External Accounts
To link an external account:
1 . Click the “Link Account” button at the top of the homepage of digital banking .

2 . Select your financial institution from the list, or type the name or website address of your financial institution into the search box
3 Enter your login credentials for your external account
4 Choose how to receive your secure access code
5 . Enter your code
6 Your accounts at the financial institution will appear; choose which accounts you want to include in your digital banking dashboard, then click “Continue”
7 . Click “Done”
8 Log out of digital banking, then sign in again to view your external accounts from your dashboard

To update login credentials for an external account:
1 . Click the options icon to the right of the account 2 . Click “Update Login”
3 . Re-enter your User ID and password
4 . Click “Done”
Adding External Accounts
To add an external account:
1 . From the menu, click “Transactions” then “Add External Account” 2 . Enter your external account number 3 . Select the account type 4 . Enter your external account routing number 5 . Click “Continue”
Two small deposits will be sent to your external account in approximately 24 hours in order to verify your account . Verifying your external account:
1 . From the menu, click “Transactions” then “Verify External Account” 2 . Select the external account you want to verify
3 . Enter the amount of the two deposits that were made to your external account
Settings and Preferences
Account Preferences
Account Preferences allows you to see all of your accounts, even the ones you have hidden on your digital banking dashboard, and make changes to how they appear in digital banking
To navigate to Account Preferences, click on “Settings” in the menu, then “Account Preferences ”
To nickname your accounts:
1 . From the Account Preferences page, click the account you would like to nickname and then click the pencil icon under “Online

Display Name”
2 . Enter the nickname you want to give your account, then click the check mark
To hide accounts from your dashboard:
You can control which accounts show up on your digital banking dashboard . If you want to hide an account from your homepage…
1 . From the Account Preferences page, click the account you want to hide
2 . Under “Account Visibility”, click the slider to change your account visibility on your dashboard and in Financial Tools
a . Your account will be visible if the slider is blue and has a check mark and will be hidden if the slider is gray with an “x”
b After you have hidden your account, it will appear under the “Hidden Accounts” heading towards the bottom of your Account Preferences page
To reorder your accounts within their groups:
1 . Click the up or down arrow to the right of the account name
a You can reorder and group your accounts from your dashboard (see “Grouping and Ordering Accounts”
Security Preferences
To access the features in this section, navigate to the Security Preferences page by clicking on “Settings” then “Security Preferences” in the menu
To change your password:
1 . From the Security Preferences page, click “Change Password”
2 . Enter your current password
3 . Enter your new password
a . Your password must be between 8 and 20 characters long, contain at least one number and one UPPER CASE letter, and not be identical to a previously used password
4 . Confirm your new password
5 . Review your changes, and then click “Change Password”
To change your login (user) ID:
1 . Click “Change Login ID” on the Security Preferences page
2 . Enter a new Login ID into the field
a . Your new User ID must be between 4 and 15 characters long
3 . Click “Save new Login ID”
To update your contact information for secure access codes:
1 . From the Account Preferences page, click “Secure Delivery”
2 . To edit your current information, click the pencil icon next to the information which needs to be updated
a . Click the check mark to save your edits, or the “x” to cancel
b . To delete outdated information, click the trash can icon
3 . To add new contact information, click either:
a . New Text
b . New Voice
c New Email
4 After you have entered your new contact information, you will
need to receive a secure access code to confirm your changes; select how you would like to receive your code
5 . Enter your secure access code to confirm your new contact information
To set a login passcode:
1 . From the Security Preferences page, click the switch next to “Passcode”
2 Click “Create Passcode” to create a passcode to use instead of your user ID and password when logging into digital banking
3 . Enter your passcode
4 . Confirm your passcode
5 . Enter your user ID and password to activate your login passcode
6 . When logging in, click “Passcode” to the bottom right of the login box to use your passcode
Alerts
Alerts warn you about the status of each of your accounts and notify you when transactions occur . Some alerts are automatically generated by the system, such as security alerts, but some alerts you can create and customize yourself .
When you create an alert for your accounts, you specify the conditions that trigger the alert, as well as the way you want to be notified Alert conditions vary depending on the alert type .
To access your alert settings, click “Settings” then “Alerts” in the menu .
Security Alerts
Security alerts notify you when a security setting (i .e . your password was changed) or an account setting (i .e . an external account has been added to digital banking) has changed
There are several different preset security alerts you can choose to activate . Some alerts, such as “Alert me when my password is changed”, are always active . Your alert is active if the slider is blue and has a check mark, and is inactive if the slider is gray with an “x”
Account Alerts
Account alerts notify you when the balance in one of your accounts drops below or rises above a specific threshold .
To create a new account alert:
1 . From the Alerts page, click the “New Alert” button in the top right of the screen
2 Select “Account Alert”
3 Select which account you would like to set the alert for
4 In the “Account balance type” field, select “Current Balance” or “Available Balance”
a . The current balance will tell you the current balance of your account without accounting for pending transactions
b . The available balance will tell you the balance of your

5 Select “more than”, “less than” or “exactly”
a . Select “more than” if you want to know when your balance is above a certain threshold, “less than” if you would like to be notified when your balance drops below a certain threshold, or “exactly” when you want to be notified when your balance is an exact amount

6 Enter your threshold amount
7 . Select how you would like to receive your account alert and enter your contact information
a . If you select to be notified via text message, you will need to agree to the SMS terms and conditions
8 Click “Create Alert”
History Alerts
History alerts notify you when a debit transaction or credit transaction is more than, less than or an exact amount you specify, when a specific check number posts, or when a transaction description matches text that you specify
To set up a history alert:

1 From the Alerts page, click the “New Alert” button in the top right of the screen
2 . Select “History Alert”
3 . Select “Debit Transaction”, “Credit Transaction”, “Check Number”, or “Description”
4 . Follow steps 3 – 7 above to finish setting up your alert
Online transaction alerts notify you on the status of a check reorder, external transfer, funds transfer, or stop payment .
To set up a new online transaction alert:
1 . From the Alerts page, click the “New Alert” button in the top right of the screen

2 . Select “Online Transaction Alert”
3 . Select the type of alert you want to setup using the dropdown in the “Transaction” field
4 . Select the account you would like to set the alert for
5 . Choose the status you want to be alerted for
6 . Select how you would like to receive your account alert and enter your contact information
7 . Click the “Create Alert” button to create your alert
Reminders
Finally, you can set reminders through digital banking for a variety of life events . For example, this tool is useful for reminding you to inform Alabama ONE about your vacation plans, so your account can be marked for travel .
To set up a new reminder:
1 . From the Alerts page, click the “New Alert” button in the top right of the screen
2 . Select “Reminder”
3 . Choose your reminder type in the “Event” dropdown
4 Select a date
a If you want to set up a recurring reminder for each year, check the “Recurs Every Year” box
5 . Use the “Message” field to write out your reminder message

6 Select how you would like to receive your reminder and enter your contact information
7 . Click the “Create Alert” button to create your reminder
Edit & Turn Off Alerts
To edit an existing alert:
1 Click the down arrow next to the alert type you would like to edit
2 Click “Edit” next to the specific alert you want to edit
3 To make changes to the criteria, click on the specific criteria under the “Edit Account Alert” heading
4 . Click “Save”
To turn off an alert:
1 . Click the drop-down arrow next to the type of alert you would like to edit
2 . Click the slider to either turn on or off the alert
a . Your alert is active if the slider is blue and has a check mark, and is inactive if the slider is gray with an “x”
3 . You will need to receive a secure access code to turn off your alerts; choose how you would like to receive your code and type the code in the box
4 Click “Verify”
Sending Alabama ONE Messages
Send a Message
To send a message about your account as a whole from the Messages page:
1 . From the menu, click “Messages”
2 . Click the blue pencil icon
3 . Use the form to type your message to Alabama ONE
4 . If you want, you can attach a file to help explain your needs using the “Attach a file” link
5 . Click “Send Message”
To send a message about your account as a whole from your dashboard:
1 Click on the account you have a question about
2 Click the Options icon from the account details page, then “Ask a question”
3 . Follow steps 3 – 5 above to send your message

Send a Message about a Transaction
To send a message about a specific transaction:
1 . Click the account you have a question about from your dashboard
2 . From the account details page, click on the options icon to the right of the transaction you have a question about
3 . Click “Ask a question”

4 Follow steps 3 - 5 above to send your message
1 . From the menu, click “Messages” 2 Your messages inbox will show
3 To send a reply, click the message you want to respond to, then the “reply” icon

4 . Type your message, attach any supporting files, and click “Send message”
Financial Tools
Digital banking provides you with money management widgets aimed to help you budget and save better . You can find your money management widgets at the top of your dashboard .
Financial Tools has five widgets: the net worth widget, the budget widget, the spending widget, the trends widget, and the debts widget .
A . The net worth widget allows you to see the total value of all your Alabama ONE and external linked accounts, showing your net worth over time .
B . The budget widget helps you set budgets for each spending category as well as track your spending in those categories each month The first time you use the budget widget you have the option to start from scratch or have your budget auto-generated based on your spending .
C . The spending widget allows you to see a visual representation of how you are spending your money over time .
D . The trends widget builds on your spending analysis in the spending widget to help you track spending over time as compared to your income .
E The debts widget allows you to see all of your debt accounts (like loans) in one place and calculate how making additional payments, or paying off your debt completely, could affect your total debt over time
The Budget Widget
The first time you use the budget widget you have the option to start from scratch or have your budget auto-generated based on your spending We suggest that you elect to auto-generate your budget, as the system will create a budget for you based on your spending history . Keep in mind, you can make changes to your budget at any time .
To auto-generate your budget:
1 . From your dashboard, click “Financial Tools”
2 . Click “Budget”
3 . Choose “Auto-generate Budget” to have your budget autogenerate from your spending habits
To build your own budget:
1 From your dashboard, click “Financial
2 Click “Budget” 3 . Choose “Start From Scratch”
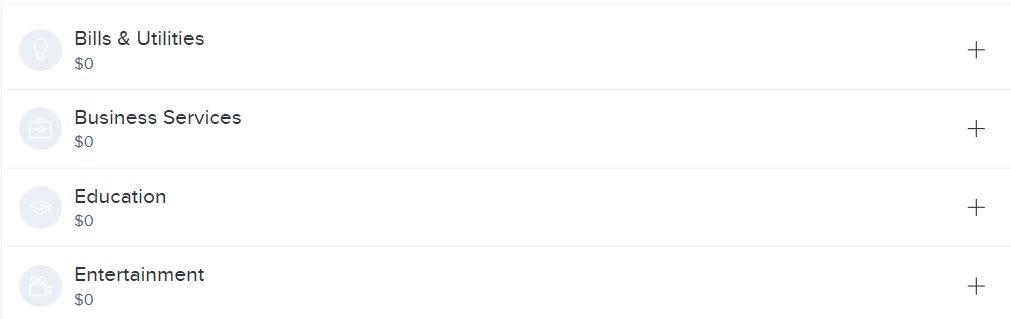
4 . Click the “+” next to each budget category to enter your monthly budget, then click “Save”
a . If you choose to instead auto-generate your budget, scroll to the bottom of the page and click “Recalculate Budget”
5 . Click the arrow at the top left of the screen to save your budget and exit
To add a budget category:
1 Click the “+” in the right top corner
2 Click the “+” next to the budget category you want to add
3 . Enter your budget, then click “Save”
4 . Click the arrow at the top left of the screen to save your budget and exit
To edit a budget category:
1 . Click the budget you want to edit
2 . Click “Edit Budget”
3 . Enter your new budget amount and click “Save”
To add a subitem to a budget category:
1 . Click the budget you want to edit
2 . Click “Add New Sub-Budget”
3 . Choose the subcategory you want to add, or make your own by clicking “Add a Sub-Category” a the bottom of the list
4 . Enter the sub-budget amount, then click “Save”
To delete a budget item:
1 . Click the budget you want to edit
After you have created your budget, or requested that your budget be auto-generated, your budget categories will appear in bubble form . The bubbles help you see both the health of your finances, as well as how close you are to reaching your budget limits .

You will notice that there are three colors of bubbles . A green bubble indicates that less than 80% of the budget for that category has been spent, a yellow bubble indicates that more than 80% of the budget for that category has been spent, and a red bubble indicates that more than 100 percent of the budget for that category has been spent

To switch from bubble view to list view:
1 . Click the list icon to the bottom right of the bubbles
To view transactions within a budget category:
1 . Click the budget category you want to view transactions for
2 . Click “Transactions”
To change the category of a transaction:
1 . From the transactions within the budget category, click the transaction you want to change the category for
2 . Click “Category”
3 . Select the new category for the transaction
Changing the category of a transaction will also change the category of the transaction across digital banking
To add a memo to a transaction:
1 . From the transactions within the budget category, click the transaction you want to add a memo to
2 . Click “Add a memo”
3 . Type your memo
Adding a memo to a transaction will also add the memo to the transaction across digital banking
The Net Worth Widget

The net worth widget will allow you to see the total value of all internally held and linked accounts by showing your net worth over time . You can adjust the time to view by six months, nine months, or one year .
The net worth widget is not available through the Alabama ONE mobile app .
To view your current assets and liabilities:
1 Click “View Assets and Liabilities” to the right of the chart
To view your net gains and losses:
1 . Click the month you want to view your net gains and losses for on the right side of the chart
a . Alternatively, click a point on the chart to view your net gains and losses for that month
2 . Click on an account to view the account transactions for that month
To change the time frame of your chart:
1 . Above the chart, select “6M” for a six month view, 9M for a nine month view, or 1Y for a one year view
To view your net worth in a specific account:
1 . Click “Filter Accounts” to the upper left of the chart
2 . Choose the accounts you want to include in the analysis
3 . Click “Apply”
The Spending Widget

The spending widget will allow you to see a visual representation of
how you are spending your money over a period of time You can switch between viewing your spending graph and your income graph by selecting “Spending” or “Income” to the right of the spending graph .
To change the timeframe of your spending graph:
1 Click the date range above the graph
2 Insert the time frame or select on of the range options
3 Click “Apply”
To view spending category details:
1 Click on the category you want to view details for in the graph a . Alternatively, click on the category in the list to the right of the graph
2 . Click “Select to View Transactions” in the center of the graph
To change a transaction category:
1 . Follow steps 1 – 2 above
2 . Click on the transaction you want to change the category for
3 . Click on the category
4 . Choose the new category
Changing the category of a transaction will also change the category of the transaction across digital banking .
Add a memo to a transaction:
1 . Follow step 1 above
2 . Click on the transaction you want to add a memo to
3 . Click “Add a memo”
Adding a memo to a transaction will also add the memo to the transaction across digital banking .
To view your spending and income in a specific account:
1 . Click “Filter Accounts” to the upper left of the graph
2 . Choose the accounts you want to include in the analysis
3 . Click “Apply”
The Trends Widget
The trends widget builds even further on your budgeting categories by helping you track your spending over time as compared to your income . It shows your spending history by category along with a dark green line that correlates to your income . This widget will help you quickly determine if
you are spending more than you are making
The trends widget is not available on the Alabama ONE mobile app
To view your spending in a category:
1 . Hover your mouse over the category in the chart to see total spending or income for the chosen time period
2 . Click on the category, either in the chart or in the key below the chart for an expanded view
3 Click on “View Transactions” to view the transactions within the category
To switch to list view:
1 . Click the list icon to the upper left of the graph
To change the timeframe of your trends graph:
1 . Click the date range above the graph
2 . Insert the time frame or select one of the range options
3 . Click “Apply”
To view your trends in a specific account:
1 . Click “Filter Accounts” to the upper left of the graph
2 . Choose the accounts you want to include in the analysis
3 . Click “Apply”
The Debt Widget
The debt widget shows details of all of your debt (loan) accounts in digital banking in one place to give you a better overview of your debt . As you link and add external accounts, they will be included in this widget
Using this widget gives you a current view of your individual loan balances, interest rates, monthly payment amounts, and maturity dates, all shown below the chart . The chart shows your decrease in debt as you pay them off and will show the effects of different repayment strategies
• Fastest Payoff First- Your debts are ordered by which debt

you will pay off soonest based on balance, annual percentage rate (APR), and minimum payment . Your additional amount towards your debts is applied in that order as you pay off your debts .
• Highest Interest First- Your debts are ordered from the highest APR to the lowest APR . Your additional amount towards your debts is applied in that order as you pay off your debts
• Lowest Balance First- Your debts are ordered by balance amount from lowest to highest . Your additional amount towards your debts is applied in that order as you pay off your debts .
• Highest Balance First- Your debts are ordered by balance amount from highest to lowest . Your additional amount towards your debts is applied in that order as you pay off your debts .
To change your debt repayment strategy:
1 . Click the current method to the top left of the chart
2 . Choose a new method from the drop-down menu
To view details for a specific account:
1 . Click “Filter Accounts” above the chart
2 . Choose the account you want to view details for
Other Tools
Text Banking
Text banking is an easy tool outside of digital banking that can help you on-the-go . Text banking uses a list of codes sent through text messages . To sign up for text banking:
1 . In digital banking, go to the menu and click “Services” then “Text Banking”
2 Click the switch at the top of the page to turn on text banking
3 Enter the phone number you want to use for text banking
a . You will only be able to use one phone number for text banking . If you want to change your number, return to this page at any time
4 Read the terms below and click “Agree to terms”
5 Scroll to the bottom of the page and click “Save”
6 From the menu, click “Settings” then “Account Preferences”
7 Click on the account you want to set up text banking for
8 . Click “SMS/Text”
9 . Click the switch to turn on text banking
10 . You will need to set a text banking nickname for your account; under the activation switch, click the pencil icon to enter your account nickname
a Your account nickname must be no longer than four characters
b . Please note this account nickname is different from the account nickname which will show on your dashboard in digital banking
11 . Repeat steps 6 - 10 for each account you want to set up text banking for
To use text banking:
1 . Text a command to 226563
a . You can find this list of commands on our website at alabamaone .org/text-banking
i . BAL – provides balances for all accounts that are enabled for text banking
ii . BAL “account nickname” – provides the balance for the specified account
iii HIST “account nickname” (i e HIST Chec) – provides account history for the specified account
iv . XFER “from account nickname” “to account nickname” “amount” (i .e . XFER Chec Sav 100 .00) – transfers the specified amount from the “from” account to the “to” account
v . LIST – sends a list of text banking commands
vi . HELP – sends a list of Alabama ONE contact information
vii . STOP – disables text banking
To disable and stop text banking:
1 . Text “STOP” to 226563
Telephone Banking
Telephone banking is another great on-the-go tool outside of digital banking
To sign up for telephone banking:
1 . Call either (205) 752-1777 or (800) 478-1025
2 . Follow the prompts to enroll in telephone banking
To use telephone banking:
1 . Call either (205) 752-1777 or (800) 478-1025
2 . Follow the prompts to check your balance, make transfers, or talk with our Contact Center for more help eStatements
You can access digital versions of your statements through digital banking thanks to free eStatements .
Signing up for eStatements:
1 From the menu, click “Services” then “eStatements”
2 PDF verification, to ensure you can view PDFs, will pop up; click “Get Code”
3 . Enter the four-character code on the PDF that opens into the verification field, then click “Verify”
4 . Check the box next to the account you want to view an eStatement for
5 . Click “Register”
6 . Complete a second PDF verification test by again entering the four-character code which appears on the PDF that opens into
7 Click “Next”
8 . Enter your contact information and click “Next” to receive a confirmation email
9 . Open the email sent to the address you listed in the previous step; click on the confirmation link
10 Choose whether you would like to be notified each time an eStatement is available to view 11 . Click “Next”
12 . Read and agree to the terms and conditions
13 . Click “Finish”
Viewing eStatements:
1 . From the menu, click “Services” then “eStatements”
2 . Choose the account you want to view an eStatement for
3 . A list of your eStatments will show; choose the eStatement you want to view by clicking “Account Statements” next to the corresponding date
4 . Click “Done” to return to step 2
If you have a loan or mortgage with Alabama ONE, your account information will show on your checking and savings account statements You will not receive a separate statement for your loan .
Viewing notices:
1 . From the menu, click “Services” then “eStatements”
2 . Choose the account you want to view notices for 3 . Click “Notices” in the eStatements menu
4 . Click on the notice to view
Viewing tax forms:
1 . From the menu, click “Services” then “eStatements”
2 . Choose the account you want to view tax forms for
3 . Click “Tax Forms” in the eStatements menu
4 . Click on the tax form to view
Discontinue eStatements:
1 From the menu, click “Services” then “eStatements”
2 . Choose the account you want to discontinue eStatements for
3 . Click “Settings” at the top of the page; in the Alabama ONE mobile app, click “More” then “Settings”
4 . Click “Discontinue/Resume Accounts”
Reorder Checks
1 . From the menu, click “Services” then “Check Reorder”
2 . Select the account you want to order checks for
3 . Enter your routing number
4 . Enter your account number
5 . Enter your ZIP code
6 . Select your account type
7 . Click “Continue”
8 . If needed, enter your account information and proceed to shop for your checks
Find an Alabama ONE Location
1 . From the menu, click “Locations”
2 Use the map to find Alabama ONE locations near you Call Alabama ONE
1 . In the Alabama ONE mobile app, click “More” at the top right of digital banking
2 . Click “Call Us!”
Find Rates In the Alabama ONE mobile app:
1 Click “More” at the top right of digital banking 2 Click “Rates” From your desktop: 1 . Click “Rates” in the top right of digital banking
Additional Resources
For more digital banking resources, including tutorial videos, please visit
• alabamaone .org/digitalbanking
• Alabama ONE’s YouTube Channel
Contact Us

Toll-Free: (800) 225-0110
Send us a text: (205) 342-2080
Email: memberservices@alabamaone org
Chat with us online at www .alabamaone .org