Heated Towel Ladder
Installation Guide
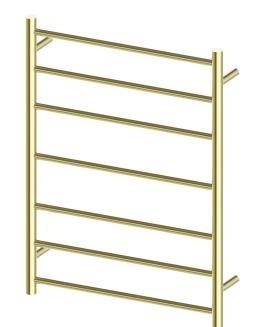
Nero Heated Towel Ladder Rail
Connection Wire Leg Kit


including:
- 2 x Non-Wired Legs
- 1 x Exposed Wired Leg
- 2 x Concealed Wired Legs
- 1 x White Concealed Wiring Sleeve (Supplied inside the leg)

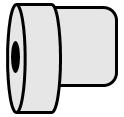


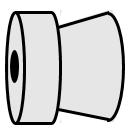
- 3 x Mounting Brackets (Supplied inside the leg)
- 1 x Exposed Wiring Mounting Bracket
- 4 x Wall Plugs
- 4 x Countersunk Screws


- 2 x Machine Screws
- 4 x Small Machine Screws
- 4 x Grub Screws (Supplied inside the leg)
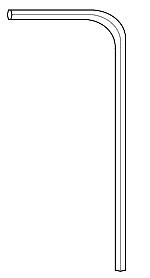
- 1 x Allen Key
Please note these parts are not to scale
● Cross Head Screwdriver
● Pencil
● Spirit Level
● Tape Measure
● Drill Bits (6mm & 12 mm)
● Cordless Drill
● Electrical Supply
The Nero models in this guide can be installed with either concealed or exposed wiring, with the electrical supply connected at the bottom or top, left or right hand mounting point. This section concentrates on the concealed wiring method. For exposed wiring see page 6


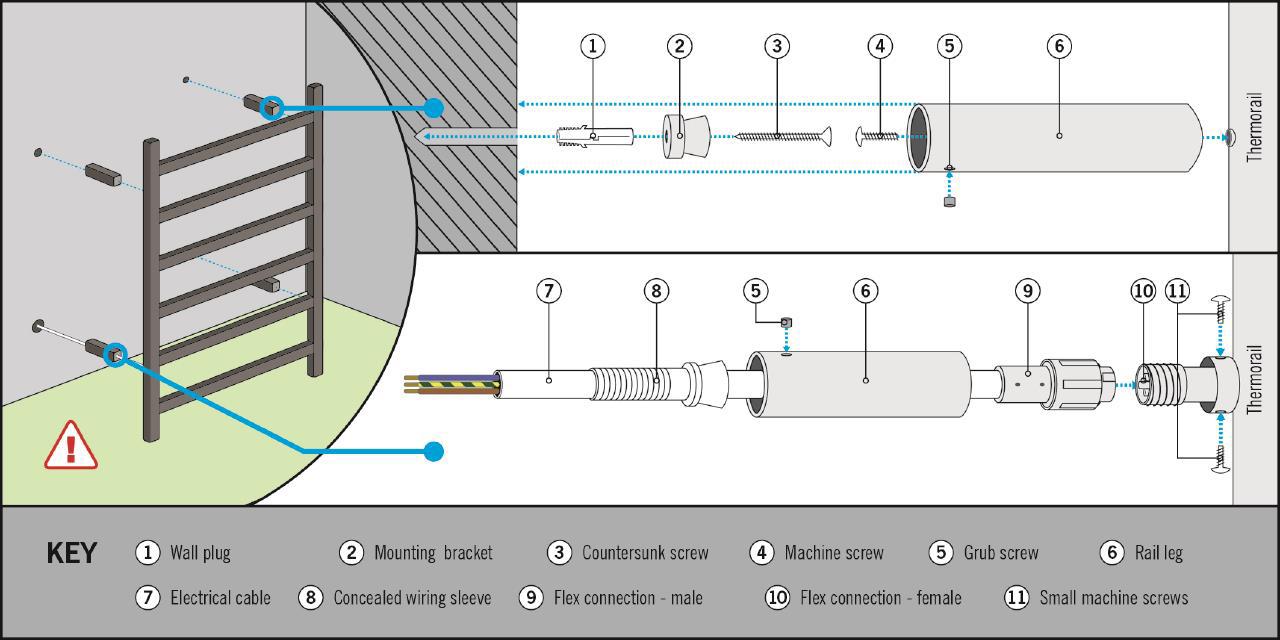
Ensure that you have all the correct parts needed for concealed wiring installation of this towel rail Pictured below are the parts and quantities needed. The remaining part s are only used for exposed wiring installations so can be disposed of.


Fix the legs to the Heated Towel Ladder
First, decide which side you want to connect the electrical supply to and then allocate the appropriate legs to each of the three remaining mounting points. Remove the mounting brackets from inside the legs by releasing the grub screws with the allen key provided. Attach the two non-wired legs to the rail using the machine screws and a cross head screw driver. Attach the third leg to the non-wired point at the bottom of the rail using two of the small machine screws and a cross head screwdriver


3.
Measure and mark out the four wall bracket positions making sure they are level. The easiest way to mark this is to put some masking tape or similar at the location of the four mounting positions and then hold the rail against the wall and once it is strai ght and level mark the four leg footprints on the tape. For safety reasons, we recommend that the heated towel rail is installed at least 600mm above the floor.
Drill a pilot hole in the centre of each of the three marked mountin g positions and insert the wall plugs provided. Now fix the three wall brackets in place using the countersunk screws and a cross head screwdriver. In the fourth position drill a larger hole (12mm) for the electrical cable.
Remove the 3 pin plug from the end of the lead. Connect the lead to the rail at your chosen position by unscrewing the screw cap (See Diagram 2a.), pulling out the cap, lifting f rom the red ring (See Diagram 2b.) inserting the lead in to the connection point ensuring that the pins match up correctly using the arrows marked (See Diagram 2c ) and tighten the screw cap (See Diagram 2d.). Slide the concealed wiring leg over the electrical cable (See Diagram 2e.) and fix in place using the small machine screws and a cross head screw driver (See Diagram 2f )

Ensure you connection is pushed in fully and screw cap is screwed on tightly with the arrows matching up. Once checked tick this on page 11.
Ensure the mains power supply is switched off before attempting to carry out any electrical work. Slide the concealed wiring sleeve over the exposed end of the mains cable and insert into the hole in the wall Connect to the mains supply in accordance with current electrical regulations.
Ensure you have 240Volt power at the connection point between you Heated Towel Rail and the mains supply. Once checked tick this on page 11.
Fix Nero Heated Towel Ladder to the Wall
to the mounting brackets installed on the wall. You may need assistance to
models in this guide can be installed with either concealed or exposed wiring, with


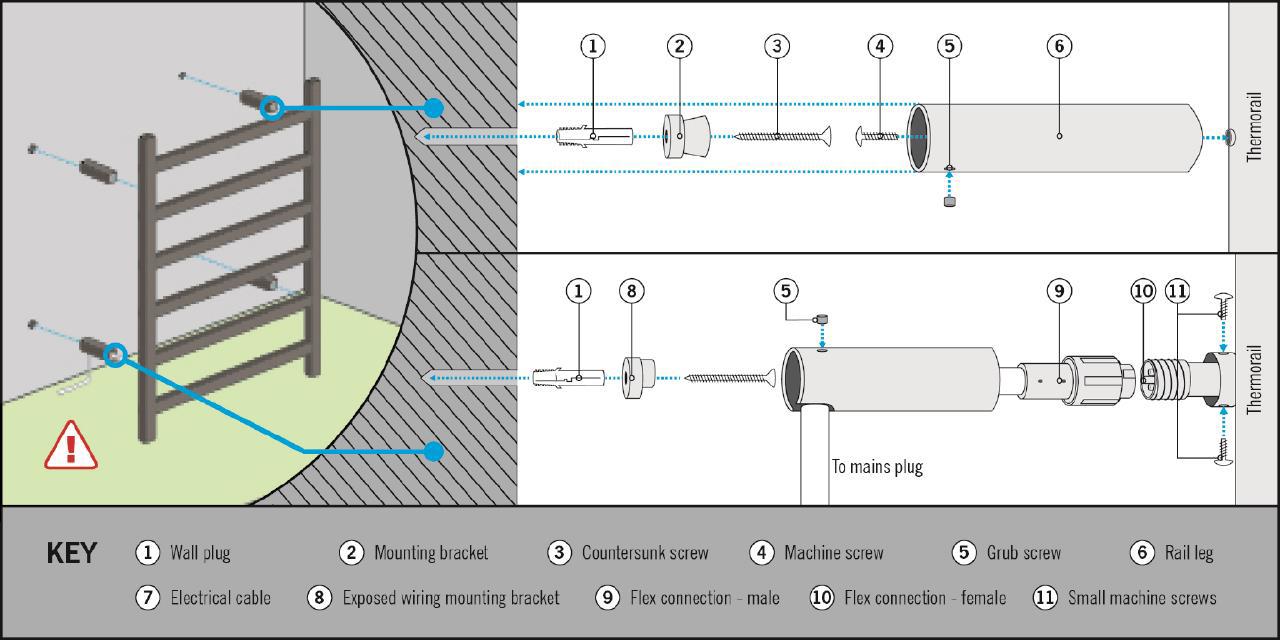
Ensure that you have all the correct parts needed for exposed wiring installation of t his towel rail Pictured below are the parts and quantities needed. The remaining parts are only used for concealed wiring installations so can be disposed of.


Fix the legs to the Heated Towel Ladder
First, decide which side you want to connect the electrical supply to and then allocate the appropriate legs to each of the three remaining mounting points. Remove the mounting brackets from inside the legs by releasing the grub screws with the allen key provided. Attach the two non-wired legs to the rail using the machine screws and a cross head screw driver. Attach the third leg to the non -wired point at the bottom of the rail using the small machine screws provided.


3.
Measure and mark out the four wall bracket positions making sure they are level. The easiest way to mark this is to put some masking tape or similar at the location of the four mounting positions and then hold the rail against the wall and once it is straight and level mark the four leg footprints on the tape. For safety reasons we recommend that the heated towel rail is installed at least 600mm above the floor.
Drill a pilot hole in the centre of each of the four marked mounting positions and insert the wall plugs provided. Now fix the three wall brackets in place using the countersunk screws and a cross head screwdriver. In the fourth position attach the exposed wiring mounting bracket using a countersunk screw.
Slide the exposed wiring leg over the lead ensuring the cut away section is facing towards the 3 pin plug. Connect the lead to the rail at your chosen position by unscrewing the screw cap (See Diagram 2a.), pulling out the cap, lifting from the red ring (See Diagram 2b.) inserting the lead into the connection point ensuring that the pins match up correctly using the arrows marked, (See Diagram 2c.) and then tighten the screw cap (See Diagram 2d.). Slide the exposed wiring leg down towards the (See Diagram 2e.) and fix in place using the small machine screws and a cross head screw driver (See Diagram 2f.).
Ensure you connection is pushed in fully and screw cap is screwed on tightly with the arrows matching up. Once checked, tick this on page 11.

Fix Nero Heated Towel Ladder to the Wall
assistance to hold the rail in place. For the three non-wired mounts, tighten using the grub screws and the allen key provided. In the wired position, secure using a small machine screw and a cross head screw driver.
Ensure you have 240Volt power at the power point (GPO) to which the is being plugged into. Once checked tick this on page 11.
Nero Heated Towel should be installed and tested by a qualified electrician and in accordance with current local regulations. We recommend that the rail is installed onto a flat uniform wall at least 600mm from the floor and with a 300mm clearance from permanent fixture. Where possible the Nero Heated Towel Rail should be screwed into studs or if fixing to hollow walls suitable anchors should be used to ensure rail in secure.
Please read and understand this installation guide in full before commencing installation. ●
Observe and adhere to electrical guidelines and IP ratings when placing your heated rail in wet areas
Ensure any timers or switches used are installed in correct zones according to the IP rating of the timer/switch
Ensure that your is protected by a suitably rated RCD circuit
Do not use the towel rail to hold towels or other articles that have been in contact with oil, petroleum based products or dry cleaning fluids
This appliance is intended to warm and dry towels and therefore is hot to touch. When near young children or infirm persons, close supervision is necessary. Do not immerse your
The Stainless Steel finish of your Nero eated owel is hard wearing and easy to maintain. However any harsh scrubbing, scratching or acid based cleaning products will damage the surfa ce of your towel rail. Cleaning with a soft cloth and a non -abrasive cleaning agent will give the best results.
