
Device is for indoor use only.
1.CONDITIONS:Itemsmust be installed by a licensed tradesperson only,
SHAVINGMOONLIGHTCABINET
2. The installation of the product is in accordance with the instructions provided.
INSTALLATION GUIDE
If the supply cord is damaged it must be replaced by the manufacturer, its service agent or similar qualified persons in order to avoid potential hazard.
Please inspect thoroughly before installating to ensure that the product has not been damaged and is correct item to be installed. No claims for damage or incorrect items will be recognised after installation.

IMPORTANT CONDITIONS
This item/light must be installed in accordance with current AS/NZS wiring rules. This device contains no serviceable parts.
LED MIRRORED SHAVING CABINET INSTALLATION
4. Ensure cabinet is level when storing and preparing for installation. Please note DO NOT allow cabinet corners to be placed on hard surface to avoid chipping or cracking of mirror corners.


Notes:This device contains no serviceable parts. If the supply cord is damaged it must be replaced by the manufacturer, its service agent or similar qualified persons in order to avoid potential hazard.

Screw X 4 Plugs X 4 Caps X 4 Plastic Ring x 4 1 3 2 4


1. Check Products for any Damage. Do not install if any damage is found.

2. Lay the cabinet flat and remove carefully from packaging.
3. Remove all parts from packaging, check and prepare all parts for installation.

Notes:This device contains no serviceable parts. If the supply cord is damaged it must be replaced by the manufacturer, its service agent or similar qualified persons in order to avoid potential hazard.


6. Mount cabinet to wall and mark out locations of drill holes that are pre-drilled, on the wall. Then remove cabinet from wall. 299mm 299mm
5. Mark out cabinet corners in the location you would like mirror to be placed at and ensure it is level.


6. Drill holes for mounting screws provided, ensure these are drilled into supporting wall (through masonary, brick wall or noggins to support the cabinet load).
MinimumFIXINGof
fixings at Top &Bottom2
LED MIRRORED SHAVING CABINET INSTALLATION
7. Hammer in plugs into the drill holes.

1 1 3 3 2 2 4 4
10. Add caps to conceal screws.

9. Mount cabinet to wall and install all scews and rings. Ensure all fixing points are secure and tightly screwed in.


8. Assemble screws, rings, and parts for mounting.


11. Now that cabinet is installed, prepare electrial connection for the LED component.
LED MIRRORED SHAVING CABINET INSTALLATION
Earth(green/yellow sleeved copper)
Green/Yellow250V
Switched live(usually single black)
DETALL
LED MIRRORED SHAVING CABINET INSTALLATION
13. Electrican can supply and use alternative connection housing components also for a superior connection.


Wiring from light fitting
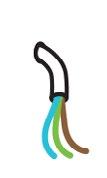

Blue(N)
Switched live(usually single black)Brown(L) Brown(L)
1 2
Blue(N)
Earth(green/yellow sleeved copper)
Green/Yellow
Neutral(usually two black)
ONLY to be installed by a licensed electrician.
Device is for indoor use only. This light must be installed in accordance with current AS/NZS wiring rules. This device contains no serviceable parts. If the supply cord is damaged it must be replaced by the manufacturer.


LED light Connectivity
Neutral(usually two black)
DETALL N L
12. Connect your hardwire wall power source to the LED shaving cabinet using the connector housing provided.
