8942A 8943A RAIN DUET SHOWER COLUMN
INSTALLATION INSTRUCTIONS
BEFORE YOU BEGIN
All information is based on the latest product information available at the time of publication. Kohler Co. reserves the right to make changes in product characteristics, packaging, or availability at any time without notice.
Please leave these instructions for the consumer. They contain important information.
NOTES:
1. Shut off the water supplies to the fitting.
2. Inspect the supply tubing for damage. Replace as necessary.
3. Observe local plumbing codes.
4. Recommended working pressures is 2 to 5bar.
5. The highest working pressure for showerhead is 0.5 Mpa(5 bar). If it exceeds 0.5Mpa(5 bar), a pressure reducer is needed. The highest water and environment temperature is 60ºC. Please keep showerhead away from heater, or it may become damaged and cause injury to the user.
HANDLE OPERATION
Turn the diverter handle counter-clockwise, the hand shower works; turn it clockwise, the showerhead works.
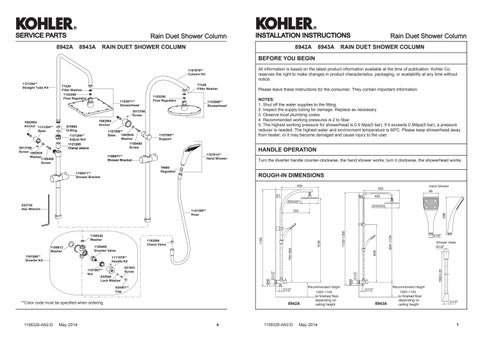
ROUGH-IN DIMENSIONS
How To Install The Slide Bar
Select a location in vertical wall to install shower column according to rough-in dimensions.
To perform installation, installer must provide G1/2" water supply nipple(1).
NOTE: Measure the distance from the end of the nipple to the surface of the finished wall, make sure that it is between 17 and 25 mm. Ensure it is vertical as well.
For 8943A Only
Rehearse the slide bar kit(2) installation to determine the anchor(3) mounting location. Slide the base(4) onto the connector(5) 26mm. Screw the screws(6) into the base with the hex wrench(7), and tighten them.
Loosen the nut(8) with a strap wrench to take off the diverter kit(9) and washer(10). Thread the diverter kit onto G1/2" water supply nipple until it is against the finished wall, adjust diverter kit and make sure the connector(11) is facing upwards.
Put the washer(10) into the nut(8). Thread the nut(8) onto the connector(11). Put the base(4) against the finished wall(NOTE: make sure the base is vertically aligned with the supply fitting).
Mark the diameter of the base with a pencil. Loosen the nut(8) to take off the washer(10). Remove the diverter kit. Loosen the screws(6) with the hex wrench(NOTE: Don’t lose the screws.), remove the base. Mark the center point of the base diameter with a pencil.
Drill a hole on the center point to suit the anchor diameter. Press the anchor into the hole. Secure the base with the self-tapping screw(12) and washer(13). Ensure the two screw holes in the base are facing downwards.
Install the washer(14) into the diverter kit. Thread the diverter kit onto the G1/2" water supply nipple until it is against the finished wall, adjust diverter kit and make sure the connector(11) is facing upwards.
Remove and discard the guard from the tube kit(15), then install it into the slide bar kit. Install the nut(16) onto the tube kit with soft cloth between internal hole of the nut and the tube kit. Then screw the nut onto the slide bar kit with strap wrench or soft cloth between the nut and regular wrench.
Install the connector(5) into the base. Put the washer(10) into the nut(8). Thread the nut onto connector(11), and tighten it with a strap wrench.
Tighen the screws(6) with the hex wrench.

For 8942A Only
Drill hole in the finished wall according to the rough-in dimensions and diameter of the anchor(17)(NOTE: make sure the hole is vertically aligned with the supply fitting). Insert the anchor into the hole. Loosen the screw(18) with hex wrench(19). Take out the mounting base(20). Secure the mounting base to the wall with the screw(21) and washer(22).
Loosen the nut(23) with a strap wrench to take off the diverter kit(24) and washer(25). Install the washer(26) into the diverter kit. Thread the diverter kit onto G1/2" water supply nipple until it is against the finished wall, adjust diverter kit and make sure the connector(27) is facing upwards.
Insert the support(28) into the mounting base. Make sure the outlet bush(29) faces the front. Put the washer(25) into the nut(23). Thread the nut onto connector(27) , adjust the supporter if needed. Tighten the nut with a strap wrench.
Tighen the screw(18) with hex wrench to secure the support.
How To Install The Showerhead
Turn the diverter handle(30) vertically downwards and run hot and cold water for one minute to remove any debris before the showerhead (31) is installed.
Tighten the showerhead onto the tube kit outlet with strap wrench.
How To Install The Hose And The Hand Shower
Turn the diverter handle(30) vertically upwards and run hot and cold water for one minute to remove any debris.
Remove the guards on the outlet connectors of the hose(32). Connect the hose and the connector(33), hose and the hand shower(34). Tighten all the connectors.
INSTALLATION CHECKOUT

Ensure that all coupling nuts are tightened. Turn on the main water supply, and check for leaks. Repair as needed.
CLEANING INSTRUCTIONS
All Finishes: Clean the finish with mild soap and warm water. Wipe entire surface completely dry with clean soft cloth. Many cleaners may contain chemicals, such as ammonia, chlorine, toilet cleaner etc. which could adversely affect the finish and are not recommended for cleaning.
Do not use abrasive cleaners or solvents on Kohler faucets and fittings.