

You can make a themed cake in different ways. In doing so you will discover what suits you best. We’ll start with the basics first.
A themed cake is usually made with sponge cake. The outside of the cake can be quite heavy and that is why it is important to keep the inside as light as possible. The extra filling you put between your sponge layers is up to you. We prefer to keep this filling simple as well. After the cake is baked, we use sugar water to make sure the cake doesn’t get dry inside. Then we will mask the outside with butter or ganache and finally, the fondant goes on top. There are many different ways to bake, fill and mask a themed cake, but in this book I want to show you the way I always do it.
We start with the sponge cake
6 eggs
200 g (7 oz) granulated sugar
40 g (1½ oz) good-quality butter
200 g (7 oz) flour
1 tsp baking powder
1 dash of vanilla extract
a pinch of salt
PREPARATION
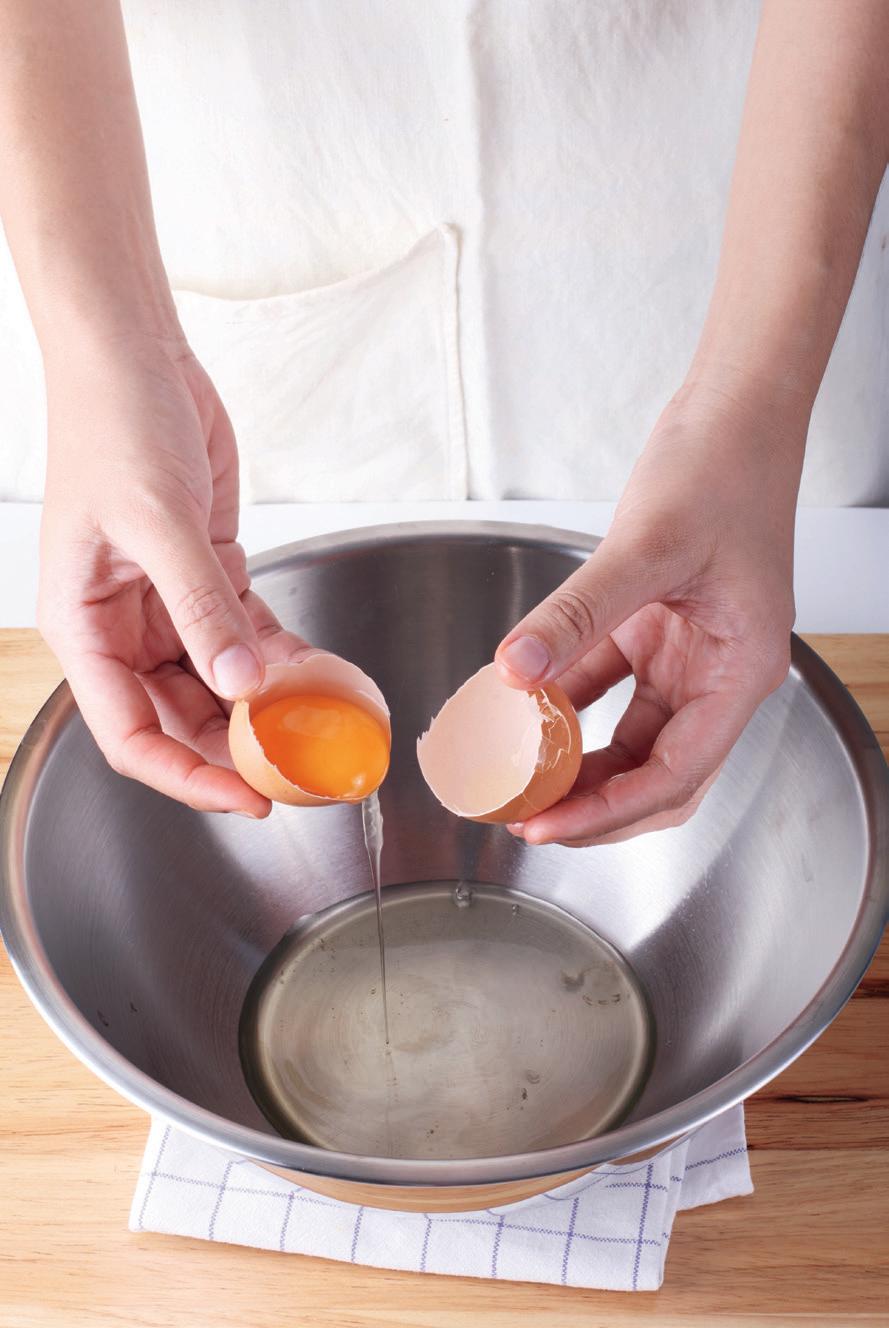
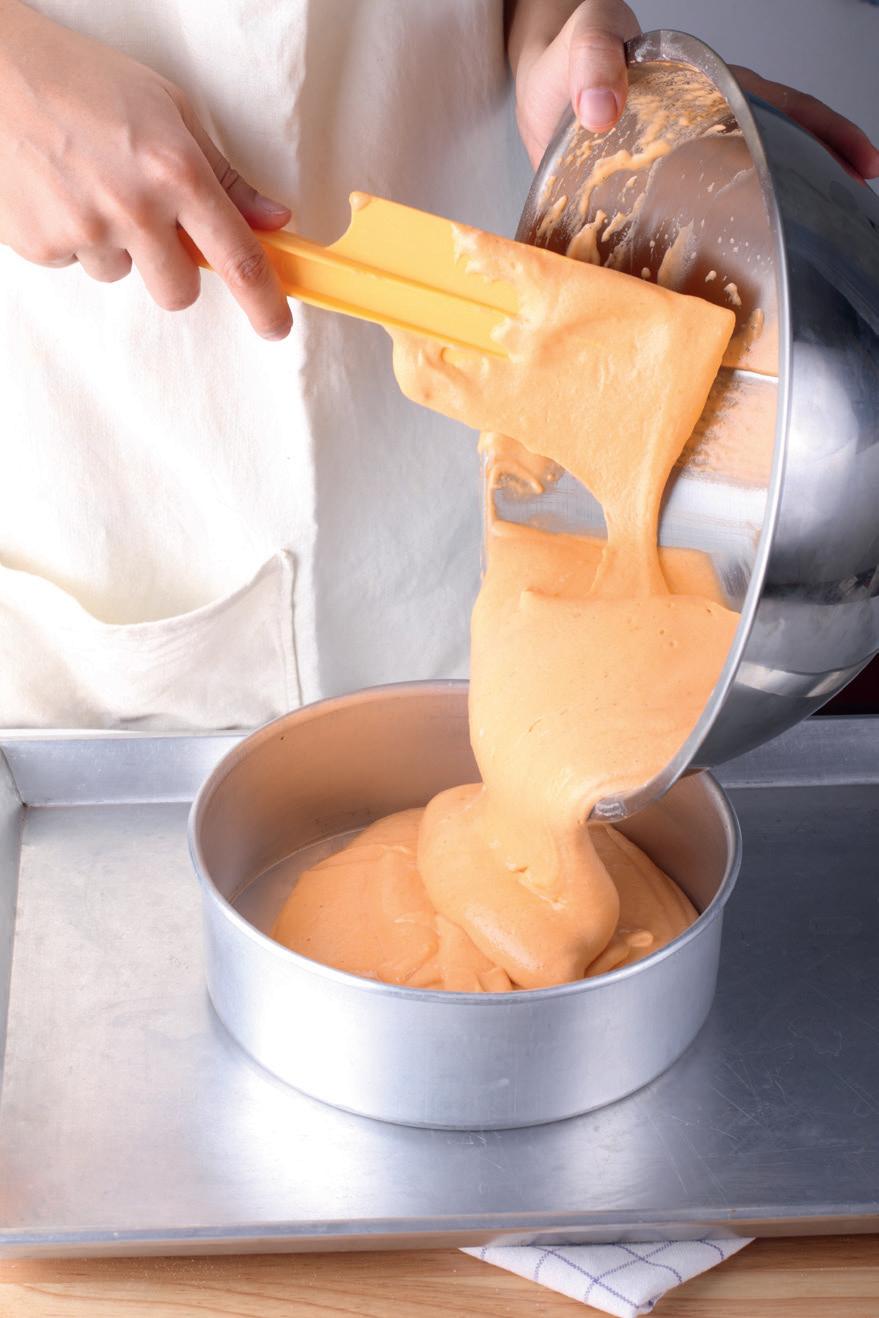
Preheat the oven to 180°C (356°F). Beat the eggs lightly and then add the granulated sugar. Beat for a while until you have an airy foamy mass. Melt the butter and add this to the egg mixture. Keep mixing. Mix the flour with the baking powder and sift it gently into the batter. Then add the vanilla extract and salt.
Grease a 23 cm diameter and 6 cm high springform pan with a little butter. Pour the batter into the springform pan and set it in the oven for 40 minutes. Remove it from oven and let it cool.
Would you like to make cupcakes? Then use this same recipe! Many people go for a Madeira or pound cake recipe when they make cupcakes, but in combination with the fondant or other decorations this quickly becomes too heavy. Sponge cake always stays light and is therefore also perfect for cupcakes or cake pops!
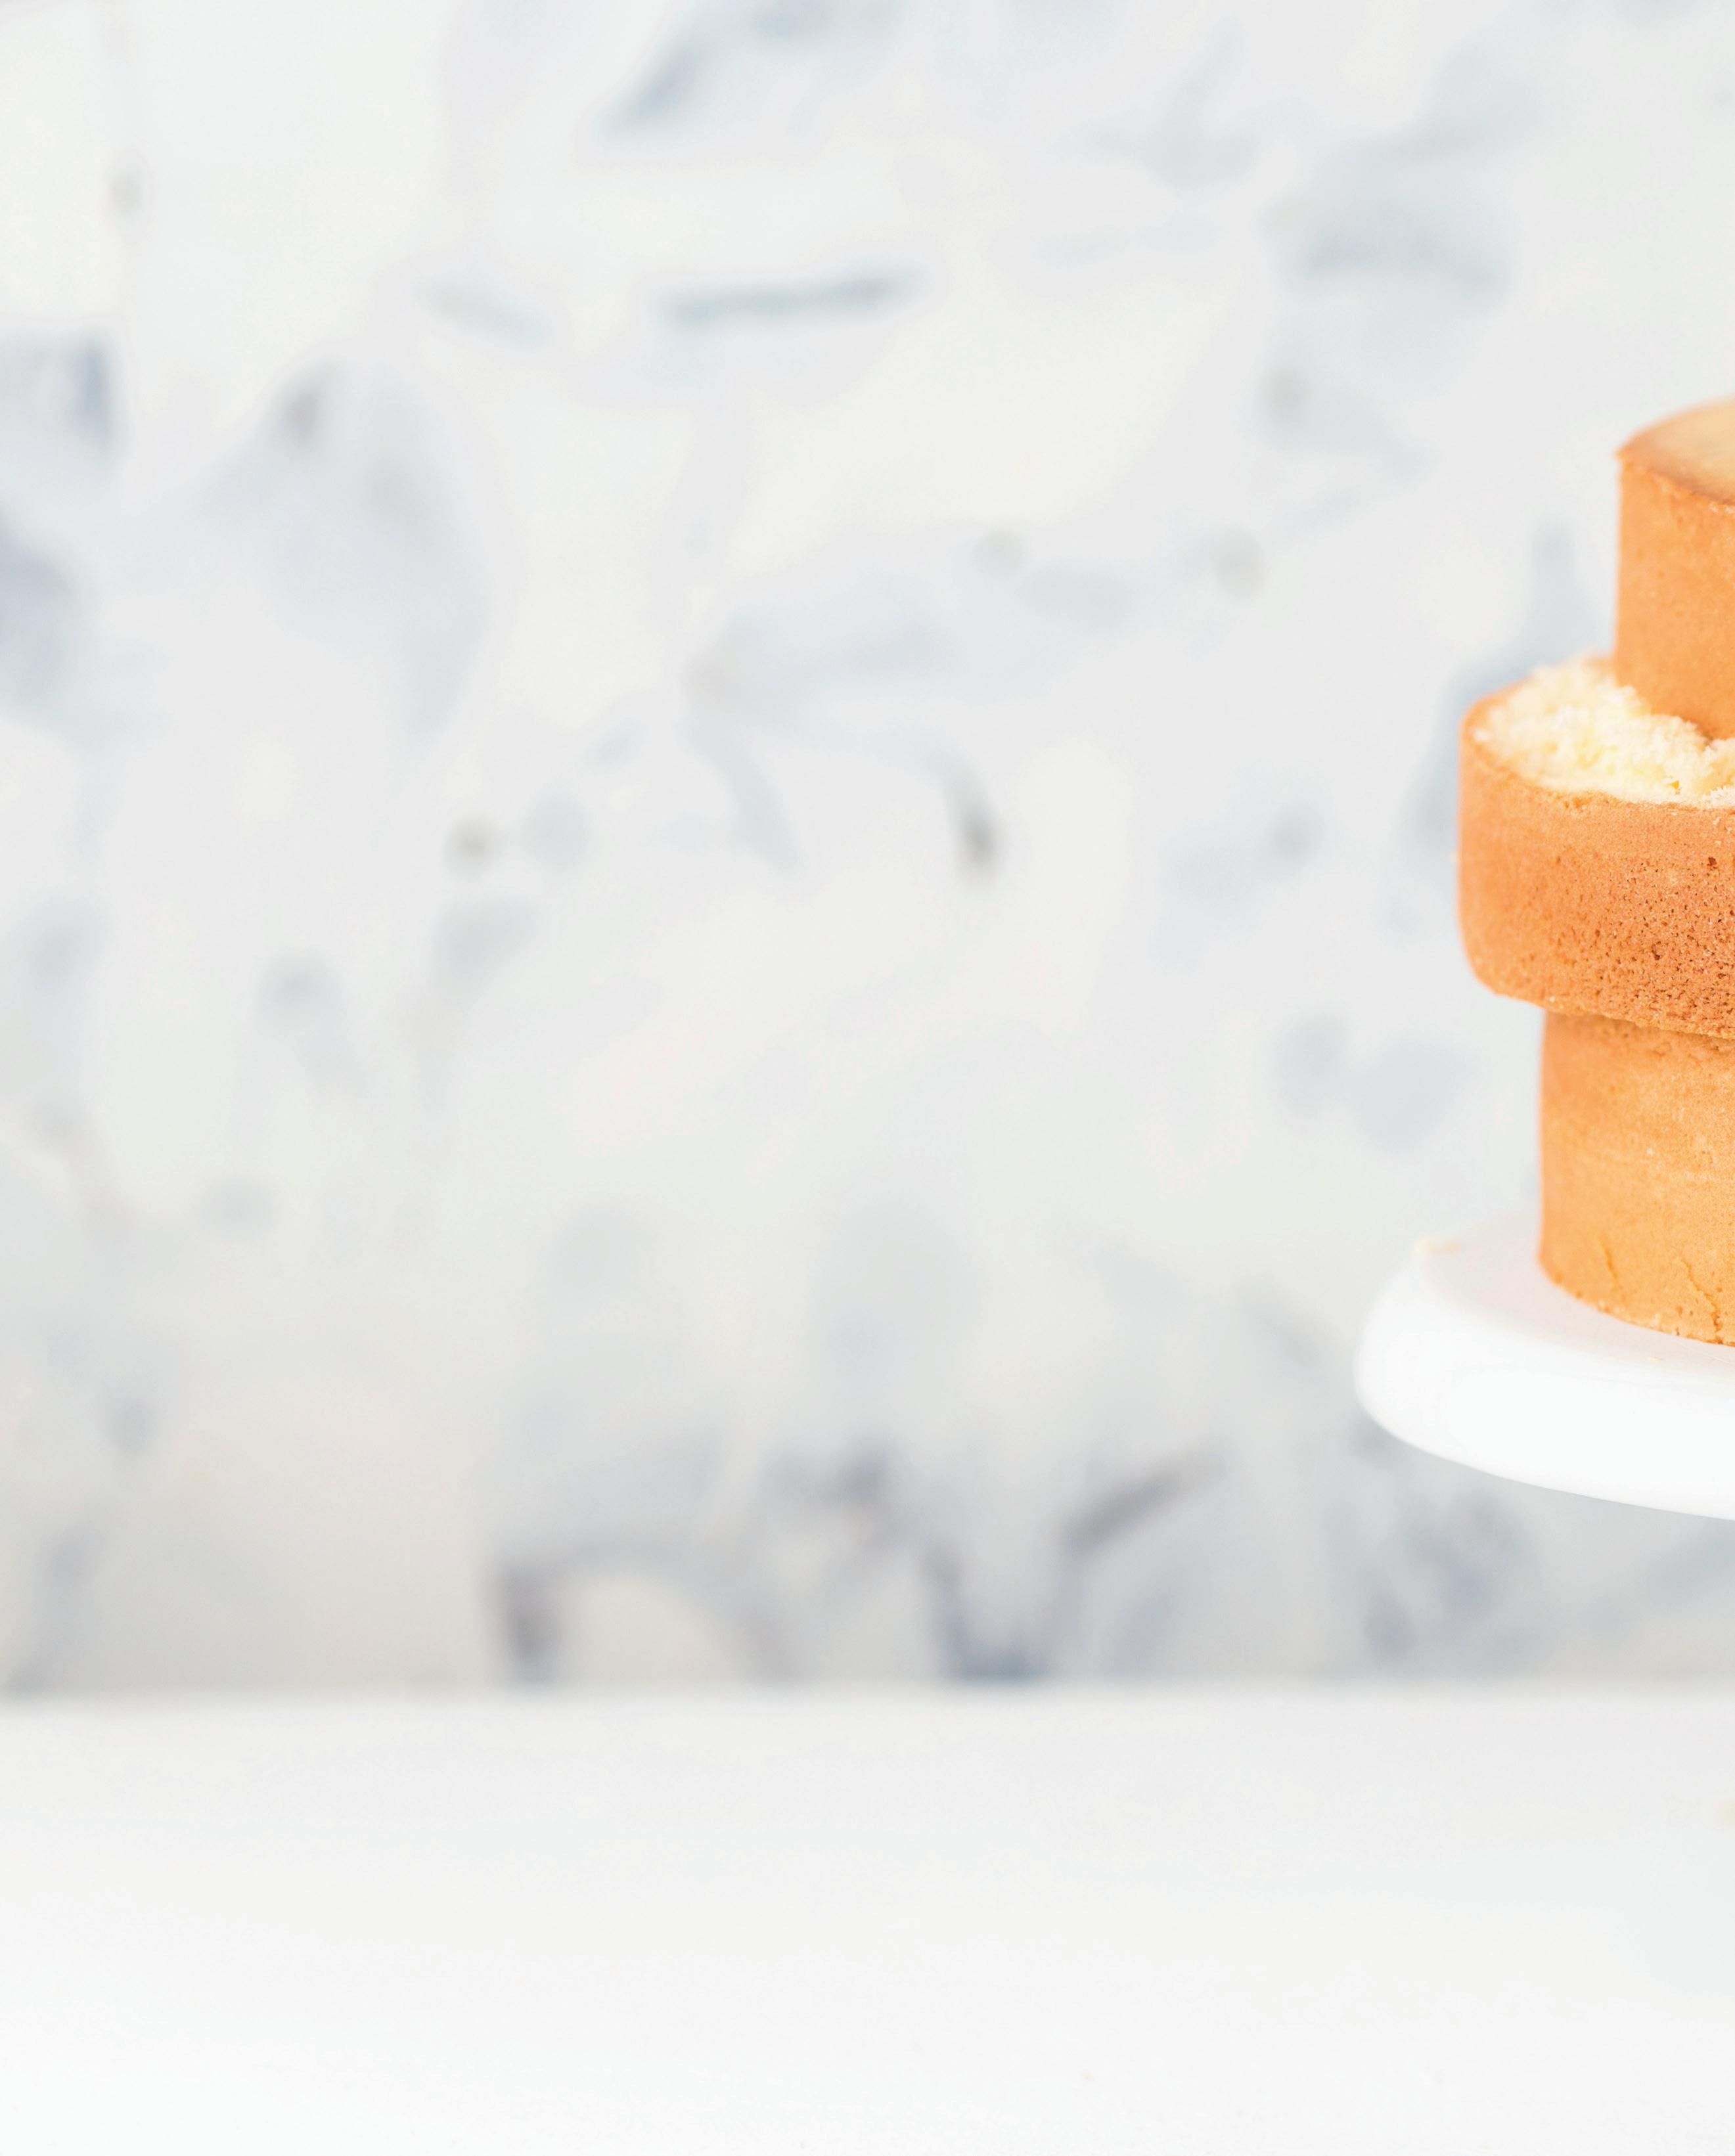
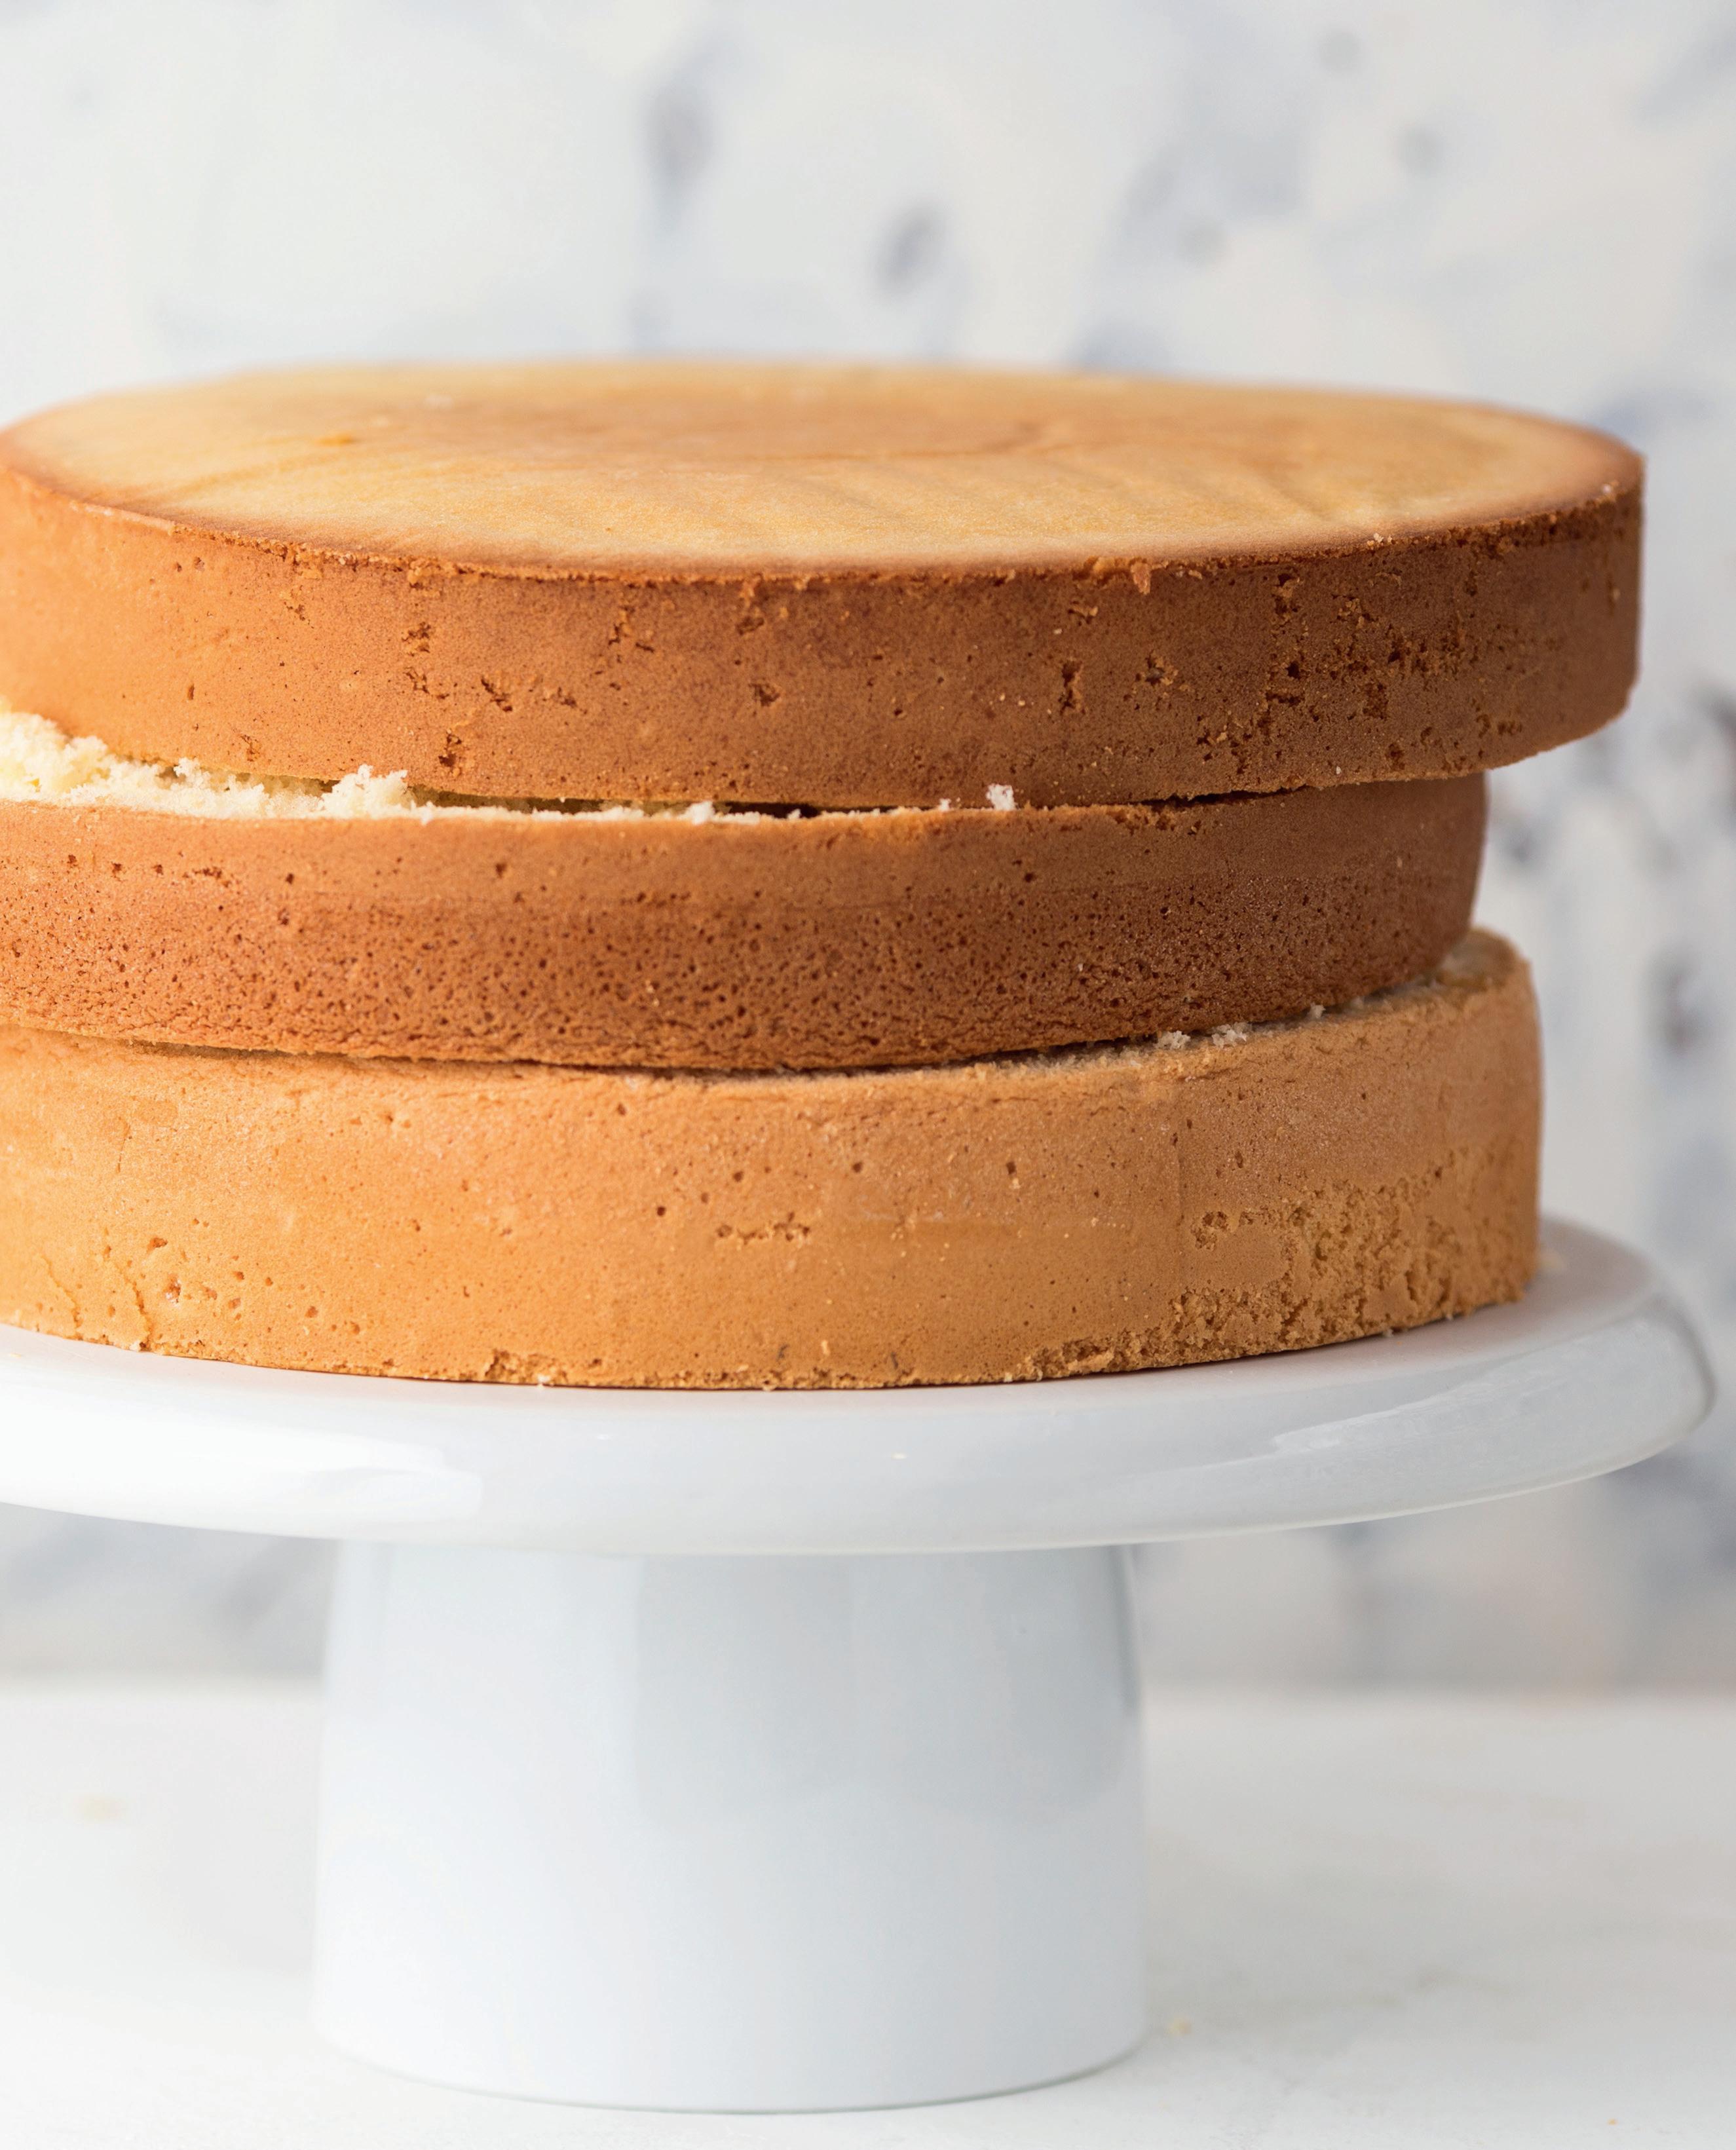
Once you’ve prepared the basic cake, you’re ready to go! Cut the cake twice horizontally to create three layers. Place the three layers next to each other in the correct order. Take a coarse brush that is food safe and brush sugar water over the top two layers. Don’t cover the bottom layer with sugar water, because otherwise the bottom of the cake will be too soft. Place the bottom layer on a plate and top with a filling of your choice.
Popular fillings are:
- whipped cream with pieces of fresh strawberry (nice and fresh on hot days)
- whipped cream with jam of your choice
- whipped cream with pieces of pineapple
- whipped cream with raspberries
- whipped cream with crumbled Oreo (or other cookies; let your imagination run wild)
- fresh chocolate mousse (choose an airy chocolate mousse)
Then put the second layer on top and repeat the filling. End with the top layer. We are now ready to mask.
Preferably choose a filling that is not too heavy.
The ‘trap’ in a theme cake is that the cake looks really nice, but doesn’t taste so good because it’s too heavy. Keep the inside as airy as possible.
The more classic fillings (for example whipped cream with pieces of pineapple) are still the most popular among an older crowd!
When your cake is masked, you are ready to cover it. The most popular way to cover it is with fondant, but other products exist, such as marzipan, chocolate… Since I always work with fondant, I will describe this method.
Rolled fondant, also known as sugar paste, is mainly made out of sugar. There are different brands, colors and flavors of fondant. My experience is: try them out for yourself! What works great for me, might not work so well for somebody else. It also depends a lot on the method you use. I have tried several brands over the years and, in Belgium, I am happiest with two specific brands: Callebaut and Bouwhuis.
Now for the coating technique:
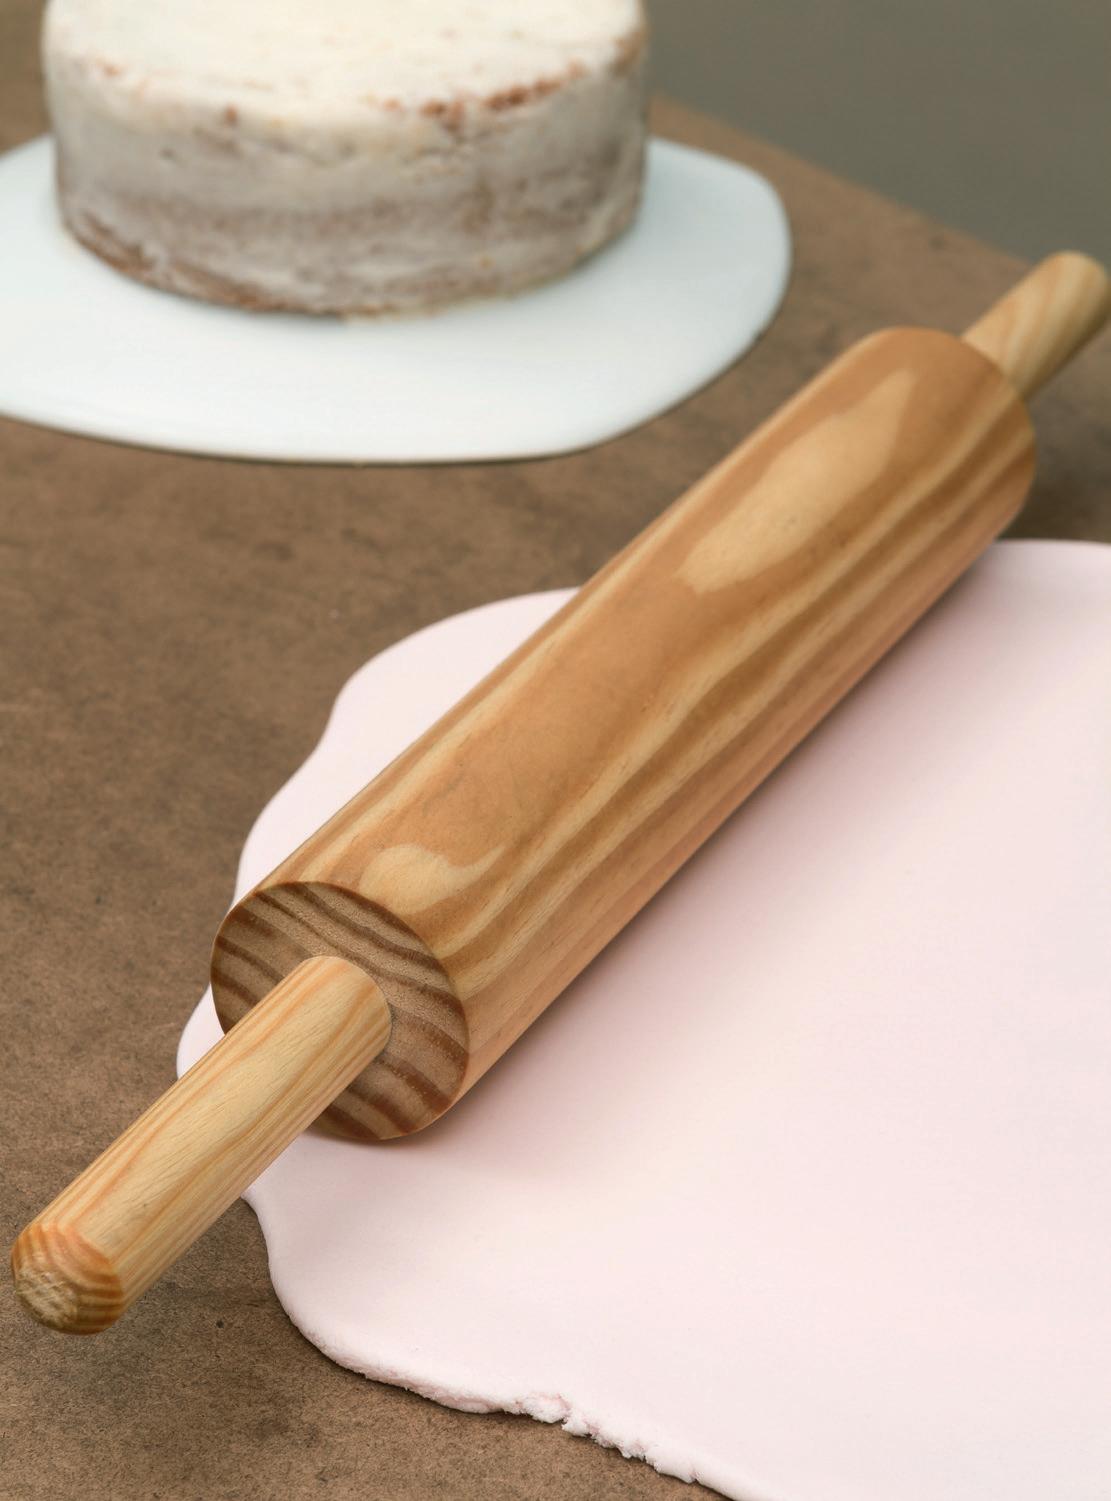
1. Roll out the color of your choice as thinly as possible. For this, I use a rolling machine, but you can also get started with a rolling pin and some icing sugar. The trick is to roll it as thin as possible, making sure that the fondant doesn’t tear and that the cake doesn’t show through when it is applied. Also don’t overdo it with the icing sugar; only add some if you notice that the fondant is starting to stick. The thinner the fondant, the better it tastes afterwards.
Rolled fondant dries out in the air. So it is important to put the fondant on your cake immediately after rolling it out.
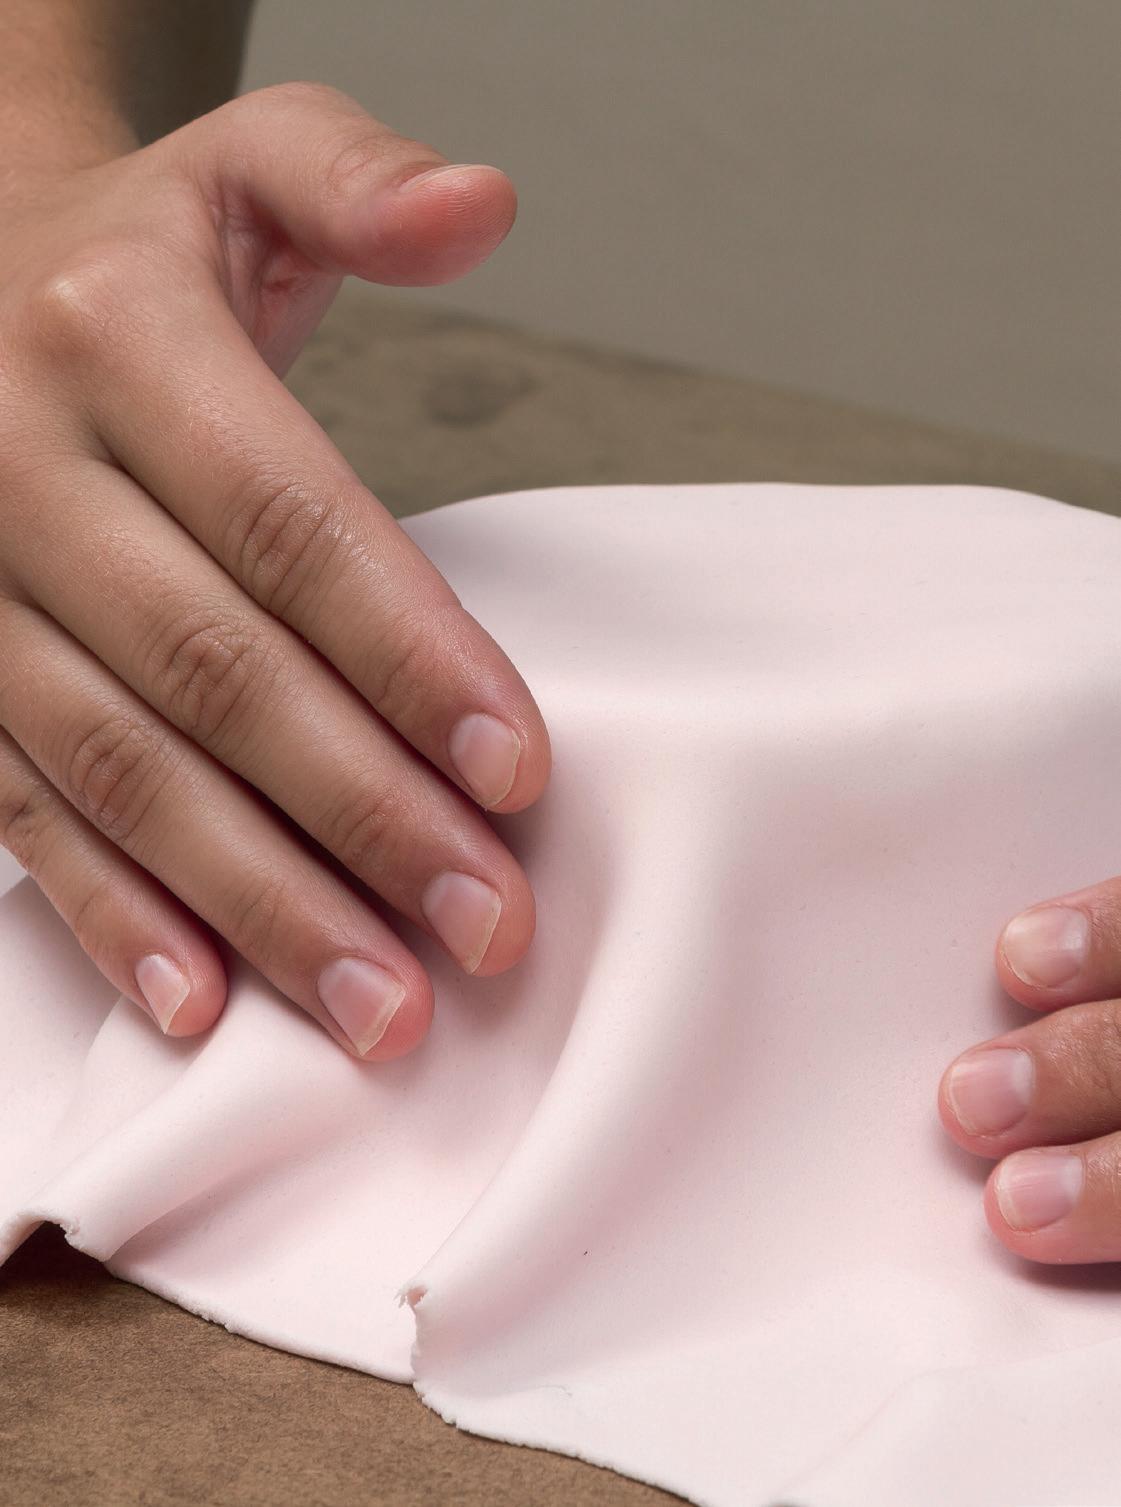
2. Take hold of the rolled fondant at the top and drape it carefully over your cake. Do this in one quick move, otherwise your fondant will tear due to gravity. You can also roll the rolled fondant over your rolling pin and then drape it over your cake.
3. Third step: take a smoother. I prefer to use a smoother with a convex side on top and a sharp edge at the bottom. First smooth the top of the cake. Then go over the front with the convex side of your smoother and make a downwards movement. Repeat this all around the cake so that the sugar paste adheres nice and tight. Now go around the edges with the sharp side of the smoother. If necessary, you can always strengthen the sharp edges by pressing them together with a second smoother. When you are satisfied, cut the excess sugar paste with a sharp knife to remove it.
4. Congratulations, you’re ready to decorate!

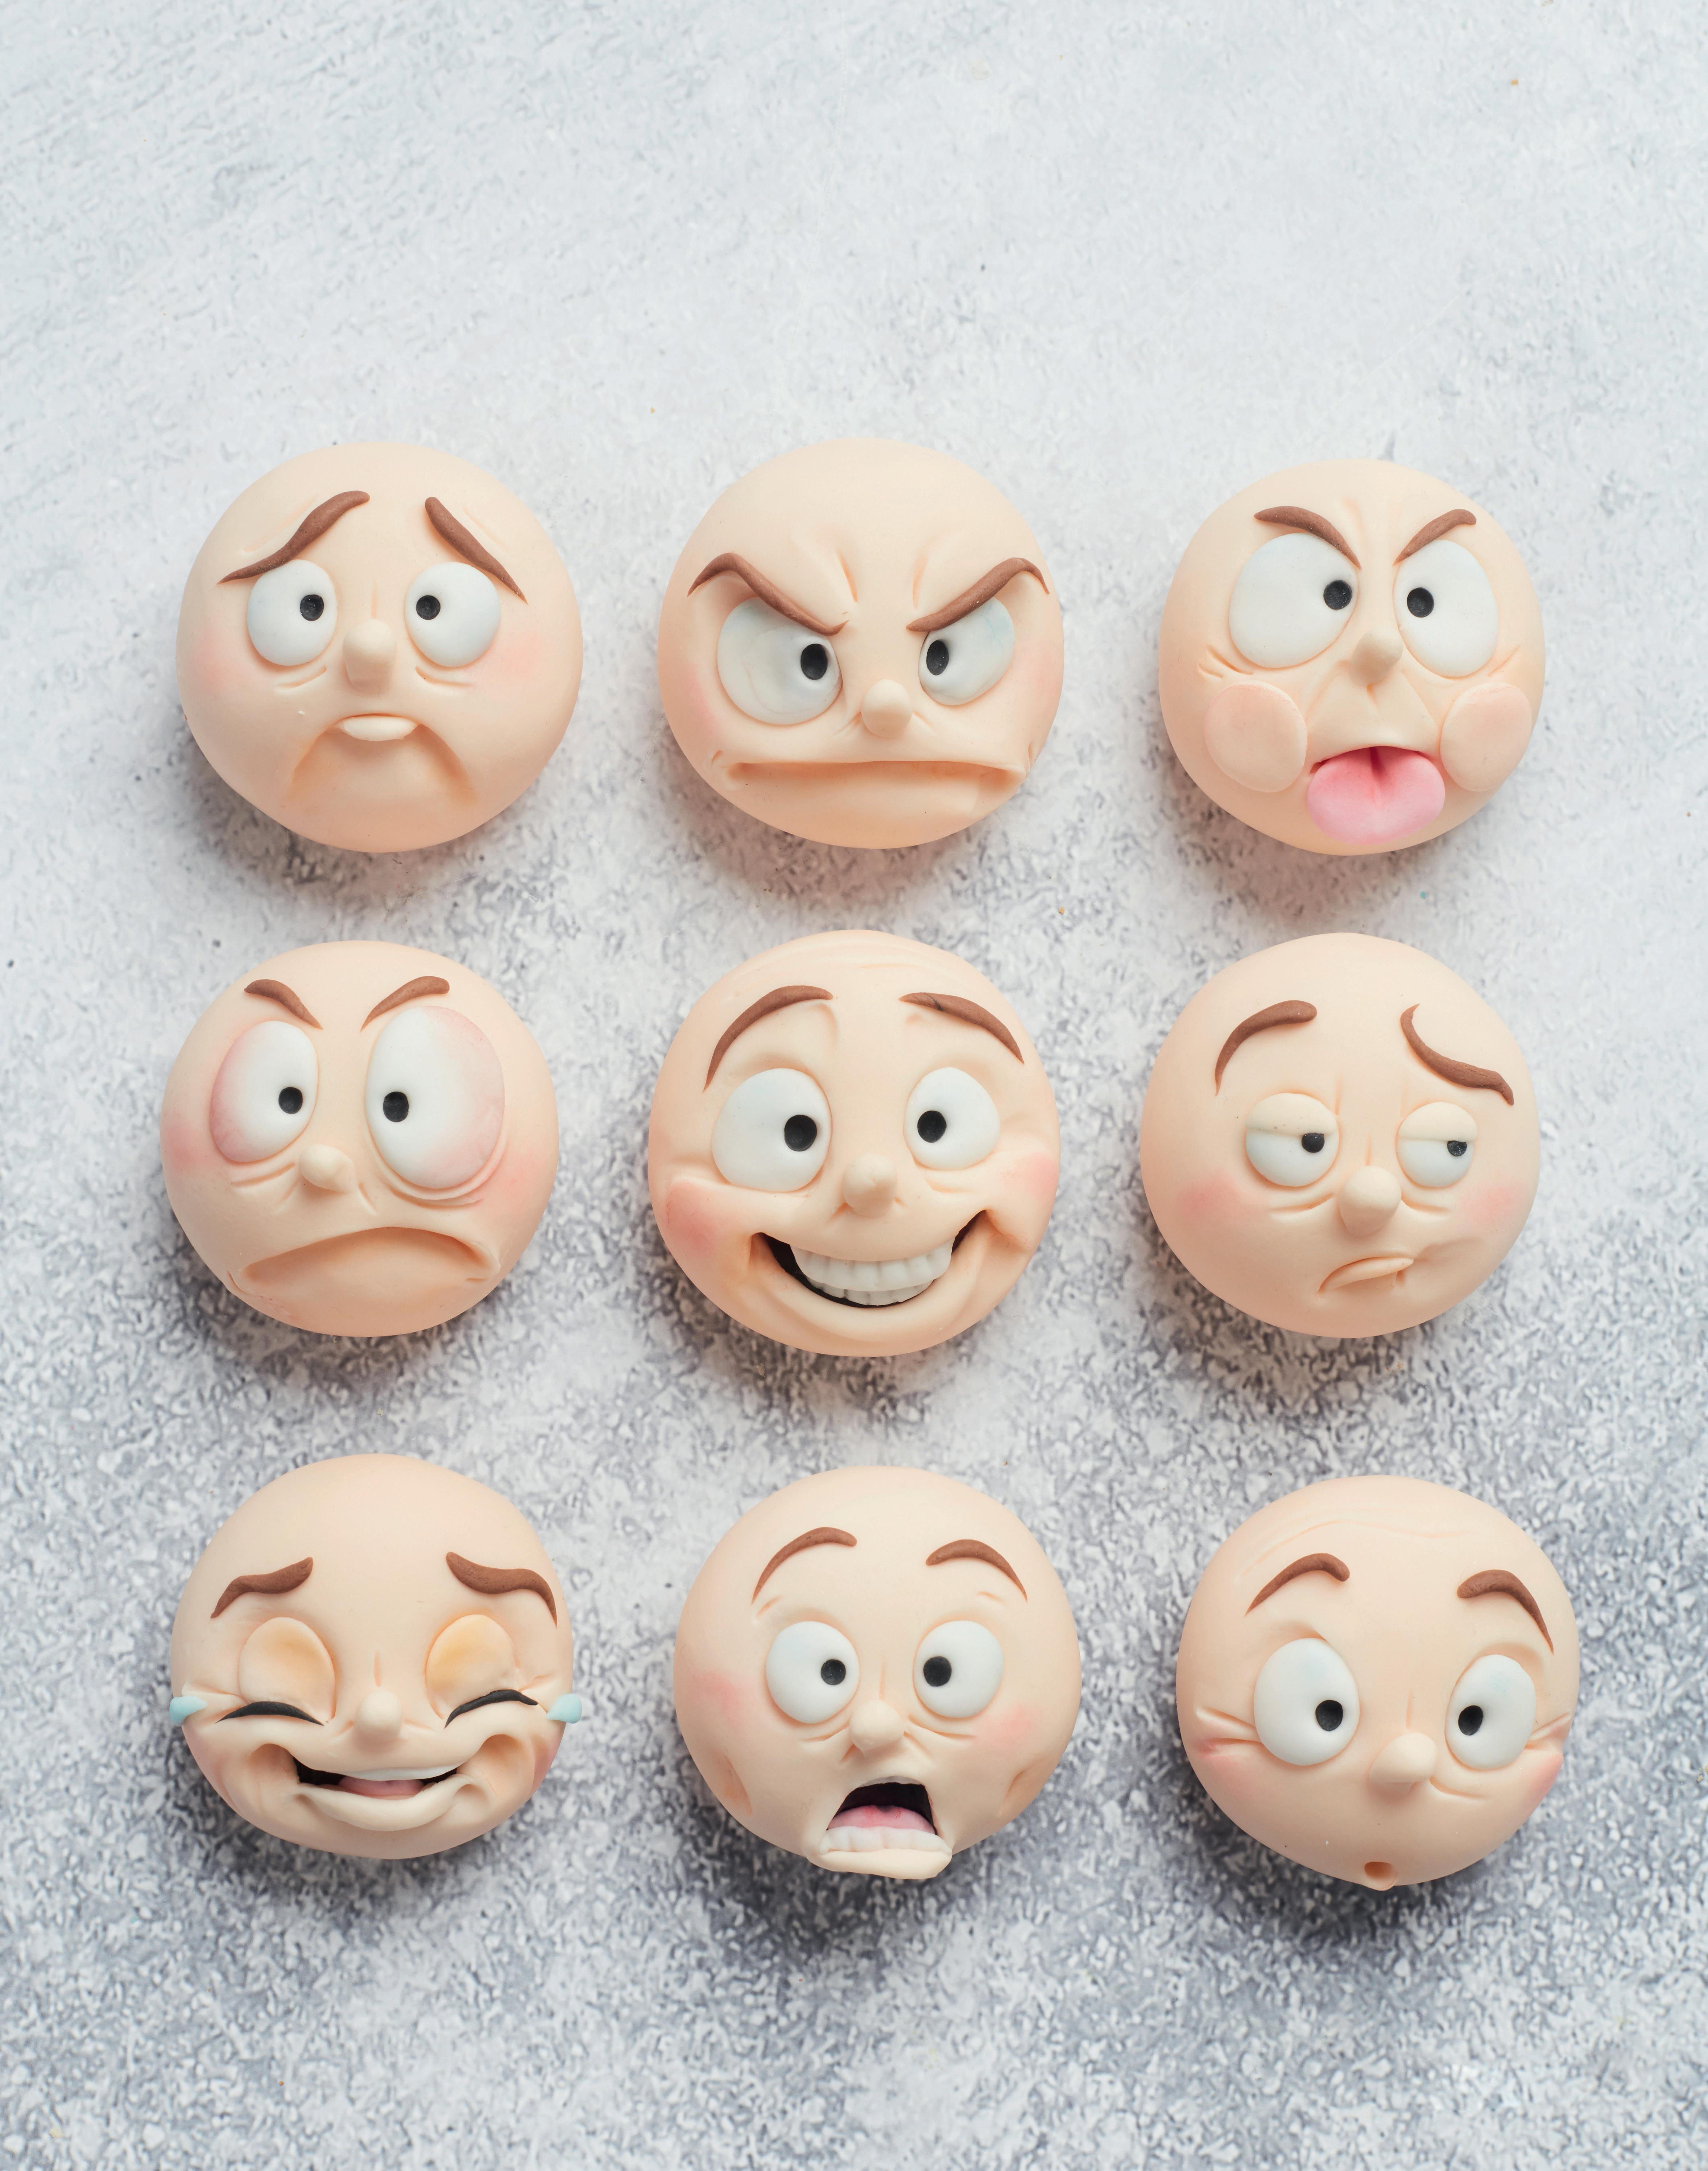
With faces, expression is very important. Carefully consider which emotion you want to express and feel free to research how this emotion is usually shown.

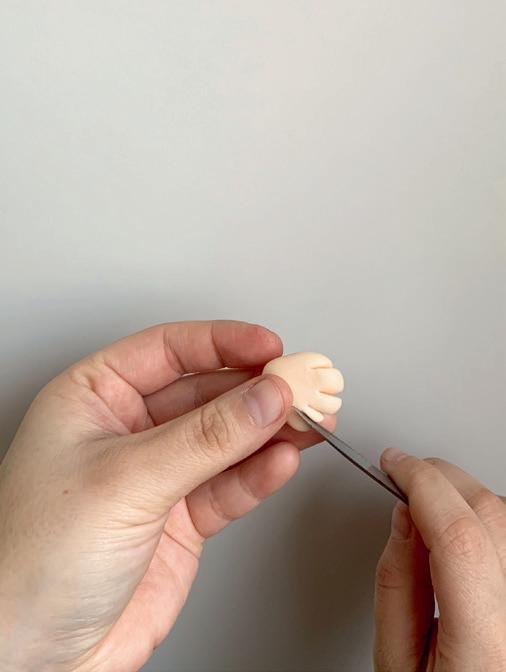
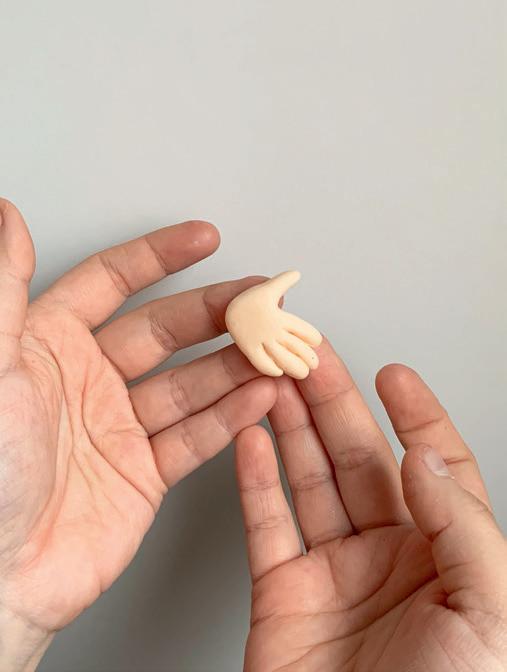

With the hands I usually start with a ball of rolled fondant, that I mold between my fingers and then slowly flatten. Use a knife to cut the shape of the fingers. Then carefully take each finger one by one and stretch it. By rolling each finger gently, it will make it rounder and appear more realistic. Also take a good look at which hands go with which type of figure. A cartoon will often have stubbier fingers than a more realistic figure. Finally it is very important that the thumb always has a little more space around it than the other fingers. The thumb also always points to the body.
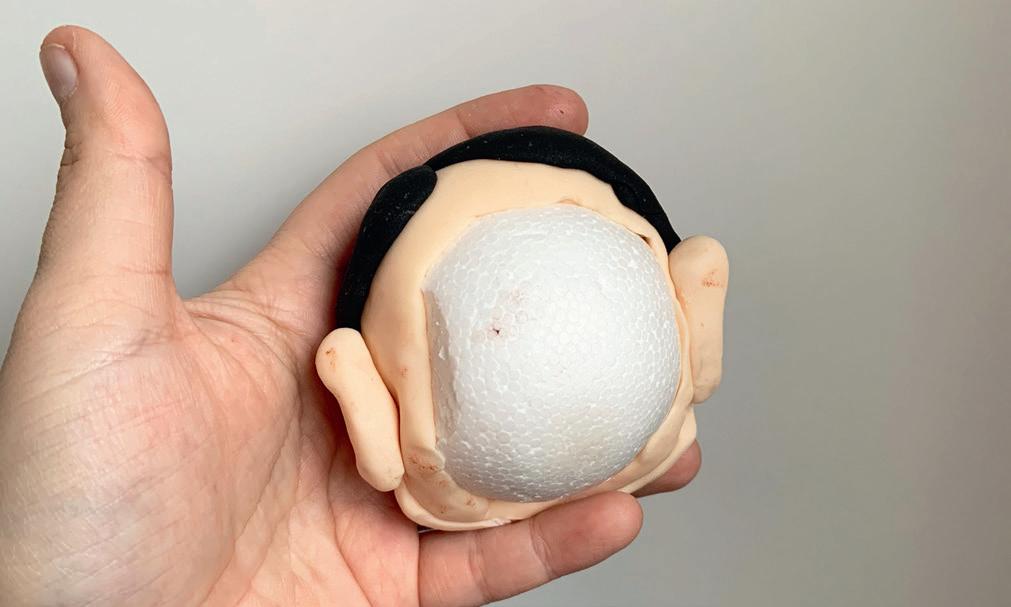
tH e B ack side o F t H e F igurine
Anyone with any experience in modeling knows that the back is the trickiest part. Yet there are different ways to finish the back beautifully as well. I am happy to share the two methods I mostly follow. The first way is to dry out your figure completely. Place the head on it, and only then start with the back. Do this by rolling fondant and blending it in nicely with the pointed modeling stick. The second method is to make a figure in Styrofoam. Then the head stays nicely round at the back and it is easier to finish the back later. If you work with Styrofoam, the figure is no longer edible and this method is not the way to go if you have a more complex figure shape. With very large figures I almost always use Styrofoam, then the whole figure weighs less. So before you start working on the figure, think about what the best option is for you regarding your specific figurine.

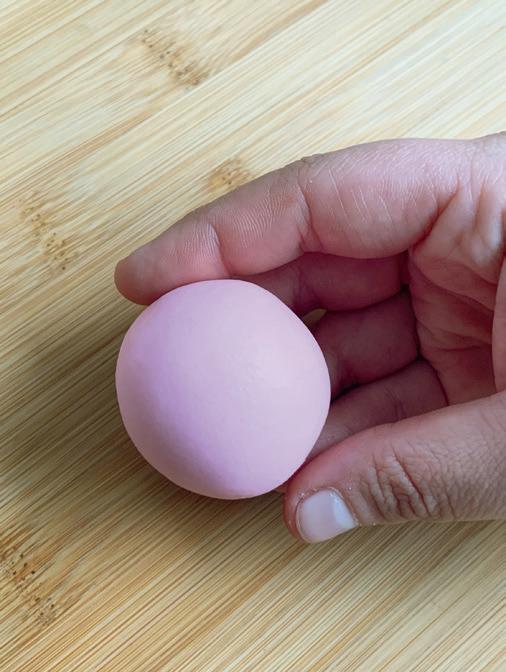

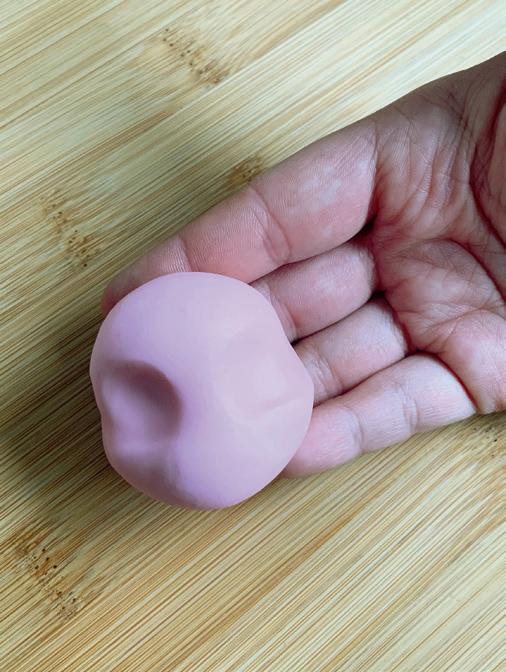
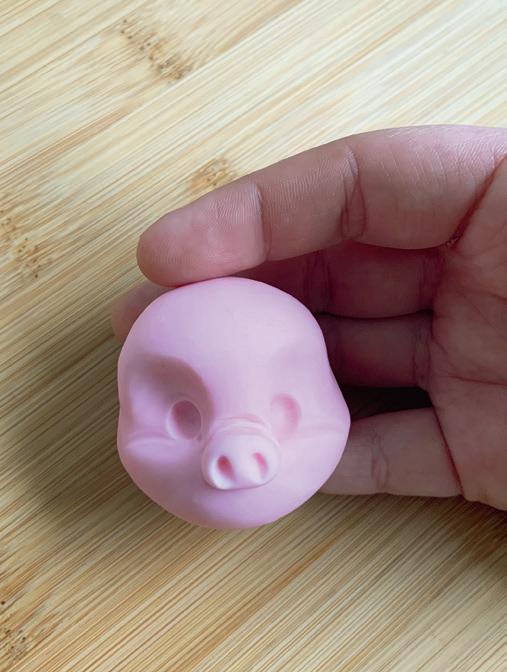
1. Form the head by shaping pink fondant into a ball.
2. Push in the eye sockets with your fingers. Then narrow the upper part of the head by pushing it together.
3. With the spherical modeling stick, make the holes for the eyes and draw a line with the pointed modeling stick at the bottom of both eyes.
4. Using pink fondant, form a small ball and place this where you want the nose to be. With a toothpick you can make some lines above the nose and with the pointed modeling stick you shape the nostrils.
5. Make an opening for the mouth under the nose with the pointed modeling stick. With the flat side of the modeling stick push under the right jaw to indicate the corner of the mouth. Also indicate the location of the eyebrows.
6. To form an ear out of pink fondant, shape a triangle between your fingers. Place one side of the triangle against the head and blend it out. Now fold the top of the triangle over your pointed modeling stick. Repeat these actions for the other ear.
7. Place a ball of white fondant in each eye.


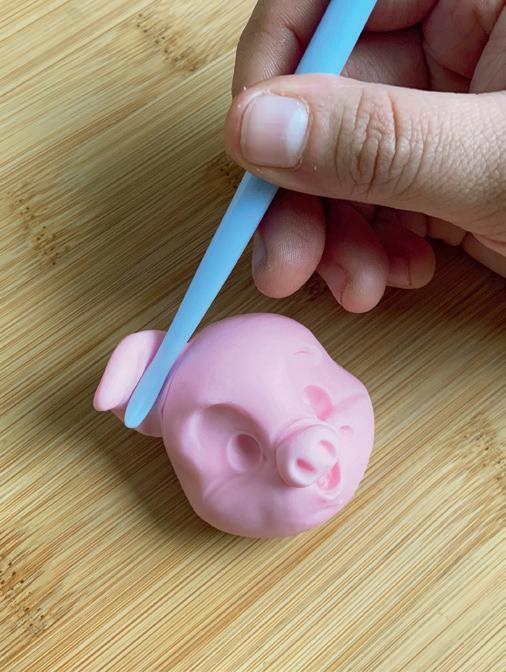

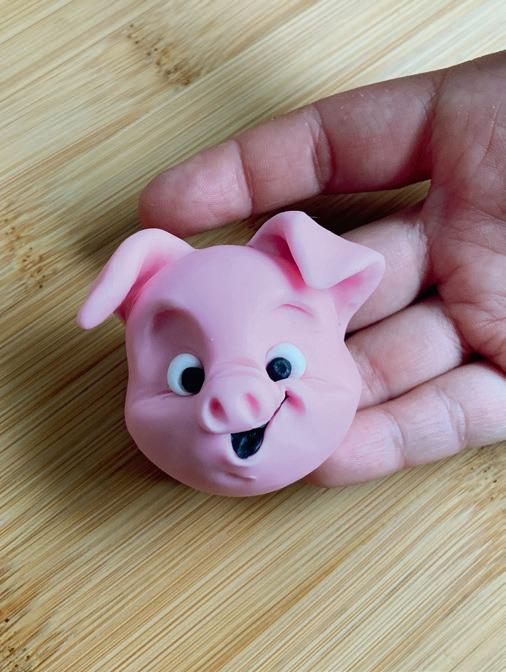

8. Take the spherical modeling stick again and push the eyes in.
9. Fill the eyes and mouth with black rolled fondant.
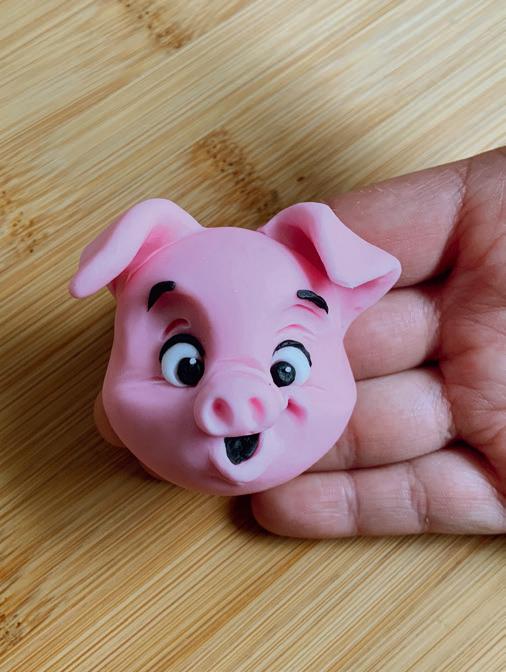
10. Give both eyes a small white dot, to mimic some light reflection. Then for the eyebrows roll two small pieces of black rolled fondant between your fingers and bend it around the top of each eye.
11. Add extra fold lines with a toothpick and just like that, you add extra detail to your figure.
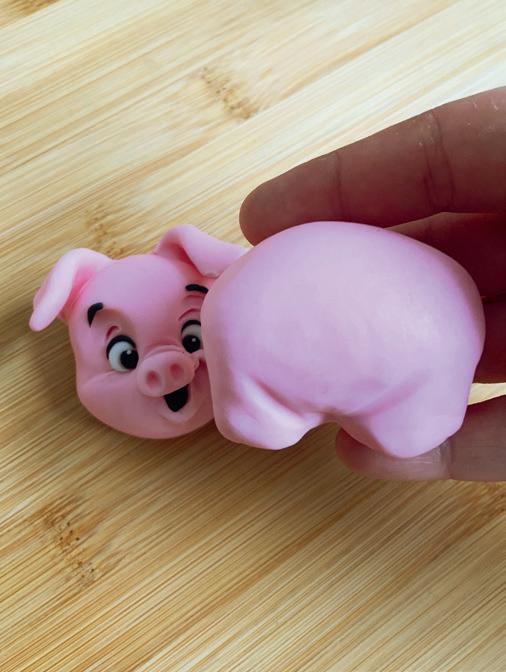
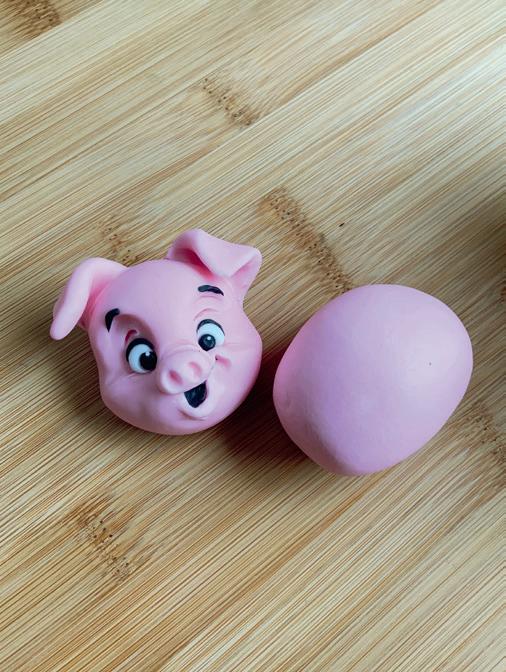
12. Form a pink ball for the body, but make it a little longer. Hold the head against it until you find the right proportion.
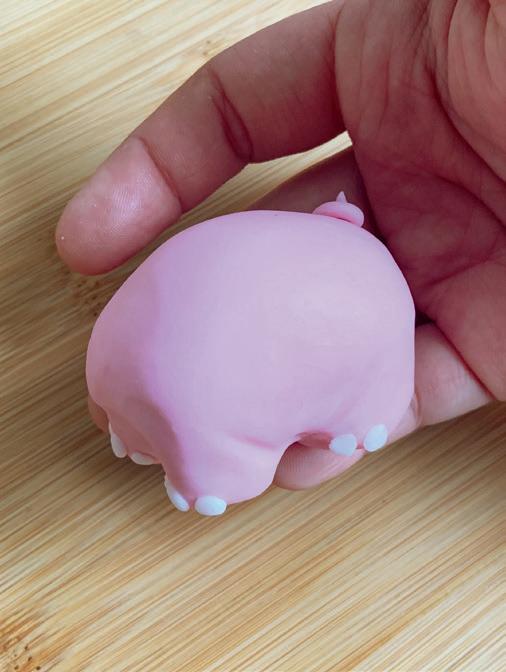
13. On each side of the body use a pointed modeling stick to draw one line at the bottom.
14. Push four legs into the bottom of the body with your fingers. Accentuate with the pointed modeling stick to form the curve of the belly.
15. Form small balls of white fondant and stick them on each leg. Use pink fondant to make the tail between your fingers by rolling a sausage and curling it. Place the tail on the backside of the pig.
16. Stick two sticks in the front of the body and let it dry. After drying, slide the head carefully over the sticks to attach it to the body.

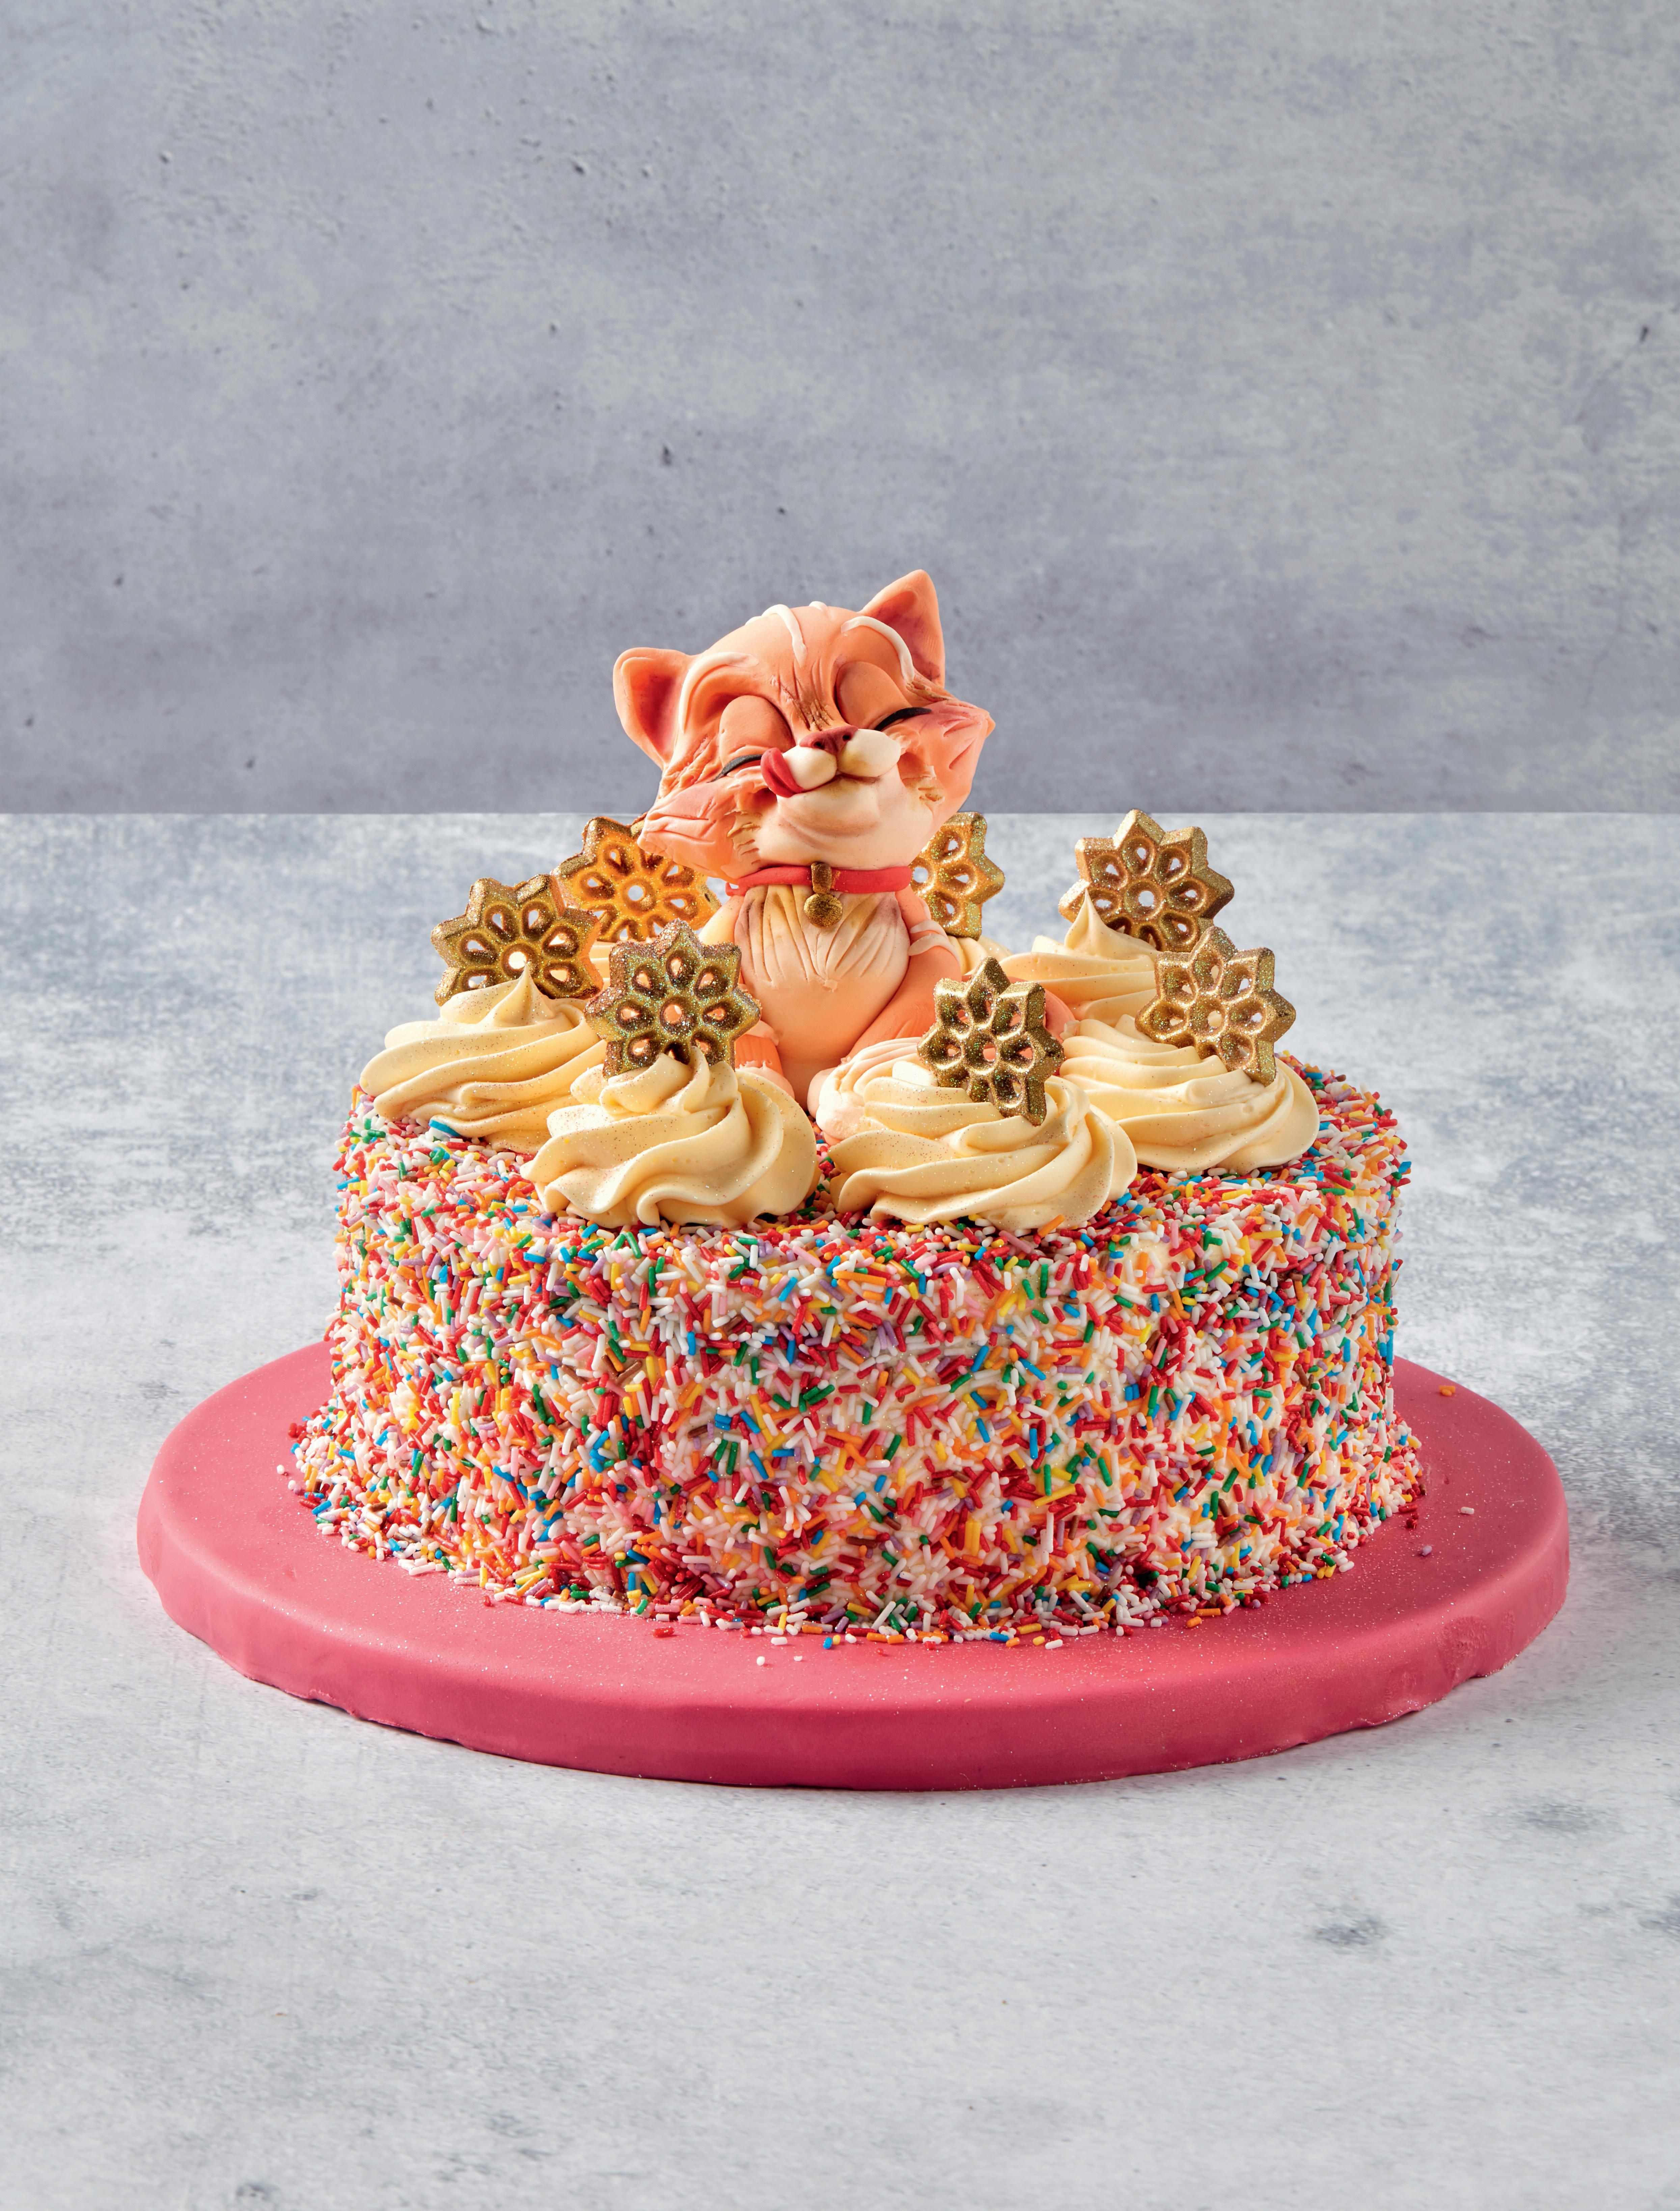
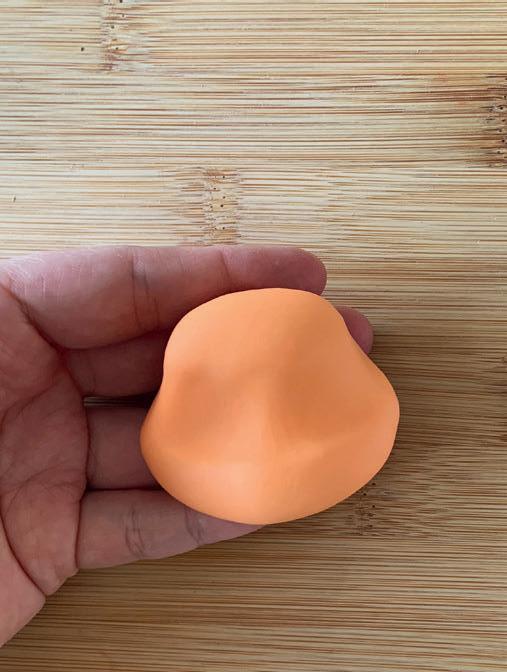

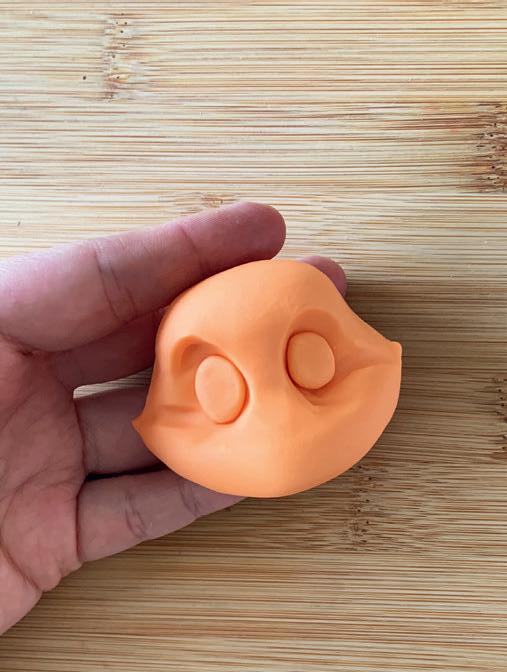

1. Shape orange fondant into a ball and make sure that the top is narrower than the bottom.
2. With your fingers, push in the eye sockets.
3. Hold the ball firmly between your fingers and make a pointy shape on both sides.
4. Now deepen the eye sockets. Then with the pointed modeling stick make a line from the inside to the outside of both eyes.
5. Since the eyes are closed, use the same color as for the face instead of white fondant for the eyes.
6. Push in both eyes, but not too deep. The edges must remain clearly visible.
7. Mark the position of the corners of the mouth with your fingers.
8. For the nose, make two small balls of white fondant and place them between the corners of the mouth.
9. Now take another piece of white fondant, but press it completely flat. Stick this under the nose.
10. Blend the outsides well.

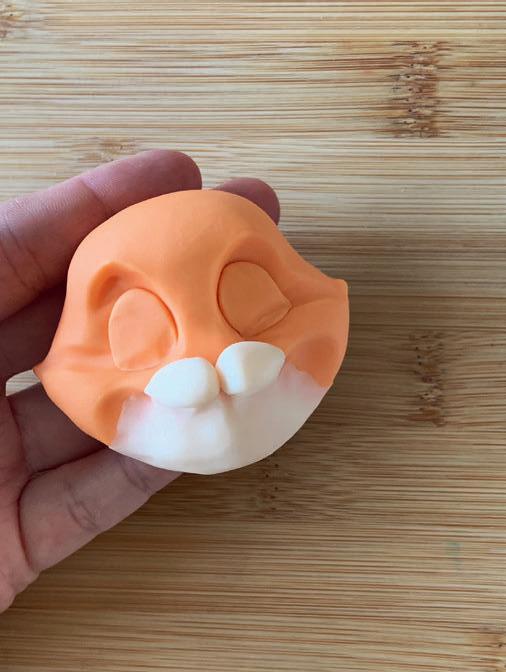
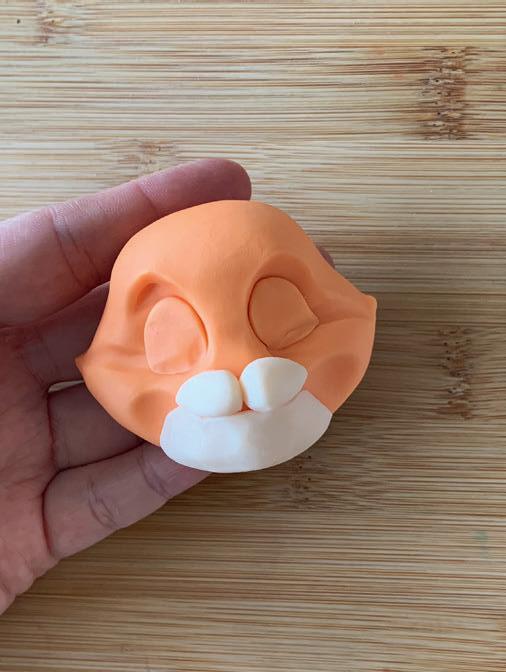

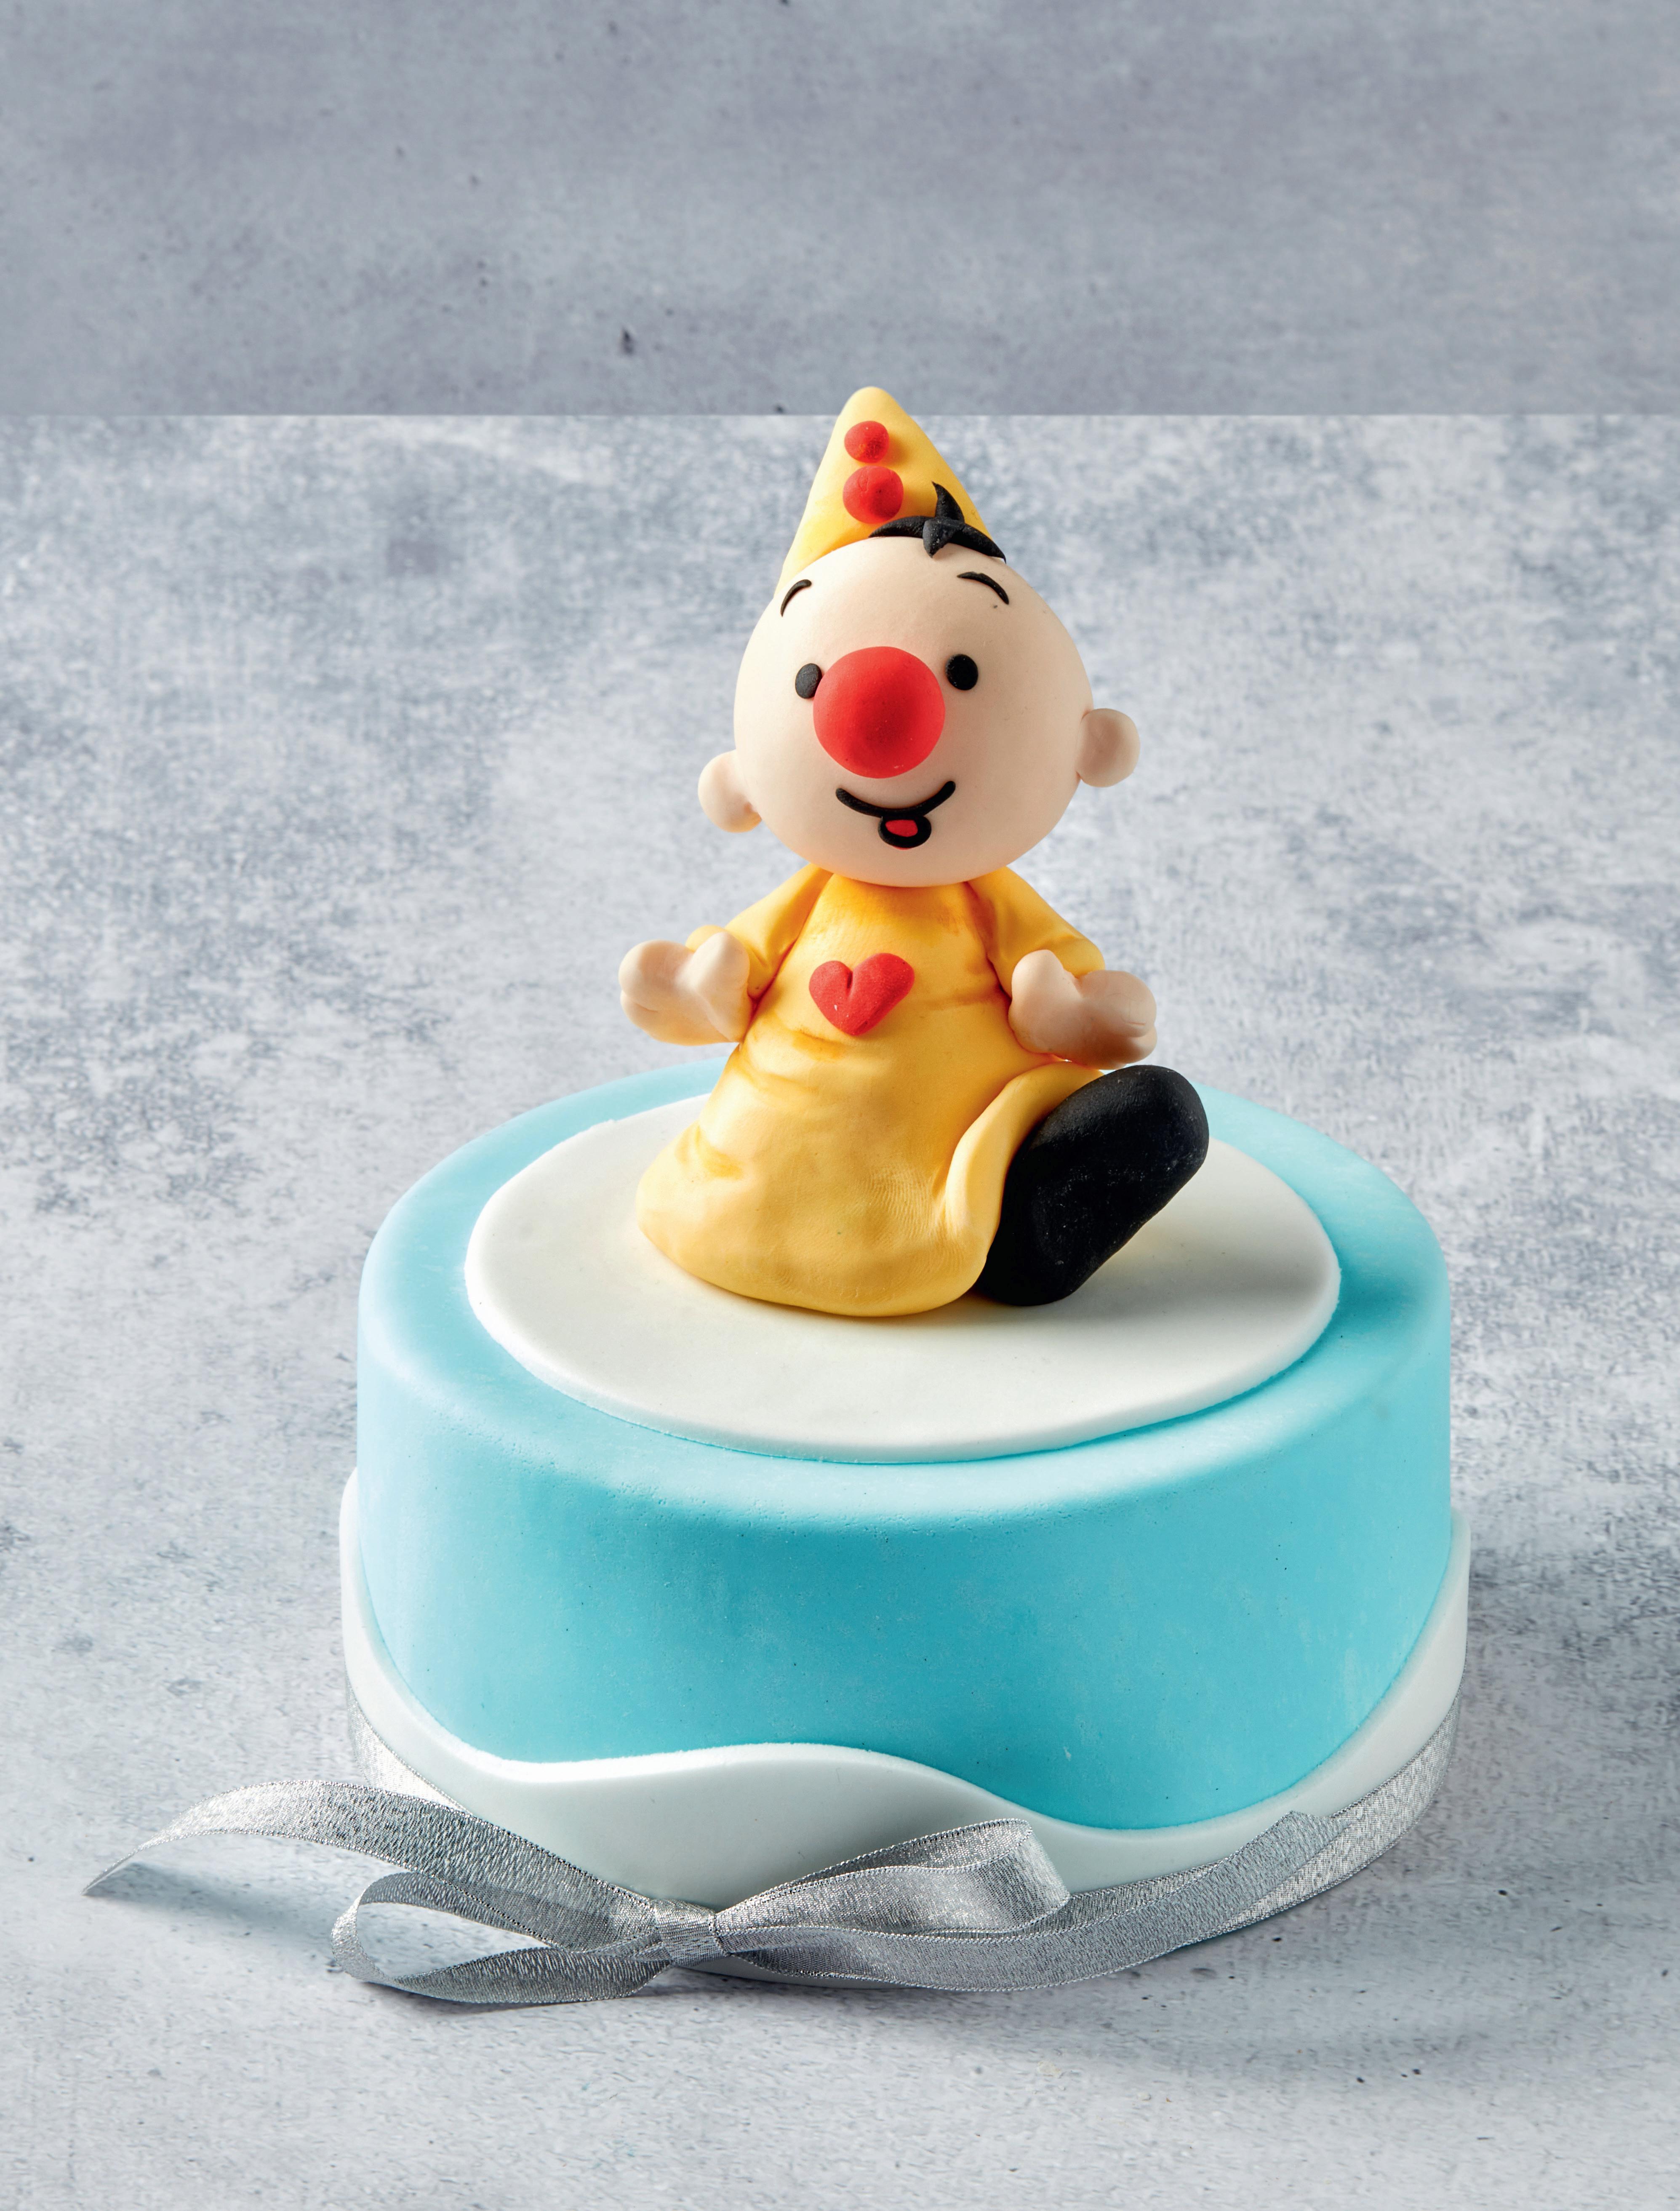
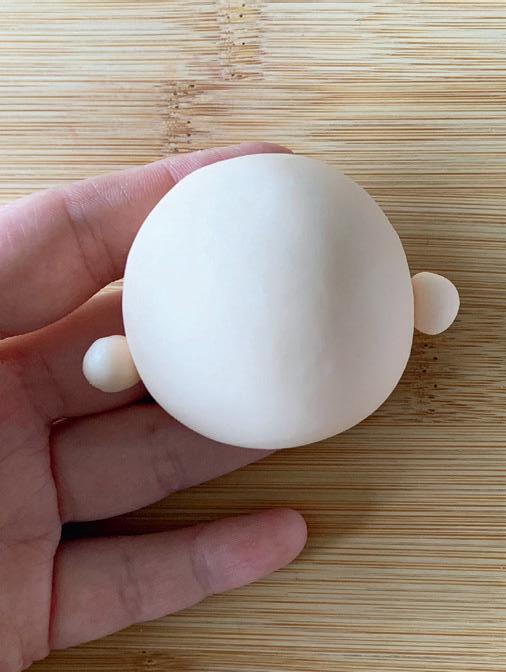


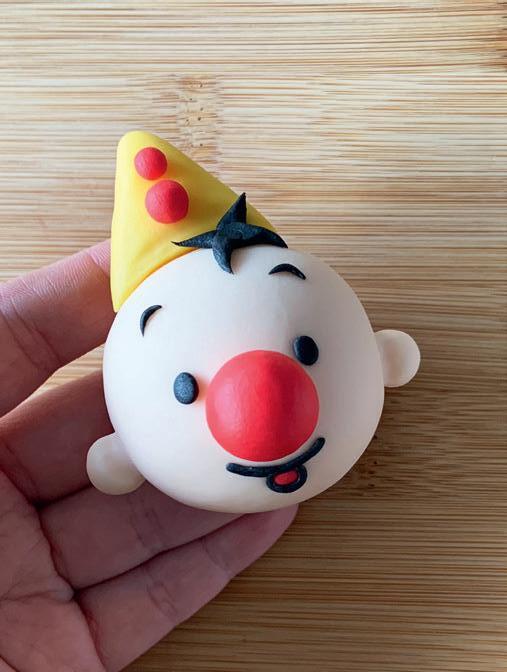
1. Form a ball for the head out of skin-colored fondant.
2. Make two skin-colored balls for the ears. These must be a lot smaller than the head. Make the ears as even as possible and stick them just below the centerline.
3. Blend both ears nicely against the side of the head.
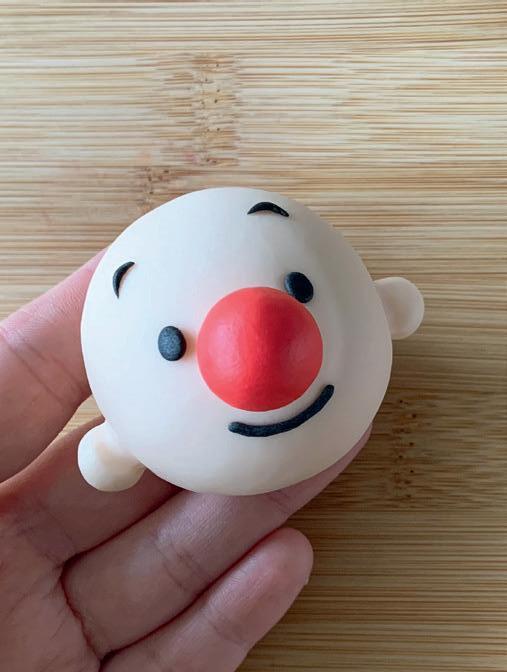
4. For the nose, you form a ball out of red rolled fondant. Stick this in the middle, slightly higher than the ears. Do not push the ball too much; this will make it too flat.
5. For the eyes, stick a small black ball on each side of the nose.
6. Roll black fondant between your fingers to form two very small fine sausages and stick them neatly above both eyes. Try to make them as level as possible.
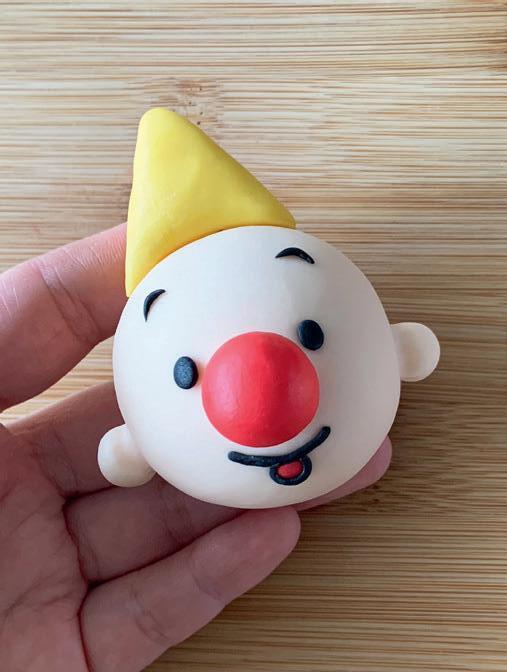
7. Roll a fine black rolled fondant sausage for the mouth. Stick this just under the nose. Add a small piece red rolled fondant to the middle of the mouth to create the illusion that his mouth is open.
8. Give this red ball a small black line. Make sure it fits nicely on the mouth.
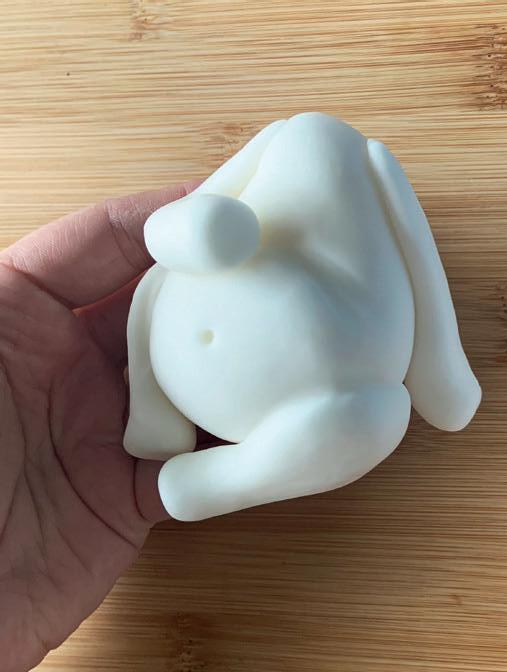
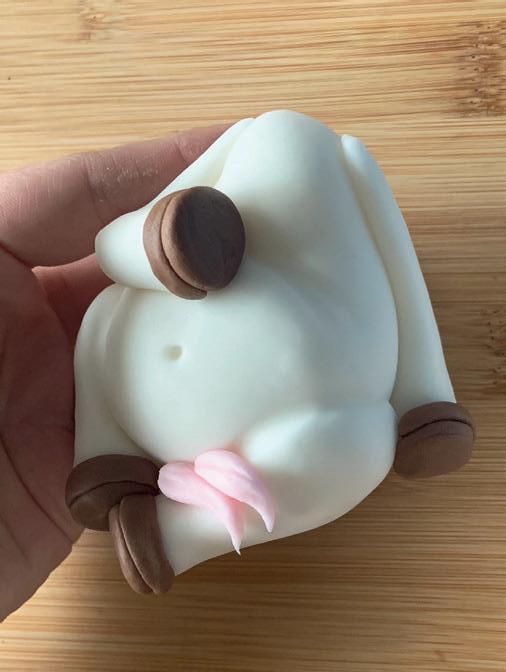
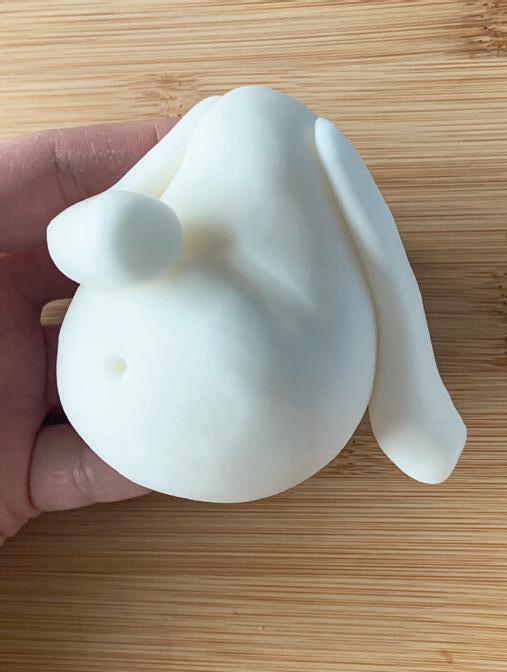
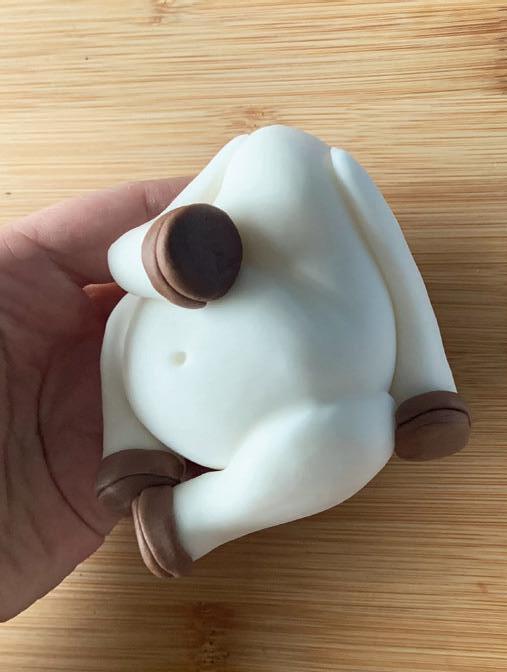

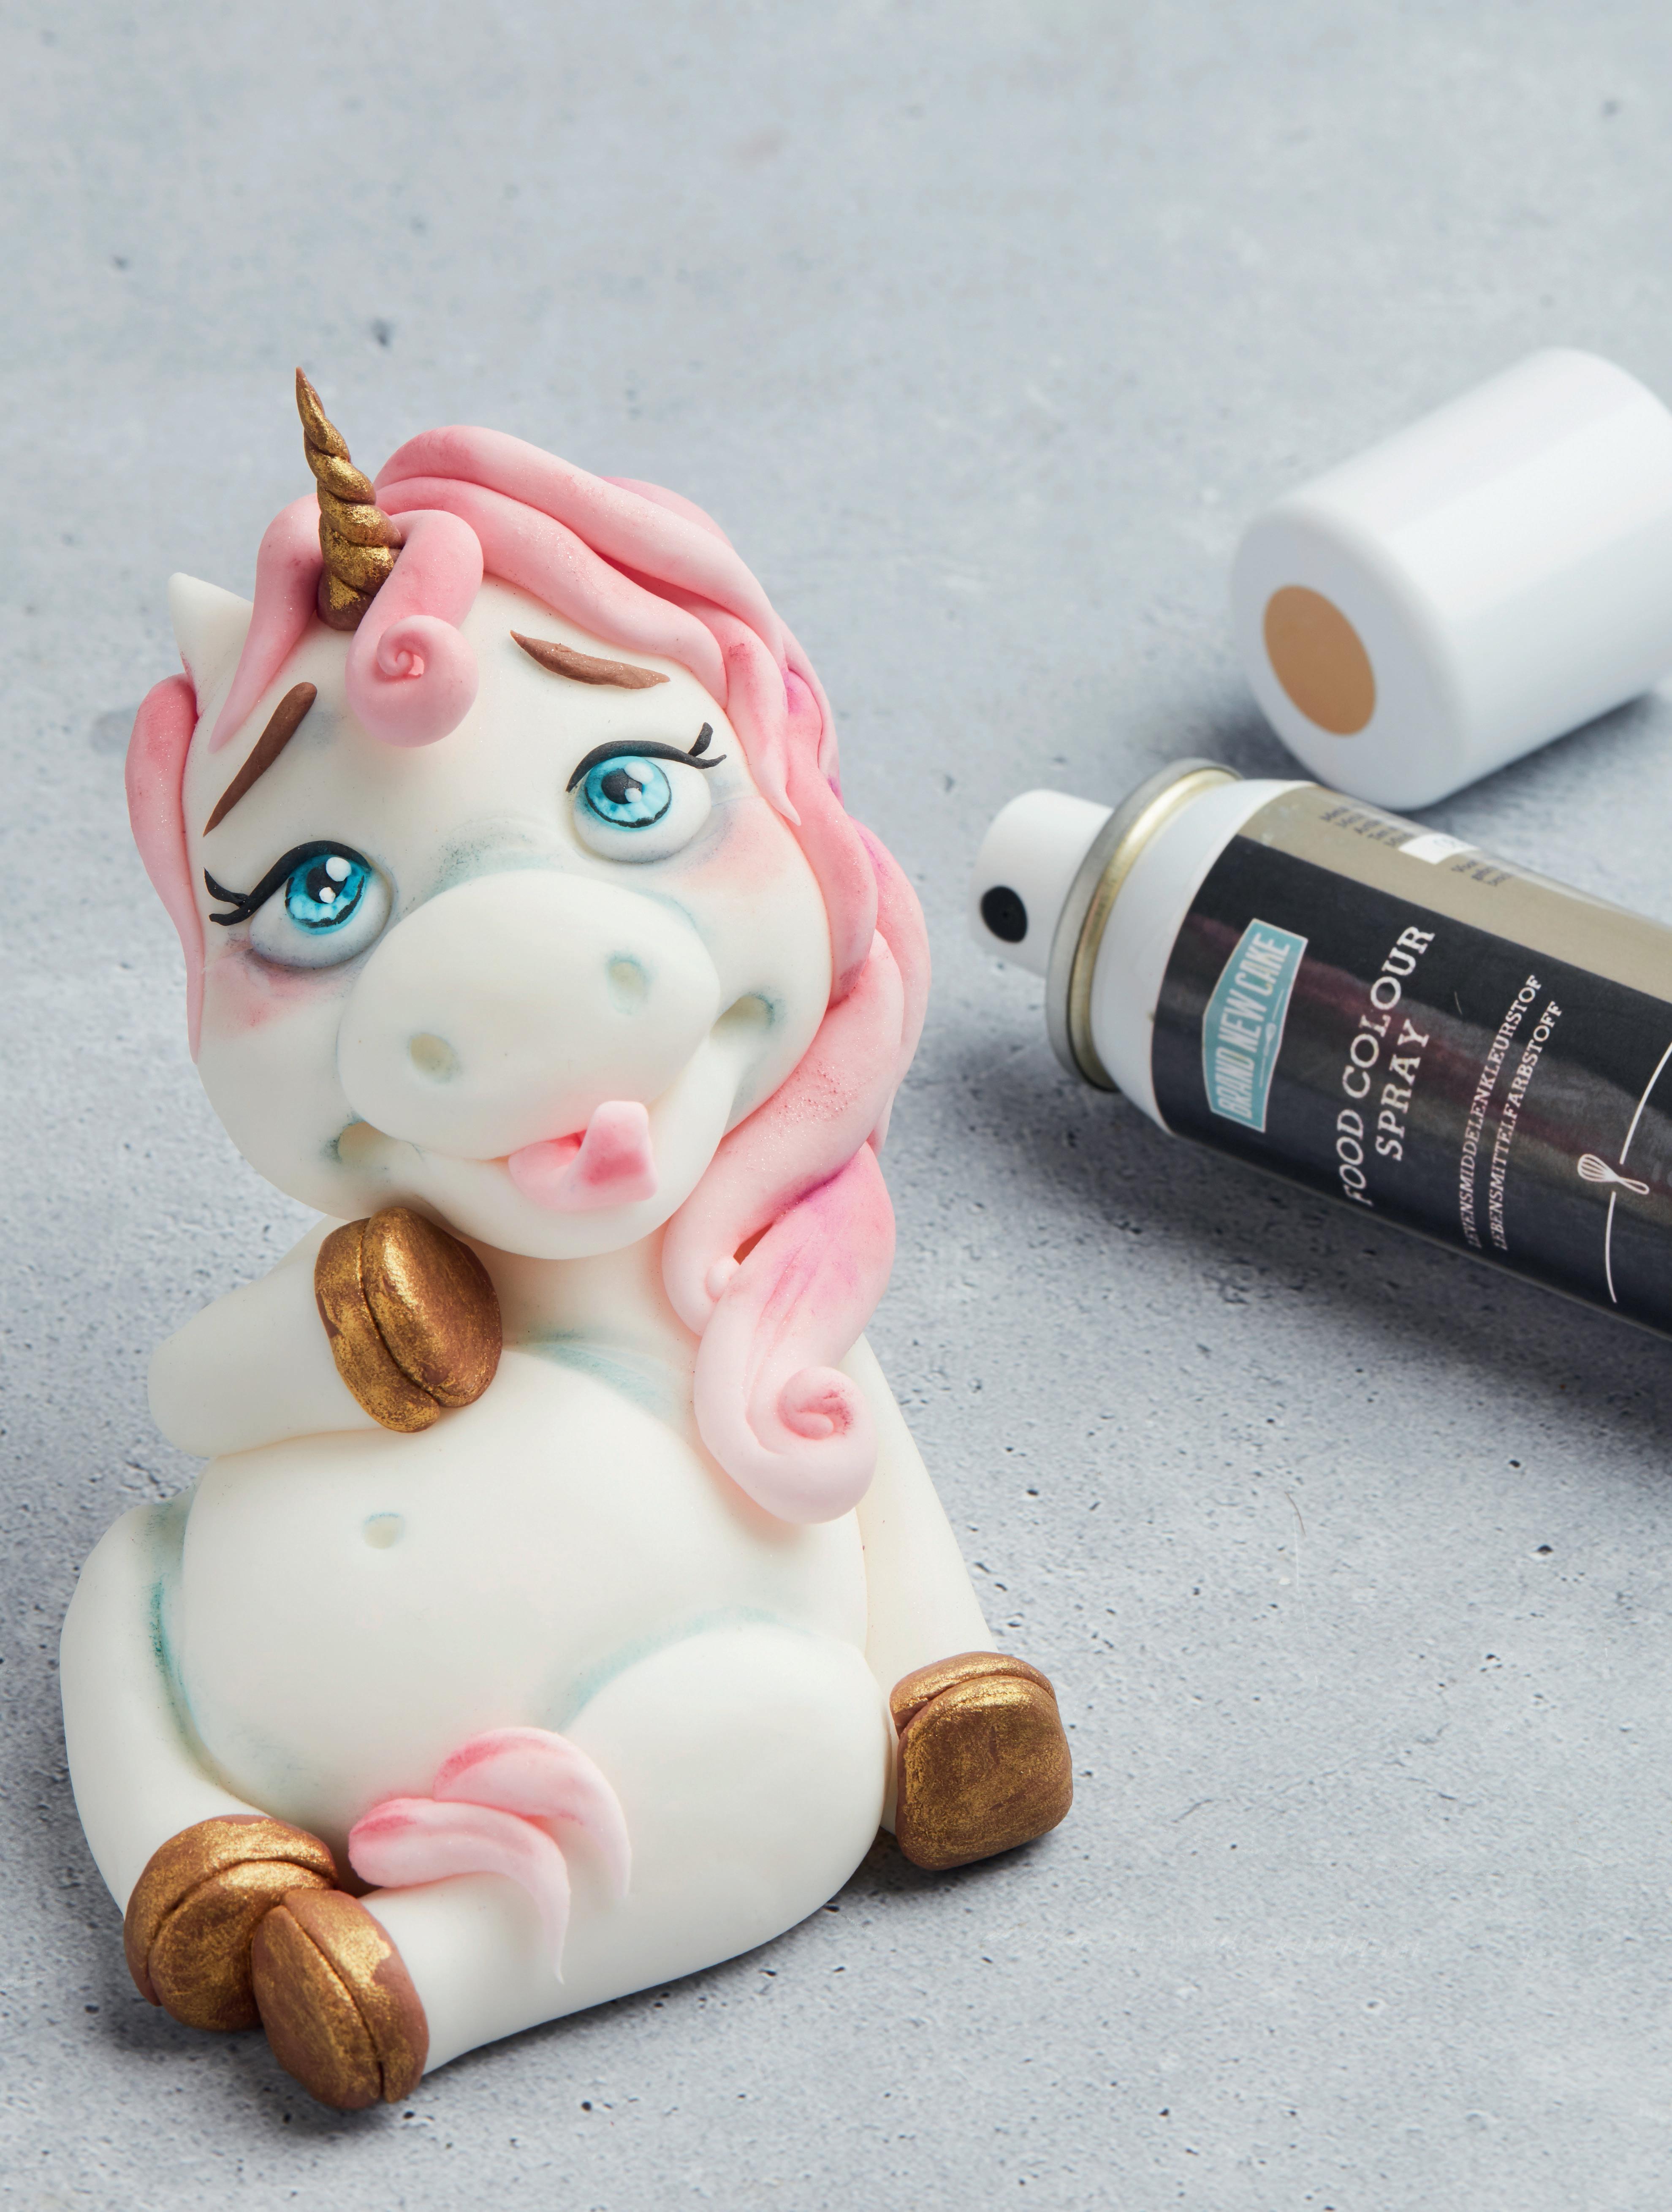
19. Draw a line with the pointed modeling stick to form the bulge of the belly. Also give it a belly button.
20. Make two front legs that are reasonably thin on top and getting wider towards the hooves. Rest one of those front legs on the stomach.
21. Create the hind legs in one piece. Push the thighs firmly against the body and blend well into the buttocks.
22. Now make four flat circles of brown fondant. Stick these against the bottom of the four legs.
23. Now give all hooves an edge and blend it so the ends look good too. Paint them gold later.
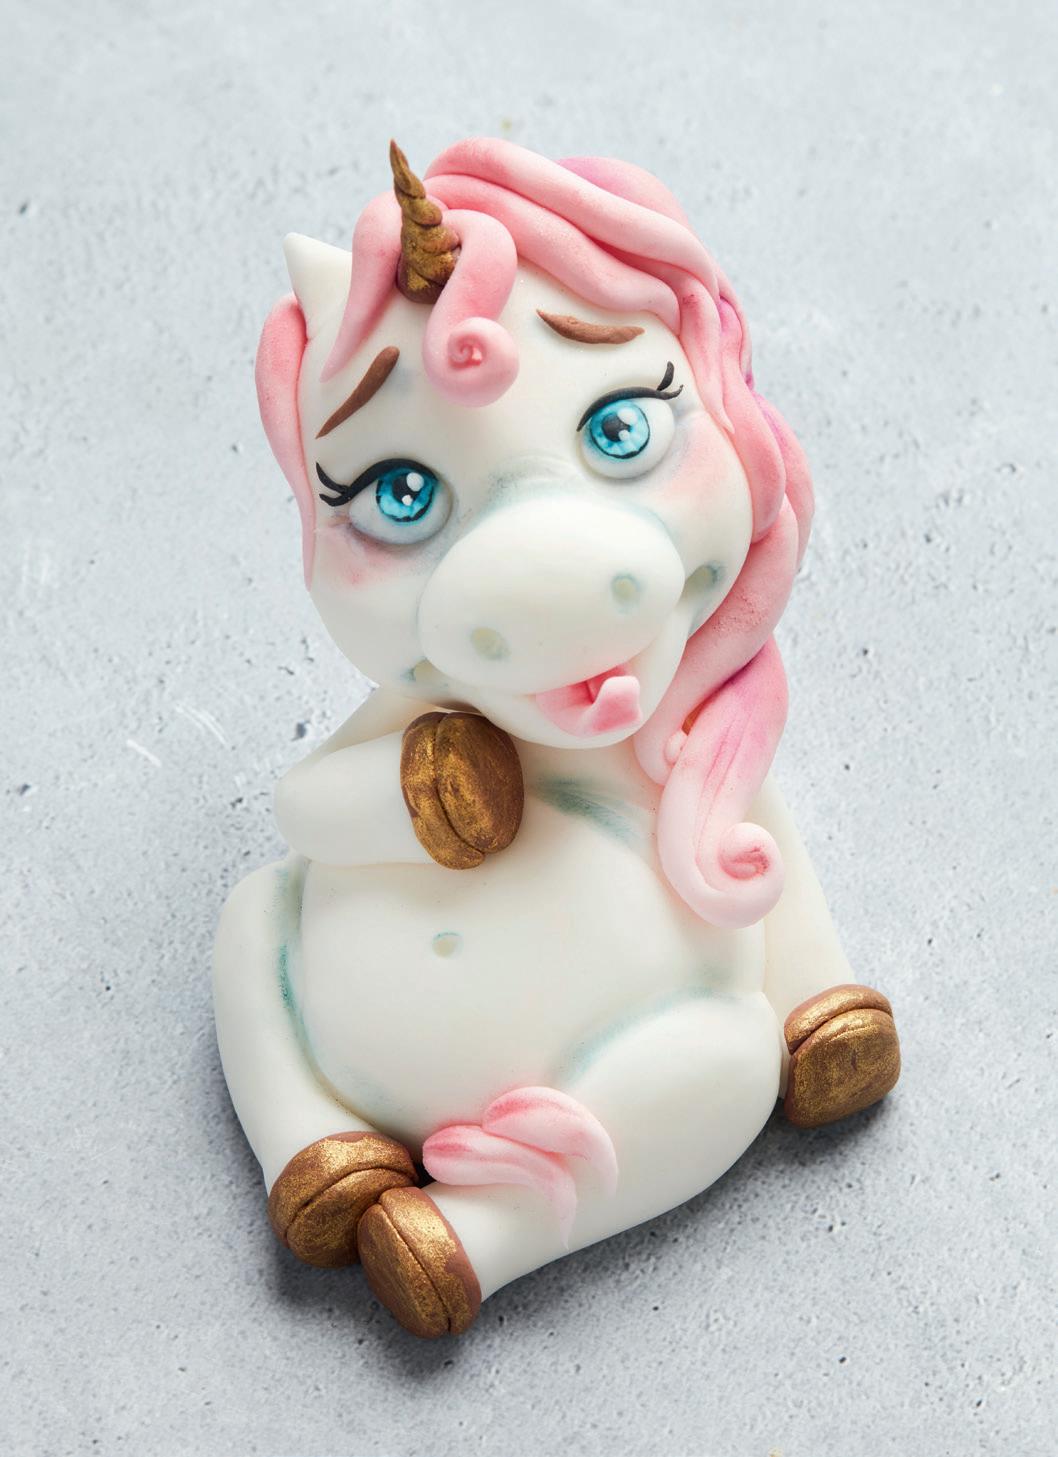
24. Roll two small sausages of the same pink rolled fondant as the mane and drape them over a leg.
25. Stick two sticks into the top of the body and leave to dry. When dry, carefully slide the head over the two sticks. If desired add some extra curls on the neck in pink rolled fondant.

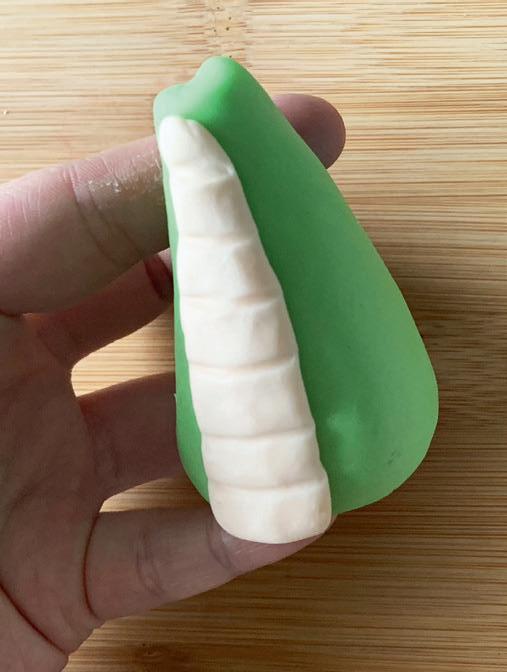
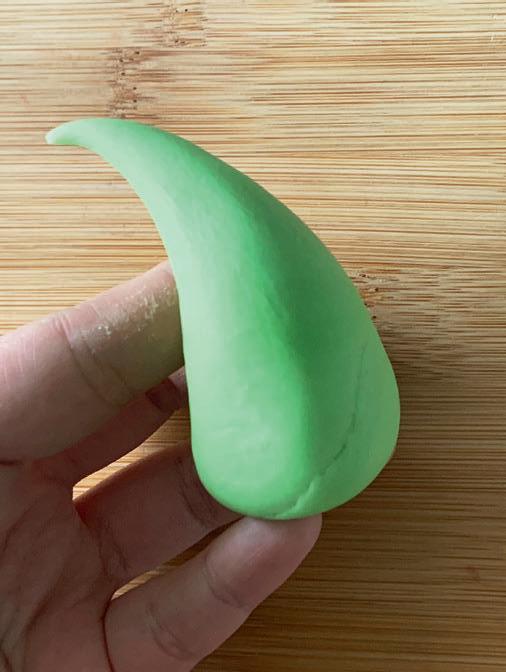
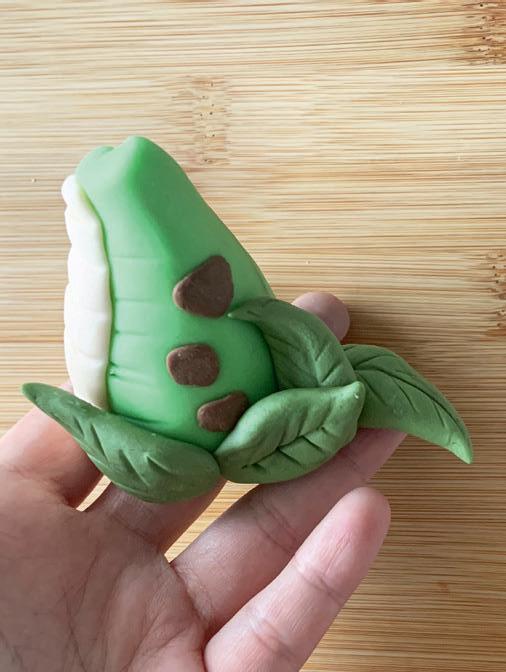
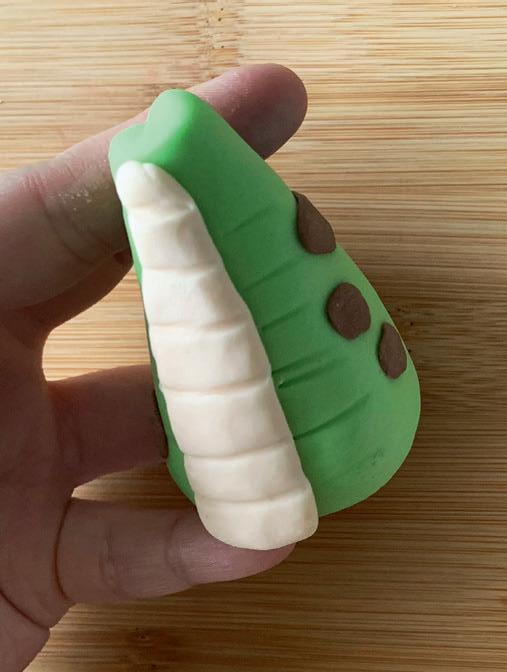
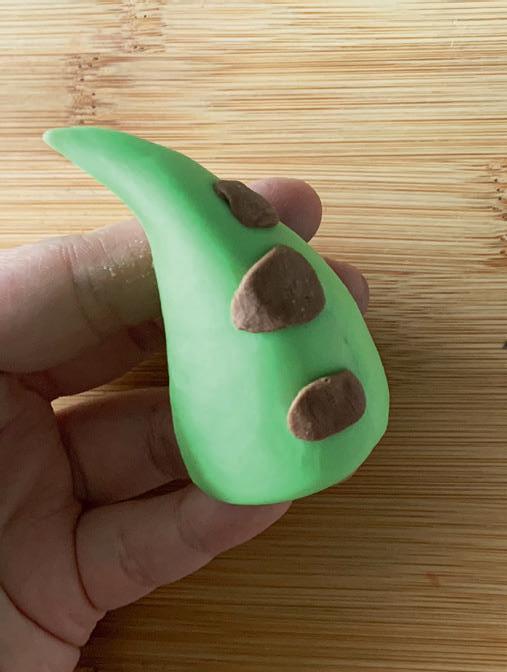
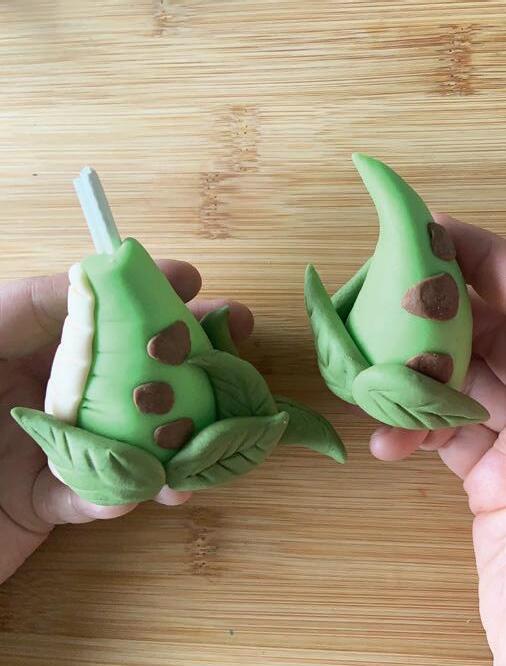
24. Add those same spots here.
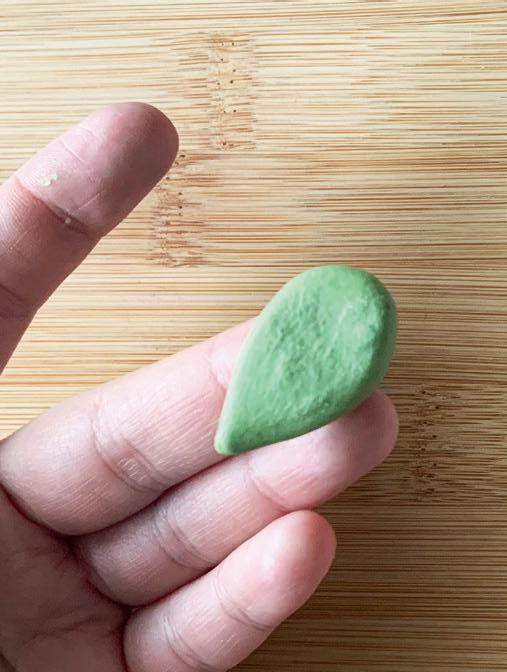
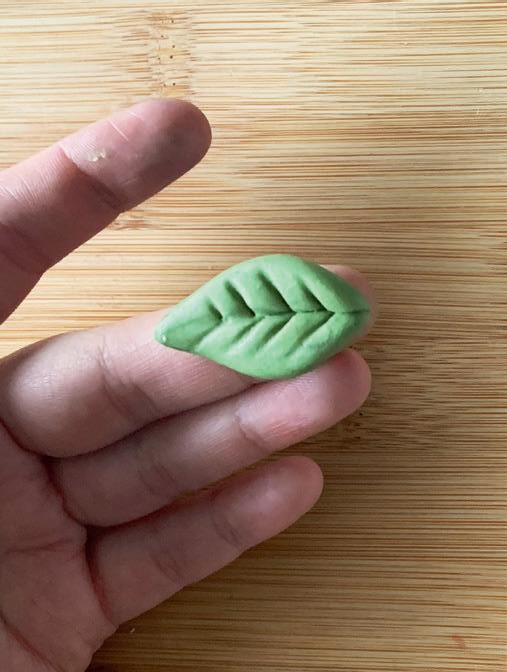
25. We are now going to make leaves to create the illusion that the bottom runs even further down. So using fondant in another shade of green, make droplets and flatten them between your fingers.
26. Create a pattern in the leaves with your toothpick. Start from the center and then draw different lines outwards.
27. Now stick different leaves at the bottom of the body and tail. Stick a stick in the body and let it dry.

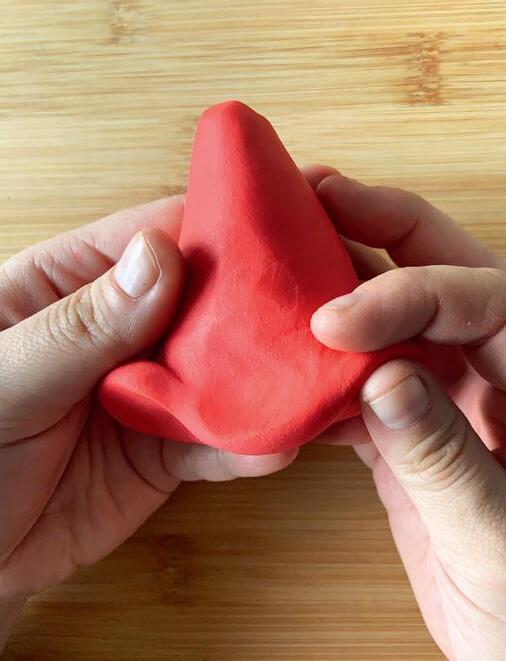
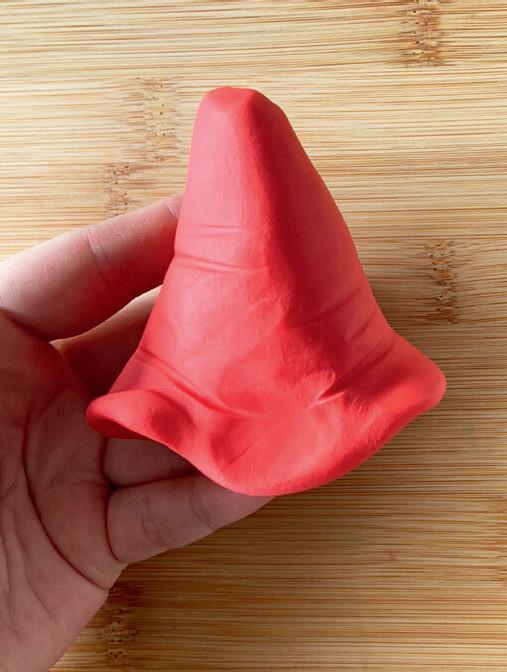
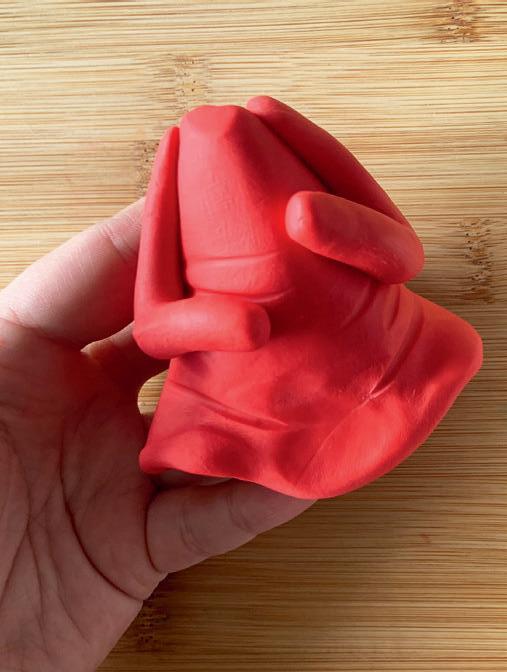
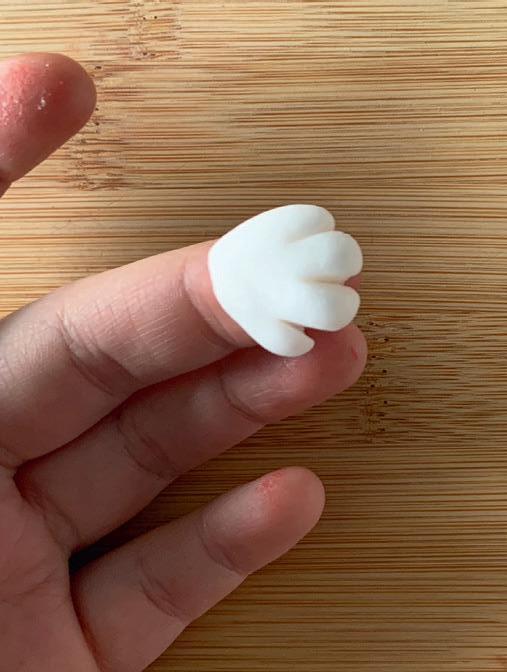
27. Make a sphere out of red fondant for the body. Make sure to push in the base of the sphere and bend the tip.
28. Give the body extra lines to accentuate it.
29. Add an arm to each side of the body in red fondant.
30. Roll two balls out of white fondant for the hands. Push the balls flat with your fingers and cut three incisions in them with a knife to create the fingers. Make sure the thumbs point toward the body. Paste the hands on the arms.
31. Form two little rectangles out of brown fondant. Now cut two triangles on one side, try to make sure they have the same shape.
32. Form two triangles out of blue fondant and drape them around the shoulders. Let them meet in the middle. Give the cape some extra pleated lines.
33. Make a little ball out of brown fondant and put it where the cape comes together in the front.
34. Roll a big piece of blue fondant and place it over the back.
35. Paint all brown parts in gold. Stick two sticks into the top of the body and let it dry for at least a day.
36. After drying, place the head over the sticks on top of the body.

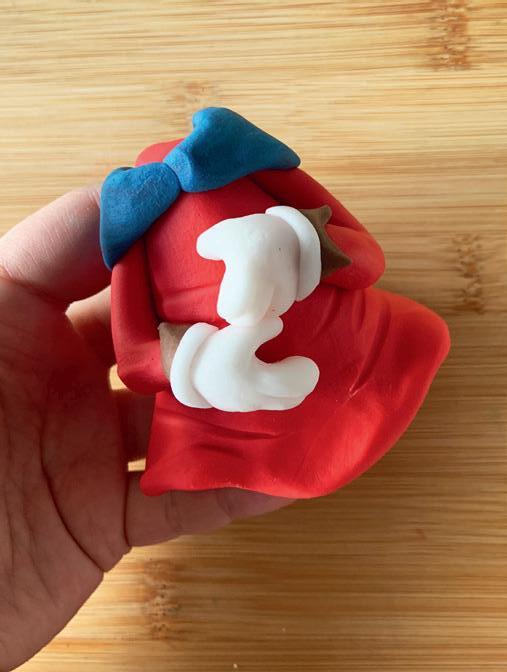

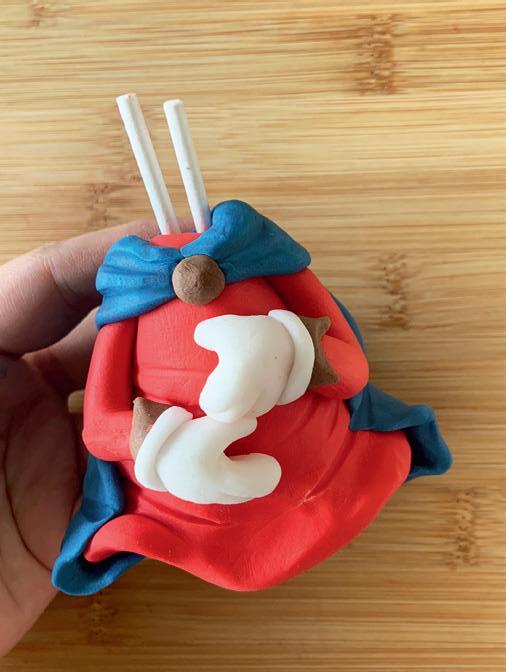
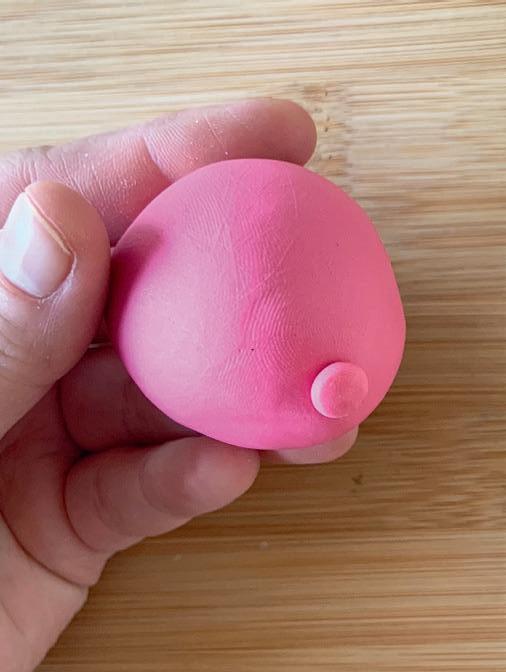

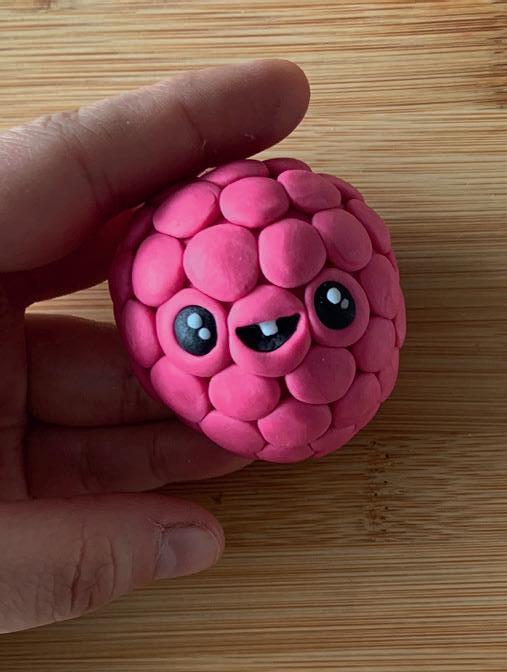
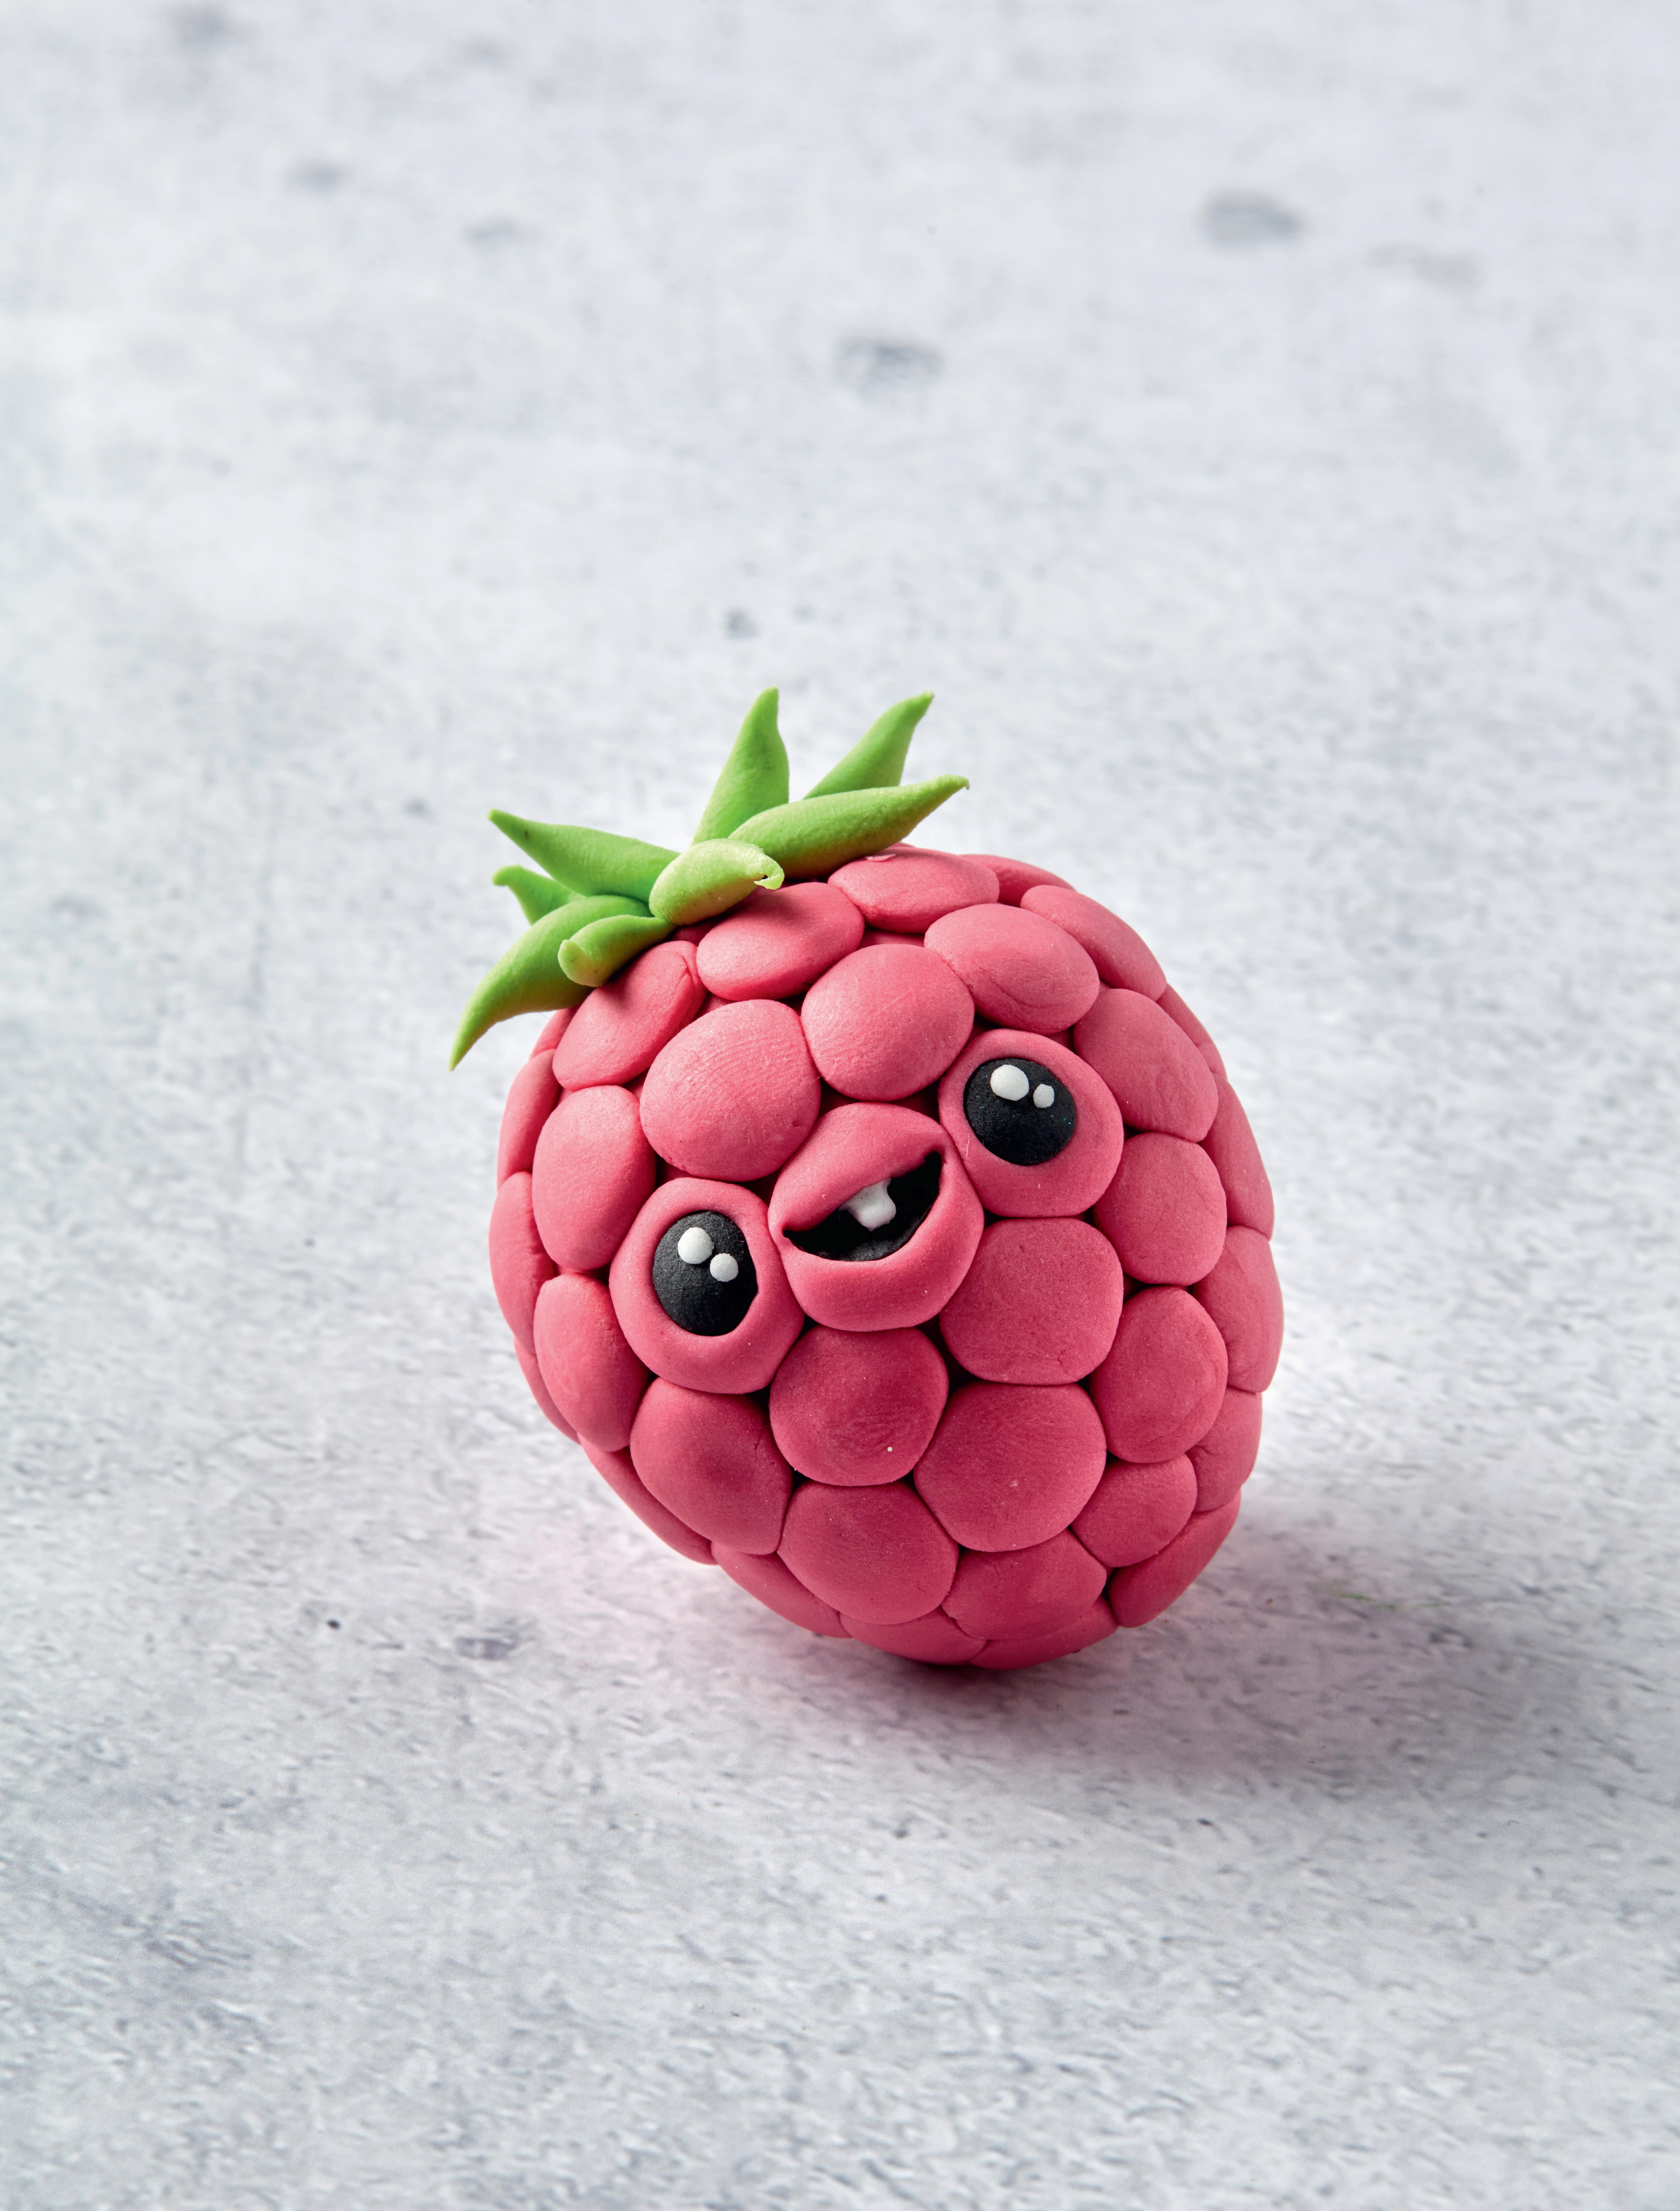
1. Using cherry pink fondant, roll out a ball with a pointed top.
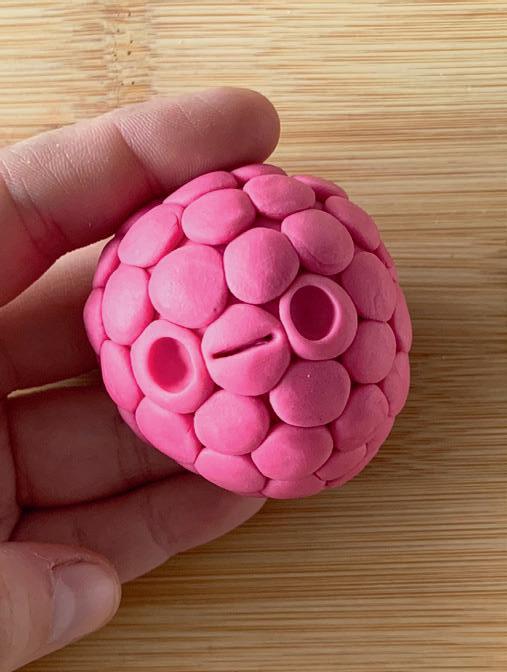
2. Roll out several small balls of dark pink rolled fondant and stick the first ball at the bottom of the big ball. Paste the following balls on the left and the right of the first one and repeat all the way round.
3. Stick balls on the bottom of the larger ball and work upwards. Paste the full raspberry and press well.
4. Push the eye in with the spherical modeling stick. Mark a line between the eye sockets with a toothpick.
5. Using the pointed modeling stick make the line slightly larger at the bottom so that it fits the shape of an open mouth.
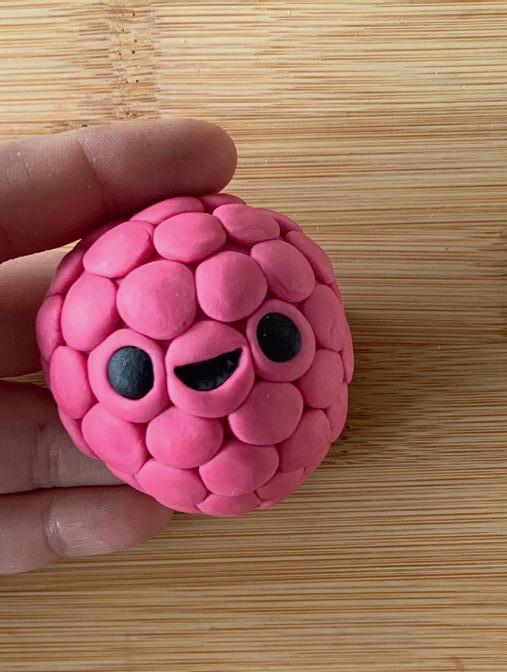
6. Fill the eyes and mouth with black fondant.
7. Give both eyes two small white balls of fondant to mimic light reflection. Make sure that one white ball is slightly larger than the other.
8. Make a small rectangle out of a piece of white fondant for the tooth. Stick the tooth in the upper half of the mouth.
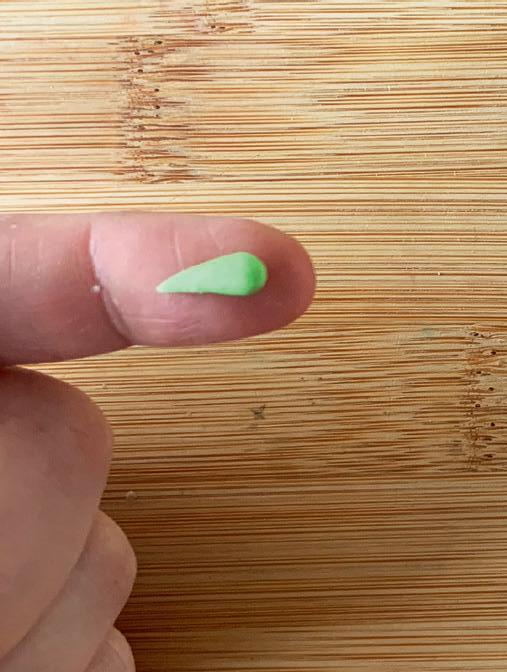
9. Now take green rolled fondant and make small teardrop shapes.
10. Finally stick different green teardrop shapes at the top of the raspberry to create the crown of the raspberry. Add as many as you wish.

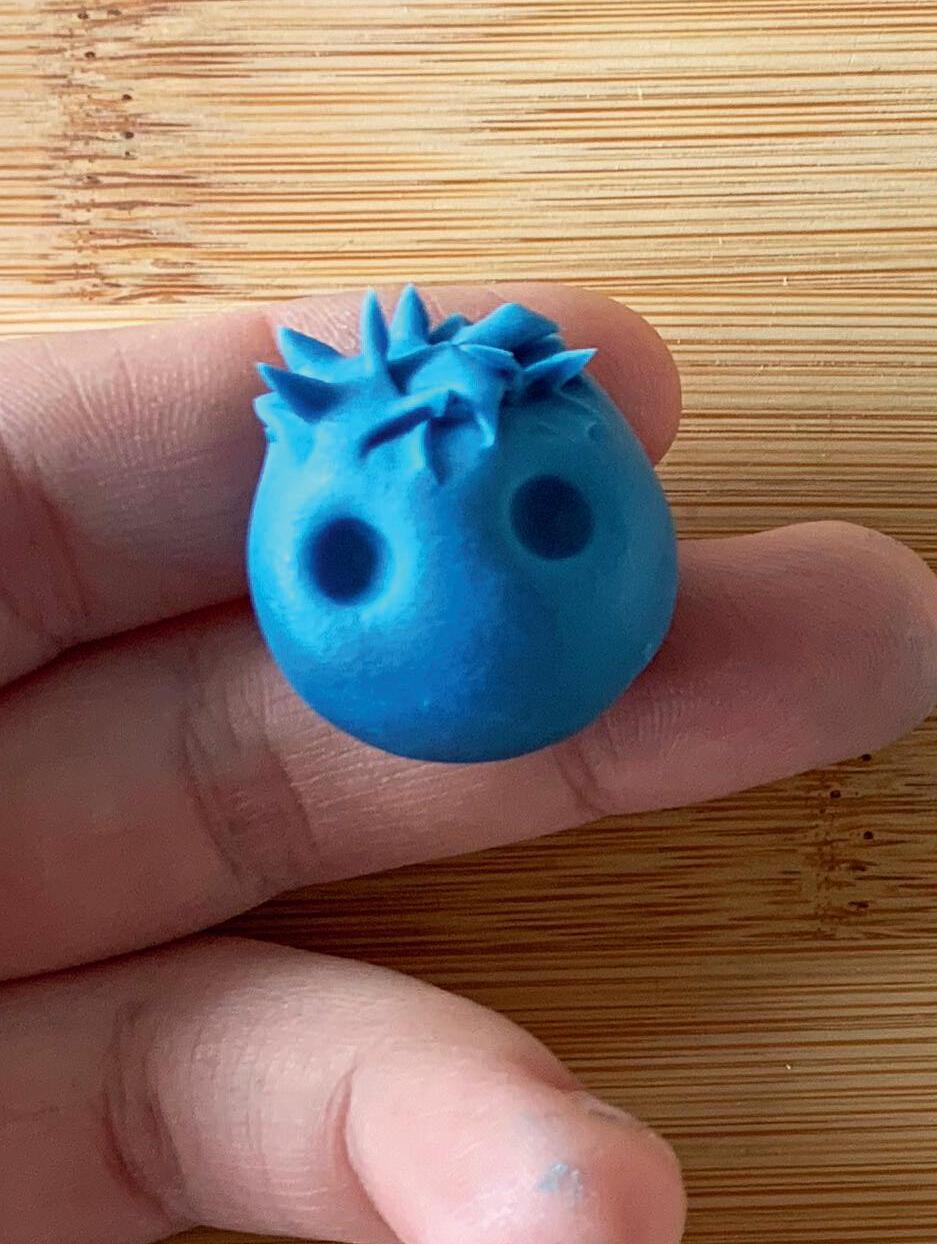
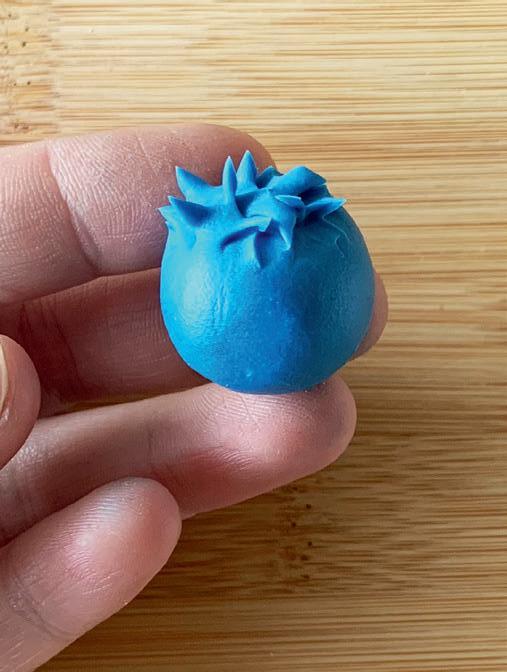

1. Mix a piece of dark blue fondant with a small piece of red fondant to create a purple color. Roll a small ball out of this fondant.
2. Then use a small, sharp pair of scissors and start clipping. This will be the top of you berry.
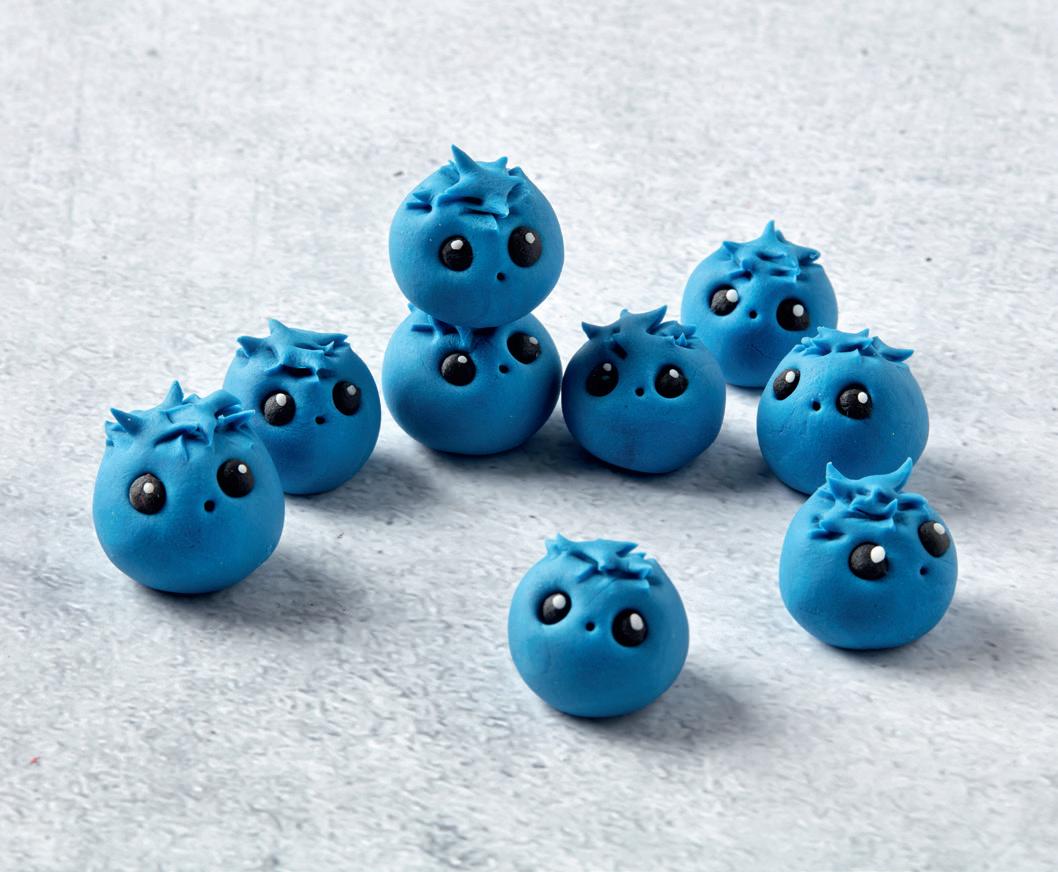
3. With the spherical modeling stick, push in the eye sockets. Do this very carefully, to avoid distorting the berry by pressing too hard on the fondant.
4. Poke a hole with a toothpick in the place where the mouth goes.
5. Fill the eyes with black rolled fondant.
6. Give the eyes a small white ball of fondant to mimic light reflection. Make sure that the one white ball is slightly larger than the other.
As the berries are so small, it’s always nicer to make several straight away. Give them different facial expressions, stack them on each other… Be creative!
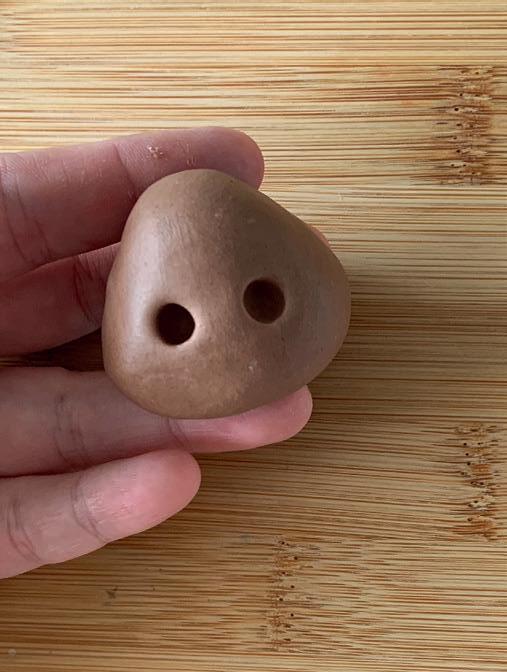
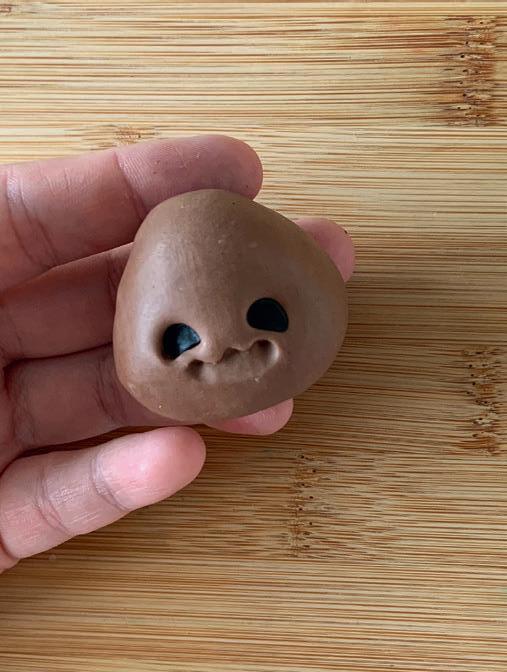
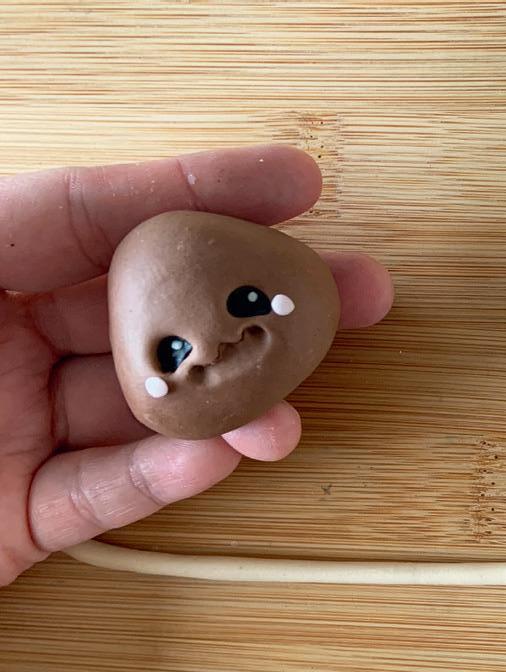
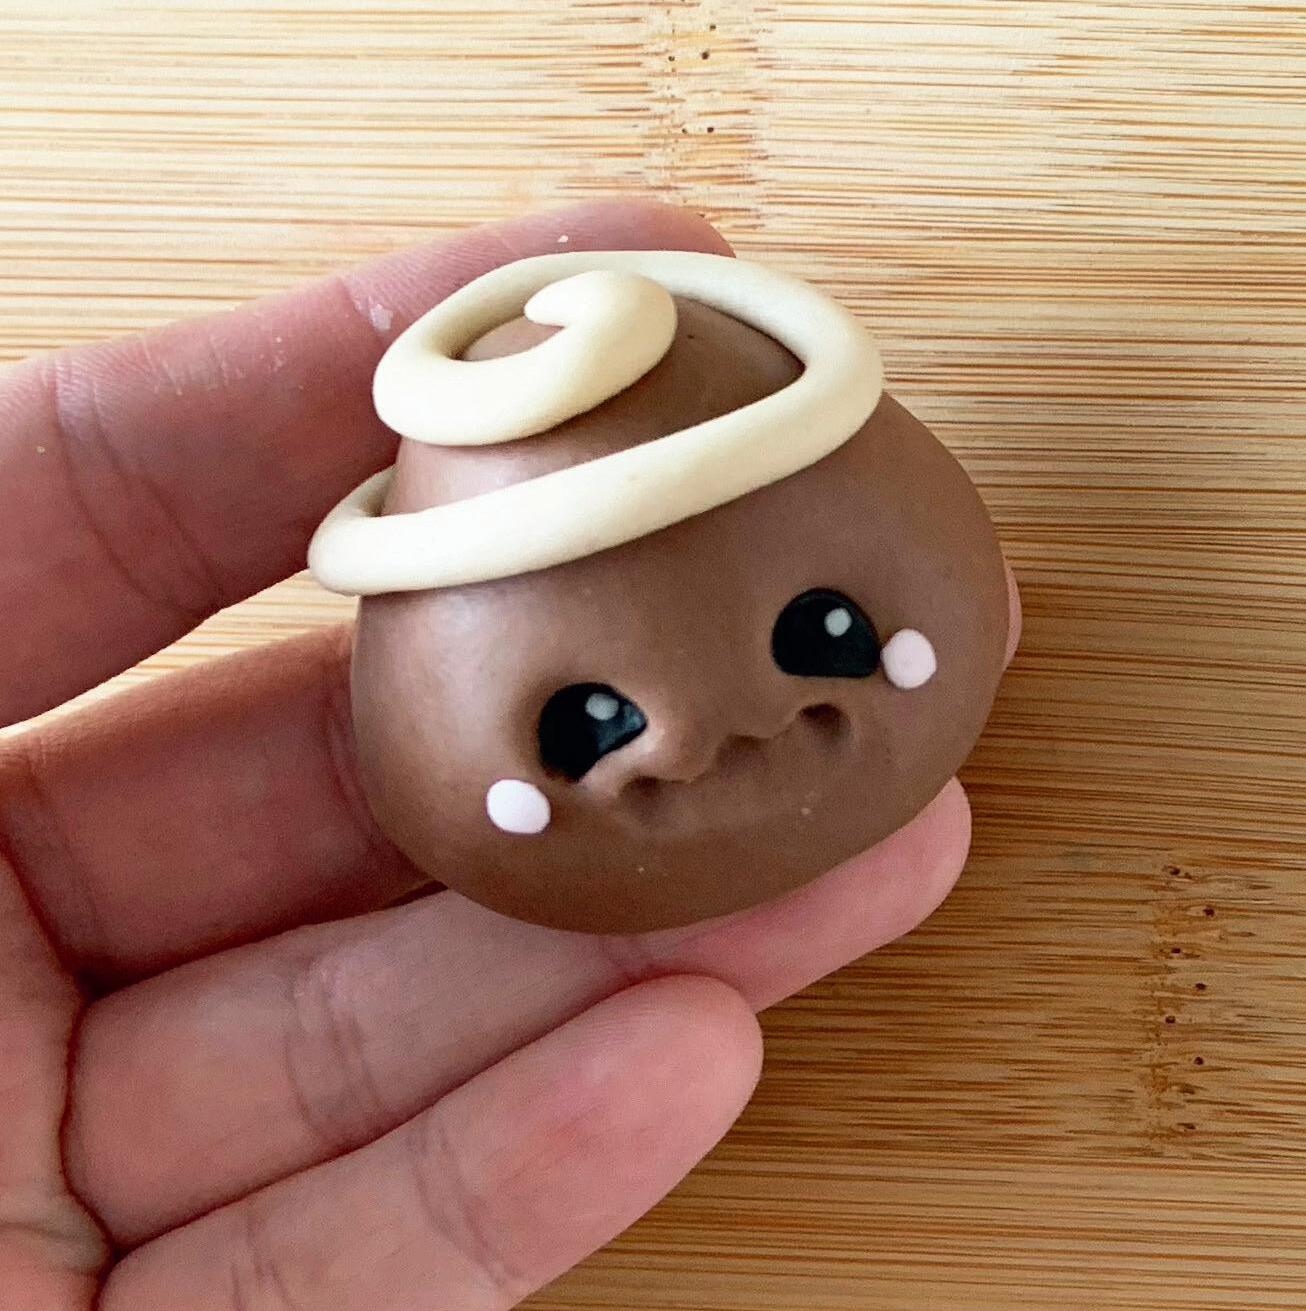
1. Roll a piece of brown rolled fondant into a blunt cone.
2. Push the eye sockets in with the spherical modeling stick.
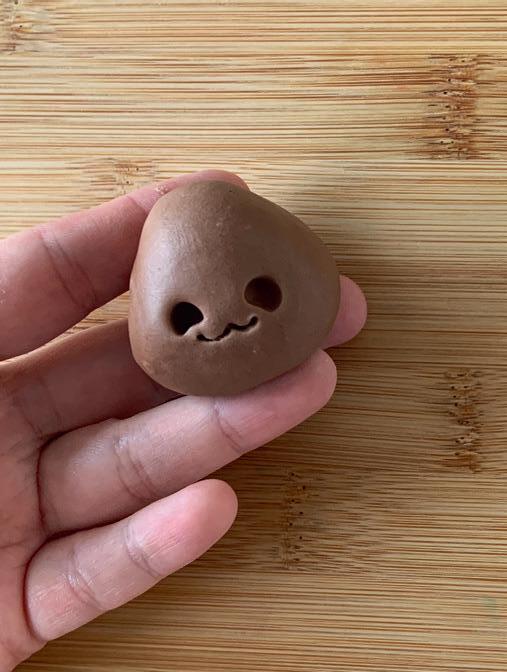
3. Using a toothpick, draw a line under the eyes to create the mouth. Start under the eyes and mark an arc outwards on both sides.
4. Make this line softer by using the flat side of the pointed modeling stick against the bottom of the mouth. Push in the corners of the mouth straight away.
5. Fill the eyes with black rolled fondant.
6. Give both eyes a small white ball of fondant to mimic light reflection. Make sure that one white ball is slightly larger than the other.
7. Use a little light pink fondant on the cheeks to mimic a blush. Place these pink bubbles under the eyes. (The same effect can also be created by dusting, but this would be less noticeable due to the brown color of the chocolate candy.)
8. Roll a piece of light brown fondant (for this mix a piece of white fondant with brown rolled fondant) into a long sausage for the curl of the chocolate candy.
9. Make the top of the candy a little bit wet and wrap the sausage on it like a snail shell.
