5 minute read
FEATURE ARTICLE


Load Stability
Article contributed by STUART EDWARDS, HEAVY LIFT ENGINEER
Advertisement
In the crane industry, lifting loads safely is a key component to the success of any project. When selecting rigging for a lift, the capacity of the lifting points and rigging often are the first items to be addressed, closely followed by strength of the load to support itself and various site constraints such as allowable head room and crane limitations. Whilst these areas are very important, the overall stability of the load is crucial in successfully completing a lift. If this stage of lift planning is ignored, it may result in damaged loads, injury or even fatality. This article focuses on how to identify when a load may be unstable.
Generally, any loads with a rigging arrangement that lifts from the top via the use of lift points that are above the centre of gravity (COG) will be stable. This is because the centre of gravity of the load is below the lift points and if there is an external force such as wind, acceleration of the crane etc. as the COG wants to go back down and restore the load back to equilibrium, much like hanging a broom from the handle at the top. Figure 1 below show a stable rigging arrangement.
Lift points above the COG >> LOAD IS STABLE This type of load will not tip over once it is freely suspended.
Figure 1 - Stable lift with lift points above the centre of gravity
When the lift points are below the COG caution needs to be taken as there is a risk of load instability. Figure 2 shows a load being lifted from its base with two slings either side up to a single point. This lifting arrangement forms a triangle in the plane shown, often referred to as the lifting triangle. If the COG of the load sits inside this triangle the load will remain stable. Sufficient distance from the COG to the lifting triangle is required to allow for external forces such as wind and crane motions.
Lift points below the COG >> LOAD IS STABLE BUT CAUTION REQUIRED Two fixed length slings required. COG to be within the ‘triangle’ of the rigging.
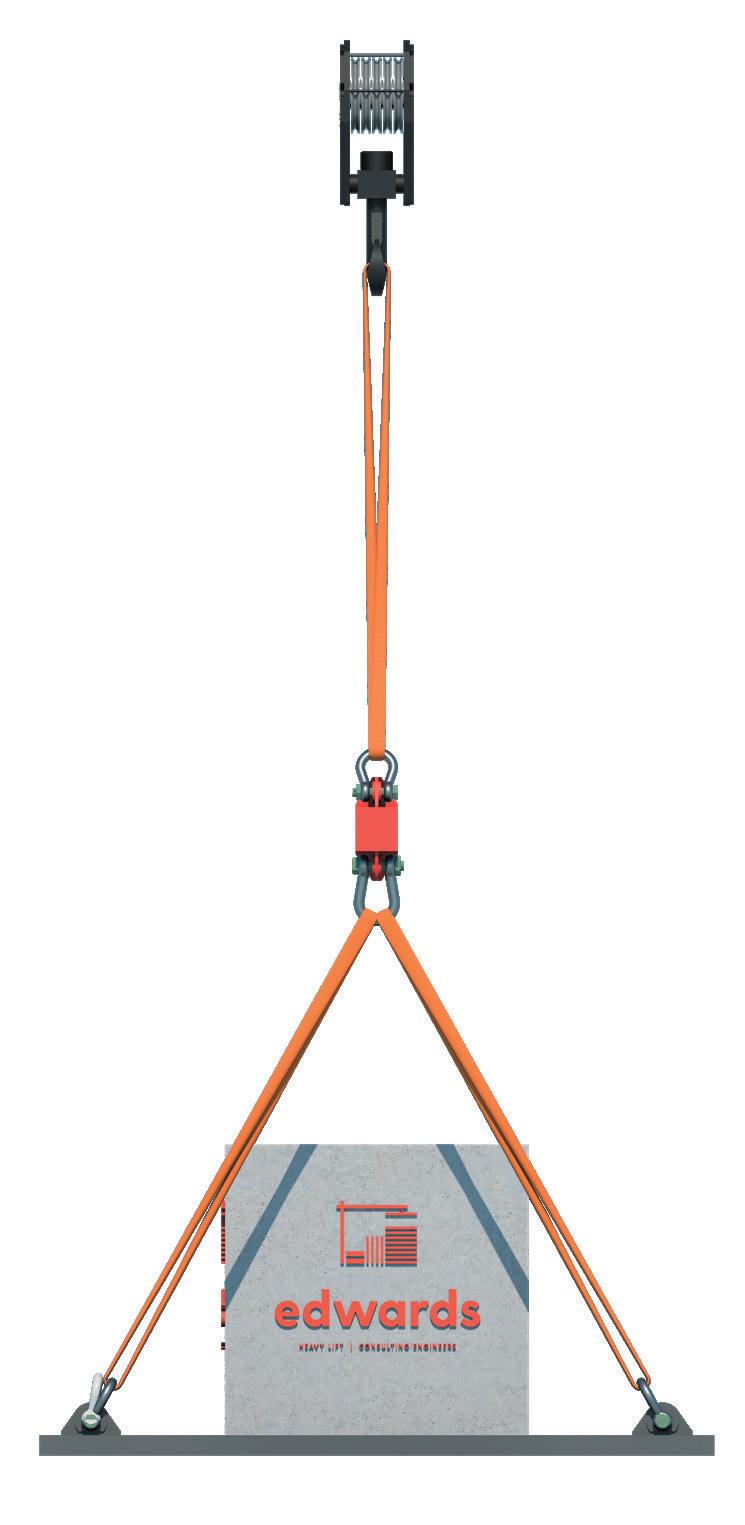
Figure 2 - Stable lift with lift points below the centre of gravity
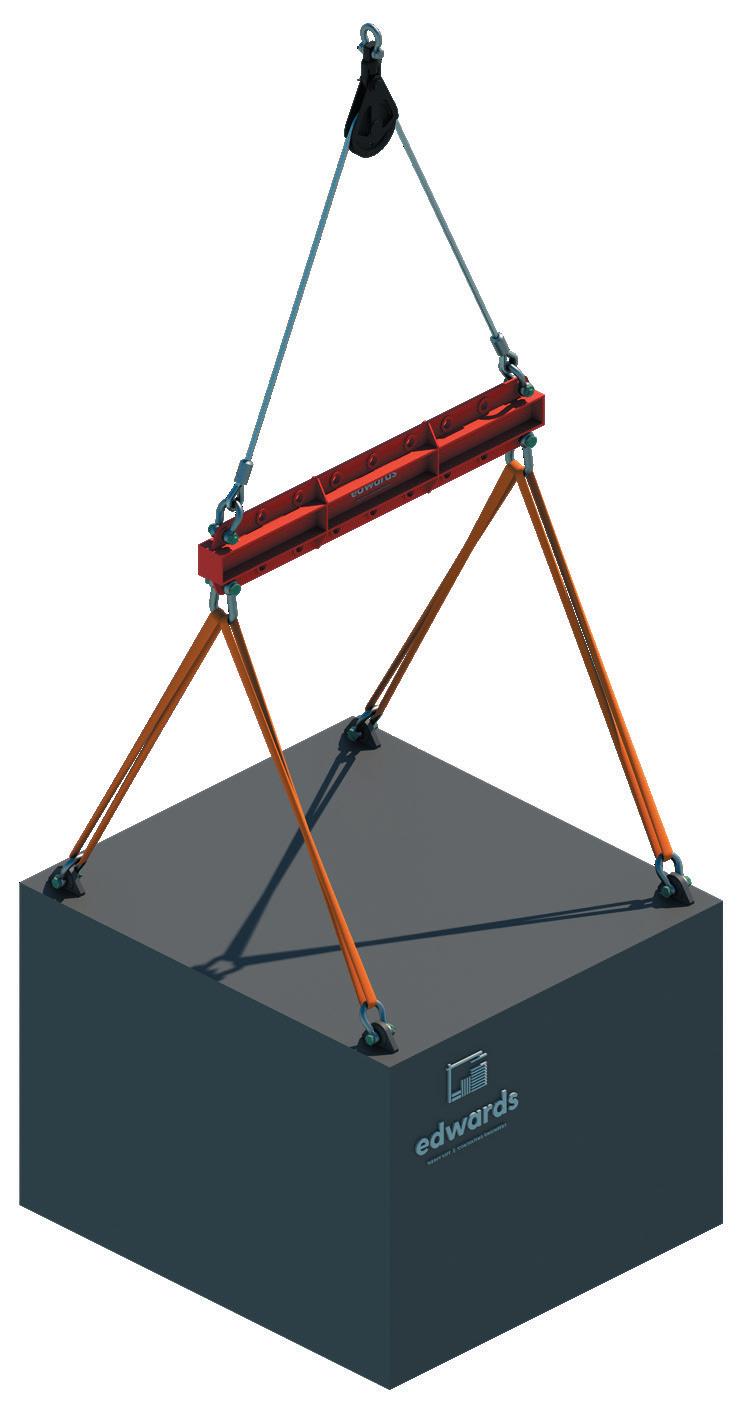
Sometimes a lifting device such as a lifting beam or spreader bar may be required depending on the geometry of the load. In the case of limited head height many lift designers and riggers will opt for the use of a lifting beam. However, caution must be taken when using lifting beams as the load may be unstable. This is similar to trying to hold a broom vertical by lifting it with your finger under the end of the handle when the broom is upside down. You may be able to maintain it being lifted vertical for a while but any movement and the broom will tip over.
Figure 3 and Figure 4 show common lifting beam and spreader bar arrangements where the lift points are sitting below the COG. The stability of both arrangements can be determined by the difference between the distance of the lifting points to the COG B and the distance between the lifting beam’s lower lift points and the central top lifting point A.
For example, as shown in Figure 3, the load will be stable in this plane if A > B.
Distance A is greater than Distance B Two fixed slings to the crane hook >> LOAD IS STABLE
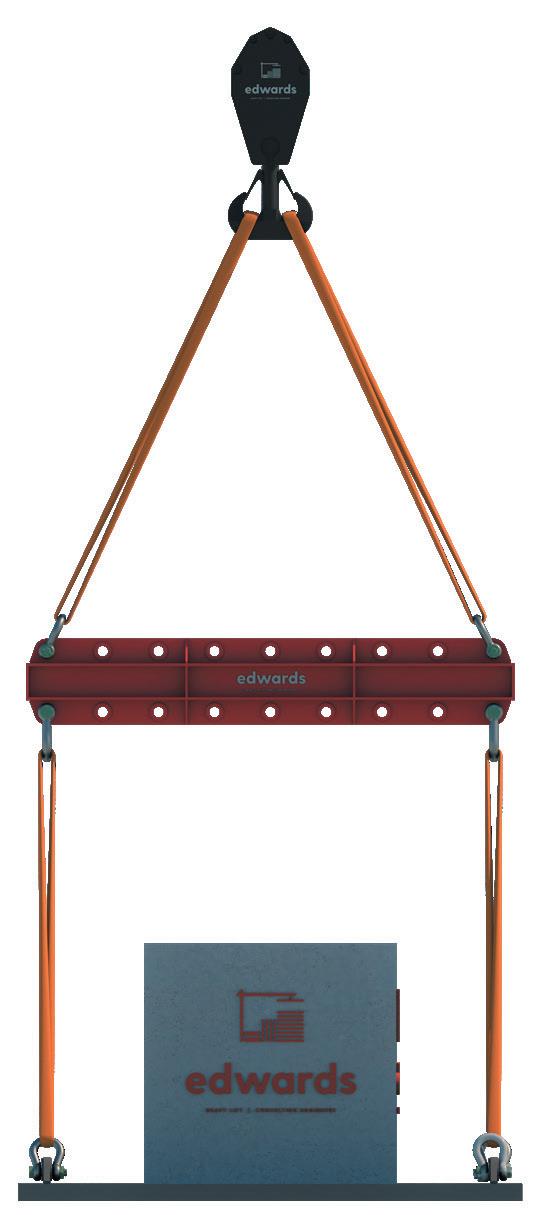
A
B
Figure 3 - Stable lift with lift points below the centre of gravity and two fixed length slings to crane hook
However, in Figure 4, the load is unstable when using as a lifting beam. If the COG Distance B is greater than Distance A the load may become unstable and tip over can occur.
A
Lift points below the COG >> LOAD IS UNSTABLE Distance A is less than Distance B
Figure 4 - Unstable lift with lift points below the centre of gravity
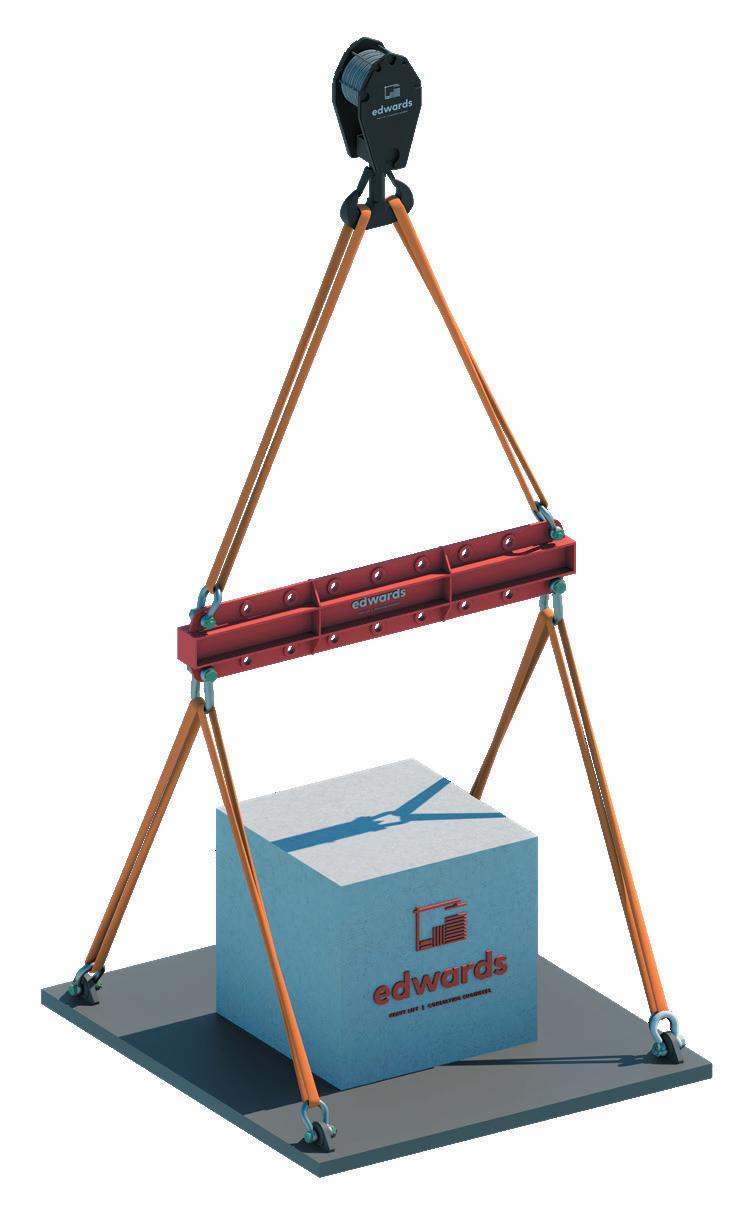
Another key point when using slings above a spreader is to ensure the slings cannot run over the upper support point. If the rigging can run above, as the COG shifts below the load becomes unstable. Essentially the rigging will keep running until the load tips over. Figure 5 shows a spreader arrangement with a snatch-block (sheave) and wire rope which is unstable. The other case that

B
will cause instability in this situation is if there is one sling placed over the hook so that it reconnects back down at the other side of the spreader as shown in Figure 6. Although friction may resist, there may be a point where friction is overcome and the load becomes unstable much like the snatch block arrangement.
Slings above the spreader can run >> LOAD IS UNSTABLE A sheave with wire ropes is being used above the spreader. The slings above the spreader can run and the load tip over.
Figure 5 - Unstable lift with lift points below the COG and rigging above the spreader that can run and tip the load.

If you look closely one sling has been used above the spreader and looped over the hook. The slings above the spreader can run and tip the load over.
Figure 6 - Unstable lift with lift points below the COG and rigging above the spreader that can run and tip the load.
In summary, when the lift points are above the COG the load will be stable. If the lift points are below the COG caution is required and the principles described in this article should be considered. Consideration to load stability along with careful planning will ultimately result in a safe and successful lift.
Stuart Edwards is a Heavy Lift Engineer with several years' experience in engineering, planning and executing large scale lifting and transport projects. With a number of innovation and lift of the year awards under their belt, Edwards Heavy Lift has extensive capability and experience across a variety of industries with their innovative designs and practical construction approach.