
Enterprise Quoting (EQ) User Reference Guide (Version 1.0) August 2023 www.waudena.com

Table of Contents Subject Page Supported Browsers…………………………………………………………………………... 4 Troubleshooting…………………………………………………………………………………… 4 How to Clear your Cache……………………………………………………………… 4 First Time Logging in(https://youtu.be/GOISWn9QTXw).………………………………… 4 How to Properly Sign Off……………………………………………………………… 8 Creating a Desktop Shortcut Google Chrome……………………………………………………………………………. 14 Windows………………………………………………………………………………………. 9 iPad………………………………………………………………………………………………. 14 Logging in to Configurator 19 Recovering Forgotten Password …………………………………………........... 21 Entering a Quote (https://youtu.be/raDAyYyQS7g) Creating a New Quote………………………………………………………………….. 26 Quick Quote vs Detailed Quote Line……………………………………………. 30 Information References………………………………………………………………… 31 Copying Quote/Order Lines………………………………………………………………. 34 Copying a Quote/Order………………………………………….…………………………… 35 Creating Multiple Versions of a Quote 37 Setting Sell Price (https://youtu.be/N3ohGKzyW2w) Pricing at Order Level…………………………………………………………………… 39 Pricing at Line Level……………………………………………………………………… 43 2
Table of Contents Subject Page Expired Quotes………………………………………………………………………………………. 44 View/Print/Share Quotes……………………………………………………………………. 46 Placing an Order (https://youtu.be/KAuR_zyA77w) Existing Quote………………………………………………………………………………. 51 No Existing Quote…………………………………………………………………………. 54 Why don’t I see the Place Order Option?................................. 54 Managing Quotes/Orders……………………………………………………………………. 55 Managing Quotes…………………………………………………………………………… 55 Managing Orders……………………………………………………………………………. 58 Creating a Customer Record (https://youtu.be/kF-jxzOxvf4) New Customer………………………………………………………………………………... 59 Customer Ship-To Addresses…………………………………………………………. 60 Creating Customer Default Terms…………………………………………………. 61 Creating Customer Contacts…………………………………………………………… 63 Projects and Jobs (https://youtu.be/kF-jxzOxvf4) Creating a Project……………………………………………………………………………. 64 Creating a Job…………………………………………………………………………………. 65 Moving Open Quotes to a Project/Job……………………………………………. 66 Creating a New Quote Within a Project/Job……………………………………. 67 XML File Downloading an XML………………………………………………………………………… 69 My Items (https://youtu.be/6PRVvgq4KKI)……………………………………………………………………. 71 Using Write-In Items (https://youtu.be/brXAjOHP1G8) …………………………………………….. 78 3
Supported Browsers
Chrome for Windows and Mac OS
Microsoft Edge for Windows
Microsoft Edge Chromium for Windows
Safari 15.6 for Mac OS Only
*Unsupported browsers may lead to issues with quotes and orders*
Trouble Shooting
How to Clear Cache
1. Click the Tools menu (three dotted lines in the upper-right corner).
2. Select History
3. Inside the History tab, there are three more dotes. Click on those and select Clear Browsing Data.
4. If on a Windows computer, close and re-open Chrome to save your changes. First Time Logging in
To see an example, click this link: https://youtu.be/GOISWn9QTXw
1. If you are having trouble getting signed into the new EQ Configurator, please follow the below steps.
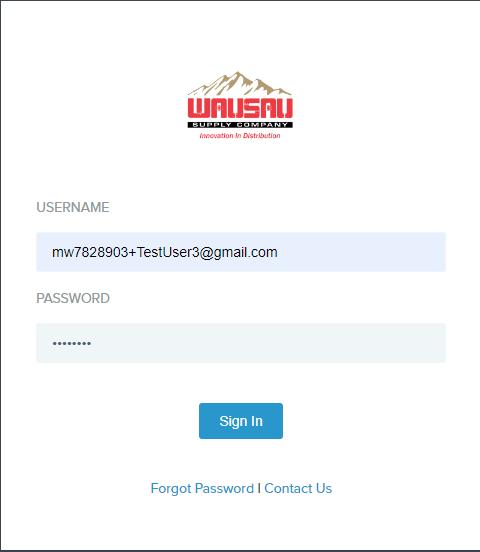
2. Go to the log in page for the Waudena Enterprise Quoting configurator:
https://mingle-portal.inforcloudsuite.com/wausau_prd/?identity=mingle
3. Select “Forgot Password”
4
4. Enter your email address.
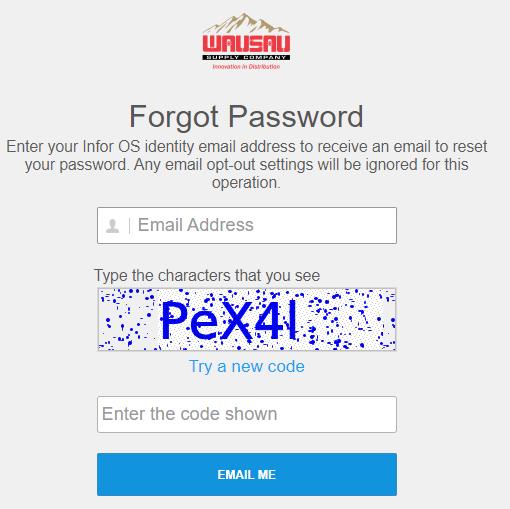
5. You will receive an e-mail shortly. Please check your junk or spam folders. Follow the steps provided in the e-mail to complete the recovery of your account.
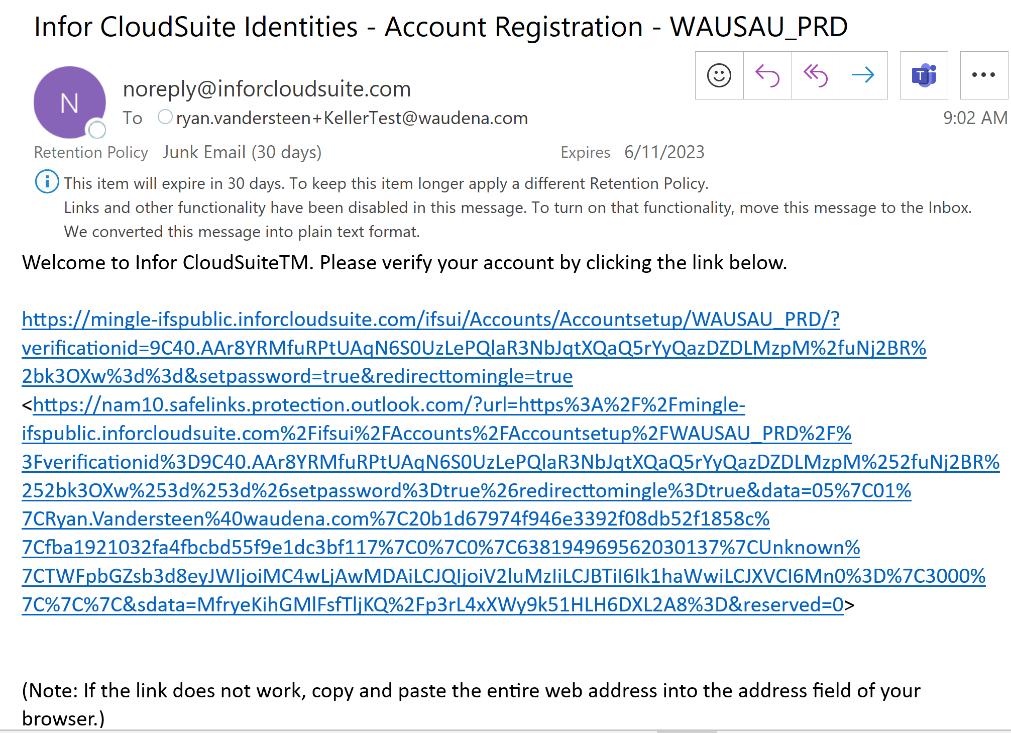
6. The email will like similar to the below:
5
7. Click the link and follow the instructions. If you click the link and it does not redirect you to a new screen, try copying the link and pasting it into a new web browser. (If you do not receive an email within 5 minutes, please reach out to your TM.)
8. Once you click the link, it will redirect you to a screen that looks like the below. This screen is where you will enter your job title and create a password.
6
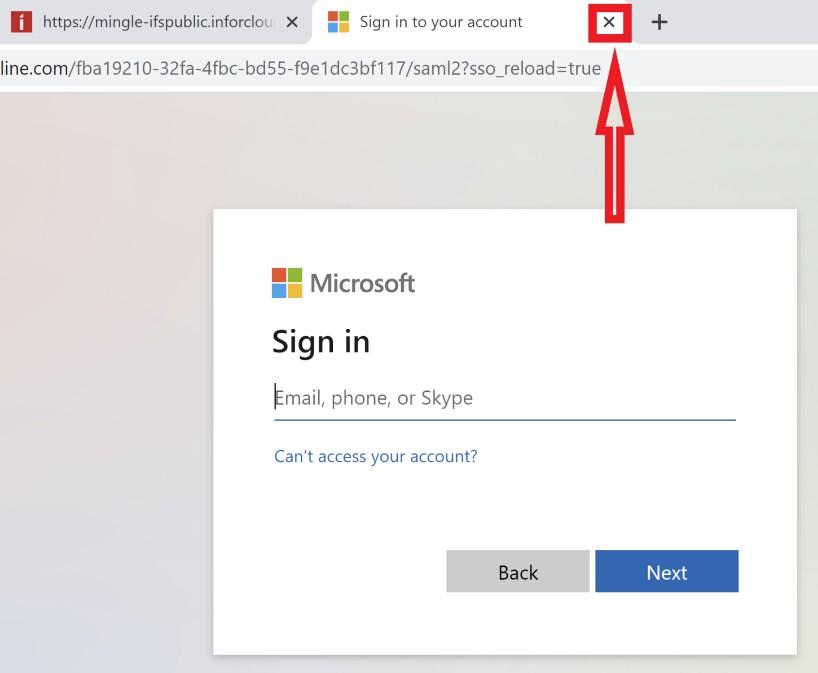
9. After hitting “Create Account,” you might be prompted to sign into your Microsoft Account. You can ignore this and exit the tab.
10. You will receive a confirmation email from noreply@inforcloudsuite.com. This should come to your regular inbox, but please also check your junk folder.

7
11. If you click on the link in the confirmation email, this will redirect you back to the login page.

12. You will then enter your username, which is your email address, then enter the password that you just created and click sign in.
How to Properly Sign Off
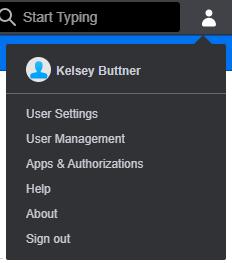
1. Click the person icon at the top right of the page.
2. Then click “Sign Out.”
8
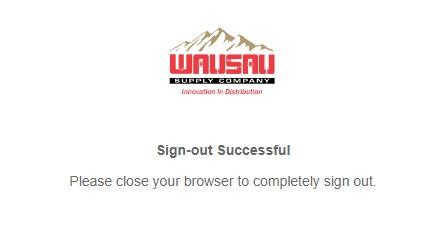
3. Signing out is a 2-step process. PLEASE, let the system complete the entire process before closing your browser. If this is not completed, it could cause some complications.
4. Once you see, “Sign-out Successful” you are able to close your browser.
If you have any questions, please reach out to your TM.
Creating Desktop Shortcut for Configurator
Objective: Create a desktop shortcut for Product Configurator to increase visibility and ease of access.
Google Chrome (see Windows starting on page 13, iPad on page 18)
1. Create a folder on the user’s desktop and label it “Icons”.
2. Copy the attached Enterprise Quoting icon file to the Icon folder.
9
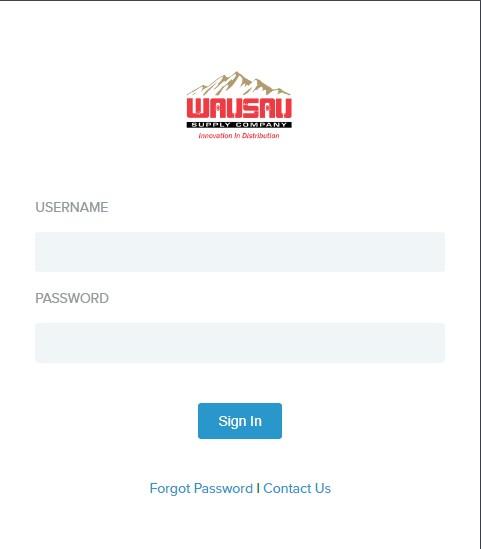
3. Open Google Chrome and enter https://mingle-portal.inforcloudsuite.com/wausau_prd/?identity=mingle into the address bar to go to the sign in page.
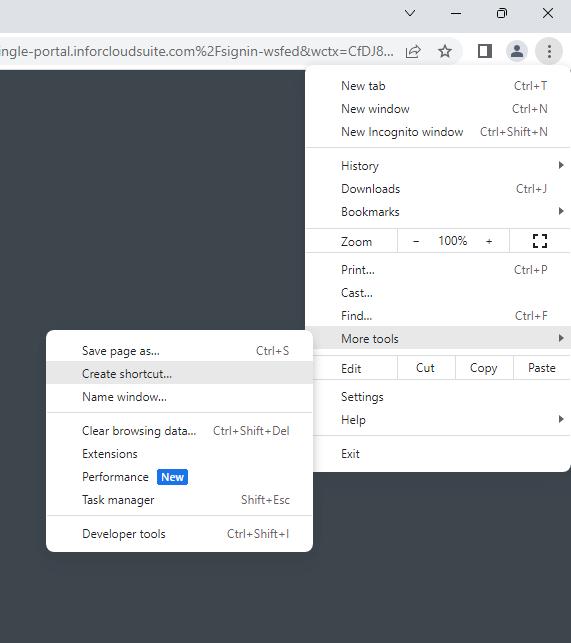
4. In the upper right-hand corner of Chrome, click on the vertical ellipsis, select “More tools” and “Create shortcut…”.
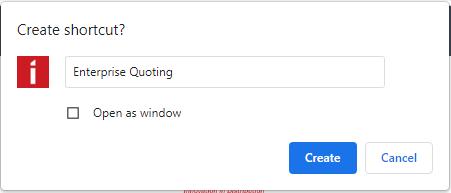
5. The “Create shortcut” window will open. Change the name from the default to Enterprise Quoting, check “Open as window” and select “Create”.
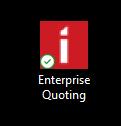
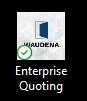
6. Close Chrome and you will now have an icon on the desktop that will look like this:
7. Right click on the icon and select “Properties”.
11
8. The window below will pop up. Select “Change Icon…”.

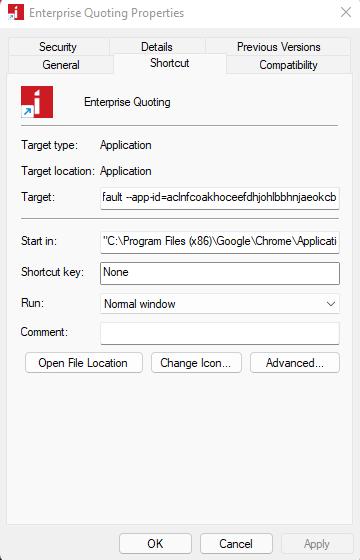
9. Select “Browse” in the window that pops up.
10. Locate the folder you labelled “Icons” and select the Waudena icon. Double click on it or highlight it and select “Open” to choose the icon.

11. Click “OK” in the icon window and again click “OK” in the Properties window.
12. You’re done. Your desktop shortcut should now appear as below. The user can now double click that icon to launch directly into the login screen.
Creating Desktop Shortcut for Configurator 13
Objective: Create a desktop shortcut for Product Configurator to increase visibility and ease of access.
Windows
Note: Google Chrome is the preferred browser and will provide the best user experience.
1. Create a folder on the user’s desktop and label it “Icons”.
2. Copy the attached Waudena Configurator icon file to the Icon folder.
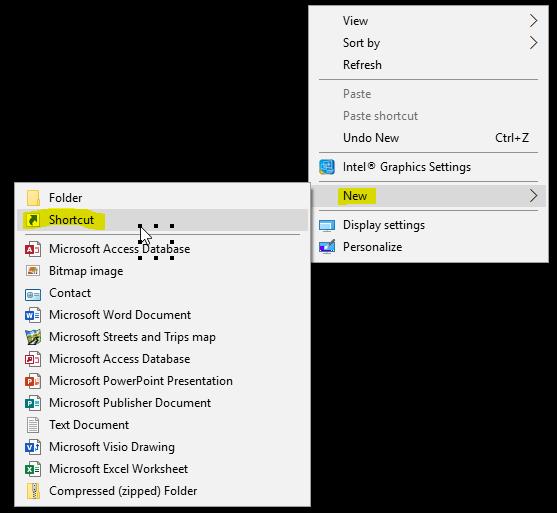
3. Right click anywhere on the desktop and select “New” and “Shortcut”.
14
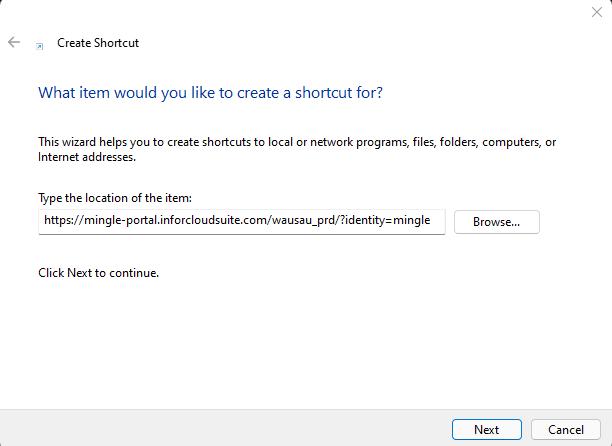
4. The shortcut window will open so you can type the destination of the shortcut. Enter https://mingle-portal.inforcloudsuite.com/wausau_prd/?identity=mingle as the destination and select “Next”.
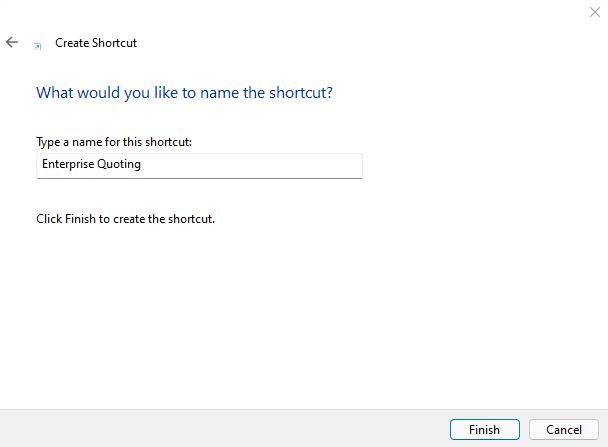
5. In the next window, enter “Waudena Configurator” as the name for the shortcut and select “Finish”.
15
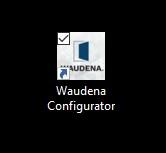
6. You will now have an icon on your desktop that will look like this:

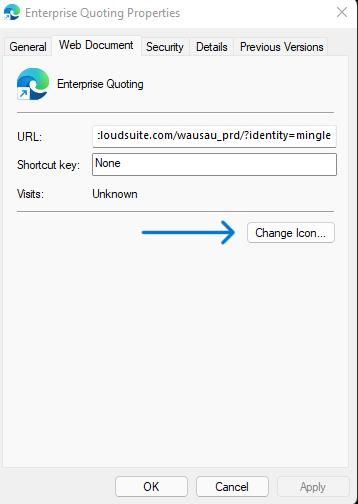
7. Right click on the icon and select “Properties”.
8. The window below will pop up. Select “Change Icon…”.
16
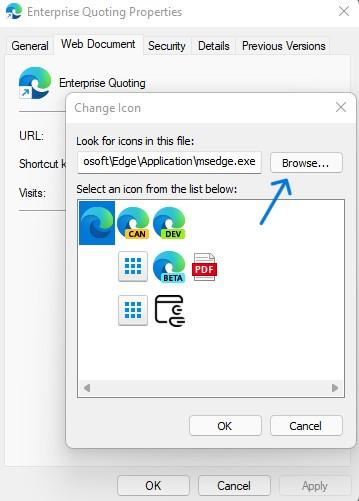
9. Select “Browse” in the window that pops up.
10. Locate the folder you labelled “Icons” and select the Waudena icon. Double click on it or highlight it and select “Open” to choose the icon.
17
11. Click “OK” in the icon window and again click “OK” in the Properties window.
12. You’re done. Your desktop shortcut should now appear as below. The user can now double click that icon to launch directly into the login screen.
Creating Desktop Shortcut for Configurator
Objective: Create a desktop shortcut for Product Configurator to increase visibility and ease of access.
iPad
Notes: Google Chrome should be added to the iPad before creating the shortcut. Instructions provided using iOS 14.6, other iPad versions may work differently. Update is recommended before adding the shortcut.
1. Send the Waudena icon file, in .jpg format, to the user’s iPad via e-mail or Airdrop and save it to the photo album.
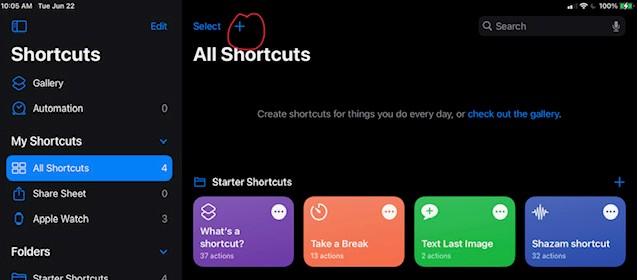
2. Open the “Shortcuts” app on the iPad.

3. Select the “+” to create a new shortcut.

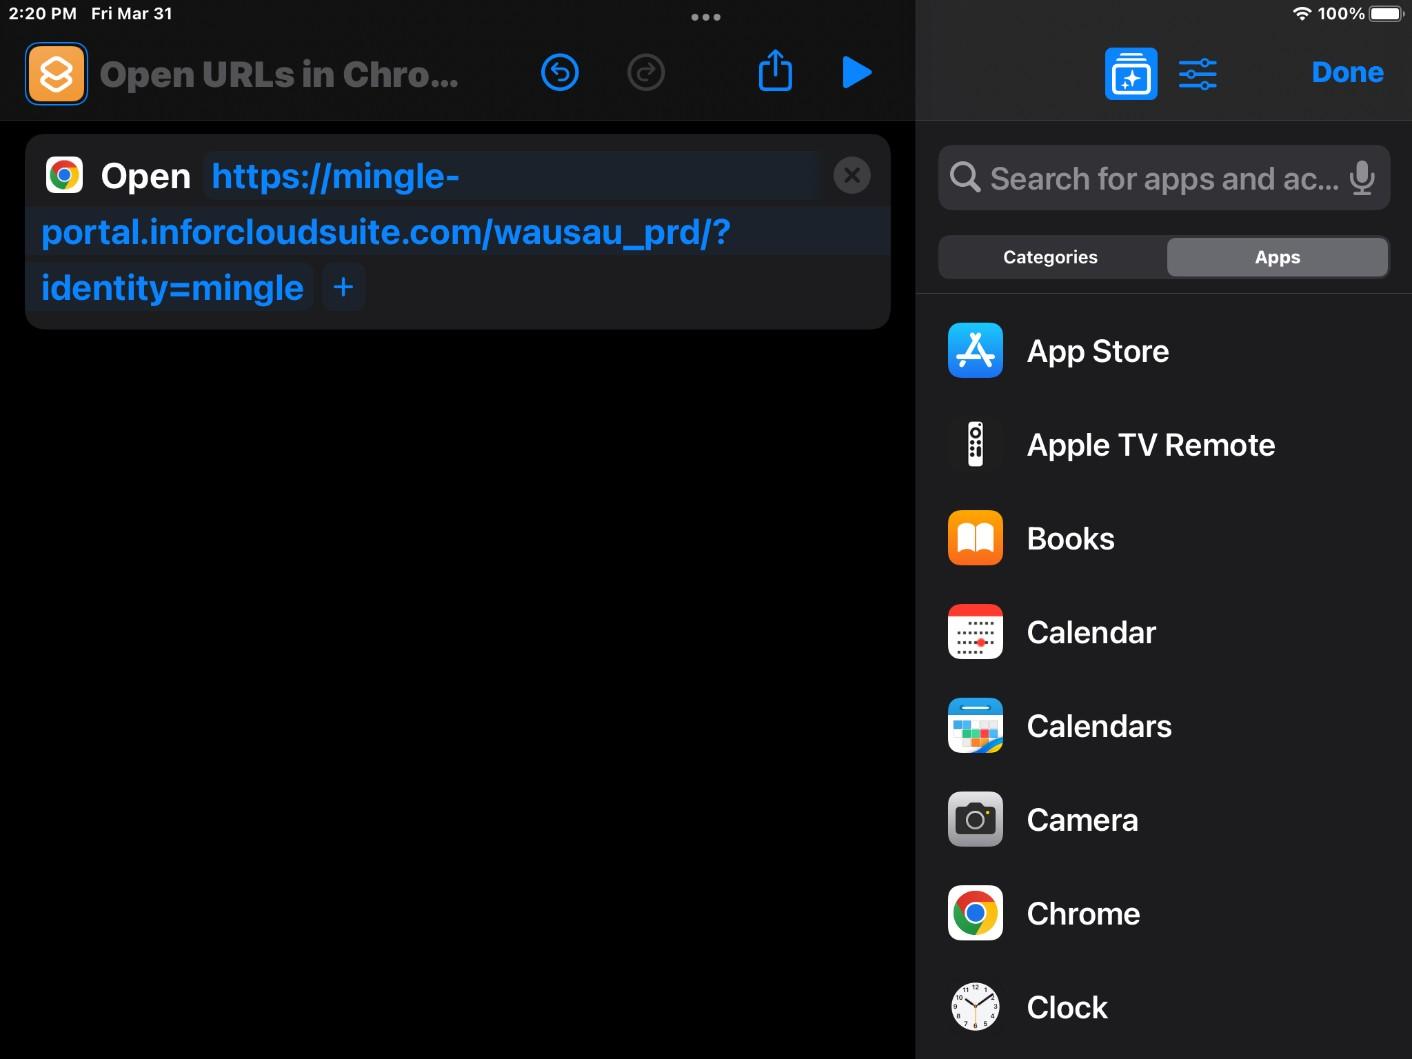
4. In the next window, type Chrome into the search field and select “Open URLs in Chrome”.
19
5. When prompted, type https://mingle-portal.inforcloudsuite.com/wausau_prd/? identity=mingle into the URL field and hit “Done”.
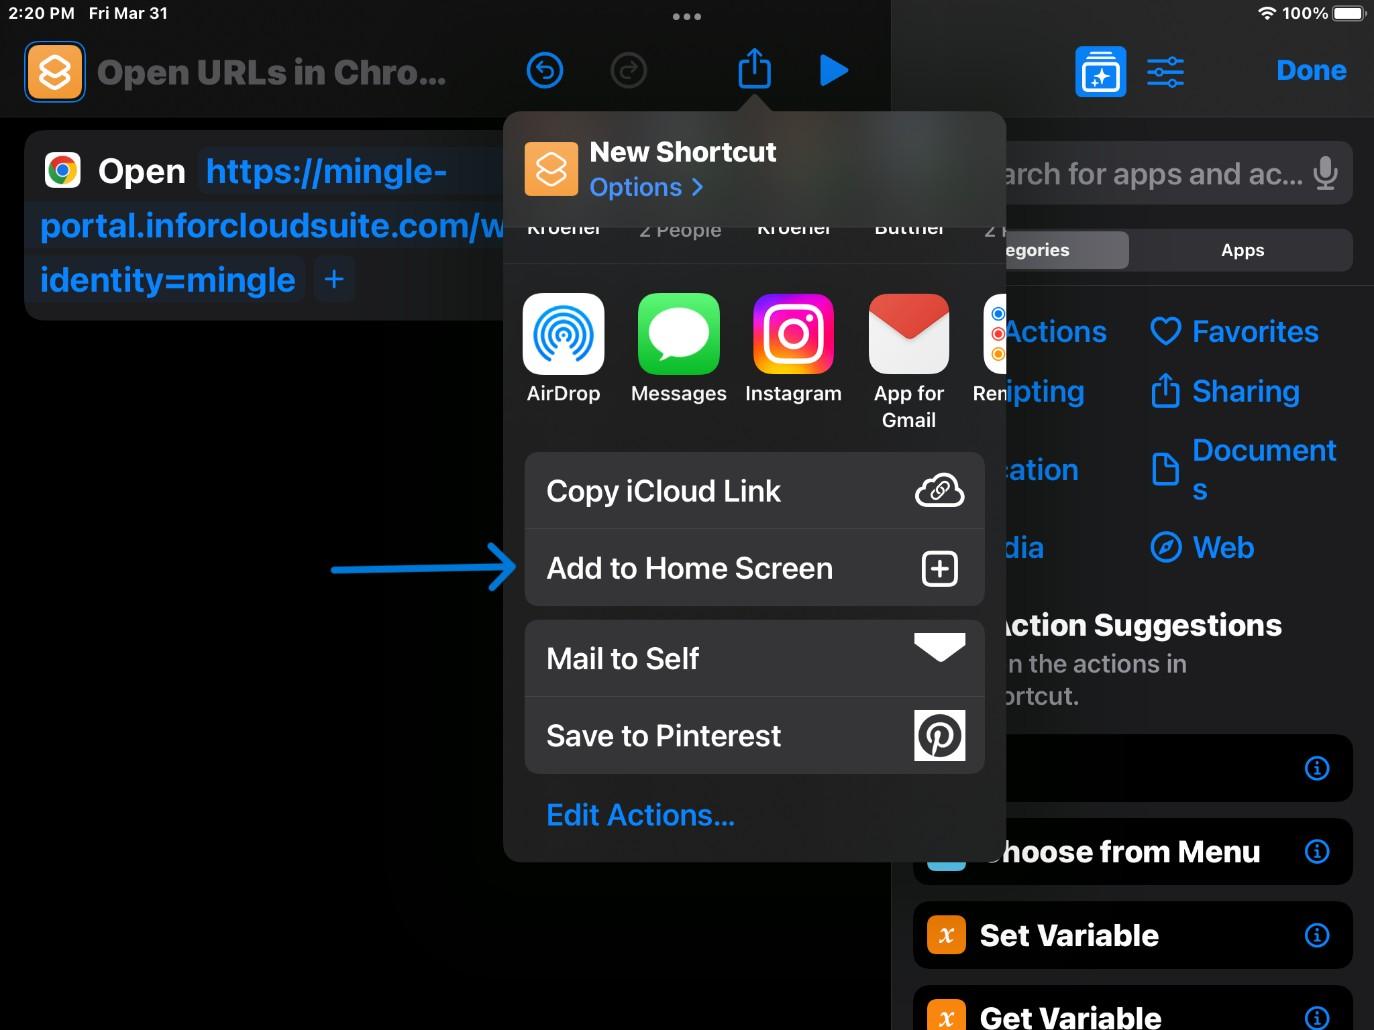
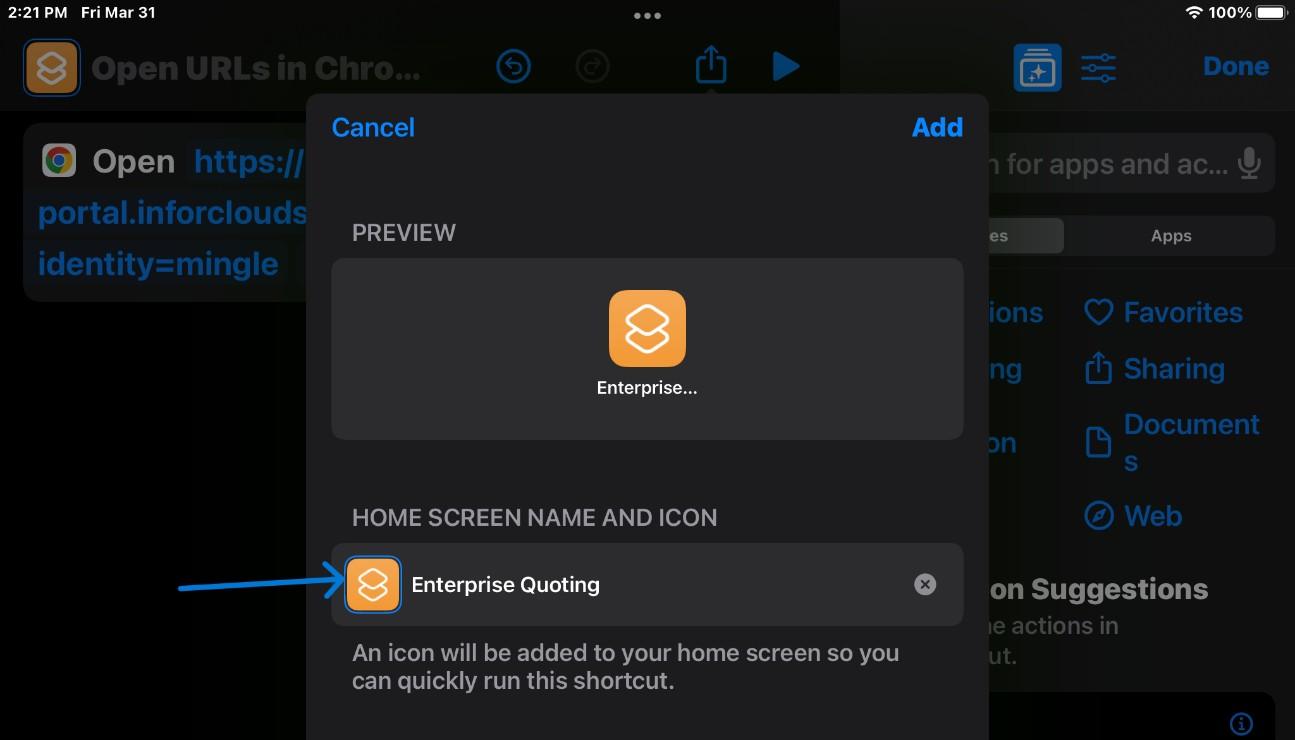
7. When prompted, select the area that says, “New Shortcut” and change it to Enterprise Quoting or EQ and select “Return”.

21
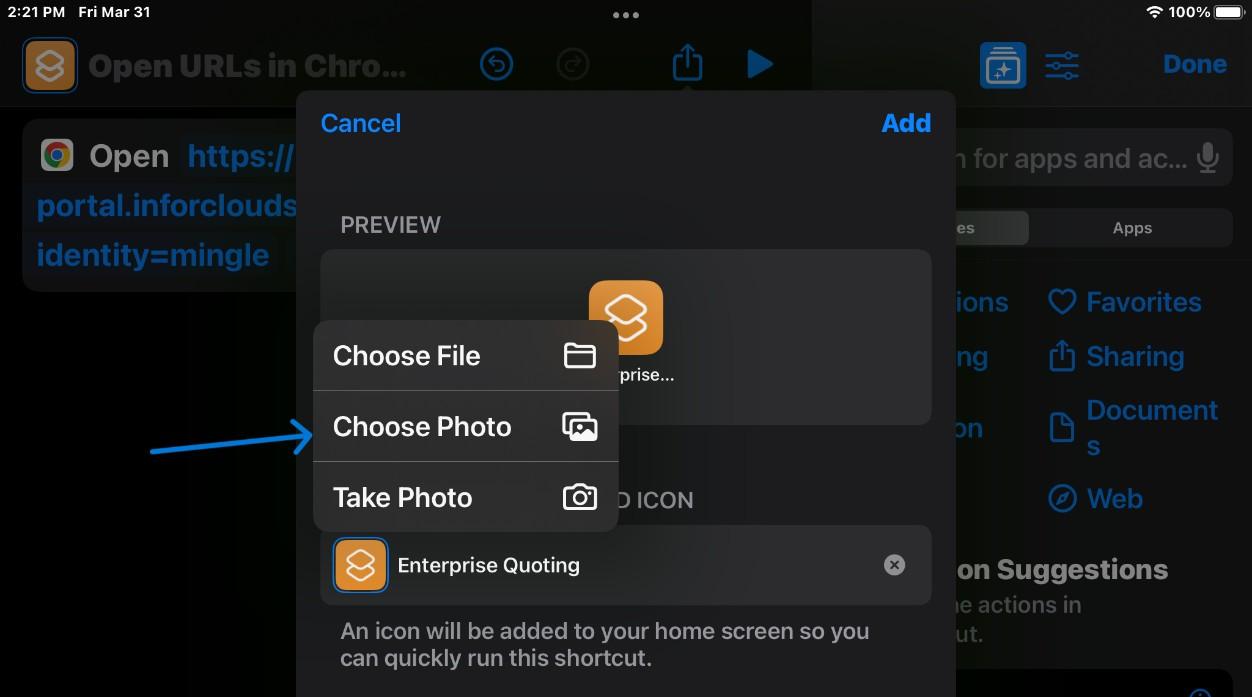
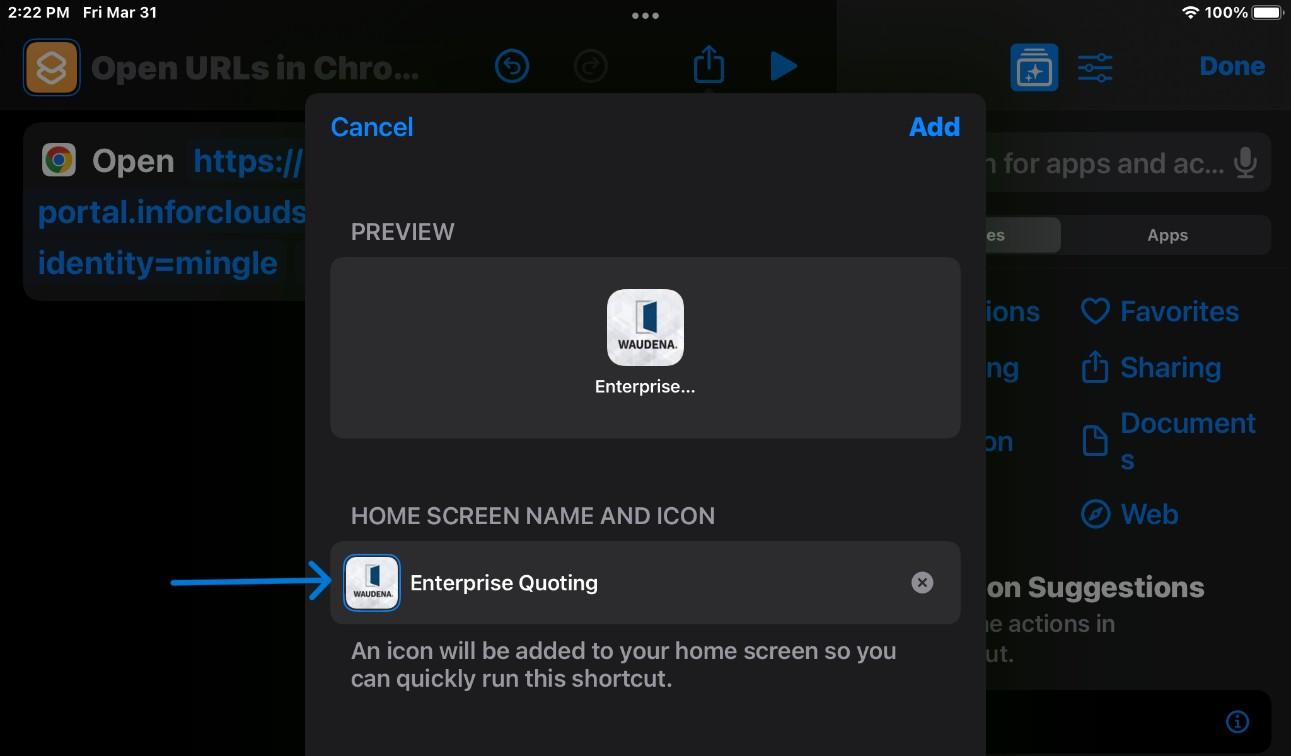 9. Click “Choose Photo” and select the Waudena image, that was placed on the device in step 1, from your photo gallery.
22
10. After confirming the name and image, select “Add” to place the shortcut on your desktop.
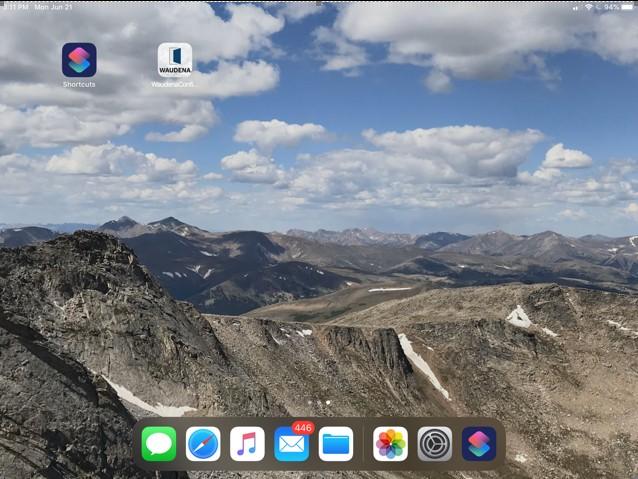
11. You should now have a Waudena Configurator shortcut on your desktop. Click on the icon for one-step access directly to the Configurator log in page.
Logging in to Configurator
Via waudena.com
Note: For best performance, Google Chrome is the recommended web browser.
1. Navigate to www.waudena.com.
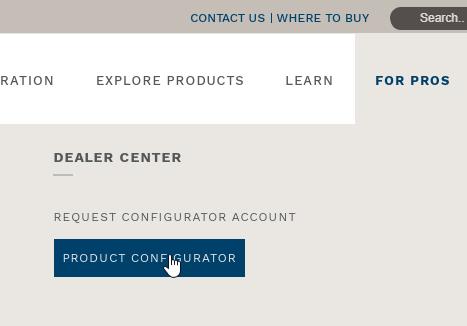
2. Hover over “For Pros” and select “Product Configurator”.
3. Enter Username and Password and select blue Sign In button.
Logging in to Configurator
Direct Access
Note: For best performance, Google Chrome is the recommended web browser.
1. Select the desktop shortcut for Waudena Configurator or open your browser and navigate to https://mingle-portal.inforcloudsuite.com/wausau_prd/?identity=mingle.
24
2. Enter Username and Password and select the blue Sign In button.
Recovering Forgotten Password
Objective: Replacing a password with a new password if the original is lost or forgotten.
1. On the log in home page, select the link “Forgot Password?”
25
2. Enter your Email, enter the code provided and select “Reset Password”.
3. You will receive an e-mail shortly. Follow the steps provided in the e-mail to complete the recovery of your account.
Entering a Quote
Objective: Enter a new quote for a Waudena item.

Notes: This example will include steps that, although not required, are recommended for the best experience.
New Quote
1. From the Quotes tab, on the far right of the screen, select “New Quote”.
26
2. Select a customer (optional). All information for the customer, including pricing records, will be applied to the quote once chosen (see Creating a Customer Record for more details).
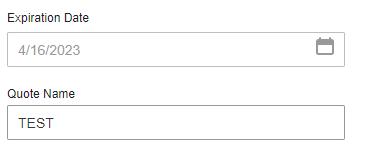
3. Apply Quote Name (optional) located under “Edit Header Details.” Tip: Using a job name will make managing quotes easier.
4. The job name will appear next to the quote number when in the quote.

Building the Quote
To see an example, click this link: https://youtu.be/aaBRmixwmYw
27
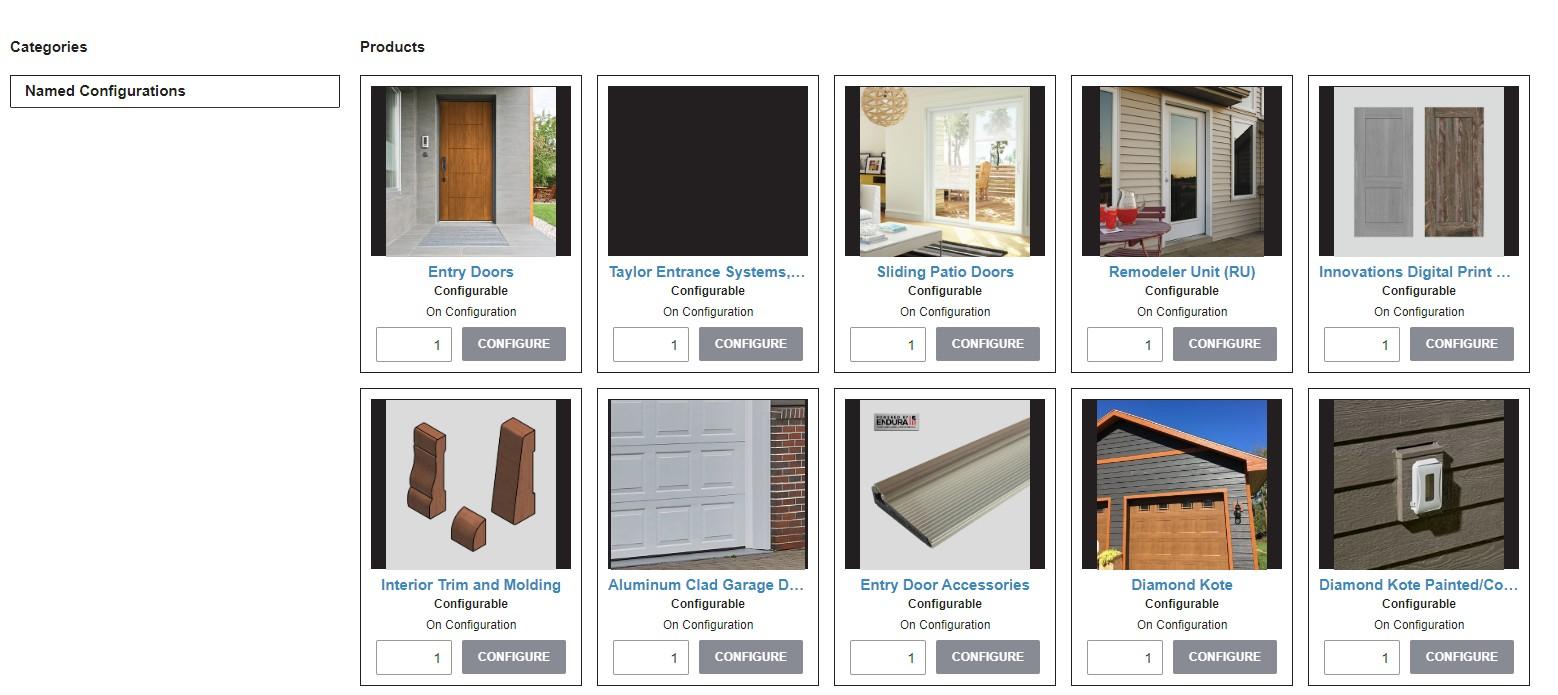
1. Select the item to be entered. (Waudena will be used in this example).
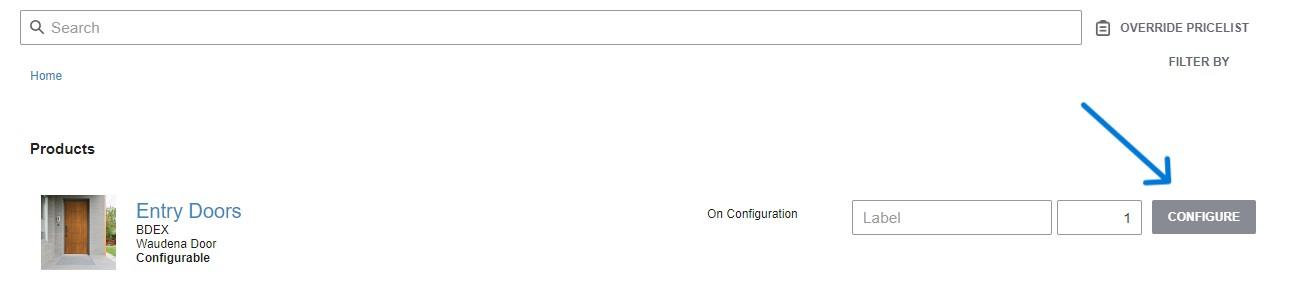
2. Apply Label for the line item (optional). Expand the line and scroll below the description, that is where a box specifically for a line label will be located.
NOTE: The label will appear on all paperwork and on the product label when shipped. Using a label can make it easier to identify where a product belongs on the job site.
3. Set quantity required. The quantity is shown and set on the line. The system will default to a quantity of 1.
4. Select “Configure” to begin selecting the details of your product.
28
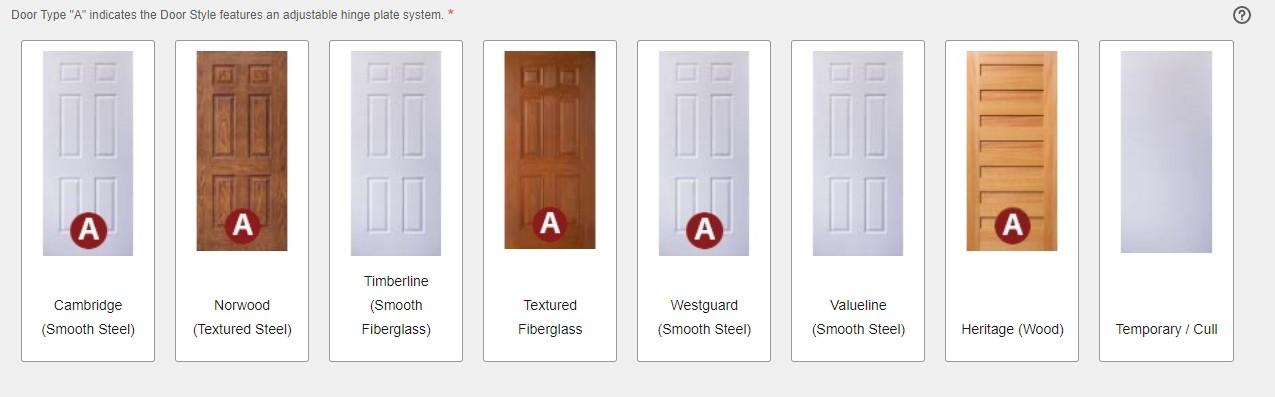
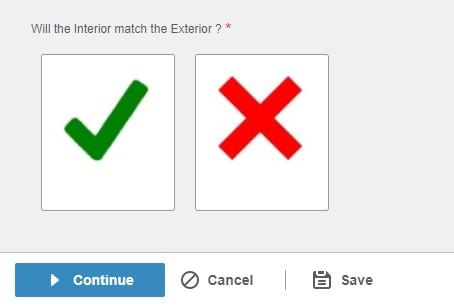
5. Each configuration includes a series of questions. The questions and available answers are filtered based on previous answers given, meaning that you should not receive options that are not available for your Configuration. Answer each question by selecting the answer images located immediately below the question.
6. After completing all questions on each tab, you will be prompted to select “Continue” to confirm the answers on the tab and move to the next.
29
7. As you make your selections, an itemized list will appear on your right. At the top you can see there is an image and detail tab. The details tab will show all the prices broken down. All prices will be shown as list price.
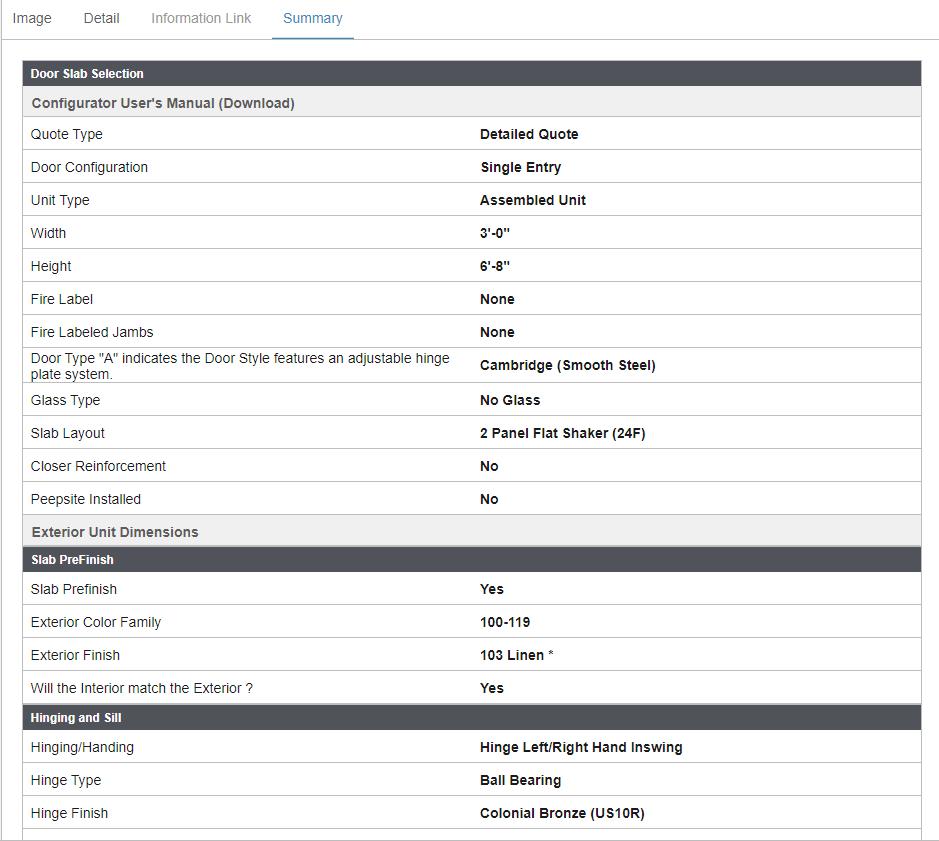
8. Upon completing all the questions for a complete configuration, you will be prompted to select “finish” to confirm all selections and complete the line.
Completing the Quote
Repeat previous steps for additional items needed on the quote.
Once all items have been entered, complete the quote by simply exiting the Configurator or navigating to another page. You do not need to save. See additional sections for pricing, printing, and e-mail options.
Quick Quote vs. Detailed Quote
30
When you begin a quote for a Waudena Entrance System, you will be offered the option for a Quick Quote or a Detailed Quote. But what are the differences?
Quick Quote
- Ideal for getting a price quickly in the following scenarios:
Customer just wants a rough idea of the price of a unit.
Working to narrow down many different doors to one or two options.
The specifications of the door are very basic.
- Fewer Questions
Doesn’t ask questions that will not impact the price.
Doesn’t include more complex units, keeping it simple and fast.
Cannot be placed as an order, does not include enough information.
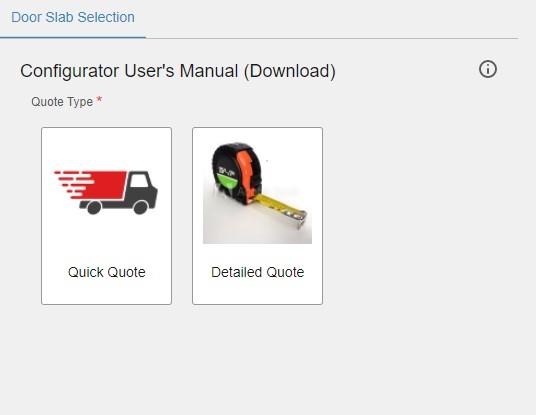
Detailed Quote
- Includes every detail to ensure complete accuracy within the quote.
- Offers additional items that may otherwise be missed when quoting.
- Includes all types of units, simple to complex.
- Includes all details required to place as an order.
31
Information References
There are several methods employed, within a Configuration, to share information about the options offered or selections that have been made.
Infolink
Infolinks are identified with the italicized “i” next to the selection.
Once you select the Infolink, additional information about the selection will show to the right of your Configuration.

32
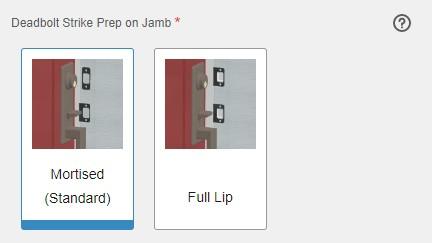
Tooltip
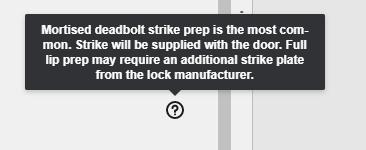
A Tooltip is identified by the question mark to the right of the title.

When you see a Tooltip, hover over the question mark to see additional information about the selection.
33
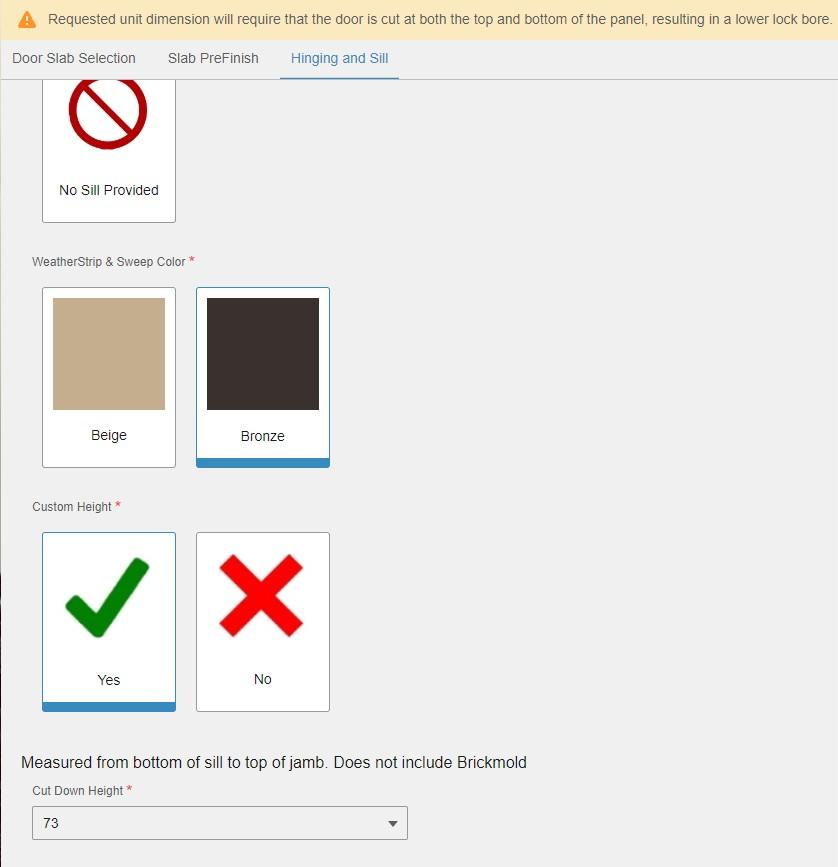
Information Message
An information message may be used to convey additional details about a selection that has been made. They will automatically “pop-up” at the top of the screen to share any details that you should be aware of when making that selection.
Copying Lines or Quotes
Objective: Save time in quoting by copying lines, copying quotes, or creating multiple versions of a quote.
Copying Quote/Order Lines
When entering quotes or orders with multiple lines, it is possible to copy a line and make minor changes when the specifications are consistent from line to line.
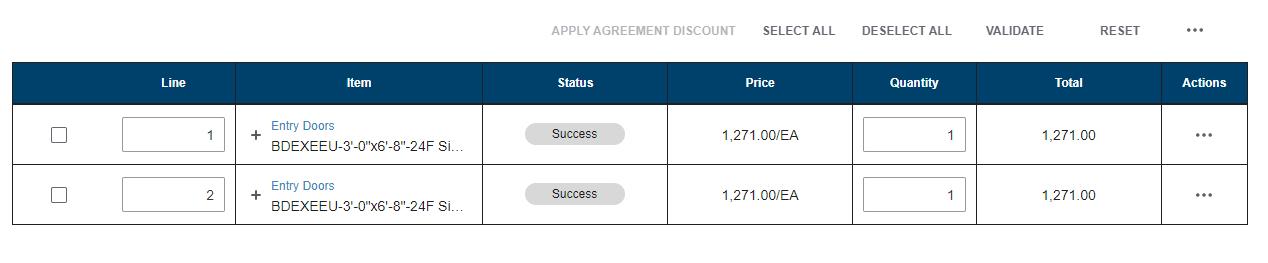
1. Enter the first line of the quote.
34
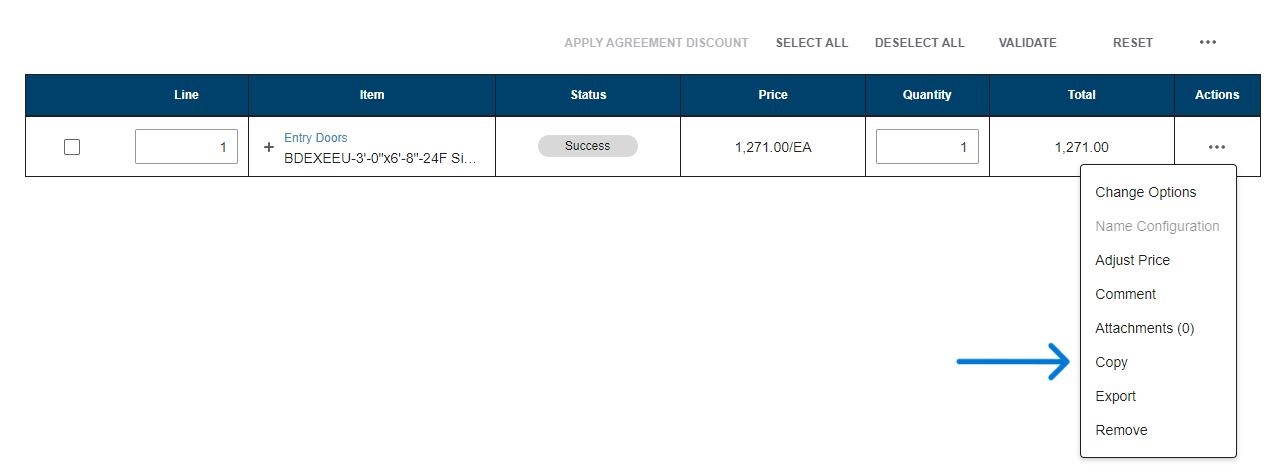
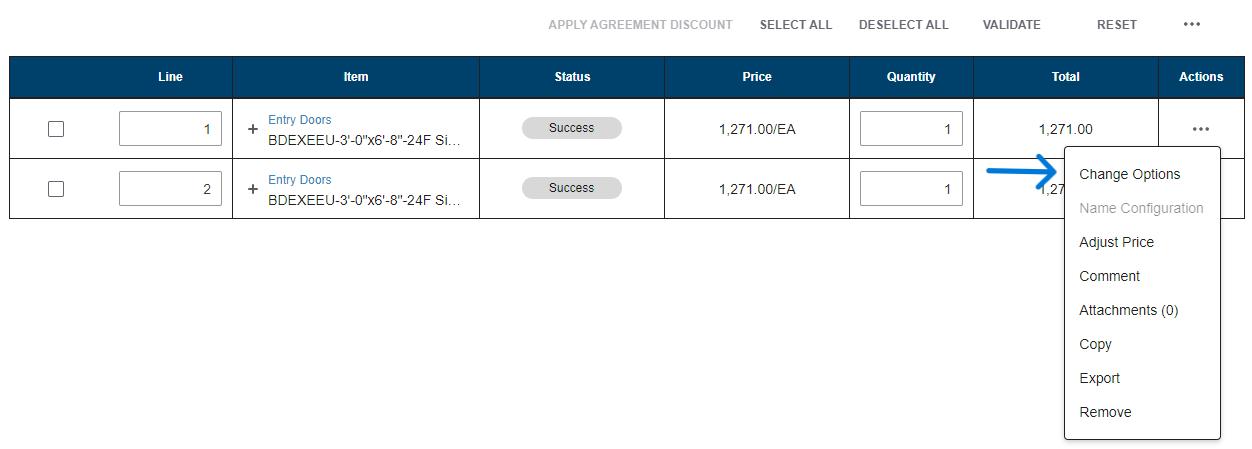
2. To copy the first line to the second, the three dots under the action tab will open a dropdown where you will select “Copy”.
3. You will now have identical lines. You can make changes to the new line, including quantity or label. If line 2 requires changes in the details from the previous line, select “Change Options”.
4. Continue to copy as many times as needed or enter new lines if the specifications are not similar, until the quote is complete.
Copying a Quote/Order
You can copy an existing quote or order to a new quote. This may be useful if you want to build another quote with the same or similar details as previous quote or order, or if you want to recreate the quote but with slightly different options.
1. Enter the first quote as desired or locate the existing quote/order that you want to copy.
35
2. Click the three dots to the right of the desired quote. A drop down will appear. Select “Copy” from the ribbon.
3. The Configurator will automatically create and open an identical quote and assign it a new quote number. The new number will be unique and does not correlate to the original quote.


36
4. Make necessary changes to the details of the quote including pricing, customer or quote name as needed.
5. Make necessary changes to each line by clicking the three dots to the right of the line and select “Change Options”.
6. You now have 2 quotes that are similar but with changes as needed.
Creating Multiple Versions of a Quote
Another way to create multiple quotes with similar specifications is to create additional versions. The result is very similar to copying a quote but will result in quote numbers that correlate. This works well for offering multiple options for the same project.
1. Enter the first quote as desired or locate and open the existing quote for which you’d like to create a new version.
37
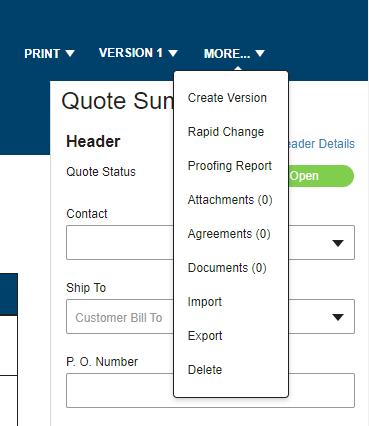
2. To the far right of the screen, click on the “More” down arrow and select “Create Version”.
3. The Configurator will take you in to the newly created version of the quote.


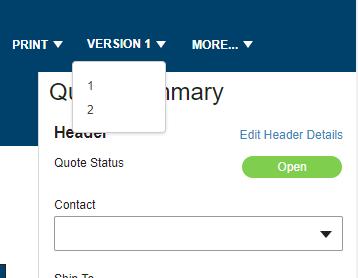
4. The second version will retain the same quote number but will have a -2 suffix. You can create as many different versions as needed.

Examples of quote numbers with multiple versions.
38
5. Make all necessary changes the same as you would when copying a quote (see steps 4 and 5 in the previous section “Copying a Quote/Order”).
6. Toggle between versions by selecting the drop down in the version box on the right of the screen.
7. When ready to order, select the version of the quote that you wish to order and follow the “Placing an Order” procedure.
Setting Sell Price
Configurator produces a list price and will calculate your cost. There are two methods available to set margins or markups, additional discounts, tax, etc on the quote.
IMPORTANT NOTE: If you have not applied any default pricing or set pricing at the order or line level, when you print the quote at Selling Price, it will show your cost. If you’re providing a printed quote to your customer, you should ALWAYS set pricing through one of the methods offered or print the quote at MSRP/List Price.
Pricing at the Order Level
Adjusting price at the order level willl affect all lines on the quote equally and allow changes to the bottom line details.
To see an example, click this link: https://youtu.be/Cea4iiGva1o
39
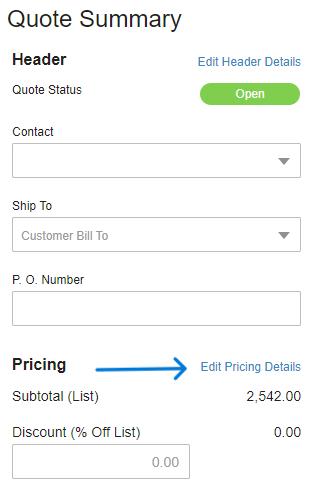
1. In the main screen of the quote select “Edit Pricing Details”.
2. If you’ve set Default Terms for your account or if you applied a Customer Record with Default Terms, they will automatically populate the pricing summary. If there are no default price records being used, the summary will only calculate cost.
40
Default Pricing In Use:
No Default Pricing In Use:

41
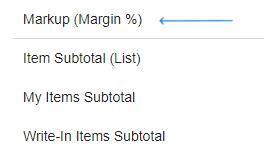
3. You can decide how you want to set your pricing, whether it be margin, markup, etc. The method you use is determined by your personal preference.
4. After selecting the preferred method, the Pricing Summary will adjust the options to reflect your preference.

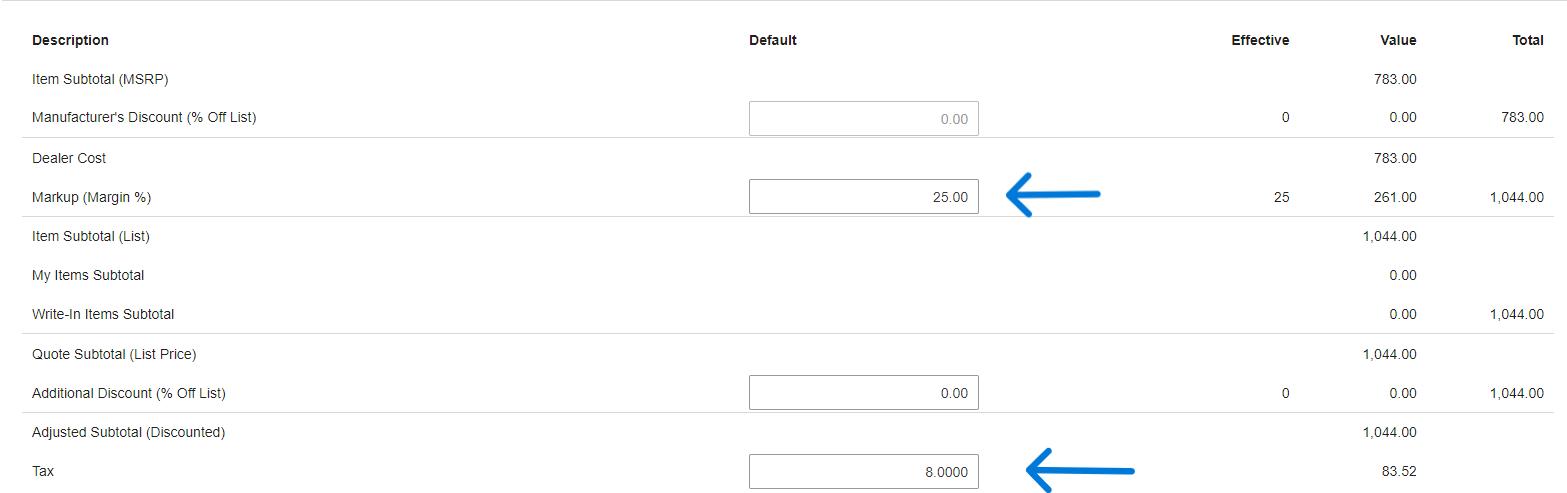
5. You can now populate all fields that you want to employ in your quote. Most common items are margin/markup and any appliable tax rate.
42
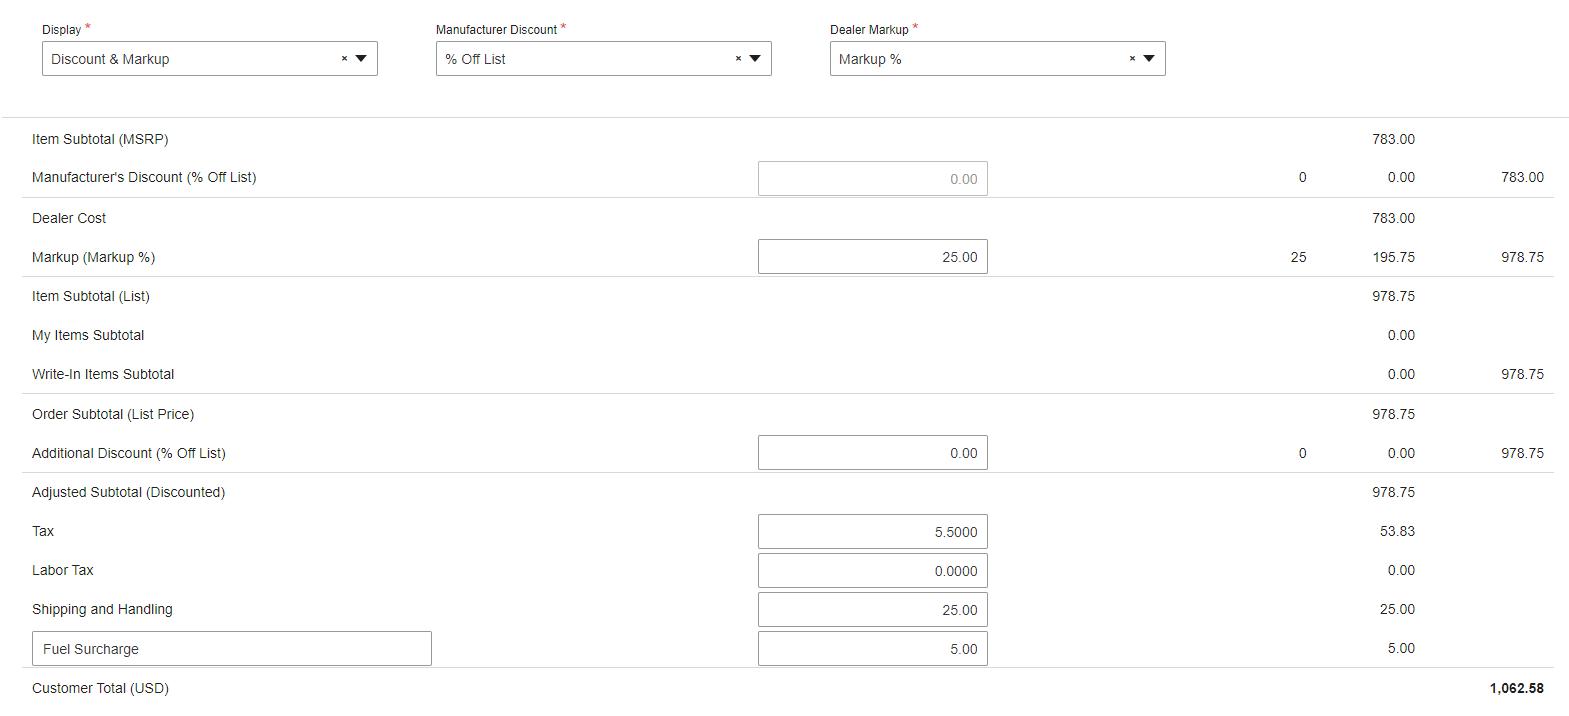
6. Additional items that you may wish to use include Shipping and Handling or Other Charges. These items are optional and subject to personal preference.
7. As you make your changes, you will see the complete breakdown calculation on the right side of the screen. In this case, the line will reflect a price of $978.75. The bottom of the quote will detail the $53.83 for tax, $25.00 for Shipping and Handling and the $5.00 Fuel Surcharge for a bottom line total of $1,062.58.
8. See the section on Printing Quotes for options for how pricing items will appear on the quote.

43
Pricing at the Line Level
Adjusting price at the line level will affect only the line that you’re changing and does not include bottom line details. Line level pricing will override the order level pricing based on the print function selected.
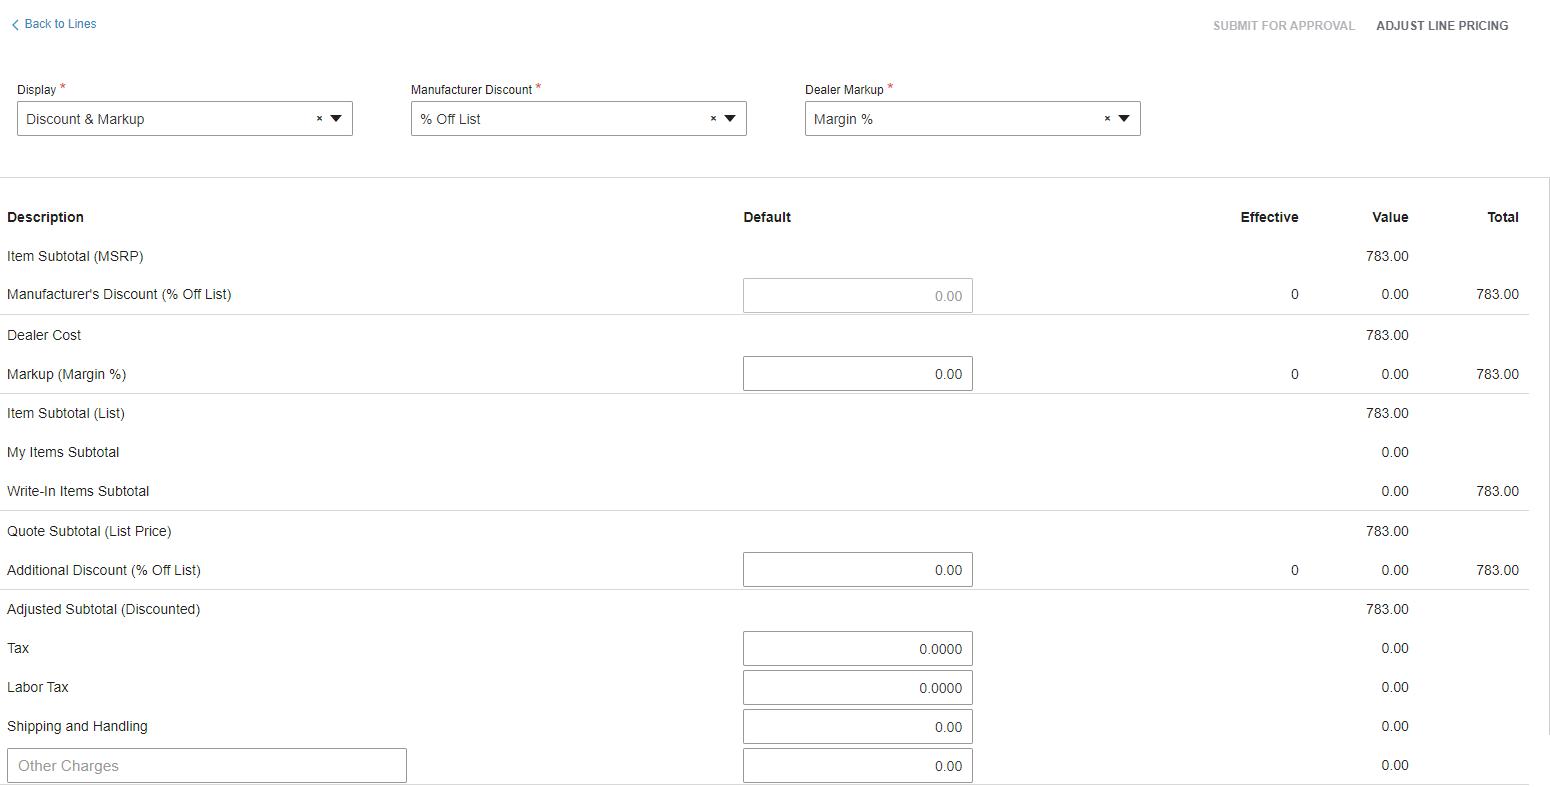
1. After creating a line, under the “Edit Pricing Details” link, at the top right, select “Adjust Line Pricing” to make changes for a specific line.
2. Your discount from list and any order level pricing that is in place on the quote will be reflected in the Adjust Price window.
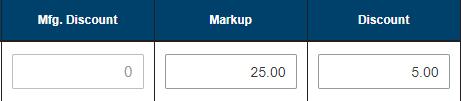


3. Make any additional adjustments that you wish to make only to the line. In this case, we will offer the customer an additional 5% off of this line only.
44
Expired Quotes
Why is my quote expired?
1. All quotes in the Configurator expire 90 days from when the quote was entered.
2. Once a quote surpasses 90 days, it expires, however; it can be copied to a new quote and the information is not lost.
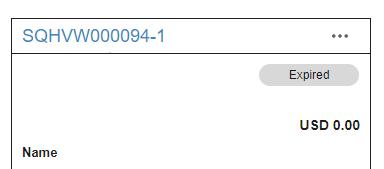
Identifying an Expired Quote
1. When a quote has expired, it will show a status of Expired in the Quote screen.
2. All options to place the order or change the details will be unavailable on an expired quote. You may still print the quote, however; it will indicate that it has expired and the pricing is not guaranteed to be accurate.
45
Recovering an Expired Quote
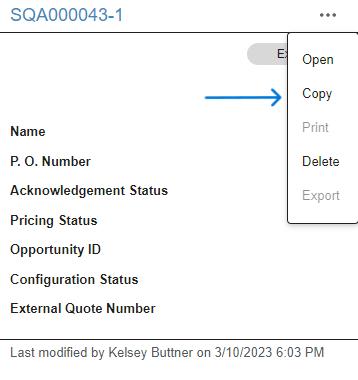

1. In order to copy an expired quote you have to be on the main quote search page. You will click the three dots to the right of the quote and select “Copy”. You will then be redirected to a new quote.
2. After selecting Copy, you will notice that the lines will be noted with a warning sign under the “Status” tab. The pricing will indicate “Requires Review”.
3. Select “Validate” to allow the system to rerun the options and calculate current price. The line status will then change to “Success” to confirm that the line has been validated.

46
4. The copy will be given a new quote number and will be valid for 90 days from the date it was created.

View/Print/Share Quotes
Objective: View, print and/or share a quote with a customer.
View/Print/Share Quotes
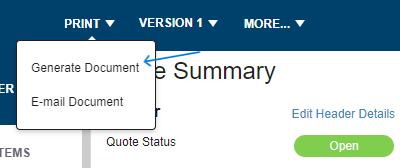
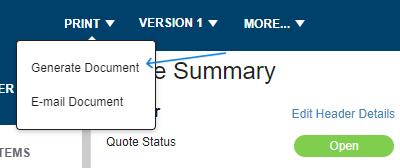
1. While in a completed quote, click the “Print” dropdown at the top right of the screen and select “Generate Document”.

2. Make selections for how you want the quote to appear. (You will need to scroll to see all selections.)
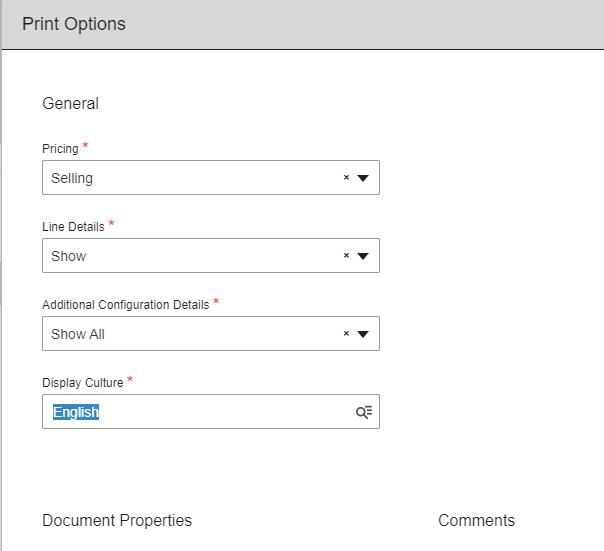
47
3. While the selections are subject to user preference, it is particularly important to select the correct price option to ensure you are sharing the appropriate information.
IMPORTANT – Anytime there are no markup/margins set at any level, the quote will show dealer cost when selling price is selected. Always include a customer, order or line level price set up when providing a quote to a customer.
None – No pricing will appear on the quote.
Dealer Cost – Will show dealer cost.
MSRP – Will show full list price with no mark up or discount applied.
Selling (Line Level) – Will show dealer sell price, including all mark ups or discounts applied to the line. If nothing applied at the line level, it would use order level pricing. If no order level pricing applied, it will show customer record pricing.
Selling (Order Level) – Will show order level pricing. If no order level pricing applied, will show customer record pricing.
Selling (Totals Only) – Uses lowest level pricing and only shows order total (no individual line totals).
Selling (MSRP) – Uses full list price as basis and includes lowest level discount to arrive at a final sell price.
4. If any Header, Terms, Pricing or Line notes were included on the quote, select the appropriate boxes to allow the notes to appear on the quote as
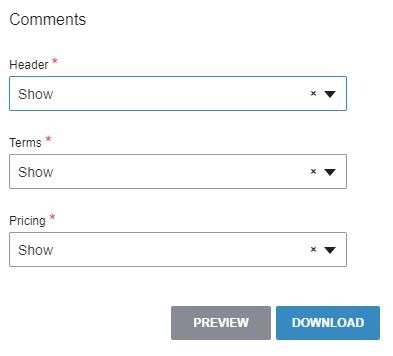
desired.
48
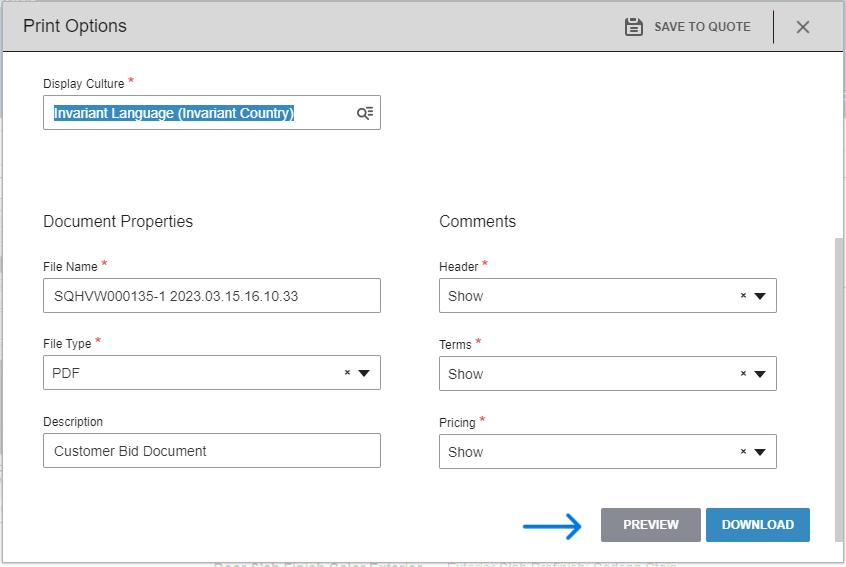
View Quote
1. To view only, once the appropriate “Print Options” are selected, click on “Print” then select “Generate Document” and scroll all the way to the bottom and select "Preview”.
2. Once in PDF format, the quote can be saved in PDF for printing or e-mailing. Direct print and e-mail options to follow.
49
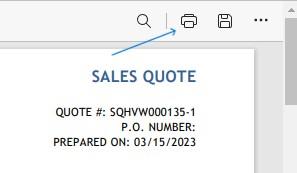
Print Quote
1. To send directly to a printer, once the appropriate “Print Options” are selected, follow the steps provided to preview a quote. Once that PDF document is open, at the top right corner, you will find a printer icon. Select that to continue with your printer options then hit print.
2. Depending on your system, this may take you directly to your printer or may go to PDF format. Check with your system administrator for details.
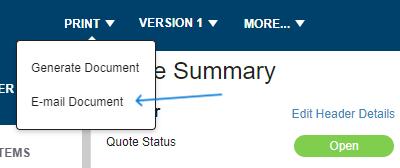
E-Mail Quote
1. To e-mail directly from Configurator, once the appropriate “Print Options” are selected, click on “E-Mail Document”.
50
2. Enter the e-mail address of the recipient.
3. User’s return address will automatically populate the From field.

4. Subject line will default to the quote number, however; user can change this as desired.

5. User can also type a message to accompany the quote.
6. Once all items are ready, select “Send” to release the e-mail. A message will appear confirming that the e-mail was sent successfully.
51
Placing an Order
Existing Quote
1. On the left of the screen, in the drop down select “Quotes”. From there, at the top of the screen will be a search box.

In the search box, you are able to use your name, the customer’s name, a quote number, the PO, etc to narrow down your search.
2. Locate the quote you’re looking for.
3. Once you have located the quote that is to be ordered, click on the quote to enter it.
52
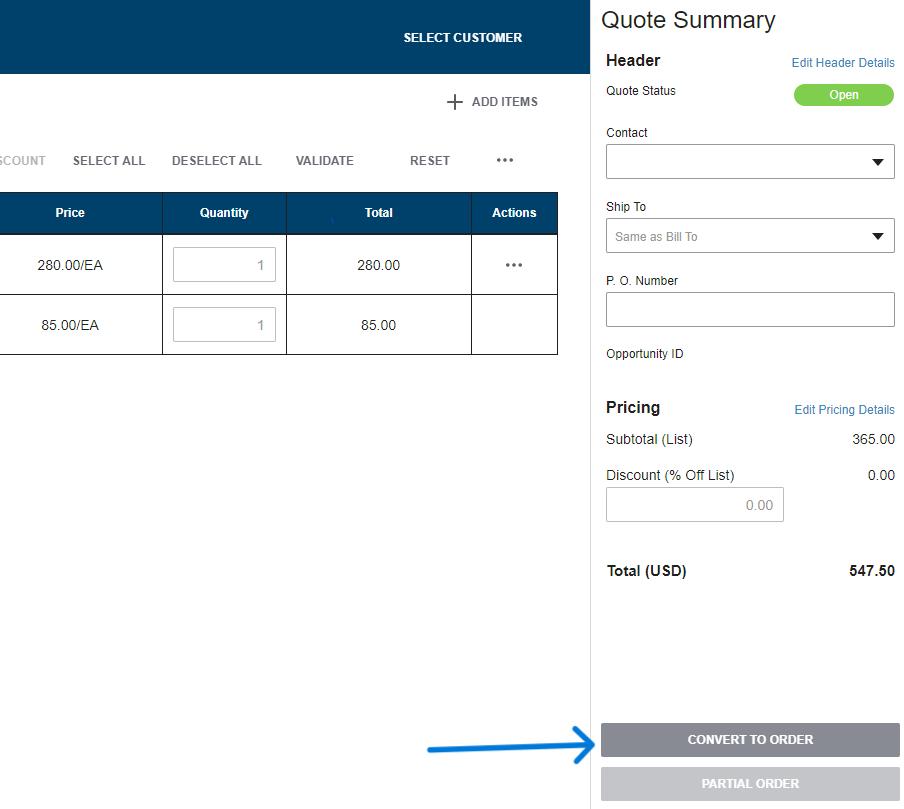
4. Once in the quote to be ordered, begin the process of placing the order by selecting “Convert to Order”. (This makes the quote and order but does not send to the manufacturer.)
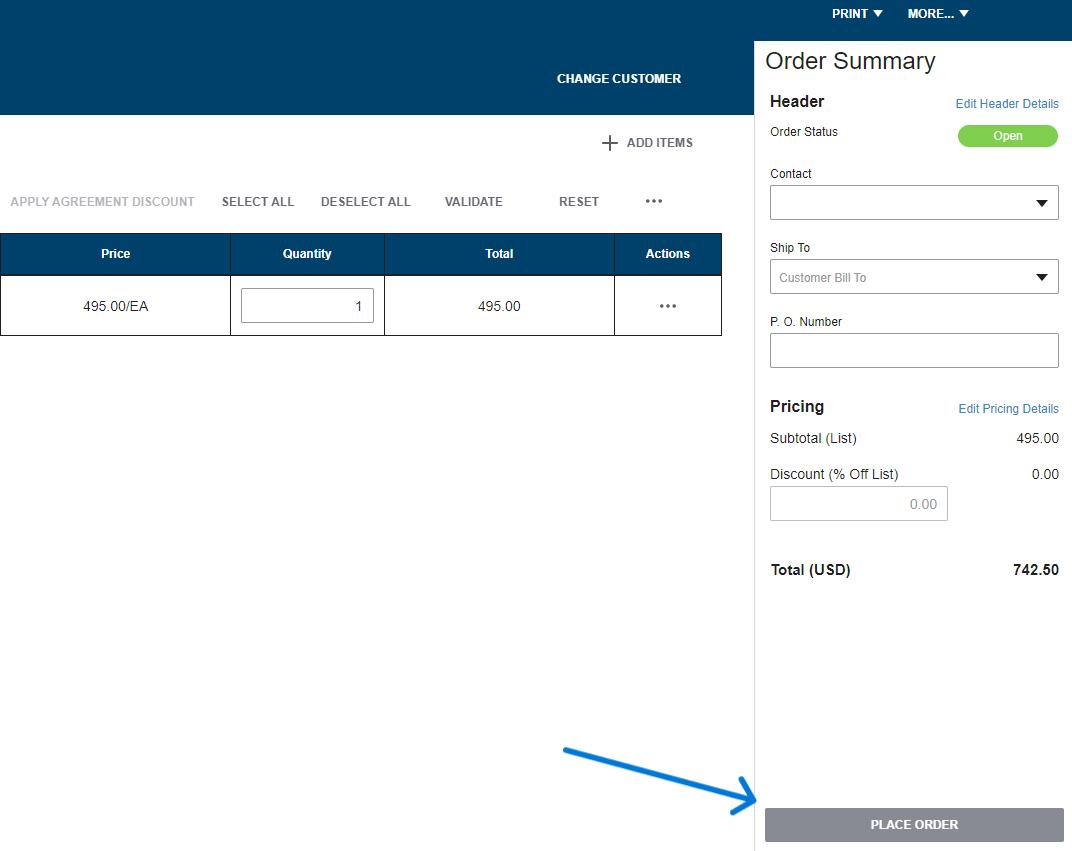
5. When you select “Convert to Order” it will automatically redirect you to an order screen, this is where you would select “Place Order” at the bottom right of the page.
53
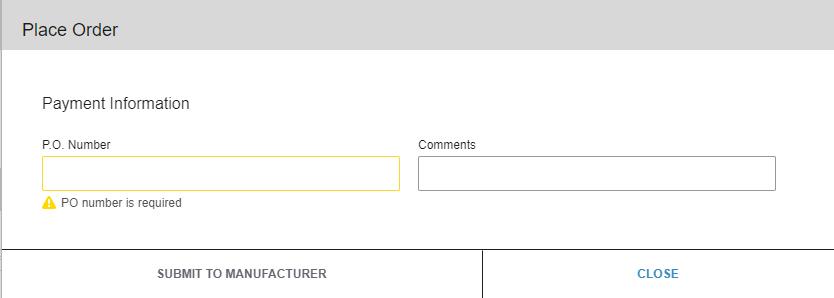
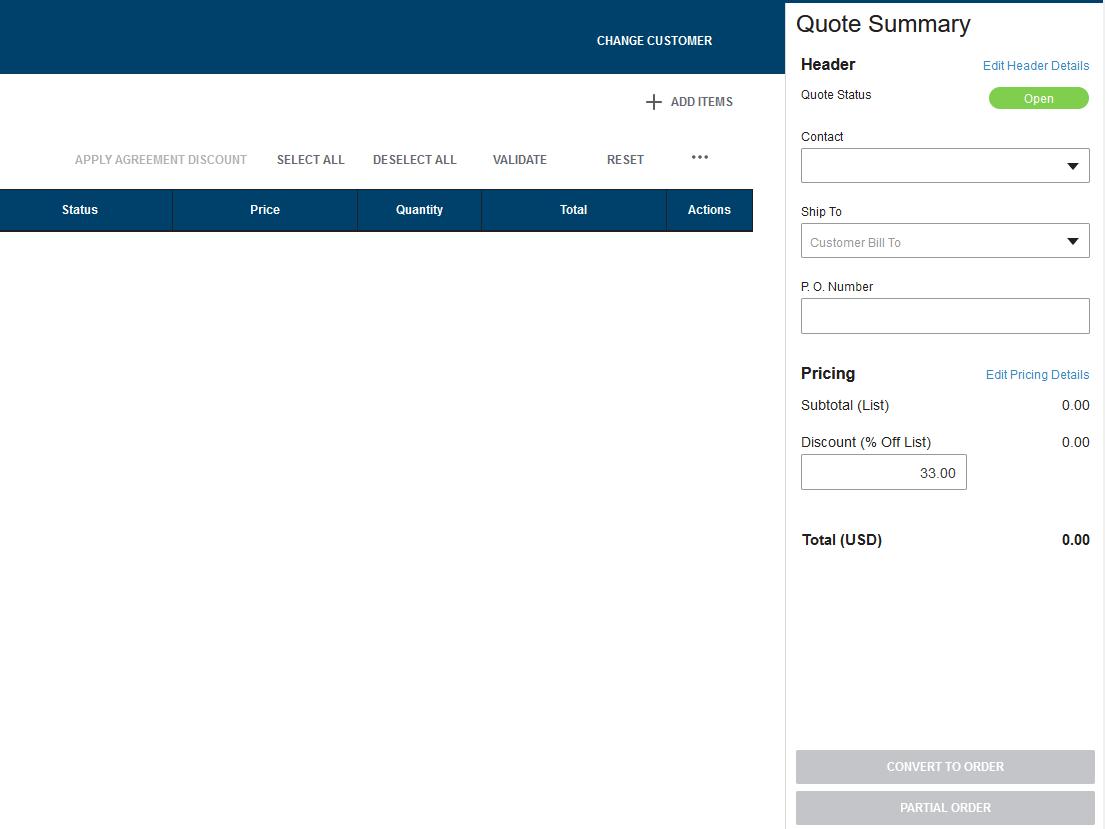
6. The Place Order box will open once you select “Place Order”. At this time, you are required to enter a valid PO number for the order. (Under the Quote Summary section, there is a link labeled “Edit Header Details” this is another area where you are able to enter a PO.)
7. You may also enter notes to the right of the PO with any special instructions for the Customer Service Representative to review when confirming your order.
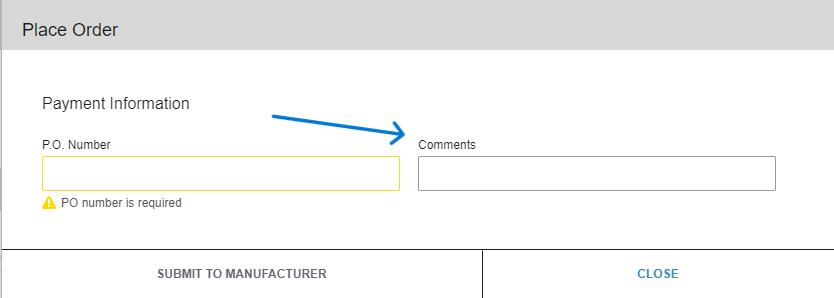
8. When ready, select “Submit to Manufacturer” to transmit your order to Waudena.
Important Note: Only Waudena dealers can place orders with Waudena. If the user is a contractor (Child Dealer), purchasing from a Waudena dealer,
54
they will be able to place an order with that dealer but the dealer will need to submit the order to Waudena.
Ordering with No Existing Quote
1. If no quote exists for the items to be ordered, follow the steps on the section labelled “Entering a Quote” to build the items required.
2. After completing the quote, follow steps 5-8 above to place the order with Waudena.
Why do I not have the Place Order Option?
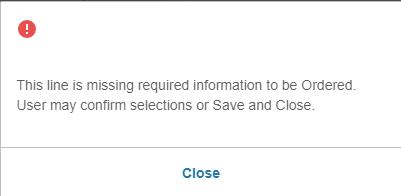
1. If the quote includes a line that was created as a Quick Quote, the Convert to Order button will be unavailable. Quick Quotes do not include enough information to process as an order and will provide a pop up. If you choose to save and close, and wish to order the Quick Quote; under line actions it will give you the option to continue configuration, change to a Detailed Quote, and answer the additional questions to provide the details required to process as an order. The Convert to Order button will then appear.
55
Managing Quotes/Orders
Objective: Manage existing quotes or orders.
Note: Including a customer and quote name makes managing quotes and orders much easier using the search function. While using a customer and/or quote name is not required, it is recommended.
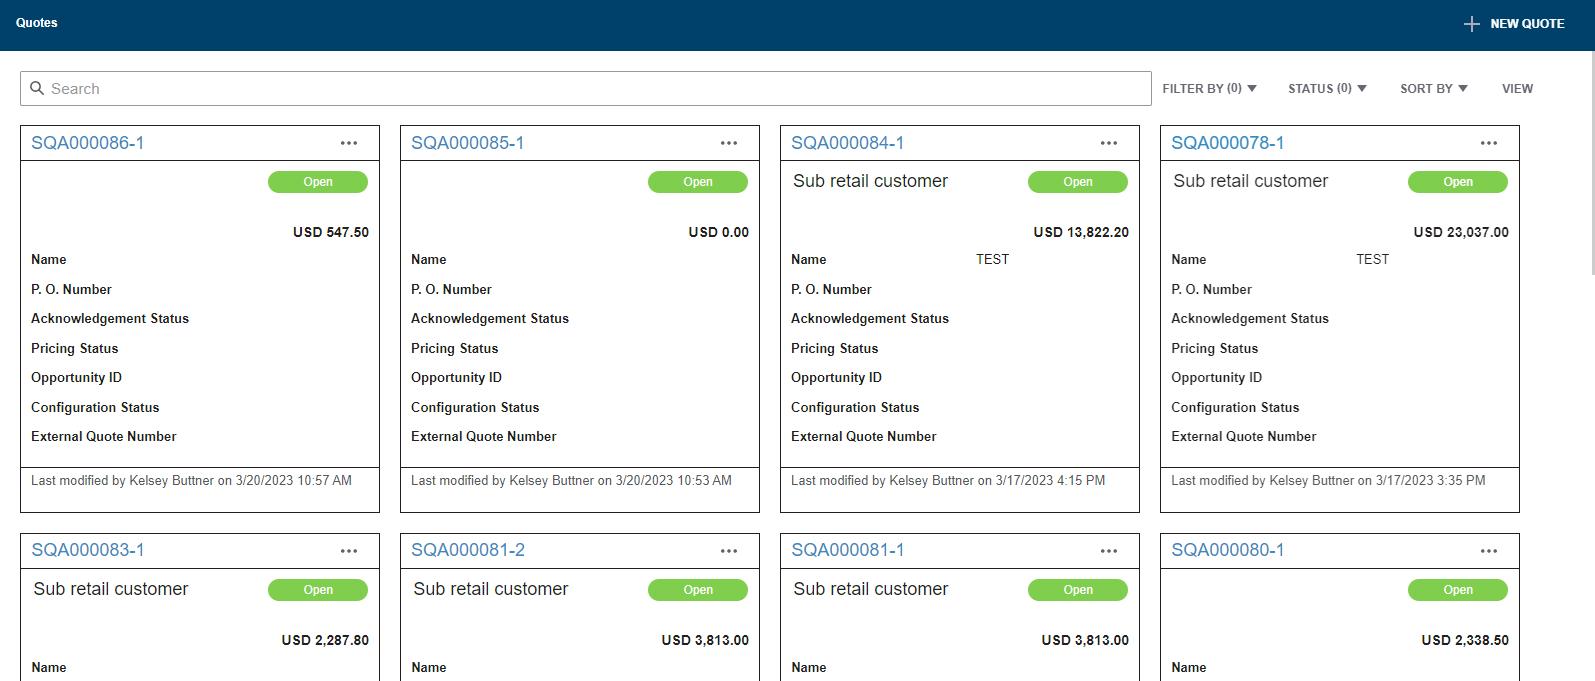
Managing Quotes
1. Upon logging into the Configurator, you will be automatically directed to the Quotes page. The search box is located right at the top of the quote page.
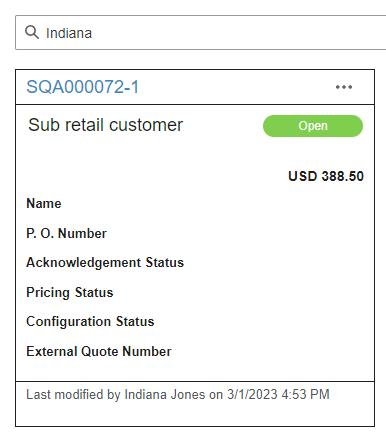
2. You will see all quotes that have been entered for your company. Information includes the quote number, name of who last modified the quote, the date it was last modified and the status of the quote (Open, Ordered or Expired). If
you selected a customer or included a Quote Name, this information will also appear.
3. To open an existing quote, click on the hyperlink containing the quote number you wish to open.
4. To simplify the process of locating a specific quote, you can search by the customer, quote name, or quote ID.

5. To search by customer, type in the customer’s name, or first few letters of the customer’s name and press enter.
57
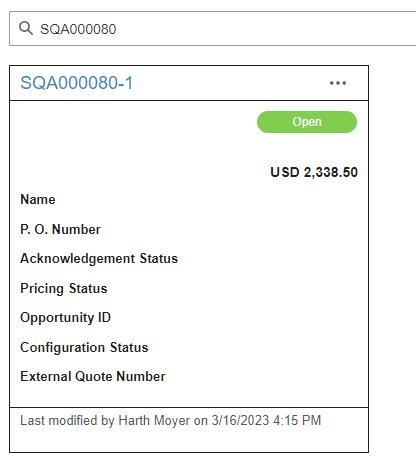
6. To search by a name, type in the name or the first few letters of the name and press enter. (It will show who last modified the quote at the bottom of the quote.
7. To search by quote ID, type in the alphanumeric quote ID and press enter.
8. The status of the quote will be Open, Ordered or Expired. Quotes remain in the open period for 90 days after entering. If the quote you wish to access is Expired, see the section on Expired Quotes to copy to a new quote.
58
If the quote has been placed as an order, it is still available to view.
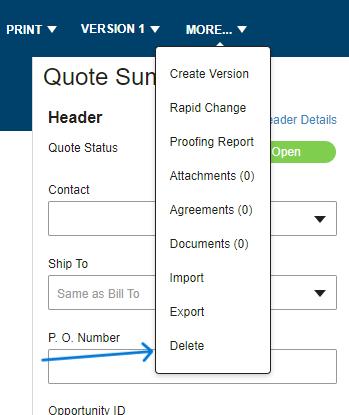
9. If a quote is no longer needed and you wish to delete it, you can do so by opening the quote and selecting delete in the “more” dropdown.
Managing Orders
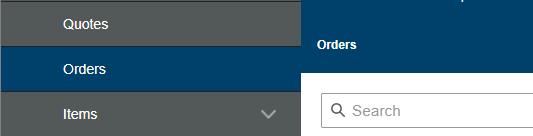
1. To navigate through orders, click “Orders” in the ribbon to the left of the page. Once you are in the Orders page, at the top is a search box.
2. You will see all orders that have been submitted as an order. Information includes the PO number provided with the order, Configurator order number, name of who submitted the order, and the date it was submitted. If you selected a customer or included a Quote Name, this information will also appear.
59
3. You can select an order by clicking on the row it is in. This will allow you to view, print or e-mail a copy of the order. You will not be allowed to make changes in the Configurator once the order is placed.
Creating a Customer Record
To see examples, click the link: https://youtu.be/kF-jxzOxvf4
Objective: Create a customer record to be applied to quotes.
Notes: A customer record can include pricing records for consistent quoting and can be used to manage quotes for that customer. Although use of customer records is not required, they are recommended for ease of use. Using customer record also makes a quote more detailed and personal when provided to the customer.

New Customer
1. Within the Configurator, navigate to the Customer tab and select “Create Customer” button at the top right of the page.
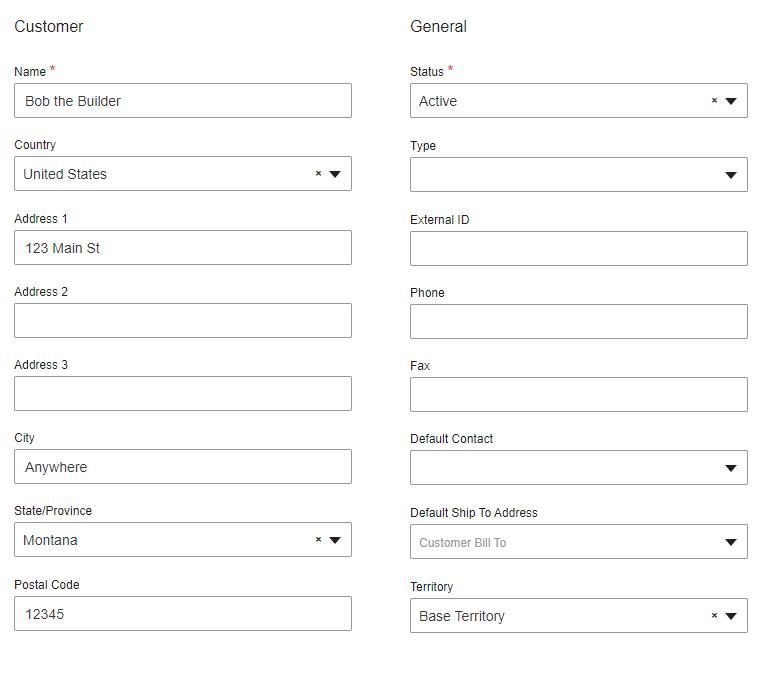
2. Fill in the blanks with information about the customer. Only a name is required, however; the more information entered the more complete a quote will be once entered.
IMPORTANT – When creating a new customer, it will be visible to all logins that are enabled. For customers with ‘Contractor Access’, be sure to uncheck the box so they cannot see customer records you have created. (Located at bottom of customer record).
Ship-To Addresses
If the customer has more than one address, create additional ship-to addresses within the customer record.

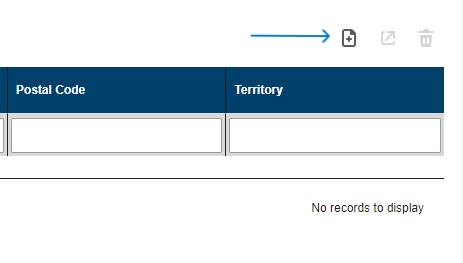
1. Select the “Ship-to Addresses” tab within the customer record and click on the “Create Ship-to Address” button to the right.

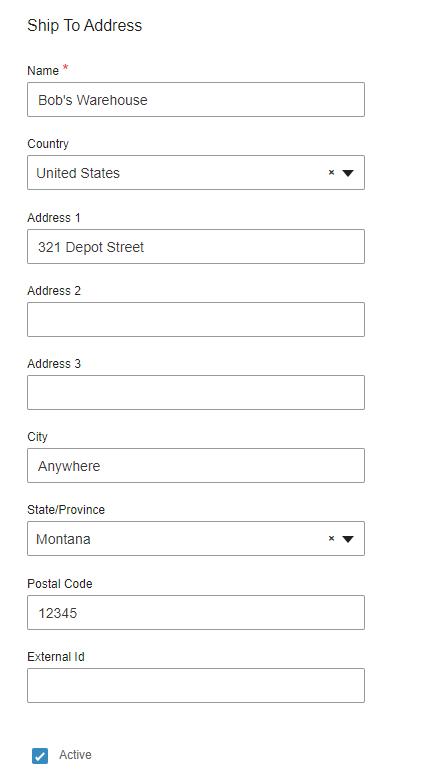
2. Complete as much information as desired for the additional ship-to record.
3. Repeat for as many ship-to addresses as required.
Creating Default Terms for a Customer
1. Select the “Default Terms” tab within the customer record.

62
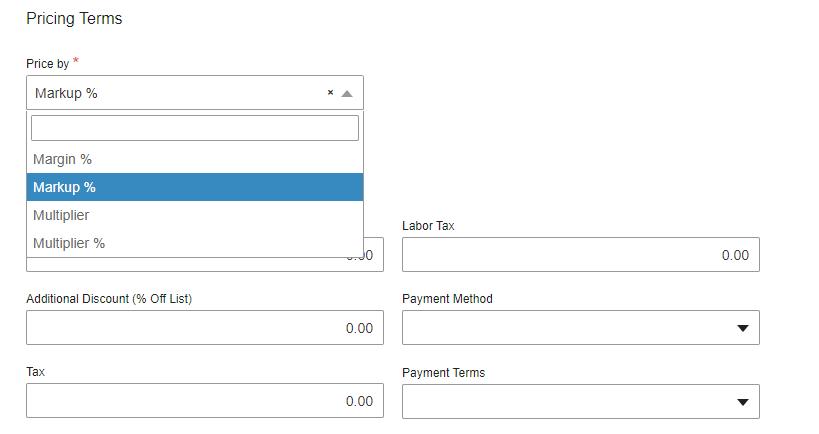
2. Determine if you will price by markup, margin, or multiplier to achieve the customer’s purchase price. Make the selection prior to setting the percent of markup, margin, or multiplier for best results.
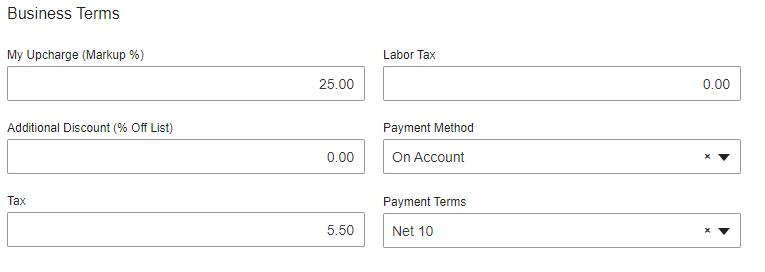
3. Apply as much term information as desired. The more that is included, the more complete the quote will be when the customer is used. Pricing will be applied to any quote the customer record is applied to.
63
Creating Contacts for a Customer
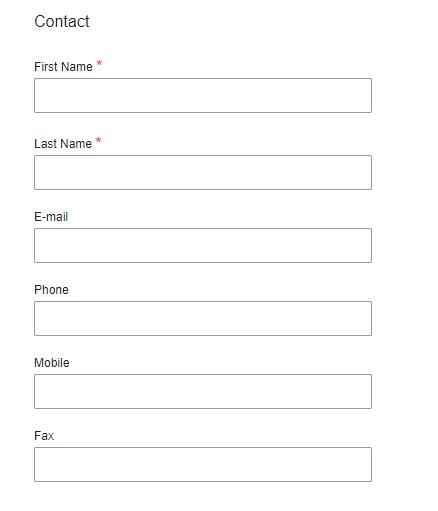
Additional contacts can be created for each customer record.

5. Select the “Contacts” tab within the customer record and select “New Contact”.
6. Complete as much contact information as desired. Select “OK” when completed.
7. Repeat for additional contacts as desired/necessary.
64
Projects and Jobs
Objective: Create a project with different jobs within to have a more organized way to view customers quotes or orders.
To see examples, click the link: https://youtu.be/kF-jxzOxvf4
Creating a Project
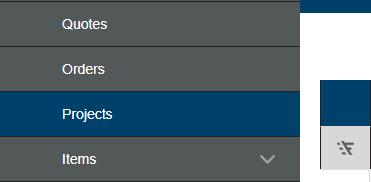
1. To create a project, click “Projects” on the ribbon to the left of the page.
2. One you are in the Project page; at the top right you will select the “Create Project” button.
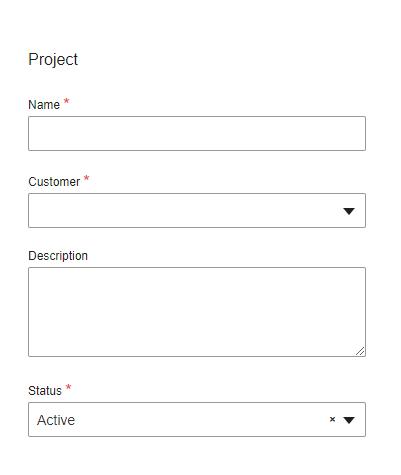
3. Once you select the “Create Project” button, it will redirect you to a new page. This is where you will enter the project information, which includes Name, Customer, Description (Optional), and Status. The Name, Customer, and Status are all required in order to move or create quotes within this project.
65
4. Once a project has been set up, you will notice a section titled “Jobs” will appear at the bottom of this page.

Creating a Job
1. Within a Project, you have the ability to create certain Jobs for that project. For example, if there are multiple items needed for that specific project you could label them as such. (Doors, Siding, Garage, etc. truly customizable to fit your needs.) Creating a Job is not required if not necessary.
66
2. To create a job, you would select the “Create Job” button on the right.


3. After you select “Create Job”, it will redirect you to a new page. This is where you will enter that Job information including Name, Description (Optional), and Status. The Name and Status are required in order to move or create a new quote within this Job.
Moving Open Quotes to a Project/Job
1. Once you have your Project and/or Job created, you will notice the three buttons (View Quotes, Create Quote and Copy) at the top right of the page become available to you.
67
2. To move open quotes to a project you will select the “View Quotes” button. This will redirect you to the Quotes page. You will search for the desired quote and open it.
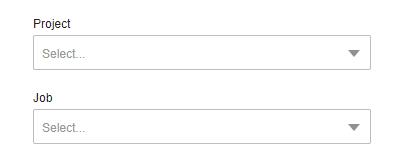
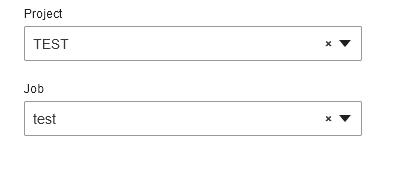
3. Once you are in the open quote, you will select “Edit Header Details”. From there you will see two dropdowns on the left labeled “Project” and “Job”.
4. You will select the correct Project and Job that you would like your desired quote to be assigned to. Once the Project and Job are selected, it will automatically be saved.
Creating a new Quote within a Project/Job
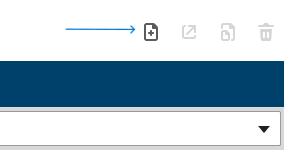
1. To create a new quote within a Project/Job, you will select the “Create Quote” button.
2. Selecting the “Create Quote" button will redirect you to a new quote page.
3. From there, you can refer back to the “Entering a Quote” portion of the manual.
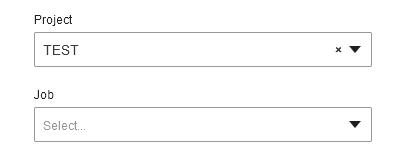
4. Once everything desired is added to the new quote, you can select “Edit Header Details” and will notice the Project is already listed in the dropdown.
5. If a Job is created, the correct Job will also be listed in the dropdown.
6. If you have any questions, please contact your TM.
69
Downloading an XML File
1. Locate the correct quote or order.
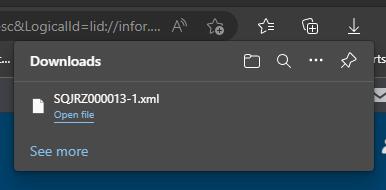
2. At the top right of the quote or order, there are three dots. You will click on those, and you will see the following (Open, Copy, Print, Delete, Export, and Download XML).
3. You will select “Download XML” and you will see the below pop up at the top right of the screen.

70
Creating “My Items”
To see an example, click the link: https://youtu.be/6PRVvgq4KKI
Introduction
“My Items” allows a user to create chargeable items to include in a Configurator quote that are not items from Wausau Supply or Waudena, to allow you to include everything for a job within a quote.
Dealers/Contractors that perform installs or offer additional services are one example of a user that may want to use My Items. You can preset items with a name, description and sell price that suits your business to be selected for use in a quote.
Example: A contractor may want to create items to charge for installation. They can create an item for “Install Single Door” or “Install Double Door” etc.
My Items are intended for ease of use to create complete quotes and can be used however the dealer or contractor sees fit. My Items will not transfer to Waudena Customer Service when an order is submitted. Prices on “My Items” will appear on the quote as you enter them.
Creating a New Item
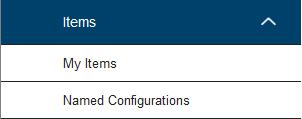
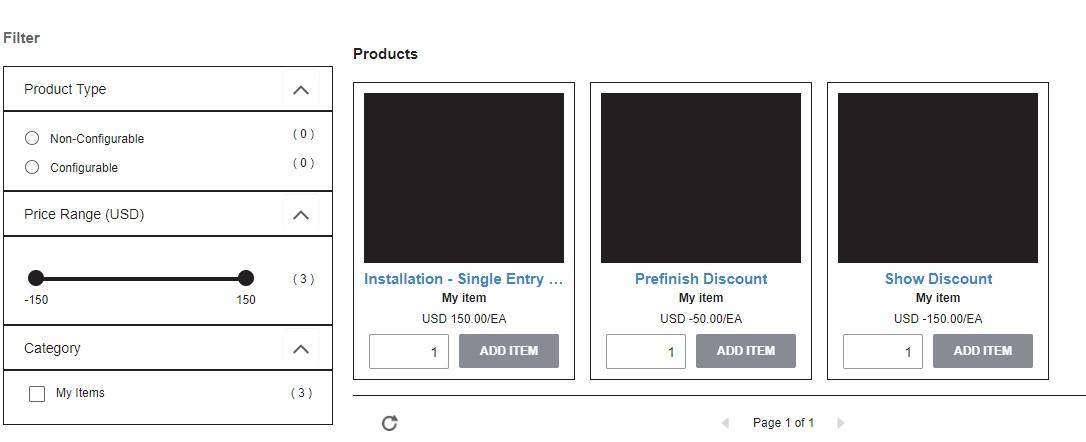
1. Click on the tab in the ribbon labelled “My Items”.
2. Select “Create My Item” to create a new item (See arrow in picture below) or to search type in the boxes to review or edit existing items.
71
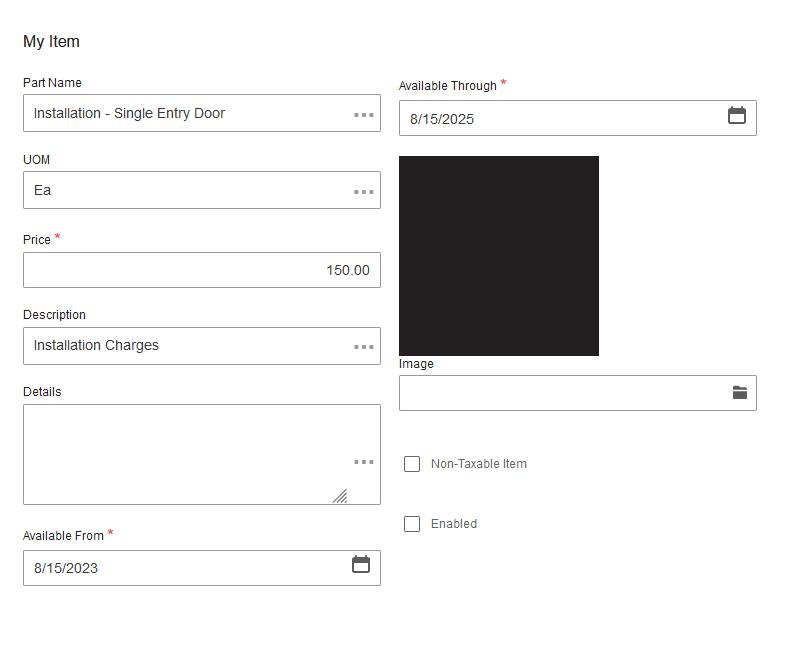
3. Fill out the form with a Part Name, Price, Description and Unit of Measure and set the time frame that the part is available, perhaps in the case of promotional items, as well as a long description as needed.

Tax often does not apply to labor. By checking the box for “Non-Taxable Item”, any tax applied to the quote will not be applied to this item.
4. There is a section to add an image if that is something you would like. You just need to upload by selecting the file.
Note: If the item will be needed long term, it is recommended to set the date out so long as deemed necessary.
72
Example:
Using “My Items” in a Quote
1. To include one of the items you’ve created, click on the “Add Items” button in the new quote you just created, then select “My Items” to the left of the page you were just redirected to. The items you’ve created will appear.
73
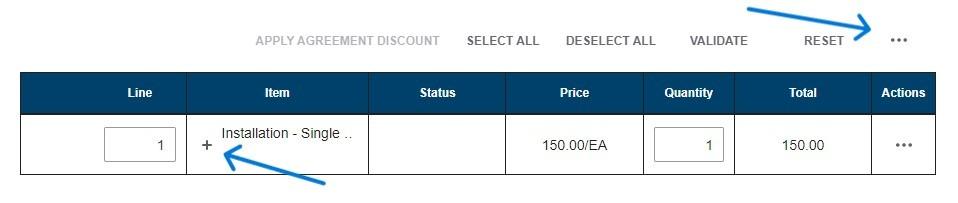
2. Click “Add Item” once, this will automatically add your item to the quote. After you click “Add Item”, you can then find the quote number at the top right of the page. Once you select that, it will take you back to the line items page.
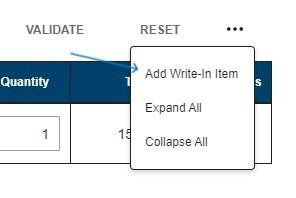
3. After selecting the item, you can change the quantity right on the line and to add a line label, if desired, click the plus sign on the line to expand the line or select the three dots to the right above the line located by “Reset” and select expand all.
4. The item will then show up on the quote you provide to your customer as a line item and will be calculated into their bottom-line totals. Apply multiple items to the quote as desired.

74
Using Write-In Items
To see an example, click the link: https://youtu.be/brXAjOHP1G8
Introduction
“Write-In Items” are another way to include chargeable items in a Configurator quote that are not from Wausau Supply or Waudena. Write-In Items are easier to use quickly for an ad hoc need that is not preset and will not be stored for recurring use. Write-In Items will not transfer to Waudena Customer Service when an order is submitted. Prices on “Write-In Items” will appear on the quote as you enter them.
Example: A user may want to use a Write-In Item to include a storm door that is purchased from another manufacturer. Because there are so many options for storm doors, the user can create a one-off item with the specs/price that they need rather than managing these as My Items.
Adding a Write-In Item to a Quote
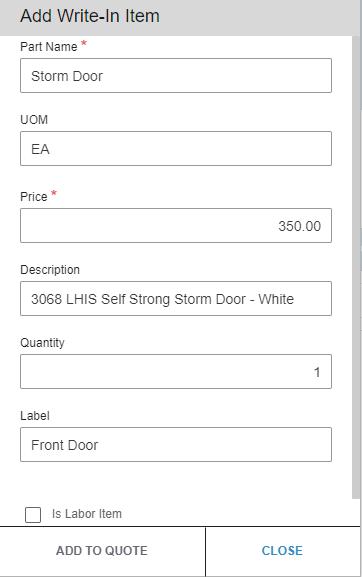
1. Within the quote in which you want to include the Write-In item, select “Add Write-In Item” in the Item Selection area.
75
2. Fill out the Part Number, Description, Unit of Measure, Price, and Quantity as desired. Be sure to check the labor item box if it should not have tax applied.
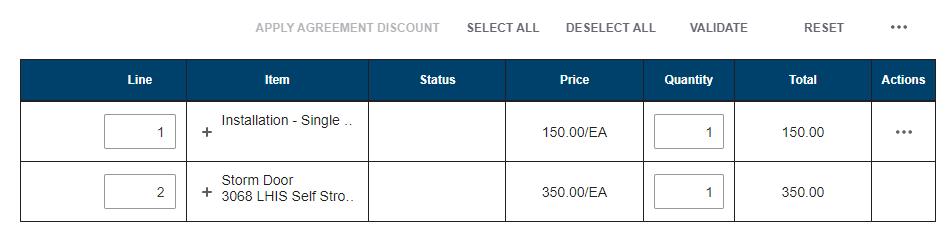
3. After completing the Write-In Item form, select “Add to Quote” to add the item to your quote.
4. The item will then show up on the quote you provide to your customer as a line item and will be calculated into their bottom-line totals. Apply multiple items to the quote as desired.
76
