3 minute read
The DIY


A short story of the birth of the DIY and five useful tips.
by Alessandro Pantorno
Advertisement
The DIY stands for “do it yourself’; it was born within the punk culture in the late 70s, promoting a particular form of protest able to create a sub-alternative way of communication, production, and independence from a capitalistic system.
This method of auto production was first used by punk-bands like Buzzcocks who created their label to be independent of industrial marketing.
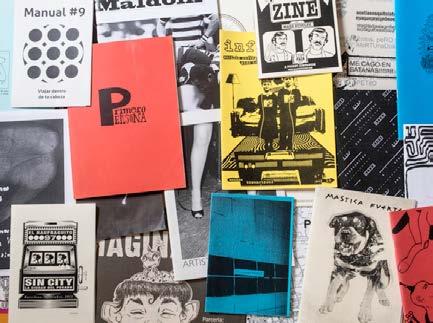
Another essential tool in that period was the birth of the fanzine, a magazine created by people with no budget. The magazine was in an A-4 format, mostly written by hand, largely talking about music scenes, as it was written by punk fans (hence the term fan-zine), that allowed bands from different countries to get to know each other.
The fanzine evolved very quickly since it’s inception in the ’70s and took many forms of expression by including topics like art and politics.
Nowadays the spirit of DIY evolved in diverse ways. By browsing on youtube you can find a lot of tutorials on how to create basically any object.
In essence, the idea of the DIY encourages the discovery of personal creative spaces, independence, and trust in inventive and handcraft.
For this reason, I give you 5 tips to start some DIY projects:
1. Customise or create your clothes:
Instead of buying new clothes, you can recycle your own old/ugly/broken ones, to create new ones. You can also create some useful objects like a bag or a blanket. The only thing you need to know is how to use a sewing machine, that is pretty easy! I advise you to follow DEPOP, a website where you might find inspiration.
2. Create a “fanzine”:
If you’re an artist, a photographer, or a content creator looking for visibility, you can create your own fanzine that can be both digital and printed to distribute everywhere! To create it:
- In photoshop open a new layer and be sure it is horizontally.
- Divide the layer in two with a ruler so as to have the first page on the left and the last page on the right.
-Now put the pictures side by side and create as many layers as you want.
- Then print it and assemble them like a book.
- To bind it you can use a stapler.
- If you would like to have a cover too just take the picture you need and print it on the backside of the first layer (in this case the left becomes right and the right becomes left).
3. Learn how to create/fix things at home:
Improve your technical skills by trying to work with the wood, you can create a lot of things, from a table to a guitar.
Here I attached you some youtube channel you may follow:
- Scrap Wood City: this channel is the perfect combination of DIY and wood; you can find many tutorials on how to create useful objects for your home.
- HomeMadeModern: an online design source that shares design ideas with hopes of inspiring people to make more of the things they own.
4. Create costume jewelry:
By recycling plastic, iron, stones you can make bracelets, necklaces, earrings and rings.
You could probably find inspiration by the thousands of people that are selling it on the streets.
5. Vessels for flowers:
Instead of buying new vessels, create new ones by reusing tin cans or glass jars, and decorate it or paint it as you want.

© Alessandro Pantorno