
TIPS
SUNRISE & SUNSET Our Tamron pros offer tips and techniques for "Mastering the Magic Hour"
PRO
FOR
MAGAZINE I ssue 16 · Summer 2023 MEAGHAN OGILVIE shows us a glimpse of Indonesian marine life
her
CAROLYN HUTCHINS documents Florida’s Aerospace Expo with her Tamron 70-300mm F/4.5-6.3 Di III RXD lens.
Cover image by Lisa Langell with the Tamron 35-150mm F/2-2.8 Di III VXD
with
Tamron SP 35mm F/1.4 lens.


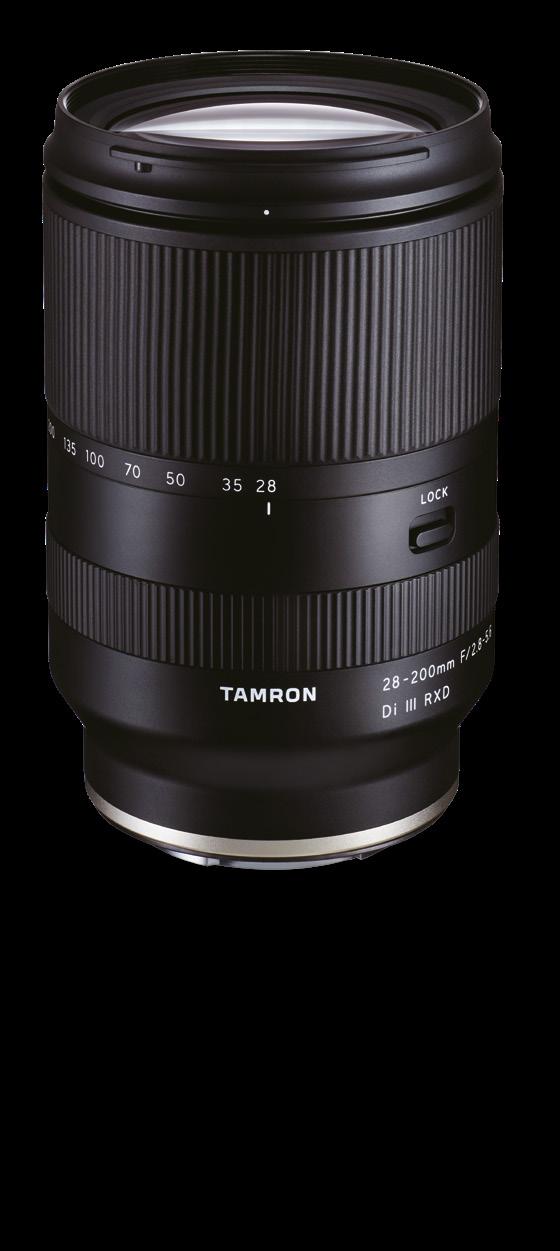
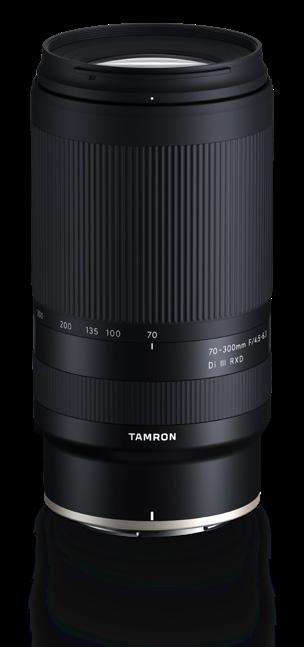
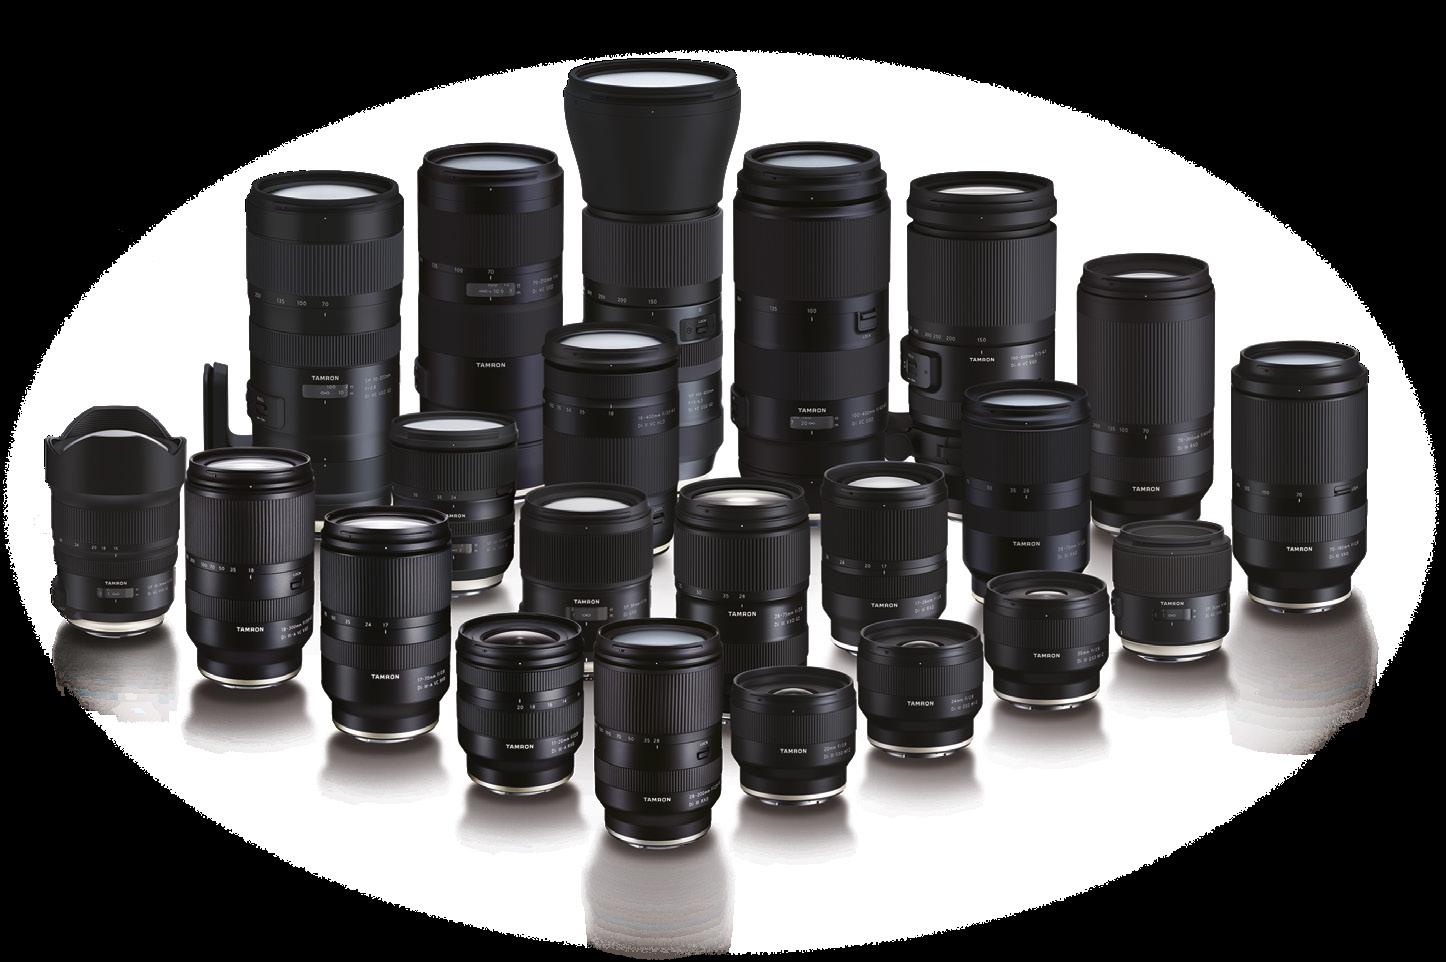
Choose the perfect Travel Zoom for your next photo excursion APS-C MIRRORLESS FULLFRAME MIRRORLESS APS-C DSLR ALL-IN-ONE ZOOM LENS For Sony E-mount [ model A071] 28-200mm F/2.8-5.6 Di III RXD ALL-IN-ONE ZOOM LENS For Sony E-mount and FUJIFILM X-mount [ model B061] 18-300mm F/3.5-6.3 Di III-A VC VXD ALL-IN-ONE ZOOM LENS For Canon and Nikon DSLR mount [ model B028] 18-400mm F/3.5-6.3 Di II VC HLD www.tamron-americas.com ONLY AVAILABLE AT YOUR AUTHORIZED TAMRON AMERICAS RETAILER
Dear Readers,
Welcome to the Summer Issue. We’re sharing lots of tips and techniques from the pros to help you get some great shots during your vacation and local excursions.
Early risers and night owls are in for a special treat with this issue’s special article covering 15 tips to achieve better sunrise and sunset photos. From lens choice to filters, exposure to composition, and more, this guide will have you capturing the rising and setting sun with stunning results all summer long.
If your vacation plans include a journey to an exotic destination, Kenna Klosterman offers great advice for capturing the spirit of the locale in her article featuring images and tips from her trip to Bali. Sticking closer to home? Capture the summer fun with tips from family photographer Marcie Reif, or document your outdoor adventures like Corbin Spring. Intrigued by underwater photography? Then Meaghan Ogilvie’s imagery will have you diving for photos before you even finish reading. If up in the air is more your style, check out Nick Moran’s tips for photographing landscapes and wildlife from a helicopter, while Carolyn Hutchins provides tips for capturing soaring aircraft with your feet firmly planted on the ground. And Tomas Koeck is in the studio and we showcase his latest portrait project that celebrates people behind the music we love. Wherever you travel this summer, we hope this issue inspires your photographic endeavors. Share your images shot with Tamron and use the tag #TamronSummerScenes.
See you again in the Fall!
Sincerely,
CONTENTS
4 NEWS
Check us out on YouTube and subscribe to our eNewsletter
7 TAMRON VIP CLUB
Register your Tamron lenses towards 2024 VIP status and reap the rewards
8 EXCURSION
Kenna Klosterman reveals “The Spirit of Bali”

12 INTERVIEW
Meaghan Ogilvie explores the “Last Paradise on Earth”
16 SPECIAL
Pro Tips for Capturing Sunrises and Sunsets
22 HIGHLIGHT
Nick Moran flies over Maui
24 FIELD REPORT
Carolyn Hutchins gets “Up Close at the Air Show”
28 PRACTICE
“Artists Unveiled” portraits by Tomas Koeck.
32 PRACTICE
Experience the “Outdoor Thrills, Epic Shots” of Corbin Spring
36 PRACTICE
Marcie Reif captures summer with "Sun, Surf, and Shutter"

40 MY PROJECT
Kazimir Skye plays with dark and light
42 PARTING SHOT
Rick Berk captures "The Quiet Side” of Mount Desert Island, Maine
www.youtube.com/user/tamronvids
Stacie Errera
Vice President, Marketing & Communications
INSTAGRAM @tamronamericas

TWITTER @tamronamericas
PINTEREST @tamronamericas

Tamron Magazine 3
NEWS
news, interviews, photo tips and more twice a month. Visit Tamron at www.tamron-americas.com to sign up.
US:
TAMRON
Get
FOLLOW
FACEBOOK tamronamericas
WATCH TAMRON IN ACTION
WELCOME
© Kenna Klosterman


NEWS SUBSCRIBE TODAY AT www.youtube.com/TamronVids SUBSCRIBE TO ALL FOUR TODAY AT bit.ly/TamronNewsSignUp 4 Tamron Magazine 60-SECOND LESSONS NEW PRODUCT HIGHLIGHTS BEHIND THE SCENES VIDEOS Aspirational and how-to videos from the pros. Tips from the pros, new product info and specials delivered to your inbox. CHECK US OUT ON... SUBSCRIBE TO OUR... eNewsletter FOUR SUBSCRIPTIONS TO CHOOSE FROM! n3 Portrait and Events n3 Everything Nature and Travel n3 World of Close-up and Art n3 General news, events and promotions Available in English, French and Spanish
TAMRON AMERICAS VIP CLUB


Register your Tamron lenses towards 2024 VIP status and reap the rewards
Tamron Americas' VIP Club rewards users who have registered their eligible Tamron lenses through our online warranty registration system since May 2011. There are three VIP Club levels: Silver for those having registered three to four purchased lenses; Gold for those having registered five purchased lenses; and Platinum for those having registered six or more purchased lenses. Club membership will be evaluated each year to include new members who qualify and to increase the status level of current members if applicable. Get complete rules and program details at http://www.tamron-usa.com/vipclub.
SILVER Membership (3-4 lenses)
Tamron owners who have purchased and registered three (3) to four (4) lenses during the time-frame of May 2011 and January 15, 2024 are eligible for these 2024 membership perks:
GOLD Membership (5 lenses)


Tamron owners who have purchased and registered five (5) lenses during the time-frame of May 2011 and January 15, 2024 are eligible for these 2024 membership perks:
PLATINUM Membership (6+ lenses)
Tamron owners who have purchased and registered six or more (6+) lenses during the time-frame of May 2011 and January 15, 2024 are eligible for these 2024 membership perks


VIP Liaison Program Magazine Lens Cloth Sportspack Pin Contest Rebate Repair Cap Water Bottle Vest Excusion Workshop Discount Excusion Advanced Registration Notice SILVER MEMBERSHIP 4 4 4 4 4 4 $50 10% 4 $500 3-days GOLD MEMBERSHIP 4 4 4 4 4 4 $75 15% 4 4 $750 4-days PLATINUM MEMBERSHIP 4 4 4 4 4 4 $100 20% 4 4 4 $1,000 5-days
REGISTER YOUR TAMRON LENSES AT bit.ly/RegisterLenses HIGHLIGHT

HIGHLIGHT 11-20mm (20mm), F/5.6, 1/950 sec., ISO 160
JASON HUNTER
Jason Hunter is a professional photographer from Chesapeake, Virginia. He enjoys mixing elements of New Topography with Minimalism in his photographs. There is often a focus on the mundane because he feels anything can be beautiful and everything is worth photographing.

Instagram @fuji.hunter

HIGHLIGHT
THE SPIRIT OF BALI
With her Tamron SP 24-70mm F/2.8 VC G2 high-speed zoom, Kenna Klosterman offers a photographer’s perspective on this island province’s splendor.
EXCURSION 8 Tamron Magazine
PHOTOS: KENNA KLOSTERMAN
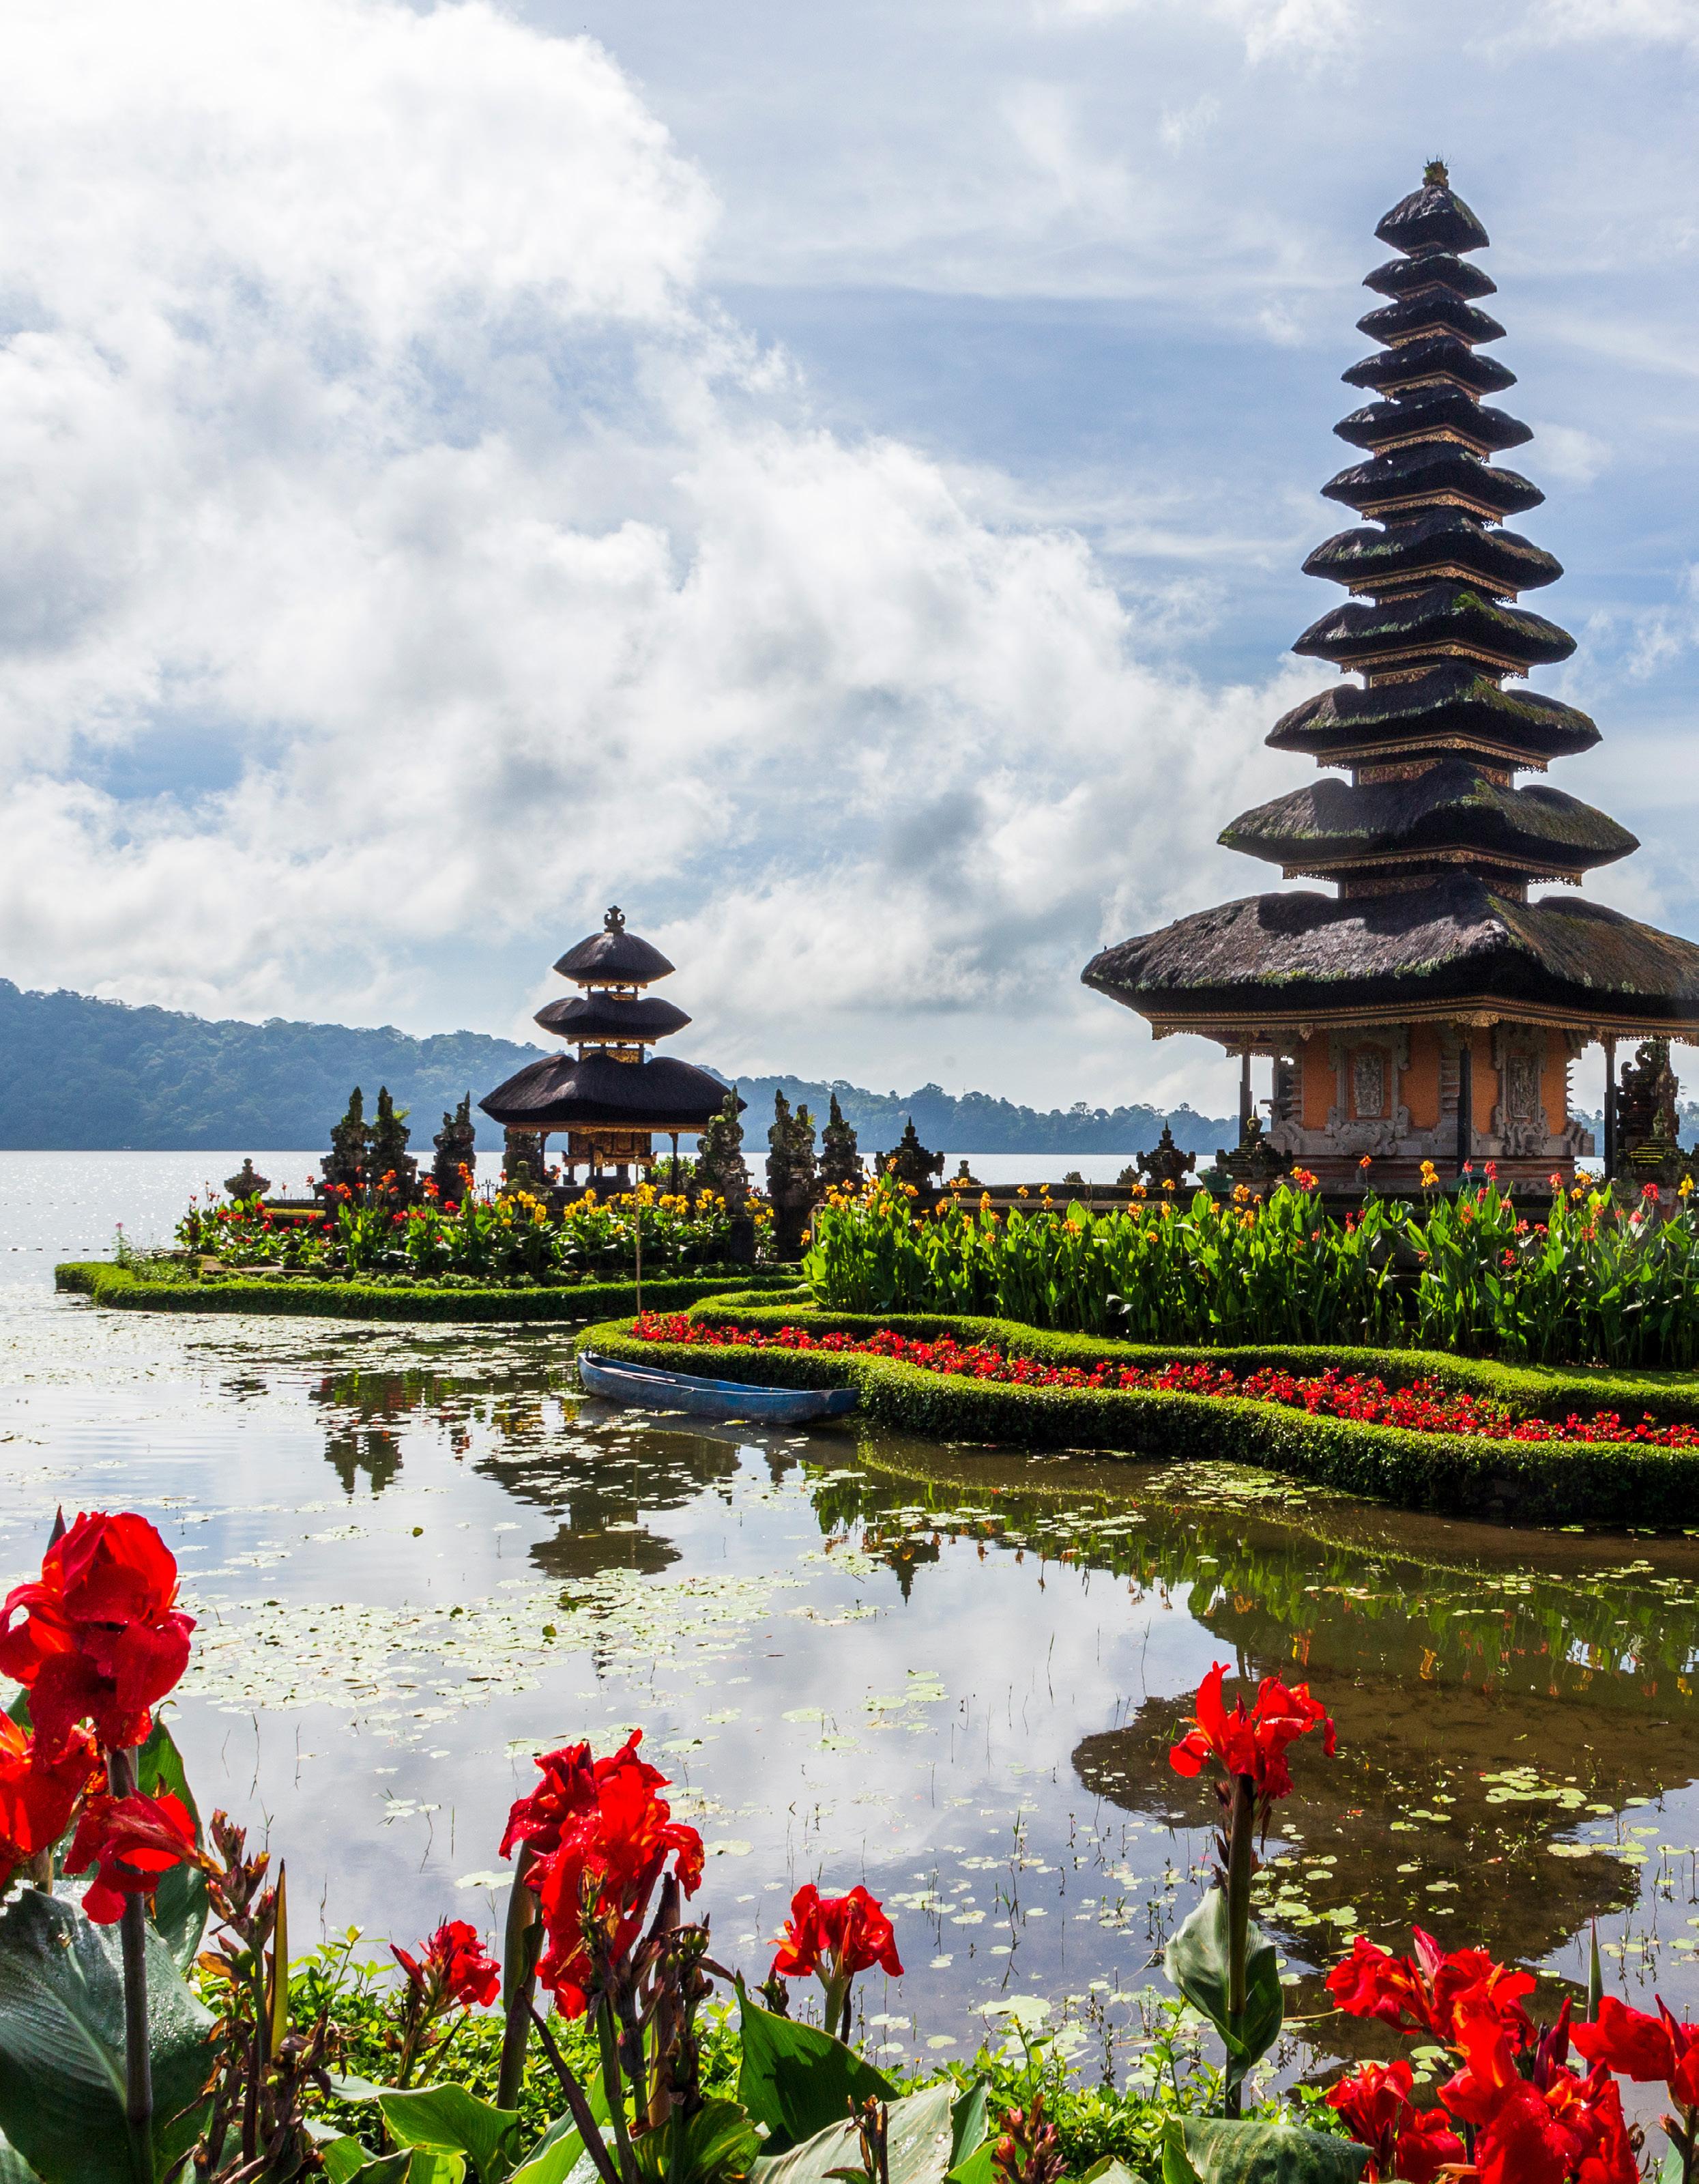
The Indonesian province of Bali is renowned for its stunning landscapes, vibrant culture, and ancient temples, making it a photographic paradise. In late 2022, travel photographer Kenna Klosterman ventured to the region, seeking to capture the essence of this tropical gem during a nearly monthlong trip. “I visited the islands of Nusa Ceningan and Nusa Lembongan, as well as Sukawati, where I led a mindfulness retreat, and Ubud, known for its temples,” she says. “My photographic goal was to capture the spirit of what Bali is known for.”

For Kenna’s journey to Bali, which she’d last visited 15 or so years ago, she brought along a trusted travel companion: the Tamron SP 24-70mm F/2.8 VC G2 high-speed zoom lens. Kenna found the 24-70mm’s versatility ideal for capturing the diverse subjects and scenes before her camera, easily transitioning between street photos, wide-angle compositions, and more detailed shots. “When I travel, especially internationally, I try to minimize the amount of gear I’m bringing, so the 24-70mm’s versatility was perfect for this trip,” she says. “Plus, having the Vibration Compensation (VC) feature and F2.8 maximum aperture this lens offers was so important in helping me to keep my images sharp, crisp, and beautiful.”
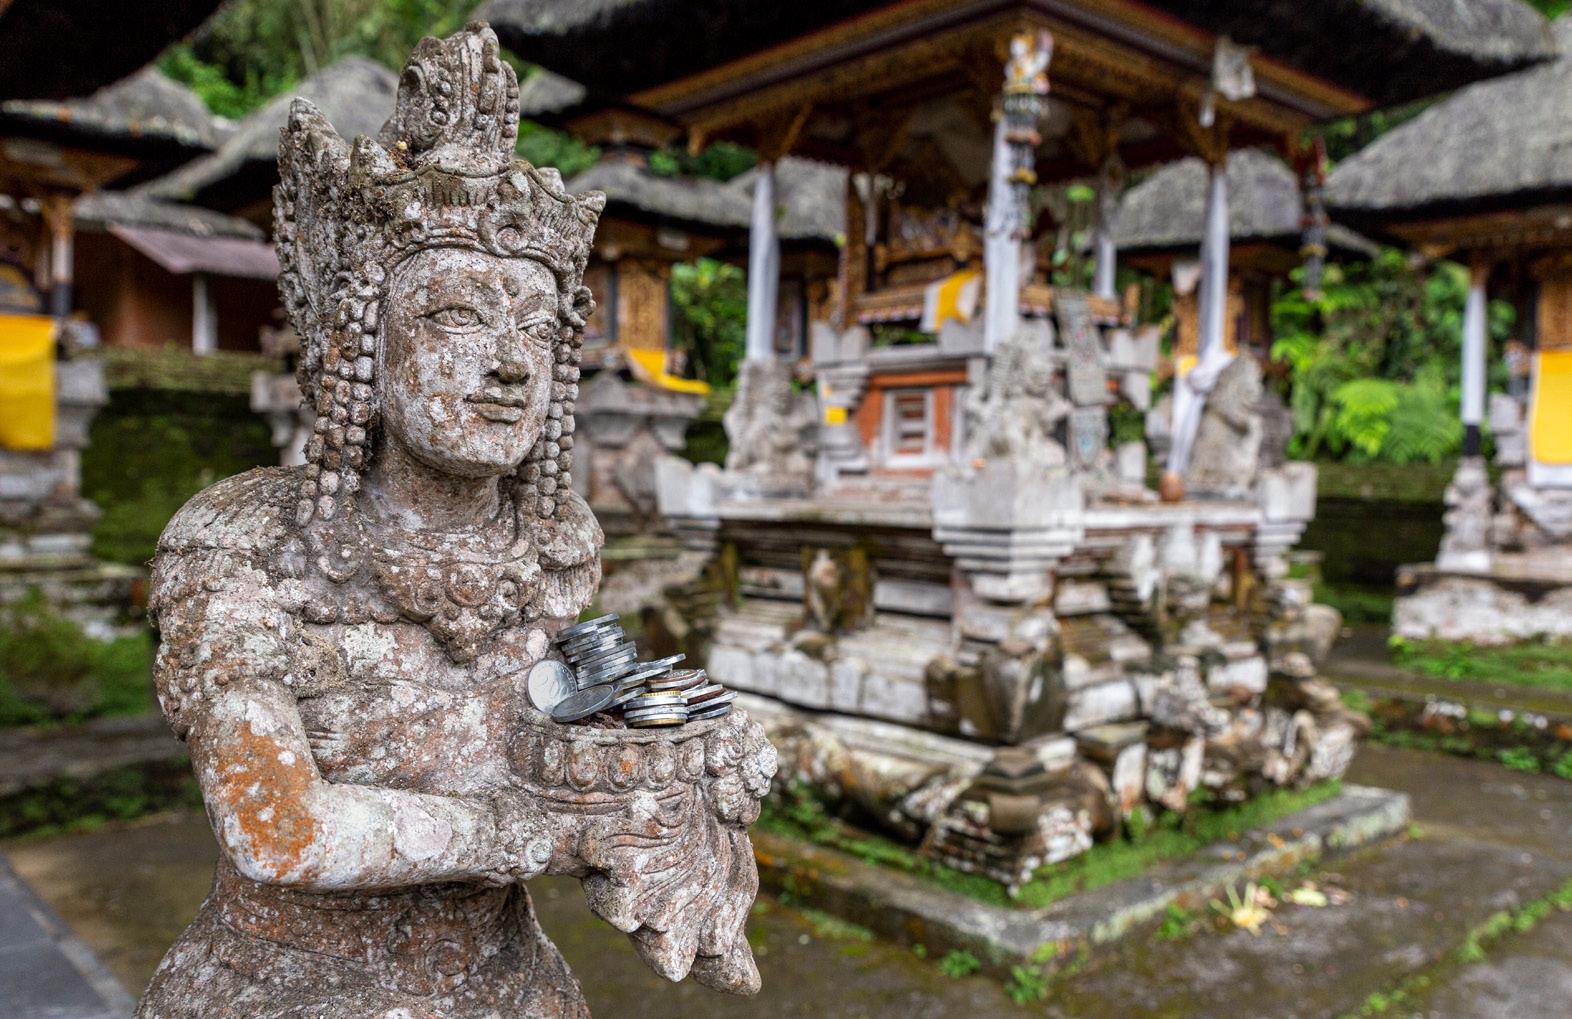
The temples that dot Bali’s landscapes are a hallmark of the island’s heritage. Kenna explored these temples with an aim to tell the stories of those sacred spaces.
EXCURSION
24mm, F/16, 1/200 sec., ISO 200
Tamron Magazine 9
24mm, F/11, 1/100 sec., ISO 400
“When you start to see the details of these intricate structures is when it gets really interesting,” she says. “That’s when you ask yourself: How do I tell this story? What do I isolate in the photo? In the photo of this statue inside one of the temples, focusing on the coins allowed me to pose questions for the viewer—for example, what are those coins? Are they offerings from the visitors that have passed through?”
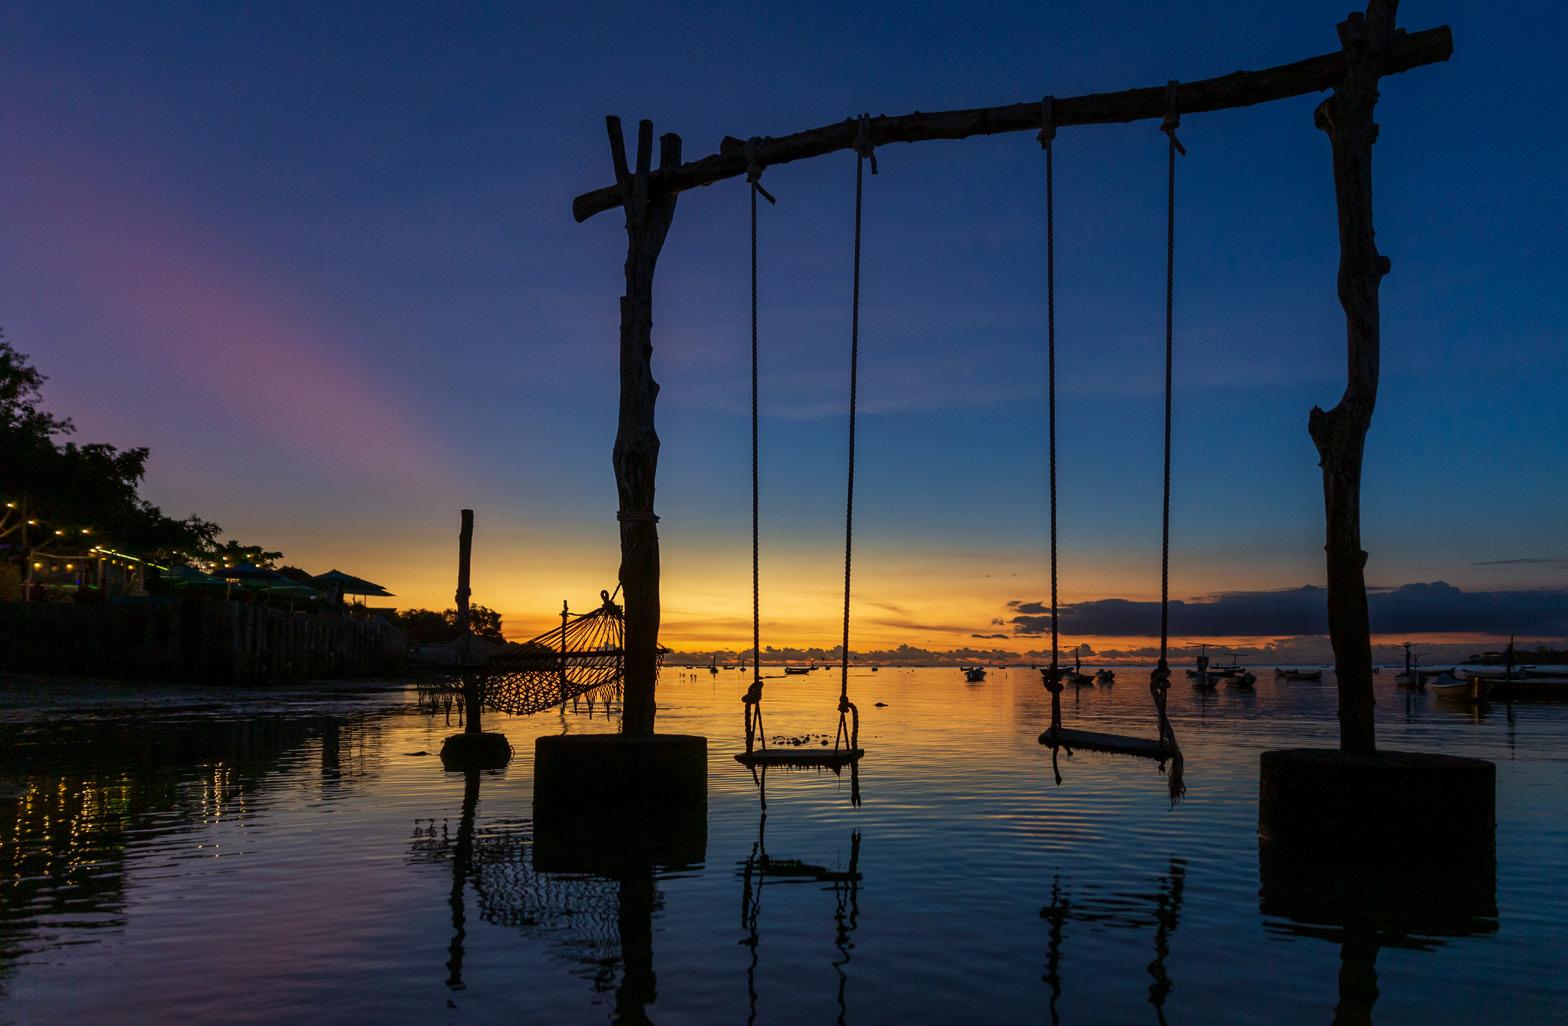
Bali’s spectacular sunsets are a sight to behold, and Kenna seized the opportunity to capture their magic. On a small island near the mainland, she discovered a swingset and hammock, set in the water during high tide.
“This photo was about capturing the
reflection,” she says. “And this is exactly the type of low-light situation where the 24-70mm shines with its F2.8 aperture.”
Bali’s coastlines offer breathtaking views, and Kenna capitalized on the dramatic cliffs and rock formations to capture striking aerial shots. “I did a lot of waiting for the waves to move in different ways, so I could achieve an almost abstract type of photo,” she says. “This image also brought me back to my mission of showing the spirit of Bali, as nature is such a powerful part of the culture here.”
One of the most delightful aspects of Bali is the lively presence of
children in everyday life. “I love street photography and interacting with people, so this scene of a little convenience shop—almost like their version of a 7-Eleven—caught my eye,” Kenna says. “Shooting at 45mm allowed me to frame the scene naturally, so I could interact with some locals in their immediate surroundings.”

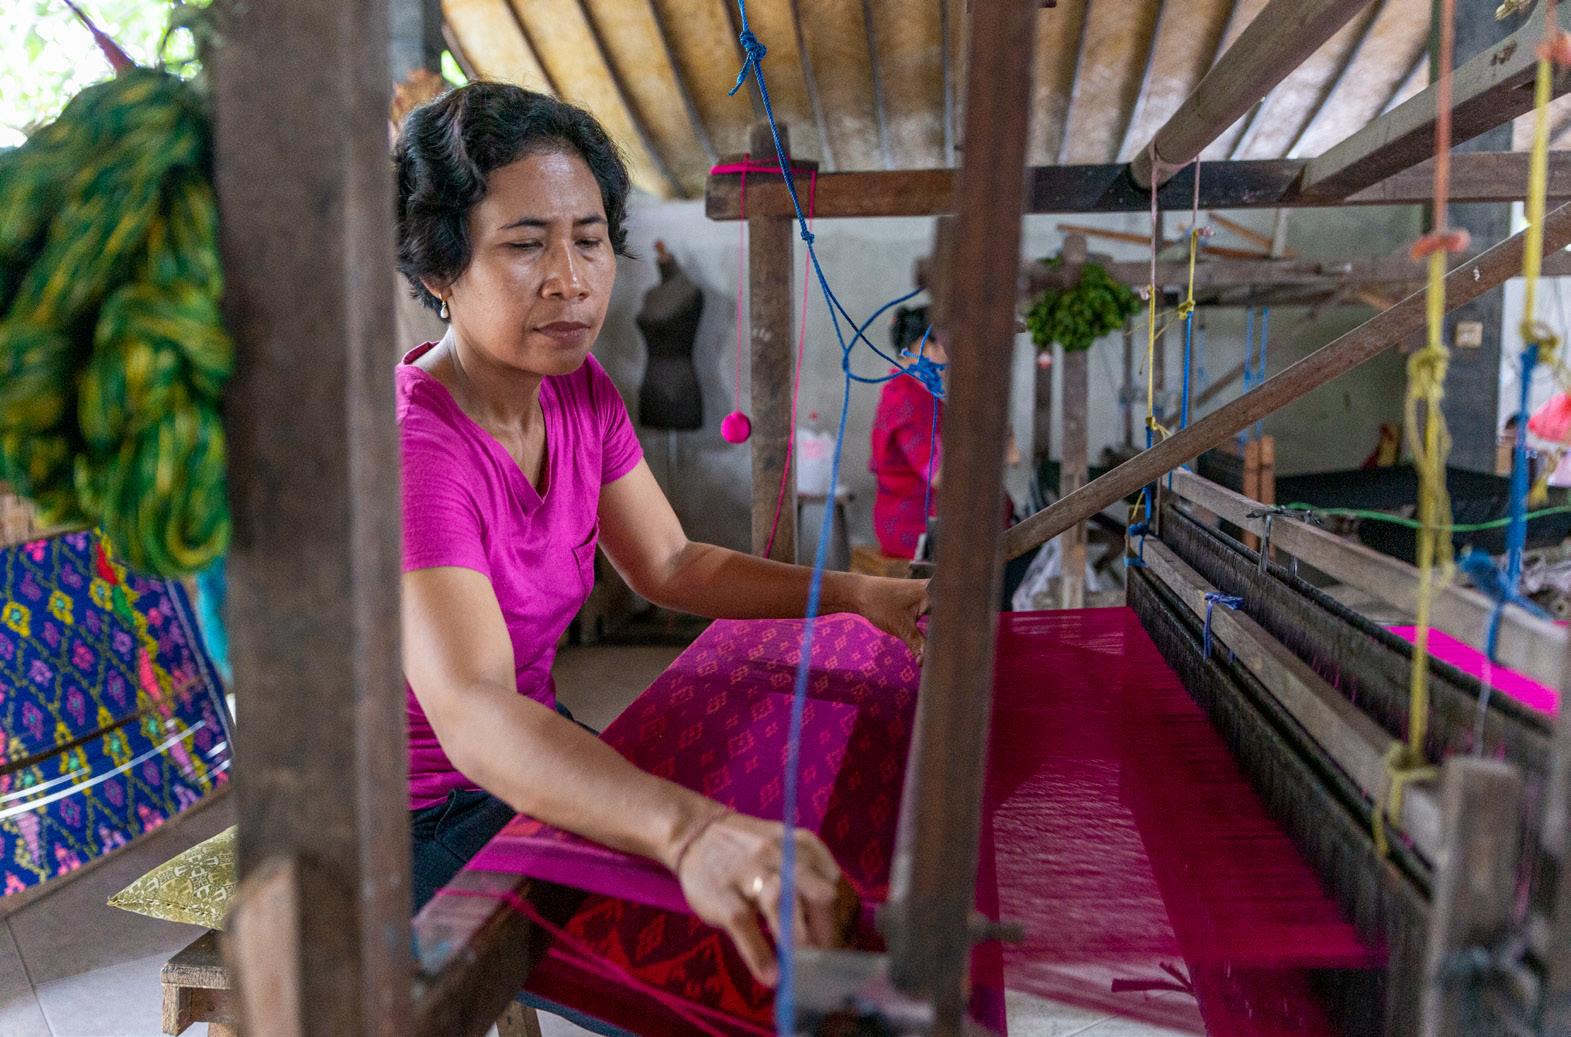
Craftsmanship and traditional arts play a significant role in Balinese culture, and Kenna sought to document this aspect of daily life, including through photos of some of the local weavers operating their looms. “I’m the type of photographer that, with permission, wants to get up close and personal,” she says. “I don’t simply want a photo of the finished piece. With my Tamron 24-70mm, I can unobtrusively insert myself into the process, so the viewer will feel like they’re right there with the artisans in action.”
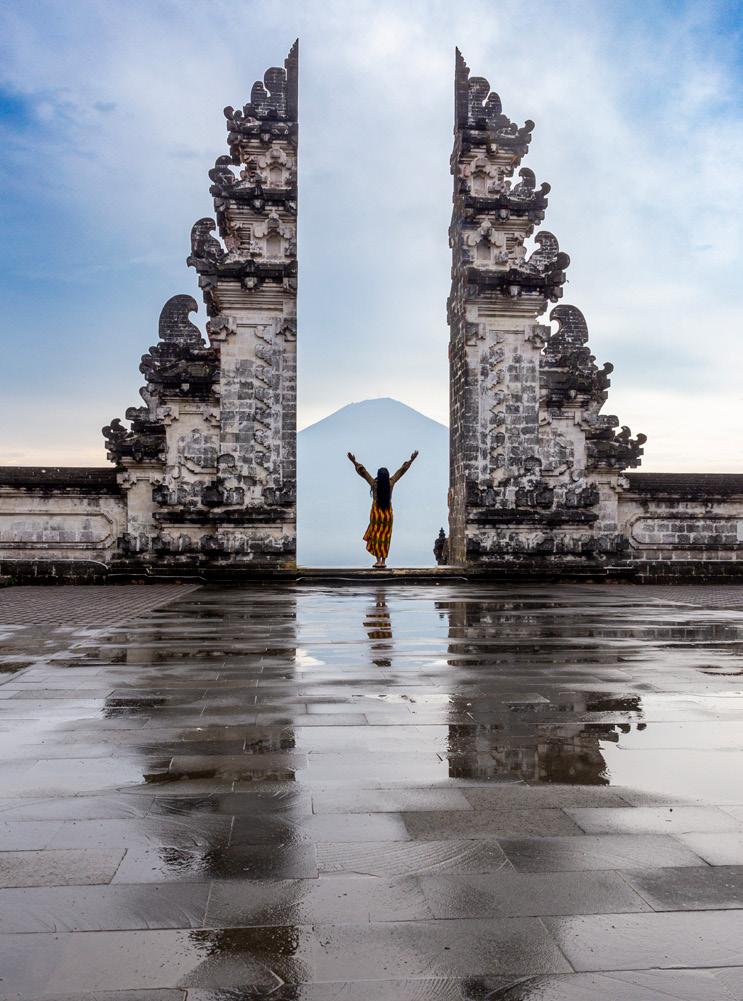
At the Lempuyang Temple, one of Bali’s oldest and most well-known temples, Kenna found her quintessential “spirit of Bali” image, gazing through what’s known as the “Gates of Heaven,” with a view of the Mount Agung volcano in the distance. “It’s all about capturing perfect alignment in this photo—my subject right in the middle of the gates, and the volcano smack in the middle of the background behind her,” she says. “There’s a reason this site is one of the most iconic spots for photos in Bali.”
45mm, F/5.6, 1/100 sec., ISO 200
10 Tamron Magazine
31mm, F/2.8, 1/100 sec., ISO 1600
ABOUT: KENNA KLOSTERMAN

Kenna Klosterman is a travel photographer, educator, podcaster, international emcee, tour leader and creative connector. For over a decade she's hosted 1000+ live online workshops, classes, and web series across the subjects of photography, video, filmmaking, graphic design, art and more. As the Lead Host of CreativeLive she championed millions of students around the globe to master their craft in hobby, business, and life. In the We Are Photographers podcast, Kenna takes you behind the lens and behind the lives of photographers, filmmakers, and industry game-changers to uncover the real stories behind why they do what they do. It brings her great joy to lead photographers in the field on tours to countries including Cuba, Kenya, Tanzania, and more.
https://www.kennakphoto.com
Instagram@KennaKlosterman
 PHOTOS: KENNA KLOSTERMAN
Tamron Magazine 11
“WITH MY TAMRON 24-70MM VC G2, I CAN UNOBTRUSIVELY INSERT MYSELF INTO THE PROCESS, SO THE VIEWER WILL FEEL LIKE THEY’RE RIGHT THERE WITH THE ARTISANS IN ACTION.”
SP 24-70mm F/2.8 Di VC USD G2 [model A032]
24mm, F/2.8, 1/400 sec., ISO 640
31mm, F/5.6, 1/100 sec., ISO 400
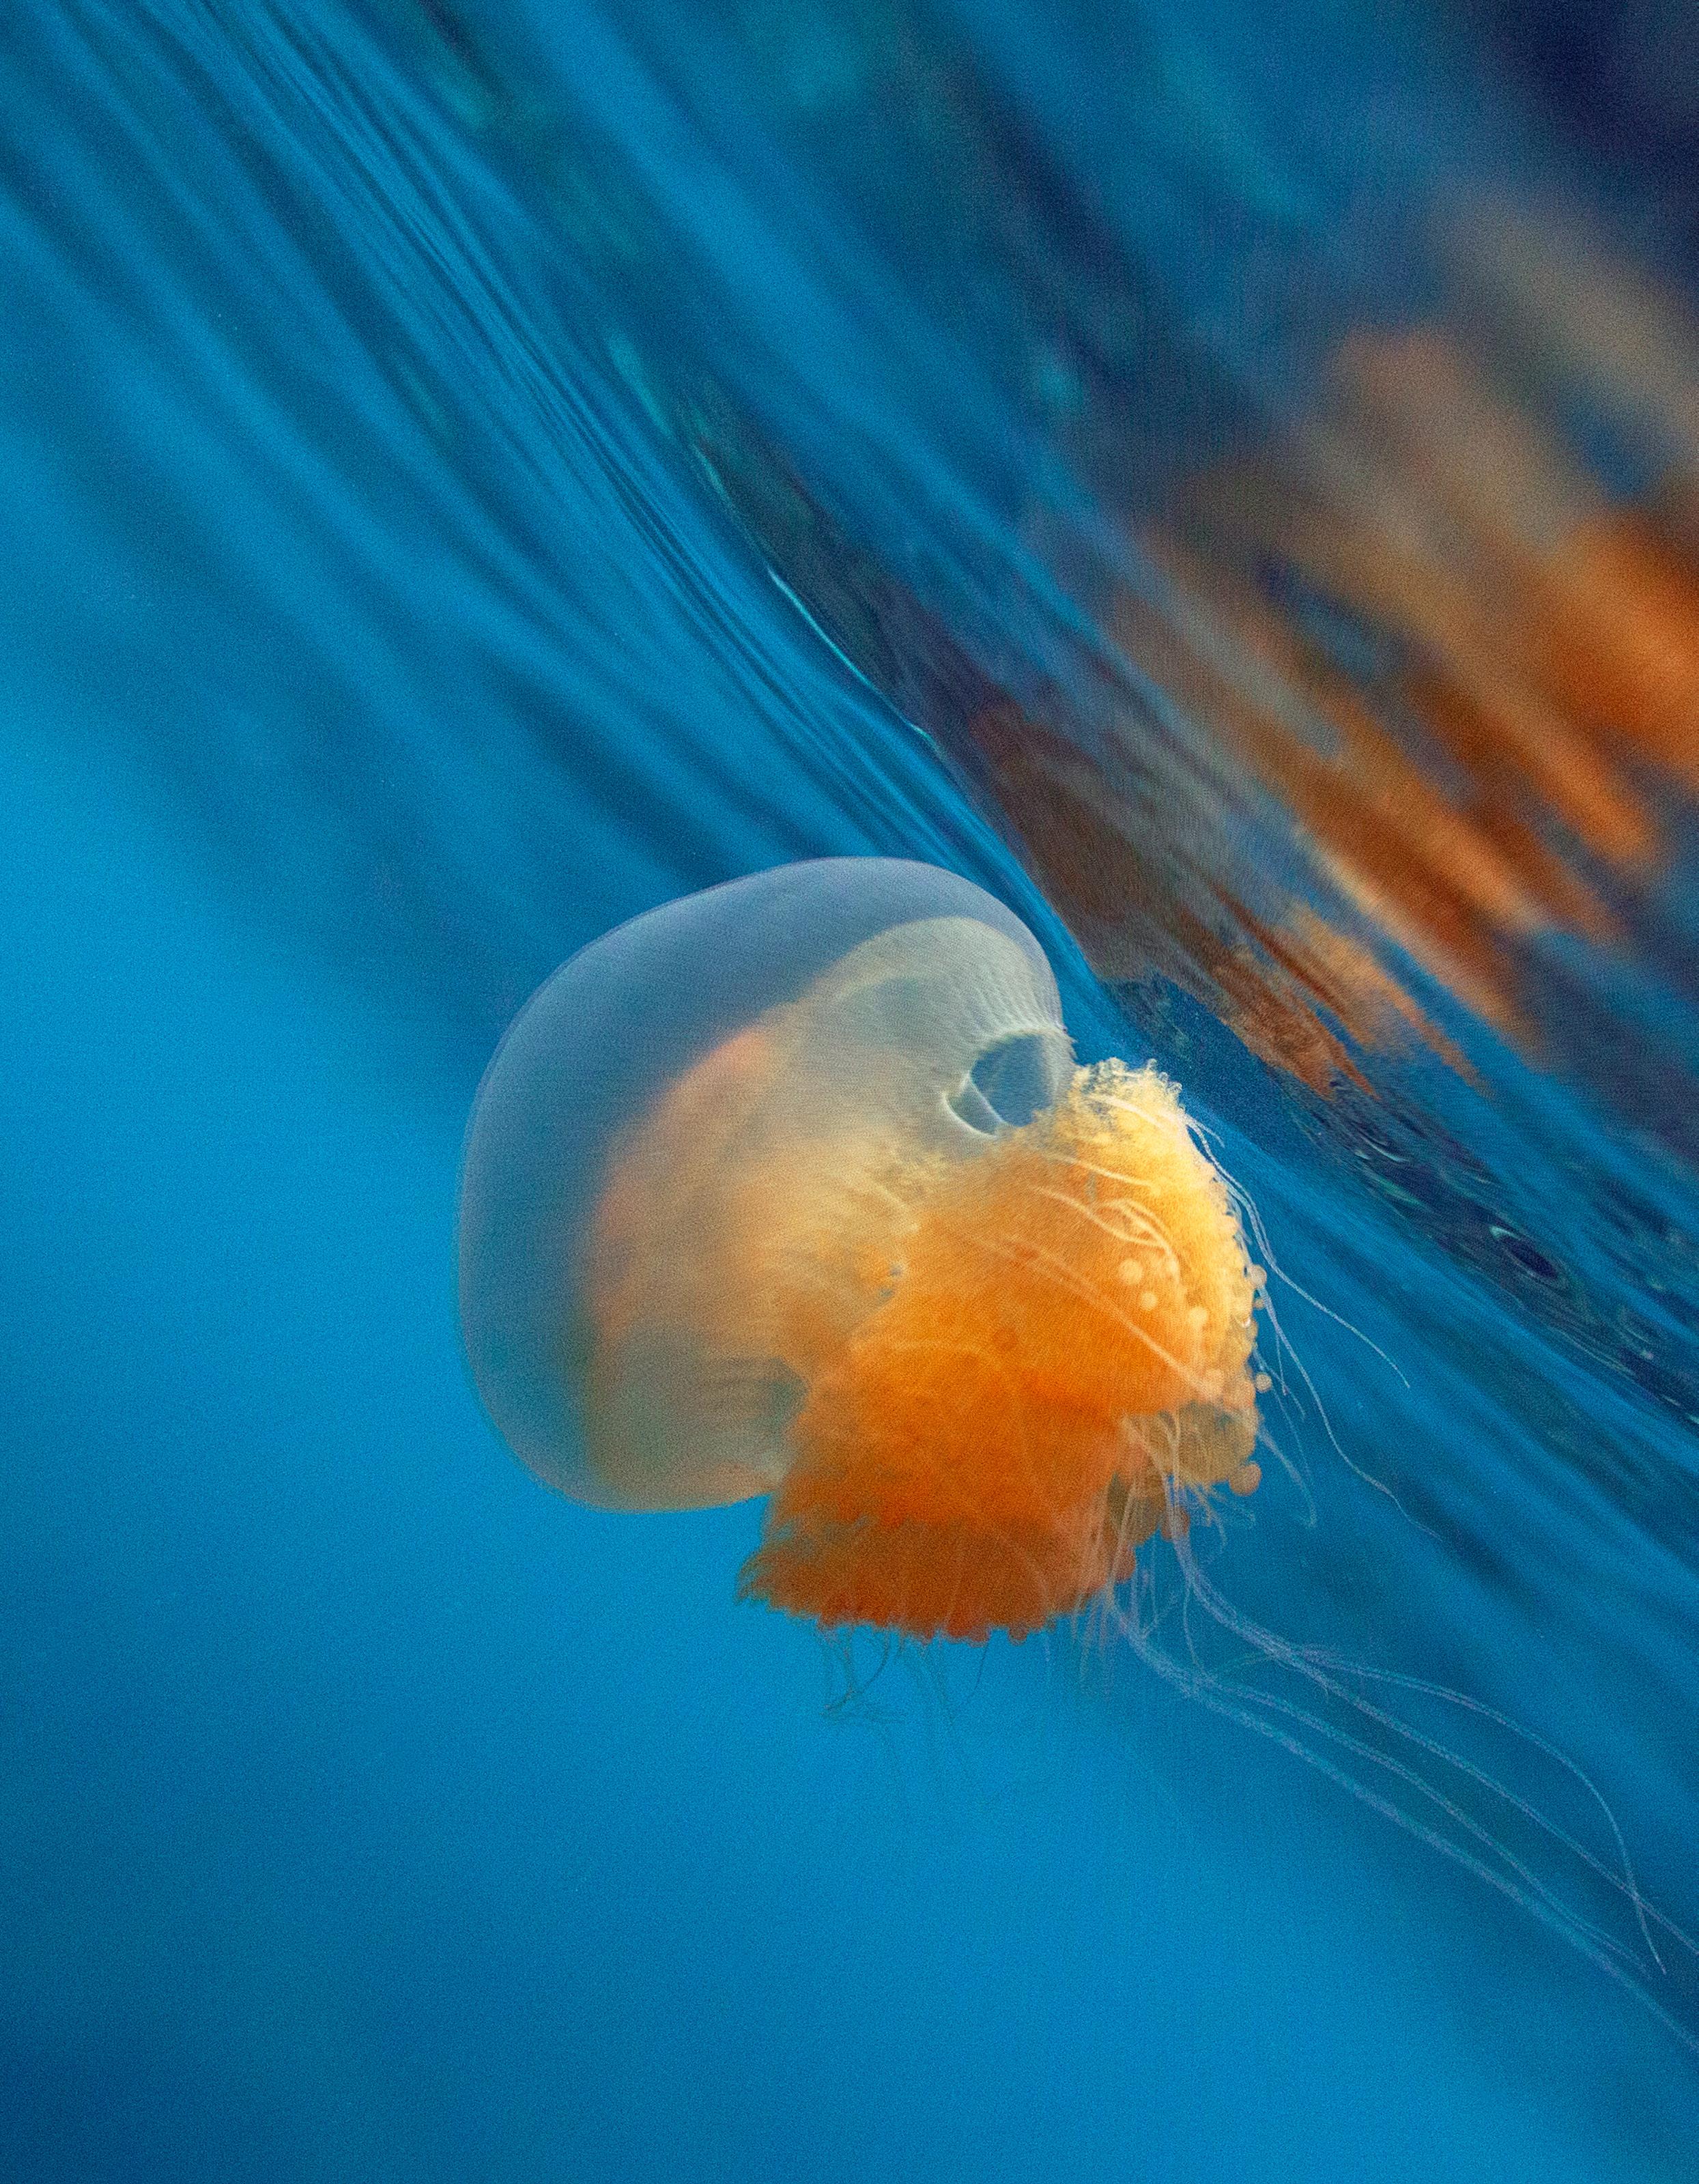
LAST PARADISE ON EARTH
Meaghan Ogilvie’s Tamron SP 35mm F/1.4 lens offers an intimate underwater glimpse of Indonesian marine life.
PHOTOS: MEAGHAN OGILVIE 12 Tamron Magazine INTERVIEW
From her first 35mm film camera at age 14 to her commercial photography studies at Ontario’s Sheridan College, Meaghan Ogilvie always knew that creating images was her calling. It was after graduation, however, when the Canadian photographer redirected herself into a career in the fine arts, where she soon gained international recognition for her award-winning underwater images.
“I started underwater photography before I started diving,” she says. “I began photographing in pools, and as I progressed, I needed the diving skills to help with more complex shoots in open water. My initial reason for photographing underwater was to bring attention to my dad’s disease. He was diagnosed with multiple system atrophy, a rare neurodegenerative disease. I wanted to help with awareness, and the best way I knew how to do that was through photography. My goal was to create striking, unique images to grab people’s attention and then use that platform to talk about his disease. At the time, I had no idea those images would change the trajectory of my life and career.”
Read on for a Q&A with Meaghan, who describes her style of photos as “art and documentary, with themes of escapism and transformation.”
What appeals to you about underwater photography?

Ogilvie: It’s a unique way to see the world. The underwater realm can be full of vibrant colors, intricate patterns, and the most beautiful and bizarre creatures. I love being connected to the ocean. Underwater photography also allows me to capture the

Tamron Magazine 13 INTERVIEW
SP 35mm, F/2.8, 1/3200 sec., ISO 2000
SP 35mm, F/5.6, 1/320 sec., ISO 1250
beauty and diversity of marine life and share with others who may have never witnessed it. It can also be a powerful tool for conservation and education.

As an artist, it can be a very poetic and ethereal experience to photograph underwater with muted sounds, slowed movements, and the feeling of infinity around me. Underwater photography also provides opportunities to travel and explore. I love the athleticism and problem-solving needed. Shooting in this type of environment has taught me to adapt to any situation and use it as a creative advantage.
Tell us about your journey to Raja Ampat, Indonesia, for the series of photos here.

Ogilvie: I won a trip in April—a oneweek live-aboard, where you stay on a boat and dive four times a day—via an underwater photography contest, and I stayed an extra week on land. Raja Ampat is described as “the last paradise on earth” due to its remote location and rich biodiversity, with nearly 1,700 types of fish inhabiting its waters.
Talk about using the Tamron SP 35mm F/1.4 Di USD lens for underwater images.
Ogilvie: Tamron was generous enough to lend me the 35mm for my trip. I’m used to shooting with a 17-40mm, so it was amazing to try this lens to create a shallower depth-of-field, play with bokeh, and achieve a closer perspective of my subjects. Shooting conditions were challenging due to heavy rains and strong currents that brought plankton and algae. This affected the visibility for pictures, but the 35mm offered great, reliable autofocus in low light and visibility. It was versatile enough to capture wider shots of schools of fish, but also closer details of coral, which Raja Ampat is known for. I was able to use this lens not only underwater, but also on land to capture tiny insects and seascapes.
How challenging is lighting for underwater photos?
Ogilvie: Lighting does become trickier the deeper you’re submerged. Without light, colors begin to fade, and red is the first to be absorbed, followed by orange and yellow. Even at a depth of 5 feet, there’s a noticeable loss of red. Generally, I’ve shot in more shallow water with natural light and am able

14 Tamron Magazine INTERVIEW
SP 35mm, F/5.0, 1/400 sec., ISO 320
SP 35mm, F/5.0, 1/320 sec., ISO 320
SP 35mm, F/8, 1/320 sec., ISO 400
to recover reds, oranges, and yellow in Photoshop. If I’m diving to 30 feet, it can be more difficult. To get around this, I’ve started using strobes, and they’ve made a big difference. If I’m staying shallow, I continue using natural light. Through experience, I’ve learned where to position myself for different effects.
When I’ve shot indoors in swimming pools for advertising shoots, I’ve used an HMI constant light on the surface pointing into the pool. The light mimics sunlight and is really beautiful. For a more dramatic effect, I’ve used a large underwater light with a bare bulb pointing down just under the surface for more dramatic shadows.
What are some of the other challenges of taking photos like these?
Ogilvie: There are many, especially in open water, including fluctuating weather, strong currents, fatigue, dehydration, sun exposure, and temperature changes. Technical challenges are mastering buoyancy underwater to avoid bobbing up and down; potentially damaging coral or bumping into marine life; and bad visibility, which can lead to backscatter in images, which are tiny debris or plankton in the water that light up when lit by the sun or strobes.

Where does being mindful of the species you’re working with fit into all of this?
Ogilvie: As a diver, you learn to respect marine life. If you’re diving in a place for the first time, local dive guides can educate you on the rules for that area. I would never touch or chase an animal I’m photographing to cause them stress. That means it takes more time and patience to get close to take a picture.
I now contemplate my contribution to the threats that diving tourism causes. Raja Ampat is known for its remote location and successful restoration projects, but with increasing tourism, it’s facing new threats. From an influx of tourists and a lack of proper infrastructure, the reefs of Raja Ampat now face coral degradation, anchor damage, boat strikes, and increased plastic pollution.
What advice do you have for those who want to experiment with underwater photos?

Ogilvie: Get comfortable in the water before using a camera. Becoming certified in free-diving or scuba diving would be a sensible step if you want to do this more seriously. I suggest starting in a controlled environment, like a pool. You also don’t need to buy an expensive underwater camera to start. Experiment and have fun!

ABOUT:
MEAGHAN OGILVIE
Meaghan Ogilvie is a Toronto-based photographer specializing in fine art underwater images. Her passion and advocacy for water became her focus after winning an award to travel to Palau and dive in one of the largest marine protected areas in the world. Meaghan has exhibited works at the Art Gallery of Ontario, the Oceanside Museum of Art in California, Le Festival L’Homme et la Mer in France, the DGI BYEN Centre in Copenhagen Denmark, amongst others.
Website: www.meaghanogilvie.com
Instagram: @meaghan_ogilvie
SP 35mm
F/1.4 Di USD [model F045]

INTERVIEW PHOTOS: MEAGHAN OGILVIE
SP 35mm, F/6.3, 1/1000 sec., ISO 640
SP 35mm, F/6.3, 1/2000 sec., ISO 640
SP 35mm, F/10, 1/200 sec., ISO 400
“UNDERWATER PHOTOGRAPHY IS A UNIQUE WAY TO SEE THE WORLD. IT CAN ALSO BE A POWERFUL TOOL FOR CONSERVATION AND EDUCATION.”
MASTERING THE MAGIC HOUR
Our Tamron pros offer tips and techniques for capturing spectacular sunrises and sunsets.

© Cody Conk
SPECIAL
There’s nothing more captivating than when the sun rises above the horizon, casting its golden rays upon the world, or when it bids farewell with a kaleidoscope of colors during a breathtaking sunset. These moments offer photographers the perfect canvas on which to create stunning images. Our Tamron experts dive into the art of sunrise and sunset photography, unlocking the secrets to capturing the ethereal beauty that these celestial events offer. From finding the ideal location and understanding the nuances of light, to crafting compelling compositions and harnessing the interplay of colors, here’s how to master the magic of sunrise and sunset photography.
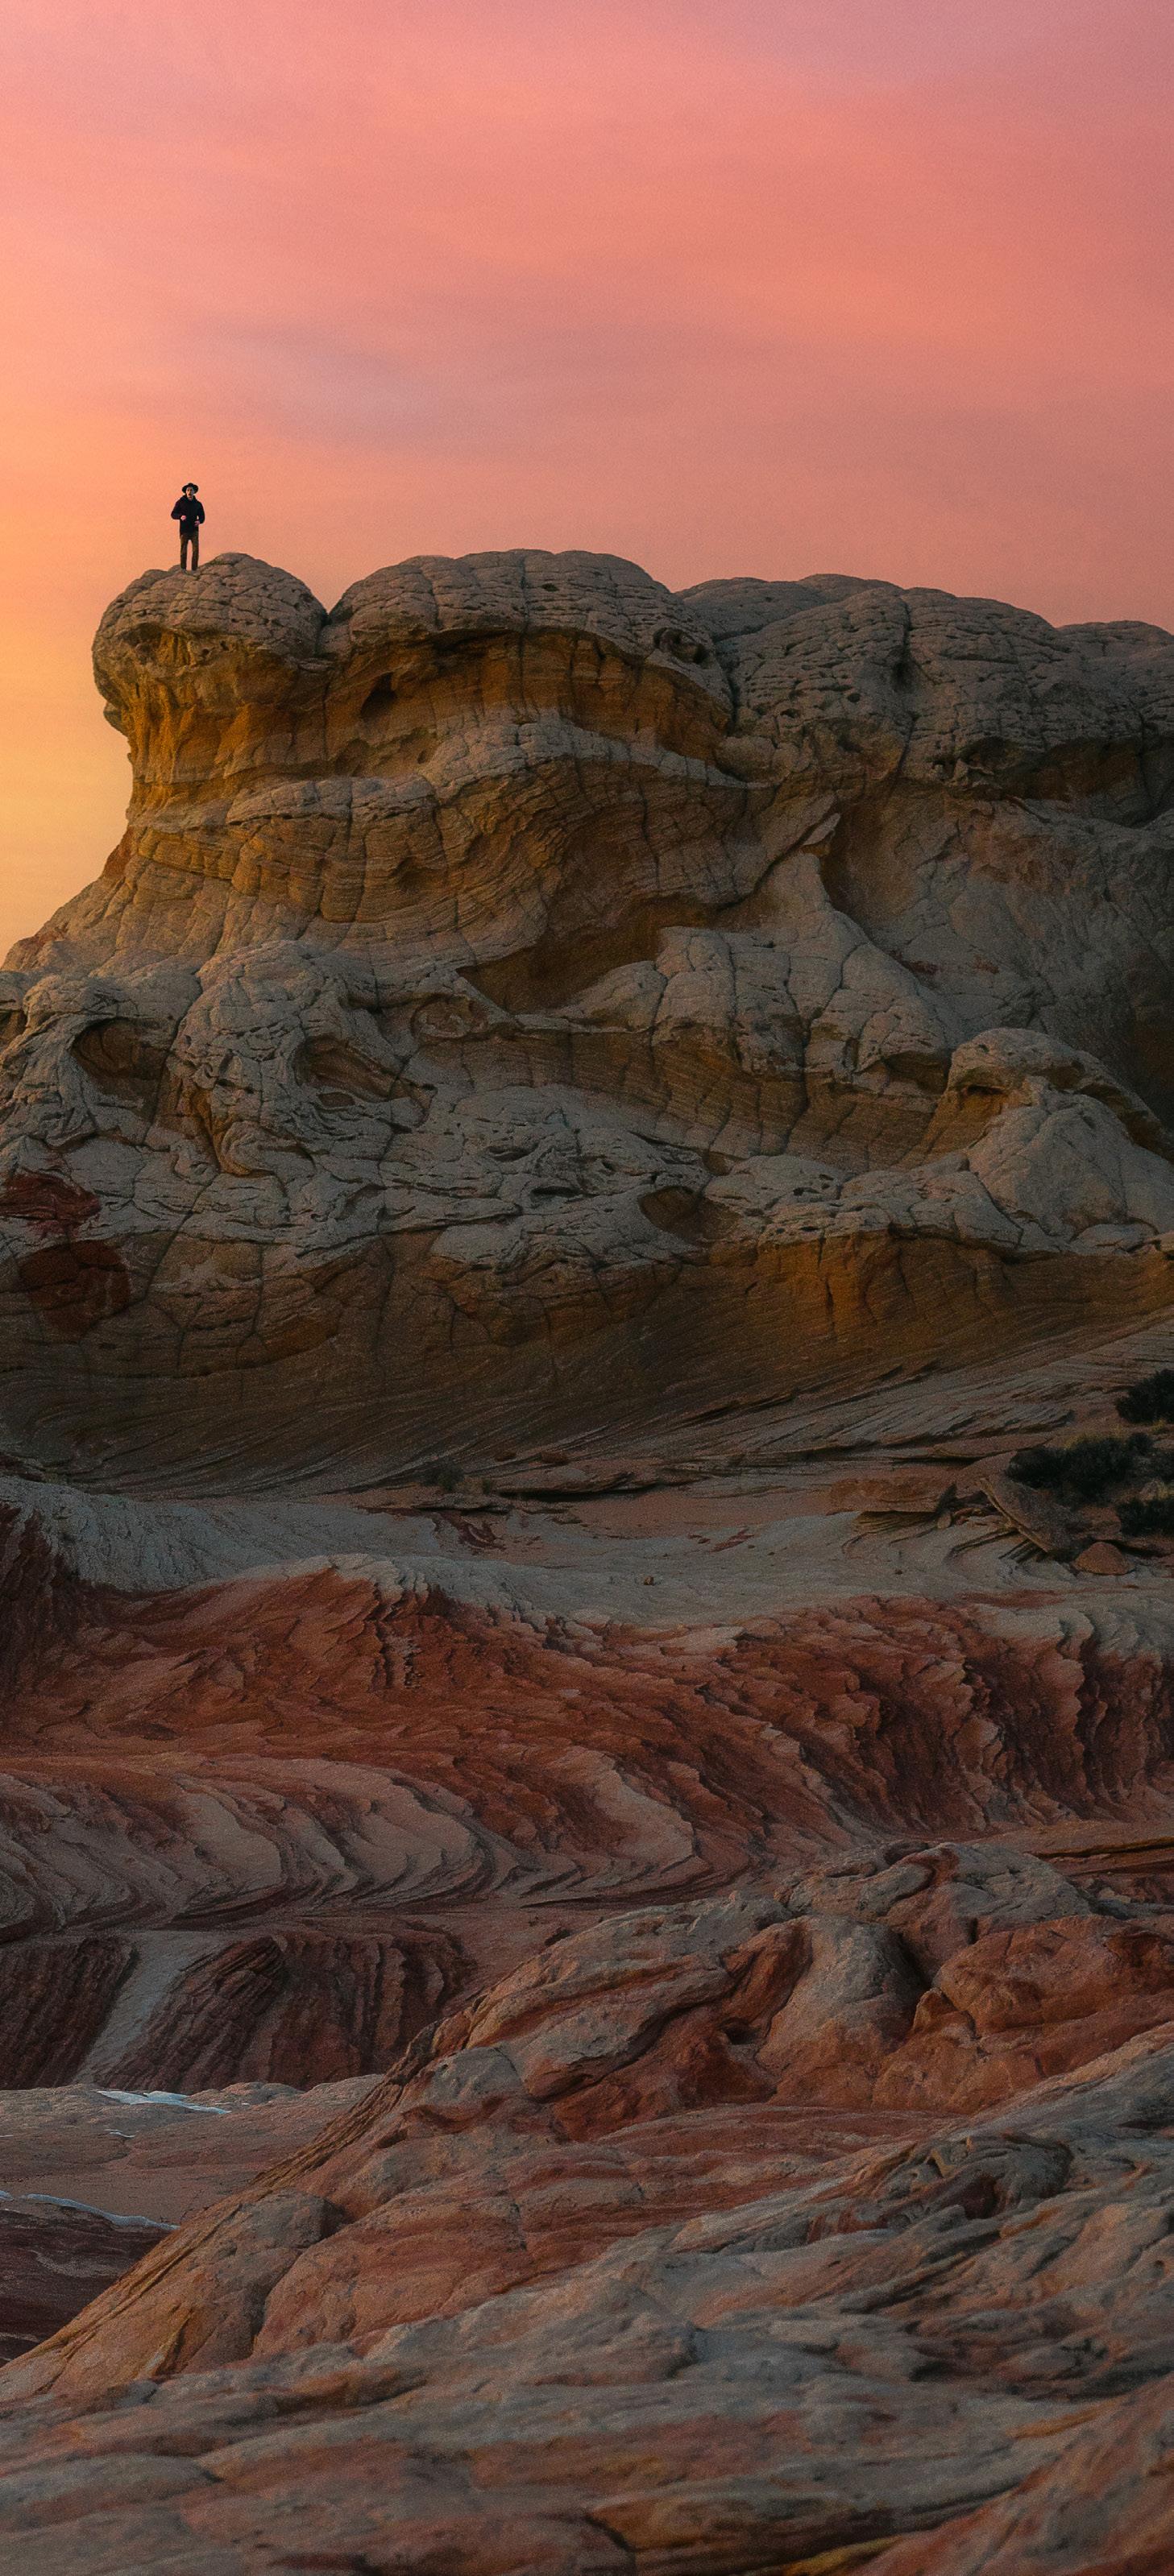
ADD HUMANS FOR SCALE.
What would a sunset be without people to see it? Incorporate humans into your shot in a way that allows for separation between your subject and the scene, and so that the subject stands out. In this red rocks photo, the photographer placed the human subject in the upper right third of the image, which was the highest point in the frame. Make sure the people in your photos are noticeable, but not distracting. The human element should add value to your image, not hurt it.
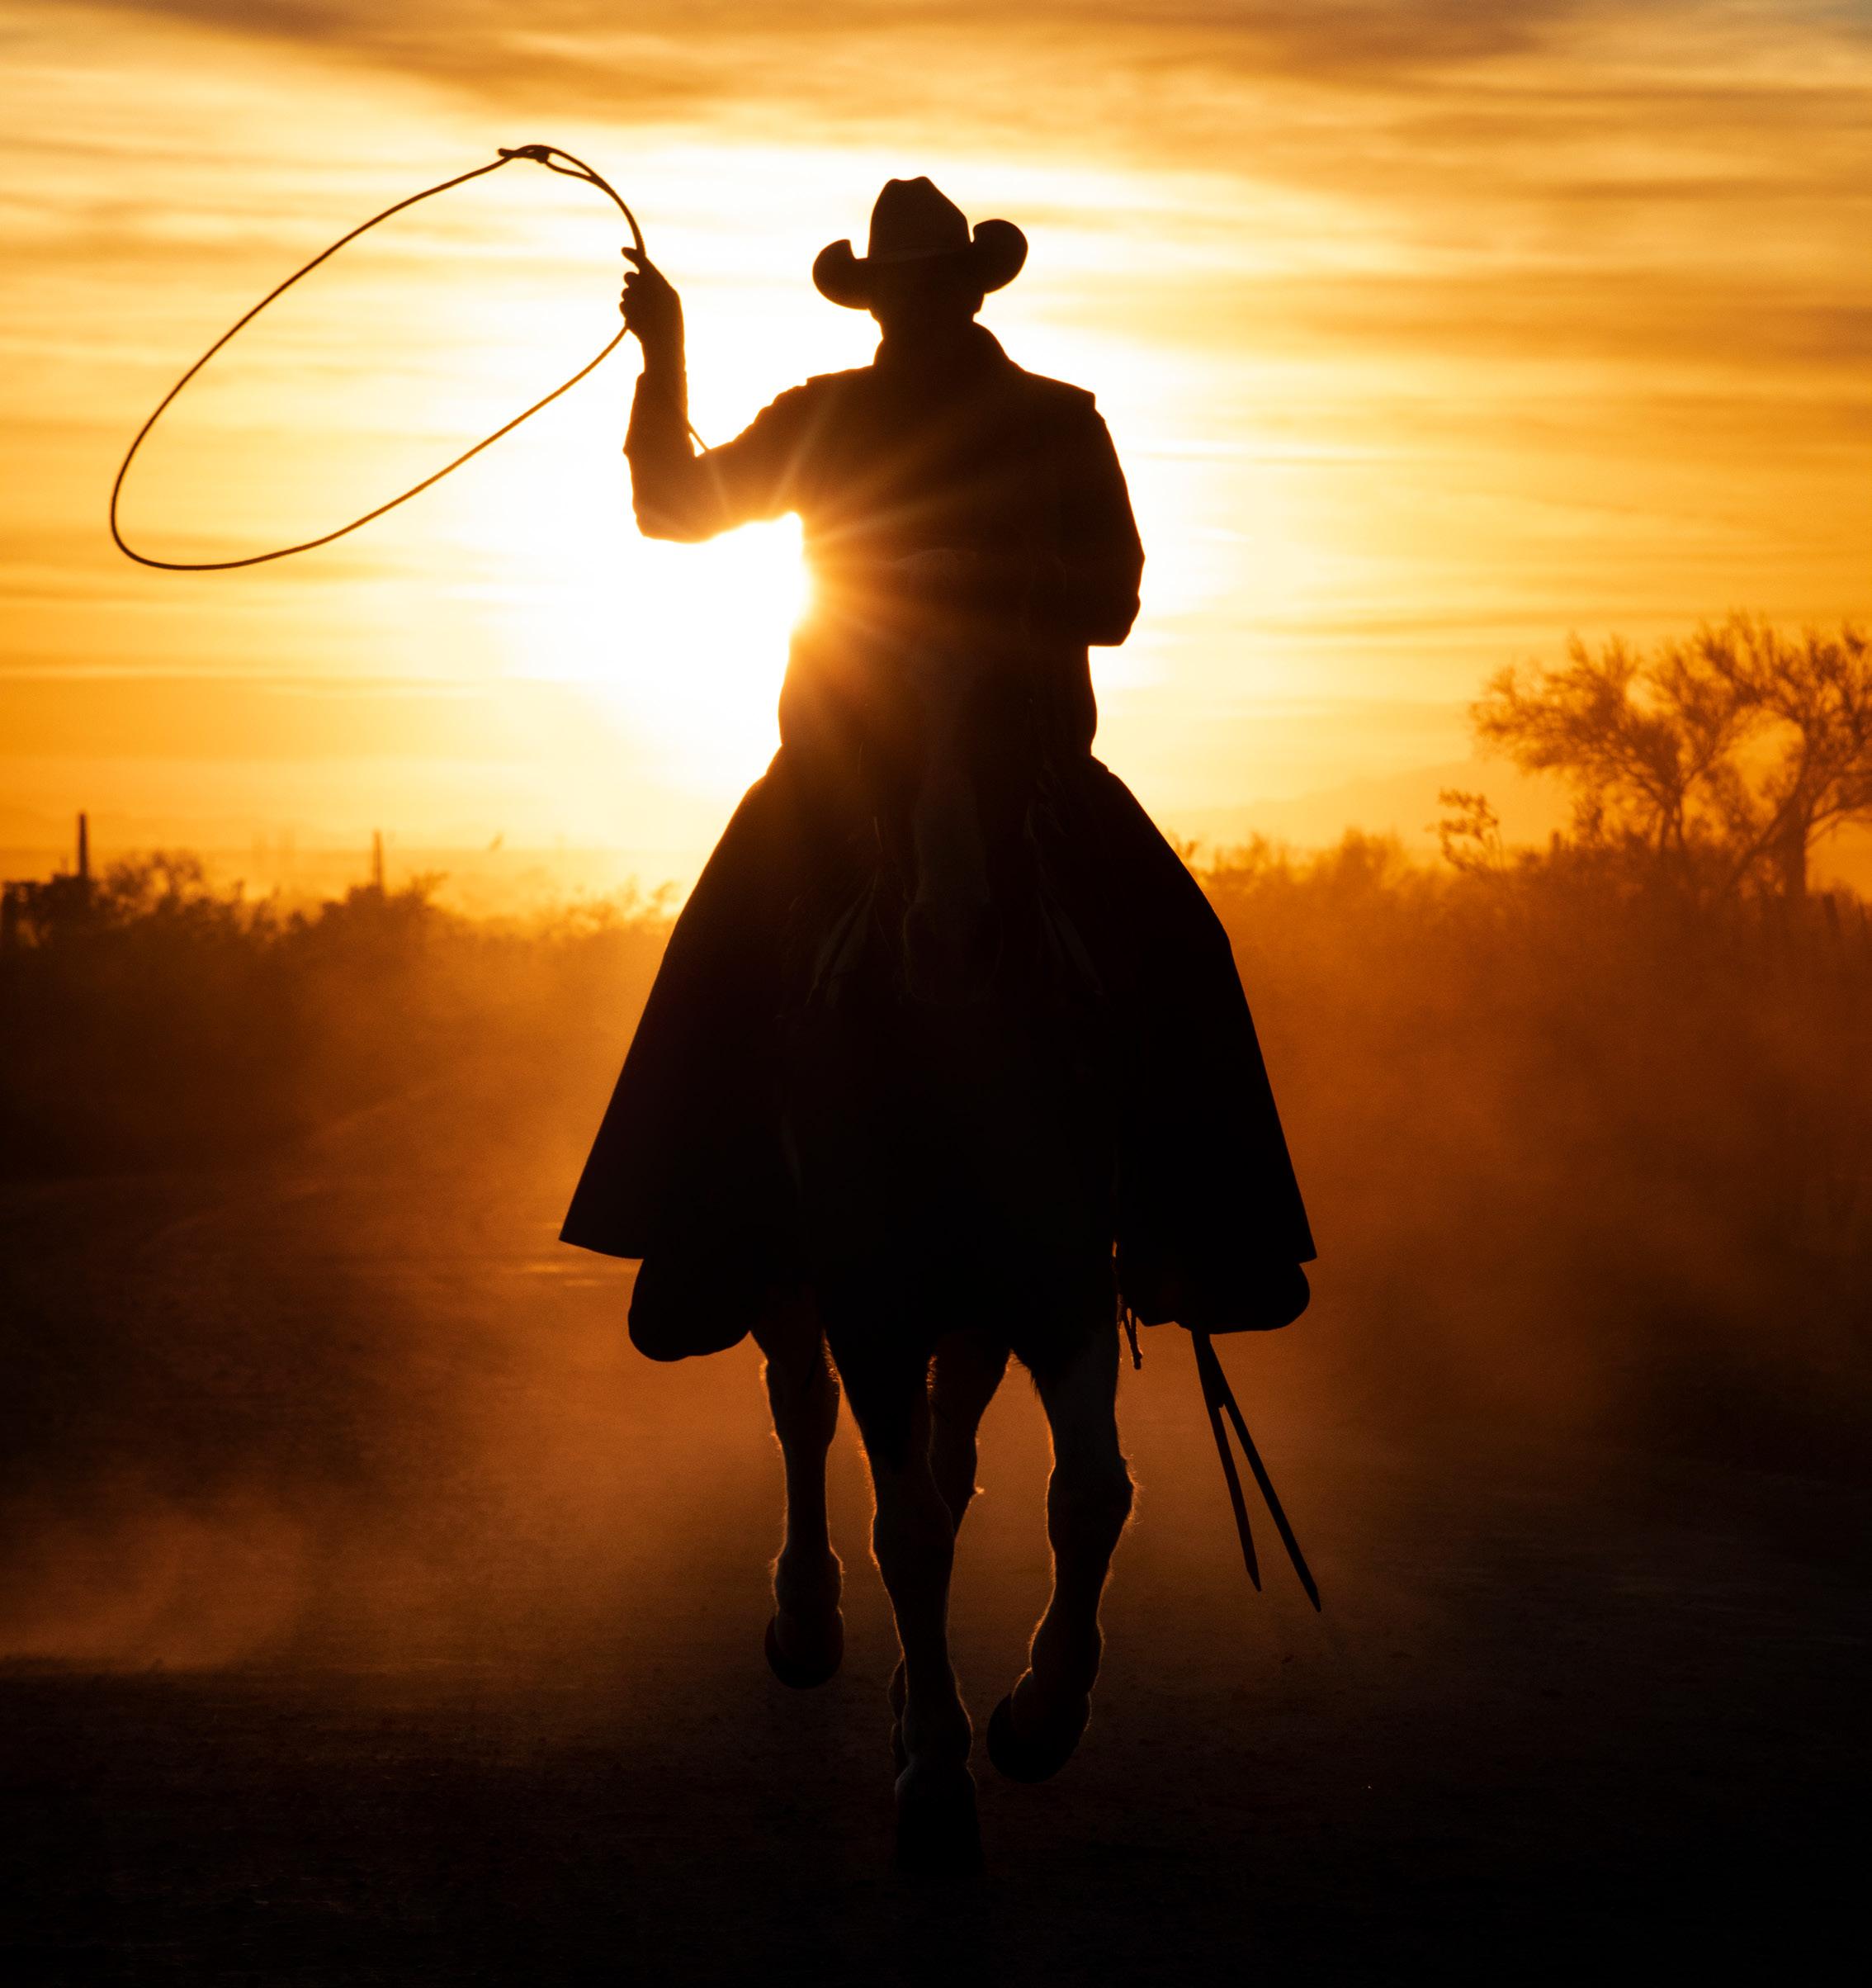
PAY ATTENTION TO SHAPES IN SILHOUETTES.
This can be a spectacular way to use this precious lighting. That said, your camera may not give you the best exposures if you capture images on “auto” or priority-type settings. First, ensure the shapes of each subject don’t merge with one another or with the background. Subject separation is crucial for an effective silhouette. So often, photographers aren’t mindful that the entire shape of the subject usually needs to be visible for the shot to be visually effective.
In this photo of the cowboys on their horses, notice the horses’ legs. One can see them all the way from the riders’ hats to the horses’ feet. The light sky stops at the horizon, at which time the backlit dust keeps doing the job of continuing the silhouette. Without the dust, the image would showcase only the upper halves of the horses; the lower halves would be black and blend with the black background.

Tamron Magazine 17
SPECIAL
© Lisa Langell
NAIL EXPOSURES FOR SILHOUETTE PHOTOS.
Expose for the sky first, set your settings, then introduce your subject. Don’t forget to account for the correct shutter speed needed to freeze the action. You may need to underexpose by 1/3 to 2/3 of a stop to get the best look when the sun is a bit higher in the sky. As the sun approaches very close to the horizon (actual sunrise or sunset) or below the horizon (the blue hour), you may need to expose with your meter at or near zero.
DON’T ALLOW THE SUN ITSELF TO TURN INTO A DISTRACTION.

It can become a large white spot on your image, which draws attention away from your subject. By partially or completely blocking the sun, you draw greater attention to your subject and the silhouette. Ensure the sun is obfuscated by a few clouds or dust, or either partially or completely by your subject. This will help achieve a better visual balance with your silhouetted subjects.
CAPTURE A STARBURST.
Crank your f-stop to between F13 and F22 and include the sun in your frame. If you’re looking for the effect to be a half-sun, make sure to cover half of the sun in some manner. One way to achieve that is with the horizon line at sunrise or sunset. The starburst effect works with all strong light sources, so practice creating this kind of image using a headlamp or city streetlight.
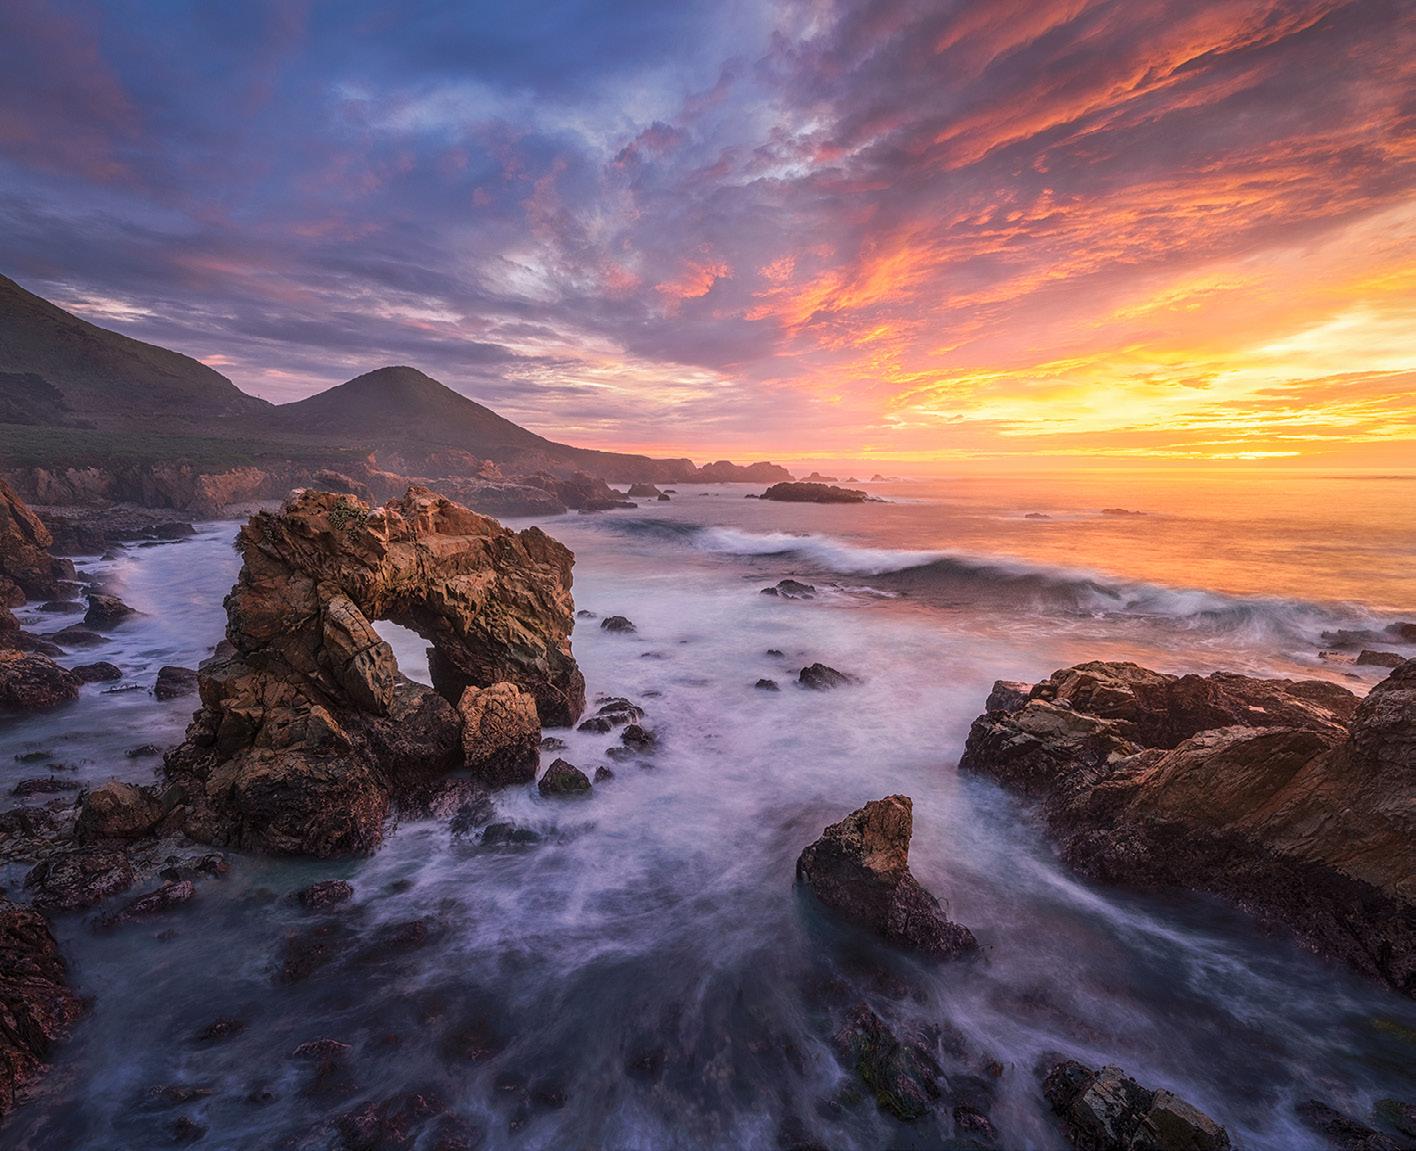
COMPLEMENT A SUNRISE OR SUNSET SKY WITH WATER.

The texture of water can play a big compositional role. Besides getting the right conditions in the sky, try to experiment with different shutter speeds for capturing the movement in the water. You can also combine different waves or textures during exposure blending to create the best composition and flow in the image.
SPECIAL
© Cody Conk
“SUBJECT SEPARATION IS CRUCIAL FOR AN EFFECTIVE SUNSET SILHOUETTE.”
© Lisa Langell
© Dalton Johnson
© Tanmay Sapkal
PLACE ELEMENTS IN THE FOREGROUND.
Not only do they add depth and visual interest to the image, like the rocks in Alberta’s Two Jack Lake do here, but they can also serve to guide the viewer’s eye toward the setting sun, or the main subject lit by the setting sun—in this case, the mountains in the background.

USE FOCUS-STACKING.
When you do place elements in the foreground, such as wildflowers, get as close to those subjects as your lens allows and use focus-stacking to keep everything in the image sharp. You might need to capture dozens of images to achieve that sharpness, so take as many images as you think you’ll need, and then some just to be safe.

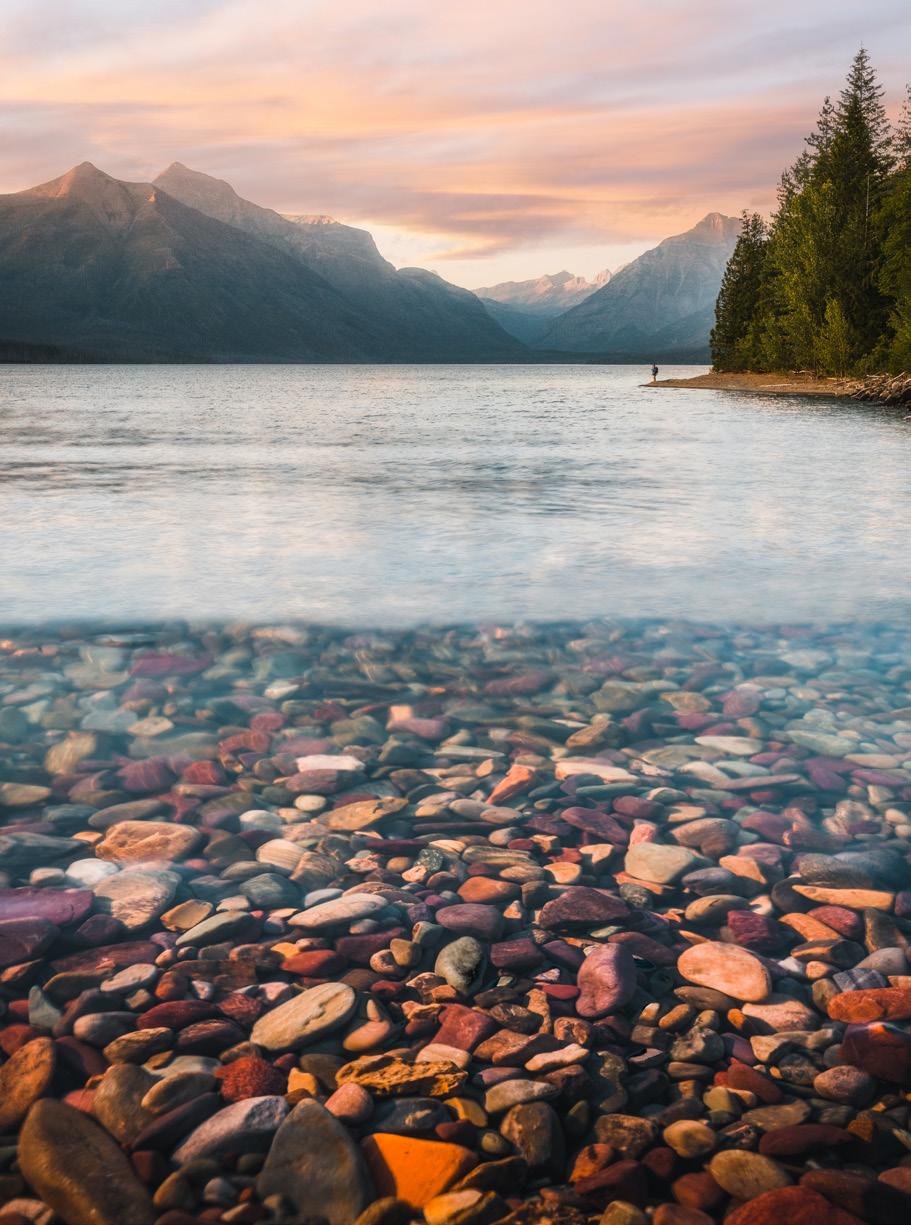
Focus-stacking was key as well for this photo of rocks in Glacier National Park’s Lake MacDonald. Using a tripod, the photographer first captured the foreground with the colorful rocks, using a circular polarizer to help cut down on the glare from the water. From there, the photographer moved on to capture the higher parts of the photo, using the brighter water above the foreground rocks to make them pop in the image. Focus-stacking was achieved during post-processing.
FOLLOW THE LIGHT.
Your sunrise or sunset plans may not always work out exactly as you’d hoped. Don’t be afraid to move around or even completely switch your location based on how the light is turning out. For this image in Hawaii’s Waimea Canyon State Park, the photographer had planned to shoot the sunrise from beyond the waterfall seen in the distance, but instead they had to drive back to another location because the original spot was completely fogged in.

Opening Spread
28-75mm (75mm), F/4.5, 1/200 sec., ISO 800
35-150mm (150mm), F/6.3, 1/320 sec., ISO 100
Counter Clockwise from top left
SP 150-600mm (600mm), F/32, 1/500 sec., ISO 100
28-75mm (28mm), F/22, 1/10 sec., ISO 100
150-500mm (500mm), F/6.7, 1/250 sec., ISO 100
17-28mm (17mm), F/11, 1/80 sec., ISO 100
20-40mm (36mm), F/22, 8.0 sec., ISO 100
17-28mm (17mm), F/11, 1/80 sec., ISO 100
17-28mm (17mm), F/14, 1/120 sec., ISO 100
SPECIAL
© Ken Hubbard
© Tanmay Sapkal
© Tanmay Sapkal
BE READY FOR THAT OPTIMAL MOMENT.
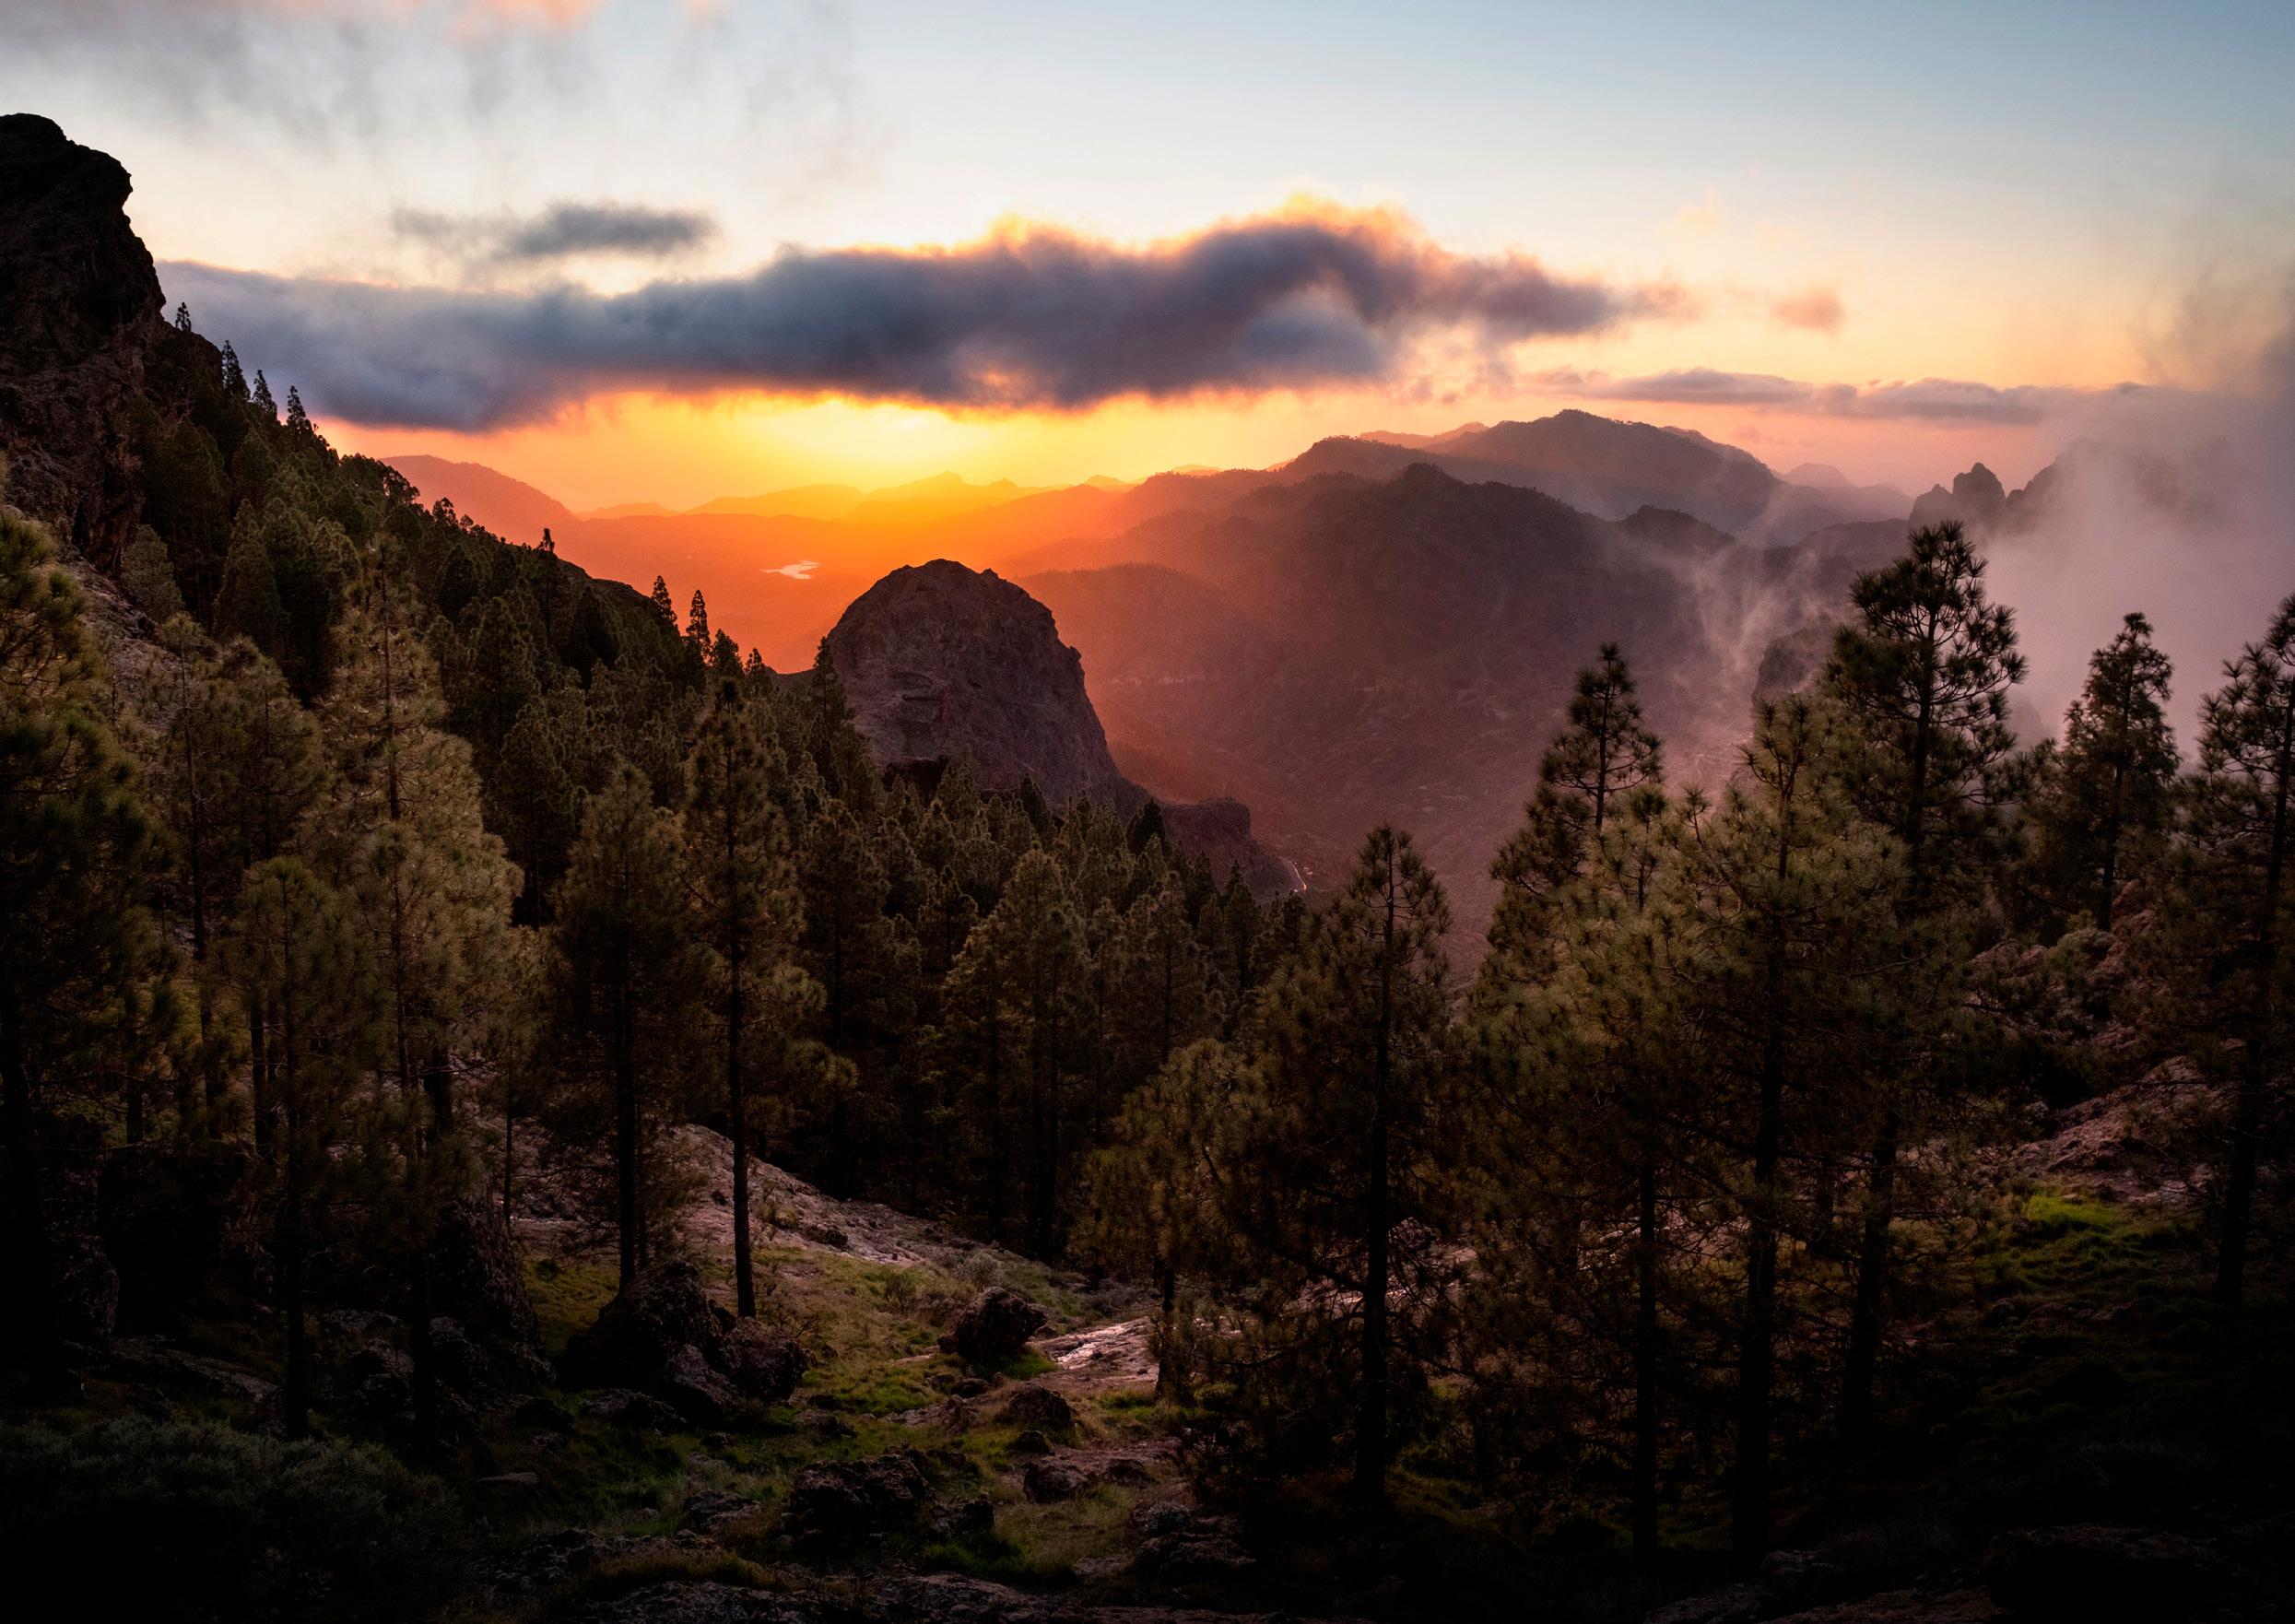
We only get the kind of warm, golden-hour light you see near sunrise and sunset for a few minutes each day. Planning ahead and knowing where the light will hit your subject are key to achieving a stunning sunrise or sunset image. Arriving early and setting up well before sunrise or sunset will give you time to adjust your gear and settings and find the perfect composition without being rushed.
Think about how the angle of the sun will affect your subject. Backlighting, for instance, can create silhouettes, while side lighting can create dramatic shadows. Finding the right angle of the sun can be done by using various apps like PhotoPills, or by visiting a location multiple times. For the photo of the boats in the harbor, the sun was hitting them from about a 45-degree angle from the camera, which helped bring that warm light into the reflection and across the entire scene.

UNDERSTAND HOW THE LIGHT WORKS WHERE YOU’RE SHOOTING.
Timing a sunrise or sunset when you visit particular sites is important. For this photo inside a rock cave, for instance, the photographer arrived right at sunrise but waited just a bit longer, until the sun was higher and more light entered the cave, filling it with illumination and color. The angle of the sun in photos taken earlier and later than that exact moment wouldn’t have offered the same effect.
Depending on your location, the light at sunrise and sunset can also act in different ways. For this shot of Clingmans Dome in Great Smoky Mountains National Park, the “smoke” in the mountains transforms from a grayish blue to a warmer yellow or orange as the sun sets. Sometimes waiting until the sun is either just setting or has just set will offer the best light to capture the mood.

GO PANORAMIC.
Sometimes when you’re viewing a sweeping landscape at sunrise or sunset, it’s obvious you won’t be able to capture the entire scene in one frame, even with an ultra-wide-angle lens. For this photo of a majestic waterfall, the photographer took a handheld vertical-motion pano, taking about six photos from top to bottom. The key to such a shot


20 Tamron Magazine
“INCORPORATE HUMANS INTO YOUR SUNRISE AND SUNSET IMAGES IN A WAY THAT ALLOWS FOR SEPARATION BETWEEN YOUR SUBJECT AND THE SCENE.”
© Cecil Holmes
© Jose Mostajo © Jose Mostajo
© David Akoubian
is keeping the camera fixed in one spot and rotating the angle of the lens; otherwise, it won’t stitch properly.
EXPERIMENT WITH DEPTH-OF-FIELD.
This is especially important if you have a person in your frame. If your subject is up close, shoot wide open and focus on the glow of the landscape to keep it as your main subject as the sun goes down (or comes up). Your subject will exist for scale and as a storytelling element, yet the viewer will still be gazing past her at the amazing sunlit textures.


TWO WORDS: TRIPOD AND INTERVALOMETER.
A sturdy tripod is your best friend when going on a sunset photographic adventure alone, especially if there’s a good amount of wind. To place yourself in the frame, turn on your built-in intervalometer, let it shoot continuously, and walk into the frame, trying out different poses. That gives you a variety to choose from later on.
CAPTURE A SUNRISE OR SUNSET OVER CLOUDS.

This can create a stunning display of colors as the sun rises above or dips below the horizon. Be patient and observe how the light changes as the sun goes through its motions. Capture a series of shots to document the progression of colors and atmospheric conditions.
DON’T GIVE UP ON THE LIGHT.
For this photo of Maine’s Portland Head Light at sunrise, the light started out looking good that morning, but then a cloud diffused the light and more than half the people gathered left. The photographer, however, spotted a slight break in the clouds, and less than five minutes later, the sky lit up for about another minute. The photographer also used a neutral density filter to help slow the exposure down to enhance the reflection of color in the water.

Counter Clockwise from top left
70-300mm (81mm), F/8, 1/40 sec., ISO 50
17-28mm (21mm), F/5.6, 1/160 sec., ISO 100
17-28mm (17mm), F/7.1, 1/500 sec., ISO 250
24-70mm (24mm), F/22, 1/15 sec., ISO 400
24-70mm (38mm), F/16, 8.0 sec., ISO 100
28-75mm (75mm), F/2.8, 1/1600 sec., ISO 100
28-200mm (91mm), F/8, 1/10 sec., ISO 200
28-75mm (58mm), F/2.8, 1/4000 sec., ISO 320
Tamron Magazine 21
SPECIAL
© Jose Mostajo
© Jose Mostajo
© Kazuya Seki
© David Akoubian
NICK MORAN
Maui Arial Photographer. Nick has been behind the lens for the last 6 years and enjoys finding new fresh perspectives. Nick lives on the island of Maui with his wife Magen where they run a helicopter company called Go Fly Maui. Aside from being a photographer and helicopter pilot, Nick is an avid kiteboarder, fisherman, and horse dad. Instagram: @Nick_Moran_Photography & @goflymaui

HIGHLIGHT
Tamron Magazine 23 HIGHLIGHT 150-500mm (500mm), F/6.7, 1/2500 sec., ISO 1600
UP CLOSE AT THE AIR SHOW
Carolyn Hutchins documents the excitement of Florida’s Sun 'n Fun Aerospace Expo with her Tamron telephoto lenses.

FIELD REPORT
PHOTOS: CAROLYN HUTCHINS
Carolyn Hutchins’ day job is working at central Florida’s Gatorland, where it’s not unusual to see her photographing the crocodiles, birds of prey, and (naturally) alligators congregating in the marshy waters. The nature and wildlife photographer also lives close enough to Florida’s Space Coast so that she often finds herself heading out to take pictures of the various air shows in the area, including the Sun ‘n Fun Aerospace Expo in Lakeland.
“I’m on the photography team for the expo, so I have great access,” Carolyn says. “We photograph a lot more than just the aircraft. Our team is responsible for documenting the entire show, including all of the educational initiatives, the kids’ programs, and whatever else might be happening.”

For this year’s show in the early spring, Carolyn’s Tamron 70-300mm Di III RXD and SP 150-600mm Di VC USD G2 telephoto lenses were ready for the action. “The 70300mm is my walk-around lens, especially when I’m checking out the aircraft before the show,” she says. “It’s compact, lightweight, and sharp. The 150-600mm, meanwhile, which I use on my mirrorless camera system with an adapter, is perfect for when I’m on the ground, trying to capture planes in the sky. I can zoom in to focus on a single aircraft, or I can pull back a bit to capture the wider formations with multiple planes. Also, because I shoot handheld and do a lot of panning when I’m at these shows, the Vibration Compensation

Tamron Magazine 25 FIELD REPORT
70-300mm (70mm), F/7.1, 1/640 sec., ISO 100
70-300mm (222mm), F/8, 1/2000 sec., ISO 100
(VC) feature on the 150-600mm, with a mode specifically set for panning, is especially handy for helping me avoid camera shake and keep my images sharp.”
There’s not necessarily a “best” vantage point at an air show—“many of my best photos come from taking pictures from the same areas where the general crowd is,” Carolyn says—but she notes that show center can be fun, as are the ends of the runways. “That’s where you can get cool banking shots, where the aircraft fly from one end to the other and then whip around.”

Making sure her camera is ready for the action is key. “I tend to change my settings a lot while shooting, but I’m usually in manual or shutter priority,” Carolyn says. “If I’m photographing the prop planes, for instance, I’ll shoot in shutter priority, so I can set a lower shutter speed and capture the movement of the propeller. And when the planes are in the air, especially in formation, I’ll almost always shoot in continuous burst mode.”
Images of the aircraft in action are the money shots. “I love taking pictures of the planes flying in formation, especially when they eventually break from the formation and fly off in different directions,” Carolyn says. “Capturing the smoke trails is also a terrific way to show movement in your photos.”


To nail those fast-moving images, Carolyn suggests familiarizing yourself with what goes on in shows like this beforehand. “Go online and watch videos of past performances,” she says. “Or, if you have the opportunity, you head over to the venue the day before the show. The Blue Angels, for instance, will often fly in early and spend that day learning the airspace, as every airfield is different, and practicing their maneuvers.”
If a multiday show is coming to town, attend on the first day as your “practice” day. “This will allow you to see how the lighting lands on the different parts of the runway throughout the day,” Carolyn says. “You can then go back the second or third day with more of a feel for what you’re working with.”
In the early morning, before most people have arrived for the main event, Carolyn will often

26 Tamron Magazine FIELD REPORT
70-300mm (300mm), F/6.3, 1/640 sec., ISO 800
150-600mm (210mm), F/7.1, 1/4000 sec., ISO 100
70-300mm (70mm), F/7.1, 1/1250 sec., ISO 100
150-600mm (150mm), F/5.0, 1/2500 sec., ISO 160
head to the venue to walk the grounds. “I find I have more time and freedom to capture the aircraft from different perspectives, without too many people around,” she says. “If I’m able to capture the planes at sunrise, when there’s sometimes a lovely Florida mist, my photos can take on an otherworldly feel.”
During those quieter hours is when Carolyn was able to photograph the Lockheed Electra and P-51 Mustang planes seen here in black and white. “The real challenge with these types of static display shots is taking a picture without also capturing your reflection in the chrome,” she says. “That’s where the 70-300mm comes in very handy, as I’m able to back up a bit and then zoom in nice and tight so I can hide myself.”
Some sage advice Carolyn offers for other photographers heading out to document an air show, especially for first-timers: Concentrate on creating photos that intrigue you the most. “If you want to take pictures of the big


jets, do that,” she says. “If you want to capture the fireworks that they often feature during the evening shows, do that. The point is, don’t necessarily try to capture everything in one show, like I do as part of the team I’m on. Go in with a particular goal in mind and stick to it.”
ABOUT: CAROLYN HUTCHINS
Carolyn is an outdoor photographer from central Florida, where she has been on a team of airshow photographers for several years. During the shows, she has worked to capture unique images of jets, propeller aircraft, hot air balloons, and static aircraft. After working with DSLRs, she has now transitioned to mirrorless. When not out on active airfields, she enjoys photographing the landscapes and native wildlife of Florida.

Website: www.carolynhutchins.com
Instagram: @carolynh527
Tamron Magazine 27
“CAPTURING THE SMOKE TRAILS IS A TERRIFIC WAY TO SHOW MOVEMENT IN YOUR PHOTOS.”
FIELD REPORT
PHOTOS: CAROLYN HUTCHINS
150-600mm (500mm), F/6.3, 1/4000 sec., ISO 125
70-300mm F/4.5-6.3 Di III RXD [model A047Z]
ARTISTS UNVEILED
Tomas Koeck’s portraits with the Tamron SP 35mm F/1.4 prime lens celebrate performers behind the scenes.

PRACTICE 28
PHOTOS: TOMAS KOECK
Since he first picked up a DSLR in 2017, Tomas Koeck has experienced an impressive ascent in the filmmaking and photography worlds, including serving as an ambassador for Amazon Prime’s “The College Tour”; landing a sponsorship with Tamron Americas; shooting documentary shorts; and working on projects for the PBS Nature series, ESPN, the Smithsonian Channel, and the National Audubon Society.

Now a graduate student at Sacred Heart University, Tomas is finding even more creative opportunities unfolding before him, including through his collaborations with renowned musician Matt Oestreicher. “Matt is one of the best pianists and guitarists in the eastern United States, and he’s worked with a who’s who of international artists, including Stevie Wonder, Alicia Keys, Neil Diamond, John Legend, and many others,” says Tomas. “Working with him has given me the chance to learn so much about the music industry.”
This collaboration also got Tomas to thinking about a new portrait project—not of the biggest names, but of the performers who don’t see as much of the limelight, serving in supporting roles—well-respect-

Tamron Magazine 29
PRACTICE
35mm, F/4.6, 1/640 sec., ISO 8000
35mm, F/3.2, 1/640 sec., ISO 10000
ed within the industry but not household names. “These actors, singers, and musicians make the huge stars shine even brighter,” Tomas explains. “Working with Matt has connected me with some of these brilliant artists, many of whom perform at the Sacred Heart University Community Theatre.”
Tomas’ vision for the project would be to tell the story of each artist through their portrait, but with a twist: He’d shoot them in black and white, then selectively add pops of color to highlight a distinctive, signature item or piece of clothing. “Matt’s bright sunburst-color Gibson guitar, the iconic pink gloves worn by the singer Denise Renee (aka


Stout), the microphone and hat of Joe Gray, who used to warm up the crowds at the Apollo—these colorful accents all serve as visual cues, offering glimpses into the musicians’ unique personalities and careers,” Tomas explains.
To capture his portraits, Tomas opted to use the Tamron SP 35mm F/1.4 Di USD prime lens, using an adapter for his mirrorless camera system. “Its remarkable sharpness, even when shooting wide open at F1.4, helped me capture crystal-clear, detailed images,” he says. “And the 35mm focal length proved ideal, striking a balance between tight and wide compositions. It provided a versatile perspective that worked well for the studio-style setups I was striving for.”
To bring his portraits to life, Tomas used a three-point lighting setup. “The key light, often a ringlight, illuminated the subjects, while constant light strategically placed on the sides provided additional depth,” he says. “The portraits were captured against a large white backdrop in a photo studio at Sacred Heart, offering a clean and visually appealing aesthetic.”
Creating a relaxed atmosphere was key to portraits that felt genuine. “I wanted to ensure my subjects felt comfortable during the shoot, and that I was capturing authentic expressions,” Tomas says. “I encouraged my subjects to interact with their musical instruments and other props that symbolized their craft. This approach not only helped them relax, but also added an element of familiarity and personal connection. The musicians embraced the opportunity to showcase their talents and passions, resulting in captivating, dynamic poses that showed their love for their respective crafts.”
“Portrait” also doesn’t have to mean “serious.” “Gary Lindemann is an actor who’s appeared
30 Tamron Magazine
PRACTICE
35mm, F/4.5, 1/640 sec., ISO 10000
35mm, F/2.5, 1/1000 sec., ISO 800
35mm, F/1.4, 1/640 sec., ISO 2000
35mm, F/3.5, 1/160 sec., ISO 2000
in such TV series as Law & Order:SVU and Quantico, as well as in Phantom of the Opera and Anything Goes on Broadway,” Tomas says. “That’s how we came up with the idea of him tossing tickets in the air. We also wanted to incorporate a mask, to represent his turn in Phantom But that shot you see here of him making a silly face is actually from my ‘blooper’ reel—when we were just hanging out, talking, and laughing, which is often when I start hitting the shutter.”
For the colorization process, Tomas used masks in Photoshop, carefully masking the black-and-white areas and allowing select colors to shine through while maintaining an overall monochromatic tone. “I maybe upped the saturation a bit more in the areas I wanted to pop, but because most of the image was in black and white, I didn’t have to do too much of that,” he said. “In fact, in some cases, I had to desaturate the original colors.”
For Tomas, who’s spent the last couple of years tracking owls in Minnesota
and diving in with the great white sharks of Baja California, this portrait project proved a new, exciting challenge. “I had to push myself, but I also surprised myself in what I was able to achieve with the Tamron 35mm F1.4 lens,” he says. “It was also an honor to create a visual tribute to these artists, and to their dedication, talent, and support for the performers they accompany on stage.”
Production assistants: Sophie Camizzi, Maddie Robbins, and Jackson Sokoloski
ABOUT: TOMAS KOECK


Tomas Koeck is an award-winning filmmaker, SPJ award-winning journalist, photographer, and expeditionist. In simpler terms, he’s a storyteller, an environmentalist and, most importantly, an optimist. Tomas's work has found its way into PBS Nature, the Smithsonian Channel, the National Audubon Society, ESPN, and others and while on assignment has covered animals ranging from great gray owls to great white sharks.
Website: https://www.tomaskoeck.com/ Instagram: @tomaskoeck
Tamron Magazine 31
PHOTOS: TOMAS KOECK
PRACTICE
“I HAD TO PUSH MYSELF, BUT I ALSO SURPRISED MYSELF IN WHAT I WAS ABLE TO ACHIEVE WITH THE TAMRON 35MM F1.4 LENS.”
35mm, F/4, 1/30 sec., ISO 400
SP 35mm F/1.4 Di USD [model F045]
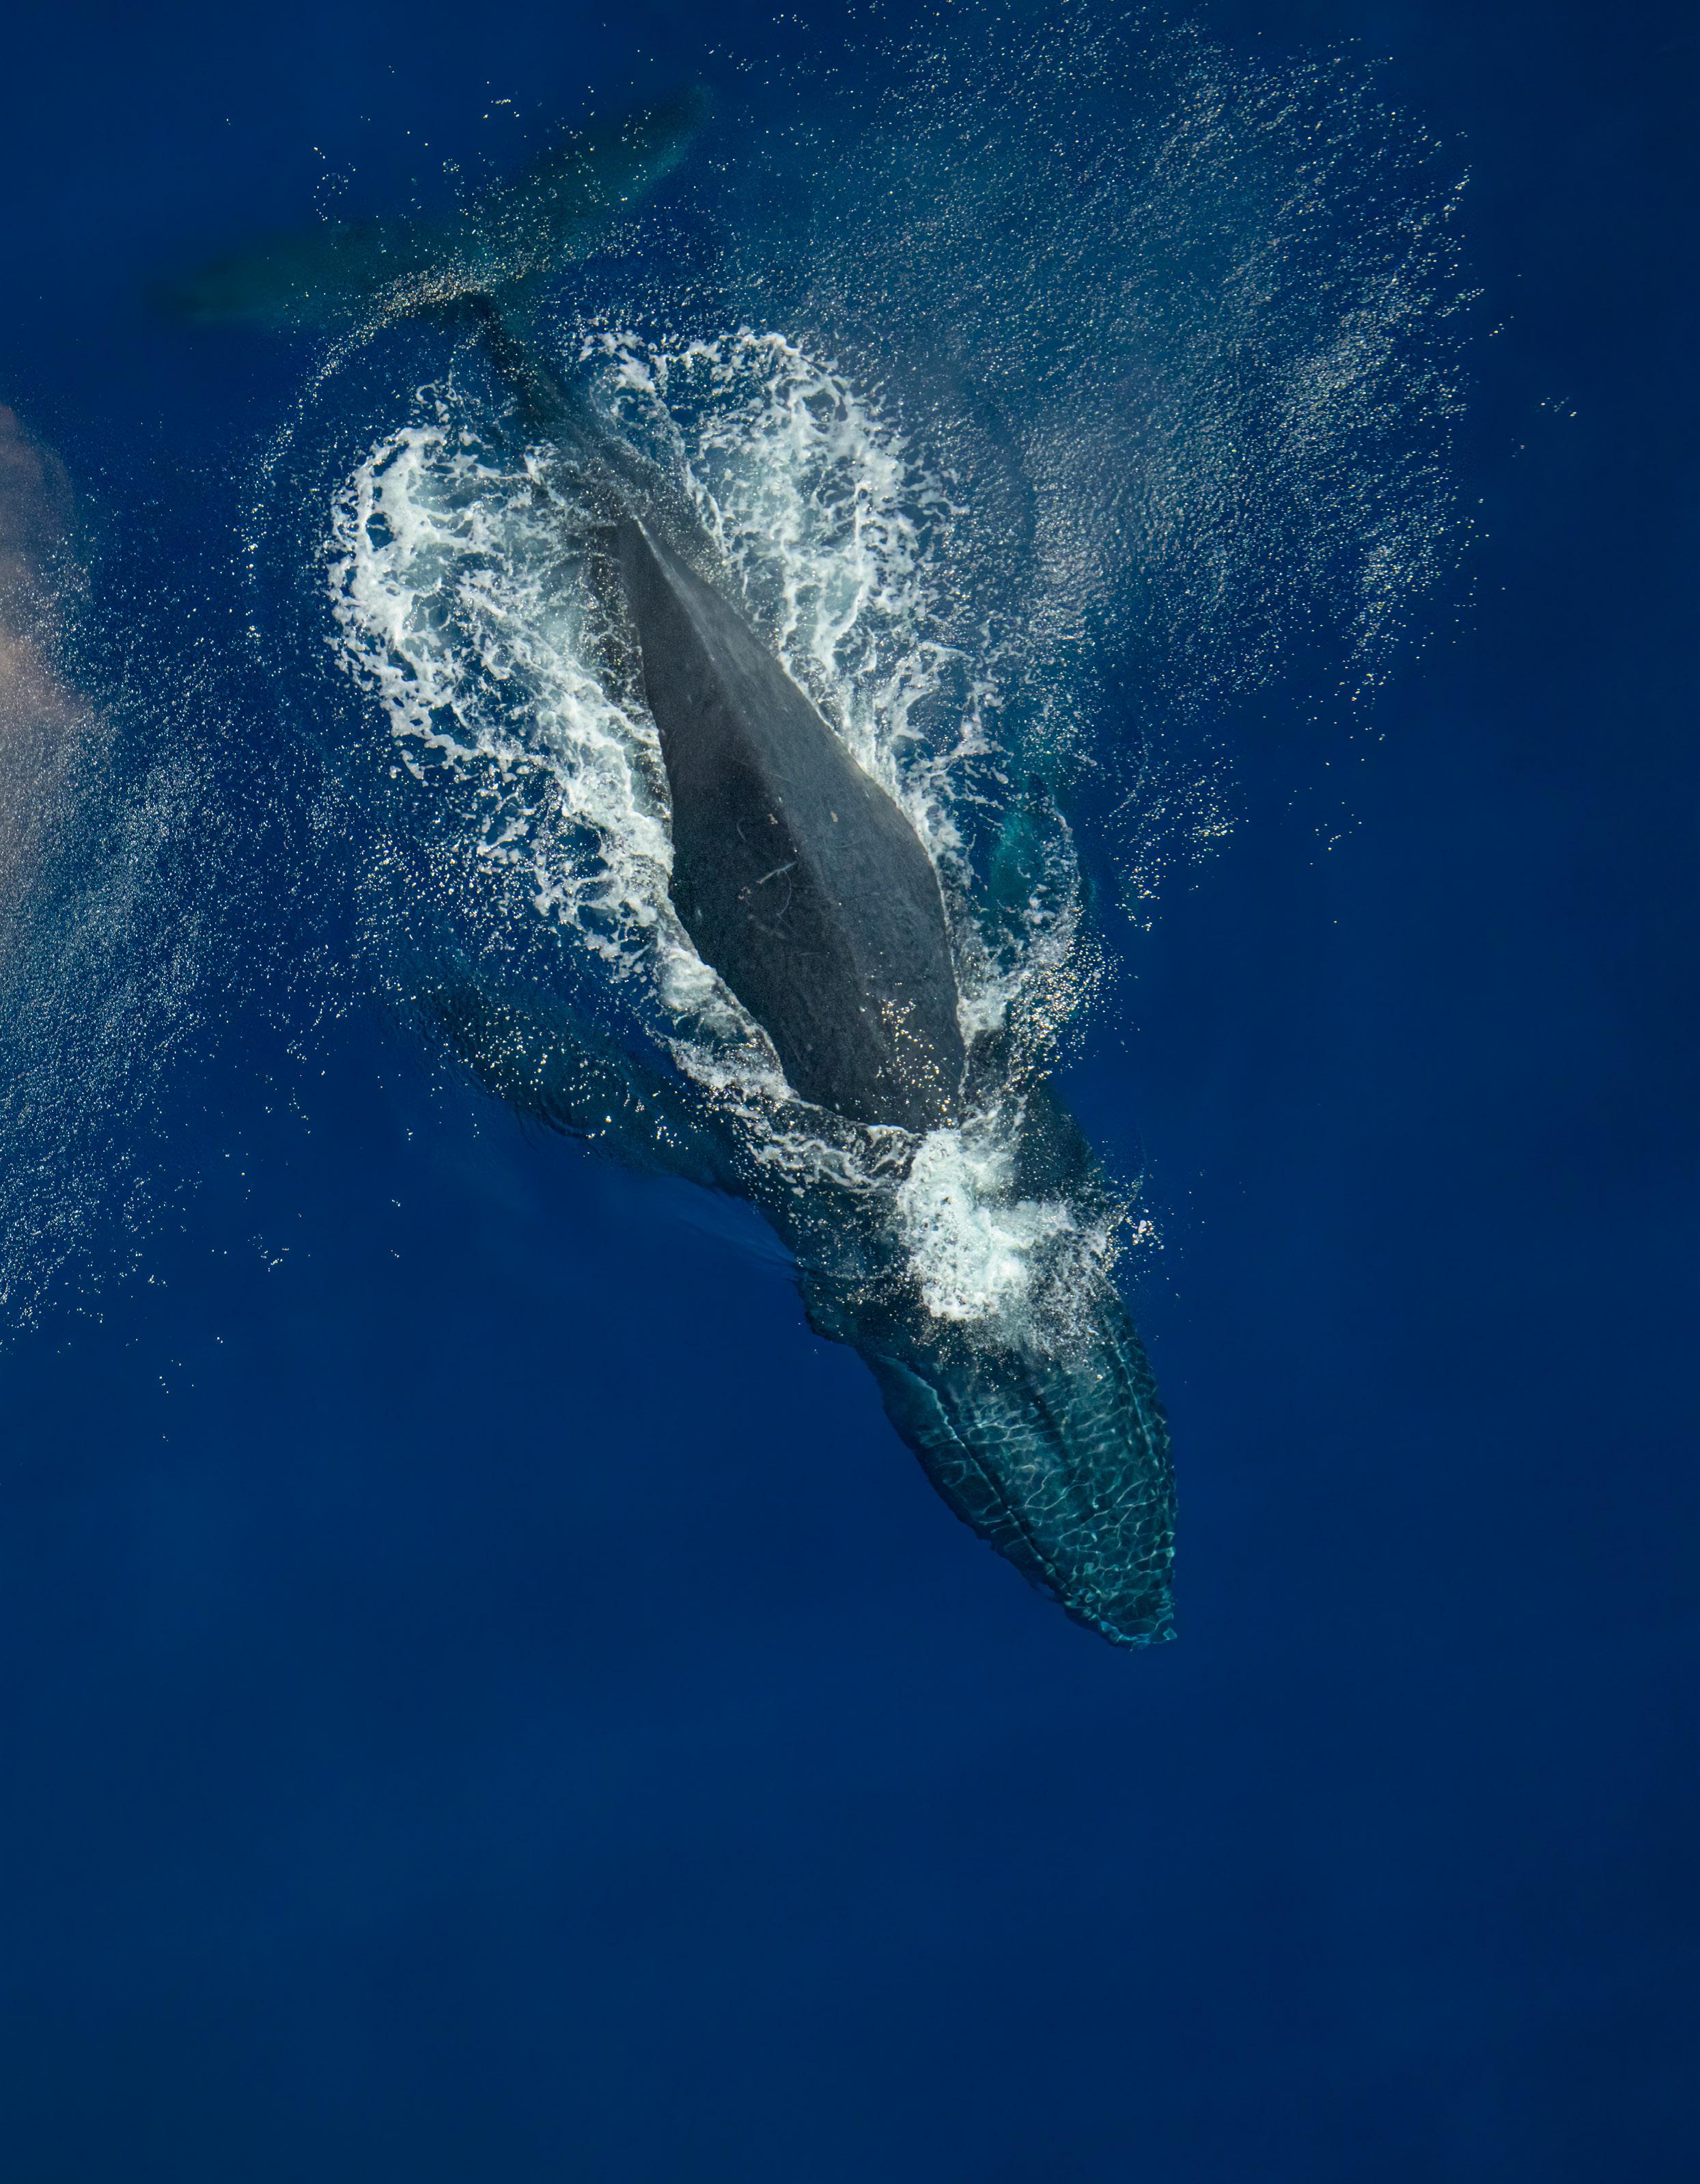
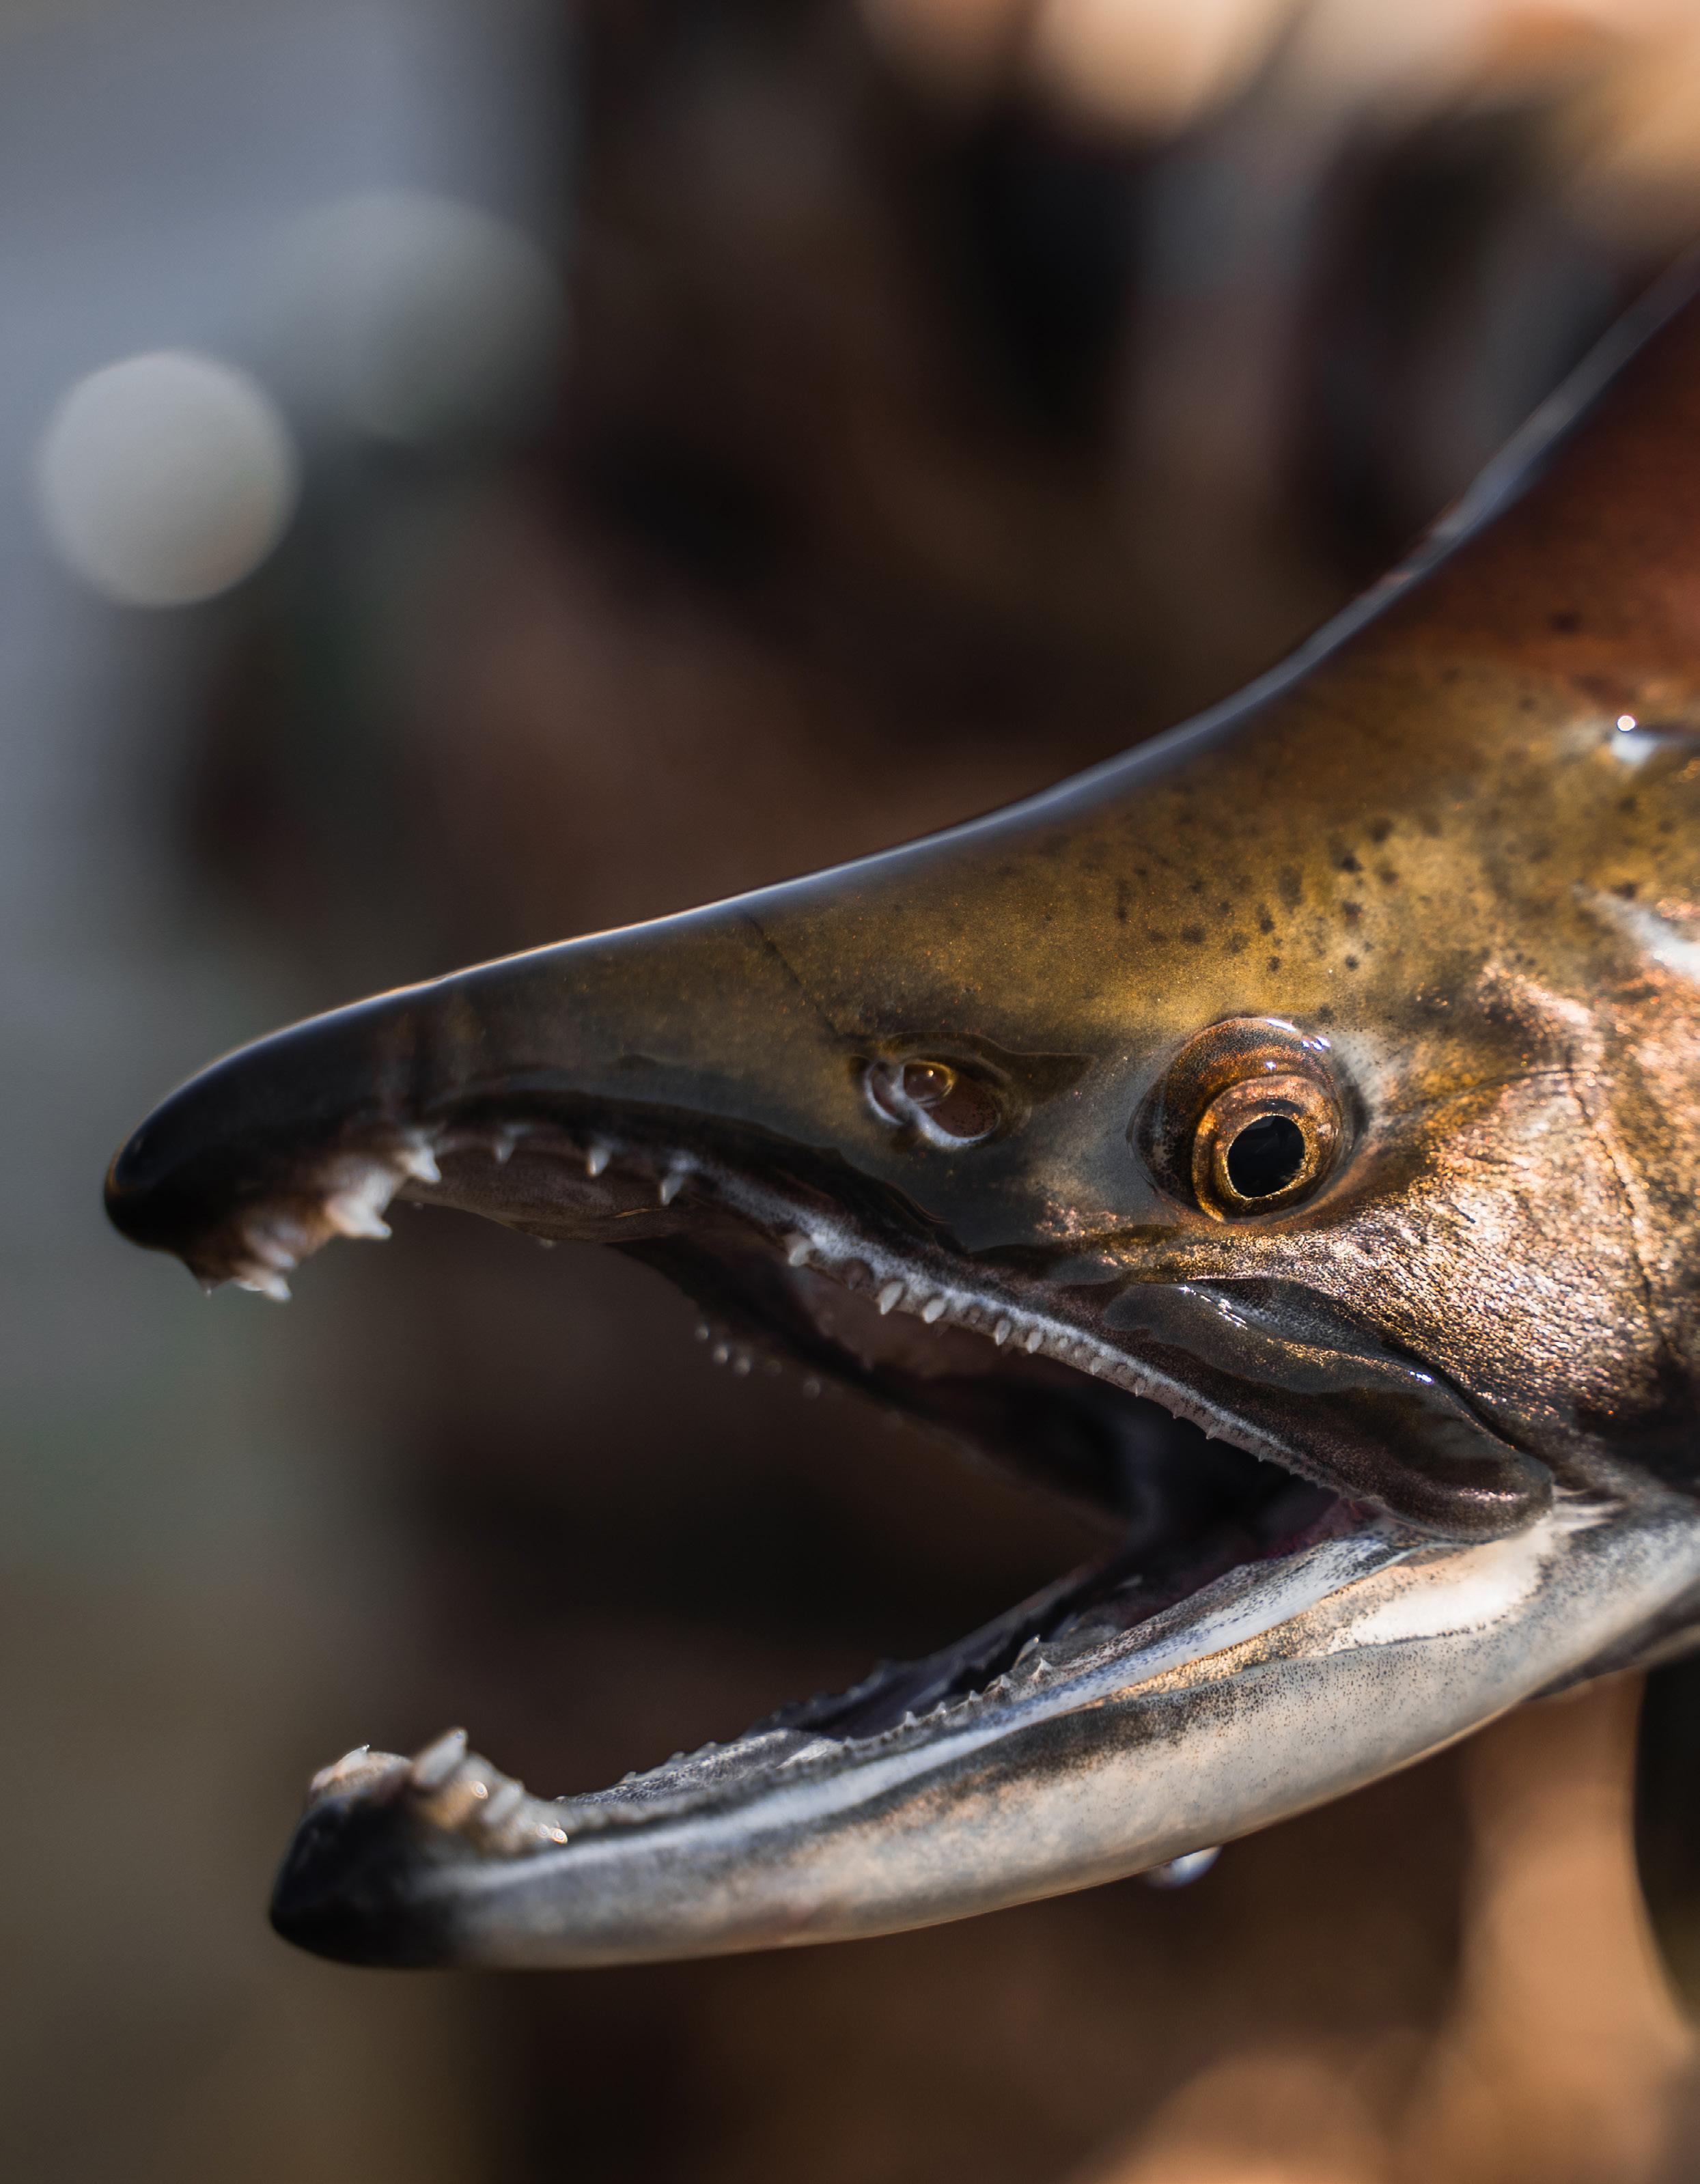
OUTDOOR THRILLS, EPIC SHOTS
Corbin Spring explores the Colorado backcountry with his Tamron 28-75mm F/2.8 G2 and 35-150mm F/2-2.8 zoom lenses.
 PHOTOS: CORBIN SPRING
PRACTICE 32 Tamron Magazine
When Corbin Spring moved from Texas to Colorado five years ago, he realized he’d found the perfect natural muse for his photographic treks. In the vast wilderness of the state’s backcountry, where nature’s untamed beauty intertwines with recreational adventure, Corbin weaves together his background in art and graphic design, photographic skills, and yearning for outdoor exploration into images that embrace the call of the great outdoors.
“My style of photography is to use nature and natural light to my advantage to bring out certain features of the landscape, or of the people I’m photographing,” says Corbin, the creative force behind Bearded Bros. Media, a photography and filmmaking media production company based in Lafayette.
“Colorado is perfect for the creative work I do. In addition to hosting diverse landscapes of mountains, plains, deserts, trails, and lakes, there’s also so much dynamic range as far as the light goes. I rarely use artificial light.”
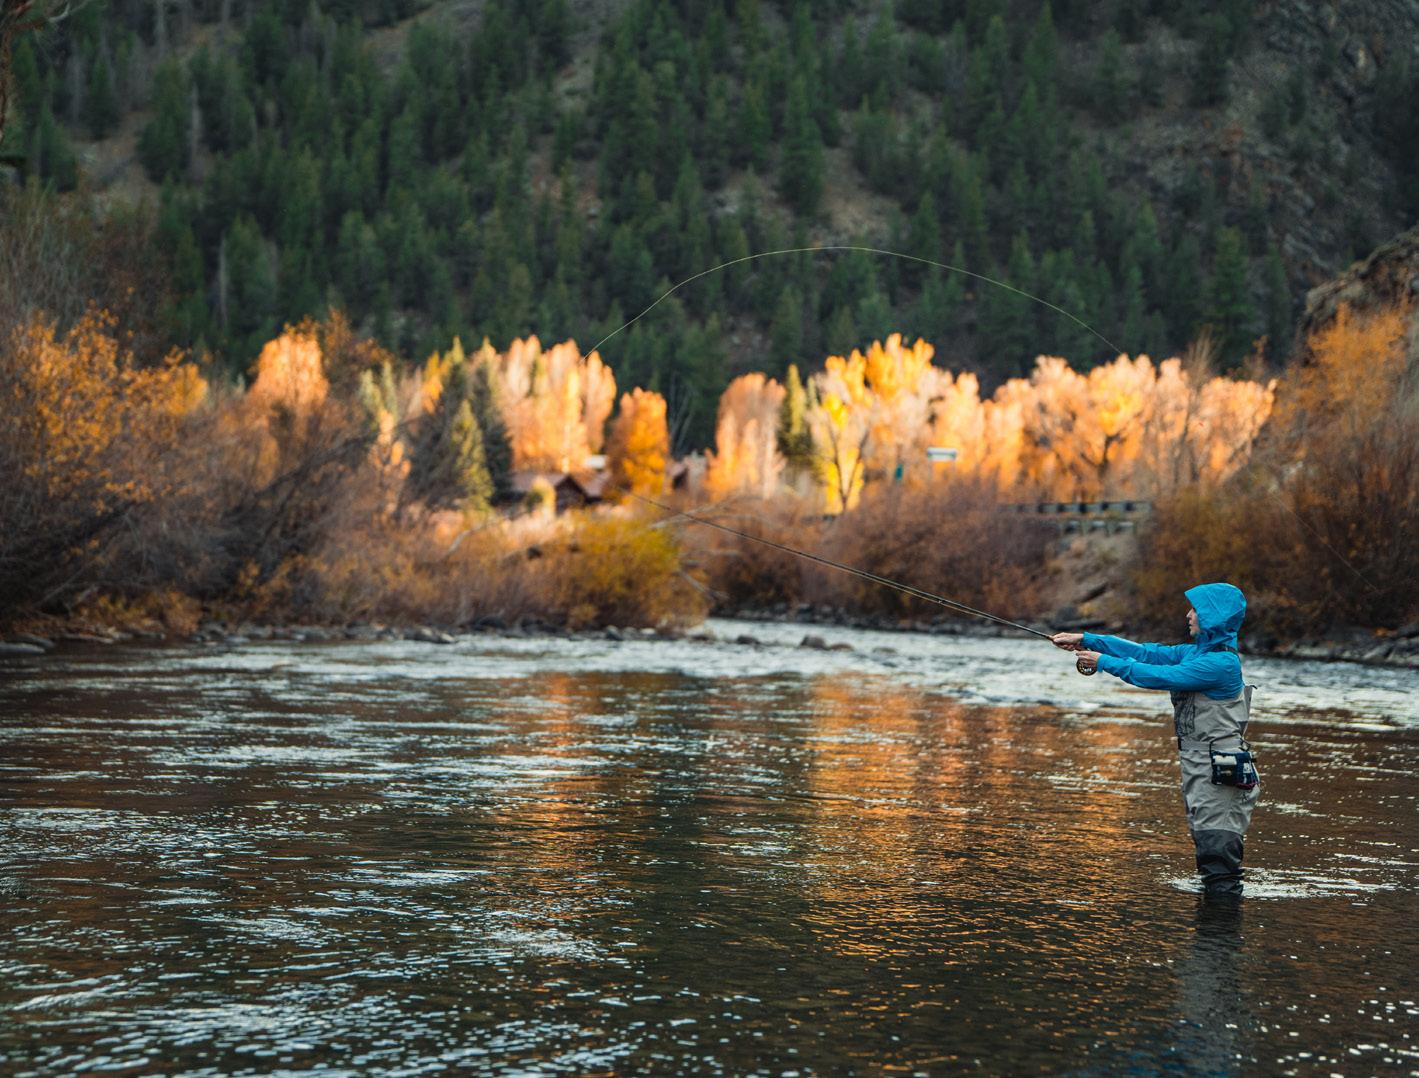
There are also plenty of opportunities for adventure—from mountain biking and hiking, to fly-fishing, off-roading, and camping. “Fly-fishing is especially a passion of mine,” Corbin says. “It makes sense that I would take lots of photos of it, so the challenge for me is to constantly look for new ways to document it, so that other people can see why I love it the way I do.”
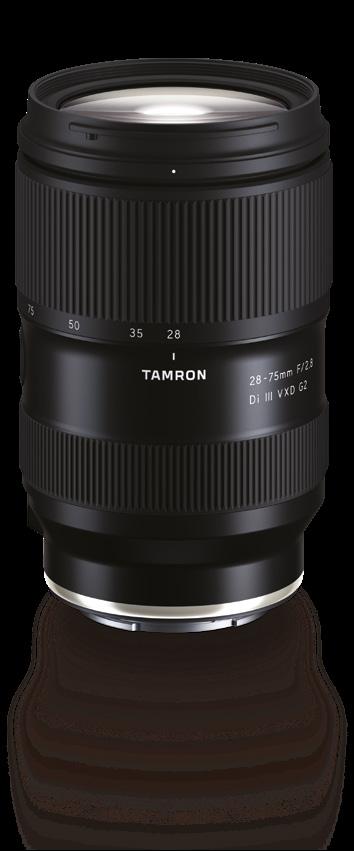
Key to Corbin’s photographic success in the backcountry are his Tamron 28-75mm
PRACTICE
28-75mm (58mm), F/2.8, 1/1600 sec., ISO 200
Tamron Magazine 33
35-150mm (107mm), F/2.8, 1/1600 sec., ISO 250
F/2.8 G2 and 35-150mm F/2-2.8 Di III VXD fast-aperture zoom lenses for his Sony mirrorless camera system. “I purchased the 28-75mm lens first,” he says. “That’s a really sharp lens, and the affordability is important to me, too— when I’m hanging on a limb off of a mountain or over a lake, I don’t want to worry that if I drop the lens that I won’t be able to pick up another one. Luckily, that hasn’t happened yet.”
As for the 35-150mm: “This is my
favorite lens ever,” Corbin says. “From a focal length perspective, the 35-150mm covers everything I want to do, whether that’s a wide angle of a landscape or zooming in super-tight for a detail shot of a fish. I can leave that lens on all day and never have to change it. To be able to shoot at those low apertures across the board clinches the deal—shooting at F2.8 has always been the sweet spot for me. Both lenses offer the exceptional sharpness, price point, and durability
that are crucial for an adventure photographer like me who’s always on the move.”
PHOTO TIPS: BACKCOUNTRY ADVENTURE

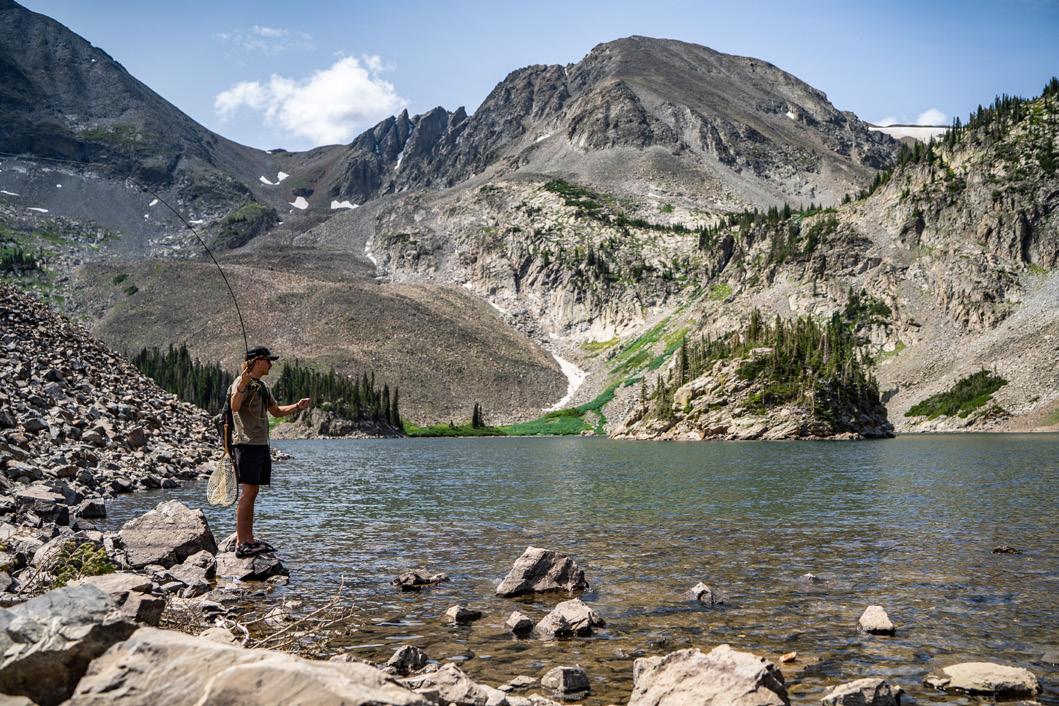

1 Show the environment along with the action.
Part of why I live where I live is because I’m in an amazing location that’s conducive to taking pictures. A photo showing a person casting a fly rod can be superboring, but if you pair that with a gorgeous background, it can be hard to take a bad shot. It also offers a sense of place and provides a deeper context for the photo. By capturing a fly fisherman in the act of
28-75mm (64mm), F/2.8, 1/2500 sec., ISO 200 35-150mm (35mm), F/2.8, 1/2000 sec., ISO 200 PRACTICE 35-150mm (35mm), F/2.8, 1/3200 sec., ISO 400 28-75mm (63mm), F/4.0, 1/4000 sec., ISO 320 34 Tamron Magazine
“A PHOTO SHOWING A PERSON CASTING A FLY ROD CAN BE SUPERBORING, BUT IF YOU PAIR THAT WITH A GORGEOUS BACKGROUND, IT CAN BE HARD TO TAKE A BAD SHOT.”
casting, you ensure their action remains the focal point, but the true magic perhaps lies in how the light hits the trees in the background, or how the clouds are gathering over the mountains. Experiment with different angles and compositions to see what’s most appealing to your eye.
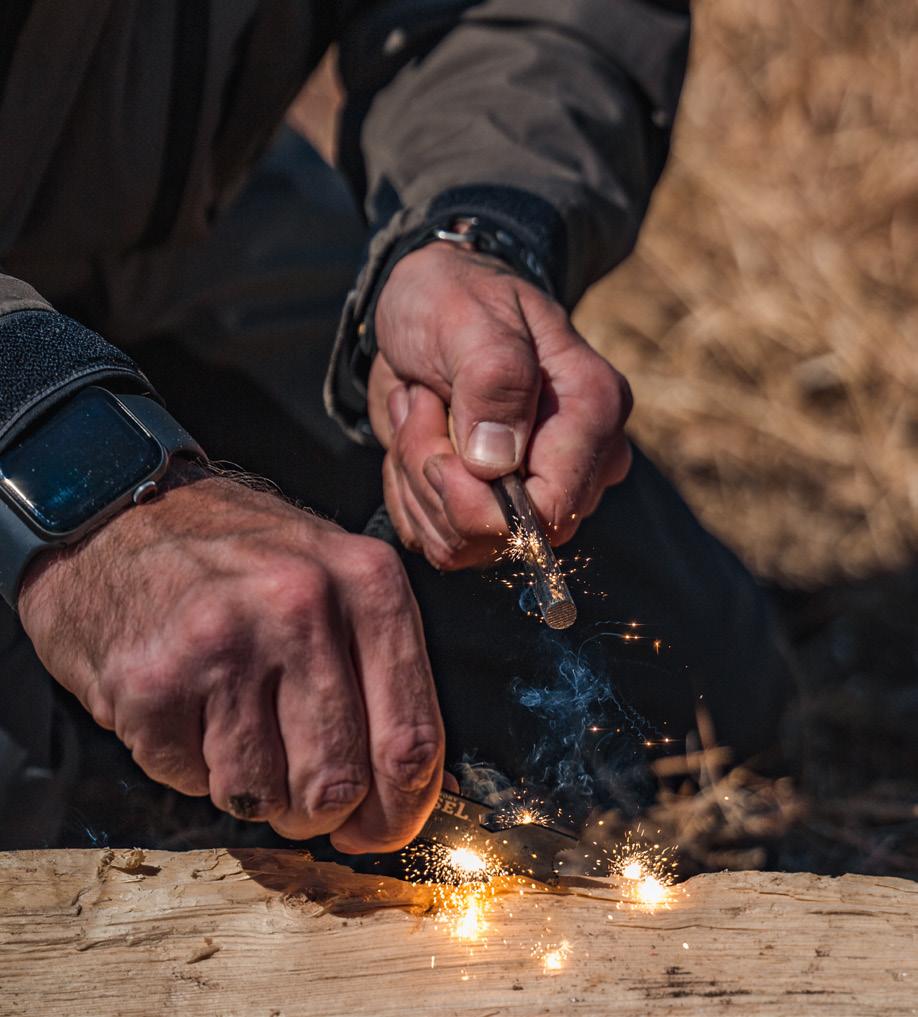
2 Concentrate on the process. For instance, when you see pictures of camping, they’ll often feature fires that are already built and blazing—you’re seeing the result, but not what went into making it. For me, the action is sometimes more interesting than what you see at the end. Focusing on the process—whether it’s creating the sparks that build a fire, setting up your fishing gear, or cleaning your bike—allows you to capture the artistry within those actions that most people might not initially think are especially beautiful.
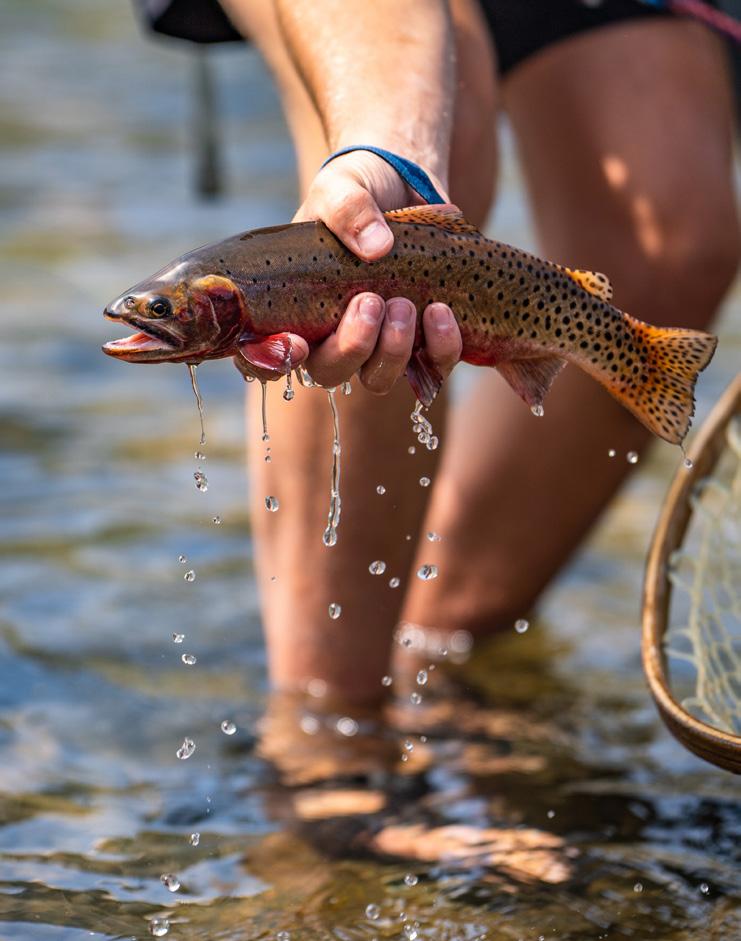
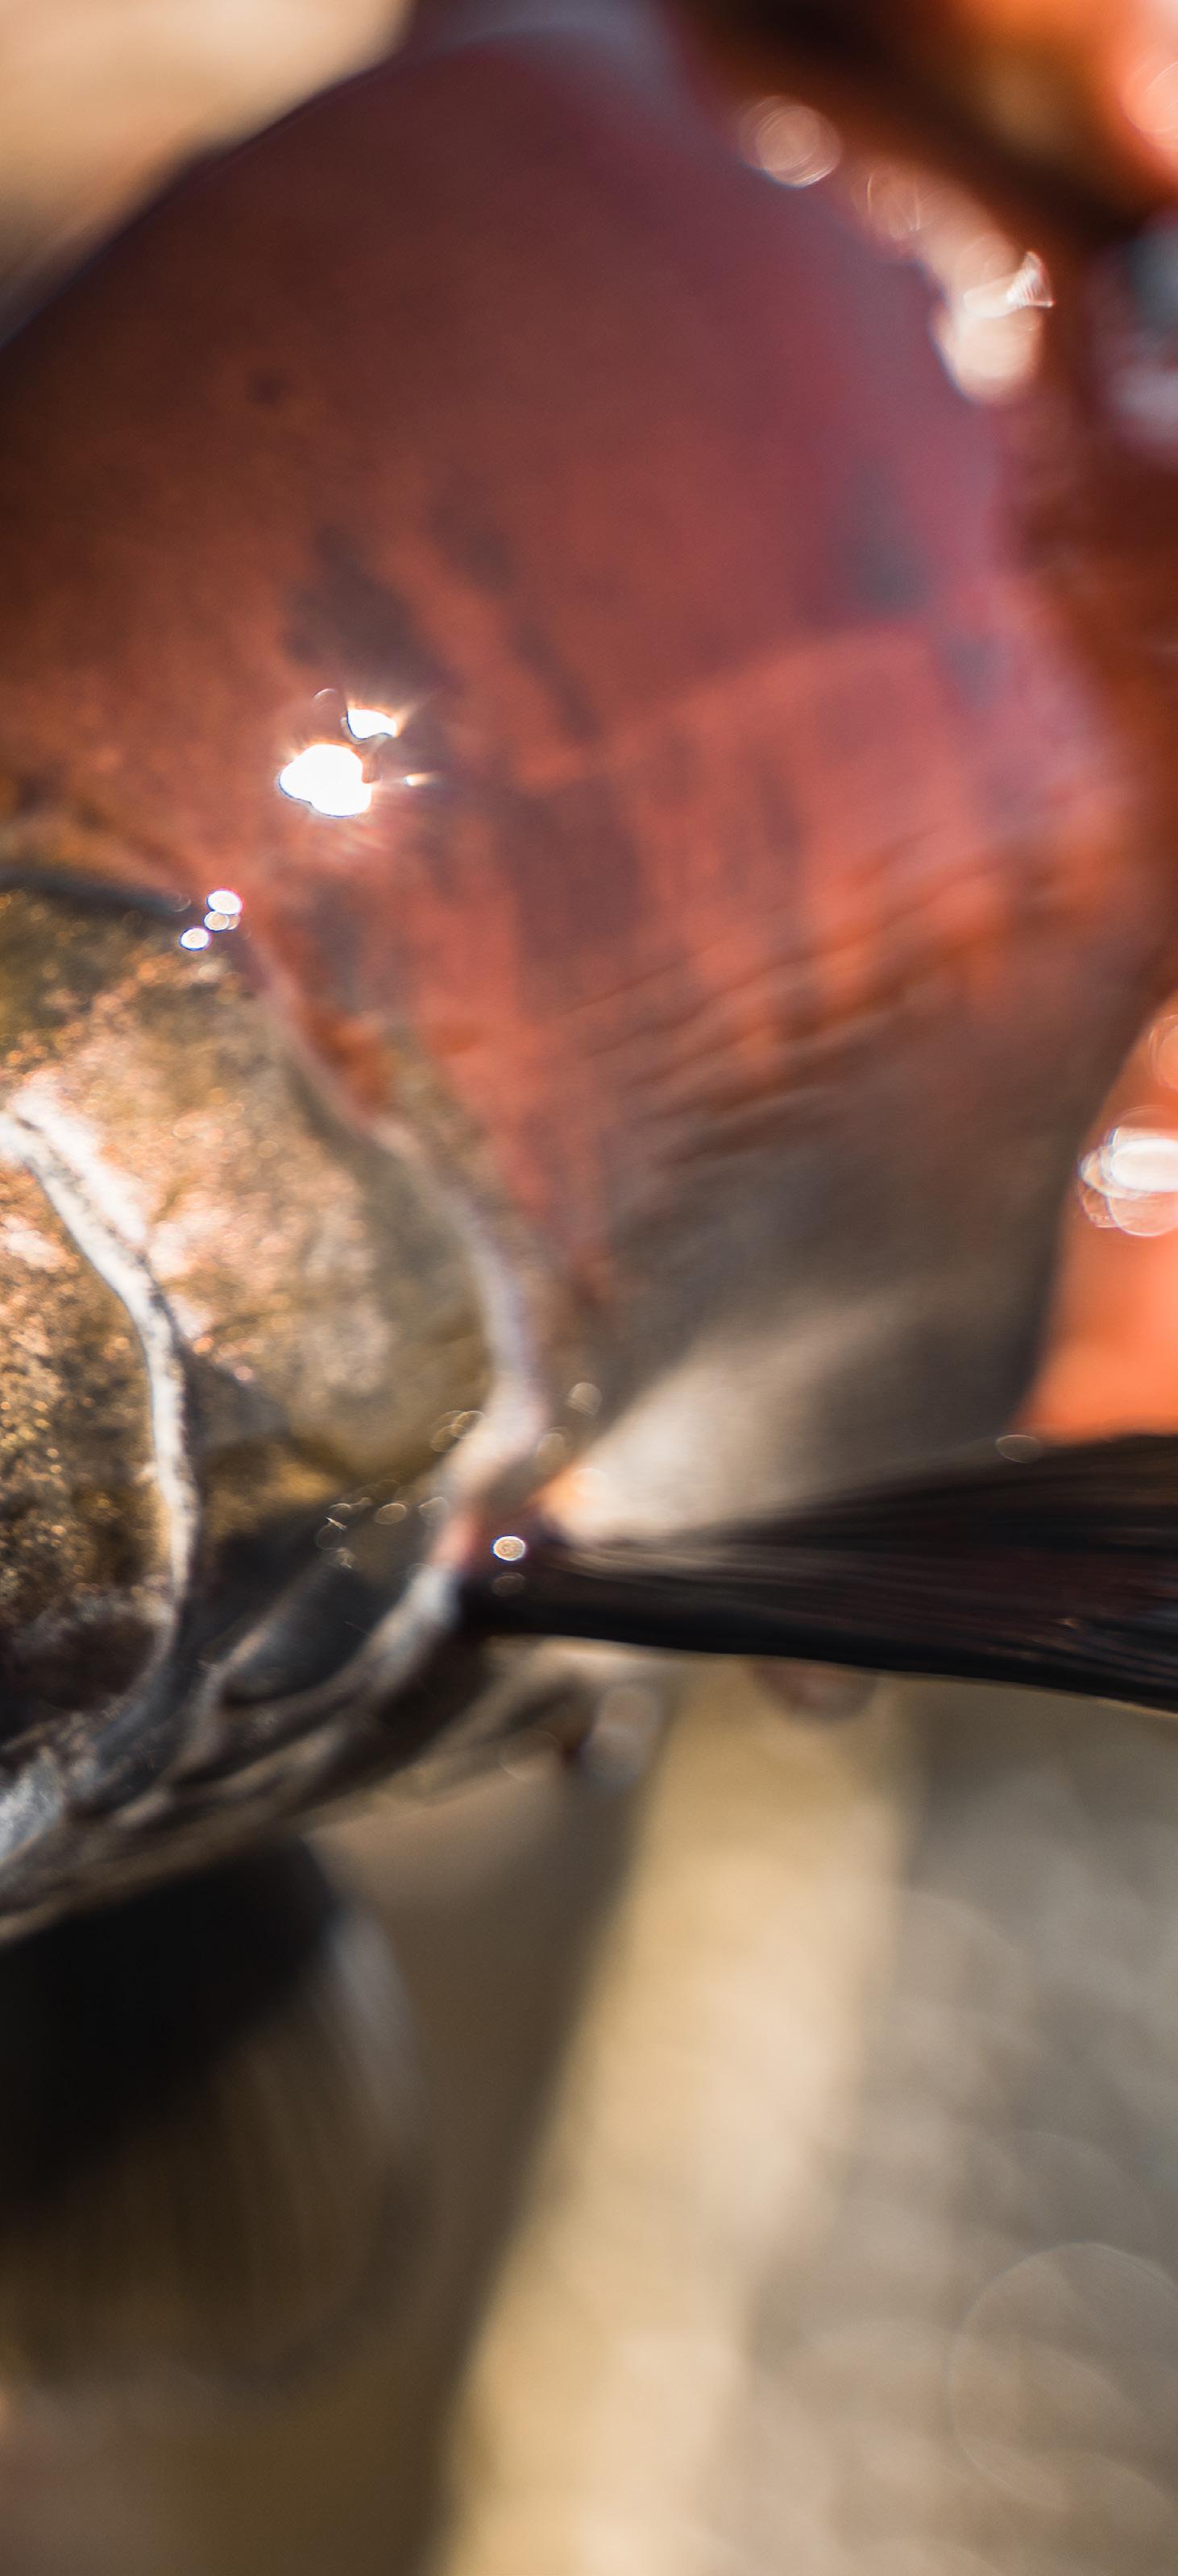
3 Zoom in on the details.

I love that with the 35-150mm lens, I can capture a wider shot of some fly-fishing, then zoom in to capture the details that elevate the impact of my images—all without changing position. I was balanced on a rock for both types of photos while photographing some fly-fishing. I zoomed in to capture the water dripping from a cutthroat trout, which added an unexpected dimension to my composition. Although the fish itself was visually appealing, it’s those intricate drips that make this photo stand out and draw the viewer’s attention
to the nuances and subtleties that often go unnoticed.
4 Make viewers feel like they’re part of the action.
To create a photo that immerses your viewer in what’s happening, consider shooting from a lower perspective and incorporating elements of the foreground, slightly blurred, to add depth and dynamism to your composition. By positioning yourself below the subject, you capture the energy and excitement of the moment. Go a little wider, like I did here at 59mm, to encompass a broader view while still maintaining a tight focus on the subject. By adopting creative angles and perspectives, you can capture images that go beyond the ordinary and truly engage the viewer in the exhilarating experience of zipping down a mountain trail.

ABOUT: CORBIN SPRING
My name is Corbin Spring and I am a professional photographer and filmmaker. I was born in San Antonio, Texas and now live in the great state of Colorado. I am an avid fly fisherman, adventure motorcycle enthusiast, and outdoorsman. I am the founder of Bearded Bros Media, a professional photography and film making company specializing in shooting outdoor adventure gear, off-road products and engaging outdoor stories. I have a passion for adventure and I prefer to do it off the grid!

Instagram: @beardedbrosmedia
 PHOTOS: CORBIN SPRING
PRACTICE
Tamron Magazine 35
35-150mm (79mm), F/2.5, 1/1000 sec., ISO 640
SP 28-75mm
F/2-2.8 Di III VXD G2 [model A063]
35-150mm F/2-2.8 Di III VXD [model A058]
SUN, SURF, AND SHUTTER
Marcie Reif captures summer fun with the Tamron SP 35mm F/1.4 prime and 35-150mm F/2-2.8 zoom.

PHOTOS: MARCIE REIF PRACTICE 36
Summer is in full swing, which means it’s time to document laid-back days lounging by the pool or at the beach before school and work kicks into high gear again. When Atlanta photographer Marcie Reif vacations at the shore with her own family, she knows she needs sturdy, fast-focusing, sharp lenses that can endure the sun and surf and produce crisp, high-fidelity images.
Packed in Marcie’s bags along with the sunscreen and Frisbees are the Tamron SP 35mm F/1.4 Di USD prime lens for her Canon DSLR, and the 35-150mm F/2-2.8 Di III VXD for her Sony full-frame mirrorless camera system. “The 35mm prime, which offers such a versatile focal length, is compact, portable, and ideal for summer excursions,” she says. “I can capture so much of the environment in my pool and beach portraits, which is important when you’re vacationing and want to remember as much as you can about your destination.”
The 35-150mm, meanwhile, has become Marcie’s go-to travel lens. “It’s the best lens I have,” she says. “The wider end allows me to take more of those environmental shots I just mentioned, but I can still zoom in to capture moments when I don’t want to interrupt the kids’ fun. I love the color rendition on that lens as well. And I’ve found I’m not just using it at the beach and pool—the 35-150mm offers me so much flexibility that I’ve been tapping into it for everything from landscape shots in the mountains to newborn sessions.”


Tamron Magazine 37 PRACTICE
SP 35mm, F/2.0, 1/8000 sec., ISO 160
SP 35mm, F/2.5, 1/4000 sec., ISO 400
PHOTO TIPS: AT THE POOL AND BEACH


1 Keep your shutter speeds high and apertures low.
I typically use faster shutter speeds—at least 1/1250 sec.—when photographing kids in summer mode, because there’s always so much movement. And I rarely shoot above F2.8. That’s my sweet spot. It balances the f-stop/shutter speed, and exposure triangle I try to perfect when chasing the kids around, and it offers beautiful bokeh when I need to blur out distracting crowds and background elements.
2 Be patient with underwater shots.
I have an underwater housing for my camera so I can use the 35mm to take pictures of the kids in the water, especially in the pool. I’m able to take some really fun shots with it that way. You have to realize, though, that, unless you have goggles or a scuba mask on, you’re not going to be able
to see really well—you’re often just holding the shutter down and hoping for the best. What I’ll do is take a few test shots first. If they’re way off, I’ll get out of the pool and adjust any settings that might need tweaking. Once I have everything to where I want it, I just keep shooting. But I also realize that only a few of the photos will likely come out the way I’m hoping. For the photo of my daughter making a heart shape in the pool, I probably took 100 pictures, and maybe three were like, “Wow, that’s a great picture.” Sometimes the camera will focus on bubbles and send your subject out of focus, for instance. I often have to ask my kids to do something more than once, just in case it doesn’t come out the way I want it the first time.
I also know that I’m going to be doing some editing work later on. When light crosses through the water, it loses the higher-wavelength colors, and the images
end up very cool-toned. It doesn’t matter how the pool has been painted—that’s just the way images turn out in the water. You can adjust the warmth a bit in postprocessing to really enhance the colors and bring the photo back to life.
3 Stay as unintrusive as possible. Hang out in the background and use a zoom like the 35-150mm to capture more intimate moments that highlight relationships and the memories your kids are making over their summer break. That photo of the two boys hugging from behind is a perfect example of that. Even though kids these days are so used to selfies in front of their phones, when they’re at the pool or beach, they don’t want to stop every five seconds to pose in front of your camera.

4 Mix the spontaneous shots in with some posed ones.
On the flip side, if you keep out of your kids’ way for most of the day, they’ll be more willing to stage an occasional photo for you, and might even ham it up, like the photo of the boys here with their sunglasses and baseball mitts (these boys are all baseball players). I’ll usually prep them about 10 minutes beforehand so they’ll have time to wrap up whatever else they’re doing and be more into taking the picture.
5 Focus on the fun.
Thanks to that waterproof case on my camera, I’m able to get right into the water at the beach with the kids on their boogie boards. I’ll even take the camera and bounce it in the waves for some cool images. What’s most important, though, is capturing the emotion as they’re splashing around in the surf. For this photo of my son’s best friend on his board, I could’ve stayed back on the shore and zoomed in, but it feels so much more immersive
PRACTICE
SP 35mm, F/2.5, 1/5000 sec., ISO 400
35-150mm (106mm), F/2.8, 1/4000 sec., ISO 125
35-150mm (35mm), F/2.8, 1/1250 sec., ISO 125
(literally) when I get low to the ground and am right there in the water with him.
6 Stick around as the sun starts to set. When we vacation at the shore, I usually make my family stay down at the beach at least one evening when we don’t have to rush off to dinner. There’s something magical about that later part of the day, and I plan on such times for taking pictures in which the sun becomes part of the photo. I especially love to capture the sun almost touching my subjects.
You can see that in the closeup of my son, and in the photo of my husband and daughter playing a hand game in their beach chairs. I’ll squat down or otherwise adjust my level so that I get the sun right where I want it in the frame. Sometimes with longer lenses, sun flares like that will come out too blurry. The 35mm lens is perfect for this kind of backlighting shot.

Marcie Reif is an in-demand kids, family, and commercial photographer in Atlanta, GA. In addition to running her portrait business she is also a photography educator. Marcie is the co-founder of The Photographer’s Retreat, an educational experience for female photographers, and the author of the best selling instructional resource Bringing Home the Story of the Beach.

Instagram: @marcie_reif_photography


Tamron Magazine 39 PHOTOS: MARCIE REIF PRACTICE
35-150mm (35mm), F/2.8, 1/2500 sec., ISO 125
SP 35mm (35mm), F/2.8, 1/8000 sec., ISO 500
“USE A ZOOM LIKE THE 35-150MM TO CAPTURE MORE INTIMATE MOMENTS THAT HIGHLIGHT RELATIONSHIPS AND THE MEMORIES YOUR KIDS ARE MAKING OVER THEIR SUMMER BREAK.”
SP 35mm F/1.4 Di USD [model F045]
35-150mm F/2-2.8 Di III VXD [model A058]
ABOUT: MARCIE REIF
MY PROJECT A STUDY IN CONTRASTS
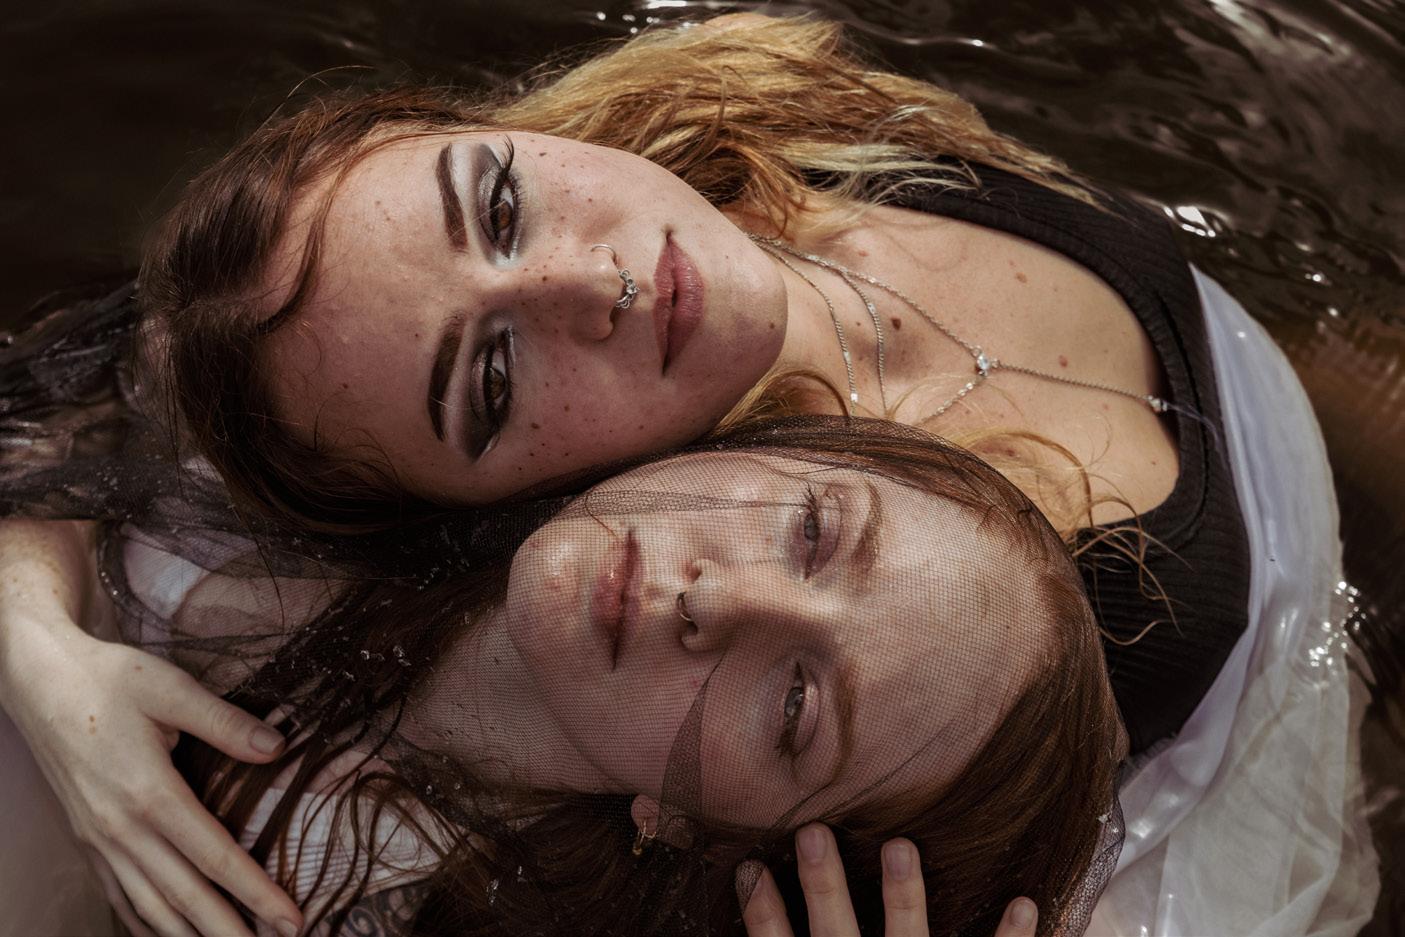
Kazimir Skye plays with dark and light, black and white in his portraits with the Tamron SP 24-70mm F/2.8 VC G2 zoom lens.
Since graduating from Georgia’s Savannah College of Art and Design with a bachelor’s in advertising and a concentration in art direction, I’ve been working full time in social media management here in Savannah, while doing shoots for fashion, seniors, and the like in between. It’s been so much fun.

A good friend of mine and her sister were recently in town, and we decided to get creative together. After a bit of collaboration, we opted to do a photo shoot at a local beach and boat dock site about 20 minutes outside of the city.
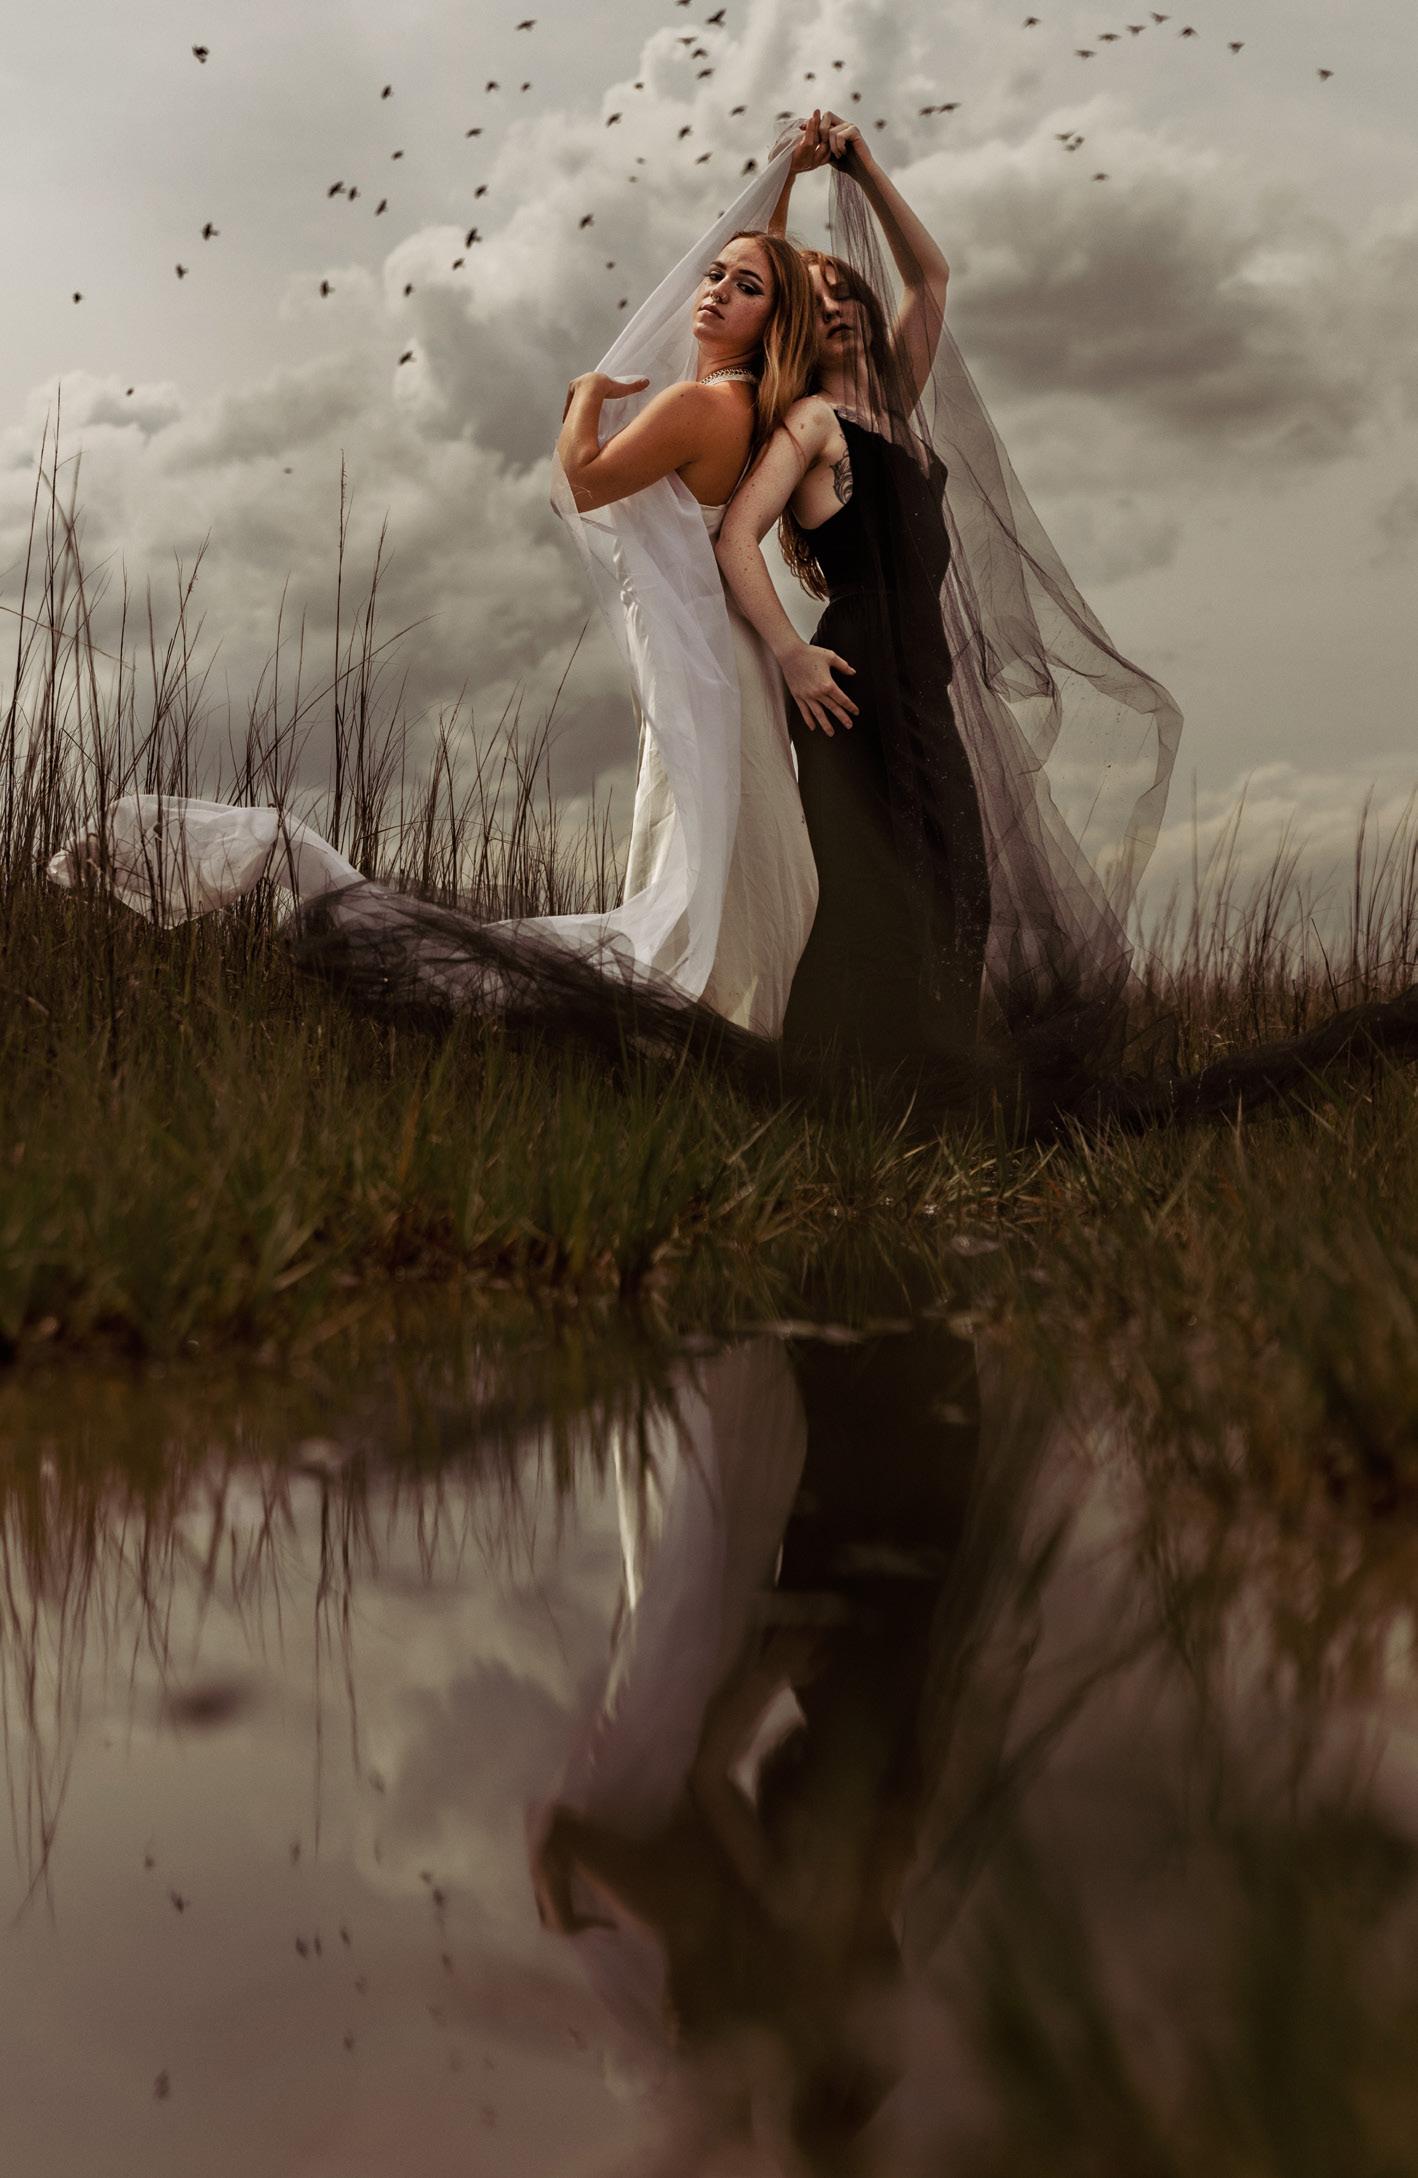
I envisioned a slightly dark, yet still airy portrait session, with a moody feel to it, where I could balance the light and dark of each image while still retaining crisp sharpness and contrast throughout. It helped that a huge storm was blowing in, which hit full force right after we finished shooting. The sisters described the session as having an “ocean bog witch” kind of vibe.
Ever since I received the Tamron SP 24-70mm F/2.8 Di VC USD G2 zoom lens a few years back, it rarely leaves my camera. I use it for everything from landscapes and fashion photography to portraits and beauty close-ups. Plus, I don’t use a tripod often when I'm shooting, so the image stabilization offered by the 24-70mm’s Vibration Compensation feature is a must.
What I especially appreciate about this lens for the types of portraits you see here is my ability to move back and forth and be able to capture the entire scene at 24mm, and then, without
40 Tamron Magazine
52mm, F/3.5, 1/2500 sec., ISO 100
having to change my position or the models’, zoom in for beautiful closeups. I love being able to achieve such a variety of images with one lens. That slight wide-angle look at the 24mm end lends a fashion feel to my portraits. No matter what focal length I’m at, my images are sharp and in focus.
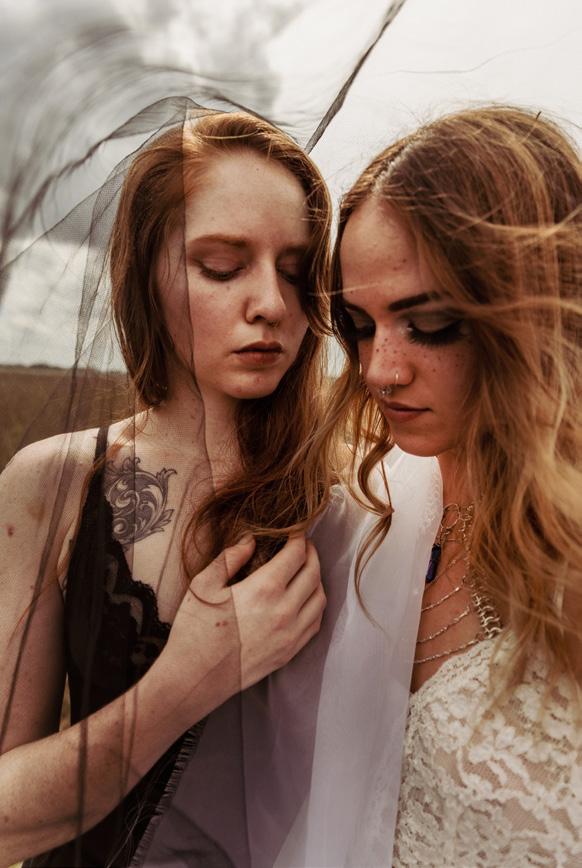
The lighting for this shoot was all natural, with a reflector to bounce the light. The main image here in which the reflector played a big part is the one of my friend in the black dress, with the veil over her face. She was fully backlit in that scene, so I wanted the reflector to bounce the light in. The veil effect was an abstract of sorts, meant to show how her face is fully covered, yet still visible and seen.
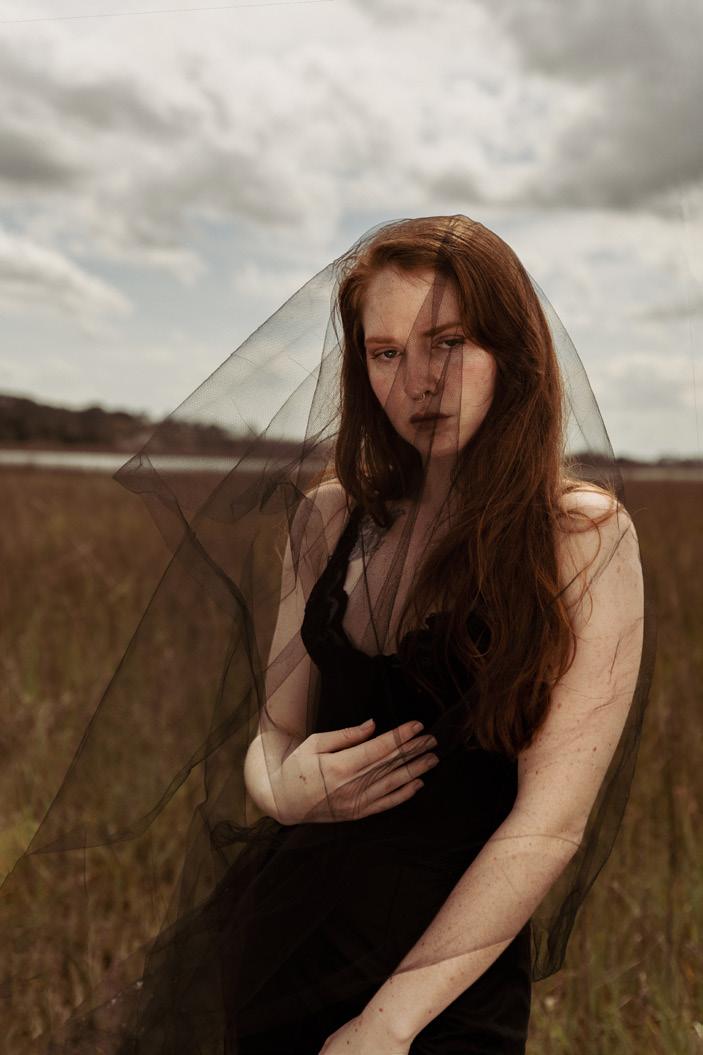
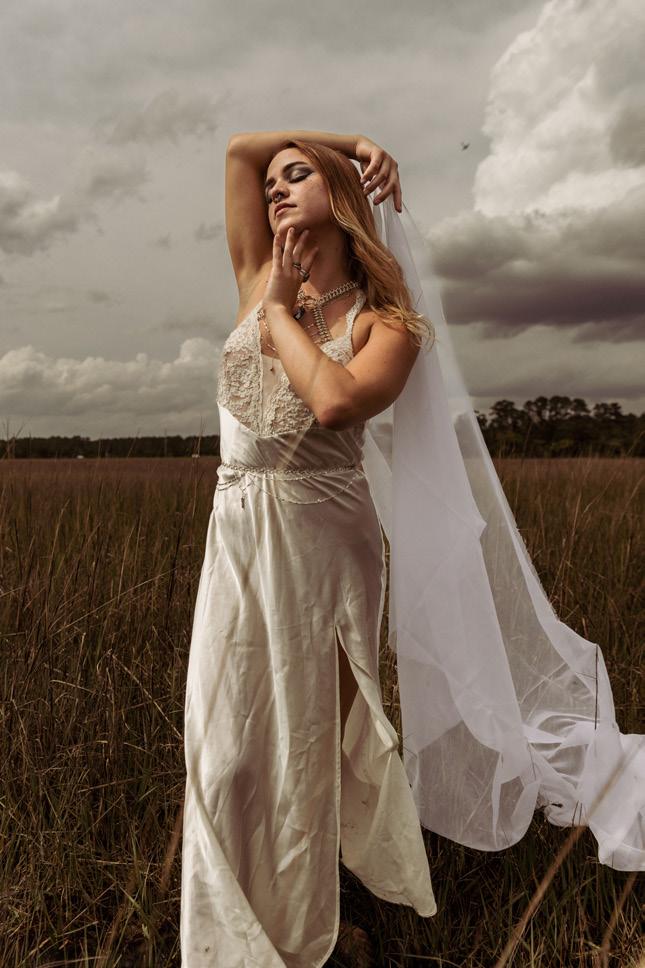
For her sister’s solo shot in the field, I was striving for light and airy, with the light flowing directly onto her, but without any harsh shadows. The image looks bright and relaxed.
When we were brainstorming before the shoot, we decided we wanted to show the duality of both the self and of being sisters—kind of the yin and yang of opposite yet interconnected forces. At one point the sisters even switched outfits, with my redhaired friend changing into the white dress and her sister putting on the black one, which matched her makeup better.
We even had a happy accident while we were shooting near the beach. There’s a series of waterways that flood onto the grass, and at the time we were there, the place was just starting to clear out from the most recent flooding. It was a perfect opportunity to work some reflections into my images. Those birds that ended up in the photo here—that’s the happy accident I was talking about. They flew straight into the frame as the sisters were doing one of their dramatic poses, and I snapped the shot.
PROFILE: KAZIMIR SKYE
Location: Savannah, GA
Occupation: social media manager for local businesses, photographer
Photographic Specialty: fashion, and beauty
Passions: traveling, sewing, baking, videography.
Favorite Lenses: Tamron 90mm, 24-70mm G2
Instagram: @skyeb.photo
Tamron Magazine 41 MY PROJECT
24mm, F/3.5, 1/2000 sec., ISO 100
55mm, F/3.5, 1/1250 sec., ISO 100
70mm, F/7.1, 1/30 sec., ISO 100
24mm, F/3.5, 1/1250 sec., ISO 100
PARTING SHOT:
CONTACT
MAGAZINE FEEDBACK
tamroneditor@tamron.com
#tamronamericasmagazine
CUSTOMER SERVICE
If you have any questions about our products or services, get in contact with us:
Telephone: 1-800-827-8880 / prompt 1
Email: custserv@tamron.com
Mon-Fri 8:45am – 5:00pm EST
REPAIRS
Tamron products are manufactured with the greatest care and precision. However, should there be any damage to your lens, Tamron Customer Service will be happy to assist you. All Tamron lenses purchased through an authorized Tamron Americas retailer are supported with our 6-Year Warranty. You can find contact addresses and more detailed information on the warranty and the procedure for sending in the product and having it repaired in the Support section of our website: www.tamron-americas.com
LEGAL NOTICE
Publisher: Tamron Americas, 10 Austin Blvd, Commack, NY 11725
Editor: Stacie Errera
Writer: Jennifer Gidman
Staff: Sabrina Retas, Lisa Keller, Damion Fearron
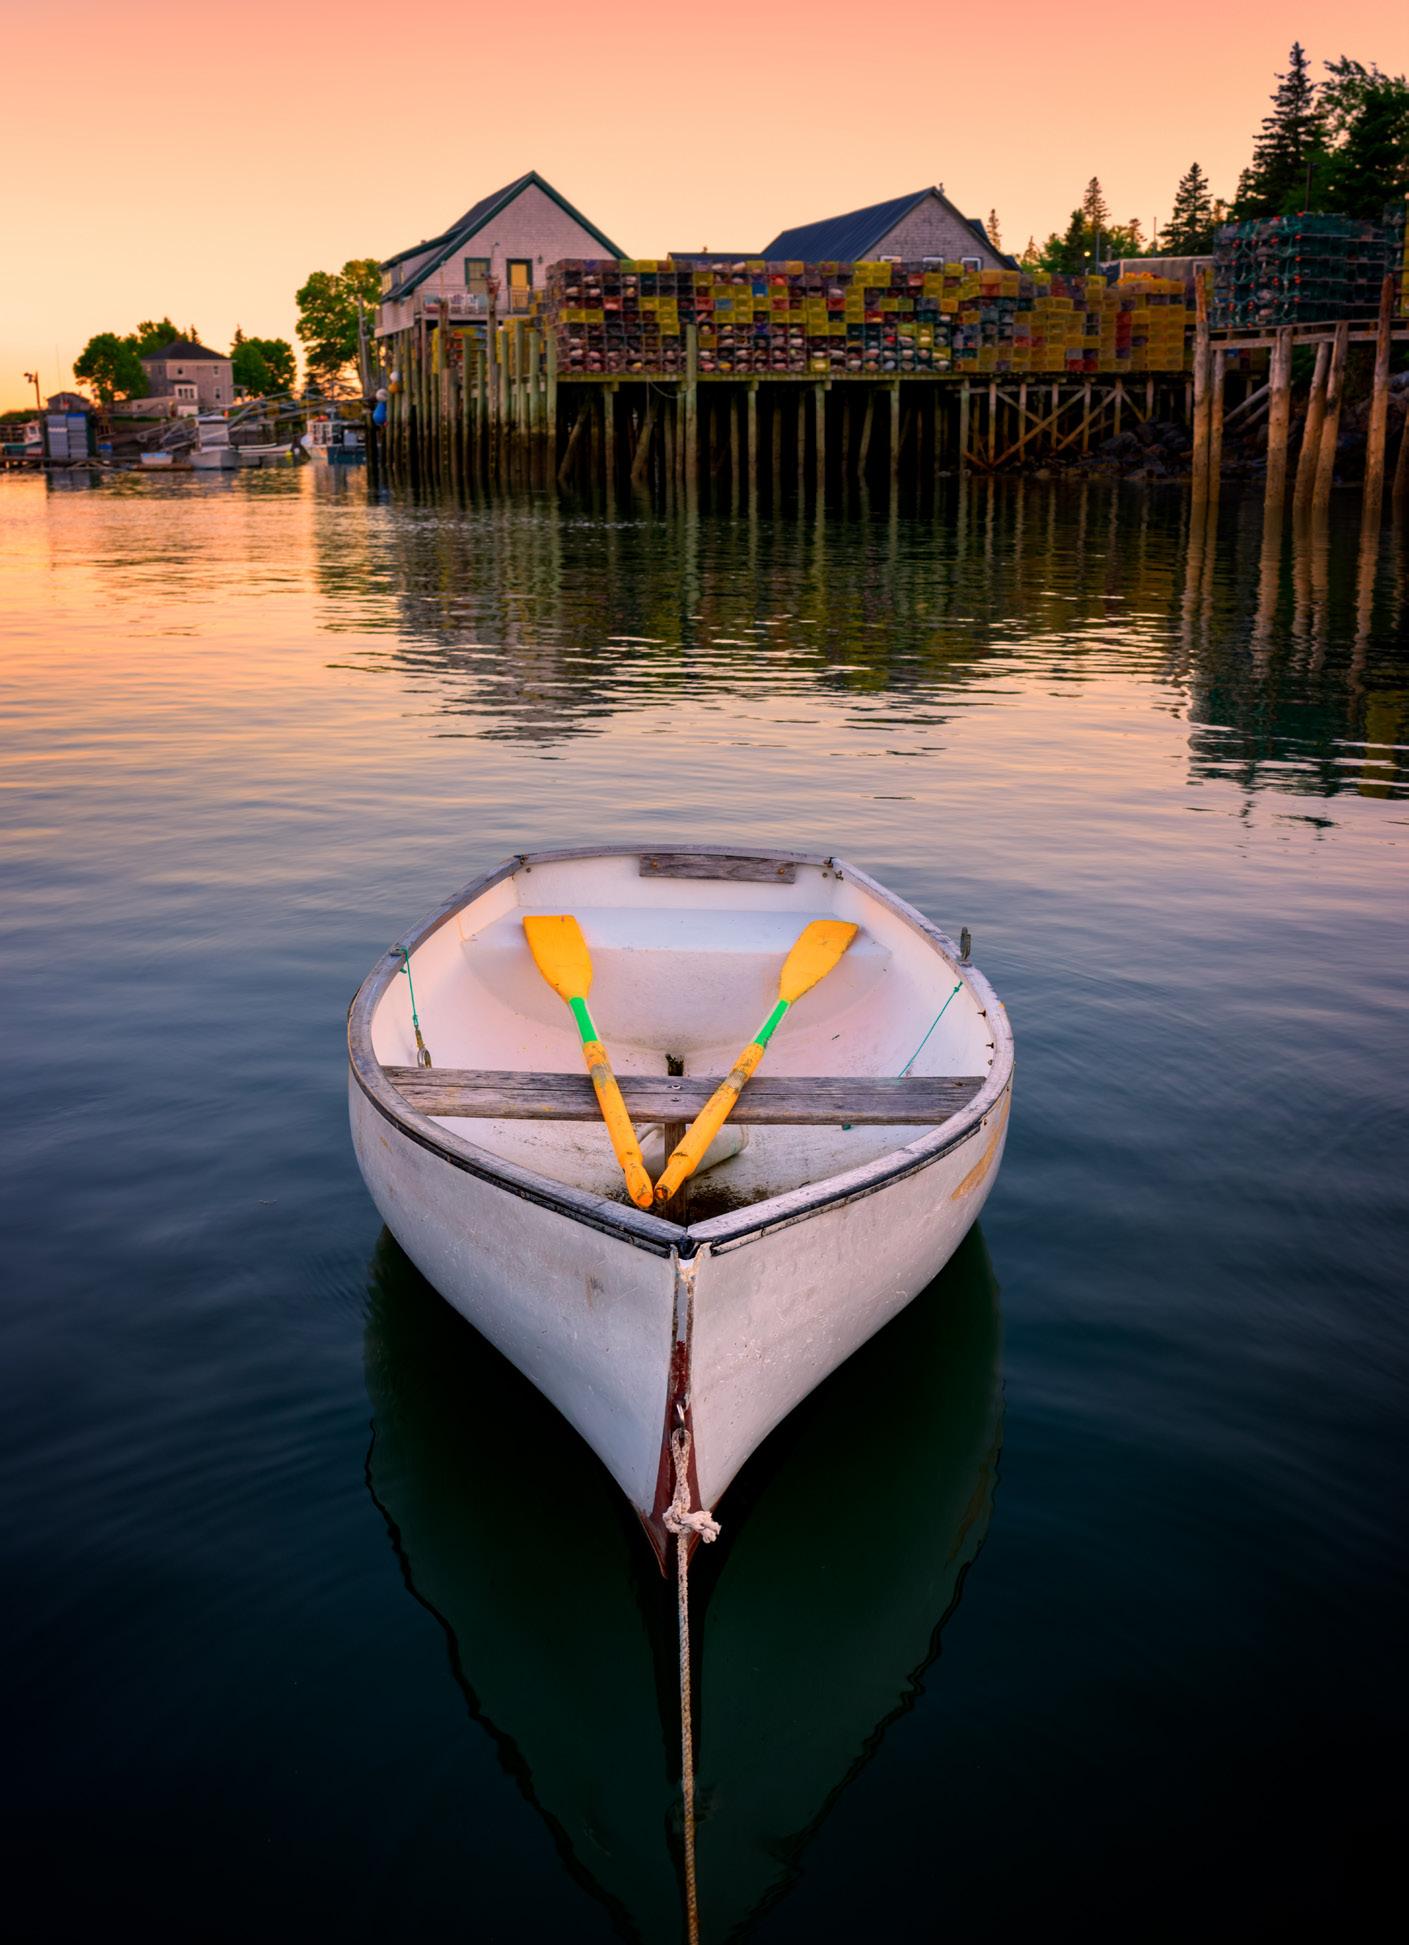
Rick Berk
I was on Mount Desert Island in Maine on this early summer evening, primarily to explore Acadia National Park. But on this evening I ventured over to what’s known as "The Quiet Side” of the island to explore some of the working harbors located there. In Bernard, a small fishing village I found several small boats tied up at the docks. This one, with the shacks and stacked lobster traps in the background, was perfect. A gentle shove of the dinghy pushed it away from the dock and in perfect position. The calm waters of the harbor allowed for the shacks and piers to reflect nicely while the boat sat still as I snapped off several frames. The 35mm f/1.8 is one of my favorite lenses to have when I’m just walking around, and was the perfect lens to have on my camera for this image!
Instagram: @rickberkphoto
Contributors: Ken Hubbard
Production and layout: Stephen Reisig / Real Imagination
Printed by: Spectragraphic, New England
Reprinting,
Copyright © 2023, Tamron Americas
42 Tamron Magazine
in online services and on the internet, duplication onto storage media such as thumbdrive, CD-ROM, DVD-ROM etc. are only permitted with the advance written permission of the editorial staff. All information, prices, dimensions and colors are subject to correction
reproduction
Tamron SP 35mm F/1.8 Di VC USD F012N 35mm, F/8, 1/50 sec., ISO 800
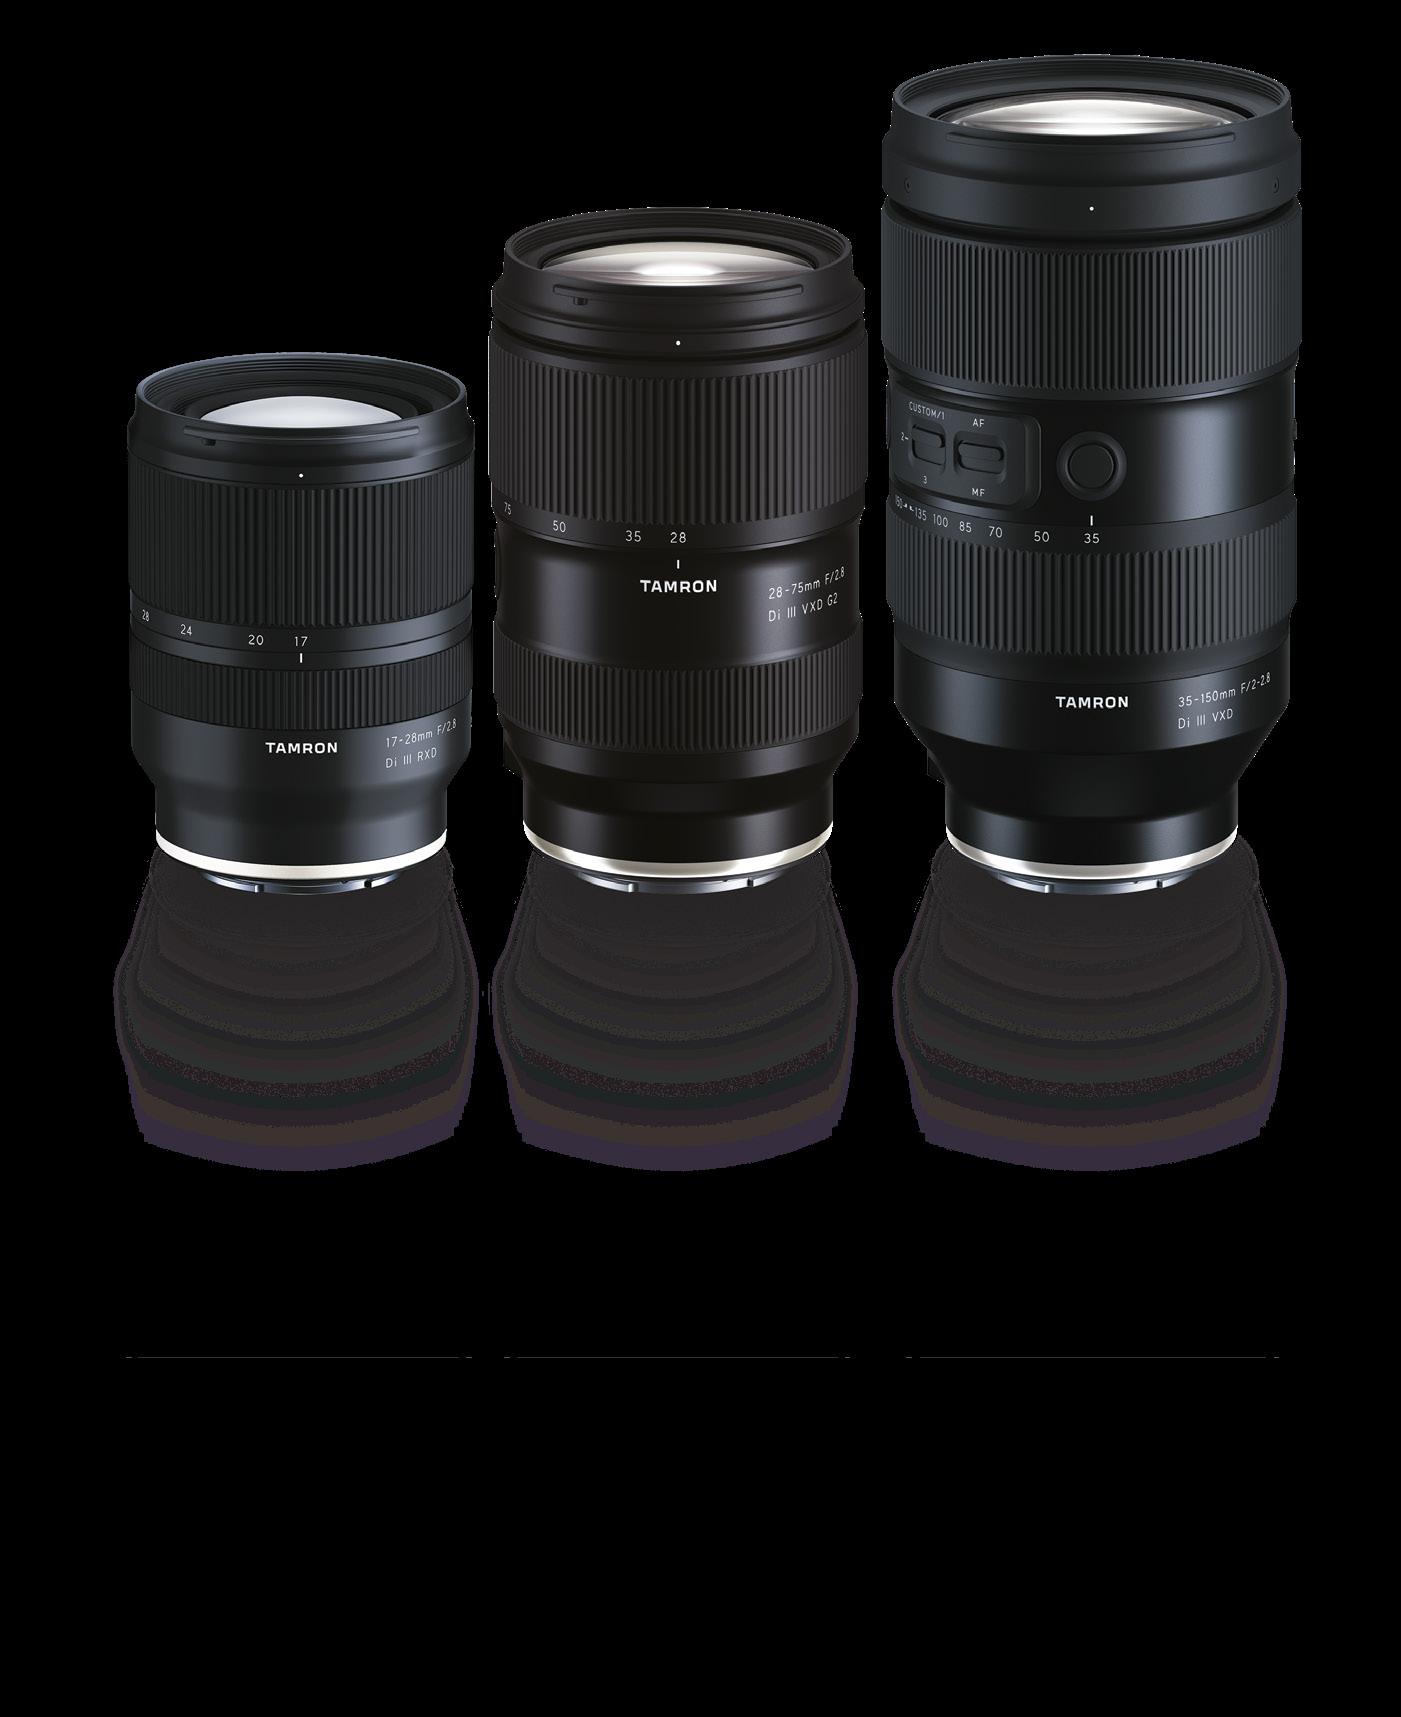
ALL NEW G2 STANDARD ZOOM LENS for Sony E-mount [ model A063] 28-75mm F/2.8 Di III VXD G2 FAST F/2 ALL-IN-ONE ZOOM LENS for Sony E-mount [ model A058] 35-150mm F/2-2.8 Di III VXD ULTRA WIDEANGLE17-28mm F/2.8 Di III RXD [ model A046] WIDE-ANGLE ZOOM LENS for Sony E-mount www.tamron-americas.com Capture the decisive moment with Tamron. ONLY AVAILABLE AT YOUR AUTHORIZED TAMRON AMERICAS RETAILER
www.tamron-americas.com
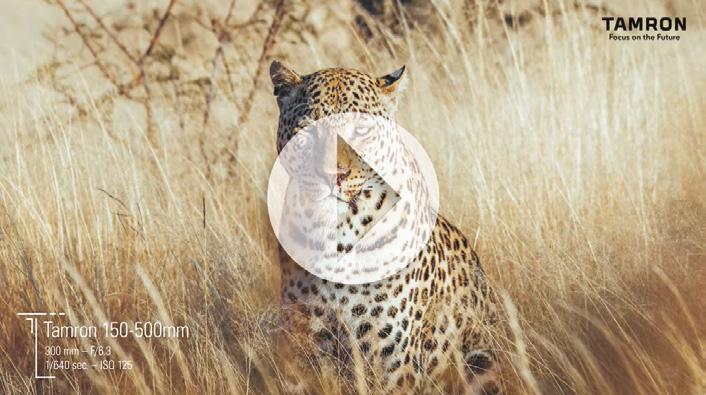
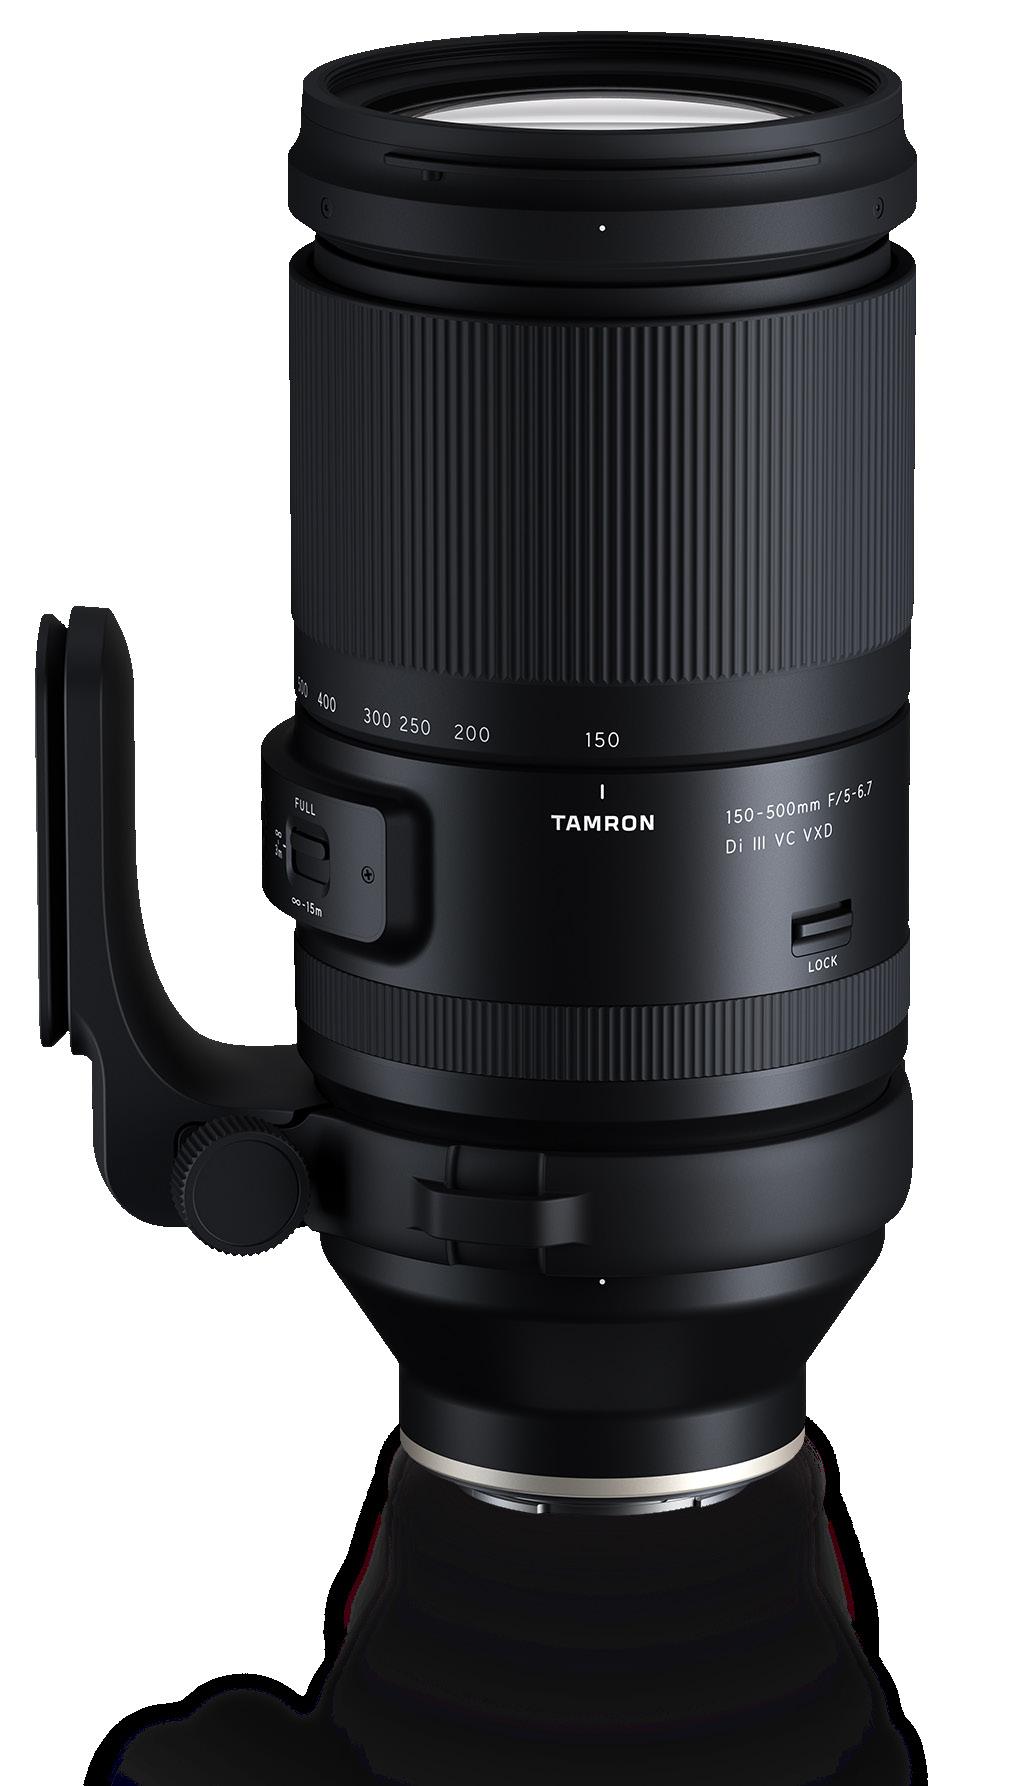
The compact and lightweight ultra-telephoto zoom with VC and fast AF for Mirrorless Cameras ULTRA-TELEPHOTO ZOOM LENS for Sony E-mount and FUJIFILM X-mount [ model A057] STABLE VC150-500mm F/5-6.7 Di III VC VXD ONLY AVAILABLE AT YOUR AUTHORIZED TAMRON AMERICAS RETAILER 500mm, F/ 6.7, 1/200 sec., ISO 1250
© Ken Hubbard
