1 minute read
Install


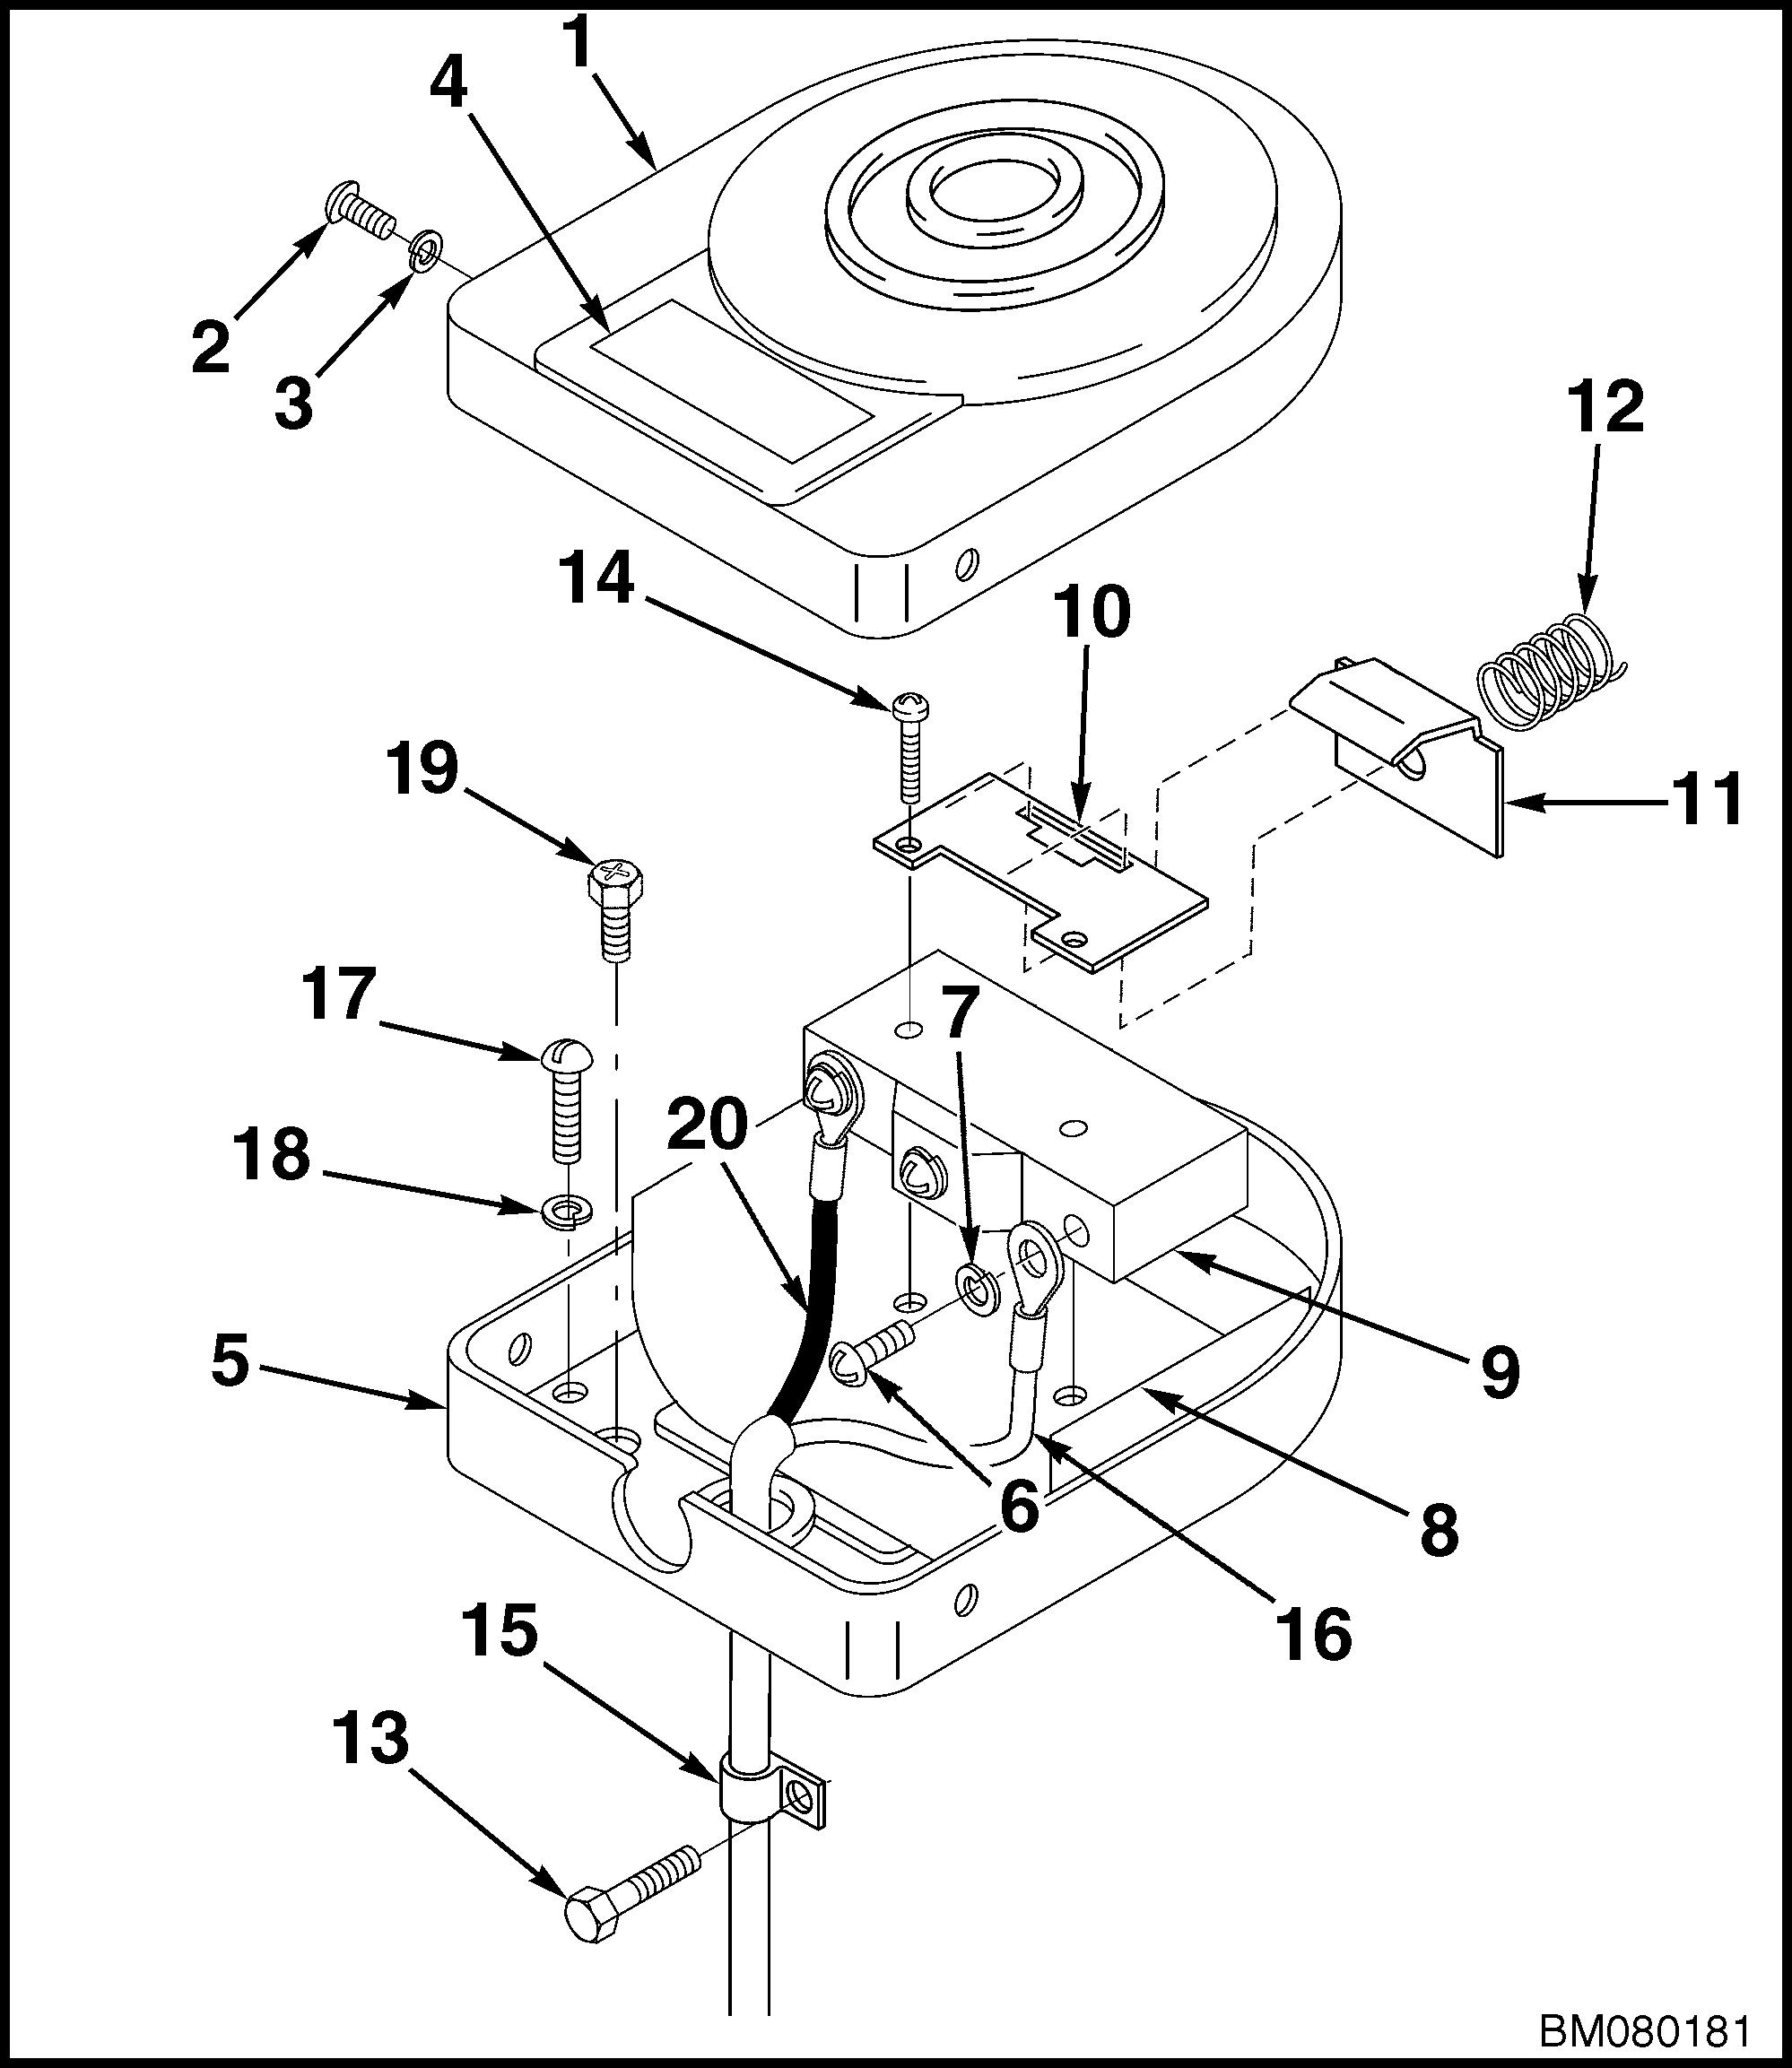
1. COVER 2. SCREW 3. LOCKWASHER 4. NAMEPLATE 5. BASE 6. SCREW 7. LOCKWASHER 8. INSULATION 9. SWITCH 10. ACTUATOR PLATE 11. ACTUATOR 12. SPRING 13. SCREW 14. SCREW 15. CABLE CLAMP 16. WHITE WIRE 17. SCREW 18. LOCKWASHER 19. GROUND SCREW 20. BLACK WIRE
Figure 14. Foot Switch
Advertisement
INSTALL
1. Pull wires through rubber grommet in bottom of base. Install wires to switch as removed. See
Figure 14. 2. Install the screws (6) and lockwashers (7) securing the wiring harness to the switch as removed.
3. Install actuator to actuator plate in the orientation shown.
4. Attach actuator and actuator plate to switch by inserting screws (14).
5. Place switch assembly into base as removed.
6. Center the spring inside the base between the curved side and the actuator.
7. Pull the switch toward the spring to align screws with holes in base and tighten to secure in place.
8. Secure the switch assembly to the floor of the operator's compartment using screws (17) and lockwashers (18).
9. Secure top cover to base using screws (2) and lockwashers (3).
10. Connect the battery and turn the key switch to the ON position.
WARNING
Move the truck to an area with plenty of room where top speeds can be checked safely.
11. Test the high speed switch for proper operation.
12. Install the floor mat.