5 minute read
DISCOVER


Throwing a date night
BY PADEN HUGHES
couple of weeks ago my husband surprised me with what we call a “wild card date night”—an evening out doing something new—by taking me to throw pottery. It’s rare for me to truly love things I’m not good at, but art is that one exception. I was thrilled with the prospect and impressed with his willingness to risk it and try something out of the ordinary. So off we went to Anam Cre’, a local, laid back pottery studio located in downtown San Luis Obispo’s Creamery. This quaint space makes you feel like you walked into an art studio that never sleeps. It’s always evolving with the people and art pieces that come in and out; every one contributing in their own way to the vibe of the studio, whether with an incredible sculpture or smear of clay on the floor. It’s the kind of place you don’t feel that you have to be an expert to join in and be welcomed, which was good for us. For those wondering about throwing pottery and what it entails, it’s a two-stage process. The first time you go, your goal is to sculpt the clay. The second time you go, you paint/glaze your art. After both stages your pieces are fired in a kiln (a stone oven that looks related to a pizza oven). So, for the partner who is looking to get credit for two nights of creativity, this is for you. Owner, Shevon Sullivan, guides you through selecting your medium, the type of clay you will be working with, and teaches you how to knead it. Then you head to the wheel and embark on a journey of concentration, applied pressure, and enjoyment. Had we simply chosen to make platters or small cups, we may have needed less attention, but as it was, we came wanting to make beer steins that resembled Spike’s friendship beer mug, you know,
Athe giant ceramic steins that hold four liters of beer? Why not? We thought if we were going to throw pottery, we might as well maximize the experience. Sullivan graciously informed us that to throw something that big as beginners was ambitious and likely to end in a warped condition. To her credit she was not far off the mark. Ignoring her advice, we doubled the clay quota and started in on the steins with gusto. It was incredible to see how quickly the combination of pressure, water and wheel turning creates a shape that can be so easily manipulated. The humor of our night came after my husband continued to thin the walls of his would-be-stein only to watch it crumble. Twice he went back to the kneading table, accompanied by our combined laughter. Thankfully, Sullivan thrives on redemption projects like ours and helped us craft what we fondly describe as steins, but anyone else would assume to be large vases. We came back on a second date to finalize the glazes and paint on the finishing touches. Looking at our artwork lined up next to incredible designs and sculptures was a little humbling, but like proud parents of kindergarten art, we smiled at our finished product. The humor, the freshness of the experience and the memory we have was well worth the $20 per person charge for two hours of creativity. Anam Cre’ hosts adult pottery open time several evenings a week from 6:30 to 8:30pm and Sullivan lets you BYOW (bring your own wine). So if it has been a while, or if you’ve never tried, give throwing a shot.
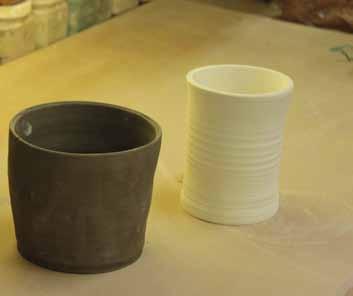
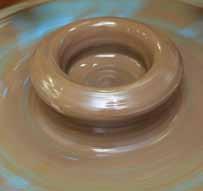
Check out our beer steins, or vases, or, uh, pencil holders...

Why do they call it throwing?
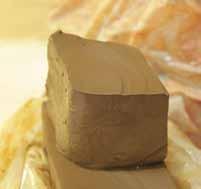
With a little research we discovered the origins of “throwing” pottery. According to those more well-read than us, the Old English word “thrawan” from which “to throw” comes, means “to twist or turn.” Going back even farther, the Indo-European root “ter” means “to rub, rub by twisting, twist, turn.” The German word “drehen,” a direct relative of “to throw,” means “turn” and is used in German for throwing. Because the activity of forming pots on the wheel has not changed since Old English times, the word throw has retained its original meaning in the language of pottery but, as we all know, it has developed a completely different meaning today. There’s low-fire or high-fire clays, and they warrant different results. Low-fire clays are great for bright colors and detailed decoration. But they’re not good in water, so if you do go for low-fire clay, get a glaze that you know will seal. Highfire clays aren’t so great with bright colors, but they’re sturdy, waterproof, and can be texturized easily. Glazes may move when fired, so detailed images could get blurred.
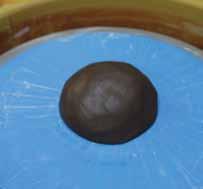
2. Pick your place
Put the clay on the center of the wheel head. The easiest way to do this is by tossing the clay with some force on the center.
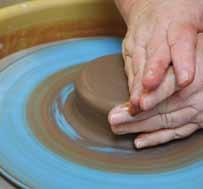
3. Find your center
Centering the clay means that its outer edges spin perfectly smooth with no bumps or wobbles. There are different ways of doing this… so don’t be afraid to ask for help.
4. Open up
Once the clay is centered, it is time to open it. To start, you need to make a hole in the center. To do this, start by moving your finger across the top of the clay in a straight line. This is so you find the exact center. If the hole is not started in the exact middle, the clay will begin to wobble and you will have to re-center it. Seriously, it’s alright to seek out instruction.
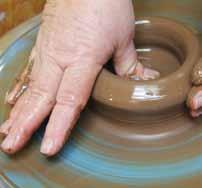
5. Don’t supress, compress
After you have created an opening the bottom will need to be compressed. To do this you can either use a wooden rib to take out all of the uncentered clay from the bottom or you can slowly smooth it out with your fingers. The former method will create a flat bottom. Okay, there’s a lot more to it than this... so, just ask for help already!


