7 minute read
3D printed parts

from Summer 2022

3D PRINTER COMES TO THE RESCUE
REPRODUCING WINDSCREEN TRIM
Advertisement
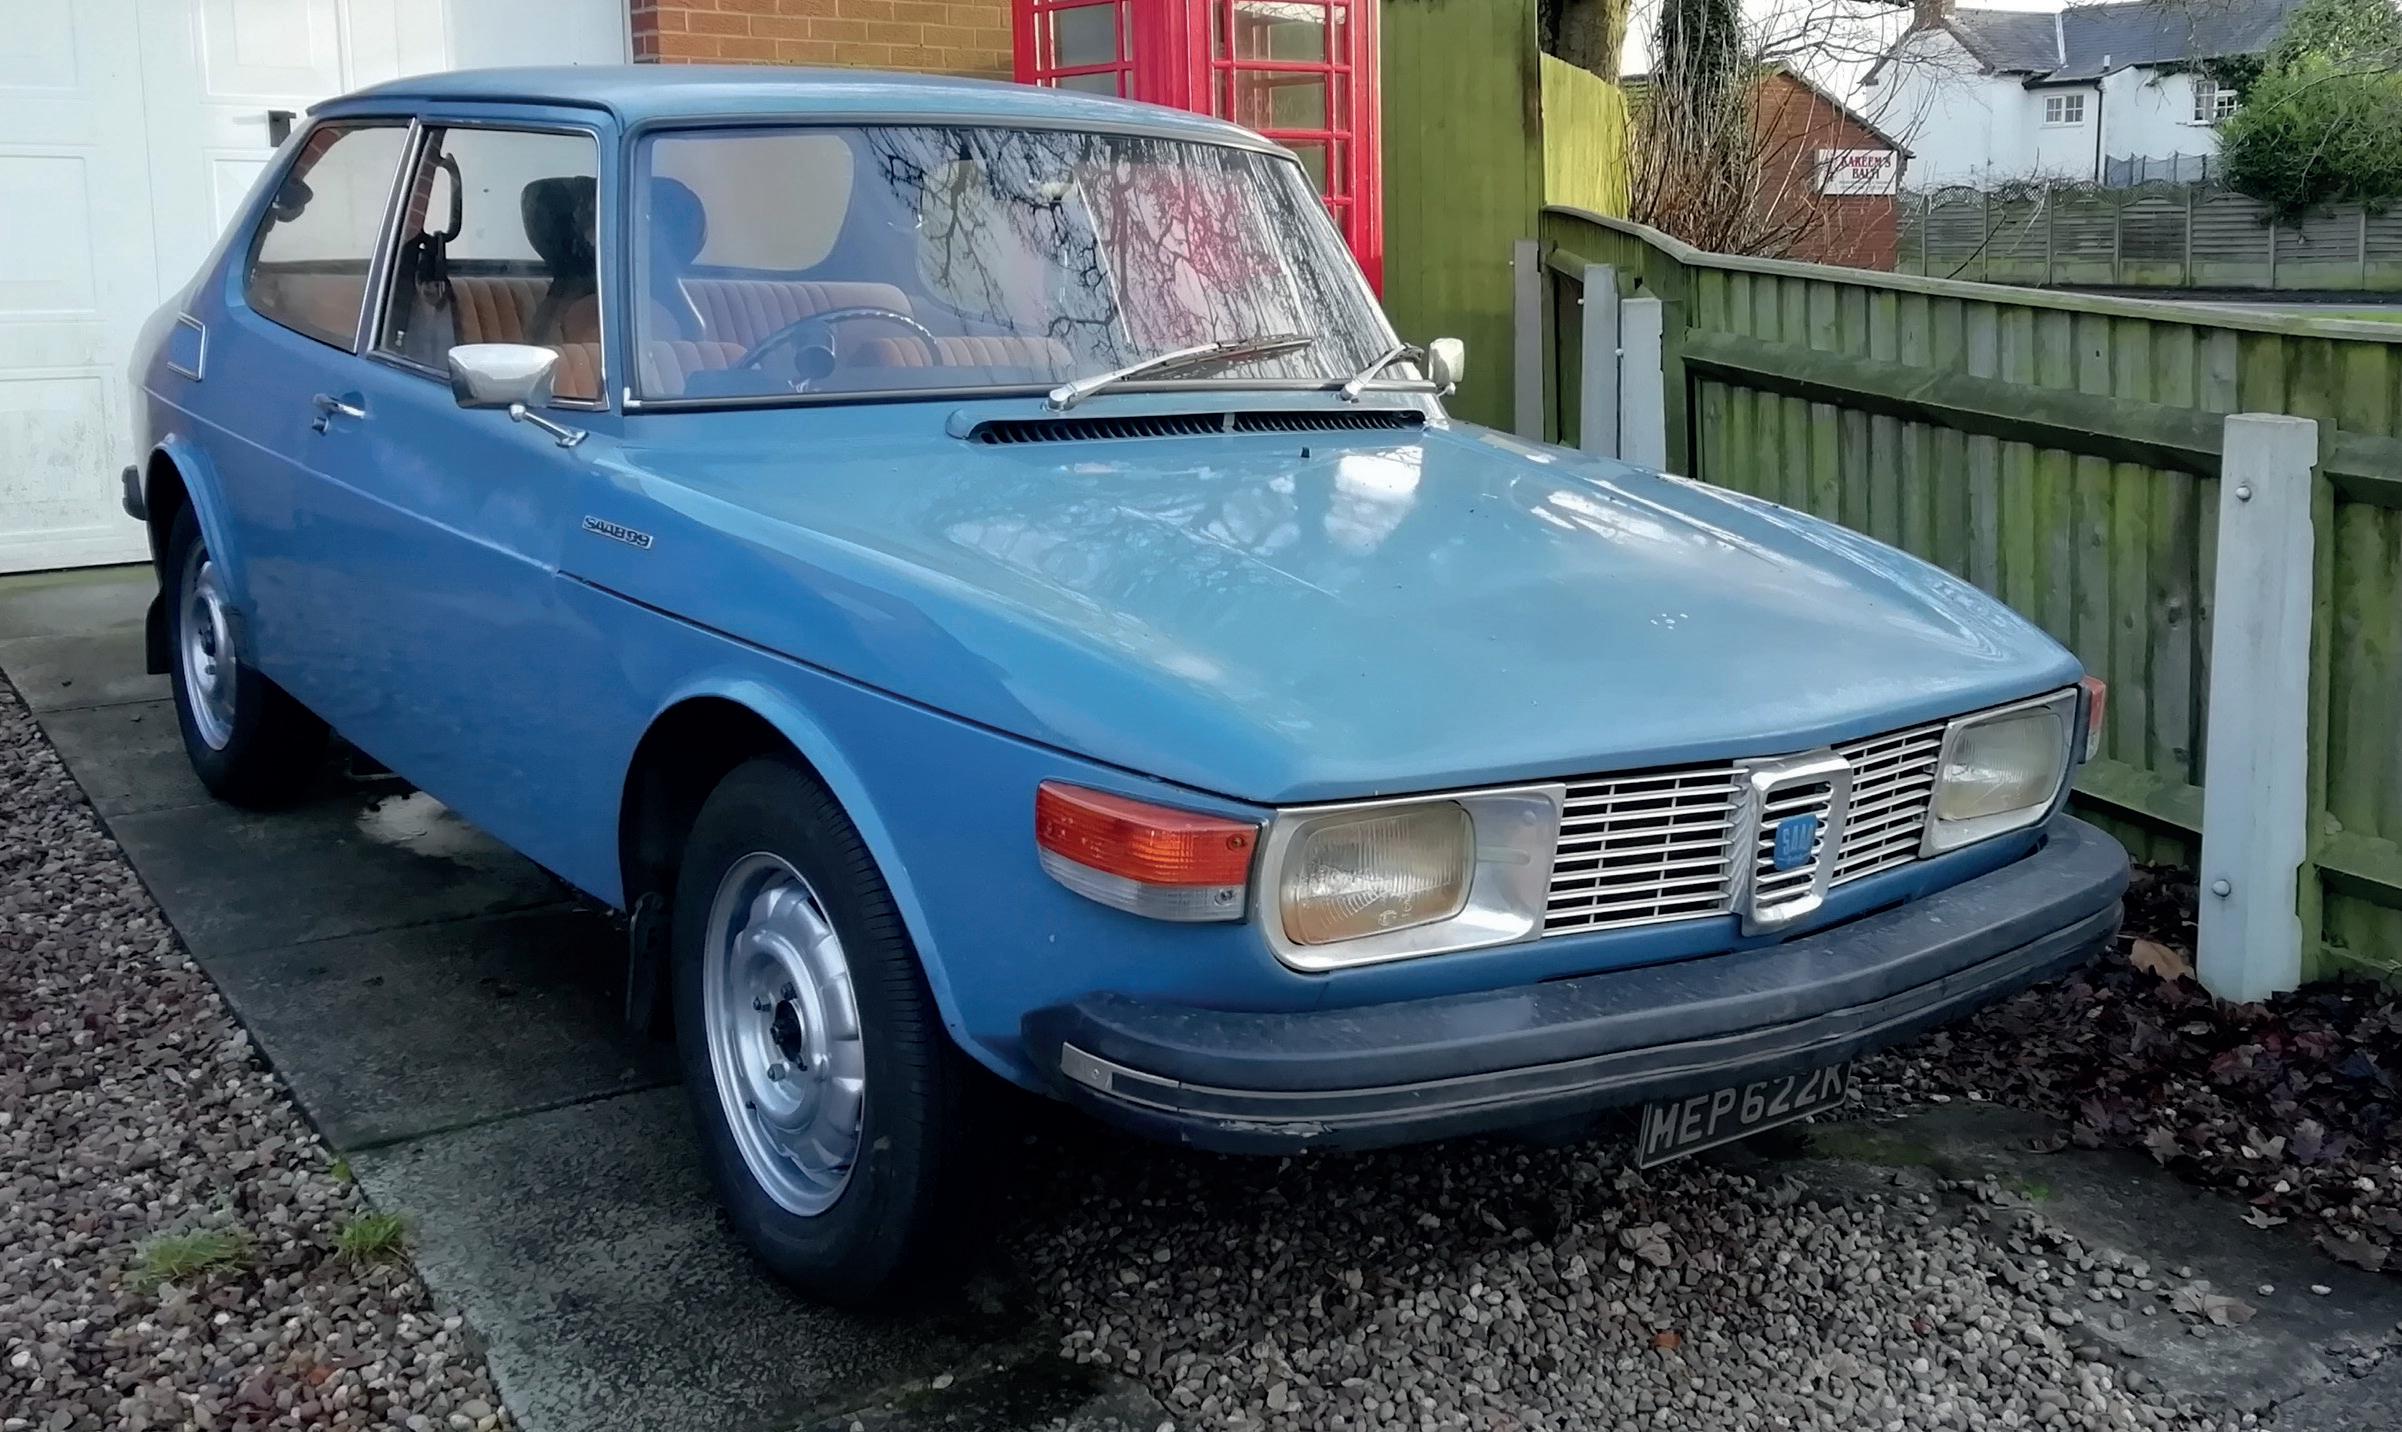
In November 2018 a Middle Blue 2 door Triumph powdered 99L arrived on my driveway with a failed engine. A good friend of mine had bought it unseen, suffered the disappointment of finding the dipstick covered in thick white gunge and had it delivered to me for a serviceable Saab B20 engine to be installed and the car brought back to road worthiness. The shell was very solid, the owner prior to my friend had spent money on new brake parts all round and the mission was accomplished by March 2019 when it was proven reliable and handed back.
The car went off to live its life on the fen roads round Ely in Cambridgeshire but in December 2019 it returned to my driveway when I became the proud owner of an old but usable car that I found to be utterly charming and proud to call my own.
The desire to improve my new project grew the more I used it and once I was able to get it into the dry warm space of my garage, the obsession spiralled out of control. This is a story many do it yourself enthusiast restorers will be familiar with and there will be sympathetic nods throughout the readership on hearing the car is now nearing completion having had a what is approaching 2 years for a bare metal, nut and bolt restoration ‘tidy up’.
Having quickly sped past the point where I just couldn’t cut any corners, I have found myself having to devise ways of improving every single part that came off the car and where that just wasn’t possible with 50 years of wear and tear and replacements couldn’t be purchased; reproducing them.
This article is to explain how I recently found myself using 3D printing as part of the process of reproducing some trim parts on the car. The technology is out there, more accessible than ever and if you have the CAD skills to draw parts; limited mainly by imagination. This article

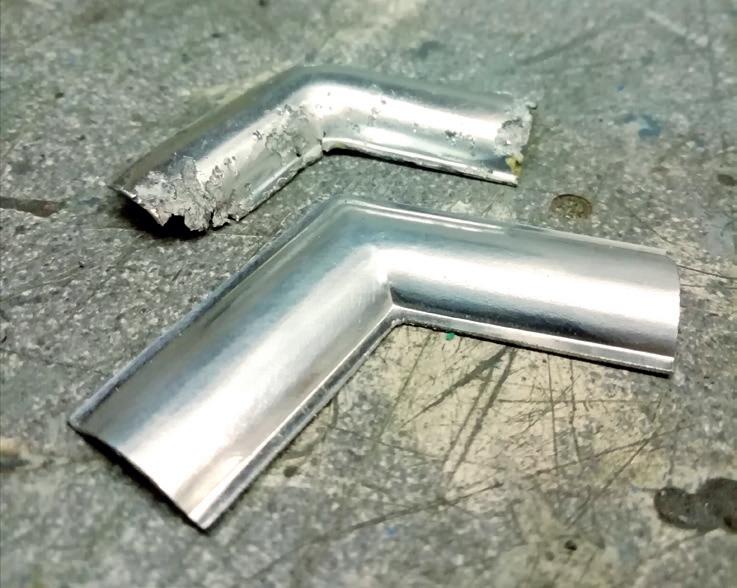
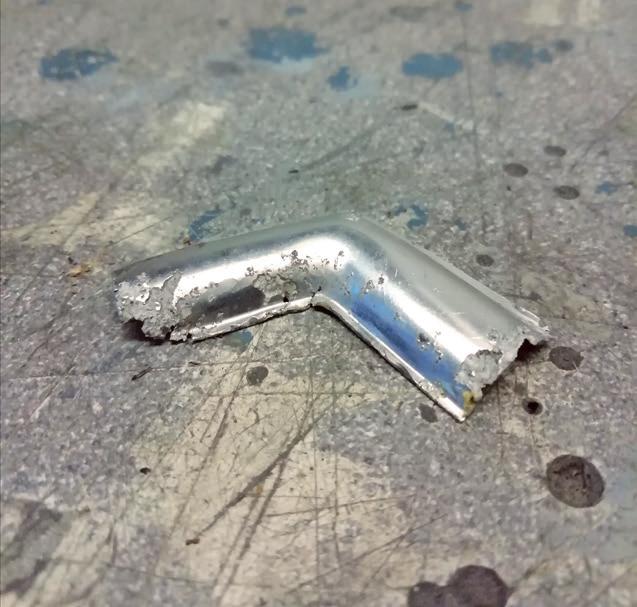
Original windscreen trim piece
is intended as inspiration rather than instruction and I hope that other classic Saab owners may find the idea of 3D printing useful in some way for their own ‘tidy ups’.
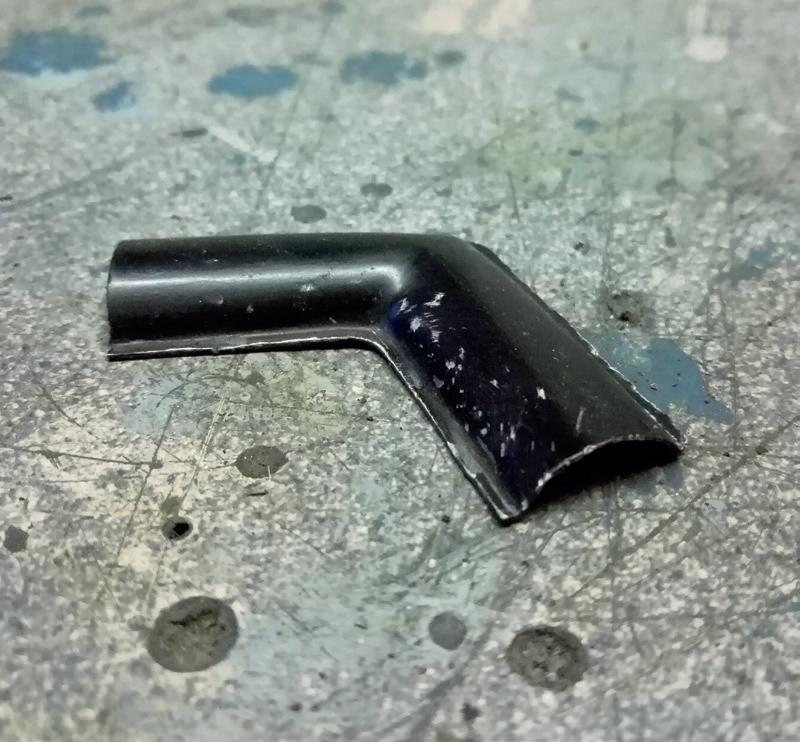
On the Saab 99L windscreen seal there is a silvered locking bead that closes up the seal onto the glass and hold it tightly enough to keep water out. The locking bead width and layout changed a few times over the course of the 99 production run, some turbo cars used black beads and trims, some used the silver version and on mine; the trim pieces were only used on the bottom corners of the screen whereas others also used them on the top corners.
The trims on my 1972 model were silver, they were originally clear anodised aluminium and were in a bad way with white powdery corrosion taking hold to the point where some of the metal had crumbled away and was missing. With so much time invested in the car to this point, something had to be done about these trims.
The part itself was not suitable to be 3D printed as they are only 0.5mm thick and it would have been difficult to create a metallic enough finish to look right. The only way to make them metallic enough was to make them from metal and this was done by printing a two part press tool intending on pressing new parts from polished 0.5mm aluminium.
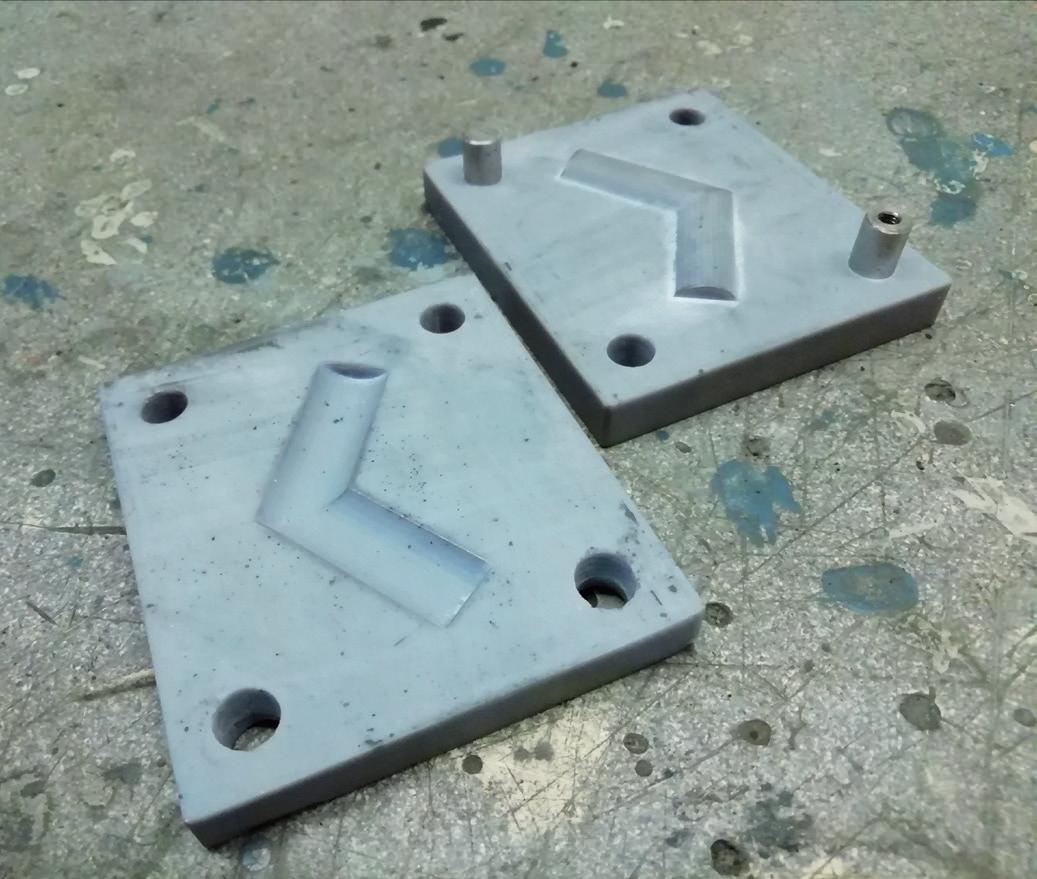
The trim part was copied and drawn in Solidworks CAD software and once copied, the part was subtracted to leave a part shaped cavity in a simple rectangular block that would become the body of the tool. Once happy with the design of the tool, an. STL file was created as this format which is compatible with most if not all 3D printers. (PICTURE 5 PRESS TOOL OVERALL SHOT)
My printing friend owns an Elegoo Saturn 2 8K resin printer which creates the design by curing liquid resin rather in a tank than fusing layers of filament strands on a bed. Different ways of achieving the same result but final surface quality subject

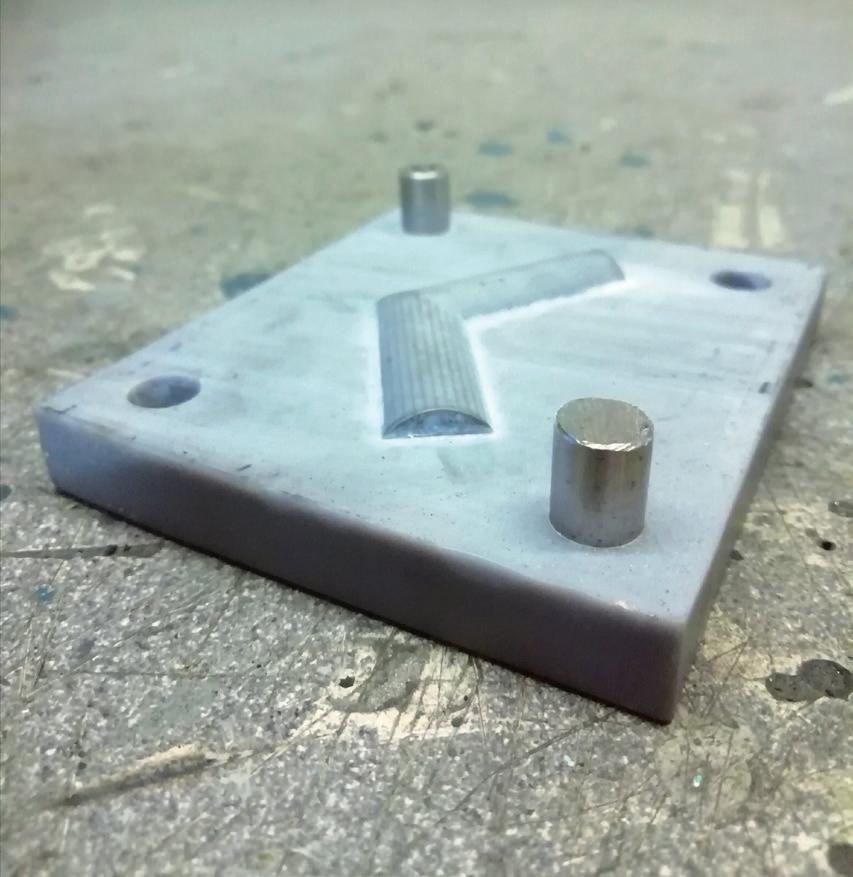
3D printed ‘male’ side of the press tool, printed in 12mm material with 8mm locating pins
Unusable windscreen trim piece
to print resolution which is a discussion big enough to be its own article but its worth mentioning that the 8K resin surface quality is astonishing and good enough to paint and use if you used it to print a part rather than a tool.
I decided that the main body of the press tool should be solid (‘100% fill’ in 3D printing terms) to withstand the pressing forces and opted for each half of the tool being 12mm thick. As I was intending to press soft aluminium parts, it didn’t seem necessary to make the tool any thicker and the 70x80mm pressing surface was chosen to be strong enough but economical enough with resin use. I don’t have the details of exactly which resin was used but it is a mid-range and, in practise there is no noticeable flex at all.
The two halves of the tool are brought together accurately in line courtesy of an 8mm diameter metal guide pin in 2 opposing corners – this was essential as without them there was every chance of damaging the male impression in the tool by colliding it into the flat area surrounding the female depression.
In use the two halves of the tool press together very easily with 0.5mm aluminium. I used nothing more than a bench vice and didn’t anneal/soften the metal before hand – it just wasn’t necessary. The sheet being so thin might not draw out so well into deeper shapes than the trims but if a design required it – a thicker gauge of sheet would give more scope.
I could only find brushed finished aluminium sheet but polished it to enough of a shine to look as ‘bright’ as the original parts and to finish them; it is my intention to drop them off at a local anodising company to get them clear anodised to maintain their appearance yet offer protection. I have had other parts clear anodised and can report it barely alters the appearance of the polished parts and of course there would be no reason why you couldn’t get them anodised in black if your car had that trim option.
The pressed parts were cut from the sheet using a thin Dremel multi cutting

The pressed aluminium piece and below, the final trimmed part
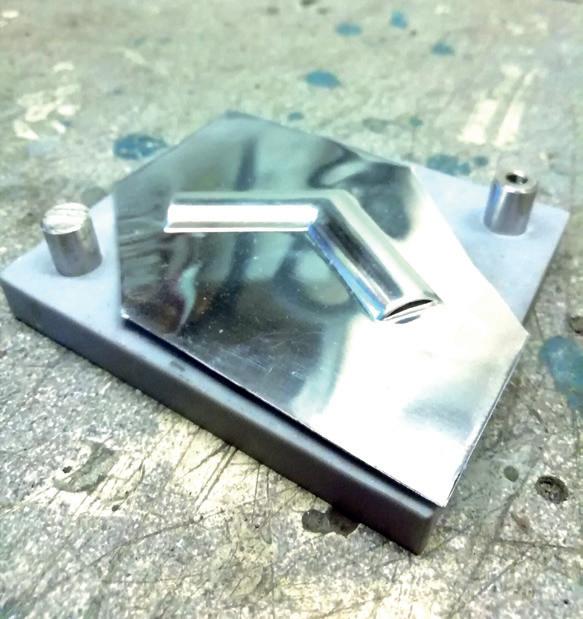
disc and cleaned up using a fine grade file. I found this was the most time consuming part of the whole process but as it’s an easy material to work with; starting wide and narrowing down bit by bit was order of the day to avoiding taking too much off.
Costs were less important to me than the result but it was actually one of the more economical processes especially considering the massive improvement these newly made parts will bring to the overall look of the car.
Sheet material: 500x200mm - sufficient to practise with and then produce 10 pairs was circa £12.

Resin used: £4-5 (plus cost of two packets of biscuits to hire the printer) Metal guide pins: Nothing as they were in the workshop. Anodising: Yet to be done but as a guide; my local classic car friendly anodising company re did my silver front grille for £30 - the trims won’t be much at all.
This was my application for 3D printing, it worked perfectly and was incredibly satisfying.
There are lots of applications featured in videos online and using plastic press tools on sheet steel seems to be no problem. The ability to press steel parts opens up the possibilities of making your own repair panels for the bodyshell, which luckily I haven’t needed to do and that is something my incredibly patient and understanding wife is grateful for.
Regards,