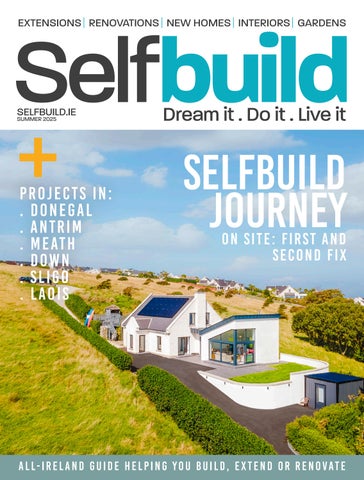
Selfbuild


And much, much more including inspiration galleries, videos and podcasts, regular news updates and categorised advice sections


Europe’s leading, award-winning window brand for over 90 years. Innovative, high-performance architectural window and door systems for self-build, renovation and Passivhaus projects.
Outstanding quality, bespoke design, and exceptional thermal performance. For further information, please visit uk.internorm.com.

Roadstone FlowPlus is the next generation self-levelling cementitious screed developed in conjunction with the ARDEX Group.
Roadstone FlowPlus is the next generation self-levelling cementitious screed developed in conjunction with the ARDEX Group.
• Provides a quick, smooth and level surface with minimal leveling
• Ease and speed of installation
• Provides a quick, smooth and level surface with minimal leveling
• Suitable for all domestic and commercial applications
• Ease and speed of installation
• Suitable for all domestic and commercial applications

“What’s very clear is that self-builders really need all the help they can get at this point in time.”
Across the island of Ireland there are people, young and old, who are in the process of building their own home. Doing their research, getting their dream plans finalised. Pouring their blood, sweat and tears into their project, not to mention their life savings.
It’s a very rewarding journey to set out on and from the point of view of the housing crisis, a most commendable endeavour.
Yet, somehow, governments don’t seem that keen to help people build, be it in the countryside or not. After all, the ROI government’s plan to offer serviced sites in clusters hasn’t exactly panned out (page 12).
Some say the lack of enthusiasm is due to our rural landscape being a major feature of our tourism industry. In other words, dotting the countryside with one-off houses wouldn’t look the part. Others argue building out in the sticks encourages car use, at a time when we’re trying to reduce our dependence on fossil fuels.
But at the end of the day, don’t we need more homes to be built? They can’t all be apartments. There needs to be a mix of solutions. There’s no point complaining that there’s a rural exodus if we don’t allow people to build to live there.
What’s very clear is that selfbuilders really need all the help they

can get at this point in time.
Pre-Covid, homes we featured in the magazine were costing €250k to €350k, contractor led, now we’re looking at €400k homes. Sure, with house prices sky high it still makes sense to build, but economic uncertainty is putting many of us risk-averse folk off.
We have 2,600+ self-builders who’ve signed the petition to get rid of onerous development charges and water connection charges in ROI. We’re advocating for that waiver, which last year saved self-builders thousands and thousands of euros on their projects, to apply to self-builders only. There is no need to line the pockets of developers.
We’ve just sent a letter to the ROI government to reinstate the waiver on the back of the petition. Hopefully people power will prevail; we’ll keep you posted.

The second stage of being On Site deals with first and second fix. It will all move very fast at this stage, so preparation is key.
In the meantime, happy building!

Astrid Madsen - Editor astrid.madsen@selfbuild.ie

If you have a question, want to share some insights, or simply let us know how you’re getting on with your project, we’d love to hear from you for our Letters page. Email us at letters@selfbuild.ie

Front Cover Photograph: John Mee,
24 The test of time
Sarah and Paul Foster’s selfbuild in Co Meath shows what can be achieved with good design choices.
34 Framing the future
Ryan Daly chats about how his timber frame new build delivers on both energy efficiency and aesthetics.
46 A shore thing
How Michael and Tina Clancy transformed their coastal holiday home in Co Sligo into a sustainable, energy efficient, forever home.
56 Sydney vibes, Belfast style
All articles equally cover the 32 counties; when we refer to the Republic of Ireland the abbreviation is ROI. For Northern Ireland it’s NI.
Phil and Jennifer Baker’s Belfast home gets an Aussieinspired makeover, swapping a cold, disconnected sunroom for a bright, open extension that effortlessly blends indooroutdoor living.

64 Building a cosy home
Áine Carey’s direct labour new build in Co Donegal has the cosiness and character of a cottage that’s been lovingly restored.
70 Garden with levels
A Co Cavan garden design that deals with a sloped site and unsightly retaining walls.
74 Letters
Issues with upgrading the energy rating on an existing home, drying out the house, and how to flush €15k down the drain.
76 Is blockwork still the cheapest way to build?
Quantity surveyor Keith Kelliher looks at whether Ireland’s most popular building method is still the most cost effective.
78 Are roof windows a good idea?
Passive house consultant Seán McKenna weighs the benefits of incorporating roof windows into your design, and why you should steer clear of roof lights.
80 Throwing good money after bad
Eco builder Liam Walsh argues 40 per cent of grant-aided energy upgrades aren’t worth the money.
82 Savings room by room
Where to spend to save, plus some hacks to get the most bang for your buck on your new interiors.
84 Garage conversions
Engineer and architectural designer Les O’Donnell looks into how to transform your garage into a living space, and offers design ideas for granny flats.


88 Overview
An introduction to the second part of Stage 5 of your Selfbuild Journey: On site, dealing with first and second fix.
90 First fix
Watchpoints at the early stages of wiring and electrics.
96 Second fix
Watchpoints at the fit-out stage.
100
Watchpoints when it comes to finishing the external walls and putting up roof coverings.
Roof covering options, from traditional to more modern.
Liam Canavan chats through how he’s fitting out his timber frame extension, from installing the wall insulation himself, to tiling and drywalling.

Gavin Connolly shares the secret ingredients that’ll have you breeze through the construction phase of your self-build, with tips and advice from his own experience with the trades and suppliers.
CONTACT info@selfbuild.ie
EDITOR
Astrid Madsen astrid.madsen@selfbuild.ie
DEPUTY EDITOR
Heather Campbell heather.campbell@selfbuild.ie
DESIGN
Myles McCann myles.mccann@selfbuild.ie
Shannon Quinn shannon.quinn@selfbuild.ie
Megan Buckley megan.buckley@selfbuild.ie
MARKETING
Calum Lennon calum.lennon@selfbuild.ie
Victoria Hunter victoria.hunter@selfbuild.ie
Rebecca Ferris rebecca.ferris@selfbuild.ie
Erin Mason erin.mason@selfbuild.ie
SUBSCRIPTIONS
Becca Haslett becca.haslett@selfbuild.ie
ADVERTISING SALES
Emma Phillips emma.phillips@selfbuild.ie
Joanna McConvey joanna.mcconvey@selfbuild.ie
Lisa Killen lisa.killen@selfbuild.ie
Maria Toland maria.toland@selfbuild.ie
Nicola Delacour-Dunne nicola.delacour@selfbuild.ie
ACCOUNTS
Karen McLeigh karen.mcleigh@selfbuild.ie
Leanne Rodgers leanne.rodgers@selfbuild.ie
SALES DIRECTOR

Mark Duffin mark.duffin@selfbuild.ie
MANAGING DIRECTOR
Brian Corry brian.corry@selfbuild.ie
CHAIRMAN Clive Corry clive.corry@selfbuild.ie
DISTRIBUTION
Delivering windows and doors that are crafted to last generations.
Redefining quality and luxury for almost a century. Our windows and doors are not just built to last, but crafted to inspire.
For more information visit nordan.ie
NorDan’s Timber/Alu-Clad Windows combine the classic warmth and beauty of timber on the inside with a tough weather-resistant aluminium cladding on the outside.
Merging timeless elegance and enduring strength, NorDan’s Timber/Alu-Clad Doors are perfect for those seeking stylish yet practical modern living solutions.
The ideal solution for modern homes and commercial properties, offering a huge range of design possibilities, enhanced energy efficiency, and premium performance.
The perfect solution for the contemporary needs of residential and commercial properties that highlight energy efficiency, low maintenance, and versatile design options.

NorDan’s Entrance Doors have been designed with durability and energy efficiency at the core. With contemporary and traditional designs available, there is a perfect match available for your perfect welcome home.


New ROI planning minister John Cummins is considering making it easier to build modular and cabin-style homes in back gardens without needing planning permission, to help tackle the housing crisis.
Right now, you can build extensions up to 40sqm connected to your main home without needing permission. But if you want to put up a detached structure, even if it’s the same size, it has to get approval. The new proposal would change that, allowing freestanding modular units to be built under the same 40sqm limit without the usual planning red tape.
The proposal will go through public consultation; there will also be a government evaluation how feasible these changes might be. As it stands, there’s no specific timeline for when we might see new regulations.
“I see it as the ability of people to be able to have that intergenerational movement within their own community and for younger people to live independently,” said
Minister of State Cummins.
“I’m not saying that this is a panacea, that it’s the solution to the housing crisis. I’m saying that this is a potential option that will suit certain circumstances,” he said.
If these changes go through, the exemptions would apply only to structures up to 40sqm. Anything bigger would still need full planning permission. The Minister of State added that it would be down to local authorities to look after regulations for the dwellings – despite not being subject to planning.
“It’s a matter for the local authorities, in the context of ensuring that things are compliant with planning and building standards. In the same way as if it…was attached to the main dwelling house,” he said.

Self-builders in NI using the Planning Portal are facing higher costs. As of April 1, 2025 self-builders looking to secure outline planning permission had to pay £10 more, with fees increasing from £505 to £515. Reserved matters applications (following an outline approval, adding details like design) increased from £505 to £515 and a full planning application (detailed application for a single house) has increased from £1,014 to £1,035.
Planning applications for extensions, alterations or improvements to an existing house, new fences, walls, gates or outbuildings within a home’s boundary, increased from £340 to £347.
With a new ROI government in full swing, it seems grants and financing models that help more homeowners afford upgrades, particularly older people who may face financial or logistical barriers, are top of the agenda. Community-driven initiatives are also being supported, with group retrofitting schemes allowing neighbours to collaborate on upgrades and share costs.
Low-interest loans for energy improvements will remain available under the Home Energy Upgrade Loan Scheme, covering upgrades costing between €5,000 and €75,000. Measures to move older homes off oil-based heating systems are also being pushed, with sustainable biofuels promoted as a short-term alternative for homes unable to undergo immediate retrofits.
Grants for solar storage batteries could also be reintroduced; the government grants for batteries were axed in 2022.
Make the greener choice for your home, upgrade your existing central heating with an eco-friendly, low noise Midea Heat Pump. Air source heat pumps are the low-carbon future of home heating which integrates heating and domestic hot water into one system.
The future of heating, renewable energy is the greener, cleaner way to heat your home. Midea’s air source heat pumps are the costeffective way to lower your energy bills and switch to a low-carbon way of heating your home. Make yourself at home and start saving with Midea Heat Pumps.

OUR MIDEA MONOBLOC HEAT PUMP COMES WITH A MARKET LEADING 10 YEAR WARRANTY.

While Vacant
drawdowns have increased, the number of completed projects still falls short of government targets.
While the Vacant Property Refurbishment Grant (VPRG) has seen an increase in grant payments in 2024, a significant gap remains between the number of applications, approvals and actual drawdowns.
By the end of December 2024, over €77 million had been paid out for the refurbishment of 1,449 homes under the scheme. However, this figure is far below the government’s revised target of 4,000 homes by 2025.
Reflecting on the latest data, Minister for Housing James Browne said: “The rapid increase in grant payments shows the scheme is growing momentum, helping to tackle vacancy and providing much-needed housing.”
To date, Donegal County Council holds the highest number of applications (1,042), approvals (715) and grant payments (93). Cork County and Mayo County Councils had the second and third highest number of applications respectively.
The Vacant Property Refurbishment Grant scheme, introduced in 2022, aims
to revive vacant and derelict properties into permanent homes or rental units, with grants of up to €70,000 available upon completion of works. As of the end of 2024, over 11,300 applications had been received, and 7,700 approvals issued. But the number of drawdowns lags far behind the figures hoped for when the grant was first launched.
Critics point to one key obstacle in the programme: the requirement that homeowners fund the work upfront. Although 1,449 drawdowns were reported at the close of 2024, the scheme’s dependence on post-completion payments is a big hurdle for many homeowners, particularly those lacking the resources to cover refurbishment costs in advance.
That’s why Minister for Housing John Browne is considering stage payments for those availing of the grant, acknowledging that it’s difficult for families to avail of it as the grant has to be paid upfront. Mortgage providers must see that you can finance the entire cost of the work before starting.

According to the ROI Programme for Government, the vacant and derelict property refurbishment grants, worth up to €70k, will be extended to 2030. These grants, funded by the Croí Cónaithe (Towns) Fund, will undergo regular reviews.
The government has committed to ensuring every local authority has an expanded vacant property team in place to improve access to support. It will continue the Local Authority Home Loan bridging finance to support the use of the grants, and will roll out a new Local Authority Mortgage for vacant properties.
A new ‘Above the Shop’ Living Refurbishment Grant will be launched to convert vacant spaces above retail premises into residential use. Recognising the additional complexity involved in such projects, the scheme will provide extra funding, alongside pilot incentives like commercial rates reductions for property owners. The cost of infrastructure upgrades has also been flagged as a barrier to bringing derelict homes back into use. To tackle this, the programme includes a proposal to “credit existing water and wastewater connections” in the calculation of new connection charges.
In July 2024, in an attempt to help fill the funding gap, the government introduced the Local Authority Purchase and Renovation Scheme (LAPR), which applies to all properties eligible for VPRG.
Under the new LAPR, first-time buyers or Fresh Start applicants struggling to secure funding from commercial lenders can apply to their local authority for a LAPR to buy or renovate a VPRG eligible home. A key feature is the inclusion of a bridging loan. Tied to the VPRG this will boost applicants’ borrowing capacity and project viability. The bridging loan is repayable once the grant is paid out. This approach allows more funding for renovation works than typical bank loans.
The new ROI Programme for Government offers modest updates to existing schemes but falls short of providing the supports self-builders need.
The new Programme for Government takes a cautious approach towards helping selfbuilders and home improvers, focusing on protecting and expanding existing supports rather than introducing bold new initiatives.
While schemes such as Help to Buy, the First Home Scheme (FHS) and energy retrofit grants are set to continue with minor updates, the lack of substantial new measures is apparent.
Help to Buy will remain in place until 2030 and the FHS has been expanded to include first-time buyers of secondhand homes.
A major blow to self-builders
is the omission of any extension (or any reference at all) to the development levy waiver, which has been a key costsaving measure. Without this waiver, self-builders now face potentially thousands of euros in additional costs (see below). Instead, the new coalition government’s housing strategy centres on incremental improvements to existing schemes, such as streamlining grant processes, expanding refurbishment incentives and promoting energy efficiency. Proposals to cut VAT rates on building materials has also not been taken up by the new government.
The Local Authority Home Loan scheme, which is open to self-builders, will undergo significant changes, including the creation of a centralised administration point and adjustments to loan limits to reflect rising house prices. An expansion of the scheme to assist mortgage holders with non-bank lenders is also under consideration.
Addressing water infrastructure issues remains a key focus, with ongoing support for group water schemes and private well grants. Additionally, the rollout of the Special Rural Water Investment Scheme — also known as the
Unsewered Villages Scheme— aims to tackle long-standing issues in areas lacking adequate wastewater infrastructure.
Alongside these measures, the government is promoting Modern Methods of Construction (MMC) to speed up housing delivery and improve sustainability. A dedicated fund will support MMC but details are unclear. The initiative also includes a push for timber frame in new builds, as part of the government’s broader environmental goals.
Westport Councillor slams development levy’s impact on young couples in rural areas, calling for exemptions.
Independent Councillor John O’Malley has renewed his call to remove development levies for young couples building homes, stressing the financial strain on those trying to settle in rural areas.
Cllr O’Malley criticised the levy, describing it as a barrier to homeownership for local families.
“Building a house already costs at least €300,000 if you’re fortunate enough to have a site. Adding the development levy on top of that makes it nearly impossible for young couples to get started,” he said. “We should be encouraging families to settle in rural Ireland, not penalising
them with additional costs.”
Cllr O’Malley called for fairer solutions, such as exempting local first-time homebuilders from development levies while applying them to wealthy buyers or large-scale developments.
Self-builders currently have to pay Section 48 development levies to their local authority to pay for infrastructure costs such as roads. These can amount to tens of thousands of euros in certain areas.
According to analysis by Selfbuild, for a 200sqm house self-builders were paying on average €6,805 to their local authority for the Section 48 levy, ranging from €1,080 in Co
Monaghan to €30,301.50 in Dún Laoghaire-Rathdown County Council’s new Cherrywood development area.
In April 2023, the ROI cabinet introduced a temporary 12-month development holiday as one of several measures to stimulate house building. The waiver period was extended a number of times, with the final deadline for commencement of qualifying new builds set for December 31, 2024.
Self-builders who started construction before that deadline now have until December 31, 2026, to complete their projects. The scheme originally required the house to
be completed by the end of 2025.
The Business Post reports Minister Browne doesn’t intend to extend the waiver, as developers haven’t started on many of the projects that got the waiver.
Selfbuild has sent a letter to the minister outlining that 2,600+ self-builders have signed a petition to scrap the scheme for self-builders only.
Get updates and sign the petition here:

An exclusive selfbuild.ie survey reveals painfully slow progress on the government’s goal of 2,000 serviced sites by 2025, as only 30 sites have been made available and been identified as suitable for sale.
Just 21 fully serviced sites are currently available to selfbuilders looking to build their own homes in ROI through the government’s Ready to Build Scheme. To date, an additional nine sites have been sold.
Under the scheme, launched in 2022 under the Croí Cónaithe (Towns) fund, local authorities directly sell sites to self-builders at a discounted price and also provide services such as water, wastewater, electricity and access to the sites. All local authorities in Ireland are administering the scheme.
The government’s Ready to Build Scheme was designed to provide 2,000 serviced sites for self-builders in regional towns and villages by 2025.
The Programme for Government 2025 reaffirmed this goal, stating that each local authority would be required to deliver serviced sites for 3 to 10 housing units in at least three locations every year. Based on these projections, the initiative was expected to create between 279 and 930 serviced sites annually.
Yet, an informal nationwide survey of local authorities carried out by Selfbuild paints a bleak picture. Only nine out of the 31 councils responded when asked how many serviced sites they currently have available, with those who did respond reporting only a handful of sites in place.
Despite the ambitious targets, many councils are still in the early planning stages or struggling to secure land. Several local authorities have yet to make any serviced sites available under the scheme.
Clare, Kilkenny, Meath and Waterford confirmed they have not sold or made any serviced sites available. However, they are taking steps to progress the scheme forward, carrying out site feasibility studies.
Kildare County Council has seven sites in Clogherinkoe village, priced at €45,000 each.
Tipperary County Council has three fully serviced sites in Boherlahan village, available for €25,000 each.
Wicklow County Council has five sites in Kilcommon, priced between €35,000 and €50,000, but further expansion remains uncertain.
Laois County Council has been the most proactive, selling eight sites in 2024 and planning to release six more this year, while evaluating additional locations.
According to the Department of Housing, a further 140+ sites are at various stages of consideration by the relevant local authorities and the Department is “working with those local authorities to progress the sites”.

A key issue blocking progress is the lack of available land banks. Meath County Council, for instance, stated that the scheme remains in its early stages due to land shortages. Similarly, other counties are still reviewing potential sites but have yet to make concrete headway.
Housing Minister Browne told Selfbuild that the scheme still played a central part in the government’s “drive to
tackle vacancy and dereliction in towns and villages around the country”, stating: “my Department will continue to work with local authorities to progress suitable sites”. Adding: “By providing alternative choices for people to live in our towns and villages we are supporting the growth and development of these places – strengthening Ireland’s rural urban fabric, and supporting the communities who live there.”
Whether you are upgrading an existing property or building new, the addition of an insulated thermal lining to the inside of a wall, roof slope or ceiling will dramatically improve the energy efficiency standards in your home.
Why choose Unilin Thermal Liners?
Optimum performance from a thinner board
Cost-effective
External wall appearance maintained
Easy to install
Readily available from your local builders merchant
For expert advice, contact our technical team on 046 906 6050 or discover the range below:

The Conservation Advice Grant for vacant traditional farmhouses has been cut by a third, as scheme exits pilot stage and gets rolled out.
If you own a vacant, traditional house then you may qualify for the Conservation Advice Grant launched by the ROI government in March – but you’ll be getting €5,000 or €2,500 less than the original pilot scheme grant amount offered in 2023.
Now in its second year, the Conservation Advice Grant Scheme for Vacant Traditional Farmhouses will provide grants of up to €5,000 (excluding VAT) to cover the cost of having a conservation expert with the right experience to conduct a survey and put together a tailored conservation advice for the property owner. The original maximum grant offered by the pilot scheme was €7,500.
The scheme is aimed at homeowners applying for or considering the Vacant Property Refurbishment Grant, which provides funding of up to €50,000 for vacant properties and up to €70,000 for derelict homes. The conservation grant covers up to 67 per cent of costs for expert advice on repairs, improvements and energy efficiency measures for traditional buildings.
This includes a report outlining the condition of the building and identifying repairs and improvements that would restore it to use while enhancing its

character, energy efficiency, integrity and amenity.
By partially offsetting the cost of engaging expert advice at an early stage, the scheme also helps owners to avoid the risk of damage to their properties, obtain the services of appropriately skilled tradespeople and ensure value for money in the completion of their projects.
For more about who qualifies and how to apply here


Climate rules ending boiler replacement grants in ROI from the beginning of January 2025 leave vulnerable homeowners facing high costs and winter hardships in poorly insulated homes.
The change is driven by the Energy Performance of Buildings Directive (EPBD), adopted in May 2024, which prohibits public funding for new fossil fuel boilers from January 1, 2025.
However, grants for repairing existing fossil fuel boilers remain unaffected. The directive is part of the EU’s efforts to improve energy performance and reduce emissions, but its rigid application has drawn criticism for disproportionately impacting Ireland’s elderly population.
The Department of Housing defends the measure, stating that the EU directive aims to prevent vulnerable households from being “locked into” fossil fuel systems. However, critics argue that the policy undermines the principle of a “just transition”, placing the burden of climate action on those least equipped to shoulder it.
The directive does not prohibit grant funding for renewable heating systems. Homeowners are being encouraged to explore options such as heat pumps, solar energy and hybrid systems. The Sustainable Energy Authority of Ireland (SEAI) offers grants for these systems, including free grants (fully funded work) for those on certain welfare payments, including those on job seekers allowance, under the Warmer Homes Scheme.
With updated fire safety regulations set to take effect in NI on May 6, 2025, here’s what you need to be aware of at the design and build stages.
The latest update to the Building (Amendment) Regulations (Northern Ireland) 2024 introduces several important fire safety measures under Technical Booklet E –Fire Safety. While most apply to multi-dwelling or high-rise buildings, some will affect selfbuilds.
These changes are about improving fire detection and making it easier for fire services to access your home in the event of a fire. Here’s what you need to know to stay ahead of the curve.
A key change is that smoke alarms must now be installed in every single room, an increase from the old rule that only required them in the main living room, circulation spaces and kitchens. The technical booklet wording is: “an automatic fire detection and fire alarm system complying with BS 5839-6 of at least D2 Category LD2 standard including a smoke alarm or
alarms in every habitable room and a heat alarm or alarms in every kitchen”.
Under the previous rules, the fire service had to reach the front door with a hose, within 45 metres of the fire engine. The new regs, however, stipulate that they need to be able to reach every part of your home within that same 45-metre distance from the fire engine. This change could affect the
layout and design of your home, particularly if you’re in a rural or remote area. These changes are designed to improve the safety and accessibility of new build homes, making sure that both the occupants and emergency responders are better protected.
More information on Department of Finance’s website, finance-ni.gov.uk
Get expert architectural advice and support a great cause at the same time.
If you’re planning a new build or renovation, you probably have plenty of questions and may not know where to start. The good news? Two great initiatives allow you to get expert guidance from a registered architect while making a meaningful difference. By making a donation to charity, you’ll receive a onehour consultation with an experienced architect who can help you refine your ideas and plans.
It’s important to note that all participating architects volunteer their time and expertise, ensuring that 100 per cent of donations go to charity. This is a fantastic opportunity to receive expert advice tailored to your project while supporting a cause that changes lives.
In ROI: The RIAI Simon Open Door initiative, which opened on March 10th 2025, sees you make a donation of €125 to Simon Communities, and book an hour-long consultation with a Royal Institute of the Architects of Ireland (RIAI) registered architect.
Simon Communities provide housing and vital services for people experiencing homelessness across Ireland.
Your donation supports this important work while giving you access to expert architectural advice on building, renovating, or retrofitting your home.
Consultations will be held between April 7–13, book you spot at: riaisimonopendoor.ie.
In NI: Ask an Architect
is back this spring, offering homeowners in Northern Ireland a chance to meet with a registered architect. For a minimum donation to Friends of the Cancer Centre at Belfast City Hospital, you’ll receive a one-hour consultation with an architect registered with the Royal Society of Ulster Architects (RSUA).
Friends of the Cancer Centre
is one of Northern Ireland’s leading cancer charities, focusing on clinical care, patient comfort, and cancer research. Every penny raised through Ask an Architect goes directly to supporting local cancer research.
Book your consultation at askanarchitect-ni.com.


The Federation of Master Builders Awards 2025 are all about clebrating quality of workmanship. Here, we’ve got a treat in store… the Sustainability Building Award entries for Northern Ireland. Enjoy!
The Federation of Master Builders (FMB) Master Builder Awards are the pinnacle of recognition for small to medium-sized building firms across the UK, a celebration of exceptional craftsmanship, client satisfaction and building excellence. Recognised as the gold standard in the industry, these awards champion the very best in construction, from sustainability and innovation to heritage restoration and customer care.
On 23 May 2025, Northern Ireland’s most skilled builders will gather at The Malone Hotel, Belfast to honour the regional winners, each of whom will then go on to represent Northern Ireland at the UKwide finals in September. Finalists have a chance to win a brand-new Isuzu Pick-Up Truck worth £42,000, courtesy of headline sponsor Isuzu, as well as national exposure.
For builders, the awards are not only a mark of professional pride but a platform for future growth, showing clients they uphold the highest standards. For homeowners, they’re a reminder that when you choose an FMB Master Builder, you’re choosing quality, accountability and proven expertise.
More information on fmb.org.uk
Set high above Strangford Lough, this once energyinefficient 200-year-old cottage has been transformed into an EPC (Energy Performance Certificate) A-rated eco home. Despite recommendations to demolish the property, the clients chose a full retrofit, preserving the home’s character and embedded
carbon while dramatically improving sustainability and comfort. The property was modestly extended and reimagined with help from McAdam Stewart Architects and Daly Renewables.
Environmental upgrades included external wall insulation by Soltherm EWI, triple glazing, 600mm loft insulation, mechanical ventilation with heat recovery (MVHR) system, an air source heat pump and photovoltaic (PV) panels on the new garage. Locally sourced materials and trades helped reduce
carbon emissions, while careful logistics planning and waste minimisation protected the surrounding Area of Outstanding Natural Beauty. The result is a modernised, all-electric home with dramatically lower bills (under £800/year) and a deep respect for its historic footprint. The project reflects both the builder’s technical skill and the client’s values, achieving sustainable, low-impact living without compromise.


Set high on the North Antrim coast, this two-storey timberframe holiday home is a blueprint for all-electric, low-carbon living. Designed in collaboration with John Kennedy Architects, the house was built to operate entirely on renewable energy, combining a smart integration of PV, battery storage, and intelligent energy tech to dramatically cut emissions and reduce dependence on the grid.
Built using airtight construction, high levels of insulation, and triple glazing, the home also features a
Built on a brownfield site with panoramic coastal views, this bespoke detached family home in Greenisland blends cutting-edge energy technology with modern,
ventilation and heating Nilan air system with Helios backup. The Electric Storage Company’s PARIS Greentech system allows the home to learn usage patterns and optimise energy flow-storing, using, or even selling excess electricity.
This was Setanta’s first fully electric new build, requiring complex modelling and close collaboration with stakeholders. Despite site access challenges, the team delivered a highly efficient home that meets Passivhaus principles, futureproofed for technological advances and backed by a strong clientbuilder partnership.


elegant design. Designed with saleability in mind, the property was sold off-plan early in the build and completed in collaboration with its new owners, who moved from Germany to Northern Ireland. The home achieves a Standards Assessment Procedure or SAP of 102, meaning it generates more energy than it consumes.
Sustainability features include an air source heat

pump, PV system, battery storage, underfloor heating and an MVHR system, all controlled via an intelligent eco-smart management system. The build also prioritised airtightness, local materials and upskilling the site team to roll out lowenergy principles across future projects.
Thoughtful touches like retaining native hedgerows for biodiversity, introducing

a user welcome pack and providing personalised support throughout the project reflect a commitment not just to performance, but to people. This project sets a new benchmark for combining luxury and low-carbon living in Northern Ireland.

Perched on a 1.2-acre woodland plot with sweeping views of Belfast Lough, this 5,100sqft Georgian-style family home combines period aesthetics with cutting-edge sustainability. Delivered by Distinguished Homes
in collaboration with the developer and architect, the project features timber frame construction, handmade clay brick, sash windows and premium finishes, all designed with energy efficiency and environmental sensitivity at its core.
The property includes a 50kW battery, 20 solar PV panels, air source heat pump, underfloor heating across three levels and a smart home system to monitor energy
performance. Built on a former derelict site (containing asbestos and bats), the team took a conservation-first approach, working with ecologists and recycling all site materials, including repurposed rubble, wood chippings and rainwater harvesting. Despite 177 tree preservation orders, all removed trees were replanted, with deadwood repurposed for wildlife habitats.
With the buyers living in Los
Angeles throughout the build, Distinguished Homes managed the project seamlessly through remote Zoom meetings, detailed updates and collaborative selections. The result is a home that achieved a SAP of 94, was delivered on time and on budget, and demonstrates what’s possible when craftsmanship meets climate consciousness.


GP McManus
This Grade B1 listed Georgian property underwent a meticulous restoration and renovation, returning a near 200-year-old home to its original grandeur. Led by GP McManus in collaboration with Taylor and Boyd structural engineers, the project involved complex structural work, including the replacement of the entire roof, extensive dry rot treatment, and the preservation of historic features like original trusses, cornicing, stained glass and sash windows.
Key challenges included maintaining full waterproofing during the roof removal to protect ornate interiors and navigating countless design changes while adhering to strict heritage guidelines. All work was documented and reinstated like-for-like, from parapets and battlements to intricate ceiling mouldings, with care taken to photograph and preserve details throughout.
The team also improved the building’s energy performance using Isover’s Optima insulation system, specially suited to heritage properties. Regular site meetings, clear stakeholder communication, and a passionate client-builder relationship helped ensure the project was delivered to a high standard, on time and within budget.


Build your dream energy-efficient home with CavityTherm, the ultimate insulation for cavity walls. Perfect for self-builders, CavityTherm delivers passivhaus-level U-values as low as 0.12 W/ m²K, ensuring top-tier energy efficiency and thermal performance.
Outstanding U-Values: Achieve passive-level insulation in cavities under 150mm wide.
Smart Design: Engineered edge joints, easy-to-use accessories, and detailed guides for smooth installation and Part L compliance.
Moisture Control: Unique HIPS facing directs moisture safely away from your home’s structure.
Eco-Friendly: Sustainable PIR insulation designed to reduce carbon impact.
Trusted across Ireland and the UK for both new builds and renovations, CavityTherm is the reliable, high-performance solution for self-builders seeking easy installation, superior insulation, and building code compliance.
Take the next step toward your energy efficient home with CavityTherm. For expert advice and technical support, contact SIG today!


Belfast: +44 28 9038 0060
Omagh: +44 28 8224 6220
Dublin: +353 1 623 4541
Limerick: +353 61 531 381
Cork: +353 21 432 1868
enquiries@sig.ie
www.sig.ie


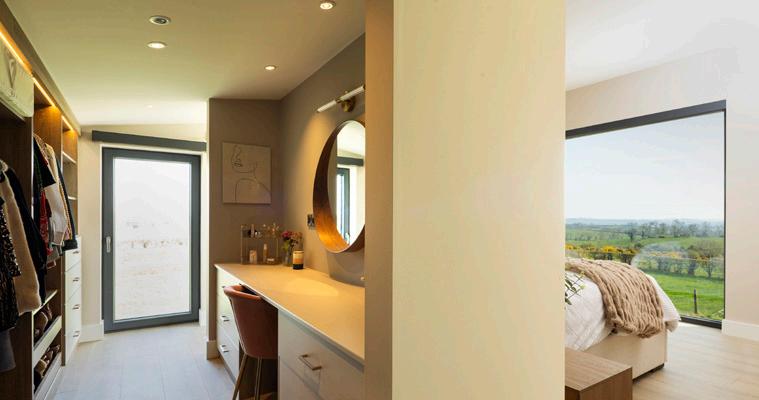
House size: 230sqm (270sqm including attic)
Bedrooms: 4
Heating system: Air to water heat pump and under floor heating
Ventilation: Centralised mechanical ventilation with heat recovery
Build method: Block BER: A3

Completed nearly seven years ago, Sarah and Paul Foster’s self-build in Co Meath shows what can be achieved with good design choices and tender loving care.
or Sarah and Paul, building their own home was all about creating a space for their family to grow and connecting with Sarah’s deep ties to the family farm. It’s a project that blends the past with the future, honouring history while looking ahead to a new chapter.
F“Building a house on the family farm had probably been a subconscious dream of mine for years, even from a young age. I’d always imagined using the stone from a ruin on the farm if I ever got the chance to build,” Sarah says. “The connection to the land was a huge factor. Our house is directly across from the family farm, where my dad farmed. That tie to my roots and the area has always been really meaningful to me.”
After spending about 10 years away, Sarah returned to the area, and it was during that return that the idea of building their dream home took shape. “Coming back home really brought the idea to life,” Sarah reflects. “It felt like the right time, and the idea of having a place where our family could grow, surrounded by the land I grew up on, was exactly what we needed.”
From the beginning, Sarah and Paul had a clear vision for what their new home should look like. They wanted a modern farmhouse style that would


complement the 100-year-old farmhouse already on the property, blending the old with the new.
“We were really intentional about incorporating local sandstone from the farm into the build,” Sarah explains. “That stone was important to us. It felt like a way of connecting the house to the land and to the history of the place.”
The design process was a collaborative effort between Sarah, Paul and their architectural team. “We worked closely with our architectural designer to design a home that fit where we are in life, especially with a young family,” Sarah says.
The couple’s priorities were clear: functionality, comfort and a sense of connection to their surroundings. They wanted a home that would not only serve their needs today but also adapt as their family grew.
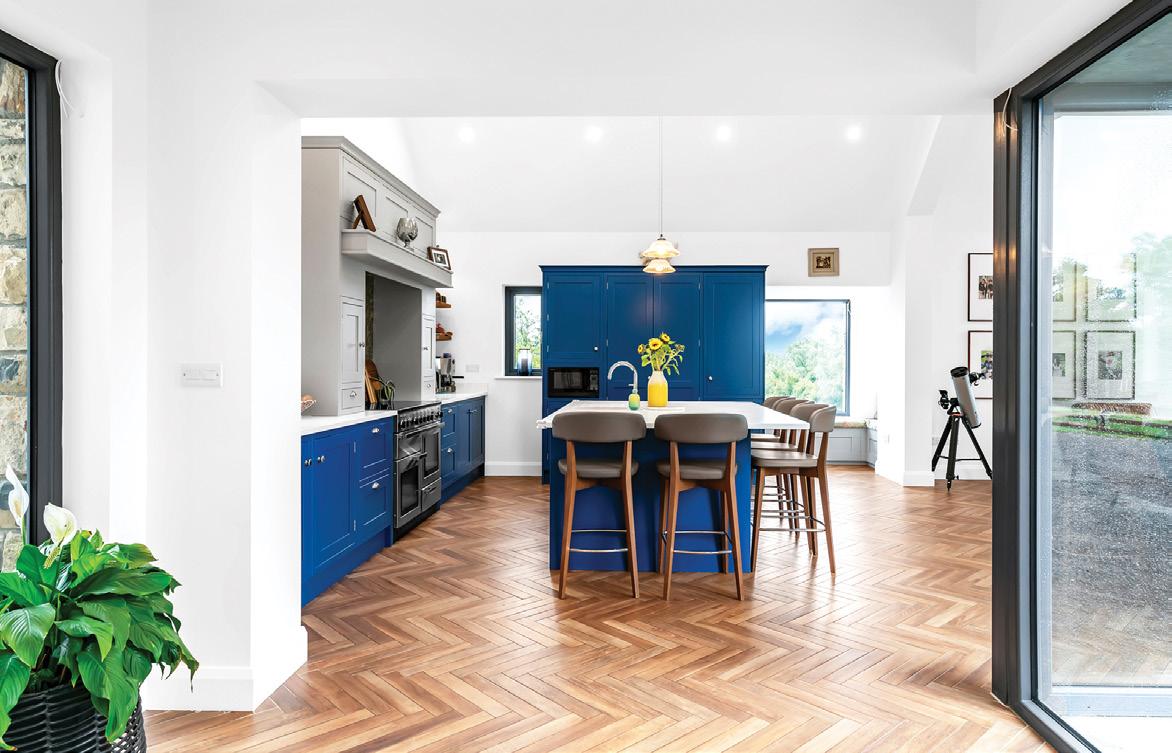
One of the key decisions was the layout. “We knew we wanted an open plan living space, with the kitchen as the central hub. The kitchen is where we spend most of our time together, so we wanted it to be spacious and functional,” Sarah explains.
They also included a window seat in the design, a feature that has since become one of their favourite parts of the house. “It’s such a cosy spot, and it’s where we often gather to relax and chat.”
While staying within budget was
important, Sarah and Paul were willing to invest in key features that would make the house feel like home. “Creating the home we wanted was more important than sticking to a strict budget, but we still tried to make cost effective choices where we could,” Sarah says.
For example, they decided to build the garage later, to help manage costs, and opted for an air to water heat pump instead of geothermal.
But it wasn’t just about the design and layout. The statutory process was not without its challenges, particularly when it came to gaining planning permission. The couple faced unexpected delays due to a system crash in the online planning portal.
“It was more complicated than we thought,” Sarah admits. “We had to jump through a lot of hoops just to get things moving. At one point, we even had to go to our TD to try to get things changed. It was stressful.”
To make matters even more difficult, Sarah’s father passed away during this time, adding an emotional layer to an already demanding situation. “It was an incredibly emotional time,” Sarah reflects. “Losing my dad while we were trying to navigate all these planning issues felt overwhelming.”
One of the most meaningful parts of the build was incorporating a personal memento from Sarah’s late father. “I wanted to honour my dad’s memory


by embedding a coin of his into the foundations, beneath the kitchen window seat,” Sarah shares. “It was a way to keep a part of him in the home.”
In the end, the build, which was originally expected to take 12 months, stretched to 15 months, largely due to the three-month delay caused by the planning difficulties. Despite the setbacks, Sarah and Paul remained determined to create the home they
envisioned.
“We were so grateful to have such expertise during the planning process,” Sarah says. “It really helped us navigate all the paperwork and red tape. Without that, I don’t know how we would have managed.”
The couple was also lucky to have a strong support system in their builder, who helped manage the timeline and coordinate the various trades. Paul also

What is your favourite design feature?
I’d have to say the kitchen — it’s our favourite spot in the house. We spend most of our time there, and it feels like the heart of the home. I especially love the window seat; you get a great view and can see right through the rest of the ground floor from that spot.
What would you change or do differently?
Looking back, I wouldn’t change much about it, really. I’m so happy with how it turned out. This house feels like home — a place where we can simply enjoy living without constantly thinking about what needs to be fixed or improved.
What surprised you?
I didn’t expect it to be as complicated as it was. You go into it a bit naively, thinking there won’t be any issues, but there are so many decisions to make, and when you’re completely new to building, it can feel overwhelming. The process can be overwhelming at times, especially for first time builders. I remember trying to deal with all of those decisions while climbing up ladders with a new baby — it was a lot. But when you’re in the thick of it, you just keep going, and then, when you finally move in, there’s this moment where you think, “oh my God, did we really do this?”
It feels like such an achievement. That said, the sheer number of decisions along the way is definitely something to prepare for.
single piece
advice would you give a budding selfbuilder?
My main advice would be to remember that the house you’re building is your home. Don’t get too stressed or caught up in things like design features, the size of your kitchen island, or what type of flooring you choose. Because once you move in, it’ll just be home— the place where you live and make memories.
And try to enjoy it for what it is instead of focusing on the things you might want to change or do differently later. That’s the mindset we’ve tried to keep throughout.


contributed his plumbing expertise, which helped streamline the process.
Throughout the build, Sarah and Paul remained highly involved in the decision making. “We were really hands-on, from the design and layout to the material choices,” Sarah says. They made a few key changes during construction, like adjusting the kitchen layout, showing just how involved they were in shaping the house.
“It was important to us that we were in control of the vision, but we also relied on the professionals to handle the day-today work,” adds Sarah.
The home’s insulation and energy efficiency were top priorities, for Paul in particular. “We made sure the walls were well insulated with 150mm of insulation,” he explains. “That’s one of the things I’m
most proud of — it makes the house so efficient.”
For the exterior cladding, they used sandstone from the ruins of a previous house on the farm, connecting the new build to the family’s history.
One of the standout features of the house is the vaulted roof over the barnlike living area. “The vaulted, triangular design was something we really wanted,” Sarah says. “We boxed it in and painted it, turning it into an architectural feature.”
The interior of the house reflects Sarah and Paul’s attention to detail. “We chose herringbone tile flooring for the main living areas,” Sarah says. “Paul’s dad laid the tiles himself, and it took him three weeks to finish. It’s such a labour of love, and it really makes the space feel special.”
Paul’s father also crafted bespoke base
units for the bathroom, adding a personal touch to the design.
The house is filled with natural light, thanks to extensive double glazing and high-level windows in the kitchen. “We decided not to use blinds or curtains,” Sarah says. “We wanted to keep the views open and unobstructed.”
For heating, they installed an air to water heat pump system, which runs the underfloor heating throughout the house and supplies hot water. The system runs on a day/night meter, helping them manage energy costs effectively.
“We also have a mechanical ventilation system, which is crucial for keeping the air quality consistent,” Sarah adds. “If we turn it off, condensation builds up, so it’s definitely something we rely on.”
When it came to water, Sarah and Paul opted to connect to a managed private water scheme in the area, avoiding the need to drill their own well. “It was an easy solution and worked out really well for us,” Paul says.
The house is fully electric, with no gas connections, and they installed a smart meter to help monitor their energy usage.
The kitchen was a focal point of the design. “We worked with our architectural designer to design the layout,” Sarah says. “The countertops are made from a white marble-like material with subtle blue veining, and we originally planned to have navy blue cabinets. But in the end, we chose

“I wanted to honour my dad’s memory by embedding a coin of his into the foundations, beneath the kitchen window seat...”
May 2016
Applied for planning
November 2016
Planning permission granted
March 2017
Build start
March 2018
Moved in


a shade with more blue tones, and it worked out beautifully.”
Lighting was a big consideration in the design process. “We added extra lighting options in the main living areas,” Sarah explains. “We wanted a mix of spotlights and pendant lights to create different ambiances. It’s all about creating the right mood in each space.”
In the bathrooms, Sarah and Paul chose hexagon shaped tiles and a black and white scheme for the ensuite. They also had custom built vanity units made to fit the spaces perfectly. “We kept the walls white at first, which helped us get a better sense of the spaces before deciding on colours and furnishings,” Sarah says.
When it came to landscaping, the couple didn’t take on any major projects immediately after the build was completed. “The builders left the site in such good condition that we didn’t have to do much,” Sarah says.
However, during the pandemic, they took the opportunity to put in what they call their ‘Covid garden’. “It was a great chance to make some landscaping improvements after we moved in.”
The garage was built separately after the main house was completed. “Looking back, we wish we’d done it at the same time,” Sarah admits. “It ended up being more hassle to tackle it later.”
Now, with three kids, Sarah and Paul’s home is everything they hoped for and more. “The layout works so well for our growing family,” Sarah says. “The open plan areas are perfect for when we’re all together, but we also have separate spaces for when we need some quiet time.”
The house has become a home that supports their day-to-day lives and adapts as their needs change. “One of

my favourite things is how flexible the space is,” Sarah says. “I’ve been able to use one of the downstairs bedrooms as a home office, and that’s been a lifesaver. It’s reassuring to know that the space can grow with us.”
Looking back on the whole experience, Sarah is rightly proud of what they’ve accomplished. “When we set out on this self-build, our goal was to create a functional, family friendly home. I’m thrilled to say we’ve achieved that and more. This house has become exactly what we envisioned — a space that supports us and grows with us as a family.”
In the end, Sarah and Paul’s home is a blend of history and modernity, built on Sarah’s childhood farm to provide a lasting space for their growing family. Combining local sandstone and a thoughtful design, they’ve created a home that reflects their roots while offering the flexibility to adapt to their future needs.

Architectural design
Donal McPhillips Architecture, mcphillipsarchitecture.com, tel. 048 677 41813
Engineer
Derek Conor Consulting Engineer, Enniskillen
Contractor (builder)
Barry Kieran of P.K. & Son Ltd., Co Monaghan, mobile 086 382 2509
Internal doors and floors
P.S. Supplies, Co Meath, pssupplies.ie
Tiles
Tilermade, Co Cavan, tilermade.ie
Design SAP and airtightness test
BM Energy Consultants, bmenergy.ie
Windows Munster Joinery
Roof covering
Western natural slate supplied by Slate Supplies Cavan, slatesupplies.com
Photography
Damien Kelly, damienkellyphotography.com
NI calling ROI prefix with 00353 and drop the first 0

Find out more about Sarah and Paul’s new build project in Co Meath...
Roof: 500x250x6mm premier grade slate with matching ridge caps fixed to treated timber battens. Roofing felt over rafters, lapped 150mm min. horizontally and vertically, carried well into gutters and 150x50 C16 rafters at 400mm cts fixed to 100 x 75/50mm treated wall plate(s) fixed down at 12000mm cts with galvanised steel straps fixed down 2 no. courses of blockwork. Provided lateral support to gable walls along top of gable wall and at ceiling level with 5x50x900mm galvanised steel straps at 1.8m cts, built into blockwork as the wall is constructed and turned down 100mm tight against outside face of internal leaf. Provide horizontal noggings to prevent twisting of straps. 150x50mm C16 ceiling joists at 400mm cts with 200mm fibreglass insulation tightly packed between joists, 200mm of same cross-layered above. Ceiling finish to consist of 12.5mm plasterboard backed with a vapour control layer fixed to underside of rafters and finished with skim coat and painted to selected colour. U-value 0.12W/sqmK.
Flat roof: Fiberglass on 18mm marine ply deck screw fixed to treated timber firring pieces to falls, screw fixed to 150x50mm C16 flat roof joists at 400mm cts, full fill spray foam insulation between joists, vapour barrier installed to warm side of insulation, 62.5mm insulated plasterboard and skim finish. U-value 0.18W/sqmK.
Walls: 100mm concrete block inner leaf with bonding and skim finish, 150mm cavity with 100mm PIRinsulation, held in place with ss. wall ties located at 450mm cts vertically and 750mm cts horizontally and staggered, remainder of cavity pumped with platinum beads. 100mm concrete block outer leaf with smooth floated render finish in chalk white. U-value 0.16W/sqmK.
Floor: Concrete strip foundations reinforced with layer of A393 mesh located 75mm from bottom of foundation. Foundations min. 3x width of wall wide and 1x width in dept min. Bottom of foundation to be 600mm minimum below finished external ground level. Floor construction consisting of 100mm concrete screed, with a 25mm insulation upstand along the entire perimeter of the external walls on 125mm PIR insulation, on radon resisting membrane to equivalent of 2000-gauge continuous polythene dpm lapped and bonded to dpc, on 150mm C30/20 newton conc. subfloor, on 225mm min. and 600mm max. hardcore compacted in 225mm layers. U-value 0.14W/sqmK.
First floor: Finish on 100mm concrete screed, on 150mm prestressed hollow core slabs to manufacturer’s layout, grout between all slabs with dryish C35 Newton concrete immediately after placing of units.

House size: 317sqm
Bedrooms: 4
Plot size: 1 acre
Timber frame cost: £100K
Steelwork cost: £30k
Heating system: Geothermal heat pump with PV
Ventilation: centralised mechanical ventilation with heat recovery
Build method: timber frame
EPC (SAP): A (97)

Ryan and Joanne Daly’s search for a home that could accommodate their growing family led them to a timber frame new build solution in Co Down; this is their story.


When Ryan and Joanne decided it was time to move out of their three-bed semi-d in south Belfast, they ran into the same problem as many other families — there just weren’t enough suitable homes on the market. With three children and the need for more space, they started looking for a four-bedroom house nearby but quickly
realised their options were limited. That’s when Ryan, an engineer with years of experience working with self-builders, suggested a different approach: why not build their own home?
They were both attracted to the idea of rural living and found the ideal opportunity when they came across a farmer selling a site with planning permission. After negotiating the purchase, they began their self-build
journey in earnest. Ryan took on the role of project manager, overseeing the entire process.
“We had our architect, John Lavery, design the house, and were really happy with what his team came up with,” Ryan recalls. “We gave them a two-page brief outlining what we wanted, and their first design was almost spot-on. We only needed a few minor tweaks.”
The house they envisioned was spacious, functional and highly energy efficient. It has a modern layout and futureproof features for their growing family. At 317 sqm, there are four bedrooms and a unique design featuring four different levels on the ground floor.
Ryan’s decision to use a timber frame construction method was rooted in his professional experience. “I’ve worked in the low energy housing sector as a renewable energy engineer for the last 16 years,” he explains. “The best-performing houses I’ve seen in terms of comfort and low running costs were those built with timber frame.”
Timber frame offered several advantages, including speed of construction, airtightness and excellent


insulation performance. “While masonry builds can also be airtight and energy efficient, they require a contractor with specific knowledge of airtightness and thermal bridging techniques, which isn’t always easy to find,” Ryan adds. “The precise engineering and even surfaces of a timber frame build also simplify the installation process.”
Ryan and Joanne chose a timber frame supplier they had worked with in the
past. “I was impressed by their attention to detail and the feedback from their previous customers. I had seen first hand the quality of their work — everything from the insulation to the airtightness membranes and tapes.”
The timber frame company played a pivotal role in the build, supplying not only the timber frame kit but also the associated steel frame to support the structure, the windows and a complete
airtight solution. This package was particularly appealing to the couple, as it ensured a seamless integration of all components.
“The timber frame team provided detailed technical drawings and worked closely with us to make sure everything was perfect before installation,” Ryan says. “Their involvement didn’t stop there — they offered great advice on other aspects of the build, even though we were using direct labour.”
The company’s airtight solution, which included intelligent membranes and high performance tapes, was a key factor in achieving the house’s exceptional energy performance.
“We brought in a builder for the foundations and a groundworks contractor to prepare the site,” Ryan explains. “After that, the timber frame company came in to install the frame. It was great to see everything come together.”
One of the most exciting moments for the family was seeing the timber frame kit arrive on site. “It came on a

“The best-performing houses I’ve seen in terms of comfort and low running costs were those built with timber frame.”
lorry one day and was erected the next,” Ryan recalls. “The speed of construction was incredible — it all came together so quickly.”
Energy efficiency was a top priority for Ryan and Joanne, and their choice of heating and cooling systems reflects this commitment. The house features a geothermal heat pump (GSHP) integrated with a photovoltaic (PV) system.
“Timber frame houses perform exceptionally well in winter, but their airtightness and insulation can lead to overheating in summer,” Ryan explains. “The GSHP solves this by offering cooling capabilities, and because it’s powered by our solar PV system, the running costs are minimal.”
The couple’s first year energy bill for heating, hot water and cooling was a reassuring low £132. With the increase in electricity prices over the last two years, this is averaging now at £360/annum which is less than £1 per day. This level of efficiency illustrates the benefits of integrating renewable energy systems with a well designed timber frame structure.
The family also installed a rainwater


Choose passionate and enthusiastic contractors even if they may be slightly more expensive. We noticed a difference in the quality of work between contractors who showed a genuine interest and commitment to our project versus those who were not as invested.
Document VAT reclaim records from the start. It will save a lot of hassle later on when you are claiming your VAT back from HMRC.
Get high spec windows. We designed our house with a lot of south facing glass. The quality of the window system supplied by Neil Orr from the timber frame company means our house is heated naturally on cold sunny days. Having lots of glass is only okay if your heat pump can cool as well as heat. Having a poor quality window system could have the opposite effect, contributing to the heat loss of the fabric.

harvesting system for gardening and car washing, reflecting their commitment to sustainability. Inside, a smart home system adds convenience with features like motion-sensor lighting and automated heating controls. “With four kids now, life is busy. We wanted a ‘fit and forget’ system — everything just works without us having to think about it,” says Ryan.
Ryan and Joanne worked closely with their architect to make certain the house met their family’s needs. The layout features distinct zones that create a sense of flow and separation without losing
connectivity.
“We wanted to walk through the house as if we were moving through different zones,” says Ryan. This approach led to clever touches like a half wall and a few steps between the kitchen, dining and living areas, giving each room its own character.
The roof design features three mono pitch flat roofs, which contribute to the home’s modern aesthetic. “We opted for an aluminium alternative to zinc, for the roofing material,” Ryan says. “It was a cost effective choice that didn’t compromise on style.”


The timber frame company not only installed the structure but also provided the glazing package, which included triple glazed aluclad windows. “One of the reasons we wanted to get the window package through them was that they set out the openings for the windows. It made sense for them to install the windows and carry out the airtightness system around the frames,” Ryan says. “For me, that was a really good package to get.”
Joanne took charge of the interior design, carefully selecting tiles, finishes and lighting to balance style and practicality. “She worked with a consultant at the tile showroom to find the right options for our bathrooms,” says Ryan. The lighting design was another key focus, with the couple opting for minimal spotlights and more mood lighting to create a warm atmosphere. Outside, the landscaping is about 75 per cent complete. A professional contractor handled the stone masonry, driveway and kerbing, while an outdoor lighting expert created a soft, understated effect. “We love how the lighting highlights the stone walls and trees,” Ryan says.
No self-build project is without its challenges, and Ryan and Joanne’s experience was no exception. A delay in the roofing contractor’s schedule meant the house was left exposed to the elements for several weeks during the

June 2020 Build start
December 2021
Moved in
January 2022 Build end


winter of 2021.
“Moisture got into the timber, but the timber frame company reassured us that their system, which includes an intelligent airtightness membrane, would allow the moisture to escape,” Ryan explains.
Another hiccup occurred during the window installation. “One of the installers accidentally dropped a piece of scaffolding, smashing the glass on one of our solar panels,” Ryan recalls. “Thankfully, the timber frame company immediately offered to replace the panel at no extra cost. Their response gave us a lot of confidence — we felt like we were in safe hands.”
A further challenge came with the prefabricated spiral staircase. Originally, Ryan had decided to leave out 25mm
of insulation in the floor above where the staircase meets the first floor to create more headspace. However, the timber frame company recommended reinstating the insulation for better soundproofing. Ryan agreed to the change, but in the rush, he forgot to inform the staircase company. When the installers arrived to fit the staircase, it didn’t fit. “I had to use my kango hammer to dig out the base plate and lower it to make it work,” says Ryan.
“Not everything is going to go right — it’s about minimising mistakes and having the right team to address issues when they arise.”
For anyone else considering a timber frame build, Ryan stresses the importance of choosing a reputable supplier. “The success of a timber frame

build depends heavily on the quality of the materials and the expertise of the team,” he says. “It’s always worth investing in people who care about their work.”
The couple also highlights the value of clear communication and thorough planning. By working closely with their architect and timber frame company, they were able to streamline the design and construction process, making sure everything came together with minimal disruptions.
Today, Ryan and Joanne’s home is more than just a house. It’s a testament to what can be achieved with careful planning, expert collaboration and a commitment to sustainability. From its energy efficient
design to its smart heating and cooling systems, the house is perfectly tailored to their family’s needs.
“People who visit are always amazed at how easy everything is,” Ryan says. “We hardly have to adjust anything — lights, heating, hot water — it’s all automated and just works.”
In the end, by choosing a versatile and sustainable design, they not only gained the space they needed but also created a futureproof, energy efficient home that blends functionality with style.
But for the couple, their self-build journey was about more than creating a comfortable living space. It was an opportunity to reflect their values and support their way of life. “We’re thrilled with the result,” Ryan concludes. “It’s everything we wanted, and more.”

What is your favourite design feature?
We love the snug, which is set down about three steps from the dining room floor. This design gives it a cosy, 1970s-style feel. We specifically requested this type of sunken space in my initial brief to the architect, and love how it turned out. It’s a comfortable, intimate spot with a large TV on the wall, and the layout works perfectly with the rest of the house.
What would you change or do differently?
We would probably go for a slightly larger utility and boot room area if we could do it over. Originally, the architect had designed it better, but our kitchen designer convinced us to make the pantry bigger while reducing the boot room and utility space. In hindsight, we probably should have stuck with the architect’s initial design for that part.
What surprised you?
One thing that surprised us, looking back, was the VAT reclaim process for the project. We should have downloaded the template at the start to keep track of all the invoices and documents we’d need instead of doing it after the build. Also that a big empty house is an acoustic challenge. We need to add more soft furnishings to help absorb some of the noise.
single piece of advice would you give a budding self-builder?
If you don’t have family members with construction experience, I’d advise hiring a project manager to oversee the work. While it may add to your costs, it can still be more affordable than hiring a full contractor. And you’ll avoid the challenges of managing the project yourself without the necessary expertise.
Would you do it again?
Yes, we really enjoyed it, it wasn’t too stressful.

At Coolestone, we specialize in providing an exceptional range of natural stone, landscaping materials, paving solutions, porcelain tiles, and cobblestones.
With our extensive knowledge and passion for quality, we carefully source and import the finest materials from around the globe, ensuring that every product meets our high standards. With decades of expertise in the industry, we understand the importance of quality, durability, and aesthetic appeal in every project!

Renewable systems
Ryan Daly, Daly Renewables
Architect
BGA Architects, bga-ni.com
Timber frame company Kudos, buildingkudos.com
Smart home, home cinema and motorised blinds
Epitome Living, Co Armagh, tel. 028 (048 from ROI) 3881 0102
Stonework Coolestone, coolestone.co.uk
Photography Paul Lindsay, paullindsayphoto.co.uk
Walls: timber frame with cellulose, PIR and hemp insulation, U-value 0.13 W/sqmK
Roof: monopitched sloped and flat roofs both
U-value 0.12 W/sqmK, insulation hemp, PIR, cellulose
Floor: suspended timber floors with insulation between joists, screed over 125mm PIR insulation, U-value 0.13 W/sqmK
Windows: triple glazed, aluclad, overall U-values from 0.78 to 0.90W/sqmK
Airtightness: 1.97 m3/h.sqm

Established in 2010, Daly Renewables are MCS certified installers helping self builders transition to low carbon heating with renewable technology solutions, not just standalone technologies.
We’re different because we bring an uniquely engineerled approach to the design, installation and commissioning of renewable energy heating systems for modern day living.
We work across residential, public and commerical sectors.
If


Words: Heather Campbell
Size before extension: 135sqm
Size after extension: 173sqm
Bedrooms: 4
Plot size: 1 acre
Heating system: Condensing oil bolier
Ventilation: Natural
Build method: Concrete blockwork

Michael and Tina Clancy transformed their coastal holiday home in Co Sligo into a sustainable, energy efficient retirement haven, blending modern upgrades with the charm of their much loved family retreat.
In 1994, Michael and Tina built a holiday home in a beautiful coastal village. Over the years, this beloved property became more than just a getaway; it became the heart of their family’s life. Now retired, they decided to transform the house into their ideal retirement haven, a place where they could embrace the next chapter of their lives.
With their children grown and moved on, the couple no longer needed the large vacation house they built for their growing family. Instead, they imagined a space that was just right for their current needs, offering comfort, practicality and room for the occasional family visit.
The project was not only about creating a home that fitted their lifestyle but also about modernising the property. Michael and Tina focused on upgrading the insulation, heating and windows while incorporating energy efficient and environmentally friendly features. These changes made sure their home was futureproof and matched their wish to live sustainably.
The original house had a classic dormer cottage look, with concrete barge gables and a traditional feel. Michael wanted to keep that charm but bring in more modern touches, especially natural light and better views.
The process began with applying for planning permission through Sligo County Council, which, to their relief, went smoothly. “We were fortunate to


avoid any obstacles, which meant we could concentrate fully on the design and construction,” Michael explains.
The couple brought in architectural designer Martin McLaughlin to translate their ideas into a practical and well executed design. “Martin worked with us to design a space that maximised natural light and made the most of the scenic views surrounding the house.”
“We were especially keen on blending the old with the new — keeping the character of the original cottage while introducing a modern style. Once we approved the plans, Martin handled everything with the council, which made the whole process seamless.”
“Our builder Peter McNulty and his team were fantastic to work with, completing the entire project in just four months.”
The work involved an extensive renovation of the entire property as well as constructing a large extension.
The new extension was built with concrete blocks finished in white plaster to match the original house. The roof of


“We are delighted with the performance and reliability of our heat pump, in particular when the weather has been damp and cold.”
The Grant Aerona R290 air to water heat pump is an excellent choice for self-builders throughout the UK and Ireland seeking an efficient and environmentally friendly home heating solution. Designed specifically for the UK and Ireland climate, the Aerona R290 range utilises the natural refrigerant R290, which boasts a remarkably low Global Warming Potential (GWP) of 3, compared to R32 refrigerant which has a GWP index of 657.
Its sleek design, combined with exceptional perfoamnce and ultra-low noise levels, recognised by Quiet Mark, ensures it integrates seamlessly into modern homes without disruption. Available in outputsranging from 4kW to 16kW, the Aerona R290 caters to properties of various sizes, offering flexibility for diverse self-build projects.
“Since installing my 9kW Grant Aerona R290 heat pump I have noticed a consistent, balanced heat throughout my home. It heats water faster than my previous heat pump and has demonstrated superb performance throughout the winter, in particular when the weather has been damp and cold. We
are delighted with the reliability of our heat pump and it is so quiet we barely know it is there.” Michael M, Co. Laois.
As a self-builder, choosing the right heating system is a key decision - and demand has never been higher for solutions that combine performance, efficiency, and suitability for the Irish and UK climate. Grant’s Aerona R290 air-to-water heat pump ticks all those boxes, making it a standout option for those aiming to build a home with low energy consumption.
Specifically designed and tested for the changeable conditions in Ireland and the UK, the Aerona R290 delivers performance where it counts. Many air source heat pumps struggle with frost build-up in damp conditions, triggering frequent defrost cycles that sap efficiency and shorten lifespan. The Aerona R290 has been designed and tested to handle these conditions, with enhanced drainage, protective coatings, and smart controls that minimise energy waste - keeping homes warm, efficient, and comfortable all year round.
Featuring five models ranging from 4kW to 16kW, the Aerona R290 heat pump range offers the flexibility needed to match the requirements of different sized new build homes - and at present is the only heat pump that offers this range of outputs within a single product line.
For self-builders focused on long-term efficiency and comfort, every unit in the Aerona R290 range achieves an impressive A+++ energy rating (at 35°C flow temperature) and -5°C outdoor air and 55°C flow temperatures. This means that self-builders can feel assured that Grant’s Aerona R290 range will deliver consistent warmth at low running costs, even during damp and frosty winters.
Choosing R290 refrigerant also means self-builders are building with the future in mind. With EU and UK regulations shifting towards natural refrigerants, systems like the Aerona R290 are set to play a big role in the next generation of low-carbon homes.
Grant’s significant investment in developing the Aerona R290 shows their commitment to helping homes meet today’s energy goals—without compromising on performance and comfort for the homeowner.
If you are currently in the process of building a new build home, let Grant design your heating system free of charge. Simply send planning drawings and your preferred choice of heat emitters (underfloor heating and / or aluminium radiators) to heatpump@grant.ie / heatpump@grantni.com
For further information visit www.grant.ie / grantni.com

the extension was fitted with a high quality uPVC roofing system, while the original slate roof remained intact. Polished tiles finished the concrete floors, creating a sleek yet practical look throughout.
“Because we’re so close to the Atlantic, where storms can be fierce, additional steel reinforcing was used in the extension to support the larger spans of windows,” explains Michael. The new triple glazed uPVC windows not only allow for incredible views of the sea and mountains but also provide excellent insulation and protection against the elements.
“Energy efficiency was a major priority for us, especially as we plan to live here full time,” says Michael. “We installed a 5.8kW solar photovoltaic (PV) system, which helps keep our electricity costs down and makes sure we have a sustainable energy source. This system also delivers a continuous supply of hot water without using fossil fuels.”
“We installed a new condenser oil burner, but we are considering upgrading to a heat pump system in the future to further improve the energy efficiency of the home. We’re
just waiting for the technology to improve and become more suitable for our needs.”
“We opted for underfloor heating throughout the house, which has proven to be both efficient and comfortable. For backup heating, we installed a wood burning stove, which adds a cosy


ambience to the living area.”
“The old open fireplace in the original part of the house was replaced with a built-in electric fireplace. It’s a much cleaner and more energy efficient option. On top of that, we upgraded the insulation throughout the walls, ceilings and floors, significantly reducing heat loss. The
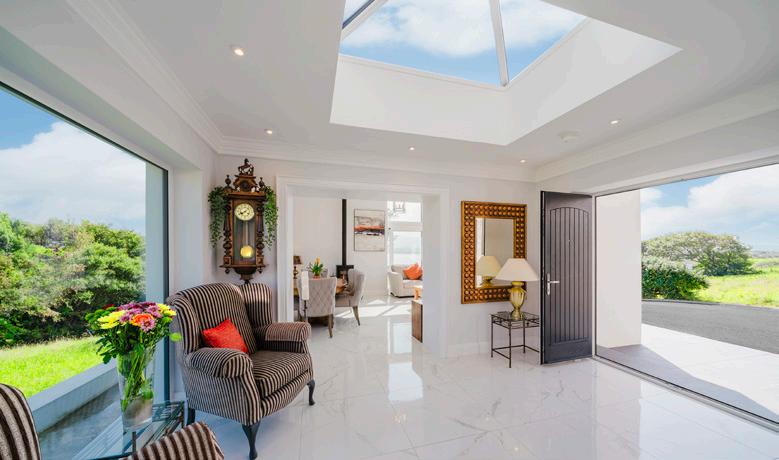

house is now zoned for heating, giving us more control over energy use. And as a final touch, we had high speed broadband fibre optic cable installed, ensuring we’re well connected.”
The interior of the house was just as important as the structural work. “Having enjoyed our kitchen in our previous home, it was an easy decision to include one in the new space. The kitchen designer, Mick Territ, worked with us to create a bespoke kitchen that balances functionality with beautiful craftsmanship. The fitters did an impeccable job, and we couldn’t be happier with the result.”
“The kitchen is a very social area of the house, where we can sit around the island and socialise as well as prepare meals.”
Lighting was another key consideration. “We wanted a mix of cosy, ambient lighting and functional options. Low energy recessed lights provide ample illumination when needed, while feature lamps add a touch of elegance. One of my favourite features is the rooflight in the link room between the kitchen and the new living area. It floods the space with natural light and connects the old and new sections beautifully.”
The new living area is a standout feature of the house. “With extensive glazing, it feels like we’re sitting in the landscape itself, taking in the views of the sea, harbour, beach and mountains. The furniture was carefully chosen to complement the space. A lounge suite, dining chairs and luxury kitchen island


What is your favourite design feature?
We love the kitchen and the new living room – it’s so bright, airy and with fantastic views.
What would you change or do differently?
If I could do it differently, I would have installed a mechanical ventilation system, such as a heat recovery system, from the start. Although it’s something we’re now considering for the future, seeing our sister’s installation in her renovated home has highlighted the benefits. Having one in place from the beginning would have been more efficient and helped with overall air quality and energy savings.
surprised you?
What surprised me the most was the advancements in building materials, insulation and heating/cooling technologies. The difference from when we first built the house in 1994 was striking. The engineering and capabilities of modern architects and builders also really impressed us. Another surprise was how smoothly the underfloor heating installation went. Initially, we had concerns about the pipes bursting and causing leaks, but the professional, thorough installation process put those fears to rest. It was reassuring to see how reliable the system turned out to be.
What single piece of advice would you give a budding self-builder?
Consult widely and always listen carefully to professional advice.
Would you do it again?
If I were younger, I would definitely consider taking on another self-build or renovation project, as the experience was overall very positive. However, at this stage in my retirement, I don’t feel the need to embark on another major construction project.
stools bring comfort and style. We also refurbished the bathrooms, adding new plumbing, sanitary ware and tiling. The wet room, with its three-bar pump shower, has been a fantastic addition.”
A downstairs guest room also features French doors opening to the west side of the house, perfect for visitors to enjoy the surroundings.
One of the more unique spaces in the renovated home is the ‘drop out’ room, a quiet space that was once the old porch of the original house. By reimagining this area, Michael and Tina created a secluded haven, perfect for moments of solitude away from the main living areas. The room’s stunning feature is its panoramic view, with French doors out to the garden.
The landscaping around the house was designed to make the most of the outdoor setting. “At the back of the house, we had an old wooden decking area that had served us well over the years, but it was starting to feel outdated and worn,” admits Michael. “We decided to replace it with a more modern and durable concrete and tiled area. It wasn’t the easiest task — getting large concrete mixers to the site turned out to be quite a challenge — but we were determined to see it through.”


“We added recreation areas, green spaces and hedging, along with secluded parking. The access avenue was upgraded with new kerbing, drainage and asphalt resurfacing. It’s now a pleasure to drive up to the house and see how it all comes together.”
“Like many projects these days, we did encounter some delays due to supply chain issues caused by the Ukraine war and Covid disruptions. We waited about five weeks for a specialised steel component that was crucial for the window installation.”
“Just when we thought we were back on track, there were additional delays with the glass for the new windows due to issues at the factory, which set us back another three to four weeks. It was frustrating, but we had to adapt and work around these delays as best we could. None of this was the fault of our builder, and we appreciated his efforts to keep things moving as smoothly as possible.”
There were also a few unexpected decisions along the way. “Installing underfloor heating wasn’t part of our original plan, but one of the builders, who had a lot of experience with the system, suggested it. After some thought, we decided to go ahead with it, and we couldn’t be happier with the result — it’s been a game-changer for comfort. That said, it added more work and coordination to an already complex project.”
“Living in the house during the renovation wasn’t ideal, but it felt like the best option for us at the time. We made do by cooking in an adjoining shed and moving between different bedrooms as

Keep open communications with your builder. It helped us understand and accept the unexpected challenges that came our way.
May 2022
Planning permission applied
August 2022
Planning permission granted
July 2023
Build start
November 2023
Build end

work progressed. In hindsight, it wasn’t the healthiest arrangement, with all the dust and building materials around, but we managed to get through it.”
“Despite these challenges, we’re proud of how everything came together in the end. The process wasn’t always easy, but seeing the finished home makes it all feel worth it. Our three children were fully involved in the design and decoration of the house – it has been a real family effort.”
“Looking back, the transformation of our holiday home into a retirement haven has been incredibly rewarding. The new space feels like it was designed perfectly for us and the upgrades we made have also brought a new level of comfort and functionality to the house.”
“What’s especially meaningful to us is how well the house now suits this stage of our lives. Downsizing from our previous main residence, we wanted a home that was compact and easy to maintain while still offering everything we need. This house checks all the boxes and is perfectly in line with our needs in retirement. We’re so grateful for the professional advice we followed to bring our vision to life.”
“As we sit in our new living room watching the waves roll in and the changing light on the mountains, we know we made the right decision. This house is more than just a place to live — it’s our ideal retirement haven.”


Architectural designer
Martin McLaughlin, October House Design Ltd, Ballyshannon, Co Donegal, mobile 0862217173, octoberhouse.org
Main contractor


Find out more about Michael and Tina’s project in Co Sligo...


Peter McNulty of PMN Construction
Kitchen
Christoff Custom Built Rooms; kitchen lights Laura Ashley
Stoves Stanley

New roof Trocal
Furniture
Taylor’s Castlebalwin, Co Sligo
Photography John Mee, johnmeephotography.com

NI calling ROI prefix with 00353 and drop the first 0

Walls: 350mm cavity wall, 150mm cavity filled with EPS beads, 37.5mm insulated (PIR) plasterboard, U-value 0.16W/sqmK
Floor: 100mm concrete on compacted hardcore, 120mm PIR insulation
Roofs: flat roof 125mm PIR between rafters, 62.5mm thermal liner below rafters; pitched roof 125mm PIR between rafters, 52.5mm thermal liner below rafters
Windows: triple glazed, uPVC, argon filled, overall U-value 1.3 W/sqmK

Words: Heather Campbell
Photography: Luke McCallum

House size before: 241sqm
House size after: 258sqm
Bedrooms: 4
Plot size: 1/2 acre
Total build cost (rounded): £200k
Architect/project management fees (rounded): £8k
Heating system: condensing boiler
Ventilation: natural
Build method: concrete block

Phil and Jennifer Baker’s Belfast home gets an Aussie-inspired makeover, swapping a cold, disconnected sunroom for a bright, open extension that effortlessly blends indooroutdoor living. With a focus on light, space and practicality, the renovation has transformed how the family lives, works and enjoys their home.
When Phil and Jennifer’s family moved into their Belfast home, they knew the layout wasn’t quite working for them. The sunroom at the rear, intended as a bright and airy space, instead proved cold and inefficient, cutting them off from their garden rather than connecting them to it.
Determined to create a more functional, comfortable home, Phil embarked on a major renovation project that would transform not just the structure of their house but how they lived in it.
“I initially spoke with several architects, trying to find a more budget friendly solution,” explains Phil.
“However, after careful consideration, I decided to go with a ‘full service’ approach and brought in Micah Jones as the architect for the job.”
“Micah provided both project management and architectural services throughout the renovation. He was involved in every stage, from the design phase to the planning submission, site visits and overall project management. He helped us understand what to expect at each stage, what needed to be done and when it would be completed. He really helped set clear expectations for both myself and the builders.”
The project plan involved removing the redundant sunroom and replacing it with a modern, double height, mono pitch kitchen extension. The dining room also had a similar roof design and a high window installed which was replicated in the kitchen.
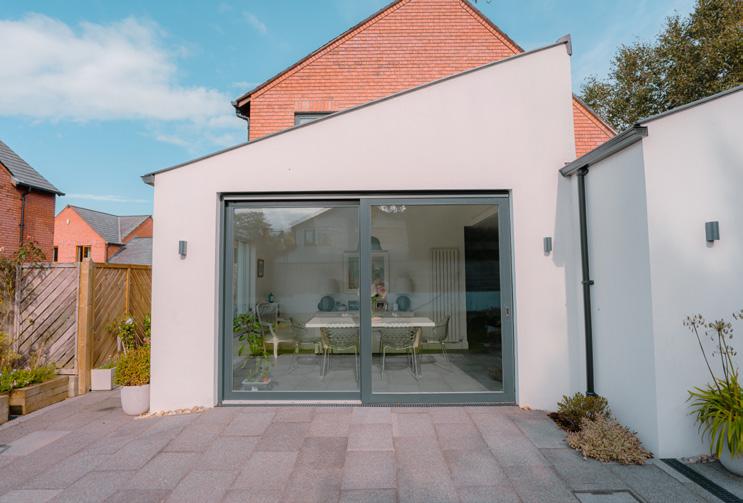


The project involved a lot of steelwork, especially in the connection between the new extension and the original house.
A family member, who’s a structural engineer, played a key role in the project, helping with the design and calculations for the steelwork. They made sure everything was safe and up to standard.
“The connection between the new mono pitched roof of the extension and the original house was tricky,” admits Phil. “We had to give it a lot of thought to get it right, but we’re really impressed how the two different roof pitches were integrated.”
One of the important requirements of the steelwork was that it be completely hidden. “There are no visible structural elements in the upstairs bedrooms, even though the extension is right below,” says Phil. “I wanted to make sure the steel was integrated carefully, so it wouldn’t disrupt the rooms above.”
The original house was already well insulated, so they were starting from a good place. However, when


the foundations were dug out for the extension, some of the existing insulation underneath was lost and had to be replaced.
They also included 100mm insulation in the extension walls. Extra insulation was also added to the ceiling, as building control had specific fire safety requirements.
“Building control wanted the ceiling insulated to a high fire rating because it’s a fire escape route from the bedrooms upstairs,” explains Phil.
The project included a significant redesign of the downstairs floor layout. The kitchen was moved to the side of the house, allowing for the addition of a home office, extra living space, a larger hallway and a new downstairs toilet. This rearrangement made the layout much more practical.
The existing utility room was a bit of a multi-purpose space, but not always in the most practical way. “The original downstairs toilet was tucked in there,
which meant visitors had to squeeze past our two dogs to use it.”
As part of the renovation, they expanded the utility room and gave it a new lease of life. The toilet was removed, and in its place, they created a dedicated boot room, directly connected to the garage. “Now, the dogs can come in from outside, get dried off and avoid traipsing mud through the house.”
They also made good use of what they already had, repurposing some old cabinetry from the garage and reusing the original kitchen’s granite countertop in the new utility room—blending practicality with a bit of sustainability.
The new extension was all about creating a bright, open space with triple glazed windows, high ceilings and a fresh white palette inspired by homes in Sydney. “We quite like that style,” Phil says. “They’re very light-filled, and they have that outdoor lifestyle we love.”
To keep things feeling calm and uncluttered, they opted for soft, muted tones. “It’s quite calming when you walk in because it’s all pale blues,” Phil explains. “Other people say it’s like being in Ibiza when they come in — like a holiday feeling.”
Their love of simple, airy interiors led them to a very paired-back, quite white colour scheme and white kitchen, which set the tone for the whole space. 120x120cm tiles for the floor and clean,

“With the house being so airtight thanks to the triple glazing, ventilation became an unexpected issue...”

Timeline
2016
House purchased
Early 2022
Planning application submitted
Mid-2022
Planning approval granted
August 2022
Build start
September 2022
Family moved out
March 2023
Build end
minimalist finishes tied everything together.
Careful attention was given to lighting. Pendant lights were installed above the kitchen island, while recessed strip lights and LED features created a welcoming ambience.
With large windows and patio doors opening onto the garden, they made sure the extension felt as connected to the outdoors as possible — bringing a bit of that Australian-style indoor-outdoor living into their home.
About a year before the renovation began, the boiler broke down, which ended up being good timing. They decided to replace it with a larger condensing boiler that could handle the extra demand from the extension. “The plumber upgraded the pumps and put in a bigger boiler to cope with the eventual extra radiators and increased size of the house,” Phil explains. With the house being so airtight thanks to the triple glazing, ventilation became an unexpected issue. “We had to add some background ventilation vents in the living
What is your favourite design feature?
The high level window in the kitchen. It offers amazing views of the changing sky, and the light just pours in.
What would you change or do differently?
I wish we had professionally landscaped the garden straight after the renovation so we could have enjoyed it sooner. There are still bits I’m looking at that need work.
What surprised you?
Not much, to be honest. I’ve watched lots of TV home improvement and new build shows over the years, and Kevin McCloud’s always saying, “Why didn’t you go for project management?” So, we figured, why not just listen to him? We didn’t want to mess around. We’re both professionals in what we do, so it didn’t make sense to try to take on another profession. It’s their profession, after all.
Our architect warned us about or thought through most of the potential issues that came up, and that helped immensely.
What single piece of advice would you give?
Make a list of the things that matter most to you, and think about what would make the biggest difference to your lifestyle in the house. I don’t think a house renovation changes your lifestyle itself, but it definitely changes how the space feels and how it makes you feel. It’s more about shifting the mood than changing your lifestyle.
Would you do it again?
I would yes, as long as we weren’t living in the house at the same time.
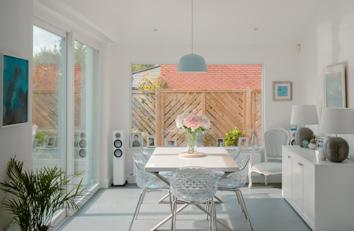
Don’t rush into it. We lived in the house for quite a few years before deciding what we wanted to do.
Make a list of the ‘non-negotiable’ items versus the ‘nice to have’ features. This helps the project to focus on the things that will make the biggest impact on your daily life.
room,” Phil says. “The windows didn’t have trickle vents, and building control hadn’t mentioned we’d need them at first.”
They also gave the old gas fireplace a facelift, swapping it out for a modern wood-burning stove. Underfloor heating was briefly considered for the extension but was ruled out because of the hassle of integrating it with the existing house.
Like any big renovation, there were a few bumps along the way.
One of the biggest challenges was getting the roof pitches to line up where the extension met the original house, which led to a few weeks of delays, but luckily, no major changes to the plans.
The internal demolition work was pretty full-on, affecting the entire downstairs. For safety reasons, they had to move out during the main construction phase. “It was a big disruption,” Phil admits.
Electrical work didn’t go as smoothly as they’d hoped either. “The electricians made a few mistakes,” he says, which added to the frustrations.
With rising construction costs, they had to make some budget adjustments. “We had to curtail a few things,” explains Phil, which meant slightly reducing the size of the kitchen and dining area.
The house sits within a relatively tight courtyard walled garden at the back of the property, which shaped their approach to outdoor space.
The existing patio was relaid after the renovation work rather than completely redone. “Ideally, we would have used the same tiles as the kitchen to create a seamless look, but in the end, we opted to reuse the existing patio to save time and money.”
The garden itself is still a work in progress. “It needs more work,” Phil admits and they’re planning further
landscaping down the line, possibly adding some outdoor lighting in the future.
They went for a mix of old and new when it came to furniture. “We upcycled a lot of pieces and painted them,” Phil says, but they also added some modern touches, like a new dining table.
To tie everything together, they had a custom-made sideboard built for the dining room to match the kitchen cabinetry. The white walls kept things bright and airy, but they made sure to add pops of colour and personality with carefully chosen artwork.
“Since the renovation and extension work, the house feels so much lighter and brighter, and it’s honestly made a huge difference to how we live. The new extension is a game-changer. We spend way more time outside now, even when it’s a bit chilly.”
“Our kitchen, dining and living area is huge now, all open plan, and it’s become the heart of the house.
It’s perfect for hanging out and being creative, especially when we’re playing music or getting into art projects.”
“One of my favourite things is the huge windows and patio doors we put in the extension. Now we’ve got this amazing view of the garden. I can watch birds flying by and even see squirrels walking past the window while we’re inside.”
“And the light. Wow, the natural light in here is unreal. We often don’t even need to turn on the lights, which makes the whole place feel so relaxing, almost like being on holiday. Sitting at the kitchen island, I just love how I’m bathed in light.”
“The new boot room off the garage has been a lifesaver too. With two dogs and all their gear, it’s made life so much easier to keep things organised.”
“All in all, we’re beyond happy with how the house is working for us now. It’s perfect for our lifestyle, with more space, better connection to the outdoors and just a much brighter, more uplifting vibe.”


Architect and project manager
Micah T. Jones Architect, micahtjones.com
Windows and doors Rational
Flooring Ballycastle Homecare
Worktops Lamont Stone
Kitchen units Oakfield Cabinets
Photography Luke McCallum
Floor: 75mm screed with 150mm PIR insulation on 150mm ground bearing slab and DPM, U-value 0.17W/sqmK
Walls: Cavity wall construction with 100mm full fill PIR insulation, U-value 0.17 W/sqmK
Roof: Natural slate with 100mm PIR insulation between rafters and 50mm PIR below rafters with 25mm service void and plasterboard ceiling, U-value 0.16W/sqmK
Windows: Aluminium-clad timber windows RAL colour 7016, argon filled, triple glazed, low e coating, average U-value 0.91W/sqmK


Plot Size: 0.5 acres
House Size: 2,064 sqft
Bedrooms: 3
Construction: Blockwork (cavity wall)
Heating and hot water: Geothermal heat pump
Ventilation: Centralised mechanical with heat recovery
BER: Projected A2 pre-solar; likely A1 now
Cost: Approx. €400k (includes everything, build, interiors and the first big shop!)
This new build in Co Donegal has the cosiness and character of a cottage that’s been lovingly restored. Áine Carey shares how she went about building the dream.
Our inspiration came from Irish cottages, vintage interiors and homes we saw on social media. We used natural oak, vintage rugs, florals, textured finishes and traditional features like sash windows, Belfast sinks and timber beams to create warmth and a sense of age. Nothing feels too shiny or new, and that’s exactly how we like it. There were no existing buildings on the site, so we had a blank slate to work from.
It was a self-managed build with incredible help from local tradespeople. We were total beginners, so the whole process was a real “learn on the job” experience. Instagram and the selfbuild community were invaluable. We relied heavily on advice from our trades and found the process time consuming but ultimately rewarding.
We both teach full time (I teach English, my husband teaches Geography), so we juggled site visits with work, a toddler — and a newborn, born just after blockwork began. It was full-on, but we got there.
There were a few setbacks including an error with the name on the application and boundary clarification needed from a neighbouring landowner.
We opted for a traditional block build with a focus on durability and insulation. We chose triple-glazed, argon-filled windows for efficiency and comfort, and timber beams purely for aesthetic charm.
We installed a geothermal heat pump with underfloor heating, and mechanical ventilation with heat recovery (MVHR). It’s been a brilliant setup; cosy, energy efficient and low maintenance.
Our home is well insulated with triple glazing, geothermal heating and mechanical ventilation. We also installed 16 solar panels. Our projected BER was A2, but we believe it would now qualify as A1 post-solar.
There were moments of chaos, especially


Remember you only live once. As this is our forever home, we were careful with spending but didn’t compromise on the details that really mattered to us. Our advice: plan well, trust your trades and don’t be afraid to splurge on features that bring you joy. My personal favourites are the sash windows and oak ceiling beams, they bring such charm. We also love the TV and, of course, our little mini bar, which we made room for from day one.


with a baby and a toddler in tow, but we wouldn’t change a thing.
A classic example was when we changed the direction one of our doors opened after the floor had already been tiled. We hadn’t thought it through properly, and the result was that the toilet floor was peeking out under the door — not ideal.
I also made a few questionable choices when it came to paint colours and tiles. In fact, I’ve dedicated a whole Instagram highlight to our mistakes and people love it. So much of Instagram is picture-perfect, but I’ve made sure to share the things that didn’t go to plan too.

We removed the planned plant room in the hallway to extend our main bathroom and allow space for a large walk-in shower. We relocated the plant room into our utility and worked closely with our kitchen designers to create a custom enclosure. It fits perfectly and looks like it was always part of the plan. It’s one of those changes that really worked in our favour.
Originally, we hoped to hire a contractor for the full build, but once we received the pricing, we realised it just wasn’t within our budget. That said, we used their projected costs, along with figures provided by our architect, as a starting point for budgeting.
We got three quotes for nearly everything and considered much more than just the price: things like availability,


recommendations, timelines and even general “vibes” from tradespeople. My husband kept a detailed spreadsheet and tracked every single expense. I wasn’t allowed to buy a spoon without it going in the spreadsheet.
The foundations and site prep were major budget busters. Our site is basically built into a hillside, and the amount of rock we had to remove was far more than expected.
Just clearing the site and putting in the road ate up a massive chunk of the budget. We also needed a raft foundation, which cost more than we had originally accounted for.


How did you findcommunication with the trades?
Honestly, this was one of the toughest parts. I felt like a needy ex-girlfriend at times… and I got ghosted more than once!
You get used to being ignored, sent to voicemail, hung up on; thankfully no one blocked me. But in all seriousness, I made it my mission to stay on top of progress and made sure the house was never sitting idle. It took a lot of chasing, but keeping that momentum going made a huge difference.
Did you do any DIY work yourselves?
My husband and dad laid the floor insulation, fitted the attic flooring and did all the site tidying and clean-up in the evenings. They also built every piece of flat-pack furniture. I took charge of morale, making sure there was always tea and snacks for anyone on site.
What surprised you the most about the whole process?
Definitely the decision fatigue. I never realised just how many micro-decisions would be involved, and how exhausting that could be. From socket placements to tile grout to door handles. It was relentless.
There came a point where I asked tradesmen to stop giving me options.
Sometimes the simplest or most obvious choice really is the best. But secondguessing every decision and wondering if we got it right was probably the most overwhelming and anxiety-inducing part.
We leaned into soft lighting, natural tones, floral fabrics and vintage touches throughout. Books, maps and globes fill the shelves, and there’s plenty of personality in every corner, including dollhouses for our four-year-old.
A favourite splurge was our high tech TV which looks like a painting and blends right into the space, avoiding the dreaded “black box” effect on the wall.
We’ve kept things simple for now, with steps and a small paved area at the back. We hope to extend the patio area in future when budget allows. It’s a work in progress.

August 2022
Final plans completed
May 2023
Planning permission granted
August 2023
Site cleared
December 2023
Foundations poured
June 2024
Roof completed, windows and doors installed, first fix electrics begun (chasing)
August 2024
Wiring of electrics completed
October 2024
Underfloor heating pipes laid and floors poured
November 2024
Plastering completed
December 2024
Electricity connected
January 2025
Tiling and laminate flooring completed
February 2025
Kitchen installed
March 2025 (St Patrick’s Weekend)
Build complete and moved in

Find out more about Áine’s project in Co Donegal...


Follow Áine’s build on Instagram @casadecareys
Timber
Friary Timber Products, Donegal Town
Kitchen
Greenforth Kitchens – Bridgend
Bathrooms and tiles
Tailored Tiles, Newtowncunningham
McDaids Bathrooms & Tiles, Buncrana
Furniture
McGinleys Furniture, Letterkenny
Countertops
Devlins Marble & Granite, Bridgend
Painting and decorating
Paul Breslin Painting & Decorating, Gweedore
Carpentry
Pádraig McGinley, Gweedore
Solar panels
Martin Diver Electrical, Gweedore
Plumbing
Conor O’Donnell Plumbing, Dungloe
Heat pump and MVHR
Efficient Renewables, Newtowncunningham
Walls: Concrete block inner and outer leaf, filled with 150mm PIR board, U-value 0.14W/sqmK
Floor: 125mm PIR insulation, concrete 10mm agregate on top of the underfloor heating pipes, 75mm deep, U-value 0.14W/sqmK
Roof: trusses for the vaulted section with 300 mm spray foam between the rafters and 62.5 mm insulated plasterboard on top; cut roof for the rest of the house with 400mm of mineral wool insulation between the joists and 125mm spray foam insulation at pitched roof rafters for airtightness and insulation of attic space , U-value in vaulted roof area 0.14W/sqmK and 0.11W/sqmK for apex roofs
Windows: chalk colour sliding sash uPVC triple glazed argon filled

This Co Cavan garden design shows how to deal with a sloped site and unsightly landscaping elements.
Asite with a slope or changes in level can appear challenging, but with careful design it can be a blessing in disguise and result in a really interesting outdoor space.
In this case, the homeowners had lived here for a few years prior to renovation and had noted the movement of the sun throughout the day.
The garden design needed to reflect this and allow for separate areas for morning coffee, dining and evening gatherings, while working with the slope upwards from the house to the boundary.
They had grown fond of a pair of old apple trees halfway up the slope and wanted to keep them, and there was an old pump house at the end to be retained for storage. A home needed to be found for an existing grape vine too.
When working with changes in level, steps and retaining walls are almost always needed, but how you use these can make a huge difference to how the space looks and feels.
In this garden a retaining wall in front of each apple tree allows a space to be carved out for the dining area, with plants just behind the walls allowed to soften their appearance. Further planting below one wall extends the colour and greenery to two levels.
Retaining walls need careful attention, as they need to literally ‘retain’ all of the earth and rocks behind them, so their construction differs from that of, for instance, a boundary wall.
Foundations need to be sturdier and wider, and weep holes placed appropriately to allow moisture to escape from the earth behind the wall. Once the technical and safety requirements are met, the walls can be finished in different


ways so that they visually form a part of the design and complement the other garden elements.
Steps leading upwards towards the fire pit and evening seating area follow smaller retaining walls along the lefthand boundary, with planting again allowed to soften and add contrasting shapes to the straight lines of walls and steps.
A timber pergola provides a home for the grape vine, vitis vinifera, and maybe a rambler rose or honeysuckle, while suggesting a change of atmosphere as you move from the more formal dining area to the relaxed, slightly wilder surroundings near the boundary trees.
Silver birch trees line the rear boundary with woodland style planting underneath, to help screen the garden from the houses behind.
The little former pump house, currently used for storage, has its gable facing the back of the house, and makes a perfect backdrop for an area of cottage style garden. A trellis with climbing plants on its wall, rustic obelisks and a low picket fence in front continue the cottage style


vibes, but they have another purpose too.
The owners are keen to install a greenhouse and grow their own produce, but this may be a few years away, so a cottage style garden allows them to experiment with edible and ornamental plants grown together informally, just like the original cottage gardens were used historically.
This kind of planting can look glorious in summer and somewhat untidy at other times, though, so the low picket fence conceals the messy bits from the more formal garden areas.
Lawn and further planting extends to the right, continuing around the side of the house, and can be added in stages as the time and budget allows –an ideal solution for many following a costly build or renovation.
The area to the right of the house benefits from morning sun, so a smaller, informal area is included near the glass doors for morning coffee. A border of carefully chosen plants is located here, visible through the glass, to lift the spirits when looking out throughout the year.
Evening seating area, lounge style seats, fire bowl
Timber pergola over path for grape vine
Steps/retaining walls
Paved dining area/ planting
Planting to screen heat pump
Screen for wheely bins
Growing your own produce can sound very tempting, but consider how this will work with the more ornamental parts of your garden.


A new home is a hugely exciting time. Whether you’re patiently planning your self-build, purchased a fixer-upper or a new build you’ll want to add a little bit of you in the fit out. You’ll likely be constrained by your budget and want plenty of bang for your buck – enter Dalzells.
Kitchen fitters and builders are infamous for teeth sucking and while it makes sense to trust them with their specialities, appliances isn’t one of them… Make your money go further by buying your kitchen appliances direct from Dalzells, renowned for delivering legendary savings on package deals with expert advice and excellent customer service.
Established in 1956 this large family run home appliance specialist has almost 70 years of expertise and has the buying power to deal directly with manufacturers, buying in bulk
to secure the best deal for the savvy shopper. From all manner of kitchen appliances and multifuel stoves and TVs they warehouse more than 9,000 large home appliances at any time with an extensive showroom with many hundreds more on display. Dalzells hold accounts with all leading and niche brands from staples like Hotpoint and Beko to big favourites like, Samsung, Quooker and Rangemaster to Bosch and Neff you can step it up to super premium brands such as LaCanche, La Cornue, Fisher Paykel, Miele and Liebherr.

A true specialist, they hold almost 1,000 range cookers with 50+ on display, and hundreds of American fridgefreezers with 30+ on display. With free delivery throughout Northern Ireland and flexible storage to you’re ready, they also offer a range of financing options should you need

“A
true specialist, they hold almost 1,000 range cookers with 50+ on display, and hundreds of American fridge-freezers with 30+ on display.”
them. There’s almost always a luck penny too.
So, maximise your return on that budget with Package Deal savings by buying your appliances direct from Dalzells by emailing, calling or visiting Dalzells in-store today.
62-68 Main Street, Markethill, Co Armagh, BT60 1PL, tel. 3755 1260 (ROI prefix with 048), armaghelectrical.com sales@armaghelectrical.com


I’m potentially on the verge of meltdown but I thought I’d see if
any of your readers have experienced this problem.
We moved into our new home (built 1937) last September and it came with a C1 Building Energy Rating (BER). At the end of last year I had PV panels installed on the roof hoping to get it to B3 and a ‘green mortgage’.
When the new BER assessment was carried a few weeks ago the house was downgraded to C2 for two reasons. Firstly I’d no evidence of internal wall insulation on the external walls and secondly I had no information on the windows that were installed.
The previous owners had done extensive work back in 2016 and the C1 BER was issued on the back of this. I thought (incorrectly) that

any work that I would do such as installing the PV panels would be an upgrade to the C1 cert.
The BER assessor said the SEAI needed evidence of the wall insulation, I would have thought the previous cert would have been evidence enough as it’s not the sort of material you’d briefly install for the purposes of an assessment and then remove. I contacted the SEAI asking did they have any evidence on file (as I have none being the new homeowner) and they stated that the assessment done in 2019 was done offline so there’s nothing on file.
The assessor who produced the 2019 cert no longer carries out assessments. I eventually removed a socket and back box revealing the insulation, took a photo of it (it could have been any house) and sent it to our current assessor and he was happy with that so I managed to get the first issue solved (back to C1).
The second issue with the windows I thought would be
straight forward enough, I contacted the company and they forwarded me a couple of specification certs for the windows installed. I passed them to our assessor who was happy with them but said the SEAI will require it in writing that these windows were installed at our property on a said date. So I went back to the company who said they can only give that information to the purchaser of the windows and not me (the homeowner) because of GDPR.
We moved from an A3 rated home into C1 and I’m all for sustainability, reducing costs wherever I can even if there’s an initial outlay so installing the PV panels in conjunction with the grant seemed like a no brainer. The SEAI seem to have made the whole process of getting a new BER nigh on impossible with their demands for written and physical evidence all which should have been recorded (and saved!) by themselves back in 2019 which they haven’t done, so effectively
I’m starting from square one.
I may have been unlucky but I don’t feel the SEAI have been helpful at all with the process.
In relation to this particular case, it appears that window company can confirm that they installed windows in the property and the make and model of those windows. It may be worth requesting from the supplier, confirmation of the make and model of the windows installed at the address of the property without breaching any GDPR guidelines.
The date of installation of the windows is useful but not mandatory. There is no requirement for them to include any details related to the person who placed the order, the price paid for the windows, etc.
In general, a BER assessor is responsible for verifying the data inputs in any BER assessment they publish. If the assessor does not have enough evidence to support a non-default input, they apply default values. There are
default values that can be used to reflect what the BER assessor observes in the dwelling during the survey.
For windows for example, there are different default values for single, double and triple glazed units and for different frame types and glazing specifications. The more information available onsite, the closer the default will be to the certified value. Some windows for example, contain quite a lot of information in the spacer bar between glazing panes. Where
there are no certificates available for the assessor to use, the assessor can use the observed information to apply the most appropriate default value.
The correspondence indicates that the previous assessment was done offline.
This would suggest that it was carried out using the DEAP 3 software which is the predecessor to the current DEAP 4 platform for producing a BER.
In 2019, the DEAP software was updated to include functionality to upload information such as

window certs to support the BER assessment.
In 2019, the calculation methodology was also updated and since then, the primary energy factors for electricity have also changed. These calculation changes also impact the result.
The challenge of retaining documentation relating to a building’s energy performance for the lifetime of that building is one that is being addressed in the latest recast of the European Energy Performance of Buildings Directive. This directive requires each member state to develop a ‘Digital Logbook’ to store relevant energy performance information and provide better accessibility to this data once collected.

Sustainable Energy Authority of Ireland, seai.ie
I am building a house but ESB Networks can’t give me a date for connection. Mould has started appearing on the fresh plaster and I’m worried. Have you come across anyone that has used a generator to power a heat pump to get the house dried out?
Yes, a generator can run a heat pump but the power ratings need to be known. You first need to find the heat pump input power requirements (kW) for starting it and running it. Starting power is usually higher than the running power. Check the manual for details and give these details to your generator hire company.
Typically, a fairly large generator would be required, perhaps with an output of around 20kW or more and this could be expensive to hire and run, so check costs.
An alternative would be to forget about the heat
pump and consider running dehumidifiers or electric fan heaters, or a combination of both. A dehumidifier will dry out air faster than a heater.
Depending on the size of the space to be dried, a smaller generator would then suffice. You would still have to work out the total input power required for the appliance(s) to be used.
I would suggest hiring a dehumidifier suitable for the size of your construction project and a good hire company will be able to advise on what is best for you. If thick floor screeds were used in the construction, they will
take a longer time to dry. Finally, when running a generator or other electrical appliances, always adhere to the relevant health and safety guidance. Check the manufacturers’ documentation and also sources such as the Health & Safety Authority and ESB Networks.

Les O’Donnell of Landmark Designs, landmarkdesigns.co.uk
15k in fees to be told I can’t get planning permission
I recently applied for planning for two onebedroom apartments to replace an old structure at the back of my premises that opens onto a laneway. Unfortunately I was refused planning by the transport department of the planning authority. I had asked a few architectural designers over the years on advice on if I would get planning for a dwelling where the old structure was, but they said it would not achieve planning for accommodation. So I put it on the back burner. Because of the housing crisis I decided to get further advice from an architectural designer whose work I had seen in an area near where I live. He and his business partner called out to see the property and were very positive about the chances of gaining planning for the project and I decided to go ahead with planning.
Overall it’s cost me over 15k in fees just to be told I could not build there. I feel personally that the architectural designers led me up the garden path knowing I had no chance of getting planning just to make money off of me.

Keith Kelliher Quantity surveyor, adjudicator.ie

Q: Is it still cheaper to build out of blockwork or is timber frame and Insulating Concrete Formwork (ICF) on par now with building regulations being so tight?
A: It depends on the design, and what factors you take into consideration, but as a rule of thumb traditional methods remain more cost effective.
The answer to this, like many other questions, will very much come down to the design and layout of the building. Some forms of construction will be more suited to others and costs will fluctuate depending on that design.
In a general context we carried out a review of ICF versus blockwork on a recent house in the northside of Dublin which had over 1,500sqm of external wall blockwork. The ICF supplied and fitted cost we received was €180 per sqm which resulted in a total cost of the structure of just over €270,000 (yes, it’s a large house).
When we compared this back to the traditional blockwork cost (we excluded the external render from our calculations), we had circa €114,000 of blockwork costs, €27k of lintel and thermal block costs, circa €41k of insulation and DPC costs
and then circa €45k in the need for an airtightness membrane so an overall total cost of circa €227,000.
It is for other people to decide which route is better from a building regulation perspective but from a pure cost perspective, the traditional route is still a cheaper option, with the main differential driven by the cost of ready-mix concrete.
The main area that ICF sets itself apart from the traditional route is the speed of installation and reduction in waste. There is very little waste from an ICF installation compared to the traditional route.
There can be no doubt that when it comes to detailing, quality control, cavity maintenance, thermal bridging and the likes, traditional construction will struggle to match the abilities of ICF, but on a purely cost basis, ICF has a
way to go to take that issue off the deciding table.
In respect to timber frame, outside of the clear benefit in speed of installation, I have never found that it is comparable with the costs of traditional construction, mainly due to the fact that most people still install an outer skin, which is generally done in blockwork or brickwork anyway which results in the need for scaffolding, blockwork and mortar in any event.


Introducing the Litcore Nordic Niagara Guttering System –now enhanced with a unique hidden system option! The strongest guttering system on the market just got a stunning upgrade. With our sleek gutter fascia and soffit covering, your property will not only be protected but also transformed with a clean, modern aesthetic. Perfectly tailored for domestic and commercial projects, the Litcore Niagara system combines exceptional durability with unmatched style – the ultimate choice for those who demand both performance and elegance. Experience the difference today!

Ideal for today’s, low energy homes, MVHR provides effective ventilation, without compromising efficiency. As a ventilation specialist, Brink knows a thing or two about effective, efficient ventilation. That’s why Brink offers:
• A choice of machines certified by the experts at the Passive House Institute (PHI);
• Industry-leading levels of efficiency;
• European design, engineering and manufacturing;

• Integrated Sound Dampeners to virtually eliminate noise transfer;
• Standard Pre-Heater and Summer Bypass functions for maximum comfort all year long;
• A range of filter choices to suit any application.
To discover five essential considerations when choosing an MVHR system for your build, visit www.brinkhrv.com/fivetips.


Roof windows will brighten up your space, but it could also lead to overheating. Seán McKenna looks at where to put them to avoid turning your house into an oven, and what you need to consider at the design stage.
Roof windows bring in daylight, regulate heat, and improve ventilation. But they need careful planning to avoid making your house uncomfortably warm.
Poorly placed or oversized roof windows can contribute significantly to overheating. Good design is about balance, ensuring that glazing areas are proportionate, shading is included, and ventilation is properly planned.
Building a certified passive house in Ireland sounds like a dream. Fresh, filtered air, no need for radiators, and a home so well insulated that a toaster could practically heat it. But there’s a catch.
Designers, caught up in the romance of floorto-ceiling windows and solar gain, sometimes go overboard. The result? Overheating. Yes, you read that right. In Ireland.
A common misconception is that overheating in modern low energy homes is caused by too much insulation or airtightness. In reality, there is no such thing — only poor design. Passive house principles do not just focus on keeping heat in during winter; they also ensure homes do not overheat in summer.
The real challenge is preventing excess solar heat gain and not introducing unnecessary internal heat from heating systems. This is where careful design, backed by science, comes in through the passive house methodology.
Thermal modelling early in the design process allows overheating risks to be predicted based on orientation and Ireland’s latitude, ensuring a home stays comfortable all year round.
It’s true, however, that with good insulation and airtightness comes the need for ventilation – for fresh air (not for cooling). And the passive house methodology requires that you install Mechanical Ventilation with Heat Recovery (MVHR).
If you’re thinking of relying on open windows

Designers, caught up in the romance of floor-to-ceiling windows and solar gain, sometimes go overboard. The result? Overheating. Yes, you read that right. In Ireland.
and trickle vents, remember that it is the equivalent of cutting a hole in your house and hoping for the best. You may get somewhat consistent fresh air if you’re lucky, but you will also lose heat in winter and let in excessive warmth in summer.
An MVHR system filters, distributes, and recovers heat, providing constant fresh air without the energy losses of traditional ventilation.
Not
all roof windows are created equal, and where you put them matters. South-facing roof windows can be useful in winter, bringing in passive solar heat, but without external shading


or smart glazing, they will crank up indoor temperatures in summer. It is like leaving a magnifying glass on your roof and wondering why your sofa is melting.
North-facing roof windows, on the other hand, do not have this problem. They provide consistent, glare-free daylight without overheating, making them perfect for bedrooms and workspaces.
Even better, when placed high in the building, they act as thermal chimneys, allowing rising hot air to escape on those rare (but increasingly common) sweltering Irish days. A well-placed north-facing roof window with remote opening –
The Vikings, inventive as they were, did not have the luxury of triple glazing. Instead, they used thin slices of animal horn to let in light while keeping out the wind. A functional solution, but we’ve come a long way since.
Modern Passive House roof windows now come with insulation collars and vapour barriers to prevent dreaded condensation buildup. Without these, your sleek new home could develop a hidden water problem, slowly rotting away like an old longboat left in a bog.
ideally solar-powered so you do not have to climb onto the worktops every time you want fresh air – can naturally ventilate a home and make summer heatwaves far more bearable.
Triple glazing is non-negotiable in a passive house, and what is between those panes is just as important as the glass itself.
A standard window has air in it. The problem is, air allows heat to escape through convection – warm air rises, cool air sinks, and heat is lost in the process. Enter noble gases: argon krypton, and xenon.
• Argon is cost-effective and great for wider gaps.
• Krypton is higher performing, perfect for thinner glazing where space is tight.
• Xenon is the Rolls-Royce option; excellent but wildly expensive.
Why do denser gases insulate better? Simple. They are less prone to movement, which slows down heat transfer. If heat loss were a relay race, dense gas molecules would be slow to pass the baton.
It’s a good idea to add glazing to your roof, but make sure it’s a roof window, not a rooflight, that meets the passive house criteria. And preferably choose a north facing orientation, for steady light and summer cooling, because a south-facing roof window without proper shading will lead to overheating.
The terms roof window, skylight and rooflight are often used interchangeably, but they are not the same thing.
The main difference is that roof windows must be installed in plane with the surrounding roof, meaning they sit flush with the roof structure. Rooflights, or skylights, on the other hand, can be installed out of plane, meaning they can project above the roofline.
This distinction is not just a matter of terminology; it is covered under International Standards and CE marking. If a product is sold as a roof window, it must meet strict structural and performance standards, ensuring airtightness, weather resistance and durability in an inclined roof installation.
Skylights and rooflights, while still useful, do not always meet these same standards and are often more suitable for flat roof applications or aesthetic purposes rather than high performance passive house builds.
For a passive house, where airtightness and thermal performance are critical, roof windows that comply with passive house standards are generally the best choice.
For more about the passive house methodology, see passiv.de

Carpenter/builder Liam Walsh self-built his own straw insulated home in Co Cork, email tofinobuildingsolutions@gmail.com
If you’ve an existing house, Liam Walsh argues it’s often better to knock it down than to try upgrading it.
We all know there is a housing shortage and that we need to do something about it. But buying a bad house and throwing money at it will not necessarily get you a good house.
You really have to weigh up your investment. It takes a lot to retroactively insulate a house properly; in a lot of cases the buildings are not worth the money you’ll have to pour into them to carry out an energy upgrade. It just costs too much to do, and it will never compare to a wellbuilt home.
So unless you’re dealing with a historical building, or a building with a very good layout and design to begin with, I would argue upgrading the energy efficiency of a badly built home isn’t worth the (taxpayers’) grant money.
In many cases, it would be best to knock it down and start from scratch. There’s no point in saying Ireland has X many houses when a huge percentage of them are of a very poor standard. This may sound contentious but, if you ask me, about 40 per cent of all of the energy upgrade projects that are out there are not worth the money. So at what point do we stop throwing good money after bad?
And that’s not taking into consideration the quality of the energy upgrades; they’re not all done to the required standard.
I think the placebo effect has homeowners convinced they notice an improvement. No one would want to believe they wasted tens of thousands on an aesthetic makeover.
One reason for this is that building energy ratings (BER) mean very little.
I know a lady with young children who bought a B2 energy rated house who said the house was so cold she couldn’t put the children down on the floor, and some rooms they couldn’t use during the winter months due to cold draughts. There was no way it was, in practice, a B2.
BER certificates are based on documentation; there is nothing invasive about the process
of doing the house survey – it’s a box ticking exercise that gives new home buyers an illusion of quality.
In reality there’s often a huge difference between theory and practice. A house that theoretically gets its entire exterior wrapped in external wall insulation should see a positive increase in thermal comfort. But that’s not always the case.
If you have draughts, mildew, mould, dampness and high heating costs, this is evidence of substandard building. It is not my intention to insult people’s homes, but to raise awareness of substandard housing and to de-normalise it.

Did you know? There is a lot of research that shows buildings do not perform as well as they were designed. The difference between anticipated and actual performance is known as the performance gap.


Draughts are not just uncomfortable, they also mean warm air is escaping. That’s why reducing air infiltration is the most important step of an energy upgrade. A lot of this work can be done room by room, by most DIYers.
While extensive draughtproofing will require a condensation assessment and a dedicated ventilation strategy, the following upgrades can be done quite simply and effectively.
If you have an open attic, I would argue loose fill cellulose insulation installed by a reputable installer is the best. I don’t think you should waste your time rolling fiberglass out. You will never get it fitted perfectly around every timber that protrudes through it, and insulation needs to be continuous to work at its best.
Cellulose is like a big fluffy cloud that covers everything but a reputable installer is the key. Cellulose is also one of the best insulators and has a good level of wind tightness keeping
out draughts through ceiling light fittings and plumbing pipe protrusions.
I try to use cellulose on my jobs wherever I can, and I have it installed in my own home so I am speaking from experience. Cellulose has the added benefit that it’s made from recycled paper. It’s also important to air seal floor to wall junctions. In most homes, air moves freely behind skirting boards. Every house differs but it’s usually a case of removing the skirting boards and taping the floor to wall junctions, mainly on exterior walls. Airtight foam can sometimes help fill this space also.
Windows and door reveals also need attention. A good quality MS polymer will be sufficient along the entire perimeter of the windows and doors, not forgetting the underside of the window sills. Don’t use silicone or chalk, it will crack.
Energy ratings exist in both NI (known as Energy Performance Certificate or EPC) and ROI (known as building energy rating or BER). It’s a certificate that gives your house a grade to tell you how energy efficient it is, on an A to G scale, much like your washing machine or fridge. A being the best, G the worst.
In ROI, the BER scale is broken down for each rate band, e.g. A1, A2 and A3.
The same methodology is used to both prove compliance with the energy efficiency requirements of the Building Regulations and to draw up energy ratings. The NI methodology is called Standard Assessment Procedure or SAP and in ROI it’s called the Dwelling Energy Assessment Procedure or DEAP.
The SAP rating in NI is more commonly used than the EPC; anything above 100 indicates an energy positive house (generates more energy than it consumes).
Energy ratings can be a poor way of measuring actual energy performance, and changes to the BER system is underway in ROI.
The recast energy performance of buildings directive (EPBD) entered into force in all EU countries in May 2024 with the aim of increasing the rate of renovation in buildings across Europe.

Next year, in 2026, ROI will see the rescaling of the BER scale and the introduction of building renovation passports amongst other provisions.
Ailbhe MacMahon Selfbuild+ contributor


Interior designers aren’t just there to advise you on what layouts will work and where to place furniture, they’ve also got a role in helping you avoid mistakes and make savings.
The consensus seems to be that when it comes to furniture, base items such as sofas and beds are worth investing in as they’ll form the foundations of your home. “Do it once and do it right,” says interior designer Ali Kirby.
Here’s Ali’s breakdown of where to spend and save when decorating, room by room.
Because you’re in your kitchen and your living area for most of the day, and it’s what your guests will see, Ali Kirby says she always focuses the budget there.
A good quality stone countertop is the first thing that she recommends spending a significant sum on. “It elevates the kitchen,” she says. “A beautiful countertop transforms an average, mid-
level priced kitchen.”
Next, spend on a statement light fixture, such as an elegant pendant to suspend over the dining table or the island unit.
The floor and backsplash tiles also demand considerable investment. “Tiles make any room,” Ali says. Shop around to find the colourway and aesthetic that complements your kitchen.
Everything you source should meet a high standard of quality and craftsmanship, as buying cheap, flimsy fixtures will end up costing more in the long run.
However, savings can be made when sourcing kitchen cabinets. Mid-level cabinetry purchased from kitchen suppliers can be transformed with beautiful handles and knobs, Ali explains.

And if you’re not a keen cook, don’t spend a fortune on the latest culinary gadgets. “There are loads of really good quality cookers, fridges and dishwashers that are mid to high price,” Ali says. “They don’t have to be the highest spec.”
To save money on your bathroom, overlook uber expensive, state of the art bathtubs, sinks and toilets in stores and showrooms. Instead, opt for a high quality, mid-range alternative.
Spotlights or wall lights can be entry to mid-level in price too. The one caveat is that these light fixtures must be suitable for the damp environment, Ali says.
Where should you splash out? Spend money on a shower and showerhead that is guaranteed to deliver strong water pressure, Ali recommends.
Next, invest in a handsome set of taps for your sink. It pays to spend extra on the “things that you’re touching every day”, Ali says. Striking bathroom tiles and items that are both functional and stylish, such as mirrors with hidden storage or LED sensor lighting, are also worth spending extra on.

Furnishing and decorating an empty two bedroom house entirely with high end furniture and finishings, including the kitchen, bathrooms and wall and floor finishes, could cost an estimated €200,000 (£166,240) to €250,000 (£207,800), says Ali Kirby. That same house with a considered mix of high end and mid-range furnishings, prioritising spending where it matters most, could reduce the budget by nearly 50 per cent, bringing it down to an estimated €90,000 (£74,800) to €120,000 (£99,700).

Spare no expense on a sofa that’s high quality and comfortable. “It’s the big ticket item,” Ali says. Parents of young children and pet owners will benefit from buying a sofa made from a washable and durable fabric. “Don’t choose a cream bouclé sofa and spend a grand on it… it’s going to get destroyed,” Ali says.
“Work within realistic living parameters. Invest in a good fabric that is going to be wipeable and cleanable.” Doing this will guarantee you’ll have the sofa “for a very, very long time”, she says.
Next in the spotlight is lighting. Ali often mixes striking designer light fixtures with more affordable aesthetic pieces. “If the budget is tight, have one lamp that you splurge on,” she advises. “It’ll just elevate the whole space.”
Textiles needn’t cost the earth, however. “Save money on some of the soft finishings because they will get replaced over time,” Ali says. Numerous cost effective brands stock elegant rugs, throws
More interiors inspiration here
and cushions at accessible prices, she adds. High quality, readymade curtains, rather than the custom made variety, can help preserve the budget.


The trick is to “keep the colour scheme, walls and flooring relatively neutral and then you can just change up your cushions and your rugs and your throws”, Ali says. If your budget allows, commission a carpenter to craft bespoke, built-in storage for your home, interior designer Deirdre O’Connell advises. It will stand the test of time and cleverly conceal clutter. “Quality, solid closed storage is a real winner,” she says.
Never scrimp on your bed, Ali advises. “Invest in a good bed frame plus a good mattress.”
Spend money on superior bed linen too. “If you can get really nice organic cotton sheets, I would,” Ali says. Well made blackout blinds or lined curtains are another essential for a good night’s sleep.
Rugs and throws, on the other hand, can be sourced from more cost effective brands. “Choose soft colours,” Ali advises. “Keep things calm and comfortable in the bedrooms.”
Put money into an office chair that’s specially designed to offer back support. “There are chairs out there that are ergonomically sound but also really stylish,” Ali says. To prevent eye strain and enhance the room’s atmosphere, allocate funds to a good desk lamp.
Desks, meanwhile, can be more economical. “As long as the desk is sturdy, you don’t need to spend a fortune on it,” Ali says.
Greenery from local botanical suppliers and a patchwork of mid-range soft furnishings are affordable finishing touches.
Further information: Ali Kirby Studio, alikirbystudio. com, mobile 086 840 4588; Deirdre O’Connell of Dtale Interior Design Studio, dtale.design, mobile 086 829 1082. NI calling ROI prefix with 00353 and drop the first 0.

A lick of paint: Cut back on your spending by refreshing old doors and wooden furniture with fresh paint. Sand and prime the piece before painting. Social media is filled with helpful tutorials on the subject. To ensure you don’t spend more than you need on vats of wall paint, use an online paint calculator to calculate the exact volume you require.
Give yourself time to add the finishing touches: Small, cost effective accents can go a long way in transforming a home. “Rooms look unfinished without a rug or art on the walls,” Deirdre says. “I come across many people who have unhung pictures and mirrors; just get them up on the walls, it will help.”
Buy secondhand: Deirdre says that secondhand marketplaces such as Done Deal, adverts.ie, GAFF Shop, gumtree.co.uk and Facebook Marketplace are full of amazing secondhand treasures. Or find what members in your local community are giving away for free, on sites like freecycle.org, or check out your local charity shops. Car boot sales and auctions will be advertised locally.

Les O’Donnell Landmark Designs
Converting your garage could be a cost effective way to go about adding space to your house; here’s what’s involved.
As well as being usually more economical to exploit any spare space in an existing property, many of us have a strong attachment to the family home or locality, so it often makes more sense to extend a home or convert an existing building instead of buying elsewhere.
When weighing up your options, a garage conversion could be a better option than a loft conversion. After all, our vehicles are often parked outside all year round for convenience, so garages end up as rather expensive storage units. Ideal for repurposing.
Of the many reasons for altering a home or garage, the most common one is to gain additional living space, followed closely by the need for a home office or studio. These are often converted into a granny flat, i.e. an independent living space for an elderly relative.
But there are a few things to consider before you take the plunge. The most important first step is to determine the intended use of the space and whether statutory approvals are necessary.
As a general rule, even if little or no actual building work is to be carried out, a garage which is to be converted from one use to another will require applications to be made to the planning and building control authorities and possibly also other agencies.
There is a lot of guidance available to read on the subject and in practice some of it can be quite complex, with certain rules taking priority over others. The fastest way to get reliable answers is to ask a design professional such as an architect or chartered architectural technologist. They will help you to make decisions by telling you what is possible or allowable, will examine how the structure can be adapted for living purposes and can also try to keep any proposals within your planned budget (page opposite).
Probably the easiest garage conversion to gain approval for and to carry out the works, is one where the garage forms part of the overall dwelling and where alterations can be kept simple. The only external changes may be the replacement of the garage door with a window and maybe the addition of another external entrance door.
Probably the easiest garage conversion to gain approval for and to carry out the works, is one where the garage forms part of the overall dwelling and where alterations can be kept simple.
One thing to keep in mind is that in the countryside, extra living space created by this method should remain dependent upon the existing dwelling and be physically linked internally, e.g. with a connecting internal door. If, on the other hand, the annexe were to include a kitchen and bathroom in addition to a bedroom and living room and not be internally linked through to the remainder of the dwelling, it would be regarded as a separate dwelling unit. In that case, you will need to go through a full planning application and other statutory requirements applicable to a new house.

Leslie O’Donnell is a structural engineer and a chartered architectural technologist with over thirty years experience in designing and supervising the construction of buildings.
Find out what the planners and building control authorities will have to say about your garage conversion.
In our cities, towns and villages, the change of use of an existing building is usually encouraged in favour of new builds as this is considered to be a more sustainable form of development.
Generally, a garage for conversion in an urban area can be attached or detached and may have more than one storey. In the NI countryside, planning policy categorises a separate domestic garage as a ‘domestic ancillary building’ and in most cases, converting one into standalone accommodation would not be permitted.
In ROI, the rules for garage conversions are similar. In both areas, subject to certain limitations, there is the possibility for permitted development.
The planning authority will look at issues such as location, existing and intended use, whether the garage is attached to or detached from the dwelling, access, dimensions, external appearance, outdoor amenity space and local character. Rules for rural development will differ to those for urban development.
Converting a garage for commercial purposes in an urban residential area or in the countryside would not usually be permitted although there are some exceptions.
In some urban areas, the garage may have counted as parking space when the original planning permission was granted, so check what implications it may have if you remove this space from the parking allocation.
Other agencies will be consulted as part of the planning application process. The local roads authority will look at such things as access to and from the public road, gates, parking, roadside drainage, temporary works and street lighting.
The water authority will be interested in water supply, pollution and the impact on, or capacity of, any public wastewater system. Rivers and fisheries agencies will have an input on drainage, pollution, flood protection and so on.
Environmental agencies exist for conservation of the environment and natural heritage, so will want to check on likely impacts on local protected flora and fauna and their habitats and the treatment of any invasive species. The
presence of listed buildings, conservation areas and archaeological sites may also influence the application.
If the planning requirements can be satisfied, the proposed design must also be able to conform to the building regulations, which will cover things like structure, access, fire safety, acoustics, energy conservation, ventilation and drainage, etc. The provision of a separate septic tank for the new habitable space will require approval.

A garage attached to a dwelling should have had a separating fireresisting wall built up to the underside of the roof.
This should be retained intact if the garage is to become a separate dwelling unit and it will be important to carefully check all fire-stopping and upgrade that if necessary.
If the conversion simply extends the use of the existing dwelling, fire separation will not be necessary, but emergency egress measures will be required and fire, gas and smoke detection and alarms will need to be linked throughout the dwelling.
A separate dwelling unit should have its own fire safety system.


Find out whether the garage was originally built with approvals or as a later unapproved add-on, as this could have implications for the adaptability of the construction for its new purpose.
The pre-design survey will assess its suitability and should also attempt to identify materials which may be hazardous, e.g. asbestos; or defective, such as reinforced autoclaved aerated concrete (RAAC).

Space: Available space will largely dictate what can be done. A single bedroom with an ensuite shower room might suffice with 15 to 20 sqm of floor space, but add an open plan living room with a compact kitchen and it would require around twice that. A single person bedsit should require about 30 to 35 sqm and a two person, one bedroom flat might need around 50 to 55 sqm of floor space.
A home office or studio could be smaller, although the planned activities or equipment sizes and positions will need to be considered.

Access: Many attached garages are accessed from the dwelling through a utility room or similar. If so, a separate route might be needed, but if this removes the use of an existing room or renders it impractical, alternatives may be required. Any internal or external stairs, ramps, handrails and guarding serving the new habitable space must comply with the building regulations. A loft access hatch will need to be added if the garage roofspace is not accessible from the dwelling one, and no hatch exists on the garage side.

Insulation: To begin working out how internal spaces might be affected by the addition of insulation, allow insulation thicknesses of about 150mm for external walls, 300mm for ceilings and 100mm for floors. Your designer will carry out heat loss calculations to refine these thicknesses to meet the building regulations. Insulation thickness will depend on its thermal conductivity and the target U-values. Newly insulated elements may require a vapour control layer (VCL) and/or a breather membrane.

Floors: Garage floors might not be insulated, however any attached garage should have been built with its floor at a lower level than that of the adjoining dwelling; so it is often possible to add insulation and a floating floor finish to the top of the existing floor to bring it up level with the dwelling floors. Add a damp proof membrane (DPM), just in case the one under the floor is damaged or missing.


Walls: Some garages will have been built with single-skin solid external walls, possibly with piers. These walls will need to be insulated and an air cavity provided between the inner and outer wall leaves. If the wall is already a cavity wall, check the width of its cavity, whether it is insulated and if additional insulation needs to be added. If the cavity has insulation board fixed inside the cavity, with some free air space, it may be possible to have the space filled with injected bead and gel insulation.


Foundations: If it is suspected that existing foundations have been constructed to a lesser standard than required, it is imperative that trial pits are excavated adjacent to them for examination by a structural engineer, who can then decide whether additional loads can be applied or if strengthening is required.
Roofs: Check the weather resisting performance of all roofs before or during the design stage. If any leaks are suspected in a flat roof, a surveyor can carry out electronic leak detection tests and have them repaired and retested as the survey proceeds. An older concrete or asphalt flat roof or one with a built-up bituminous felt covering may now be near the end of its life. Pitched roofs tend to last longer, but old felt underlay, battens, slates and tiles can deteriorate. Also check the fastenings including nails, clips and hooks. In all roofs constructed with timber, get into the roof void and check for rot or infestation. Only alter roof trusses under guidance from a structural engineer.
90
STAGE 5: ON SITE
PART 2: FIRST AND SECOND FIX

106
110 FIRST FIX

104
INSPIRATION: ROOF COVERINGS

SELF-BUILD DIARY: DIY FIT-OUT IN CO LAOIS

SELF-BUILD DIARY: ON-SITE TIPS IN CO DOWN
88 OVERVIEW / 96 SECOND FIX / 100 EXTERNAL FINISHES
Now that the house is weathertight, we move on to the expensive business of kitting out the house.
After the main structural work on foundations, walls, floors and roof has been completed on your building job, the next stages will include some quite complex and expensive work, so decisions to alter a design now can have a significant impact on your budget.
Want to hear a golden rule of self-building? If anyone suggests to you a ‘better’ way to do something than that which has previously been carefully considered, designed-in and agreed, do not give a knee-jerk answer but take time to consider the pros and cons.
If a product, process or method is is to be substituted by an alternative, a good phrase to use is, “Your idea sounds reasonable, but give me a note of the cost difference and I will give you my decision”. But don’t make your decision purely on cost and if in doubt, ask your designer.
In the song ‘The Boxer’ penned some 57 years ago (I know, unbelievable!) by Paul Simon, the phrase “a man hears what he wants to hear and disregards the rest” is a universal truth and particularly pertinent in the self-builders’ world.


In a domestic construction project, the two principal internal works stages are usually referred to as ‘first fix’ and ‘second fix’.
First fix work includes the construction and installation of everything which will later be concealed, such as timber or lightweight (cold-rolled) steel framing, most insulation, cables,

conduits, pipes and ducts.
Second fix refers to the fixtures which will remain visible, such as sanitaryware, fitted joinery, lights, switches, tiles, etc.
The tradespeople working
After the main structural work on foundations, walls, floors and roof has been completed on your building job, the next stages will include some quite complex and expensive work, so decisions to alter a design now can have a significant impact on your budget.
Get started with the On Site stage of your Selfbuild Journey here

on the various installations will typically complete their first fix works and then come back after a suitable drying out period when the house is ready for the second fix phase. Most of the internal wet trades such as plastering, screeding and some tiling, will occur around the end of the first fix phase. Skimming, the final step in the plastering process, occurs later.
It would be exceptional for a designer to get clients to pin down each and every internal finish or product at the design stage, therefore many of these decisions tend to be made during the second fix phase, so care needs to be taken to ensure that chosen fixtures and finishes can be correctly accommodated.
Any self-builder will find at times that work which is needed by one trade might not have been fully carried out by another trade beforehand. A clear set of working drawings will already have identified where services penetrate walls, floors and roofs and where fixtures require extra structural support.
Programme planning and site supervision will then identify, inform and control who is responsible for what. Good communication on and off site is vital.
Note that there can be some confusion as to what should be regarded as first and second fix (and so-called ‘final fix’) and tradespeople will have their own interpretation of what is included in each phase. Therefore, if engaging contractors to complete just part of the job, a schedule of works will form an indispensable part of the contract.
The watchpoints in the following pages have been selected from those items which can at times be problematical and include some lesserknown ones which might not necessarily be covered by building regulations or the certifier’s checklist.
We’ve gathered what the online platform onlinetradesman.ie says are the going rates for 2025 for the main trades involved in first and second fix in ROI. Price estimates are for labour only excluding materials and VAT.

Carpenter. Daily rates are pegged between €250-300 and the hourly rate at €40-50. Floor installation costs range from an average of €45/sqm for laminate and natural wood, to €50/sqm for engineered wood and €70/sqm if any of these have a herringbone pattern. Skirting boards are fitted on average for €30/sqm, while hall panelling commends an average of €120/sqm, and decking €100/sqm. A built-in wardrobe (double) on average costs €1,650, a new door installation €130, alcove shelving €2,000, understairs storage €1,550 and a small shaker style kitchen install (eight cabinets and one set of drawers) €5,000.


Plasterer. The cost for skimming is €150-€700 per room, taping and jointing (drylining) is €150-€350 per room. Externally, both wet dashing (rough cast) and pebble dashing (dry render) range from €1,500 to €4,000.
Plumber. Costs from 2024 showed plumbers charged between €52 to €93 per hour, with an average of €72/hr. A comprehensive plumbing job for a three-bed house ranges from €4,326 to €8,240.
Electrician. Costs from 2024 showed rewiring costs ranged from €2,800 to €15,500, with the average cost falling between €6,200 to €8,200 for a typical three bedroom house.
Tiler. Daily rates from 2024 ranged from €228 to €340 with labour intensive tiles on the higher end; Dublin as a location will also be costlier. Pricing the job per sqm, standard floor tiling came in at €30, mosaics and marble €60+, patterned and stone €50+. Tiling underfloor heating added €10/sqm, external floors add €20/sqm. Additional costs to consider include grouting, trim, adhesive, on average €15 extra per sqm. Difficult access or room size can add €170-€450 to the job.

Painter. While some painters may still offer daily rates (averaging €210 in Dublin and €160 outside Dublin), painters prefer to price per job. For a small house, from 90140sqm, the average price quoted was €2,500 for internal painting and €2,000 for external. For a medium house, from 140 to 230sqm, €3,500 for internal and €2,800 for external. For a large house, 230-325sqm, €4,500 internal and €3,700 external, and for a very large house, 330+sqm, €5,500 internal and €4,500 external.

Les
O’Donnell Landmark Designs landmarkdesigns.org.uk
Here’s a checklist of what you need to watch out for at the first fix stage of your build.
It is fairly common practice to bring the electrician on site to mark out the walls where chases need to be cut into the brickwork or blockwork to allow cables, conduits, sockets and switches to be buried within the wall structure.
A registered electrician will be familiar with installation safety around hazards such as wet zones and with the access regulations affecting placement of switches and sockets, so none of this should present a problem.
However, not everyone has a clear working knowledge of the regulations and guidance on the correct positions and dimensions of chases to maintain the strength of the walls. In fact I have seen some very worrying demonstrations
of how not to cut chases, so it’s best to familiarise yourself with the regulations before work commences.
For a start, there should be no curved or diagonal cuts and there are strict limits to depths and widths. Chases in block or brick walls are ideally cut using a twin-bladed power saw which ensures that the correct depth and width of cut is maintained. Clearing out the chases is easily done using hand tools. Avoid the use of impact power tools on brick or block walls. Hollow bricks or blocks should not be chased unless with explicit permission from the manufacturer.
Notching and drilling of timber joists for routing cables and pipes must be done with care and there is clear guidance

Many devices and appliances operate wirelessly, which makes smart wiring installations a lot easier. You may however, prefer that the TV, PC or other smart devices be physically connected to the broadband hub using an Ethernet cable for a stable and fast connection. If so, tell your electrician in good time. If not already done, decide on automated systems such as electronic windows, doors, gates, blinds, climate control, lighting, entertainment and security, etc. Again, keep the electrician informed.
in the building regulations for acceptable positions and dimensions.
If at all possible, run small diameter waste pipes parallel to joists. Obviously, larger diameter soil pipes and ducts cannot be taken through solid joists. There may be more than one trade involved, maybe at different times, so ensure that their combined requirements can be accommodated without causing structural damage.
Open-web joists are ideal for routing all sorts of services whilst avoiding any headaches regarding how it might affect the strength of the joists.

Identify where and what size holes in walls and floors will be needed. At this stage, you should have some idea of the fixtures and fittings you prefer, so check their vital dimensions such as inlets, outlets and fixing positions. Allow for insulation thicknesses around pipes and ducts and sufficient space to accommodate movement between services and fixed structural components.
Some holes will already have been formed and will be difficult to alter, such as those made for waste drainage upstands through solid floors. To take one example and regardless of what the internet tells you, there is no single standard distance for the dimension between a WC outlet connection and the wall behind, so always check in advance that your chosen products will fit with the work done on site, or vice-versa if possible.
All holes, notches or apertures in reinforced concrete (RC) elements should have already been built-in. Do not allow any site operative to cut or break out RC elements unless the structural engineer has approved it. In case of precast RC elements, always consult the manufacturer and obtain written instructions or drawings before any alterations are made.
WC soil pipes are typically 110mm in diameter and if routed vertically within the building, will usually run within a built-in void or a purpose-made plywood duct. Internal soil pipes should be acoustically insulated where they pass through a habitable room
Some installations in the roof void will require a platform to allow future maintenance work to be carried out safely, such as space around ventilation units to fit replacement filters or around a water tank to replace float valve seals, etc.
Services passing through the external cavity walls should be protected and sealed (but not solidly embedded) in accordance with the working drawings. The only service item which will terminate within the cavity of an external wall is the electrical cable tail for the meter box.
Where permitted, copper water pipes in floor screeds should be sleeved or wrapped so that they can move freely along their length and at joints and bends.
All pipes, ducts and cables should be installed with allowance for expansion and contraction to avoid noise and damage.
All pipes, ducts and cables should be adequately supported with clips or brackets.
The colours of plastic pipes and ducts can be used as a preliminary guide to identification, but also check the markings and delivery paperwork against the drawings and specifications. Do the same for copper pipes.
Be on the lookout for cheaper and less robust duct pipe being used where drainage pipe has been specified.
It is good practice to run metal tape along the routes of hidden plastic pipes in walls and floors so that they can be more easily detected during future alterations or maintenance.
All services which will become hidden during the second fix must be tested before being covered, in accordance with the relevant regulations and codes of practice. Obtain written certification for each test procedure.

The heating system needs careful consideration so that everything is in the most effective position. Heat providing equipment including boilers, heat pumps, solar hot water panels, and so on, plus all pipes, valves, drainage, storage and expansion vessels, underfloor heating pipes, thermostats and manifolds (or radiators), must have all been accounted for in the design.
Control equipment such as motorised valves and programmers, etc. will require input from both the plumber and the electrician.
Note that refrigerant pipes between the indoor and outdoor units of a split heat pump system must be insulated and properly protected.
If a mechanical ventilation and heat recovery (MVHR) system is to be installed, your designer will have ensured that sufficient space has been allocated for ducting and for the unit itself.
On the other hand, if the installation is a ‘post design’ decision, your joiners will need to know where to leave spaces for ducting within first floor stud walls and suspended floors.
Always get a layout design from the MVHR installers, which should ensure that all ducts and vents are correctly placed and that factors such as fire safety and noise control are not compromised by this work. Similar steps may need to be taken if a central vacuum system is to be installed.
Also ensure that ventilation ducts in suspended floors or over ceilings are laid to fall slightly towards their exit points on the external wall, or alternatively be fitted with condensate traps and drains.
Also make sure that rigid ducting is used in preference to the flexible types. Not only will rigid
ducts provide better airflow, they will resist damage better and generally last much longer.
All vent ducts and their connections need to be meticulously sealed to prevent leakage.
Structural supports will be needed for heavier items such as baths, water storage tanks, battery packs, ventilation units and the like, even for heavy light fittings (i.e. chandeliers).
In timber floors and roofs, this will involve fixing additional supports which should be detailed on the working drawings. Some items may also require support from walls or beams.
Timber stud walls, for their part, will need to incorporate additional vertical studs or horizontal nogging pieces (aka noggins) to support fixtures such as radiators, shelving, wall-mounted wash basins or televisions, etc.
Allow absolutely no alterations to structural steelwork or joint connections without first consulting the structural engineer. Do not alter prefabricated roof trusses unless with prior written approval from the manufacturer. Alterations may require a structural design solution.
Fixing a layer of 12mm plywood on kitchen and utility room stud walls is often used to provide support for wall-hung cupboards and is especially useful where precise fixing points may be unknown beforehand. In areas which will remain visible, the plywood is covered with plasterboard.
Arguably, the plywood backing solution is essential in the case of lightweight steel stud walls, although kitchen fitters may have their own preferred methods such pieces between the metal studs or using cabinet fixing rails. This may sound obvious, but shelving must be securely fixed and level. It can be useful to include some demountable shelves in cupboards. Limit the heights of shelves so that they do not encourage occupants to use lower shelves as steps up to higher ones.
For all timber frame and stud walls, ensure that the timbers intended to support plasterboard are at the correct spacing for the

Timber moisture content of 20 per cent or less is generally permissible for internal structural use, but timber joists will usually dry further after installation, so expect some shrinkage to occur. The shrinkage may not be uniform across a floor, so adjustments can be required to achieve level floor finishes.

plasterboard to be used. One face of a plasterboard sheet is suitable to receive plaster or decoration and the other faces inwards, so know which is which. Plasterboard sheets should have staggered joints on ceilings.
In general, all timber products both external and internal, should be produced using timber sourced from sustainable forests and certified accordingly by a body approved under FSC or PEFC regulations.
External timber frame walls are usually fitted with service voids on the internal side, so that services won’t pass through the insulation or the airtight envelope. Make sure that the voids are deep enough to take the largest diameter pipe or duct that will be required. Any cuts made in vapour control layers (VCLs) or the airtight membrane will need to be properly repaired.
At this stage of the build, fire barriers should already have been fitted where necessary in wall cavities, but other positions including around party walls and voids within floors,

ceilings and roofs should be thoroughly checked for compliance with the fire safety drawings.
Fire stopping, using approved materials in accordance with the manufacturers’ instructions, should be provided around all services which penetrate fire resistant floors or walls.
Allowances must be made for minor irregularities in masonry units, timber and concrete. This relates to permitted tolerances in walls, ceilings and floors. It is important to know these, so check with your designer or certifier.
A common oversight with combustion appliances is to build standard 200mm internal diameter clay flue liners into a chimney before checking the specification. Whilst a 200mm liner will serve the requirements for a
standard open fireplace, your wood-burning stove might require a 150mm diameter flue to run at optimum efficiency and some might only require a 125mm flue.
Very often, the builder’s answer is to install a flexible stainless steel flue liner through the as-built flue and you might even be told that it is necessary for new-build stove installations. This is a widespread myth. Unless you can envisage a time when you will revert to an open fireplace, there should be no need to install a larger flue liner than necessary.
Double check the connection between the stovepipe and the flue liner in the chimney. This should
be a purpose-made metal plate adaptor, connected and sealed to both pipes using an approved fire-resistant product such as fire rope or sealant. If you end up with a flexible flue liner, a similar connection for support should be provided at the top of the chimney where the flexible liner meets the chimney pot.
Check any fill material such as vermiculite or a Micafillcement mix, which might have been used to fill the space between a flexible flue liner and the original clay flue liners. Builders will often stuff mineral wool insulation around the top of the stovepipe to prevent loose material from falling out.
The keyword for fitting insulation anywhere is to fit it ‘snugly’. Don’t stuff it or squash it, don’t leave gaps and ensure that alternate layers run crosswise over each other.
Board insulation should have taped joints and layers must not be allowed to separate from each other to form air gaps.
When providing decking in a roof space, take care to support it 50mm above the level of the ceiling insulation so that the insulation is allowed to breathe and does not become compressed (compressed insulation is less thermally efficient). There is a good choice of ‘loft leg’ components on the market to allow this to be achieved accurately and robustly.
After every worker has been and gone from your roofspace after the insulation was originally laid, get up there and fix it because nothing is more certain than it will need it.
Before fitting ceiling insulation, ensure that approved caps are fixed over all light fittings which have been recessed into the ceilings.
Ducts and pipes outside the insulated ‘envelope’ but within the building will all need to be insulated. A water tank in a ‘cold’ roof space should be insulated around the sides and over the top but not underneath.
At an appropriate point during the first fix period, the potential air leakage of the dwelling will really benefit from painstaking attention to detail. Use good quality membranes, sealants and tapes and be thorough.

Run a final check on all insulation before it is covered up.


It’s finally time to kit out your house; here’s what to look out for.

The first thing to know is that building materials and products which possess differing characteristics in terms of density, surface area and moisture content, etc., will, when fixed or set together, tend to move in relation to each other due to different rates of expansion and contraction.
The most frequent visible outcome is that of plaster cracks, especially at junctions between walls and ceilings and around window and door heads and sills. Plaster cracks up to 2mm are usually permitted. Cracks of up to 4mm may be found between timber stair strings and masonry walls.
The fact that this will almost certainly happen must be
accepted and allowances made for remedial work later. Cracks exceeding 5mm in width or any which are believed to be moving over time should be brought to the attention of the structural engineer.
If installing metal components, dissimilar metals should be isolated from each other where they are joined together. Also be aware that aluminium or its alloys should be kept separate from cementitious material. Moisture will exacerbate these potential corrosion issues.
Before starting, protect alreadyinstalled finished fixtures and fittings from spatter during
plastering and later skimming and painting.
External windows and doors and other products may have been supplied in plastic wrap, but if this is missing or damaged, you should fit or repair it yourself using appropriate adhesive tape and polythene sheet.
Check the blockwork manufacturer’s technical instructions before applying plaster to lightweight block walls. Normally, internal brickwork and blockwork walls require at least two coats of plaster.
The use of expanded metal lath in plaster at known problem areas may reduce crack problems and plaster beads should be used to provide edge protection at external corners.
Ensure that plaster which has been specified to contribute to the acoustic or fire resistance performance of walls and ceilings is applied to at least the correct minimum thickness.
Plaster and plasterboard may be intended to provide local fire protection to steel beams and if so, should be carefully checked.
Different grades of plasterboard may have been specified in different areas, for example wet rooms or kitchens usually require moisture resistant products. Check against the drawings.
Plastic type ceiling boards and tiles are not seen so much nowadays, but if it’s something
you really want, make sure that they comply with the fire regulations.
Before fitting finished products, the underlying structure must be at or below the maximum permitted moisture content for each particular type of finish.
Traditional sand-cement floor screeds take a very long time to dry properly (allow up to 150 days for a 100mm thick screed). Fast-drying screeds will take less time, but always check the manufacturer’s technical information and be very aware that a self-levelling screed is not necessarily a fastdrying one.
Carry out an accurate moisture content assessment towards the end of the drying period and check with each supplier to make sure the screed is fit for accepting their finished products and fixing methods.
Before fixing finished timber
Plaster mixes should never contain a combination of Portland cement and gypsum plaster.

Internal finishes should usually be checked in daylight from within a room and if a room does not have daylight, only fixed (i.e. not portable) lighting should be used.
Fitted kitchens should present straight lines along worktops, drawers and doors. Gaps between doors and drawers, etc. should be regular, whilst some allowance needs to be made for adjusting the likes of door hinges and drawer runners.
All kitchen parts must be resistant to delamination, warping and other damage from heat, steam and moisture. Surfaces with significant scratches or marks should be repaired or replaced by the installer.
Radiators and other factory-manufactured components such as electrical connection boxes, socket outlets and hatch panels, etc., should be checked for obvious defects.
Make sure that your fuse box has been clearly labelled (i.e. not with illegible pencil scribbles) so that you know which fuse does what and you can identify them easily by torchlight.
Check sanitary items such as baths, wash basins and shower trays for chips and scratches. Any items with defects which are conspicuous at a distance of not less than 5m should be repaired or replaced.
Glass should be generally free from undue defects, although occasional bubbles, small particles and small scratches may be visible. Glass should be checked in daylight from within the room at a minimum distance of 2m, or 3m for toughened, laminated or coated glass.
Look for the correct stamps on safety glass and fire rated glass, you will usually find these in a corner of the pane.
In almost all finishes and particularly true of reclaimed materials, colours and textures may not be consistent. It is very much a matter of opinion as to how much inconsistency is acceptable, however there are common sense limitations as to what is an aesthetic feature and what is not.

products, allow them sufficient time in the new building to acclimatise to reach an average temperature and humidity level that will be experienced during long-term use.
Timber floorboards and other wood-based flooring should be conditioned to the correct moisture content before fixing and it is advisable to keep underfloor heating running before and during the laying of the floor finishes.
Stairs, whether they are of timber, glass, metal or concrete;
are more often than not, fabricated off site. They were traditionally included in the first fix but nowadays, with the exception of concrete stairs, tend to be left until most of the wet trades have finished.
It is imperative that the stair manufacturer at least knows the exact measurements between finished floors, which means that you need to have accurately determined the structural floor levels and floor finish thicknesses in advance.
Last-minute changes to stair configurations can be very problematic and therefore
The tiling rate in Dublin at the moment is €65/sqm; it was €18/sqm four years ago. Anything off standard you will pay extra, so large format tiles or if you need them cut and laid in a pattern, the latter adding €15/sqm extra. The high cost may be attributed to the fact that tilers are hard to find and tend to be the most difficult trade to get on site to do a job.
costly. You might find difficulties with providing supports for glass balustrades where metal or timber was originally specified, or moving the stair position could create issues with headroom and distances to door openings.
Floor finishes should be protected from damage until all works are complete. If grit gets under the protective layer, it will scratch floorboards and tiles.
Check the alignment of joints in floor and wall tiles unless they are intended to be irregular. Also check the manufacturer’s details for the correct joint sizes for the tiles being used.
There may be small variations in surface level between adjacent tiles, but these should generally be 1mm or less where the joint is up to 6mm wide, or 2mm or less where the joint is over 6mm wide. There should be no more than ± 3mm of deviation in the level of a tiled surface across a distance of 2m.
Tiles on solid floors should be bedded on a continuous bed of mortar (i.e. not dabs) or a proprietary adhesive, either of which should be laid to the correct thickness for the material used.

Tiles on timber floors should be laid on an approved flexible adhesive.
In wet rooms, decide whether tiled skirtings are to be fitted. Also decide on whether tiles should be from floor to ceiling and whether you want tiles or PVC wall panels within showers. When choosing shower trays, ensure that the proper depth of waste traps can be fitted (check your drawings).
Where the width of a tiled floor exceeds 2m, movement joints should be provided at floor perimeters and around rigid upstands. Note that floor perimeters would include those which meet under internal doors.
All tiles must be suitably grouted according to their location and in accordance with the manufacturer’s instructions.
Floating floors are those in which the floor finishes are separated from the substrate by a layer of insulation boards and/or a vapour control layer. The layers should allow the floor finish to be physically isolated from the walls and the supporting floor structure. Extra support, using battens for example, may be required under heavy items such as storage heaters.
Timber floor finishes such as woodblocks or parquet flooring which are directly applied to the solid substrate should be fixed using the correct adhesives, to the pattern shown on the drawings and with the correct
Attic access
Don’t forget about fitting insulated and sealed loft access doors and abide to the various regulations that apply to them.
Ventilation solutions may require gaps to be left under internal doors, so check that this is done in accordance with the approved drawings. These air gaps need to additionally allow for floor finishes if they have not yet been laid.
Note that a factory- finished item such as a door may have a slightly different appearance to site-finished components such as the architraves and doorstops adjacent to it.
Decide whether curtains or blinds will be fitted within window reveals or outside them. Ceiling tracks may be required, especially at corner and bay windows. Ensure that recessed ceiling tracks do not compromise the fire or acoustic performance of the ceiling.
perimeter movement gaps.
Panel type flooring products such as plywood, chipboard or oriented strand board (OSB) have particular requirements for nails or screws, fixing patterns and intermediate supports.
Check the specifications for the correct methods, because fixings are often missed, resulting in noisy floors. The minimum acceptable thickness of the flooring will be directly related to the support spacings and the design strength of the material.
Flexible resilient sheet or tile flooring products have specific requirements for underlay materials, adhesives, jointing, moisture control, laying temperatures and methods for adjustment after initial expansion or contraction. Follow the manufacturer’s instructions for whichever type is being used.
Problems arising with these flooring materials are often attributable to incorrect moisture content of the floor structure and to poor preparation of the substrate.

Internal door frames will have been fitted during the first fix. Most of a door frame will be covered during the second fix by door stops and architraves, but the part where the door sits will be exposed so will need protection, especially if it is to be left with a natural timber finish.
Pre-finished internal doors and doorsets should be robust and good quality. You will also need reassurance that pocket doors and their sliding or rolling gear will remain trouble free. Examine them closely in door showrooms before buying.
For some reason, a common omission is forgetting to fix internal door hinges with the correct number of screws, so check every hinge.
All openings in walls should be squared, level and plumb, subject to permitted tolerances.
Similar rules apply to the windows or doorframes fitted within those openings.
There are also permitted tolerances for internal doors and their frames, but do check the rules with the manufacturer if fire doors are fitted.
The fixing of skirting boards is best left until after all floor tiling or boarding is complete. A maximum gap of 5mm between the bottom of the skirting and the floor finish is considered acceptable, but note that joist shrinkage in timber floors may increase this gap over time.
Some joiners will fix skirting boards, architraves, dado rails, picture rails, coving or cornices, etc. using a strong adhesive. This is very effective and avoids having to fill nail holes, but can be notoriously difficult to remove without damaging plaster if you need to change any of it in the future.
“The fixing of skirting boards is best left until after all floor tiling or boarding is complete.”


Most new houses are now painted internally for the first time using spraying techniques. The first thing to do is make sure that the painters take particular care to protect all other finished surfaces.
Spraying will tend to highlight imperfections in the underlying surface so scrupulous preparation is essential.
A professional service will do so, or tell you what needs to be done, and also let you know at what moisture content they can start the job.
Some spray paints may create unhealthy fumes or contain volatile organic compounds (VOCs), so access to others may need to be restricted during this work.
What you need to watch out for when the protective layers of your walls and roof are applied.
To start off, all scaffolding should remain in place and unaltered until external roof and wall finishes have been completed. Also, slates, tiles and facing bricks should be mixed across at least three pallets after delivery in order to reduce the possible effect of colour variations between batches.
Before finishes are applied, re-check to assure yourself that truss roofs are properly braced, tied down to walls and provided with lateral support measures to walls. All details for these should be found on your drawings.
Roofing products can be issued with generic fixing instructions and you may need to read further into the technical literature to ensure that slates, tiles or cladding are fixed and overlapped to suit your local environment and weather patterns. Slates or tiles on mansard roofs, dormers and dormer cheeks will require additional fixings, so check this too.
All flashings and DPCs should already be correctly fitted, including tray type DPCs at abutments between walls or chimneys and the roof. Treat all exposed lead with patination oil or similar.
If, after the design phase, a decision is made to install photovoltaic (PV) systems on a roof, check that the structure has been designed for the additional loads. Instead of adding PV panels over the top of new slates, tiles or cladding, consider integrated panel systems or interlinked PV roofing tiles. Integrated panels may need to be ventilated.
The old method of using mortar to finish verges and to bed ridge tiles does not stand the test of time very well. My advice is to instead use screw fixings at ridge and hip tiles and fit well secured corrosion-proof metal trim along verges and valleys. Note that
roof trim sections should be installed up the roof slope from the bottom so that upper sections overlap lower ones.
Visual checks once completed:
• Scan the roof for defects, ideally when the roof is dry. Binoculars can be helpful to avoid climbing. Look for consistency of appearance, cracked, broken or misaligned slates or tiles, dislodged or broken vents, hips, valleys and ridges, uneven surfaces and irregular joints.
• Get flat roof membranes tested by a specialist surveyor using electronic leak detection equipment, then re-test any repairs which have been carried out.
• Metal deck roofs will tend to deflect slightly after construction, so double check the pitch to ensure that it has not moved below the manufacturer’s minimum requirements.
• Green or biodiverse roofs should be re-checked after installation and ideally at least

in spring and autumn. Check fire safety, plant health, irrigation systems, the integrity of the waterproof membrane and the as-designed discharge of excess water. Prune, fertilise and add native plant species as required.
Know the difference between moss, algae, liverwort and lichen. The last two are not known to cause damage to buildings or to create slip hazards on paths, so can be
“A common mistake is to fail to properly store or protect bricks before and during building works.”

safely left alone to contribute to the environment.
Bird droppings may exacerbate the growth of moss on roofs, especially under TV aerials and around chimneys.
Moss will grow better on rough surfaces than on smooth ones such as metal. To the best of my knowledge, installation of metallic zinc or copper-coated strips on slate or tile roofs has not been scientifically proven to be effective in eliminating moss from entire roofs, although some people swear by them, but maybe that’s mainly the people selling them.
Moss doesn’t like to grow on the strips or directly below them but usually continues to grow lower down the roof slope.
Regular maintenance is the best solution, just as long
as it doesn’t involve power washing or the use of harsh chemicals. Zinc and copper are harmful to fish and other aquatic organisms.
Make absolutely certain that all timber which might become exposed to the weather is kiln or air dried and properly pressure or vacuum treated against all rot, fungal and infestation attack using an environmentally friendly product.
This should include rafters, roof battens, barge ladders, timber fascias, soffits and barges and backing boards behind uPVC or aluminium fascias, soffits and barges.
Sawn timber ends should be hand treated on site with an
For more about roofing and external wall finishes watchpoints

Preparation is vital before painting external wood, metal or in fact any other surface. Check out and follow to the letter, the paint manufacturer’s instructions as found on their website as well as what is printed on the container.
When painting or decorating external surfaces, patiently wait for ‘Goldilocks’ weather conditions i.e. neither too hot, cold nor wet. Check the weather forecast for the duration required for the paint to be applied and to dry afterwards.
approved preservative. Do check that it’s done right. I once found a joiner with a can displaying a well known wood treatment label, which on closer inspection contained heating oil.
For all external wall finishes, make sure that they comply with planning conditions which in certain cases can be very specific, for example using the correct size of aggregate in a dash, or using an acceptable colour and texture in render and facing brick.
Even though not many builders do this, know that it is entirely feasible to build the outer leaf of an external cavity wall solely using natural stone, subject to the relevant regulations.
Check that copings on walls, such as at parapet gables, remain securely fixed to the wall head and that there are no signs of movement.
Ensure that guarding is correctly supplied and fitted to balconies. The use of timber is not permitted.
External lighting which illuminates the surface of a wall from a very shallow angle will highlight imperfections which might otherwise remain undetectable, so is perhaps best avoided. External lighting in any case, must not create or add to light pollution so uplighters should not be installed.
External facing brick walls will have been all built by now. Check that all external vents are

present and correct. There will be requirements for weep vents at certain locations and these will be noted on your drawings.
White deposits due to efflorescence may be evident on bricks (or tiles), caused by water in the bricks or mortar which migrates to the surface, carrying salts outwards which then dry to a powdery white substance as the water evaporates. The source of the water can be rain, dew, groundwater or condensation, etc. A common mistake is to fail to properly store or protect bricks before and during building works. Efflorescence can be successfully removed.
If bricks are used where they may become periodically saturated with water, the wall cavity should only have partialfill insulation with a minimum 50mm air gap between the insulation and outer brickwork to allow the bricks to dry after
each wetting.
Facing brick walls in our climate should only ever be built with bucket handle or weathered mortar joints.
Render on external blockwork
walls can be smooth or textured sand-cement render, a wet or dry dash or a proprietary product such as silicone based products. Render mixed off site and delivered when required will generally be more consistent than the site-mixed alternative.
A render consisting of sand, lime and cement should mixed in accordance with the relevant code of practice (e.g. BS 5262) and applied at thicknesses of between 8-16mm for the base coat and 6-10 mm for subsequent coats. Each successive coat should be no thicker and no stronger than the previous. Admixtures should
be used only when necessary and then strictly in accordance with the manufacturers’ written instructions. Cure all coats before applying succeeding coats by sheeting over, shading or damping periodically according to weather conditions, and allow coats to harden slowly. Curing compounds should not be used if the rendering is to be painted.
and will tend to occur most often at the corners of external wall openings and along mortar joints. When building the walls, the use of mortar bed reinforcement in the blockwork at lintels and sills should go a long way towards avoiding many cracks. The usual sandcement render is very inflexible and susceptible to quite minor changes in conditions, so the

Factory-produced render products require proper preparation, followed by a base coat, a primer and a top coat, all as directed and supplied by the manufacturer.
Smooth rendered bands are often used around wall openings. These should be regular in shape and dimensions should match the drawings.
Some time after completion, surface cracks in the render may become visible. These will be easier to see in smooth render
use of a flexible render such as one incorporating lime or which uses materials such as silicone, acrylic and synthetic fibres is well worth considering.
Small cracks are easily repaired if care is exercised to match colours and textures between the wall and the filler material.
Cracking in buildings may be due to a wide range of causes, with various solutions and although too large a subject for this article, should not be
“Uncoated natural timber cladding products will alter in appearance due to weathering over time, most acquiring a grey or silver sheen.”
ignored. If in doubt, ask your structural engineer for an assessment.
In some areas, planners will be very determined that the correct stone cladding is used, as some manufactured stone products can appear particularly unnatural. Likewise, stone which does not occur naturally in the local area can look out of place. If in doubt, talk to your designer or local planner.
Quoins and similar features are nowadays purely decorative and can be formed of smooth render or stuck-on precast items. It is less usual to see them built-in to blockwork than to brickwork. Check for reasonable uniformity of colour, texture and dimensions and also that each item is securely fixed with no boast sound when tapped. Plinths may be
part of the wall structure or may be added in a similar way to quoins. Projecting plinth headers are more exposed than the vertical wall above, so carefully check for damage or faults. All decorative wall features should be checked for cracks, large chips, indentations, rough patches and integrity and regularity of joints.
Any stone or brick slip cladding to the face of the external wall should be fixed to the concrete blockwork behind.
Some systems will require the use of flexible setting exterior adhesive, some will require mechanical fixing and some will require both. Follow the written instructions from the cladding, fixing and adhesive manufacturers.
Uncoated natural timber cladding products will alter in appearance due to weathering
Check that all rainwater goods are defect free and properly secured and then test them with a hose for leaks. Gutters should allow water to run slowly towards the outlets.
Rainwater goods should have been designed to provide adequate flow rates for your roof characteristics and the local rainfall, so check that their dimensions match those specified on the drawings as this information is quite often overlooked by installers.
over time, most acquiring a grey or silver sheen. Sheltered areas of cladding will be less affected than exposed ones.
Typically, the appearance of external walls should be examined in daylight from a distance of 10m. Check for walls being out of plumb and for excessive hollows or bumps. External render for example must be flat with a maximum permitted tolerance vertically and horizontally, of ±4mm over a distance of 5m.
Ventilation gaps for air circulation behind cladding should be covered with a fine durable mesh of maximum 4mm apertures. Rainscreen cladding might be installed on some walls, in which case, due to the wide range of products available, follow the technical drawings and the manufacturer’s advice. In the absence of guidance on permitted tolerances, apply a maximum deviation of ±3mm in any structural bay width or storey height or otherwise accept what appears reasonable for the materials used.

Your roof finish is not just a practical decision, it’s a defining feature of your home’s style and character. Here are your options.

A good roof is an investment that can enhance your home’s value, curb appeal and provide comfort for years to come. But with so many finishes available, it can be overwhelming to decide which one is best for your needs. Here, we explore the most popular roof finishes available in Ireland today, suited to our notoriously unpredictable weather.

in Ireland as they’re cost effective, weather well, and are long lasting (40-75 years); make sure you’re happy with the appearance and choose good quality to ensure longevity.

Clay tiles, naturally resistant to rain and frost, are typically longer lasting than concrete tiles (50-100 years). In their natural form they provide a more traditional aesthetic, while more modern models are made to look like slate.

Natural slate is among the most expensive options but one of the most iconic and enduring roof finishes. Renowned for its natural beauty and a lifespan of over 100 years, it is also exceptionally resistant to rain, frost and wind. Natural slate comes from quarries, often in Spain or China. The famous Welsh Bangor Blue slates are among the most expensive.
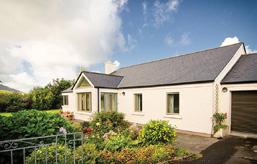
For a modern and cost effective alternative to natural slate, the fibre cement equivalent is lighter and easier to install. While they do not last as long as natural slate (30 to 60 years), they’re designed to perform well in wet and windy conditions, and are available in a range of colours and finishes to suit different architectural styles.

Standing seam metal roof coverings are among the most expensive options, from zinc to aluminium, but they last for up to 70 years and are ideal for homes in rural or coastal areas where resilience to harsh weather is a priority. Rain on a metal roof can be noisy, so rigorous installation with good detailing is essential.
Rising in popularity in Ireland are corrugated metal roofs, as seen on farm buildings, for their cost effectiveness and looks. Similar engineered solutions (fibre cement) provide the corrugated roof barn aesthetic.

When it comes to flat roofs, EPDM (a synthetic rubber membrane) and GRP (fibreglass) have replaced felt as more durable and reliable options, lasting anywhere from
Who says you need to stick to one material? Many modern designs mix different roof finishes to create visual interest and improve functionality.
Combining materials can also highlight different areas of your home, providing a contemporary edge while maintaining harmony with traditional elements. Plus, using the right finishes in the right place can improve energy efficiency and add character to your build.
Also remember that your roof covering needs to match your wall covering; a red corrugated roof might only look the part with a whitewashed finish below, for example. Your architectural designer will guide you with this and show you examples.
And do take the time to consult with roofing professionals early on to take into account the unique demands of your home, as they are likely to provide suggestions too.
15 to 50 years. An EPDM roof is highly resistant to weathering and provides excellent waterproofing, making it ideal for long term performance.
GRP, on the other hand, offers a seamless, strong surface that is highly resistant to leaks. Both materials require little maintenance, making them practical choices for extensions and modern home designs.
Proprietary systems that contain PVC (plastic) are also popular for flat roofs as they come certified; PVC can also be found in sheeting materials but aren’t as long lasting as the alternatives.
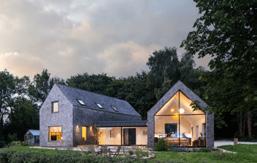
Cedar shingles look stunning, offering a warm, natural aesthetic that weathers beautifully over time. They do require specialist installation and

with regular maintenance are long lasting (50 years). Asphalt shingles are budget friendly, lightweight, easy to install and come in a range of colours and styles, but aren’t long lasting (15 years) as they struggle in areas prone to heavy rain and high winds.

Among the most expensive options, a green roof is covered with vegetation, providing insulation and reducing stormwater runoff. With a good lifespan (50 years) this type of roof is good for biodiversity and blends harmoniously with countryside greenery.
Solar tiles, or built in photovoltaics (BIPV), are still in their infancy and expensive but have the benefit of acting
as both roof covering and solar panel. The efficiency is not

high (less than panels) and the lifespan around 30 years, but it’s an area worth watching as the technology will no doubt improve in years to come.

Proper detailing in relation to ventilation, insulation and airtightness is essential for longevity and, needless to say, is a requirement in building regulations. Specialist detailing, e.g. with metal roofs, will be more complex than others, adding to the cost.

The weight of your tiles will have a knockon effect on your roof structure, so your choice of roof covering needs to be done early on. Natural slate, as well as concrete and clay tiles, are very heavy and so are green roofs due to the soil.

Have a chat early on with your roofer to see what they are used to working with. Natural slate for example will require specialist installation, which may add to the cost. Tiles tend to be quicker and more cost effective to lay than slate, but this will depend on the type.

Maintenance is also vital to ensure your roof lasts as long as possible; make visual checks once a year and after bad weather to determine if there are any repairs needed.

In part 2 of Liam and Fiona Canavan’s house extension project, he explains how he fitted out his timber frame extension in Co Laois on a DIY basis.
In July 2023, our timber frame extension was weathertight. We had the timber frame supplier build the house up to the point of felting the roof. At this stage they’d put up the timber frame, and we had to fit the insulation ourselves, including vapour permeable membrane, jointing and taping.
The house drawings which were issued to the subcontractors that were contracted by the timber frame suppliers, did not have the porch on them.
This meant that after the house was erected, they had

to come back and pour the foundations for the porch. Unfortunately, the roof structure the timber frame company supplied was not the right size and we only realised this when four of us manually
To get to the point of having the windows and floors in and the roof felted and battened (i.e. to builder’s finish; the wall insulation was supplied but we had to install it ourselves) we were quoted €150k but we added some extras, from the external timber finish to windows for the link corridor, and in the end it came to €190k.
On top of that we had the tiling, drylining and fit out to add on to the cost. We’re still in talks with them over the final payment, there’s €1.5k outstanding as there are some details we’re still disputing.

lifted the roof into place after building the porch walls. We were able to adjust the beams of the roof ourselves and on the second lift, the roof fitted into place.
Between the existing house and the extension we have a
link room; the timber frame supplier had left an opening in the wall for it and also supplied the door which we fitted ourselves. We got the windows from them to match the rest of the extension.
Our builder entirely built the link corridor, including the window install.
This link corridor is actually a lovely space, it’s wide enough to include a seating area and thanks to the floor to ceiling windows it offers beautiful views of the countryside. We’ve scaffolding boards left over from the build and will be using those as shelving, to create a library feel in there.
The laths on the back of the house were installed in the factory before the eight sections of the house were shipped. The timber frame company supplied the laths for the porch area and around the front door, which we put on ourselves when we built the porch. We love the warmth the timber brings, and added
Part 1 of Liam’s self-build journey, including floorplans, here

some more laths to the back of the extension.
The catch here was the amount of wood preservative they supplied – you need to apply two coats to get a lovely colour and good protection from the elements. They didn’t supply enough of the stuff so we’ll need to get more; for a 5 litre can it’s €170. Small things like this are a bit of a headache, having to order more and getting it here even though we expected the calculation had been made to give us enough.
The fascia boards are all of the same wood, which lends a cohesive feel. We prioritised treating those boards first while we had the scaffolding. On both gable ends we clad the fascia board with uPVC, on the very high part of the roof that’s hard to reach simply because the wooden fascia boards require maintenance.
For the roof covering, we sourced the roof tiles through our builder, who was also the one to build the link from the existing house to the extension.
The builder calculated how

many concrete roof tiles we would need and as it turns out, he overbought so we’ve loads left. They’re so heavy there’s no point sending them back for a refund, so my plan is to reuse them as paving slabs.
Our builder recommended the electrician we used, a young guy starting his business, he worked weekends to get it done. It was a total wiring job and we’re very happy with the result.
For heating, the extension has electrical underfloor heating mats, there is no wet system.
Despite the cold winter we just had, we haven’t had to use it yet. My wife Fiona has had to put on an extra jumper on some days, but the boys and I
thought the temperature was comfortable – it never fell below 18 degrees.
We do have a centralised mechanical ventilation system with heat recovery (MVHR) which helps retain heat and keep the air inside the house fresh. We had to install MVHR as the house is so airtight and energy efficient.
For the existing portion of the house, we have radiators fed by a high efficiency oil boiler we installed not long ago and have the thermostats set at a balmy 21 degrees. Our yearly oil bill for heating the cottage, and for hot water, is approximately €1k.
Because the heating in the extension is electric, all we need to plumb for now is the taps, and we’re likely to do that


Futureproof your build. For us, futureproofing the house meant building a passive house so that our energy bills would be very low. It also meant building an extension that would be single storey, so we can continue using it into old age.
Buy secondhand furniture and tools. We bought most of the furniture for the extension online. I even got the cement mixer from someone who’d bought it for one small outdoor project and it’s virtually brand new. Not only is this a way to get great value items but you also get to meet people all around the country. I have to say we’ve only had good experiences; the only thing is you need to take the time to search the websites and you have to travel to pick up the items.

ourselves via the service routes in the roofs.
The main issue we had was that the timber frame company put the waste pipe in the wrong location when they built the extension. Despite the right location being clearly indicated on the plans. I had the sewage pipe in a specific place to get the right falls.
Their opening is further away from the septic tank so I had to dig a new trench, and I’m hoping the fall will be enough now.
Myself and my brother in law did a lot of DIY work on the house. We insulated the walls and roof. For the walls we used products supplied by the timber frame company – mineral wool over two layers plus vapour control barrier.
We also did all of the drylining. I calculated the wall area and ordered the sheets of plasterboard and tape; we only had one and a half sheets left over so very little waste.
The drylining job simply involves taping and jointing. Taping between the plasterboard sheets then jointing which involves applying two coats of a proprietary compound. The only thing is you have to sand the wall between coats and it’s very dusty. I have an orbital sander with integrated hoover and that works really well but then when it comes to the corners, I have to go at it by hand.
This is still a work in progress, but the main living area is done now. We went for an industrial style for the plant room which I quite like, with the chipboard walls and industrial fittings.
We’ve a cold roof design meaning the insulation in the attic is at floor level instead of in the roof rafters. We did this ourselves and got quotes from various suppliers; one option we looked at was 300mm recycled newspaper but that came in at €9k.
Instead I went with phenolic board to make sure we’d retain


the ceiling height; this was fitted between the floor joists as the boards are 150mm thick for the same insulation value.
With the help of my brother in law we did have to cut each one to size which wasn’t easy but at least we didn’t didn’t have to raise the floor in the attic and the outlay was €4k for the materials. We fitted it ourselves so saved on labour.
The timber frame company was also in charge of pouring the concrete floor. Because the

timings were so tight, the person laying the floor had to rush the job late into the night which in turn means the finish gets patchier toward the end of the house.
This had a knock on effect for me laying the floor tiles, which we’re putting in every part of the extension bar the bathroom, sauna and plant room. Even though the tile adhesive makes up for the uneven surface, it makes the job much more fiddly. On one tile, it took me three goes to get it level. It’s still a work in progress.

We knew from the very beginning that we wanted to get photovoltaic (PV) panels installed and we got that done at the end of 2022. We paid €14.5k for 16 panels and a battery, and got €2.5 back in the form of the Sustainable Energy Authority of Ireland grant.
For six months of the year we have no electricity bills. The way it works is the battery charges up at the cheaper night electricity rate, and during the day the panels cover our use and we export electricity back to the grid.
It’s a smart system in that the solar company can see remotely if there’s a problem with the battery; I got a call once and they told me what to do to sort it and that was that.
When we lost power in the storm we couldn’t use our solar panels; the only way we could have would have been to install a switch but we’re not considering that as the solar panels wouldn’t be enough to supply the amount of electricity we would need for the house in winter, which is the time of year we get the storms.
As we do get power cuts from time to time, we are going to be investing in a 5.5kW backup generator instead, just to keep the fridge/freezer running and basic electrics.


In part three of his self-build diary in Co Down, Gavin Connolly chats through the sequence of works to build his family home.

Your internal layout will have an impact on your drainage popups. For example you’d traditionally have the sink at the window but if you want it in an island, you need the drainage, water connections there, and power if there’s a cooker going in too.
To a certain extent, you can add more sockets around an external wall retrospectively, prior to plastering, but if things are in the middle of a floor, if they’re not in first time you’re not going to get them in. Or it’ll be costly to put them in.
It all comes down to planning. Planning what you want, planning what to do, planning ahead, that’s what’s important. Whether you bring in a contractor or go direct labour, you have the same decisions to make. If you don’t think of what you want ahead of time, you’ll be adding cost and time which can get out of control very quickly.
There’s always something to be thinking about; six months down the line doesn’t take long coming around. It’s all about having things lined up and having things right. If it’s something you haven’t thought about, it might be too late in the process to put it in. Question your own decisions, have I thought this through? Is there something I’m missing? Computer generated images are good for this.

Starting off, the drawings had everything set out and I was able to make sure everything was done as per the plans. I did the engineering side of things myself, marked out everything in the right place, made sure that everything was square. Making sure that the footings are right is essential.
It went very quickly once we got the house watertight, from January to August. Even second fix electrics was done within a couple of weeks. There were no delays because everything was sequenced; I had my suppliers lined up well in advance and had the commercial side of things sorted.
Having all of the specifics organised before we were on site made things so much easier. The people and supplies were in when we needed them. We used local suppliers which means stuff was there when we needed it and if anything was missing, I could run down the road to get it.
Even though we built a traditional house, in that we used blockwork, I managed to speed up the schedule with some new technologies.
The first thing that sped up the build was going for precast concrete slabs for the subfloor, which we organised before breaking ground and got measured right after we got the foundations poured, the substructure built, and had all of our drainage pop ups through the slab.
I had very little to do with the subfloor other than get the
“Whether you bring in a contractor or go direct labour, you have the same decisions to make.”
damp proof membrane (DPM) down below the precast slabs the day before they arrived. We were building on top of it within a couple of days. This worked for us, others may have different views.
The reason to go down this route was to save time and not having to look for people to put concrete in. The cost wasn’t that much more than going with a standard, poured-in subfloor.
The walls took six to seven weeks after that, and at wall plate level we got the truss supplier to confirm the measurements of the roof structure. I got the windows and doors, which were on order from six weeks into the build, measured at this point too – the manufacturer came to confirm measurements to get them made.
Then the trusses arrived within two weeks. We had a crane and they were set on within a day. The roofing guys worked away after that. They put up the fascia boards and backing boards, felted and lathed, the lead and valley boards. They put in all the dry verges and ventilated tiles in place, guttering, then they tiled it at the end.
Once the roof was on, the windows went in. We were watertight for the Christmas of 2022, which was a date I had in my head as being a milestone. The stonemason was on site October, November, December, getting
the stonework built in parallel. All this while I had the first fix trades ready to go, having kept them in the loop of my progress and when I would need them. In the new year we started with getting door frames on, first fix electrics in, plumbing, plastering and floors.
We went with the liquid screed and liquid insulation to the floor. I’d been dealing with the supplier for around 18 months


Critique your plans. At end of day, your architectural designer is working for you. Critique your own plans, what is the end product going to be? Do this before you start on site. Architectural designers will design but they’ll make it fit with what they think will work. That might not fit with what you need or want.
Avail of 3D imaging services. It’ll allow you to see furniture in place, where the TV goes, how things fit in the room, how big your rooms are. A lot of people get caught out because they think they want big sofas and media walls. Then once you put the stuff in, you realise the room isn’t really that big. That’s where you’ll see where to put a socket on the wall for that wall hung TV. If the containment isn’t in, it’s hard to do retrospectively.
Chat to people who have built or are currently building. You’ll always pick up tips from them, telling you things they’d wished they had of done or wish they’d known before starting. That’s where you get ideas. We looked at multiple sites and took bits and pieces of plans from other houses into ours, e.g. the bedrooms and ensuite layouts, walk-in wardrobes, also we knew we’d get good light with sliding glazed doors and long windows in the sunroom and we wanted a good size utility, as well as a front and back porch.
For the electrical layout, we’d been talking to our electrician prior to Christmas. He’d given us what he’d normally do with a house, and that helped a lot. Spotlights in most rooms and some ceiling roses that’ll take fancier lights down the line.
We had the tracking in the walls done and made sure we were happy with the outside power supply; we double checked it was all worked through before the floors were poured in. We got cables in for future CCTV cameras and we had our satellite TV cable left out so it’s fairly well futureproofed.
I was always going to hardwire the house for internet as we’ve no phone signal here, so we put in CAT6 cables and access points into all rooms. Appliances and TVs were hardwired in so they wouldn’t be eating into the wifi. We also added wifi boosters, and now have great internet speed throughout the house with no dead zones.
Each socket and switch costs you money, and this is a common budget buster so plan ahead and get it all costed early. We put plugs everywhere, for Christmas decorations, not to mention the tree, for the hoover. With plugs, you’ll always use them if they’re there. As a rule of thumb we put in a double socket in every wall, and a high level double socket in every room plus a CAT 6 point.
In the master bedroom we also have double sockets beside the bed for phone charging and tablets; it saves on having trailing sockets.
prior, getting specifications. At first to get the details right, we went back and forth making sure the product would deliver the right U-values. Once the architectural designer was happy, that was sitting ready to go as we’d agreed on price.
My contact with them after

that was about the programme, keeping them updated on the timeline from January to May. We were on schedule so I booked them in for the first week of May and had the plasterer working around that.
We did the inside plastering first, got it ready for the floors to


be laid. We made sure we had first fix electrics and plumbing sorted, making sure there were no issues with pipework prior to the floors going in.
They came in one morning and had the insulation layer poured, then came back the following week to pour the top layer. It was a very quick process. They arrived at 7:30am and were gone by 11am.
The benefits are not just speed but also the fact that there is no waste in comparison to conventional insulation sheets, and it’s not labour intensive. It’s a wee bit dearer but when weighing the pros/ cons for sequencing and not needing massive manpower and time, it worked better for us.
There wasn’t much we could do while the floors dried out in May so that’s when I got the next bits lined up, which was spray painting. We’d been
monitoring moisture levels, from the plastering and floors, to make sure he’d come in at the right time. He came in early June and it took him a couple days to apply two coats of white paint, including walls and ceilings.
We put in a positive input ventilation system and had to get that ducted; the installer came in just after first fix to get the ducting in. Then before we started painting, they came back to finish it off and they commissioned it just before we moved in.
We moved on then to second fix electrics, plumbing and joinery. We got the tiling and flooring down June/July time, then we were into kitchens and bathrooms.
We had the layout for the kitchen agreed in advance back when we were doing drainage
pop ups and prior to the floors going in.
Most of the house is tiled, only the bedrooms have carpet which were put in one week before we moved in (give the supplier accurate room sizes and they need to know if the carpet is meeting tiles or a wooden floor, as the joints are different for each).
We got a tiler who both supplied and fitted all in one go, so if there were any issues it was on him – he got everything down to the grout and adhesive and we didn’t have any leftover tiles. We didn’t know him and went on recommendations and photos of his previous work. We invested in good tiles for the main areas, it was worth it in my opinion.
Once we’d tiling finished,
the bathroom fit-out was one of last things to do. We’d been to pick out our bathroom, it was just a case of getting it fitted. Basic checks are that the waterproofing is in, the mastic is down around shower doors and sinks, everything fits well and is tested.
After that we put in the skirting boards, architraves, and the last thing we did was get the doors hung. We got our stove in, hearths, inserts for stoves then too. We only got it lit for the first time at Christmas (2024).
We wanted to be in mid to late August, for our son starting primary school in September. We moved in on a Sunday and he started school on a Friday so it was pretty much down to the wire in the end.

For the start of the timeline, suppliers list, specification and more tips and advice, read up on the first two parts of Gavin’s journey here


Make sure the walls are plumb. I walked around with a spirit level checking the walls were plumb and lined through.
Check the cavity walls. The wall ties must be clean (no mortar on them), the bottom of the cavity needs to be cleaned out, there can be no mortar on the damp-proof course (DPC). The DPC needs to be in right, and not torn, make sure there’s an overlap between the insulation and DPC.
Prior to Floors. Make sure you have the pipework for heating and
water in, that there are no leaks or damage (it can happen from people walking in and out over them), that you have any ducting in for incoming services or for those outside lights, garage and shed supplies.
Make sure your floors are set from one datum point and that they work in with your door thresholds giving consideration to floor coverings, e.g. tiling, for your finished floor level (FFL).

At wall plate level. The bricklayer will make sure it’s the right height, set off datum levels. The wall plate needs to be level all the way around with laser level.

Window openings. They need to be square, i.e. not wide at the top and narrow at the bottom or vice versa. They can’t be off level either. Visual checks go a long
way with windows; if it doesn’t look right, ask.
Trusses. The measurements for the trusses have to be checked and double checked; they’re made to measure so they need to be right. On site make sure the bracing is put in on the trusses, that the felt above is overlapping and fixed down properly and tied in.
Roof tiles. Tiles are often installed to overlap, sometimes they hang off each other and are only nailed every other row. Our roofing contractor, a friend of mine, put nails and fixings in every row of tiles; it’s been a big topic over the winter storms as quite a few people lost tiles. Ours are all fixed and secured properly.

May/June 2022
Foundations and subfloor in
June/July 2022
Walls built
September/December
2022
Roof and guttering in, windows in
January 2023
First fix
March/April 2023
Plastering
May 2023
Insulated floors in
June 2023
Spray painting
July/August 2023
Second fix
August 2023
Moved in
October 2024
Patio/paving


