Selfbuild


RORY BEST Flogas Brand Ambassador


Europe’s leading, award-winning window brand for over 90 years. Innovative, high-performance architectural window and door systems for self-build, renovation and Passivhaus projects. Exceptional thermal performance, outstanding noise reduction and enhanced security. For further information, please visit uk.internorm.com. *Available from 8 April – 21 June. T&Cs apply. Contemporary Triple Glazing Solutions


27-29 SEPT 2024 TEC BELFAST
As a Selfbuild+ subscriber, you’ve got full access to selfbuild.ie, including the Build Cost Hub, the House Plans Library, Selfbuild Journey, Advice Zone, the latest news, podcasts and much more. Here are a few things you may have missed on the platform and what to sign up to in the coming quarter…
Sign up to a build cost clinic for one-toone advice on your project; the sessions are limited to 10 participants and run monthly.
Extend the development levy holiday indefinitely for self-builders. It’s saving self-builders €12k on average and it’s due to expire at the end of the year.
Our online events page contains playbacks including the June 2024 build cost talk.
Missed an issue? Not to worry, you can browse through previous editions of Selfbuild magazine and themed guides here.


“In many ways it’s become easier than ever before to build a house...”
Welcome to Selfbuild magazine, one of the many benefits to your subscription to Selfbuild+.
In many ways it’s become easier than ever before to build a house. There are professionals who can help you navigate the process and the statutory requirements; there are building methods that allow you to get your house built in a matter of weeks.
But all of this comes at a cost, at a time when material and labour prices are yo-yoing more up than down. There are also the hidden costs, from connection fees to costly foundations.
Another nasty surprise comes in the form of the bill you get in the post after your local authority in ROI grants you planning permission. It’s a juicy fee to cover the costs of roads and other infrastructure that arise from the development.
This local development fee will set you back €12k on average for a 200sqm house (costs vary considerably depending where and what you build, see selfbuild. ie or the previous issue of the magazine for full details).
The good news is, this levy is waived until the end of this year.
And your Irish Water connection charges are also axed

until the end of October; this can save around €6k for water and wastewater connection fees. Who’s paying for all of this? The government is footing the bill for both self-builders and developers.
Here at Selfbuild we are campaigning to extend this holiday indefinitely for selfbuilders, who need all the help they can get (see QR code opposite page).
We know self-builders tend to be couples with young families, who get into debt to build their house. Yet the Department of Housing recently published a report that puts into question whether or not there is a need to provide financial supports to selfbuilders (see p15).
Without supports, many wouldn’t be in a position to build. The Help to Buy scheme, which has been extended for a further five years, has been a lifeline (see p16 for our Factsheet) for years.
So where does that leave you if you’re thinking of building? Now’s the time to build the dream, and avail of these supports while they

The Design stage of your Journey deals with the details you need to have finalised to secure planning permission.


If you have a question, want to share some insights, or simply let us know how you’re getting on with your project, we’d love to hear from you for our Letters page. Email us at letters@selfbuild.ie
Astrid Madsen - Editor astrid.madsen@selfbuild.ie
26 Masterclass
Architect Sinéad Thackaberry designed her new build home in Co Meath, and with the help of her quantity surveyor husband Brian, managed the build from start to finish.
36 Building love
How Chloe and Paul Barr built their family home in Co Tyrone from scratch, with their wedding day as the ultimate deadline.
46 Turning lemons into lemonade
How Tom and Miriam Higgins transformed a 1900s red brick terrace house in Co Dublin from a dark, outdated space into a warm, light filled home.
66 H is for home
How architect Declan Brennan with his wife Michelle built a contemporary H-shaped bungalow in Co Laois.
74 Screened patio
A garden design in Co Galway that makes the most of its orientation to carve out a screened patio area for the entire family to enjoy.
09 News
Get up to date with the latest in home building and home improving, in both NI and ROI.
78 Letters
All articles equally cover the 32 counties; when we refer to the Republic of Ireland the abbreviation is ROI. For Northern Ireland it’s NI.
54 From darkness to light
After the sudden loss of her husband, Oonagh Murray returned to her roots in Belfast
This issue we look at paying money upfront, mould after plastering, and more.
80 What’s a builder’s finish?
Quantity surveyor Keith Kelliher spells out what the term means and what to check for.

82 Attic conversion inspiration
We look at the many ways you can transform your roof space.
84 Reaching new heights
Explore the cost effective option of extending into your roof space for additional room.
88 Where to start with a farmhouse renovation
Architect Micah Jones shares his tips about what the first steps are, from what to prepare for to determining the budget.
90 The downsides to underfloor heating
Whether the system is electric or warm water, we look at the downsides to this near ubiquitous heat emitter.


94 Overview
An introduction to Stage 3 of your Selfbuild Journey: Design.
96 Plans at the ready
How to apply for planning permission and put together the specifications for your home building project.
99 Kitchen and bathrooms
The main elements to determine at the design stage in these rooms.
100 Is green building worth it?
Project manager Andrew Stanway’s guide to greenwashing as you select your bits of tech, from heating to ventilation.
101 Heat pumps
Passive house experts Barry McCarron and Seán McKenna weigh the pros and cons of the technology for a new build.
102 Windows and doors
A whistlestop tour of what to expect from one of the costliest components of your build.

104 Garden design
The benefits of planning ahead for your outdoor space, even if you don’t spend any money at the start.
105 Family home
Certified passive house consultant Patrick McMullan of Co Tyrone explains how he approached the design stage of his self-build.
112 Compact design
Construction industry veteran Louis Gunnigan gives us an update on the design of his home in Co Dublin.
114 Who’s Who Site assessors.


Roadstone FlowPlus is the next generation self-levelling cementitious screed developed in conjunction with the ARDEX Group.
Roadstone FlowPlus is the next generation self-levelling cementitious screed developed in conjunction with the ARDEX Group.
• Provides a quick, smooth and level surface with minimal leveling
• Ease and speed of installation
• Provides a quick, smooth and level surface with minimal leveling
• Suitable for all domestic and commercial applications
• Ease and speed of installation
• Suitable for all domestic and commercial applications

In NI, there’s been some concern self-builders are being blocked from getting planning permission on some greenbelt sites.
Arecent court ruling against ribbon development in NI indicates self-builders could be denied planning permission in some greenbelt areas.
In a potential landmark legal win, environmental activist Gordon Duff’s challenge to a planning decision by the Newry, Mourne and Down District Council could have “far-reaching” implications for rural development.
The Irish News reported that The Court of Appeal ruled in favour of Gordon Duff, who contended that the council’s approval of ‘infill’ planning permission for two houses and garages along a rural road near Ballynahinch, Co Down contravened planning policy on ribbon development (when houses or buildings are built one after the other along a road).
Duff emphasised the ruling’s broader significance, predicting: “It’s a precedent and will potentially affect thousands of similar planning applications over the next few years.” Other infill planning applications to local authorities will have to consider the court’s decision.
The case revolved around an application in April 2021 to build two detached houses and garages on Glassdrumman Road, Ballynahinch. Representing himself, Duff challenged the council’s approval of outline planning permission. He argued that the decision would contribute to ribbon development contrary to guidelines that preserve rural character and habitats.
While accepting that application constituted ribbon development, the council argued that Policy CTY8 allowed for a limited exception permitting a maximum of two houses in small gap sites.
However, after his initial judicial review challenge was dismissed, Duff mounted an appeal to rescind the planning decision. He contended that the council’s decision was unsupported by the facts and wrong in law.
The Court of Appeal judges highlighted CTY8’s “strong unambiguous language” about denying applications which will add to ribbon development. “This is an inherently restrictive policy such that, unless the exception is made out, planning permission must be refused,” Lord Justice Treacy said, reports the Irish News.
The judge found it unreasonable to consider a large open space in undeveloped land at the Glassdrumman Road site as part of the front of an existing property. “Where the infill exception is being relied upon a key question is whether there is a substantial and continuously built up frontage,” he stated.

Three social housing units in Dundalk will be the first 3D printed homes in Ireland, at a cost comparable to building a traditional cavity wall house.
The 3D printing of homes consists of piping layers of concrete, in this case 50mm, out of a giant 3D printer. It builds the walls from scratch, without using concrete blocks. HTL is the construction tech company that’s brought the technology to Ireland.
HTL says the houses are built three times faster than they would using traditional concrete blocks and that it results in reducing labour costs by a third.

The second edition of the ‘Bringing Back Homes Manual’ provides technical and grant advice to those renovating a vacant or derelict building in ROI.
The revised edition includes updates on policy, regulations, technical guidance and support schemes for renovating vacant and derelict properties for residential use. It is especially beneficial for property owners applying for the Vacant Property Refurbishment Grant.
The guide describes the process for bringing existing buildings back into residential use, and expands on how building regulations apply to three common building types.
There are also successful refurbishment examples for different building types.


Make the greener choice for your home, upgrade your existing central heating with an eco-friendly, low noise Midea Heat Pump. Air source heat pumps are the low-carbon future of home heating which integrates heating and domestic hot water into one system.
The future of heating, renewable energy is the greener, cleaner way to heat your home. Midea’s air source heat pumps are the cost-effective way to lower your energy bills and switch to a low-carbon way of heating your home.
Make yourself at home and start saving with Midea Heat Pumps.
Local Authority Home Loan extension to support purchase and renovation of eligible properties in ROI for first time buyers and
n a bid to support first-time buyers looking to renovate vacant or derelict properties, the Minister for Housing, Local Government and Heritage, Darragh O’Brien TD, announced the Government’s approval of the Local Authority Purchase and Renovation Loan (LAPR).
IThis new initiative builds on the existing Local Authority Home Loan, expanding it to cover both the purchase and renovation of properties eligible under the Vacant Property Refurbishment Grant, which offers up to €70k in subsidies towards renovating a derelict building. Grants of up to €50k are available for vacant properties that aren’t derelict, and higher amounts are available for island properties (€60k and €84k respectively).
The Vacant Property Refurbishment Grant has already seen success, with over 8,100 applications received. The new LAPR aims to further assist first-time buyers by offering a loan that covers both the purchase and necessary renovation of these vacant or derelict homes.
Applicants must be first-time buyers or fresh start applicants, meet income limits (€70,000 single, €85,000 joint), and be eligible for the Vacant Property Refurbishment Grant.
Previously, only habitable homes qualified for the Local Authority Home Loan, which was solely for property purchases. The LAPR, however, now includes renovation funding, significantly broadening the scope of eligible properties.
Minister O’Brien stated: “The extension of local authority mortgage lending to the purchase and renovation to all homes eligible for the Vacant Property Refurbishment Grant will help people who are struggling to complete the purchase and renovation of a vacant or derelict property and will give them the necessary finance to make their project viable.”
The LAPR offers a new financial pathway for potential homeowners who struggle to secure funding from commercial lenders.
A key feature is the inclusion of a bridging loan. Tied to the Vacant Property Refurbishment Grant, this will boost

applicants’ borrowing capacity and project viability. The bridging loan is repayable once the grant is paid out. This approach allows more funding for renovation works than typical bank loans.
The LAPR will take into account the cost of the project, net of the Vacant Property Refurbishment Grant, when determining whether a project is viable or not.
The LAPR is designed for two scenarios. First is a person with a project that is viable and whose income is insufficient to source the necessary financing from a bank but is sufficient to demonstrate repayment capacity for their local authority.
Or, a person whose project is not viable according to bank lending criteria but is viable according to LAPR lending criteria. They would also need sufficient income to demonstrate repayment capacity for their local authority.
Other terms and condition and more information here
The three major banks in ROI now offer the government-backed, low-interest rate loans for SEAI-backed energy upgrades. This is a major boost for consumers who are feeling the pinch but still want to upgrade the energy efficiency of their home and benefit from lower energy bills.
The interest repayment is around 3.5 per cent, depending on the lender, and supports homeowners who are availing of a Sustainable Energy Authority of Ireland (SEAI) grant, for individual energy upgrades such as adding a heat pump or solar panels, or a deep retrofit (one stop shop).
The interest rates are low thanks to the combination of an EIB Group loan guarantee and a government-funded interest rate subsidy.
There will be no requirement for the loan to be secured against the property being upgraded, as is the case with a mortgage. Once approved, the loan can be drawn down before works begin.
According to the SEAI, this gives certainty to homeowners that they have the funds for the planned energy upgrades as well as any upfront costs or milestone payments. This is often identified by homeowners as a key barrier to upgrading their homes.
Those who are thinking of buying a vacant property with a view to doing it up are now eligible for the Conservation Advice Grant Scheme for Vacant Traditional Houses.
The grant covers up to 67 per cent of the costs (up to a maximum of €5,000) of hiring a conservation expert to visit their vacant/ derelict property, conduct a survey and compile a report with tailored conservation advice.
The catch is the deadline for applications was the 31st of July 2024 though the scheme was announced less than a month earlier. The scheme should presumably reopen next year.

The grant is being rolled out thanks to the success of the pilot scheme of the same name that was launched in June 2023; the grant amount under the pilot scheme was €7,500.
To be eligible you must own a traditional house and avail of, or consider availing of, the Vacant Property Refurbishment Grant.

Your renovation project gives you one opportunity to get your insulation right, so it is important to consider it carefully.
At Unilin Insulation, our experts will help guide you to the best insulation solutions for your project – for a warmer, more energy-efficient home.
For free one-to-one advice, talk to our technical team on 046 906 6050
Water connection and local authority development contribution waivers propel one-off building starts by over 100 per cent – doubling last year’s numbers.
The Department of Housing, Local Government and Heritage released its latest data on the number of commencement notices (residential construction starts) showing that of the total buildings started in the first quarter of 2024, nearly 10 per cent (2,878) were one-off buildings, which is 1,521 more than during the same period last year, representing a 112 per cent increase.
In comparison, just 4,695 one-offs were started during the whole of 2023. Cork County is the local authority which recorded the largest number of oneoff build starts for the first quarter of 2024, with 309 commencements.
Commenting on the Housing Market Monitor Q1 2024 Brian Hayes, Chief Executive of BPFI, said: “In April 2024 alone, 18,000 housing units were commenced, partially influenced by the anticipated end of the waiver on development contributions and the rebate on water charges.”
However, government data for May 2024 indicates a slowdown in total commencements, with just 1,983 started– a 35 per cent reduction from May last year when 3,059 units were commenced.
This decrease reflects the large amount of activity
fast-tracked into April 2024, as this was when the development levy and water charge waiver were meant to end.
Given the effectiveness of these waivers in accelerating activity, they have now both been temporarily extended, to October 2024 for water charges and to the end of the year for development levies.
Self-builders can save thousands of euros on development levies alone, and €6k+ on the water charges for connecting to sewage and water.
Self-builds are leading new build mortgages across a quarter of ROI regions with 40 per cent of new build mortgages now attributed to self-builds, according to the Banking & Payments Federation Ireland’s Housing Market Monitor for the second half of 2023.
According to the report, the number of first-time buyer (FTB) mortgages taken out for self-building or

Source: CSO, data compiled by Selfbuild
purchasing new homes has increased by 4.2 per cent, totalling 8,606 loans – the highest figure since 2008. Self-build mortgages now account for more than half of new build mortgages in a quarter of Ireland’s regions. Of the new build mortgages, the share of self-builds by region is as follows:
• Dublin: 4 per cent
• Cork: 22 per cent
• Galway: 55 per cent
• Limerick: 47 per cent
• Meath: 22 per cent
• Kildare: 7 per cent
• Wicklow: 8 per cent
• Border: 38 per cent
• West: 65 per cent


• South and Mid West: 76 per cent
• Midlands: 39 per cent
• South East: 37 per cent
However, the report’s main finding is the overall number of FTB mortgage borrowers in ROI buying or building outside their own county, in part led by an increase in remote working – a trend that started during Covid. Other contributing factors are the uptick in house prices and the shortage of new homes.


Affordable Luxury of Nova Brazilian Natural Slate
Why choose Nova Graphite over Fibre Cement?
Genuine natural slate with 100+ year lifespan
Only €3.50 more per m² than fibre cement
Unmatched elegance and curb appeal
Superior weather resistance and durability
Environmentally friendly, 100% natural product
Better long-term value for your investment
LEARN MORE: www.sig.ie/nova-brazilian-natural-slate/
Belfast: +44 28 9038 0060
Omagh: +44 28 8224 6220
Dublin: +353 1 623 4541
Limerick: +353 61 531 381
Cork: +353 21 432 1868


www.sig.ie enquiries@sig.ie
TD urges protection of self-build supports amidst government report that questions €100k in subsidies, loan schemes and tax back schemes.
The Department of Public Expenditure’s
One-off Housing in Ireland: Trends and State Funding Supports report raises questions about whether self-builders, meaning those building one-off houses, need as much financial support as they are currently getting.
These supports, (see sidebar), are crucial for first-time buyers building their own homes.

The report has led to worries among TDs that the department was having doubts about continuing supports of up to €100,000 for self-builders, covering those building a new home and those renovating an existing one.
Christopher O’Sullivan, TD for Cork South-West, criticised the department’s analysis, arguing it fails to acknowledge the unique challenges faced by self-builders.
According to the Irish Examiner, O’Sullivan highlighted the significance of rural one-off housing, which accounts for a significant proportion of housing deliveries, arguing that first-time buyers opting to build their own homes deserve the same supports as those purchasing from new developments.
“I regularly meet couples who would not have been able to build their own home without the Local Authority Home Loan, Help-to-Buy scheme and the First Home Scheme,” he said.
“Building your own home can be one of the most stressful and exciting things, at the same time. Self-builders, like other buyers, are susceptible to interestrate volatility, unavoidable delays and additional costs. They are as deserving of state supports as any other first-time buyer.”
Here are the main points from the report: Self-builds are easier to complete: Oneoff housing units face less delivery risk and are more likely to be completed compared to high-density developments, so they might not need as much help from the government.
Better use of funds: The money spent on supporting one-off houses could be used more effectively to build much-needed social and affordable housing in cities where it’s harder to get projects off the ground.
Household-driven costs: Construction costs for one-off housing are driven by household preferences and funding capacity, leading to significantly larger and more expensive units compared to apartments or multi-unit housing.
Wide access to support: New policies have made it easier for wealthier households to get government help to build their own homes, letting them build bigger and more expensive houses.
Need for better targeting: The report suggests that government funds should be targeted more carefully to support building more homes where they are most needed, rather than subsidising large homes for private owners.
The supports for self-builders in ROI are for both new builds and home improvements. For new builds, there is roughly €50k in direct supports plus loan schemes. While the loan schemes and shared equity schemes help finance the build, the money has to be paid back. These include the Local Authority Home Loan and the First Home Scheme.
In terms of direct subsidies, new builds benefit of two schemes, the first being the Help to Buy scheme (see Factsheet on next page), which is a tax back scheme. This means your level of contributions over the years will determine how much you get; the maximum amount is €30k.
The second support is perhaps the biggest help, in large part because it kicks in automatically. Unlike the other schemes, there is no need to apply for it. And that is the waiver on development levies charged by your local authority when you get planning permission, which represents thousands of euros in savings. How much exactly depends on where you live. This waiver expires in December 2024.
The Irish Water waiver, which has been lumped with the development levies, requires a simple application process to avail of. Developers, including self-builders, are exempt from paying water connection fees, which on average are around €6k, until the end of October 2024.
Those building new also have the option of buying a serviced site from their local authority at a discounted rate, but due to a lack of land this scheme has been slow to roll out.
For those doing up an old house there is €100k available through the energy grants and the vacant property grants which come with an additional grant to pay for professional services. However, these schemes aren’t the most straightforward to navigate.

To extend the development levy waiver for self-builders, sign the petition
Self-builders in ROI can get €30k in tax back from the Help to Buy scheme; here’s what you need to know.
Buying or building a first home can be incredibly challenging, especially when it comes to saving up for a mortgage deposit. For many first-time buyers, the high upfront costs can be a significant barrier.
This is where the Help to Buy (HTB) scheme comes in. Designed to ease the financial burden, this government programme aims to make it more feasible to secure a new build home for first timers.
In the first half of 2024, there have been 3,500 claims under the HTB scheme – a 28 per cent increase compared to the previous year.
The latest data from the scheme, published by Mazars consultants alongside Budget 2023, states that since HTB was launched in 2016, over 8,000 self-builders have benefitted from the scheme.
Further analysis indicates that the median house price for self-builds under the scheme was €305,000, compared to €330,000 for newly purchased houses. On average, self-builds were priced at €312,114, presenting a 6 per cent saving compared to the average purchase price of €332,320 for newly built homes.
The HTB scheme is a government tax refund scheme designed to help first-time buyers fund the deposit needed to selfbuild or buy a new home. First-time buyers (FTB) can claim a tax rebate of up to €30,000 towards the price of a self-build house. This is up from €20,000 when the HTB scheme was first introduced in January 2017.
In the Budget 2024 updates, the HTB scheme was extended to December 31, 2025. Also, as of October 11, 2023, applicants using the Local Authority Affordable Purchase Scheme are now eligible for the Help to Buy Scheme.
In April 2024 Taoiseach
Simon Harris identified house building as a key priority and pledged to extend the Help to Buy scheme by a further five years.
To get the Help to Buy (HTB) scheme, you need to:
• Be a first-time buyer.
• Self-build or buy a new home between January 1, 2017 and December 31, 2025.
• Live in the home as your main residence for at least five years after building or buying it.
• Be tax compliant and have

On average, self-builds cost €312,114 to build, presenting a 6 per cent saving compared to the average purchase price of €332,320 for newly built homes.
tax clearance if needed.
You must also get a mortgage for at least 70 per cent of the home’s approved value from a qualifying lender. Normally, government shared-equity funds don’t count in this calculation, but there’s an exception if you’re using the Local Authority Affordable Purchase Scheme and signed a contract on or after October 11, 2023.
Be aware that you can’t have previously owned or built a house or apartment – alone or with others – anywhere in the world. If you’re selfbuilding with others, they
all need to be first-time buyers too. Inherited or gifted properties might not disqualify you, depending on the situation.
If you sign a contract for a new house, or draw down on a self-build mortgage, between July 23, 2020 and December 31, 2025, you can get the increased relief.
Although you don’t need a Revenue-approved contractor for self-builds, you do need a solicitor registered with Revenue as an HTB approver to confirm your claim.
You are allowed to have a guarantor on the loan. If you have a guarantor on the
loan, they do not have to be a first-time buyer.
What qualifies as a ‘new build’ in a selfbuild scenario?
Only self-builds or brandnew homes qualify. Conversions, extensions and renovations of old properties don’t count, but converting a non-domestic building into a home might be eligible.
What does the scheme consist of?
This scheme gives you a refund on income tax paid over the last four years, up to
10 per cent of the approved valuation of your self-build home or €30,000, whichever is less. It’s only for homes valued at €500,000 or less. So, if your self-build is valued at €300,000, you can get the full €30,000 rebate. If it’s valued at €400,000, you’ll still get €30,000, but you get nothing if it’s over €500,000. You must have paid enough income tax and/or DIRT in the last four years to claim the amount. Even if you were abroad, as long as you paid some income tax in that period, you could qualify.
How does Revenue determine the valuation?
For self-builds, Revenue uses the final valuation approved by your lender, not the actual building costs.
Can Revenue ask me to repay the Help to Buy payment?
You will have to repay Revenue some or all of your HTB payment in certain situations. This is called clawback. You have to pay the HTB payment back to Revenue if you:
• Don’t live in the home for at least five years.
• Don’t finish building the home within two years from the date on which the HTB payment is made.
• Weren’t entitled to the payment in the first place. If you don’t complete the build within the two-year threshold, HTB must be paid back to Revenue within three months. If you do not live in the home for five years, the amount you must repay depends on how long you lived there as per the table below:
For instance, Brendan received an HTB payment of €15,000. The house was completed by the builder in September 2021, and he moved in immediately. In November 2024, he stopped occupying the house and sold it, notifying Revenue accordingly. Since Brendan ceased to occupy the house in year 4, there is a clawback of the HTB payment as follows:
€15,000 x 40 per cent = €6,000
The application process for the Help to Buy Scheme consists of four stages:


1. Application Stage
• Apply for HTB online.
• PAYE employees apply via Revenue’s myAccount service.
• Self-assessed taxpayers apply through Revenue’s Online Service (ROS).
• Access MyEnquiries for secure correspondence with Revenue: ROS business users access it from the My Services screen under ‘Other Services’. PAYE employees access it through myAccount.
• Upon approval, you’ll receive a summary of your maximum claim amount if tax compliant.
2. Claim Stage
• Once approved, make your claim using ROS or myAccount.
• Provide mortgage documents and property details.
• Refer to Revenue’s Help to Buy – Summary Guide for Applicants for required documents and claim process details.
3. Verification Stage
The information you have provided is verified by an eligible verifier. This is the contractor if you are buying a new home, or your solicitor if you are building your home.
4. Refund process
If you’re self-building, the refund is deposited into your bank account held with your loan provider.

As the architectural awards season comes to a close, we bring you the highlights from across NI and ROI.
Royal Institute of Architects of Ireland
There’s plenty of inspiration coming from the RIAI, with highlights including 14 Clarendon Street by Shaffrey Architects getting a mention for restoration and repair, and Living in a Landscape by Arigho Larmour Wheeler Architects bagging the much coveted award for new house.
For loads more inspiration from the RIAI awards


BELFAST / 27-29 SEPT 2024
GO TO EVENT IF BUILDING, EXTENDING OR RENOVATING YOUR HOME
WHAT TO EXPECT:
l BATHROOMS & KITCHENS
l BUILDING & RENOVATING
l ENERGY & TECHNOLOGY
l INSULATION & ROOFING
l PLANNING & FINANCE
l WINDOWS & DOORS
l GARDEN & OUTDOOR LIVING
l SECURITY & MORE

150+ EXHIBITORS SHOWCASING 30+ ADVICE TALKS
THEATRES l TALKS l 1-2-1 CLINICS
EXPERTS l ADVICE l INSPIRATION AND MORE...
McGonigle McGrath Architects won two RSUA awards for rural one-off housing projects, the third year in a row that the practice scooped the accolade, thereby securing a hattrick. House on Redbrae Farm, a rural Co Down project, and Longhurst, a family home in south Belfast, both scooped

For more RSUA inspiration

Scooping an AAI award was High Street, Balbriggan designed by Robert Bourke Architects, a 6sqm alltimber micro extension that ingeniously transforms key spaces in a two storey Victorian terrace, offering a budget friendly solution for maximising space. This project also won at the RIAI awards.
The original layout featured a typical floor plan, with an entrance hall leading to separate front and back reception rooms and a kitchen return. However, the layout felt disconnected, with limited access to the garden.
Robert Bourke Architects addressed this by adding just 3sqm at ground and
top accolades.
Meanwhile architect Patrick Bradley secured his own set of awards with his shipping container home, Barney’s Ruins, which he built floating above the ruins of his family’s 200-year-old farmstead near Maghera. The original cottage was last lived in by Patrick’s great-great uncle Bernard, locally known as Barney. This project also won at the RIAI awards.


first floor levels, swapping the living and dining rooms and creating a direct link to the kitchen through the extension. A new sliding door offers easy garden access, while relocating the wood burning stove frees space for a bespoke oak booth in the dining area.
Upstairs, the cramped master bedroom was redesigned, replacing the old gas boiler and hot water cylinder – which was housed in the tiny wardrobe – with a combi boiler in the attic, allowing for a spacious wardrobe. The addition of extra square footage also enabled the installation of larger windows, enhancing garden views and increasing sunlight.
The extension and refurbishment project was built by Structure Tone Developments.


FROM ILLUSION TO REALITY

Discover the perfect fusion of form and function with MIRAGE - our new range of Wetroom Panels. Available in Fluted, Smoked and Clear Glass, this collection provides a variety of design choices to suit your taste.


Scan to download the SONAS 2024 Edition 2 Brochure for more Bathroom Inspiration.
Gaining access to the attic space can be cumbersome and let’s face it, dangerous depending on the type of ladder you have in place.
Enter QmanPro’s universal zero gravity booster spring solution that’s a dream to use. Thanks to its spring operated opening mechanism, your foldable ladder gently opens up - and folds back up again when you’re done. No need for heavy lifting.
The booster spring is compatible with wooden loft ladders which are at least 60cm in width. It can be added onto existing loft ladders or installed prior to fitting.
The zero gravity booster spring can be combined with leading loft ladders brands. Installation of this product is available all over Ireland and can be installed as a complete loft ladder or just the booster spring attachment onto an existing loft ladder.
atticaccessni.co.uk

Due to the demand for ever better insulation properties in front doors, the installation depth of the profiles and therefore also the thickness of the infill panels have increased significantly in recent years.
Depending on the design and material of the infill panel and profile, and particularly in the case of dark colours and closed panels in exposed positions, different interactions may occur, which can lead to a warping of the entire
door leaf.
Enter NorDan’s new aluminium entrance door range which produces panels with ESC composite as standard. The ESC Feature is a patented elastic sandwich composite (EP3 593 989) for exposed locations and dark colours. Thanks to the elastic sandwich compound, the forces caused by solar radiation, or the effects of cold temperatures are reduced to a minimum.
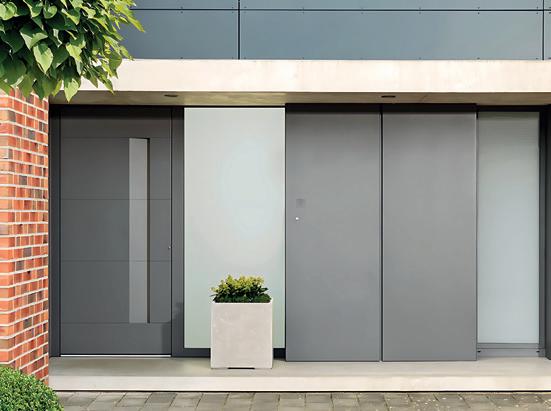
Among many other features, the doors also come with toughened safety glass (ESG) as standard for all panels above 60mm thickness, and a 19 mm glass inset meaning the edge seal is 4 mm thicker all around resulting in a lower risk of leaks (pane does not become cloudy or etched, even during long periods of use).
For NorDan’s entrance door e-brochure, email info@nordan.ie
Pipelife Ireland now offers extensive product training at its new Renewable Training Academy in White’s Cross, Little Island, Cork as well as at its new Distribution Depot in Mulhuddart, Dublin 15.
Led by members of the Pipelife Ireland Technical Team, the courses are free to attend. You’ll gain practical knowledge and get up to speed with installation practices. Plus, you’ll get a unique tour of the Pipelife manufacturing facility where visitors are given the opportunity to see first-hand where its products are designed and produced.
Designed for service engineers, plumbers, merchants, architects, local authorities and BER assessors, the courses are also open to self-builders who are planning to do some of the installation.
Pipelife specialises in renewable heating technology, primarily air-to-water heat pumps, underfloor heating and low-temperature radiator systems.
More information on pipelife.com; email ireland@pipelife.com


Set against the scenic backdrop of Ballygalley, Co. Antrim, stands a remarkable 3,000 square foot coastal self-build home featuring a Grant integrated heating system for efficient space heating and hot water.
Epitomising eco-conscious living, this beautiful single-story home was built on the site of an 18th century mill by Rob and Janice McConnell who prioritised sustainability throughout the design process.
Winner of RTE’s Home of the Year in 2023, the timber framed property was designed by 2020 Architects and features stunning high ceilings and large windows to capture scenic views.
Sharing his experience in choosing the home heating system, Rob McConnell said, “I really wanted one supplier for all our heating requirements and loved the idea of working with an Irish company to provide the heating technologies for our home. The heating design process was very straightforward, I sent my house plans through to the Grant team and they calculated the heat loss requirements for each room and provided a fully integrated heating solution including specified heating technologies for the property.”
Given the property’s expansive size, a 13kW Grant Aerona³ R32 air-to-water air source heat pump was specified as the main heat source for the property. Popular with self-builders, this unit from the Aerona³ range is recognised for its quiet operation by the internationally acclaimed Quiet Mark.
Available in 6kW, 10kW, 13kW, and 17kW outputs, models within the Grant Aerona³ R32 range offer superior seasonal coefficient of performance (SCOP), delivering up to 4kW of heat energy for every 1kW of electricity used, depending on climate conditions and system demand.
To support the system, a pre-plumbed and pre-wired Grant hot water cylinder was chosen for hot water storage within the home. Additionally, Rob opted for Grant Uflex underfloor heating to be installed throughout the property to provide uniform warmth with individual room thermostats for precise zoned heating.
“Our previous home was heated by oil and having now moved to an air to water heat pump, I have noticed how the heat pump provides a level, constant heat throughout the house so it always feels warm and comfortable. Having solar PV means that I can also run the heat pump using renewable electricity during the day or take advantage of using a night-time rate so it’s a win win situation.”
Barry Gorman, National Renewables Sales Manager at Grant, commented, “We are delighted to have provided a bespoke home heating system for the McConnell’s self-build home. Designed to work together, the Grant Aerona³ heat pump combined with Grant Uflex underfloor heating provides a highly efficient, low carbon heating solution which complements the sustainability focus of this beautiful home.”

Start your journey
How to avail of Grant’s Home Heating Design Service
1. Send planning drawings, a contact number and your preference of underfloor heating, radiators or both to heatpump@grant.ie or heatpump@grantni.com
2. Grant technical specialists will be in touch to discuss your requirements
3. Full property specifications with recommended Grant products will be provided
For further information visit www.grant.ie / www.grantni.com


Site size: 0.6 acres
House size: 220 sqm
Bedrooms: 4
BER: A1 (5.53 kWh/sqm/yr)
Airtightness: 1.83m3/(hsqm) at 50 Pa
Heating and hot water: air to water heat pump
Ventilation: centralised mechanical with heat recovery
Build method: masonry (cavity wall)

This new build in Co Meath was a homecoming for architect Sinéad Thackaberry, who with her husband, quantity surveyor Brian, managed the build from start to finish.
Words: Astrid Madsen
Photography: Damien Kelly
fter having lived in Texas for five years, Sinéad and Brian moved back home.
“Our eldest was born in the USA and when we returned to Ireland in 2019, I was six months pregnant with our second child.”
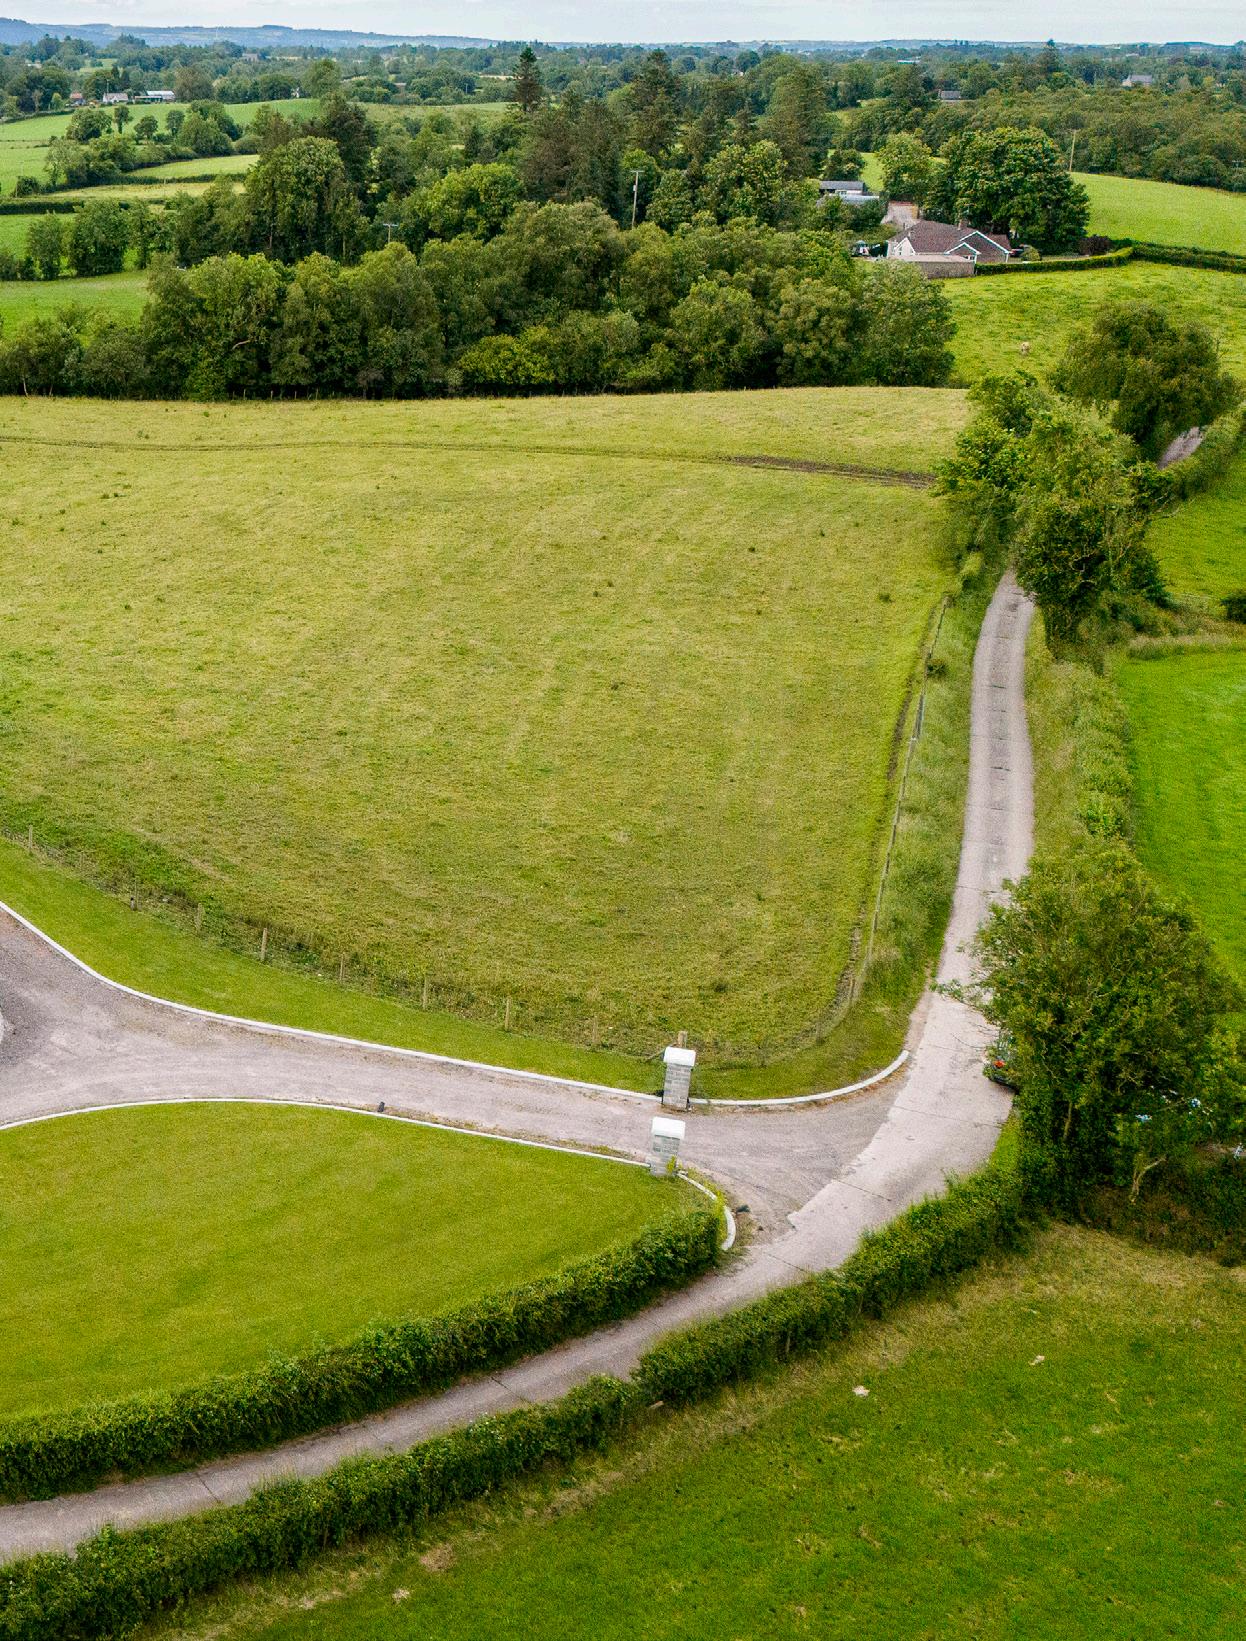
“We were very fortunate that we had a site to build on,” says Sinéad. “My parents gifted it to us, it’s next door to my aunt and uncle. My brother who is a dairy farmer lives down the road with his family, beside my parents. We are surrounded by family.”
They were also lucky to be able to draw on their own expertise. After all, the bill of quantities that Brian created at the tender stage was within €5,000 of the actual build cost. It’s no small feat considering the year was 2020, when Covid affected schedules and prices.
In this sense too, help from family helped a lot to keep things moving and on budget. “My dad and uncle were available during the build to help with deliveries, which was a huge help,” says Sinéad. “We also had family involvement in the form of our kitchen and utility fit out. Both were manufactured and installed by my husband’s cousin Niall, who is a carpenter.”

Sinéad was delighted to get to design her own house while on maternity leave. “As an architect, I always wanted to design and build my own home, and thankfully my husband and I were on the same page as to what we wanted from it. He’s also from a farming family, his is from Co Carlow, which means we both enjoy the unrestricted views over the fields. And occasional cow neighbours.”


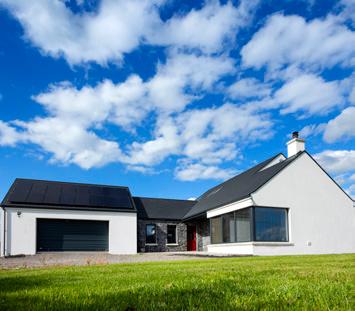
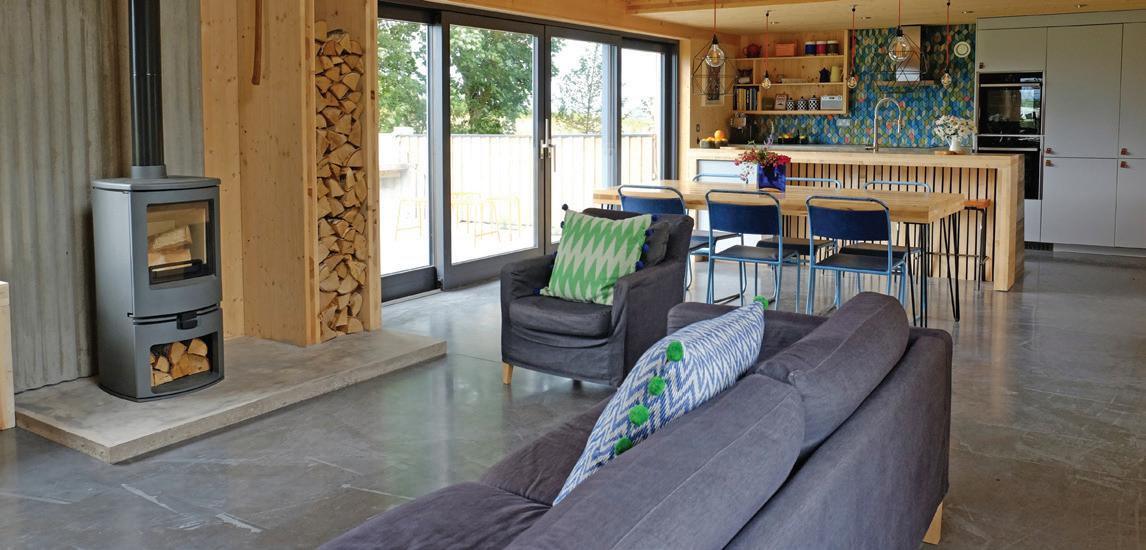
She refers to her home as a modern farmhouse, a traditional shape with modern finishes. “I love Scandinavian style interiors with clean lines, light wood functional furnishings, lots of plants and a neutral palette so my first design consideration was orientating the house to achieve maximum natural light to the living spaces.”
This meant plenty of windows, which is a design feature that comes with the risk of overheating. That’s something Sinéad considered from the start. “All windows on the north façade of the house are fixed panes. During hot weather the electric roof lights in the vaulted ceilings

can be opened to act as chimneys for the hot air.”
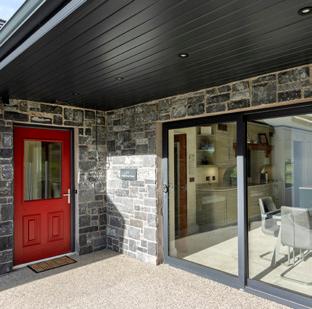
“Externally, I prefer the look of flush eaves so we don’t have fascia and soffits, and have metal gutters and downpipes. Our main roof is a fibre cement slate and the rear extension is finished in an aluminium standing seam roof. The entrance canopy at the front door is clad with matching aluminium and composite timber cladding.”
“With the Scandinavian theme, we decided early on that we would spray paint the entire house white and gradually introduce colour to rooms using furniture, textiles and artwork. At


this stage we also knew we’d use laminate throughout the ground and first floors and up the stairs in a light oak colour. We tiled the floors in the kitchen, utility and bathrooms.”
The couple achieved an A1 building energy rating (BER) thanks to high levels of insulation, triple glazed windows and doors, as well as renewable energy via heat pump and solar panels.
“For the build method, we went with a traditional masonry cavity wall construction, with bonded EPS beads pumped to fill the cavity with insulation, as we were both familiar with traditional construction,” says Sinéad. “We did research non traditional methods such as metal and timber frame during the design process but in the end we went with what we were comfortable building.”
“For the first floor slabs and stairs, we chose precast concrete for two reasons – sound and time. We had previously rented a house with timber floor joists and the sound would travel from room to room, floor to floor, we don’t have that problem in the new house. Also our hollowcore floors and precast stairs were craned in and finished in one day – it would take a lot longer to build timber floors and stairs.”
“We visited the Selfbuild Extend & Renovate Live show in Citywest in September 2019 which gave us a good

idea of suppliers for certain elements we wanted to include.” For space heating and hot water they chose an air to water heat pump (with underfloor heating as the heat emitter), and for ventilation they opted for a mechanical ventilation and heat recovery (MVHR) system.
“We chose a heat pump as it provides a constant temperature in our home,” says Sinéad. “All our thermostats are set to 18 degrees and we have never felt cold since we moved in due to the high levels of insulation and airtightness.”
“We chose MVHR to ensure the air quality throughout the house was maintained as the system works by continuously extracting the stale air and replacing it with fresh filtered air. We have a downdraft recirculating hob in our open plan kitchen as we didn’t want


to penetrate the external envelope with an extract vent, so the MVHR also helps eliminate cooking smells.”
“We have a stove but had to find a sealed low kilowatt output stove in order to maintain our A1 BER rating (we had it shipped from The Netherlands) and had to add 4.6kW of solar panels to the roof to balance out the carbon emissions,” adds Sinéad. “We now have an electric car and during the summer, we charge it directly from the solar panels.”
Their wastewater system is a concrete sewage treatment plant with a raised bed percolation area which was included in the contract with the main contractor to install. “We are on mains water, which runs past the gate to our house so connection was quite easy for that, and we were lucky to have a connection in place for most of the build,” adds Sinéad.
“As for planning, it was really straightforward with Meath County Council as we qualified for a local housing need as returning emigrants.”
Once planning was secured, it was time for Sinéad to draw up the construction drawings and put together the tender package.
At this stage Brian drew up a bill of quantities, which is a costed breakdown of the elements that go into building a house. “That meant we had a really good idea of actual costs involved,” says Sinéad.
“We sent out tender drawings to five or six local contractors in Co Meath and interviewed the two contractors who
I love the open airy feeling of the high ceilings, large windows and the connection to outside provided by the views of the surrounding countryside.
One thing we would probably change is that because of hybrid working from home, we both now need an office in the house. As the house was designed before Covid this wasn’t a consideration at the time.
Our double sided stove was probably our biggest splurge as it is only used for about three months of the year. I wanted a real wood burning stove, and although the house is generally warm throughout the winter, the stove has come in handy when we’ve had power cuts due to storms.

Spend time on the design. Try to make as many decisions as you can at planning stage – take your kitchen plans to a designer and that will then help with placement of sink, cooker, fridge, sockets, etc. in the kitchen when you are doing first fix. Mark out the floorplans on the site and this will let you move windows to frame any special views you want.


returned the lowest tender prices, before visiting projects that they had both recently finished,” says Sinéad.
“Both contractors’ work was of a very high standard so it came down to the contractor with the lowest price. The reason we went with a main contractor, for a turnkey construction service, is that we both were working full time.”
The contractor’s site manager David was on site most of the time. “He was very enthusiastic and had a positive attitude which we liked,” recalls Sinéad.
But that doesn’t mean they weren’t hands on. “Even though it was a full turnkey construction service, I took on


Christmas 2019 Start design process
End of April 2020 Planning applied
July 2020 Planning granted
October 2020 Tenders issued
December 2020 Contractor appointed
March 2021 Build start
St. Patrick’s Day 2022 Moved in
May 2022 Lawn seeded
the role of procuring the items which were included as provisional sums in the contract.” This included window suppliers, sanitaryware, tiles, kitchen and utility cabinets, appliances, light fixtures and flooring.
They were also on hand to answer any questions or troubleshoot. “We were renting a house less than a kilometre from site for the duration of the build, so if the site manager needed questions answered or decisions made it was easy enough to drop down to site before or after work, or on our lunchbreak as both my husband and I were working from home at the time.”
That’s not to say there weren’t any setbacks. “I wanted a feature lighting piece over the stairs and vaulted hallway and we also went for a vaulted ceiling in our kitchen so sourcing light fittings when you have a four metre plus drop was a challenge,” she says. “We got drop cords made specifically for the ceiling height over our stairs. They took five months to arrive but were worth it.”
Then of course, Covid hit. “We were initially due to start construction in January 2021 but sites were shut down across the country. We were delayed starting by about three months and
then encountered further delays due to Brexit, shortage of materials and the Suez Canal.”
Thankfully, the contractor still managed to complete the entire build within his 12 month timeframe. “I think we might have saved time on the build because a lot of the big decisions were made before we got to site and we made very little changes during the construction,” she says.
What about the garden? “We had our patio laid as part of the site works as the back door is our level access entrance to the house. We levelled and seeded the lawns and planted fruit and ornamental trees, which were presents from family and friends. We would like to do more work on the gardens in the coming years.”
As for the house, it’s working like a dream. “The house is great, we love it. We have a layout that is designed to work for us as a family.”

photographs available at selfbuild.ie
Floor: 75mm screed with underfloor heating pipes on polythene separating layer on 130mm rigid PIR board with 30mm edge of slab insulation board on 150mm concrete slab on damp proof membrane, on standard build up, U-value 0.12 W/sqmK
Walls: 370mm cavity wall construction with 20mm render, 100mm external concrete block, 170mm full fill cavity bonded bead insulation 0.035W/mK, 100mm internal concrete block inner leaf, 20mm parge coat (airtightness level of 3 maximum) plaster finish, U-value 0.16 W/sqmK
Slated roof: slate on treated battens, breathable membrane, 50 mm ventilated cavity, 150mm phenolic insulation between rafters with 62.5mm insulated (phenolic board) plasterboard and airtight self-adhesive sealing tape at junctions with blockwork, U-value 0.16 W/sqmK
Metal roof: standing seam metal roof on 18mm WBP marine plywood decking with rafters fitted with 38mmx38mm treated sw battens on membrane on 44mm x 175mm rafters with 50mm ventilated cavity. 150mm phenolic insulation between rafters with 62.5mm insulated (phenolic board) plasterboard beneath and airtight self-adhesive sealing tape at junctions with blockwork, U-value of 0.16 W/sqmK
Attic insulation: 100mm fibre insulation laid between trusses with two layers of 150mm laid over. Pitched roof insulated on rafter, U-value 0.16 W/sqmK
Windows: triple glazed, argon filled, U-value 0.8 W/sqmK


At NorDan Vinduer, we firmly believe in the power of strength and resilience. Our roots are deeply embedded in Norway, where we engineer our doors and windows to withstand the harsh, unforgiving weather. This makes our products the ideal choice for Ireland’s diverse and challenging climate.
We have faced countless storms and emerged victorious, leading the way in sustainability, carbon reduction, and quality in every product we offer. Our dedication to excellence has established us as a leader in sustainable manufacturing of windows and doors.
Choosing the right windows and doors can be a challenging task, especially since it's not something we do frequently. This rarity makes the decision even more crucial. Our expert team are on-hand to guide you through key considerations to help you make informed choices.
Whether it’s a new build or refurbishment, each requirement is unique and the NorDan team are the perfect partners to help you find the ideal solutions for your project.

Plot size: 2,600 sqm
House size: 218sqm
Bedrooms: 3
Heating system: air to water heat pump
Ventilation: centralised mechanical with heat recovery
Build method: Blockwork
Build cost: £260k (not including fitout and furnishings)
EPC (SAP): B (81)
Architect: £4,500
Building control fees: £210
Planning fees: Mid Ulster District Council received £433 for outline planning and £433 for planning fee.
Electricity connection cost: £7,300 for NIE.
Landscaping (so far): £10,000 for pillars, lawn, steps, resin and concrete at back of house. Gardens, gates and tar yet to be completed.
Interior design and fit: Kitchen, walk-in pantry and utility was £21,700 and stairs were £2,500. Sofa, TV and stove added up to £5,000. Internal doors and handles were £2,400, tiles were £9,000 and bathroom supplies were £7,000. Windows and outside doors: £11,000.
Building a home from scratch in Co Tyrone, with their wedding day as the ultimate deadline, allowed Chloe and Paul Barr to design a space that perfectly complements their contemporary lifestyle and farming heritage.
Nestled amidst the gorgeous Co Tyrone countryside, Chloe and Paul Barr set out to build their dream home - a practical and contemporary farmhouse that reflected their rural upbringing. Their decision was simple: to live close to Paul’s farm for work convenience, and to be near both sets of parents.
“The main reason for building our own home was its proximity to Paul’s farm, just 200 yards away,” explains Chloe. “He was keen to stay close to his work and we were fortunate to own the land, which meant we didn’t need to purchase a site. Both of us grew up in the countryside, so rural living was non negotiable. Plus, our new home is exactly eight minutes from both sets of our parents, perfectly located in the middle.”
“We wanted features like a spacious, open plan kitchen, tranquillity and beautiful views – things that are not easily found in prebuilt homes within our budget.”
“Initially, we had a different site on the farm in mind for our house, but we couldn’t secure planning permission due to access issues from the main road. Our current site is approximately three fields away from the original spot, accessible via a different road through a shared lane.”


E&R Bennett offer a unique service to the bathroom and tile sector in the Tyrone and Fermanagh area. Sourcing many exclusive brands that are manufactured in the UK and Ireland, including Utopia Bathrooms, MyLife Bathrooms, Imperial Bathrooms, Adamsez Baths, and many more.
E&R Bennett Ltd established in 1987 as ‘Elkin and Bennett Ltd’. In 2012, the business divided into two. E&R Bennett is owned by Everett and his son Rodney and is located on the Main Street of Fivemiletown.


Securing planning permission involved coordinating with neighbours who also use the shared lane. “Paul has a very good relationship with our neighbours so we were able to get the necessary signatures and information without any problems.”
“When it came to the design of the house, I had clear ideas about what I did and didn’t want. Paul had a good grasp of the building process because
some of his friends were in the midst of self-builds, and he was following what they were doing. Internally, we both knew that we wanted an open plan living space. I always wanted a large kitchen and a spacious sunroom because I love entertaining, and these were must haves.”
“For the exterior style of the house, we spent many Sunday afternoons driving around the area to see what we liked
and disliked about different houses. We took photos and shared them with our architect, and had many meetings with him to refine our vision.”
“Paul wanted a bungalow, while I preferred a two storey house. However, planning restrictions allowed only a storey and a half, which turned out to be a perfect compromise.”
“Our farmhouse combines contemporary design with practical functionality. For example, we designed the garage to be attached to the house with a small door at the back, so Paul can come in from the farm directly into the utility room. It’s a modern design that suits our lifestyle. Visitors would never guess there’s a farm nearby.”
“Interestingly, we don’t have a front door. We both liked the style of a particular house we had seen on social media, and I sent a screenshot of it to our architect. When we reviewed his plans, I pointed out, ‘Oh, you’ve forgotten to put the front door in.’ He replied, ‘I haven’t forgotten. The house you sent me didn’t have a front door.’ I said, ‘Oh, that’s a mistake. I want a front door.’”
“However, to include a front door in our design, we’d have to sacrifice our walk-in pantry. We thought about it and realised that the layout of our house

“We wanted features like a spacious, open plan kitchen, tranquillity and beautiful views –things that are not easily found in prebuilt homes within our budget.”


What is your favourite design feature?
Definitely the kitchen. I absolutely love it and don’t regret any decision on it. We chose a large island, both for looks and practicality. Everything is within reach; our kitchen designer knew what they were doing. We have a huge larder, so all our food, freezer, everything is in there. I love it as an entertaining space.
What would you change or do differently?
I suppose not having a front door, is something that comes to mind, just for the look of it.
What surprised you?
An eye opener was the amount of money that goes into things that you will never see, like the groundworks, the walls. All that money is more or less buried away.
What single piece of advice would you give a friend who’s looking to embark on a project similar to yours?
Research, you can never do enough of it. And take advice from family and friends that have been on their own self-build journey, and from people who know what they’re talking about. I used social media a lot also, putting up polls and asking people what they thought about different things.
Would you do it again?
100 per cent. I enjoyed every step of it, and learned so much. We’ve built our home the way we want it. Paul would probably say no, because of the pressure on him managing the project. It’s 18 months of very hard work, and that’s every single day. You don’t have a day off from it.


naturally leads people around to the side. So, we decided to do without a ‘front door’.”
“Communication with our architect was key during the design process. We set up a group chat between us where we could share ideas and opinions. Although Paul and I sometimes didn’t agree on what we wanted, we could always find a compromise.”
“My parents had used a contractor for their self-build, which they recommended to us. However, during the pandemic, with Paul being self-employed and me at university while also working for my parents, we felt equipped to take on the project ourselves.”
“Paul did a lot of the work himself but brought in professionals for tasks like plumbing and joinery, who also happened to be our friends. We brought in a roofer that Paul knows well, and he helped him with the roof. Paul and his father also did all the painting.”
“A friend of ours did general building work, and we spent many evenings shovelling stones. Paul handled all the loft insulation, with me cutting it up and handing it to him to install in the attic.”
“One advantage of employing friends was their flexibility to work in the evenings. For instance, our plumber might have prioritised other clients during the day, but once he was at


our place, we could keep him working through the evening with the promise of a meal! Paul would also lend a hand to speed things up, which significantly reduced costs. He also laid all the vinyl flooring himself.”
“Our friends appreciated the business, and we were grateful for their help. Many of them had social media business pages, so I tagged them and shared updates when someone was working, giving them shoutouts. I also took professional photos of their work and posted them online.”
“Personally, I am so glad we took this approach because it gave us insight into every single step of the process. We were deeply involved in everything. I started a scrapbook the day we broke ground, and it’s still going strong. It contains all the photos, dates and magazine cutouts related to the house. I love looking through it and seeing how involved we were. With a contractor, I might not have had that same level of involvement, as we would have left much of the work to others.”
“My advice to anyone else building a house would be to ensure you have the time and patience. There will be good days and bad days, but we made it through, and I totally enjoyed it. I know Paul did too, as he learned an awful lot throughout the process - we both did.”
The build was all the more special as they were working to a different kind of deadline than they were used to.
“Our wedding in January 2023 set our main deadline. Paul concentrated on getting the house ready while I took on the wedding planning. Moving in the day after our wedding kept us both focused, as you can imagine.”
Take lots of photos – at every stage. Don’t be worrying that you’ve got too many because I guarantee you, you’ll need them at some stage or you’ll look back and think “why didn’t I just take a photo of that room”. I print them and put them into a scrapbook so that they don’t fill up my camera roll.
Make time for the prep work. I couldn’t believe all the tiny things you have to do to get a seemingly simple job done. I remember thinking we could just go in and paint, but it’s not that straightforward. For instance, when we fit the skirting boards, there were screw holes that had to be filled, then they had to be sanded before they could be painted. It’s the ‘behind the scenes’ steps that people don’t realise.
“Communication with our architect was key during the design process. We set up a group chat between us where we could share ideas and opinions...”
“I had a clear vision for our interior design and sought feedback from friends on my ideas. Our kitchen is forest green and grey, and we used these colours to frame the rest of the open plan area. For inspiration, I turned to magazines and social media, cutting out pieces and saving posts to get ideas.”
“We decided against hiring an interior designer to keep costs down, but we might consider it later on. We painted the walls in the rest of the house in plain colours and plan to add feature walls over time to give each room its own character.”
“Supporting local suppliers was very important to us, so all our furniture came from a local shop. I created mood boards for each room to visualise how everything would come together. For example, our downstairs toilet follows a

pink and green theme with patterned tiles. I included towel colours, wall colours, and other details on the mood board to ensure everything matched.”
“I sourced many items online and followed self-build social media accounts. If I liked something they tagged, I would check it out. I carried colour patches and tile samples everywhere to ensure everything matched. The person who designed our kitchen had excellent interior knowledge, and I noted down her ideas for our open plan area.”
“We visited five local kitchen designers. Price and understanding our vision were key factors. Some designers couldn’t grasp our ideas, while others did, which is why we chose the one we did. They understood our desire for an open plan space with lots of room and a massive island. The kitchen design was our starting point.”
The utility room follows the same style as the kitchen. Social media provided ideas, like raising the washing machine and dryer off the floor and ensuring ample storage.
“For the bathrooms, I had a clear idea of what I wanted due to my involvement with the company we sourced our sanitaryware from. Our ensuite features black, white, gold accessories and brassware, while the downstairs toilet has chrome fixtures. Attending the KBB kitchen and bathroom event in Birmingham in 2022 provided many ideas and samples. The bathrooms were an easy project because I was so familiar with the industry.”
“We haven’t touched the family


August 2019
Design start with architect
October 2019
Planning permission applied
July 2020
Planning permission granted
July 2021
Build start
Aug 2021
Building control fees paid
January 2023
Moved in
bathroom upstairs yet. We are postponing the completion of the first floor until a later date, so for now, we’re effectively living in a bungalow.”
“For flooring, we chose vinyl tiles in the office, bedroom and spare bedroom, with larger tiles elsewhere to open up the space. Lighting choices were guided by our kitchen designer’s advice, social media and our personal preferences.”
“Outside, we completed a resin walkway around the main entrance before moving in. Paul seeded the lawn before our honeymoon, with the help of a friend. Concrete slabs form the drive, and we’re now tarring around the house and concreting the back area leading to the farm.”
So how does the final build compare to their initial vision and expectations?
“Our home fulfils all our needs,” says Chloe. “Its proximity to the farm and modern design make it a perfect fit, blending practicality with our personal touches. It’s not a typical farmhouse but a unique, modern residence that suits our lifestyle perfectly.”
2
photographs
Find out more about Chloe and Paul’s project in Co Tyrone...
Kitchen, utility and pantry
Dunlop Kitchens, tel. 6772 1919, dunlopkitchens.co.uk
Bathrooms, plumbing, heating and tiles
E&R Bennett, tel. 8952 2303, eandrbennett.co.uk
Stove
Maydown Stoves, mobile 07989 553597, maydownfireplaces.com
Sofas
BR Modern Interiors, tel. 8556 7364, br-modern-interiors.myshopify.com
Stones
Campbell Quarry, tel. 8954 1666, campbellcontracts.com
Blocks and concrete
FP McCann, tel. 6772 1286, fpmccann.co.uk
Windows and doors
Clogher Valley Windows, tel. 8554 9764
Internal doors and handles
Kildress Joinery, tel. 8675 1292, kildressjoinery.com
Building supplies
Creighton’s of Lisbellaw, tel. 6638 7207, creightonslisbellaw.co.uk
Solar panels
KB Electrical, tel. 6634 1093, kbelectrical.co.uk
Photography
Paul Lindsay, paullindsayphoto.co.uk
ROI calling NI prefix with 048, for mobile prefix with 0044 and drop the first 0
Walls: 150mm cavity blockwork walls pumped with EPS beads
Roof: timber frame roof with clay tiles, 100mm spray foam insulation and 75mm insulated plaster board
Floor: 150mm PIR insulation sheets on standard build up
Windows: double glazed uPVC argon filled
Words: Heather Campbell
Photography: Luke Kuchta

Cost
House size before and after: 119sqm
Bedrooms: 2
Plot size: approx. 130sqm
Purchase cost: €495K
Renovation cost: €165K
Heating system: Gas fired central heating
Ventilation: Natural
Build method: Blockwork
€4.5K

Originally built for workers of the nearby Lemons confectionary factory, Tom and Miriam Higgins transformed their 1906 red brick terrace house in Dublin from a dark, outdated space into a warm, light filled home, blending modern comforts with Edwardian charm.
Tom and Miriam bought their Drumcondra house in 2018, aware that it was a fixer upper. It had single glazed aluminium sash windows and an outdated kitchen housed in an 1980s extension. “The extension was so rickety, it felt like it might fall if you leaned on it,” says Miriam.
Built around 1906, the house is located halfway along a red brick terrace, originally built by Dublin’s Lemon & Co. confectioners for its factory employees. “The factory sat behind our house, but it has long been demolished and replaced by a modern estate,” says Tom. “Our house is slightly larger than some others on the road, as it would have been intended for middle managers, based on what we have been told.”
By 2021, the couple had lived in the house long enough to know what needed to be done. They had a clear idea of how to improve the layout, particularly regarding a long, narrow patch of the backyard that was overshadowed by the house. It was wasted space, so they
decided to break through the back wall of one of the sitting rooms to build an L-shaped extension, aiming to maximise light.
“Luckily we have a friend who is an architectural designer and he helped put our ideas on paper,” says Miriam.
“Our main goal was to bring in as much light as possible. The front of the house is north facing and a bit dark, while the back is lovely and bright. We wanted to remove two small rooms at the back—a breakfast room and the kitchen extension—and create a large, square space. I don’t think we added much in terms of floor space by having the extension, but it makes better use of the backyard and allows the light to pour in.”
The back wall of the rear sitting room was removed to create the open plan kitchen, dining and living area – steel beams were installed for structural integrity.
Originally, there was a step down from the sitting room to the kitchen level. However, when reinstating the floor, their builder levelled off the open plan area to meet the hall level. “Tom is very tall, and when I first saw the new kitchen space I felt the ceiling was too low. It needed that step down to allow adequate height. Luckily our builder is a very patient man, so he lowered it without any complaint at all.”
“As it’s just the two of us we decided we didn’t need to try and fit in a utility room.


Instead, the dishwasher and washer dryer are integrated into the kitchen island. At the back of the kitchen, there’s a bifold door and a large floor-to-ceiling picture window, with a rooflight above the kitchen table.”
“We painted the entrance hallway in slightly contrasting neutral tones using shades of white, added dado rails and carpeted. The front sitting room, which retains its original cornice, is painted
a navy blue shade. In the rear sitting room area, we reinstated the cornice to match the front room. We salvaged two Drumcondra fireplaces from a salvage yard and installed them in each sitting room.”
“On the first floor, we slightly extended the bathroom, adding a walk in power shower with a black shower head and black slate tray with bottle green tiles on the walls.”
“Up four steps and you reach the guest bedroom which we papered in a bright and lemony yellow print, with two bespoke double wardrobes and a white wrought iron fireplace.”
“Our bedroom spans the full length of the house, featuring two large sash windows and an original black wrought iron fireplace. A lot of houses on the street have divided the front bedroom into two, but we didn’t feel the need for an extra bedroom.”
“The walls were covered with over 100 years’ worth of wallpaper which was meticulously removed by our painters. Although it seemed that every wall in the house would need skimming, in reality we only had to skim the front bedroom and front sitting room. The painters managed to restore the other walls using filler and their expertise.”
“They were phenomenal. The hallway looked dreadful after we removed the wallpaper, but they transformed it beautifully.”
“When we moved in, the single glazed windows meant the house was cold and noisy, especially during the ‘Beast from the East’ storm in 2018. We replaced the front windows with composite triple glazed sash windows in a cream colour.”

“Despite it being a modern extension, the interior still reflects its period style.”


What is your favourite room?
I find myself relaxing in the back sitting room a lot because it’s so bright and cosy. My favourite design element would have to be the way it blends our modern tastes with a heritage feel. It’s a modern take on the classic Edwardian style that really appeals to me.
Tom really loves the kitchen, especially the big window at the back. We decided to expose the red brick in there, and I’m absolutely in love with how it turned out.
What would you change or do differently?
The bathroom. If I did it again, I wouldn’t spend as much money on fixtures, because it’s just a bathroom at the end of the day. I would keep a better eye on timeframes all the way – lead times are a big deal – I would have put a bit more pressure on some of the trades, they were quite relaxed.
What surprised you?
How fragile old houses are. You touch something in an old house and a problem will emerge somewhere else.
What single piece of advice would you give a renovator?
Just make sure you have a contingency in your budget because it is going to cost more than you think. The budget is a best laid plan really, and other things will emerge and when they do, you have to tackle them – you can’t pretend that it will go away.
Would you do it again?
If I won the lottery and could afford to move out and live somewhere else, I would definitely do it again. But not if we had to live in it as the work was being done.
“We upgraded to period style radiators and installed a new gas boiler. Along with the triple glazing, we insulated the rear of the house and added extra insulation to the roof. The house is now really warm and cosy.”
“We have a loft space, and many neighbours have converted theirs, but we didn’t consider it necessary since the house already meets our needs.”
“Before this extension, around 2019, we decided to reroof the main part of the house after finding some dropped slates on the street. We replaced all the gutters, although, in hindsight, I regret not repairing the original ones.”
In the small bedroom on the return, they encountered a major issue while removing the window frame. “We had previously removed two full chimneys from the ceiling down to the ground, which destabilised the back wall,” says Miriam. “When the granite windowsill in the bedroom was removed, one of the surrounding bricks moved. Using all the original bricks our builder rebuilt the entire wall in a few days. He did it all in a very relaxed manner, he understood the vibe—no fuss, just get it done.”
“We lived in the back of the house throughout the renovation work, which was extremely challenging. At one point,

we had no bathroom or kitchen, relying on showering at work. Tom worked from home and we ended up living in just one room during the dead of winter. For a week and a half, when we opened our bedroom door we were looking directly onto the street – the wall was completely gone.”
“We were brushing our teeth and washing our cups in the half sink in the downstairs toilet, that’s all we could do. We had no washing machine for a long time as well. It was extremely hard going, but the truth is, if we had moved out and tried to rent in this area, we wouldn’t
have been able to afford to carry out the project.”
The extension roof, that covers the kitchen, is slanted to almost 45 degrees. “We installed a large rooflight which is boxed in, so you don’t see the frame from the inside. It makes it look like it’s floating. The first iteration of the rooflight leaked, but the supplier immediately replaced it. The original version opened, but it looked clunky, so we replaced it with a fixed one that looks much better, it’s almost flush with the roof.”
“Our kitchen is built in a shaker style with mullion top doors. The doors are

Architect Micah Jones chose RTU's innovative products for his personal project.

“I chose Zircon to combine stunning aesthetics with high-performance functionality.”
- Micah Jones, Architect.


standard height and don’t reach the ceiling which is quite high. We chose white quartz for all the worktops and installed a large pantry in a perfect spot between the back sitting room and the doorway.”
“It has double doors and a white marble worktop inside. Our kitchen guy was great – just a small startup – he did everything we wanted. We have a mixture of brushed brass knobs and cup handles, a Belfast sink and a brushed brass tap unit. He also organised and supplied all the appliances.”
“We focused on heritage colours with modern flashes of colour. We chose a burnt orange and a navy sofa for the front sitting room. The carpets upstairs are all white or cream, and there’s a lamb’s wool carpet runner on the stairs. We splurged on the stairs. Although the floors upstairs can be sanded, we chose to carpet because, by that stage of the renovation, we had reached the limit of endurance.”
“At the front of our house, we dug out this small area and put down gravel. There’s just a step into the house, and we added a new composite front door in a heritage style shade.”
“In the rear garden, we laid slabs and made flower beds from the granite windowsills. We planted lavender, rosemary and other plants. The entire extension is painted black, and all the doors and window frames at the back of the house are black against the red brick. We added lighting on the wall, above the lintel of the extension and above the bifold door.”
“Despite it being a modern extension, the interior still reflects its period style. The bifold door is framed by red brick, making it look integrated with the original building, and the black render complements it.”
“Our builder was fantastic—nothing was ever a drama. While many others said ‘no’ to our ideas, PJ, our builder, always said, ‘That’s not impossible.’”
“The renovation took longer than expected, as we added and took away elements throughout the process. PJ worked mostly alone, with occasional help for the timber roof and demolition.”
“We’re delighted with how the house turned out. We’re particularly proud of the kitchen, which we think looks great. We had excellent people working for us and we put a lot of thought into the design. The house is lovely and warm, especially the extension.”
“We’re getting married this year, which adds another layer of excitement and anticipation. The house feels like a true home now, and we couldn’t be happier with the transformation.”
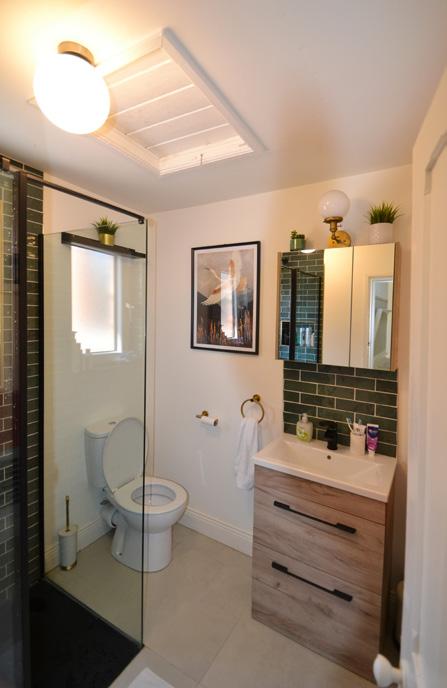


Architectural design
Joe Fallon Design, joefallon.com
Engineer
ONCE Consultant Engineers, once.co
Builder PJ Higgins, mobile 086 8546120
Painting Brendan Mullins Décor, mobile 086 1521305
Kitchen and wardrobes
Bespoke Kitchens and Wardrobes, mobile 086 2436175
Windows and folding doors
Vindr, vindrvs.com
Plumbing
M and R Plumbing and Heating Ltd
NI calling ROI prefix with 00353 and drop the first 0
Extension walls: 215mm hollow concrete block wall with selected nap plaster finish, 125mm PIR insulation internally, plasterboard, skim, U-value 0.16 W/sqmK.
Extension floor: 50mm PIR preformed perimeter strips to floor slab along door threshold, 150mm reinforced concrete slab with power floated finish, 110mm PIR on radon barrier on 50mm sand blinding, compacted hardcore layers, U-value 0.13W/sqmK.
Extension roof: bitumen flat roof single ply torch on membrane on 100mm PIR mechanically fixed to 18mm WBP plywood, on 75mm PIR fixed between joists. Finish roof edge with powder coated aluminium trim. WBP plywood on thick firring pieces starting in cross section 50mm high x 50mm wide so as to create central gutter depression. Vapour control layer to underside of joists suspended ceiling (with two layers of fire plasterboard and 25mm mineral wool slabs) finished with 12.5mm plasterboard and 3mm skim coat, U-value 0.13W/sqmK.
Windows: U-value for all including rooflight 1.2W/sqmK, colour: Grey RAL 9011; aluminium cill to match.

House size before: 212 sqm
House size after: 270 sqm
Bedrooms: 4
Plot size: 64 sqm
Purchase price: £480k
Contract price: £222k increased due to unforeseen works.
Heating: oil boiler
Ventilation: natural
Build method: cavity wall extension
Architect fees covering concept designs, planning permission and building control submissions:
£9,215
Planning fees: £291
Building Control fee: £1,465

After the sudden loss of her husband, Oonagh Murray returned to her roots in Belfast to buy a house, which she transformed into a light-filled, functional space that perfectly suits her lifestyle and honours the past.
Moving home is often driven by pivotal moments in life and for Oonagh, it was the sudden loss of her husband while they were living in ROI. Originally from Belfast, she found herself naturally gravitating back to her roots after his passing.
“I was already working in Belfast, so it made sense to move back,” says Oonagh. After an extensive search, she stumbled upon the ideal renovation project. “It took years to find the perfect house to buy, but the moment I walked in, I knew it was right – it had a happy feel to it.”
Despite needing substantial renovations — an undersized, dark kitchen, lack of heating, poor insulation and a flimsy lean-to conservatory — she was attracted by the house’s potential and its south Belfast location. Through careful planning and personal touches, she knew she could create her ideal home.
“I lived in the house for about two years before I started renovating it. This period was invaluable as it allowed me to understand how the house worked for me. Had I rushed into getting drawings done immediately, I don’t believe I would have achieved the wonderful home I have now. By living in it, I realised the house was starved of natural light, especially in the kitchen area. I also discovered how cold it was – the nine-inch solid walls needed to be significantly insulated.” When it came to briefing an architect on her renovation wish list, Oonagh had


specific requirements for her house. “I wanted a large kitchen and dining area, as well as a space to store my campervan. The house has a good sized drive which worked well for this purpose. Additionally, I needed a separate entrance and boot room for my two big labradors who loved rolling in muck (though I only have one now). I also needed a workroom for my upholstery work and I wanted a carport – I saw one at another house I viewed and really liked the idea of it. These were more functional requirements rather than anything else.”
“I wanted more light in the house, but I wasn’t keen on having a wall of glazing.”
The new rear extension designed by her architect Micah creates a broken plan living space that fits Oonagh’s needs and incorporates a workshop. In a broken plan space, there are distinct zones or areas within a larger room, often achieved through partial walls, changes in floor levels, or furniture placement.
The extension layout is staggered to allow as much light from the south as possible into the downstairs plan.


Introducing the new Bosch Air to Water Heat Pump and Gas Boiler Hybrid System, available now in Ireland in conjunction with Calor. This innovative system combines the efficiency of a Bosch heat pump with the reliability of Calor gas-powered heating, offering an ideal solution for modern home energy needs.
The new Bosch hybrid system includes a range of both monoblock and split unit heat pumps, designed to seamlessly integrate with traditional gas boiler systems. The Hybrid interconnector simplifies the connection and communication between these technologies, ensuring efficient and effective home heating.
The hybrid system connects the flow and return pipework from both the air to water heat pump and the gas boiler into the Hybrid interconnector. From there, a single flow and return pipe leads to the home’s heating system. A sophisticated software program within the Hybrid interconnector manages which appliance to use at any given time, constantly optimizing for efficiency and cost-effectiveness.
Homeowners can input their electricity and gas prices into the system, allowing the management software to make informed decisions on whether to use the gas boiler or the heat pump, further enhancing energy savings.
Michael Nolan, Bosch Home Comfort Technical Area Sales Manager, notes that the hybrid system has attracted a diverse range of customers. Some are hesitant to fully transition to an air to water heat pump and prefer to retain the use of a trusted gas boiler. Others have relatively new boilers and see the hybrid system as a way to incorporate renewable energy without decommissioning their existing setup.
Additionally, the rise in solar PV installations has spurred interest in the hybrid system from customers and contractors eager to maximize the use of home-generated electricity, even if a full heat pump switch-over isn’t yet feasible.
Thanks to the strong partnership between Bosch Boilers and Calor, this hybrid system is available to rural homeowners who do not have access to the natural gas grid. Many homes previously heated by oil have successfully transitioned to LPG to take full advantage of the hybrid system.
Bosch and Calor work together to offer comprehensive support to ensure accurate system design and smooth installation. This includes on-site visits for first-time installers, training courses at Bosch facilities in Dublin, and collaboration with Calor’s Home Energy advisers and various design teams.
A recent installation by Fenlon Heating and plumbing in a beautifully designed home near Mount Leinster showcases the system’s versatility. Fenlon Heating and plumbing completed the hybrid installation incorporating a Bosch 50Kw combi LPG boiler, Bosch heat pump and Calor Underground tank.
A hybrid heating solution is an ideal choice for homeowners who want an efficient and reliable home energy solution, which is flexible and future – ready, enabling them to reduce their carbon footprint while taking a positive step on their sustainability journey. Calor LPG powered boilers also work perfectly when powered by Calor’s renewable gas, BioLPG. Customers can choose the option of using a renewable blend now or in the future without the need to make any changes to their gas boiler.
For more information on Calor hybrid solutions or to find out more about BioLPG visit Calorgas.ie and fill out a form to arrange a call back from a Calor Energy Advisor.
Please visit Calor Ireland You tube channel and search Hybrid Home Heating Solutions to view the case study on this hybrid system.


Clerestory windows (a row of windows well above eye level) have been used to flood the monopitch, vaulted ceilings with light, and the exterior has been clad in black timber to minimise visual impact.
Securing planning permission was a challenge due to the conservation status of the area. “Because many of the homes
are old and Victorian, there are strict restrictions in place,” says Oonagh. “Any new construction or extension must be in keeping with the character of the existing houses. Originally, my application included larch cladding at the front of the extension, but the planners deemed it too contrasting with the surrounding houses, so I had to change it to brick. I also had to alter a couple of windows at the back. These were the only changes required, so
I consider myself fortunate.”
Work started in December 2020, under the constraints of Covid. “It was unusual because the initial meetings with the builder and architect were held over Zoom. When work began on site, it wasn’t too difficult in the first few months because a lot of the work was outdoors.
As the internal work started, masks were worn and it wasn’t much of an issue.”
As a former building control officer, Oonagh was comfortable managing the build without a project manager, liaising directly with the builder and architect.
A major structural change involved replacing a narrow, L shaped hallway with a spacious, open one, significantly enhancing light and space. Oonagh explains: “The original entrance hall was very narrow, and there was a rear reception room that led into the kitchen. I decided to remove the walls and create one large hallway. This was compliant in terms of creating a fire protected route, as there were doors to all the other rooms.
The hallway feels open and allows in a lot of light. There is much more space, which makes it easier to move furniture around. The fireplace provides the perfect focal point.”
“We installed aluclad, double glazed

“Because many of the homes on the street are old and Victorian, there are strict restrictions in place.”


What is your favourite design feature?
Well, the light obviously. And I love my carport, the shutters and my workroom. The carport is such a useful space. I can easily park my car, let the dog out and bring in my groceries without worrying about the weather. But there are more uses than that. Because I restore furniture, I can work on restoring chairs in that area, even when it’s raining outside. I can pot plants in there – it’s an area that’s being used for everything. If you want to store something, the carport is just great for that.
surprised you?
Unless you’re very lucky, the contract time is never really accurate. Especially with an old house, there’s always going to be the unknown – something that will hold it up. The builder was excellent. He was very meticulous in everything he did. The quality of workmanship is brilliant. I really couldn’t fault them at all. But there’s always going to be unknowns or things that are going to take longer. My contract was originally for nine months and it ended up 16 months. But it wasn’t anybody’s fault.
What single piece of advice would you give a budding renovator?
If you’re buying a house, live in it and see how it works. When I lived in the house, prior to the renovations, I knew what worked for me and what didn’t. I knew what changes I wanted to incorporate into the design.
Would you do it again?
Yes, absolutely. In fact, I’m currently renovating a small 1960s bungalow in Ballycastle – on a much smaller scale.
What would you change or do differently?
I can’t think of anything!
windows to the extension, replaced the old, single glazed sash windows in the existing house, and opted for gas fired central heating with underfloor heating throughout. The project included converting a dark, rear bedroom into a bathroom and adding ensuites to improve convenience and futureproof the house. We even designed a shower on the ground


floor for the dogs.”
The extension includes a combination of flat and pitched roofs with sedum planting on the flat areas, providing an attractive green feature that can be seen from different parts of the house.
“I have quite a large family, and previously, whenever everybody’s over at once, there’s never one room big enough to cater for everyone. I asked the joiners to create bifolding doors between the dining room and my hallway so that when there are loads of people over, these can open up to create one large space.”
“The joiners also created shutters for
my workroom, which is adjacent to but at a slightly raised level to my kitchen. When opened they allow lots of light to come into my workroom, which would otherwise be very dark. I can also keep an eye on my dog while I am working –she’s not allowed into the workroom. When closed, the shutters hide all the upholstery mess away.”
Oonagh has achieved a seamless, stylish look in the kitchen by using bespoke doors on flat pack carcasses. The doors are made of formica and birch, and the workshop shutters are also made of birch to tie in.


Oonagh had visited many kitchen places but couldn’t find anything she liked, specifically something without handles. Her architect suggested checking out the website she ended up going with, which offered a great selection of doors to choose from.
The kitchen floor is white oak, with plank flooring in the extension and parquet in the existing house. The original, internal doors were dipped, painted and retained to preserve character.
“My mum always had Ercol furniture at home and I have many of her pieces in my house. I’ve upholstered or restored a lot of the furniture in my house myself, and there’s still more to do. I really enjoy it as a hobby. Most of my furniture is mid Century, with some Edwardian and Victorian pieces in the hall. I also have
Do your prep. Make sure everything’s specified, right from the start. Because then you’ll know if the tender prices are accurate and you won’t get a shock.
September 2018
Bought house
June 2019
Planning permission applied
January 2020
Planning permission approved
December 2020
Work started
March 2022
Work finished
“The kitchen floor is white oak, with plank flooring in the extension and parquet in the existing house.”

some Art Deco pieces – it’s quite a mix, really.”
The interior palette is light and neutral, allowing accessories to bring in colour. “I painted the house using only two colours at the start because I was pressed for time and didn’t want to spend too much time deciding on different paint colours. However, I recently had the entire house repainted with a variety of colours, except for the kitchen, which I kept in neutral shades because I think it suits the space.”
Landscaping is ongoing, with a curved patio at the back and a raised area along the house’s side, addressing the significant level drop from the original ground. A resin gravel driveway complements the house’s aesthetic, marking the finishing touch on the project. This year’s focus is on planting shrubbery and improving the garden’s appeal.
“During the extension work, the builder noticed that the floor level at the corner of the back of the house was sloping off...”


“The extension wraps around to the front of the house and is quite close to the neighbour’s property on the left side,” says Oonagh. “When we started pouring the foundations, we encountered a problem: my front door would be at the same level as the neighbour’s foundations, which meant that my extension would end up being lower. As a result, we had to build a retaining wall alongside the neighbour’s property.”
“Another issue we encountered was subsidence. During the extension work, the builder noticed that the floor level at the corner of the back of the house was sloping off, indicating that some of the brick wall had started to


drop. Consequently, the wall had to be propped, a new foundation put in, and a new block wall built to support the corner of the rear return of the existing house.”
Now that the work is complete, how is the house living up to her expectations?
“The renovation has transformed the house, filling it with light and functionality. My workroom, carport and overall design make daily life a pleasure.”
“Despite the lengthy process, the result is a home that perfectly suits my lifestyle, filled with personal touches and practical solutions. Living through the renovation has given me a new perspective and appreciation for the intricacies of building and design.”
“Despite the lengthy process, the result is a home that perfectly suits my lifestyle...”


Architect
Micah T Jones Architect, micahtjones.com
Kitchen frames IKEA, ikea.co.uk
Kitchen doors Plykea, London, plykea.com
Sanitaryware
Ballycastle Homecare, ballycastlehomecare.co.uk
Wooden flooring
Oakra Flooring, oakra.co.uk
Aluclad windows and doors
Baskil Joinery, baskilwindowsystems. co.uk
Sliding sash windows McAreavey Joinery, mcareaveyjoinery. co.uk
Fireplaces Ryan and Smith Fireplaces, ryanandsmith.com
Flat roof
Sikaplan Flat Roof Membrane
Wall insulation Unilin CavityTherm
Existing house: solid brick –internal insulation 50mm PIR board with a ventilated void between the insulation and wall consisting of vertical battens and a vertical DPC.
Extension walls: 300mm cavity walls made up of 100mm inner leaf of blockwork, 100mm cavity full fill insulation (PIR boards) and 100mm blockwork outer leaf, U-value 0.20 W/ sqmK.
Extension roof: flat roof membrane with 120mm PIR insulation, U-value 0.17 W/sqmK.
Extension floor: 150mm concrete subfloor, 175mm thermal lightweight aggregate (TLA) insulation screed, 50mm liquid screed, U-value 0.16W/ sqmK.
Windows: aluclad double glazed windows in extension, U-value 1.3 W/ sqmK; replacement of existing sliding sash windows, U-value 1.6W/sqmK.

Overview
House size: 200 sqm
Bedrooms: 3
Garage size: 35 sqm
Site size: 1 acre
Heating: air to water heat pump
Ventilation: centralised mechanical with heat recovery
Build method: closed panel timber frame
BER: A1
How architect Declan Brennan of Co Laois, with his wife Michelle and two kids, built a contemporary H-shaped bungalow that oozes style and comfort.
Having spent three years working abroad in Australia, we returned home and immediately looked towards building a family home. We had a choice of sites available to us, but I was always drawn towards the original family farm where my grandfather had lived and where I had spent a lot of my childhood. My family home is only 100m up the road.
I knew the existing house was gone past restoring so I put a plan in place for a new design, to demolish the existing derelict dwelling, barn and outhouses, and rebuild a new, energy efficient house on the original footprint whilst retaining the enclosed east facing courtyard.
The aim was to achieve an A rated home on the building energy rating (BER) scale. We wanted a contemporary bungalow that would be comfortable to live in and use as


many sustainable, energy efficient materials within the budget available to us.
The design is based on a simple H shape floor plan with the main living areas to the south and the bedrooms to the north. The centre section features a timber clad link with zinc window box looking onto the east facing courtyard and the west facing patio.
The hall and corridor look onto the courtyard while a small sitting room and main bathroom faces the patio area. Sliding doors open onto the patio area from the living room, link and the main bedroom. The house was designed to be narrow plan to ensure brightness into all rooms.


The plan for the interior of the house was to create a simple free flowing layout that would be bright and easy to maintain. The large areas of glazing to the south and west play a huge role in the natural lighting of the house whilst also providing valuable solar gain which is hugely beneficial through the winter months.
Colours on the interior walls are kept to whites and greys and colours are introduced into the house through joinery and furnishings. The main bathroom consists of a main freestanding bath which sits on a raised tiled plinth with an overhead bulkhead incorporating LED mood lighting. Colour is introduced with planting to each side of the bath.
For the main bedroom, I couldn’t find the type of bed I wanted so I designed one myself and had it manufactured by our local joinery company. The bed was sprayed yellow to add a vibrant colour to the room,


MDF refers to Medium Density Fibreboard, made of wood pulp and commonly used as framing material for units, e.g. in kitchen carcase, or as boards.
Solar gain refers to the sun’s energy building up in the house, which can help heat the house in the cooler months. It also refers to daylight and reducing the need for artificial lighting. Thermal mass refers to a material’s ability to store heat, e.g. concrete floors.


Overheating refers to too much solar gain, where the building becomes so hot it’s uncomfortable to its occupants.
The building fabric refers to the entire house ‘envelope’ meaning your walls, windows and doors, floor and roof. Adopting a fabric first approach is to focus on getting all of those elements right (well insulated and airtight) so your home doesn’t require too much space heating.
and sits against a mixed batten screen wall. The back wall consists of vertical grooved panelling sprayed grey with inset TV. The colour theme for the bedroom consists of white, greys and yellows.
In the living room the central chimney stack is clad in horizontal MDF boards which were sprayed a dark grey with orange shadow lines to tie in with the colour theme of the room. These were manufactured by our local joinery company and installed by my brother who works as a cabinet maker. It is finished with two storage boxes/seating and two floating shelves each side.
The kitchen has a very simple, symmetrical layout with units on the rear wall and a large freestanding island. We chose a dark grey colour for the units to tone down the brightness and a white quartz countertop and splashback. The island units are also a dark grey and are wrapped in the same white quartz.
Two large rooflights are centred over the island to draw light down into the kitchen. The kitchen, although small works very well and simple clever storage is the key. We spend most of our family time around the island.

We went with an air to water heat pump as the most straightforward way to comply with building regulations. It’s a renewable system, using one unit of electricity in exchange of four units of heat, which was important to us as well.
Originally, we had planned a gas stove for the living room, however we changed our
mind and installed an inset electric stove instead.
For wastewater we put in a precast concrete septic tank with 90m percolation area, and for drinking water we have a well. We got a standard connection to ESB Networks and installed solar photovoltaic (PV) panels last year. They were a great addition and are

already making a difference to our energy costs.
The polished concrete screed was poured on a very hot weekend so we spent two full days on site watering the slab to keep it cool and prevent cracking. The polished floors were completed before the house was skimmed so we had to ensure that they were covered down and protected for the remainder of the build.
The garden design was completed after we
moved into the house and most of the work to date has been undertaken by ourselves with help from my father. It was a priority to undertake the planting in our first year as the site boundaries were open to two roads and we wanted to establish screening of the house as quickly as possible.
The aim was to create a nice flow to the garden and segregate different areas that could be enjoyed at different times of the day. The plan was to create a west facing patio area which links to the upper garden and a gravel path which flows to a sunken fire pit and an informal pond with native tree planting on the west boundary. These are still a work in progress.
We built a south facing patio with a formal water feature. This water is reflected onto the ceiling in the living area during


the summer. There is wildflower planting around the wastewater treatment area and a section of an old ash tree lies on its side that was once part of the site.
We were lucky enough to make use of some lovely natural limestone boulders that were part of a previous rockery on site. They make a lovely landscape feature.
What single piece of advice would you give a selfbuilder?
Spend the time and money where possible on the important parts of the build – the building fabric. The more insulated and airtight the fabric is, the lower the running costs.
The only downside to the house is the overheating in the summer because the house is so well insulated and airtight. It is possible that we may add some type of brise soleil system to the living area to reduce the amount of overheating in the summer months.
Were there any changes during the build? What would you change?
We made some slight modifications to the floor layout prior to construction due to costs. A mezzanine was removed and the overall floor area was reduced. We would have very few changes but maybe a larger utility room if we had to mention something. And if we’d had the budget, we would have gone with natural slate, limestone sills and cappings.

The timber frame kit, the windows, the polished floors, the zinc and cedar cladding on the link. The windows were a nonnegotiable as I didn’t want to use uPVC windows. I think it was worth the extra cost for the quality and look of the aluclad. The polished floors were something we wanted from the start – we loved the aesthetic of them. After six years in the house, we still find them great; the durability and low maintenance but also how much brightness they bring to all the rooms. They also provide great thermal mass in that they absorb the heat during the day and release this extra heat throughout the night.
“The only downside to the house is the overheating in the summer because the house is so well insulated and airtight.”


Always be prepared to make or take a phone call.
There will be times when those on site are looking for clarification or asking for extra materials. Be prepared to go to site to answer specific questions.
Be one step ahead at all times.
Do your research prior to construction to avoid costly changes / mistakes on site.
Do as much DIY as you can.
We were very lucky to have the help from our family throughout the build and this allowed us to undertake a lot of the work ourselves where we could. We insulated the cold roof areas, vaulted ceilings and service cavity, installed the ceiling airtight membrane, fixed the airtightness tape around the windows and installed the plasterboard and shadow gaps ourselves. We spent a lot of late nights, Saturdays and Sundays working on the house to cut costs.

One of our favourite features is the living room with the large areas of glazing which provide both solar gain but also great views of the garden. There is no TV in this space, just an electric stove added as a feature. It is a lovely space to relax for peace and quiet late in the evening, or for a chat with family and friends without any background noise. Another favourite feature are the natural stone walls on the utility and the front porch. This stone is from the original house. We sorted through the stone when we demolished the existing derelict house so it
was lovely to reuse some of the old stone in the new build.
There is a nice open flow throughout with living areas separated from the bedroom areas. The house is very comfortable to live in and we are delighted we chose the closed panel timber frame building method.
The level of insulation and airtightness is definitely reflected in our energy bills. The mechanical ventilation also makes a huge difference to the comfort levels of the house.

Architectural design and project management
DB Design Studio, Co Laois, dbdesignstudio.ie, mobile 0858676577
Engineer
Peter Bolger Consulting, Co Carlow, pbconsulting.ie, tel. 0599158005
Demolition and groundworks
Kilross Construction, Co Kilkenny, mobile 0868054190
Timber frame
KTF Housing, Co Louth, ktf.ie, tel. 0429352134
Windows
Rationel AuraPlus, rationel.ie, tel.012971005; all windows sealed and taped with Tescon Profile tape.
Electrical
CM Electrical Services, Co Kildare
Plumbing
Alan Hendy, Co Laois, mobile 0868137721
Plastering
Denis Kealy, Co Laois, mobile 0863910887
Timber cladding
Wood components MTS Ltd, Co Wicklow, info@woodcomponents.ie
Zinc roofing and window box
Audsley Roofing, Co Wexford, tel. 0539164469, info@audsleyroofing.ie
Slate roofing
Eoin Culliton Construction Ltd, Co Laois, mobile 0857896850
Polished concrete
Concrete Innovations, Co Kerry, concreteinnovations.ie, mobile 0863736870
Renewables
Air to water heat pump: Nibe F2040 8kW. Underfloor heating throughout. Photovoltaics (PV): 18 Sunpower 415W panels (7,470 kW), 6kW Sofar hybrid inverter and 5.12kW Sofar smart battery.
MVHR
Beam Axco C130 mechanical ventilation unit with 150mm insulated ducting, from Beam’s Gary Dunne in Co Carlow, mobile 0872226017
Materials
Roof: Cedral Smooth Thrutone fibre cement slates by Etex; Tyvek for the breathable membranes; insulation Knauf Earthwool for cold roofspace and Knauf Omnifit for vaulted ceiling. Floor: Unilin T&G HyFloor PIR with a Monarflex DPM/Radon Barrier; Walls: 180mm Knauf Omnifit Insulation on timber frame, service cavity insulated with 50mm Knauf Dritherm Cavity Slabs. Airtightness membrane throughout: ProClima Intello Plus.
Photography Damien Kelly, damienkellyphotography.com
NI calling ROI prefix with 00353 and drop the first 0
Find out more about Declan & Michelle’s project in Co Laois...


Floor: 75mm polished concrete screed, 150mm PIR, 125mm reinforced concrete slab, DPM/radon barrier, 50mm sand blinding, 200mm clean crushed hardcore. U-value: 0.12 W/sqmK
Walls: white sand/cement render, 100mm concrete block, 50mm cavity, 185mm closed panel timber frame fitted with 180mm mineral wool insulation, airtightness membrane, 50mm service cavity insulated with 50mm mineral wool insulation sheets, 12.5mm plasterboard, skim finish. U-value: 0.16 W/sqmK
Roofs: fibre cement slates, 50x25mm counter battens (ventilated space), 50 x 35mm battens, breathable roof barrier, Fink trusses, airtightness membrane, 50mm battens, 12.5mm plasterboard, skim finish; insulation to cold roofspace: 400mm mineral wool insulation (U-value: 0.11 W/sqmK); insulation to vaulted ceilings: 220mm mineral wool insulation (U-value: 0.15 W/sqmK), zinc standing seam, vapour control layer, 18mm marine ply, 50x25mm counter battens (ventilated space), 50 x 35mm battens, breathable roof barrier, Fink trusses, airtightness membrane, 50mm battens, 12.5mm plasterboard, skim finish.
Windows: triple glazed units (4mm glass-20mm spacer bar-4mm glass-20mm spacer bar-4mm glass) argon filled. Colour: RAL 7024 Graphite Grey. Average U-value: 0.8 W/sqmK.
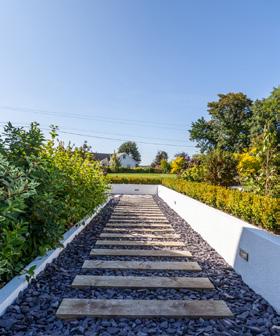

This Co Galway home made the most of its orientation to carve out a screened patio area for the entire family to enjoy.
One of my first considerations when designing a garden seating area is to make sure it’s likely to be used.
A main seating area should look inviting, particularly from indoors, and be easy to reach – if it’s too far away from the house, it can be a delightful haven of colour, scent, and sunshine, but you won’t be inclined to make the trek to the end of the garden. It makes more sense to have a usable space just outside and a more informal area further away for occasional use.
And finally, it needs to feel comfortable when you’re in it – so if your home is in a windy, exposed location, or you’re in full view of a busy road, screening measures will make all the difference.
This Co Galway home benefits from lots of sunlight at the front, making this the ideal place to create a paved seating area for family use. A Liscannor stone faced office room is placed to the front at an angle, providing a contrast with the rendered walls and an interestingly shaped space.
When creating a screened patio, access needs to be considered to and from several points.
In this case, two sets of doors lead from the kitchen / dining room to the back garden. This section needs to be reachable from the front door and parking area. And from the rest of the front garden, via side access.
A contemporary horizontal timber screen runs from the office and continues at a right angle across the garden, with an angular ‘archway’ providing a link to the lawn beyond. This brings a sense of privacy without cutting off the rest of the


Beyond the screen, a curved sweep of mixed planting flanks the driveway to enhance the approach to the front door.
Flagstone paving with wide, shallow steps extends to both sets of doors, with plenty of room for seating and planting.
A combination of raised and ground level planting, with generously wide beds, allows a blend of colour and greenery to bring the space alive.
With these plants providing interest in the bleaker months, the flowering perennials can party from spring through to autumn, with long flowering varieties of erysimum, salvia and astrantia bringing pops of jewel like brilliance.
Seating areas. When investing in a paved patio area, make sure it’s easily accessed from indoors as well as comfortable – if you can’t relax and switch off in the space, you won’t be inclined to use it. In this garden, informal seating areas are dotted around the wider space to be used occasionally.
Make sure you’ve considered entry and exit points, with plenty of room for family and visitors to come and go comfortably. This patio space allows plenty of room for furniture and planting, without obstructing the gate and doors. garden.
Mediterranean style planting featuring drought tolerant plants extends into the pebbled area – these plants do surprisingly well in this part of Galway, despite the frequent rainfall, thanks to the good drainage provided by the limestone rocks below the slightly sandy soil.
Planting design for a garden like this needs to be careful. The owner’s preference leads the way – contemporary and wildlife friendly in this case, with a blend of flowering perennials, grasses, and suitably sized structural shrubs. For an area just beyond the kitchen and visible through two sets of glass doors, you need to consider planting for the entire year, not just the colourful days of summer.
Hellebores and bergenias, as well as flowering in winter, provide glossy foliage in striking shapes all year round. Pinus mugo, carex and pittosporum provide evergreen structure.
The pebbled area offers a textural contrast to the flagstone paving but remains visually linked to it by a row of flagstones set into the pebble, drawing the eye along towards the entrance to the wider garden beyond.
Evergreen star jasmine clothes the timber screen and provides a backdrop to a sculpture placed opposite the bifold doors, with a shallow Corten steel, or weathered steel, water bowl at ground level reflecting the changing sky.
This will be visited by garden birds when the coast is clear, to drink and bathe. And for wildlife lovers, watching them from indoors in winter can be magical. Encouraging birds and pollinating insects into your garden is one of the best ways to keep it naturally healthy, creating a balanced ecosystem where many of the ‘pests’ with designs on your plants end up as meals and snacks for busy wild creatures.
They’ll also reward you with the buzz, hum and birdsong that makes the garden feel truly alive.

Carefully select the plants near the house. You’ll be looking out at the garden more than you’ll be using it in the Irish climate, so plenty of green and structure help to brighten up darker winter days and provide something uplifting to look at.

With their compact size, remarkable performance, and ecoconscious designs, the new units are poised to transform the way MVHR systems manage indoor air quality in homes.
Ventilation experts, BEAM, are excited to launch the new award winning Axco C440 and C570 Heat Recovery Ventilation (MVHR) units to their low energy Counterflow range.
These brandnew units boast an impressive compact, spacesaving design to help facilitate installation into homes.
Measuring only 600mm x 602mm, the BEAM Heat Recovery units can easily fit into any cupboard, utility room or hotpress. Moreover, it offers the convenience of left or right-hand on-site configuration, allowing for adaptable placement according to specific requirements.

Although the units are small in size, their performance is unimpeded. The powerful, low energy units have high airflow capability up to 158 l/s (568 m3/h) @ 100 Pa to ensure optimal indoor air quality. Additionally, the range proudly boasts a remarkable Specific Fan Power (SFP) down to 0.38 w/l/s.

One of the standout features, the highly efficient heat exchanger achieves up to 91% heat recovery. This outstanding recovery not only ensures superior ventilation, but also aids in reducing energy consumption and demonstrating BEAM’s dedication to energy efficiency and sustainability.

As standard, both units come equipped with an Aura-T™ SMART App Ready touchscreen controller. The user-friendly interface allows users to easily programme the unit settings to suit their living requirements and to help save energy. The smart WiFi controller can also connect to the BEAM Vent-SMART app which allows users to access settings and control the system directly from their phone!
BEAM’s Sales & Marketing Director, Paula Osborne said, “These new units are a game-changer in the ventilation industry. Their impressive airflow capacity, energy efficiency and smart connectivity options set a new standard for indoor ventilation solutions.”

Since 1977, BEAM have been at the forefront of clean indoor air solutions, providing a complete range of Mechanical Ventilation Systems for new, existing and commercial buildings throughout the country.
An MVHR system is ideal to install alongside a BEAM Central Vacuum System, where you are clinically assured of clean indoor air, even after vacuuming.
For more information, contact BEAM’s countrywide team of ventilation experts, who can advise, specify, and provide a bespoke technical design for your project.
Tel: +44 (0)28 7963 2424
Email: info@beamcentralsystems.com Web: beamcentralsystems.com


I’ve been asked to pay money upfront, from various suppliers, including a window company asking for 100 per cent payment before the windows were to be delivered on site.
I know it’s not recommended to pay for things in advance, and don’t intend to do so, but I’ve come across this issue with most timber frame companies I am considering to go with.
They are asking for 80 to 90 per cent before kit delivery. Why is this? Is my only option
a bridging loan or will the banks give me an advance?
In short, the banks in Ireland will only give you money for work completed on site and signed off on by an engineer.
In our case we ask for 10 per cent of our contract price to be paid before any work is done on site.
We then fully build the foundation after which the customer makes a regular drawdown. Then we come and erect the whole structure and leave materials to finish the house on site after which the customer makes a regular drawdown.
So the customer needs to have 10 per cent as savings but this is never really a problem and usually a requirement for their mortgage anyway. The above however means that we build a completely bespoke house in our factory and order

a lot of materials to deliver with the house.
We then ship the house across Europe and erect it on site with our team and a crane without being paid anything. It then usually takes some time for the customer’s engineer, bank, lawyer etc. to actually pay the money.
So, for every house we build we are taking a huge risk due to the drawdown process being tailored towards slow block builds. The banks don’t seem to have much interest in changing. The timber frame industry may need to start pushing for change.
So in the case of timber frame, I can understand that a supplier would ask for payment in advance as a result of them having to take a very big risk. If a bespoke house is manufactured for a customer and they suddenly cannot pay the producer is in big trouble. We do sign contracts with
I’m looking for information about mould on ceilings/walls after the plastering is finished internally while the house is drying out (before heating).
people before manufacturing but the contract is really not going to solve anything. If someone cannot pay for a house after it was built and they were theoretically brought to court, they can still not pay for the house. Especially in Ireland we do not have much legal security.
We have looked into ensuring that people have full mortgage approval before progressing but it turns out that “fully underwritten mortgage approval” is still not a guarantee for a mortgage, it can be subject to x, y and z.

Nils Pettersson of timber frame supplier Scandinavian Homes, scanhome.ie
We’ve a couple of rooms where the ceiling has a lot of mould and would love to hear any tips you have or how ye have seen it treated. I’ve heard this is common? It’s not a very common occurrence, but it is known to happen in wet times of the year when the air moisture content (relative humidity) is high.
Add in damp walls or ceiling materials before plastering
and a lack of ventilation and the conditions are created for growing mould. Note that if plasterboard gets too wet, it cannot be successfully restored.
It could also be possible that some of the materials (water, plaster, etc.) or the underlying ceiling and wall surfaces were contaminated in some way before the plastering was carried out.
Purge ventilation would be a good first step if you can leave all the external doors and windows open for as long as possible. However, given the wet weather we’re having, it might take a long time.
A dehumidifier would be the best bet if you have to leave the house secured and then only when all other wet trades have been completed.
Then, only when the plaster is suitably dry (less than 12 per cent moisture content
is advised, although I would aim for lower than that), use a suitable chemical treatment to get rid of the mould growth. Monitor and repeat if necessary.


My son has bought a bungalow erected in 1974. The twoflue chimney needs to be taken down to ground level.
He proposes to replace the chimney with a single flue with stove. Also it needs to be re slated with new felt. He proposes to obtain quotations from three contractors for this work. Please advise the best approach to doing this. He will be applying for the ROI vacant house grant.
There is no explanation as to why the chimney needs to be taken down, but assuming
that it in fact, does, here are a few points which should help:
For any building project, the best way to get quotations which can be accurately compared with each other, is to have drawings prepared which accurately describe and specify the works to be done.
A schedule of works is also a valuable tool in providing a detailed description of the work to be done and can include images of the proposed fixtures and finishes, etc. Some aspects of the proposed work will have a potential impact on the health and safety of the occupants, so it is imperative that the works be properly planned and executed.
Preparing drawings for a small project might sound like overkill to some self-builders, but you should be advised that, whether in NI or ROI, a building control application is
required for a material change to a heating system in an existing dwelling. The working drawings for the application will then also be used by the contractor to plan and execute the works.
As well as satisfying Building Control that the proposal will comply with the relevant regulations, the drawings should show the extent of any demolition and how it affects the existing structure. Good drawings should also help to avoid those unpleasant ‘extras’, i.e. costs which can creep in if the builder has not been made aware of something at the pricing stage.
Be aware that homeowners now have 13 months to finish the works under the (ROI) vacant homes refurbishment scheme, not the 18 months which applied previously.

Upon completion of the works, a technician from your local authority will visit the property and confirm that the work is completed. Planning permission, in certain situations, may be required for the removal of a chimney and the erection of a new flue, so double check with your local planning office before making the grant application.


Q: I have been quoted for a builder’s finish, what does that mean?
A: There
is no specific definition
of the term “builder’s finish” so make sure to find out what the other party means by it.
Care needs to be taken when discussing the term as your belief and the belief of what the other party in the discussion may understand the term to include, may differ greatly.
In a general sense, the term builder’s finish traditionally referred to the construction of a property with no finishes. It usually means that the property will be completed structurally, it

will be weathertight, it will have walls, a roof and windows, it will have basic electrics and the internal plumbing system will be installed but it will still need floor and wall finishes, bathroom suites, kitchens, fireplaces, wardrobes, and even internal doors, architraves and skirtings.
There are many contractors who include the installation of bathroom suites, staircases, internal doors, architraves and skirtings within the term builder’s finish, so again it is important to clarify.
It is also important to note that a house completed to a builder’s finish will have little or no external works included. There will be no landscaping, no driveway or paved areas and I have previously seen a project which was completed to a builder’s finish where there were no drainage works completed externally.
The cost of the builder’s finish will differ from project to project depending on the structure layout, groundworks
specifications and costs and the specification of finish for the external wall and roofs.
I have recently carried out a review of projects tendered in the Dublin area and the builder’s work element of the overall project accounted for between 50 and 60 per cent of the total cost.
There is no such thing as average cost of construction given the variables of house size, layout, design and specification, so it is impossible to give a guide for any specific project as to what the cost per sqm of builder’s finish or indeed final finish might be.
That can only be achieved through a detailed review and costing of the specific design and specification for the specific project. To budget on an average basis is misguided and can be dangerous as it will without doubt result in a substantial pressure being placed on the budget.

Combining understand Scandinavian elegance, with the very latest combustion technologies, HETA stoves are a firm favourite with selfbuilders today, across Northern Ireland and the Republic of Ireland.
Now in our nineteenth year, Neil Mathews Architects has become a niche practice for high quality improvements to homes across NI and beyond. Our work is not about high budgets and expensive materials, but it is about putting simple materials together well.
Remarkably efficient, every HETA stove is engineered to provide more heat, whilst using less fuel. And with a wide range of models, finishes and outputs to choose from, there’s a HETA stove to suit almost any home… from a townhouse to a manor house.
We can dramatically improve the enjoyment of homes from the most dense urban environment to the most rural, and our clients speak very highly of us.
To find out more, why not visit your local HETA dealer today? Alternatively, to visit HETA Ireland online, just click or tap www.hetastoves.com
We are not tied to a particular style or taste in architecture. We listen to our clients, and we work with them. We provide a service which visualises our clients’ aspirations and ideas and we add to, advise and enable that to happen.

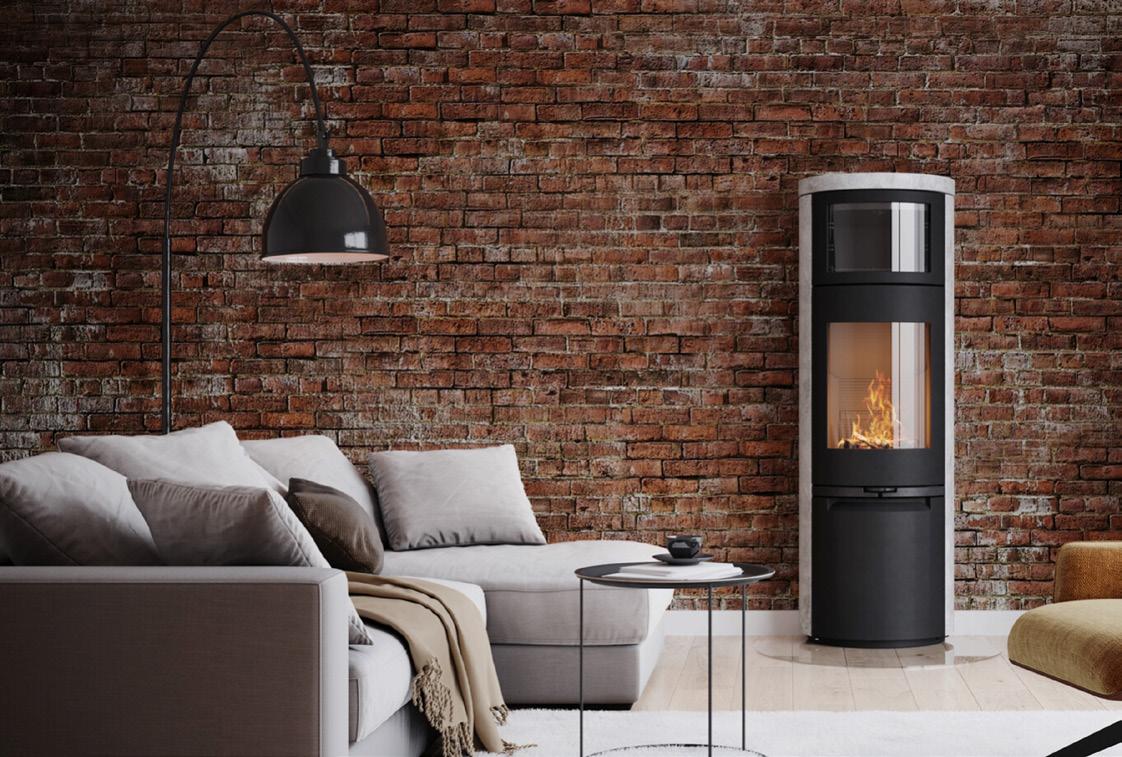

Sometimes we work on huge projects and sometimes it’s small, but always our core values remain, to provide a service which is spoken highly of wherever we go.
Our aim is always to give added value to a home. Always we search for a way to add quality to life, and enjoyment of the home.
Now in our nineteenth year, Neil Mathews Architects has become a niche practice for high quality improvements to homes across NI and beyond. Our work is not about high budgets and expensive materials, but it is about putting simple materials together well.


Completing an attic conversion opens up a world of possibilities, transforming a forgotten room into an incredible space.
When it comes to attic conversions, the possibilities are endless. The space underneath your roof can convert into anything from a cosy bedroom or a sleek home office, to a play space for the kids.
Each option not only breathes new life into a previously unused space but also tailors your home to fit your routine and needs. Whether you’re looking to expand your living area, boost your home’s value, or simply create a special nook that’s all your own, an attic conversion offers a customisable and flexible solution.
Here’s a look at the different types of rooms you can transform your attic space into.

Change this unused room into a practical storage space solution to declutter your home and keep your living areas tidy and spacious.

Transforming your attic into a bedroom can create a cosy and private retreat away from the hustle and bustle of everyday life. This conversion not only maximises your home’s usable space but also offers a serene spot for sleeping.

Another option is changing your attic space into a home office. This conversion can create an open and dedicated workspace, free from the distractions of daily household activities. A home office can provide a comfortable and inspiring environment to boost productivity and creativity right under your own roof.

A mezzanine introduces an open, fresh element to your home, effortlessly blending levels and developing the sense of space. This architectural change not only adds visual interest but also serves as a multifunctional area that can be adapted to suit various needs, from a reading nook to a lounge space.
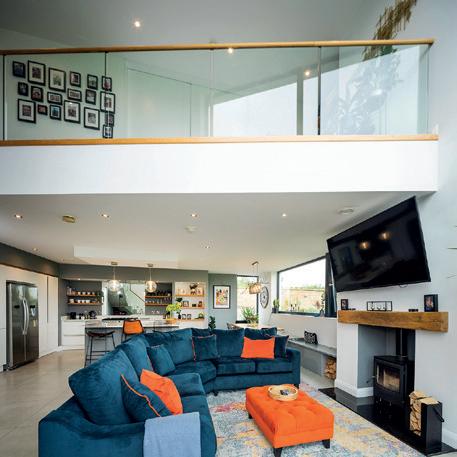

Turning your attic into a bathroom can create a luxurious retreat, offering a private space for pampering away from the rest of your home. This conversion takes advantage of the attic’s unique layout to install a relaxed, spa like bathroom, adding both functionality and value to your property. Usually done as an ensuite for a nearby bedroom.
Turning this vacant space into a snug living room will create a cosy hideout perfect for unwinding and relaxing. This conversion can infuse charm and warmth into your home, making the most of your attic’s dimensions and character.


Structural integrity. The floor (joists) may not necessarily be designed to carry a heavy load, e.g. for a bathroom, so this will need to be checked. You will need to get the rafters checked too – trussed roofs aren’t always suitable for an attic conversion. In the case of a mezzanine, cantilevers may need to be used. For all attic conversions, check with a structural engineer before undertaking any work.

Building regulations. Depending on the house, you may need a fixed staircase up to the attic and/or a fire escape as well. Roof windows are ideal for light and ventilation but also check if you’ll need additional mechanised ventilation.

Services. It’s likely you’ll need to run electrics and plumbing, depending on the use of the space. This may or may not be straightforward to do.
Insulation. An attic with a ‘warm roof’ will have insulation in the rafters so the space should already be insulated. A ‘cold roof’ set up means the insulation is in the attic floor, so the rafters and walls will need to be insulated to make the space comfortable to be in and not cost a fortune to heat.

Heather Campbell Deputy editor
to expand your living space but limited by a small garden? Explore the cost effective option of extending into your roof space for additional room.
Converting a roof space can be a smart choice when you want to expand the size of your home but can’t afford to move or aren’t able to build an extension –sometimes, the only way is up. But, even if you are experienced in construction work, it’s important not to rush into this kind of project without thorough consideration.
Extending into your roof space is a lower cost solution—each storey of a house costs between 10 and 20 per cent less to construct than the storey below— and messy work is typically finished within six to 10 weeks.
But it’s a complex process; the project affects two floors, and the inside of the roof space is usually an odd shape. There will also be several walls, water tanks, chimney stacks, joists and rafters to work around, and they won’t be easy to move should that be required
Load bearing walls generally do not need to be moved, but there will be severe cost implications if they do. Most roof space conversions include the installation of at least two standard steel beams.


When figuring out if your house is suitable for an attic conversion, it all hinges on the attic space’s ability to handle the load of a new floor.

Houses built before the 1960s typically feature sturdy rafters and purlins (cross pieces), which can be easily relocated or replaced with steel beams by a
Extending into your roof space is a lower cost solution than extending — each storey of a house costs between 10 and 20 per cent less to construct than the storey below—and messy work is typically finished within six to 10 weeks.
specialist roof space conversion company. Modern houses often have prefabricated W-shaped frames called trusses running the length of the loft, which can’t support any weight. For a trussed roof space, you will need a professional engineer to complete the conversion and ensure the roof maintains its structural integrity.
The suitability assessment is the first step in deciding whether your roof space is fit for conversion. This involves evaluating three key factors: adequate headroom, robust joists and a suitable stairway.
Seeking advice from a specialist roof space conversion company, architect or engineer early on can maximise space and minimise disruption to your home.
A roof space conversion can significantly increase your home’s floor area. Conversion companies typically mention an extra 25 per cent for two storey houses and 50 per cent for bungalows. The ‘floor area’ is defined as that part of the floor where the head height is 1.5m or more.
When you measure up the roof space for your plans, remember that new joists, floorboards and ceiling plaster will reduce headroom by up to 200mm.

Head height needs to be measured from the top of the loft floor joists to the underside of the ridge beam. Although the building regulations permit head heights of 2.2m, 2.4m is a far more comfortable height once a new floor covering has been laid and the ceiling finish has been applied.
Typically, at least two thirds of the floor area should have a minimum height of 2.45m for habitability. A dormer window loft conversion is a great way to add headroom, with its box like structure creating an easy to use space with flat ceilings and walls, but it might involve seeking planning permission or extra expenses.
Lowering the ceiling height of the room below is impractical since you need ample headroom for the room to be usable. Raising the roof is expensive, involving stripping it down and rebuilding it from higher gable walls.
A more affordable option is prefabrication, with specialised companies, which mostly operate out of the UK,

plumbing and the new roof. It’s then installed with a crane after cutting out the designated roof section.


Most attic conversions are exempt from planning permission in ROI because the ceilings are not high enough to qualify as ‘Habitable Accommodation’. However, if you plan on installing a dormer window or installing your roof windows to the front (not rear) of your home, then you will need planning permission.
It’s a similar situation in NI for planning permission, however in NI there is a requirement to notify building control (building regulation application) for pretty much any attic conversion project, i.e. “when the intention is to provide one or more rooms in an attic”.
Your builder, architect or loft conversion specialist will help you prepare building regulations plans and structural specifications and ensure compliance to secure approval.
In ROI you must also follow building regulations for attic conversions, and you should also file a commencement notice to

The floor area is defined as that part of the floor where the head height is 1.5m or more.
building control. Remember, if it’s a small project, you must comply with building regulations.
In NI and ROI, much of the building control regulations have to do with fire safety, i.e. safe means of escape in case of fire and to ensure the fire services can access the upper storey.
In both jurisdictions the regulations stipulate several key points: new windows must be large enough for fire escape, with egress window openings required for all first floor habitable rooms. If adding a third storey, a protected stair enclosure leading to an exterior exit door is necessary. Fire safety measures include 30 minute fire protection for floor joists, fire doors, and mains powered smoke alarms on each floor.
Regulations also cover floor and beam support, soundproofing, staircase construction, wall support, window installation, bathroom plumbing and electrics, electrical standards and thermal insulation compliance.


Seeking advice from a specialist roof space conversion company, architect or engineer early on can maximise space and minimise disruption to your home.
How much does an attic conversion cost?
Costs can vary widely, but according to Chartered Building Surveyor and Fellow of the Society of Chartered Surveyors Ireland (SCSI) Noel Larkin, a general estimate for a standard 25sqm to 30sqm attic conversion with a bedroom and ensuite, plus rooflight windows at the rear, would typically run around €25k/£21k to €26k/£22k.
“Additional expenses for carpeting and decoration, etc. – normally the homeowner’s responsibility – can add another €5k/£4k on average,” says Noel. “So, all in all, you’re looking at around €30k/£26k for a standard conversion. For a higher end finish, including features like a quality staircase and fitted wardrobes, you could be adding another €15k/£13k.”
The budget typically spans from €1,200/£1,000 per square metre for straightforward conversions to €1,800/£1,500 per square meter for a higher level finish.


At The AGA Shop Stove & Fire Centre in Belfast and Conlig, you won’t simply find the world’s finest range cookers. You’ll can also discover a world of complementary kitchen appliances, electric and gas fires, multifuel stoves and wood-burners too.
Our experienced, friendly, manufacturer trained, staff, have over two decades experience of helping self-builders across Ireland, make their dreams a reality.
Why not call in today, and discover how we can help you make your dreams a reality too? We’re open 9am to 5pm weekdays, 10am to 2pm Saturdays, with free car parking on site… and a warm welcome is guaranteed.


www.agabelfast.com


ask the expert


Q: I’m renovating an old farmhouse. Where should I start and what do I need to have/know before going to an architect, e.g. should I visit a mortgage broker first?

A: It can be useful to get an idea of what you can borrow before starting, as there is a lot to consider when tackling a renovation.
One of the most stressful things you can do is to set out on a renovation project without enough budget to complete it, so yes it is a good idea to approach lenders to know how much you can borrow. It can also help to set the parameters as it can be difficult to know where to stop with renovation projects.
Aside from the budget, the first thing to do is start to compile a brief of what you want to achieve; the space you need and the problems which need solved. Can this be achieved in the existing footprint or do you need an extension?
The next key thing is to establish if any of the building fabric needs repaired or replaced. Items like the roof, guttering, render and lead work may need replacing. Windows and doors are a big ticket item but can be easily priced with a window company to give you an idea of the cost. You may need some expert advice at this stage to make sure you get to the root of the problems and don’t just end up papering over the cracks – quite literally.
It’s also worth considering what can be upgraded or improved.
Ventilation of older houses is often poor as owners over the years have tried to reduce draughts and in so doing reduced the natural ventilation which, while unpleasant, actually helps to get rid of moisture.
A mechanical ventilation system with heat recovery (MVHR) could be a good way to improve air quality, reduce damp problems and make the house more energy efficient, but with this system you do need to achieve a good level of airtightness to allow it to run efficiently.
It can be worth looking at external insulation; but it doesn’t suit every house. Where the exterior of the existing house is rendered, it can work well as this finish can be easily added on top after the insulation is installed. Where the walls have exposed stone or brickwork the only options would be internal insulation. However it is key to ensure the walls can breathe and a natural insulation such as wood fibre boards with a lime plaster to the inside can be a good solution allowing moisture out of the walls and keeping the walls healthy.
It’s essential to ensure the roof is watertight and renew
any dubious flashing and lead work. Chimneys can often be a big problem area and if these are leaking or need rebuilt, be sure to use a welded lead tray to ensure no water can get through.
Don’t panic if you find the old farmhouse has no foundation. If you are in doubt a trial hole can be dug at the base of the wall to expose the foundation and what it’s sitting on. Often thick stone walls were built directly off the clay and their thickness 400-500mm will provide enough support; but with this in mind don’t plan to add extensions or another storey which will add significant weight on the existing walls. Always seek advice from a structural engineer and look at solutions which are free standing or lighweight.
An extension can contrast beautifully with an old farmhouse which can bring together the best of both worlds; providing modern living space, light filled and open, alongside the cosy intimate spaces of the older house.
This mix of old and new can give opportunities to modernise without losing the character, history and beauty of an old property.
Building your dream home?
We know a self-build project isn’t as straightforward as a standard house purchase, so you will need local experts like Progressive to guide you through the process.
theprogressive.com

• Highly experienced advisors on hand throughout your build
• Staged payments following completed stages of construction
• Each case is reviewed individually
• Local advisors and 11 branches across the province
• In person, telephone or online mortgage appointments available
• Foreign currency self-build mortgages are available
• Over 100 years’ experience
The Society also offers a Renovation Remortgage – you can switch your mortgage to Progressive and borrow additional funds to make structural renovations to your home.


Stanway Author of Managing Your Build

The benefits and advantages of underfloor heating are well known and much publicised. But whether the system is electric or warm water, there are downsides to this near ubiquitous ‘must have’.

If you want or need a heating system that reacts quickly then underfloor heating is not for you. It can take 30 to 60 minutes for a floor to warm up and much longer for it to heat the actual air in the room because it takes time for the warm water to circulate throughout the underfloor piping and heat up the screed, pipes and floor covering before anything starts to heat the room itself.
If the underfloor heating is run off a boiler, you’ll be switching off the boiler for periods of time partly to save on energy costs. Coming into your cold home after many days/weeks of no heating, or because there’s a sudden cold spell (when you’ve had the heating off for days), then heating the place up quickly cannot be done.
If you have a heat pump and allow the heating controls to do their job year-round, i.e. tell the heat pump when to kick in for space heating, you should be able to keep the room to a constant room temperature, at a low running cost. Heat pumps work at their best in homes that are well insulated and airtight. Nowadays heat pumps
You can’t have the floor temperature higher than 27degC...

often provide hot water as well, which means the system runs year-round.
If you have lots of furniture and rugs, these, too, trap heat within the floor and the room won’t heat up efficiently.

Ceramic tiles and stone surfaces are best because they heat up quickly, readily transfer their heat to the air and store heat once the system is turned off. Everything else reduces heat transfer from the warm water or electric cables to the air. Engineered timber flooring can work well, as can laminate and even lino but ask a professional before committing yourself to a floor covering.
This is especially important if you want carpet. Carpets are rated for their insulating properties, using a tog system. Always use one with a tog rating of less than 1.5. And don’t forget the underlay. Thick underlay can add a further 1.0 tog, resulting in very little heat coming through and into the room. If you want to have luxurious carpet and a good underlay you may need to choose another type of heating for that space.

Underfloor heating relies on a lot of background tech. A complex set of specialised equipment including manifolds, actuator heads, flow valves, pumps and thermostats must all function properly for the system to work. When any of this goes wrong there’s no option but to call in the experts. This can be expensive.


Electric underfloor systems are relatively cheap to install, even allowing for the cost of a qualified electrician to connect them up, but hydronic ones that rely on water filled pipes are really expensive. These pipes have to be laid in a special way and carefully fixed, being sure not to damage them, then covered in a screed. Then all the manifolds and controls have to be installed and this too is expensive.

Both electric and warm water systems can involve using selflevelling screed. This takes time to dry thoroughly before the heating can be started up. It is also vital to warm a new floor slowly (perhaps over days) so as not to damage the new screed. All this can hold up the progress of your build.
For more about heat emitters

Although electric underfloor systems are quick and cheap to install compared with warm water versions, they are much more expensive to run. This means most people use them only for small areas, such as bathrooms.
Although a competent professional can usually find the break in an electric underfloor cable, it is often expensive to get to it and mend it, partly because it usually means destroying the floor surface.

This is still, however, much easier than finding and mending a leak in the underfloor pipes of a wet system. In fairness, though, properly installed, meticulously tested, high quality underfloor heating pipes hardly ever leak.
Retrofitting underfloor electric mats or cables involves very few challenges on floor height but this isn’t true for warm water ones. There are now, however, some very thin water systems that can be only 16mm deep, but you’ll have to allow for insulation underneath and this can further add to the floor height issue. The vast majority of underfloor installations are, of course, done on new builds, when it’s simple to allow for the extra floor thickness required.
In a busy family household not everyone will be a fan of a hot floor. Some children complain about playing on them and some pets find them uncomfortable.


There is a huge selection of radiators available today that underfloor heating lovers miss out on entirely. Some can be highly attractive in themselves, virtually never go wrong, and can provide instant heat in a way underfloor never can. And they don’t necessarily have to take up wall space. Various types of heat emitters can be installed into a channel around the edge of a room within the floor, and today there are radiating wall and ceiling panels that do away with conventional radiators altogether.
Just like radiators, it’s a type of heat emitter – meaning it releases heat to warm up the space you live in. Underfloor heating systems are either electric or wet.

consist of a series of pipes laid in your floor, fed by your central heating system. If you’re using a heat pump, the water flow temperature will be adequate. But if you run your wet underfloor heating on fossil fuels, such as a gas or oil boiler, the set up will need to cool down the high temperature coming from the boiler to feed the underfloor system. You can’t have the floor temperature higher than 27degC, and what this involves is a lot of cooling from the average fossil-fuel boiler temperature.

run off mains power and are usually only used on a small floor area, or in a larger space that has a low need for space heating, i.e. well insulated and airtight. They come in mats that are rolled out and are very thin so suitable for retrofits where floor height can become an issue. Remember though that you need to insulate under underfloor heating mats/ pipes to prevent the heat from going down into the subfloor.
Firebird has been delivering world class products for the past 40 years, while setting new standards in quality, sustainability and innovation. We guarantee a stress free installation process and a backup service you can really trust - great for the installer and the customer!
We have the complete Heating Solution for your new build or retrofit

Enviroair Air Source Heat Pump

• High performance levels and space saving.
• Economical and environmentally friendly.
• Ideal for newbuilds or home upgrades.
• Comfort all year round.

Envirogreen Boiler Range


• HVO ready.
• 25-30% savings on fuel bills.
• Up to 97.5% efficiency.
• Easy to service & maintain.


Available from your Local Builder Provider
t: +353 (0)26 45253 | e: sales@firebird.ie | www.firebird.ie


The Design stage of your Selfbuild Journey is all about finalising how you’re going to build your house, and what’s going to go into it.
At this point you’ll have your finances in order, and you’ll know what you want from your house. Now is the time to refine that vision and secure planning permission.
Take your time putting together the drawings you’ll be submitting to obtain planning permission. The reason is, the cheapest time to make changes is on paper. So take your time with your architectural designer to ensure the design will work for you.
This can be a really fun exercise, ensuring you get the flow right and that all rooms have a purpose, all based on the decisions you made at the Pre Design stage, from the build method to how energy efficient you want the house to be.
At this point, work out details that will have an impact on the footprint, like storage requirements and staircase design. Doing this early ensures the dimensions are right on the plans to have what you want in them fit.
Basic kitchen and bathroom design is therefore best thought about now, for plumbing to go in the right place and for there to be enough room to fit all the cabinetry or pantry space you might have in mind. Equally, making the space larger than it needs to be will cost you more to build (and eventually, tidy/clean).
Heating and ventilation


systems also need to be thought about as they require a lot of space – not just where to put equipment but where to direct the services. Ducting is bulky.
There is no need to be overly specific but it’s worth pointing out that moving a window, which will alter the appearance of the house, after planning permission has been approved requires you resubmit the planning application. So getting the flow and space right at the start will save headaches later on. And save you money.
This is the time to tweak the design to save on the build. Standard dimensions,


Standard dimensions, rectangular compact shapes, choice of where to build so you avoid slopes, are all ways to keep costs down.
Get started with the Design stage of your Selfbuild Journey here

At the moment, inflation seems to be under control with material prices having come down – perhaps not to the point where they were two years ago, but insulation, metal and timber are now priced more reasonably than last year. That said, concrete costs are relatively high, due to high energy costs and to a smaller extent, the concrete levy in ROI.
Labour costs are also high, and persistently so, somewhat offsetting the savings made by the reduction in material costs. The shortage of skilled labour in particular means these are unlikely to come down.
Taking into account the current drop in material costs, compared to the pre-Covid period, costs have increased by about 10 to 15 per cent. To build by direct labour, excluding VAT, and for a builder’s finish, I’m seeing costs ranging from £130 to £140 per sqft in NI, and €1,600 to €2,300 per sqm in ROI.
rectangular compact shapes, choice of where to build so you avoid slopes, are all ways to keep costs down.
It is of course impossible to predict unforeseens like the ground conditions, which may require more costly foundations. But one thing you can foresee is that building the house far away from the road will cost you in landscaping costs – building far away from service connection points will also increase costs proportionally. Check what all of these costs will turn out to be, from getting an estimate for blinding and landscaping, to making a connection request to NIE/ESB Networks and Irish
If you’re building in ROI, there are development levies to pay your local authority when planning is approved. These on average are €12k. The ROI government has waived these fees until the end of 2024. More info on selfbuild.ie


It’s a topic that’s often brushed under the carpet but in both NI and ROI, there are health and safety regulations you must follow if you’re building a house or extending. This is especially important at the building stage, but the regulations require that you start looking into this aspect at the design stage.
As per regulations, at the design stage you need to appoint a project supervisor design stage (PSDS for ROI) / Principal Designer (PD for NI) who will sign off on the health and safety aspect of the design. This person is the one who has designed the house for you, so it typically would be your architectural designer.
This person must plan, manage and coordinate the planning and design work; they must also help you gather information about the project and ensure that the designers have done all they can to check that it can be built safely.
The third stage of your self-build journey is broken down into the following sections:
- Cost Savers
- Getting The Space Right
- Kitchen And Bathroom Designs
- Designing The Outside Space
- Choosing Windows And Doors
- Choosing External Finishes
- Securing Planning Permission
- Heating Systems
- Heat Emitters
- Ventilation
- Provisions For On-Site Electricity, Water
- Construction Drawings
- Health & Safety: Appoint PSDS/PD STAGE 3
Water/NI Water, to avoid nasty surprises.
In terms of big ticket items, the kitchen is a key area where you can make savings. One way is to source the units from a wholesale or flat pack supplier and mixing and matching with elements you want to splurge a
bit more on, such as worktops or doors.
Equally, windows and doors are a key area where you can save, and avoid overheating, by reducing their size and number. With good design, clever placement can still give you the views and light you’re after.
As the owner, you must notify the authorities when work is about to start and you must keep a health and safety file.
Perhaps because this feels somewhat laborious, and there is of course a cost involved, many self-builders don’t often pay much attention to this element of the build. But it doesn’t require too much extra work and you do want to ensure the site is safe for all those who work there and visit. It is also a legal requirement and something to discus with your designer early on. Both health authorities’ websites have guidance documents for homeowners to follow; hsa.ie for ROI and hse.gov.uk for NI.
Expect to plan for risks such as falls from height, collapse of excavations, collapse of structures, exposure to building dusts, exposure to asbestos, electricity (live wires and buried services), and any other aspects specific to your build.
It’s time to finalise your drawings – the ones you’ll submit for planning permission, and once approved, the ones you will submit to building control and use to build your house.
In both NI and ROI you need planning permission from your local authority if you are building a new house or any other structure that you plan to live in. You also need planning permission for changes to a listed building.
Not all extensions require planning permission; in ROI the rule of thumb is anything below 40sqm is exempt but this includes any previous extensions made to the original dwelling and other caveats.
It’s a good idea to discuss your project before you make a formal application; this will clarify exemptions and what to consider when applying for a new build. To do this, apply to the planning department in your local authority for a pre-planning meeting (ROI) / a
pre-application discussion (NI). Get up to speed with the local development plans, available on your local authority’s website, before you go have a chat with the planners.
You apply for planning permission by filling in the planning application form and submitting it with required documents, including maps, to your local authority.
In ROI you must give public notice of your proposals by putting a notice in a local newspaper and putting up a site notice (must stay up for five weeks from receipt of application).
If you don’t supply all documents or fail to execute the public notices as detailed by your council, the planning application will be sent back to resubmit.
Once you’ve successfully applied for planning permission, in ROI your local authority has eight weeks to make a decision. Requests for Further Information and third parties objecting to you application will result in a more drawn out process. Without a statutory timeframe, in NI planning applications can be notoriously long to process depending on the council. For single dwelling applications, the aim is to process your application within 12 weeks of receipt.
Once the council has processed the application and made a decision, you can appeal the council’s decision

In ROI the fee for an application to build a house is €65, and it’s €34 for a house extension or the conversion of a garage for use as part of a house. In NI full planning permission for a single dwelling is £1,014 (outline applications £505) and £340 for an extension/alteration.
to refuse your planning application. Equally, third parties can appeal the council’s decision to grant you permission, before a decision is made and for four weeks after.
As part of the planning application process, you must submit drawings that show what you will be building. The planners are mostly concerned with the appearance of
It’s a good idea to discuss your project before you make a formal application; this will clarify exemptions and what to consider when applying for a new build.
For more about planning permission

What does it mean to specify things for your self-build? Here’s what you need to know.
Specifying is the process in the run up to a build during which a list is drawn up of everything that has to be sourced. This is then detailed in a formal way. Only by having this list will you be able to get a professional to cost the whole project accurately. This list can be drawn up by one or more of your professionals, by you alone if you are capable of doing it, or by a combination of the two.
The specification details of the actual construction materials will be handled by your professionals but everything else will need your input.
The challenge with specifying is that there are masses of choices for everything you’ll want to do and making decisions is always hard. For example, the planners may say the finish to the exterior walls must be ‘brick’. But which of the hundreds of types of brick will you choose? And having made that choice, will it satisfy them?
Which brick will then will look best with your roofing? What colour mortar will look best? What colour window frames will look good with your chosen brick? And so on. Every choice you make will have knock-on effects.
It’s vital to nail down as much detail on everything as you can well before you start building. Listen to your designer and learn from their experience. This said, only you know how you want to live. For example, only you can detail how many electric sockets you’ll want in any given room or how you see your bathroom being kitted out.
All this can be challenging as you’ll have to think ahead to ‘see’ yourself living in your finished home.
Then, once you’ve made these choices, together with your professionals you’ll start to create a budget. This is often when reality dawns on what you can and cannot afford.
the house and how it sits within the landscape. Your application must therefore include the site plans, showing existing dwellings, and your own house plans with:
Elevations: technical drawing that shows the external appearance of the proposal from each of its four sides.
Floor plans: technical drawing
that shows the internal layout of the building.
Roof plan: technical drawing that shows the design of the roof from above.
The drawings submitted for the purpose of securing planning permission aren’t detailed enough to build from. The construction drawings are the ones you will submit to
You’ll need to carry out this process for:
Plumbing/heating/air-handling/sanitary fittings, and so on
Internal doors and door furniture
Kitchen/utility room plus all their white goods and fittings
Staircase and balustrade
Internal wall finishes
Floors and their finishes
Ceramic tiling everywhere
Internal decorations
Electrics and lighting
External windows and doors
Exterior surfaces of walls and roofs
Rainwater goods
External decorations
Paving, footpaths, driveways, patios and decking
Planting and landscaping
Clearly, this is a huge job that will take weeks to achieve. But although this may all sound daunting, a good designer will hold your hand through much of it as they’ll have seen it all before.
When trawling the web, be sure to keep notes or you’ll never be able to remember your choices and the things you’ve discarded. Best, too, to keep a record of various items at different price levels so you can come back once you get an overall budget. Then you can trim costs if necessary.
As a self-builder the process of specifying can be the most fun part of the project as you enjoy the thrill of the chase, find bargains, and imagine what your home could be like well before anything is actually built.
Andrew Stanway Project manager and author of Managing Your Build

building control; these are the ones you will use to build your house.
Construction drawings will include details of the build up of each section, i.e. roof, walls, floor including details for how each opening and junction is dealt with.
To build your house you’ll need water and electricity; water for mixing things like cement and for cleaning, electricity for tools and other gizmos. Temporary connections can take time; there could be an option to hook up to a nearby house. Look into this when planning is secured.


Tubs & Tiles offers a bespoke bathroom design service including 3D visuals, expert technical advice, layout design guidance, scaled fitting plans, product suggestions and assistance along with a tailored quote with full price breakdown. Here’s how it works.
If you are designing or renovating your bathroom, the professional design team at Tubs & Tiles will help you transform your ideas into your dream space.
The tailormade designs include plans and realistic 3D renders so you can visualise how your bathroom will look before you make your final selections. Here’s how it works.
GATHER INSPO: Browse your local Tubs & Tiles showroom to get inspired by the wonderful range of bathroom suites on offer.

BOOK YOUR DESIGN CONSULTATION: Once you’ve gathered all of the inspo you need, book in with a Tubs & Tiles bathroom consultant for a more in depth look at your design.
EMAIL YOUR DETAILS: The more information you can provide in advance of meeting the Tubs & Tiles design team, the better.
MEET YOUR DESIGNER: During your consultation the Tubs & Tiles specialist design team will help you navigate the choices.


Plans or a simple sketch with measurements and details for anything that needs to be factored into your design, including windows and doors, waste and pipe locations, radiators.
Photos of your bathroom if it is a renovation.
Inspiration photos or screenshots of bathrooms and features that you like.

Showrooms in Athlone, Cork, Dublin, Ennis, Galway, Kilkenny, Limerick, Navan, Sligo, Tralee and Wexford, tel. 090 6424000, tubstiles.ie

REVIEW AND SIGN OFF: After your consultation Tubs & Tiles will provide you with 3D Designs and quotation for all elements. At this point, the team will make any adjustments. Once you are happy with the design, the team will process your order and complete the drawings and fitting plans.
HOW TO BOOK
You can book a design consultation with your local branch, or simply email info@tubstiles.ie.


For more about kitchen and bathroom designs

You don’t need to think about every detail, but the more you plan, the more likely it is you’ll get what’s on the wish list at an affordable cost.
For both kitchen and bathrooms, it’s never too early to visit showrooms. Figuring out what you want in the space will help determine layout. So if you’re clear on the main components, at least you’ll have all the plumbing in the right place and enough space to make all of your cabinetry and appliances fit comfortably. Window and internal door placements will be part of this process.
Both bathroom and kitchen suppliers provide design services so make the most of this by binging your plans and photos of styles you like. Researching your preferences ahead of showroom visits will speed up the process.
Cost is a big factor – from the Selfbuild survey, last year selfbuilders were spending around €/£30k on their kitchen fit out. That said, prices for kitchens can start around €/£4k; with appliances the starting point tends to be closer to €/£10k. For bathrooms a rule of thumb is to budget €/£5k but you can easily spend double or more on a family bathroom.
In a new build, clever design solutions early on will help with the budget, e.g. integrating storage space and making sure the space is the right size and shape – when you go to buy your cabinetry/sanitaryware/ appliances/etc. you’ll find anything outside standard sizes tends to cost more.
The costs involved in a kitchen include the carcases, doors and door furniture, countertops and
splashbacks, appliances, floor and wall coverings.
For a bathroom there’s the sanitaryware, shower, vanities/ cabinets and other furniture, mirrors/lighting, ventilation and a heating source, wall and floor coverings, waterproofing. Labour needs to be added, from tiler to plumber and electrician.
Once on site, work will progress quickly. To save you headaches later on, get the pipework and fittings sorted before the trades get ahead of you.
First fix is all about getting your pipes in the right place and making sure everything is set up so you can hook up services without having to make costly changes to the tiles or other finishes. The main elements to think of at the design stage are: Waste and water pipes.
You’ll need to know where the waste pipes go – it’s better to have these routes planned
ahead of time so you don’t have to worry about moving ducts around at a later stage. Water pipes are easier to move around but with bath taps in particular, you’ll need to know if you’re going floor or wall mounted.
Ducting. Consider ventilation and in the kitchen, the extractor fan – if you want it to extract to the outside, downdraft ones need pipework in the floor.
Fixings. For wall hung basins and toilets you need a fixing in the wall to attach to. This piece of kit needs to be installed at first fix. Also know where lighting will go and what needs to go in the wall, e.g. some cabinets are encased in the wall, you may also want to create a shower niche. All of these need created prior to tiling.
Electrics. Lights and sockets in particular, but any other electrical requirement, e.g. for water filters, should also be worked out in advance.

Smart toilets. Previously called self-washing toilets, the Japanese invention is now referred to as smart. The rebrand presumably makes them more marketable and, in fairness, most of these do have enough electronics to make your smartphone blush. It’s basically a bidet and toilet rolled into one, meaning you won’t ever need to buy a loo roll again. There are water jets, warm air drying, heated seats, even UV light for a hygienic clean (goodbye bleach). Needless to say, it comes with a price tag. One that’ll make you think smart phones are cheap.
Gold accents. Black and brushed brass finishes are costlier than chrome, but they do add a touch of modernity to the bathroom. Gold accents in particular, in the form of copper hues in the kitchen, are on trend, in line with the hotel chic and quiet luxury trends. In the bathroom, gold and black are spreading beyond taps, to mirrors and shower doors.
Natural materials. Tactile and evoking comfort, natural materials are bang on trend. In the bathroom this means plastered shower walls, timber panelling, and textured stone finishes. And plenty of fluffy towels to boot. For environmentally conscious consumers, this can mean timber countertops in kitchens alongside colours that evoke nature, from beige and soft browns to green.
Peach Fuzz. Hot on the heels of Barbiecore, this pink hue is the 2024 Pantone colour of the year. Expect to see it at your showroom visits.

When it comes to choosing your heating system, heat emitters and ventilation system, you’re likely to wonder if the costs are worth the investment.
It’s understandable to be feeling somewhat pressured by all the talk of ‘green’ building. The main idea behind ‘green’ buildings is to reduce their adverse environmental impact on natural ecosystems. But achieving this can become can be an emotional subject as some people adopt the moral high ground on the matter.
This said, most people want to do the responsible thing by the planet, if they can afford it.
The best example of highend, ‘green’, housebuilding is what’s referred to as passive house, which has been codified in Germany but is used loosely as a term to refer to a low energy building. This type of build involves ensuring the construction is of a much higher standard than average by attending to four things: Thermal control. This means keeping the house warm inside when the outside is cold and vice versa which, in turn, involves having high levels of insulation throughout the entire building. Another part of this thermal control is to have suitable windows that regulate solar heat transfer. It’s also vital to avoid thermal bridges to minimise cold corners and by doing so to eliminate mould growth. It also improves comfort. Building this way can reduce heating costs by at least 76 per cent.
Without doubt such a build should have a south-facing elevation to make the most of nature’s free heat but this
can be hard to achieve in a city because of overshadowing.
Air control. A passive home ensures far better air quality by making sure the entire envelope is airtight and by providing balanced, mechanical ventilation that delivers fresh air. This, too, saves energy costs.
Radiation control. Controlling solar radiation is critical in this type of house build to prevent overheating. Cooling overheated indoor space is very ‘carbon-costly’ so should be avoided. External screening can reduce solar gain on southfacing elevations.
Moisture control. Using suitable equipment, a passive house’s humidity is controlled for comfort and the prevention of mould growth. There are all kinds of other conditions for a truly passive house which, together with those above make it a costly construction method as materials, labour, design and certification are more expensive than for an ordinary build. With a large build this additional cost can, however, be as low as 10 per cent. If the energy assessment on your home shows that the payback time is reasonable, you’re likely to be

tempted to invest.
But is it really worth all the extra fuss and cost? People increasingly say they want energy efficient homes. And some are willing to pay more for them. But it may not be wise to build to such demanding ‘low carbon’ standards in a low value area as it might push the price above what future buyers are willing to pay.
Finding a builder who can work to these high standards
may also not be easy and you’ll need a lot more supervision of the project by professionals who know what they are doing if you want to claim that your new home is truly a passive house. When choosing materials and products that claim to have green credentials be very careful and seek professional advice as there’s a lot of greenwashing out there.
The main idea behind ‘green’ buildings is to reduce their adverse environmental impact on natural ecosystems. But achieving this can become can be an emotional subject as some people adopt the moral high ground on the matter.


Heat pumps will have the lowest long term running costs for new builds, and are a more sustainable option than alternative heating systems. But is there more to consider than that?
The heat pump was invented in the mid 1800s for the purpose of drying salt, shortly after the invention of refrigeration, which is a similar concept but in reverse. The simplest analogy for a heat pump is a refrigerator, which is essentially a well insulated airtight box with a heat pump.
If you leave a fridge door open, the motor will run overtime and work very inefficiently. Similarly, heat pumps will be less efficient in poorly insulated leaky buildings, although many studies have shown that heat pumps are still the most efficient option for most domestic buildings, old and new.
Most issues related to the running costs of heat pumps have to do with poor installation, improper sizing and lack of knowledge of how to operate them. In Ireland’s temperate climate, a heat pump works one way, to transfer heat into the building. In climates where both heating and cooling are required, heat pumps can work to both transfer heat in and out of the building.
Counterintuitively, heat is present in air far below freezing, to under -270°C, also known as absolute zero or zero degrees Kelvin. A heat pump transfers heat from the outside air, even in freezing conditions, into your home.
Capital costs can be prohibitive, so the justification for heat pumps in very high quality builds is reduced if upfront costs are an issue.
It absorbs heat, evaporates the refrigerant at a low temperature, compresses the gas to squeeze the heat out, and releases it inside. This process moves heat rather than creating it and is a very efficient process.
Creating heat has historically been very inefficient. The thermal efficiency of an open fire, the amount of energy used that gets converted into useful heat energy, can be as low as 10 per cent. A wood stove has an efficiency of about 75 percent.
A modern oil boiler can have an efficiency of over 95 per cent. In optimal conditions, heat pumps have an impressive thermal efficiency of up to 500 per cent, or a Coefficient of Performance (COP) of 5. Even in freezing conditions, heat pumps have a COP of 1.5 to 2.
Air source heat pumps can still be over 100 per cent efficient in conditions as low as -25°C and beyond. At these temperatures however, ground source heat pumps are recommended as they make use of the steady
and predictable temperature below ground. Globally, ground temperatures a few metres down are stable; in Ireland they are roughly 11°C.
In colder climates, ground source heat pumps are more justified, and they are a great option generally, but the cost may be prohibitive. With Ireland’s mild temperate climate, air source heat pumps may be sufficient, especially with decreased costs and increased efficiencies in recent years.
In the long term, ground source heat pumps will likely be the most cost effective and pay for themselves after seven to 10 years. Air source heat pumps pay back in a shorter time but will have slightly higher running costs over time.
Heat pumps aren’t a silver bullet solution to reduce energy use in buildings. Especially for new builds, it is more important to install insulation properly, specify high performance windows and doors, carefully address construction details and
thermal bridging, and aim for maximum airtightness.
What is often overlooked in Ireland, is mechanical ventilation with heat recovery. This system ensures high indoor air quality and efficiently recovers heat from any source used to warm the home.
Addressing all these elements will significantly reduce the need for space heating to the point where hot water heating will become the primary heating demand. Simple, inexpensive electric heaters controlled by thermostats could suffice for space heating, thanks to low upfront and running costs from high quality construction. It is also important to consider heat pumps for domestic hot water heating. Capital costs can be prohibitive, so the justification for heat pumps in very high quality builds is reduced if upfront costs are an issue. If the government are to incentivise the installation of heat pumps, it is the initial capital cost of purchase and installation that needs to be addressed.
A costly component of your build, windows and external doors are made to measure. That means making sure they’re just right. Here’s a whistlestop tour of what to expect.
The design stage is when to decide how many windows you need, and of what size. You’ll have to consider the light, views and wow factor, and balance all of that with cost, energy efficiency and maintenance requirements (window cleaning can become a headache).
Your architect is likely to pull you in the direction of the more glazing the better, but a
high performing window is four times less energy efficient than an insulated wall. This means that heat escapes in winter but also that in the summer, you’re likely to suffer from overheating.
The way to get around this is to design the house so that the glazing-to-wall ratio is right and consider orientation, or which way the house faces.
The passive house institute’s
When it gets dark outside, you’ll need some form of dressing to make the room comfortable. Blinds and curtains are expensive, because it’s likely they too will be made to measure.
Consider whether the largest window openings will require dressing, (they might not if the area is not used at night), and make provisions for those that will (e.g. concealed fixings at first fix).

software PHPP is especially helpful in this regard.
Pain points for costs are how much uninterrupted glazing you need for your views. The larger the pane of glass the more expensive it will be. Fixed panes are cheaper to install and are more energy efficient, so consider their use in the overall design to soften the blow.
Self-builders, who tend to

go high spec, can easily spend 10k+ on their windows; it all depends on house size, design and choices you make. When selecting windows you’re likely to ask yourself the following:
Aluminium is the most expensive finish and tends to be used for large expanses of glass, costing in excess of €/£850 per sqm. uPVC is the most cost effective (in the region of €/£300-350 per sqm), but high quality uPVC won’t be much cheaper than aluclad (in the region of €/£600-800 per sqm). Aluclad refers to the external side of the frame being clad in aluminium; the frame can either be timber or uPVC. Aluclad uPVC is more cost effective than aluclad timber windows, the latter being the most common.
The debate rages on whether the extra cost for triple is worth it, which can be up to 30 per cent although many suppliers say costs are comparable. Some argue the three panes of glass is now the standard for new
For more about choosing windows and doors

builds, others say triple glazing is only necessary for sound proofing. This can be worked out when you carry out the energy assessment.
Most homes nowadays have a wall of glazing that doubles up as a door to get to the patio. The two mechanisms are lift and slide, which allow the pane of glass to slide along a channel or bifold, which involves hinges along the windowpanes. For these large expanses of glass, aluclad is the most common option (uPVC is more limited on pane sizes). For the largest sizes and for bifold, the framing is often aluminium which pushes up the price further.

Smaller builds such as tiny houses tend to look for secondhand windows and design around them – that’s all fine as long as you’re sure of provenance and that they’re not damaged. This can represent a big saving.
As with windows, aesthetics will be important here. Wood and uPVC doors are no longer common as more energy efficient composite doors dominate the market, with costs starting from roughly £/€1k. Composite doors are engineered using a range of materials such as wood, insulating foam and GRP (glass reinforced plastic).


The external finish of your walls will depend on the build method. For blockwork, a sand/ cement render is the most cost effective option (starting from around €/£30/sqm); there are also silicone based screeds that offer greater weather protection. Blockwork can also be clad in sheets of timber or stone. Insulating concrete formwork (ICF) will require an acrylic render finish, or can be clad (this requires a damp proof membrane). This must be worked out in advance to anticipate if any fixings will be required. For timber frame, many self-builders will build a block wall tied into the timber frame to then screed as normal. You can also go with cladding, or screed onto a cement board. Other building methods will offer similar options.
Flat roofs generally cost less to build than pitched roofs, as much as 20 to 30 per cent less. Then for the roof coverings you can expect to pay from £/€20 per sqm to more than ten times that amount for high end finishes. From least costly to most costly, your roof covering options range from concrete tiles, clay tiles, fibre cement slates, natural sales and metal coverings such as zinc. You’ll also need to consider any valleys or leadwork that might be required as this is also likely to have a visual impact, and cost.
Anne Byrne annebyrnegardendesign.com
When embarking on a home build, it’s tempting to mentally file your garden plans under ‘to be sorted out later’ and that’s fine. But it’s a better idea to at least plan ahead, even if you don’t have the funds to start straight away.
Unless you’re happy to spend the first few years in your new home looking out the windows at heaps of earth, puddles and weeds, it makes sense to incorporate the outdoor planning into your building plans at an early stage, and as a garden designer, I find this is increasingly what selfbuilders are inclined to do.
A good garden designer will produce a set of plans drawn to scale that you can implement right away, or in stages over a period of several years if that suits you better. Your designer’s job is to figure out what will work best for you, and make sure this aligns with your plans for the house, as well as being feasible in your site and location. Commissioning a set of plans means you can be certain that if you complete some parts of the garden now and leave others till later, you’re working towards a coherent plan that ultimately covers every aspect of your space, with each element in the right spot and with the right proportions/ dimensions.
A comprehensive set of garden plans typically
includes a layout plan showing all the hard and soft landscaping elements in relation to the house itself. Your package should include separate planting plans, and the designer should ensure that all plants specified, (hedges for screening, trees for height and/or shelter, and ornamentals to look good), reflect your own aesthetic preferences and are suitable for your site.
Conditions from one site to another can vary hugely, even in the same area – your garden could be sheltered or exposed, prone to salty sea winds, frost pockets or flooding, and contain soil that’s well drained and rocky, or damp and loamy. You can see the temptation to put off even thinking about it until you absolutely have to.
If this sounds bewildering, don’t worry –your designer can provide a mood board with carefully selected images to help you visualise the garden and see how it will work for you.
By thinking about the garden and engaging with your garden designer early on, you can make sure that paths and patios near the house are in the best location and are the right size. The designer should consider which doors you’ll use the most to move from
house to garden, shed or office, and how these need to link with parking.
Views from inside should be considered and if screening with plants is needed adequate space can be assigned, even if ground preparation and planting happens later.
All of this helps prevent expensive mistakes that you may regret further on, and if you want your builder to install some of the paving or complete some of the groundworks, you’ll have a plan to work from and discuss with them, allowing you to make the most of the manpower and machinery on site while you have them.
Home builders typically invest from €3,000 and upwards in their garden design, for a detached home on a half acre site or larger, with design costs for projects varying according to the size of the site and complexity of the project.
The cost of implementing your garden design will obviously depend on the paving materials chosen, the amount needed, and the plants selected, as well as additional features. Expect to allow in the region of €200 per square metre for the supply and installation of paving as a rough guide, so an average sized patio /
Once
seen as a luxury, garden design is recognised as adding value to your property. It’s also a vital step in creating an indoors and outdoors that fosters your family’s mental and physical wellbeing.
seating area, which is one of the first things many people look to do, could typically take anywhere from €5,000 to €10,000 of your budget.

Hard landscaping refers to paving and building so includes patios, paths, steps, walls, raised beds and driveway and parking spaces.
Soft landscaping includes planting and sometimes water, so lawns, trees, hedging, and ornamental planting such as areas of shrubs and perennials to bring the garden to life.

The site we are building on is located in the countryside, on the family farm in Co Tyrone, which falls under the jurisdiction of Mid-Ulster District Council. It was always my intention to move back home and build close to my family, but what really motivated my wife and I to take the plunge was the need for more space.
We had our third child last April and are fast outgrowing our current three bed semidetached house in a local town. Although prices across the board have risen quite considerably in the past number of years, we wanted the kids to grow up in the countryside, so we felt it was the right time to build.
We were extremely lucky to have been gifted the site which was a huge help. To
be honest if we had to buy the site before we started the build we quite literally couldn’t have afforded to do it, so we realise we are in a very privileged position.
The starting point for the style of house was a range of different ideas. Thankfully we have lived in a house with the kids for a few years which gave a great insight into things we would like which we don’t currently have or where more room would be a huge help. Had we built this house five years ago before the children were born, I dread to think what monstrosity we would have come up with. It would have been a random mix of modern ideas from social media which just wouldn’t have been
practical and would have been expensive to build and maintain.
The aesthetic appearance of the house was very important to us, but the main criteria was that it be a functional, low energy home that would be cheap to run and make the most of the space we had.
Upstairs we wanted four good sized bedrooms so the children could eventually have a room each and in the main bedroom we incorporated a walk-in dressing room and ensuite.
At this design phase we spent 90 per cent of our time planning the layout downstairs as there were so many possible variations for everything. We only spent around 10 per cent of the time on the upstairs design as it more or less took care of itself. We tried where possible to keep the bedroom glazing on the west side of the build to avoid the morning sunrise.
I am a certified passive house consultant so was keen to keep the form factor as low as possible. So, the simpler the shape the easier it would
House size: 250 sqm
Bedrooms: 4
Plot size: 2 acres
Site cost: gifted
Build cost: £250k
Construction: masonry
cavity wall
Ventilation: centralised
mechanical with heat recovery
Heating system: air to water heat pump
House build cost: £100/sqft
Building concrete blocks:
£3.50 per square foot plus £9,200 for builder
Windows and doors (house and garage): £19k
Attic roof trusses (house and garage): £9k
Slates (house and garage): £8k
MVHR installed: £6k
Heat pump, cylinder and underfloor kit: £9.5k
Stairs: £4.5k
200mm blown bead insulation (house only): £4.3k
Electricity connection: £6.5k
Water connection: £1.2k
Electrical work: £9k
“At this design phase we spent 90 per cent of our time planning the layout downstairs as there were so many possible variations for everything. ”

“The biggest cost saving we have made, and it is massively underestimated, is by keeping the shape of the house simple.”
be to hit the required metrics in terms of airtightness and U-values (see explainers on next page).
Thankfully this played nicely into the style of house we wanted, as we both like the two storey modern/ Georgian farmhouse style. This style of house allowed us to make the most use of space as we had no irregular shapes to design around.
We wanted a nice open plan kitchen and living area as we tend to spend most of our time in these rooms. This meant orientating the kitchen to the south side of the build and incorporating slightly more glazing to take advantage of views and solar gains. We also really liked
the idea of a larder to reduce clutter and keep the main kitchen area simple.
We decided to use the space under the stairs for a walk-in larder as it was likely to finish up just being a wasted space otherwise.
We also went with no back hall to make the utility room larger and used the extra space to incorporate a drying room within the utility. We stacked the wet rooms (toilets/showers, etc.) and kept them all to the north/ east of the build. This helps with the waste pipe returns and with the mechanical ventilation with heat recovery (MVHR) system efficiency as all the extract rooms are on one side of the house and the
supply rooms on the other. It also meant less protrusions through the exterior walls which helps keep the building airtight. This design means that there is no protrusion on the front or either gable wall which we felt was very important for the aesthetics. In total there are only two pipe protrusions on the entire house as the
change throughout the build. The biggest cost saving we have made, and it is massively underestimated, is by keeping the shape of the house simple. We essentially have a rectangular box with a straight truss roof and no chimneys. We have saved thousands on materials and labour in this regard and have got a more spacious, energy

majority of the smaller waste pipes were joined inside the house within the suspended ceilings. We also went with a multipurpose room downstairs which for now will be a toy room for the kids but may be converted to a bedroom sometime in the future if required.
Budgeting on a self-build can be difficult because it’s a moving target – things
efficient home.
A very modern build with irregular shapes, bay windows, flat roofs, chimneys and lots of glazing would have cost considerably more and it also would have looked out of step with the countryside surroundings. Due to this saving, we felt we could spend more on the interior which is why we have chosen to go with the higher end suppliers in terms of the kitchen, windows, stairs and

MVHR.
We have also been able to save money by getting several quotes from different suppliers and keeping them competitive against each other.
There are also several jobs which we have done ourselves particularly in relation to the airtightness which can deliver a good saving.
It’s very likely we will have to make some tougher decisions later in the build when it comes to bathrooms, tiles, flooring and furniture, and we will have to look at the more budget friendly options with them.
The kitchen was one of the easier choices on this build as we both wanted our kitchen to come from a local company that has a reputation in the Tyrone area for producing high end handmade kitchens. It was important for us as it’s a room we are going to spend the majority of our time in as
a family, and when we visited their showroom we were sold straight away.
In fact, they were our first port of call when we got planning approved. We actually spoke to our kitchen designer before we spoke to our architect as we knew it was going to be the centrepiece of the entire house, so we basically got the kitchen we wanted and then designed the rest of the house around it.
I would recommend speaking with your kitchen designer alongside the architect at the very early stages of the design process as it’s such an important room in any house to get right.
As we are going for a very simple, uncluttered design with no stove or chimneys in the open plan kitchen/living area the room could look quite empty, so we really wanted the kitchen itself to be the standout feature of the entire house and give it the ‘wow’ factor. The kitchen designers gave us some
really good ideas of simple features to add to really make it stand out, such as a bulkhead feature surrounding the entire room with upstand strip lighting and coving incorporated. For a small bit of additional cost it really gives the room a huge lift.
The bathroom choices at this stage are still up in the air. We have spoken to some local companies and looked at importing from Poland but haven’t fully settled on anything yet. Broadly speaking we haven’t focused as much on our bathrooms as they aren’t as high on our list of priorities.
Whereas in our kitchen/ living and utilities we have been meticulous in the details we want, we would be happy with almost any type and style of bathroom.
The outside space was at the forefront of our thoughts and was probably the second most important consideration for us after the kitchen/living
Form factor: The relationship between the external surface area (A) and the internal Treated Floor Area (TFA). Achieving a heat loss form factor of less than three is a rule of thumb when designing passive house homes.
Compact building (low A/V ratio): A low external surface area (A) to internal volume (V) ratio – less than 0.7sqm/ m3 – will result in a more energy efficient build, i.e. one with a low heating demand.
U-value: A measure of how effective a material is as an insulator. The lower the U-value the better.
Airtightness: A measure of how many air leakages a building contains.


area.
We really wanted the house to be absorbed into the existing landscape as we like the look of livestock grazing in the fields around the house, which is why we chose to go for no gardens at the front or sides.
We plan to only have an artificial grass area out the back so the kids can play on it all year round. From experience in our current house, the kids can only play in the garden a few months a year when it is dry. And they also bring a lot of muck and dirt back into the house which we wanted to avoid.
This option will be very low maintenance and we hope to offset the cost of this artificial grass by the fact we won’t have to buy any equipment to maintain natural grass (lawnmowers/ strimmers/hedge cutters, etc.) which can be costly and time consuming.
We deliberated for weeks over the external finishes and
eventually settled for a sand and cement rubbed up finish. We both really like the look of a low maintenance acrylic render when it is freshly applied, in white. But we have seen too many examples where it gets really badly discoloured over time and turns green and black, which was off putting particularly as we are surrounded by trees and shrubs.
We also looked at a dashed finish as it would help to hide any hairline cracks which might appear but didn’t think it would suit the style of the house. We will eventually paint the house, but for now the grey sand and cement finish looks good and it also feels a little more like a blank canvas. It gives us time to choose the right colour.
The windows and doors were a relatively simple choice in terms of the supplier as the company we chose has a great reputation in the
Tyrone area with excellent after sales support which was very important to us.
I was keen to go with triple glazed casement windows to keep with the passive house principles, but my wife really liked the sliding sash windows which only come in double glazed, so it was a trade-off between performance and aesthetics.
We eventually went with the double-glazed sliding sash as we felt that aesthetically it went with the house style better, and we were happy to take a slight hit on the U-value and airtightness.
We also knew that the windows would be expertly fitted and have also been told that a well fitted double glazed window will outperform a badly fitted triple glazed window.
To make up for a slight performance drop with the windows we decided to go for a composite door over the conventional uPVC as it had a better thermal efficiency and U-value.

“We also tried to maximise south side glazing for solar gain, but we also wanted to try and keep some symmetry between the two gables.”
We also tried to maximise south side glazing for solar gain, but we also wanted to try and keep some symmetry between the two gables. So, like many of the decisions it was a three-way trade-off between performance, cost and aesthetics.
Planning permission in this case was relatively straightforward as there were favourable factors which helped the site get approved. We applied under policy CTY 10 ‘Dwelling on a Farm’ as we knew we met the criteria for this policy. The house is visually linked to an existing farm building, and it has a very mature hedgerow fully surrounding it which meant it was an ideal site for absorbing a new dwelling.
There was also an existing laneway and excellent visibility splays in both directions from the entrance, so it ticked a lot of the required boxes. Our architect submitted the planning application on our behalf and dealt with the entire process which all ran very smoothly. The entire process took around six months from the initial application.
In NI, if your house is under 250sqm there is a fixed Building Control inspection fee of £238. If you go over that value even slightly, the inspection can rise massively into the thousands so it’s an important thing to consider when applying for planning permission.
We went with a 12kW heat pump and underfloor heating on both the ground and first floor. The company supplying the heat pump sized this system for us, and although it is slightly oversized it has a variable control feature. This means that if it only requires 2kW, that’s the energy consumption it will use as apposed to coming on and off with the full 12kW blast. It also means that the heat pump will never be running at its maximum capacity which will help with the lifespan of the compressor unit.
We have also installed photovoltaic (PV) panels on the south facing garage roof to complement the heat pump. The solar panels generate electricity, which is what the heat pump runs off. We also opted for the upgraded inverter which can incorporate battery storage.
At this point, purely from a cost perspective, we didn’t add the battery storage, but it’s nice to know the system is futureproofed and can be added down the line.
We always wanted the house to be ecofriendly and we are hoping that with high levels of insulation and good airtightness that it will be an economical way to heat the house also.
The other option we looked at was an oil boiler with radiators spread throughout the house. This didn’t appeal to us as we felt the heat pump in conjunction with the MVHR system would give us the best comfort levels.
There were lots of different heat pump options and to be honest they all were very good, but we got a recommendation from a friend who had installed this type of heat pump in their new build and that swayed us to go with that option.
We also looked at possibly upping the size of the hot water cylinder to 500 litres to take advantage of the solar panels in the summer, but we felt what you would gain in the summer you
March 2022
Design start
April 2022
Outline planning applied
March 2023
Full planning applied
June 2023
Planning granted
July 2023
Site clearance, foundations and subfloor
September 2023
Slabs installed
December 2023
Roof trusses
January 2024
Roof slates
February 2024
Windows installed
March 2024
MVHR installed
April 2024
Metal ceilings, first fix plumbing and electrical
May 2024
Electricity and water connections to site
May 2024
Plastering


would lose in the winter with the bigger tank, so we eventually settled for a 300 litre tank. We used the rough calculation of 50 litres of water per person to size the cylinder.
This was a choice we deliberated on quite a bit. We were always going to install a full MVHR unit as opposed to positive input ventilation (PIV) units but there was so much choice, it took time to get our heads around it. There were some budget friendly options, but we
decided to spend a little more and go with one with additional features which we felt justified the uplift in cost.
The main thing we liked was the built-in preheater with frost protection. And the fact that it was selfbalancing. We had spoken to other friends who had installed MVHRs who were happy that they were getting clean fresh air but they said the temperature of the air was too low.
My advice in this area would be to double check that you have some kind of pre-heater/frost protection on the intake as otherwise on cold nights in winter your system will either not work at all or will be exhausting warm air and taking in much colder air. For example, if your house is heated to 20degC in winter and the outside air temperature is zero degrees, with the MVHR running at 75 per cent efficiency it
still means that the supply air is coming in at 15degC. That would be noticeably uncomfortable. With a preheater on the intake, the supply air gets a boost before it goes through the MVHR unit.
I would recommend taking time to think of where the connections for electricity and water will go as it can add considerable cost if you must install transformers and several electricity poles. With the water connection also, we have heard some horror stories of sites
being a longdistance from a connection point and ultimately having a massive drop in water pressure by the time the water reaches the site.
We have just recently got our electricity connected and bar the initial upfront cost of a new connection the rest of the process has been straightforward. From the moment we made the payment to NIE Networks, we had about a 10-week turnaround time to installation.
We were lucky that we had an existing transformer and pole just less than 200m from the site, so we didn’t require


Even though it’s more expensive, Patrick chose cork plaster instead of traditional gypsum as it improves the thermal performance of a wall and allows it to breathe and balance room humidity which prevents condensation and mould. It’s also up to 10 times more elastic than traditional plasters reducing the risk of cracks and helps reduce thermal bridges.


any additional infrastructure and we were able to run he cable underground. As the cable was running through agricultural land it had to be buried 1100mm deep which meant a little extra work on the excavation and back fill as the standard trench depth is usually 550mm.
Thankfully my family owned the agricultural land we were digging through so there was no issue with permission or access.
The water connection was made with NI Water and again the process was straightforward with a reasonably quick turnaround time. We had a new connection point about 100m from the site which
means we have good water pressure.
The more information you can bring to you architect at this stage the better as you can make more informed choices about the layout and style if you know what you want from the start.
Our construction drawings took some time and there were several revisions from the initial draft. We were lucky to have a good architect who was happy to listen to what we wanted and make suggestions and improvements.
We also took the initial

construction drawings to several of the key people who would be working on the job such as the kitchen designer, MVHR designer, tradesmen, plumber and electrician.
They all were able to make slight changes and improvements and it was worthwhile speaking to as many people as possible at this stage as they all had good suggestions.
PIV: Mechanical ventilation system that pumps fresh air into the home, usually to a central location, to create a pressure differential that pushes out stale air through gaps in the fabric and trickle vents.
MVHR: Centralised mechanical ventilation system that mechanically extracts stale air and replaces it with filtered fresh air that’s been prewarmed (by the heat gathered from extracting stale air).

Walls: 200mm cavity walls pumped with EPS beads, cork lime plaster on window reveals, U-value 0.17W/sqmK
Roof: 200mm rockwool between joists, 50mm insulated plasterboard below, U-value 0.12W/sqmK


Floor: 50mm insulated liquid screed to cover pipework, 100mm PIR board 50mm liquid screed on top (200mm total), U-value 0.15W/sqmK
Windows: timber sliding sash double glazed, overall U-value 1.4W/sqmK
Self-build diary – Louis Gunnigan

In part two of Louis Gunnigan’s self-build diary, he explains how he went about finalising the design of his home built for retirement.
For us, a big part of getting the space right was to have no circulation spaces apart from the entrance hall. This means every bit of the house is usable space, making it feel bigger than it is. We also went for higher ceiling heights to add to that feeling of spaciousness, at 2.6m as opposed to the standard 2.4m.
The house is T-shaped, with the kitchen/dining area and spare room in one section, which we’d originally specified to have as a flat roof. But we decided the kitchen would benefit from a double height ceiling in the form of an apex roof.
This created an attic above the spare room, which we decided to use as the plant room. We have the water tanks up there, for mains water and for the rainwater. The heat recovery ventilation unit is there as well.
In the rest of the house, above the bedroom area and living room, there’s a full attic space that can be converted into one or two spare bedrooms. There’s 40sqm of usable space; we used 9x2 rafters which means we have full ceiling height on it. We also put in the full depth of floor joists so anyone converting won’t need steel.
A knock-on effect of not having corridors is that each bedroom needs its own ensuite. For visitors, we have a toilet and wash hand basin beside the spare room behind the kitchen. This bathroom doubles as an ensuite if the spare room is ever used as a third bedroom.
This spare room is multipurpose; it’s most often used as a sitting room or playroom for the grandchildren, but it also has a sofa bed.
As for the statutory

requirements, planning permission was straightforward with our architect. For the health and safety, our architect took on the role of Project Supervisor Design Stage which didn’t add much to his fees.
Wall covering. Because we built with Insulating Concrete Formwork (ICF) we had to go with an acrylic plaster, the same stuff that goes on external wall insulation. One thing to remember with this system is that a satellite dish would need a fixing right through the insulation to the concrete. It wasn’t something that bothered us as we went for a TV streaming service via broadband.
Roof covering. We chose a fibre cement slate that looks like a blue Bangor slate, as opposed to tiles and looking at it now, our decision was justified. The architect at the time said they’d seen both and had no recommendation either way. I think it’s worth the extra cost.
Guttering. The gutters and downpipes had to be aluminium because we’re less than three kilometres from the sea; we could have gone with uPVC but didn’t want to because of aesthetics. The standard galvanised finish that you see on most houses would only last five years here. Going with aluminium added a considerable amount to the project, about €2,500.
Site size: 740sqm
House size: 95sqm
Bedrooms: 2
Site cost: €170k
Build cost: €340k
Heating: Air to water heat pump
Ventilation: Centralised
mechanical with heat recovery
Construction: ICF
BER: A1
Trim. We have no fascia and soffit, and the slates come to the edge of the wall. The trim on that was expensive, well over €1k, because it also had to be aluminium. This added cost, due to our coastal location, wasn’t one we had expected. But it looks fantastic which makes it a worthwhile investment.
The kitchen was done by a subcontractor who usually works with the builder; he works out how many boxes (carcases) are needed and goes from there. He builds everything from 18mm chipboard, and the back is 12mm, so the units are really solid. We chose the doors from a supplier that he works with. Then we sourced the quartz worktops ourselves and he worked with that supplier directly on our behalf.
We had a couple of things we wanted to get right for the kitchen; it’s not a huge space with the two of us here. For one, the island on castors added huge flexibility. The U-shape came about then because there are two doors within the kitchen that lead to other parts of the house.
These doors are made to look like cupboards. There’s a great sense of hilarity

sometimes when people get confused as to which opening is a door to another space and which is a cupboard.
There were a lot of discussions about the design to make sure we got it the way we wanted it. The coffee station is hidden with bifold doors and we also have a sliding pantry type of cupboard. It keeps everything very tidy; there’s nothing on the counters. We also have drawers for pots and a magic corner cupboard.
For the bathrooms, we went to as many different places as we could for ideas of what would work. We ended up getting all of the bathroom finishes from the same place, which means we have the same quality all the way through.
We went with the standard set up of heat recovery ventilation and an air to water heat pump with underfloor heating. We originally looked into exhaust air heat pumps but even though I was under the impression it could be used for a house that’s less than 100sqm, our supplier
had only installed them in apartments.
The thinking is that with other apartments around you, you don’t lose as much heat as a bungalow would. Our suppliers had never used it in a detached house and weren’t comfortable with it, so we went with an air to water heat pump instead.
The house is so well insulated, and the set up is so good, that when someone who’d come to repair something else forgot to turn the isolation switch for the heat pump back on, it took me four days to realise the hot water was not as warm as it should be.
At the time it was one or two degrees outside at night, but four days after the switch had been inadvertently left off, the heat level in the house hadn’t noticeably dropped.
The technology is great, and as we all move away from fossil fuels, using electricity on its own doesn’t make sense when you know a heat pump will turn one unit of electricity into three to four units of heat. It really is very cost effective to run.
We also got a solar system with 14 photovoltaic (PV) panels with the capacity to generate 6.7kW of electricity.
This is paired with 10kWh of battery storage, so we are practically independent. Over the three months that we are in the house we have generated over 2MW from the panels, using what we need and exporting the excess.
We live in a built up area so connections were available at the site boundary. I made the connection applications and handed over the relevant contact details to the contractor in the hope that direct contact between suppliers and
For the suppliers list, specification, and more tips and advice, read up on the first part of Louis’ project in the Summer 2024 edition of Selfbuild magazine and here
contractor would speed things up.
However, the utility companies wouldn’t go along with this, insisting that they would only communicate with the person who applied for a connection. This resulted in a lot of time being wasted as I was relaying questions and answers in both directions.
Instead of notifying the contractor that they would visit on a specific day to connect up the house, I’d get an email saying can you ring us so we can arrange a date that suits. And then when I’d ring the number provided, the person wasn’t in the office. It’s all a bit more complicated than it needs to be.
In the end, the water connection took 42 weeks and the electricity took 49 weeks. This is a crazy amount of time considering the mains water supply and the electricity lines were at the site boundary from the outset.

Remember it’s your house.

My wife has a fabulous eye for colour and she chose a dark blue for our aluclad windows; the architect thought a grey might be better but we stuck to our guns and it looks fantastic. You’ll get a lot of advice and opinions, but remember that at the end of the day you’ll be the one living in the space.
Insulate the attic floor. The downside to having the equipment up in the attic is that in the back room, you can hear when the ventilation is running so we probably could have put a bit more insulation in the ceiling. If you were sleeping in that spare room, you would hear the water tank filling up as well. At some stage we will put in this extra insulation so that this room can become a quiet space like the rest of the house.
Find out more about who you’ll be hiring on your project here

Site assessors evaluate land suitability for wastewater systems in self-build projects. They ensure compliance with local regulations for practical, sustainable solutions.
In NI, specialists from companies that supply onsite wastewater treatment systems conduct assessments, while in ROI independent assessors offer recommendations that are not tied to specific products or suppliers.
That said, the type of product an ROI assessor recommends may only be available from a limited number of companies, or just the one. If the assessor overspecifies what type of system you need, and you’ve gotten planning permission on the back of it, there is no recourse to change the specification unless you reapply for planning with a new site assessor’s report.
Conduct site inspections:
Site assessors visit your property to gather information about its physical characteristics, such as soil type, topography, vegetation and proximity to water bodies. They identify potential constraints or challenges, such as high water tables, poor soil drainage or proximity to environmentally sensitive areas.
Soil and site testing:
Site assessors analyse soil permeability, texture and composition to assess its suitability for wastewater absorption. Percolation tests gauge water drainage rate for system selection. They also measure water table depth to prevent groundwater contamination.
Environmental impact assessment: They analyse the
site’s hydrology to understand how water flows across and beneath the property. This helps in planning systems that won’t negatively impact nearby water resources. The assessor evaluates potential impacts on local ecosystems, including plants, animals and waterways, to ensure that the development will not harm the environment. Ensure regulatory compliance: They are well versed in local, regional and national regulations regarding wastewater management and land development. The assessor prepares detailed reports that outline their findings and recommendations. These reports often include site maps, test results and proposed system designs. Their reports are essential documents that support planning applications, demonstrating compliance with regulatory requirements. Recommend appropriate systems: Based on their findings, they will recommend the most suitable type of wastewater treatment system for the site. This could range from conventional septic systems to advanced treatment units. They consider the size and layout of
the proposed development to ensure that the recommended system will be effective and efficient.
While they provide essential reports and recommendations, they cannot guarantee that your planning application will be approved.
When looking for a site assessor in NI, you’d want someone with qualifications or accreditations in environmental assessment, land surveying or civil engineering. They should ideally have credentials like Chartered Environmentalist (CEnv) or Chartered Surveyor (MRICS). Membership in organisations such as the Royal Institution
of Chartered Surveyors (RICS) or the Chartered Association of Building Engineers (CABE) indicates compliance to professional standards.
Site assessors in ROI often have accreditation from bodies like the Society of Chartered Surveyors Ireland (SCSI) or Engineers Ireland.
Site assessors in ROI charge a fee for their services, which can either be a flat rate or based on the complexity of the assessment. Typically, this fee is paid either upfront or upon the completion of the assessment report. In NI, if the assessment is conducted by a supplier, the cost may be included in the overall package price of the wastewater treatment system.


• CE and EPD certified alpha hemihydrate underfloor heating screed
• Onsite production by fully automated mobile screed factory
• Produced and installed by one company - no third parties
• Industry leading, Südanit 280 Alpha


