4 minute read
SETTING UP THE CAT COMMUNICATION ADAPTER II

from Et adaptor
by saher magdy
Requirements
171-4400 - Cat Communication Adapter II Group
Advertisement
NOTE: The 171-4400 Cat Communication Adapter II may be used; however, it is no longer available for purchase from Caterpillar Inc.
NOTE: For specific part number information, contact the Parts Department of your local dealership.
The following equipment is included in this group:
Requirements: Description
Cat Communication Adapter II Data Link Cable (24 inch) This cable must be used for J1939/11 communications. Serial PC Cable (25 foot) Carrying Case Block/Foam for carrying case Communication Adapter II CD-ROM and User's Manual
Optional Cables: Description
In-Cab Adapter Cable for ATA In-Cab Adapter Cable for the J1939/11 Serial PC Cable (10 foot) This cable can only be used with the Cat Communication Adapter II Parallel PC Cable (25 foot) IEEE 1284 (male to male connector) This cable is for PCs that do not have a serial port. This cable can only be used with the Cat Communication Adapter II
USB to Serial Adapter Kit (16 inches) ATA/CDL Unicable from a Cat communication adapter to the service connector NOTE: The 7X1412 ATA or 7X1570 CDL cable may also be used. However, these are no longer available for purchase from Caterpillar Inc. ATA/CDL T-Adapter (not required for all applications)
Cable Assembly used to connect the Service Tool directly to the ECM. Main Harness A3 and A4 E4 stub (requires Main Harness)
A4 E1 stub (requires Main Harness)
Instructions
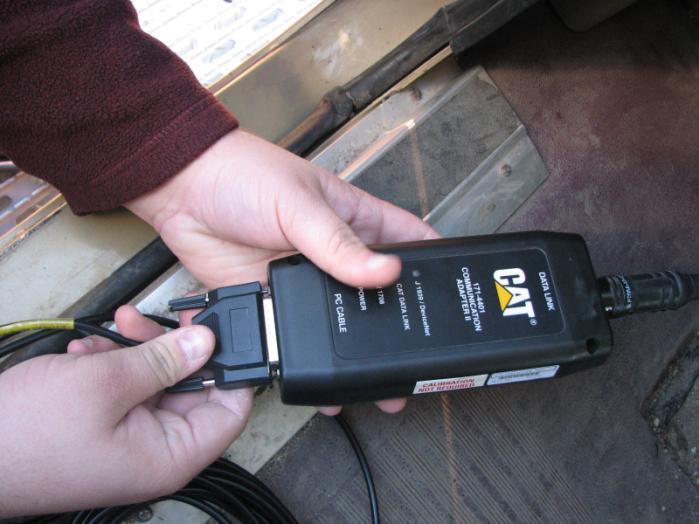
To connect the Communication Adapter II ( “Comm Adapter II”) to the PC, perform the following steps:
Step 1 Align and attach the DB25 connector end of the serial cable to the “PC Cable” end of the Comm Adapter II.
Step 2 Connect the other end (RS-232 end) of the serial cable to the communication port of the PC.
(Shown with optional USB to Serial Adapter)
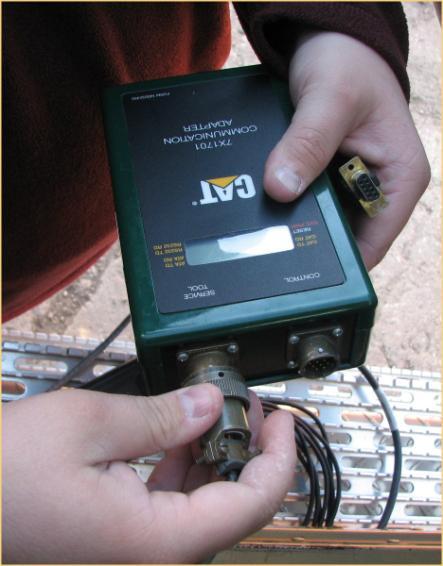
To connect the Communication Adapter II to the data link, perform the following steps:
Step 1 After connecting the Comm Adapter II to the PC, connect the DB15style connector end of the data link cable to the “Data Link” end of the Comm Adapter II.

Step 2 Connect the other end of the data link cable to the product. If the data link is powered (machine power is on), the Power light on the Comm Adapter II will glow and the diagnostic test will begin. The lights on the front of the Comm Adapter II will sequentially glow from the top (“Data Link” end) to the bottom (“Computer” end) of the device. The service tool is now ready to be started.

NOTE: For more information on installation procedures, consult the Communication Adapter II Users Manual.
Updating the Comm Adapter II Firmware to Serial IP
NOTE: Use the Comm Adapter II Toolkit version 4.0.12 or later to update the Comm Adapter II.
NOTE: Use the serial port only to upgrade the Communication Adapter II. Do not use the Parallel port.
Instructions
To update the Comm Adapter II Firmware, perform the following steps:
Step 1 Make sure the Comm Adapter II is connected to the PC and the Power light is on.
Step 2 Go to the Start menu on the computer. Choose All Programs -> Caterpillar Comm Adapters -> Comm Adapter Toolkit.
Step 3 The Toolkit application will start up and display the Summary screen.
Step 4 Choose the Application Firmware Flash icon . Then click the Select File button. The Select Firmware Flash File dialog box is displayed.
Step 5 The following files should be listed on the right: ca2vi2.apf – application firmware cav3i0.0 apf – application firmware ca2v3i1.0.apf – SIP application firmware
Step 6 Highlight the ca2v3i1.0.apf file and click the OK button.
Step 7 Click the Begin Flash button to start the download.
Step 8 A dialog box showing the download progress will appear. The download should take less than 45 seconds. NOTE: All protocol lights on the front of the Comm Adapter II will blink while the firmware is flashed.
Step 9 When the download is complete, a dialog box will appear, allowing a return to the Toolkit Summary screen, a return to the Flash screen, or an Exit from the toolkit.
Step 10 Click the Exit button.
Configuring Cat ET to use the Communication Adapter II
In order for Electronic Technician to work with the Communication Adapter II, the settings must be changed to select the Comm Adapter II as the Communication Interface Device:
Step 1 Start Cat Electronic Technician.
Step 2 Click the Stop Connect button when it appears.
Step 3 Select the Utilities menu.
Step 4 Choose “Preferences…”
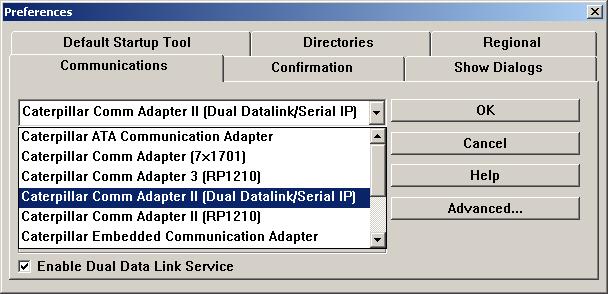
Step 5 Select the Communications tab.
Step 6 Change the Communication Interface Device to “Caterpillar Comm Adapter II (Dual Data Link/Serial IP)” and click OK.
Step 7 Select the appropriate COM port (for example, “COM1”, “COM2”, etc). This application firmware only supports Serial communications.