ASK THE EXPERTS RECHARGEasia
Remanufacturing the Dell 2335dn Toner Cartridge
Continued
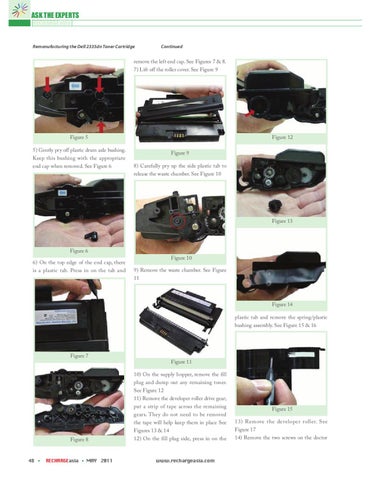
remove the left end cap. See Figures 7 & 8. 7) Lift off the roller cover. See Figure 9
Figure 5 5) Gently pry off plastic drum axle bushing. Keep this bushing with the appropriate end cap when removed. See Figure 6
Figure 12 Figure 9 8) Carefully pry up the side plastic tab to release the waste chamber. See Figure 10
Figure 13
Figure 6 6) On the top edge of the end cap, there is a plastic tab. Press in on the tab and
Figure 10 9) Remove the waste chamber. See Figure 11
Figure 14 plastic tab and remove the spring/plastic bushing assembly. See Figure 15 & 16
Figure 7 Figure 11
Figure 8
48
RECHARGEasia
MAY 2011
10) On the supply hopper, remove the fill plug and dump out any remaining toner. See Figure 12 11) Remove the developer roller drive gear; put a strip of tape across the remaining gears. They do not need to be removed the tape will help keep them in place See Figures 13 & 14 12) On the fill plug side, press in on the
www.rechargeasia.com
Figure 15 13) Remove the developer roller. See Figure 17 14) Remove the two screws on the doctor