12 minute read
Knowledge Transfer and Sharing

Next Article

Knowledge Transfer and Sharing
Training Concept of Construction
The essence of the training was to show the wider community, often with no prior experience in the construction so far, that it is possible to build with your own hands in a healthy, natural and environmentally friendly way. An important element of the training is pro-environmental education, for example explaining why we use natural materials. Working together gives the opportunity to talk about the kind of the world we want to build and what the climate dangers are if we do not switch to green technologies. It is important to emphasize that this is more than just going back to basics. Often such a return is badly associated with a return to a mud hut, with no bathroom or amenities, instead of a modern home. Natural technologies do not exclude modernity, the search for a modern form adequate to the aesthetics of the times we live in, technological improvement for example prefabrication of elements, enabling much faster construction time and greater precision. In this trend of construction, both small but comfortable homes and large facilities with intelligent systems can be created. The training concept assumed the division of work into several stages:
IDEA
The team of experts consisted of architects and builders. According to these specializations, the architects were responsible for the design stage, the builders were to ensure the proper selection of elements and details of the technology. An important element in the search for technology, form and function was the contribution of the Albanian side. Working out the idea required getting to know vernacular architecture and locally available materials. During online meetings and training series, the context was drawn. However, it was only the visit on site that made it possible to refine the project. It was necessary to get to know the plot, look at possible view openings, the trajectory of the sun, talk with future users and get to know the needs of the place and recipients in more detail. Before arriving, one of several projects presented online was selected and combined with other elements from the rest of the projects, possible to be incorporated. Designing online in a group has its limitations. That is why, a full elaboration of the design and agreeing all the details with contractors took place during a live workshop that lasted several hours. In a group, during lively discussion on drawings, with the possibility of sketching, it was much easier to come up with a good project.
PREPARATION OF THE CONSTRUCTION SITE
The works on the preparation of the construction site included: ➔ the exact location of the pavilion ➔ storage of materials:
➔ wood, ➔ straw cubes, ➔ clay, ➔ sand, ➔ describing wooden elements (dimensions and function), ➔ preparation of tools.
THE TOOLS TO BE USED ARE:
• handsaws, • screwdrivers / drills, • hand mortar mixer, • small buckets, • large buckets, • mason ladles, • floats for patch, • hammers, • measuring tapes, • eight-angles, • level, • pencils.
CONSTRUCTION
This stage of work is usually the most complicated, requiring experience, physical strength and good knowledge of tools. It is assumed that these activities should not be left in the hands of inexperienced volunteers or workshop participants. There is the greatest risk of injury with tools, falling or being crushed by a heavier element. Besides, this stage must be really well done for the structure to be stable and so that the next stages can be carried out without major problems. It is the time of observation for the workshop participants and only after a few experiences of this kind and mastering the work with power tools they can actively participate, of course, under the supervision of a specialist.
SUB-CONSTRUCTION
The elements of the substructure are no longer heavy or as complicated as the structure, and there is a possibility to participate in the workshop after being presented with the rules and how to use the tools. Elements of the substructure are created during the workshops. These are for example wooden frames for straw panels, floor substructure or roofing.
MATERIALS OTHER THAN STRUCTURES AND FINISHES
At this stage, materials such as planking for the floor or straw cubes to fill the panels are used. Working with natural materials is fun and easy to learn. Stuffing straw cubes or applying successive layers of clay plaster can be done by people of different ages. Even short experience gives some glimpse to an efficiency, a feeling that you can build with your own hands. Natural materials do not stain permanently, their smell evokes the memory of a meadow, field or forest.
CONSTRUCTION STEP BY STEP:
0. Preparation of wooden elements: cutting to the appropriate size: Tools used: handsaw, petrol saw 1. Screwing the pavilion base (frame under the floor) from perpendicular edge beams using angle brackets Tools used: drill (drilling holes), screws 2. Screwing additional beams supporting the wall where the strawbale panels will be placed and additional beams every 60 cm perpendicular to the floorboards, as a floor support (4 pieces) Tools used: drill (drilling holes), screws 3. Positioning the base on wooden blocks to align the levels (with a spirit level) Tools used: spirit level 4. Preparing wooden frames for prefabricated panels by squared timber Tools used: screwdriver + screws 5. Producing prefabricated elements: - putting the straw blocks into the wooden frame - compression by pressing the straw from above and adding timber profile - fastening of the prefabricated element with a belt
- putting another block of straw into the wooden frame - compression by pressing the straw from above and adding timber profile - removing the upper timber profile from the frame, compressing the straw bale and screwing again the upper square timber - production of 4 prefabricated elements using the above method Tools used: screwdriver + screws, assembly belts 6. Assembling prefabricated elements: - positioning prefabricated elements on the frame and screwing to the frame Tools used: screwdriver + screws 7. Installing poles and the upper frame: - screwing the column to one of the sides of each prefabricated element - aligning the prefabricated element and the column - screwing the beams of the upper frame to the columns Tools used: drill (drilling holes), screws, screwdriver + screws, spirit level 8. Installing the roof substructure: - screwing the beams parallel to one of the sides at a distance of about 60 cm - screwing the shading wooden profiles on top of the structure - cutting Tools used: drill (making holes), screws, drill driver + screws, hand saw 9. Making the "window of truth": - assembling a recycled window to the wooden profile of the prefabricated element, allowing to leave a fragment of a non-plastered wall so that you can see the material used in the panel - straw 10. Installing the floor: - screwing and cutting to size floorboards 11. Preparing the base plaster: - mixing clay, sand, water and straw Tools used: buckets, electric drill + paddle mixer 12. Applying plaster: - applying successive layers by manually imposing the plaster mix on the prefabricated elements Tools used: buckets 13. Preparing the base plaster: - mixing clay, sand, water and a small amount of straw Tools used: buckets, electric drill + paddle mixer
14. Applying top plaster: - applying layers by manually imposing the plaster mixture on the prefabricated elements and leveling with a trowel Tools used: buckets, float 15. Installing plexiglass protecting the straw walls from above: - screwing the plexiglass panels Tools used: drill (drilling holes), screwdriver + screws, handsaw
Exchange of Know-how among Professionals
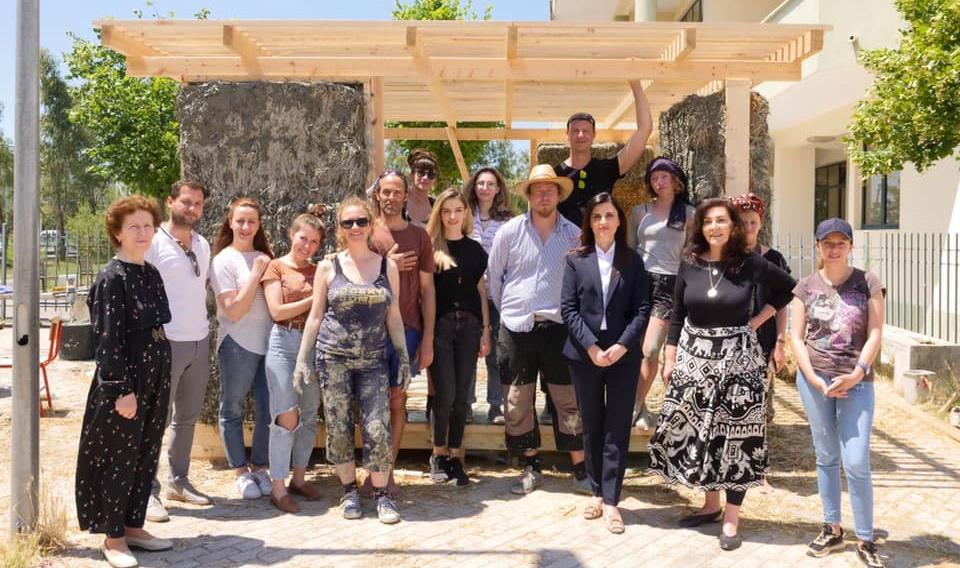
A valuable experience of working in an international team of experts offers the possibility of knowledge transfer. One of the elements of the joint work were talks about the situation on the market and ongoing projects and constructions. We compared the methods of prefabrication in Poland, the Czech Republic and Slovakia, the secrets of good plastering. We considered the durability of materials and the method of protection against weather conditions, comparing experiences from a similar climate zone in Central and Eastern Europe. We had the opportunity to compare legal regulations and restrictions on the use of natural technologies. The experiences in the Czech Republic, Poland and Slovakia are slightly different from one another but relate to similar realities. The workshop in Albania gave the opportunity to present the path followed by the above-mentioned countries in developing the use of natural technologies, presenting possible paths of education, legislation, as well as benefits and limitations.
Project Ideas Developed
PROJECT 1
Jan Dowgiałło

A small pavilion made of wood and compressed straw.
function - pergola, bike stand, possibly a swing location - both places are good materials - straw bales, wooden planks, plywood, transport straps:
OPTION1 - GREEN ROOF (long lasting, more work and money) OPTION2 - NO ROOF (simple, easy, temporary-natural decomposition)
MATERIALS
• STRAWALES X70 • 10M TRANSPORT BELTS X12 • WOOD ~ 4X12 ~ 400 RUNNING METERS • SCREWS • NAILS
TOOLS
• CIRCULAR SAW • HANDSAW • ELECTRIC SCREWDRIVER • POWERDRILL • 2-3 HAMMERS • PLIERS • CONSTRUCTION LEVEL • PENCILS
PROJECT 2
Magdalena Górska
Small pavilion with a green roof as exhibition place and meeting point.
We have three exhibition walls. On each we will have from inside the “windows of truth” of size 1x2m and information board. The rest will be plastered or covered with OSB board. Wall filled in using different techniques of natural design: strawbale, adobe, hempcrete or cordwood. If we don’t have time to plaster everything, we can cover outside of the wall (from outside) with ECO OSB and from the inside with plexiglass.

It will be safe from wind and humidity and durable. What should be prepared before workshops: - foundations - post - main constructions of the roof
MATERIALS
• 8x WOOD POSTS - 16x16x230cm • 8x POINT FOUNDATIONS (concrete or metal screw) • 16x6cm WOOD FOR ROOF CONSTRUCTION • OSB eco - 14m2 • EPDM MEMBRANE - 18m2 • METAL FINISHING – METAL PLATE 15cm, 13,6mb • STRAWBALE - ok. 40, • SCREWS • CLAY - 4 bags • SAND - 4 bags • LIME FOR MORTAR - 4 bags • WATER • (fountain - bricks - 100) • PLEXI GLASS - 6m2
PROJECT 3
Magdalena Górska
BENCH - one shape - a lot of orientations and configurations.
From two sides covered with plexiglass - showing technique of natural building - bench as a form of exposition. From other sides protected with wood planks and eco OSB. Can be filled with different techniques of natural design, strawbale, adobe, stone, hempcrete. It would be durable because the materials inside will be covered –

they will not have direct connection with outside (covered with plexiglass or wood boards). In each position of the bench, we see plexiglass that show us details of the inside filled with straw or other natural materials. It would be great in a city place, to play with configurations to create an interesting public area and at the same time promoting natural materials - exhibitions.
MATERIALS (One bench)
• 8x3cm WOOD PLANKS - 20mb • SMALL PLANKS 2x1.5 - 60mb • PLASTIC GLASS - 3m2 • OSB eco - 5m2 • STRAWBALE - app. 9 • SCREWS • CLAY – 1.5 bag • SAND – 1.5 bag • WATER
PROJECT 4
Katarina Kierulf

A small pavilion with 3 walls & a simple thin metal roof – designed as long-lasting.
2 walls could be filled with straw-bales (cutsystem) fixated between wooden pillars 1 wall could be a clay wall or 2 walls clay & 1 straw or 1 straw, 1 clay & 1 another type
In this way, the participants would learn real building techniques. The group that will be working with clay could explain how to plaster. This could be done later by locals. 1st day - wooden construction, 2nd & 3rd day infill-workshop days.
PROJECT 5
Anna Zawadzka
A small pavilion 2.5x2.5x2.5m with two benches.
Both locations are possible. If the pavilion is seen from above the green roof can be used. The structure doesn’t require foundations. The simplest version has a shading roof, which also protects materials samples. The main idea is to show different samples of natural materials, depending on what we have: straw, straw and clay, stone, different clay, hemp, green wall etc.

MATERIALS
• WOOD 12X12X250 CM, 10 PIECES • benches: • WOOD 12X12X250 CM, 4 PIECES • WOOD 12X12X50 CM, 8 PIECES • shading: • WOOD 4X4X250 CM, 32 PIECES • WOOD 4X4X60 CM, 64 PIECES • natural materials for the samples • STRAWBALE 45X45X70, 1 PIECE OR JUST STRAW • CLAY, DIFFERENT COLORS • POSSIBLY SOME OTHER NATURAL MATERIALS - HEMP, LIME • wood for the samples for the samples • WOOD 6X12X225 CM, 4 PIECES • WOOD 6X6X52 CM, 10 PIECES • PLYWOOD 52X52X1, 10 PIECES • SCREWS • NAILS
TOOLS
• CIRCULAR SAW • HANDSAW • ELECTRIC SCREWDRIVER • POWERDRILL • 2-3 HAMMERS • CONSTRUCTION LEVEL • PENCILS