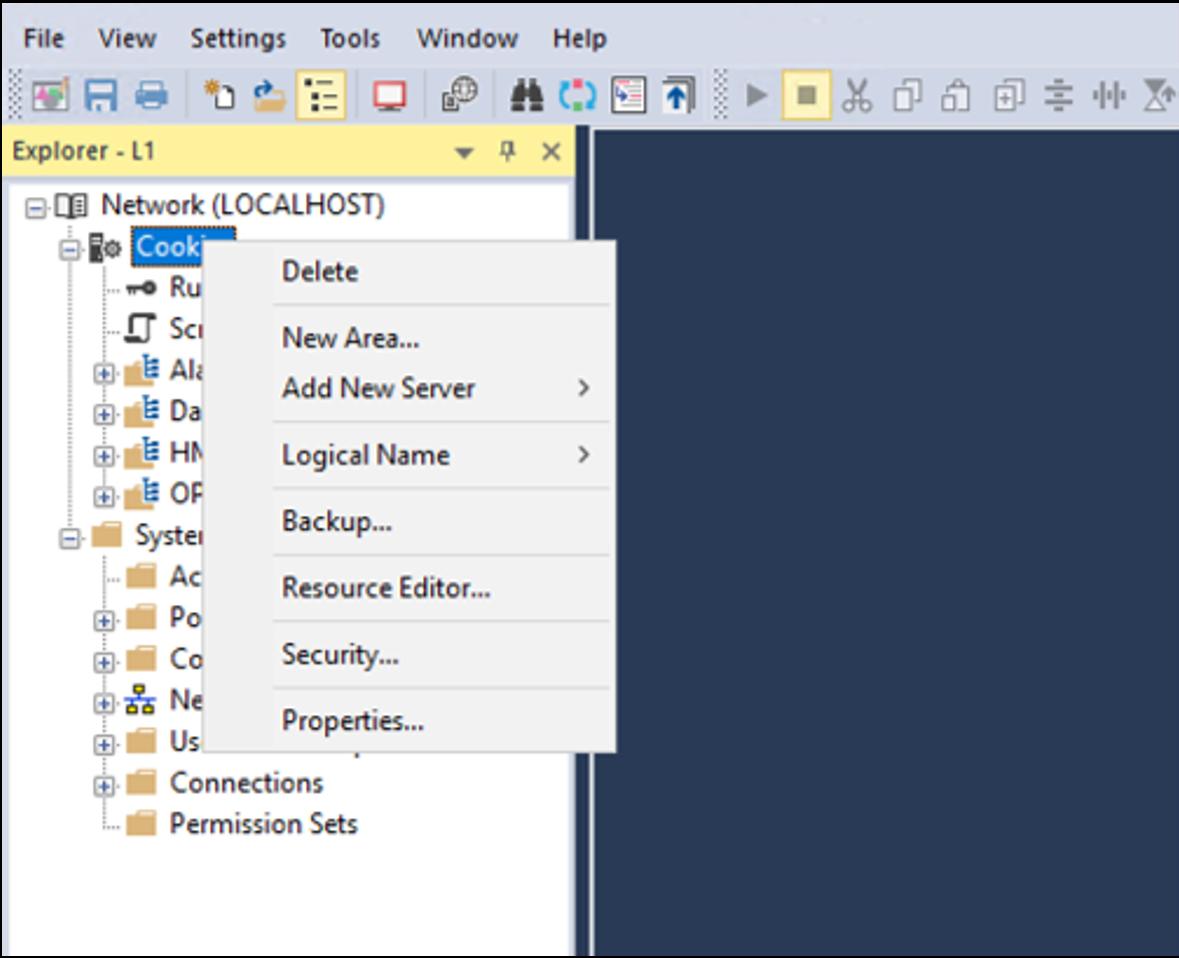
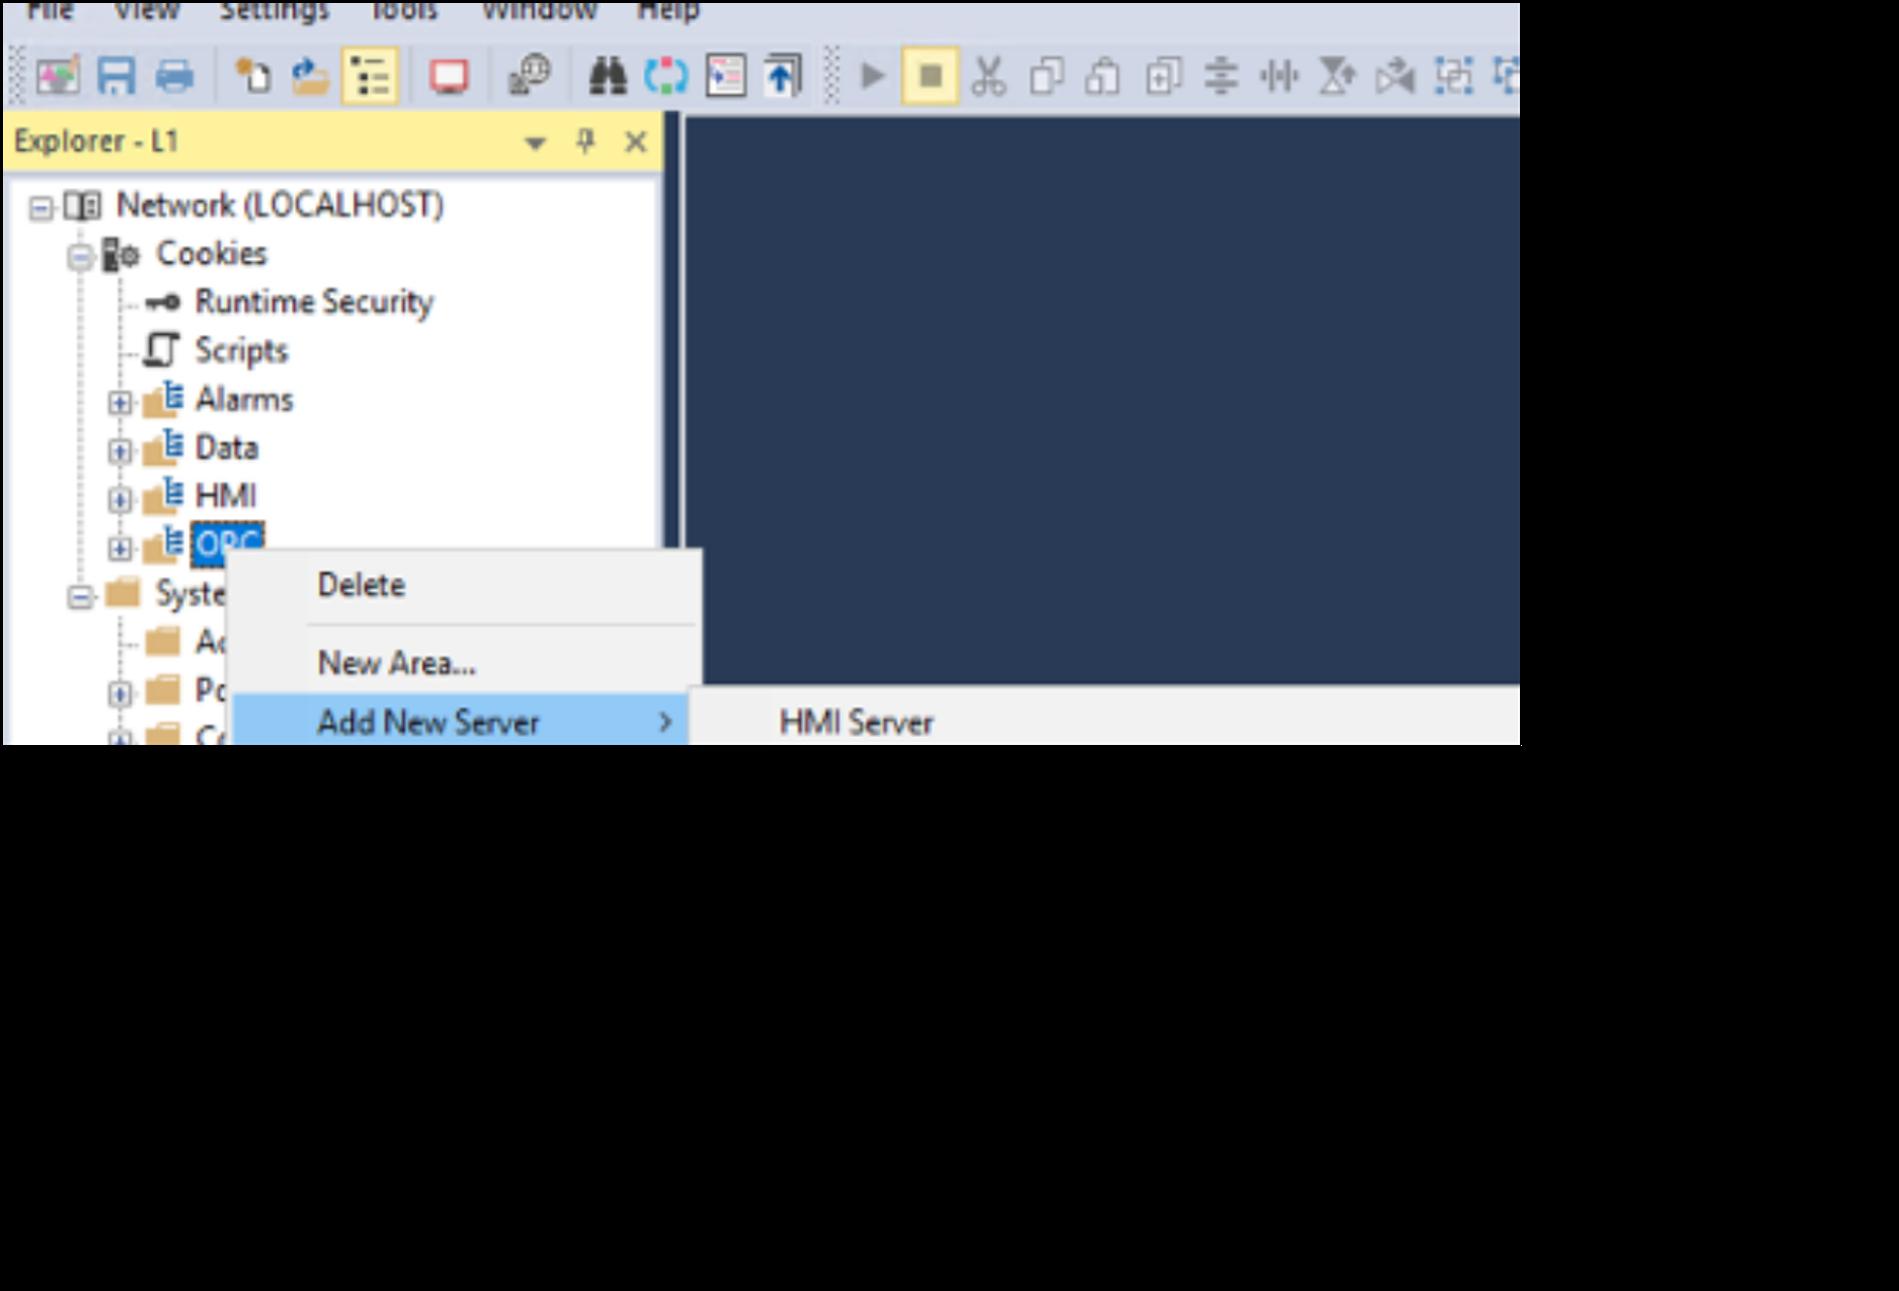
1 Create an OPC folder under the HMI application by selecting HMI application name and right click and select “New Area
2. Call it OPC
3. Under the OPC right click and add “OPC UA Server”
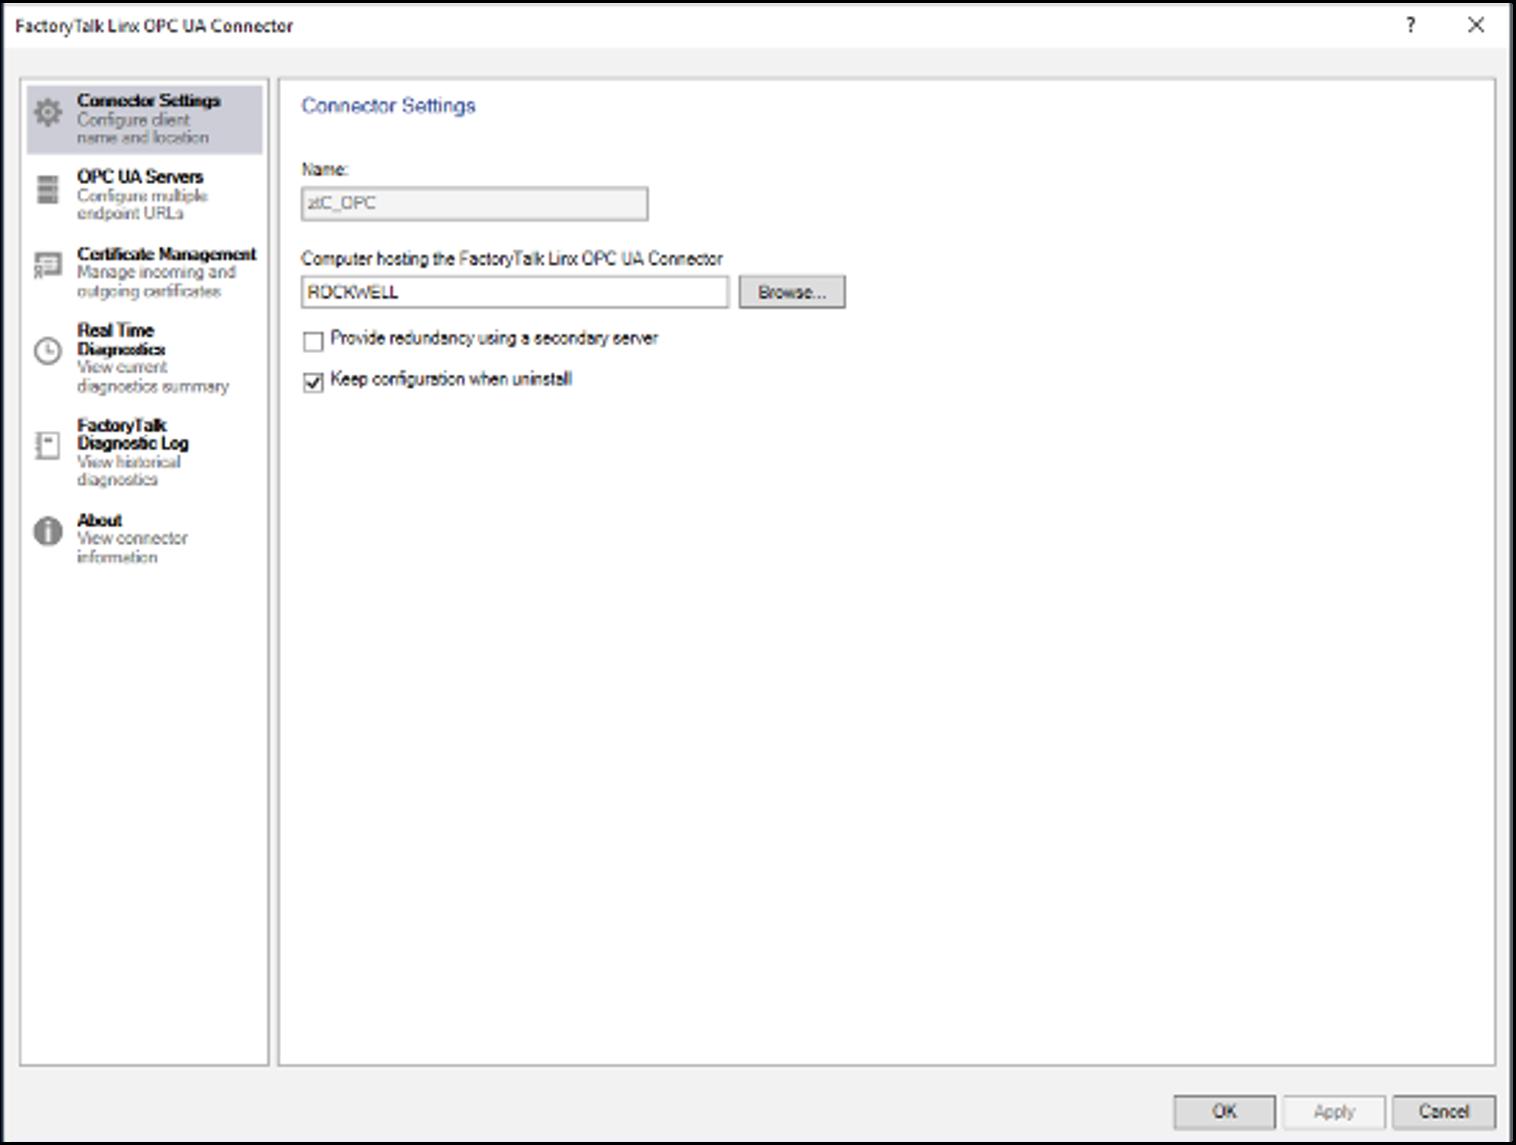
Give the UA connector a name “ztC OPC”
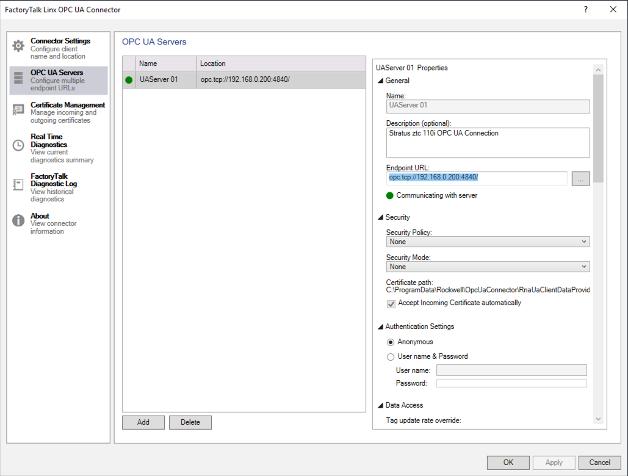
5. Enter the Name and Endpoint URL as per below picture
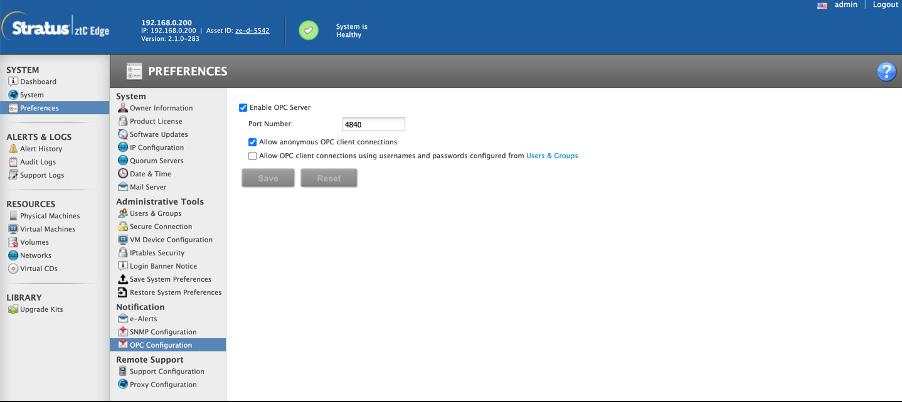
6. Leave “Authentication Settings” on “Anonymous” as per ztC OPC selection unless user was specified under ztC OPC configuration
7. Select “OK” to complete the configuration.
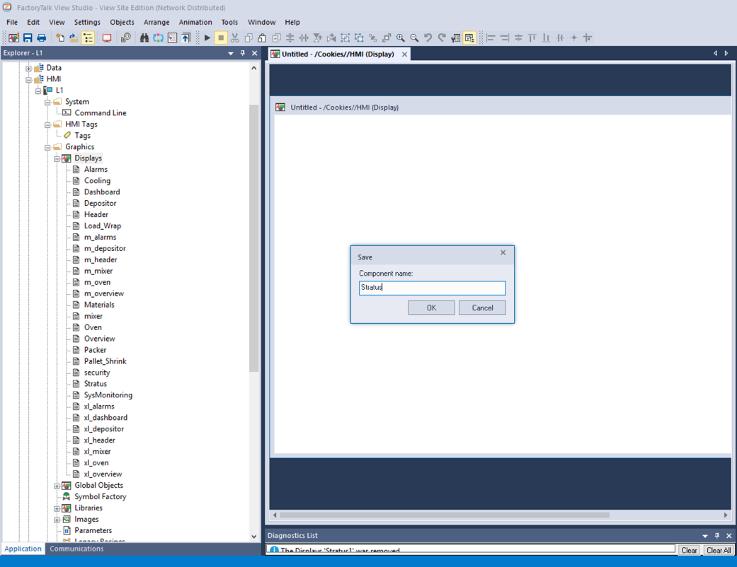
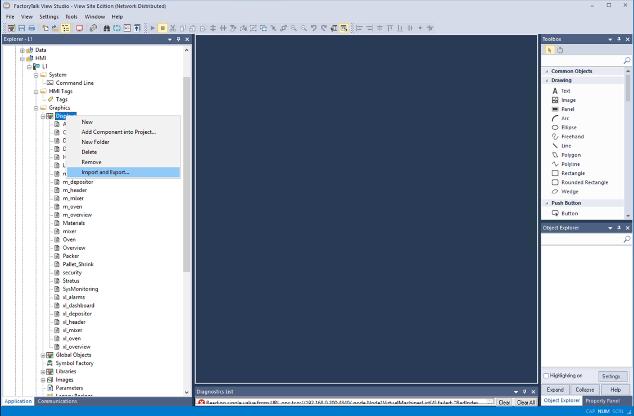
1. Select the “Graphics folder” under the HMI Project
2. Select the “Displays” folder and right click
3. Create a new blank display and save it as “Stratus
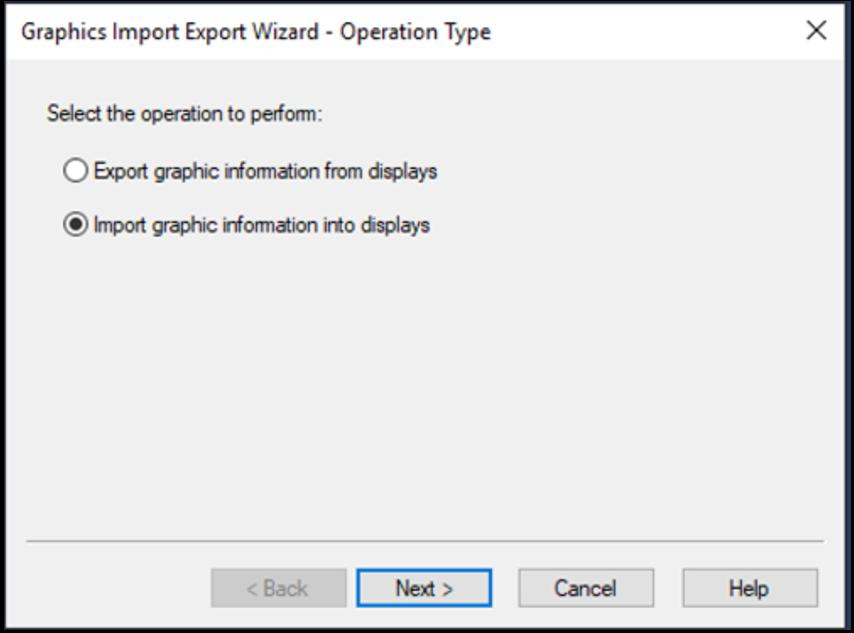
Select Import graphic information into display
NB: Impor t Files available on request
(Contact your Loc al S tratus representative)
Select “No” on backing up the displays
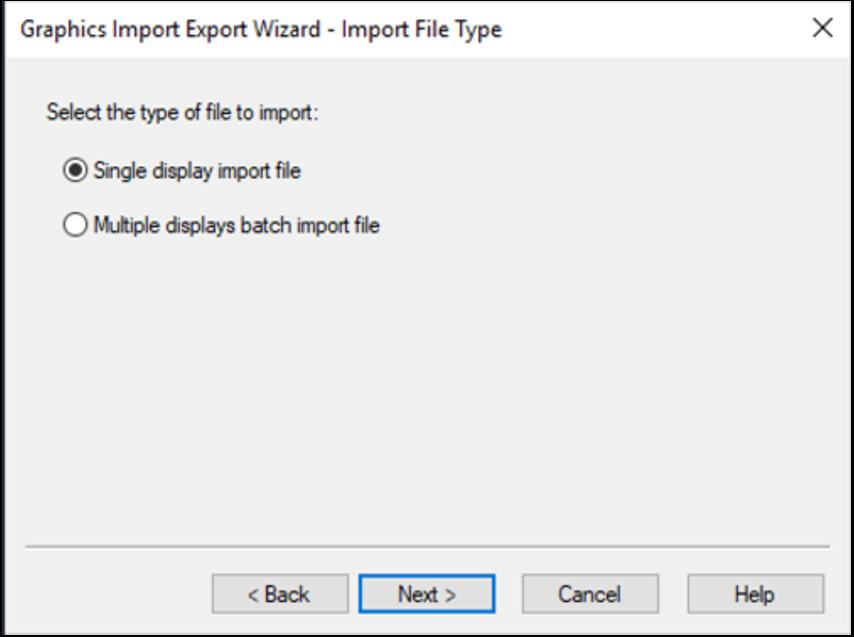
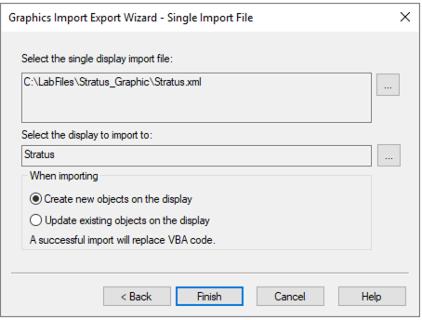
Select Single display import
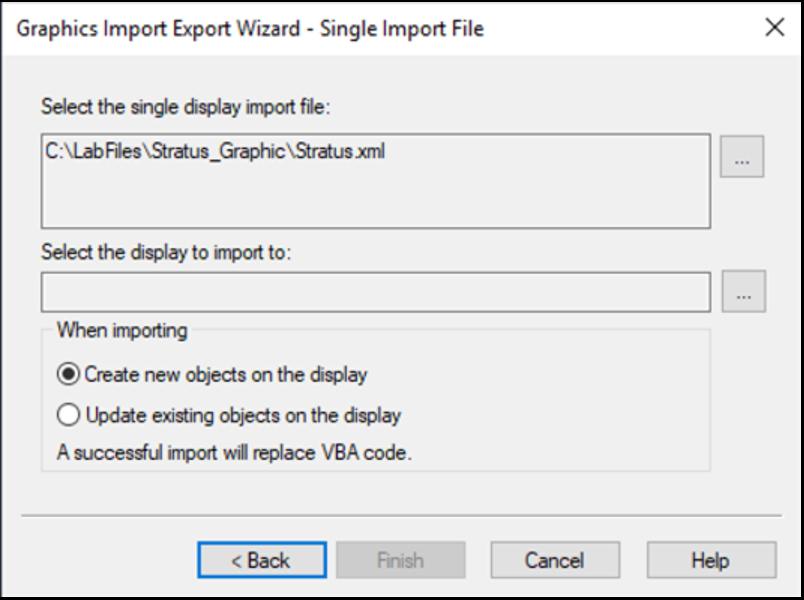
Browse to where the exported “Stratus xml” graphic is and select it
And then select the “Display to import to button”
Select the newly “Stratus” graphic you created a few steps back and make sure that “ Create new objects on the display” radio button is selected
Select the finish button and which time the “Stratus” overview graphic will be imported.
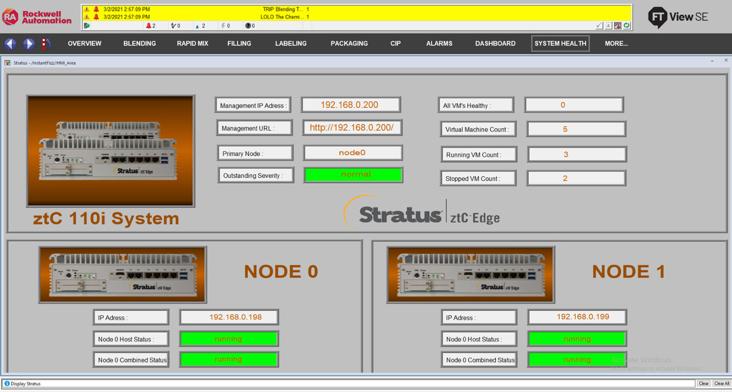
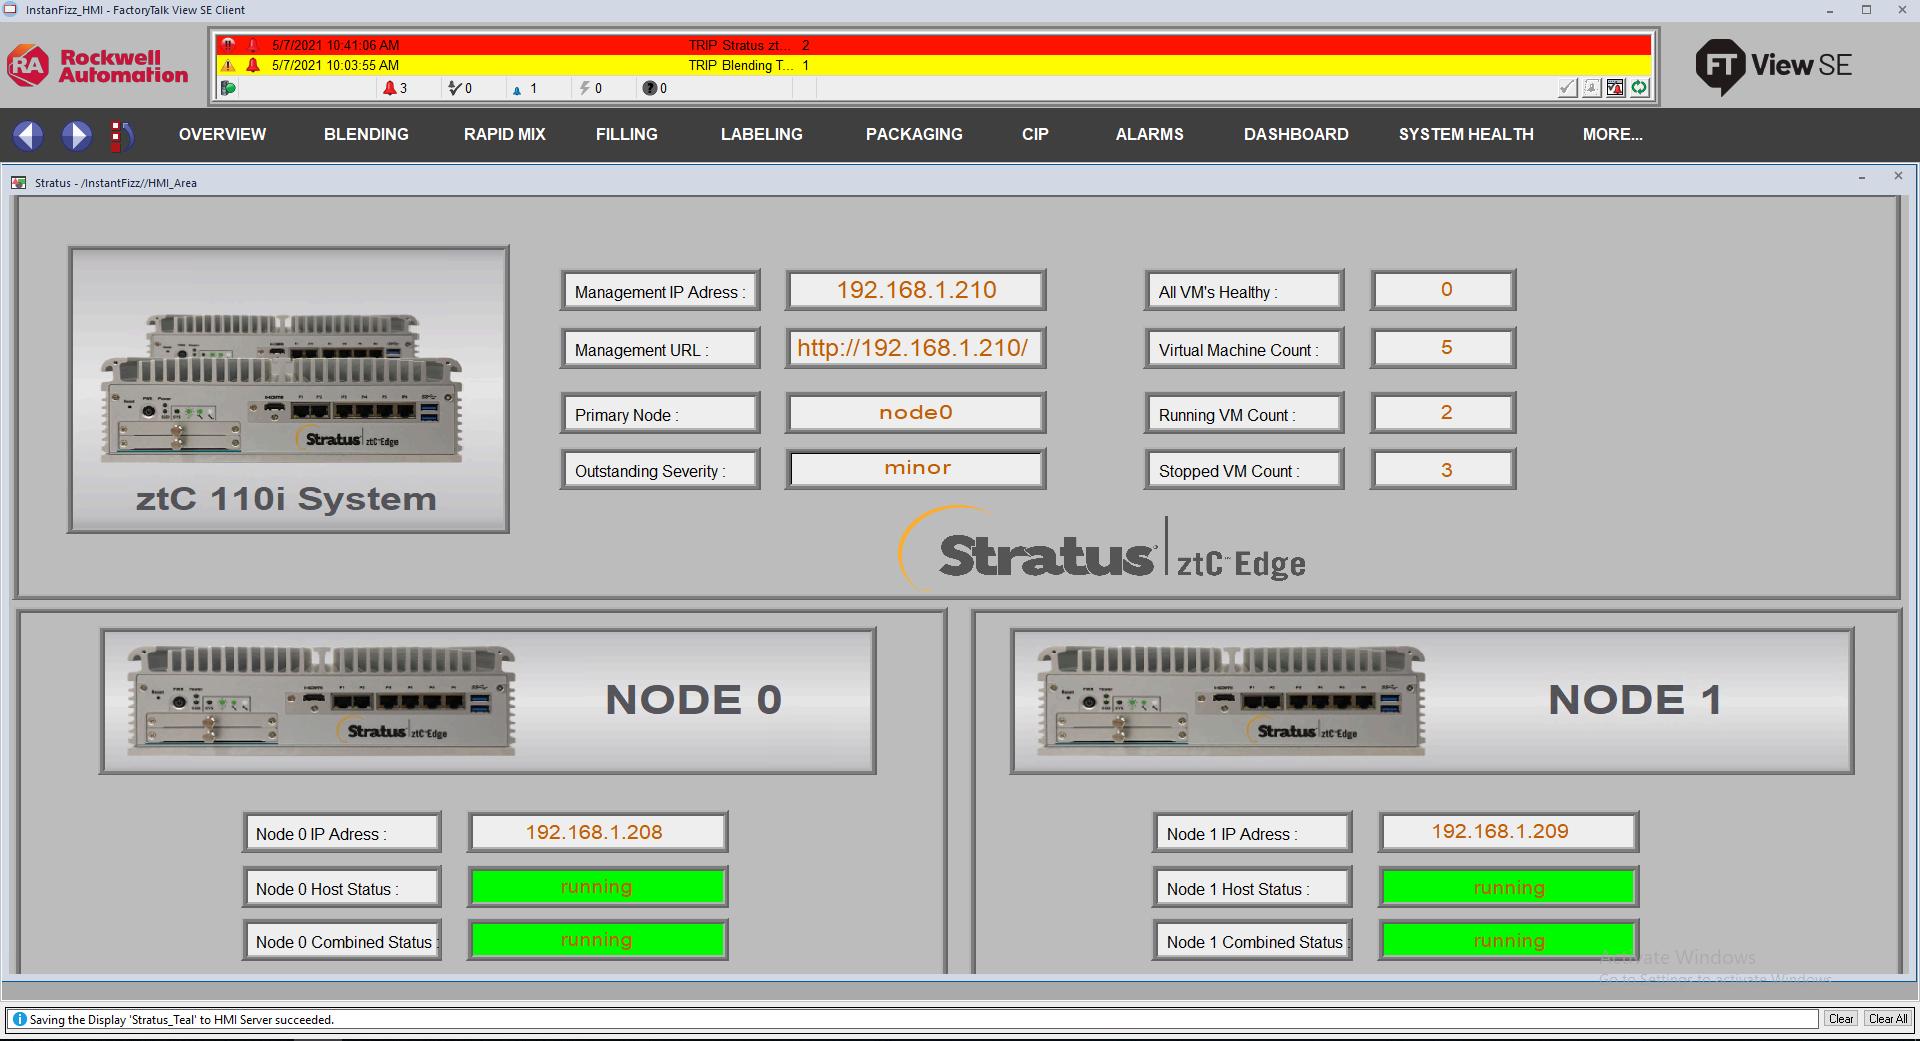
Once the import is complete you can double click on the newly created “Stratus” graphic as per below picture
At this stage you should save the project
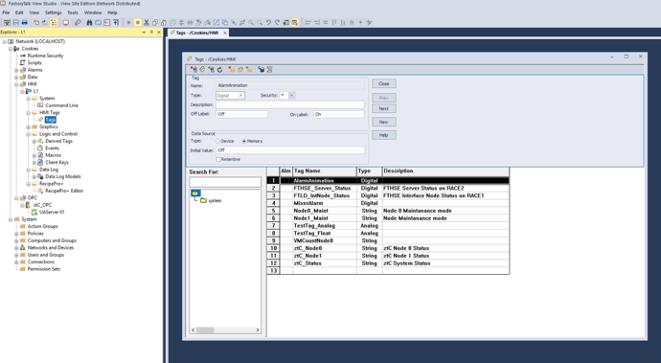
Create a few ztC Edge Tags to be used for animation
Under HMI select the applicable controller short cut and then “HMI Tags” and then open the “Tags”
Insert the following ztC tags under the next available row Remember to select the “accept” button after entering each tag details.
1. Node0_Maint
a. Type: String
b. Off Label: Off
c. On Label: On
d. Data Source: Device
e. Address:
/OPC/ztC OPC::[UAServer01]\ztC\PhysicalMachines\Node0\Node0MaintenanceMode
2. Node1_Maint
a. Type: String
b. Off Label: Off
c. On Label: On
d. Data Source: Device
e. Address:
/OPC/ztC OPC::[UAServer01]\ztC\PhysicalMachines\Node1\Node1MaintenanceMode
3. ztc_Node0
a. Type: String
b. Off Label: Off
c. On Label: On
d. Data Source: Device
e. Address:
OPC/ztC OPC::[UAServer 01]\ztC\PhysicalMachines\Node0\Node0HostState
4. ztc_Node1
a. Type: String
b. Off Label: Off
c. On Label: On
d. Data Source: Device
e. Address:
OPC/ztC OPC::[UAServer 01]\ztC\PhysicalMachines\Node1\Node1HostState
5. ztc_Status
a. Type: String
b. Off Label: Off
c. On Label: On
d. Data Source: Device
e. Address:
OPC/ztC OPC::[UAServer 01]\ztC\System\OutstandingSeverity
6. ztc_Node0_Comb
a. Type: String
b. Off Label: Off
c. On Label: On
d. Data Source: Device
e. Address:
/OPC/ztC OPC::[UAServer 01]\ztC\PhysicalMachines\Node0\Node0CombinedState
7. ztc_Node1_Comb
a. Type: String
b. Off Label: Off
c. On Label: On
d. Data Source: Device
e. Address:
/OPC/ztC OPC::[UAServer 01]\ztC\PhysicalMachines\Node1\Node1CombinedState
Once the tags have been created a button can be created on existing displays to redirect you to the Stratus monitoring graphic.
Import ztC Edge node Stratus logo picture into project
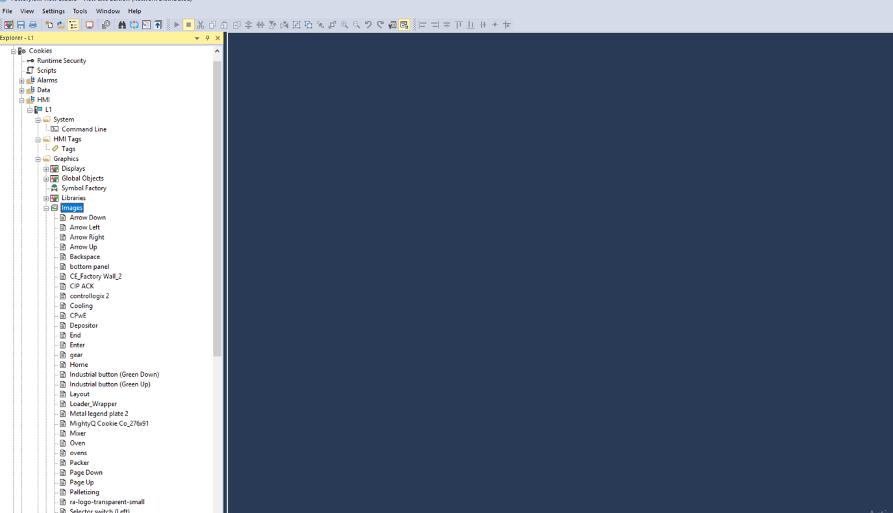
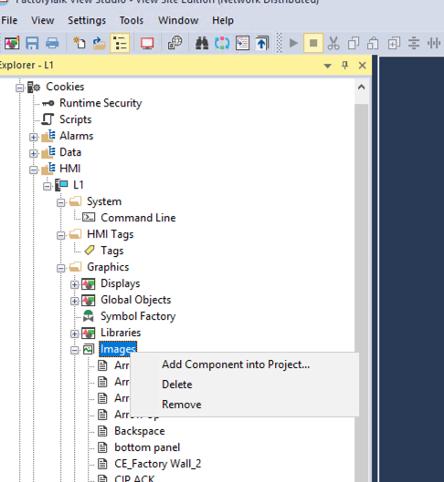
1. Browse to the Images folder under the HMI Folder of the main application.
2. Right click on the “Images” folder and then select “Add Components into Project ”
3. Browse to the ztC Edge single node, dual node and Stratus ztC Edge logo and add them all.
Import ztC Edge node Stratus logo picture into project
Clie nt
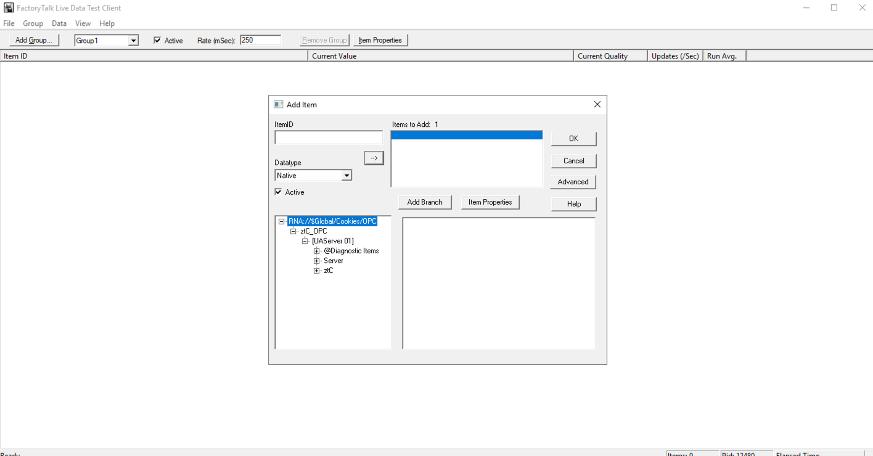
1. Open The test client and select “Network ”
2. On next pop up screen select the “Factor yTalk ” radio button and select the application under which you created the ztC OPC UA connector
S elect OPC and then “OK”
3. Create a new Group or leave the default
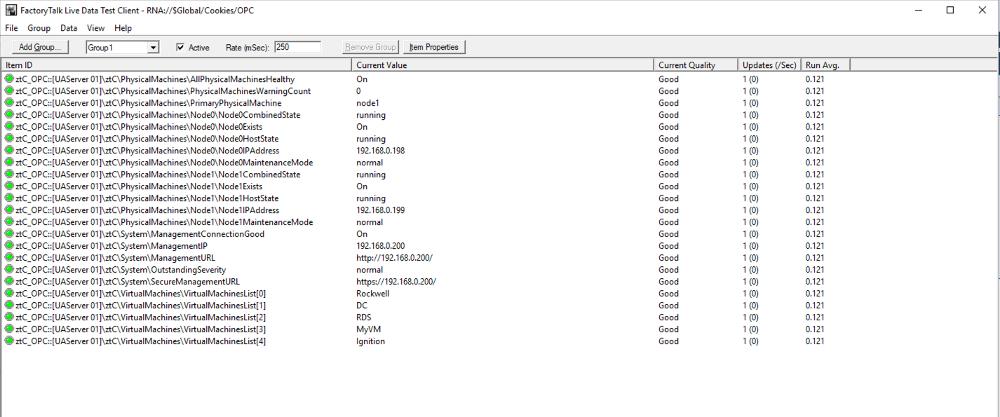
4. At the next screen you should be able to select the ztC OPC tags that you want to see a live view of
D epending on the version of F T View more ztC diagnostic OPC Tags will be available to be used