Gardener


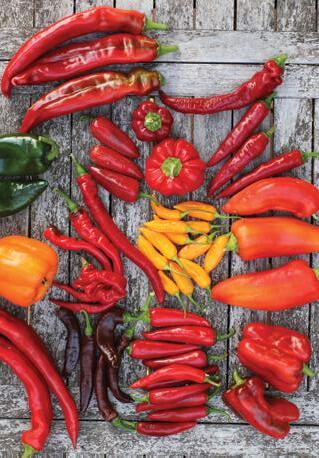
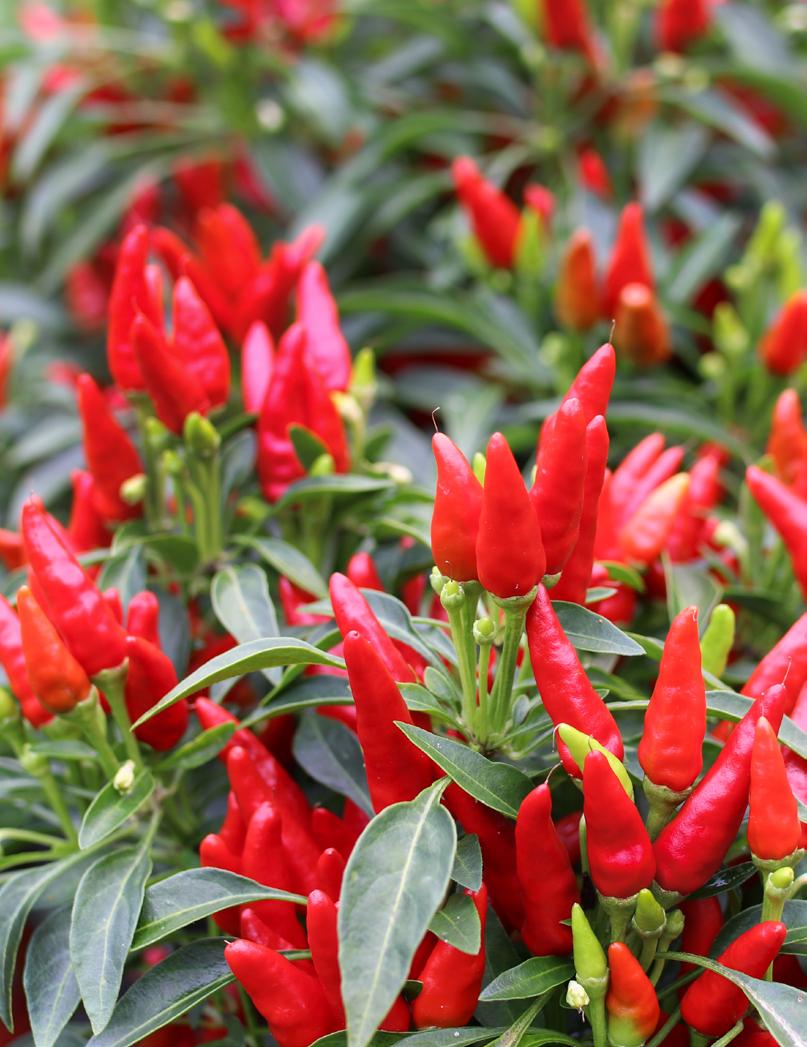
How to grow and process paprika and chili powder.
Preserve
Think beyond hot sauce when preparing homegrown chili peppers.
Two Minnesota chefs share their hottest recipes.
Yes, you can grow sweet bell peppers in cold climates.
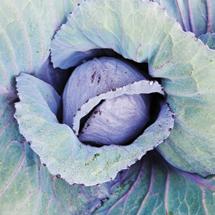
What makes some brassicas bring the heat?
Edible
in the
an
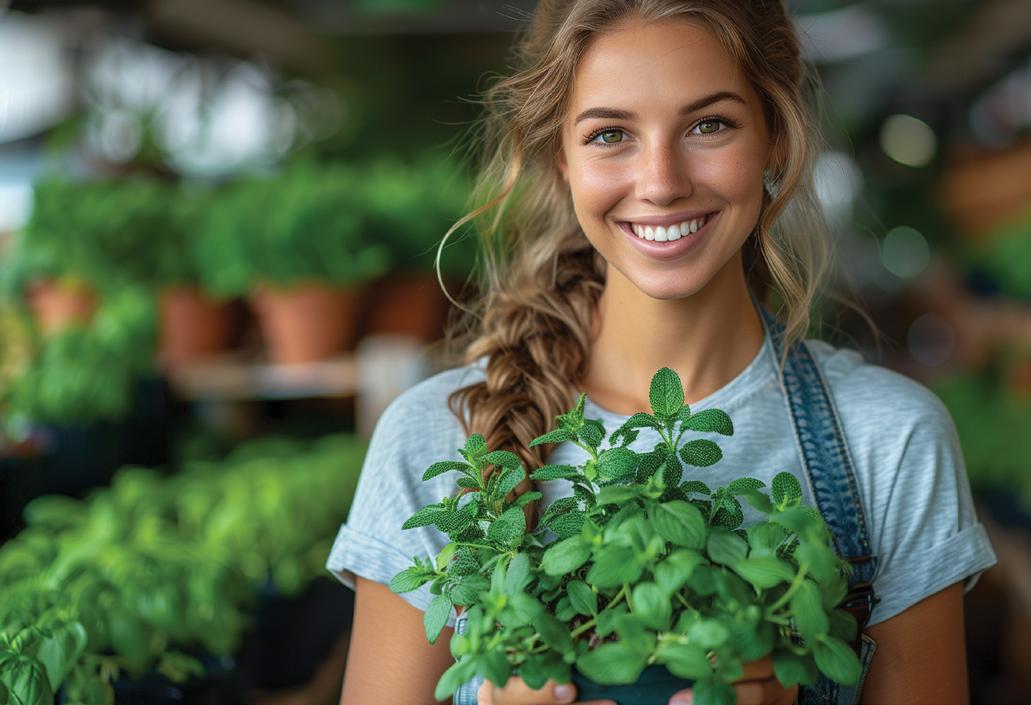
kicky herb.


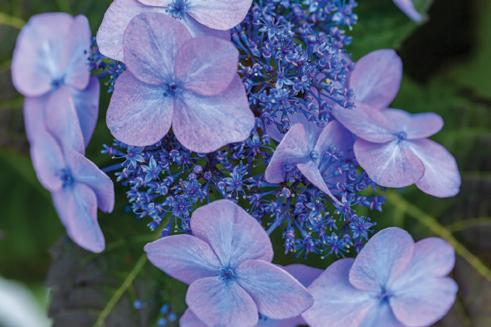


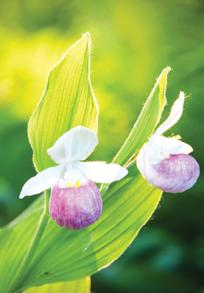
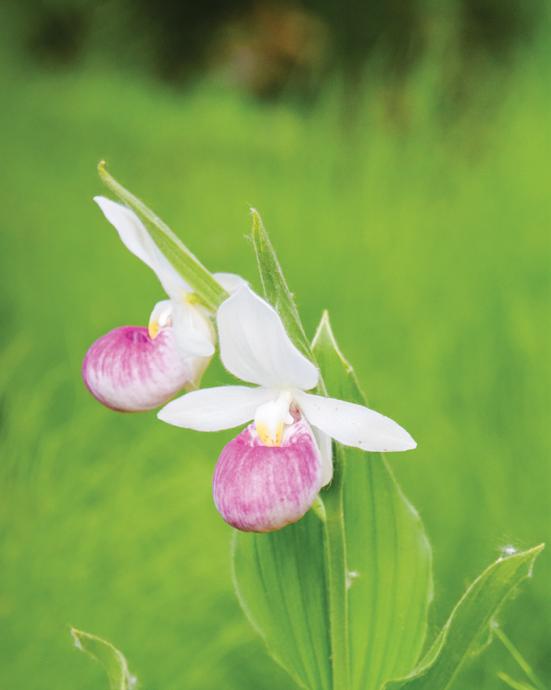
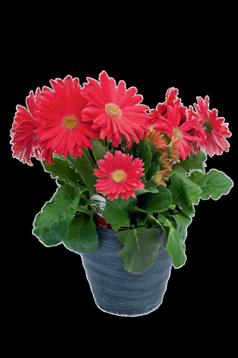
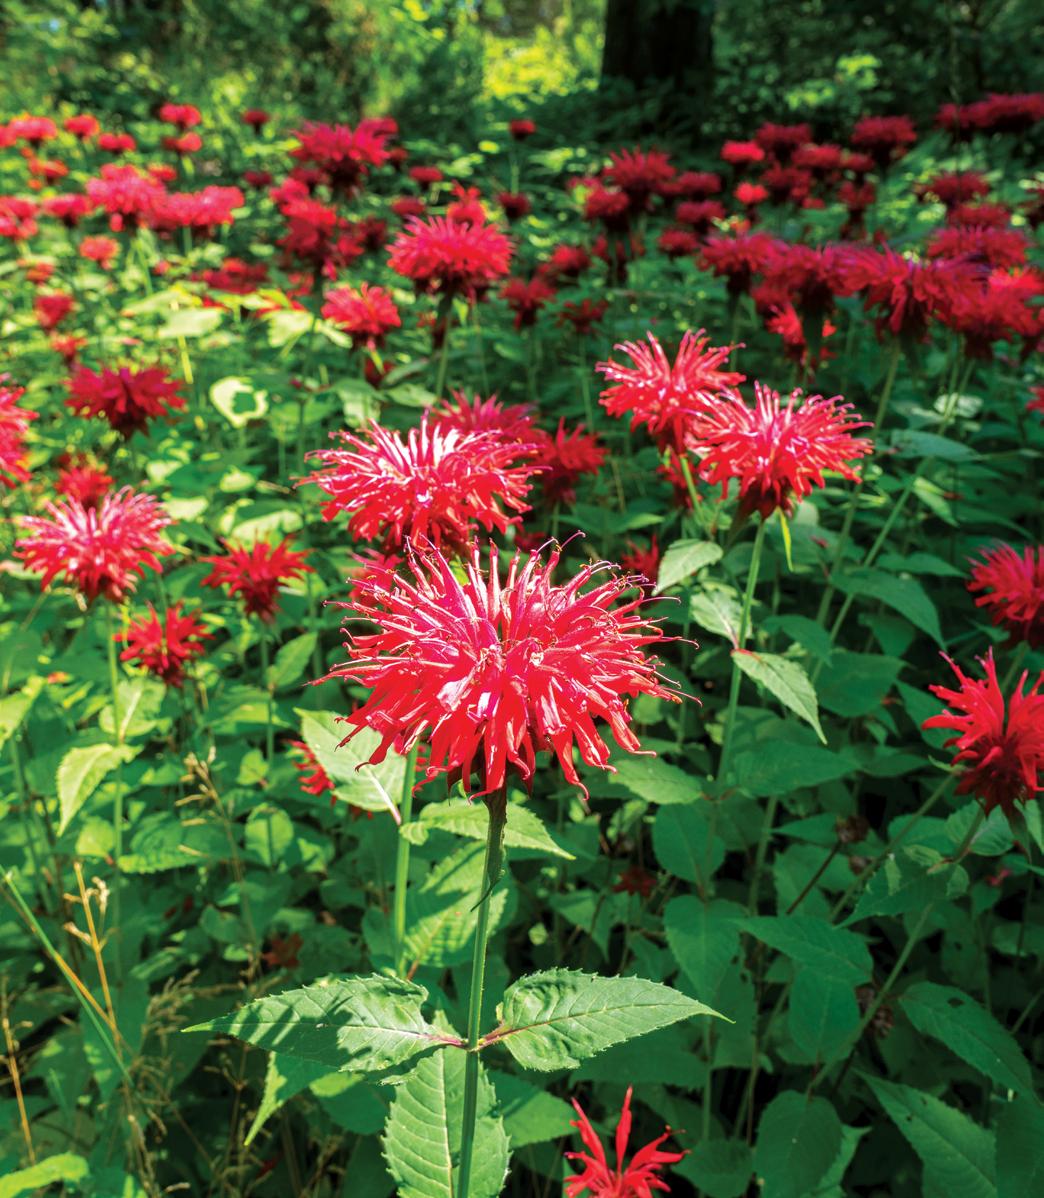
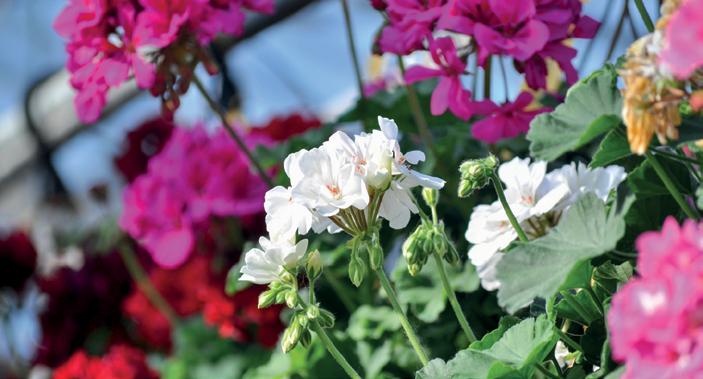
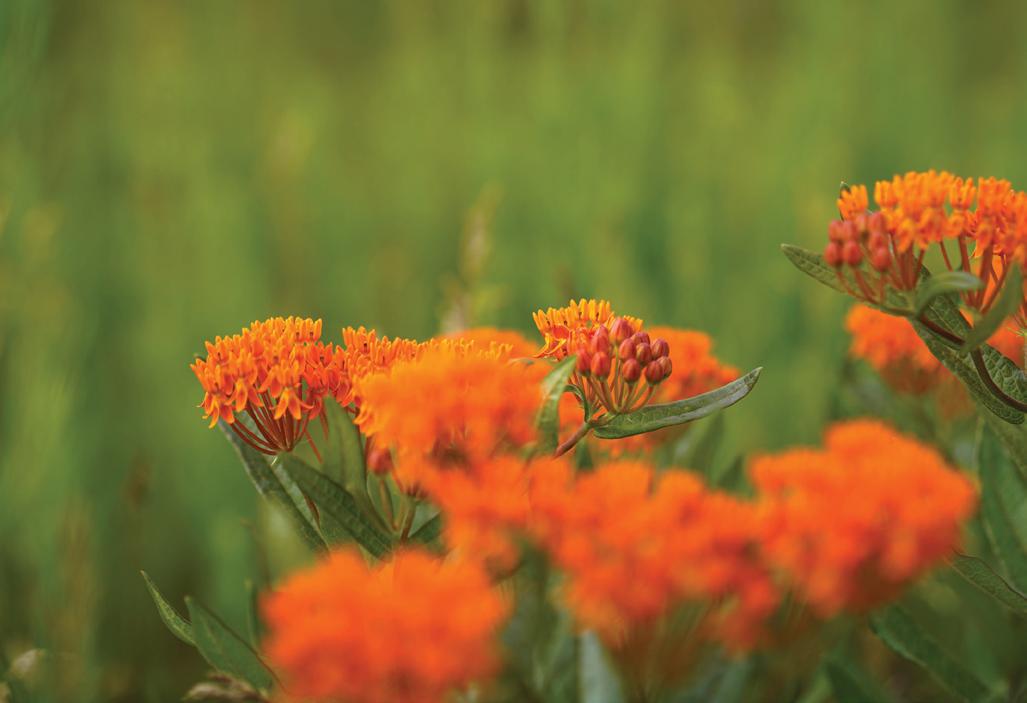
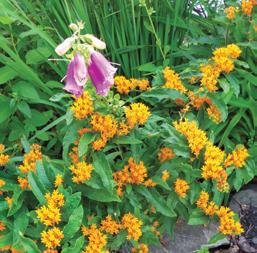
Minnesota's stunning state flower is in full bloom May through June, captivating the hearts of those lucky enough to find or grow them.
We’re hardy and we know it. Known for our brazen (crazy?) ability to brave 4+ months of sleet, sideways snow and subzero temperatures, we northern gardeners proudly earn our coldclimate gardening stripes each winter as the rest of the country watches in disbelief.
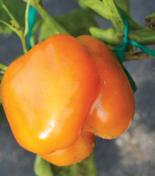
But, with winter behind us, we’re cranking up the heat in this issue. From chili to bell peppers, paprika to horseradish and all the hottest, heat-packing, homegrown produce in between, get ready to spice up your garden this summer with growing, harvesting and preserving tips from local pros.
Our summers may be short but that’s what makes them so sweet. Savor the condensed season and fire up the kitchen while the growing season is hot. Pretty soon we’ll be gathering armfuls of beautiful, garden-fresh food ripe for pickling, fermenting, chopping and roasting.
IN THIS
Issue
Try your hand at growing hot peppers and processing your own paprika and chili powder with help from seasoned food gardener Meg Cowden. PG. 56
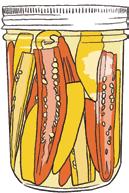
Skip the (hot) sauce and explore unexpected ways to preserve chili peppers—think dehydrating, pickling, freezing and fermenting. PG. 60
For milder palates, USDA Zone 3-based master gardener Bob Olen reveals how beautiful bell peppers can thrive even in our northernmost regions. PG. 64
Peppers aren’t the only produce packing heat. Horseradish and brassicas can bring fire to your feast. PG. 66-67
Rebecca Swee, Editor in Chief editor@northerngardener.org

Headshot: Tracy Walsh Photography
Lady’s Slippers: Michelle Mero Riedel
Pepper Harvest Photo: Meg Cowden
Pickled Peppers Illustration: Taylor Tinkham
Orange Blaze Bell Pepper Photo: Robert Olen
Cabbage Photo: Michelle Bruhn


A note from the MINNESOTA STATE HORTICULTURAL SOCIETY
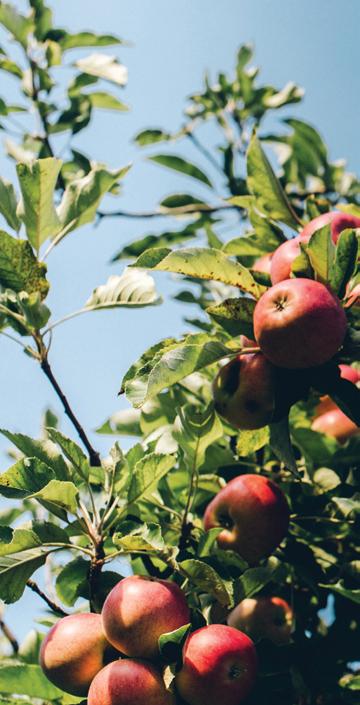
It all began with a single apple. In 1866, we embraced the challenge of growing this fruit in our northern climate. Over time, we expanded from fruit growing to encompass all areas of horticulture, reaching communities across Minnesota and beyond. As one of the longest running horticultural societies in the United States, we’ve earned the trust of thousands of northern gardeners.
Now, we are excited to bring the Northern Gardener name to all our programs and products, proudly expanding our reach to gardeners in USDA Hardiness Zones 3, 4 and 5, across Minnesota, Wisconsin, the Dakotas, Michigan, Montana, Alaska, Canada and beyond. This step allows us to connect with our neighbors across the north and streamline communications to support everyone growing in our cold climates. While our organization will remain the Minnesota State Horticultural Society (MSHS), the Northern Gardener name unifies our efforts. We continue to publish Northern Gardener magazine, offer educational opportunities and nurture community through our signature outreach programs, Garden-in-a-Box and Minnesota Green. We’re also excited to introduce The Tool Shed, a new resource hub designed to support and equip gardeners with the tools, knowledge and inspiration to thrive. Let’s grow!

MSHS COMMUNITY OUTREACH PROGRAMS generously supported by
Lara Lau-Schommer, Executive Director

Editor in Chief Rebecca Swee
Creative Director Rose Daniels
Horticultural Editor Debbie Lonnee
Copy Editor Susan Barbieri
Newsstand Consultant JK Associates
Advertising Sales Manager Betsy Pierre
Summer Issue Contributors + Editorial Advisory Board: northerngardener.org/contributors
A PUBLICATION BY THE
MSHS STAFF
Lara Lau-Schommer Executive Director
Rebecca Swee Lead Content Creator
Erik Bergstrom Marketing Manager + Digital Strategist
Anna Marhefke Programs + Outreach Manager
Mary Riehle Office Manager
MSHS BOA R D OF DI R ECTO R S
Don Smith, Chair
Paul Markwardt, Treasurer
Renay Leone, Secretary
Jackie Froemming
Gail Hudson
Neil Imsdahl
Judy MacManus
Mary Hockenberry Meyer
ADVE R TISE WITH US
Contact Betsy Pierre at:
Randy Nelson
Mary Parenteau
Lisa Philander
Jill Rulli
Tim Wilson
@mnhort

Betsy.Pierre@Ewald.com | 763-295-5420
MEMBERSHIP & SUBSCRIPTION INQUIRIES
membership@northerngardener.org | 651-643-3601
Copyright 2025 by MSHS. Printed in the USA on recycled paper with inks containing soy and/or vegetable oils. All rights reserved. No portion of this publication may be reprinted without permission from MSHS. The information published in Northern Gardener® reflects the experiences and opinions of the writers and is not necessarily endorsed by MSHS. Northern Gardener is a registered trademark of MSHS. (ISSN) 1529-8515. Northern Gardener is published quarterly (Spring, Summer, Fall, Winter) with an additional digital issue in January by the Minnesota State Horticultural Society. Periodicals postage paid at St. Paul, Minn., and additional post offices.
POSTMASTER: Send address changes to Northern Gardener, 1935 County Rd. B2 W., Suite 125, Roseville, MN 55113.
www.plaistedcompanies.com 763•441•1100
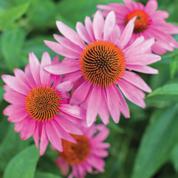
• Purple Coneflower
• Rattlesnake Master
• Spotted Bee Balm
• Summer Pastels (Yarrow)
• Swamp Milkweed
• Wild Bergamot
• Yellow Coneflower


Proudly used and endorsed by Travis Gienger Back to Back Safeway Pumpkin Weigh-Off Champ & Current World Record Holder for largest pumpkin
Enjoy events at the farm—50thanniversary celebration, tomato tasting, orchard tour, and more! Join us! 2025 EVENT SEASON
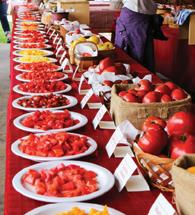

TOMATO TASTING SEPTEMBER 13, 2025
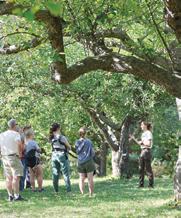
ORCHARD TOUR AND HEIRLOOM APPLE TASTING OCTOBER 4, 2025
Scan for the latest event updates! seedsavers.org/events

ANNIVERSARY August 8-9, 2025 CONFERENCE AND CELEBRATION

Seed Savers Exchange turns 50 in 2025! Join us at Heritage Farm to celebrate half a century of mission-driven work to preserve America’s diverse and endangered garden and food crop legacy.

101 Market Otsego, MN
Abrahamson Nurseries Scandia, MN
All Seasons Garden Center Grand Forks, ND
Bachman’s Multiple Locations
Como Park Zoo and Conservatory St. Paul, MN
Costa Farm and Greenhouse White Bear Lake, MN
Countryside Lawn & Landscape Zumbrota, MN
Dan and Jerry’s Greenhouse Monticello, MN
Dolan’s Landscape Center Austin, MN
Egg|Plant Urban Farm Supply
St. Paul, MN
Elk Mound Seed Elk Mound, WI
Farmington Greenhouse Farmington, MN
Flower Power Garden Center & Fred Holasek and Son Greenhouse Lester Prairie, MN
Garden Divas River Falls, WI
Gordy’s Gift & Garden Duluth, MN
Hartman Garden Center & Landscaping Victoria, MN
Heidi’s GrowHaus Corcoran, MN
Home Sown Gardens Eagan, MN
Hugo Feed Mill & Hardware Hugo, MN
Jean’s - The Right Plant Place Perham, MN
Kern Landscape Resources St. Paul, MN
Knecht’s Nurseries & Landscaping Northfield, MN
Landscape Alternatives, Inc. Shafer, MN
Lilydale Garden Center St. Paul, MN
Members save at all participating locations. Not a member yet? Join today and start enjoying discounts at local garden centers and nurseries immediately.
northerngardener.org/discount-partners
Lynde Greenhouse & Nursery Maple Grove, MN
Miltona Greenhouses Parkers Prairie, MN
Minnesota Landscape Arboretum Chaska, MN
Mother Earth Gardens Minneapolis, MN
Nagel Sod and Nursery Medford, MN
Nature’s Garden World Fergus Falls, MN
Nelson Nursery Zimmerman, MN
Prairie Moon Nursery Winona, MN
Prairie Restorations, Inc. Princeton, MN
Otten Bros. Garden Center & Landscaping Long Lake, MN
Pahl’s Market Apple Valley, MN
Paisley Gardens LLC Northfield, MN
Patio Town Multiple Locations
RT Dock and Yard Inc
DBA The Green Lake Nursery Spicer, MN
Sargent’s Landscape Nursery Rochester, MN
Sargent’s Nursery, Inc. Red Wing, MN
Schulte’s Greenhouse and Nursery St. Michael, MN
Seed Savers Exchange Decorah, IA
South Cedar Garden Center Farmington, MN
Spring At Last Greenhouse Duluth, MN
Terra Garden Center Lakeville, MN
The Garden By The Woods Chanhassen, MN
Wild Birds Unlimited Woodbury, MN
Winter Greenhouse Winter, WI
In many cases, discount is 10% off select plants and merchandise. Visit us online for all discounts and details. Want a paper list? Grab a copy at any in-person MSHS event or visit northerngardener.org to print your own.


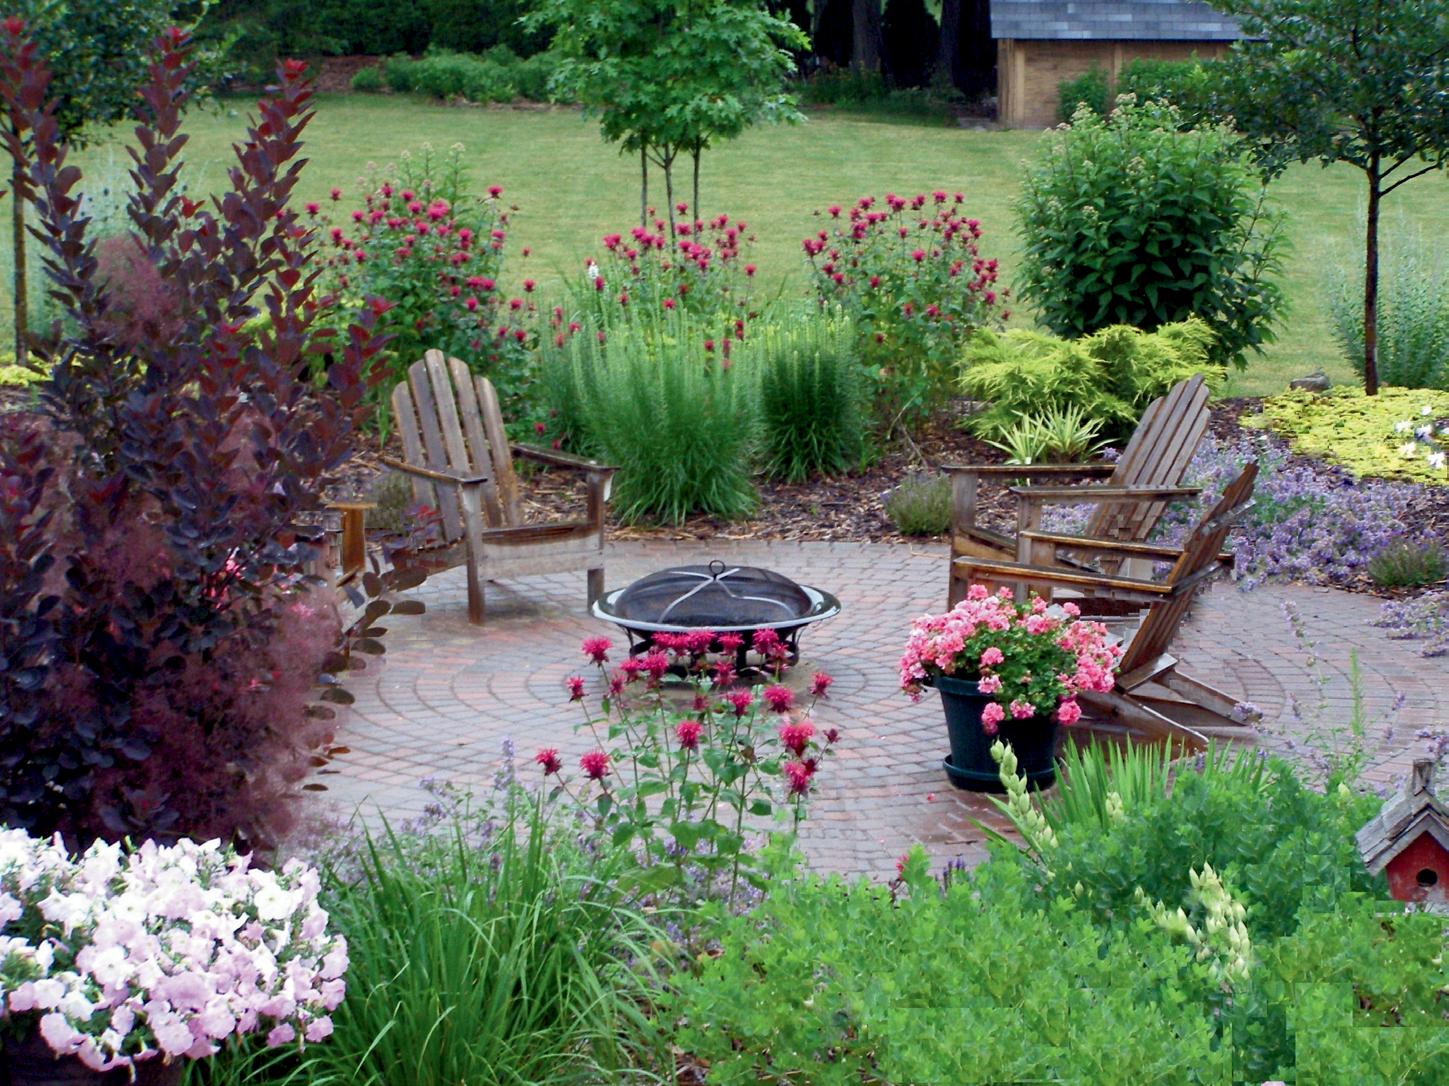
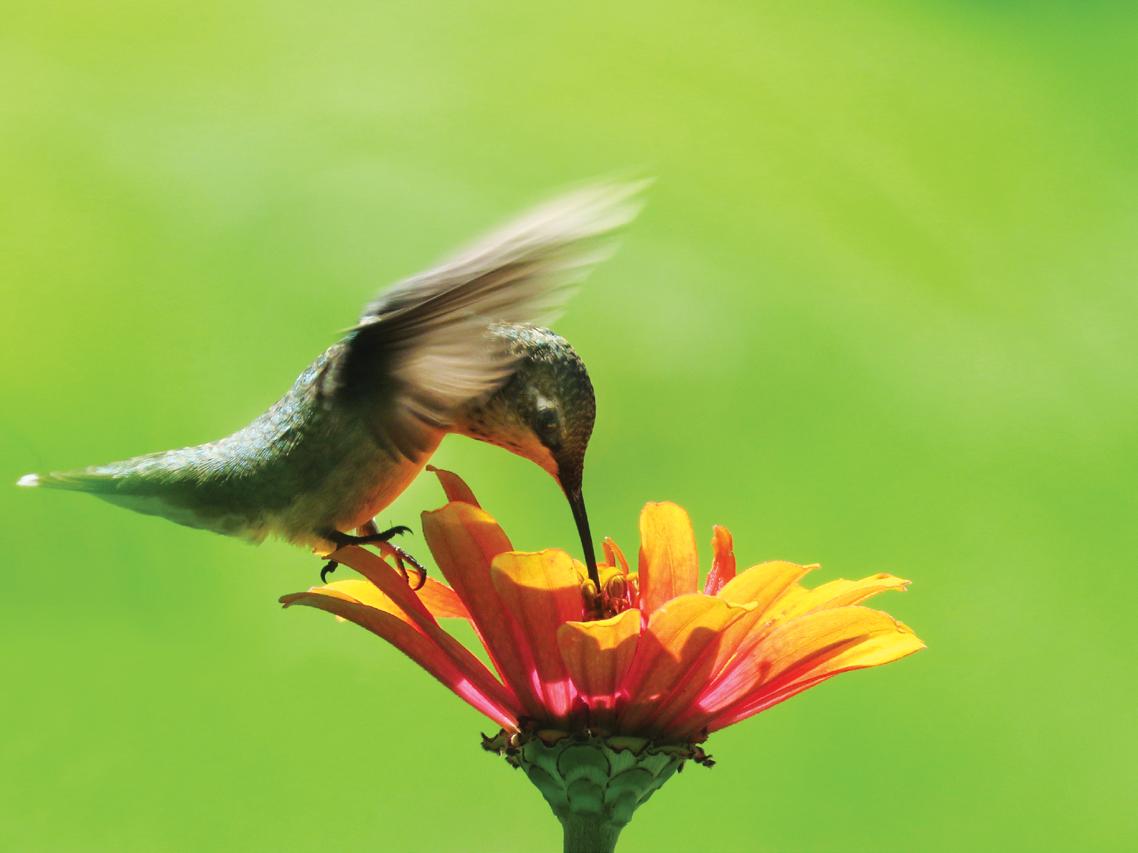
Fiery bee balm (Monarda didyma) sets northern gardens ablaze mid- to late summer and is a magnet for bees, butterflies, hummingbirds and other pollinators.
is coming in hot SUMMER
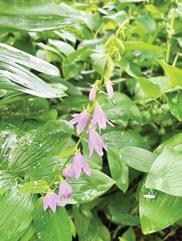
CREEPING BELLFLOWER
A weed we love to loathe PG. 13
SHADE PALETTES
Best plants for your shade of shade PG. 14
HUMMINGBIRD HOT SPOTS
Five plants they love PG. 24
BEE WATER STATION
How you can help hydrate bees PG. 25
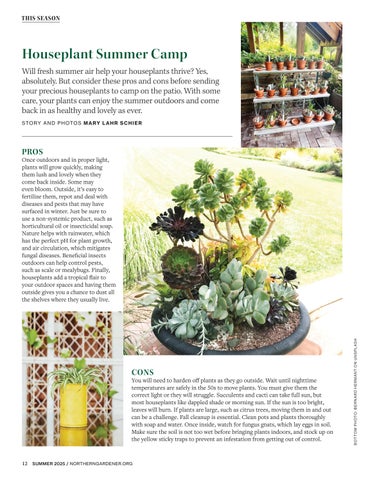
Houseplant Summer Camp
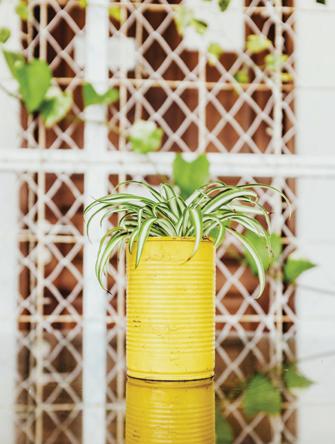
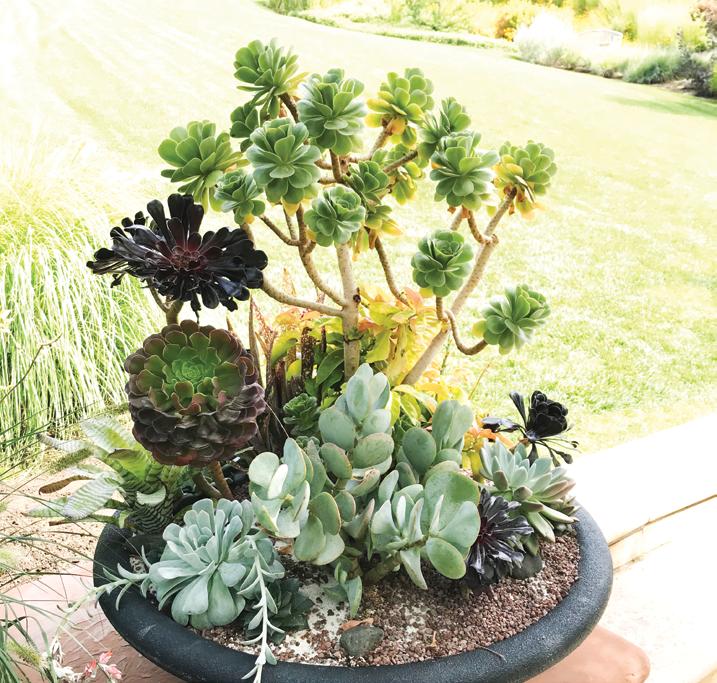
Will fresh summer air help your houseplants thrive? Yes, absolutely. But consider these pros and cons before sending your precious houseplants to camp on the patio. With some care, your plants can enjoy the summer outdoors and come back in as healthy and lovely as ever.
STORY AND PHOTOS MARY LAHR SCHIER
PROS
Once outdoors and in proper light, plants will grow quickly, making them lush and lovely when they come back inside. Some may even bloom. Outside, it’s easy to fertilize them, repot and deal with diseases and pests that may have surfaced in winter. Just be sure to use a non-systemic product, such as horticultural oil or insecticidal soap. Nature helps with rainwater, which has the perfect pH for plant growth, and air circulation, which mitigates fungal diseases. Beneficial insects outdoors can help control pests, such as scale or mealybugs. Finally, houseplants add a tropical flair to your outdoor spaces and having them outside gives you a chance to dust all the shelves where they usually live.

CONS
You will need to harden off plants as they go outside. Wait until nighttime temperatures are safely in the 50s to move plants. You must give them the correct light or they will struggle. Succulents and cacti can take full sun, but most houseplants like dappled shade or morning sun. If the sun is too bright, leaves will burn. If plants are large, such as citrus trees, moving them in and out can be a challenge. Fall cleanup is essential. Clean pots and plants thoroughly with soap and water. Once inside, watch for fungus gnats, which lay eggs in soil. Make sure the soil is not too wet before bringing plants indoors, and stock up on the yellow sticky traps to prevent an infestation from getting out of control.
I The Unkillable Weed
Sure, it looks like a hosta flower—but this invasive bellflower is a creeper, not a keeper.
STORY AND PHOTOS
JENNIFER RENSENBRINK
t thrives in sun. Shade, too. Sand, salt and clay? No problem. And if you try to pull it out, it laughs in your face. My south Minneapolis yard and neighborhood are riddled with this monster: creeping bellflower.
I’ve been on a journey with this plant that many gardeners can relate to, from “oh, that’s pretty!” to “this plant is the bane of my existence.” Native to Asia, Campanula rapunculoides was sold for many years in the U.S. as a garden plant. I can see the appeal—it grows anywhere, is nearly impossible to kill and has pretty purple flowers. These days, it’s considered invasive in the state of Minnesota.
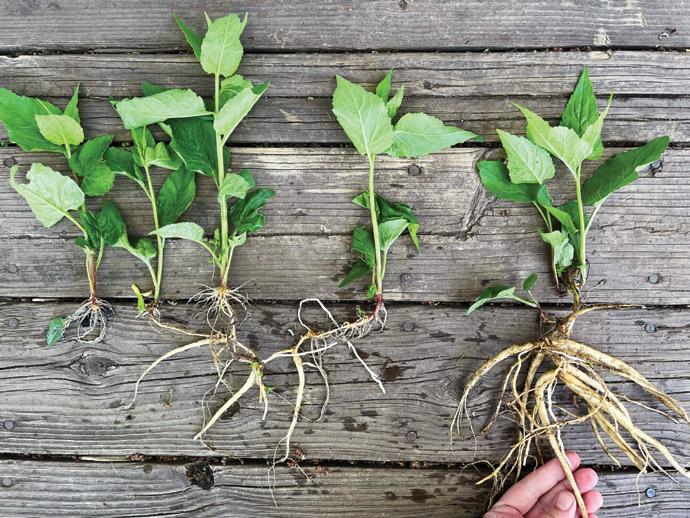
What makes creeping bellflower so impossibly hardy? The roots. If you try to simply pull it out, slender roots near the surface of the soil will break off. Unfortunately, the tuberous rhizomes that make up the critical part of the root system will still be underground, and they will send up new shoots almost overnight. Those tuberous roots also make the plant virtually drought-proof.
Control options
I dig up the plants with a shovel, but I’ve never been able to completely eradicate them despite trying for 10plus years, likely because they are so prevalent in my neighborhood. To battle bellflower, dig at least 8 inches deep all the way around the plant to loosen the soil. Gently turn over the clump and
carefully tease out the tubers and fine roots. Try to get them all. Do not throw pulled bellflower plant parts into your home compost—it will not get hot enough to kill them. Bag and toss them in the garbage or, better yet, burn them.
Herbicides like glyphosate kill creeping bellflower, but most require multiple applications as the roots continue to resprout. The University of Minnesota Extension recommends clopyralid, dicamba or triclopyr, but with these and all herbicides it’s critical to follow the instructions on the label to avoid harming yourself or non-targeted plants, such nearby trees and shrubs. Use the bare minimum amount necessary and remember, the label is the law.
Identification
It’s easiest to identify creeping bellflower when it’s in full bloom in late summer. Find any unkempt yard or alleyway and you will see the small, purple, bellshaped flowers everywhere. Get rid of it before the flowers go to seed—each plant is capable of producing more than 10,000 seeds.
I like to dig mine in May, when the ground is softer and it’s easier to pop another perennial in the spot where I removed the bellflower. Identifying it in early spring takes some practice, but once you dig it up and see the tubers, all doubt will disappear. When it first appears, it has heart-shaped leaves with hairy undersides and coarsetoothed edges.
If you can’t dig it out, pulling it in mid-summer before it goes to seed is better than letting it spread unchecked. Some gardeners successfully smother the plant under a plastic tarp, but you have to leave the material down for an entire growing season. Another irritating bellflower trait? It’s confusingly similar in appearance to desirable native varieties, such as American bellflower (Campanula americana) and harebells (Campanula rotundifolia). Native varieties aren’t nearly as widespread, so if you notice purple, bell-shaped flowers in late summer and you don’t remember planting them, it’s probably creeping bellflower.
The story of this plant’s resilience is in its roots.
Identify creeping bellflower by its small, purple flowers.
SHADE PALETTES
From dappled to dense, your particular shade of shade informs the most reliable plants to grow.
STORY MARY LAHR SCHIER
Not all shade is equal. Getting to know which variety you have is the first step toward growing the healthiest and most interesting plants possible.
Part shade
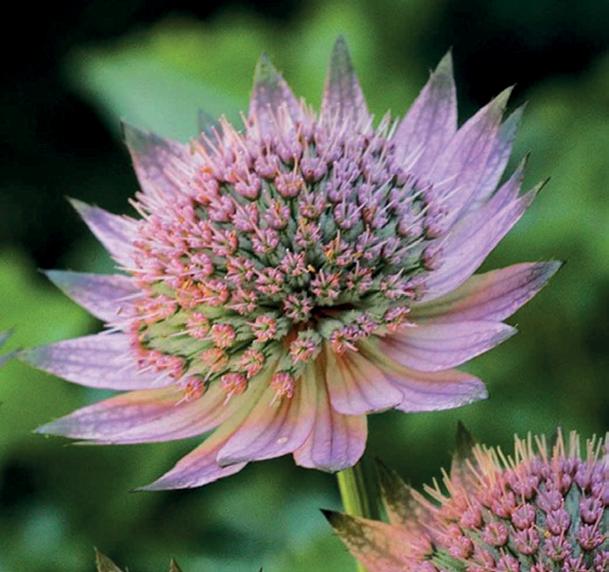
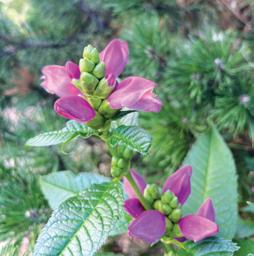
Part-shade plants need four to six hours of sunlight per day, with most of it coming in the morning or evening. (Part sun is the same number of hours with more intense light in the afternoon.) Coralbells (Heuchera spp.) are a dependable part-shade plant with dozens of foliage colors available and dainty late season blooms. For more bloom power, plant astilbe, which comes in a wide range of flower and foliage colors, or turtlehead (Chelone lyonii), with its late summer flowers that are bee magnets. Or, grow some
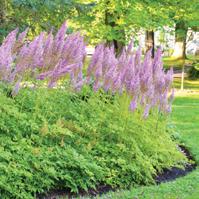
of the showier columbines, such as ‘Red Hobbit’ (Aquilegia caerulea ‘Red Hobbit’) with its red and yellow blooms or golden spur columbine (Aquilegia chrysantha) which has bright yellow flowers. Masterwort (Astrantia major) is an underused option for part shade. Its leaves look like native geraniums and its prolific summer blooms are beloved by bees.
Full shade
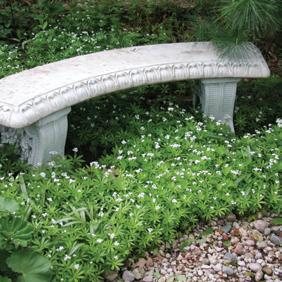
With less than four hours of sunlight, full-shade areas are often turned over to hostas, ferns and the occasional Solomon’s seal plant. All are fine choices, but not the only ones. Groundcovers that grow well in shade include sweet woodruff (Galium odoratum), wild ginger and spotted dead nettle (Lamium). Herman’s
Astilbe chinensis ‘Purple Candles’
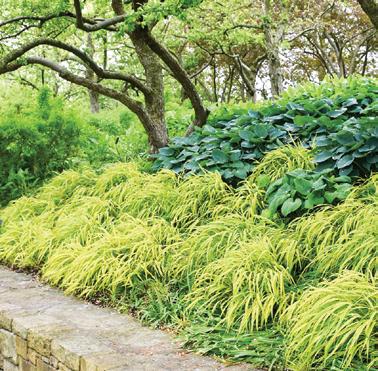
Pride (Lamium galeobdolon ‘Hermann’s Pride’) offers variegated leaves and yellow flowers. Other cultivars, such as ‘White Nancy’ or ‘Silver Beacon,’ have white or silver foliage. A sadly underplanted shade groundcover is barrenwort (Epimedium), a USDA Hardiness Zone 2-hardy plant with dainty spring flowers followed by fall color. Fortunately, new barrenwort hybrids offer more colorful blooms, which may entice more gardeners to plant it. Full-shade areas may also be good spots for hellebores in spring, native ephemerals such as Hepatica and bleeding hearts among the foliage plants. Zone 5 gardeners might also consider golden Japanese hakone grass (Hakonechloa macra ‘All Gold’) to brighten the edge of their shade beds.
Astrantia major 'Florence'
Galium odoratum
Chelone lyonii 'Hot Lips'
Hakonechloa macra ‘Aureola’
Dappled shade
Tiarella cordifolia ‘Pink Skyrocket
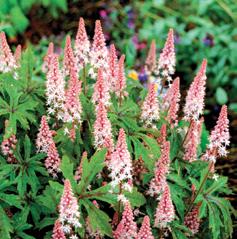
Found in areas with a loose canopy of trees overhead, dappled shade creates pools of light among the shade. Generally, the total sunlight in an area of dappled shade is less than four hours a day. Woodland natives, such as foam flower (Tiarella cordifolia), cardinal flower (Lobelia cardinalis) and marsh marigold (Caltha palustris), do well in this light. Martagon lilies also love this type of shade, bringing their height and upside-down blooms to the June garden.
Damp shade
Many part- and full-shade plants like moisture. If you have a damp spot, go wild planting carex, sweet flag (Acorus spp.) or, for a challenge, lady’s slipper. For height and summer bloom, try Ligularia, Rodgersia and goatsbeard (Aruncus dioicus). Add an other-worldly look to your garden with Astilboides tabularis, a USDA Zone 3-hardy perennial with huge leaves. Another under-planted perennial for damp shade is Korean wax bells (Kirengeshoma palmata), which grows to a large, leafy clump and produces sweet yellow blooms in late summer.
Dry shade
If your shade garden is in dry soil, maybe even near a tree that robs it of moisture, consider planting northern natives. Geranium maculatum offers spring flowers, fall color and interesting leaves and loves shade. Non-native big root geraniums (Geranium macrorrhizum) also thrive in dry shade. Meadow rue (Thalictrum dioicum) grows well in very shady dry areas. Other dry shade options include Brunnera and lady’s mantle. We often think of them as plants for damp shade but ferns also can handle dry areas, especially Japanese painted fern (Athyrium niponicum ‘Pictum’) and Christmas fern (Polystichum acrostichoides), which even grows well under walnut trees.
Dense shade
If part of your garden is in dense shade, such as all-day shade from houses, a tall fence or both, you may be able to grow ferns or other forest groundcovers. Or maybe this is a good spot for a small dining area, decorated with houseplants outside for the summer? If that’s not an option, how about a shed, the compost pile or other garden utilities, or a playset?

MEASURING SHADE
SHRUBS FOR SHADE
If you have part shade, many shrubs grow well in that light and will add heft and color to your garden.
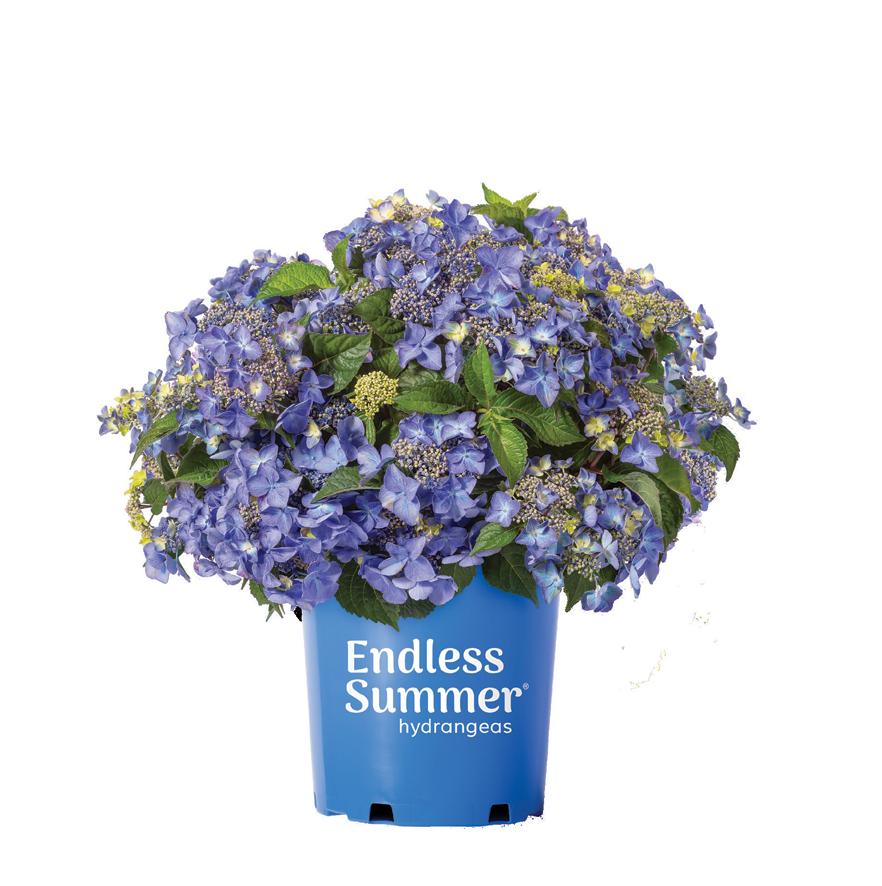
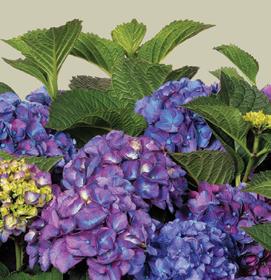
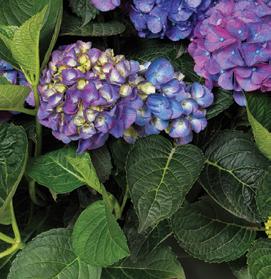
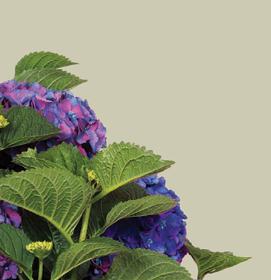
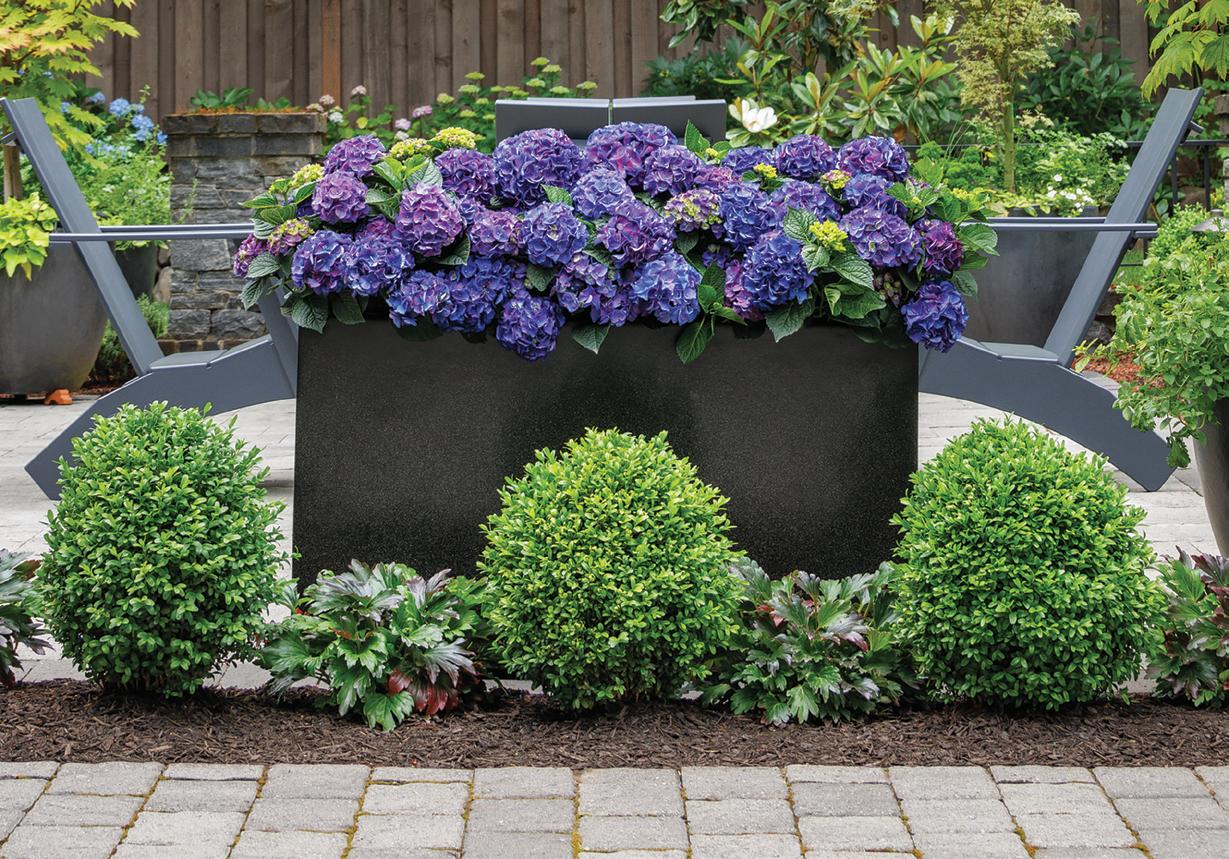
• Hydrangeas thrive in part shade and recent breeding work has led to new sizes, colors and types of hydrangeas that work well in the North.
• Other shrub stars for part shade include Korean Spice viburnum (Viburnum carlesii), dogwoods (Cornus spp.) and bottlebrush buckeye (Aesculus parviflora).
• With fewer than four hours of sun a day, consider bush honeysuckle (Diervilla lonicera), summersweet (Clethra alnifolia) or sumac
• Gro-Low fragrant sumac (Rhus aromatica ‘Gro-Low’) works well on slopes, in dry soil and other tough conditions.
» Pick a day in late spring or early summer when you will be home all day.
» Starting at 8 a.m., check the garden area in question once an hour to determine if it’s in shade or sun.
» Note the shade or sun status each hour and add up the hours to determine how many hours of sunlight your garden has.
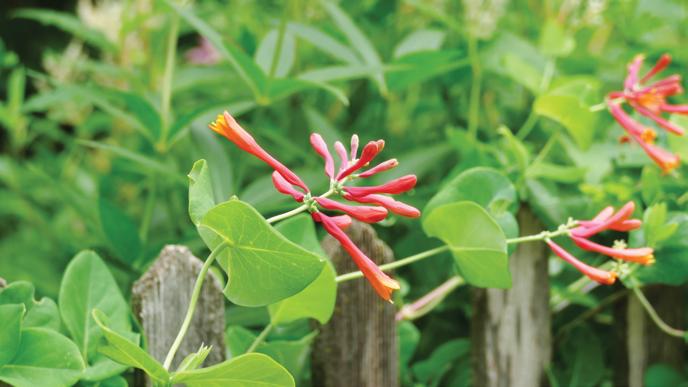
Opposite, clockwise from top left: Astrantia major 'Florence' (Ball Horticultural), Galium odoratum (Walters Gardens), Chelone glabra ‘Bloomhearts’ (Mary Schier), Hakonechloa macra ‘Aureola’ (Walters Gardens), Astilbe chinensis ‘Purple Candles’ (Walters Gardens) This page, clockwise from top left: Tiarella cordifolia ‘Pink Skyrocket’ (Ball Horticultural), honeysuckle flower on fence (Mary Schier), martagon lily (Mary Schier), Aruncus ‘Chantilly Lace’ (Walters Gardens)
Honeysuckle flower
Aruncus ‘Chantilly Lace’
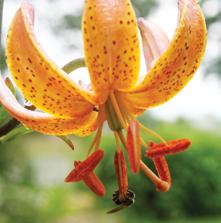
PLANT PROFILE
Carefree, Colorful Cacti
Quick! Name a Minnesota wildflower. Betcha
didn’t say “cactus.”
STORY JANET CASS
Surprise! Cacti aren’t just for the American Southwest. Some thrive in Minnesota and other northern Great Plains states, too. Plains prickly pear (Opuntia macrorhiza) and its even hardier relative, brittle prickly pear (O. fragilis), grow in dry, rocky areas of the heartland.
Anecdotal sightings report these plants in rocky outcroppings along the Minnesota River in west central Minnesota and in parts of western Montana, to name just two places these hardy little plants add color.
When I lived in USDA Zone 4 Minnesota, I was the lucky recipient of some prickly pear plants from neighbors. They grew it along the street, where it flourished despite heavy shade and annual watering by spring snowmelt laden with winter road salt. Their plants flourished to the point that they encroached on adjacent plantings.
A fellow gardener and I transplanted three of the cacti to an inhospitable parking lot median. Hot, dry, sunny and windy conditions also included salty spring snowmelt and occasional scrapes from snowplow blades. The soil was well-drained, though, which is critical for this plant. During the transplants’ first full growing season in 2022, they bloomed robustly while surrounding plants struggled in the early summer heat. Fast-forward to autumn 2024, and the original three cacti had multiplied to cover 18 square feet.
Be forewarned—this plant is covered in fine, hair-like spines that are hard to see, making them difficult to extract once you’ve been impaled. They also

break easily, so trying to remove one with a tweezer, assuming you can see the spine in order to grab it, can break off the visible part of the spine and leave the remainder under your skin. The spine that stuck in my thigh despite heavy jeans eventually worked its way out. Wear thick, tightly woven clothing when working with these plants! But, after all, temporary discomfort is worth this plant’s carefree, waterwise beauty. Spines, by the way, are modified leaves; pads are modified stems.
When I moved to zone 5b in Western Montana, I decided to include prickly pear in an ignition-resistant fire buffer of plants around my house. Wildfires are a reality in that area and, as a succulent, prickly pear should be slower to ignite than, say, a native grass. Plus, even if fire destroys the above-ground part of this plant, new pads grow from the root crown.
But wildfires aren’t only a western hazard. Up to an estimated 30 percent of Minnesota homes hug land ripe for wildfires, reports the Minnesota Department of Natural Resources.
Vegetative fuel fed the Pagami Creek wildfire near Ely, which grew to historic proportions. Wouldn’t it be handy if there were a plant that resisted wildfire and survived winter temperatures like Ely’s zone 3b lows of minus 35 degrees Fahrenheit? Well, there is.
The low, spreading growth habit of O. fragilis enables it to survive harsh winters insulated under a blanket of snow despite its reported low temperature limit of minus 30 degrees Fahrenheit.
Prefer magenta/pink blossoms to the typically yellow ones of brittle and plains prickly pear? Consider Opuntia hybrid ‘Red Gem.’ This “low, prostrate variety suitable for rock gardens or outdoor pots” withstands both harsh winters and extreme heat in zones 4 through 10, says Kelly Grummons of Cold Hardy Cactus in Colorado. It even grew at 7,000 feet in the test gardens of High Country Gardens in New Mexico.
Prickly pear cacti attract pollinators, endure harsh weather, bloom in beautiful colors and are essentially carefree once established. Still need more reason to plant this cactus? The Minnesota DNR classifies plains prickly pear as a species of special concern in the state, meaning it may be on its way to “threatened” status. Planting plains prickly pear (O. macrorhiza) might help it survive.
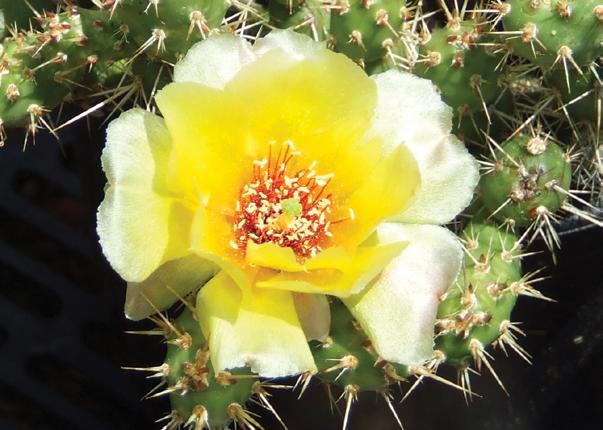
Left to right: Opuntia hybrid ‘Red Gem’ (courtesy of coldhardycactus.com), Opuntia fragilis ‘Compact Form’ (courtesy of coldhardycactus.com), plains prickly pear (courtesy of minnesotawildflowers.info).
VARIETIES
Plains Prickly Pear
(regional species names may vary)
Height: Upright growth up to 8 inches
Bloom: Early to midsummer, yellow
Habitat: Zones 4–10, full to part sun, xeric, prefers cold desert/shrubland in Intermountain West and northern Great Plains.
Pads: Pear-shaped with the narrow end at its base, wider and longer than brittle prickly pear pads
Brittle
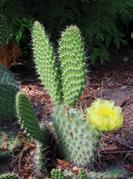
Prickly Pear
(Opuntia fragilis)
Height: Low, spreading growth, 2 inches to 8 inches
Bloom: Late spring to early summer, yellow
Habitat: Zones 3b–10, full sun, xeric, prefers drier areas .
Pads: Smaller and rounder and detach more easily than plains variety
‘Red Gem’
(Opuntia hybrid ‘Red Gem’)
Height: Low, prostrate up to 4 inches
Bloom: Spring to early summer, magenta/pink
Habitat: Zones 4–10, full sun, xeric
Pads: Small, round
CACTUS SUPPLIERS
Colorado
Cold Hardy Cactus, Lakewood coldhardycactus.com
Minnesota
Mother Co., Plants, Minneapolis mother-plants.com
Prairie Moon Nursery, Winona prairiemoon.com
Montana
Caras Nursery and Landscape, Missoula carasnursery.com
Pipilo Native Plants, Charlo pipilonatives.com
New Mexico
High Country Gardens, Santa Fe highcountrygardens.com

LEARN MORE northerngardener.org/ growing-prickly-pear
QA
&
Can you share tips for growing as a northern gardener in our changing climate?
As we face shifting weather conditions, including the likelihood of drought, increased heat and extreme weather events, it’s important that we adapt our gardening practices to meet the challenges they pose.
The climate outlook isn’t all bad—we’re looking forward to longer growing seasons and the chance to try new plant varieties that previously were not hardy in our area. But some of the effects of our changing climate, such as droughts, are particularly problematic. Lack of rain can lead to dry soil, stunted plant growth and increased risk of pests and diseases. Rising temperatures are also an issue. So far, they have occurred primarily in winter, but increasing temperatures during the growing season can cause plants to lose water rapidly through transpiration. This leads to stress and potential damage as the plant struggles to replace the moisture. Sudden changes in weather, such as deluges or bitter cold followed by unseasonable warmth, also pose challenges. Here are some practical tips to help you navigate changing conditions effectively, whether you’re starting a new garden or maintaining an existing one.
Strategies
One effective way to cope is by improving soil structure, adding organic matter such as compost. This increases plant productivity and aids in carbon absorption. Adding compost also improves drainage during heavy rains and retains moisture during dry spells. Another strategy? Minimize soil disturbance during extreme heat and dry spells to prevent moisture loss and root damage. Mulch garden beds (a 2- to 4-inch layer, ideally) to trap soil moisture, suppress weeds and regulate soil temperature. Monitor the weather

closely and secure garden structures and vulnerable plants before storms arrive to prevent damage from strong winds or flooding.
Watering
Water efficiently so that plants receive adequate moisture while conserving this natural resource. Make sure the top 2 or 3 inches of soil are dry before watering, and water early in the day to reduce evaporation and plant stress. Consider drip irrigation and soaker hoses, which save time and energy, and water deeply and less often. This encourages roots to grow deeper in search of moisture, making them more resistant to bouts of extremely dry weather.
Plant choices
Select plants that are naturally droughttolerant, such as succulents, blackeyed Susans, lavender, coneflowers, catmint and bugleweed. You can find
trees, shrubs, vines, grasses, annuals and perennials that will grow well in dry soil. Consider adding native plants like staghorn sumac (Rhus typhina), butterfly milkweed (Asclepias tuberosa) or largeleaved aster (Eurybia macrophylla). They adapt to local conditions, tolerate dry soil and require little maintenance. Vegetable gardeners, look for heattolerant and drought-resistant plants such as pole beans, squash, eggplant and Swiss chard. On really hot days, try using shade cloth and consider planting more trees to prevent direct sunlight from baking plants during peak heat hours.
ASK THE EXPERT
Have a burning gardening question? Send it to editor@northerngardener.org for a chance to be featured here. Diane McGann is a University of Minnesota Tree Care Advisor, master gardener and Ask Extension panelist.
These beds are never watered, yet the droughtresistant plants thrive.
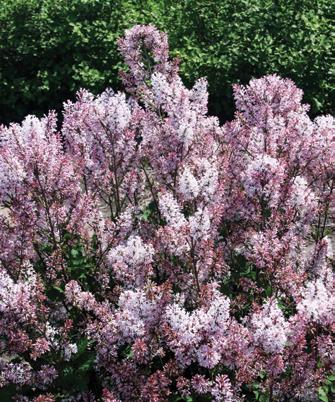
For the Love of (New) Lilacs
While we love the old-fashioned varieties, this newcomer has our hearts.
STORY DEBBIE LONNEE
For many years, Manchurian lilac (Syringa patula) was known for one wildly popular cultivar: ‘Miss Kim.’ More recently, a number of breeders developed improved forms of Syringa patula that are worth noticing and adding to northern landscapes.
One of these great new additions to the patula group is Dream Cloud Manchurian lilac (Syringa patula ‘KLMone’), a recent introduction from Wisconsin plantsman Mike Yanny.
Most notably, the flowers are quite unique and different than Miss Kim. Their dark pink buds open to a lighter shade of pink. The flower panicles are extra-large and fluffy. During peak bloom, they cover the plant so you can barely notice the foliage. An added bonus is the lovely fragrance, which
is distinct from the more commonly grown French hybrid lilacs.
Dream Cloud is great for small gardens as it only matures to 4 to 5 feet in height and 4 to 5 feet in width, creating a sweet, round shape. Plus, it doesn’t sucker like many other lilacs do.
Best grown in full sun (minimum six hours of direct sunlight per day) and evenly moist soils, it needs little care. Prune it just after it is done blooming, as the flower buds form the autumn before they bloom. All lilacs benefit from good air circulation to keep powdery mildew from forming on the leaves (and yes, we’ve seen plenty of that the last couple growing seasons). Give it space and don’t crowd it with other shrubs (by the way, Syringa patula are more resistant to powdery
Rooted In Nature
mildew infestations than French lilacs). Consider using it in a foundation planting, or it makes a delightful, informal hedge (no pruning required).
Hardy in USDA Zones 3-7, this lovely lilac will grow well across all of Minnesota. Syringa patula and its cultivars bloom a little later than other lilac species, thus extending the bloom season in late spring and early summer.


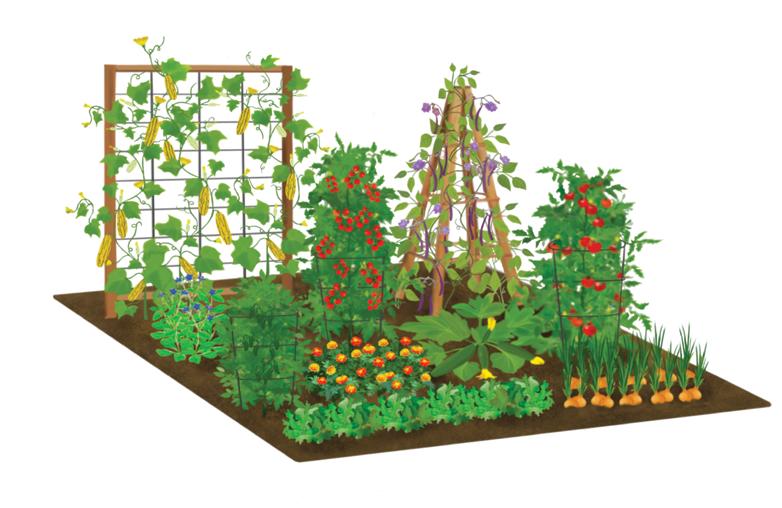
GARDEN PLAN
Vertical Vegetable Garden
Tight on space? Look up.
STORY AND ILLUSTRATIONS AMY KAINZ
This 5-foot by 5-foot edible garden maximizes space, offering creative solutions for growing fresh food in small spots. A heavy-duty trellis, obelisk and supports provide bones for vertical growth, freeing up valuable ground space for low-growing greens, vegetables and edible flowers. Growing upward boosts yield, improves airflow, reduces crowding and adds height and natural movement to the garden. Ideal for new and experienced gardeners, this DIY-friendly design is easy to maintain and adaptable to almost any space, from in-ground to raised beds.
THE PLANTS
Featuring a mix of garden staples, peppery flavors and a touch of heat, this setup ensures a productive, flavorful harvest while bringing height, depth and efficiency to your garden. Quantity in parentheses (#) indicates the recommended number of plants per square foot.
THE PLAN

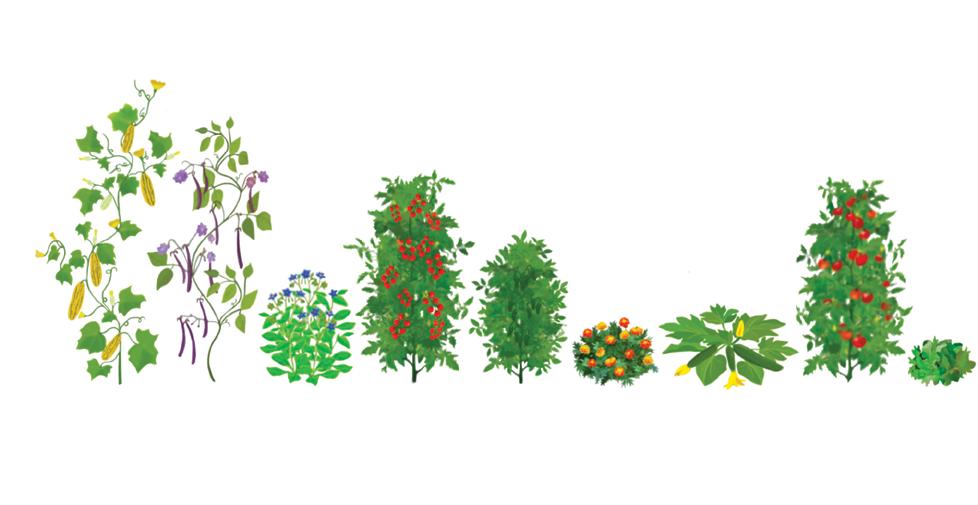
E
A Squash, Delicata (1)
Pole Bean, Purple Podded (8)
Borage, Starflower (1)
Cherry Tomato, Large Red (1)
Pepper, Jalapeno (1)
Marigold, French Double Dwarf (4)
Zucchini, Black Beauty (1) H
Tomato, Better Boy (1)
Arugula, Standard (8)
Onion, Spanish (9)
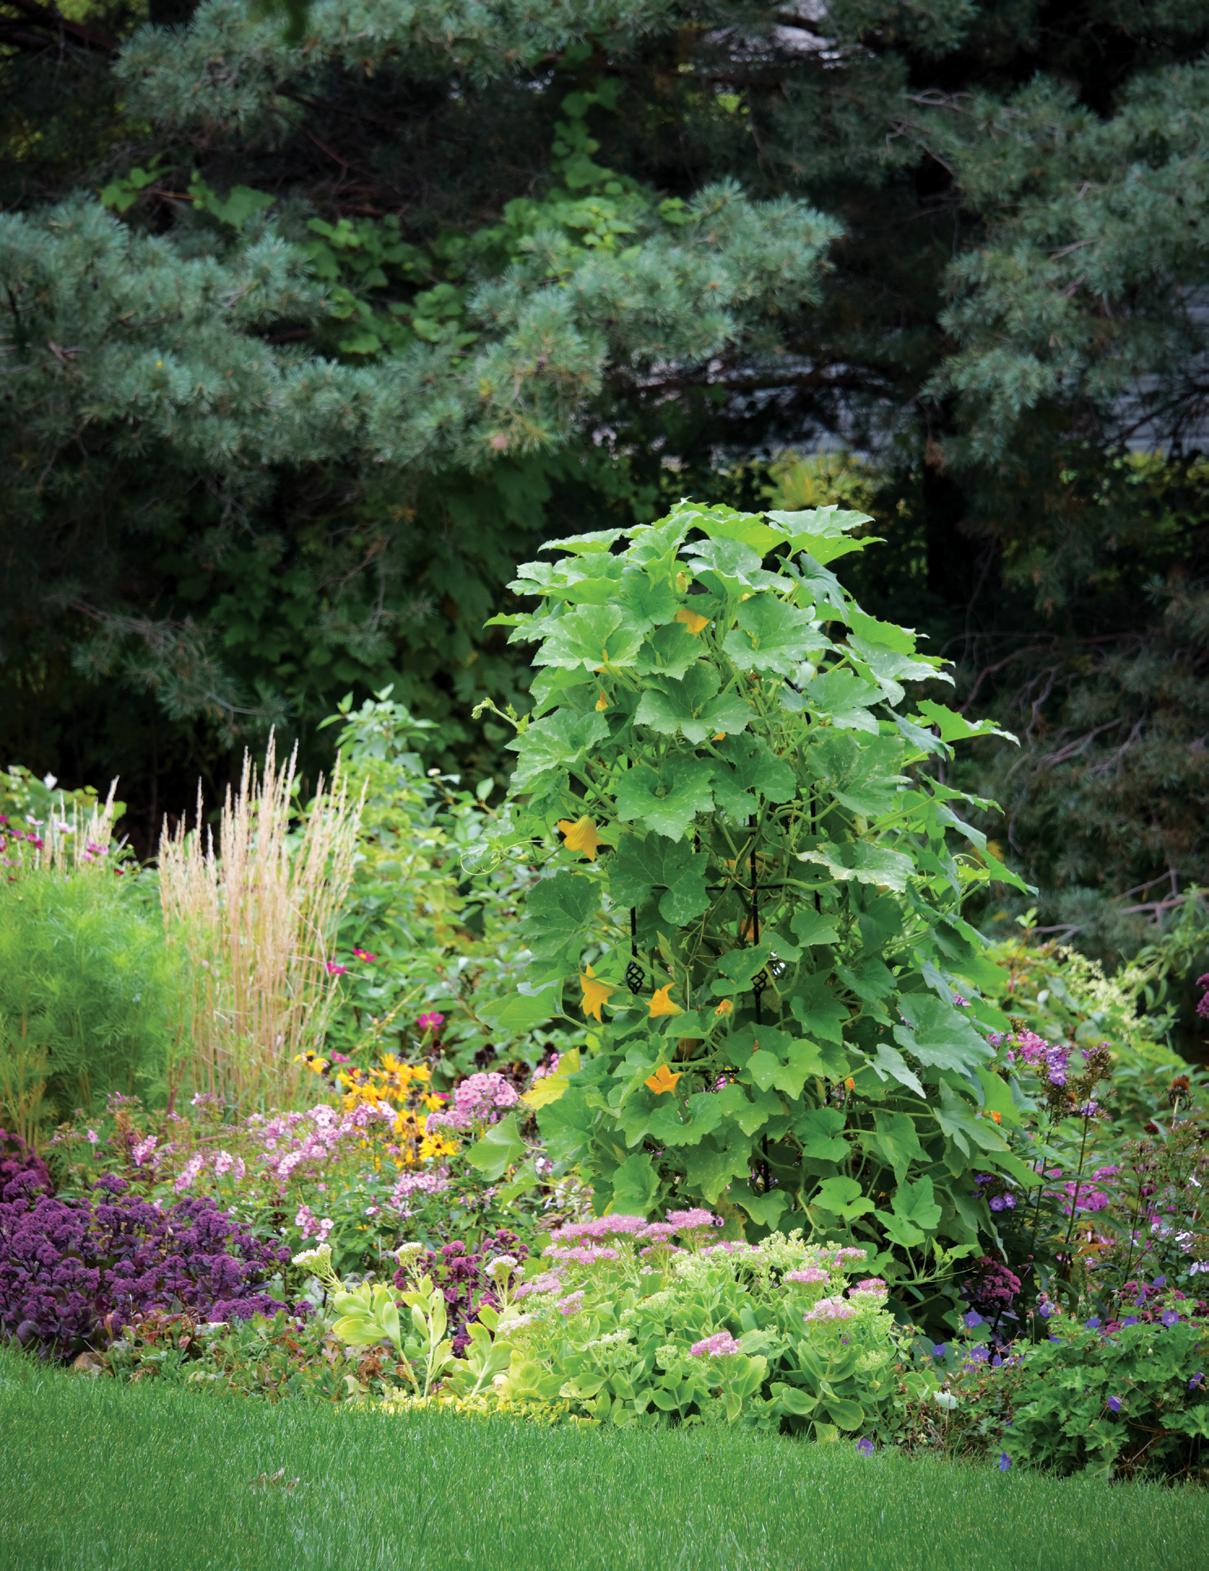
Let’s Get Vertical
There are plenty of good gardening reasons why it might be time to grow up.
STORY AND PHOTOS MICHELLE MERO RIEDEL
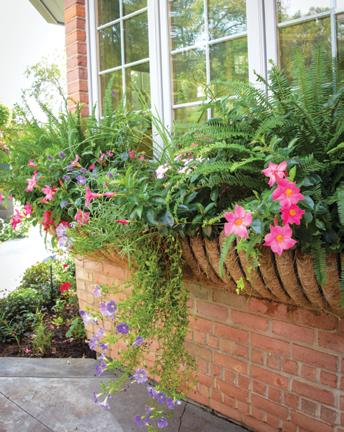
Vertical gardening is a chic way to use the space above ground and add a new dimension to the landscape. With this technique, we train plants to grow upward versus outward. We don’t need expansive yards to take advantage of this trendy practice. Gardeners in urban areas can use vertical gardening to maximize their space and grow more of their favorite plants.
Obelisk covered with mini pumpkins and gourds.
Getting structured
Plants in a vertical garden have to combat gravity, so they need sturdy support. Common supports include a trellis, obelisk, arbor, cage, pole or stake. Taller structures not only support the plants, but they can add whimsical interest and privacy to your landscape or deck.
Small-space gardeners can use containers to trellis plants that trail down a window box, hanging basket or tall pot. They can also use support to trellis up. And don’t forget raised beds—they are another way to grow plants vertically, but they don’t necessarily save space.
Before purchasing a plant support, find durable items around your home and repurpose them. Bedposts, PVC pipes, wooden pellets and ladders are just some of the helpful structures you might find.
Which support is best for your plant? If you’re a beginner, caging and staking is an easy way to force non-vining plants into growing vertically. Tomato and other bushy plants need cage support. Non-vining plants such as peonies need staking or a cage surrounding them to keep them from falling over.
Beyond caging and staking, there are other methods to grow a loftier variety of interesting plants.
First, know the mature height of your plant, and try to match the plant features with the structure. If you have a perennial, woody vine climbing 8 to
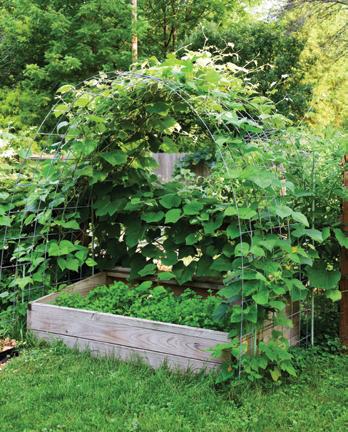
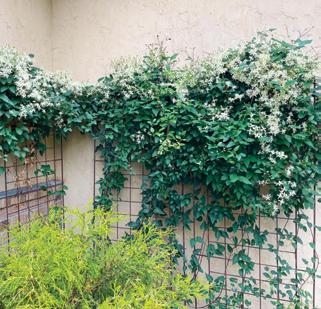
10 feet, a tall and wide trellis, obelisk or arbor are good options. Heavier plants such as pumpkins might need strong metal supports. A leafy, flowering vine such as clematis or morning glory could handle a wooden support. A flat trellis or simple stick will support pole beans and peas, as they have thread-like tendrils that naturally grab on. To keep plants from falling over, always consider their finished size and weight when selecting a structure. Also consider how much of the support needs to go into the ground or pot. I recommend buying a taller support than you think you’ll need.
Growing tips
Before adding any plant to the garden, always amend soil with organic matter. It’s essential for the health of your plant. Compost is easy to modify into the garden. I usually add about 30 percent compost to the existing soil. For the small-space gardener growing plants vertically in containers, a topquality potting mix or soil is best; find one that drains well. Don’t reuse last year’s soil—always buy fresh.
Vertical plants may need more water than those growing horizontally because they are getting more wind and sun exposure, and their roots can dry out faster. Water well to keep roots evenly moist. Because they are not laying horizontally, you’ll be able to water right at the roots, further eliminating foliar diseases. Supervise the plants
to make sure they receive adequate moisture.
Plants in containers will need more fertilizer than those in the garden. I recommend using an immediaterelease fertilizer mixed with water and applying it every two weeks. For the garden, a slow-release fertilizer added a few times during the growing season will keep plants flourishing. If you’re growing edible plants, consider an organic fertilizer and apply it as directed.
For a successful display, vertical plants may need training. Sometimes you must show the plant how and where to grow by loosely adding a flexible plant tie. A loose tie allows the plant stem to grow wider.
Placement and design
Before placing the vertical garden structure, consider the amount of light in the area. Most vertical plants, especially veggies, need a sunny location, about six hours or more.
If you have a small garden, go with small vertical supports. A large garden can take about any size. Pay attention to the plant’s finished height and weight at full size.
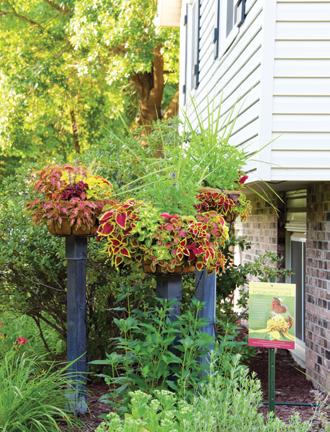
If you garden vertically using containers, consider lightweight ones so they can be moved to accommodate more sunlight. Display pots and vertical structures of varying heights but stagger them so each receives adequate light.
SIX ADVANTAGES TO VERTICAL GARDENING
Less leaning over and kneeling required while tending a vertical garden and picking the harvest.
Urban dwellers with small balconies, patios and yards can benefit from this spacesaving approach, especially using container gardens.
Create privacy with a tall structure or hanging baskets. Block out unsightly views with an arbor or add visual appeal to a wall with hanging plants.
Since plants are not spreading on the ground, less fungal diseases crop up. Encouraging plants to grow up versus out promotes better circulation and allows the leaves to dry out after rain or watering.
Growing up promotes more leaf surface area visible to the sun and more flowers. Fruit and vegetables might give you higher yields.
Vertical gardening allows you to grow more organic food. 1 2 3 4 5 6


Hennepin County Master Gardener Volunteers Upcoming Events
For more information: hennepinmastergardeners.org/events
Spring Plant Sale
Saturday, May 17, 9am-2pm
Hopkins Pavilion, 11000 Excelsior Blvd., Hopkins, MN
Offering perennials, annuals, natives, vegetables, herbs & more!
20,000+ Plants—More than ever before! One of the largest plant sales in Hennepin County. Bring your wagon!
Fully staffed by Master Gardener Volunteers ready to answer all your gardening questions. Free parking!
To learn more: Hennepinmastergardeners.org/events/ spring-plant-sale/
Learning Garden Tour
Saturday, July 12, 8:30am-4:30pm
Explore 10 inspiring gardens!
This year’s self-guided tour showcases 10 gardens in the southwest suburbs of Hennepin County. Join us for inspiration, education, and garden-related shopping.
Cost: $15 in advance; $20 day of tour.
Discounts for groups of 10 or more. Children under 12 free with a paying adult. Tour held rain or shine.
To buy tickets & learn more: Hennepinmastergardeners.org/events/ learning-garden-tour/
Left to right: Window box filled with annuals, beans on a curved arbor, column-elevated container gardens, sweet autumn clematis climbing trellis.
Plants That Attract Hummingbirds 5
Trumpet-shaped blossoms and the color red are irresistible to our favorite tiny bird.
STORY DIANE MCGANN
THE PLANTS
Here are five of their favorite plants, in order of bloom, that you can incorporate into your landscape.
COLUMBINE (Aquilegia canadensis)
This native perennial offers delicate, bellshaped flowers in shades of red and yellow and attracts hummingbirds with its nectar-rich blooms.
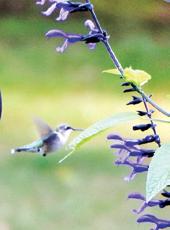
SALVIA (Salvia farinacea)
Both perennial and annual salvias draw hummingbirds. My favorite purple salvia is ‘Black and Blue.’
Another salvia that reliably attracts hummingbirds is red scarlet sage (Salvia splendens)
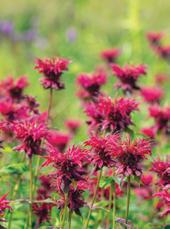
BEE BALM (Monarda)
Known for its long-blooming red, pink or purple flowers, bee balm is a perennial hummingbirds love. Easy to grow, Monarda provides a rich source of nectar for tiny visitors.
Glistening in the sunlight, they dart from flower to flower with a loud whir. We all love hummingbird season, which typically runs from May through October in Minnesota, and want to attract as many of these shimmering creatures to our yards as possible.

CARDINAL FLOWER (Lobelia cardinalis)
If you’re lucky enough to be able to grow cardinal flower, another red beauty, you’ll be blessed with flocks of hummingbirds. Cardinal flower prefers a moist soil and partial shade and can grow up to 6 feet tall.
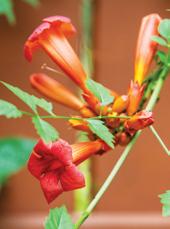
TRUMPET VINE (Campsis radicans)
With bright orange to red flowers, trumpet vine is a hummingbird magnet. It grows well on trellises or fences, offering a stunning display of color and serves as a host for hummingbirds.
Bee Water Station
Serve up swigs for your local bees.
STORY GAIL HUDSON
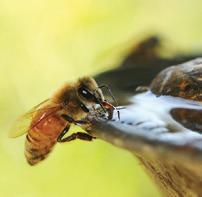
Water is essential for any garden’s success. We water our plants and fill bird baths to quench the thirst of our feathered friends. But did you know honeybees (Apis mellifera) and several other bee species need H₂O, too? So do butterflies, wasps and beetles. Honeybees need to collect water to cool the hive. “I wouldn’t say that they become dehydrated, just that they need water,” says Elaine Evans, a University of Minnesota Extension educator and researcher in the Cariveau Native Bee Lab.
As the weather warms and foraging time gets underway, honeybees start looking for water. Once they find a water supply, they’ll come back repeatedly.
A honeybee colony could have more than 40,000 members by the middle of the summer and all those bodies can produce a lot of heat. According to experts at the University of Arkansas Extension, honeybees collect the water and then deposit tiny droplets around the hive, fanning their wings to evaporate the water and cool the hive. Some stem-nesting bees, like Mason bees, need mud to make their nest. They will gather it from puddles near those nesting sites.

Water sources are crucial for every habitat, according to the Xerces Society. And even a small one can have a big impact in supporting pollinators.
How to help the bees
A pond, birdbath or other water feature is a great start. If you don’t have one, here’s how to make a bee watering station with items you may already have on hand.
How bees find the station
Establish a water source early in the season. Place your bee watering station close to the plants honeybees commonly visit. Bees use their sense of smell to find water. So, the smellier, the better. They like drinking water that smells like moss, aquatic plants or decaying organic matter. Data gathered for a study published in Ecological Entomology in 2017 suggests honeybees “forage in ‘dirty’ water sources for minerals that may be lacking in their floral diet.” If you do use clean water, add table salt (sodium chloride). Study authors say their trials showed honeybees prefer it.
MATERIALS
» One clean clay pot, 6 to 8 inches diameter, and matching (detached) saucer (a stone or concrete pot with a rough, porous surface will give bees some traction)
» Gorilla glue (clear)
» Non-toxic craft paint, outdoor gloss acrylic (weather-resistant, for use on terracotta)
» Paint brushes, sponge paint applicator
» Rocks, sticks, wine corks, pinecones or other items
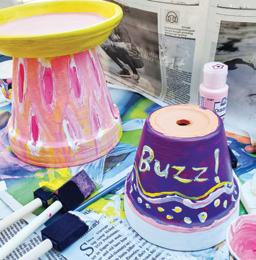
DIRECTIONS
1. Wash your clay pot with soap and water and let dry completely.
2. Turn the clay pot upside down and place the saucer (right side up) on top to position for glueing. Paint the bottom of the saucer with glue on the areas that will touch and secure to the top of the clay pot. (See right photo above.) Check glue directions for drying time. Allow to dry completely or at least 15-20 minutes.
3. Once the glue is secure, with gentle handling you can paint the pot. The sky’s the limit! When choosing your colors, keep in mind that bee vision is different from ours. They cannot see the color red, which looks like black to the bees. However, they can see and are attracted to ultraviolet light, so colors like blue and purple appeal.
4. After 24 hours, glue should be fully cured. High quality outdoor paint can last for several years with minimal fading.
5. Make a tiny bee beach! Since bees can’t swim, give them something to land on so they can perch safely without slipping. Fill saucer with small rocks, for example, and pile them just above the water level.
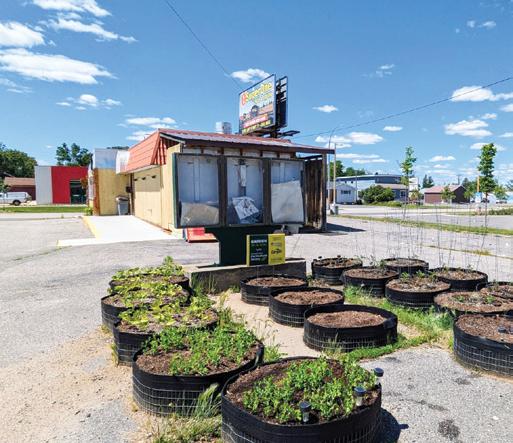
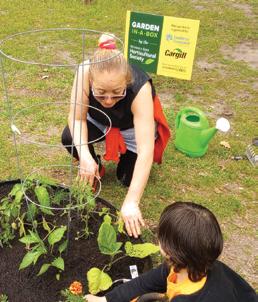
Garden for Good Abuela’s Mission
Colectiva Bilingüe and Garden-in-a-Box cultivate community and future gardeners.
STORY AND PHOTOS GLORIA VELAZQUEZ
As a gardener and grandmother, I believe in the importance of connecting with the land and passing this knowledge on to younger generations. This passion motivated me to get involved with Colectiva Bilingüe’s environmental leadership team and the Minnesota State Horticultural Society’s Garden-in-a-Box program, an initiative that has changed our lives in unimaginable ways. When my grandchildren recently began attending Emerson Dual Language School in Minneapolis, I was excited about their education and intrigued by the diverse and vibrant community they’d grow alongside.
Colectiva Bilingüe, or the Minneapolis Bilingual Education Collective, is made up of parents, grandparents, teachers, students and community members committed to bilingual education and equity in learning through community events, capacity building and resource distribution. The Collective unites Minneapolis’s five Spanish dual language public schools, creating a strong, inclusive community for all students.
Since joining Garden-in-a-Box, all five schools that make up the pre-kindergarten through 12th grade pathway—Emerson, Green Central and Las Estrellas elementary schools, Andersen United Middle School and Roosevelt High School—now proudly tend school gardens. The majority of students (70 percent) at the three elementary schools are Latino. More than 50 percent receive English Language Learner services and over 60 percent qualify for free or reduced-price lunches.


I initially joined the Colectiva environmental team because of my interest in monitoring air quality and starting a recycling program in our school cafeteria. By connecting with Latina moms from the other elementary schools, we realized that having a garden at each school could help us teach students the importance of reducing pollution. The Garden-in-a-Box program makes gardening accessible to school communities by providing growing beds, planting materials and instructions on how to make compost tea fertilizer. The idea of being able to bring this program to school excited us from the beginning because we knew it would offer multiple benefits: teaching children where their food comes from, encouraging healthy eating and strengthening our community through Latino leadership.
THE GARDENS AT EMERSON AND LAS ESTRELLAS
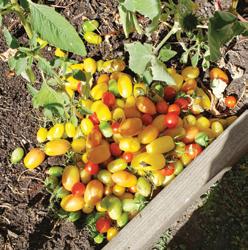
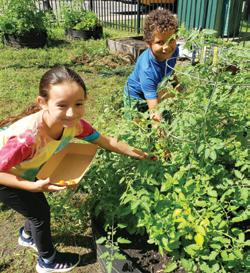
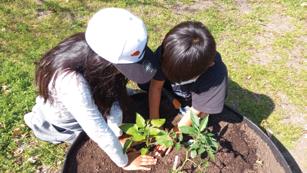
A small team of adults picked up materials to make 18 small garden beds during the first weekend of May 2024. We set up ten beds at Las Estrellas Dual Language School in Northeast Minneapolis and eight beds at Emerson Dual Language School downtown. We assembled the beds, filled them with soil and invited several classes to plant the little starts. I was surprised that the first-grade children were the most careful and hardworking of all the students. At Emerson, we involved students from three bilingual schools who attended our summer camp and harvested and gardened during recess.
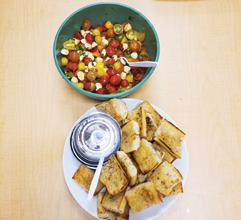
Clockwise from top left: Planting the garden with my grandchildren. One student’s summer cherry tomato harvest. Hard at work harvesting. Fresh flowers decorate a Day of the Dead altar (a Mexican tradition) at a celebration hosted by Colectiva.
Delicious
caprese salad made with our harvest!
Our main objective in joining Gardenin-a-Box was to unite our schools and families around connecting with nature and provide a sense of belonging that many immigrant families lose when moving to an unfamiliar country. As we grew gardens and community, we discovered that the benefits surpassed even what we hoped:
» Experiential education: Children learn about biology, ecology and sustainability in a tangible and fun way. Many choose to spend recess time in the garden.
» Healthy eating: By growing their own vegetables, students become more interested in trying new foods and improving their eating habits.
» Teamwork: Gardening encourages collaboration and a sense of shared responsibility among children and adults from different cultures.
» Intergenerational connections: As grandparents and parents, we can share knowledge and strengthen family ties through work in the garden.
» Community empowerment: Initiatives like this reinforce a sense of belonging and commitment to the school and the community in general.

Our dream moving forward? To expand the program, involve more families and make gardening an integral part of the daily educational experience for every student. Committed to caring for our planet, I have experienced the power of student, family and teacher collaboration. With support from Garden-in-a-Box, we will continue sowing seeds in the soil and in the hearts of the next generation.
Learn more at northerngardener.org/ colectiva-bilingue
garden


PLanting as a team!
The Hartman Garden Center provides a wide range of products and services designed to meet all your gardening needs. From trees and plants to essential gardening tools, we provide everything you need to plant a little nature in your life.
GARDEN GREENER

Monarch butterflies on the brink
Here’s what you can do in your garden to help.
STORY KATHY PURDY
Monarch butterflies feed on many aster species.
PHOTO: JUSTIN PURDY
Iplanted a large plot with flowers for my son’s wedding nearly a decade ago. To everyone’s delight, monarch butterflies (Danaus plexippus) fluttered through the cut flower garden. Last year, we didn’t see a single one. What changed? In the last 50 years, the eastern migratory population has declined by a staggering 80 percent. Several factors are making migration more perilous, threatening the monarch butterflies’ existence.
These amazing butterflies overwinter in the Sierra Madre mountains of Mexico. As spring arrives, they begin the long migration north, mating and laying eggs on milkweed in southern locations. The adults die and their eggs hatch into caterpillars. Each caterpillar eventually forms a chrysalis. When the butterfly emerges from the chrysalis, it continues the migration, mates, lays eggs and starts the process all over again, flying further north than the parents did. The monarchs arriving in Minnesota are the fourth generation in a single migration. This fourth generation will not mate. They will convert nectar into fat and begin the long flight back to Mexico. Here are the factors contributing to monarch population decline:
Climate
As the timing of seasonal temperature shifts changes, monarchs linger up north too long. Also, extreme weather events have decimated populations.
Pesticide and herbicide use
Any product used to kill caterpillars or insects also adversely affects monarch butterflies.
Habitat loss
This is the greatest cause of monarch decline. Monarch butterflies cannot survive without milkweed. As each generation moves further north, they need to find milkweed on which to lay their eggs, and their caterpillars must eat it to grow and form a chrysalis. Commercial and residential development destroy critical milkweed habitats. Common milkweed is considered an agricultural weed, but the herbicides used to control it kill all milkweeds. The situation is so dire that the U.S. Fish and Wildlife Service is proposing to list the monarch butterfly as threatened under the provisions of the Endangered Species Act.
How can gardeners help?
First, do no harm. Don’t use pesticides, which kill butterflies outright, or herbicides, which kill their food sources.
If you are limited to a balcony or small patio, grow nectar-rich annual plants such as such as cosmos, zinnias and lantana, and herbs like basil, dill and oregano. Harvest some of the herbs for yourself and let the rest go to flower for the butterflies. Some milkweed and nectar plants (see next page) are perennials, which often don’t survive the winter in containers.
If you’re ready to become a champion for monarch butterflies, create a monarch conservation garden. These home gardens become bridges between islands of natural habitat so that monarchs find food and places to lay eggs as they migrate through your area.
Position your garden in full sun away from road traffic, which could contribute polluted water runoff and exhaust. Orient it along the north-south axis, copying the monarchs’ flight route. Avoid locating it near objects that might impede visibility, such as trees and buildings. Give your garden a border of milkweed from a single row around the perimeter up to a 3-foot-wide hedge. This border is key for attracting monarchs from the air. If possible, grow more than one kind of milkweed, but keep the different varieties in blocks. Monarchs are attracted to the largest, tallest milkweeds, so plant them in fertile soil amended with organic matter. Leave the milkweed standing until well into October, even if it starts looking ratty.
In the center of the garden, grow nectar plants. Again, grow these in blocks so that the monarch butterflies can locate them easily. Offer diverse bloom times and colors. Native plants are preferred because they attract and feed many other insects, but monarch butterflies feed equally well on non-native plants with abundant nectar. However, avoid flowers with double blooms. The extra petals replace the reproductive parts of flowers so they can’t offer pollen or nectar.
Finally, provide a water source, such as a shallow bird bath, with stones in it so the butterflies can access it without drowning.
Even if you can’t meet all of these guidelines, the more of them you can incorporate into your garden, the more you will aid the monarch butterflies as they migrate.
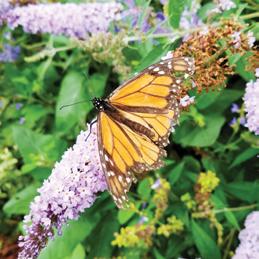
Monarch on butterfly bush
Monarch-friendly plants
NECTAR PLANTS
Listed in order of bloom time, roughly. Make sure they are free of systemic insecticides (such as neonicotinoids).
» Common boneset (Eupatorium perfoliatum)
» Coneflowers (Echinacea purpurea, E. pallida, E. angustifolia)
» Thistles (Cirsium discolor, C. muticum)
» Goldenrods (Solidago canadensis, S. speciosa)
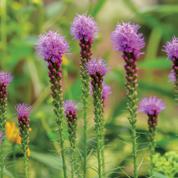
» Blazing stars (Liatris punctata, L. spicata, L. pycnostachya, L. ligulistylis, L. cylindracea, L. aspera)
» Grass-leaved goldenrod (Euthamia graminifolia)
» Hoary vervain (Verbena stricta)
» Mountain mint (Pycnanthemum virginianum)
» Perennial sunflowers (Helianthus grosseserratus, H. maximiliani)
» Beebalms (Monarda punctata, M. fistulosa)
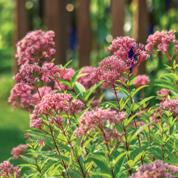
» Joe Pye weeds (Eutrochium maculatum, E. purpureum)
» Stiff goldenrod (Oligoneuron rigidum)
» Asters (Symphyotrichum leave, S. oblongifolium, S. novae-angliae)
COMMON HERBICIDES AND PESTICIDES THAT HARM MONARCH BUTTERFLIES
» Glyphosate
» Neonicotinoids: imidacloprid, clothianidin, thiamethoxam, acetamiprid and dinotefuran
» Bacillus thuringiensis (Bt)
» Atrazine
» S-metolachlor
» Resmethrin
» Permethrin
MILKWEEDS
These are also good nectar plants.
CLUMPERS
Early studies show that ornamental cultivars of these milkweeds are similar to the wild species in attracting monarchs.
Swamp milkweed (Asclepias incarnata), pink flowers, grows 3- to 5-feet tall. Doesn’t need a swamp; can do well in average or clay soils if watered during drought. Monarchs prefer this species and caterpillars’ survival rate is highest when eating this.
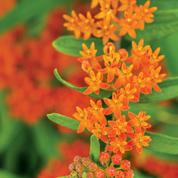
Butterfly milkweed (A. tuberosa), orange flowers, 1- to 3-feet tall, better adapted to dry or sandy soil
Showy milkweed (A. speciosa), pink flowers, 1.5- to 4-feet tall, dry to average soils
SPREADERS
Common milkweed (A. syriaca), white flowers, 3- to 5-feet tall, any soil, not recommended for garden beds. Use in wilder areas such as meadows and hedgerows. Check to make sure it’s not listed as a noxious weed in your area.
The next two are less aggressive than common milkweed but do spread by rhizomes.
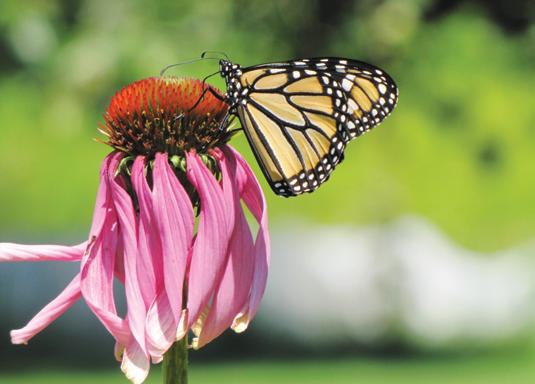
Coneflowers are monarch favorites.
LEARN MORE
northerngardener.org/ helping-endangered-monarchs
northerngardener.org/ pesticide-drift
northerngardener.org/ building-a-pollinator-garden
Prairie milkweed (A. sullivantii) pink, 3 feet tall, mesic to wet soil
Whorled milkweed (A. verticillata) white flowers, 1 foot tall, dry to mesic
AVOID
Tropical milkweed (A. curassavica) not native or hardy and its later bloom time encourages monarchs to linger when they should be moving on.
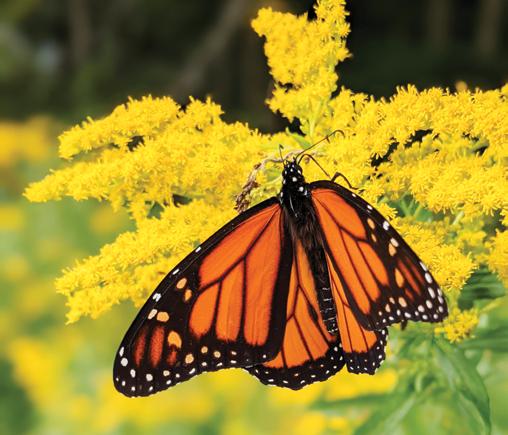
Goldenrod provides plentiful nectar to fuel the monarchs’ migration south.
As a member, get Northern Gardener magazine in your mailbox quarterly and discounts on plants and gardening education.
JOIN OR RENEW NOW northerngardener.org/membership


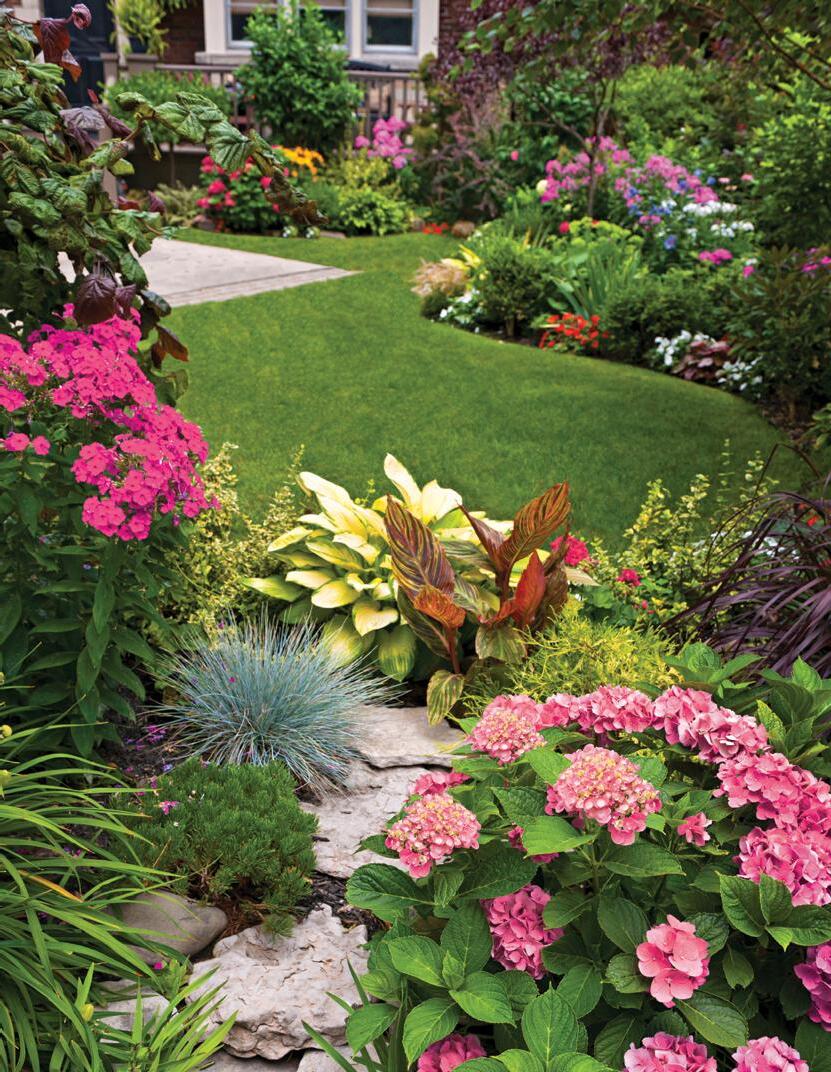
Grow a BEAUTIFUL GARDEN that blooms longer
Start with the best varieties chosen for superior performance, beautifully grown by horticultural craftsmen.


The Resilient Garden
Experts are
unanimous—when
the weather swings from deluge to drought, native plants and trees have what it takes to survive.
STORY SUSAN BARBIERI PHOTOS TRACY WALSH

Paige pelini loves a prairie look and adores native plants of all kinds, but one in particular has utterly stolen her heart: Ratibida pinnata, or Grayhead Prairie Coneflower, with its yellow petals falling like a skirt from a prominent brown seed head. “It’s tall, it’s spectacular and the goldfinches love the seed heads. It’s just like a ballerina swaying in the wind. I love it,” Paige says.
Like many avid gardeners, she is working to make her garden more resilient as climate change brings weather that seesaws between heavy rains and long dry spells. She’s slowly converting her entire yard to native flowering plants and grasses. With their deep root systems, the grasses help cool and retain moisture in the soil by taking up the space around the flowering plants, offer habitat for critters and help showcase some of her flashy native flowers.
Paige knows more than a little bit about helping people create a more drought-resistant landscape with native and non-native plants. She’s the co-owner of Mother Earth Gardens in Minneapolis, where she fields plenty of questions about how to create low-maintenance yards that don’t require a lot of watering.
“For in-ground planting, a lot of people are very interested in natives for a variety of reasons, and one of the driving factors is their ability to adapt more readily to those drought conditions,” Paige says. “Natives aren’t for everybody, of course. For perennial plantings that are non-native, just like any perennial planting, almost everyone recommends some kind of mulching to help protect that soil.”
Selecting plants that are reliable in dry conditions is important, but she says it’s even more important to put the work into getting the soil into its optimal condition.
There are new organic mulches and soil amendments available today to help soil retain moisture, including products made of sheep's wool and a peat moss substitute made of shredded paper.
Toil for good soil
Optimizing the soil is especially key for successful container gardening, she says. If you have containers on a balcony or someplace where you can’t get to them for frequent watering, starting off with optimal soil for moisture retention is key.
“We might recommend some of the soil amendments that would help the soil retain the moisture or we would steer them to plants that would be more viable in that drought situation,” Paige says. Her own containers are large and in shade, so moisture is not a big issue. She uses a lot of tropical plants and begonias, which don’t like to be too wet. She amends the container soil with pine bark mulch and sheep’s wool pellets.
Paul Erdmann, natural resources program manager at the Ramsey-Washington Metro Watershed District, is another big believer in gardening with native plants as our home landscapes in USDA Zones 3, 4 and 5 become more challenging to manage.
“There’s a huge cornucopia of native plant species for people to choose from, it really just depends on the site conditions and the gardener’s aesthetic,” he says. Those new to the native garden look can check out the grounds of the water district’s offices in Little Canada for inspiration.
The benefits of native plants are many, Paul says. They require less water than non-native plants and their deep roots stabilize the soil and help reduce erosion. Rain gardens planted with natives capture stormwater and reduce runoff.
Purple coneflower (Echinacea purpurea) serves as a sought-after landing pad for bees and other pollinators.

Best of all, native plants help reduce pollution by filtering the air and improving air quality, he says. “The roots of the plants are actually taking up some of those pollutants and filtering them out so they’re not running off into our surface water or groundwater,” Paul says.
Most of our native plants, such as milkweed or big bluestem, have deep taproots while other natives have fibrous roots that spread laterally to find the moisture they need, Paul says. Their leaves also have evolved in ways that help them retain moisture during hot, sunny days.
“Some of these have been growing here for hundreds of years, so they’re adapted to different conditions, from extreme drought years to extreme wet years and everything in between,” he says, adding that healthy soil is the key to growing healthy plants in times of drought. Overly compacted soil isn’t able to absorb and retain moisture.
Paige agrees and adds that there’s a right way and a wrong way to water. People often will not take the time to water deeply, and that’s important for our perennials, trees and shrubs, she says. Watering deeply encourages the root systems to also go deep, so they’re less vulnerable to intensely dry days.
When she talks to folks about watering the garden, she compares it to making drip coffee or pour-over coffee.
“You have to bloom the coffee, and you have to bloom your soil too, because it’s hydrophobic: When it gets totally dried out, it repels water,” she says. “Until that moisture starts to set in around the edges it’s just going to keep pushing water away. So do what you do with coffee and bloom it a little bit. First water lightly, but then SOAK it.”
DROUGHT-TOLERANT NATIVE PLANTS
Recommended by Paul Erdmann, Ramsey-Washington Metro Watershed District.
FOR SUN
» Shorter prairie grasses: blue grama, little bluestem
» Taller prairie grasses: Indiangrass, big bluestem. Attractive flowers and seed heads provide fall and winter color.
» Blazing star (Liatris)
» Yarrow can be used as a lawn replacement or garden plant.
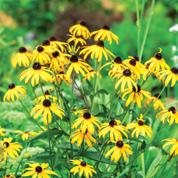
» Black-eyed Susan and other members of the sunflower family tolerate drought.
» Coneflower (Echinacea)
» Prairie sage
» Bergamot (Monarda) is similar to bee balm but has purple flowers. Spotted horsemint is its cousin and has unique-looking flowers.
» Butterfly weed has bright orange blooms and cool seed pods. Common milkweed also tolerates drought conditions.
FOR SHADE
» Joe Pye weed has pretty, pale pink flowers. Needs room to grow because some can get up to 6 feet tall and will spread.
» Large-leafed aster flowers early in the season and then a blueish purple color later in the fall. Good groundcover. Aromatic aster and sky-blue aster can also withstand drought.
» Wild ginger
» Columbine
» Anise hyssop or giant hyssop
» Pennsylvania sedge or other woodland sedges
ORGANIC

MULCH AND SOIL AMENDMENTS
Ewe & Me Wool Company, maker of Woolly Belly Pellets and Sheepy Shreds. woollybellypellets.net
Pittmoss, maker of Pittmoss Organic Soil Conditioner. pittmoss.com/product/prime/
Blazing star
Coneflower
Black-eyed Susan
Butterfly weed
Joe Pye weed
STRESS-PROOF YOUR TREES
University of Minnesota Extension educator Laura Irish-Hanson says that with the change in our weather patterns, it’s likely that more homeowners will see their trees perform poorly in their home landscape or might lose their trees altogether.
“We’ve been getting much more rain annually, so our precipitation has increased but it’s usually in less number of events so we have these crazy torrential downpours of rain and then we’re going through these longer periods without any precipitation, these drought periods or drought-like periods,” she says.
The dramatic weather swings have really slammed our lilacs, Laura notes, and some homeowners have seen their lilacs rebloom. It’s a stress response and a survival mechanism; the plant’s effort to flower and propagate. Powdery mildew and other fungal diseases have also taken a toll, causing lilac leaves to turn yellow, then brown, before falling. Finally, many homeowners mistakenly trim their lilacs as they would a hedge, inadvertently cutting off the branches that set buds for the following spring.
If you need to replace a tree, water it well in the first five years while it’s establishing a strong root system to help it bounce back from periods of prolonged drought.
LAURA’S DROUGHT-RESISTANT TREE PICKS
Northern catalpa (Catalpa speciosa)
“A fast-growing tree that’s hardy to zone 4. This native tree has large, heart-shaped leaves and fragrant, beautiful flowers. It drops seed pods, so there is extra cleanup."
Sycamore (Platanus occidentalis)
“It’s fast growing and has the most beautiful, showy bark and large pods. It’s a great shade tree. It’s native further south but as climate changes species are going to be moving around.”
London planetree (Platanus acerfolia)
“Pretty reliable for zone 5 and it’s a cross between two natives. It’s a cool-looking tree.”
Hackberry (Celtis occidentalis)
“It can handle flood situations to drought.”
Thornless honey locust
“With compound leaves and tiny leaflets, this gorgeous native tree has a moderate to fast growth rate and is hardy to zone 4.”
Kentucky coffee tree
“Hardy to zone 3, big flat pods and beautiful form. Compound leaves, larger than honey locust and flatter.”

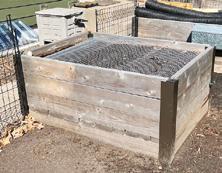
NEXT-LEVEL GARDEN BEDS
Sub-irrigated raised beds take the guesswork out of plant watering.
With last year’s feast-or-famine swings between heavy rain and dry spells, Clare LaFond was having a hard time figuring out whether her lettuce, peppers, tomatoes and leeks were getting too much water or not enough.
“I tried growing with drip irrigation and was getting frustrated because I could never tell how much water was needed, and when there were really heavy rains things seemed to get too saturated,” she says. “Then I started thinking about self-watering pots and how, basically, the roots are able to just take what water they need. So I thought, ‘What if I could do that on a bigger scale?’”
Thus began an internet search to study options for subirrigated beds. She decided to make one out of cedar wood that would coordinate with the rest of her garden. Now she enjoys two new elevated beds that are easier to tend, flood resistant and jumping worm-proof. The 2-foot height “may discourage less-ambitious rabbits,” she notes. Even better, the large water reservoir allows plants to thrive during long
periods of drought. And the overflow tube drains excess water, preventing root rot during periods of flood.
The initial performance of her sub-irrigated beds was anything but sub-par, and her neighbors in St. Paul’s Highland Park area enjoyed the surplus last year.
“I bought a jalapeno seedling and had over 100 jalapenos from this one plant. It was amazing. All my neighbors were having poppers,” Clare says.
She placed the two beds close to the kitchen door so she can easily grab herbs and other frequently used fresh ingredients. And there is no more wondering whether her plants are parched or saturated. She just pops a hose into the fill tube as needed. The plants take what they need.
HOW TO MAKE A 3X4 FOOT SUB-IRRIGATED RAISED BED
DIY AND ILLUSTRATION CLARE LAFOND
Metal corner
Perforated 4-inch drainpipes set 1/2 inch apart
Overflow tube 1/3 of the way down from top of drainpipe
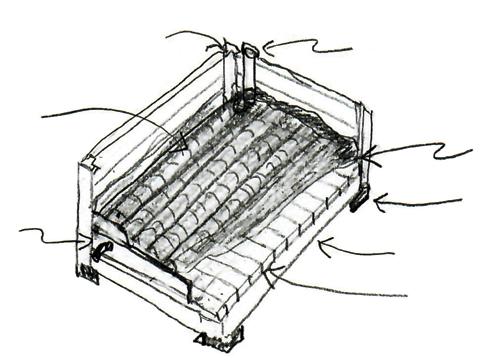
Fill tube with cap set into drainpipe
Fishpond liner extends above drainpipe
Concrete block
2-foot by 6-foot cedar
Floorboards
Fill with mixture of peat moss, perlite, vermiculite and fertilizer. Don’t use compost as silt may clog drain pipe pores.

TOOLS
» Saw to cut lumber
» Drill to fit fill tube and drainage tube
» Hoe and/or shovel to mix soil ingredients
» Staple gun to secure liner
» Tarp for mixing soil
MATERIALS
Lumber
» Two 2-foot by 6-foot by 8-foot pressure treated ground contact lumber, cut two 4-foot lengths and two 3-foot lengths
» Four 2-foot by 6-foot by 10foot cedar S4S lumber, cut into 12 3-foot pieces
» Four 2-foot by 6-foot by 8-foot cedar S4S lumber, cut into six 4-foot pieces and two 3-foot pieces
Accessories
» Four 4-inch by 4-inch by 8-inch construction blocks
» Four 24-inch-tall metal raised bed corners
» One 4-foot by 5-foot food safe EPDM fishpond liner, 45 mil
» Seven 4-inch by 4-foot perforated drainpipe, cut to fit in bed, 1/2 inch space between pipes
» One 1-inch PVC Schedule 40 potable pipe, cut to one 15-inch length for fill tube
» One 1-inch cp to fit PVC pipe
» One 1/2-inch poly tubing for overflow, cut to one 6-inch length Fill
» Eight cubic feet peat moss
» Three cubic feet vermiculite
» Three cubic feet perlite
» Fertilizer (try 4 pounds Espoma GardenTone), follow directions on package
INSTRUCTIONS
1. Place construction blocks into ground to support the four corners of the bed.
2. Fit ground contact lumber into metal corners. Check and adjust level.
3. Install 12 floorboards on top of first layer.
4. Slide three layers of side and end pieces into corners to make the bed 3 feet by 4 feet by 2 feet tall.
5. Install pond liner, folding in corners and tacking with staples.
6. Fit seven drainpipes into bed, spacing about 1/2 inch apart for soil to wick up moisture.
7. Drill hole in drainpipe to accommodate fill tube. Fit fill tube in place and cap it.
8. Drill overflow hole to fit tubing two-thirds up from bottom of tube to allow air. Insert tube through wall and liner.
9. Mix peat moss, vermiculite and perlite and fill bed, watering mixture as layers are added.
10. Add fertilizer to top 8 to 12 inches according to package directions.
11. Fill water reservoir through the fill tube. Cap tube when not in use to keep debris out.
12. Continue watering bed before planting. Add water through fill tube until it comes through overflow tube.
Garden to Table
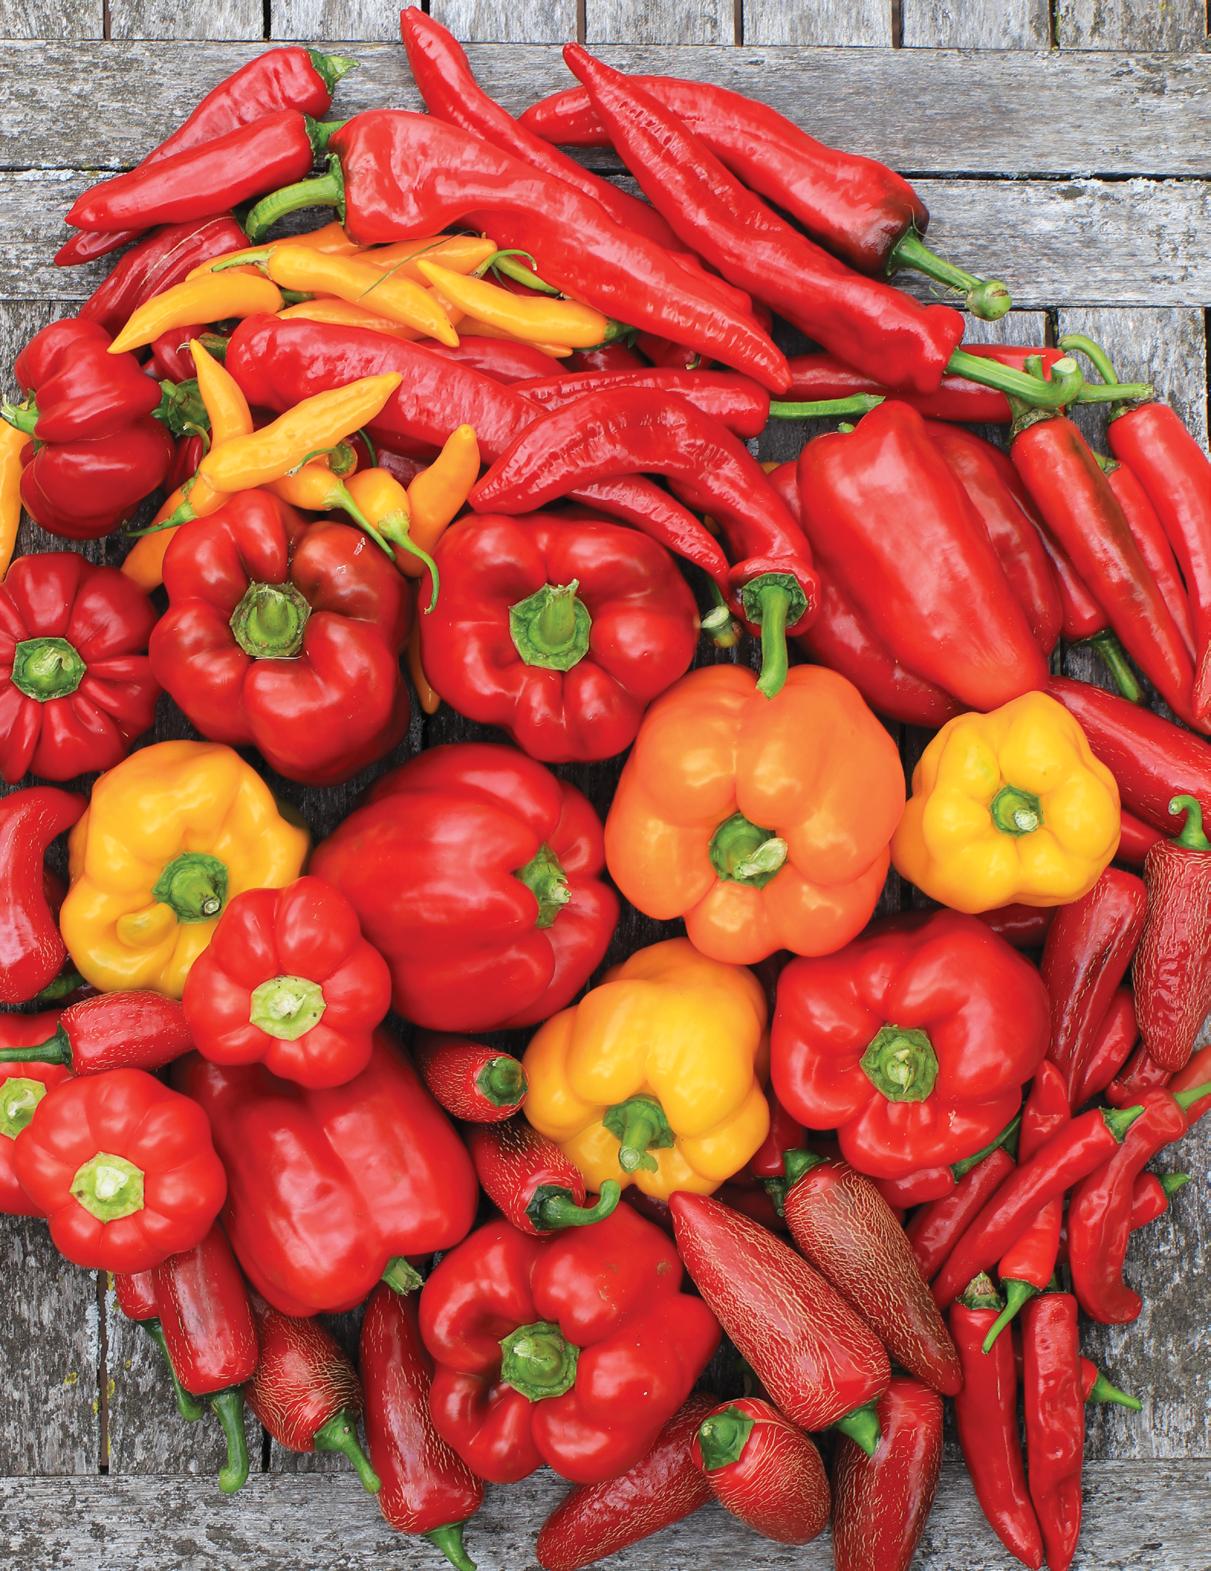
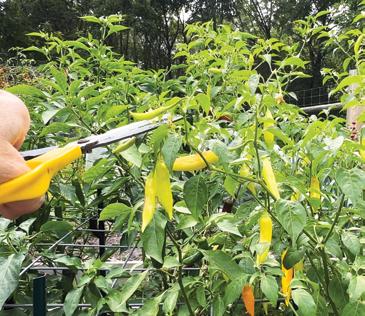
Homegrown HEAT
How to grow and process your own paprika and chili powder.
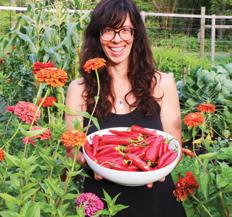
STORY AND PHOTOS MEG COWDEN
Clockwise, L to R: Meg Cowden’s 2024 pepper harvest was as bright and beautiful as it was bountiful. Habaneros require full sun and consistent moisture. Aji amarillo plants benefit from topping. Ripening jalapenos.

What plant lover doesn’t love a good garden flex? Elevate your dishes and impress your guests by growing and processing your own culinary hot peppers. Experience homegrown heat, as thrilling as your first heirloom tomato, by growing and processing your own chili and paprika powder.
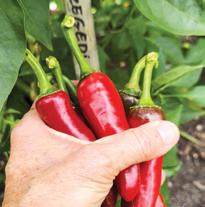
Jalapeños
When you cook with fresh jalapenos, what color are they? Green jalapeños are what I usually pick up in the store. When you grow your own, you can choose when to harvest. Be sure to let them ripen to bright red before harvesting.
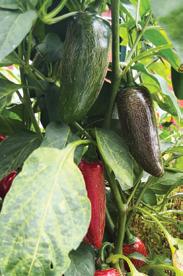
Fun fact: Chipotles are ripe (red) jalapeños that are smoked and dehydrated. Most commonly purchased in adobo sauce, we smoke, dehydrate and grind them. You can also dehydrate them and keep in a jar to rehydrate as needed in dishes.
Chipotle powder is the cornerstone of our favorite meat rub. It’s also used in lieu of chili powder when we want dishes spicy. Simply substitute for canned chipotles in dishes such as posole.
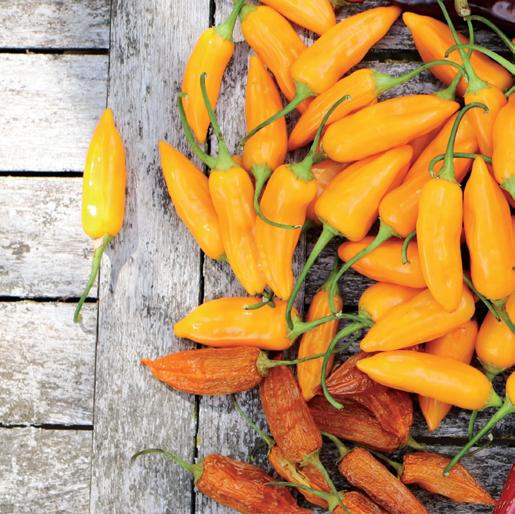
Aji amarillo
A staple of Peruvian cuisine, aji amarillos (yellow chili peppers) have a complex flavor that’s both spicy and fruity. It’s medium hot (30,000-50,000 Scoville units) but comes with tropical fruit undertones. I use this dried powder in any cuisine where I want a depth of sweet and spicy, a complex undertone to elevate the dish: chili powders, Indian curries, salsas and the like. It also makes a delicious hot sauce.
For an unforgettable dip, boil peppers for 10-15 minutes and make aji amarillo paste. Remove skins and blend with minimal water to puree. Store in freezer in small jars and use it as a dipping sauce or condiment. Simply thaw and add mayo, garlic, onion, salt and pepper to taste and prepare to be wowed.
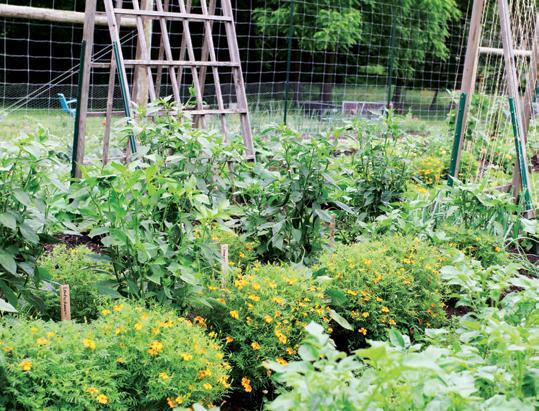
Left to right: Northern gardeners can make fresh paprika at home. Marigolds and peppers pair well in the garden. Meg’s heaping harvest of Korean chili peppers. Hot peppers ready for dehydrating.
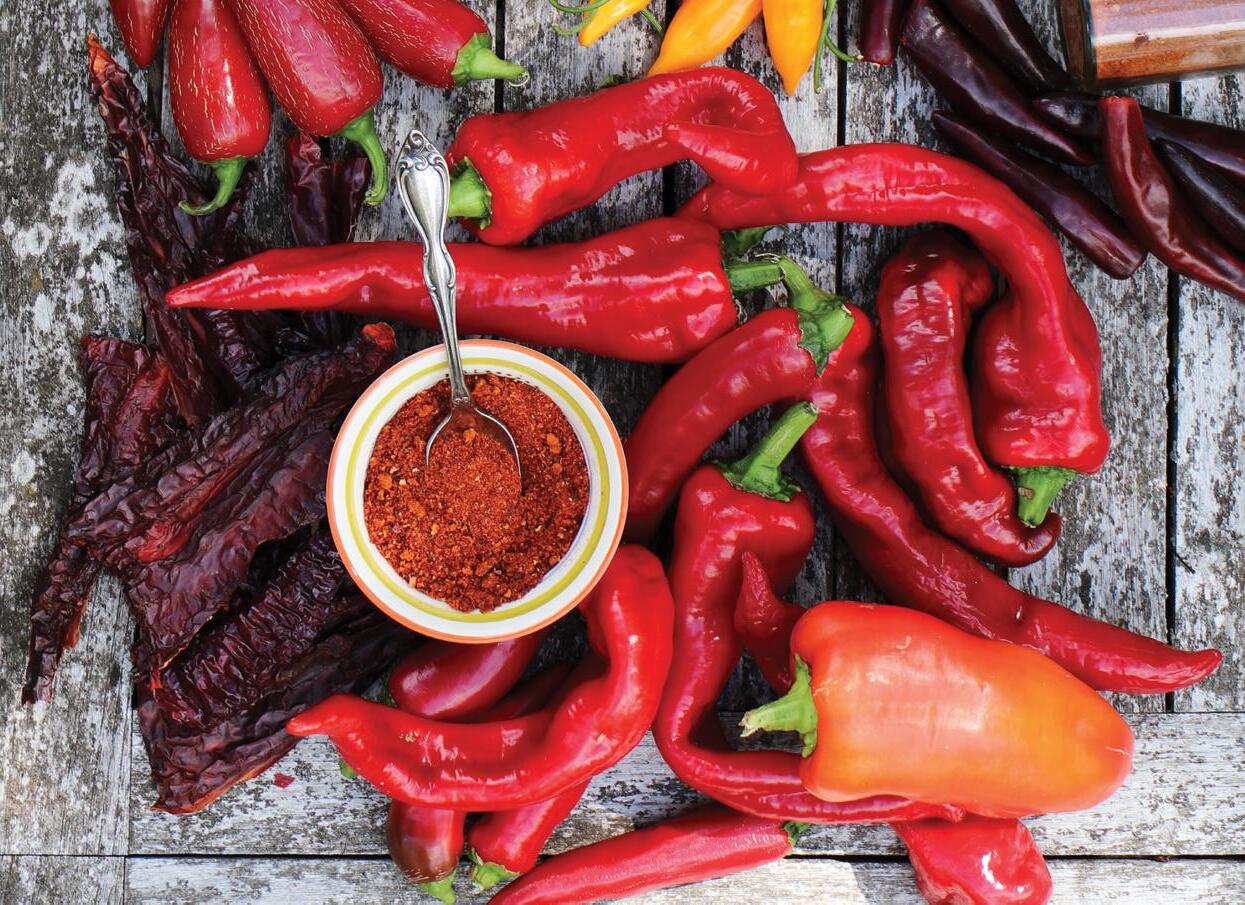
Paprika
Yes, you can grow paprika in colder climates. And, no, it won’t taste like the stale stuff you find in the pantry aisle. Fresh paprika tastes like a concentrated sweet bell pepper. A key ingredient in chili powder blends, paprika is most commonly added for color and a hint of sweetness in dishes like stews and in meat rubs. Also, classically, sprinkled atop deviled eggs.
RECOMMENDED PAPRIKA VARIETIES
VARIETY QUALITIES
Sweet Paprika
Alma 1 to 2-inch round fruit on dwarf plants. Great bell pepper alternative.
Feher Ozon 4 to 5-inch blocky fruit, thin skin. Modest producer on small plants.
If you hope to yield a few jars of freshly ground paprika, plant a minimum of two plants. We grow about five paprika plants, which provide plenty for home kitchen use plus extra for gifting. My top picks are Gernika and Szegedi 179, but if you’re in a colder zone, I’d try Magyar and Alma for sweet paprikas instead.
rSzegedi 179 hot paprika harvest
DAYS TO MATURE
75
85
Magyar 4-inch long, prolific fruit on larger plants. Early maturing. 72
Boldog Larger, stocky pepper. Modest producer.
Slender, prolific 5-inch fruits. Can be harvested green, cooked like a padron pepper or ripen to use as paprika.
75
85
Hot Paprika
Szegedi 179
Medium-sized fruit. Medium hot flavor, 5,000-7,000 Scoville.
70
Leutschauer Medium-sized fruit. Mild heat, 1,000-2,500 Scoville. 85
Gernika
HOW TO GROW FROM STARTS
Peppers can be finicky to grow from seed, so if you’re a beginning gardener, I recommend picking up starts in spring. You’ll easily find jalapeño seedlings. Pay attention to the variety, selecting only those boasting less than 85 days to maturity. Be sure they have stout stems (pencil thick) and they are stocky, signs of ample light and nutrition.
FROM SEED
If you’re a seed-starting fanatic, peppers grow readily from seed. Timing is key, as they can get quite big indoors before our temperatures are warm enough. Sow in small pots at the end of March. Using a heat mat, germination dome and grow light, resist the urge to water the soil too often. Let the soil nearly dry out between watering. If possible, passively water from below. Peppers are very sensitive to moisture, especially at the seedling stage, and turn yellow and stunted if overwatered. When in doubt, go drier, watering lightly. Harden off seedlings before transplanting by exposing to partial sun for several hours a day, increasing by an hour a day, for about a week.
WHEN TO PLANT
When soil temperatures are above 65 and nighttime lows above 50, you’re ready to transplant. This is usually in late May. You can hasten your season with low tunnels. Keep fertilizing simple. Plant with 1 to 2 inches of compost and mix a scoop of slow-release fertilizer into the transplanting hole. Both will release nutrients throughout the season.
PUSH PEPPERS TO RIPEN BEFORE FROST
It can be deeply disheartening to have a plant full of green peppers come Labor Day. After all, you’re in it for ripe peppers. Expedite ripening by topping your plants in late August. This works for every pepper variety.
The timing of this needs to coincide with at least two weeks before nighttime lows start to drop at or below 50 degrees Fahrenheit, at which time pepper ripening rapidly slows.
KNOW YOUR ZONE
ZONE 3
Peppers are possible in really cold climates. You might implement a low tunnel if you really crave ripe peppers. Use floating cover, AG19 or similar, for a little boost of heat without the maintenance of using greenhouse plastic. This increases soil and air temperatures while allowing rain in. Always top your peppers by the last week in August to hasten ripening. In zone 3, I recommend small pepper varieties, including:
• Jalapeño: Early jalapeño
• Aji amarillo: Baby aji
• Paprika: Magyar (from Renee’s Seeds) and Alma (Seed Savers Exchange)
ZONE 4

Plants may benefit from topping larger or slower to mature varieties to get the color you want. All recommended varieties grow well in zone 4.
ZONE 5
Everything above, plus aji amarillo (full-size variety), poblano and Hatch chili peppers that take longer to ripen and feel slightly out of reach in zone 4, all stellar culinary peppers used in similar ways after processing.
4 WAYS TO PRESERVE YOUR HOMEGROW
CHILI PEPPERS
STORY AND ILLUSTRATIONS
TAYLOR TINKHAM
Ihad five big bottles of homemade hot sauce in my refrigerator a couple years ago. I had just started growing a wide variety of chilis and was overwhelmed by how many each plant produced. Hot sauce was an easy way to burn up a big batch of peppers; let the chilis sit in vinegar for a few days, blend them up, strain the mixture, bottle it and done.
The problem? Even the biggest spicy food lovers only go through a small amount of hot sauce in a day. I was drowning in sauce, and it wasn’t versatile enough. And so began my quest to find new ways to preserve chilis.
I cook spicy food almost every day and am proud to say I haven’t purchased a grocery store chili pepper in years. I’m sharing a few of my favorite preserving methods, and I hope you find a couple of recipes or techniques to try. Come midwinter, you’ll be grateful when your chilis are bringing the heat.
METHOD 1
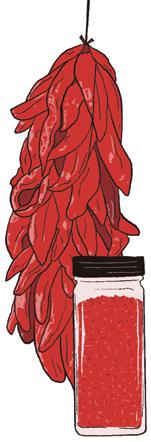
DRYING & DEHYDRATING
With a combination of warmth, air flow and low humidity, you can safely dry foods at home. Hang drying peppers is the easiest method, requiring only string and a needle. Most northern climates are too humid for sun drying, a technique famously used in the Mediterranean for sun-dried tomatoes. Instead, we northerners hang dry chilis in a wellventilated spot out of direct sunlight. Using heavy thread and a large craft needle, pierce peppers at the stem base and hang the loaded string in an attic window, screen porch or dark, ventilated pantry. Thin-skinned peppers like habanero, Thai chili and cayenne are best for hang drying. Using a dehydrator to dry whole chilis takes a painfully long time, so I cut the stems off and slice the chilis in half. I set my dehydrator to 140 degrees Fahrenheit and, depending on the type of chili, humidity level and how many peppers you pack into the dehydrator, they can take anywhere from 8 hours (thin-skinned chilis) to 12+ hours (thick-skinned) to dry fully.
PICKLING
Pickled chili peppers are a treat in sandwiches and salads and as a topping for soups, pizza and nachos. Slice peppers into rings or cut them in half after removing the stem—I like to make a few jars of each. If you prefer less heat, remove the seeds and membranes before pickling. The best chilis for pickling have thicker skins; think jalapeno, serrano, Fresno, banana and Cherry Bomb.

PICKLED PEPPERS RECIPE
For about 5 pints of basic pickled peppers, you’ll need:
3 lbs hot peppers
6 cups white vinegar
3 cups water
2 1/2 tsp pickle crisp (optional, but nice)
2 1/2 tsp canning or pickling salt (optional, but nice)
5 pint-size jars with lids and rings
To process peppers:
1. Prep chilis by either cutting them into 1/2-inch rings or slicing them longways down the middle and removing the stem.
2. Combine vinegar and water on the stove and boil for one minute.
3. Pack each jar very tightly with pepper rings or halves, then add 1/2 tsp pickle crisp and salt to each jar, if using.
4. Add hot vinegar mixture to each jar, leaving a 1/2 inch of headspace.
5. Process in a water bath canner for 10 minutes.
Learn canning basics at northerngardener.org/ food-preservation-basics

RED ALERT
An important reminder when working with chilis: always wear gloves, avoid touching your face or other parts of your body after processing them and work in a well-ventilated area, especially when processing dried and powdered products.

FERMENTING
There are two fermented pepper products I cannot get enough of: sliced jalapenos and chili pepper paste. For sliced jalapenos, I fill a jar with as many slices as I can fit, cover them with a 3 percent salt brine, use a weight to keep the slices under the brine, close the jar with a pickle pipe or airlock lid and leave it out in a dark place until the slices are bubbly and funky. Then I store them in the fridge and put them on tacos and sandwiches. For the paste, I follow the same process, but when they’re done fermenting I blend them up, pack the paste into a jar and top it with a little reserved brine. I like using the paste in sauces, dressings and even in soups and stews.
A RAINBOW OF PEPPERS
Harvest peppers regularly when they are mature size. You do not need to wait for all varieties to turn red before harvesting— many varieties (jalapenos, Thai chilis and even cayenne) are just as delicious when green. The plant will continue to produce flowers and fruit while you harvest.
PICK YOUR PEPPERS
Generally, the smaller the chili, the more of them you’ll harvest. Small chilis like Thai dragon, cascabel and Chilis de Arbol will yield a large harvest. Larger chilis (hot Hungarian wax, poblanos and Anaheim) will produce a more moderate harvest.
SOME LIKE IT HOT
Like it super spicy? Try habanero, ghost peppers or scotch bonnet. Hoping for something milder? Try Cubanelle, poblano or pepperoncini. If you’re looking for medium spice, try Fresno, cayenne or serrano.

FREEZING
For best results, freeze chilis within 24 hours of harvesting and wash and fully dry the peppers before they go into the freezer. Generally, frozen foods need a half inch of headspace in whatever container you use, so pack containers and bags accordingly. Remember to put a name and date on all containers and use frozen products within eight to 12 months of packaging.
WHOLE, FROZEN CHILIS
Great for throwing into a soup or sauce that will be blended at the end of cooking. You can also poke a few holes in a frozen chili, add it to the pot while it simmers, then remove it before serving. This will infuse a lot of chili flavor and less heat. Finally, my favorite whole frozen chili trick: use a microplane to grate a dusting of frozen chili over a finished dish. It’s the spicy equivalent of a squeeze of lemon or a dash of parmesan cheese. Preparing whole, frozen chilis is easy; wash and dry them, toss in a freezer-safe bag or container, label and freeze.
MINCED CHILIS
I love having minced chilis on hand because many of my favorite recipes start with sauteing garlic, onions, ginger and chili pepper. By the end of fall, my freezer is full of little jars of minced chilis. Using a food processor makes this project lightning fast. Remove chili stems, blend until the pieces are the size of a grain of rice, pack tightly into jars, bags or even ice cube trays, leaving half an inch of headspace, label and freeze. To defrost a jar of minced chilis, put it in the refrigerator for 24 hours before using. You can also use the defrost setting on your microwave if you’re in a pinch.

HARISSA PASTE
RECIPE TAYLOR TINKHAM
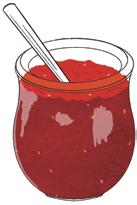
Creating flavorful chili pastes to stash in your freezer is a great way to preserve your chilis and tee up easy meals. This harissa paste is one of my favorites. Often used in North African and Mediterranean cooking, harissa originates from the North African subregion of Maghreb. I love to use harissa in soups and stews or spread it on toast and top with an egg, but one of my favorite uses is on roasted vegetables. Before roasting, toss vegetables with a few tablespoons of harissa paste, oil and salt. Enjoy harissa-roasted vegetables with couscous or rice, your choice of protein and an extra dollop of harissa on the side.
What makes this recipe special? The combination of dried and fresh chilis. To keep the paste really red, I like to use fully ripened red serranos or jalapenos in this recipe. For the mild red pepper, you can use a red bell, or red cubanelle, Marconi or carmen are wonderful, too. This is a great project for late summer or early fall when all your pepper plants are ready to harvest, and you can mix and match all your favorites.
INGREDIENTS
2 oz ancho chiles (dried poblanos), stemmed
2 poblano chiles, roasted, stemmed, seeded and skinned
1 large mild red pepper, roasted, stemmed, seeded and skinned
1 tsp cumin seeds, toasted
1 tsp coriander seeds, toasted
1/2 tsp caraway seeds, toasted
4 serrano or jalapeno chiles, stemmed
3 Tbsp chopped fresh mint
2 Tbsp olive oil
1 Tbsp lemon juice
3 garlic cloves
1 tsp kosher salt
INSTRUCTIONS
1. Add all ingredients in a blender or food processor and puree until smooth. If dried chilis are older or especially dry, put them in your food processor on their own first to give them a little head start before adding remaining ingredients.
2. Divide the paste among small jars, ice cube trays or freezer-safe bags. Label thoroughly and freeze until ready to use. Harissa will also keep in the refrigerator up to one week.
Makes about 1½ cups.
Find more of Taylor’s favorite chili recipes at northerngardener.org/chili-recipes
WICKED-HOT SALT
FARM TO FIRE
Two hot recipes featuring locally grown ingredients from a Midwest chef and forager-chef.


RECIPE YIA VANG
This Hmong pepper sauce was created for Minneapolis restaurant Vinai by executive chef and owner Yia Vang.
INGREDIENTS
2-3 cloves of garlic
1 cup cilantro, chopped
¼ cup fresh squeezed lime juice
2 Tbsp fish sauce
1 Tbsp oyster sauce (optional)
1 tsp salt
4-5 Thai chilis
INSTRUCTIONS
1. With a mortar and pestle, mash together garlic, salt and Thai chilis until a pastelike consistency forms.
2. Add cilantro and mash until well combined.
3. Add fish sauce, oyster sauce (optional) and lime juice and stir until well combined.
4. Serve with grilled meat and vegetables or any dish that needs a little heat!
RECIPE ALAN BERGO
Give summer dishes some zip with homemade spicy salt made from a blend of hot and aromatic peppers.
INGREDIENTS
1-2 ounces super-hot peppers (about six Carolina reapers, ghost peppers or scorpion peppers)
1 ounce aromatic, fruity hot peppers (about six habanero, scotch bonnet or fatalii)
1 pound coarse kosher salt or Morton kosher salt
INSTRUCTIONS
1. Wearing gloves, remove the stems from the peppers. Cut the peppers into pieces with scissors, letting them fall directly into the food processor.
2. Add the salt to the food processor and puree until the peppers are finely ground with no large particles or pieces of skin.
3. Spread the salt onto a baking sheet lined with parchment and allow to dry completely. This will take a day or two at room temperature. You can speed up the drying process by using a fan. The salt can be dried in around 12 hours in a dehydrator at about 90 degrees Fahrenheit. If you want to do that, it's a good
idea to dry it in the garage since the aroma will permeate the air.
4. When the salt is dry, store it in a labeled container in the refrigerator for long-term storage. I like to take out a tablespoon or two at a time to keep in a bowl on the dining room table.
NOTES
I’ve found that 2 ounces of super-hot peppers (totaling 2-2.5 million Scoville) is good for 1 pound of salt. This will be about 1 ounce Carolina reapers or 2 ounces ghost peppers, along with some habaneros or other fruity peppers for color and aroma. My favorite blend so far is half scotch bonnet and half ghost pepper. The citrus aroma and pink color is fantastic. For a slightly less spicy salt, halve the peppers with a paring knife and remove the seeds before pureeing. This recipe is just a guideline and a place to start. Feel free to use your favorite hot peppers and experiment to make it your own.
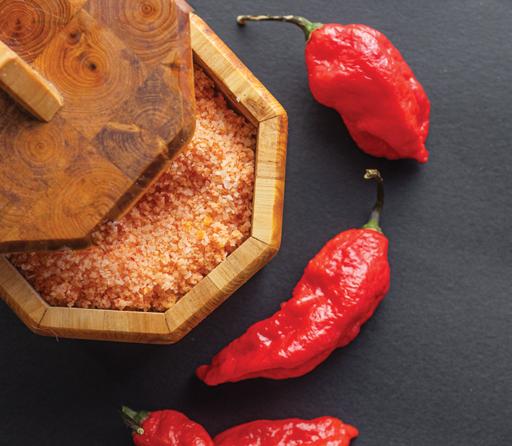
KUA TXOB
Bountiful Bells
How to grow everyone’s favorite sweet bell peppers in the northland.
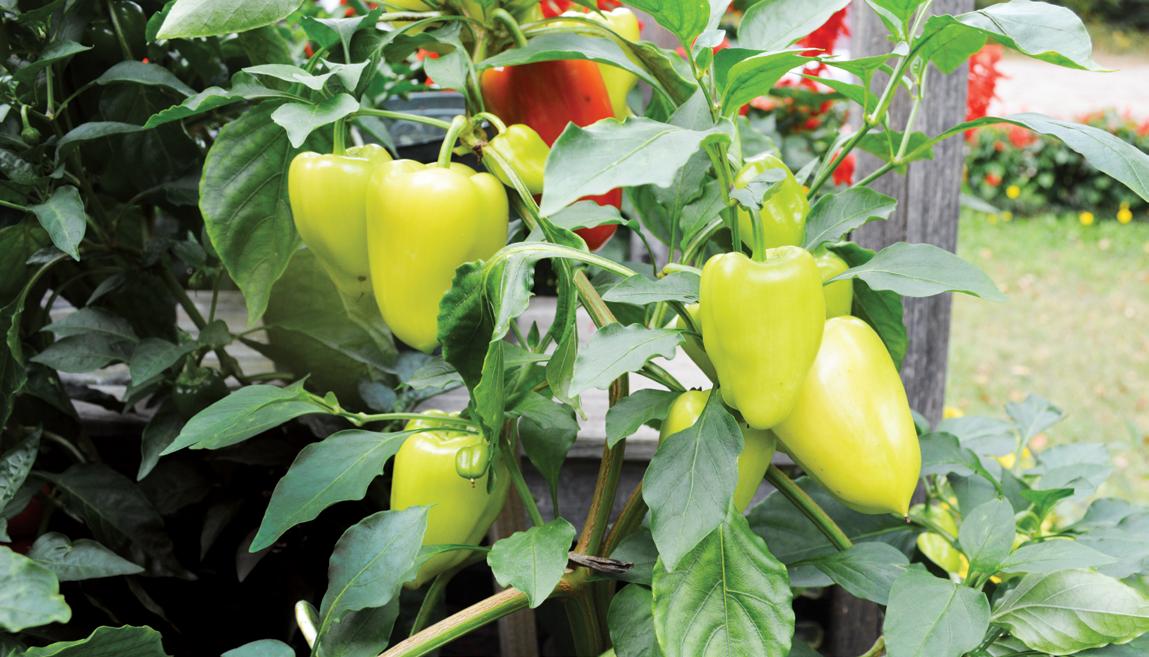
Colorful roasting peppers have become very popular among both consumers and plant breeders. Perhaps it’s the vibrant colors, the interest in roasting and grilling, or perhaps a desire to grow warm-season vegetables to take advantage of a warming climate. Whatever the reason, there’s no denying sweet peppers are popular.
Because peppers are a warm-season crop, growing and ripening them in northern climates requires close attention to the particulars of varieties and growing culture. Peppers lend themselves well to both containers and garden culture. Recent trials and research have provided some valuable insights.
Remember that from seeding until harvest warm temperatures are an important consideration. Peppers grow slower than other warm season vegetables so try to capture the entire growing season.
All peppers start green and eventually ripen to red or other colors. Ripening fruit on the plant can be a challenge in northern climates. Success requires an early start and then extending through the entire growing season. This is particularly important in zones 3 and 4, but relevant in all areas to achieve the best color, flavor and sweetness. Critical components include site selection, varieties, timing (both seeding and transplanting), soils (pH and fertility), water management and harvest.
HOW TO GROW
Whether in the ground or containers, peppers need full sun. Look for locations where heat collects, such as a lightcolored wall with southern exposure. Move containers to maximize exposure to sun and warmth.
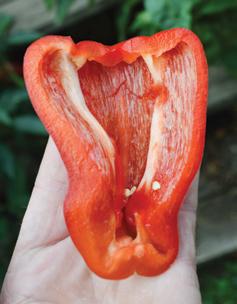
Peppers love well-drained soil with significant organic matter. Test your soil to make sure the pH skews slightly acidic (6.5-7.0). While peppers require modest amounts of nitrogen, do not overfertilize— excessive nitrogen encourages vegetative growth at the expense of flower production and fruit set. Add soluble potassium after the plant fruits. Moderate fertilizing with a balanced, lownitrogen fertilizer (8-16-16 or well-rotted manure) is effective.
Since peppers grow more slowly than other crops, seed indoors earlier and transplant into larger containers (at least 4-inch pots). Larger transplants are most successful, particularly in northern areas. Many nurseries and greenhouses grow plants in larger containers, but you may have to ask. Look for healthy plants at least a foot tall and then transplant into the garden or containers after the soil has warmed, sometime in June. In northern areas, try warming the soil with clear poly sheeting prior to transplanting. Transplants can be planted through black poly for weed control, moisture retention and some soil warming.
Consistent watering is critical. If plants are allowed to dry out, growth can be stunted and part of the season is lost. Inconsistent watering may also result in calcium deficiency and blossom end rot.
STORY AND PHOTOS ROBERT OLEN
Sweet Pepper Varieties
Several varieties produce peppers that ripen and perform well even in the northernmost zone 3 areas. Consistent early producers in northern regions include:
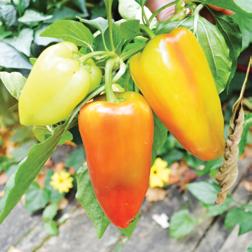
» New Ace (50 days green, 70 days red), Gypsy (60 d./70 d. yellow, red)
» Red bells with thick flesh for roasting: Red Knight (57 d./77 d.), Sprinter (65 d.), King of the North (70 d)
» Orange bells: Orange Blaze (68 d.)
» Yellow bell: Sweet Sunrise (65-85 d.)
» Purple bells: Lilo (60-80 d.), Islander (56-81 da.)
» Italian “bullhorns” with thick flesh: Carmen (red, 60-80 d.), Escamillo (yellow, 60-80 d.). Giant Marconi (red, 63 d.) Red Impact (red, 75 d.) 2024 AAS winner
Growing peppers in containers
Peppers grow very well in containers, so even gardeners with limited space can be very successful. In many ways, container gardening is easier than growing in beds. Containers can be placed in sunny locations for maximum warmth and moved inside in the fall to avoid early frosts or cool nights.
Containers placed on asphalt driveways can add to productivity but be sure to water as soils can dry out rapidly. Select containers that are large enough to accommodate a good size plant. Two- to 5-gallon containers work well. Select containers that are black or dark in color to absorb heat. Landscapers often have large, black, poly containers available after completing an installation.
Two critical components of growing in containers are soil mix and water management. If using a peat-based potting soil mix, be sure to incorporate some sandy loam mineral soil to provide calcium as well as trace nutrients. Water carefully and consistently during the heat of the summer. Inconsistent watering or soil without sufficient calcium can lead to blossom end rot. Follow these tips and you will be successful. Enjoy the passion for peppers.
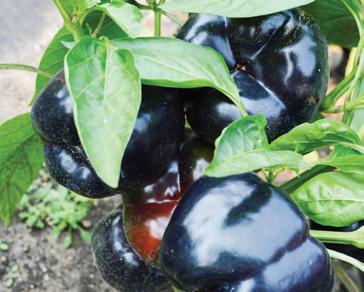
TIPS FOR BEGINNERS
Select a warm, full-sun location, preferably with southern exposure.
Try planting in black, 2 to 5-gallon containers. Place in sunny, warm, protected location.
Select short-season varieties first, then graduate to later-maturing varieties.
If starting from seed, begin early (in March) with heat mats and larger containers.
Plant larger transplants and set out when the soil is warm.
Avoid high-nitrogen fertilizers.
Water consistently throughout the season.
Harvest first fruit as soon as it is ripe.
Be ready to protect from early frost and cool temperatures.
PEPPER NUTRITION
Peppers are delicious, nutritious and low in calories. They contain vitamins C, A, B6, folate and potassium, as well as significant fiber which is important for gut health. Ripe peppers are more nutritious than unripe peppers.
Left to right: Gypsy is an early, yet prolific, wedge-shaped bell, a consistent performer in northern climates and very sweet when ripe. A Lamuyo pepper, easy-to-grow Red Impact has sweet, thick flesh and an elongated shape. A cluster of ripening Gypsy peppers. A blocky, dark purple bell, Lilo is most colorful in northern regions with cooler nights.
Secret Spice
What makes brassicas bring the heat?
Anyone who’s grown a radish can tell you that sometimes you pick a delightfully crunchy, zesty treat, and other times you pick something more akin to a spice bomb. This is thanks to sulfur-containing chemicals that can give brassicas a fiery punch. Flavors vary from mild, peppery undertones in cabbages to full-on fire intensity of wasabi.
The Brassicaceae family includes many of our favorite homegrown leafy greens and root vegetables, including broccoli, cabbage, cauliflower, mustard greens, radishes, rutabagas and turnips. Brassicas are also known as cruciferous crops because their four-petaled flowers resemble a cross. Horseradish and wasabi (a strain of horseradish endemic to Japan’s wetlands) round out the group and are prized for their unique heat. While wasabi is very tough to grow, requiring temps between 45 and 75 degrees Fahrenheit and preferring to grow on shaded stream
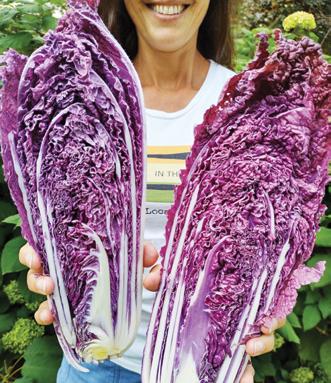
PLANT EARLY
Grow brassicas to full maturity before heat waves kick in (which is key to milder flavors) by choosing varieties that mature in 60-70 days. Tend brassica seedlings for fall harvest in a shady spot during the heat of summer. Fat, mild radishes can be ready in as little as 30 days when sown in cool spring or early fall.

banks, horseradish thrives in zones 3 through 9.
As northern gardeners, we cultivate and eat hundreds of the 3,000-plus brassica species growing around the globe—and every single one contains varying amounts of sulfuric chemicals that give it the potential, depending on insect stress, to turn up the heat and clear out our sinuses. Those chemicals don’t just light up our taste buds, they’re integral to the plant’s health. Brassicas’ sulfuric chemicals developed over centuries in response to their main predators, cabbage moths and butterflies.
The chemicals are part of an ingenious multistep reaction. When a cabbage worm (or human) takes a bite of a brassica, the existing glucosinolates mix with enzymes to create new chemical compounds that are toxic to the plant’s pests. Research shows that both the level of chemicals and pest resistance to them have increased over time. Luckily, the mustard oils (isothiocyanates) just taste spicy to us.
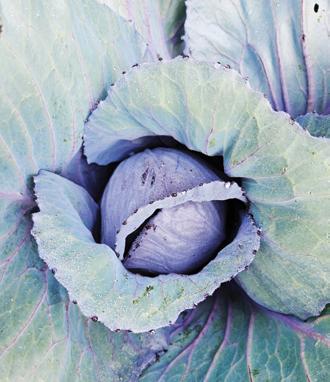
HOW TO GROW
NURTURE TO HARVEST
Consistent watering and generous mulching prevent plant stress, which seems to increase glucosinolate production. Time your harvest carefully—these crops can get spicier and woodier if harvested after their maturity date.
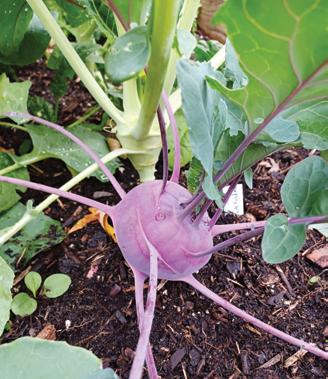
PROTECT FROM PESTS
If left unchecked, hungry cabbage worms chow down on the leaves and stress the plants. Remove pesky pests to prevent munched-on plants from sending out chemical distress signals, which affects the flavor.
L to R: ‘Merlot’ cabbage, ‘Ruby Perfection’ cabbage, ‘Azur Star’ kohlrabi Background: ‘Joi Choi’ Pak Choi
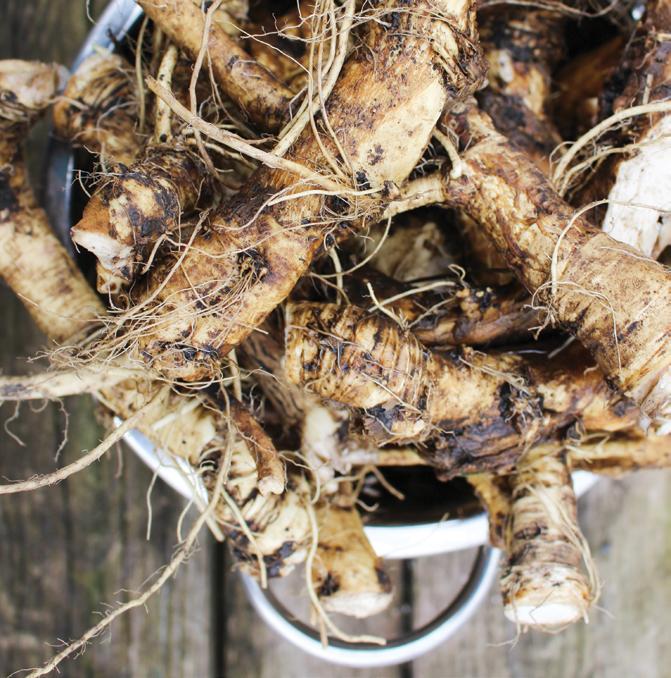
No Horsing Around
Rein in this aggressive grower for a taste treat.
STORY AND PHOTOS STEPHANIE THUROW
Horseradish is an incredibly cold-hardy perennial herb. I love it so much that I grow it in three different locations: directly in the ground in a mostly sunny location, in a raised bed baking in full sun and in a mostly shady and very neglected raised bed at our cabin. The results of my experimentation? It grows well—some might even say “like a weed”—in all locations. This plant is highly invasive and doesn’t need much attention.
Horseradish (Armoracia rusticana) spreads and, because of its long taproots, it is difficult to get rid of once established. Be mindful of this when deciding where to grow it. Of the three locations we grow horseradish, along our fence line is my favorite spot. Because the leaves grow 2 feet tall, it offers a welcome, natural privacy screen between our home and the neighbors. Their concrete driveway keeps it from spreading into their yard.
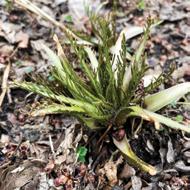
Harvesting
HOW TO GROW HORSERADISH
Horseradish grows best in full sun and prefers loamy soil. Ideally, plant root cuttings (sets) in fall or spring, once the soil is workable.
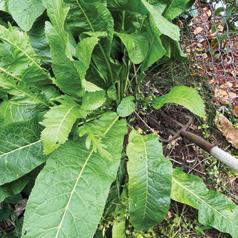
Prepare the growing space by loosening soil 6 inches deep and amend with compost.
Plant root cuttings vertically 12 or more inches apart. Cover sets with 2 inches of soil. Mulch to retain moisture and prevent weed growth. Water well after planting.
Water at the base of the plant once or twice a week throughout the growing season.
Horseradish produces delicate white flowers. Allow pollinators to enjoy the blooms but clip them off once they are spent.
Plan to wait one year before harvesting so the plant can get established. Harvest in the fall by using a pitchfork to gently loosen the soil in the growing area. After locating the roots, use a hand shovel to carefully expose them without snapping them off. A farmer once told me to wait until the first hard frost in the late fall to harvest horseradish so it grows spicier. You can harvest until the ground freezes. Any small roots remaining in the soil will sprout new growth. Reserve thin roots for replanting in the fall and enjoy the larger ones in your culinary creations. Sets can be ordered online, found at local garden centers or can be shared by a fellow gardener, if you ask around.
Storing and preserving
To store, clip off the greens, brush off the dirt and preserve horseradish roots in a loosely bound plastic bag in the crisper drawer of the refrigerator until you’re ready to wash, peel and enjoy it. You can also enjoy young, tender leaves of the plant in salads in early summer.
Limit the spread
Growing horseradish in food-grade buckets with proper drainage, above or below ground, can successfully contain aggressive horseradish plants. I grow it in my 18-inch raised garden beds to control the spread—it’s still contained five years in, and the height makes this batch easier to harvest than the horseradish I grow in the ground.
Recipe at northerngardener.org/ horseradish-recipes
Fresh horseradish harvest from a 5-year-old, inground crop after a frost.
Back to the Land

Fred Rozumalski mows paths so he can walk through the woods on his 16-acre property.
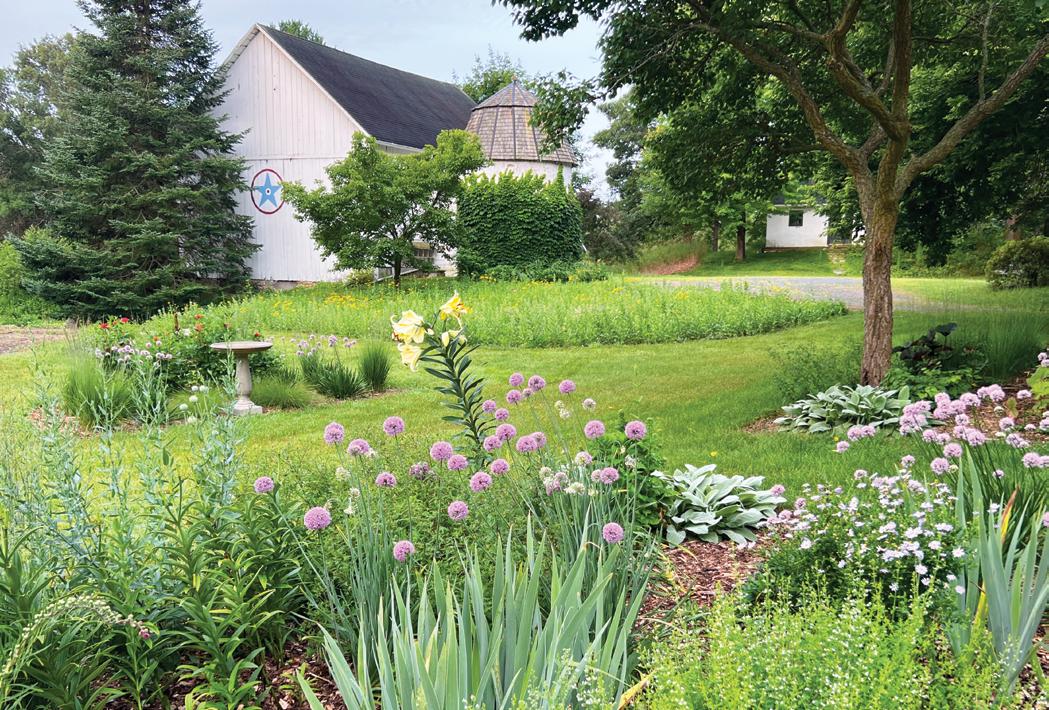
A
landscape architect gives his historic 16-acre farmstead near Marine on St. Croix a sustainability makeover.
Tanglewood farm sits just up the hill from the quaint town of Marine on St. Croix in Minnesota’s wine country. A couple years ago, highly respected Twin Cities landscape architect, ecologist and horticulturist Fred Rozumalski and his husband, Lakmal, bought the historic 16-acre site. As he does with all public and private landscape projects, Fred plans to work with nature to create a low-maintenance landscape that is functional, beautiful and supports both plant and animal diversity. Though it dates back to the 1880s, the farmstead is in prime shape, ready to be reimagined with a sustainability focus. A renovated, four-bedroom farmhouse rests on top of glacial moraine, a rolling landscape that features nature at every angle. The property boasts a good-sized orchard, a rebuilt historic barn with solar panels, space for an ample vegetable garden and a deer fence surrounding the entire
property, which butts up against a nature reserve. And, to top it off, invasive buckthorn has been largely eradicated.
“I’m just frosting this amazing cake, and only parts of it,” Fred says. “I mean it was spectacular when we got here, and now I’m just creating the gardens and taking care of everything,” he says.
Fred says he’s a believer in the power of every landowner’s potential to help regenerate ecological balance. He’s designed practical, sustainable landscapes for Macalester College and Carleton College’s Arboretum and helped cities like Bloomington, Minnetonka and Woodbury manage native plant community restoration areas in their parks and natural spaces. He also designed a wetland restoration of the Spring Peeper Meadow at the Minnesota Landscape Arboretum.
With his steady, practiced hand, Fred hopes to set an example for other homeowners’ landscapes, big and small.
Views from the front porch encompass newly planted garden beds and a new oval prairie planting by the barn. Photo by Fred Rozumalski
STORY AND PHOTOS GAIL HUDSON
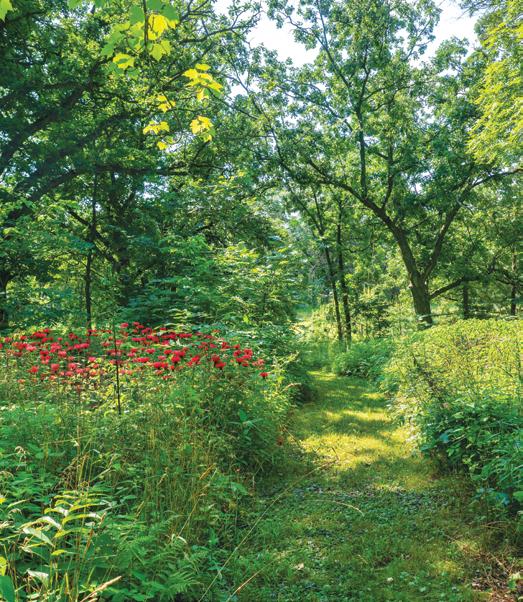
One of the first steps toward creating a more sustainable yard, Fred says, is to shrink the lawn. Traditional turf grass soaks up lots of resources (water, fertilizer, pesticides). Dwindling supplies of groundwater, even in Minnesota, need to be conserved. Typically, he says, we grow way more lawn than we need. Instead, he says the goal is to make it an “intentional” lawn—think of it more like a rug than a blanket.
Here’s how he’s doing it. Between the barn and the house, Fred pulled up a large oval of lawn and installed droughtresistant prairie plants. “It’s really coming in great,” he says. “You get black-eyed Susans coming right away, hoary vervain (Verbena stricta, USDA Hardiness Zone 4) is really going gangbusters the first year, Mexican hats (Ratibida columnifera, zone 4), of course, the bee balm and fragrant hyssop (Agastache foeniculum, zone 3).” The perennials are doing so well that he’s actually weeding out some of them, along with an overzealous planting of stiff goldenrod (Solidago rigida, zone 3).
Fred collected seeds from those plants and other nearby places for another, much larger prairie planting on the rise directly in front of the house. “You get a lot of seed in a little while,” he says, “by pulling your hand up the plant once.” To prepare for dormant seeding of the prairie in October 2024, the area was mowed, then sprayed with the herbicide Roundup in two applications two weeks apart to eliminate aggressive non-natives such as smooth brome, spotted knapweed, leafy spurge and bird’s foot trefoil. “My goal is biodiversity,” Fred says. “My approach to herbicides is to use them sparingly, targeted and at the time of most effectiveness.”
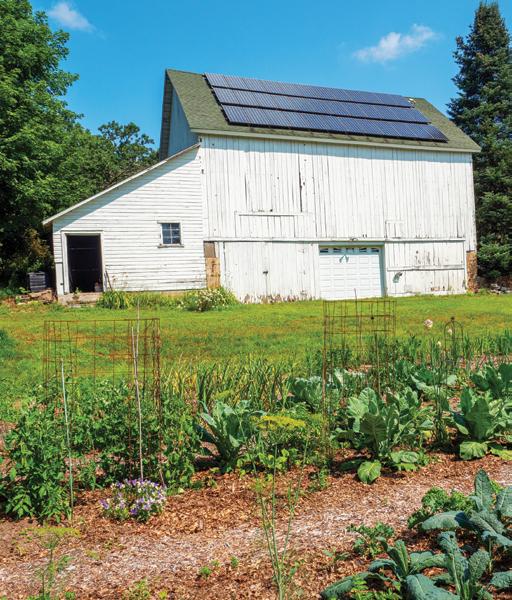
Using several techniques, Fred gave the new prairie plants the upper hand for survival. The area wasn’t tilled beforehand, so the seed bank (viable weed seeds in the soil) wouldn’t be disturbed. It means a lot less competition. Instead, a slit seeder was used to slice the ground and drop seeds of herbaceous plants into the cracks for better soil contact. A drill was used to plant grasses.
By the time he’s finished, 3 to 4 acres or a quarter of the property will be dedicated to prairie-savanna habitat to bring more diversity for the butterflies and birds. “We really consider this a refuge,” he says. “I do see unusual insects here and it’s nice that there’s so much other habitat around here [like the St. Croix river].”
Grassy areas in front of the house were uprooted for rectangular garden beds filled with low-maintenance perennials and annuals. He included many pollinatorfriendly varieties such as a pale pink and lavender Oriental lettuce-leafed poppy called ‘Imperial Pink’ (Papaver somniferum, annual), red and salmon-colored yarrow (Achillea paprika, zone 3), tall alliums, catmint (Nepeta, zone 3), as well as Asiatic lilies, Turk’s Cap lilies (Lillium martagon, zone 3), Lamb’s ear (Stachys byzantina, zone 4a), ferns and a variety of grasses.
As for the rest of the lawn? Fred stopped mowing it, only shearing the edges and making paths. This allows the couple to walk through the property, access the barns, gardens and orchard and more practically, drive an ATV-load of wood to restock wood stoves in the house.
A big patch of bee balm dazzles in the woods.
Food produced in the vegetable garden is a key sustainable attribute of the property.

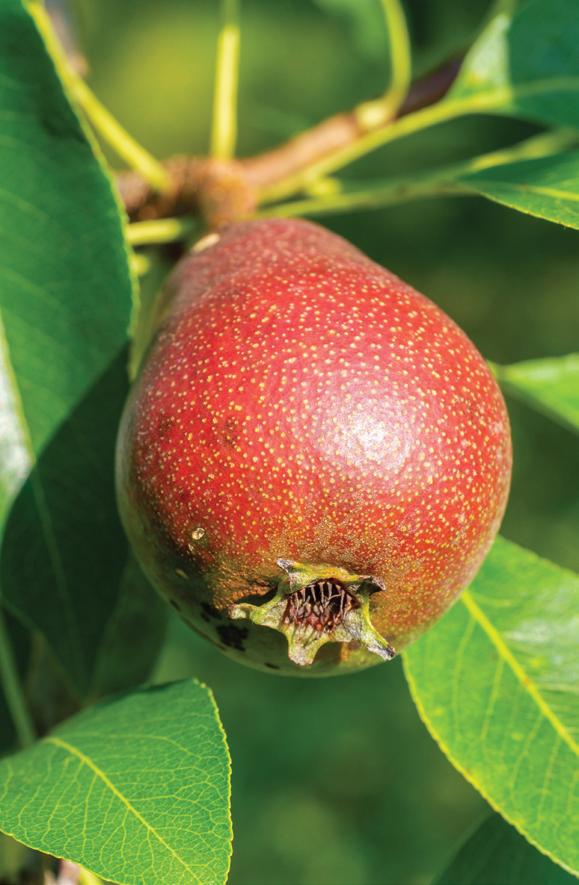
Blueberries ripen in the orchard, which also includes some very new varieties of apples, plus three varieties of pears that ripen in sequence. Fred says the table grapes on the pergola are "delicious."
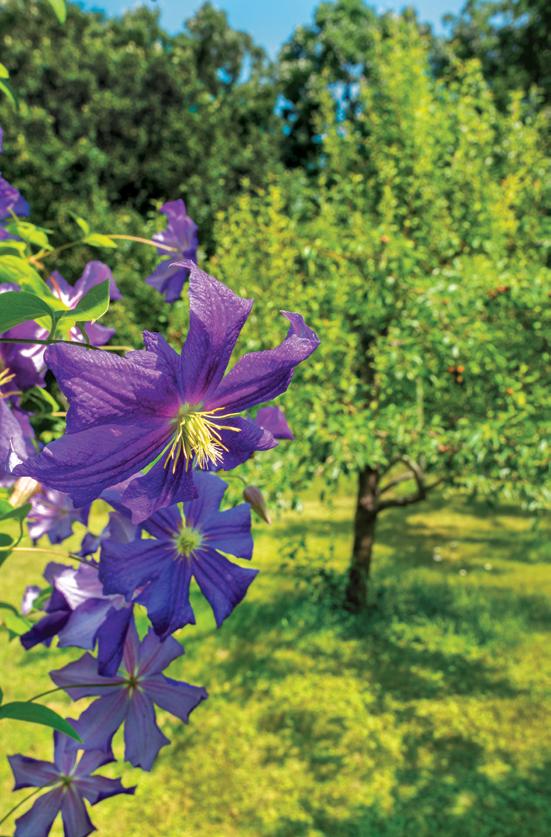
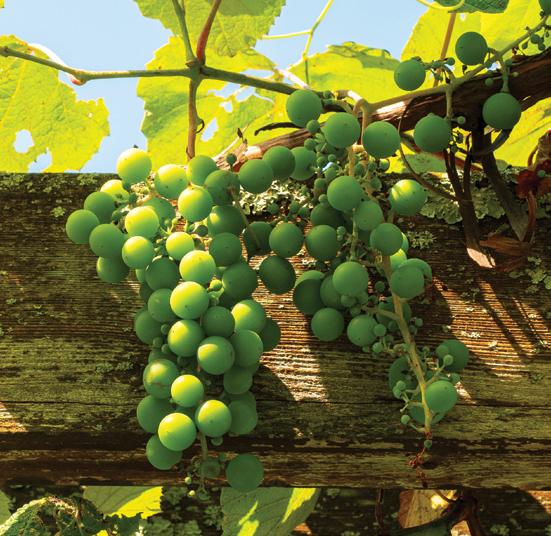
“If you don’t have the plants, then you don’t have the insects and you don’t have the birds, the whole food web. We just have to start.”
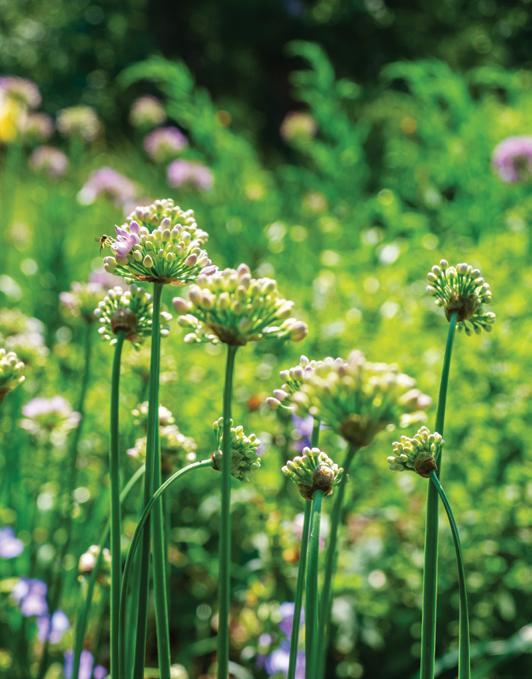
“A lot of what we’re looking for in the landscape is neatness,” Fred says. “The edge of it is very carefully articulated … for the beauty of it to guide the eye and the person to where I want them to go.”
As a landscape architect at Barr Engineering in Minneapolis, Fred works to connect the indoors to the outdoor environment in his many projects. He applied the same principles at home by lowering and widening the windows. “In the winter, I want to be able to sit there, have my coffee and look outside and really be a part of it,” he says. “I’m going to have the view … and have more light in the house.”
Fred also ripped out foundational plantings of hydrangeas and red-twig dogwoods, which can’t be readily seen from inside. Gone, too, are a “wall” of lilac shrubs and the lower branches of a Norway spruce that hid the view. “I’ve been carefully pruning for these distant views and mowing the trail and creating this intrigue and interest to draw you in and draw the eye back,” he explains. He turned one bed close to the house into a white garden with birch trees, “so we have a foreground and a background.”
The orchard can’t be seen from the house, but it’s one of the property’s most beautiful and sustainable features. Homegrown produce minimizes the need for pesticides and herbicides, and the extensive transportation of food.
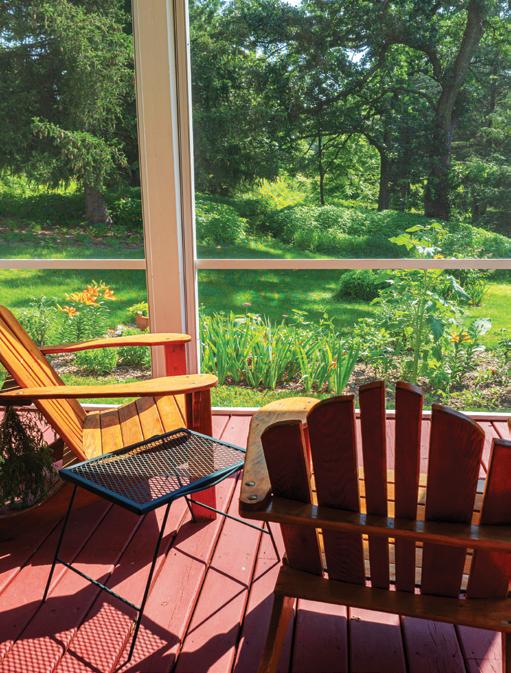
Views that bring the outside in are an important sustainable attribute to Fred.
A wire enclosure surrounds several apple trees such as Zestar!®, ‘Honeygold’ and ‘Haralson’, three varieties of pears, several apricot trees and rows of berry shrubs, from blueberries to honeyberries.
Bunches of table grape vines decorate a wood pergola. “It’s really nice to be down here,” Fred says. “It’s very quiet and the birds are amazing.” He recalls meeting a pair of scarlet tanagers the first time they visited the property, which the couple saw as an omen to buy it.
A large vegetable garden sits in a sunny plot next to the barn. Fred grows a wide range of cool and warm season vegetables such as kale, onions, chard and tomatoes.
A final key piece for achieving sustainability in this landscape is controlling the overpopulation of deer. “What [the deer] are doing is extirpating species—so, local extinction,” Fred says. He’ll be bringing back natives such as wild ginger, trillium and bloodroot. “Great Merrybells (Uvularia grandiflora, zone 3) should be all over here,” he says, “but there’s not one.” Mining bees, sweat bees and ants feed on the nectar of this plant’s drooping yellow flowers.
“If you don’t have the plants, then you don’t have the insects and you don’t have the birds, the whole food web,” he says. Fred says it takes one plant a time. “We just have to start.”
Allium begins blooming in July.
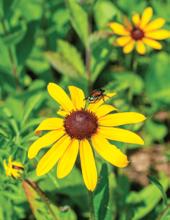
How to Plant a Prairie
If you have space, scratch the itch to be more sustainable by adding a mini prairie to your landscape. Even if you only have a sunny boulevard, you can grow your own prairie slowly with seeds or quickly with plants. Each of these plants will bloom in a prairie the first year, and pollinators love them all.
WHAT
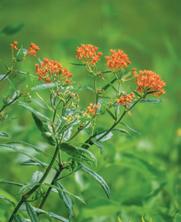
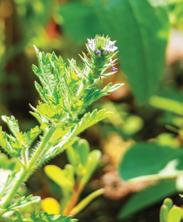
TO GROW DIY AT HOME 1 2 3 4 5
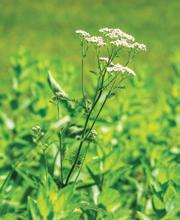
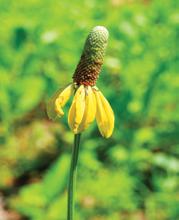
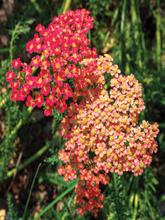
STEPS TO GARDEN MORE SUSTAINABLY
Stop using lawn chemicals. Use organic fertilizers just once a year (after Labor Day) if you must fertilize the lawn. Learn to love or at least accept dandelions and other lawn weeds—some attract pollinators and are drought resistant.
Reduce or eliminate watering. See what survives and replace plants that don’t make the cut with droughttolerant species.
Watch for birds, insects and other pollinators. Be curious about the wildlife in your garden.
Think about places in your lawn where you only go to mow. Eliminate those patches over time. Mass shrub plantings of low bush honeysuckle, Gro-low sumac or junipers are simple, low-maintenance lawn substitutions that don’t require watering once established.
Visit gardens and arboretums featuring sustainable, low-water input landscapes for inspiration.
Black-eyed Susan Rudbeckia hirta
Butterly weed Asclepias tuberosa
Hoary vervain Verbena stricta
Queen Anne’s lace Daucus carota
Large coneflower Rudbeckia maxima Yarrow Achillea millefolium
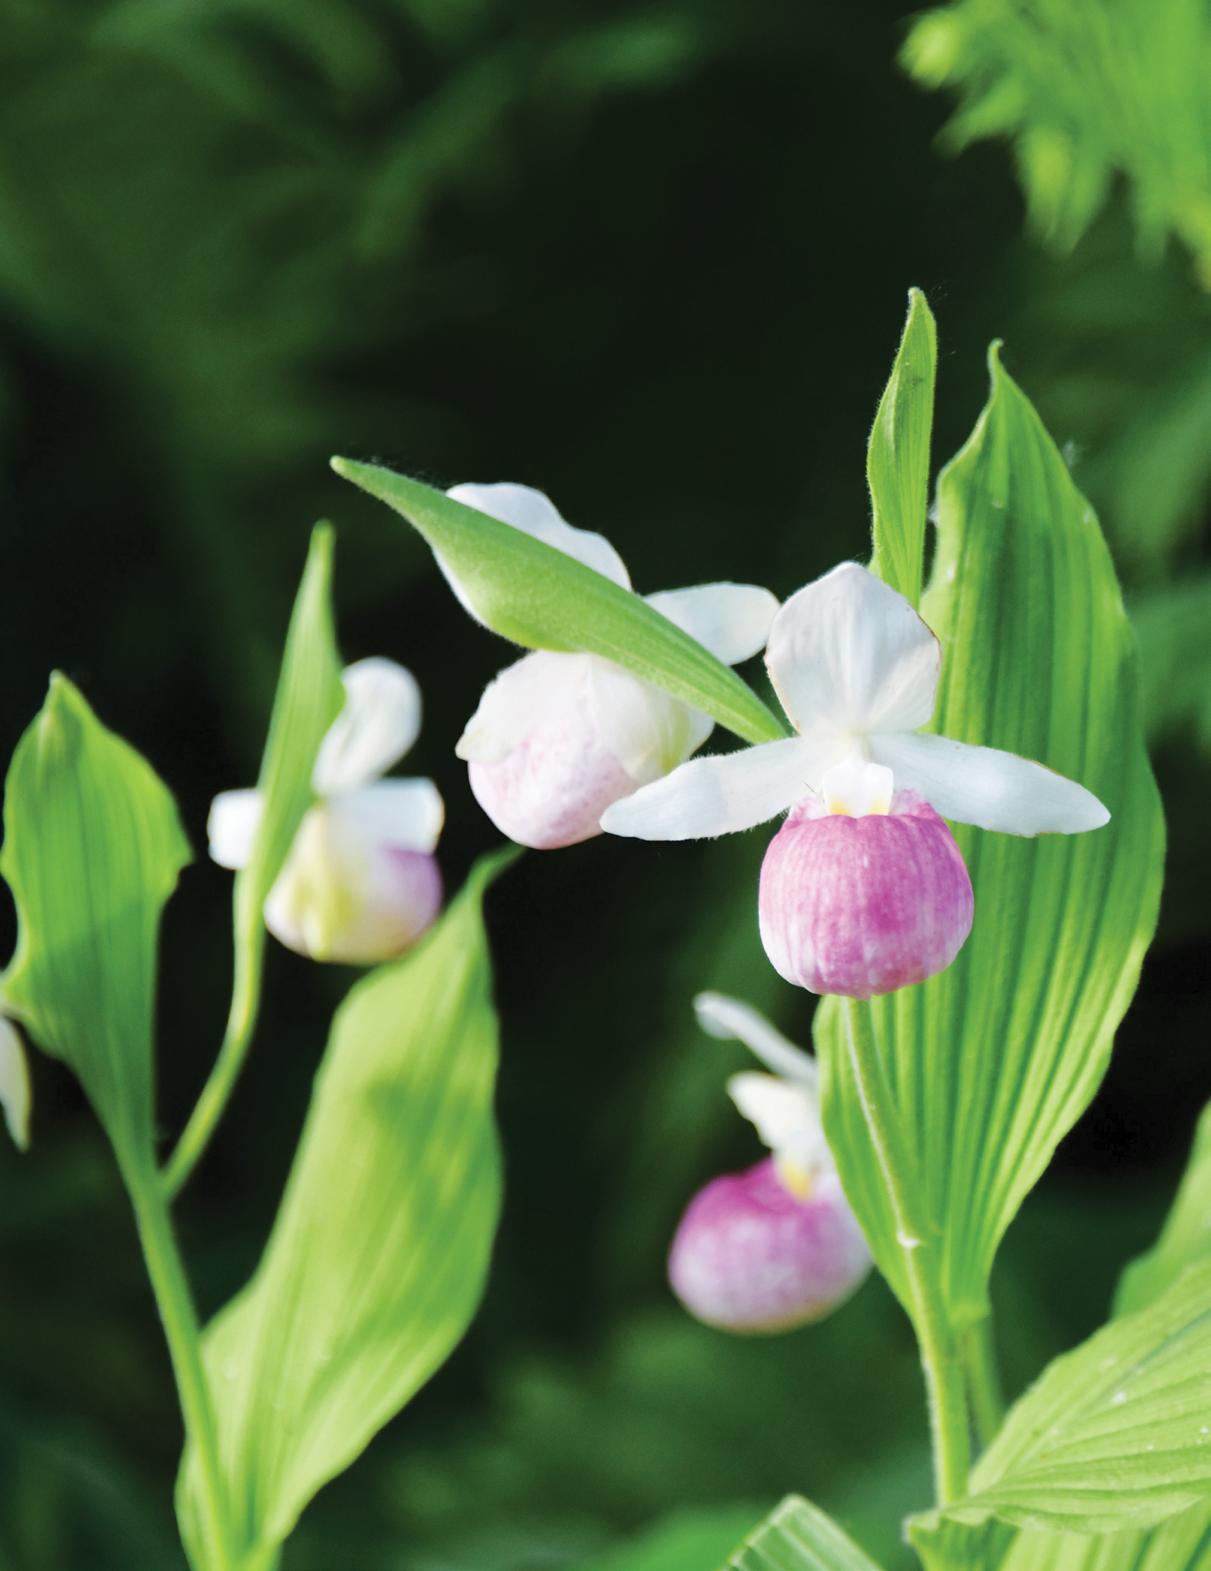
Minnesota’s Favorite Lady
The lady’s slipper— a native pink and white orchid wildflower —has the power to charm everyone.
STORY AND PHOTOS MICHELLE MERO RIEDEL
“C. reginae is best enjoyed in the wild,” says Gardens of Rice Creek owner Betty Ann Addison.
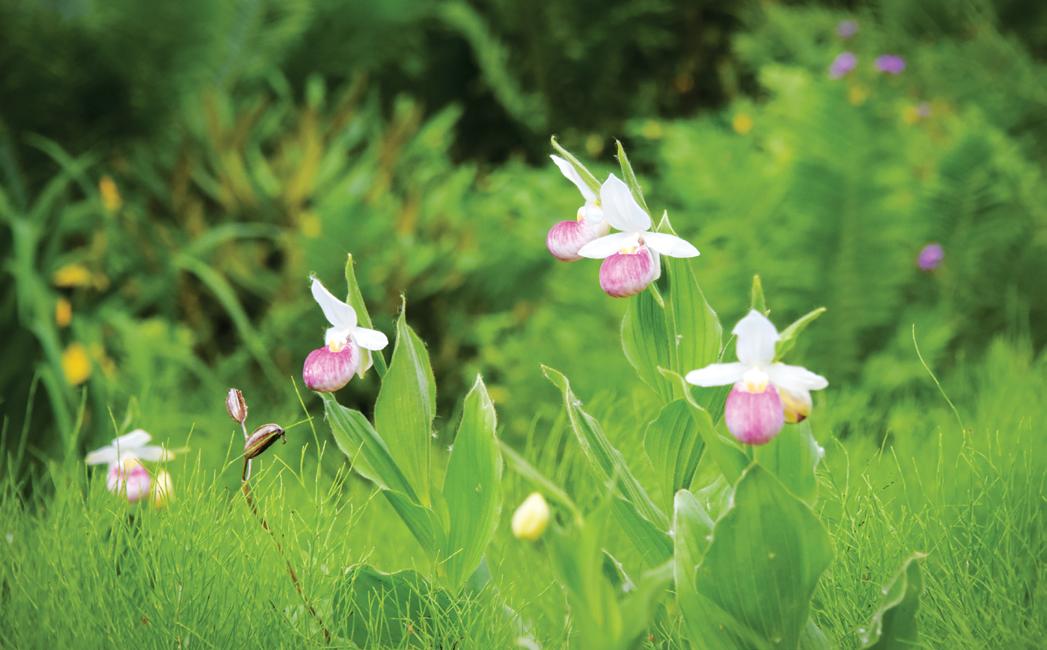
It’s a rare sighting. I caught my first glimpse decades ago while photographing a wedding. The elusive lady’s slippers were growing under a grouping of shade trees. I will never forget the enchanting scene; I felt like I was in a fairytale and hoped that someday I’d grow these beautiful ladies, too.
Years ago, a friend gifted me a mail-order plant consisting of one shoot (stem and roots). The first year I saw one flower. The second year, three flowers. From there, it just kept growing.
The plant is finicky, as it doesn’t fit into every cool-weather garden location. The lady’s slipper is best suited to the advanced gardener, but hopefully I can provide you with enough information so you, too, can grow this delicate plant.
Commonly called the showy lady’s slipper, Cypripedium reginae is also called the pink and white lady’s slipper.
Forty-three orchid species grow in Minnesota—C. reginae is one of them, though scarce and endangered in the wild. Seed-grown plants are available from nurseries (see pg. 54 for specifics), and they take up to 15 years to bloom for the first time.
Tale of the lady
It’s been 123 years since the pinkand-white lady’s slipper became the Minnesota state flower. Due to opposing opinions, she almost didn’t get her affirmation.
The dandelion almost got the vote. An opposer to the lady’s slipper thought the state flower should be common and popular. But who wants a prolific weed to represent Minnesotans?
In 1893, The Woman’s Auxiliary Board endorsed the lady’s slipper as the state flower. The women, not persuaded by the dandelion recommendation, pushed their preference through the legislature. The bill was finally passed in 1902.
Protected property
In the early 1920s, overexploitation of the lady’s slipper nearly destroyed its foothold. The plant takes about 15 years to blossom, and people were concerned it would go extinct. In 1925, it became illegal to sell the lady’s slipper unless the secretary of state granted special permission.
Vision of blooms
View Minnesota’s state flower blooming in its natural habitat at these locations:
» The Eloise Butler Wildflower Garden in Minneapolis hosts a dramatic showing of them early to mid-June. You’ll find them along Lady’s Slipper Lane. Free admission.
» If a road trip entices you, check out the Lady Slipper Scenic Byway, a 28-mile country drive between Blackduck and Cass Lake in north central Minnesota. The ladies bloom from late June to early July.
Fairytale Features
Lady’s slipper is a rare perennial, coolweather orchid that grows in USDA Hardiness Zones 2-7. Bloom time is May through July, depending on your zone.
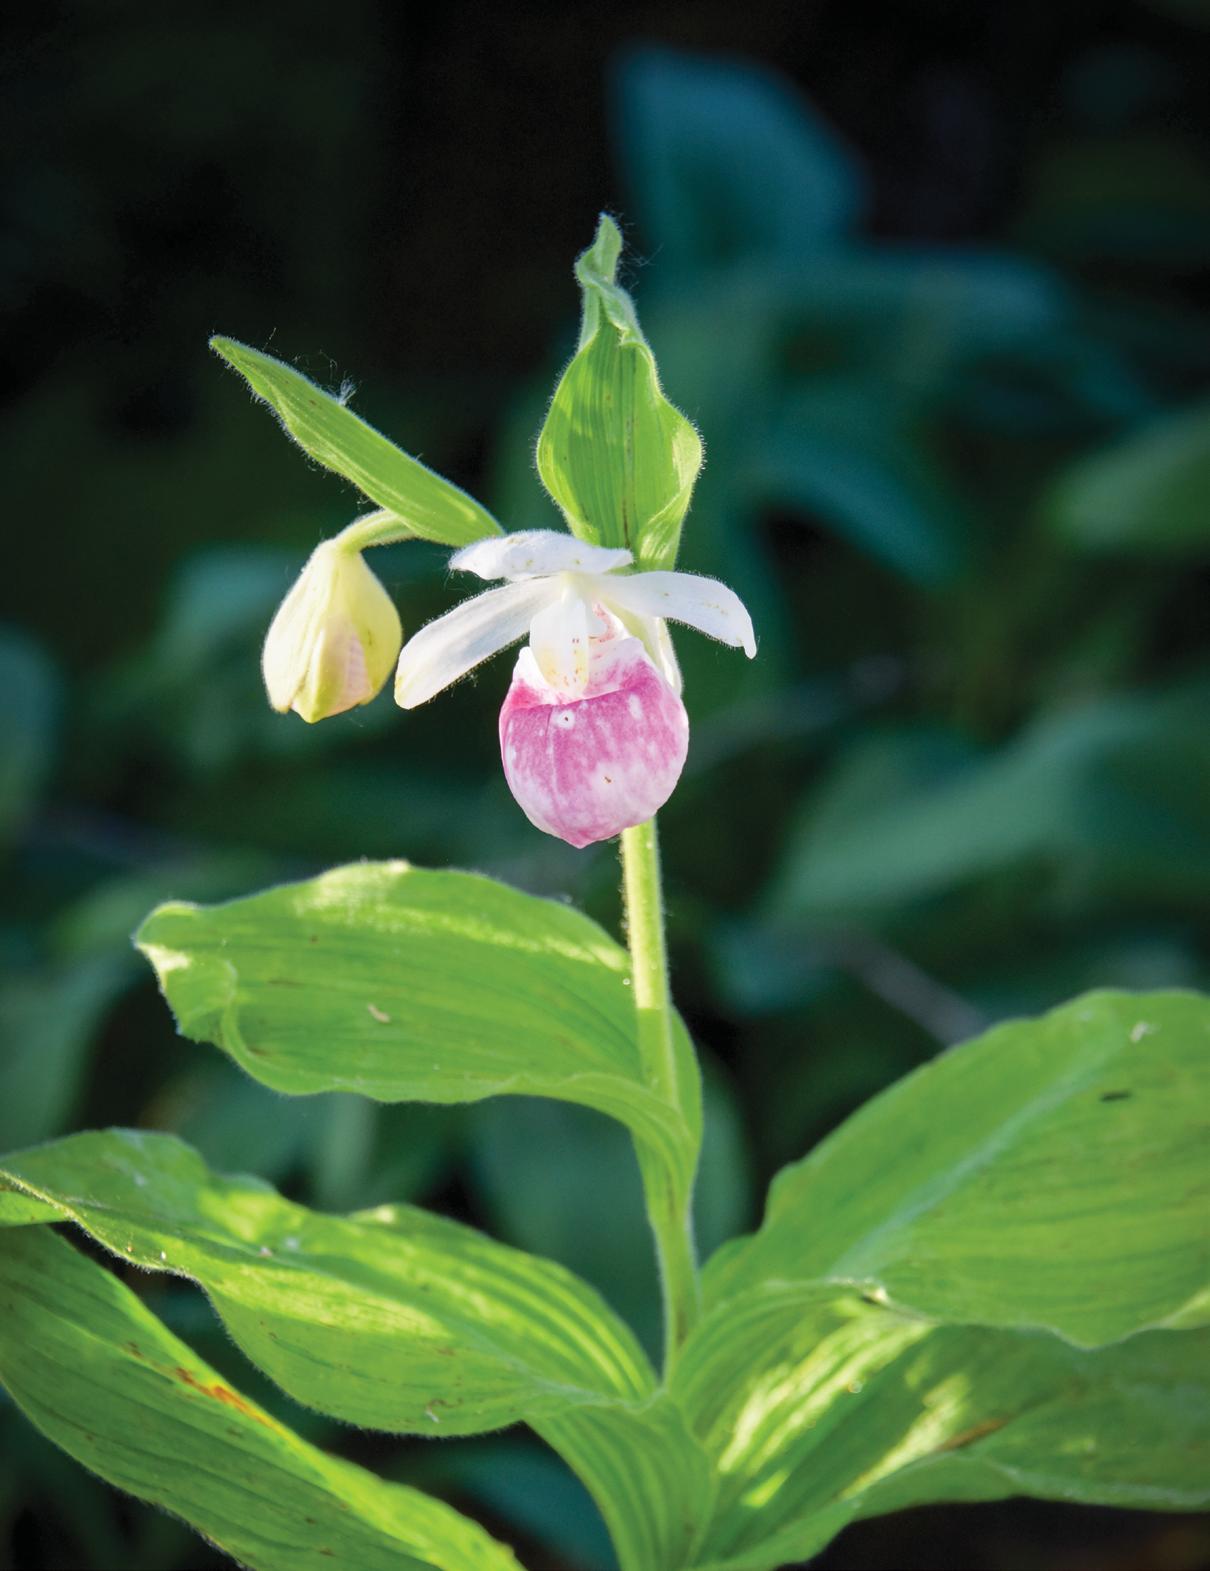
One of the plant’s most notable features is the pouch, a distinctive, vividly magenta-pink slipper that protrudes out, topped with white petals and sepals. Each stem can hold one to three flowers. Each flower lasts about two weeks.
Leaves are broad, oblong, ribbed and hairy with a velvet sheen. Each stem holds about three to five leaves.
Most of the plants I’ve seen are 2- to 3-feet tall while in bloom, but they can grow as tall as 4 feet in the right setting.
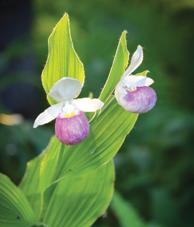
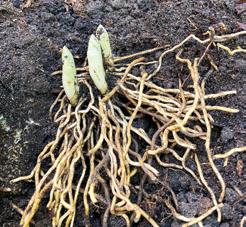
HOW TO PLANT YOUR SLIPPERS
Lady’s slippers are found in damp, open areas such as bogs, meadows, swamps, woods, ditches and prairies. The plant prefers shade with morning sun and slightly acidic to neutral soil. If you have clay or sandy soil, forgo planting lady’s slippers unless you can create a natural habitat.
Before planting a nursery-grown seedling, prepare the soil. Dig a hole twice as deep and wide as the plant and mix in sand (if the soil is heavy), compost and even organic potting soil. Backfill the hole with a few inches of the mixture and then fan the roots out horizontally on top, keeping the stem just above the soil line. The roots prefer a shallow depth—in the wild, they lay on the topsoil and are covered with native compost.
If planting a rescued, mature lady’s slipper, keep as much of the native soil intact around the roots as possible. Dig a hole slightly wider and deeper than the size of the plant. Loosen the soil and add it to the hole, then add the plant to the hole maintaining the same depth and fill along the sides. Don’t plant the stem any deeper.
After planting, adding mulch is okay, but keep it natural, similar to what you might see in a forest. Dried leaves and other natural debris make the best mulch.
Be patient. While adjusting to their new location, it can take a few years to see a lady’s slipper bloom.
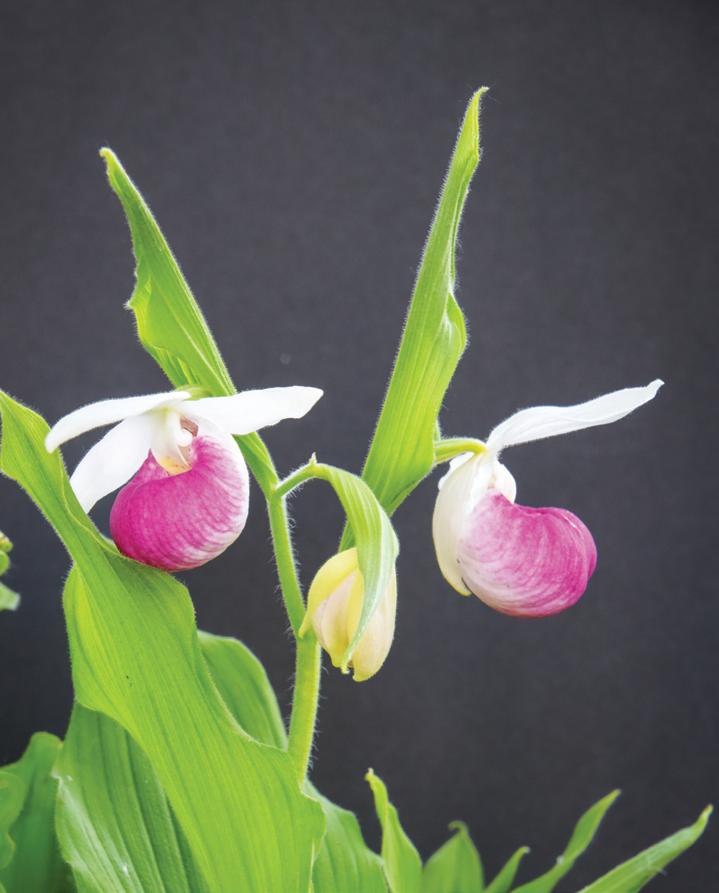
1 Each plant can live for many decades.
2
They’ve been the Minnesota state flower since 1902.
3 Since 1925, it’s been illegal to pick them on federal and state land.
4
Few pests eat them except whitetailed deer.
5 If propagated from seed, they can take up to 15 years to bloom.
WHERE TO BUY
Look for C. reginae at these recommended nurseries—they usually come in small pots and run $50-$100 per plant.
Plants Delights Nursery offers seed-grown, nursery propagated lady’s slippers in 3.5-inch pots. Located in Raleigh, North Carolina.
Special Vegetation Orchid Nursery offers seed-grown, single-stem to multiple-stem plants. They are out-of-stock for the 2025 bloom season but check back in summer and fall to preorder. Located in Indiana.
Hillside Nursery offers well-developed plants with a blooming stem. They’re also out-of-stock for the season but check back in summer or fall. Located in Ashfield, Maryland.
Gardens of Rice Creek offers 12 kinds of lady’s slippers, and they’re available for purchase May 1. Pick up only. Owner Betty Ann Addison has large groupings of C. reginae growing in moist raised beds near Rice Creek. You can see and photograph them in June. Located in Fridley, Minnesota.
Above, left to right: Lady’s slippers bloom late May to early July, depending on hardiness zone. Plant shallow and fan out roots.


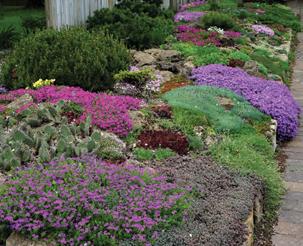
Gardens of Rice Creek


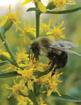
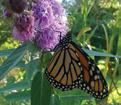
44804 East Highway 28 Morris, MN 56267
Phone: 320-795-6234 Fax: 320-795-6234
info@morningskygreenery.com
us @ morningskygreenery.com


NURSERIES/GREENHOUSES
GARDENER’S MARKET
PERENNIALS
14 labeled display gardens Perennials you’ve only seen in catalogs 250+ varieties of hostas
Over 1,300 perennial cultivars (20,000+plants) ...and the people who know how to grow them.


PERENNIALS

WATER FEATURES


Growing together
From Fast Food to Fresh Food
Garden-in-a-Box fuels Koochiching County’s commitment to feeding their community.
STORY ANNA MARHEFKE + REBECCA SWEE
A “long the northernmost edge of minnesota, a dilapidated drive-through fast-food joint now serves a new audience: food-insecure residents in Koochiching County. The primary hunger relief organization in that area, Koochiching County Food Access (formerly Falls Hunger Coalition) has been providing free meals to food-insecure community members for nearly four decades. To grow their efforts, they moved to this new location and joined the Minnesota State Horticultural Society’s Garden-in-a-Box program in 2023.
Thanks to donations of plant material, soil, fertilizer and growing tips, lush gardens now surround the building and produce enough food for regular food shelf donations, neighborhood noshing and on-site education, skills building and community participation. Nestled in the heart of a food desert largely defined by urban blight, this once-neglected lot is now a rich source of beauty, wildlife habitat, community, conversations and taste treats. Passersby are welcome to pluck tomatoes for snacking and hopefully pull a few weeds, too, to help nearby neighbors who tend the garden.
“We call it a ‘learning garden,’” says food shelf executive director Christina Daniel-McKee. And it’s a beautiful example of how reimagining abandoned land can cultivate productive and safe community spaces that foster conversation and sustainability and produce much needed healthy food—Koochiching County Food Access harvested 45 pounds of produce in 2024 alone.
Learn more about the Minnesota State Horticultural Society’s signature community outreach program at northerngardener.org/garden-in-a-box
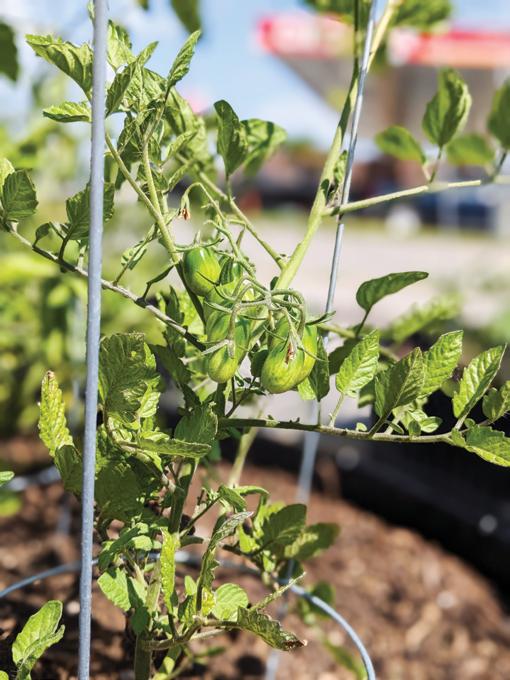
Garden-in-a-Box is such a great program. We are starting to think more about resource conservation and are looking to harvest rainwater and make other modifications to garden more sustainably.”