1 minute read
Attach the GPS receiver to the mounting plate


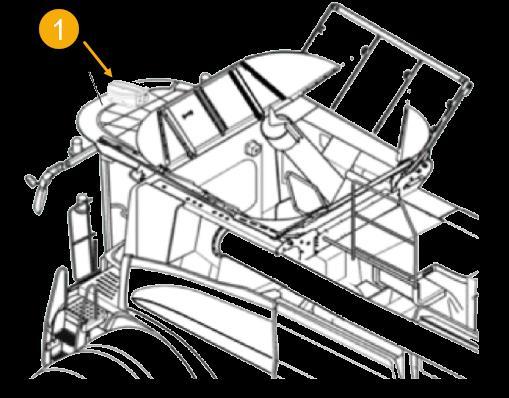
INSTALLATION OF YIELD ECU
The FieldView Yield ECU mounts in the cab of the combine and needs to be connected to the standard 12V Auxiliary power Socket.
Advertisement
If there is not such Auxiliary Socket, you need to use additional cable in the kit which needs to be wired into switched 12V power and after that you will be able to connect Yield ECU to it.
1. Remove any headliner panels or lights needed to access 12V switched power and create a free space to install the yield monitor. To ensure optimal Bluetooth™ connectivity, do not place the yield monitor directly next to radio interference, such as a two-way radio.
2. Use the supplied T-Splice Connectors to connect to +12V and Ground. Use pliers to snap the T-Splice Connectors onto the wires. Be sure to use the correct size connector and ensure the connector “snaps” shut.
3. With the T-Splice connectors attached to 12V switched power, attach the Red spade connector from the lead on the Primary Wiring Harness to +12V and the Black spade connector to Ground.
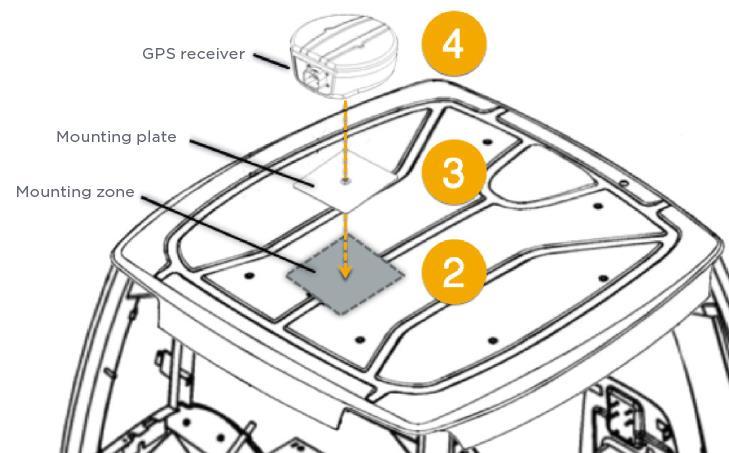
INSTALLATION OF EXTERNAL GPS RECEIVER
1. Locate a zone on the combain cab roof to attach the GPS receiver mounting plate. 2. Clean dust and debris off of the mounting zone with an adhesive cleaning wipe. 3. Attach the adhesive-tape-side of the gps receiver mounting plate to the cab roof in the cleaned zone. 4. Attach the GPS receiver to the mounting plate 5. Plug the 14-pin connector into the External GPS receiver 6. Connect extended harness of Moisture and Optical sensor 7. Connect the power plug to Auxiliary Power socket in the Cab of Combain 8. Connect the Field View Drive 9. Connect the Yield ECU