4 minute read
Sales Cloud

Our top new features in Sales Cloud Winter ‘21
The new way of appointment scheduling!
Advertisement
Trying to find a date for a meeting being in email communications ends up most times in sentences like ‘Let me know when you have time and I will try to schedule an appointment’ or ‘I can offer you the following time slots,....’. It is unproductive and once offered they can be blocked otherwise fast so your availability is not longer up to date.
Salesforce has now released a solution for sales reps users, that improves your customer’s (or clients’s) experience you are searching for an appointment to meet with them and also will save time and the risk of misunderstandings in this process.
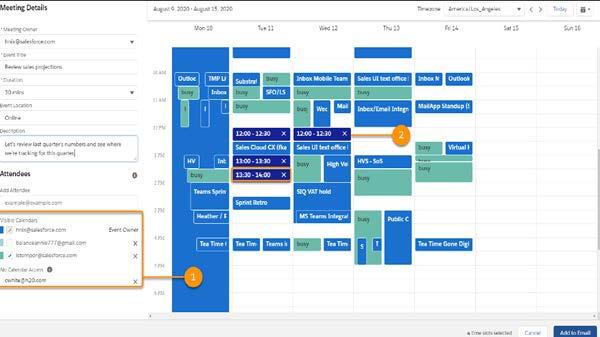
When using salesforce inbox you find the functionality in the new icon button ‘Insert Available Times’ at the bottom of the email composer.
Sales Reps can now search and select time slots in their and also other users’ calendar (1) and add these slots to the calendar and email they send to their contact (2). The recipient then just selects the slot that fits most to their schedule and confines it. That’s it! If slots are blocked otherwise they will disappear from the suggested list and no double booking will cause trouble (to be verified).
Lightning Experience orgs with Salesforce Inbox and Enhanced Email enabled in Essentials, Professional, Enterprise, Performance, Unlimited, and Developer editions and users with ‘Use Inbox user permission’, available with a High Velocity Sales, Sales Cloud Einstein, or Inbox license will be able to use that function once Winter ‘21 release is available on their Org.
Improved mobile forecasting function
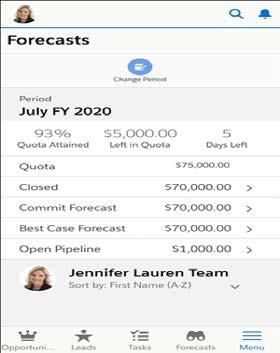
With Winter ‘21 release, mobile forecasting is no longer limited to iOS devices. About 80% of the mobile devices worldwide are operating on Android software. Considering this number Salesforce has now enabled many new users to check the opportunity forecasting numbers while travelling and using their mobile Android devices. The forecasting when used mobile is a read only feature. When it comes to editing the forecasting details users still need to access them via desktop version.
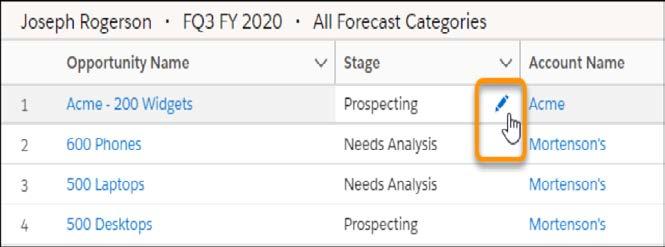
Talking about the edit function for forecasting, Salesforce released an additional new improvement for forecasting users. You can now work with inline editing for the stage field on the forecast page and no longer need to open each single opportunity. The inline editing was already available for some other fields so with the Winter ‘21 release it is extended also to the ‘Stage’ field. Just clicking on the pencil next to the stage field opens the inlined edit mode and you can update the stage for each opportunity in your forecast.
Find Changed Deals at a Glance
In our last Nextview Summer ‘20 release paper we already highlighted the very appealing Kanban view for Opportunities. It allows user to oversee all Opportunities in a dynamic overview with relevant information like opportunity amount, account name or close date. Listed by stage with an accumulated amount for each stage this is already the preferred overview for many customers. If you are using the Lightning Experience in Unlimited Edition you will now get another new helpful extension to that feature.
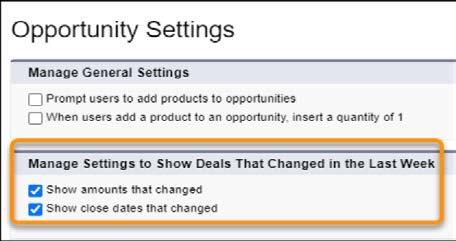
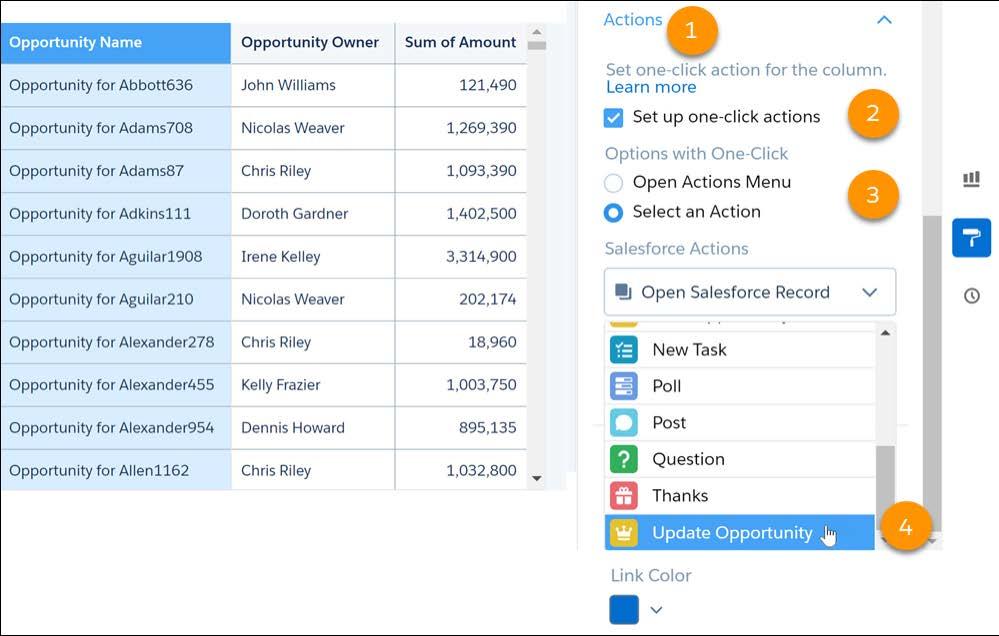
Changes to opportunity amounts and close dates now show motion indicators for 7 days. If a user has changed one of them a red text and arrows indicate amounts that decreased and close dates that were pushed out (1) or green text and arrows indicate amounts that increased and close dates that were pulled in (2). Hover over an arrow to see what changed, who changed it, and when (3). This feature is turned off by default, can be activated in the opportunity settings and is available in list view and kanban view.
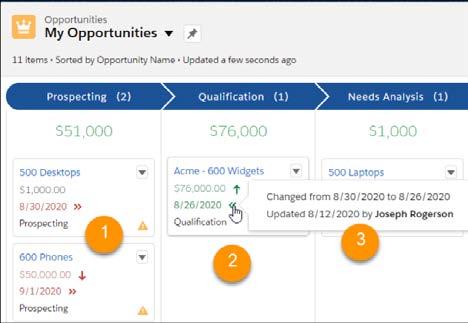
Having these new indicators you can get even more insights about the healthiness of your opportunity pipeline and see positiv (green text) or negative (red text) trendings of the single opportunities.
Create email templates faster and more easily with visual tools in Email Template Builder. Instead of adding HTML code, your users can drag elements to create effective email templates. They can compose email templates with a few clicks to place design elements right where they want them.
Where: This change applies to Lightning Experience in Professional, Enterprise, Performance, Unlimited, and Developer editions, and all editions of Pardot in the Pardot Lightning app. This feature isn’t available in Pardot Classic or the standalone Pardot app.
Who: Creating and managing Email Template Builder templates is available to users with the Access Lightning Content Builder or Manage Content Builder permission set. Any user that can send an email can use email template builder templates.
How: Sending professional, appealing emails is essential when communicating with your customers. Using captivating email templates gets you there.
After creating a Lightning email template, users with the correct permission see the Edit in Builder button.

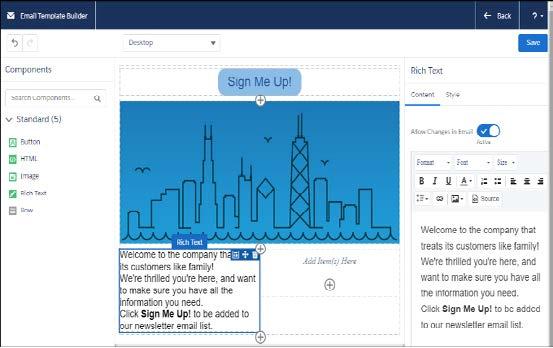
Click Edit in Builder to open Email Template Builder.
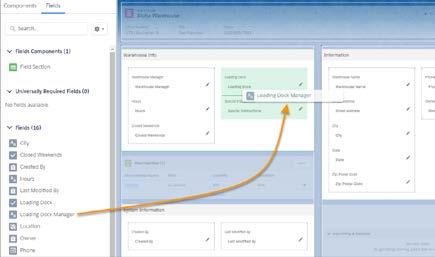
Choose a component (1) and drag it to the canvas (2). Change the details and style of the component using the properties panel (3).
Your users now can easily create an engaging email template.