05_442548-ch03.qxp
12/16/08
10:55 PM
Page 69
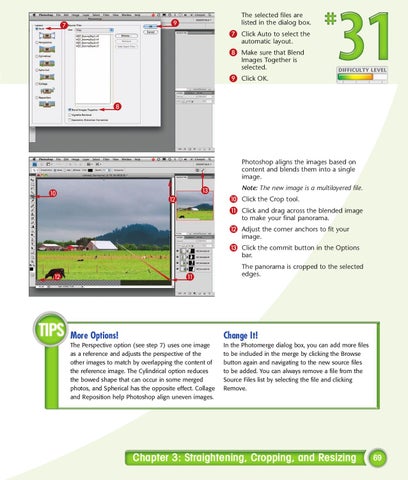
The selected files are listed in the dialog box.
9
7
7 Click Auto to select the automatic layout.
8 Make sure that Blend Images Together is selected.
9 Click OK.
8
Photoshop aligns the images based on content and blends them into a single image.
#
0
Note: The new image is a multilayered file.
0 Click the Crop tool. ! Click and drag across the blended image
@
to make your final panorama.
@ Adjust the corner anchors to fit your image.
# Click the commit button in the Options bar.
@ 0
!
The panorama is cropped to the selected edges.
More Options!
Change It!
The Perspective option (see step 7) uses one image as a reference and adjusts the perspective of the other images to match by overlapping the content of the reference image. The Cylindrical option reduces the bowed shape that can occur in some merged photos, and Spherical has the opposite effect. Collage and Reposition help Photoshop align uneven images.
In the Photomerge dialog box, you can add more files to be included in the merge by clicking the Browse button again and navigating to the new source files to be added. You can always remove a file from the Source Files list by selecting the file and clicking Remove.
Chapter 3: Straightening, Cropping, and Resizing
69